Moonfire NVR on reComputer
Introduction
Moonfire-NVR is designed with the goal of providing an easy-to-use NVR system that is lightweight and minimalistic, meaning it doesn’t come with the complexity of other more bloated commercial NVR solutions. It emphasizes functionality and simplicity, enabling users to record from IP cameras directly to a file system or cloud storage.
Prerequisites
Hardware Requirements
| reComputer R1125 | reComputer AI R2130 | reComputer AI Industrial R2145 |
|---|---|---|
 |  |  |
| reComputer Industrial R20xx | reComputer Industrial R21xx |
|---|---|
 |  |
Download Moonfire
Update system
Please use the following command to run.
sudo apt update
sudo apt upgrade -y
Download docker and docker compose
Please use the following command to install docker.
wget https://get.docker.com -O get-docker.sh
chmod +x
sudo sh get-docker.sh
sudo systemctl start docker
sudo systemctl enable docker
docker --version
The result is shown as below:

Please use the following command to install docker compose.
sudo curl -L "https://github.com/docker/compose/releases/download/$(curl -s https://api.github.com/repos/docker/compose/releases/latest | jq -r .tag_name)/docker-compose-$(uname -s)-$(uname -m)" -o /usr/local/bin/docker-compose
sudo chmod +x /usr/local/bin/docker-compose
docker-compose --version
The result is shown as below:

Create docker-compose.yaml
Please use the following command identify your IDand UID.
id
The result is shown as below.

Please use the following command to create docker-compose.yaml.
cd ~ && nano docker-compose.yaml
Note: Rewrite the
YAMLfile based on your ownIDandUID.
Then input the following content into the YAML file.
services:
  moonfire-nvr:
    # The `vX.Y.Z` images will work on any architecture (x86-64, arm, or
    # aarch64); just pick the correct version.
    image: ghcr.io/scottlamb/moonfire-nvr:v0.7.23
    command: run

    volumes:
      # Pass through `/var/lib/moonfire-nvr` from the host.
      - "/var/lib/moonfire-nvr:/var/lib/moonfire-nvr"

      # Pass through `/etc/moonfire-nvr.toml` from the host.
      # Be sure to create `/etc/moonfire-nvr.toml` first (see below).
      # Docker will "helpfully" create a directory by this name otherwise.
      - "/etc/moonfire-nvr.toml:/etc/moonfire-nvr.toml:ro"

      # Pass through `/var/tmp` from the host.
      # SQLite expects to be able to create temporary files in this dir, which
      # is not created in Moonfire's minimal Docker image.
      # See: <https://www.sqlite.org/tempfiles.html>
      - "/var/tmp:/var/tmp"

      # Add additional mount lines here for each sample file directory
      # outside of /var/lib/moonfire-nvr, e.g.:
      # - "/media/nvr:/media/nvr"

      # The Docker image doesn't include the time zone database; you must mount
      # it from the host for Moonfire to support local time.
      - "/usr/share/zoneinfo:/usr/share/zoneinfo:ro"

    # Edit this to match your `moonfire-nvr` user.
    # Note that Docker will not honor names from the host here, even if
    # `/etc/passwd` is passed through.
    # - Be sure to run the `useradd` command below first.
    # - Then run `echo $(id -u moonfire-nvr):$(id -g moonfire-nvr)` to see
    #   what should be filled in here.
    user: "1000:1000"

    # Uncomment this if Moonfire fails with `clock_gettime failed` (likely on
    # older 32-bit hosts). <https://github.com/moby/moby/issues/40734>
    # security_opt:
    # - seccomp:unconfined

    environment:
      # Edit zone below to taste.
      TZ: "America/Los_Angeles"
      RUST_BACKTRACE: 1

    # docker's default log driver won't rotate logs properly, and will throw
    # away logs when you destroy and recreate the container. Using journald
    # solves these problems.
    # <https://docs.docker.com/config/containers/logging/configure/>
    logging:
      driver: journald
      options:
        tag: moonfire-nvr

    restart: unless-stopped

    ports:
    - "8080:8080/tcp"
Please use the following command to change the permissions.
sudo chmod -R 777 /var/lib/moonfire-nvr
Create /etc/moonfire-nvr.toml
Please use the following command to create /etc/moonfire-nvr.toml.
sudo nano /etc/moonfire-nvr.toml
Then input the following content into the toml file.
ain@AI-Box:~ $ sudo cat /etc/moonfire-nvr.toml
[[binds]]
ipv4 = "0.0.0.0:8080"
allowUnauthenticatedPermissions = { viewVideo = true }

[[binds]]
unix = "/var/lib/moonfire-nvr/sock"
ownUidIsPrivileged = true
Configure Moonfire
Run docker compose
Please use the following command to init database.
sudo docker compose run --rm moonfire-nvr init
The result is shown as below.

Create a folder
Please create a folder to save the video record:
sudo mkdir -p /var/lib/moonfire-nvr/recordings
sudo chown 1000:1000 /var/lib/moonfire-nvr/recordings
Run interactive configuration
sudo docker compose run --rm moonfire-nvr config 2>debug-log
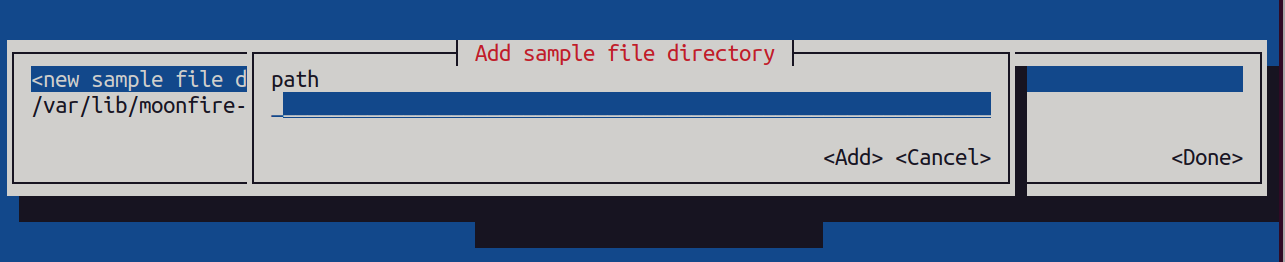
Please follow the steps below to add the folder.
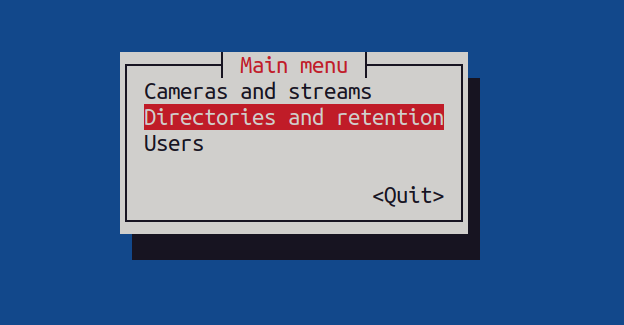
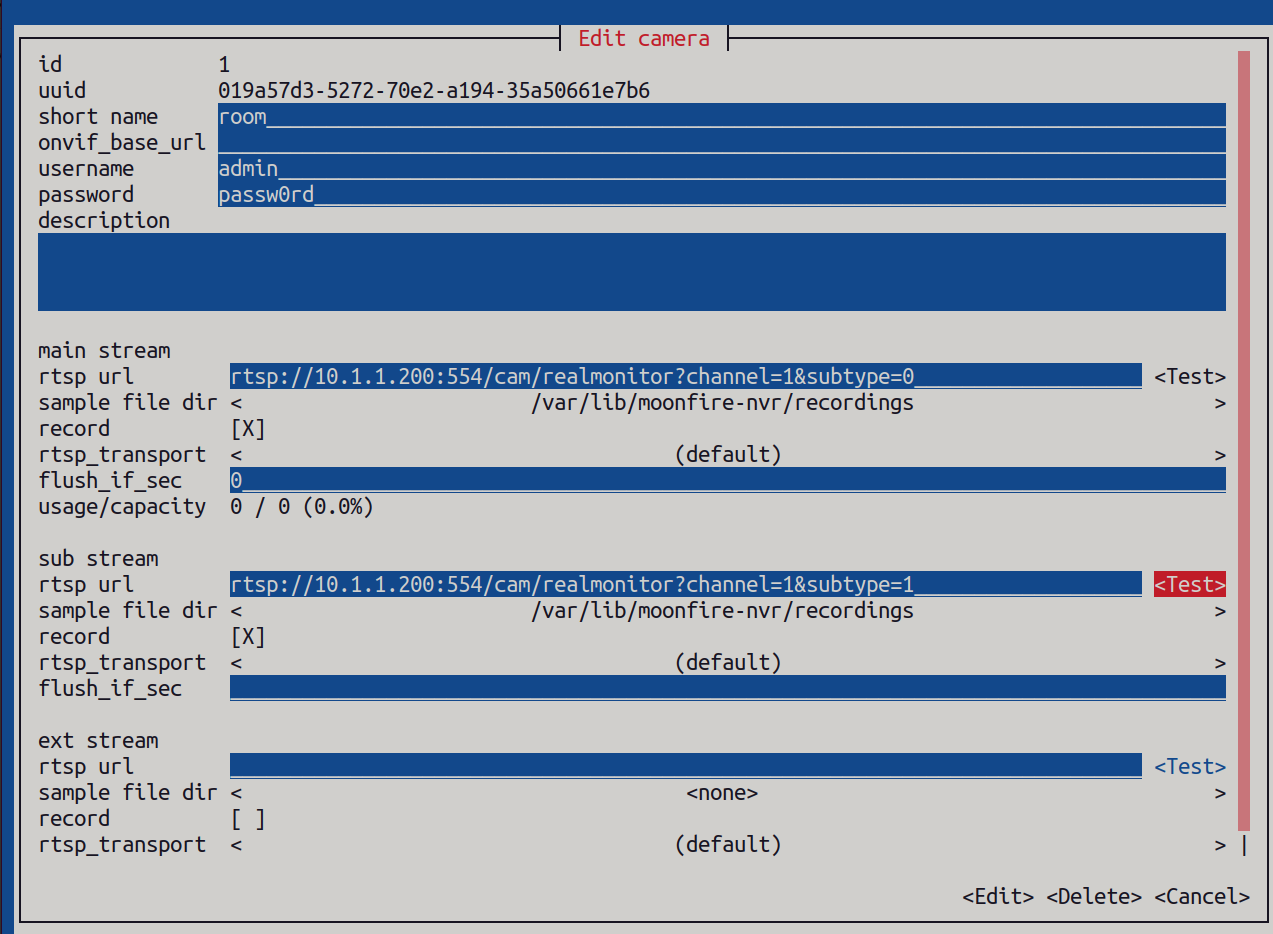
Please follow the steps below to add the camera.


Run Moonfire NVR
Please use the following command to run Moonfire NVR.
sudo docker compose up --detach moonfire-nvr
Then, open the localhost:8080 port on your device to access it. The result is shown as below:
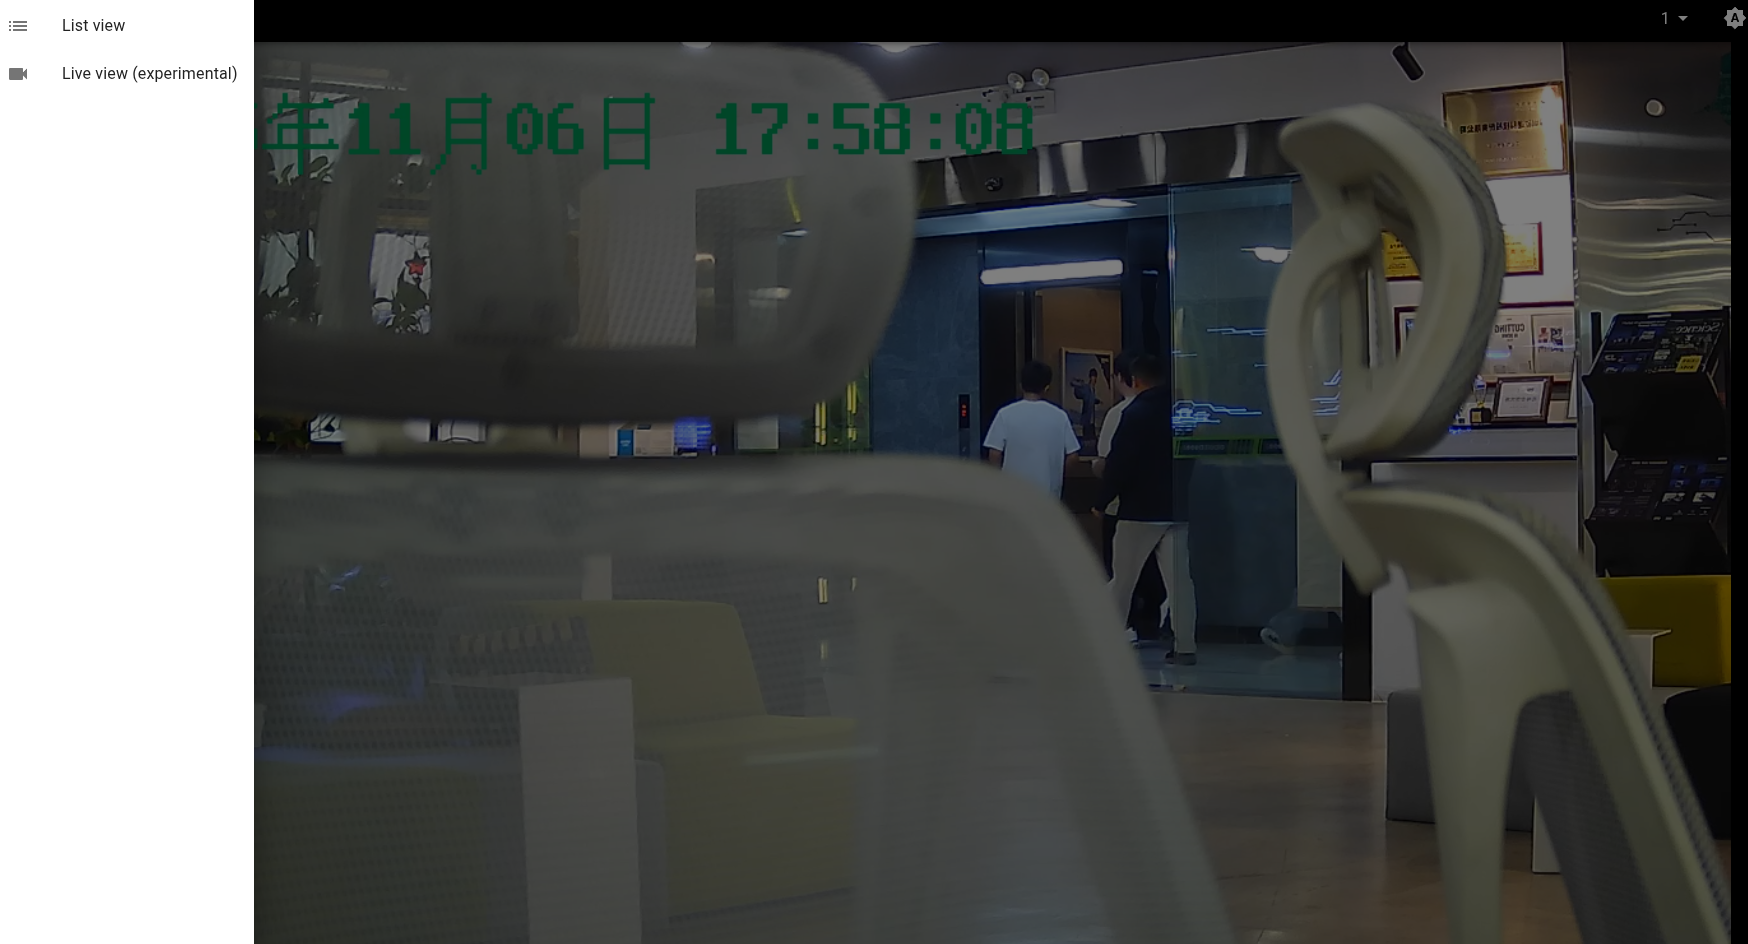
Note:Don't forget to click the option in the top left corner.
Result
Once we have configured everything, we can view the live feed from the current camera.
Tech Support & Product Discussion
Thank you for choosing our products! We are here to provide you with different support to ensure that your experience with our products is as smooth as possible. We offer several communication channels to cater to different preferences and needs.