MyActuator X Series Motors Getting Start
This article will introduce how to get started with MyActuator series motors and how to use them with C++ and Python on the reComputer Mini Jetson Orin.

Specification
Here's the completed table with all parameters filled in for all motor models:
| Parameter | X2-7 | X4-10 | X4-36 | X8-120 | X12-320 | X15-450 |
|---|---|---|---|---|---|---|
| Gear Ratio | 28.17 | 12.6 | 36 | 19.61 | 20 | 20.25 |
| Input Voltage (V) | 24 | 24 | 24 | 48 | 48 | 72 |
| No Load Speed (RPM) | 178 | 317 | 111 | 158 | 125 | 108 |
| No-Load Input Current (A) | 1 | 1 | 0.9 | 1.6 | 2.7 | 3.5 |
| Rated Speed (RPM) | 142 | 238 | 83 | 127 | 100 | 98 |
| Rated Torque (N.m) | 2.5 | 4 | 10.5 | 43 | 85 | 145 |
| Rated Output Power (W) | 37 | 100 | 100 | 574 | 900 | 1480 |
| Rated Phase Current A(rms) | 3 | 7.8 | 6.1 | 17.6 | 30 | 25 |
| Peak Torque (N.m) | 7 | 10 | 34 | 120 | 320 | 450 |
| Peak Phase Current A(rms) | 8.1 | 19.5 | 21.5 | 43.8 | 100 | 69.2 |
| Efficiency (%) | 63 | 69.5 | 63.1 | 79 | 75 | 82.4 |
| Motor Back-EMF Constant (Vdc/Krpm) | 4.3 | 6 | 6 | 19.2 | 17.9 | 29.9 |
| Module Torque Constant (N.m/A) | 0.8 | 0.8 | 1.9 | 2.4 | 3.3 | 5.8 |
| Motor Phase Resistance (Ω) | 0.61 | 0.32 | 0.35 | 0.18 | 0.12 | 0.08 |
| Motor Phase Inductance (mH) | 0.13 | 0.14 | 0.17 | 0.31 | 0.05 | 0.14 |
| Pole Pair | 13 | 13 | 13 | 10 | 20 | 20 |
| 3 Phase Connection | Y | |||||
| Back Drive Torque (N.m) | 0.4 | 0.8 | 1.14 | 3.21 | 3.8 | 4 |
| Backlash (Arcmin) | 12 | 10 | 10 | 10 | 10 | 10 |
| Output Bearing Type | Deep Groove Ball Bearings | Crossed Roller Bearings | ||||
| Axial Suffer (KN) | 0.25 | 1.2 | 1.3 | 4 | 4.5 | 5.4 |
| Axial Stress (KN) | 0.25 | 1.2 | 1.3 | 1 | 4.5 | 5.4 |
| Radial Load (KN) | 1 | 1.2 | 1.5 | 4.5 | 5 | 6 |
| Inertia (Kg.cm²) | 0.17 | 0.25 | 0.3 | 1.5 | 12.9 | 31.6 |
| Encoder Type & Interface | Dual Encoder ABS-17BIT (Input) / 17-18BIT (Output) | |||||
| Control Accuracy (Degree) | <0.01 | |||||
| Communication | CAN BUS / EtherCAT | |||||
| Weight (Kg) | 0.26 | 0.33 | 0.36 | 1.40 | 2.37 | 3.50 |
| Insulation Grade | F | |||||
RMD-X V4 Series Naming Conventions
- RMD: Brand Name R-Reducer M-Motor D-Drive
- X2: X Stands For The Series Name: Integrated Planetary Actuator, 2 represent motor model number e.g:X2 X4 X6 X8 etc
- P28: Planetary gear ratio e.g:P12 P28 P32 etc
- 7: Peak torque 7N.m
- E: Communication E: CAN BUS & EtherCAT
Main Features
- CAN BUS & EtherCAT
- Crossed Roller Bearings
- Dual Encoder
- High Torque Density
- High Precision
- Hollow Design
Getting Start
Environmental Preparation Before Use
Windows System in PC
-
Download the Download the corresponding product manual.
-
Downlaod the MYACTUATOR_Setup Software_V4.0.zip
-
Extract
MYACTUATOR_Setup Software_V4.0.zipand install the following:USBCAN_AllInOne_x86_x64_2.0.0.1.exelocated in theRequired Runtime Environment\ZLGUSBCAN_DriverdirectoryMSVBCRT.AIO.2019.10.19.X86 X64.exelocated in theRequired Microsoft Runtime Librariesdirectory
Connect the Circuit
Here we have selected the X4-36 motor, and its interface diagram is shown below.

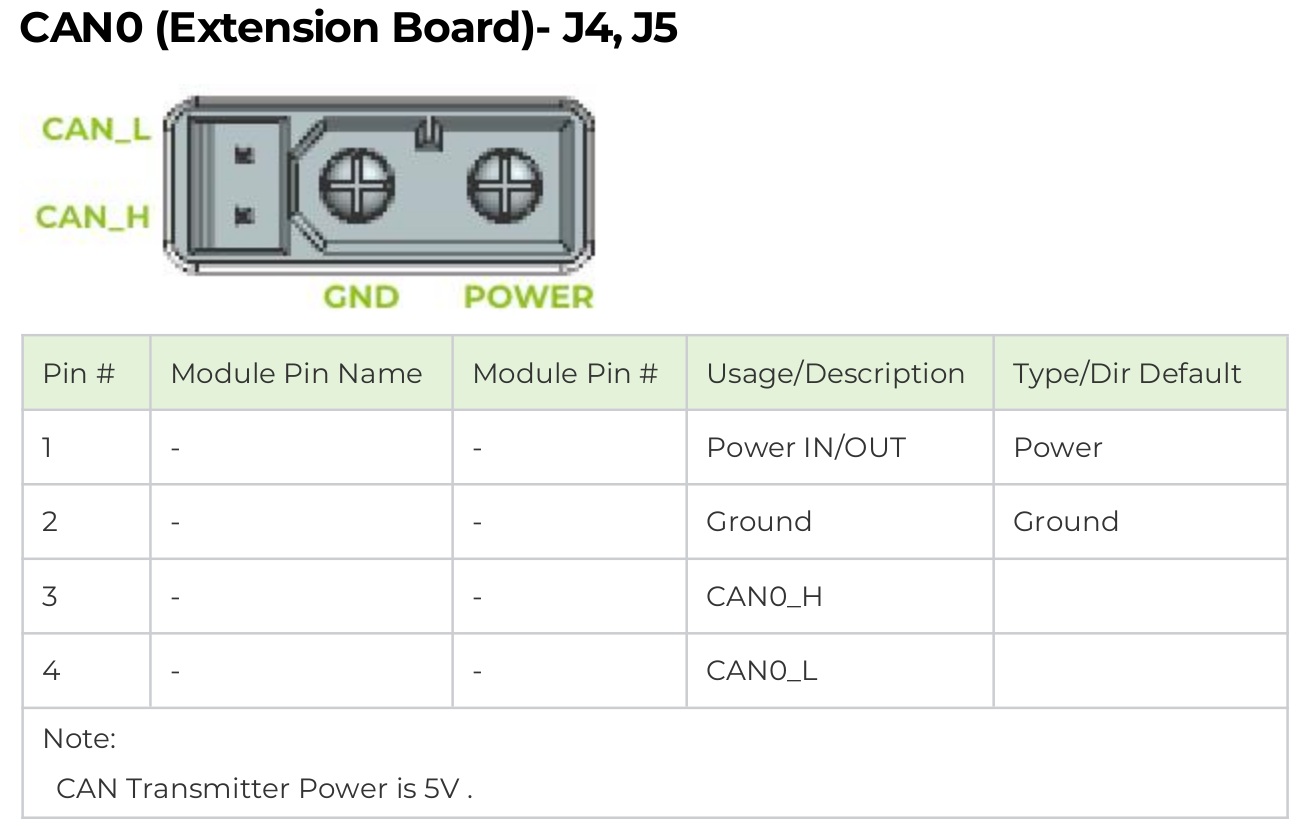
| Port Definition | Port Description |
|---|---|
| ① VCC | Power positive |
| ② GND | Power negative |
| ③ CAN_H | CAN_H network signal terminal |
| ④ CAN_L | CAN_L network signal terminal |
| ⑤ EtherCAT_IN | EtherCAT input terminal |
| ⑥ EtherCAT_OUT | EtherCAT output terminal |
| ⑦ T+ | Master sends control commands to module |
| ⑧ T- | Module sends status feedback to master |
| ⑨ R+ | Master reflects module status data |
| ⑩ R- | Module reflects master control commands |
Here, we use the CAN communication method, which requires an additional USB-CAN interface for debugging via an upper computer on Windows.

Here, you need to provide a separate 24V power supply for the motor and connect the USB to your computer.
Use the MYACTUATOR Setup Software 250206.exe to Test the Motor
| Set ID and Connection | Read Motor Information | Calibrate the motor | Calibrate the motor | Run a motor rotation test. |
|---|---|---|---|---|
 |  |  |  |  |
| The default motor ID is 1. Enter ID as 1 and click "Connect". | After connecting, click "Read" to retrieve the motor's current information. | For first-time use, click "Calibrate Motor" to perform calibration. | After calibration, click "Read" and "Save". | You can now test different motor control modes in the Motor Running section. |
For more detail features, please refer to the Setup Software Instruction Manual - V3.0.pdf included in the MYACTUATOR_Setup Software_V4.0.zip file.
Control the Motor Using the reComputer Mini Jetson Orin.
Currently, the most common CAN communication interfaces for motors in the market use XT30 (2+2) and JST connectors. Our reComputer Mini Jetson Orin and reComputer Robotics device is equipped with dual XT30 (2+2) ports and JST-based CAN interfaces, providing seamless compatibility.
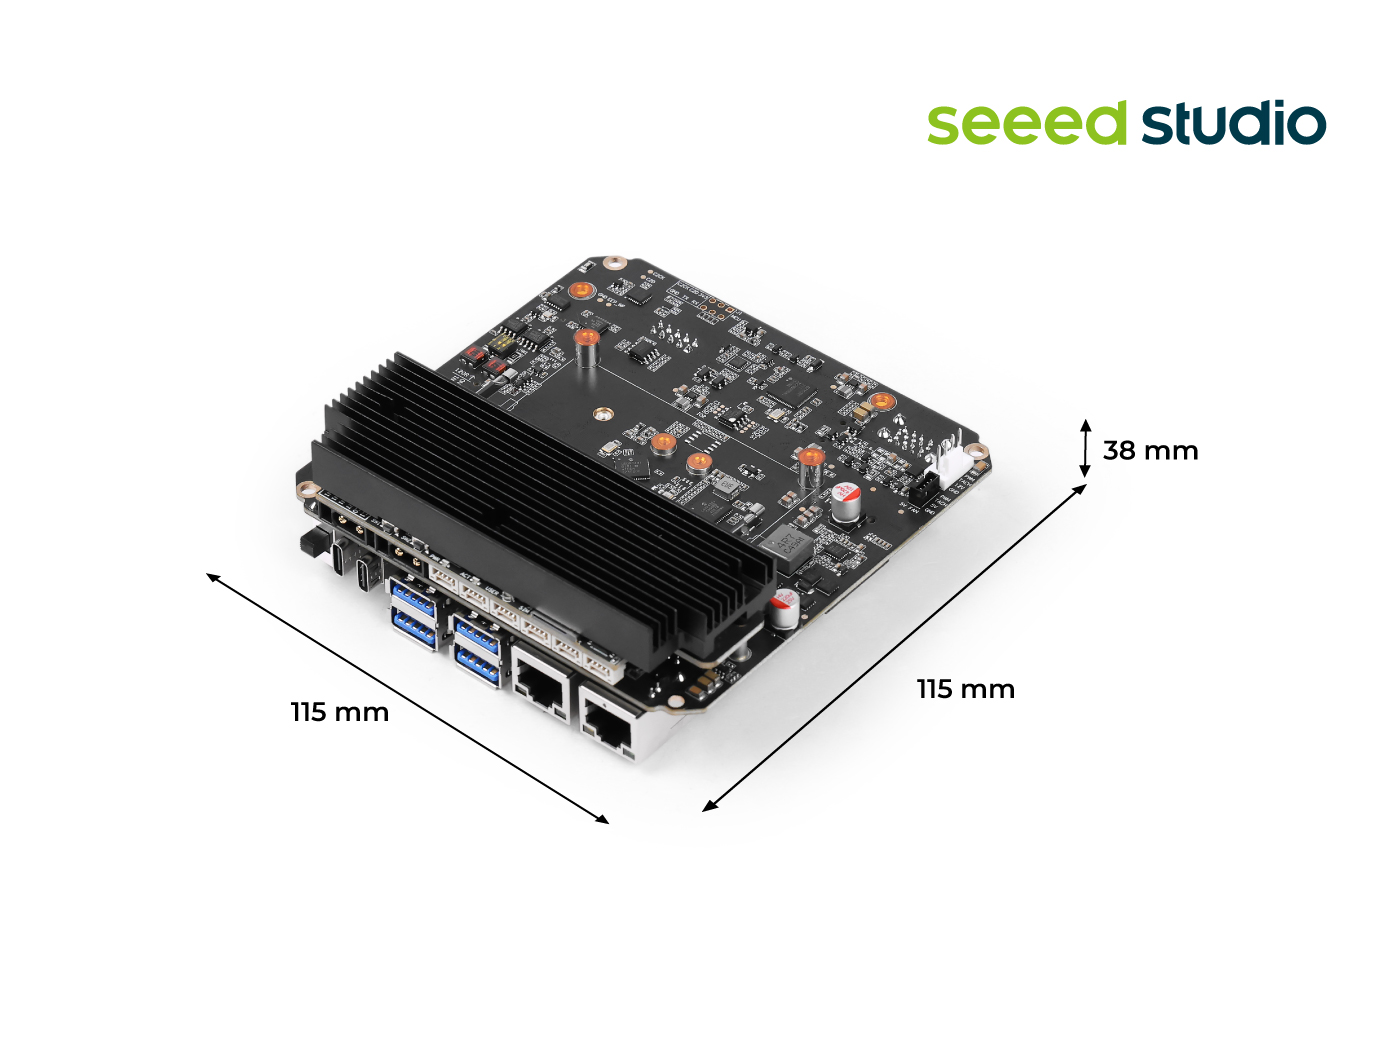
reComputer Mini:

reComputer Robotics
For more details on CAN usage, you can refer to this wiki.
Enable CAN Interfaces
Step1: Before using CAN0 and CAN1, please remove the bottom cover and set both 120Ω termination resistors to the ON position.
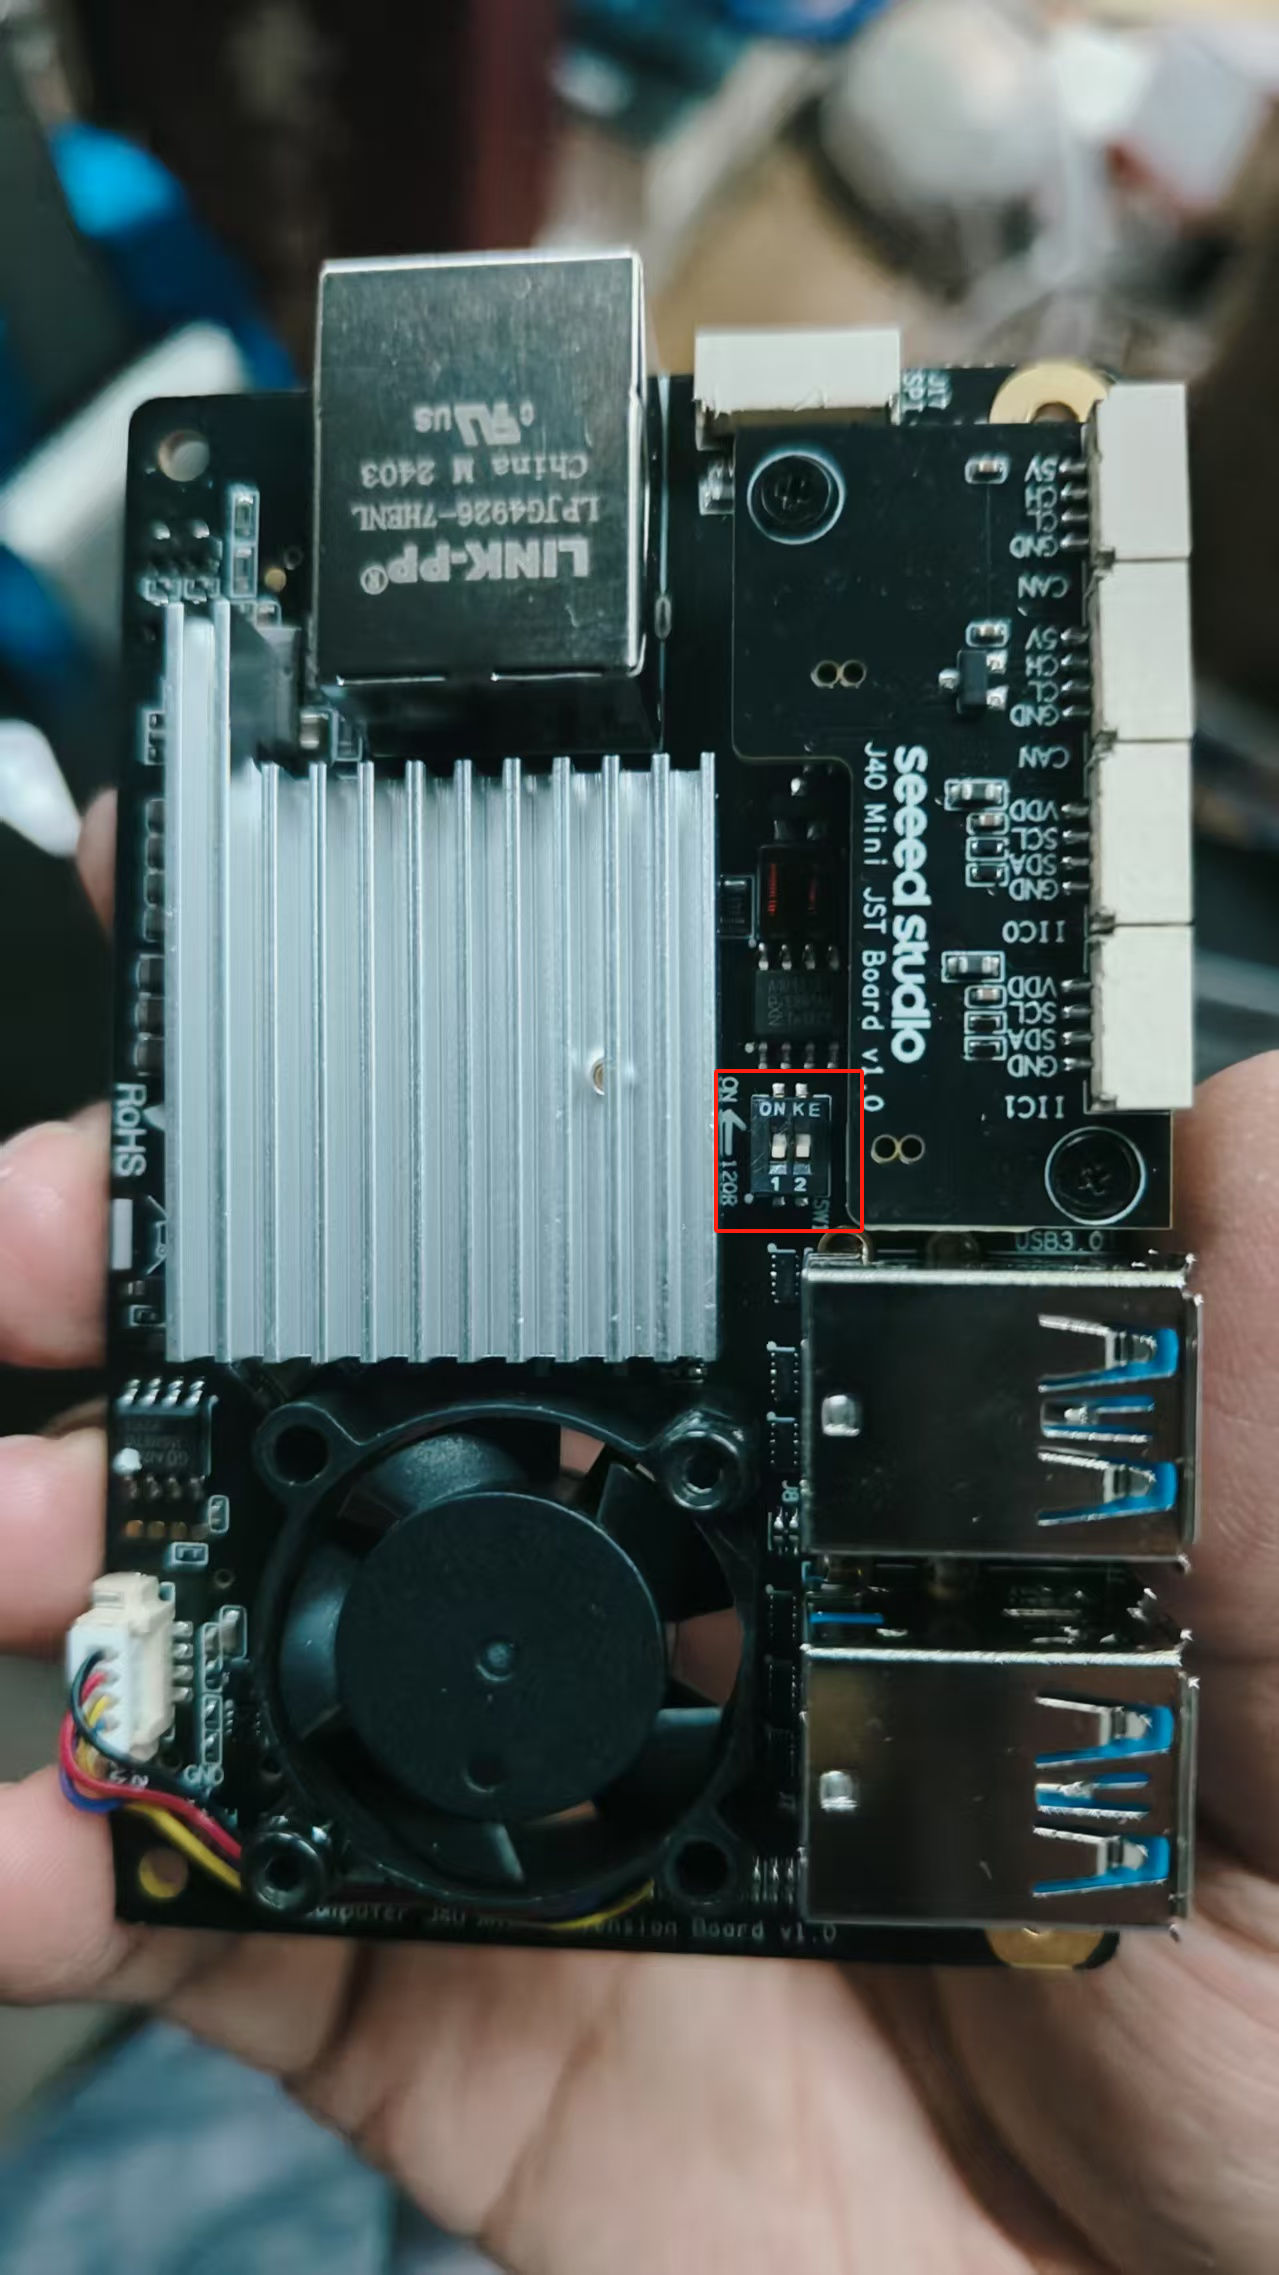
Step2: Connect the motor directly to the reComputer Mini CAN0 via the XT30 (2+2) interface.
This is CAN0 interfaces for reComputer Mini

This power supply is only for single-motor learning and testing. For multiple motors, please design a separate power board and isolate the Jetson's power supply from the motor power supply to avoid high current passing directly through the Jetson.
Enable Jetson CAN communication
Open a terminal and enter the following command to pull the GPIO pin high and activate CAN0:
gpioset --mode=wait 0 43=0
If you are using the JST-interface CAN1, pull pin 106 high.
gpioset --mode=wait 0 106=0
Keep this terminal open, launch a new terminal, and configure CAN0.
sudo modprobe mttcan
sudo ip link set can0 type can bitrate 1000000
sudo ip link set can0 up
Build Python and C++ Environment
Step1: Git clone the SDK.
git clone https://github.com/ZhuYaoHui1998/myactuator_rmd.git
Step2: This driver SDK requires the following dependencies to be installed. For Debian Linux they can be installed through apt as follows:
sudo apt-get install -y build-essential cmake
sudo apt install linux-modules-extra-5.15.0-1025-nvidia-tegra # For Jetson Jetpack 6.0
In case you want to use the Python bindings you will have to additionally install Python 3, pip and pybind11:
sudo apt-get install -y python3 python3-pip python3-pybind11 python3-setuptools
After having installed its dependencies you will have to install the driver SDK either as a C++ library or Python package as described in the following steps. Both will use CMake to compile the C++ code.
Building the C++ Library
For building the C++ driver SDK open a new terminal inside this folder and execute the following commands. On older versions of Linux the build might fail with the error message error: 'const struct can_frame' has no member named 'len' and you will have to apply the code modification discussed in issue 5.
cd ~/myactuator_rmd
mkdir build
cd build
cmake .. -D PYTHON_BINDINGS=on
make -j $(nproc)
sudo make install
The flag PYTHON_BINDINGS (defaults to off) builds the Python bindings additionally to the C++ library. In case you are only interested in using the C++ library feel free to leave it off. When building the Python bindings like this they will be compiled to a shared library but not be installed. This means you will either have to install the library manually or you will only be able to import them locally inside the build folder.
For uninstalling the package again you can use the following command xargs rm < install_manifest.txt.
Building the Python Library
For building and installing the Python bindings for this SDK open a new terminal inside the main folder and execute the following command:
cd ~/myactuator_rmd
pip3 install .
This will use the setup.py to invoke CMake and install the bindings as a C++ library. If you want to remove them again simply invoke pip3 uninstall myactuator-rmd-py.
Control Using C++
- Create project directory structure
Create your project directory under the code src directory, for example, name itmyactuator_example, and create a src folder under the subdirectory.
cd ~/myactuator_rmd
mkdir -p ~/myactuator_rmd/src/myactuator_example/src
cd ~/myactuator_rmd/src/myactuator_example
- Write CMakeLists.txt
In the~/myactuator_rmd/src/myactuator_example/CMakeLists.txtfile, write the following content:
touch CMakeLists.txt
cmake_minimum_required(VERSION 3.20)
project(myactuator_example)

# Find the myactuator_rmd library
find_package(myactuator_rmd REQUIRED)

# Create executable
add_executable(myactuator_node
src/main.cpp
)

# Use C++17 standard
target_compile_features(myactuator_node PUBLIC
cxx_std_17
)

# Link the myactuator_rmd library
target_link_libraries(myactuator_node PUBLIC
myactuator_rmd::myactuator_rmd
)
- Write main.cpp
In the~/myactuator_rmd/src/myactuator_example/src/main.cppfile, write the following code:
touch src/main.cpp
#include <cstdlib>
#include <iostream>
#include <myactuator_rmd/myactuator_rmd.hpp>

int main() {
myactuator_rmd::CanDriver driver {"can0"};
myactuator_rmd::ActuatorInterface actuator {driver, 1};

std::cout << actuator.getVersionDate() << std::endl;
std::cout << actuator.sendPositionAbsoluteSetpoint(180.0, 500.0) << std::endl;
actuator.shutdownMotor();
return EXIT_SUCCESS;
}
- Build the project
cd ~/myactuator_rmd/src/myactuator_example
mkdir build && cd build
cmake .. -DCMAKE_BUILD_TYPE=Release
make
- Run the program
sudo ./myactuator_node

Prerequisites
- CAN interface
can0must be properly configured (ensure your motor and CAN bus are correctly connected). - The
myactuator_rmdlibrary must be properly installed (if not, install it first).
For more C++ implementation details, please refer to all contents in myactuator_rmd.hpp. We will provide a detailed introduction to Python usage methods.
Control Using Python
Create a folder named scripts under the directory ~/myactuator_rmd/src/myactuator_example to store Python scripts.
cd ~/myactuator_rmd/src/myactuator_example
mkdir scripts
Get version number
Create a custom Python script named test.py under the scripts directory and fill it with the following code.
import myactuator_rmd_py as rmd
import time

# Initialize CAN driver and actuator interface
driver = rmd.CanDriver("can0")  # Using can0
actuator = rmd.ActuatorInterface(driver, 1)  # CAN ID set to 1

# Get version number
print("Version number:", actuator.getVersionDate())

Load the library and continue to create a driver for a particular network interface (here can0) and drive (here 1 corresponding to the CAN-address 0x140 + 1 = 0x141).
Get Motor Status
# -*- coding: gbk -*-
import myactuator_rmd_py as rmd
import time
driver = rmd.CanDriver("can0")
actuator = rmd.ActuatorInterface(driver, 1)

# Motor Status 1
status1 = actuator.getMotorStatus1()
print(f"""
Motor Status 1:
Temperature: {status1.temperature}°C
Brake Status: {'Released' if status1.is_brake_released else 'Locked'}
Voltage: {status1.voltage}V
Error Code: {status1.error_code}
""")

# Motor Status 2
status2 = actuator.getMotorStatus2()
print(f"""
Motor Status 2:
Temperature: {status2.temperature}°C
Current: {status2.current}A
Shaft Speed: {status2.shaft_speed} RPM
Shaft Angle: {status2.shaft_angle}°
""")

# Motor Status 3
status3 = actuator.getMotorStatus3()
print(f"""
Motor Status 3:
Temperature: {status3.temperature}°C
Phase A Current: {status3.current_phase_a}A
Phase B Current: {status3.current_phase_b}A
Phase C Current: {status3.current_phase_c}A
""")

## Torque Calculation

import myactuator_rmd_py as rmd
from myactuator_rmd_py.actuator_constants import X4_24  # Import according to your motor model

def get_normalized_torque(actuator):
    """Calculate normalized torque from current"""
    # Get current value
    status = actuator.getMotorStatus2()
    current = status.current

    # Calculate normalized torque (current/rated)
    torque_ratio = current / X4_24.rated_current
    actual_torque = torque_ratio * X4_24.rated_torque
    return actual_torque

# Usage example
driver = rmd.CanDriver("can0")
actuator = rmd.ActuatorInterface(driver, 1)

try:
    while True:
        torque = get_normalized_torque(actuator)
        print(f"Current Torque: {torque:.3f} Nm (Rated: {X4_24.rated_torque} Nm)", end='\r')
        time.sleep(0.1)
except KeyboardInterrupt:
    actuator.shutdownMotor()

Control Mode
- Get Current Control Mode
# -*- coding: gbk -*-
import myactuator_rmd_py as rmd
import time
driver = rmd.CanDriver("can0")
actuator = rmd.ActuatorInterface(driver, 1)
mode = actuator.getControlMode()
print(f"Current Control Mode: {mode}")

- Absolute Position Control
# -*- coding: gbk -*-
import myactuator_rmd_py as rmd
import time
driver = rmd.CanDriver("can0")
actuator = rmd.ActuatorInterface(driver, 1)

# Move to 180 degree position at 100 deg/s
actuator.sendPositionAbsoluteSetpoint(180.0, 300.0)
time.sleep(5)  # Wait for motor to reach target position

# Get current position
angle = actuator.getMultiTurnAngle()
print(f"Current position: {angle}°")

time.sleep(5)
mode = actuator.getControlMode()
print(f"Current control mode: {mode}")
actuator.shutdownMotor()

You will see your motor rotate to the 180-degree position.
- Relative Position Control
import myactuator_rmd_py as rmd
import time
driver = rmd.CanDriver("can0")
actuator = rmd.ActuatorInterface(driver, 1)

# Move an additional 90 degrees from current position
current_angle = actuator.getMultiTurnAngle()
target_angle = current_angle + 90.0
actuator.sendPositionAbsoluteSetpoint(target_angle, 50.0)
time.sleep(3)
angle = actuator.getMultiTurnAngle()
print(f"Current position: {angle}°")
mode = actuator.getControlMode()
print(f"Current control mode: {mode}")
actuator.shutdownMotor()

You will observe the motor rotating 90 degrees counterclockwise.
- Velocity Control
# -*- coding: gbk -*-
import myactuator_rmd_py as rmd
import time
driver = rmd.CanDriver("can0")
actuator = rmd.ActuatorInterface(driver, 1)

# Continuous rotation at 500 RPM
actuator.sendVelocitySetpoint(500.0)
time.sleep(15)

# Stop motor
actuator.stopMotor()

# Get current position
angle = actuator.getMultiTurnAngle()
print(f"Current position: {angle}°")

mode = actuator.getControlMode()
print(f"Current control mode: {mode}")

- Torque Control
# -*- coding: gbk -*-
import myactuator_rmd_py as rmd
import time
driver = rmd.CanDriver("can0")
actuator = rmd.ActuatorInterface(driver, 1)

# Apply 0.5A current (torque)
actuator.sendCurrentSetpoint(0.5)
time.sleep(2)

# Stop torque output
actuator.stopMotor()

# Get current position
angle = actuator.getMultiTurnAngle()
print(f"Current position: {angle}°")

mode = actuator.getControlMode()
print(f"Current control mode: {mode}")

- Closed-loop Motion Control
# -*- coding: gbk -*-
import myactuator_rmd_py as rmd
import time

# Initialization
driver = rmd.CanDriver("can0")
actuator = rmd.ActuatorInterface(driver, 1)

# Position control with feedback
feedback = actuator.sendPositionAbsoluteSetpoint(180.0, 100.0)
time.sleep(5)
print(feedback)


# Velocity control with feedback
feedback = actuator.sendVelocitySetpoint(20.0)
time.sleep(5)
print(feedback)

# Torque control with feedback
torque_constant = 0.32  # Set according to motor model
feedback = actuator.sendTorqueSetpoint(1.5, torque_constant)
time.sleep(5)
print(feedback)

actuator.stopMotor()

Motor Brake Control
# -*- coding: gbk -*-
import myactuator_rmd_py as rmd
import time
driver = rmd.CanDriver("can0")
actuator = rmd.ActuatorInterface(driver, 1)

# Engage brake
actuator.lockBrake()
print("Brake engaged")

# Release brake
actuator.releaseBrake()
print("Brake released")
Motor Power Control
# -*- coding: gbk -*-
import myactuator_rmd_py as rmd
import time
driver = rmd.CanDriver("can0")
actuator = rmd.ActuatorInterface(driver, 1)

# Power off motor
actuator.shutdownMotor()
print("Motor powered off")
Encoder Functions
- Get Multi-turn Encoder Position
# -*- coding: gbk -*-
import myactuator_rmd_py as rmd
import time
driver = rmd.CanDriver("can0")
actuator = rmd.ActuatorInterface(driver, 1)
encoder_pos = actuator.getMultiTurnEncoderPosition()
print(f"Multi-turn encoder position: {encoder_pos}")
- Set Current Position as Zero Point (Requires Reboot)
# -*- coding: gbk -*-
import myactuator_rmd_py as rmd
import time
driver = rmd.CanDriver("can0")
actuator = rmd.ActuatorInterface(driver, 1)
actuator.setCurrentPositionAsEncoderZero()
print("Current position set as encoder zero point")
- Set Custom Zero Point (Requires Reboot)
# -*- coding: gbk -*-
import myactuator_rmd_py as rmd
import time

driver = rmd.CanDriver("can0")
actuator = rmd.ActuatorInterface(driver, 1)

# Get current position as zero point
current_pos = actuator.getMultiTurnEncoderOriginalPosition()
print(f"Raw encoder position: {current_pos}")

# Set zero offset
actuator.setEncoderZero(current_pos)
print(f"Encoder zero point set to: {current_pos}")

# Reboot to apply settings
actuator.shutdownMotor()
time.sleep(1)  # Wait for shutdown
actuator = rmd.ActuatorInterface(driver, 1)  # Reinitialize

# Verify
new_pos = actuator.getMultiTurnEncoderPosition()
print(f"Post-reboot position (should be near 0): {new_pos}")
Acceleration Settings
# -*- coding: gbk -*-
import myactuator_rmd_py as rmd
import time
from myactuator_rmd_py.actuator_state import AccelerationType

# Initialization
driver = rmd.CanDriver("can0")
actuator = rmd.ActuatorInterface(driver, 1)

## Get initial acceleration
print(f"Initial acceleration: {actuator.getAcceleration()}")

actuator.setAcceleration(5000, AccelerationType.POSITION_PLANNING_ACCELERATION)

## Get modified acceleration
print(f"Modified acceleration: {actuator.getAcceleration()}")

# Set different acceleration types
actuator.setAcceleration(1000, AccelerationType.POSITION_PLANNING_ACCELERATION)
actuator.setAcceleration(800, AccelerationType.POSITION_PLANNING_DECELERATION)
actuator.setAcceleration(1200, AccelerationType.VELOCITY_PLANNING_ACCELERATION)
actuator.setAcceleration(1000, AccelerationType.VELOCITY_PLANNING_DECELERATION)
Tech Support & Product Discussion
Thank you for choosing our products! We are here to provide you with different support to ensure that your experience with our products is as smooth as possible. We offer several communication channels to cater to different preferences and needs.