Getting Started with TRMNL 7.5" (OG) DIY Kit in Arduino
Introduction
The TRMNL 7.5" (OG) DIY Kit is a versatile development platform featuring the powerful XIAO ESP32-S3 Plus as its brain. This DIY Kit combines the processing power of ESP32-S3 with a beautiful 7.5-inch ePaper display, creating the perfect foundation for low-power, information-display projects. This guide focuses on programming the TRMNL DIY Kit using the Arduino framework, providing you with the essential knowledge to utilize its various hardware features.
Getting Started
Before diving into the specific features, let's set up our development environment for the TRMNL 7.5" (OG) DIY Kit.
Equipment Installation
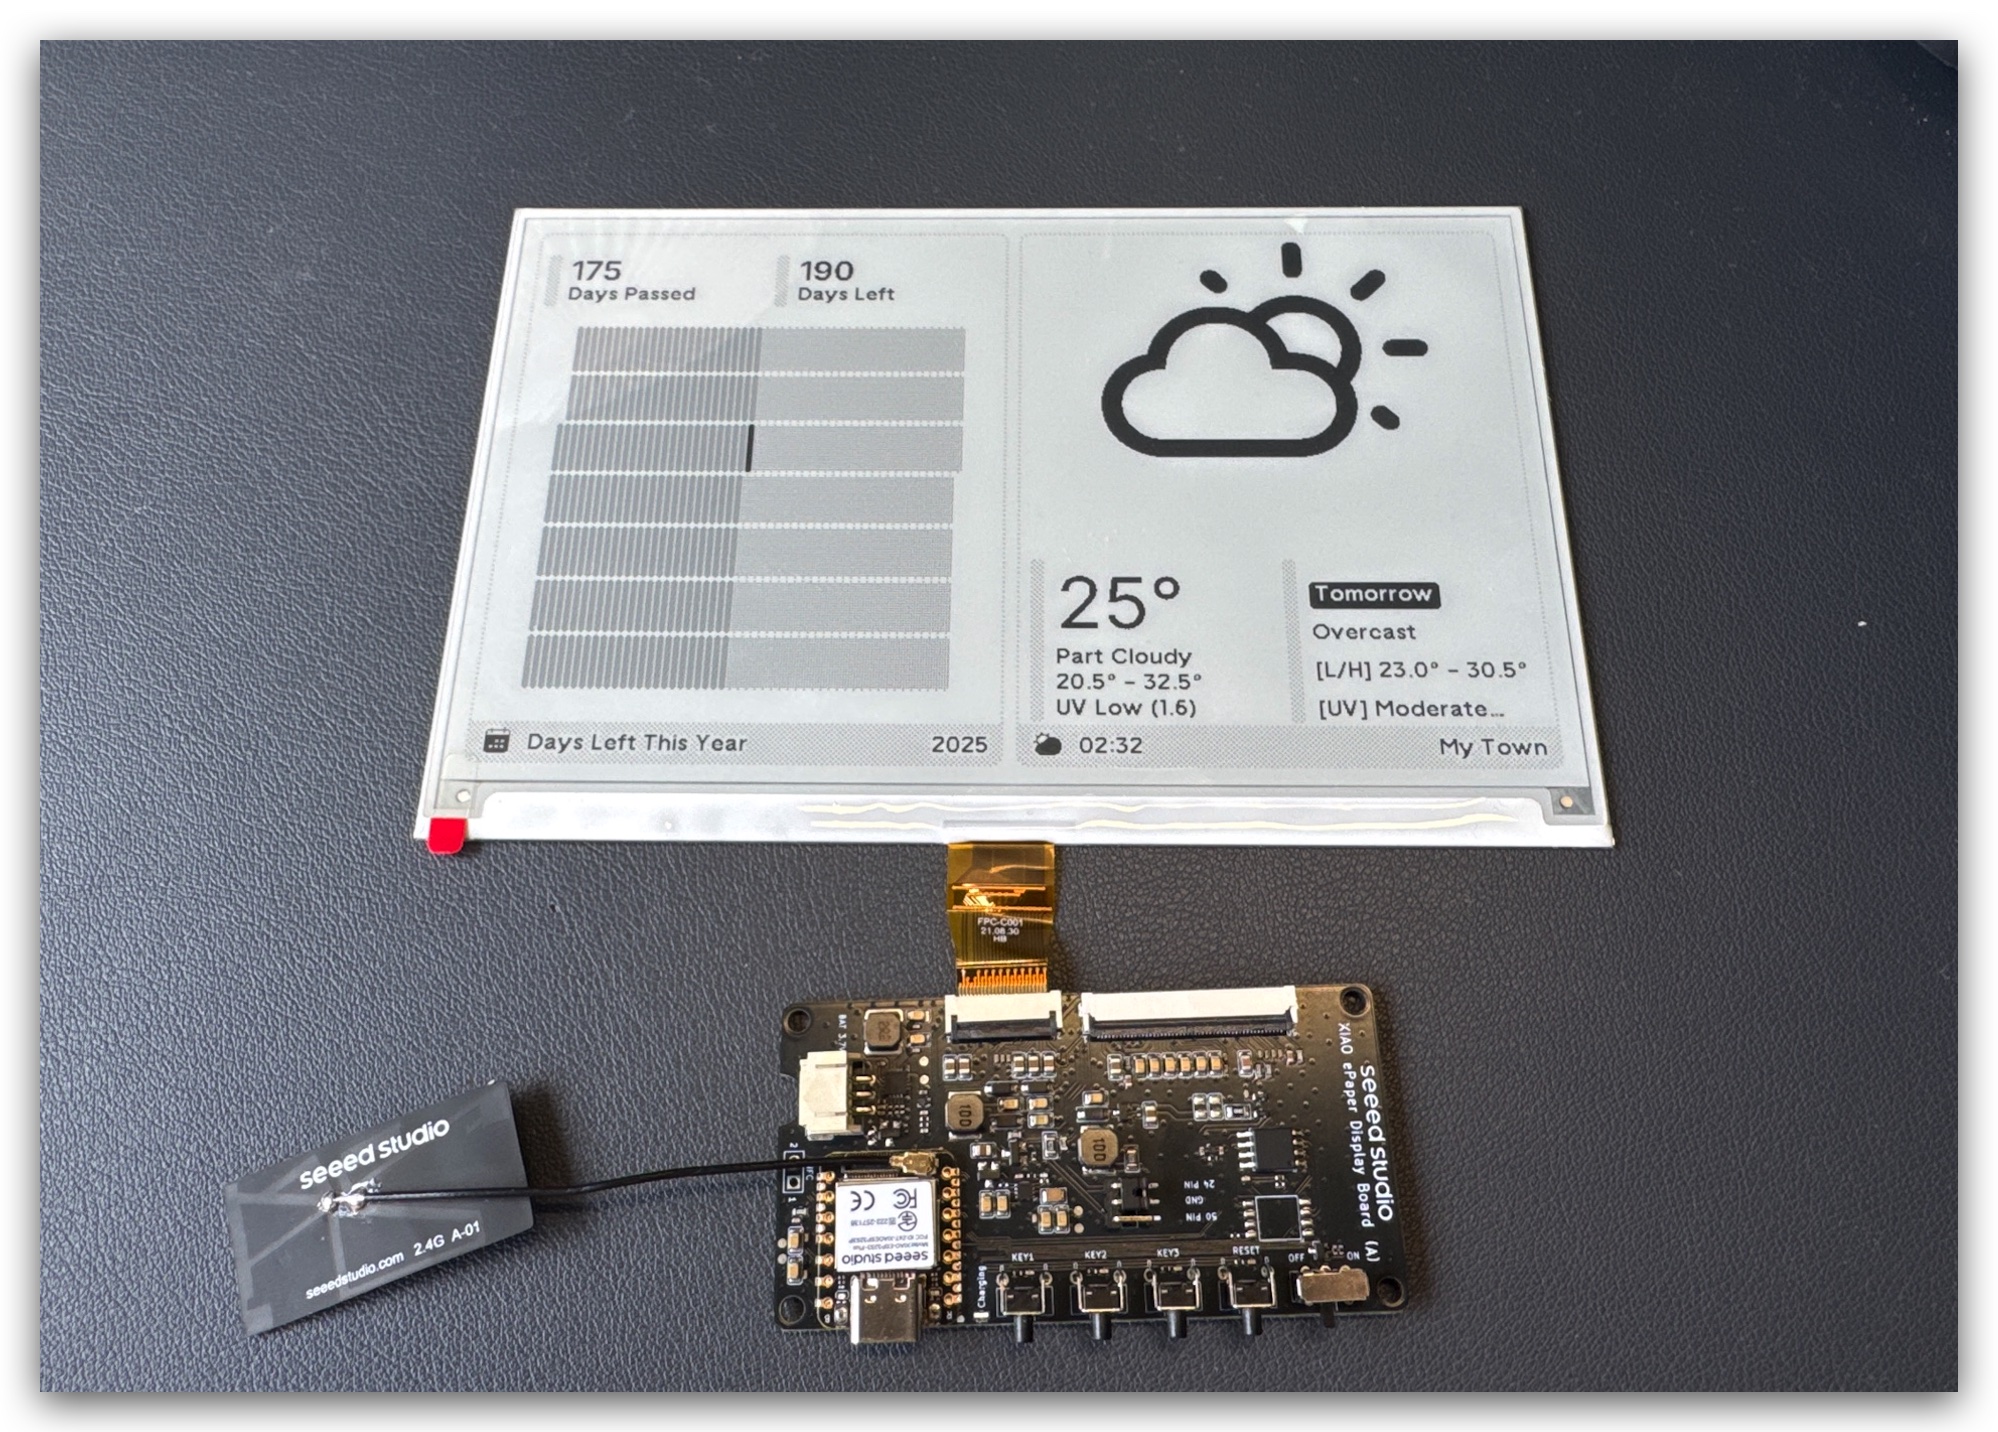
Step 1. Connect Display to Driver Board
Align the FPC cable with the connector on the XIAO ePaper Display Board, then secure the latch to ensure a firm connection.
The metal side of the FPC cable should face upwards, otherwise, no content will be displayed.
Please follow the installation tutorial below, many people get it wrong.
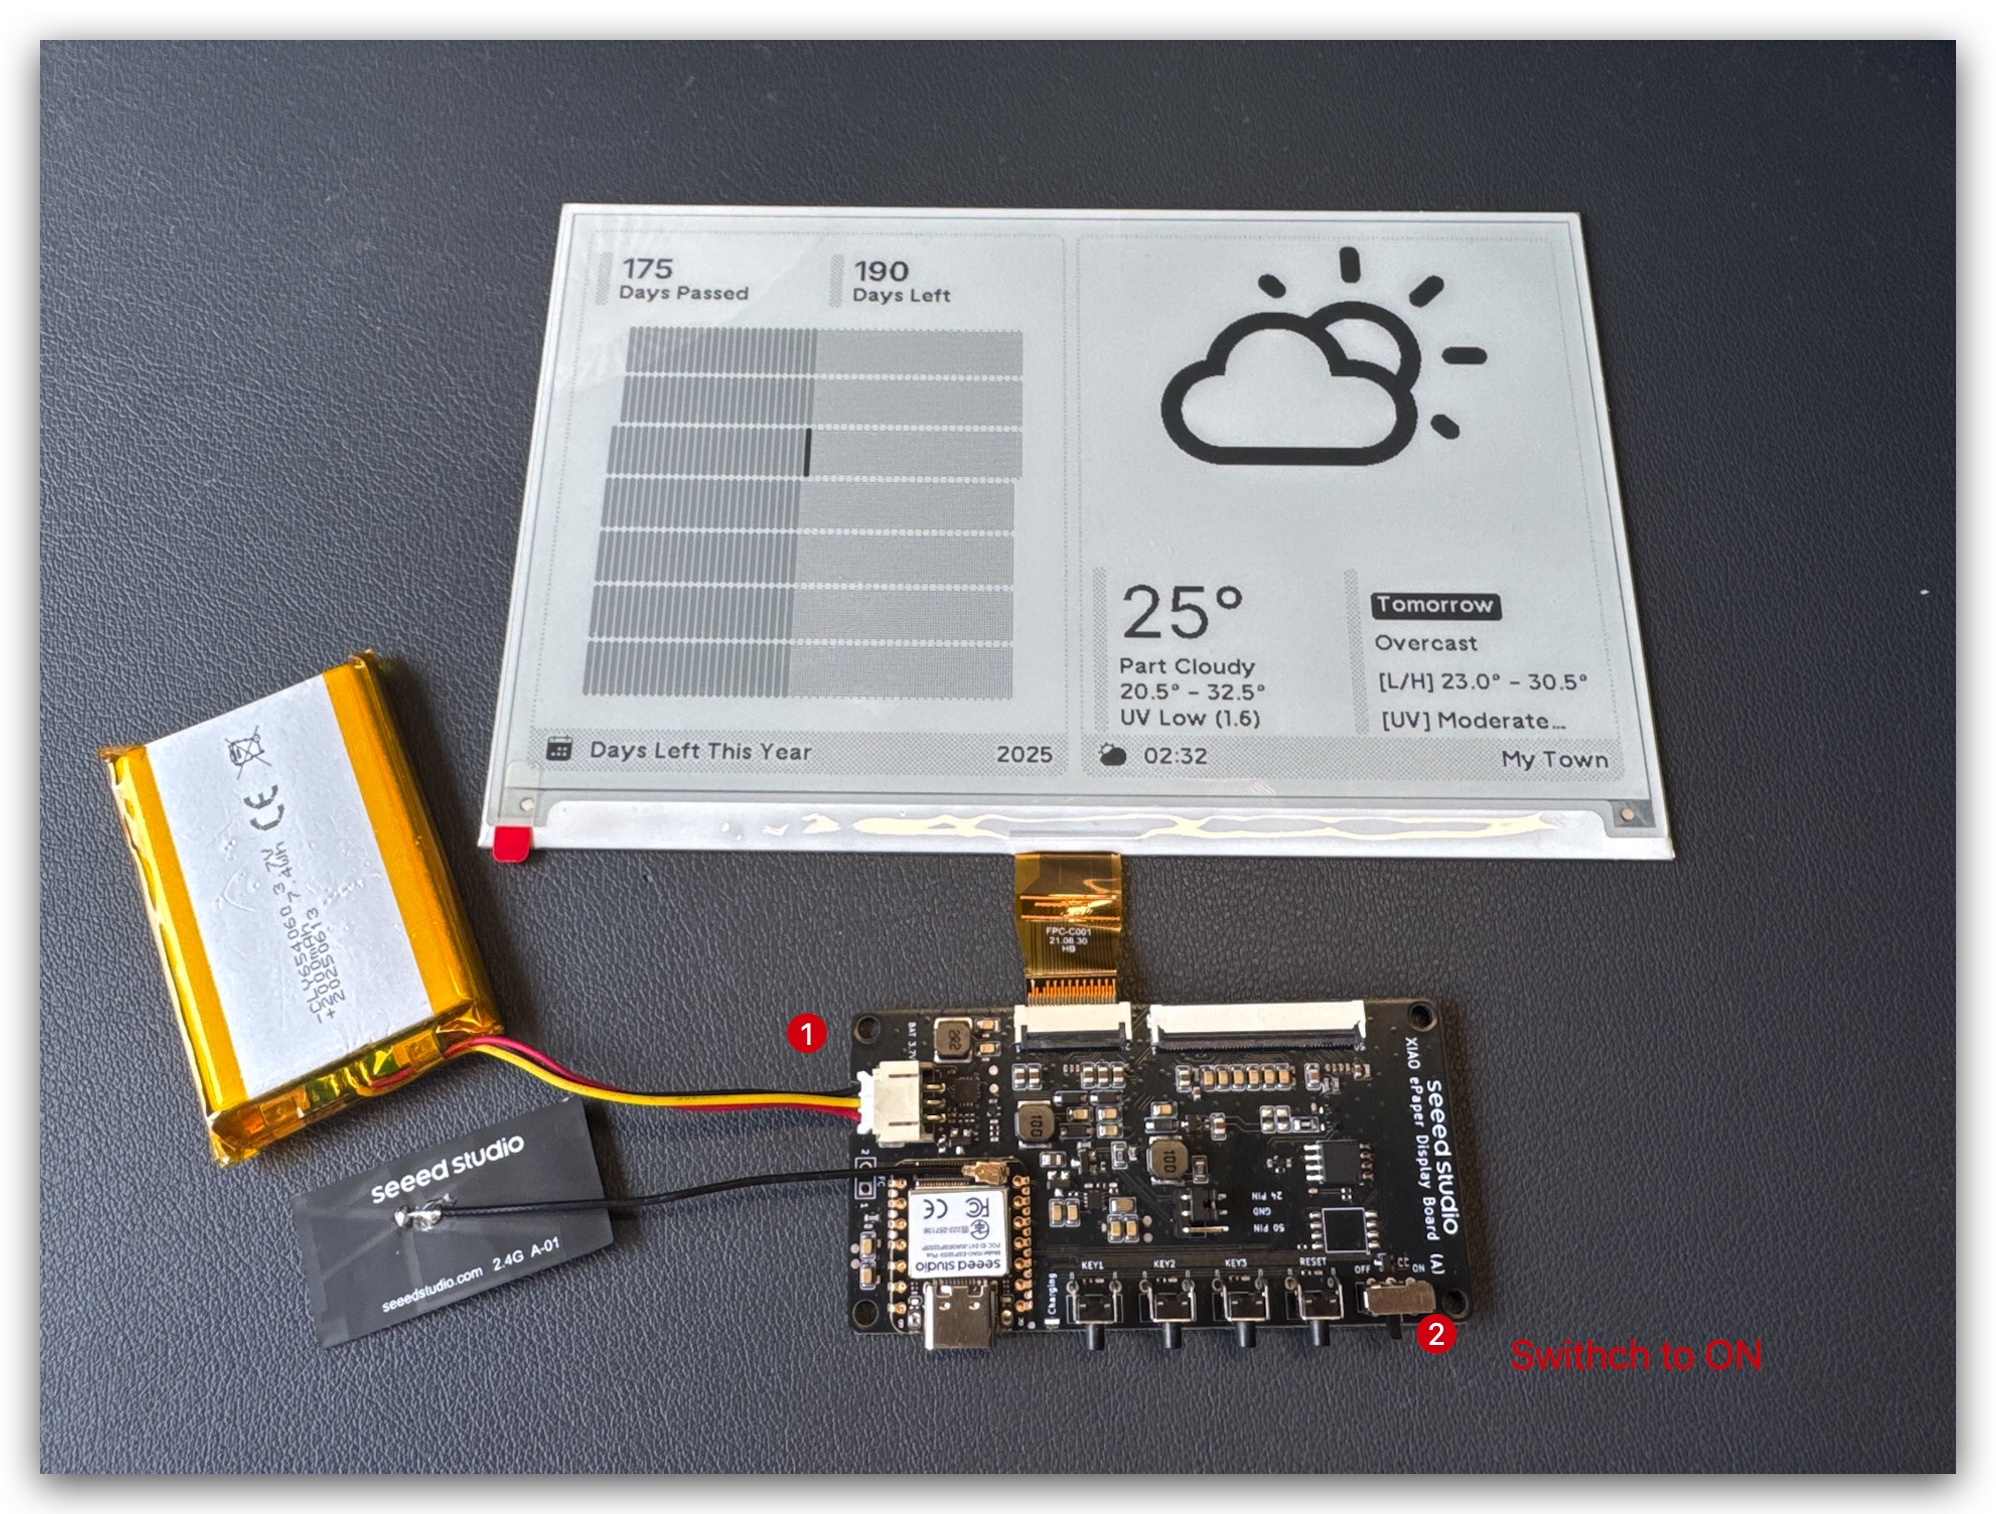
Step 2. Attach Battery
Connect the battery cable to the JST connector on the driver board, ensuring correct polarity (red wire to +, black to -).
Step 3. Enclosure Assembly (Optional)
Please note that the screen's flexible cable is very fragile. Be careful when operating. If it gets damaged, the entire screen will stop working.
Print open-source enclosure parts from Resource part and assemble the components inside.
First, assemble driver board and battery.
Test TRMNL kit if it works well.
Plug the screen into the case and make the FPC able out.
Connect FPC extension cable and assemble the whole case.
L-Shape enclosure is very similar.
If your TRMNL kit far away from your router, you can move the antenna outside the case. It would have better performance.
Environmental Preparation
To program the TRMNL DIY Kit with Arduino, you'll need to set up the Arduino IDE with ESP32 support.
If this is your first time using Arduino, we highly recommend you to refer to Getting Started with Arduino.
Step 1. Download and install the Arduino IDE and Launch the Arduino application.
Step 2. Add ESP32 board support to Arduino IDE.
In Arduino IDE, go to File > Preferences and add the following URL to the "Additional Boards Manager URLs" field:
https://raw.githubusercontent.com/espressif/arduino-esp32/gh-pages/package_esp32_index.json
Step 3. Install ESP32 board package.
Navigate to Tools > Board > Boards Manager, search for "esp32" and install the ESP32 package by Espressif Systems.
Step 4. Select the correct board.
Go to Tools > Board > ESP32 Arduino and select "XIAO_ESP32S3_PLUS".
Step 5. Connect your TRMNL DIY Kit to your computer using a USB-C cable.
Step 6. Select the correct port from Tools > Port.
Arduino Examples
Now let's explore the main features of the TRMNL DIY Kit with Arduino code examples.
User Buttons
The TRMNL DIY Kit features three user-programmable buttons (D1, D2, D4) and one reset button. Let's create a simple example to detect button presses.
Button Test Example
This example will read the state of the three user buttons and print their status to the Serial Monitor.
// TRMNL DIY Kit - Button Test Example

// Define button pins
const int BUTTON_D1 = D1;  // First user button
const int BUTTON_D2 = D2;  // Second user button
const int BUTTON_D4 = D4;  // Third user button

void setup() {
  // Initialize serial communication
  Serial.begin(115200);
  while (!Serial) {
    ; // Wait for serial port to connect
  }

  Serial.println("TRMNL DIY Kit - Button Test");

  // Configure button pins as inputs with internal pull-up resistors
  pinMode(BUTTON_D1, INPUT_PULLUP);
  pinMode(BUTTON_D2, INPUT_PULLUP);
  pinMode(BUTTON_D4, INPUT_PULLUP);
}

void loop() {
  // Read button states (buttons are LOW when pressed because of pull-up resistors)
  bool d1Pressed = !digitalRead(BUTTON_D1);
  bool d2Pressed = !digitalRead(BUTTON_D2);
  bool d4Pressed = !digitalRead(BUTTON_D4);

  // Print button states if any button is pressed
  if (d1Pressed || d2Pressed || d4Pressed) {
    Serial.print("Button D1: ");
    Serial.print(d1Pressed ? "PRESSED" : "released");
    Serial.print(" | Button D2: ");
    Serial.print(d2Pressed ? "PRESSED" : "released");
    Serial.print(" | Button D4: ");
    Serial.println(d4Pressed ? "PRESSED" : "released");

    // Add a small delay to avoid repeated readings
    delay(200);
  }
}
How the Code Works:
-
We define pin constants for the three user buttons (D1, D2, D4).
-
In the
setup()function, we initialize serial communication and configure the button pins as inputs with internal pull-up resistors. -
In the
loop()function, we read the state of each button. Since we're using pull-up resistors, the pins read LOW when the buttons are pressed. -
We invert the readings (with the
!operator) so thattruemeans "pressed" andfalsemeans "released". -
If any button is pressed, we print the state of all buttons to the Serial Monitor.
-
A small delay prevents rapid repeated readings when a button is held down.

Battery Voltage Monitoring
The TRMNL 7.5" (OG) DIY Kit includes a circuit for monitoring battery voltage connected to pin D0 (GPIO1). An important feature of this design is that it also includes a control pin (GPIO6) to enable/disable the ADC power, which helps conserve battery when not actively measuring.
Battery Voltage Monitoring Example
// TRMNL DIY Kit - Battery Voltage Monitoring Example

#define BATTERY_PIN 1       // GPIO1 (A0) - BAT_ADC
#define ADC_EN_PIN 6        // GPIO6 (A5) - ADC_EN

const float CALIBRATION_FACTOR = 0.968;

void setup() {
  // Initialize serial communication
  Serial.begin(115200);
  while (!Serial) {
    ; // Wait for serial port to connect
  }

  Serial.println("TRMNL DIY Kit - Battery Voltage Monitoring Example");

  // Configure ADC_EN
  pinMode(ADC_EN_PIN, OUTPUT);
  digitalWrite(ADC_EN_PIN, LOW);  // Start with ADC disabled to save power

  // Configure ADC
  analogReadResolution(12);
  analogSetPinAttenuation(BATTERY_PIN, ADC_11db);
}

void loop() {
  // Read battery voltage
  float voltage = readBatteryVoltage();

  // Print the results
  Serial.print("Battery Voltage: ");
  Serial.print(voltage, 2);  // Print with 2 decimal places
  Serial.println("V");

  // Determine battery level
  String batteryStatus;
  if (voltage >= 4.0) {
    batteryStatus = "Full";
  } else if (voltage >= 3.7) {
    batteryStatus = "Good";
  } else if (voltage >= 3.5) {
    batteryStatus = "Medium";
  } else if (voltage >= 3.2) {
    batteryStatus = "Low";
  } else {
    batteryStatus = "Critical";
  }

  Serial.print("Battery Status: ");
  Serial.println(batteryStatus);
  Serial.println();

  // Wait for a while before the next reading
  delay(5000);  // 5 seconds
}

float readBatteryVoltage() {
  // Enable ADC
  digitalWrite(ADC_EN_PIN, HIGH);
  delay(10);  // Short delay to stabilize

  // Read 30 times and average for more stable readings
  long sum = 0;
  for(int i = 0; i < 30; i++) {
    sum += analogRead(BATTERY_PIN);
    delayMicroseconds(100);
  }

  // Disable ADC to save power
  digitalWrite(ADC_EN_PIN, LOW);

  // Calculate voltage
  float adc_avg = sum / 30.0;
  float voltage = (adc_avg / 4095.0) * 3.6 * 2.0 * CALIBRATION_FACTOR;

  return voltage;
}
How the Code Works:
- We define two important pins:
-
BATTERY_PIN(GPIO1/A0): Connected to the battery voltage divider -
ADC_EN_PIN(GPIO6/A5): Controls power to the ADC measurement circuit
-
We define a
CALIBRATION_FACTOR(0.968) to fine-tune the voltage reading accuracy. -
In the
setup()function:
-
We initialize serial communication
-
Configure the ADC_EN pin as an output and set it LOW (disabled) to save power
-
Set the ADC resolution to 12 bits (0-4095)
-
Configure the proper attenuation for the battery pin
- In the
loop()function:
-
We call
readBatteryVoltage()to get the current battery voltage -
We print the voltage to the Serial Monitor
-
We determine and display the battery status based on voltage thresholds
-
We wait for 5 seconds before taking the next reading
- The
readBatteryVoltage()function:
-
Enables the ADC circuit by setting ADC_EN_PIN HIGH
-
Waits briefly for the circuit to stabilize
-
Takes 30 readings and averages them for more stable results
-
Disables the ADC circuit to save power
-
Calculates the actual battery voltage using:
- The average ADC reading
- The ADC resolution (4095)
- Reference voltage (3.6V)
- Voltage divider factor (2.0)
- Calibration factor (0.968)

Power-Saving Design:
A key feature of this implementation is the ability to disable the battery measurement circuit when not in use. The TRMNL DIY Kit is designed for low power consumption, and this approach helps extend battery life by only powering the voltage divider circuit when an actual measurement is needed.
The calibration factor (0.968) compensates for component tolerances in the voltage divider and helps ensure accurate readings. This value may need slight adjustment for your specific board if you find the readings are consistently off compared to a multimeter measurement.
Taking multiple readings and averaging them helps reduce noise and provides more stable voltage measurements, which is especially important for battery monitoring where small voltage changes can be significant for determining the remaining capacity.
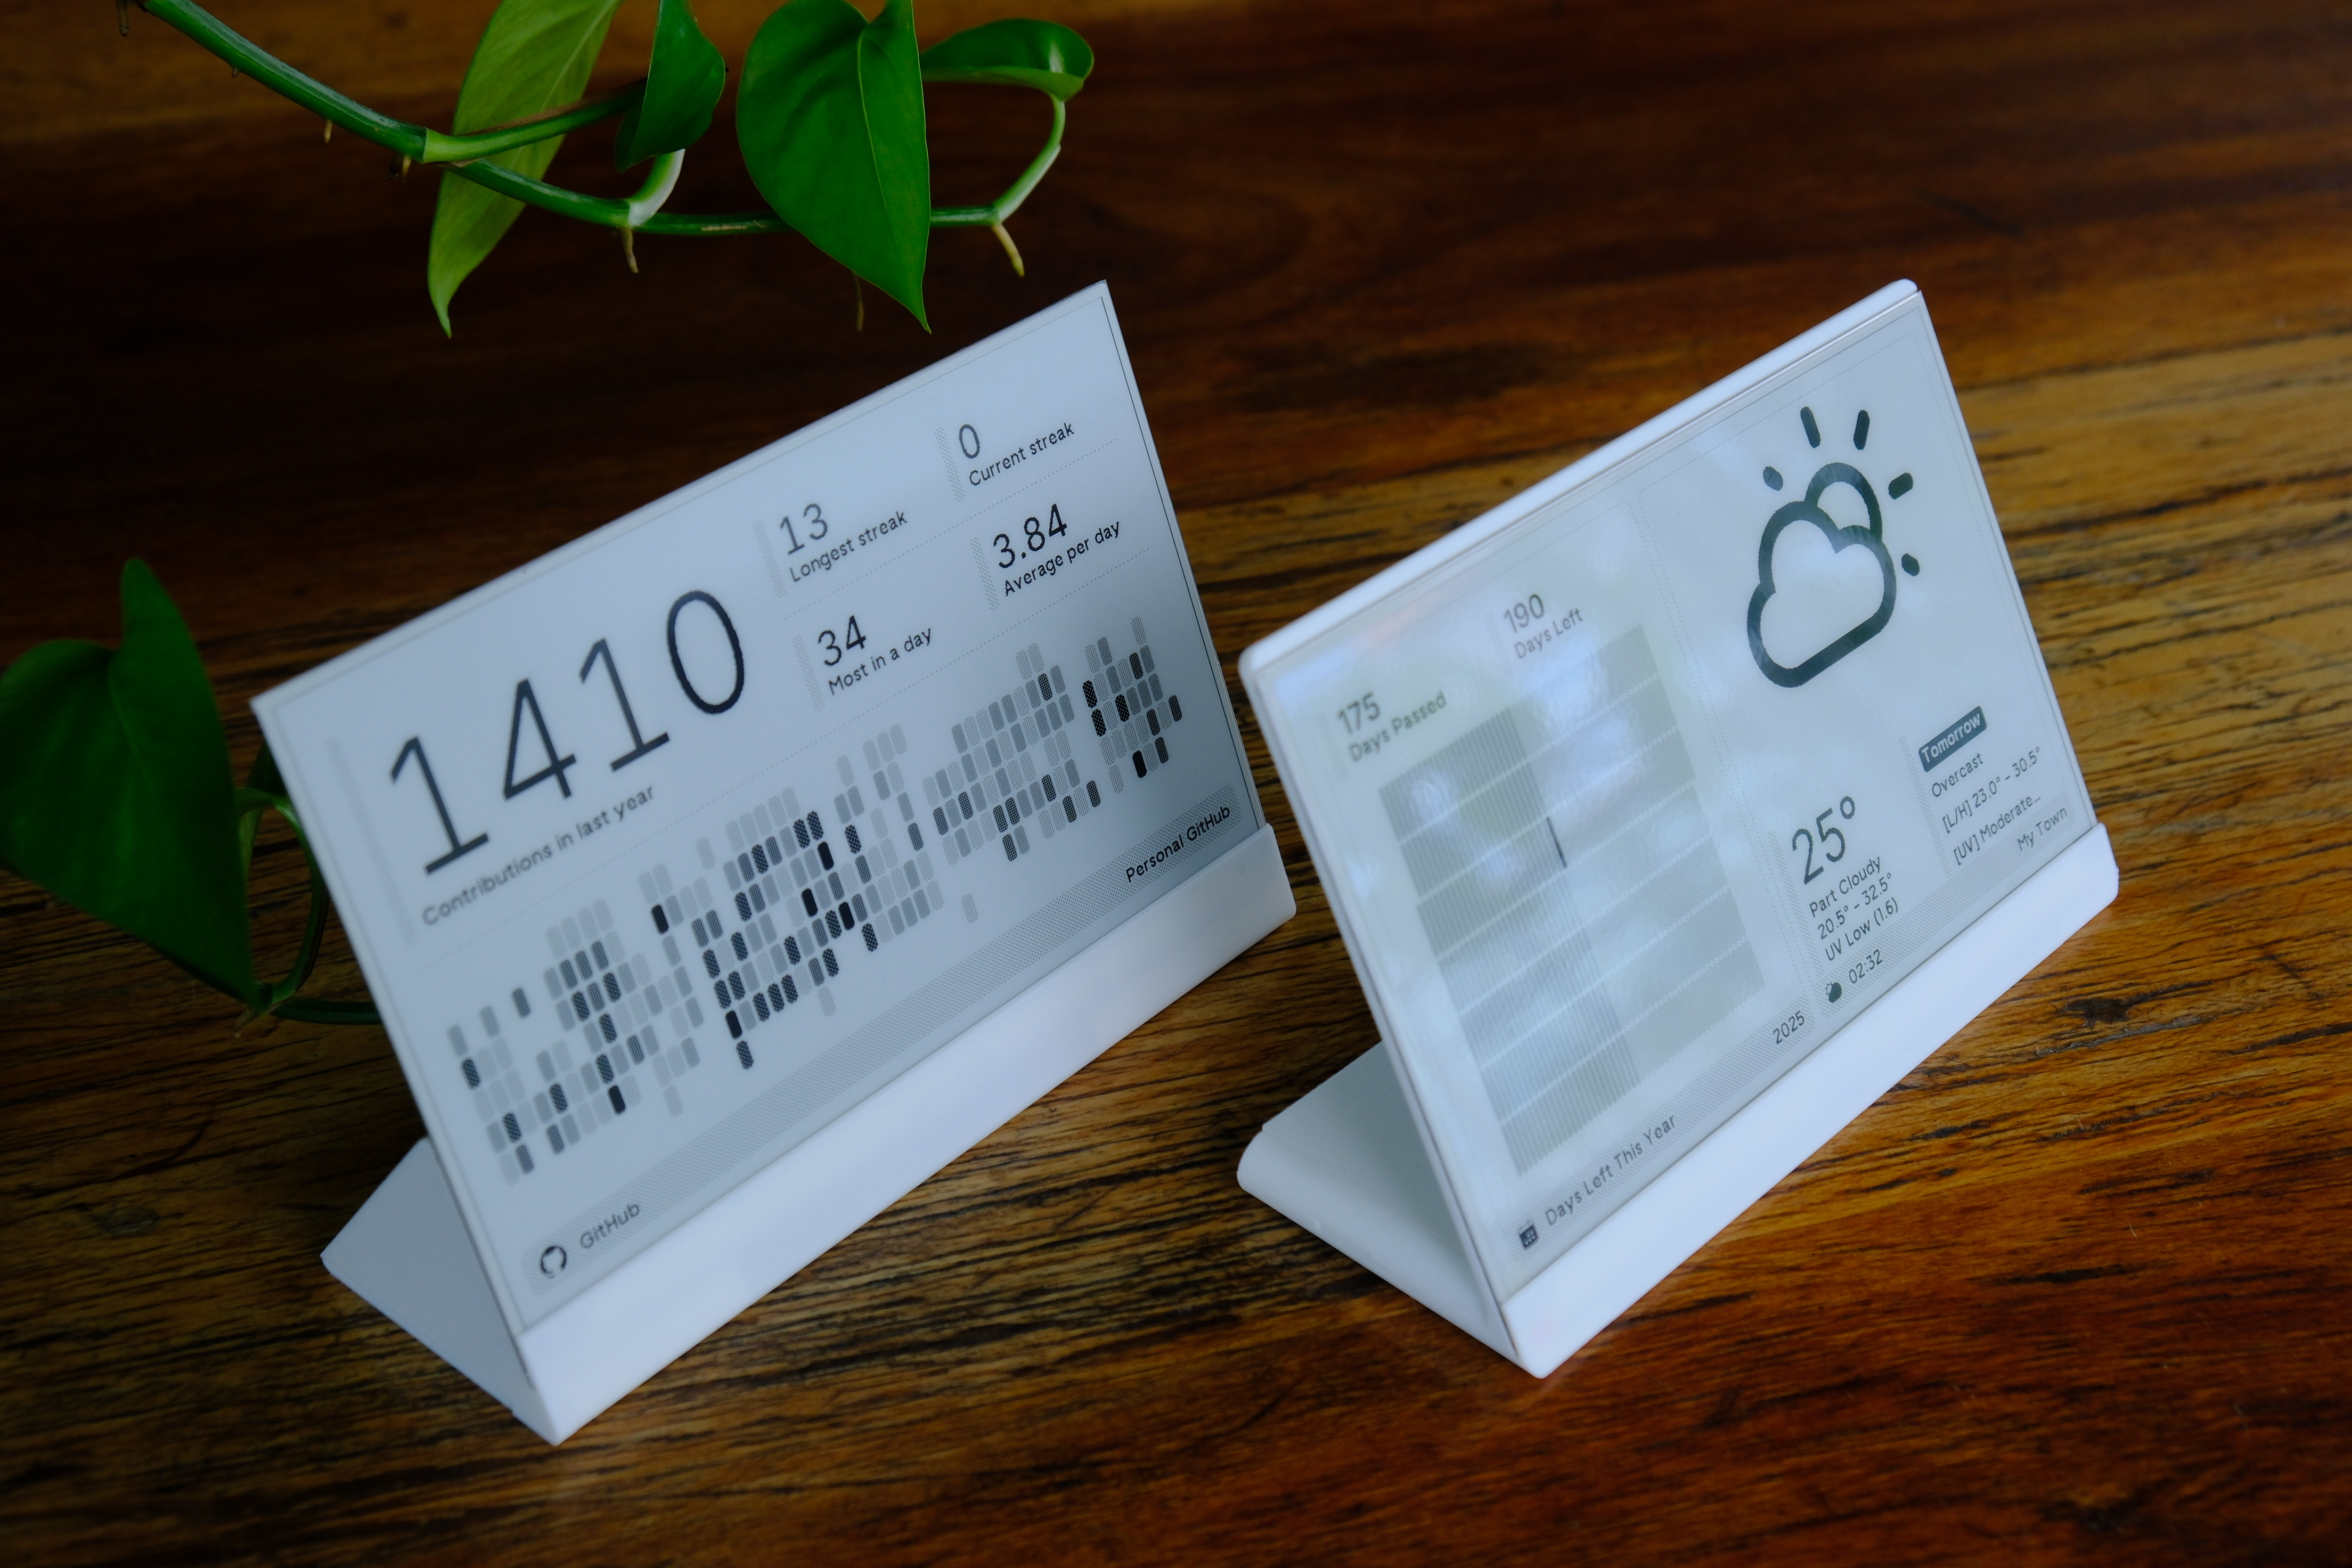
ePaper Display
The TRMNL 7.5" (OG) DIY Kit features a beautiful 7.5-inch black and white ePaper display that provides clear visibility in various lighting conditions and ultra-low power consumption. In this section, we'll explore how to set up and control the ePaper display using Arduino.
Hardware Setup
Before we begin programming, let's ensure the ePaper display is properly connected to the TRMNL board:
Step 1. Connect the ePaper display to the 24-pin connector on the driver board. The connector supports blind insertion, so you can't insert it incorrectly.

Step 2. After inserting the ribbon cable, secure it by closing the locking mechanism.
The ribbon cable is fragile and can be easily damaged. Avoid bending it sideways as much as possible.
Step 3. Ensure the jumper connects the 24Pin and GND pins on the board.

Software Setup
To control the ePaper display, we'll use the Seeed_GFX library, which provides comprehensive support for various Seeed Studio display devices.
Step 1. Download the Seeed_GFX library from GitHub:
Step 2. Install the library by adding the ZIP file in Arduino IDE. Go to Sketch > Include Library > Add .ZIP Library and select the downloaded ZIP file.
If you have previously installed the TFT_eSPI library, you may need to temporarily remove or rename it from your Arduino libraries folder to avoid conflicts, as Seeed_GFX is a fork of TFT_eSPI with additional features.
Step 3. Open the example sketch from the Seeed_GFX library: File > Seeed_GFX > Examples > ePaper > Basic > Clock
Step 4. Create a new file named driver.h in the same folder as your Arduino sketch by clicking on the arrow next to the example tab and selecting "New Tab".
Step 5. Name the new file as driver.h.

Step 6. Go to the Seeed GFX Configuration Tool, and select "TRMNL 7.5" (OG) DIY Kit" as shown in the image.

Step 7. Copy the generated code and paste it into the driver.h file you created. The code should look like this:
#define BOARD_SCREEN_COMBO 502 // 7.5 inch monochrome ePaper Screen (UC8179)
#define USE_XIAO_EPAPER_DISPLAY_BOARD_EE04
Step 8. Now you can upload the example to your TRMNL DIY Kit and see the ePaper display in action!

Basic ePaper Display Example
Let's explore a simple analog clock example that demonstrates how to draw graphics on the ePaper display. This example creates a classic clock face with hour, minute, and second hands.
#include <SPI.h>
#include <TFT_eSPI.h> // Hardware-specific library

#ifdef EPAPER_ENABLE // Only compile this code if the EPAPER_ENABLE is defined in User_Setup.h

EPaper epaper = EPaper(); // Invoke custom library

float sx = 0, sy = 1, mx = 1, my = 0, hx = -1, hy = 0; // Saved H, M, S x & y multipliers
float sdeg = 0, mdeg = 0, hdeg = 0;
uint16_t osx = 120, osy = 120, omx = 120, omy = 120, ohx = 120, ohy = 120; // Saved H, M, S x & y coords
uint16_t x0 = 0, x1 = 0, yy0 = 0, yy1 = 0;
uint32_t targetTime = 0; // for next 1 second timeout

static uint8_t conv2d(const char *p);                                                // Forward declaration needed for IDE 1.6.x
uint8_t hh = conv2d(__TIME__), mm = conv2d(__TIME__ + 3), ss = conv2d(__TIME__ + 6); // Get H, M, S from compile time

bool initial = 1;

#endif

void setup(void)
{
#ifdef EPAPER_ENABLE
  epaper.begin();
  epaper.setRotation(0);

  epaper.fillScreen(TFT_WHITE);

  epaper.setTextColor(TFT_BLACK, TFT_WHITE); // Adding a background colour erases previous text automatically

  // Draw clock face
  epaper.fillCircle(120, 120, 118, TFT_BLACK);
  epaper.fillCircle(120, 120, 110, TFT_WHITE);

  // Draw 12 lines
  for (int i = 0; i < 360; i += 30)
  {
    sx = cos((i - 90) * 0.0174532925);
    sy = sin((i - 90) * 0.0174532925);
    x0 = sx * 114 + 120;
    yy0 = sy * 114 + 120;
    x1 = sx * 100 + 120;
    yy1 = sy * 100 + 120;

    epaper.drawLine(x0, yy0, x1, yy1, TFT_BLACK);
  }

  // Draw 60 dots
  for (int i = 0; i < 360; i += 6)
  {
    sx = cos((i - 90) * 0.0174532925);
    sy = sin((i - 90) * 0.0174532925);
    x0 = sx * 102 + 120;
    yy0 = sy * 102 + 120;
    // Draw minute markers
    epaper.drawPixel(x0, yy0, TFT_BLACK);

    // Draw main quadrant dots
    if (i == 0 || i == 180)
      epaper.fillCircle(x0, yy0, 2, TFT_BLACK);
    if (i == 90 || i == 270)
      epaper.fillCircle(x0, yy0, 2, TFT_BLACK);
  }

  epaper.fillCircle(120, 121, 3, TFT_BLACK);

  // Draw text at position 120,260 using fonts 4
  // Only font numbers 2,4,6,7 are valid. Font 6 only contains characters [space] 0 1 2 3 4 5 6 7 8 9 : . - a p m
  // Font 7 is a 7 segment font and only contains characters [space] 0 1 2 3 4 5 6 7 8 9 : .
  epaper.drawCentreString("Time flies", 120, 260, 4);

  epaper.update();

  targetTime = millis() + 1000;
#endif
}

void loop()
{
#ifdef EPAPER_ENABLE
  if (targetTime < millis())
  {
    targetTime += 1000;
    ss++; // Advance second
    if (ss == 60)
    {
      ss = 0;
      mm++; // Advance minute
      if (mm > 59)
      {
        mm = 0;
        hh++; // Advance hour
        if (hh > 23)
        {
          hh = 0;
        }
      }
    }

    // Pre-compute hand degrees, x & y coords for a fast screen update
    sdeg = ss * 6;                     // 0-59 -> 0-354
    mdeg = mm * 6 + sdeg * 0.01666667; // 0-59 -> 0-360 - includes seconds
    hdeg = hh * 30 + mdeg * 0.0833333; // 0-11 -> 0-360 - includes minutes and seconds
    hx = cos((hdeg - 90) * 0.0174532925);
    hy = sin((hdeg - 90) * 0.0174532925);
    mx = cos((mdeg - 90) * 0.0174532925);
    my = sin((mdeg - 90) * 0.0174532925);
    sx = cos((sdeg - 90) * 0.0174532925);
    sy = sin((sdeg - 90) * 0.0174532925);

    if (ss == 0 || initial)
    {
      initial = 0;
      // Erase hour and minute hand positions every minute
      epaper.drawLine(ohx, ohy, 120, 121, TFT_WHITE);
      ohx = hx * 62 + 121;
      ohy = hy * 62 + 121;
      epaper.drawLine(omx, omy, 120, 121, TFT_WHITE);
      omx = mx * 84 + 120;
      omy = my * 84 + 121;
    }

    // Redraw new hand positions, hour and minute hands not erased here to avoid flicker
    epaper.drawLine(osx, osy, 120, 121, TFT_WHITE);
    osx = sx * 90 + 121;
    osy = sy * 90 + 121;
    epaper.drawLine(osx, osy, 120, 121, TFT_BLACK);
    epaper.drawLine(ohx, ohy, 120, 121, TFT_BLACK);
    epaper.drawLine(omx, omy, 120, 121, TFT_BLACK);
    epaper.drawLine(osx, osy, 120, 121, TFT_BLACK);

    epaper.fillCircle(120, 121, 3, TFT_BLACK);
    epaper.update();
  }
#endif
}

#ifdef EPAPER_ENABLE
static uint8_t conv2d(const char *p)
{
  uint8_t v = 0;
  if ('0' <= *p && *p <= '9')
    v = *p - '0';
  return 10 * v + *++p - '0';
}
#endif
How the Clock Example Works:
This elegant example creates a classic analog clock on the ePaper display. Let's break down how it works:
-
Initialization and Configuration:
- The code uses conditional compilation with
#ifdef EPAPER_ENABLEto ensure it only runs on hardware with e-paper display support. - We declare variables to track the positions of the clock hands and their previous positions.
- The initial time is set based on the compile time of the sketch using the
__TIME__macro.
- The code uses conditional compilation with
-
Setup Function:
- We initialize the e-paper display with
epaper.begin(). - The display is filled with white as the background using
epaper.fillScreen(TFT_WHITE). - We draw the clock face as a black circle with a white interior.
- Hour markers are drawn as 12 lines around the circumference.
- Minute markers are drawn as 60 dots with special emphasis on the quarter-hour positions.
- A small black circle is drawn at the center of the clock face.
- The text "Time flies" is added at the bottom of the display.
- Finally,
epaper.update()is called to update the physical display.
- We initialize the e-paper display with
-
Loop Function:
- Every second (when
millis()exceedstargetTime), we update the clock hands. - We increment the seconds, minutes, and hours as needed.
- We calculate the angles for each hand based on the current time.
- The positions of the hands are calculated using trigonometric functions:
- Hours hand: 30 degrees per hour (plus adjustment for minutes)
- Minutes hand: 6 degrees per minute (plus adjustment for seconds)
- Seconds hand: 6 degrees per second
- To reduce unnecessary updates and extend the display's lifespan, we only erase and redraw the hour and minute hands once per minute (when seconds = 0).
- The second hand is updated every second by erasing its previous position and drawing it in the new position.
- After drawing all the hands, we refresh the center dot and call
epaper.update()to update the physical display.
- Every second (when
-
Helper Function:
- The
conv2dfunction converts a string representation of a number to an integer value, used to parse the compile-time hour, minute, and second values.
- The
Important Notes About This Example:
-
Display Updates: Unlike LCD or OLED displays, ePaper displays are not designed for frequent updates. This example updates the display every second, which is fine for demonstration purposes, but in a real-world application, you might want to update less frequently to extend the display's lifespan.
-
Partial Updates: This example demonstrates partial updates by only erasing and redrawing the necessary parts of the display, which is more efficient than refreshing the entire screen.
-
Conditional Compilation: The
#ifdef EPAPER_ENABLEdirectives ensure that the code only compiles and runs if the e-paper display is properly configured in the system. -
Drawing Functions: The example showcases various drawing functions:
fillCircle()for creating the clock facedrawLine()for drawing clock hands and hour markersdrawPixel()andfillCircle()for minute markersdrawCentreString()for centered text
This analog clock example provides a great starting point for creating your own graphical applications on the TRMNL 7.5" (OG) DIY Kit's ePaper display.
Drawing and Text Functions
The Seeed_GFX library provides many functions for drawing on the display:
display.drawPixel(x, y, color): Draws a single pixeldisplay.drawLine(x0, y0, x1, y1, color): Draws a linedisplay.drawRect(x, y, w, h, color): Draws a rectangle outlinedisplay.fillRect(x, y, w, h, color): Draws a filled rectangledisplay.drawCircle(x, y, r, color): Draws a circle outlinedisplay.fillCircle(x, y, r, color): Draws a filled circledisplay.drawTriangle(x0, y0, x1, y1, x2, y2, color): Draws a triangle outlinedisplay.fillTriangle(x0, y0, x1, y1, x2, y2, color): Draws a filled triangledisplay.setCursor(x, y): Sets the text cursor positiondisplay.setTextColor(color): Sets the text colordisplay.setTextSize(size): Sets the text size (1-6)display.print("text"): Prints text at the cursor positiondisplay.println("text"): Prints text with a newline
The available colors for this monochrome display are:
GxEPD_BLACK: Black pixelsGxEPD_WHITE: White pixels
Remember to call display.update() after drawing operations to update the physical display.
Tech Support & Product Discussion
Thank you for choosing our products! We are here to provide you with different support to ensure that your experience with our products is as smooth as possible. We offer several communication channels to cater to different preferences and needs.