Getting Started with OpenDisplay 4.26" Mono Kit
Introduction
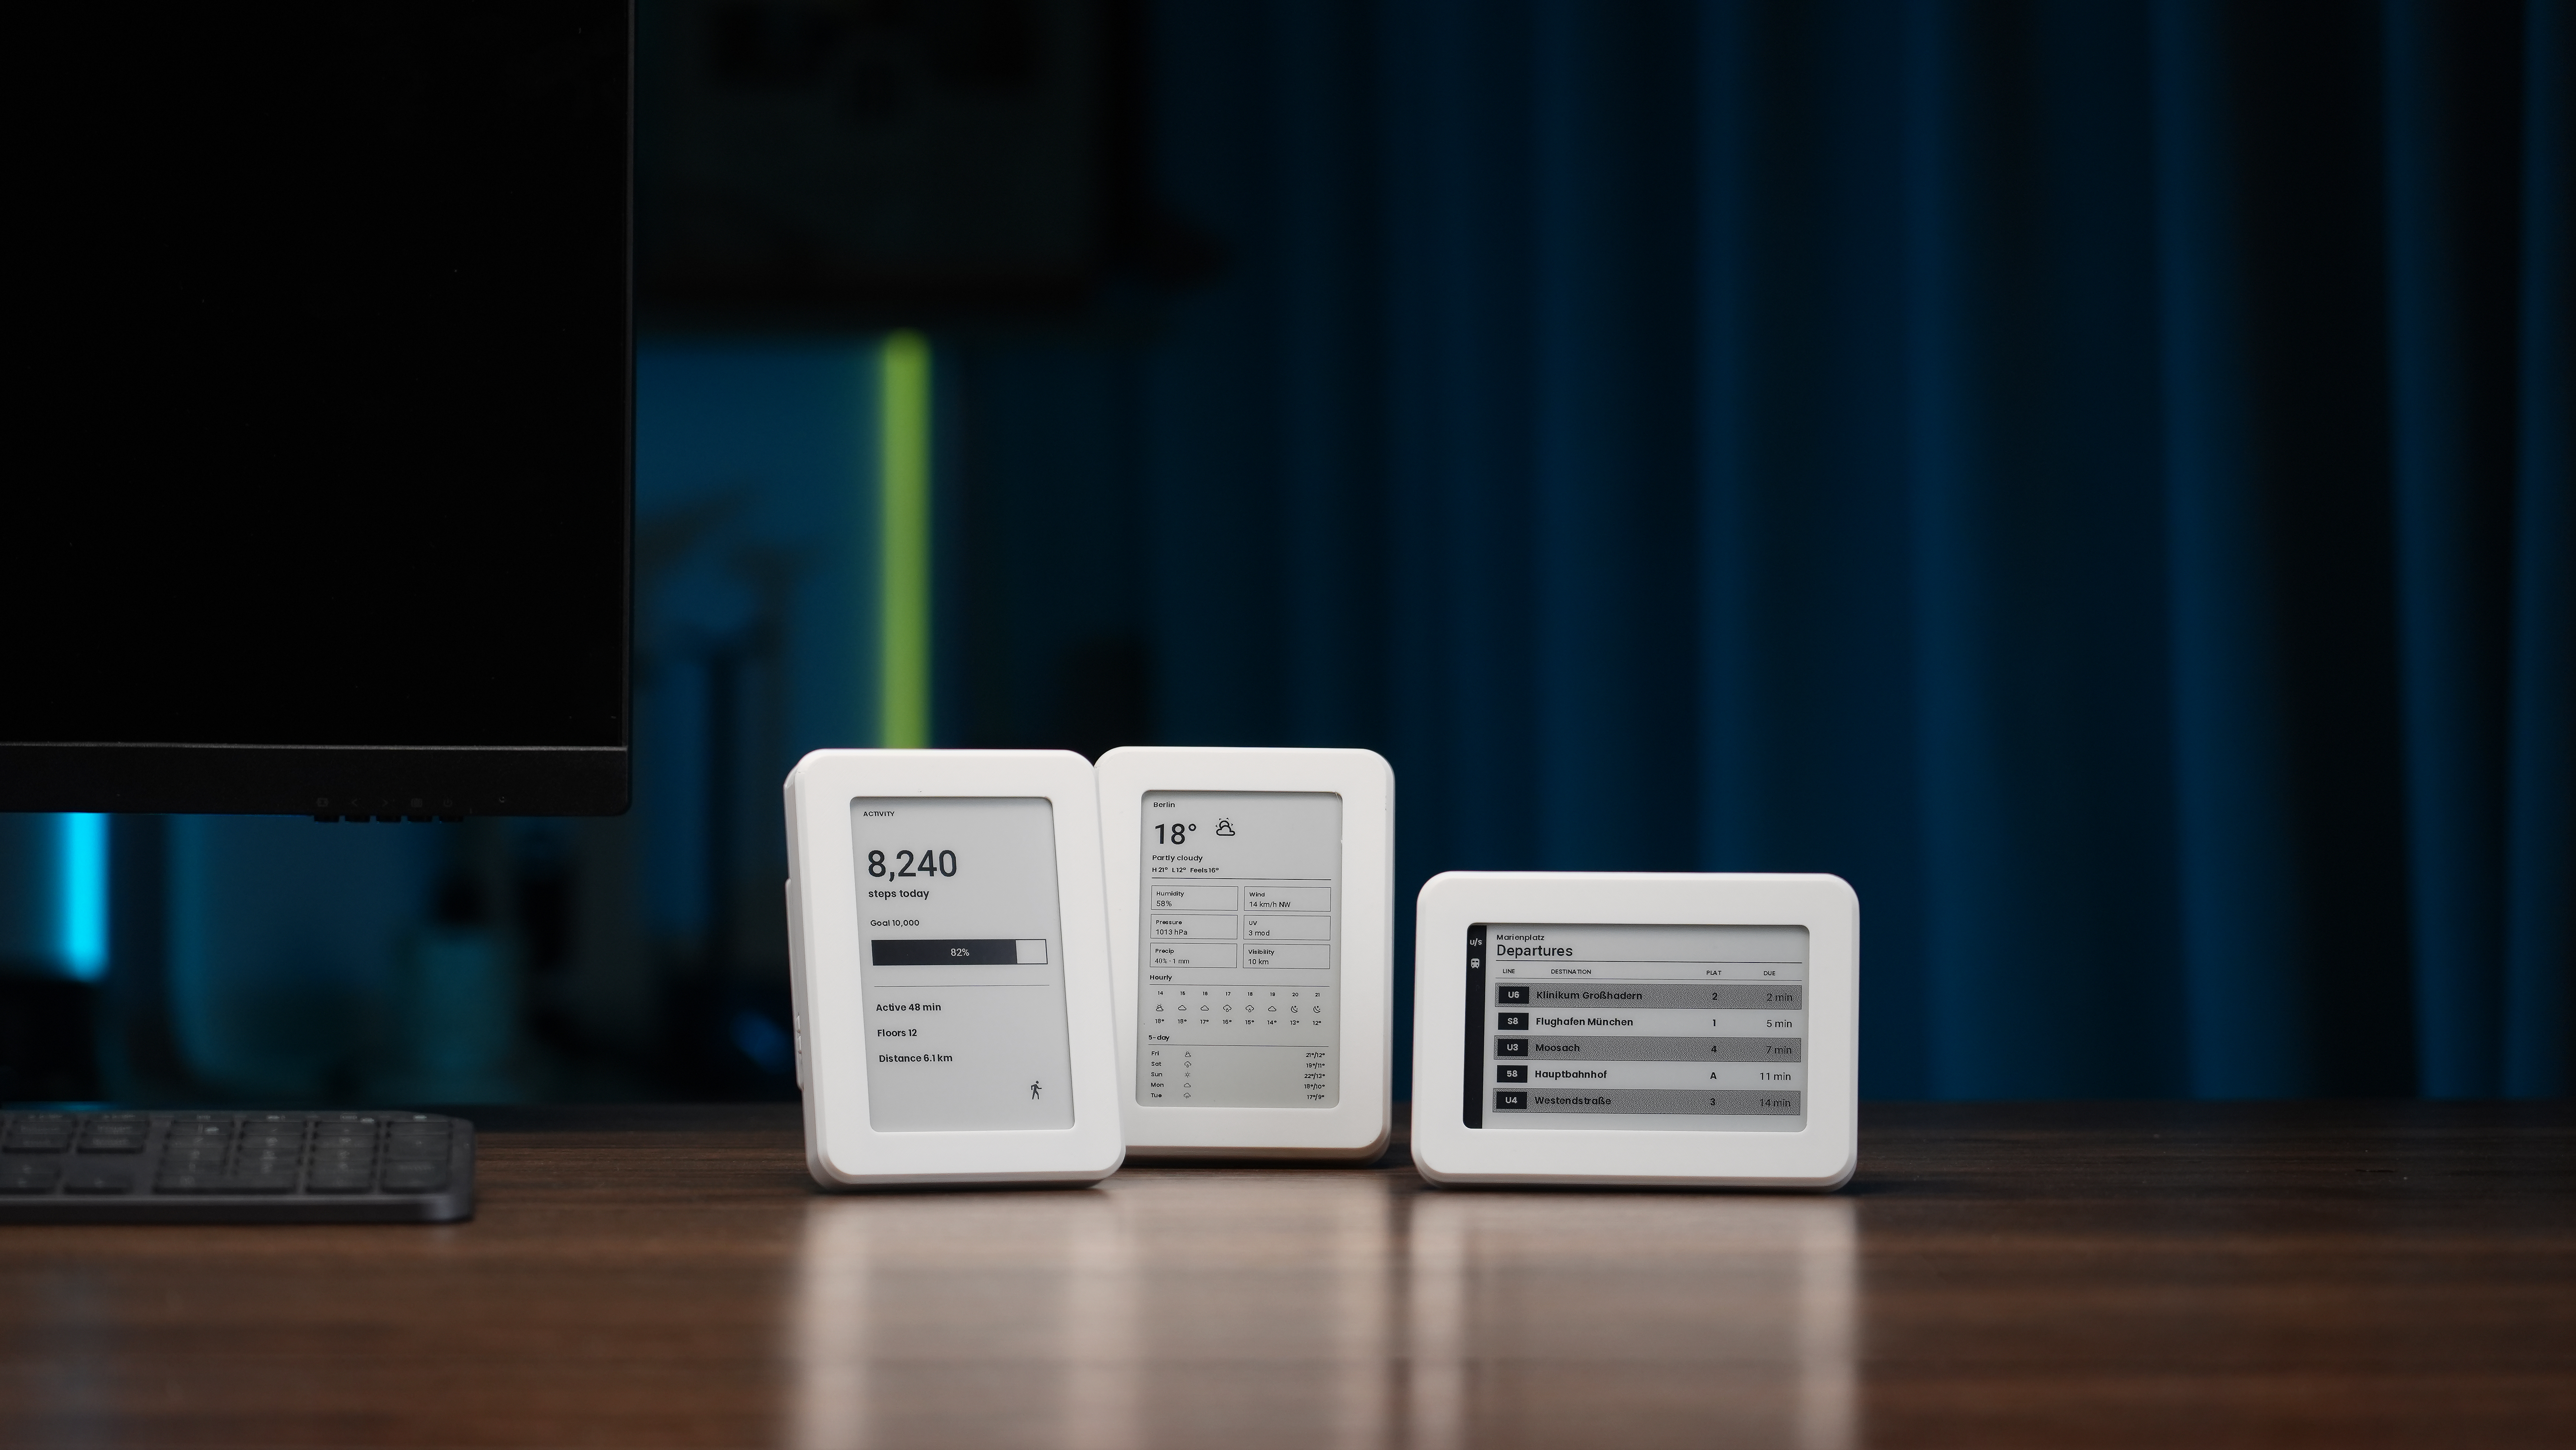
The OpenDisplay 4.26" Mono Kit is a ready-to-use e-paper display co-developed by Seeed Studio and OpenDisplay. It ships fully assembled with a 4.26-inch 800×480 black-and-white panel, a Seeed XIAO ePaper Display Board EN05 (XIAO nRF52840 Plus), a 2000 mAh battery, and a 3D-printed case — firmware already installed.
Use it over Bluetooth Low Energy from your browser or Home Assistant. No Wi-Fi is required. The radio stays in a low-power listen mode, so you can send a new image whenever the display is on and in range. Partial refresh is available in black-and-white mode. With roughly one update every 15 minutes, estimate up to about two years between charges.
What you need
- The kit, powered on and in Bluetooth range
- A phone or computer with Bluetooth
- Chrome or Edge (desktop/Android), or Bluefy on iPhone/iPad
At a glance
| Parameter | Description |
|---|---|
| MCU | Seeed XIAO ePaper Display Board EN05 (XIAO nRF52840 Plus) |
| Display | 4.26-inch monochrome ePaper |
| Colors | Black and white (default); optional 4-gray |
| Partial refresh | Supported in black-and-white mode only |
| Resolution | 800 × 480 |
| Battery | 2000 mAh rechargeable Li-ion |
| Connectivity | Bluetooth Low Energy only (no Wi-Fi) |
| Enclosure | 3D-printed case included |
Power on
- Unbox the kit and switch it on.
- Wait for the boot refresh — usually a few seconds for black-and-white. Flickering is normal.
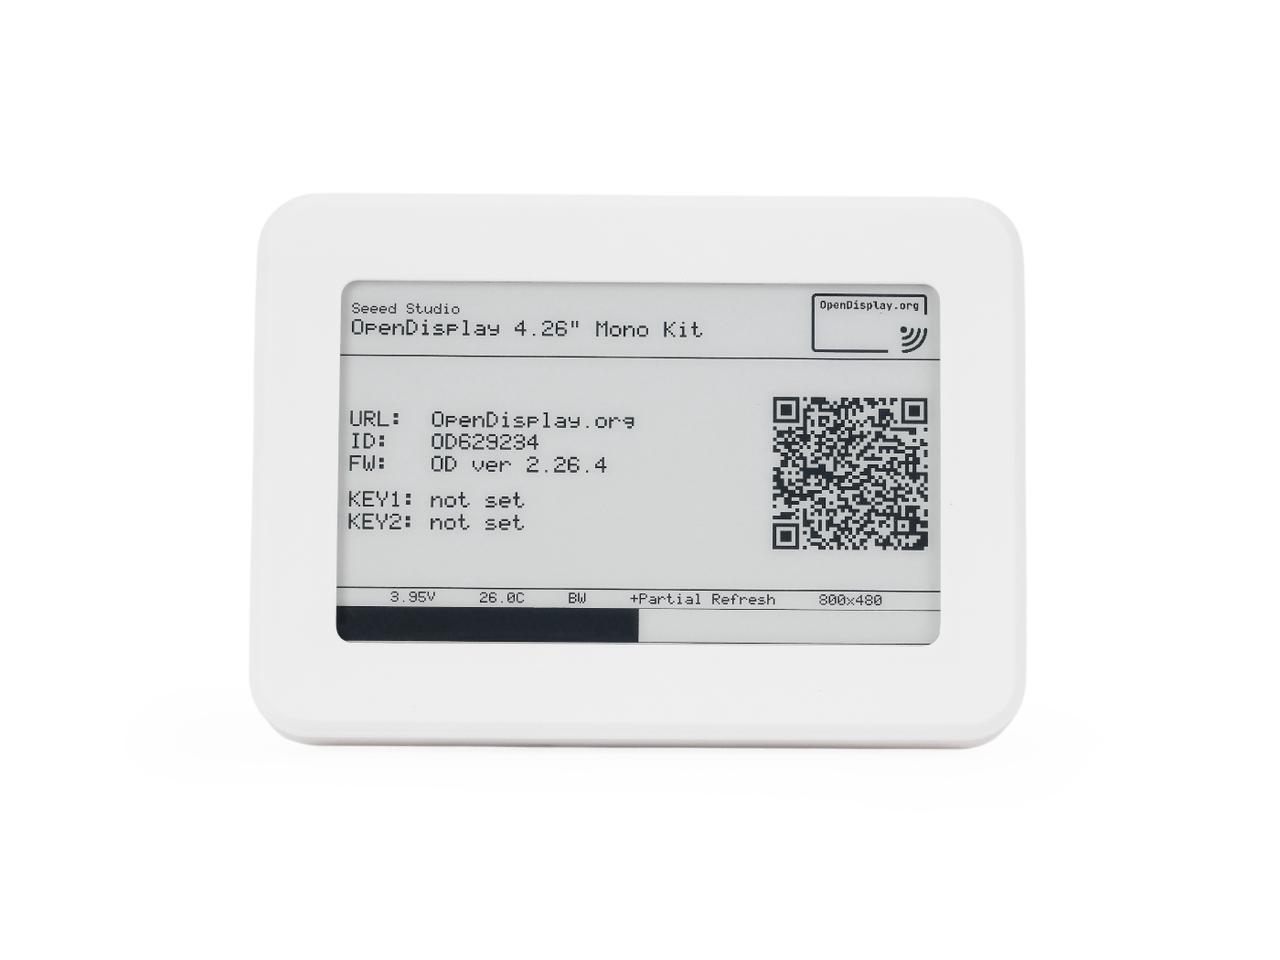
- When finished, the boot screen shows your device name (starts with OD), KEY1: / KEY2:, and a QR code.
Encryption ships off, so the key lines show not set. You do not need a key for normal use out of the box.
Send your first image
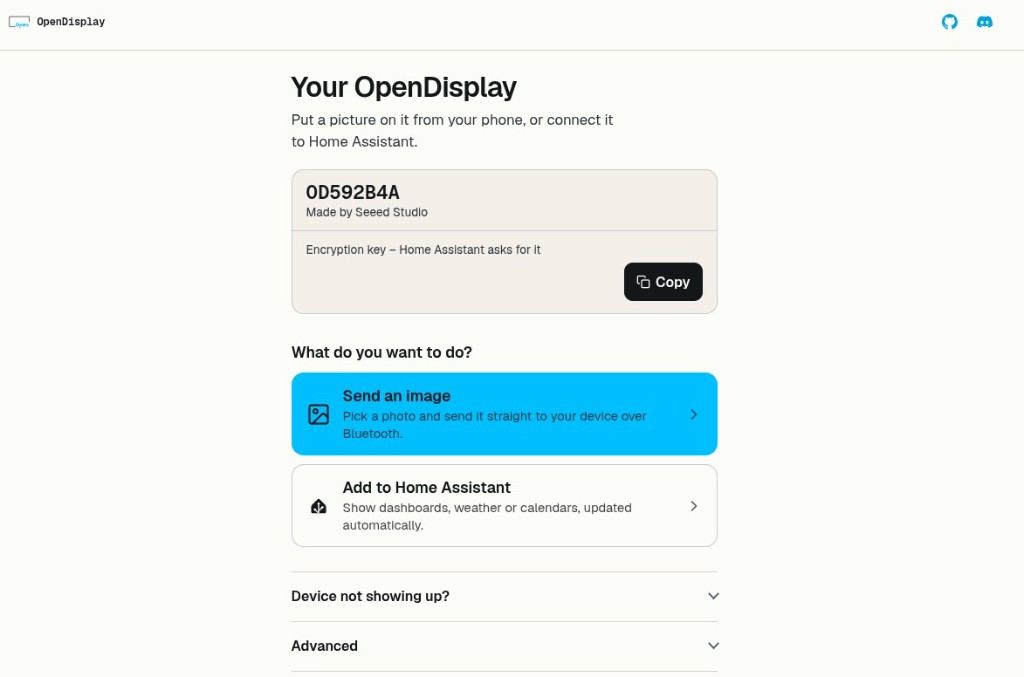
Scan the QR code on the display. It opens a personalized page at opendisplay.org with shortcuts for this device:
| Shortcut | What it does |
|---|---|
| Send an image | Opens the BLE Tester to send a test image from your browser |
| Add to Home Assistant | Starts adding the device to Home Assistant |
| Advanced → Toolbox | Change settings or reflash firmware (developers / recovery) |
Browser support
| Browser | Support |
|---|---|
| Chrome or Edge (desktop, Android) | Supported |
| iPhone / iPad | Use Bluefy (App Store id1492822055) |
| Firefox | Not supported |
From the landing page choose Send an image (or open opendisplay.org). Click Connect, pick your device in the browser list (name starts with OD — e.g. OD592B4A), then choose a photo or draw and tap Send to device.
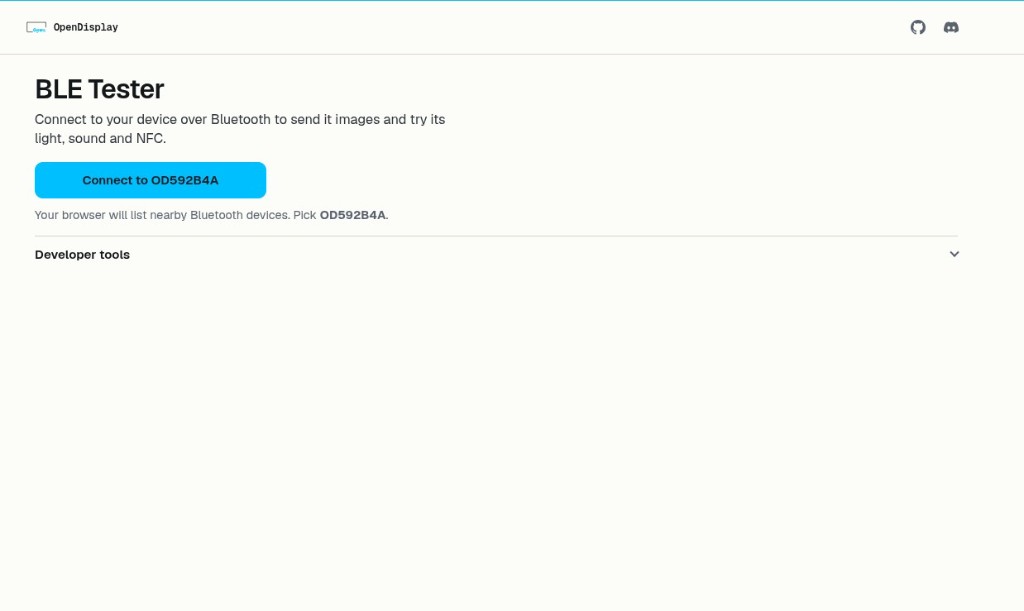
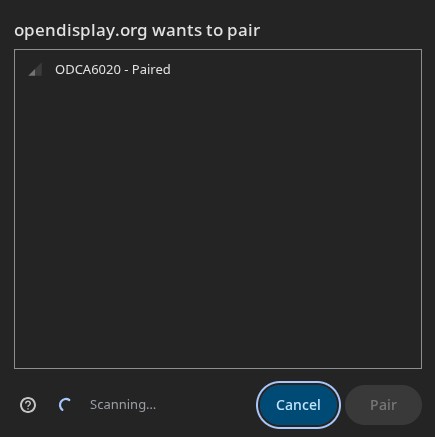
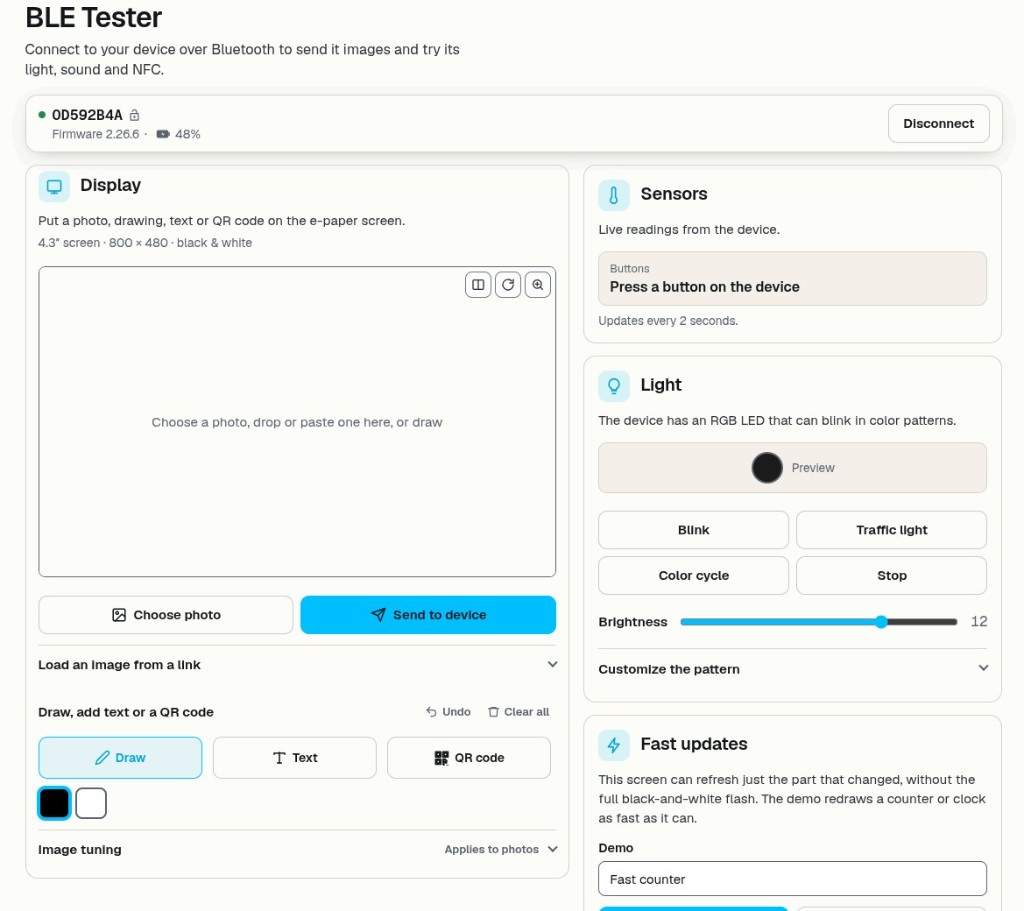
The BLE Tester may label the panel as 4.3"; the kit product name is 4.26" Mono Kit.
Done when: the image appears on the e-paper display.
Home Assistant (optional)
This kit uses BLE only. Home Assistant needs a working Bluetooth path:
- Bluetooth on the Home Assistant host — built-in adapter or USB dongle
- ESPHome Bluetooth proxy — if the display is far from the HA host (must support active / connectable connections)
Shelly BLE proxies are not supported — they cannot establish the active connection this display needs. Use a local adapter or an ESPHome proxy.
Power on the display within Bluetooth range. Home Assistant should discover it automatically — look for a name starting with OD under Settings → Devices & Services → Discovered, then tap Add and Submit.
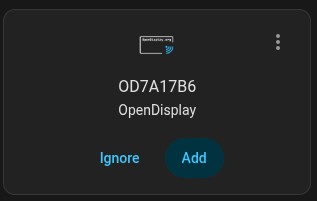
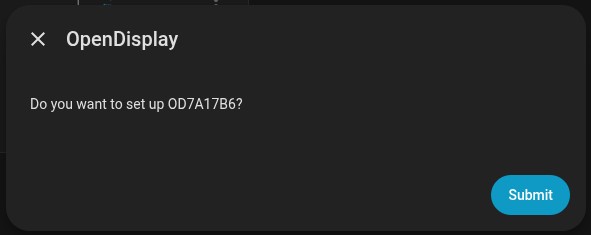
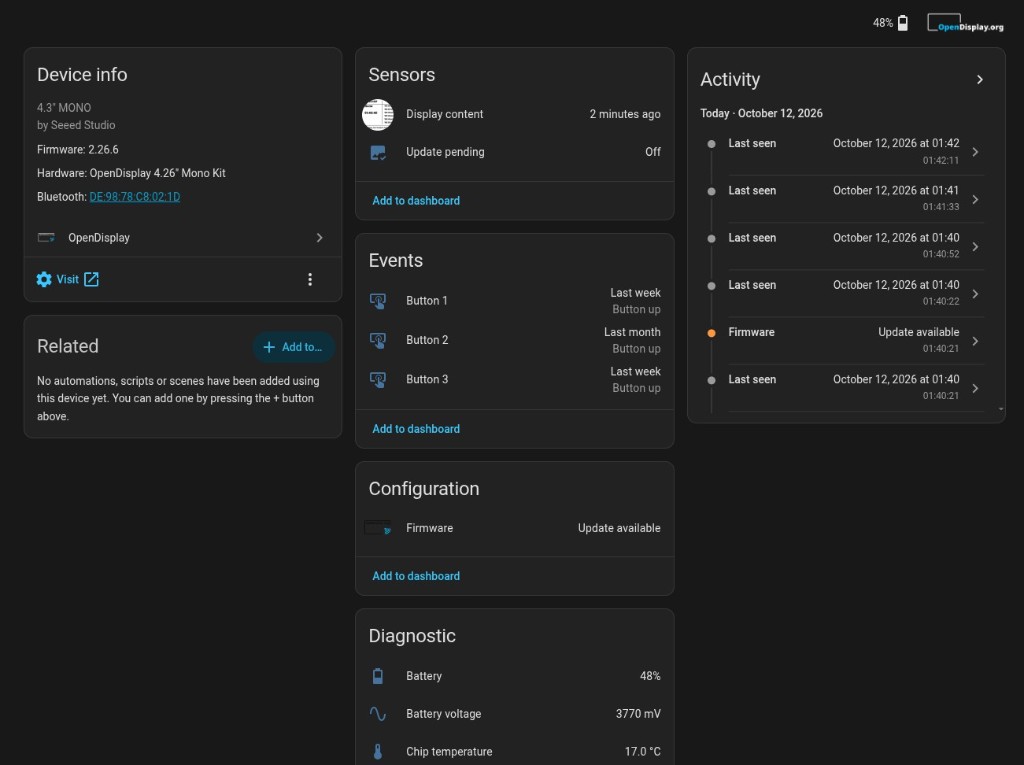
The device page shows battery, buttons, firmware status, and display content. More detail: Home Assistant integration
Going further
Enable encryption
Encryption ships off. In the Toolbox → More options, set Encryption to Locked, then Configure over Bluetooth. After reboot, the key appears on KEY1: / KEY2: and on the QR landing page. Power-cycle the display to show the key again if you lose it.
Reflash or recover
- Open Toolbox — 4.26" Mono Kit preset: Toolbox
- Install firmware (USB) — Chrome or Edge on a desktop/laptop
- Configure over Bluetooth — write settings back after flashing
py-opendisplay
For custom Python projects, install with pip install py-opendisplay — py-opendisplay
Battery life
With the included 2000 mAh battery and roughly one update every 15 minutes, estimate up to about two years between charges under typical use. Actual runtime depends on update frequency, image size, partial refresh use, and temperature.
Model your schedule at Battery calculator (select 4.26" Mono Kit / nRF52840 / 2000 mAh).
Resources
- [Web] OpenDisplay website
- [Tool] Toolbox (4.26" Mono Kit preset)
- [Tool] BLE Tester
- [Tool] Battery calculator
- [GitHub] OpenDisplay Firmware
- [GitHub] py-opendisplay
- [GitHub] Home Assistant Integration
- [Discord] OpenDisplay Discord
- [Wiki] In-depth OpenDisplay guide
Troubleshooting
Q1: Need the boot screen or QR code again.
- Power-cycle the display: Switch off, wait 10 seconds, then switch on again. The boot screen — with device name, KEY1:/KEY2: lines, and QR code — only shows after a full power-on refresh.
- Wait for the refresh to finish: A monochrome boot refresh usually takes a few seconds. Flickering and intermediate gray patterns are normal. Do not turn off the display during refresh.
- Scan the QR code again or read KEY1:/KEY2: directly from the screen if you need the encryption key.
- No reflash or reconfigure needed — the boot screen always reappears after a power cycle.
- Note: The display allows only one active Bluetooth connection at a time. If another device is still connected, disconnect it first.
Q2: The display won't turn on or is unresponsive.
- Charge over USB first: A very low battery can look like the device is dead or stuck. Connect the kit to a USB power source, charge for a while, then retry.
- After charging: Switch off, wait 10 seconds, switch on, and wait for the boot screen.
- Confirm the power switch is on: Slide the switch firmly to the ON position.
- Check the battery connector: Open the case and confirm the battery JST connector is fully seated. The red wire should face the "+" marking and the black wire should face the "−" marking. A reversed connector can damage the board.
- Make sure no other device is still holding an open BLE connection — the display only supports one active connection at a time.
Q3: Home Assistant does not discover the display.
- Check the integration version: Home Assistant 2026.4 and later include the built-in OpenDisplay integration. For older versions or the drawcustom workflow, install the HACS custom integration (copy the
opendisplayfolder intocustom_components/), then restart Home Assistant. - Disconnect other Bluetooth clients first: Close BLE Tester, browser tabs, and Bluefy — the display allows only one active BLE connection at a time. If another device is connected, Home Assistant will not be able to discover or connect.
- Check the Bluetooth path: Use a built-in or USB Bluetooth adapter on the Home Assistant host, or an ESPHome Bluetooth proxy that supports active / connectable connections. Shelly BLE proxies are not supported — they cannot establish the active connection this display needs.
- Still missing? Wait a minute, move the display closer, and check Settings → Devices & Services → Discovered for a name starting with "OD".
- Add manually: If the display is not discovered automatically, go to Settings → Devices & Services, click Add Integration, search for "OpenDisplay", and follow the setup flow.
Q4: My browser cannot find or connect to the display.
- Use a supported browser: Web Bluetooth works in Chrome and Edge (desktop and Android). On iPhone or iPad, use the Bluefy browser (App Store id 1492822055). Firefox and Safari (desktop) do not support Web Bluetooth.
- Turn on Bluetooth: Make sure Bluetooth is enabled on your phone or computer. On Android, also turn on Location — Chrome needs it for BLE scanning.
- Hold the device close to the kit.
- Disconnect all other clients first: The display allows only one active BLE connection. If Home Assistant or another browser is already connected, disconnect it before trying again.
- Pick the device name starting with "OD" (e.g. OD592B4A).
- If it's not appearing: Press a button on the display once, or power-cycle it (off 10 seconds → on) and retry after the boot refresh finishes.
- If nothing responds: Charge the kit over USB first.
Q5: Image upload fails or times out.
- Confirm the display is on and in range: The kit stays BLE-ready with no deep-sleep wake window, but it must be powered on and within Bluetooth range.
- Disconnect every other client: Only one active BLE connection at a time. Reconnect from the BLE Tester alone and try again.
- If encryption is on: Enter the key from the boot screen or the QR landing page.
- Try a smaller image, or wait for the full refresh to complete before sending the next one.
- Device stopped responding mid-session: Charge over USB, then power-cycle (off 10 seconds → on).
Q6: The encryption key is rejected or shows "not set".
- Factory kits ship with encryption off: KEY1: and KEY2: show "not set" out of the box — leave the key field blank.
- Enabled encryption but lost the key? Power-cycle the display (off 10 seconds → on) — the key appears on the boot screen after restart. You can also scan the QR code; the landing page shows the same key.
- Lost the key and cannot read the screen: Open Toolbox → set Encryption to Unlocked → Configure over Bluetooth. This removes encryption so you can set it up again. If that doesn't work, reflash the firmware and reconfigure.
Q7: The screen looks stuck, shows artifacts, or stays blank after a send.
- Wait for the refresh to finish: Do not power off the display mid-update. A full black-and-white refresh takes a few seconds.
- Partial refresh is black-and-white only: Partial refresh works in monochrome mode. If you are using the optional 4-gray mode, partial refresh is not supported — always use full refresh to avoid ghosting or stuck pixels.
- Power off for 10 seconds → on to return to the boot screen, then confirm BLE responds.
- Check for other connected devices: If another device is connected at the same time, disconnect it and retry with a single client.
- Still won't boot or connect? Charge over USB first, then power-cycle again.
- Reflash the firmware: If the display remains stuck or blank after all of the above, reflash via USB using the Toolbox (see "Reflash or recover" in the Going further section).
Tech Support & Product Discussion
Co-developed by Seeed Studio and OpenDisplay.
Thank you for choosing our products! We are here to provide you with support to ensure that your experience with our products is as smooth as possible. We offer several communication channels to cater to different preferences and needs.