Orbbec Gemini 305 3D Camera

The Orbbec Gemini 305 is a stereo depth camera for close-range robot vision, including wrist mounting, object recognition, and grasping. This page covers the USB version; the Gemini 305g has different interfaces, power requirements, and dimensions. See the Orbbec documentation for details.
Features
- Close-range depth sensing: An operating range of 4–100 cm+ and a recommended range of 7–50 cm.
- Stereo vision: Stereo cameras provide depth data alongside color images.
- Compact body: The 42 × 42 × 23 mm housing fits space-constrained installations.
- Synchronization and triggering: Supports multi-camera synchronization and software and hardware triggers.
- USB connection: A USB Type-C connection supplies power and data; USB 3.0 is recommended.
Specifications
These specifications apply to the USB version of the Gemini 305. See the Orbbec product page for test conditions and current details.
| Category | Specification | Details |
|---|---|---|
| Basic | Operating environment | Indoor and outdoor |
| Operating range | 4–100 cm+ | |
| Recommended range | 7–50 cm | |
| Depth technology / baseline | Stereo vision / 18 mm | |
| Depth | Spatial precision | ≤1% (1280 × 800 at 50 cm, 90% × 90% ROI) |
| Depth field of view | H 88° × V 65° ±3° (1280 × 800 at 20 cm) | |
| Resolution and frame rate | Up to 1280 × 800 at 30 fps; 848 × 480 at 60 fps | |
| Color | Color field of view | H 94° × V 68° ±3° |
| Resolution and frame rate | Up to 1280 × 800 at 60 fps | |
| Sensors | Stereo color, global shutter | |
| Electrical | Power supply | 5 V DC, ≥700 mA |
| Average power consumption | Less than 2 W | |
| Physical | Dimensions / weight | 42 × 42 × 23 mm / 68 g ±10 g |
| Interface | USB Type-C, USB 3.0 and USB 2.0 | |
| Ingress protection | IP54 when a suitably protected USB cable is connected and secured | |
| Mounting | Bottom: one 1/4-20 UNC and two M3 threaded holes; rear: two M3 threaded holes |
Hardware Overview
The camera has two lenses on the front and a USB Type-C port on the side. Before mounting it on a robot arm or bracket, check the field of view, cable routing, and clearance throughout the intended motion. Mounting locations and dimension drawings are available in the Gemini 305 documentation.
The following images from the official Orbbec product page show the Gemini 305 front, USB Type-C port, and bottom and rear mounting holes.
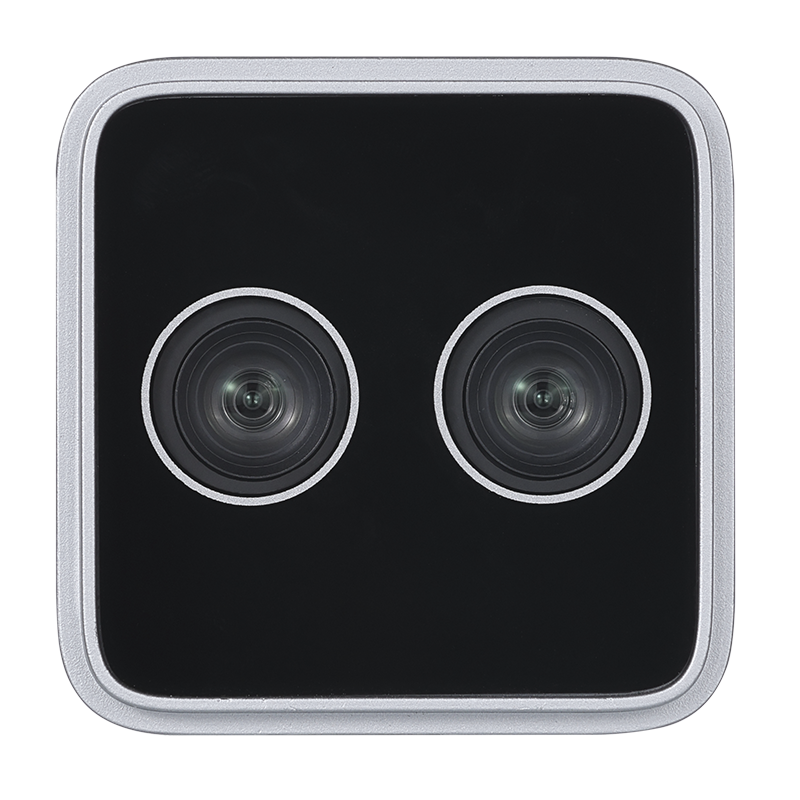
Front: stereo lenses
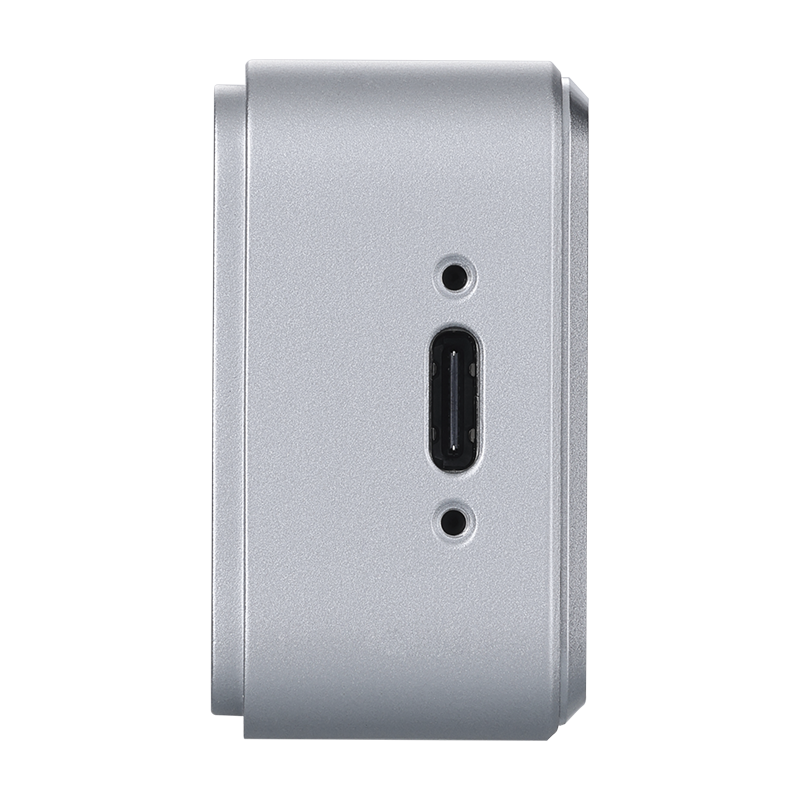
Side: USB Type-C port
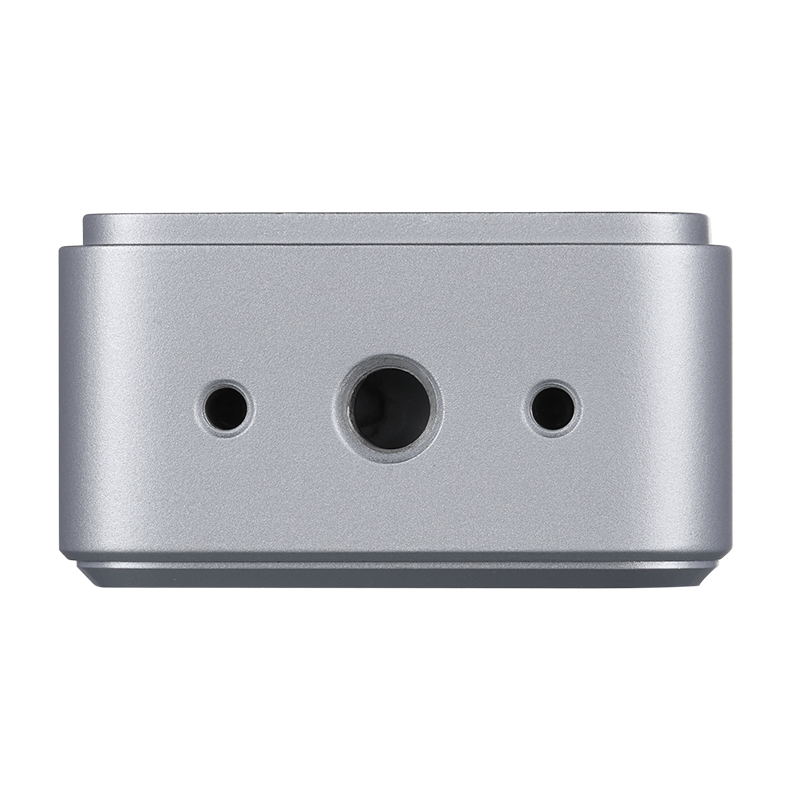
Bottom mounting holes
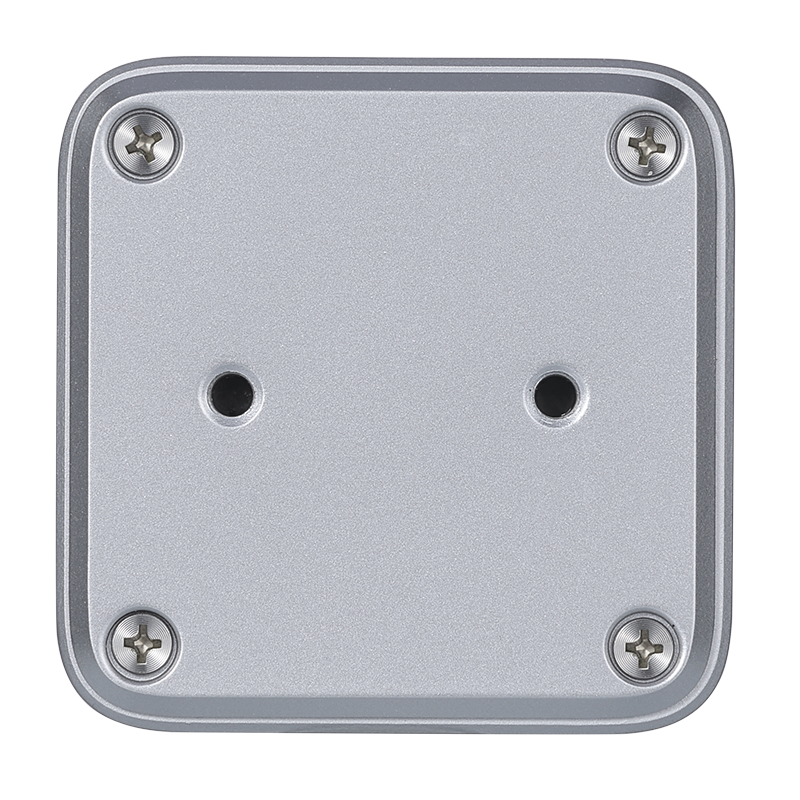
Rear mounting holes
Quick Start
Prepare and Connect
- Prepare a Gemini 305, a data-capable USB Type-C cable, and a host that meets the camera's power requirements. A USB 3.0 port and cable are recommended for greater bandwidth.
- Mount the camera for your application and connect it to the host with the USB Type-C cable. For a moving arm, leave enough cable slack and prevent the cable from being pulled or pinched.
Install Orbbec Viewer
- Open the Orbbec SDK v2 releases page, select a version that supports Gemini 305, and download the installer or Orbbec Viewer package for your host operating system and architecture. Jetson systems typically use Linux ARM64; choose the appropriate x86-64 or Windows package for a PC.
- Install or extract the package and start Orbbec Viewer as described on the releases page. File names and procedures can change between releases; on Linux, configure USB permissions according to the instructions for your version.
Gemini 305 uses Orbbec SDK v2; SDK v1 does not support this model. The Viewer interface and available features depend on the software version, firmware, and device configuration. See the SDK v2 documentation for installation and device permissions.
Preview Images and Point Clouds
- Confirm that Gemini 305 appears in the Orbbec Viewer device list and select it.
- Enable the Depth and Color streams, choose the resolution and frame rate offered by the device, and check that both preview windows display images.
- Place an object within the recommended range and observe the depth image as its distance changes. Enable the point cloud for a 3D preview, or review the depth-to-color (D2C) alignment settings when aligning color and depth images.
- Stop the streams before disconnecting the camera. For detailed controls, see the Orbbec Viewer guide.
The following images are from Orbbec's Viewer 2.6.2 guide and show a Gemini 335Lg. They illustrate the interface and are not Gemini 305 test results. The Gemini 305 has no built-in IMU, so the example's IMU panel does not indicate a Gemini 305 feature. The interface and available options depend on the device and software version.
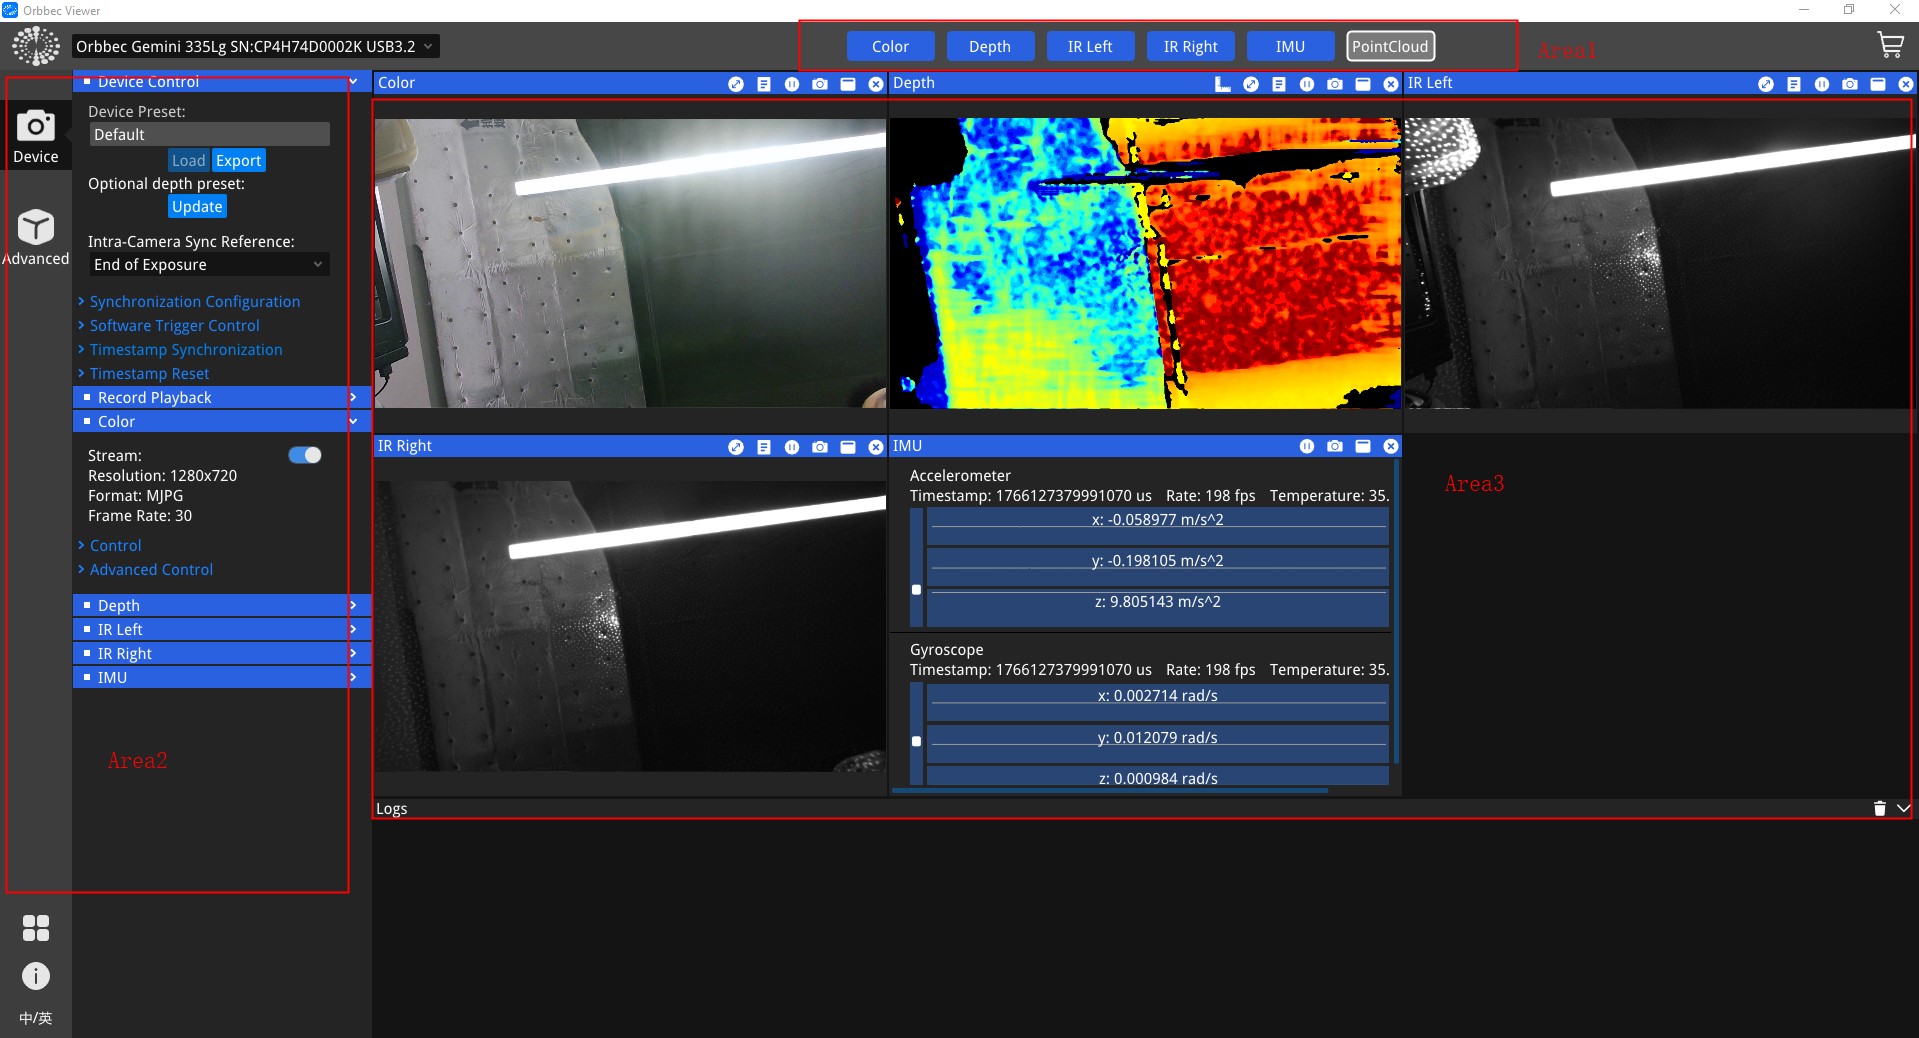
Viewer example: stream controls at the top, settings on the left, and previews on the right
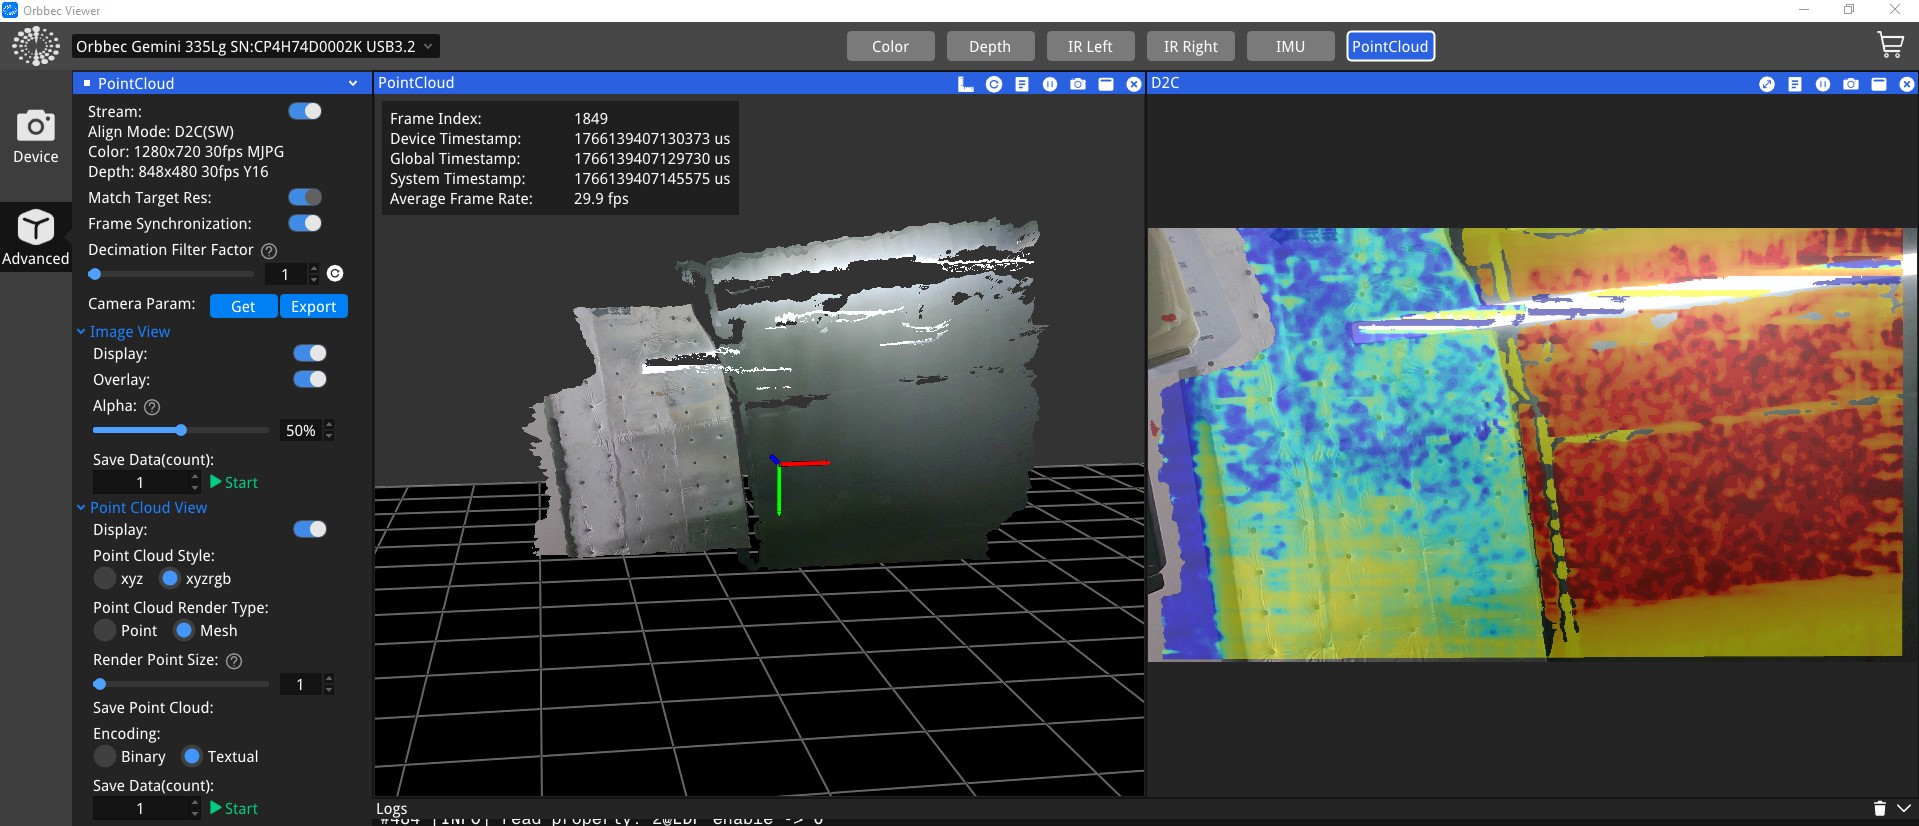
Viewer example: point cloud and depth-to-color alignment
Troubleshooting
- Device not listed: Reconnect the cable, confirm it supports data rather than power only, and check the host power supply. On Linux, also check USB permissions against the SDK v2 instructions.
- A stream will not start or is unstable: Start depth or color on its own and try other device-supported resolutions and frame rates. Check the USB port, cable, firmware, and SDK compatibility.
- Unexpected depth results: Move the subject into the recommended range, check that the lenses are unobstructed, and adjust device-supported Viewer settings for the scene.
ROS 2
To use the camera with ROS 2, follow the Orbbec SDK ROS 2 Wrapper v2 installation guide to configure the workspace and device permissions. Gemini 305 uses the v2-main branch. After installing a version that supports this model and sourcing the workspace, launch the supplied file:
ros2 launch orbbec_camera gemini_301_series.launch.py
In another terminal with the ROS 2 environment configured, use ros2 topic list to inspect the available topics. Topics and parameters depend on the installed version and launch configuration. These steps are based on official documentation and have not been verified with a physical Gemini 305 for this page.
Resources
- Gemini 305 documentation and datasheet
- Orbbec SDK v2 and Viewer downloads
- Orbbec Viewer guide
- Orbbec SDK ROS 2 Wrapper
Related Resources
Technical Support and Product Discussion
For help, visit the Seeed forum or contact Seeed.