Orbbec Gemini 335Lg Stereo Camera
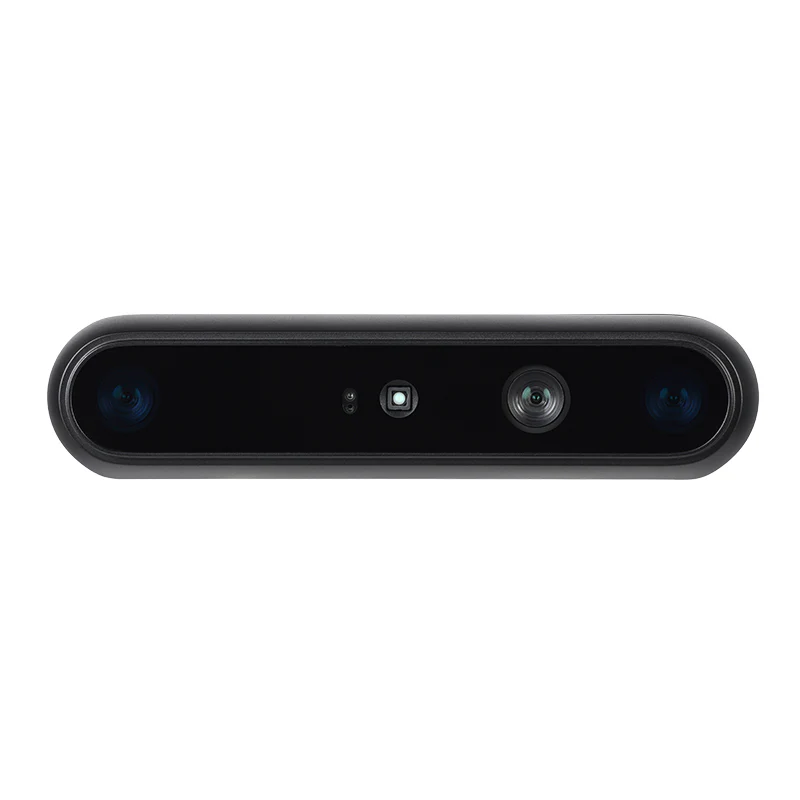
Gemini 335Lg is a standout model in the Gemini 330 series, serving as the GMSL2/FAKRA version of the industry-proven Gemini 335L.
The GMSL2 serializer combined with the FAKRA connector ensures secure and reliable connectivity for autonomous mobile robots (AMRs) navigating complex environments and robotic arms requiring flexible cabling.
Specifications
| Category | Spec | Gemini 335Lg |
|---|---|---|
| Basic | Use Environment | Indoor & Outdoor |
| Technology | Active & Passive Stereo | |
| Baseline | 95mm | |
| Data Connection | GMSL2 FAKRA & USB 3 | |
| Camera Protocol | USB & GMSL 2 | |
| UVC Compliant | Yes | |
| SDK | Orbbec SDK | |
| Depth | Depth Range [1] | 0.17m - 20m+ |
| Ideal Range | 0.25m - 6m | |
| Depth Resolution @ Frame Rate | Up to: 1280 × 800 @ 30fps; 848 × 480 @ 60fps | |
| Depth FOV (H × V) | 90° × 65° ± 3° @ 2m | |
| Depth FOV (H × V) with D2C | Up to: 90° × 65° ± 3° @ 2m | |
| Spatial Precision [2] | ≤0.8% @ 2m; ≤1.6% @ 4m | |
| Depth Sensor Technology | Global Shutter | |
| Depth Filter | Visible+NIR-pass | |
| IR | IR Resolution @ Frame Rate | Up to: 1280 × 800 @ 30fps; 848 × 480 @ 60fps |
| IR FOV (H × V) | 91° × 65° ± 3° | |
| RGB | RGB Resolution@Frame Rate | Up to 1280 × 800 @ 60 FPS; 1280 × 720 @ 60 FPS |
| RGB Sensor FOV (H × V) | 94° × 68° ± 3° | |
| RGB Sensor Technology | Global Shutter | |
| Built-in Sensor | IMU | Support |
| Electrical | Power Consumption | GMSL2: Average ≤ 3.8 W (Peak ≤ 7.5W); USB3: Average ≤ 3.0 W (Peak ≤ 6W) |
| Power Supply | GMSL2: For Best Performance, DC 12V/≥0.7A (Laser Energy Level 6); For Default Performance: DC 12V/≥0.5A [3] (Laser Energy Level 4); USB 3: DC 5V/≥1.5A | |
| Physical | Multi-camera Hardware Sync | 8-pin & FAKRA-Z |
| Dimensions (W × H × D) | 124 mm × 29mm × 36 mm | |
| Weight | 164g ± 3g | |
| Ingress Protection [4] | IP65 | |
| Installation | Bottom: 1 × 1/4 - 20 UNC; BACK: 2 × M4 | |
| Environmental | Ambient Temperature | -10℃ - 50 ℃ @ 15 FPS; -10℃ - 45 ℃ @ 30/60 FPS |
| EMC Requirement | EN61000-6-2; EN610000-6-4 | |
| Vibration | 3.8Grms @ 5 ~ 500 Hz, random, 2hr/axis | |
| Others | Lifespan [5] | 5 years |
[1] Theoretical maximum depth range up to 65 meters;
[2] Data measured during factory calibration;
[3] Gemini 335Lg default laser energy level is set to Level 4 to reduce peak power consumption and prevent operational failures. When sufficient power is available, users can manually adjust the laser to the maximum Level 6 to achieve optimal performance;
[4] Both Gemini 335L & 335Lg require the use of IP65-compliant cables during power-on operations to achieve IP65 protection;
[5] No more than 16h working per day.
Setup the Device
In this tutorial, we demonstrate both USB 3 and GMSL2 connection. Host device specification:
- reComputer Robotics J4012 with GMSL
- JetPack 6.2 (Ubuntu 22.04)
For tutorial on x86_64 Windows/Linux, or MacOS (x86_64, potentially Apple Silicon) , please refer to the README of SDK Repo
Download and Install Orbbec Viewer
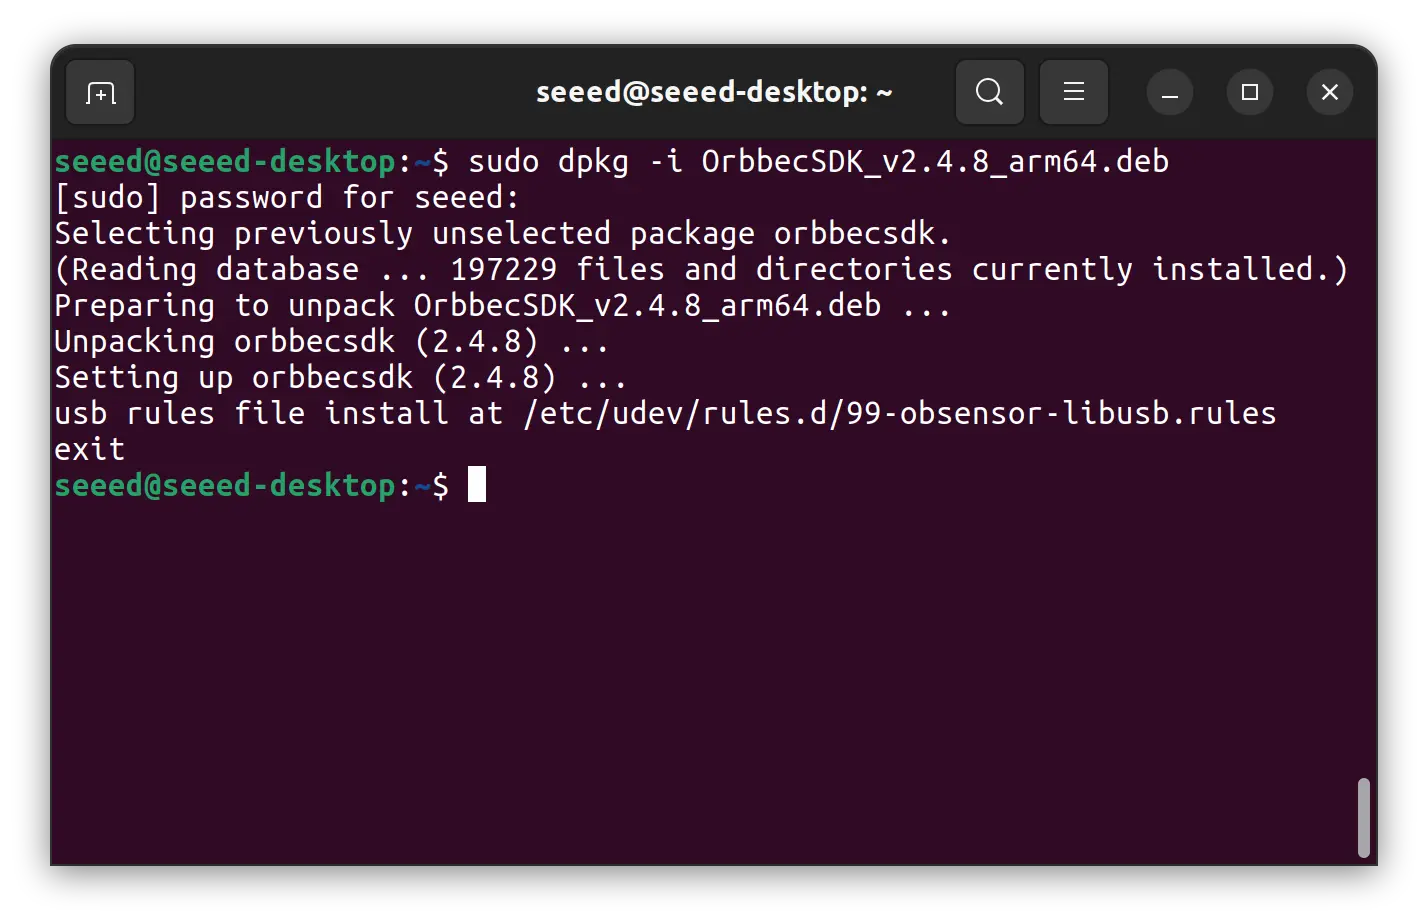
- Launch a terminal on your Jetson device, download pre-built package from GitHub release.
wget -L https://github.com/orbbec/OrbbecSDK_v2/releases/download/v2.4.8/OrbbecSDK_v2.4.8_arm64.deb
- Install SDK
sudo dpkg -i OrbbecSDK_v2.4.8_arm64.deb
- Visualization using Orbbec Viewer, download
wget -L https://github.com/orbbec/OrbbecSDK_v2/releases/download/v2.4.8/OrbbecViewer_v2.4.8_202507031357_a1355db_linux_aarch64.zip
- Extract the content
# In case you haven't install 'unzip'
# sudo apt-get update && sudo apt-get install unzip

unzip OrbbecViewer_v2.4.8_202507031357_a1355db_linux_aarch64.zip
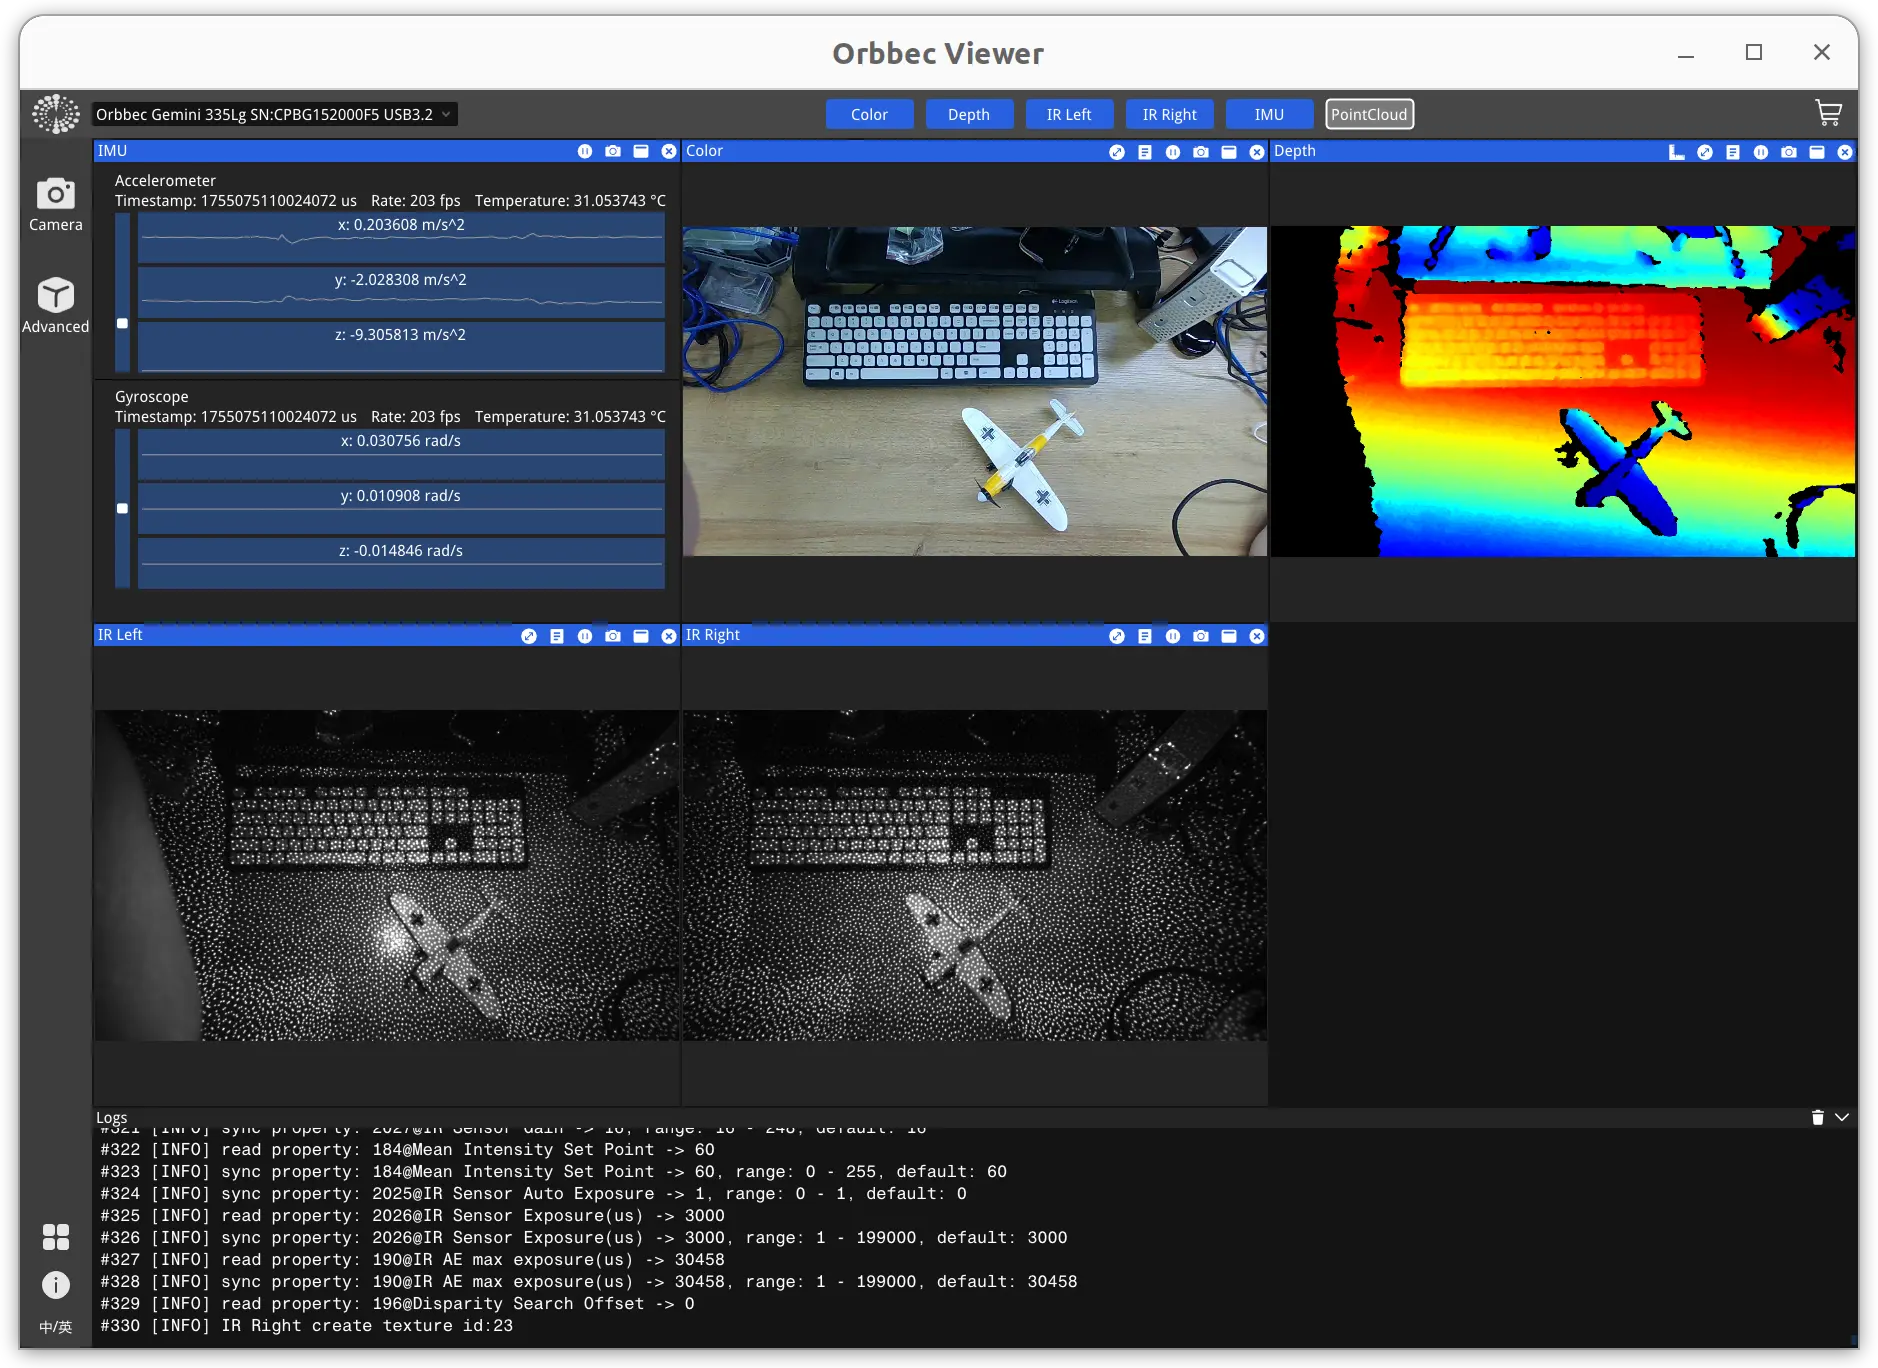
- Launch the Orbbec Viewer
cd OrbbecViewer_v2.4.8_202507031357_a1355db_linux_aarch64
./OrbbecViewer

USB3 Connection
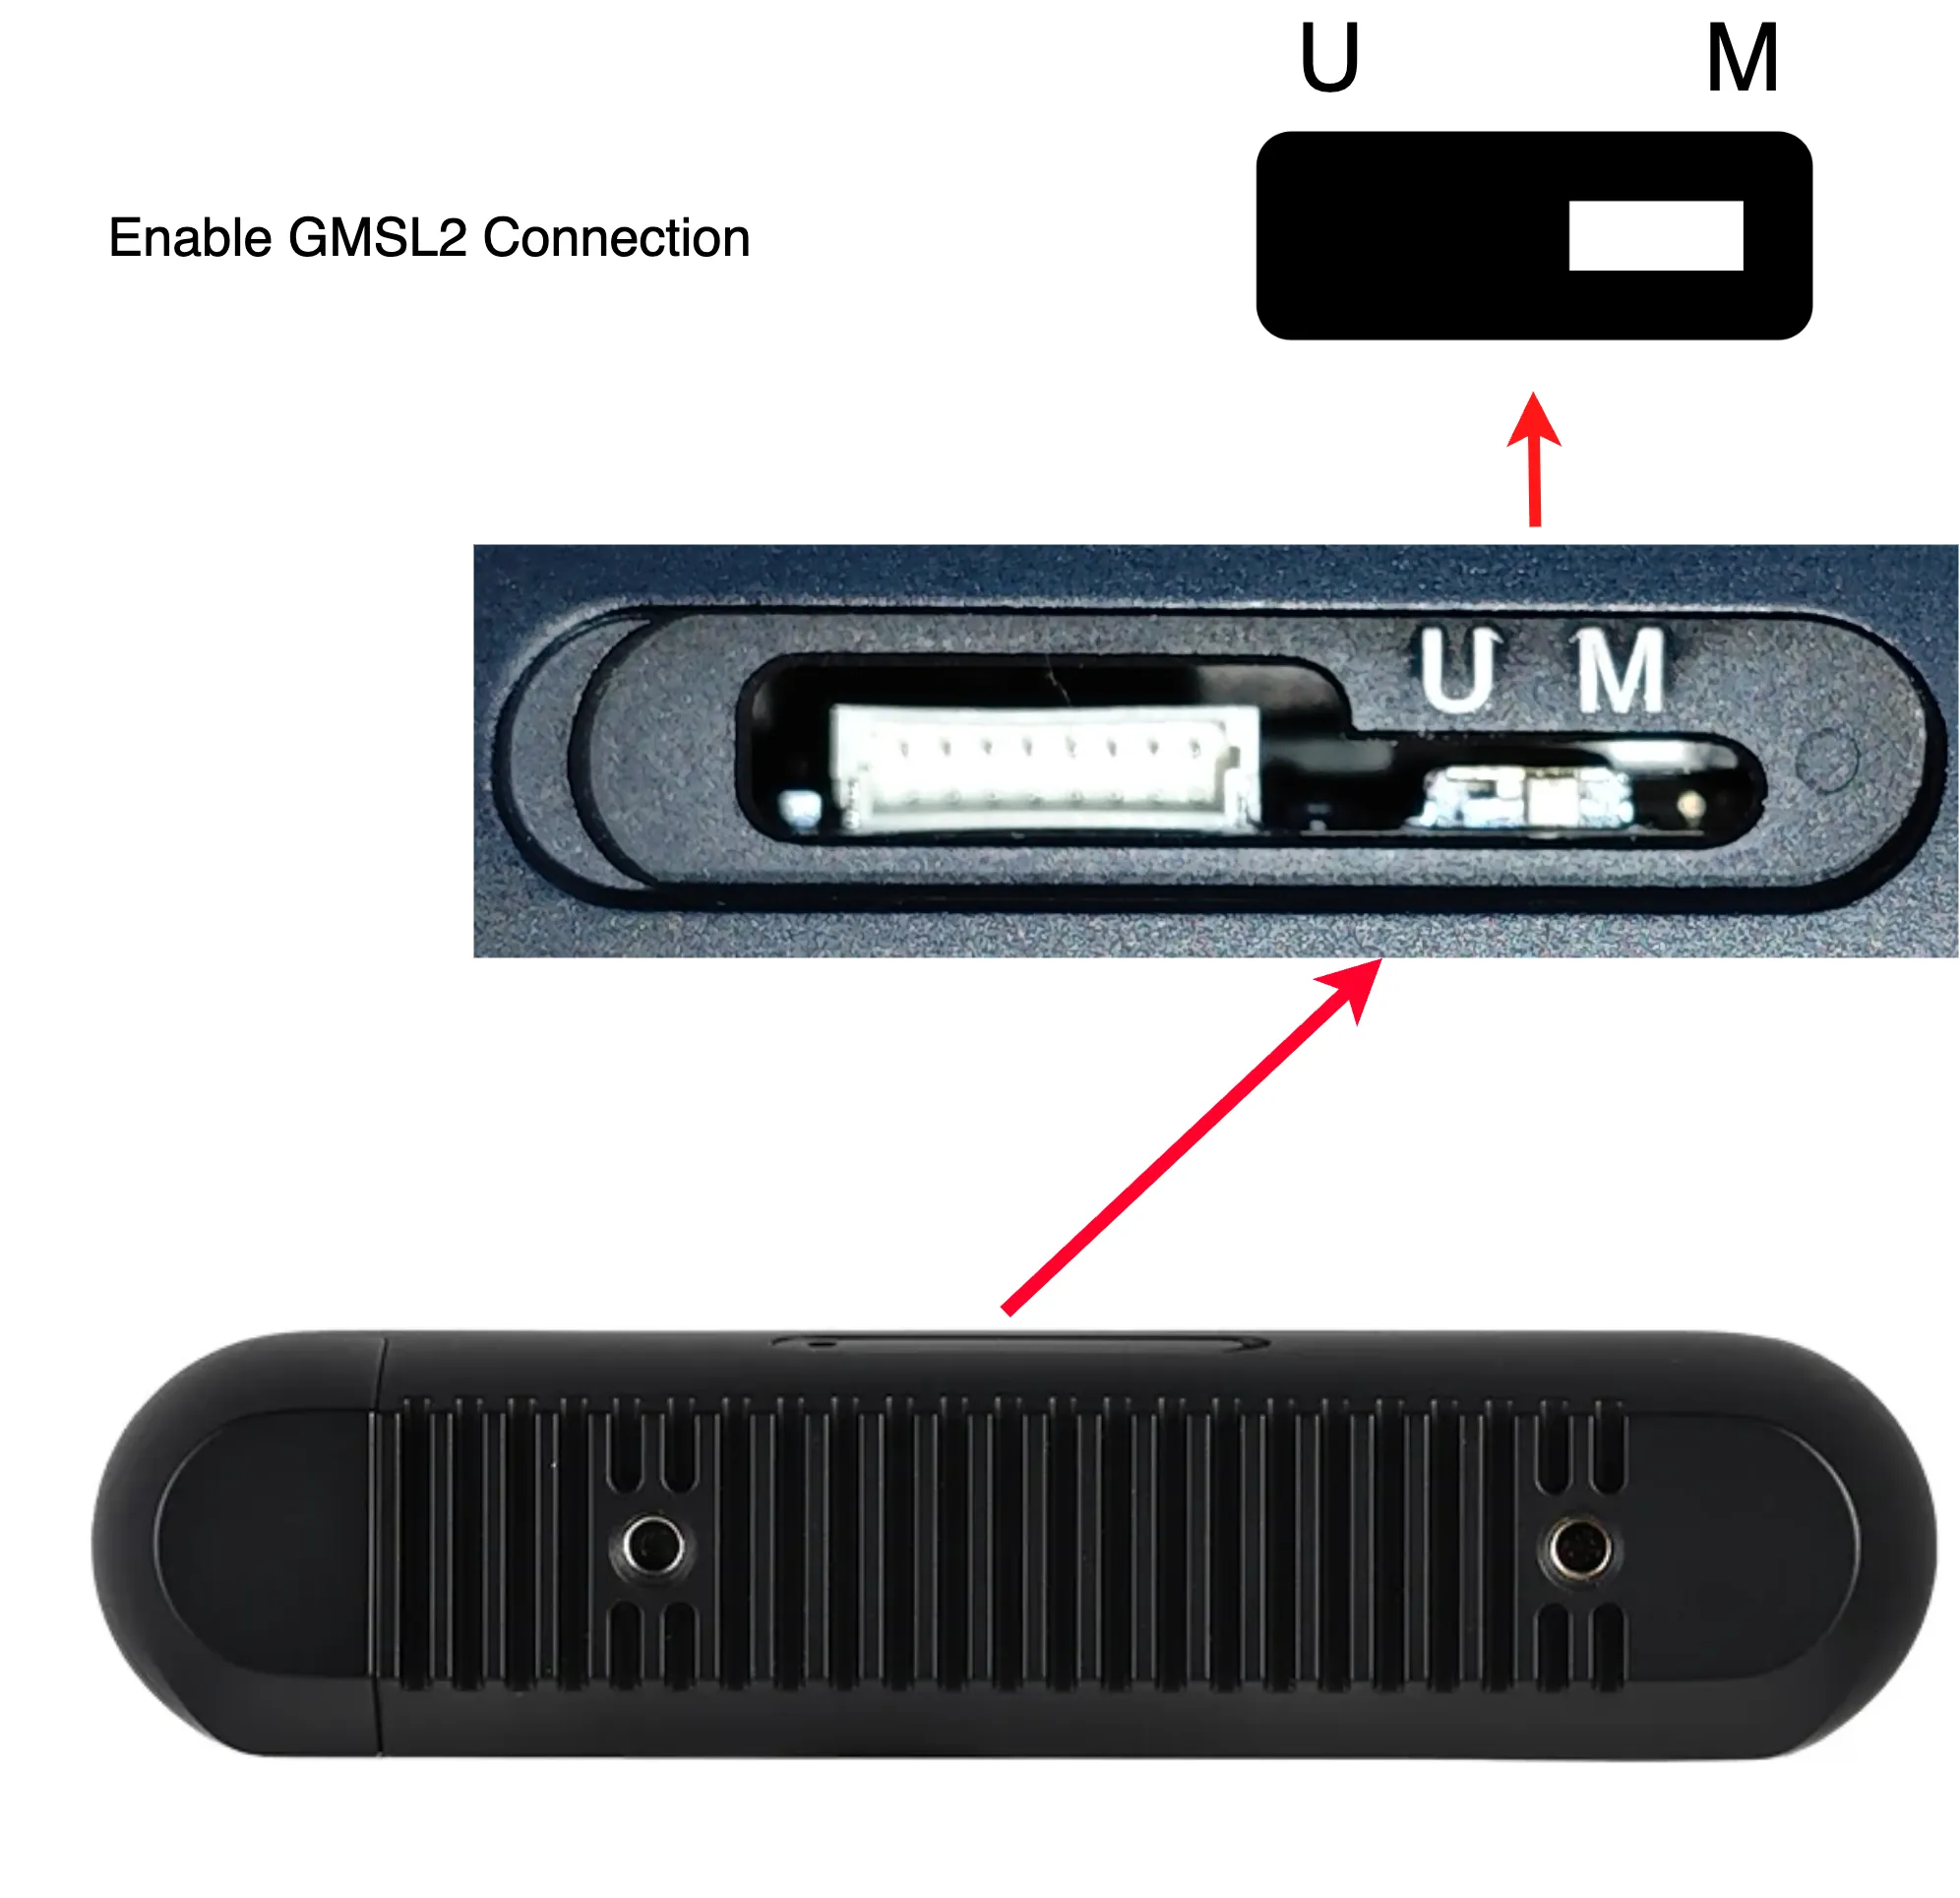
Set the DIP switch on the top of camera (remove the metal cover first) to the letter 'U' position.

What you might need:
- A USB Type-C to USB Type A cable that support USB 3 protocol.
- A host Jetson device that has USB 3 Type A ports.
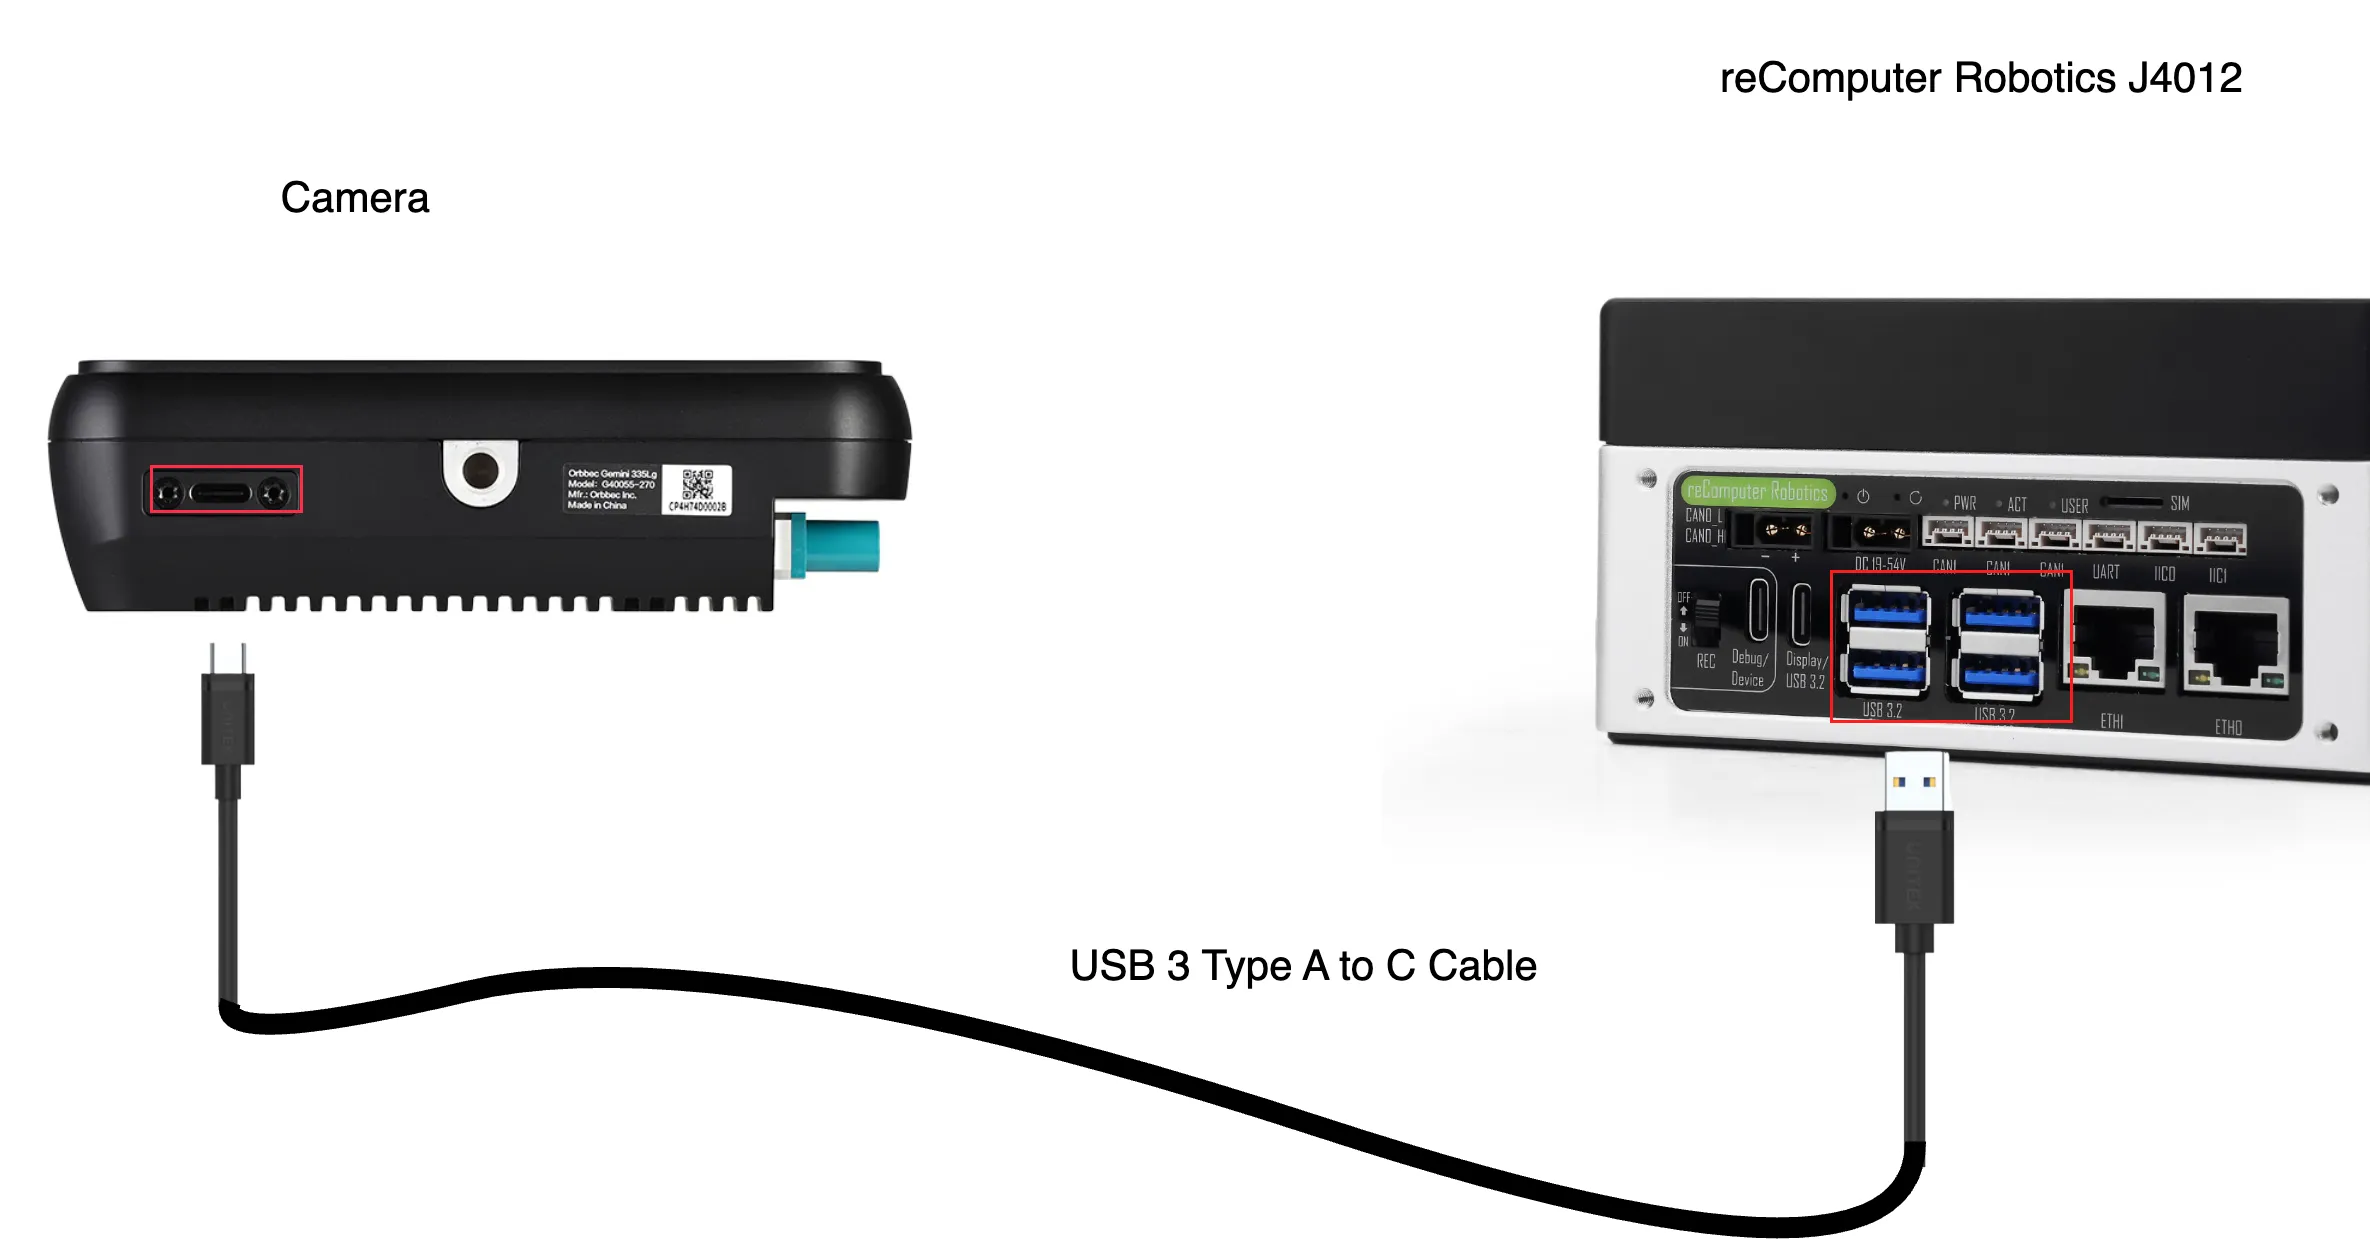
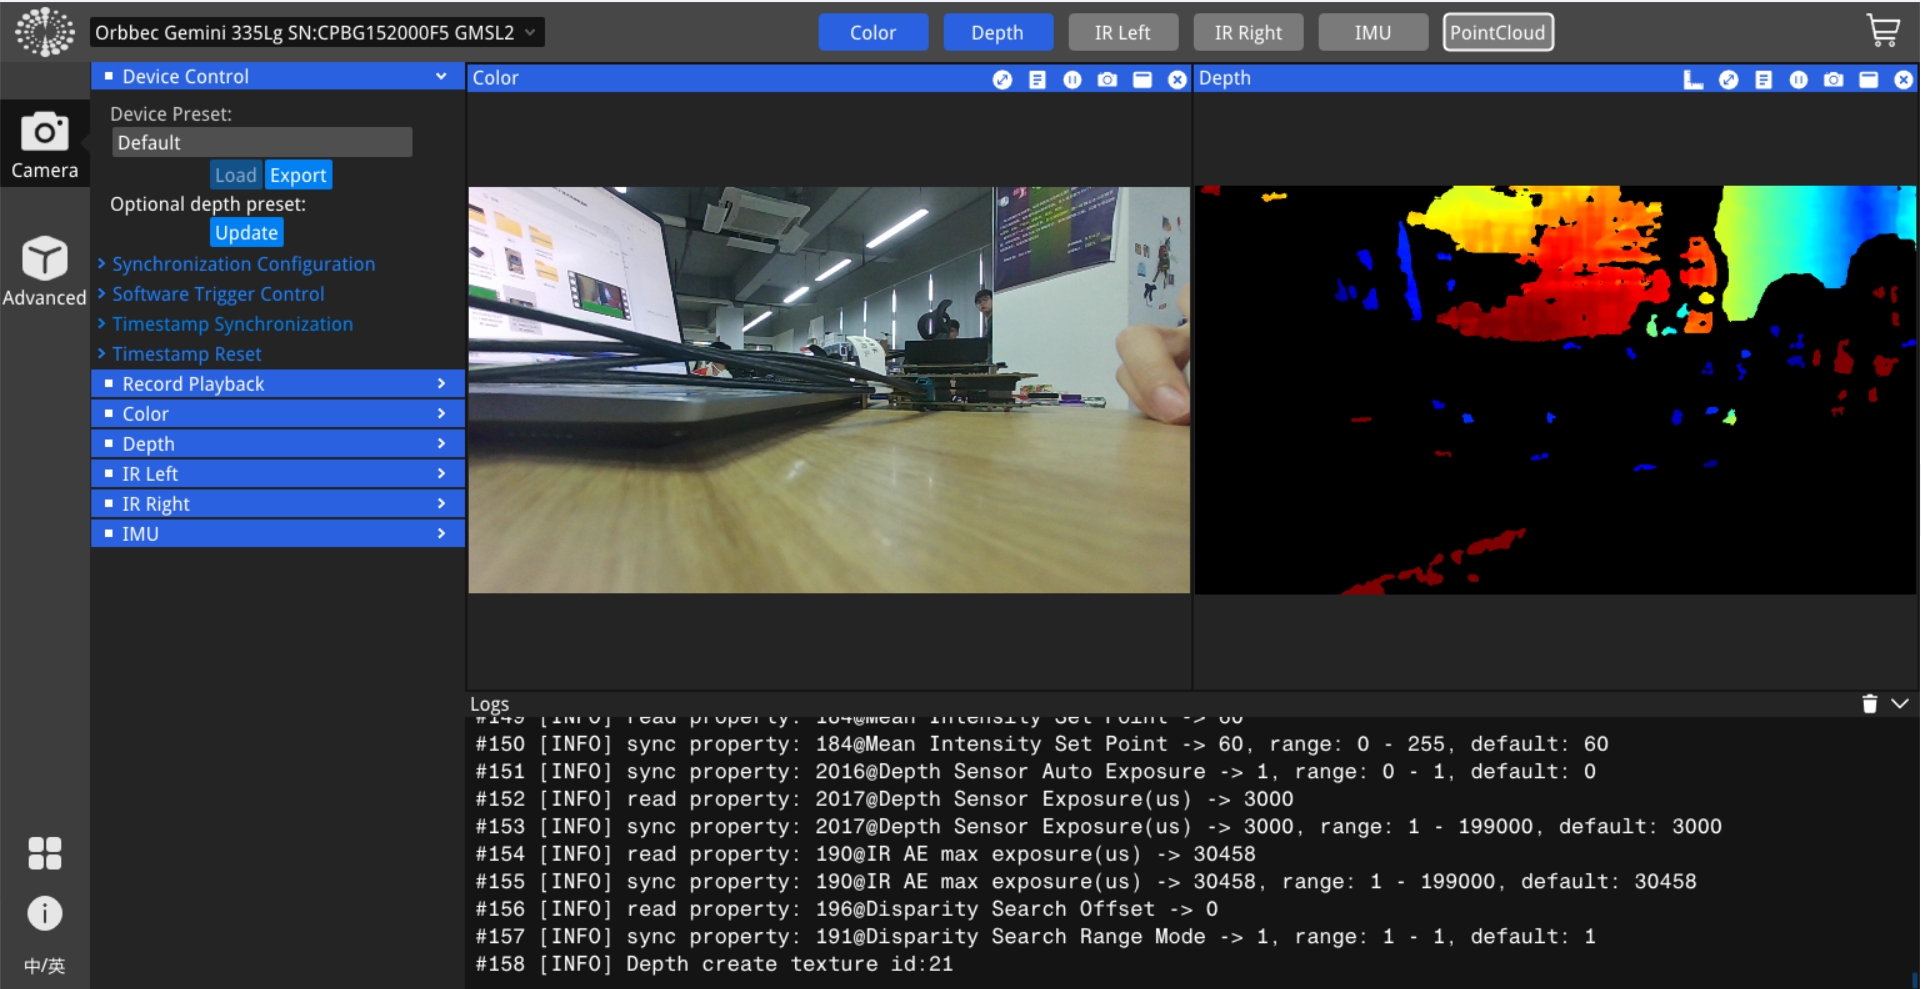
Connect the camera and use OrbbecViewer for visualization.
GMSL2 Connection
Set the DIP switch on the top of camera (remove the metal cover first) to the letter 'M' position.
What you might need:
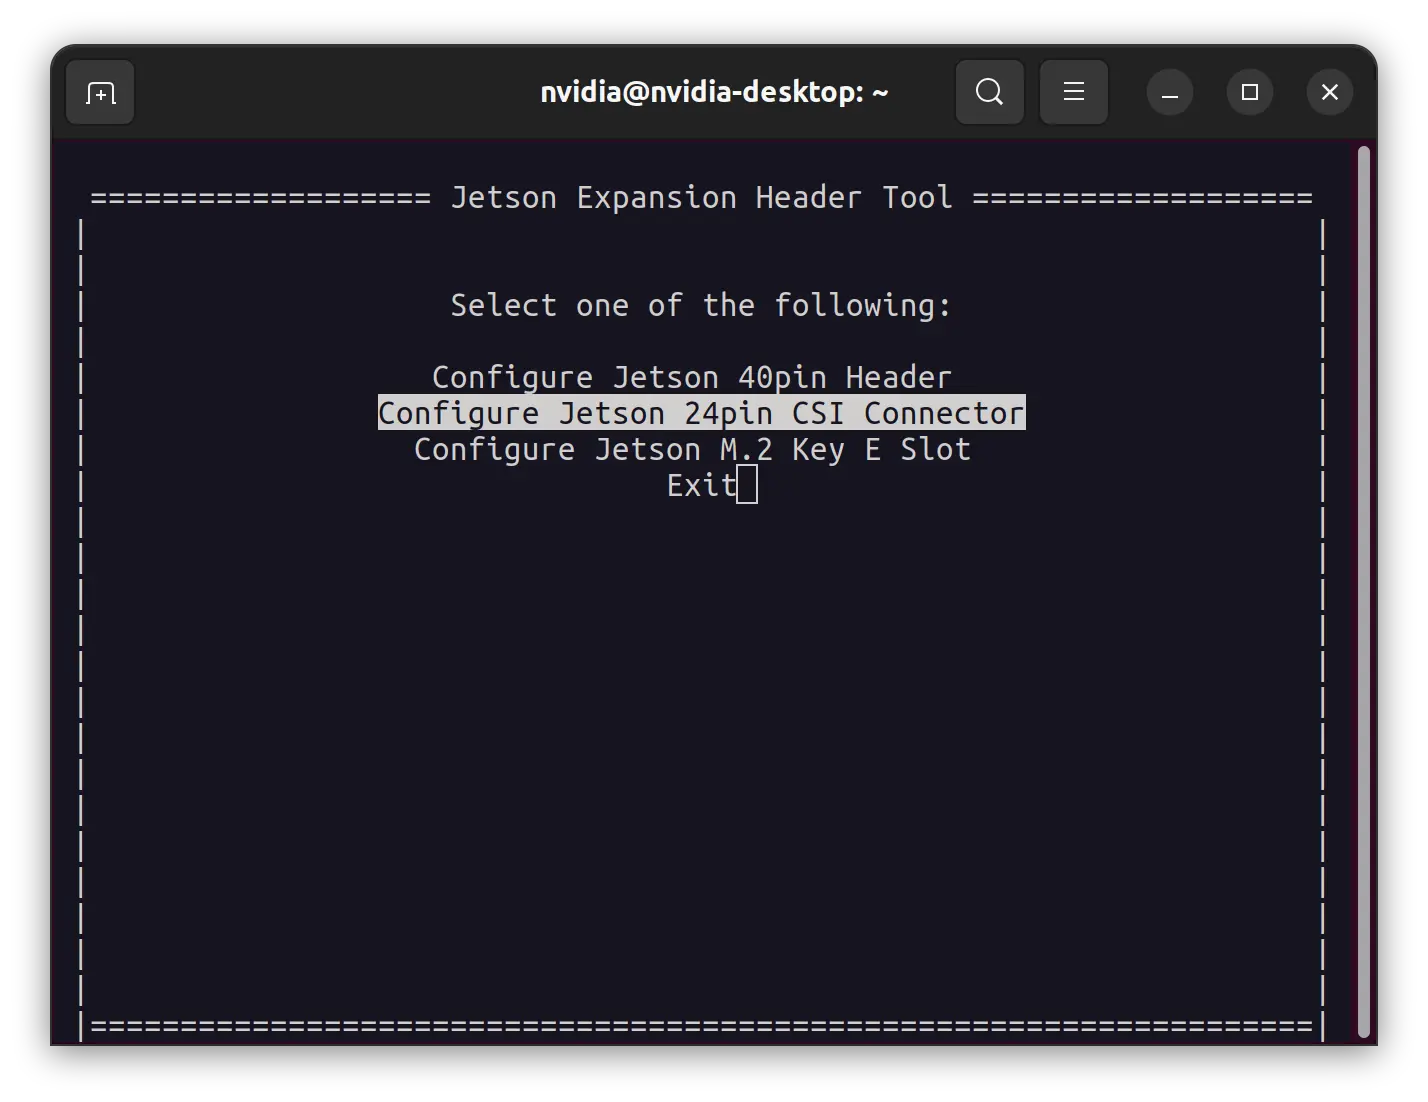
Connect the camera and launch Jetson IO on your device with
sudo /opt/nvidia/jetson-io/jetson-io.py
And configure the device tree overlay step by step:
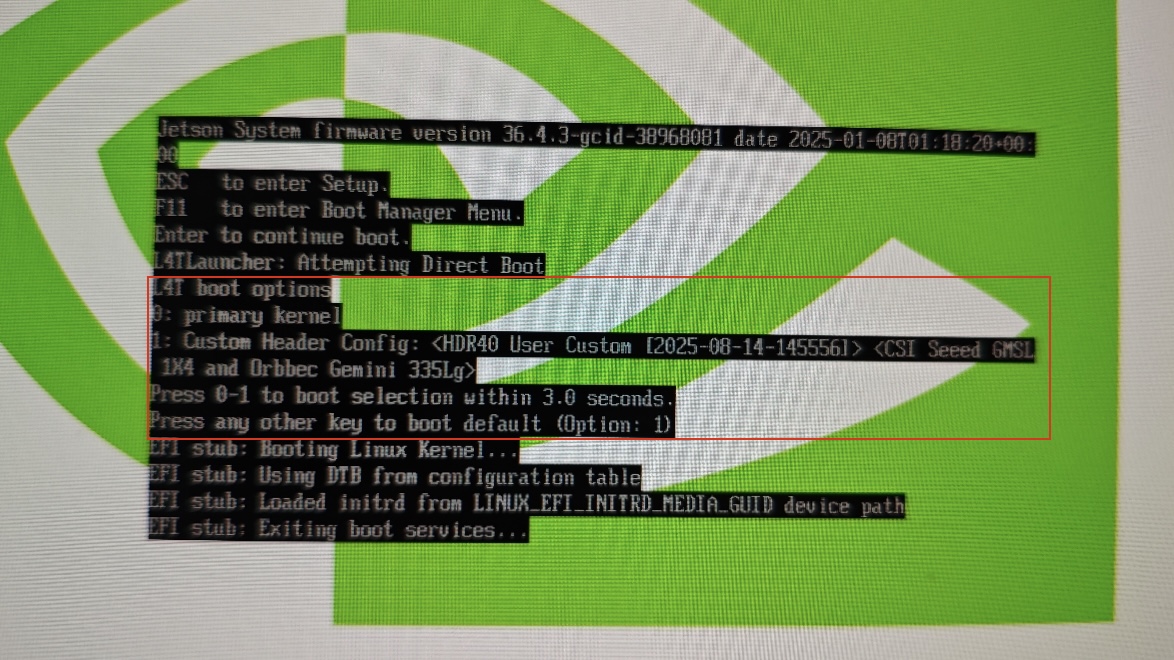
Reboot the Jetson device, on Jetson Firmware page, you might need to select the correct entry according the prompt, in our case, we press '1' to use Custom Header Config.
Connect the camera with Mini FAKRA cable.
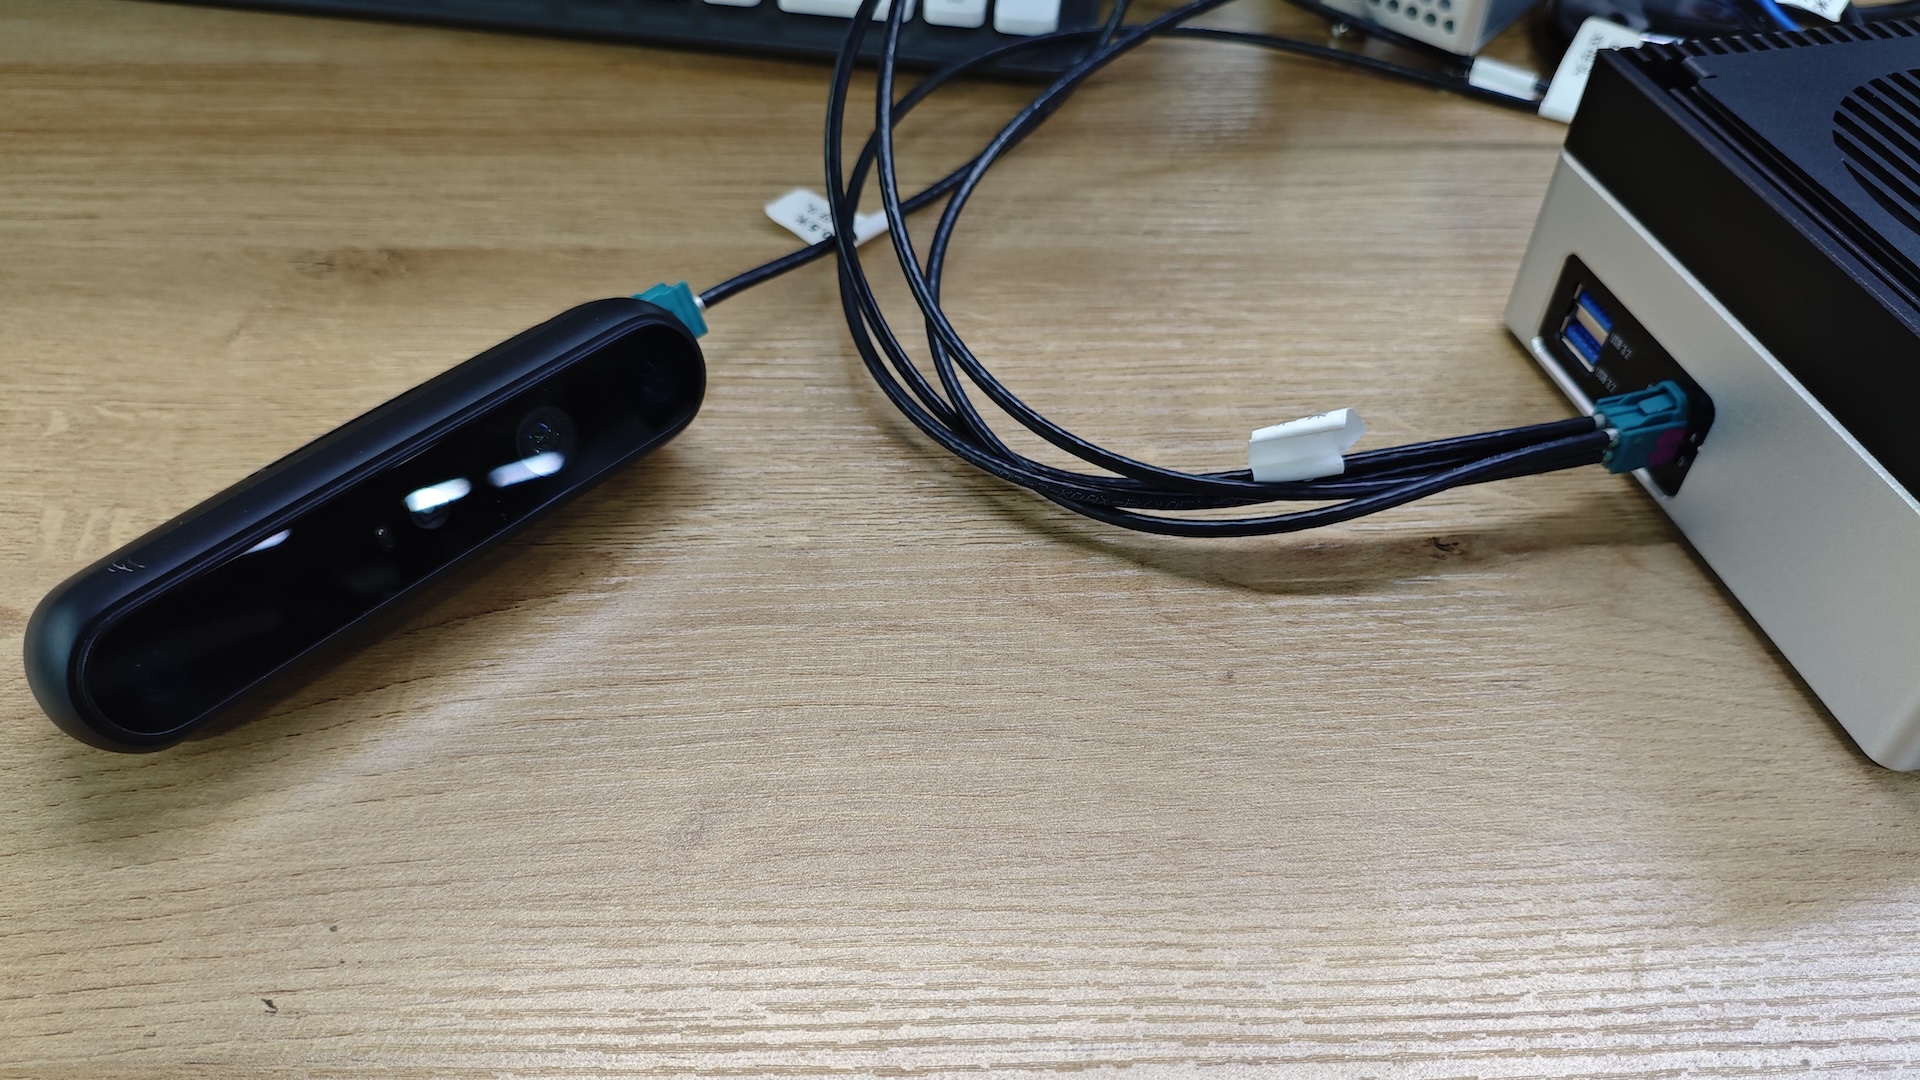
Visualize the result using OrbbecViewer
Additional Resources
Tech Support & Product Discussion
Thank you for choosing our products! Make sure you follow us on below platforms to get latest news and support.
