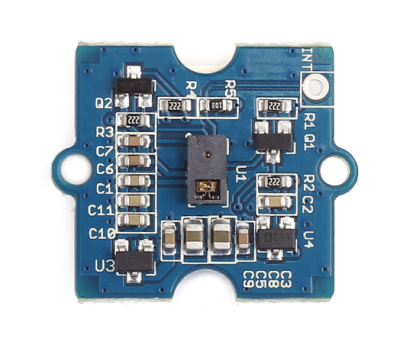
Grove - Gesture V1.0
O sensor do Grove - Gesture é o PAJ7620U2, que integra a função de reconhecimento de gestos com a interface I2C geral em um único chip. Ele pode reconhecer 9 gestos básicos, e essas informações de gestos podem ser facilmente acessadas através do barramento I2C.
Aplicação: você pode usar o Gesture como um dispositivo de entrada para controlar outro Grove, ou um computador, celular, carrinho inteligente, robô e muito mais com um simples movimento da sua mão.
Recursos
- Detecção de proximidade integrada
- Suporte a várias placas principais: Arduino UNO/Seeeduino/Arduino Mega2560
- 9 gestos básicos
- Cima
- Baixo
- Esquerda
- Direita
- Para frente
- Para trás
- Sentido horário
- Sentido anti-horário
- Acenar
Para mais detalhes sobre os módulos Grove, consulte o Grove System
Especificação
| Nome da especificação | Valor |
|---|---|
| Sensor | PAJ7620U2 |
| Fonte de alimentação | 5V |
| Imunidade à luz ambiente | < 100k Lux |
| Velocidade do gesto no Modo Normal | 60°/s a 600°/s |
| Velocidade do gesto no Modo Gaming | 60°/s a 1200°/s |
| Tipo de interface Interface IIC | até 400 kbit/s |
| Temperatura de operação | -40°C a +85°C |
| Dimensões | 20 * 20mmv |
| Faixa de detecção | 5-10cm |
| Endereço I2C | 0x73 |
Se você quiser usar vários dispositivos I2C, consulte o Software I2C.
Primeiros passos
Brincar com Arduino
Hardware
- Passo 1. Prepare os itens abaixo:
| Seeeduino V4.2 | Base Shield | Grove-Gesture v1.0 |
|---|---|---|
 |  |  |
| Adquira agora | Adquira agora | Adquira agora |
- Passo 2. Conecte o Grove-Gesture_v1.0 à porta I2C do Grove-Base Shield.
- Passo 3. Conecte o Grove - Base Shield ao Seeeduino.
- Passo 4. Conecte o Seeeduino ao PC através de um cabo USB.
Se não tivermos o Grove Base Shield, também podemos conectar o Grove-Gesture v1.0 diretamente ao Seeeduino como abaixo.
| Seeeduino | Grove-Gesture v1.0 |
|---|---|
| 5V | VCC |
| GND | GND |
| SDA | SDA |
| SCL | SCL |
INT: Máscara de flag de interrupção de detecção de gestos. Você pode conectar o pad INT ao pino digital 2 do Arduino usando um cabo jumper.
A imagem abaixo mostra como conectar o Grove - Gesture na porta I2C do Base Shield

Em seguida, conecte o Base Shield ao Seeeduino

Software
- Passo 1. Baixe a biblioteca do Github.
- Passo 2. Consulte How to install library para instalar a biblioteca para Arduino. Instalação de software.
- Passo 3. Se você não sabe como enviar o código, verifique how to upload code.
- Passo 4. Inicie a IDE do Arduino, vamos testar o exemplo de cima/baixo.
- Passo 5. Copie o código abaixo e cole na IDE do Arduino.
/*
The following simple demo will show you a very easy application: When you move up, the red led will be turned on, otherwise the red led will be turned off.
*/
#include <Wire.h>
#include "paj7620.h"

void setup()
{
  paj7620Init();
}

void loop()
{
 uint8_t data = 0;  // Read Bank_0_Reg_0x43/0x44 for gesture result.

 paj7620ReadReg(0x43, 1, &data);  // When different gestures be detected, the variable 'data' will be set to different values by paj7620ReadReg(0x43, 1, &data).

 if (data == GES_UP_FLAG)      // When up gesture be detected,the variable 'data' will be set to GES_UP_FLAG.
  digitalWrite(4, HIGH);      // turn the LED on (HIGH is the voltage level)
 if (data == GES_DOWN_FLAG)      // When down gesture be detected,the variable 'data' will be set to GES_DOWN_FLAG.
        digitalWrite(4, LOW);       // turn the LED off by making the voltage LOW
}
- Passo 6. Selecione Seeeduino V4 no gerenciador de placas e a porta COM.
- Passo 7. Clique em upload e mova a mão para cima e para baixo sobre o sensor Gesture. Você verá o LED ligar e desligar como abaixo.

- Passo 8. Vamos testar os 9 gestos selecionando File->Example->Grove_Gesture->paj7620_9gestures, depois selecione Seeeduino v4 como placa no gerenciador e a porta COM correta.
#include <Wire.h>
#include "paj7620.h"

/*
Notice: When you want to recognize the Forward/Backward gestures, your gestures' reaction time must less than GES_ENTRY_TIME(0.8s).
        You also can adjust the reaction time according to the actual circumstance.
*/
#define GES_REACTION_TIME  500    // You can adjust the reaction time according to the actual circumstance.
#define GES_ENTRY_TIME   800    // When you want to recognize the Forward/Backward gestures, your gestures' reaction time must less than GES_ENTRY_TIME(0.8s).
#define GES_QUIT_TIME   1000

void setup()
{
 uint8_t error = 0;

 Serial.begin(9600);
 Serial.println("\nPAJ7620U2 TEST DEMO: Recognize 9 gestures.");

 error = paj7620Init();   // initialize Paj7620 registers
 if (error)
 {
  Serial.print("INIT ERROR,CODE:");
  Serial.println(error);
 }
 else
 {
  Serial.println("INIT OK");
 }
 Serial.println("Please input your gestures:\n");
}

void loop()
{
 uint8_t data = 0, data1 = 0, error;

 error = paj7620ReadReg(0x43, 1, &data);    // Read Bank_0_Reg_0x43/0x44 for gesture result.
 if (!error)
 {
  switch (data)          // When different gestures be detected, the variable 'data' will be set to different values by paj7620ReadReg(0x43, 1, &data).
  {
   case GES_RIGHT_FLAG:
    delay(GES_ENTRY_TIME);
    paj7620ReadReg(0x43, 1, &data);
    if(data == GES_FORWARD_FLAG)
    {
     Serial.println("Forward");
     delay(GES_QUIT_TIME);
    }
    else if(data == GES_BACKWARD_FLAG)
    {
     Serial.println("Backward");
     delay(GES_QUIT_TIME);
    }
    else
    {
     Serial.println("Right");
    }
    break;
   case GES_LEFT_FLAG:
    delay(GES_ENTRY_TIME);
    paj7620ReadReg(0x43, 1, &data);
    if(data == GES_FORWARD_FLAG)
    {
     Serial.println("Forward");
     delay(GES_QUIT_TIME);
    }
    else if(data == GES_BACKWARD_FLAG)
    {
     Serial.println("Backward");
     delay(GES_QUIT_TIME);
    }
    else
    {
     Serial.println("Left");
    }
    break;
   case GES_UP_FLAG:
    delay(GES_ENTRY_TIME);
    paj7620ReadReg(0x43, 1, &data);
    if(data == GES_FORWARD_FLAG)
    {
     Serial.println("Forward");
     delay(GES_QUIT_TIME);
    }
    else if(data == GES_BACKWARD_FLAG)
    {
     Serial.println("Backward");
     delay(GES_QUIT_TIME);
    }
    else
    {
     Serial.println("Up");
    }
    break;
   case GES_DOWN_FLAG:
    delay(GES_ENTRY_TIME);
    paj7620ReadReg(0x43, 1, &data);
    if(data == GES_FORWARD_FLAG)
    {
     Serial.println("Forward");
     delay(GES_QUIT_TIME);
    }
    else if(data == GES_BACKWARD_FLAG)
    {
     Serial.println("Backward");
     delay(GES_QUIT_TIME);
    }
    else
    {
     Serial.println("Down");
    }
    break;
   case GES_FORWARD_FLAG:
    Serial.println("Forward");
    delay(GES_QUIT_TIME);
    break;
   case GES_BACKWARD_FLAG:
    Serial.println("Backward");
    delay(GES_QUIT_TIME);
    break;
   case GES_CLOCKWISE_FLAG:
    Serial.println("Clockwise");
    break;
   case GES_COUNT_CLOCKWISE_FLAG:
    Serial.println("anti-clockwise");
    break;
   default:
    paj7620ReadReg(0x44, 1, &data1);
    if (data1 == GES_WAVE_FLAG)
    {
     Serial.println("wave");
    }
    break;
  }
 }
 delay(100);
}
- Passo 9. Clique em upload e abra a porta do Serial Monitor.
- Passo 10. Este exemplo pode reconhecer 9 gestos e exibir o resultado, incluindo mover para cima, mover para baixo, mover para a esquerda, mover para a direita, mover para frente, mover para trás, círculo em sentido horário, círculo em sentido anti-horário e acenar. Vamos testar e ver a saída na porta COM conforme abaixo.
PAJ7620U2 TEST DEMO: Recognize 9 gestures.
INIT SENSOR...
Addr0 =20,  Addr1 =76
wake-up finish.
Set up gaming mode.
Paj7620 initialize register finished.
INIT OK
Please input your gestures:

Left
Left
Up
Right
Up
Up
Down
Up
Down
Down
Up
Right
Left
Quando você quiser reconhecer os gestos Forward/Backward, o tempo de reação dos seus gestos deve ser menor que GES_ENTRY_TIME(0.8s). Você também pode ajustar o tempo de reação de acordo com as circunstâncias reais.
Brincar com Codecraft
Hardware
Passo 1. Conecte um Grove - Gesture à porta I2C e conecte um Grove - Red LED à porta D4 de um Base Shield.
Passo 2. Conecte o Base Shield ao seu Seeeduino/Arduino.
Passo 3. Conecte o Seeeduino/Arduino ao seu PC via um cabo USB.
Software
Passo 1. Abra o Codecraft, adicione o suporte ao Arduino e arraste um procedimento principal para a área de trabalho.
Se esta é a sua primeira vez usando o Codecraft, consulte também o Guia para usar Arduino com Codecraft.
Passo 2. Arraste os blocos como na figura abaixo ou abra o arquivo cdc que pode ser baixado no final desta página.

Envie o programa para o seu Arduino/Seeeduino.
Quando o código terminar de ser enviado, o LED acenderá quando você fizer um gesto para cima e apagará quando você fizer um gesto para baixo.
Brincar com Raspberry Pi (com Grove Base Hat para Raspberry Pi)
Hardware
- Passo 1. Itens usados neste projeto:
| Raspberry pi | Grove Base Hat para RasPi | Grove - Gesture Sensor |
|---|---|---|
 |  | |
| Adquira agora | Adquira agora | Adquira agora |
- Passo 2. Conecte o Grove Base Hat ao Raspberry.
- Passo 3. Conecte o sensor de gestos à porta I^2^C do Base Hat.
- Passo 4. Conecte o Raspberry Pi ao PC através de um cabo USB.

Software
- Passo 1. Siga Setting Software para configurar o ambiente de desenvolvimento.
- Passo 2. Baixe o arquivo-fonte clonando a biblioteca grove.py.
cd ~
git clone https://github.com/Seeed-Studio/grove.py
- Passo 3. Execute os comandos abaixo para rodar o código.
cd grove.py/grove
python3 grove_gesture_sensor.py
A seguir está o código grove_gesture_sensor.py.
import time,sys
import RPi.GPIO as GPIO
from grove.i2c import Bus

# use the bus that matches your raspi version
rev = GPIO.RPI_REVISION
if rev == 2 or rev == 3:
    bus = Bus(1)
else:
    bus = Bus(0)

class gesture:
 #Registers and variables for the gesture sensor
 GES_REACTION_TIME  =.500    # You can adjust the reaction time according to the actual circumstance.
 GES_ENTRY_TIME   =.800    # When you want to recognize the Forward/Backward gestures, your gestures' reaction time must less than GES_ENTRY_TIME(0.8s).
 GES_QUIT_TIME   =1.000

 BANK0 = 0
 BANK1 = 1

 PAJ7620_ADDR_BASE =0x00

 #REGISTER BANK SELECT
 PAJ7620_REGITER_BANK_SEL  =(PAJ7620_ADDR_BASE + 0xEF) #W

 #DEVICE ID
 PAJ7620_ID  =0x73

 #REGISTER BANK 0
 PAJ7620_ADDR_SUSPEND_CMD  =(PAJ7620_ADDR_BASE + 0x3) #W
 PAJ7620_ADDR_GES_PS_DET_MASK_0 =(PAJ7620_ADDR_BASE + 0x41) #RW
 PAJ7620_ADDR_GES_PS_DET_MASK_1 =(PAJ7620_ADDR_BASE + 0x42) #RW
 PAJ7620_ADDR_GES_PS_DET_FLAG_0 =(PAJ7620_ADDR_BASE + 0x43) #R
 PAJ7620_ADDR_GES_PS_DET_FLAG_1 =(PAJ7620_ADDR_BASE + 0x44) #R
 PAJ7620_ADDR_STATE_INDICATOR =(PAJ7620_ADDR_BASE + 0x45) #R
 PAJ7620_ADDR_PS_HIGH_THRESHOLD =(PAJ7620_ADDR_BASE + 0x69) #RW
 PAJ7620_ADDR_PS_LOW_THRESHOLD =(PAJ7620_ADDR_BASE + 0x6A) #RW
 PAJ7620_ADDR_PS_APPROACH_STATE =(PAJ7620_ADDR_BASE + 0x6B) #R
 PAJ7620_ADDR_PS_RAW_DATA  =(PAJ7620_ADDR_BASE + 0x6C) #R

 #REGISTER BANK 1
 PAJ7620_ADDR_PS_GAIN   =(PAJ7620_ADDR_BASE + 0x44) #RW
 PAJ7620_ADDR_IDLE_S1_STEP_0  =(PAJ7620_ADDR_BASE + 0x67) #RW
 PAJ7620_ADDR_IDLE_S1_STEP_1  =(PAJ7620_ADDR_BASE + 0x68) #RW
 PAJ7620_ADDR_IDLE_S2_STEP_0  =(PAJ7620_ADDR_BASE + 0x69) #RW
 PAJ7620_ADDR_IDLE_S2_STEP_1  =(PAJ7620_ADDR_BASE + 0x6A) #RW
 PAJ7620_ADDR_OP_TO_S1_STEP_0 =(PAJ7620_ADDR_BASE + 0x6B) #RW
 PAJ7620_ADDR_OP_TO_S1_STEP_1 =(PAJ7620_ADDR_BASE + 0x6C) #RW
 PAJ7620_ADDR_OP_TO_S2_STEP_0 =(PAJ7620_ADDR_BASE + 0x6D) #RW
 PAJ7620_ADDR_OP_TO_S2_STEP_1 =(PAJ7620_ADDR_BASE + 0x6E) #RW
 PAJ7620_ADDR_OPERATION_ENABLE =(PAJ7620_ADDR_BASE + 0x72) #RW

 #PAJ7620_REGITER_BANK_SEL
 PAJ7620_BANK0=0
 PAJ7620_BANK1=1

 #PAJ7620_ADDR_SUSPEND_CMD
 PAJ7620_I2C_WAKEUP =1
 PAJ7620_I2C_SUSPEND =0

 #PAJ7620_ADDR_OPERATION_ENABLE
 PAJ7620_ENABLE=1
 PAJ7620_DISABLE=0

 #ADC, delete
 REG_ADDR_RESULT = 0x00
 REG_ADDR_ALERT  = 0x01
 REG_ADDR_CONFIG = 0x02
 REG_ADDR_LIMITL = 0x03
 REG_ADDR_LIMITH = 0x04
 REG_ADDR_HYST   = 0x05
 REG_ADDR_CONVL  = 0x06
 REG_ADDR_CONVH  = 0x07

 GES_RIGHT_FLAG    =1<<0
 GES_LEFT_FLAG    =1<<1
 GES_UP_FLAG     =1<<2
 GES_DOWN_FLAG    =1<<3
 GES_FORWARD_FLAG   =1<<4
 GES_BACKWARD_FLAG   =1<<5
 GES_CLOCKWISE_FLAG   =1<<6
 GES_COUNT_CLOCKWISE_FLAG =1<<7
 GES_WAVE_FLAG    =1<<0

 #Gesture output
 FORWARD   = 1
 BACKWARD   = 2
 RIGHT   = 3
 LEFT   = 4
 UP    = 5
 DOWN   = 6
 CLOCKWISE  = 7
 ANTI_CLOCKWISE = 8
 WAVE   = 9

 #Initial register state
 initRegisterArray=( [0xEF,0x00],
      [0x32,0x29],
      [0x33,0x01],
      [0x34,0x00],
      [0x35,0x01],
      [0x36,0x00],
      [0x37,0x07],
      [0x38,0x17],
      [0x39,0x06],
      [0x3A,0x12],
      [0x3F,0x00],
      [0x40,0x02],
      [0x41,0xFF],
      [0x42,0x01],
      [0x46,0x2D],
      [0x47,0x0F],
      [0x48,0x3C],
      [0x49,0x00],
      [0x4A,0x1E],
      [0x4B,0x00],
      [0x4C,0x20],
      [0x4D,0x00],
      [0x4E,0x1A],
      [0x4F,0x14],
      [0x50,0x00],
      [0x51,0x10],
      [0x52,0x00],
      [0x5C,0x02],
      [0x5D,0x00],
      [0x5E,0x10],
      [0x5F,0x3F],
      [0x60,0x27],
      [0x61,0x28],
      [0x62,0x00],
      [0x63,0x03],
      [0x64,0xF7],
      [0x65,0x03],
      [0x66,0xD9],
      [0x67,0x03],
      [0x68,0x01],
      [0x69,0xC8],
      [0x6A,0x40],
      [0x6D,0x04],
      [0x6E,0x00],
      [0x6F,0x00],
      [0x70,0x80],
      [0x71,0x00],
      [0x72,0x00],
      [0x73,0x00],
      [0x74,0xF0],
      [0x75,0x00],
      [0x80,0x42],
      [0x81,0x44],
      [0x82,0x04],
      [0x83,0x20],
      [0x84,0x20],
      [0x85,0x00],
      [0x86,0x10],
      [0x87,0x00],
      [0x88,0x05],
      [0x89,0x18],
      [0x8A,0x10],
      [0x8B,0x01],
      [0x8C,0x37],
      [0x8D,0x00],
      [0x8E,0xF0],
      [0x8F,0x81],
      [0x90,0x06],
      [0x91,0x06],
      [0x92,0x1E],
      [0x93,0x0D],
      [0x94,0x0A],
      [0x95,0x0A],
      [0x96,0x0C],
      [0x97,0x05],
      [0x98,0x0A],
      [0x99,0x41],
      [0x9A,0x14],
      [0x9B,0x0A],
      [0x9C,0x3F],
      [0x9D,0x33],
      [0x9E,0xAE],
      [0x9F,0xF9],
      [0xA0,0x48],
      [0xA1,0x13],
      [0xA2,0x10],
      [0xA3,0x08],
      [0xA4,0x30],
      [0xA5,0x19],
      [0xA6,0x10],
      [0xA7,0x08],
      [0xA8,0x24],
      [0xA9,0x04],
      [0xAA,0x1E],
      [0xAB,0x1E],
      [0xCC,0x19],
      [0xCD,0x0B],
      [0xCE,0x13],
      [0xCF,0x64],
      [0xD0,0x21],
      [0xD1,0x0F],
      [0xD2,0x88],
      [0xE0,0x01],
      [0xE1,0x04],
      [0xE2,0x41],
      [0xE3,0xD6],
      [0xE4,0x00],
      [0xE5,0x0C],
      [0xE6,0x0A],
      [0xE7,0x00],
      [0xE8,0x00],
      [0xE9,0x00],
      [0xEE,0x07],
      [0xEF,0x01],
      [0x00,0x1E],
      [0x01,0x1E],
      [0x02,0x0F],
      [0x03,0x10],
      [0x04,0x02],
      [0x05,0x00],
      [0x06,0xB0],
      [0x07,0x04],
      [0x08,0x0D],
      [0x09,0x0E],
      [0x0A,0x9C],
      [0x0B,0x04],
      [0x0C,0x05],
      [0x0D,0x0F],
      [0x0E,0x02],
      [0x0F,0x12],
      [0x10,0x02],
      [0x11,0x02],
      [0x12,0x00],
      [0x13,0x01],
      [0x14,0x05],
      [0x15,0x07],
      [0x16,0x05],
      [0x17,0x07],
      [0x18,0x01],
      [0x19,0x04],
      [0x1A,0x05],
      [0x1B,0x0C],
      [0x1C,0x2A],
      [0x1D,0x01],
      [0x1E,0x00],
      [0x21,0x00],
      [0x22,0x00],
      [0x23,0x00],
      [0x25,0x01],
      [0x26,0x00],
      [0x27,0x39],
      [0x28,0x7F],
      [0x29,0x08],
      [0x30,0x03],
      [0x31,0x00],
      [0x32,0x1A],
      [0x33,0x1A],
      [0x34,0x07],
      [0x35,0x07],
      [0x36,0x01],
      [0x37,0xFF],
      [0x38,0x36],
      [0x39,0x07],
      [0x3A,0x00],
      [0x3E,0xFF],
      [0x3F,0x00],
      [0x40,0x77],
      [0x41,0x40],
      [0x42,0x00],
      [0x43,0x30],
      [0x44,0xA0],
      [0x45,0x5C],
      [0x46,0x00],
      [0x47,0x00],
      [0x48,0x58],
      [0x4A,0x1E],
      [0x4B,0x1E],
      [0x4C,0x00],
      [0x4D,0x00],
      [0x4E,0xA0],
      [0x4F,0x80],
      [0x50,0x00],
      [0x51,0x00],
      [0x52,0x00],
      [0x53,0x00],
      [0x54,0x00],
      [0x57,0x80],
      [0x59,0x10],
      [0x5A,0x08],
      [0x5B,0x94],
      [0x5C,0xE8],
      [0x5D,0x08],
      [0x5E,0x3D],
      [0x5F,0x99],
      [0x60,0x45],
      [0x61,0x40],
      [0x63,0x2D],
      [0x64,0x02],
      [0x65,0x96],
      [0x66,0x00],
      [0x67,0x97],
      [0x68,0x01],
      [0x69,0xCD],
      [0x6A,0x01],
      [0x6B,0xB0],
      [0x6C,0x04],
      [0x6D,0x2C],
      [0x6E,0x01],
      [0x6F,0x32],
      [0x71,0x00],
      [0x72,0x01],
      [0x73,0x35],
      [0x74,0x00],
      [0x75,0x33],
      [0x76,0x31],
      [0x77,0x01],
      [0x7C,0x84],
      [0x7D,0x03],
      [0x7E,0x01])

 #Enable debug message
 debug=0

 #Initialize the sensors
 def init(self):
  time.sleep(.001)
  self.paj7620SelectBank(self.BANK0)
  self.paj7620SelectBank(self.BANK0)

  data0 = self.paj7620ReadReg(0, 1)[0]
  data1 = self.paj7620ReadReg(1, 1)[0]
  if self.debug:
   print("data0:",data0,"data1:",data1)
  if data0 != 0x20  :#or data1 <> 0x76:
   print("Error with sensor")
   #return 0xff
  if data0 == 0x20:
   print("wake-up finish.")

  for i in range(len(self.initRegisterArray)):
   self.paj7620WriteReg(self.initRegisterArray[i][0],self.initRegisterArray[i][1])

  self.paj7620SelectBank(self.BANK0)

  print("Paj7620 initialize register finished.")

 #Write a byte to a register on the Gesture sensor
 def paj7620WriteReg(self,addr,cmd):
  bus.write_word_data(self.PAJ7620_ID, addr, cmd)

 #Select a register bank on the Gesture Sensor
 def paj7620SelectBank(self,bank):
  if bank==self.BANK0:
   self.paj7620WriteReg(self.PAJ7620_REGITER_BANK_SEL, self.PAJ7620_BANK0)

 #Read a block of bytes of length "qty" starting at address "addr" from the Gesture sensor
 def paj7620ReadReg(self,addr,qty):
  return bus.read_i2c_block_data(self.PAJ7620_ID, addr,qty)

 #Print the values from the gesture sensor
 def print_gesture(self):
  data=self.paj7620ReadReg(0x43,1)[0]
  if data==self.GES_RIGHT_FLAG:
   time.sleep(self.GES_ENTRY_TIME)
   data=self.paj7620ReadReg(0x43, 1)[0]
   if data == self.GES_FORWARD_FLAG:
    print("Forward")
    time.sleep(self.GES_QUIT_TIME)
   elif data == self.GES_BACKWARD_FLAG:
    print("Backward")
    time.sleep(self.GES_QUIT_TIME)
   else:
    print("Right")

  elif data==self.GES_LEFT_FLAG:
   time.sleep(self.GES_ENTRY_TIME)
   data=self.paj7620ReadReg(0x43, 1)[0]
   if data == self.GES_FORWARD_FLAG:
    print("Forward")
    time.sleep(self.GES_QUIT_TIME)
   elif data == self.GES_BACKWARD_FLAG:
    print("Backward")
    time.sleep(self.GES_QUIT_TIME)
   else:
    print("Left")

  elif data==self.GES_UP_FLAG:
   time.sleep(self.GES_ENTRY_TIME)
   data=self.paj7620ReadReg(0x43, 1)[0]
   if data == self.GES_FORWARD_FLAG:
    print("Forward")
    time.sleep(self.GES_QUIT_TIME)
   elif data == self.GES_BACKWARD_FLAG:
    print("Backward")
    time.sleep(self.GES_QUIT_TIME)
   else:
    print("Up")

  elif data==self.GES_DOWN_FLAG:
   time.sleep(self.GES_ENTRY_TIME)
   data=self.paj7620ReadReg(0x43, 1)[0]
   if data == self.GES_FORWARD_FLAG:
    print("Forward")
    time.sleep(self.GES_QUIT_TIME)
   elif data == self.GES_BACKWARD_FLAG:
    print("Backward")
    time.sleep(self.GES_QUIT_TIME)
   else:
    print("Down")

  elif data==self.GES_FORWARD_FLAG:
   print("Forward")
   time.sleep(self.GES_QUIT_TIME)

  elif data==self.GES_BACKWARD_FLAG:
   print("Backward")
   time.sleep(self.GES_QUIT_TIME)

  elif data==self.GES_CLOCKWISE_FLAG:
   print("Clockwise")

  elif data==self.GES_COUNT_CLOCKWISE_FLAG:
   print("anti-clockwise")

  else:
   data1=self.paj7620ReadReg(0x44, 1)[0]
   if (data1 == self.GES_WAVE_FLAG):
    print("wave")

 #Return a vlaue from the gestire sensor which can be used in a program
 #  0:nothing
 #  1:Forward
 #  2:Backward
 #  3:Right
 #  4:Left
 #  5:Up
 #  6:Down
 #  7:Clockwise
 #  8:anti-clockwise
 #  9:wave
 def return_gesture(self):

  data=self.paj7620ReadReg(0x43,1)[0]
  if data==self.GES_RIGHT_FLAG:
   time.sleep(self.GES_ENTRY_TIME)
   data=self.paj7620ReadReg(0x43, 1)[0]
   if data == self.GES_FORWARD_FLAG:
    return 1
    time.sleep(self.GES_QUIT_TIME)
   elif data == self.GES_BACKWARD_FLAG:
    return 2
    time.sleep(self.GES_QUIT_TIME)
   else:
    return 3

  elif data==self.GES_LEFT_FLAG:
   time.sleep(self.GES_ENTRY_TIME)
   data=self.paj7620ReadReg(0x43, 1)[0]
   if data == self.GES_FORWARD_FLAG:
    return 1
    time.sleep(self.GES_QUIT_TIME)
   elif data == self.GES_BACKWARD_FLAG:
    return 2
    time.sleep(self.GES_QUIT_TIME)
   else:
    return 4

  elif data==self.GES_UP_FLAG:
   time.sleep(self.GES_ENTRY_TIME)
   data=self.paj7620ReadReg(0x43, 1)[0]
   if data == self.GES_FORWARD_FLAG:
    return 1
    time.sleep(self.GES_QUIT_TIME)
   elif data == self.GES_BACKWARD_FLAG:
    return 2
    time.sleep(self.GES_QUIT_TIME)
   else:
    return 5

  elif data==self.GES_DOWN_FLAG:
   time.sleep(self.GES_ENTRY_TIME)
   data=self.paj7620ReadReg(0x43, 1)[0]
   if data == self.GES_FORWARD_FLAG:
    return 1
    time.sleep(self.GES_QUIT_TIME)
   elif data == self.GES_BACKWARD_FLAG:
    return 2
    time.sleep(self.GES_QUIT_TIME)
   else:
    return 6

  elif data==self.GES_FORWARD_FLAG:
   return 1
   time.sleep(self.GES_QUIT_TIME)

  elif data==self.GES_BACKWARD_FLAG:
   return 2
   time.sleep(self.GES_QUIT_TIME)

  elif data==self.GES_CLOCKWISE_FLAG:
   return 7

  elif data==self.GES_COUNT_CLOCKWISE_FLAG:
   return 8

  else:
   data1=self.paj7620ReadReg(0x44, 1)[0]
   if (data1 == self.GES_WAVE_FLAG):
    return 9
  return 0

if __name__ == "__main__":
 g=gesture()
 g.init()
 while True:
  g.print_gesture()
  time.sleep(.1)
  # print g.return_gesture()
  # time.sleep(.1)
Se tudo correr bem, você verá o seguinte resultado
pi@raspberrypi:~/grove.py/grove $ python3 grove_gesture_sensor.py
wake-up finish.
Paj7620 initialize register finished.
Left
Forward
Left
Backward
Right
Up
Down
Você pode sair deste programa simplesmente pressionando ++ctrl+c++.
Se você usar a ferramenta I2C para escanear o endereço I2C do módulo Grove, poderá encontrar dois ou mais endereços. 0x04 é o endereço do Grove Base Hat for Raspberry Pi.
Brincar com Raspberry Pi (com GrovePi_Plus)
Hardware
- Passo 1. Prepare os seguintes itens:
| Raspberry pi | GrovePi_Plus | Grove-Gesture_v1.0 |
|---|---|---|
|  | |
| Adquira agora | Adquira agora | Adquira agora |
- Passo 2. Conecte o GrovePi_Plus ao Raspberry.
- Passo 3. Conecte o Grove-Gesture_v1.0 à porta I2C do GrovePi_Plus.
- Passo 4. Conecte o Raspberry ao PC através do cabo USB.

Software
- Passo 1. Siga Setting Software para configurar o ambiente de desenvolvimento.
- Passo 2. Faça o git clone do repositório do Github.
cd ~
git clone https://github.com/DexterInd/GrovePi.git
- Passo 3. Execute os comandos abaixo para usar este sensor
cd ~/GrovePi/Software/Python/grove_gesture_sensor
python3 gesture_value.py
Aqui está o código de gesture_value.py
#!/usr/bin/env python
#
# GrovePi Example for using the Grove - Gesture Sensor v1.0(https://www.seeedstudio.com/depot/Grove-Gesture-p-2463.html)
#
# This example returns a value when a user does an action over the sensor
#
# The GrovePi connects the Raspberry Pi and Grove sensors.  You can learn more about GrovePi here:  http://www.dexterindustries.com/GrovePi
#
# Have a question about this example?  Ask on the forums here:  http://forum.dexterindustries.com/c/grovepi
#
'''
## License
The MIT License (MIT)
GrovePi for the Raspberry Pi: an open source platform for connecting Grove Sensors to the Raspberry Pi.
Copyright (C) 2017  Dexter Industries
Permission is hereby granted, free of charge, to any person obtaining a copy
of this software and associated documentation files (the "Software"), to deal
in the Software without restriction, including without limitation the rights
to use, copy, modify, merge, publish, distribute, sublicense, and/or sell
copies of the Software, and to permit persons to whom the Software is
furnished to do so, subject to the following conditions:
The above copyright notice and this permission notice shall be included in
all copies or substantial portions of the Software.
THE SOFTWARE IS PROVIDED "AS IS", WITHOUT WARRANTY OF ANY KIND, EXPRESS OR
IMPLIED, INCLUDING BUT NOT LIMITED TO THE WARRANTIES OF MERCHANTABILITY,
FITNESS FOR A PARTICULAR PURPOSE AND NONINFRINGEMENT. IN NO EVENT SHALL THE
AUTHORS OR COPYRIGHT HOLDERS BE LIABLE FOR ANY CLAIM, DAMAGES OR OTHER
LIABILITY, WHETHER IN AN ACTION OF CONTRACT, TORT OR OTHERWISE, ARISING FROM,
OUT OF OR IN CONNECTION WITH THE SOFTWARE OR THE USE OR OTHER DEALINGS IN
THE SOFTWARE.
'''

import grove_gesture_sensor
import time

g=grove_gesture_sensor.gesture()
g.init()
while True:
 gest=g.return_gesture()
 #Match the gesture
 if gest==g.FORWARD:
  print("FORWARD")
 elif gest==g.BACKWARD:
  print("BACKWARD")
 elif gest==g.RIGHT:
  print("RIGHT")
 elif gest==g.LEFT:
  print("LEFT")
 elif gest==g.UP:
  print("UP")
 elif gest==g.DOWN:
  print("DOWN")
 elif gest==g.CLOCKWISE:
  print("CLOCKWISE")
 elif gest==g.ANTI_CLOCKWISE:
  print("ANTI_CLOCKWISE")
 elif gest==g.WAVE:
  print("WAVE")
 elif gest==0:
  print("-")
 else:
  print("Error")
 time.sleep(.1)
- Passo 4. Aqui está a saída da tela.
pi@raspberrypi:~/Dexter/GrovePi/Software/Python/grove_gesture_sensor $ python3 gesture_value.py
wake-up finish.
Paj7620 initialize register finished.

-
-
DOWN
-
-
LEFT
-
-
-
-
UP
-
-
-
-
RIGHT
-
-
UP
-
-
CLOCKWISE
-
-
CLOCKWISE
Referências
Nós definimos alguns dados de registrador de gestos, consulte a tabela a seguir.
| Gesto | Dados do Registrador | Endereço do Registrador | Se Sim | Se Não |
|---|---|---|---|---|
| Up | data==GES_UP_FLAG | 0x43 | Gesto detectado | Nenhum gesto detectado |
| Down | data==GES_DOWN_FLAG | 0x43 | Gesto detectado | Nenhum gesto detectado |
| Left | data==GES_LEFT_FLAG | 0x43 | Gesto detectado | Nenhum gesto detectado |
| Right | data==GES_RIGHT_FLAG | 0x43 | Gesto detectado | Nenhum gesto detectado |
| Forward | data==GES_FORWARD_FLAG | 0x43 | Gesto detectado | Nenhum gesto detectado |
| Backward | data==GES_BACKWARD_FLAG | 0x43 | Gesto detectado | Nenhum gesto detectado |
| Clockwise | data==GES_CLOCKWISE_FLAG | 0x43 | Gesto detectado | Nenhum gesto detectado |
| Count Clockwise | data==GES_COUNT_CLOCKWISE_FLAG | 0x43 | Gesto detectado | Nenhum gesto detectado |
| Wave | data==GES_WAVE_FLAG | 0x44 | Gesto detectado | Nenhum gesto detectado |
Visualizador de Esquemático Online
Recursos
- [ZIP] Grove - Gesture_v1.0 sch pcb.zip
- [Datasheet] PAJ7620U2_Datasheet_V0.8_20140611.pdf
- [Datasheet] PAJ7620U2_DS_v1.5_05012022_Confidential.pdf
- [Library] Library Grove - Guesture
- [Codecraft] CDC File
Projeto
Oficina de Upcycling na Seeed x.factory [Episódio 1]: No último fim de semana, tivemos uma incrível oficina de hacking de upcycling com 20 makers, designers e engenheiros da comunidade reunidos na x.factory (eu até a listei como minha oficina favorita!).

Jesty - Controle seu PC com Gestos: Controle um PC com um sensor de gestos, associando uma tecla ou um clique do mouse a cada gesto.
PHPoC - Controle Pan-Tilt via Gesto de Mão: Uma maneira interessante de controlar seu robô: via gesto de mão
Suporte Técnico & Discussão sobre o Produto
Obrigado por escolher nossos produtos! Estamos aqui para fornecer a você diferentes formas de suporte para garantir que sua experiência com nossos produtos seja a mais tranquila possível. Oferecemos vários canais de comunicação para atender a diferentes preferências e necessidades.