Adicione Interação por Voz ao Seu Robô LeKiwi com reSpeaker
Visão geral

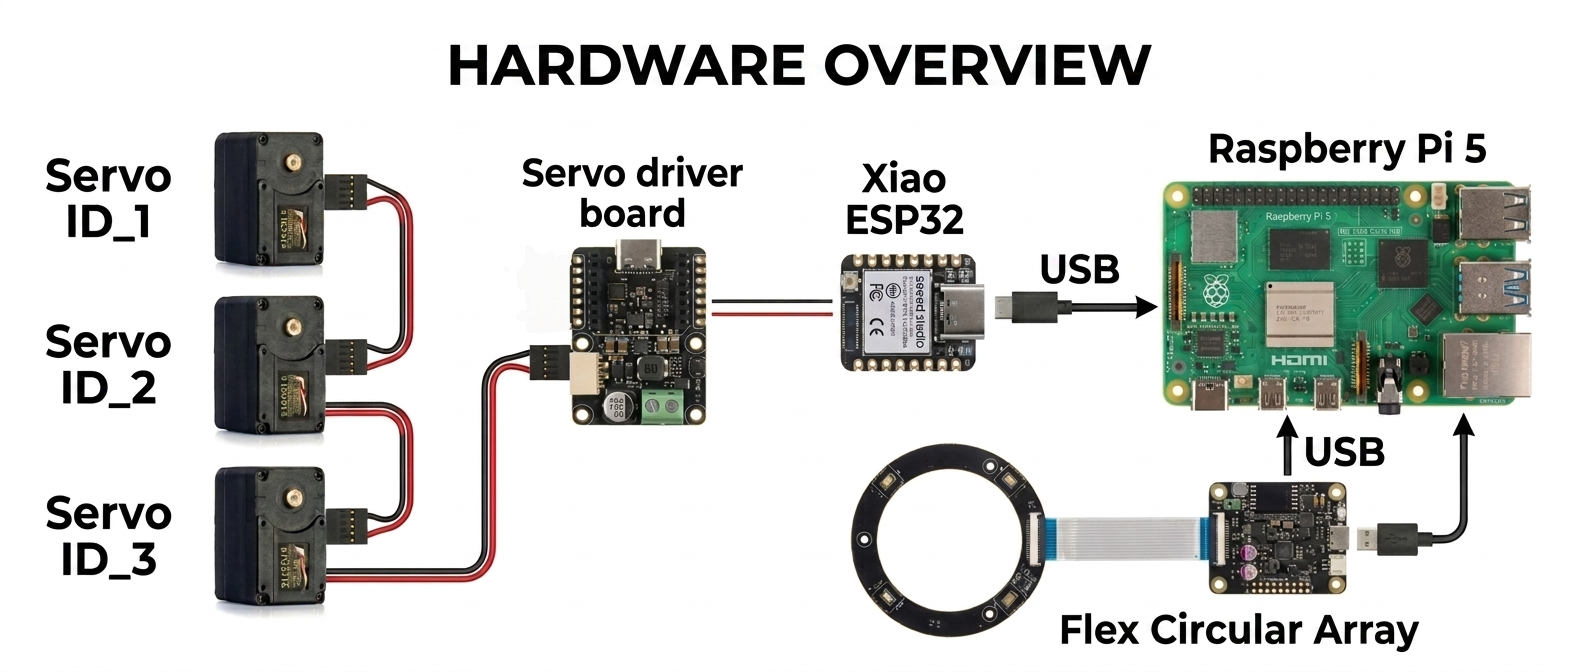
Controle um robô Kiwi-drive de 3 rodas com a sua voz! Este projeto combina um Seeed Studio XIAO ESP32 (controlador de motor) com um Raspberry Pi (cérebro de processamento de voz), aprimorado pelo reSpeaker para captura de áudio de alta qualidade e Voice Embeddings para uma interação por voz mais inteligente e personalizada. Usando comandos em linguagem natural, você pode dirigir, virar e controlar o robô totalmente sem usar as mãos, com precisão e capacidade de resposta aprimoradas.
Hardware necessário
| Kit LeKiwi | XIAO ESP32S3 | Raaspberry pi 5 |
|---|---|---|
 |  |  |
| reSpeaker Flex XVF3800 Circular | reSpeaker XVF3800 | |
|---|---|---|
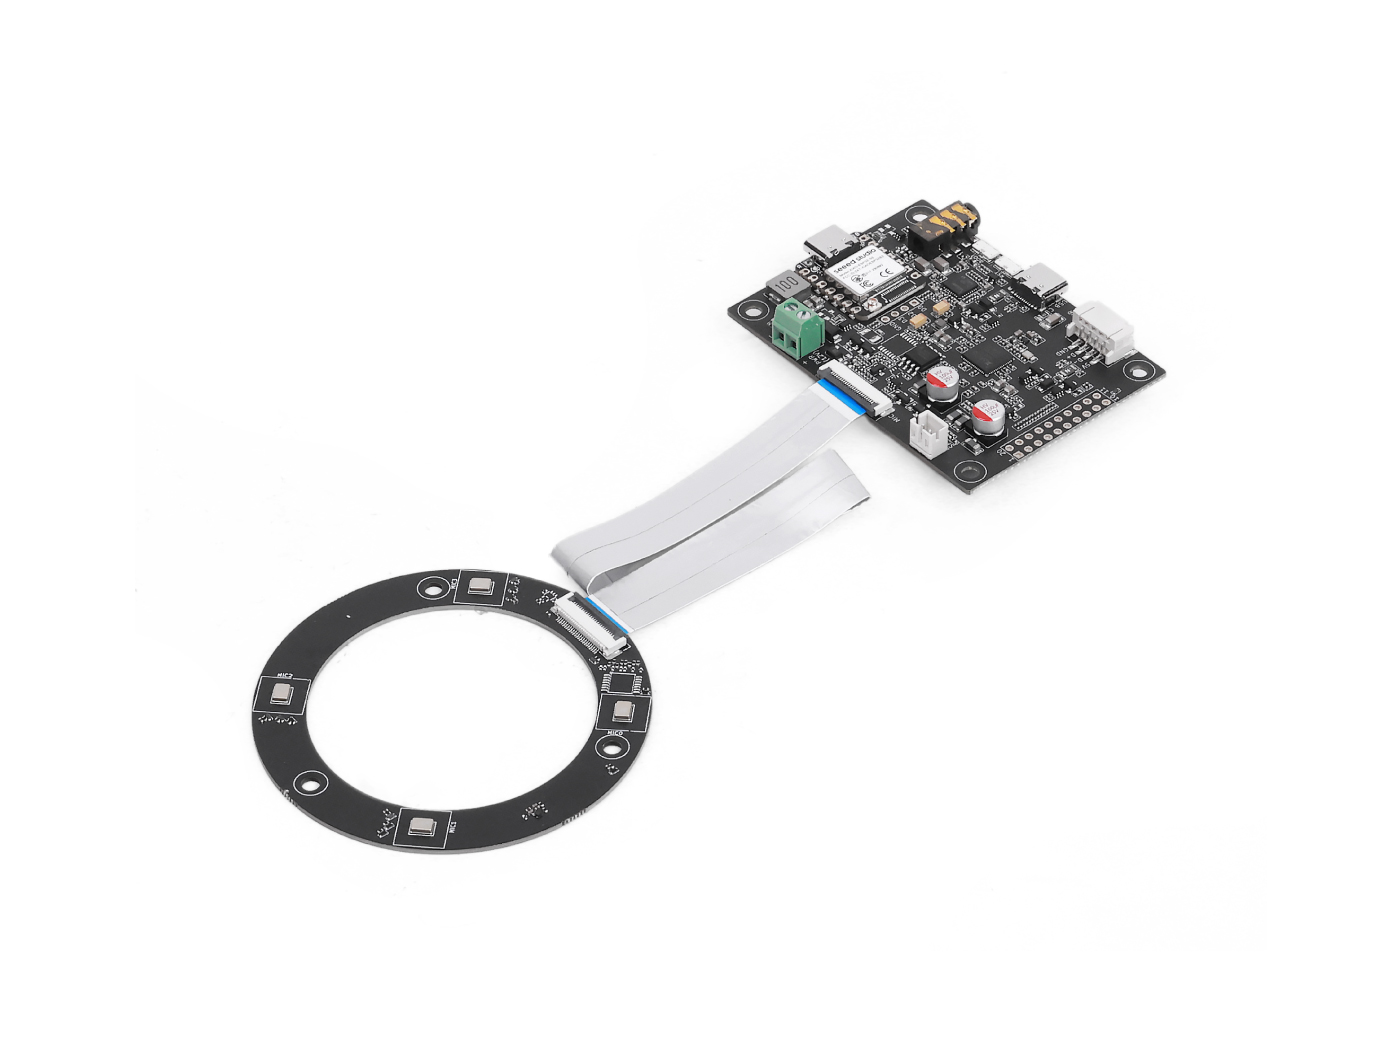 | OU | 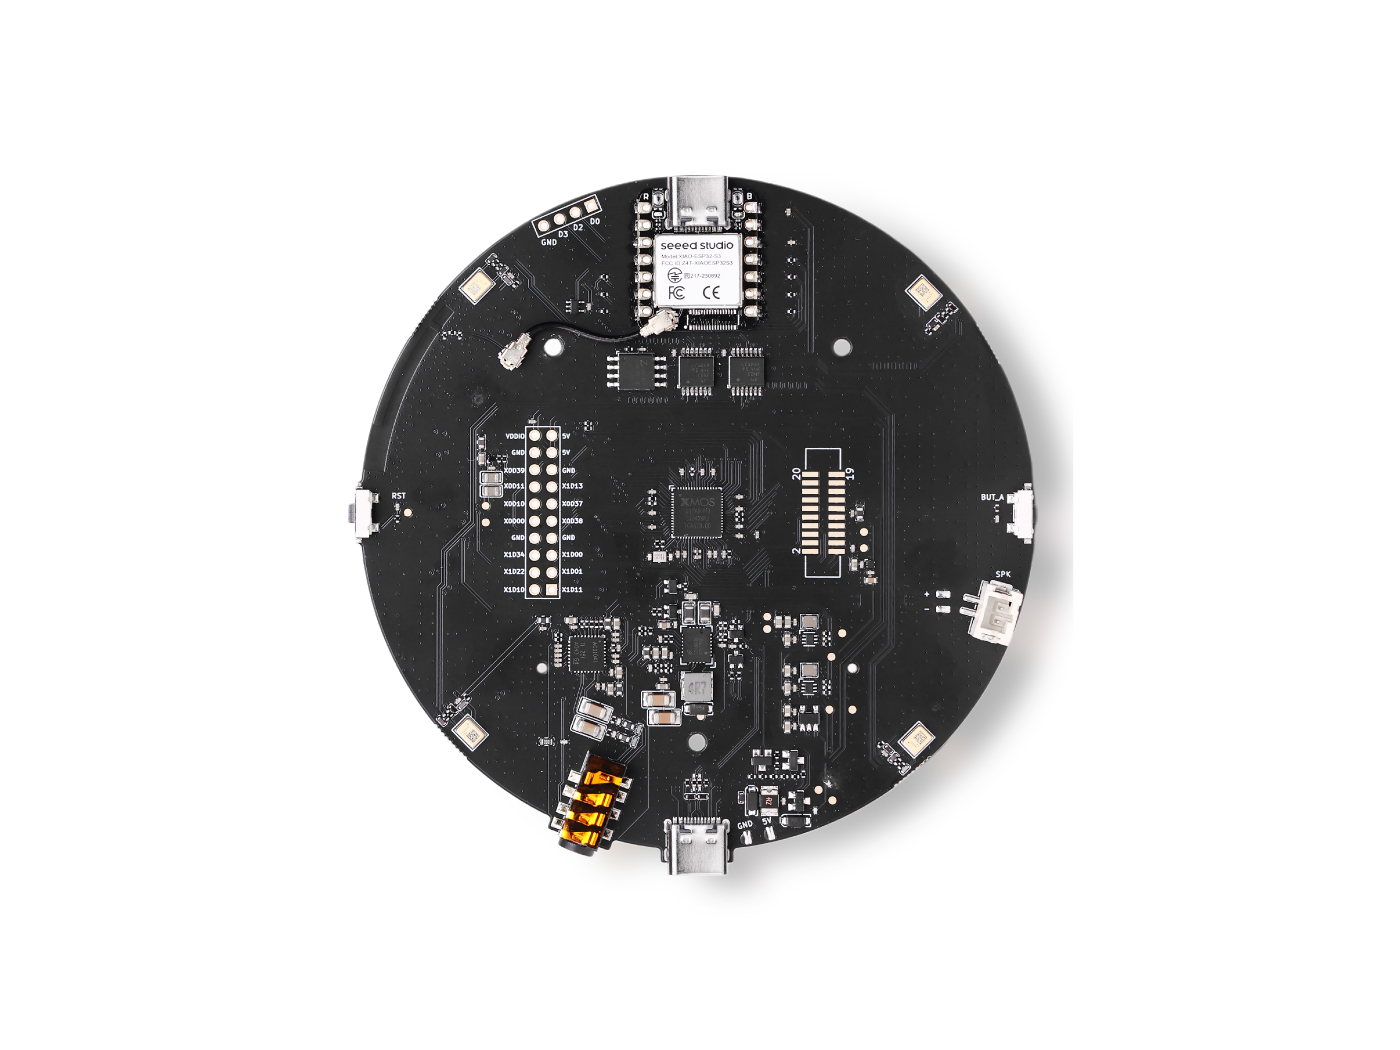 |
Serviços
- Conta do Groq: o nível gratuito é suficiente para começar
Como funciona
You speak → Wake word detected → Audio recorded → Whisper STT → LLaMA LLM → Orpheus TTS speaks back → ESP32 moves the robot
- Você diz a palavra de ativação (padrão: "Hey Jarvis")
- O Raspberry Pi grava o seu comando
- Groq Whisper transcreve sua fala para texto
- LLaMA 3 decide qual ação o robô deve executar
- Groq Orpheus TTS fala uma resposta em voz alta
- Um comando serial é enviado para o ESP32, que aciona os motores
Prepare o XIAO ESP32 (Controlador de Motor)
O ESP32 executa o sketch Arduino que aciona fisicamente as três rodas usando cinemática Kiwi-drive. Ele recebe comandos seriais de um único caractere (w, s, a, d, etc.) do Raspberry Pi e os traduz em velocidades de motor coordenadas.
Etapa 1 — Definir IDs dos motores
O sketch espera servos com IDs 1, 2, 3. Antes de montar o seu robô, conecte cada servo individualmente e atribua o ID correto usando a ferramenta de configuração da Feetech.
Etapa 2 — Monte o LeKiwi
Siga o vídeo tutorial oficial da Seeed Studio para montar o chassi, fixar as rodas e ligar os servos:
Tutorial de montagem do LeKiwi
Você só precisa concluir a montagem física; pule quaisquer etapas sobre clonar o repositório LeRobot no GitHub, pois este projeto usa uma configuração diferente.
Etapa 3 — Envie o sketch Arduino
O sketch (lekiwi_motor_control.ino) faz o seguinte:
- Inicializa todos os três servos em modo de posição, centraliza-os e depois alterna para o modo de roda (rotação contínua)
- Escuta na porta serial USB por comandos de um único caractere
- Usa cinemática Kiwi-drive para calcular a velocidade correta para cada roda
- Oferece suporte apenas ao modo de impulso (curto pulso, depois parada automática) Referência de comandos seriais:
| Tecla | Ação |
|---|---|
w | Impulso para frente |
s | Impulso para trás |
a | Impulso de giro à esquerda |
d | Impulso de giro à direita |
q | Impulso de translação para a esquerda |
e | Impulso de translação para a direita |
x / Espaço | Parada de emergência |
+ / - | Aumentar / diminuir a duração do impulso |
* / / | Aumentar / diminuir a velocidade do impulso |
Envie o sketch via Arduino IDE com a biblioteca SCServo instalada. Abra o Monitor Serial em 115200 baud para verificar se todos os três servos respondem com OK.
Código Arduino
#include <SCServo.h>
#include <math.h>

// Serial port selection
#if defined(CONFIG_IDF_TARGET_ESP32C3) || \
    defined(CONFIG_IDF_TARGET_ESP32C6) || \
    defined(CONFIG_IDF_TARGET_ESP32S3)
  #define COMSerial Serial0
#else
  #define COMSerial Serial1
#endif

#define S_RXD D7
#define S_TXD D6

SMS_STS st;
#define SERVO_NUM 3
byte ID[SERVO_NUM] = {1, 2, 3};

// Kiwi drive wheel angles (90°, 210°, 330°)
const float WHEEL_ANGLE_DEG[SERVO_NUM] = {90.0f, 210.0f, 330.0f};

// Base speed (0-3000 for STS3215 in wheel mode)
int BASE_SPEED = 1000;

// Nudge parameters
int NUDGE_DURATION = 1500;  // milliseconds to move
int NUDGE_SPEED = 800;     // speed during nudge

#define REG_OPERATING_MODE 33

void enableWheelMode(byte servoID) {
  // Unlock EEPROM
  st.unLockEprom(servoID);
  delay(10);

  // Set wheel mode (value 1 for continuous rotation mode)
  st.writeByte(servoID, REG_OPERATING_MODE, 1);
  delay(10);

  // Lock EEPROM
  st.LockEprom(servoID);
  delay(10);

  // IMPORTANT: Enable torque after mode change
  st.EnableTorque(servoID, 1);
  delay(10);

  Serial.print("Servo "); Serial.print(servoID);
  Serial.println(" configured for wheel mode with torque enabled");
}

void setWheelSpeeds(float vx, float vy, float omega) {
  for (int i = 0; i < SERVO_NUM; i++) {
    float rad = WHEEL_ANGLE_DEG[i] * (PI / 180.0f);

    // Kiwi kinematics formula
    float speed = -sin(rad) * vx + cos(rad) * vy + omega;

    // Scale to servo speed range (-3000 to +3000)
    int spdInt = (int)(speed * BASE_SPEED);

    // Clamp to valid range
    if (spdInt > 3000) spdInt = 3000;
    if (spdInt < -3000) spdInt = -3000;

    // WriteSpe expects (id, speed) - only 2 parameters!
    st.WriteSpe(ID[i], spdInt);
  }
}

void nudgeRobot(float vx, float vy, float omega) {
  // Calculate temporary speeds using nudge speed instead of base speed
  int originalBaseSpeed = BASE_SPEED;
  BASE_SPEED = NUDGE_SPEED;

  // Apply movement
  setWheelSpeeds(vx, vy, omega);

  // Wait for nudge duration
  delay(NUDGE_DURATION);

  // Stop all motors
  stopAll();

  // Restore original base speed
  BASE_SPEED = originalBaseSpeed;
}

void stopAll() {
  for (int i = 0; i < SERVO_NUM; i++) {
    st.WriteSpe(ID[i], 0);
  }
  Serial.println("Motors stopped");
}

void initializeServosToPositionMode() {
  Serial.println(F("Setting servos to position mode for initial positioning..."));

  for (int i = 0; i < SERVO_NUM; i++) {
    // Unlock EEPROM
    st.unLockEprom(ID[i]);
    delay(10);

    // Set position mode (value 0)
    st.writeByte(ID[i], REG_OPERATING_MODE, 0);
    delay(10);

    // Lock EEPROM
    st.LockEprom(ID[i]);
    delay(10);

    // Enable torque
    st.EnableTorque(ID[i], 1);
    delay(10);
  }

  delay(500);

  Serial.println(F("Moving all servos to center position (2048)..."));

  // Move all servos to center position
  u16 Speed[SERVO_NUM] = {1500, 1500, 1500};
  byte ACC[SERVO_NUM] = {50, 50, 50};
  s16 Pos[SERVO_NUM] = {2048, 2048, 2048};

  st.SyncWritePosEx(ID, SERVO_NUM, Pos, Speed, ACC);
  delay(2000); // Wait for movement to complete

  Serial.println(F("Servos positioned. Switching to wheel mode..."));

  // Now switch to wheel mode
  for (int i = 0; i < SERVO_NUM; i++) {
    enableWheelMode(ID[i]);
    delay(50);
  }
}

void printHelp() {
  Serial.println(F("\n====== LeKiwi Nudge Control ======"));
  Serial.println(F("Each key press gives a short 'nudge' movement"));
  Serial.println(F(" w = Forward nudge"));
  Serial.println(F(" s = Backward nudge"));
  Serial.println(F(" a = Turn LEFT nudge"));
  Serial.println(F(" d = Turn RIGHT nudge"));
  Serial.println(F(" q = Strafe LEFT nudge"));
  Serial.println(F(" e = Strafe RIGHT nudge"));
  Serial.println(F(" x = STOP (emergency)"));
  Serial.println(F(""));
  Serial.println(F("Continuous movement mode:"));
  Serial.println(F(" SHIFT + key = Continuous movement"));
  Serial.println(F(" Example: Press 'W' (uppercase) = continuous forward"));
  Serial.println(F(""));
  Serial.println(F("Settings:"));
  Serial.println(F(" + = Increase nudge duration"));
  Serial.println(F(" - = Decrease nudge duration"));
  Serial.println(F(" * = Increase nudge speed"));
  Serial.println(F(" / = Decrease nudge speed"));
  Serial.println(F(" ? = Show this help"));
  Serial.println(F(""));
  Serial.print(F("Current nudge duration: "));
  Serial.print(NUDGE_DURATION);
  Serial.println(F(" ms"));
  Serial.print(F("Current nudge speed: "));
  Serial.println(NUDGE_SPEED);
  Serial.println(F("==================================="));
}

void setup() {
  Serial.begin(115200);
  delay(1500);
  Serial.println(F("LeKiwi Nudge Control boot..."));

  // Start servo bus with explicit pins
  COMSerial.begin(1000000, SERIAL_8N1, S_RXD, S_TXD);
  st.pSerial = &COMSerial;
  delay(500);

  Serial.println(F("Checking servos..."));
  bool allServosFound = true;

  for (int i = 0; i < SERVO_NUM; i++) {
    if (st.Ping(ID[i]) != -1) {
      Serial.print(F("Servo "));
      Serial.print(ID[i]);
      Serial.println(F(" OK"));
    } else {
      Serial.print(F("ERROR: Servo "));
      Serial.print(ID[i]);
      Serial.println(F(" not found!"));
      allServosFound = false;
    }
    delay(100);
  }

  if (!allServosFound) {
    Serial.println(F("Some servos not found. Check connections and power!"));
    while(1) { delay(1000); } // Halt if servos not found
  }

  // Initialize servos to center position, then switch to wheel mode
  initializeServosToPositionMode();

  Serial.println(F("\nSystem ready! Press keys for nudge movement."));
  Serial.println(F("(Each key press moves the robot a short distance)\n"));

  printHelp();
}

void loop() {
  if (!Serial.available()) return;

  char cmd = (char)Serial.read();
  bool isShifted = false;

  // Check for uppercase (SHIFT key in terminal)
  if (cmd >= 'A' && cmd <= 'Z') {
    isShifted = true;
  }

  // Flush any trailing characters
  while (Serial.available() && (Serial.peek() == '\n' || Serial.peek() == '\r')) {
    Serial.read();
  }

  // Process movement commands
  switch (cmd) {
    case 'w':
      if (isShifted) {
        setWheelSpeeds(0, 1, 0);
        Serial.println(F("Continuous Forward"));
      } else {
        Serial.println(F("Nudge Forward"));
        nudgeRobot(0, 1, 0);
      }
      break;

    case 's':
      if (isShifted) {
        setWheelSpeeds(0, -1, 0);
        Serial.println(F("Continuous Backward"));
      } else {
        Serial.println(F("Nudge Backward"));
        nudgeRobot(0, -1, 0);
      }
      break;

    case 'q':
      if (isShifted) {
        setWheelSpeeds(-1, 0, 0);
        Serial.println(F("Continuous Strafe Left"));
      } else {
        Serial.println(F("Nudge Strafe Left"));
        nudgeRobot(-1, 0, 0);
      }
      break;

    case 'e':
      if (isShifted) {
        setWheelSpeeds(1, 0, 0);
        Serial.println(F("Continuous Strafe Right"));
      } else {
        Serial.println(F("Nudge Strafe Right"));
        nudgeRobot(1, 0, 0);
      }
      break;

    case 'a':
      if (isShifted) {
        setWheelSpeeds(0, 0, 1);
        Serial.println(F("Continuous Turn Left"));
      } else {
        Serial.println(F("Nudge Turn Left"));
        nudgeRobot(0, 0, 1);
      }
      break;

    case 'd':
      if (isShifted) {
        setWheelSpeeds(0, 0, -1);
        Serial.println(F("Continuous Turn Right"));
      } else {
        Serial.println(F("Nudge Turn Right"));
        nudgeRobot(0, 0, -1);
      }
      break;

    case 'x': case 'X': case ' ':
      stopAll();
      Serial.println(F("Emergency Stop"));
      break;

    case '+':
      NUDGE_DURATION = min(NUDGE_DURATION + 50, 1000);
      Serial.print(F("Nudge duration: "));
      Serial.print(NUDGE_DURATION);
      Serial.println(F(" ms"));
      break;

    case '-':
      NUDGE_DURATION = max(NUDGE_DURATION - 50, 50);
      Serial.print(F("Nudge duration: "));
      Serial.print(NUDGE_DURATION);
      Serial.println(F(" ms"));
      break;

    case '*':
      NUDGE_SPEED = min(NUDGE_SPEED + 100, 2000);
      Serial.print(F("Nudge speed: "));
      Serial.println(NUDGE_SPEED);
      break;

    case '/':
      NUDGE_SPEED = max(NUDGE_SPEED - 100, 200);
      Serial.print(F("Nudge speed: "));
      Serial.println(NUDGE_SPEED);
      break;

    case '?':
      printHelp();
      break;
  }
}
Prepare o Raspberry Pi (Cérebro de Voz)
Etapa 1 — Obtenha uma chave de API Groq
- Registre-se em console.groq.com
- Crie uma nova chave de API e copie-a — você vai precisar dela na Etapa 4
Etapa 2 — Clone este repositório
git clone https://github.com/KasunThushara/Lekiwi-voice
cd Lekiwi-voice
Etapa 3 — Crie um ambiente virtual
python3 -m venv venv
source venv/bin/activate
Execute
source venv/bin/activatesempre que abrir um novo terminal antes de usar este projeto.
Etapa 4 — Instale as dependências
pip install -r requirements.txt
Em seguida, baixe o modelo de palavra de ativação:
python3 download_model.py
Isso baixa o modelo pré-treinado "Hey Jarvis" (e outros) do openwakeword em ~/.openwakeword/.
Etapa 5 — Encontre o índice do seu microfone
Conecte seu reSpeaker via USB e, em seguida, execute:
python3 list_mics.py
Você verá uma lista como:
Available audio INPUT devices:

  [0] bcm2835 Headphones  (rate=44100Hz)
  [1] ReSpeaker 4 Mic Array  (rate=16000Hz)
  [2] USB PnP Sound Device  (rate=16000Hz)
Anote o número entre colchetes ao lado do seu ReSpeaker — esse é o seu MIC_INDEX.
Etapa 6 — Encontre a porta serial do seu ESP32
Conecte o XIAO ESP32 ao Pi via USB e, em seguida, execute:
python3 list_ports.py
Exemplo de saída:
Available serial ports:

  /dev/ttyACM0         USB Serial Device
  /dev/ttyUSB0         CP2102 USB to UART Bridge
Anote o caminho do dispositivo (geralmente /dev/ttyACM0 para XIAO).
Etapa 7 — Configure o projeto
Copie o arquivo de configuração de exemplo e preencha com seus valores:
cp config.env.example config.env
nano config.env
As principais configurações a serem atualizadas:
# Your Groq API key (required)
GROQ_API_KEY=gsk_xxxxxxxxxxxxxxxxxxxxxxxx

# The number from list_mics.py
MIC_INDEX=1

# The port from list_ports.py
SERIAL_PORT=/dev/ttyACM0
Todo o resto pode ser deixado no padrão para começar.
Execute o robô
Certifique-se de que seu ambiente virtual esteja ativo e, em seguida:
python3 pipeline.py
Você deverá ver:
======================================================
  LeKiwi Voice Controller — Ready
  Wake word  : hey jarvis
  LLM model  : llama-3.1-8b-instant
  STT model  : whisper-large-v3-turbo
  TTS voice  : autumn
  Serial     : /dev/ttyACM0 @ 115200
======================================================
[WakeWord] Listening for 'hey jarvis' ...
Agora diga "Hey Jarvis" e dê um comando de movimento!
Comandos de exemplo
"Hey Jarvis, move forward"
"Hey Jarvis, turn left"
"Hey Jarvis, strafe right"
"Hey Jarvis, stop"
"Hey Jarvis, what can you do?"
Suporte técnico e discussão sobre o produto
Obrigado por escolher nossos produtos! Estamos aqui para oferecer diferentes tipos de suporte para garantir que sua experiência com nossos produtos seja a mais tranquila possível. Oferecemos vários canais de comunicação para atender a diferentes preferências e necessidades.