Usar docker no reComputer
Introdução

Este wiki explica como usar o docker na caixa reComputer. Docker é uma plataforma de código aberto usada para automatizar a implantação, o dimensionamento e o gerenciamento de aplicações dentro de contêineres leves e portáteis. Os contêineres permitem que desenvolvedores empacotem aplicações e suas dependências em um ambiente consistente, garantindo que elas sejam executadas sem problemas em diferentes ambientes de computação.
Preparar hardware
| reComputer R1125 | reComputer AI R2130 | reComputer AI Industrial R2145 |
|---|---|---|
 |  |  |
| reComputer Industrial R20xx | reComputer Industrial R21xx |
|---|---|
 |  |
Preparar software
Atualizar o sistema
sudo date -s "$(wget -qSO- --max-redirect=0 google.com 2>&1 | grep Date: | cut -d' ' -f5-8)Z"
sudo apt update
sudo apt full-upgrade
Instalar docker
curl -fsSL https://get.docker.com -o get-docker.sh
sudo sh get-docker.sh
Adicionar o usuário atual ao grupo docker
sudo usermod -aG docker $USER
reboot
Verificar a versão do docker
docker --version
O resultado é o seguinte:

Usar docker
Criar seu projeto
Aqui, usamos my_app como exemplo para demonstrar o uso do docker.
mkdir my_app
cd my_app
Criar pasta src e criar main.py
mkdir src && cd src
nano main.py
main.py
from fastapi import FastAPI, Request
from fastapi.responses import HTMLResponse
from fastapi.staticfiles import StaticFiles
from fastapi.templating import Jinja2Templates
import os

app = FastAPI()

# Create directories if they don't exist
os.makedirs("static", exist_ok=True)
os.makedirs("templates", exist_ok=True)

# Mount static files directory
app.mount("/static", StaticFiles(directory="static"), name="static")

# Set up Jinja2 templates
templates = Jinja2Templates(directory="templates")

@app.get("/", response_class=HTMLResponse)
async def read_root(request: Request):
    return templates.TemplateResponse("index.html", {"request": request})

@app.get("/items/{item_id}")
async def read_item(item_id: int, q: str = None):
    return {"item_id": item_id, "q": q}
Criar pasta static
cd .. && mkdir static
cd static
mkdir css && mkdir js
Criar arquivo css:
cd css
nano style.css
style.css
body {
    font-family: 'Roboto', sans-serif;
    margin: 0;
    padding: 0;
    background: linear-gradient(135deg, #667eea 0%, #764ba2 100%);
    min-height: 100vh;
    color: #333;
}

.container {
    max-width: 800px;
    margin: 0 auto;
    padding: 20px;
}

header {
    text-align: center;
    padding: 40px 0;
    color: white;
}

header h1 {
    font-size: 2.5rem;
    margin-bottom: 10px;
}

header p {
    font-size: 1.2rem;
    font-weight: 300;
}

main {
    display: flex;
    flex-direction: column;
    gap: 20px;
}

.card {
    background: white;
    border-radius: 10px;
    box-shadow: 0 4px 20px rgba(0, 0, 0, 0.1);
    padding: 25px;
    transition: transform 0.3s ease, box-shadow 0.3s ease;
}

.card:hover {
    transform: translateY(-5px);
    box-shadow: 0 6px 25px rgba(0, 0, 0, 0.15);
}

.card h2 {
    margin-top: 0;
    color: #667eea;
    display: flex;
    align-items: center;
    gap: 10px;
}

.card ul {
    padding-left: 20px;
}

.card li {
    margin-bottom: 10px;
    display: flex;
    align-items: center;
    gap: 10px;
}

.endpoint {
    display: flex;
    justify-content: space-between;
    align-items: center;
    background: #f8f9fa;
    padding: 15px;
    border-radius: 5px;
    margin-top: 10px;
}

.endpoint code {
    background: #e9ecef;
    padding: 5px 10px;
    border-radius: 3px;
    font-family: 'Courier New', monospace;
}

.button {
    background: #667eea;
    color: white;
    padding: 10px 20px;
    border-radius: 5px;
    text-decoration: none;
    font-weight: bold;
    transition: background 0.3s ease;
}

.button:hover {
    background: #5a6fd8;
}

footer {
    text-align: center;
    padding: 30px 0;
    color: white;
    font-weight: 300;
}

footer p {
    margin: 0;
}

footer i {
    color: #ff6b6b;
}
Então crie arquivo js:
cd .. && mkdir js
cd js
nano main.js
main.js
// Simple JavaScript to add interactivity to the UI
document.addEventListener('DOMContentLoaded', function() {
    // Add a click event listener to the "Try it" button
    const tryButton = document.querySelector('.button');
    if (tryButton) {
        tryButton.addEventListener('click', function(e) {
            // Add a simple animation effect
            this.style.transform = 'scale(0.95)';
            setTimeout(() => {
                this.style.transform = '';
            }, 100);
        });
    }

    // Add a hover effect to the cards
    const cards = document.querySelectorAll('.card');
    cards.forEach(card => {
        card.addEventListener('mouseenter', function() {
            this.style.transform = 'translateY(-5px)';
        });

        card.addEventListener('mouseleave', function() {
            this.style.transform = '';
        });
    });
});
Criar arquivo html
cd ../../
mkdir templates
nano index.html
index.html
<!DOCTYPE html>
<html lang="en">
<head>
    <meta charset="UTF-8">
    <meta name="viewport" content="width=device-width, initial-scale=1.0">
    <title>FastAPI App</title>
    <style>
        body {
            font-family: 'Segoe UI', Tahoma, Geneva, Verdana, sans-serif;
            max-width: 800px;
            margin: 0 auto;
            padding: 20px;
            background: linear-gradient(135deg, #667eea 0%, #764ba2 100%);
            min-height: 100vh;
            color: #333;
        }
        .container {
            background: white;
            border-radius: 10px;
            padding: 30px;
            box-shadow: 0 4px 20px rgba(0, 0, 0, 0.1);
            text-align: center;
        }
        h1 {
            color: #667eea;
        }
        .card {
            background: #f8f9fa;
            border-radius: 8px;
            padding: 20px;
            margin: 20px 0;
            box-shadow: 0 2px 10px rgba(0, 0, 0, 0.05);
            transition: transform 0.3s ease;
        }
        .endpoint {
            display: flex;
            justify-content: space-between;
            align-items: center;
            background: #e9ecef;
            padding: 15px;
            border-radius: 5px;
            margin-top: 10px;
        }
        code {
            background: #dee2e6;
            padding: 5px 10px;
            border-radius: 3px;
            font-family: 'Courier New', monospace;
        }
        .button {
            background: #667eea;
            color: white;
            padding: 10px 20px;
            border-radius: 5px;
            text-decoration: none;
            font-weight: bold;
            transition: all 0.2s ease;
        }
        .button:hover {
            background: #5a6fd8;
            transform: scale(1.05);
        }
    </style>
</head>
<body>
    <div class="container">
        <h1>FastAPI Application</h1>
        <p>A modern, high-performance web application</p>

        <div class="card">
            <h2>About This App</h2>
            <p>This is a simple yet elegant web application built with FastAPI. It demonstrates how to create a beautiful UI with minimal code.</p>
        </div>

        <div class="card">
            <h2>Features</h2>
            <ul>
                <li>Fast and lightweight</li>
                <li>Responsive design</li>
                <li>Modern UI components</li>
                <li>RESTful API endpoints</li>
            </ul>
        </div>

        <div class="card">
            <h2>Try the API</h2>
            <p>You can access the API endpoints directly:</p>
            <div class="endpoint">
                <code>GET /items/{item_id}</code>
                <a href="/items/42" class="button">Try it</a>
            </div>
        </div>
    </div>

    <script src="/static/js/main.js"></script>
</body>
</html>
Criar Dockerfile
cd ..
nano Dockerfile
Dockerfile
# Use the official Python image as the base image
FROM python:3.9-slim

# Set the working directory in the container
WORKDIR /app

# Copy the requirements file into the container
COPY requirements.txt .

# Install the required packages
RUN pip install --no-cache-dir -r requirements.txt

# Create directories for templates and static files
RUN mkdir -p templates static

# Copy the source code into the container
COPY src/ ./src

# Copy the templates and static files into the container
COPY templates/ ./templates
COPY static/ ./static

# Expose the port that the application will run on
EXPOSE 8000

# Define the command to run the application
CMD ["uvicorn", "src.main:app", "--host", "0.0.0.0", "--port", "8000"]
Criar requirements.txt
nano requirements.txt
requirements.txt
fastapi
uvicorn[standard]
jinja2
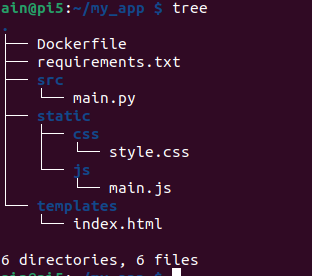
O diretório do projeto é o seguinte
tree
Build e publicação da imagem
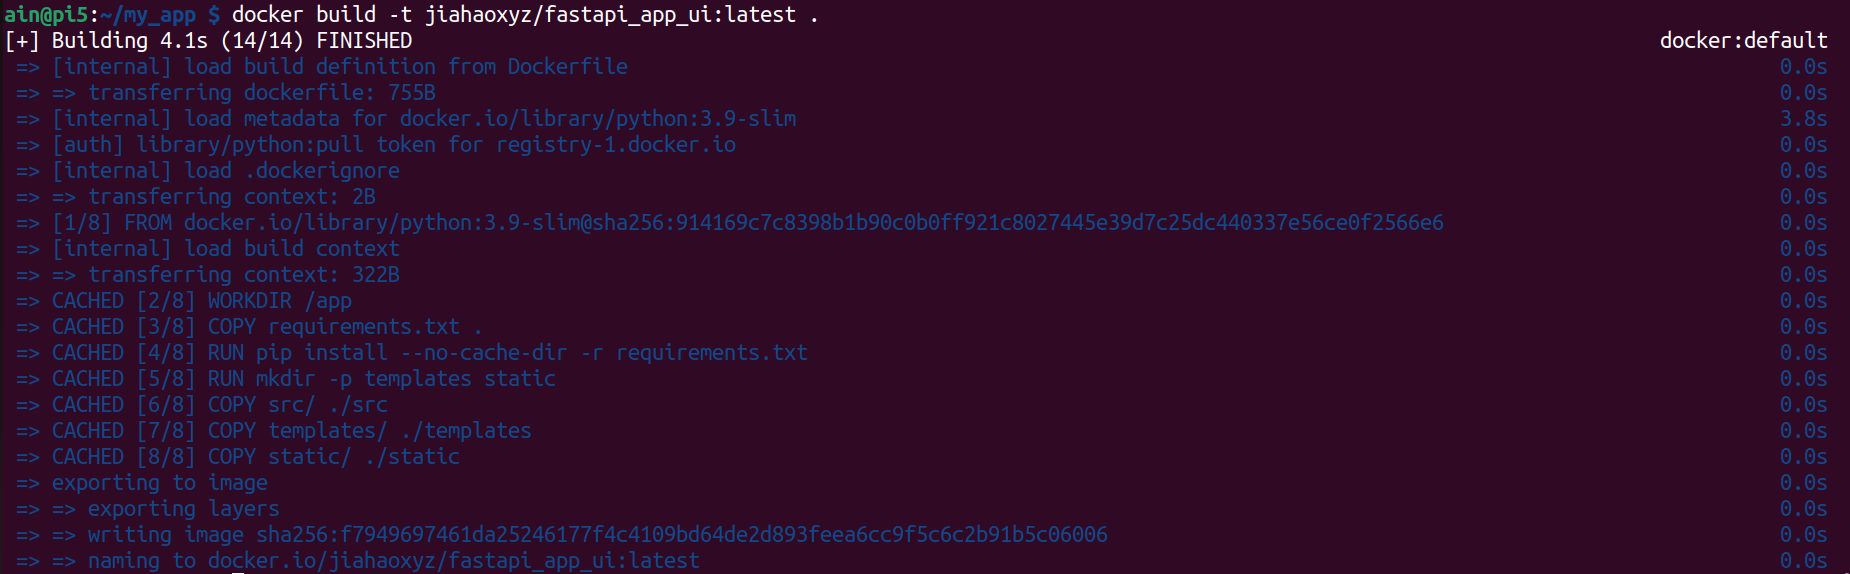
Criar imagem
Nota: Se você não tiver uma conta para o dockerhub, registre uma conta.
xxxé o nome de usuário do seu Docker Hub.
docker build -t xxx/fastapi_app_ui:latest .
Testar a imagem
docker image ls -a

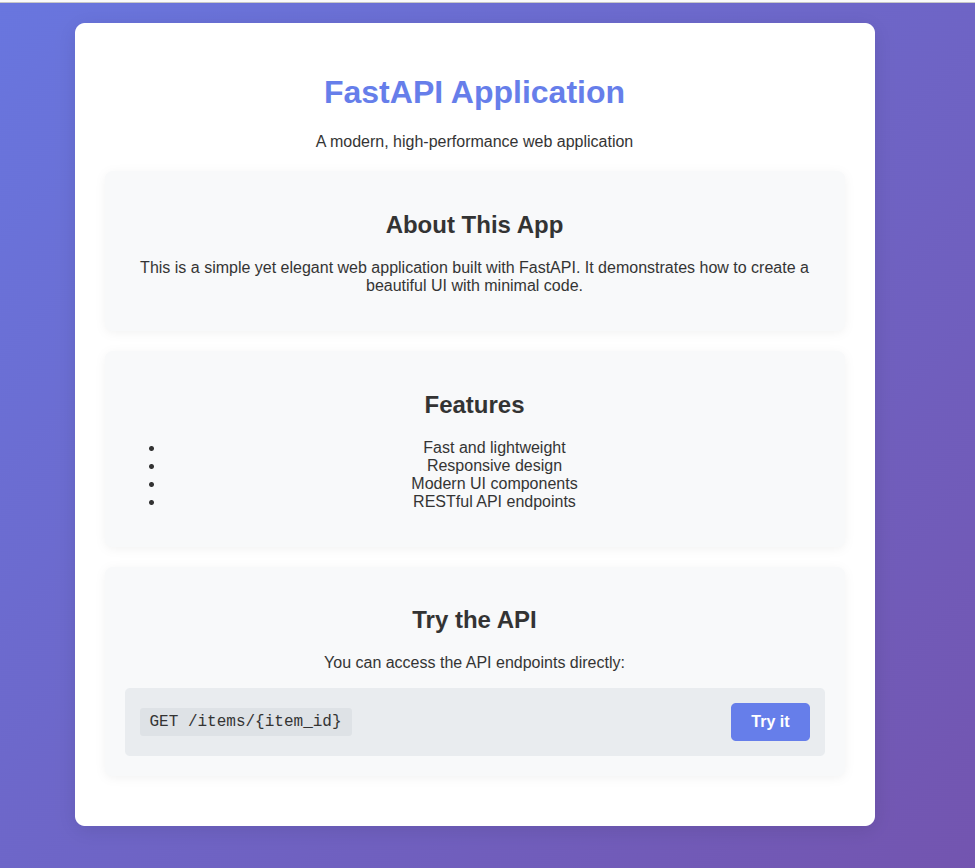
docker run -d -p 8000:8000 jiahaoxyz/fastapi_app_ui
O resultado é mostrado abaixo:
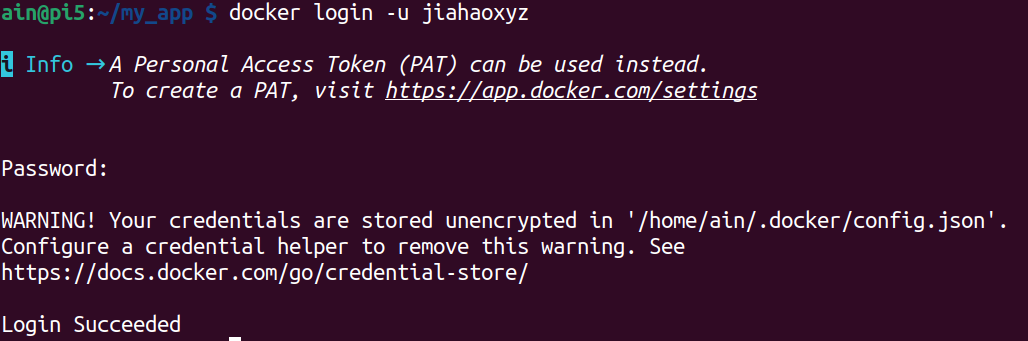
Publicar a imagem
e crie seu próprio token.
Nota:
xxxé o seu próprio nome de usuário do dockerhub
docker login -u xxx
Nota:
xxxé o seu próprio nome de usuário do dockerhub
docker push xxx/fastapi_app_ui:latest
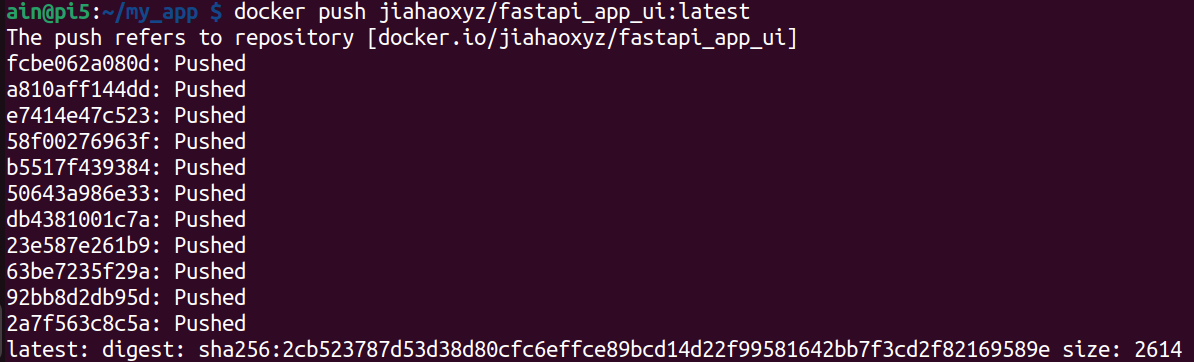
Resultado
Você pode ver que a imagem empacotada usando o Docker foi enviada para o Docker Hub e está disponível para qualquer pessoa usar.
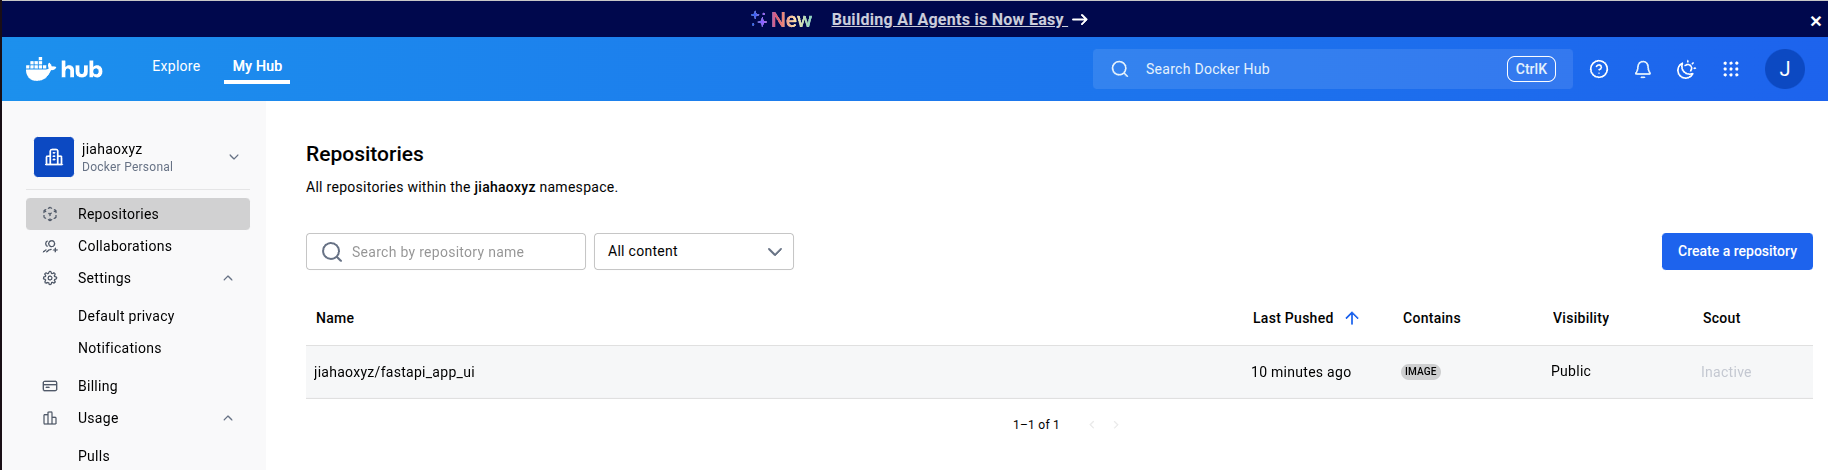
Você pode usar minhas imagens como abaixo, e aqui está a página do GitHub do projeto:
docker pull jiahaoxyz/fastapi_app_ui
Suporte Técnico & Discussão sobre o Produto
Obrigado por escolher nossos produtos! Estamos aqui para oferecer diferentes formas de suporte para garantir que sua experiência com nossos produtos seja a mais tranquila possível. Oferecemos vários canais de comunicação para atender a diferentes preferências e necessidades.