Quick Start
Power Connection
Powered by a power adapter
The reComputer R1225 is supplied with a nominal AC voltage of 12~24 V or DC voltage of 9~36V. The power supply is connected via the 2-pin power terminal block connector. To ground the reComputer R1225, the ground wire can be secured to the screw located at the top left corner of the power terminal.
The power solution utilizes a bridge rectifier diode for reverse polarity protection and is compatible with both AC and DC inputs. This ensures that regardless of how the power supply's positive and negative terminals are connected, the circuit will not be damaged. By using a bridge rectifier, the output voltage polarity remains fixed irrespective of the input DC polarity, providing effective reverse polarity protection.
PoE power supply
With the PoE module installed, the ETH0 port of reComputer R1225 can support PoE power supply, providing a convenient and efficientway to power the device over Ethernet. This option simplifies the installation process and reduces the amount of cabling required, making it an ideal solution for applications with limited power sources or where power outlets are not readily available.
- PoE input: Range 44~57V; Typical 48V
- PoE output: 12V, 1.1A Max.
It's worth noting that the PoE module provided with the reComputer R1225 is compliant with the IEEE 802.3af standard and can provide a maximum power supply of 12.95W. Therefore, if there is a need to connect high-power peripherals such as SSD or 4G modules, the PoE power supply may not be sufficient. In this case, it's recommended to use the AC/DC terminal for power supply instead to ensure stable and reliable operation of the device.
Access the Seeed Gateway OS
Access via router
- Step 1: Connect your R1225 to an Ethernet cable, and connect your PC to the same router
Your PC and device should be connected to the same router/network.
Network Connection Diagram
When using the R1225 for the first time, if there are routers and Ethernet cables nearby, you can choose to connect the R1225 to the network via a wired connection.
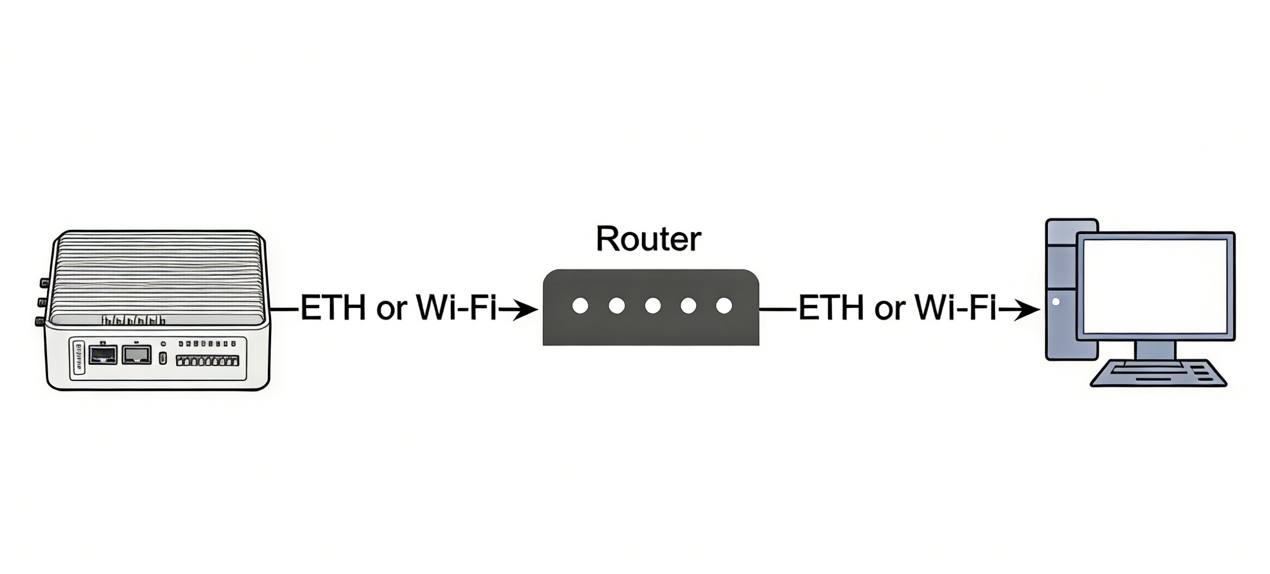
If Wi-Fi is configured, you can access the LuCI interface via the R1225’s IP address without an Ethernet cable, as long as your computer and the R1225 are on the same network.
- Step 2: Get IP Address of your device
Check the IP Address of your device on your router admin page.
-
Step 3: Get your device Username and Password
- Username:admin
- Password:null (No password required for first-time login)
-
Step 4: Login Luci
Input the IP Address of your device in a browser to enter the Luci page. Then input your device username and password to login, and click the Login button.

Access via device AP hotspot
When the R1225 is turned on for the first time, its Wi-Fi hotspot remains active for 5 minutes by default. After this time, the R1225’s hotspot will automatically turn off.
- Step 1: Turn on R1225
Plug in the reComputer R1225 LoRaWAN Gateway, and the device will power on automatically.
-
Step 2: Connect to the AP hotspot
- SSID : R1225-XXXX (last 4 digits of the SN)
- Password : 1234567890
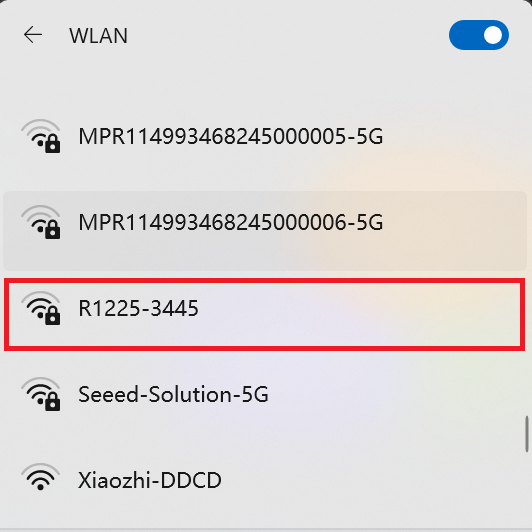
When the reComputer R1225 is powered on for the first time, it automatically enables hotspot mode. The default SSID for the hotspot is “R1225-XXXX (last 4 digits of the SN)”, and the default password is “1234567890”,connect your computer to this AP hotspot.
- Step 3: Get IP Address of your device
After connecting to the AP with the SSID R1225-XXXX, click the details icon in the upper-right corner.
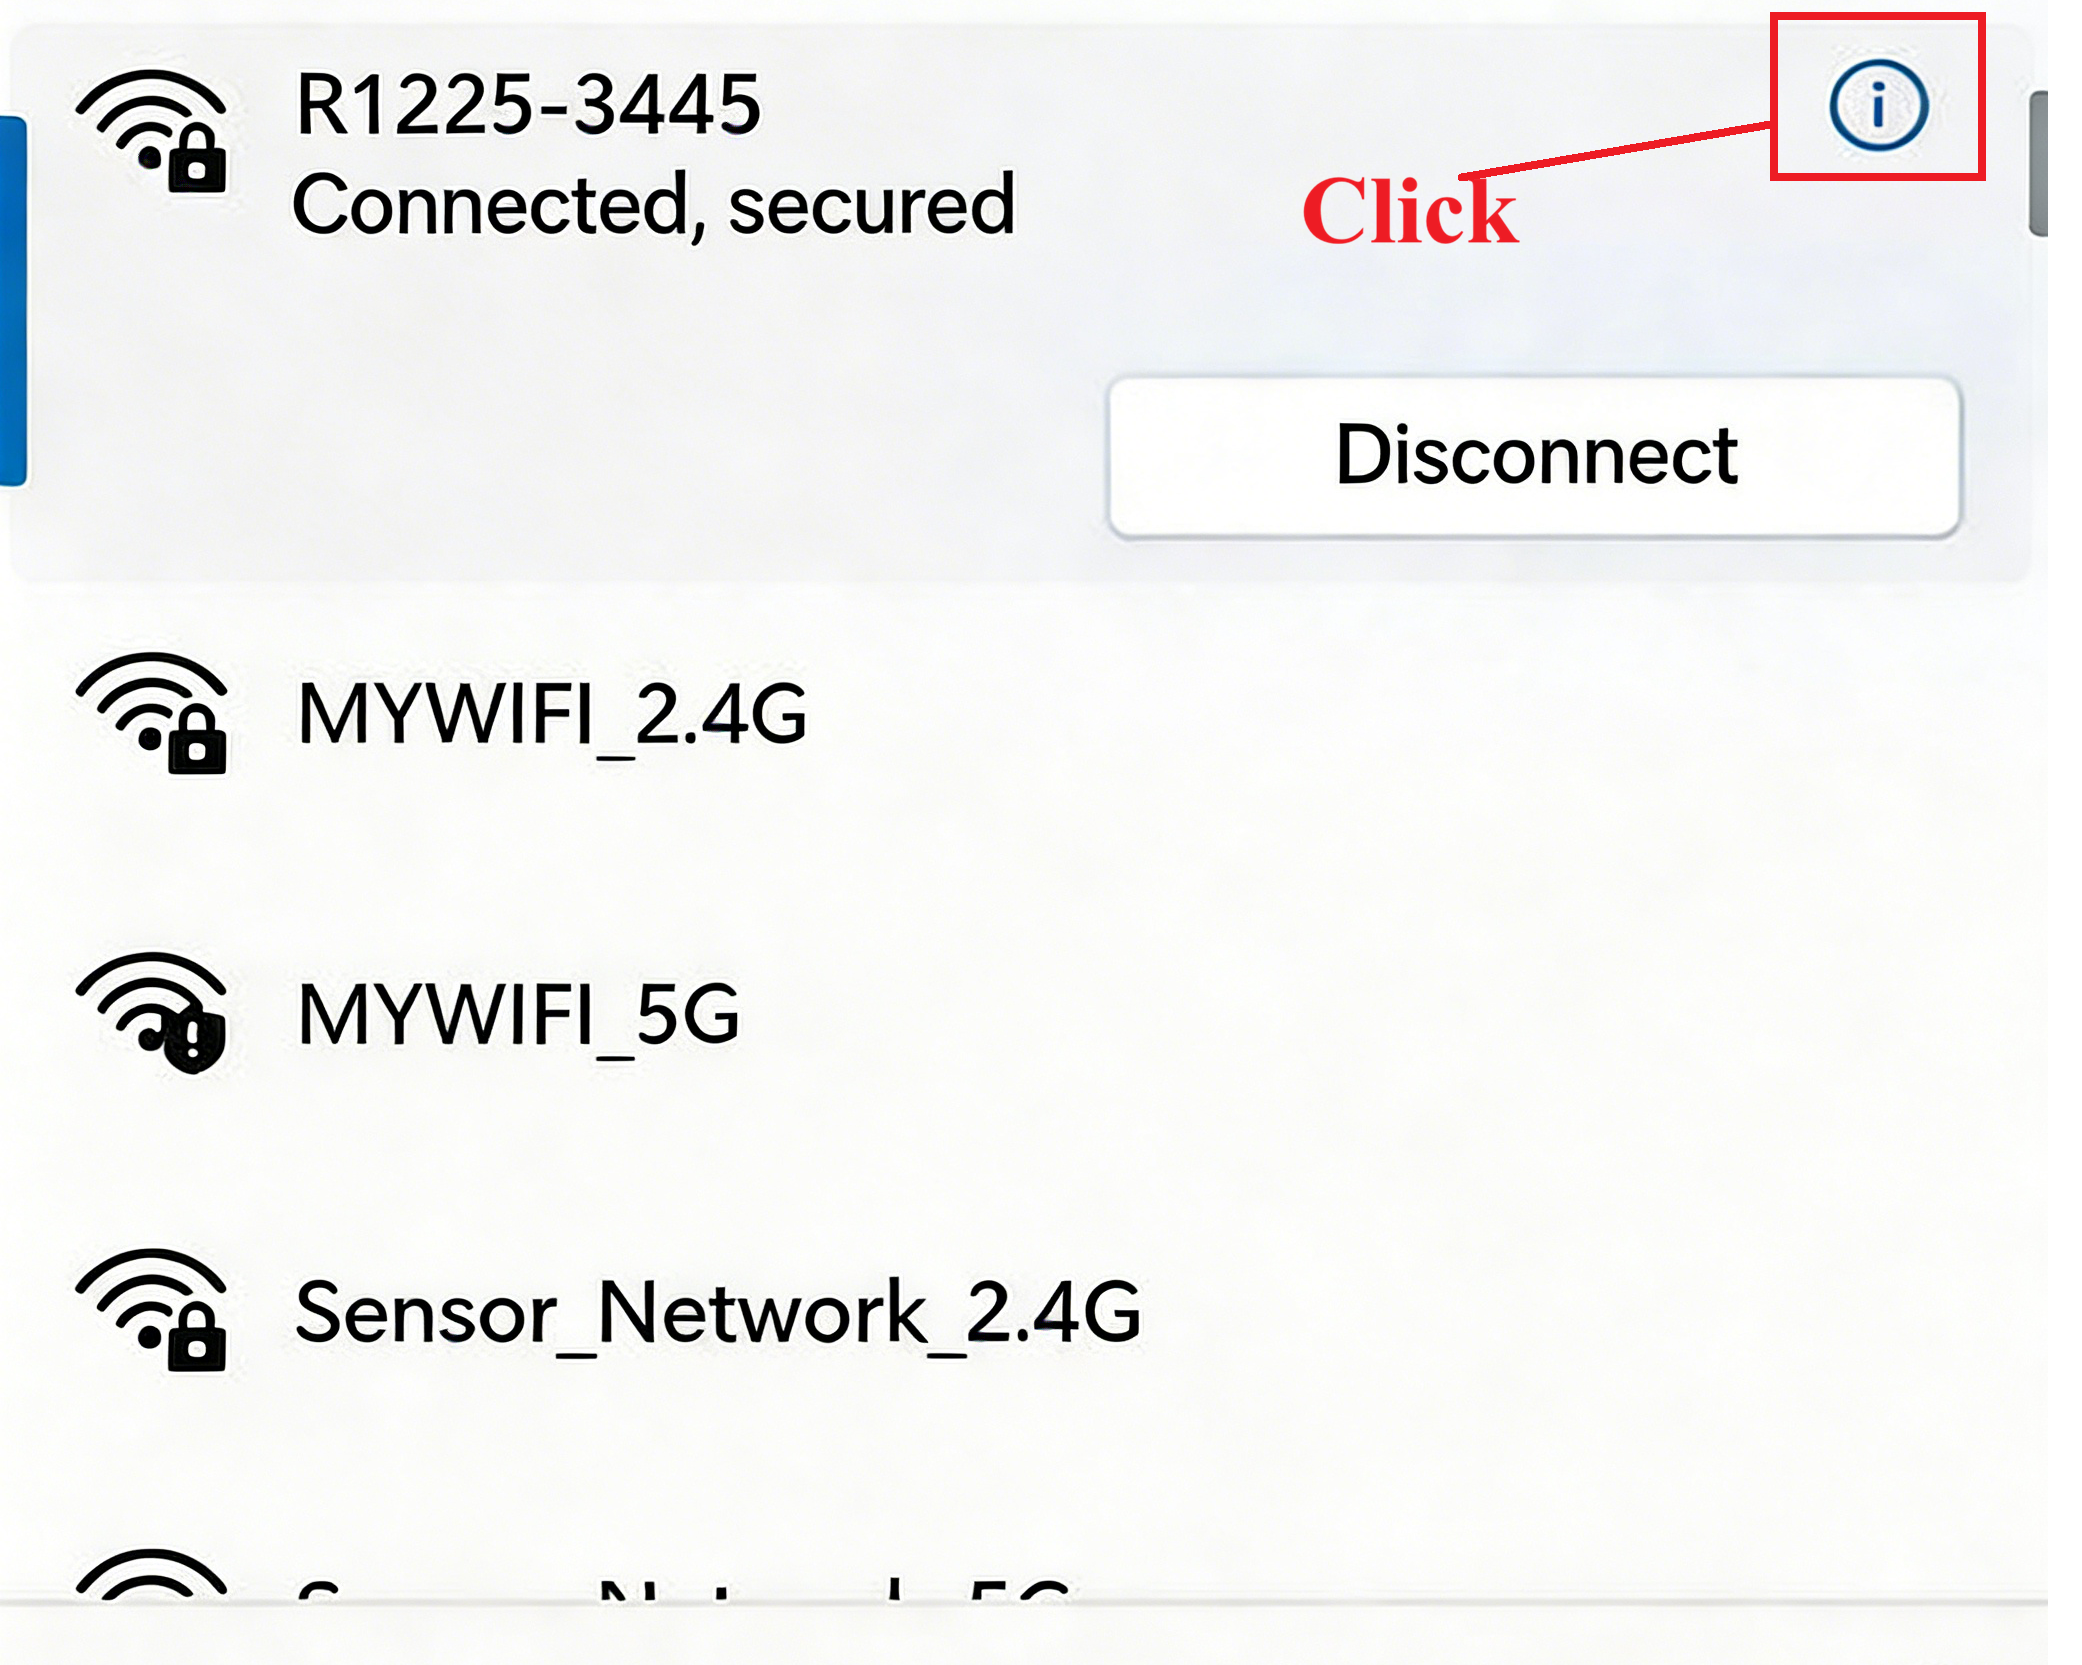
Click to open the “Network and Internet” page in the system settings, then scroll down to the bottom to find the IP address.
-
Step4 : Get your device Username and Password
- Username:admin
- password:null (No password required for first-time login)
-
Step5 : Login Luci
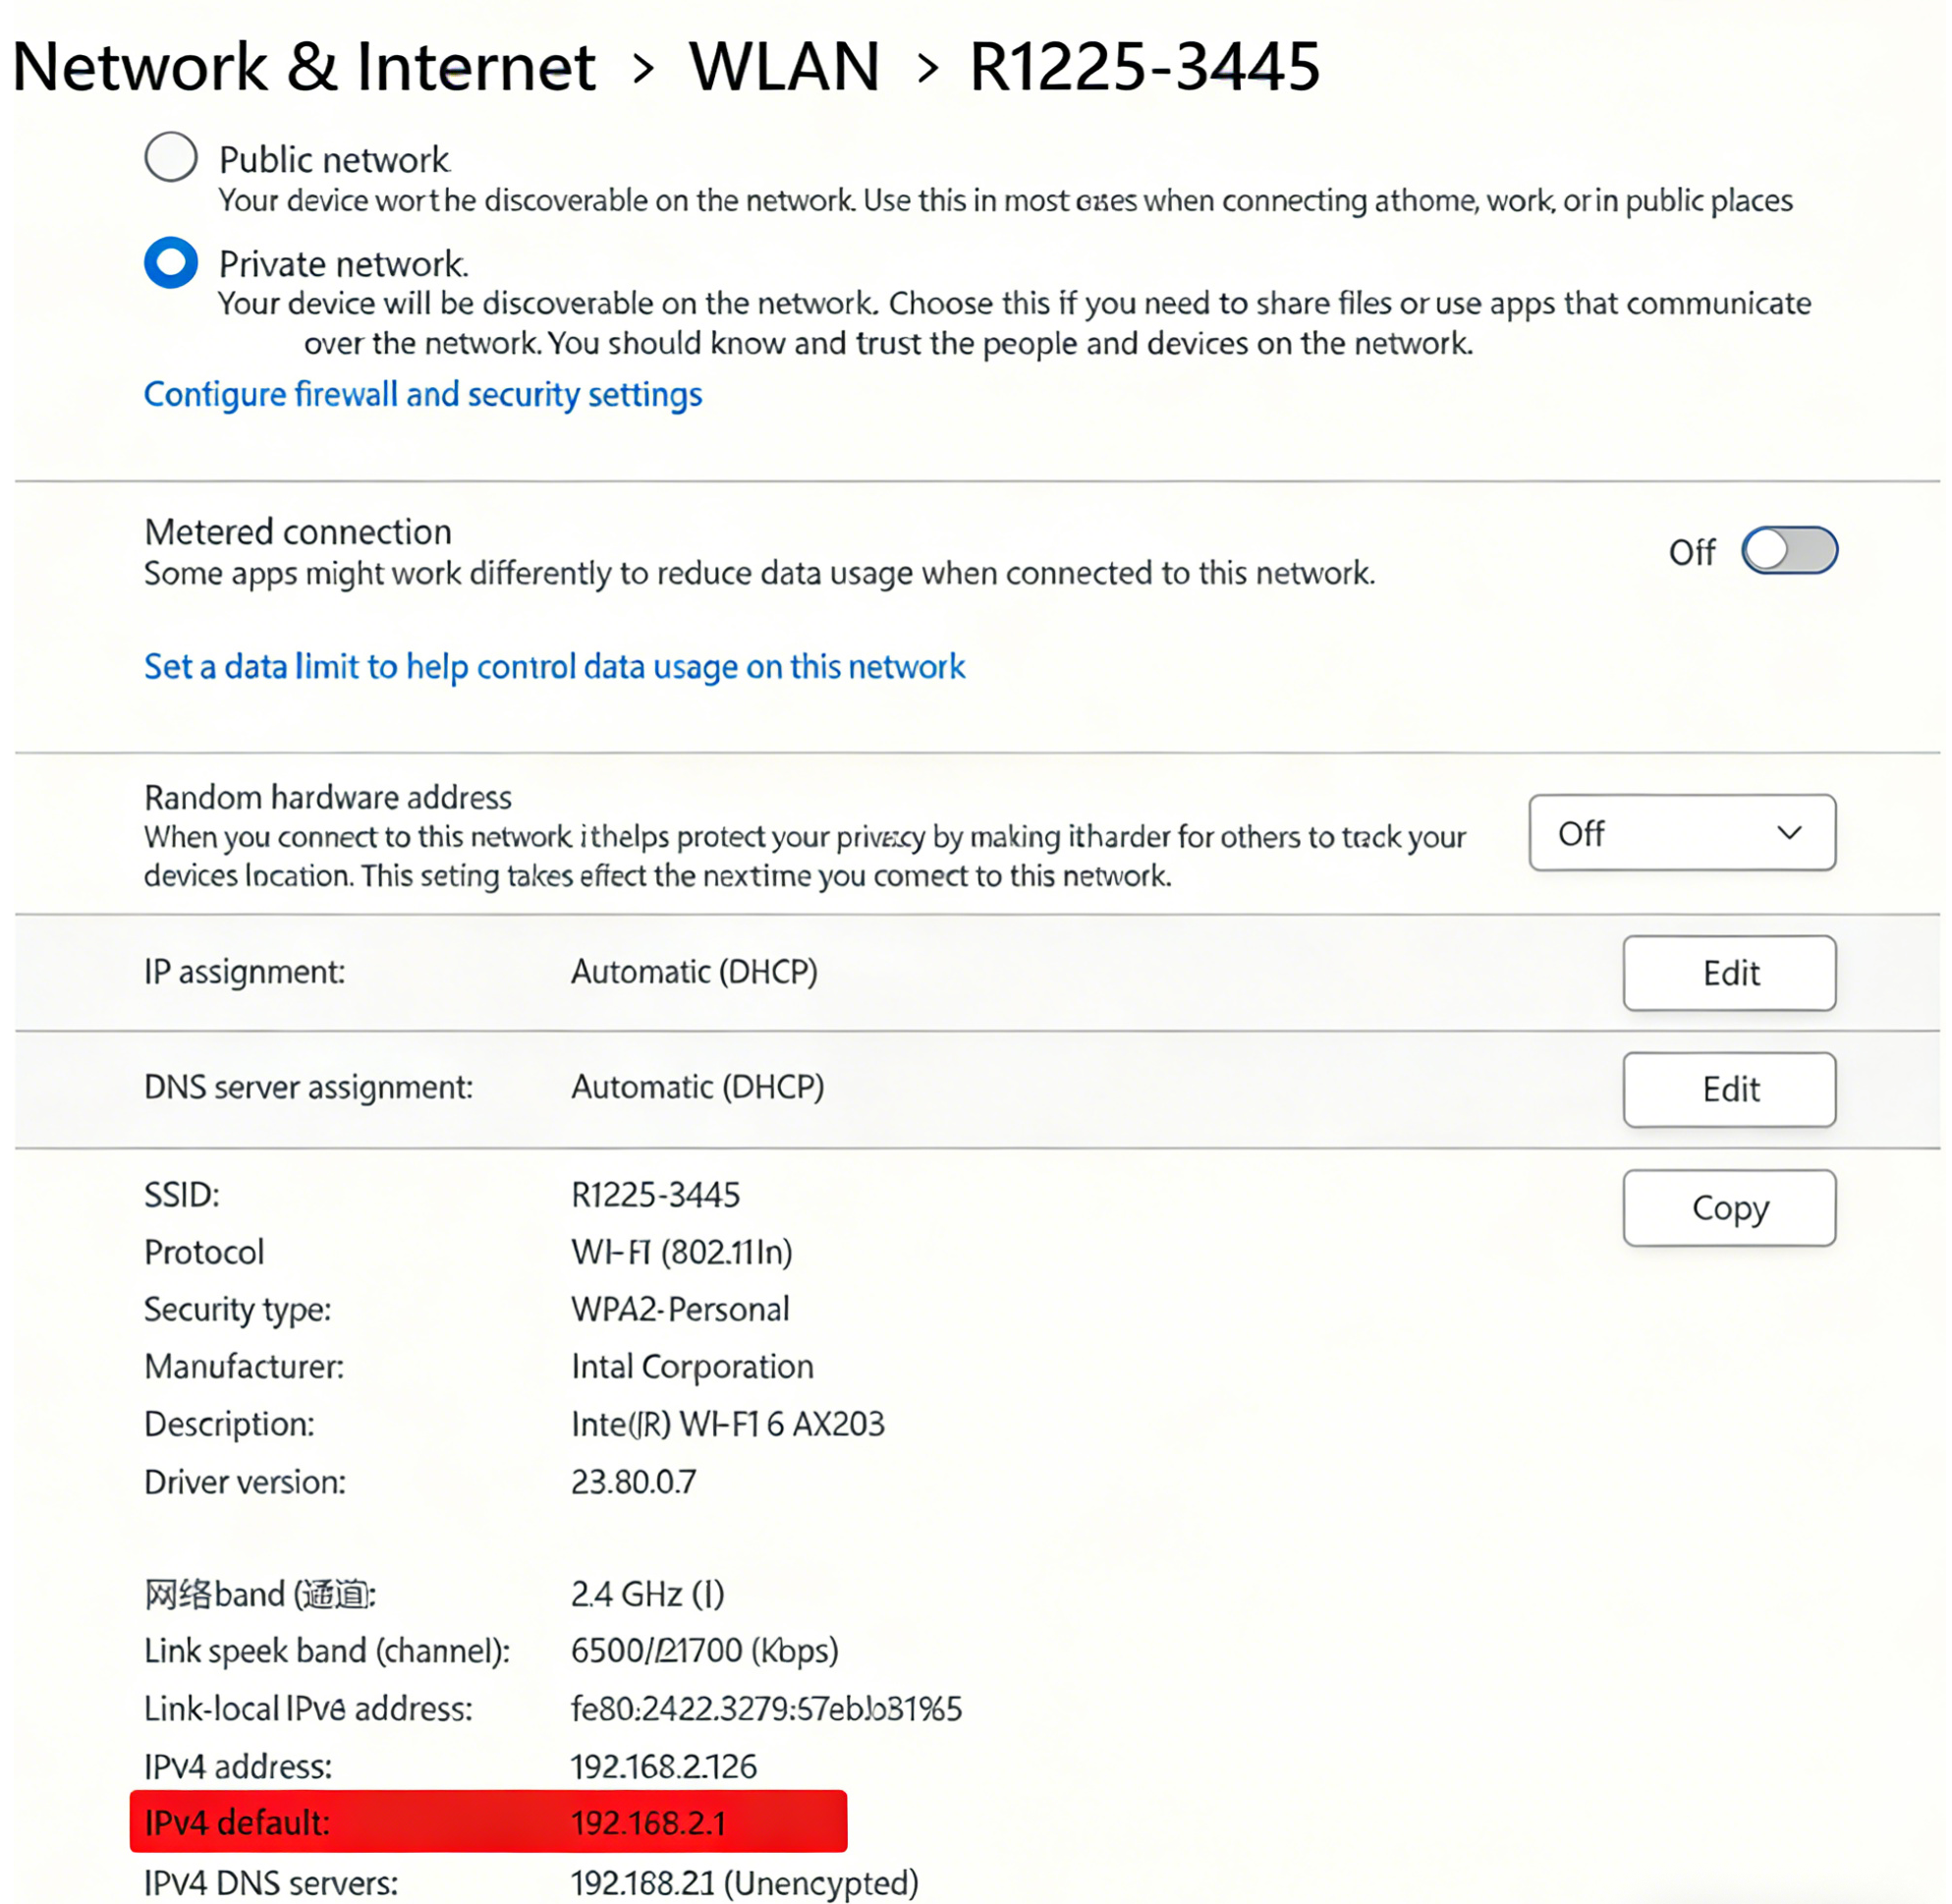
Input the IP Address (192.168.2.1) in your browser to enter the Local Console.
Then input your device username and password, and click the Login button.
R1225 Network Configuration
Ethernet Connection
Ethernet is plug-and-play and requires no configuration.
WIFI Connection
- Step 1: Click on
Network-Wi-Fi
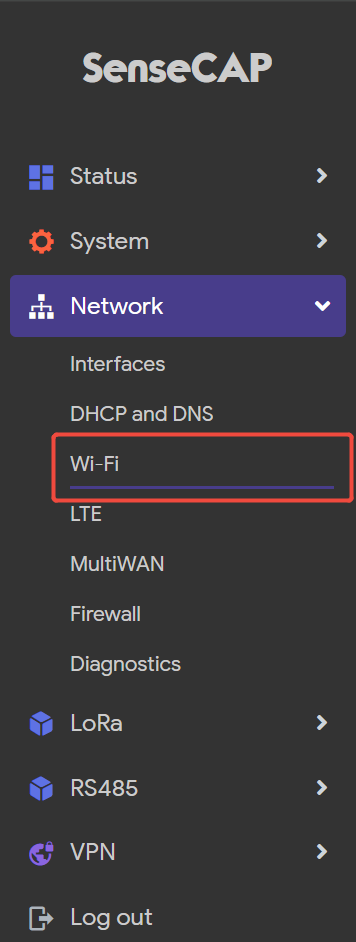
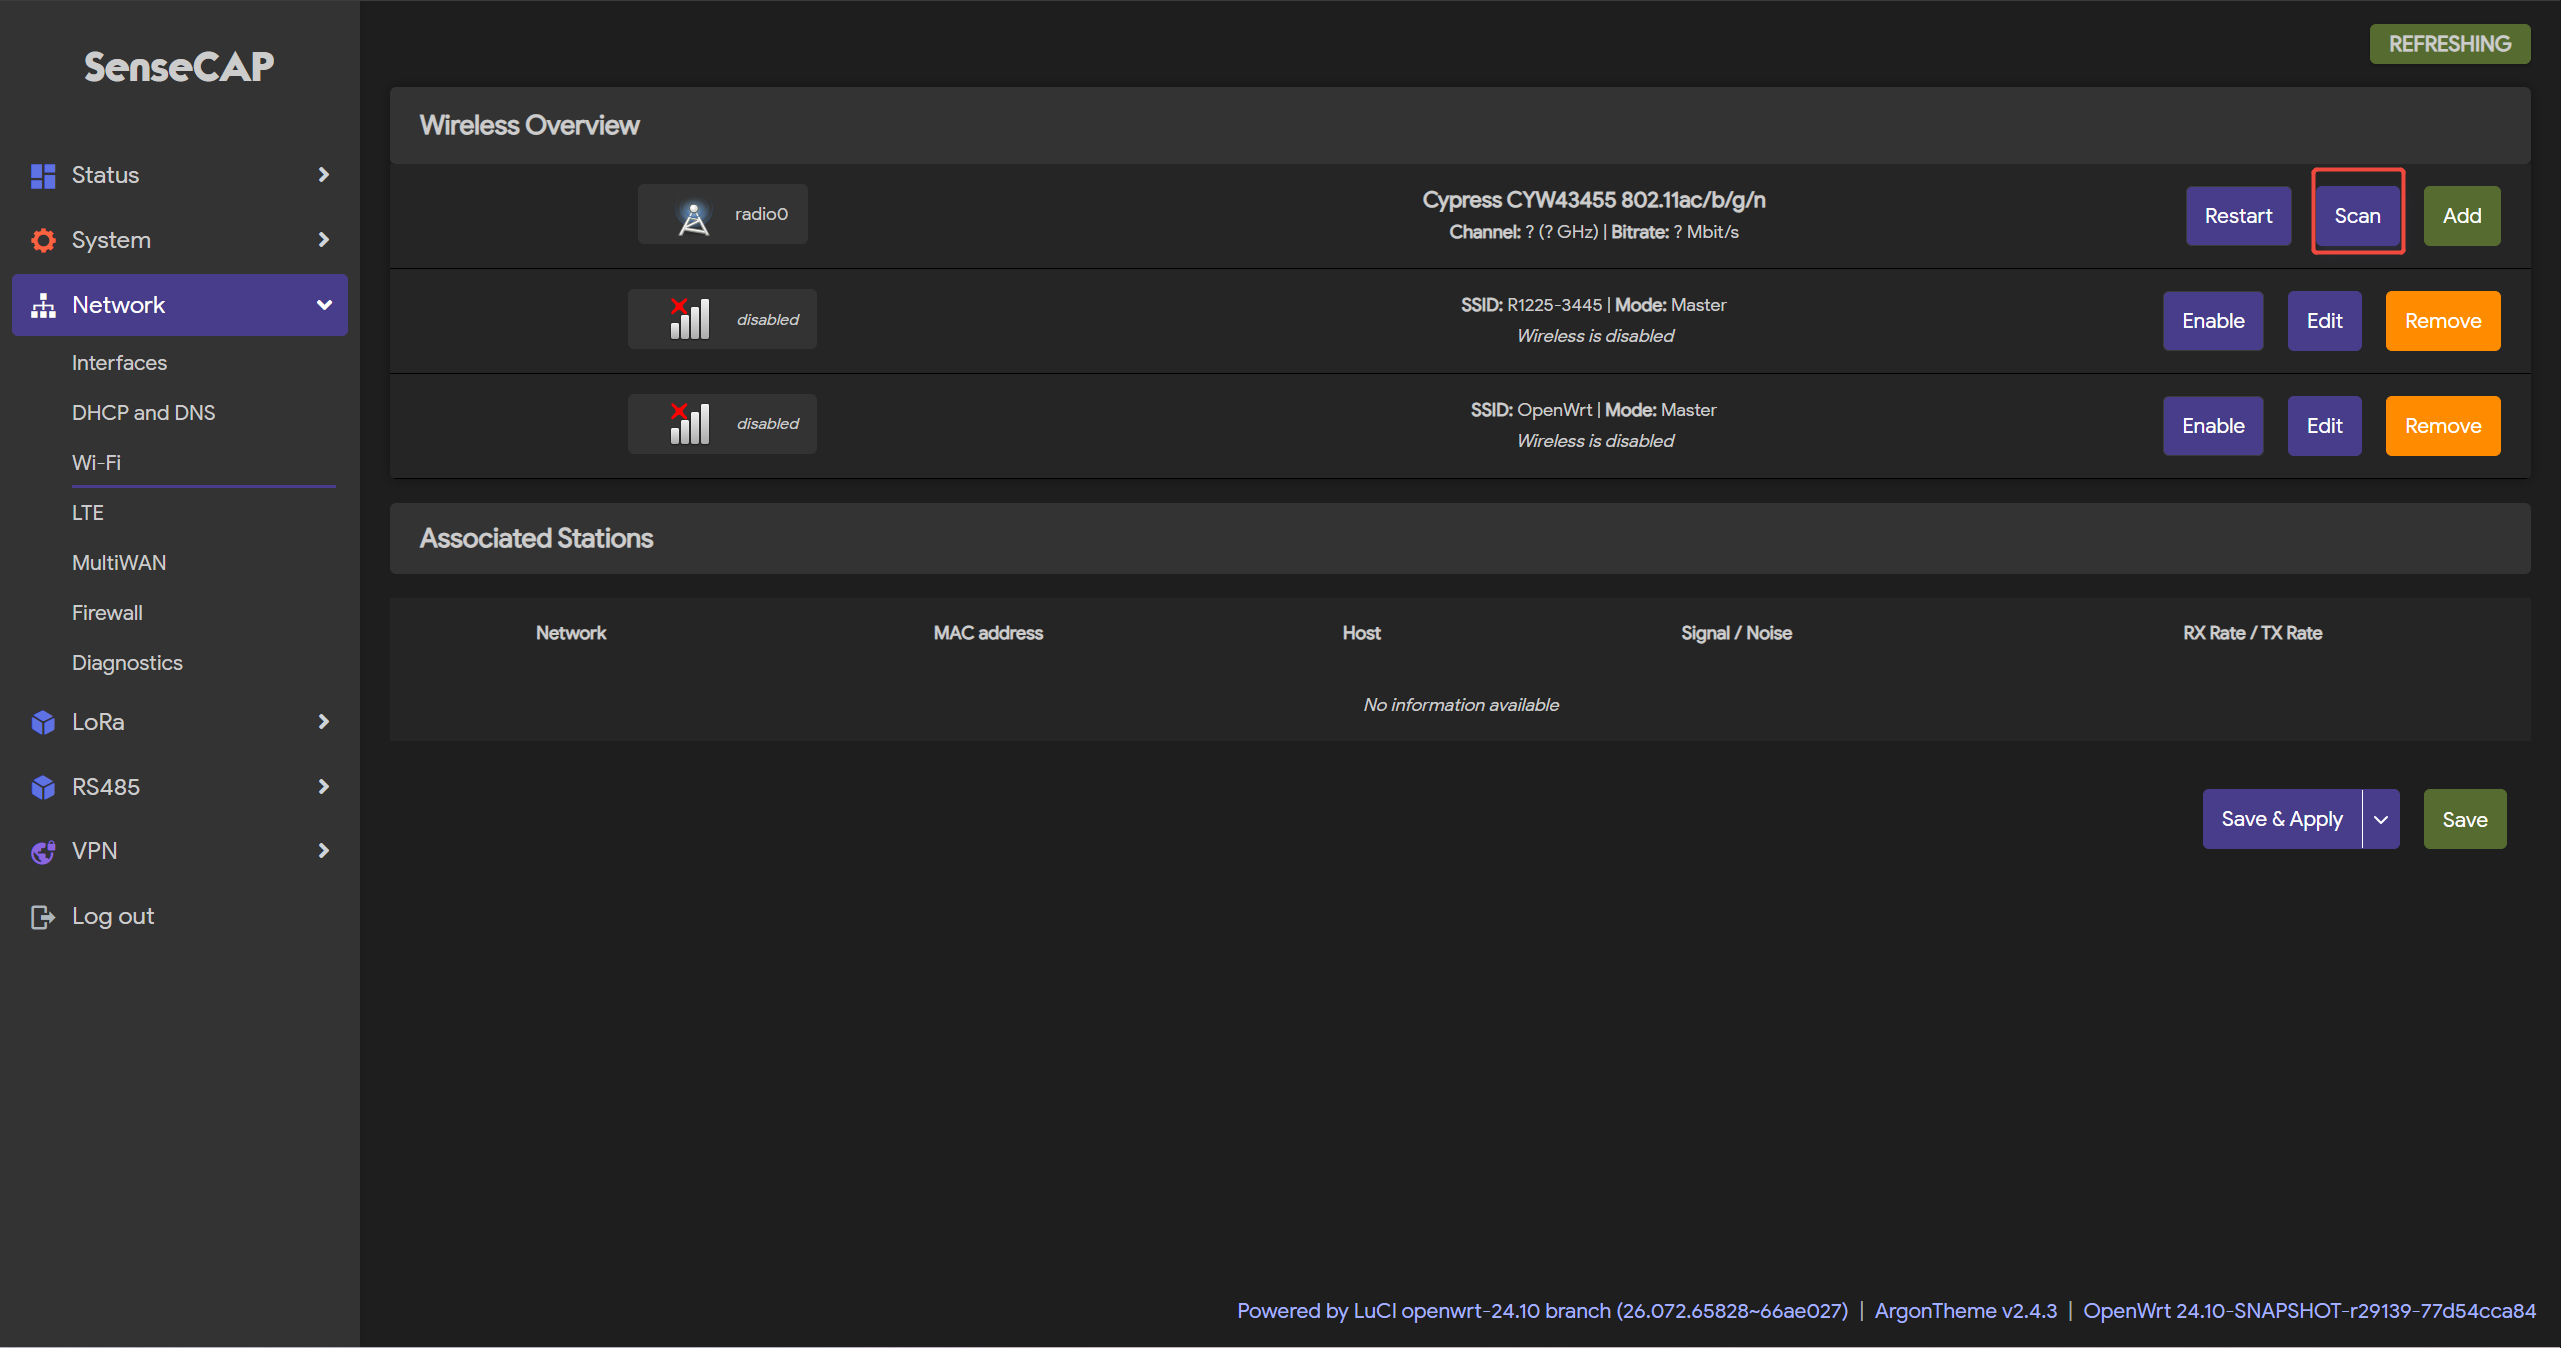
- Step 2: Click on the
Scanbutton to scan the WIFI
- Step 3: Select your Wi-Fi to join the network
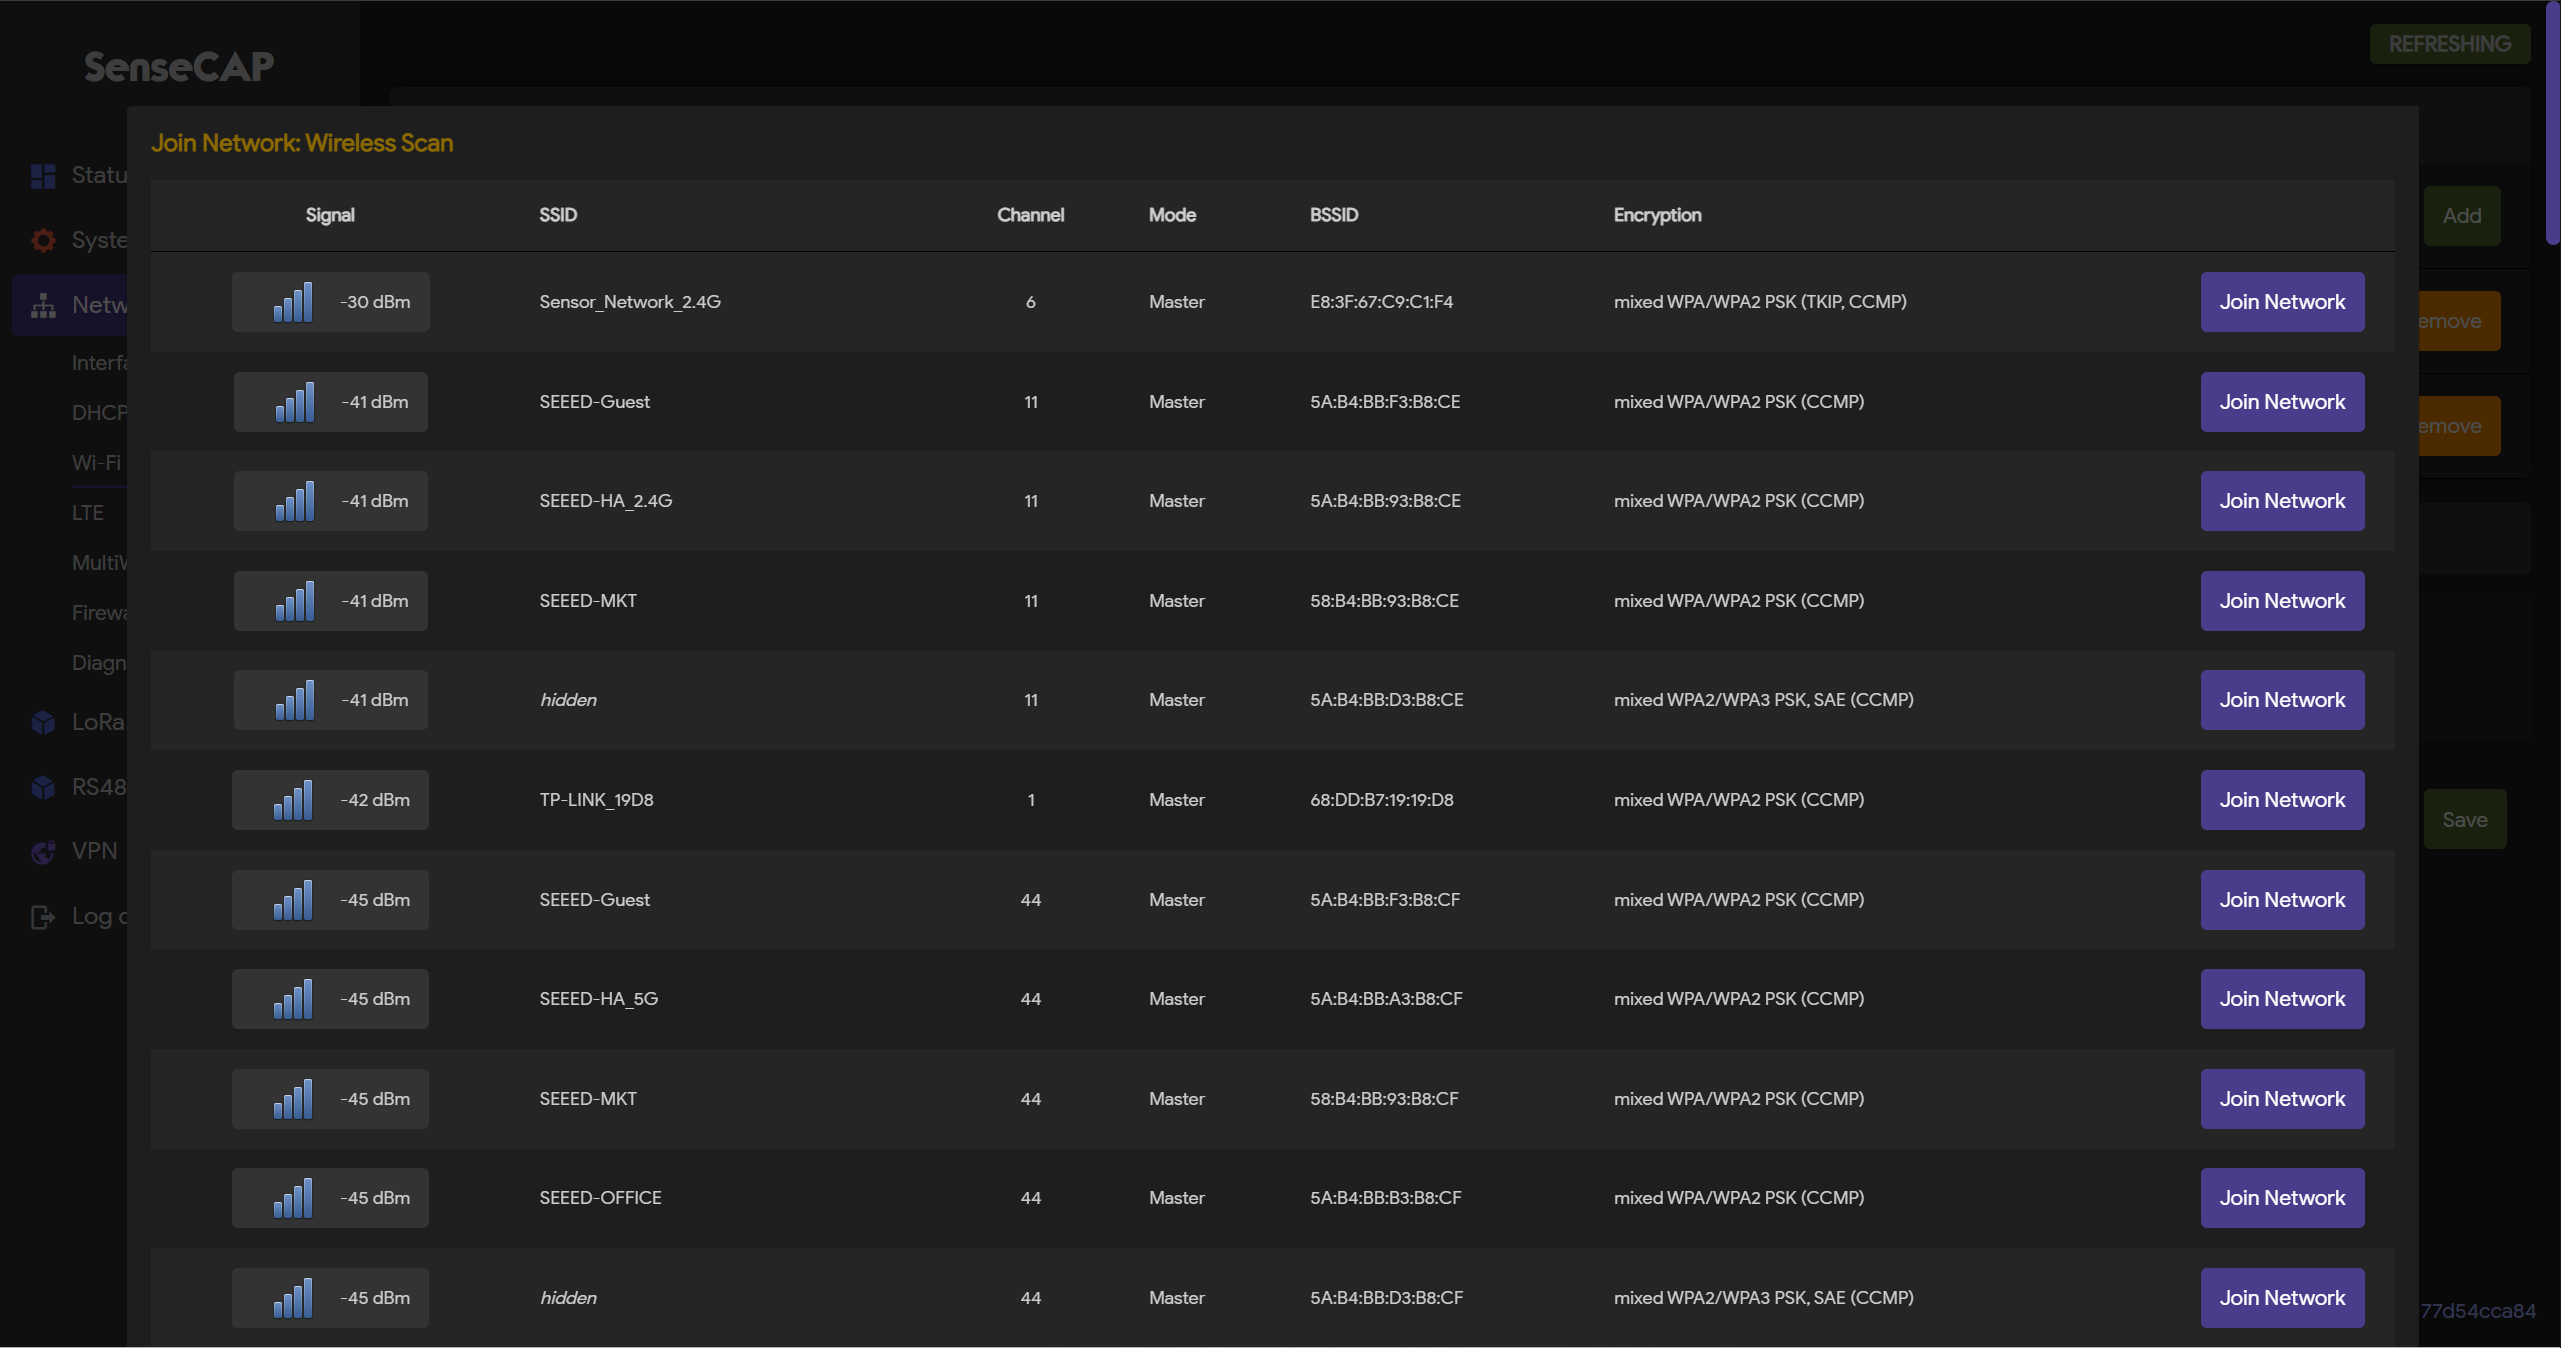
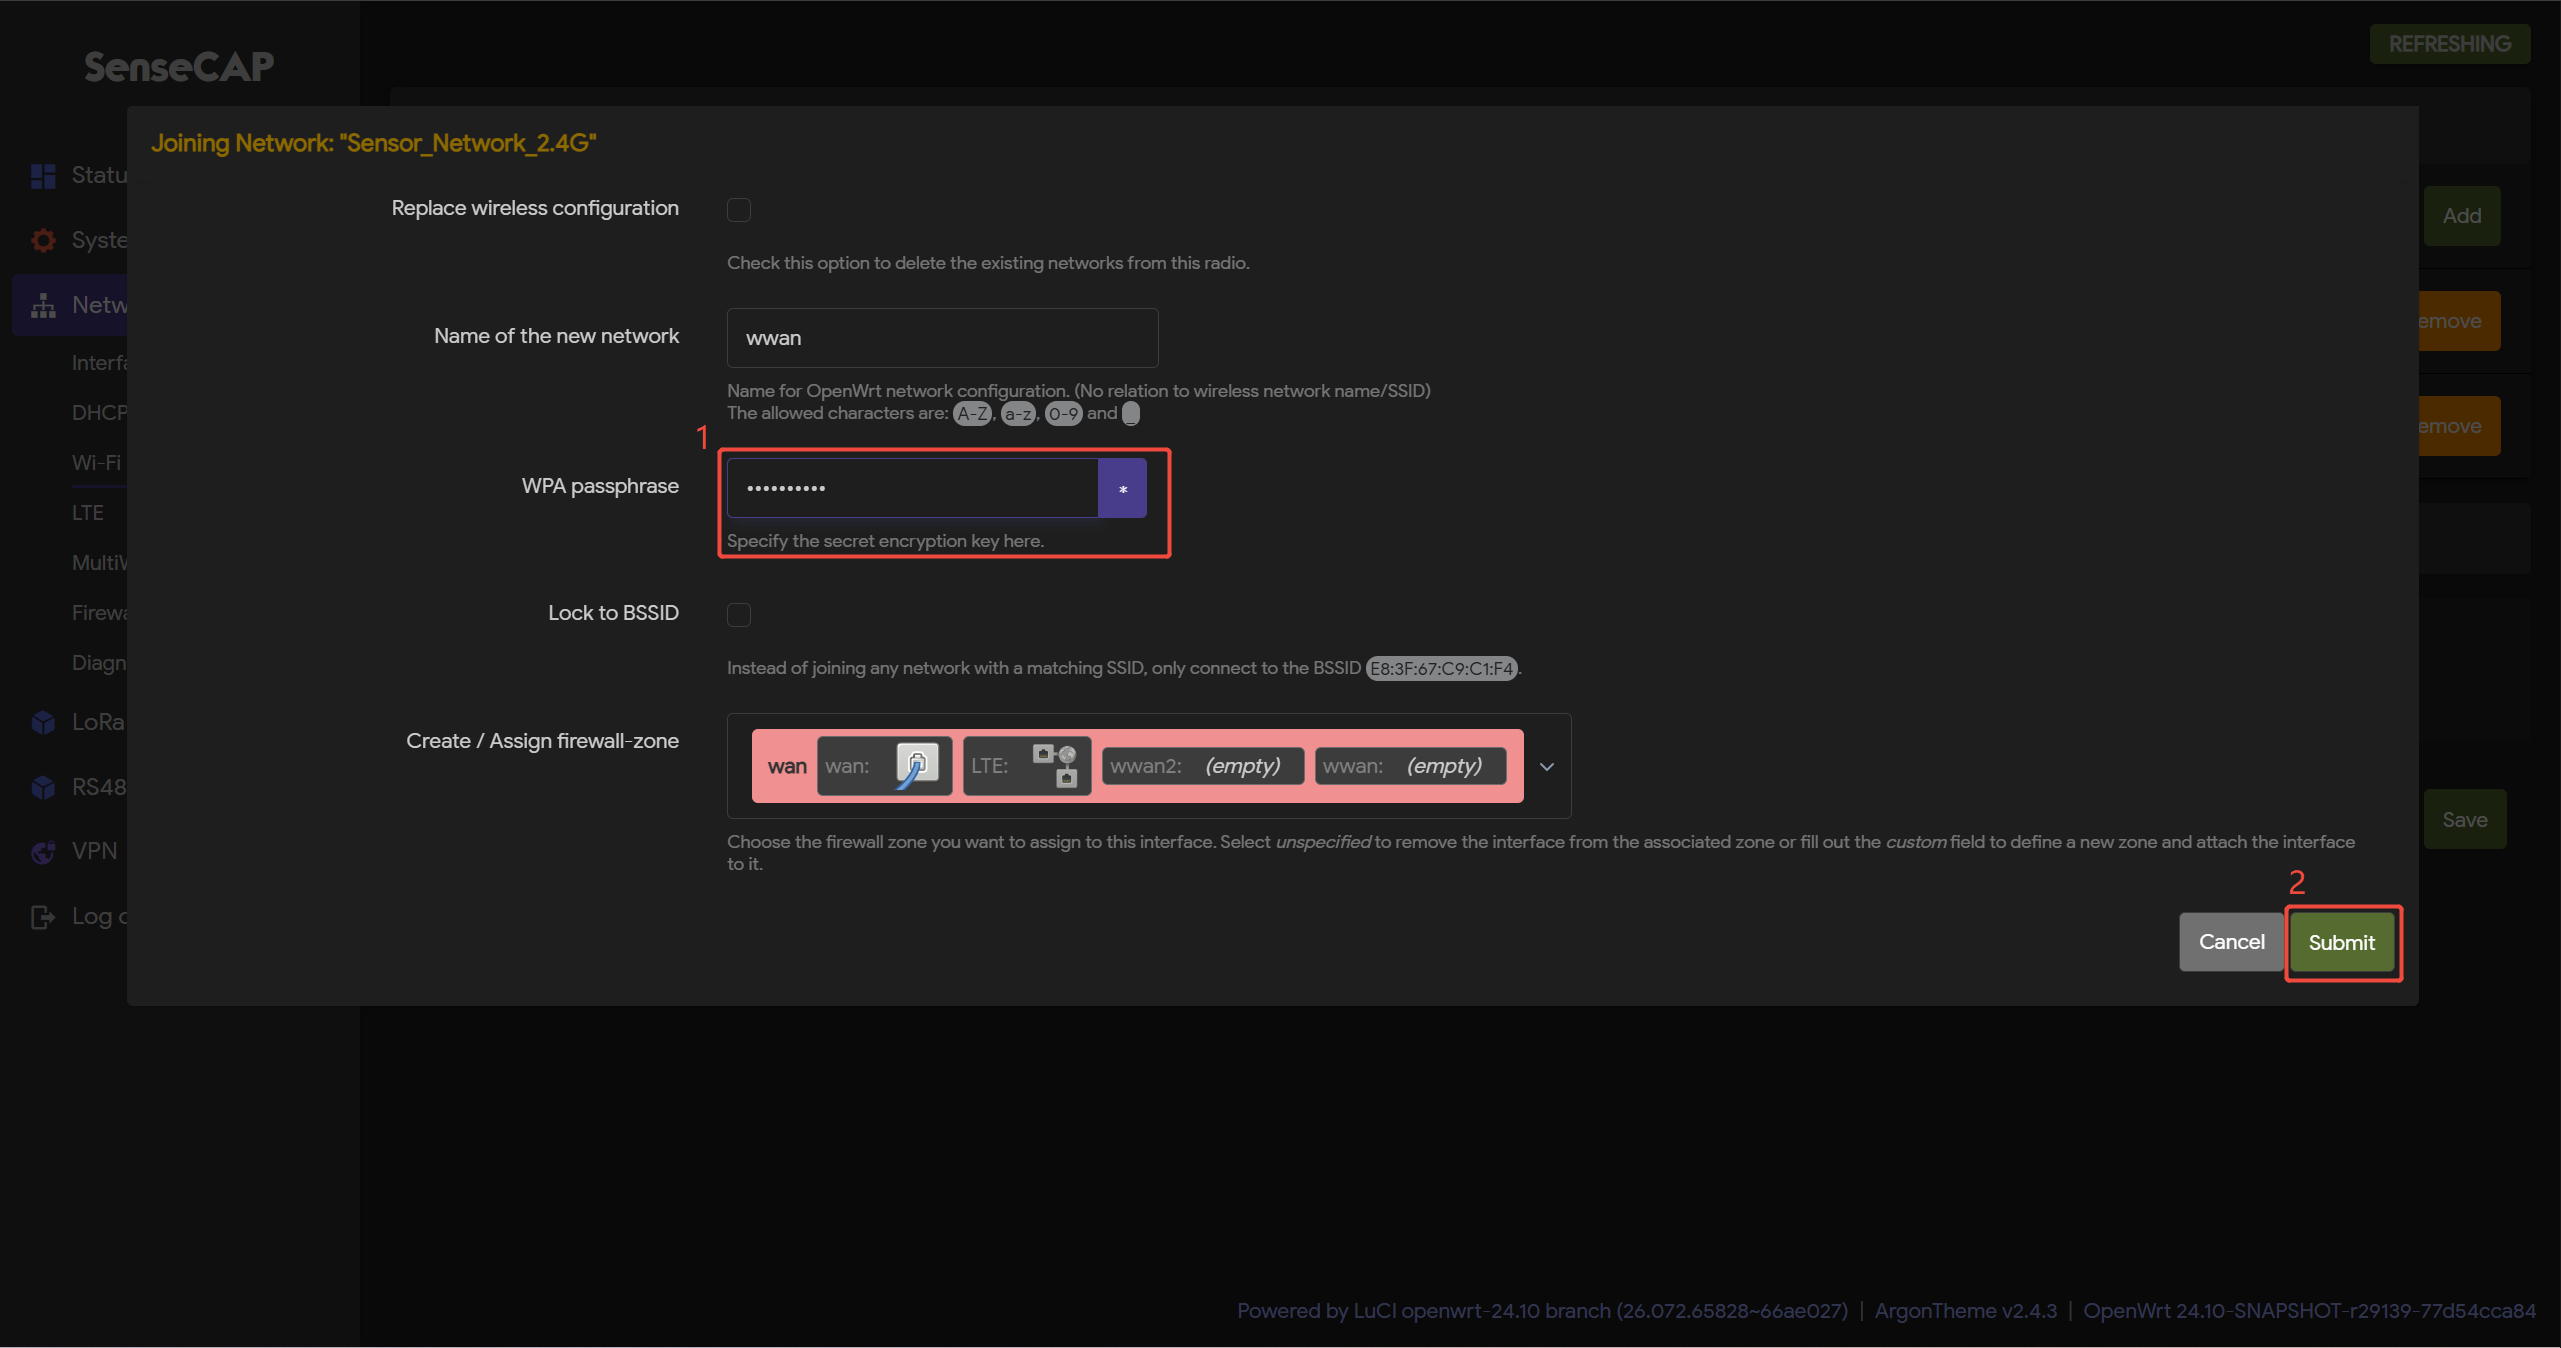
- Step 4: Submit the Wi-Fi password, and then click
Submitand Save
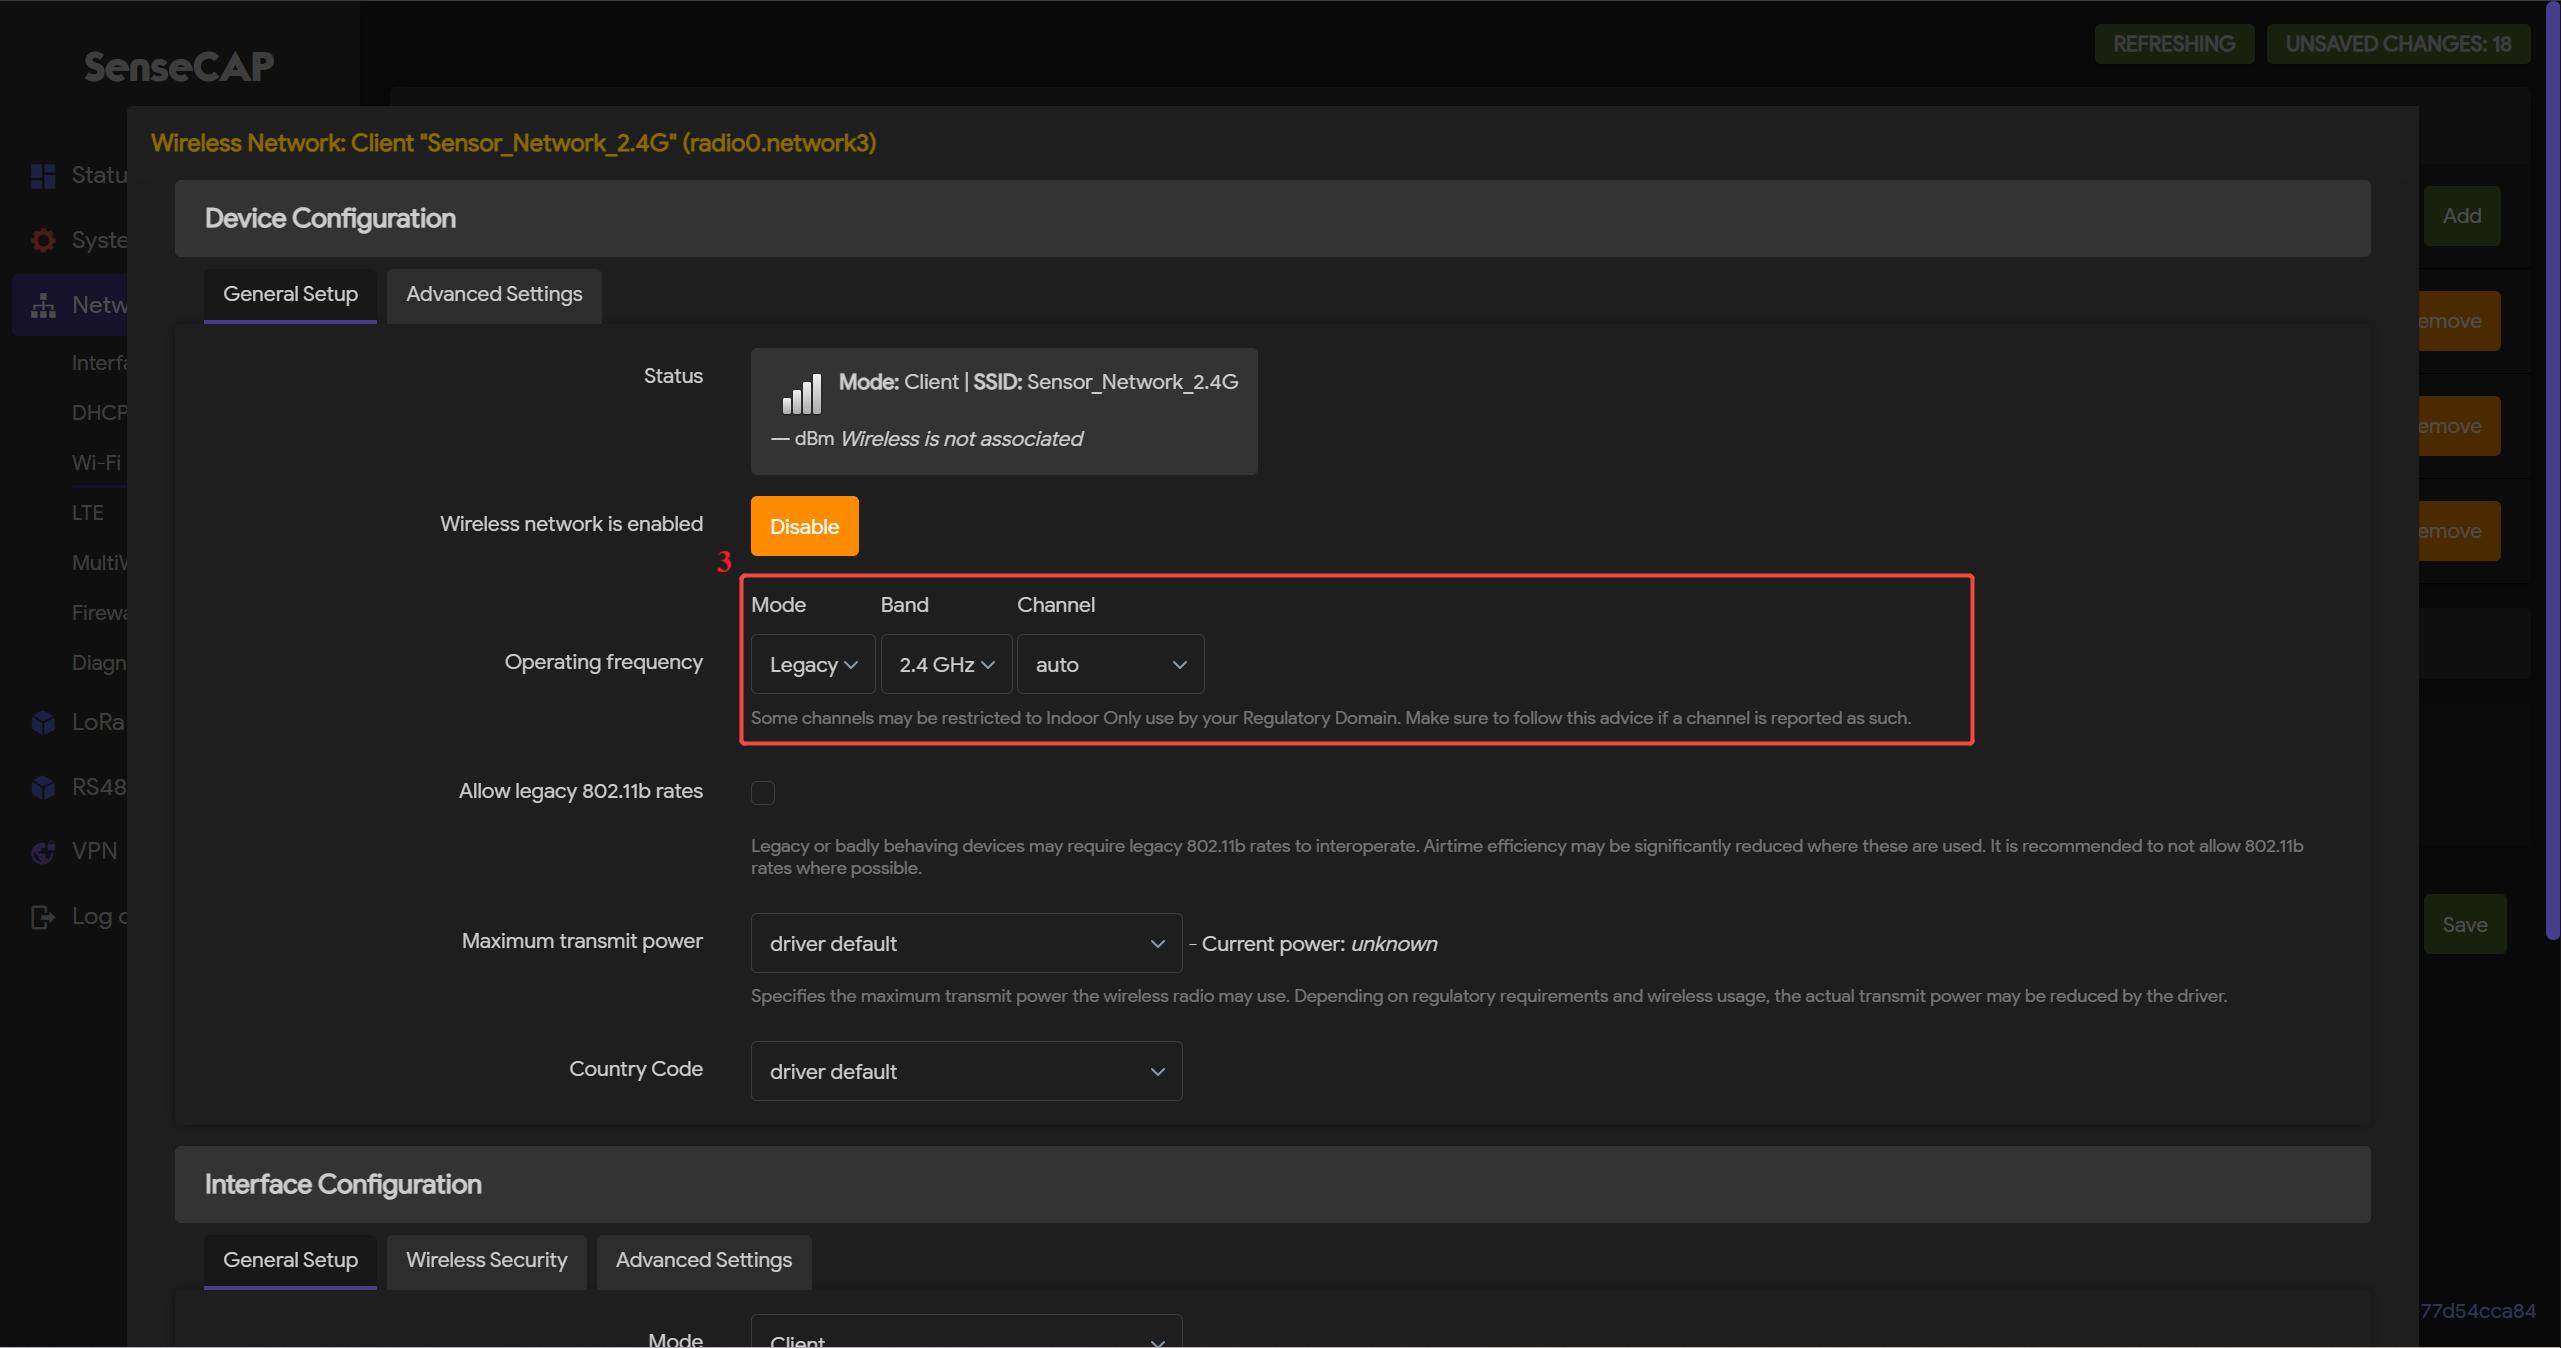
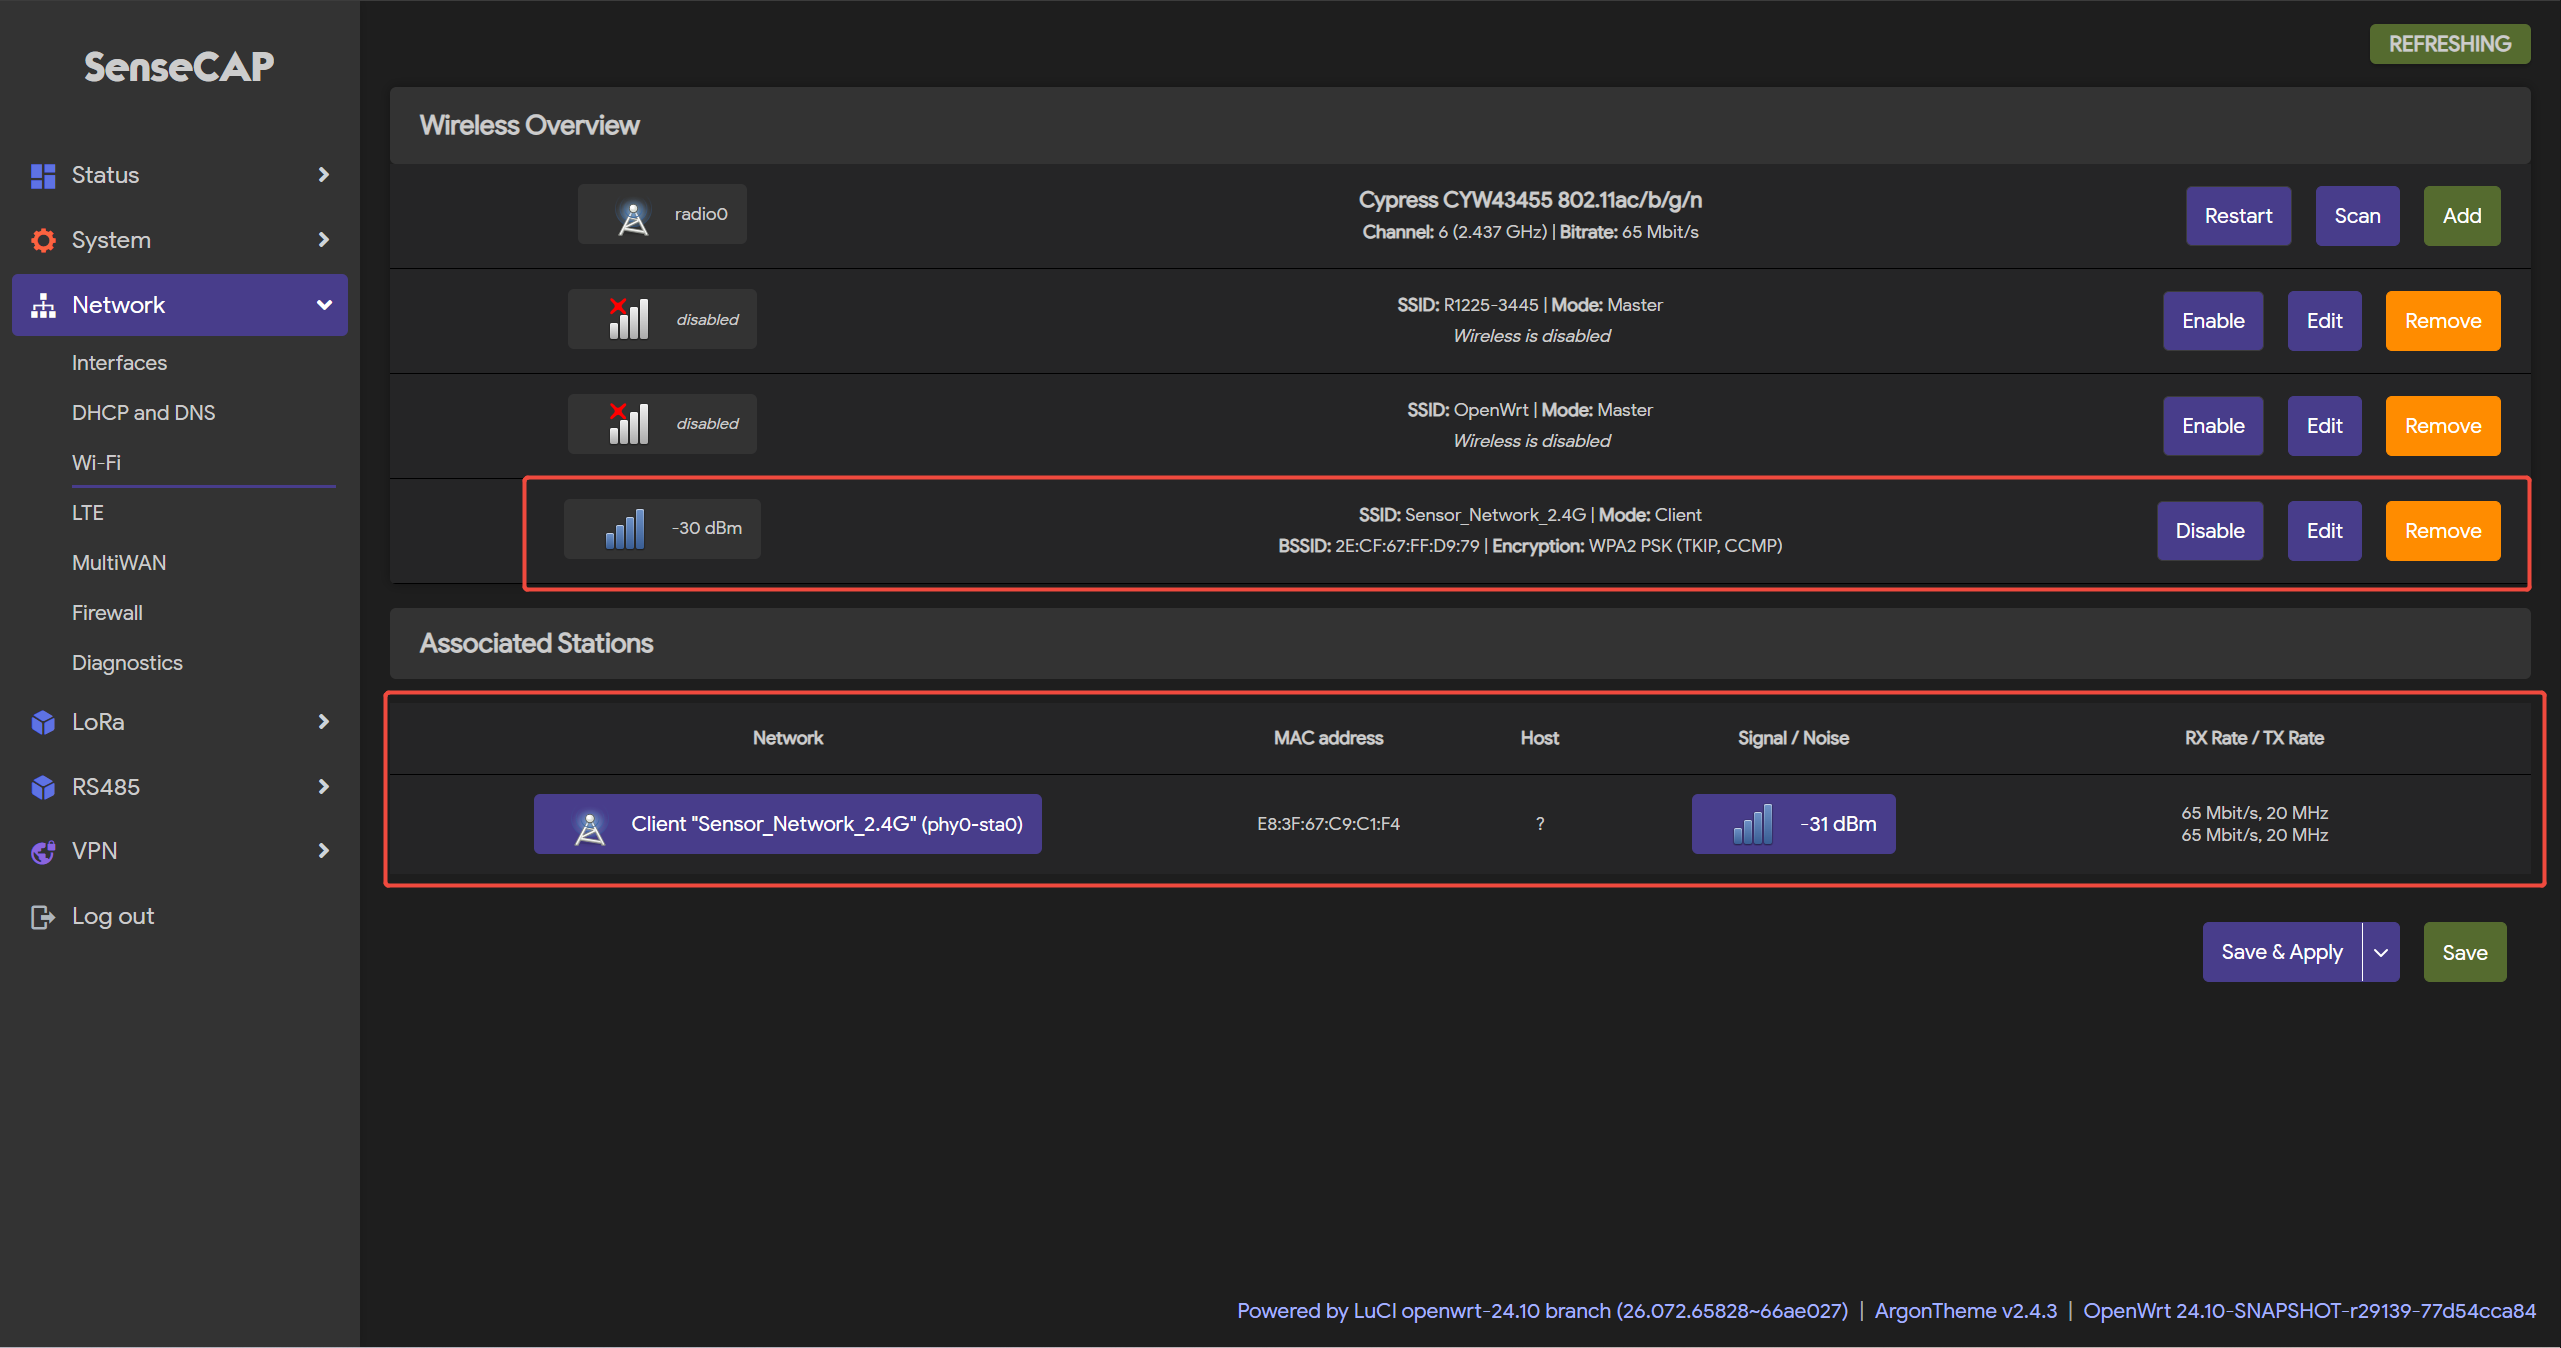
- Step 5: Click
Save & Applyto apply your settings
Cellular Connection (for 4G version)
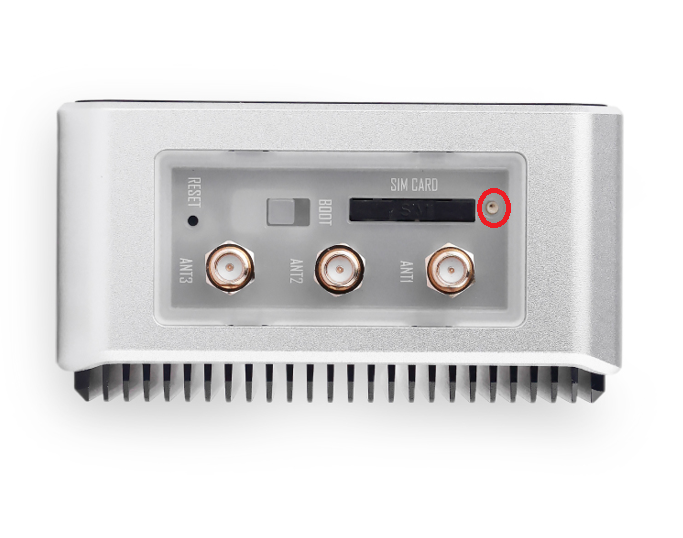
- Step 1: Plug your SIM card into the Nano-SIM card slot
Please use the DIN-rail clip we provided to insert it into the small hole next to the SIM card slot, then insert your SIM card.
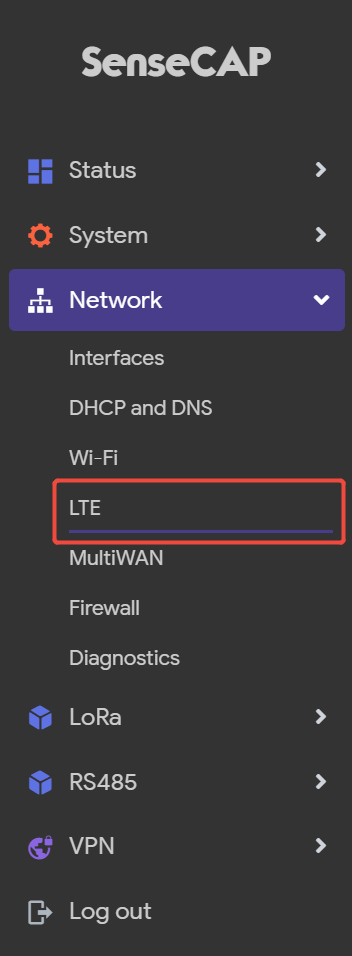
- Step 2: Login the Luci page, and click on
Network-LTE
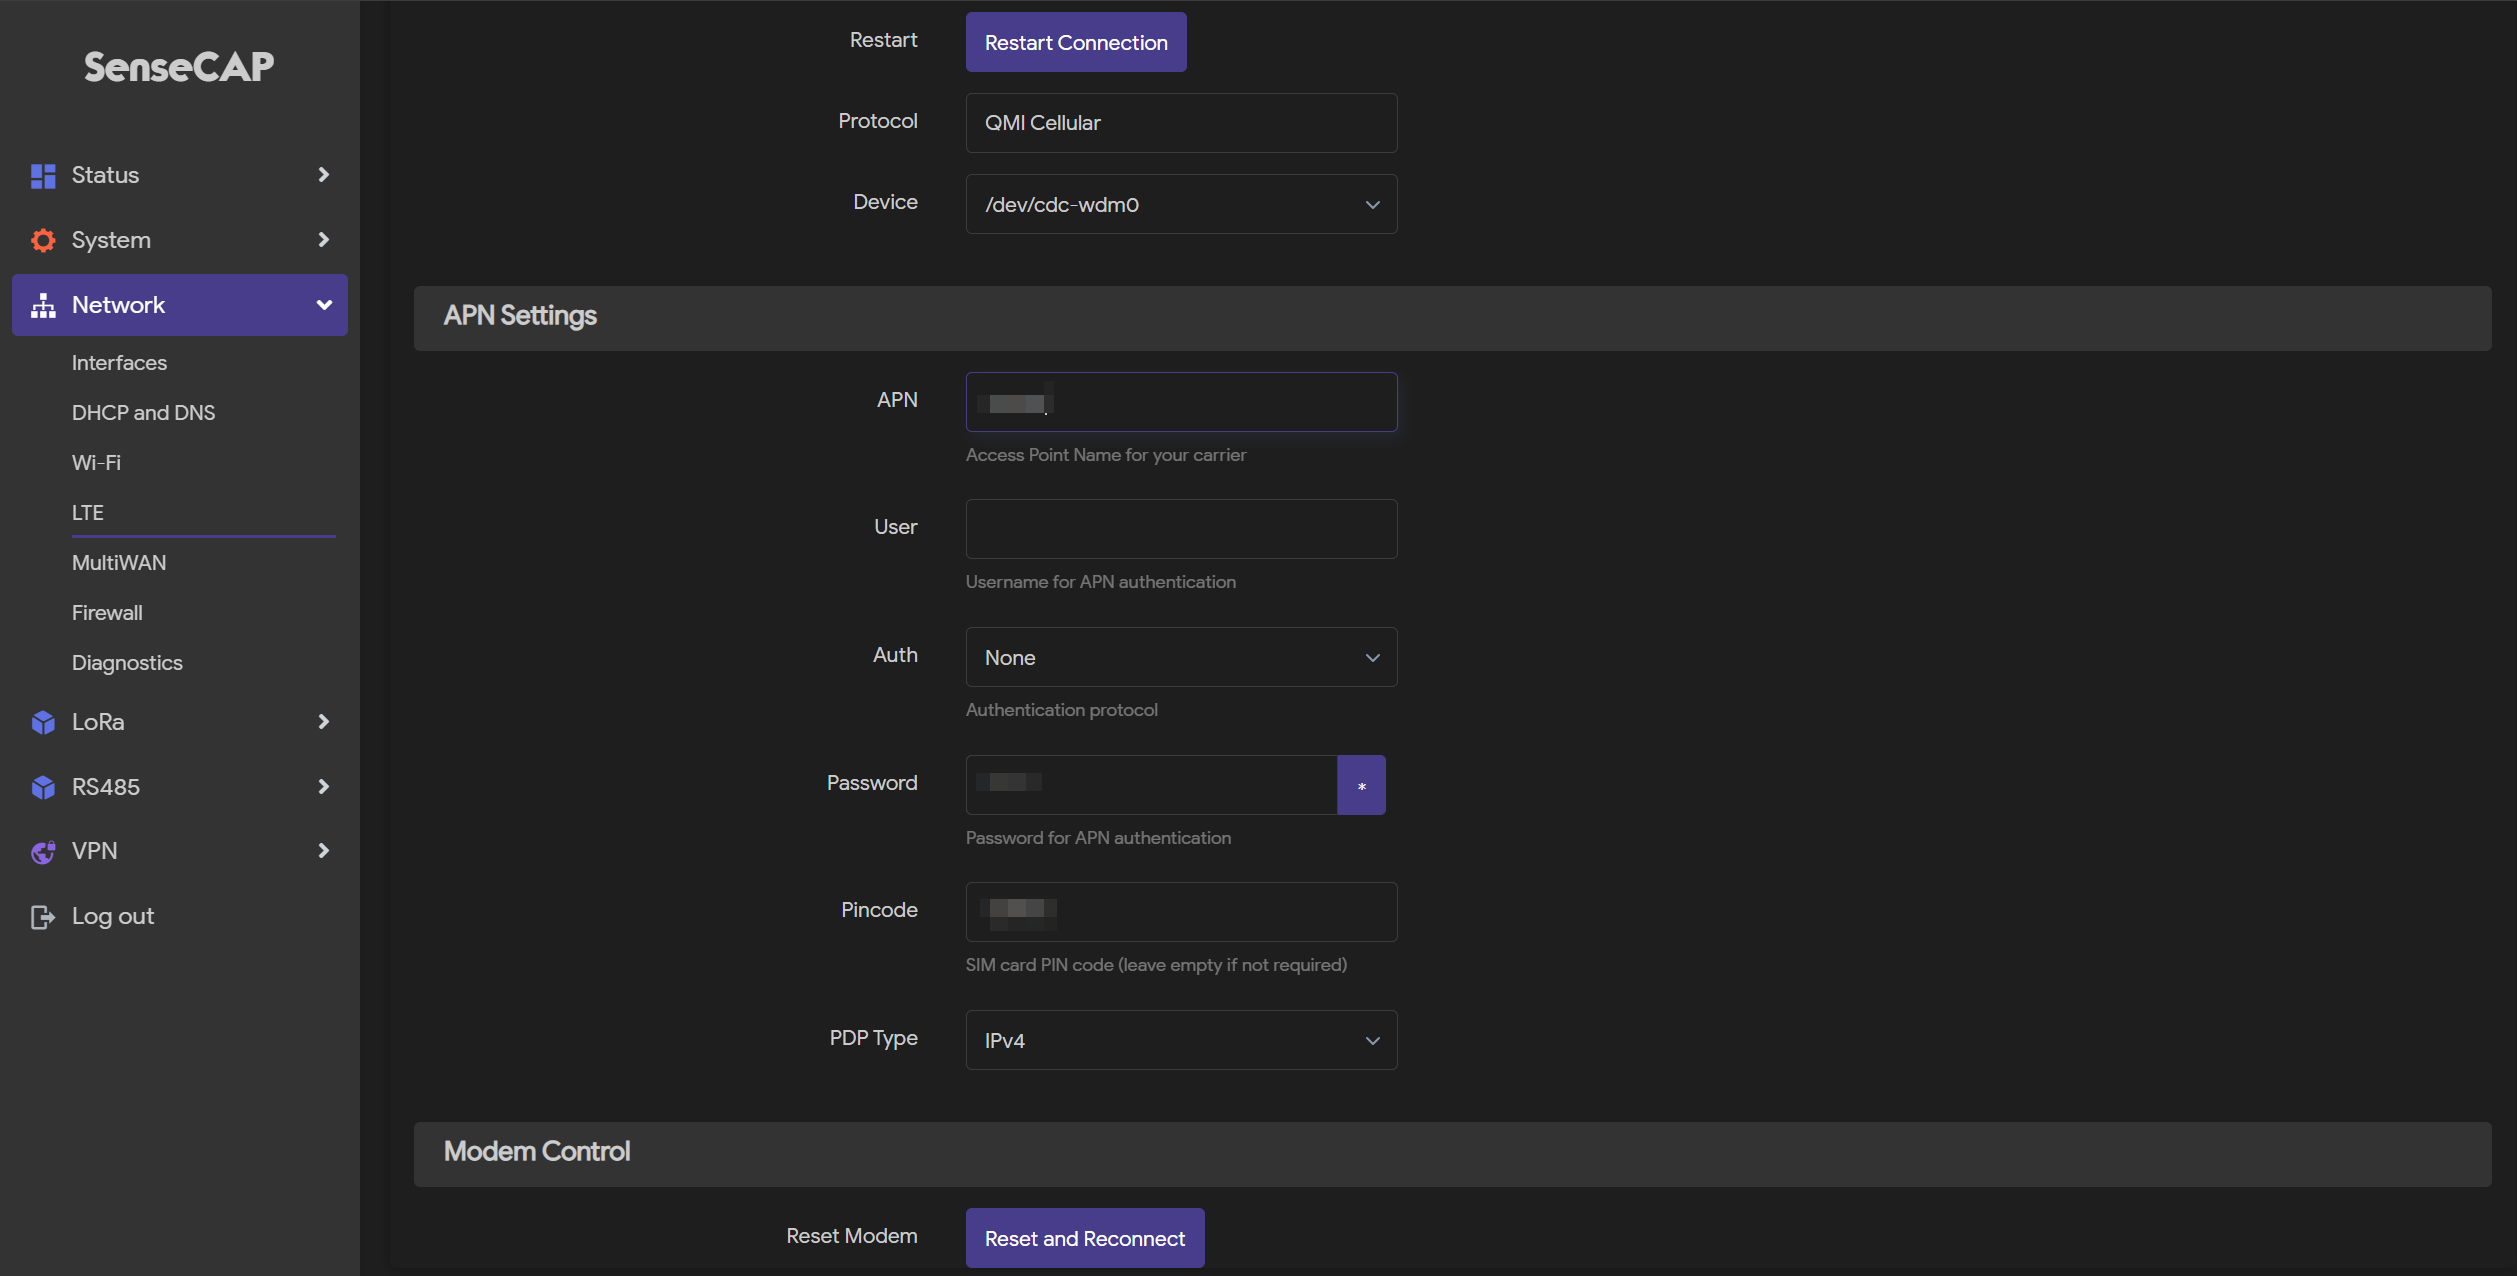
- Step 3: Setup the APN info, and click
Save & Applyto apply your settings
R1225 LoRaWAN Configuration
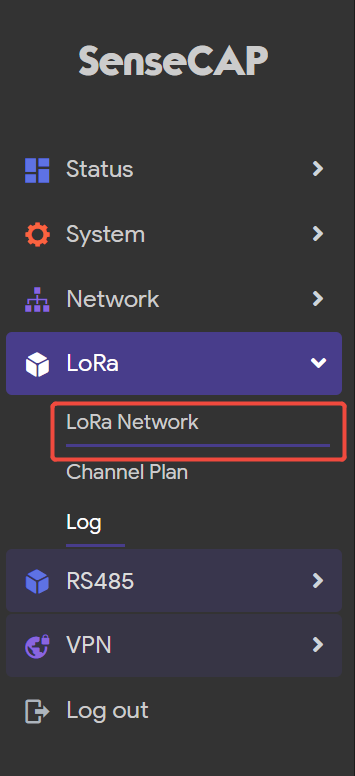
- Step 1: Click on
LoRa-LoRa Network
- Step 2: Check the
Enable LoRa functionality
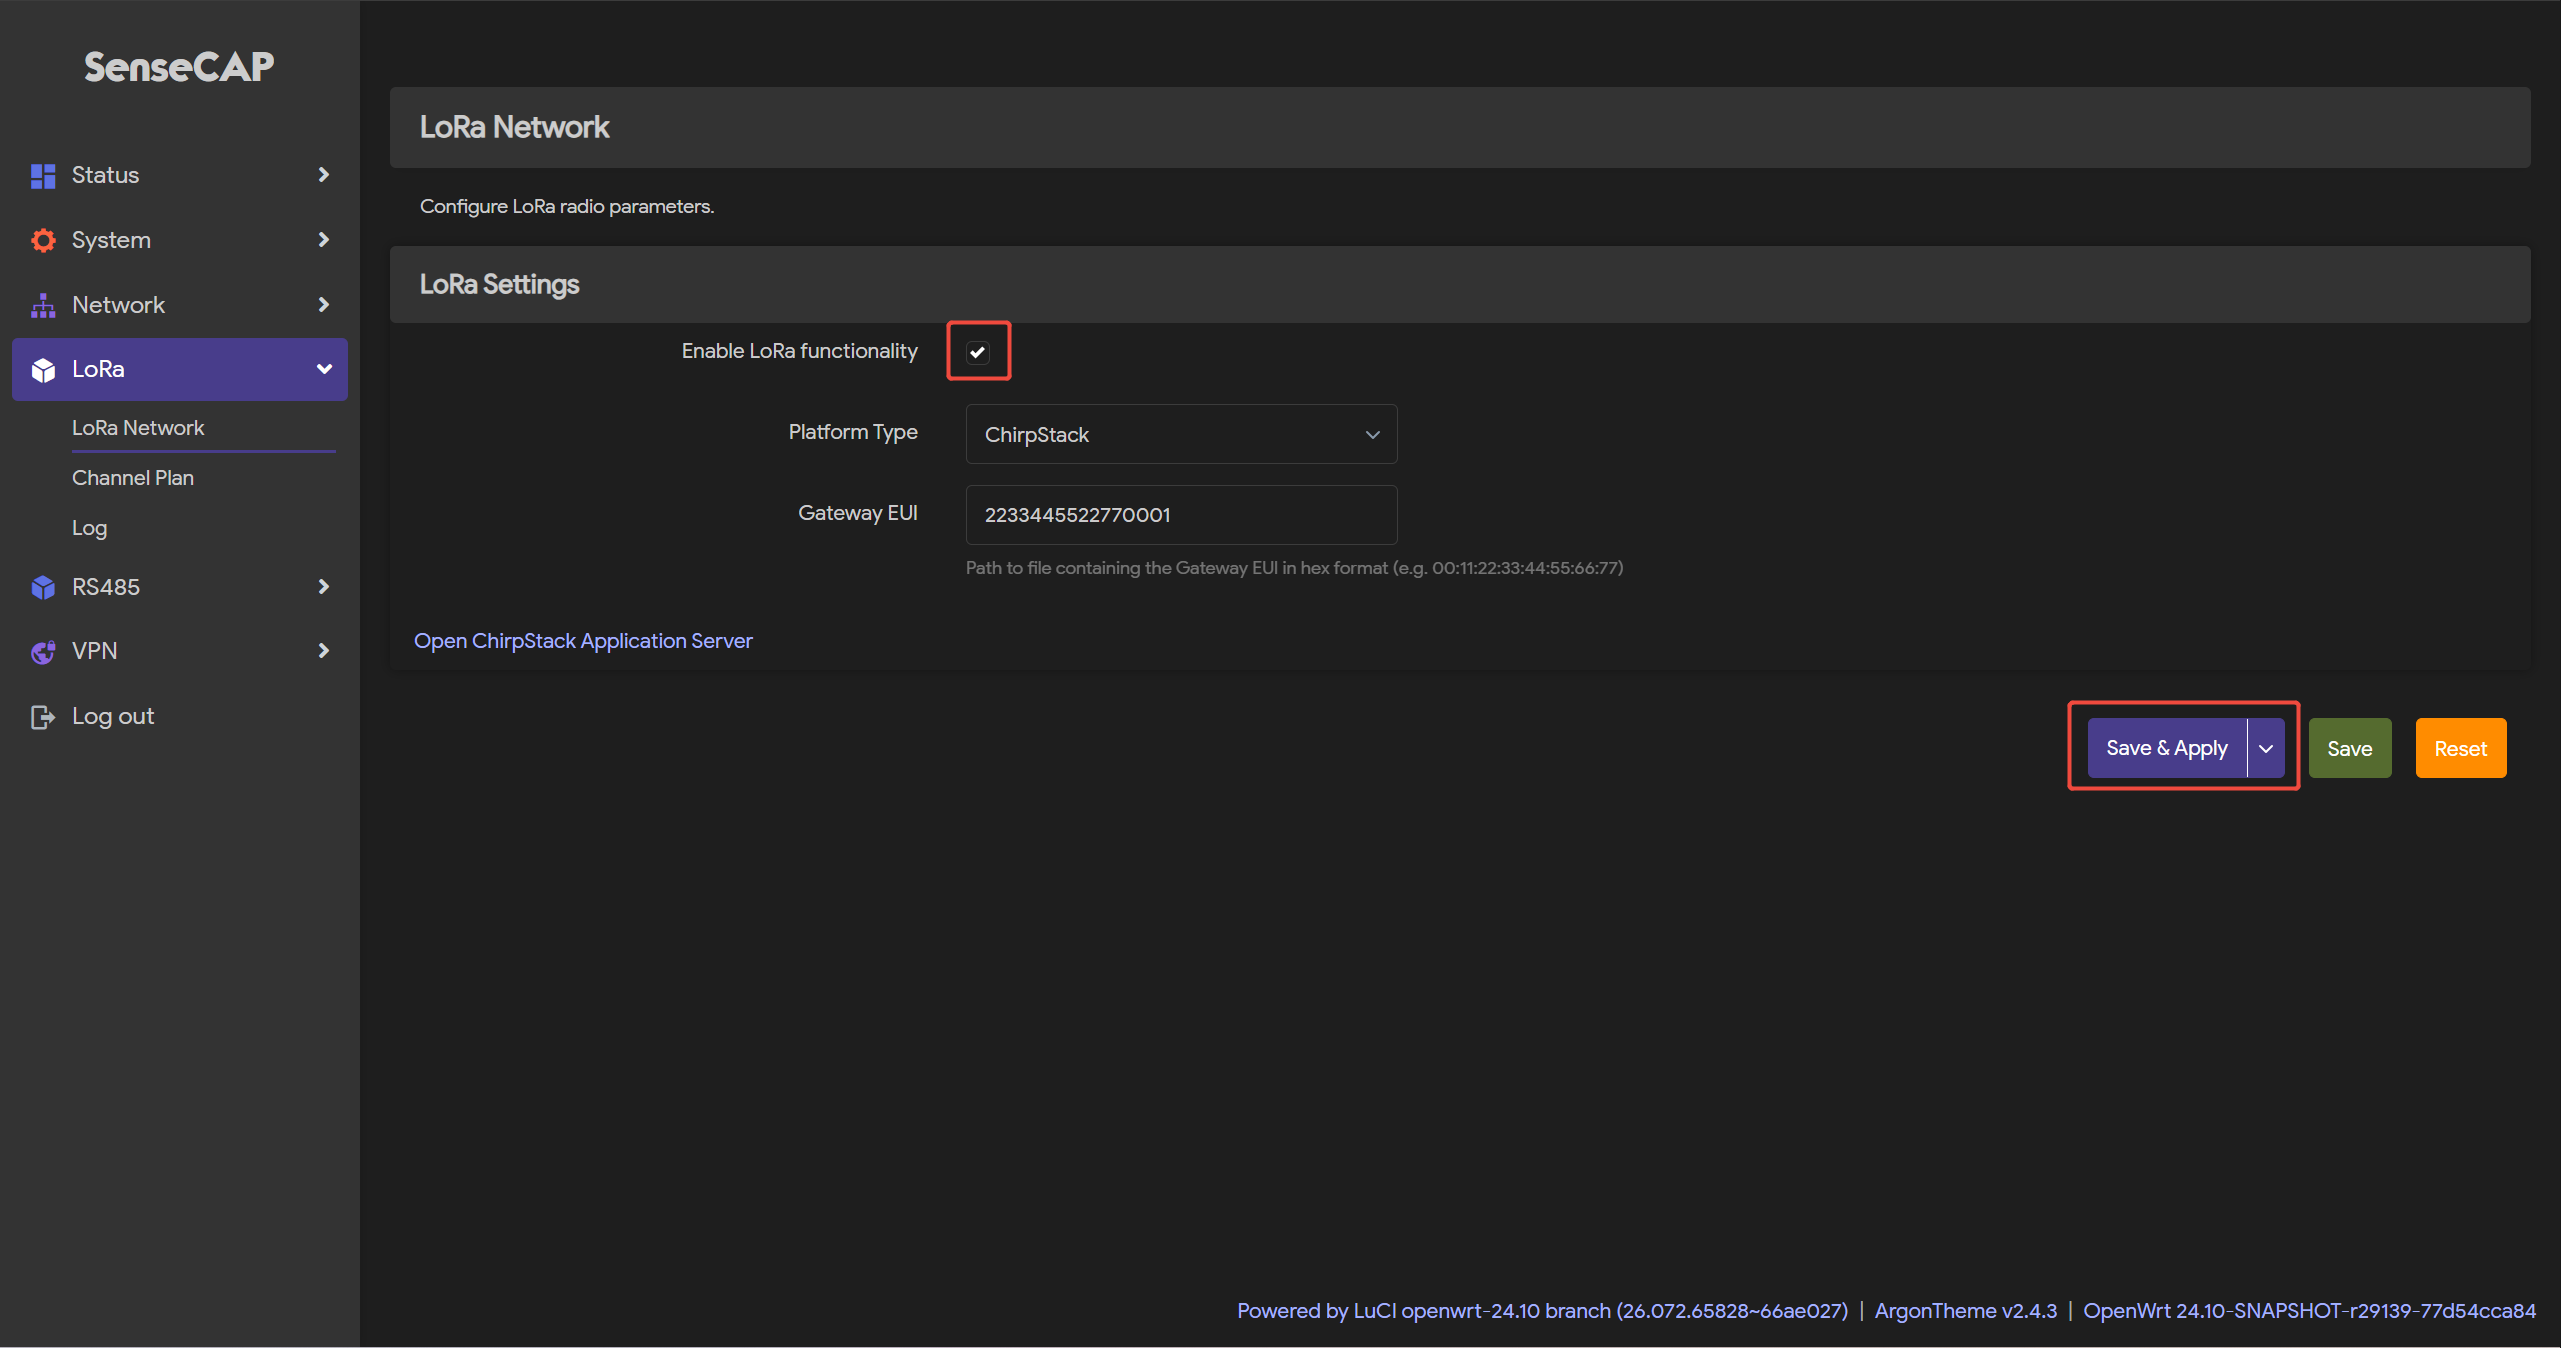
- Step 3: Click
Save & Applyto apply your settings
Channel Plan Settings
- Step 1: Navigate to
LoRa>Channel Plan
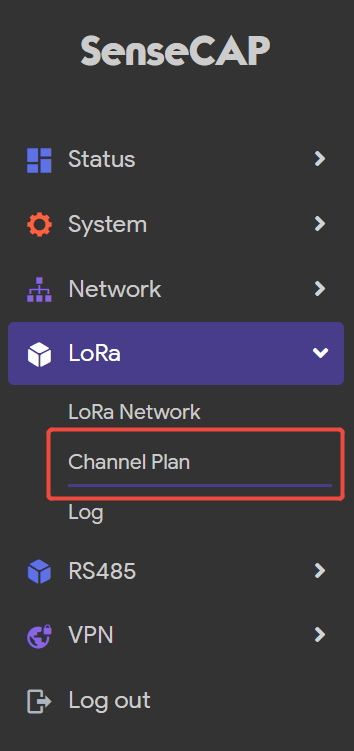
- Step 2: Select
RegionandChannel-plan

- Step 3: Click
Save & Applyto apply your settings
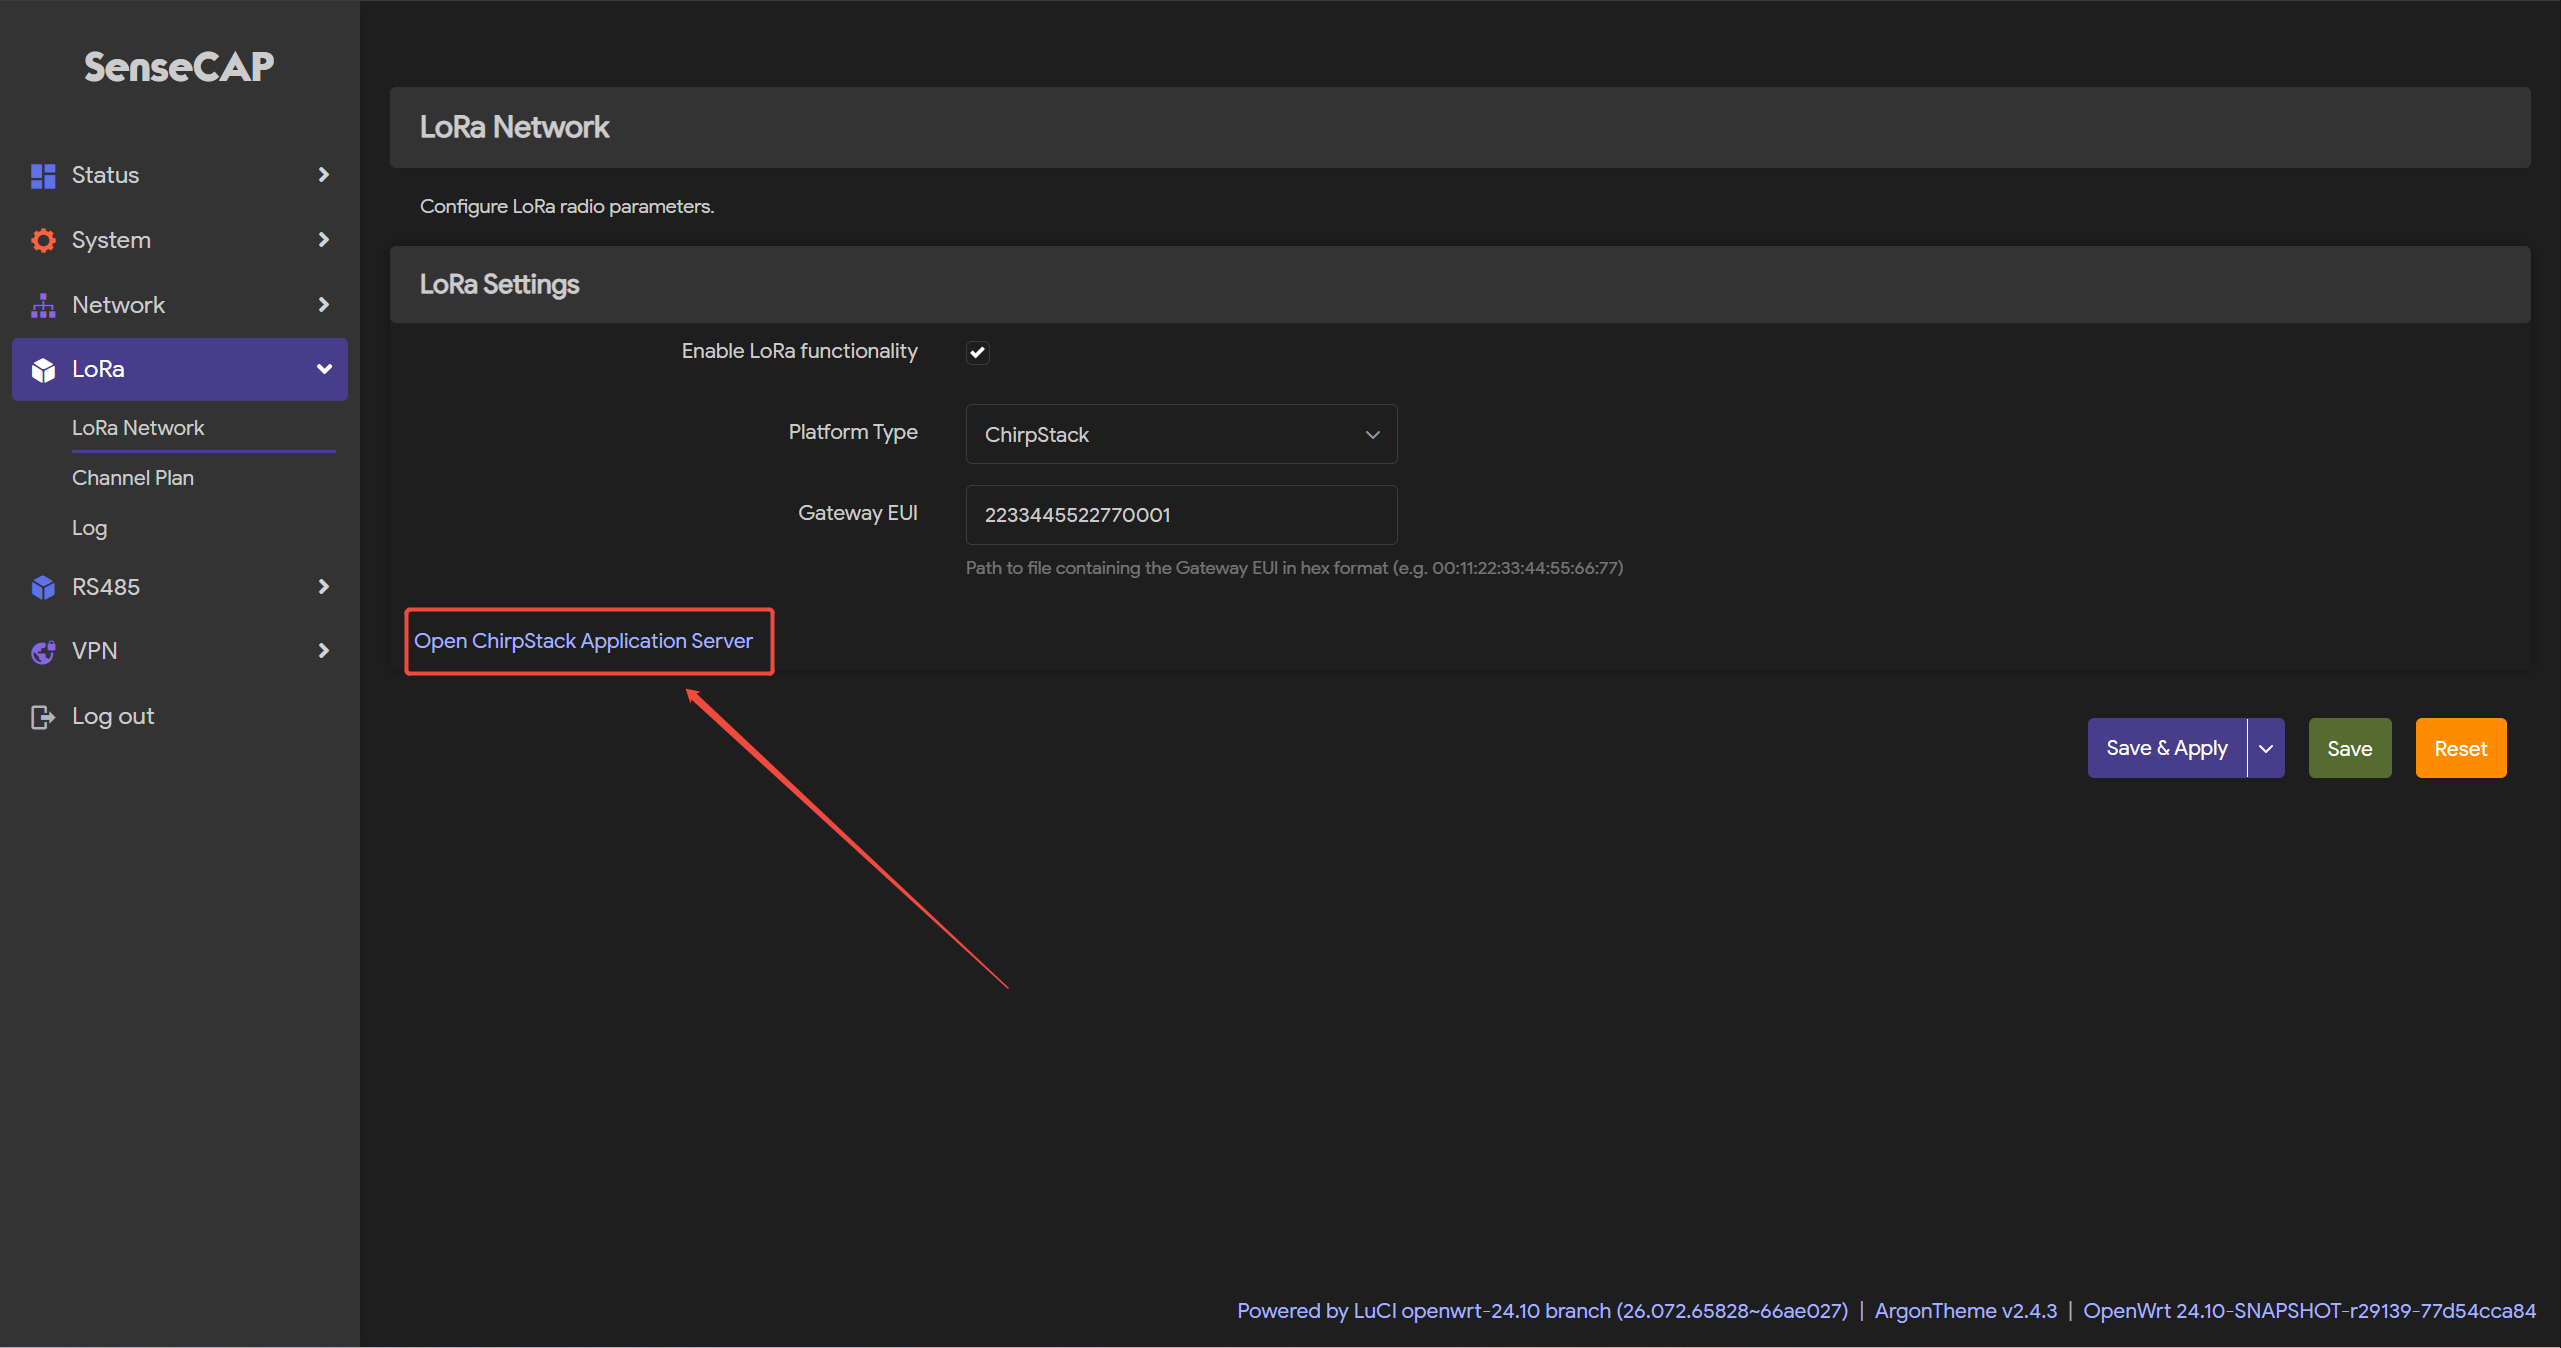
Select the built-in Chirpstack platform
R1225 comes with ChirpStack (open-source LoRaWAN network server) pre-installed.
-
Step 1: Select
Platform Type-ChirpStack -
Step 2: Check the EUI
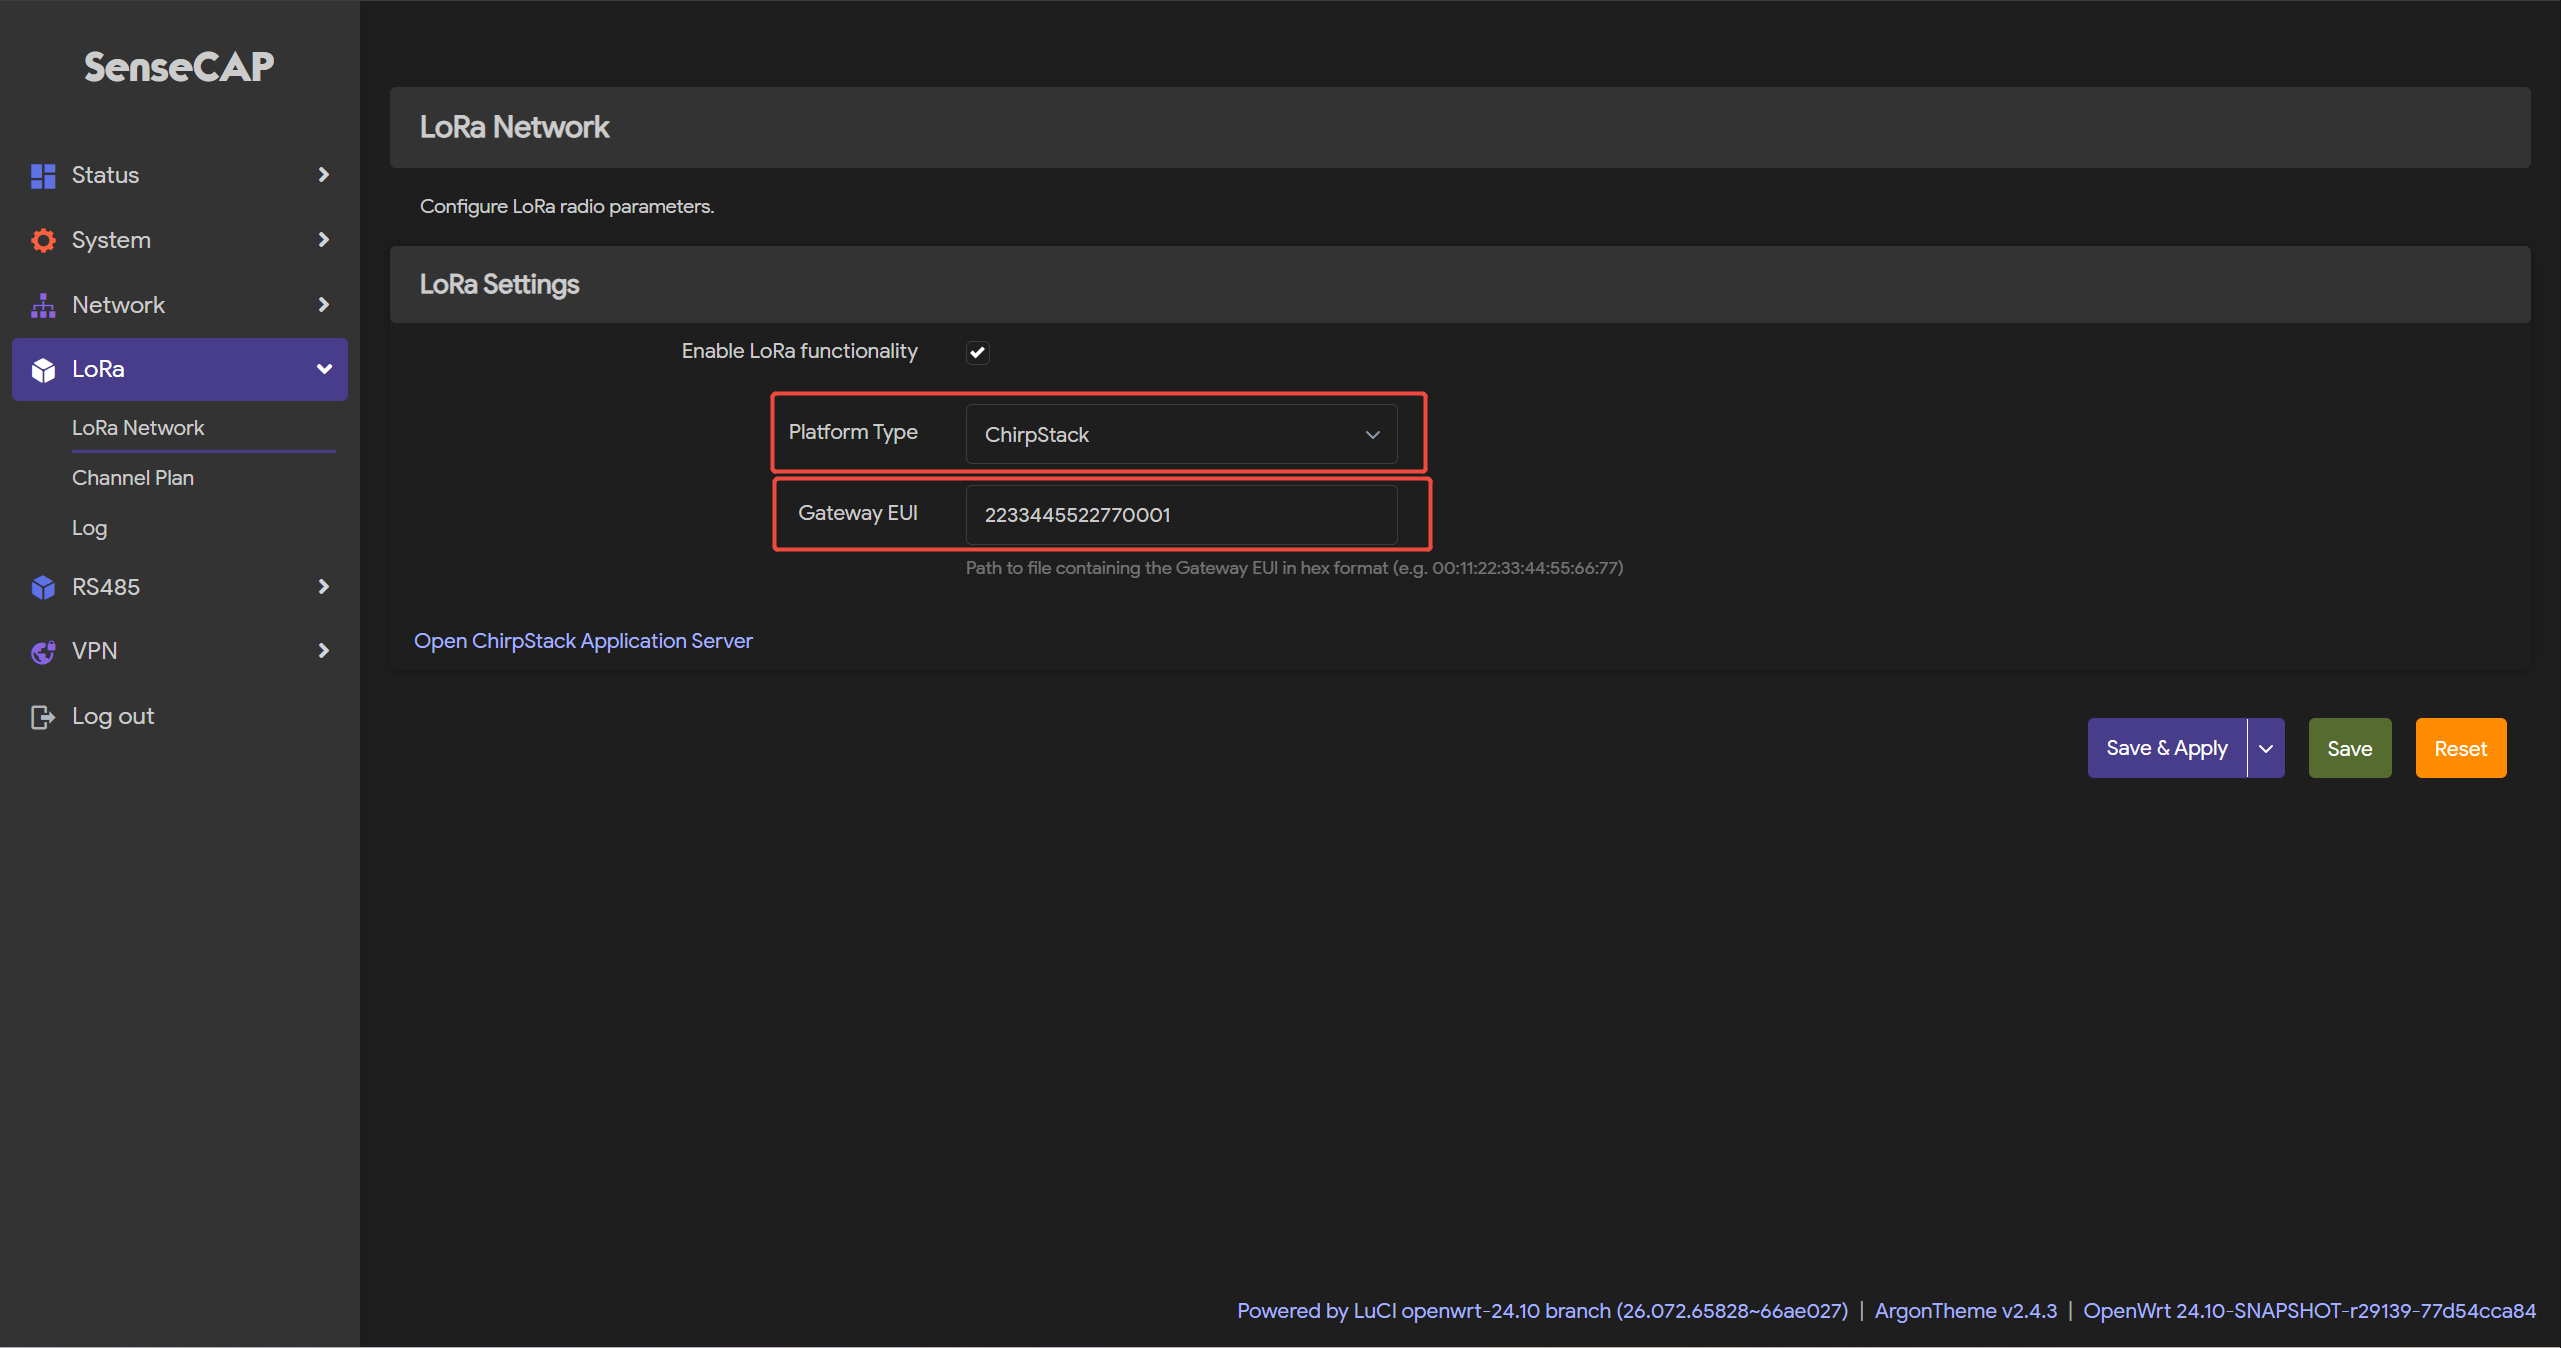
- Step 3: Click
Open ChirpStack Application Serverin the lower-left corner
-
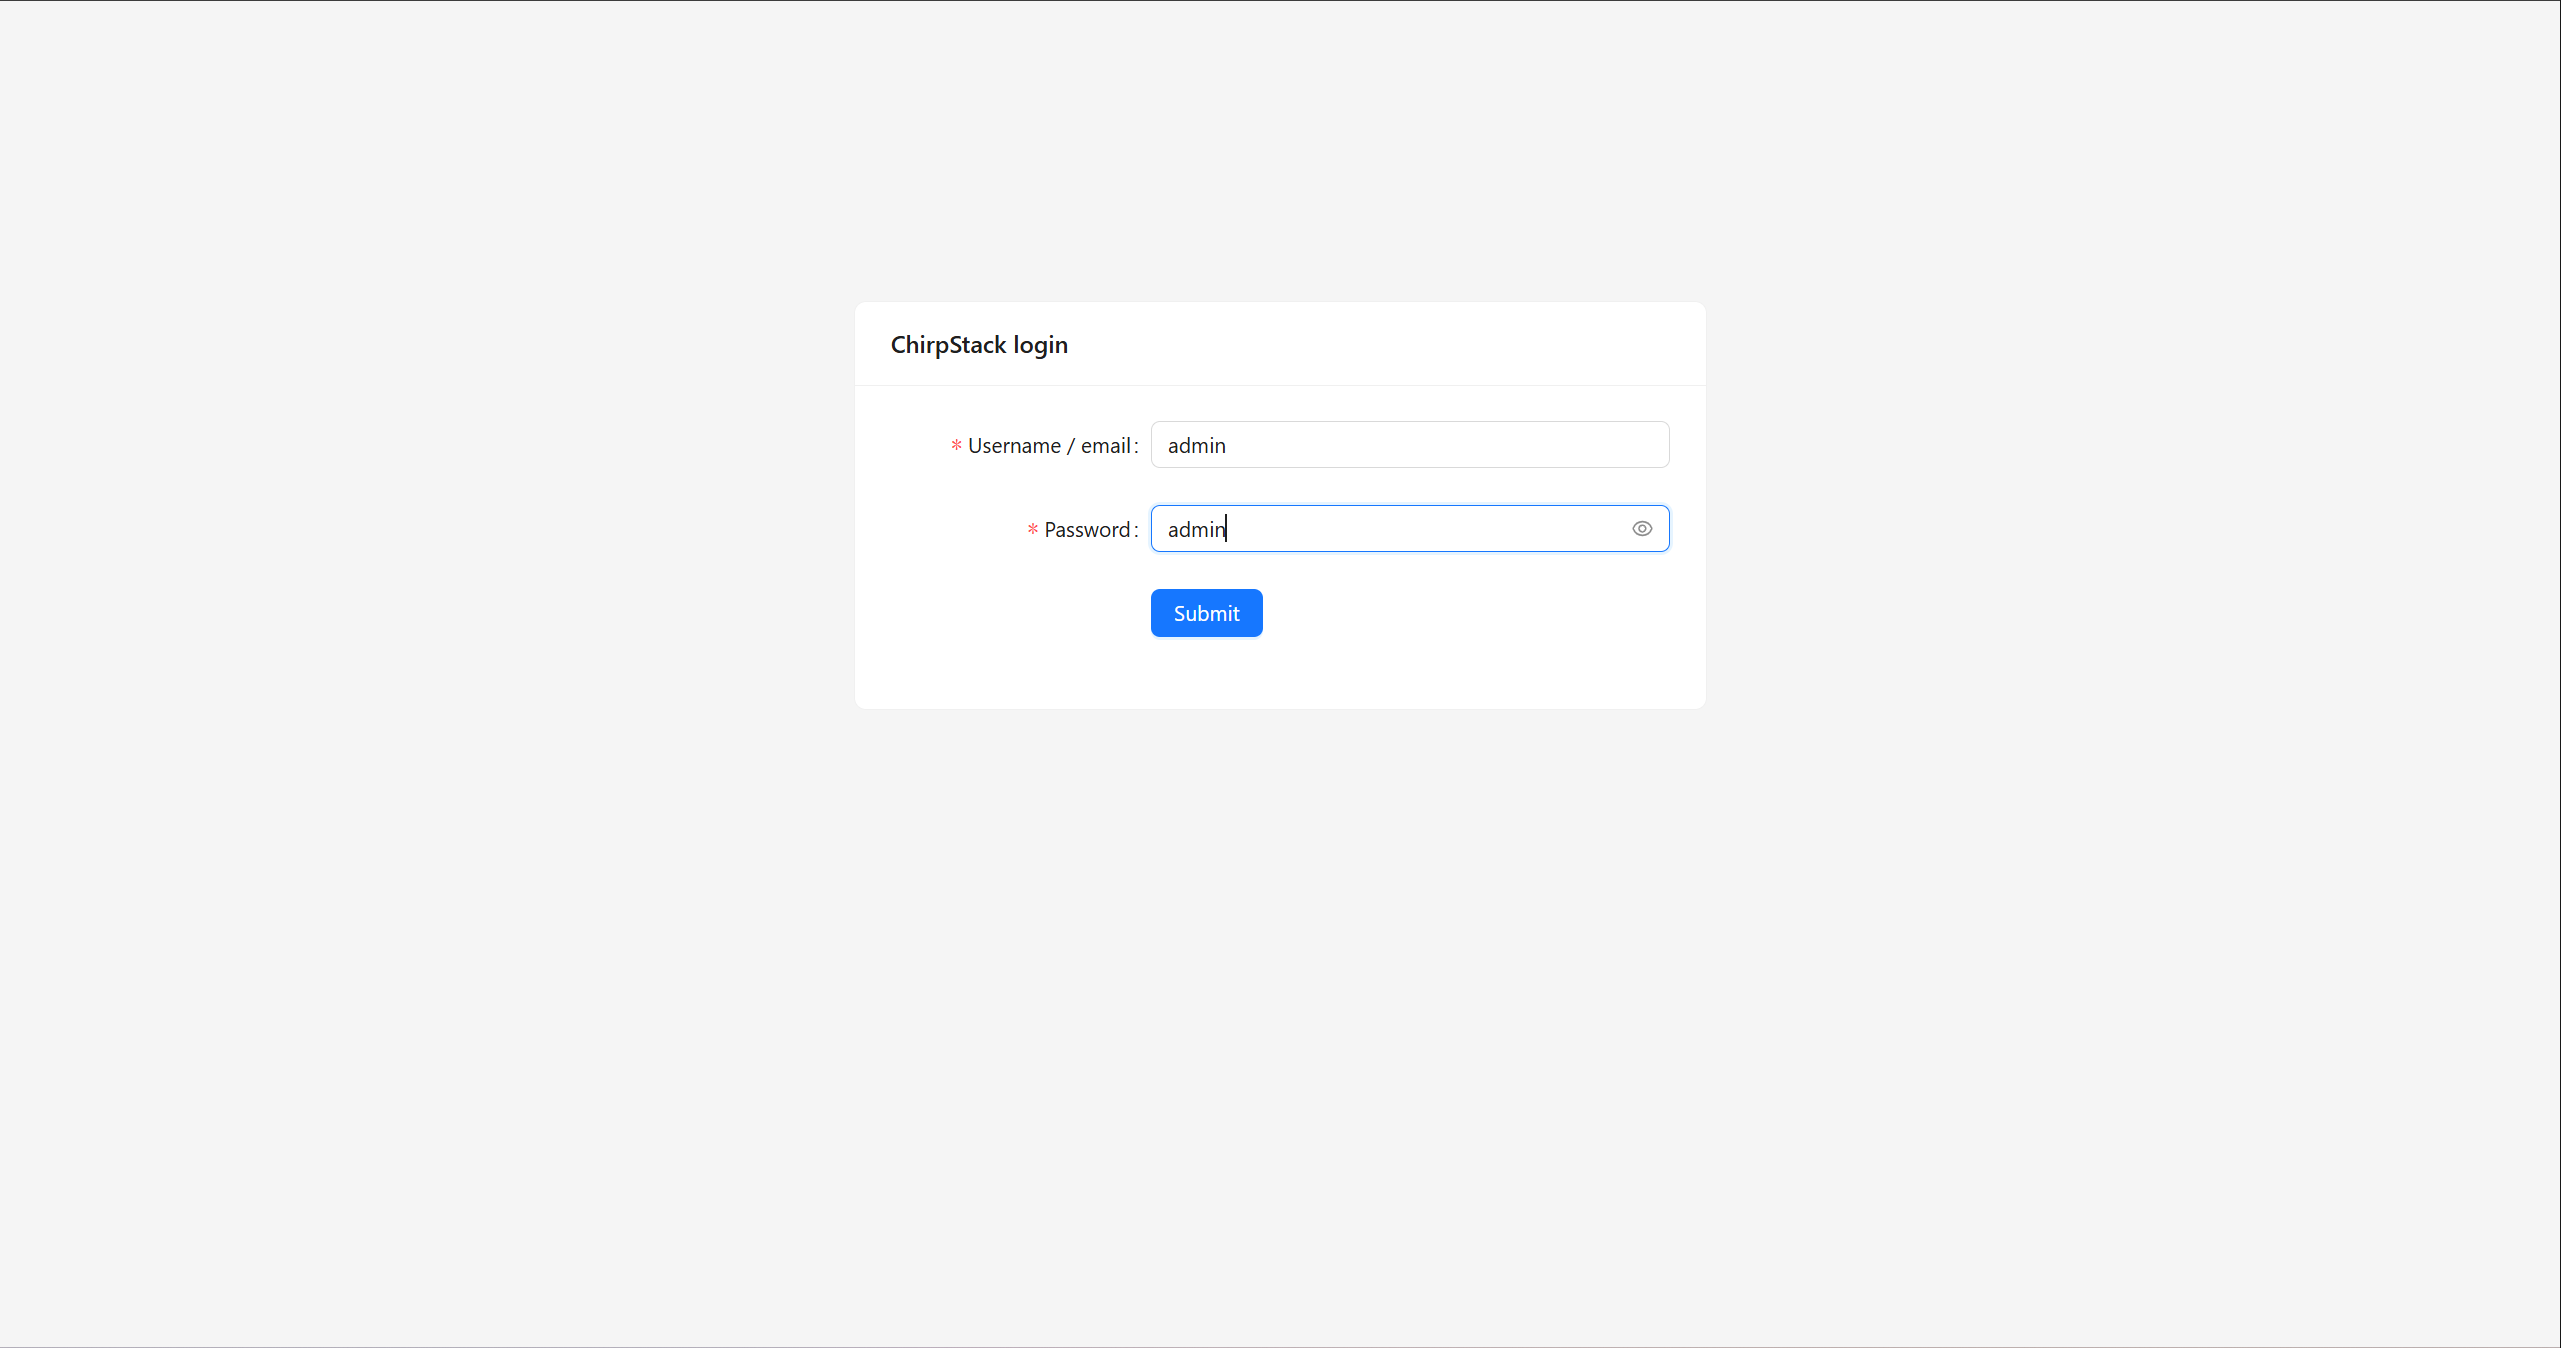
Step 4: Log in to the Chirpstack Cloud Platform
-
Username/email: admin
-
Password: admin
-
The default username and password are both “admin”
Then click Submit to go to the Chirpstack platform interface
Bind R1225 LoRaWAN Gateway
- Step 5: Navigate to
Gateway>Add gateway
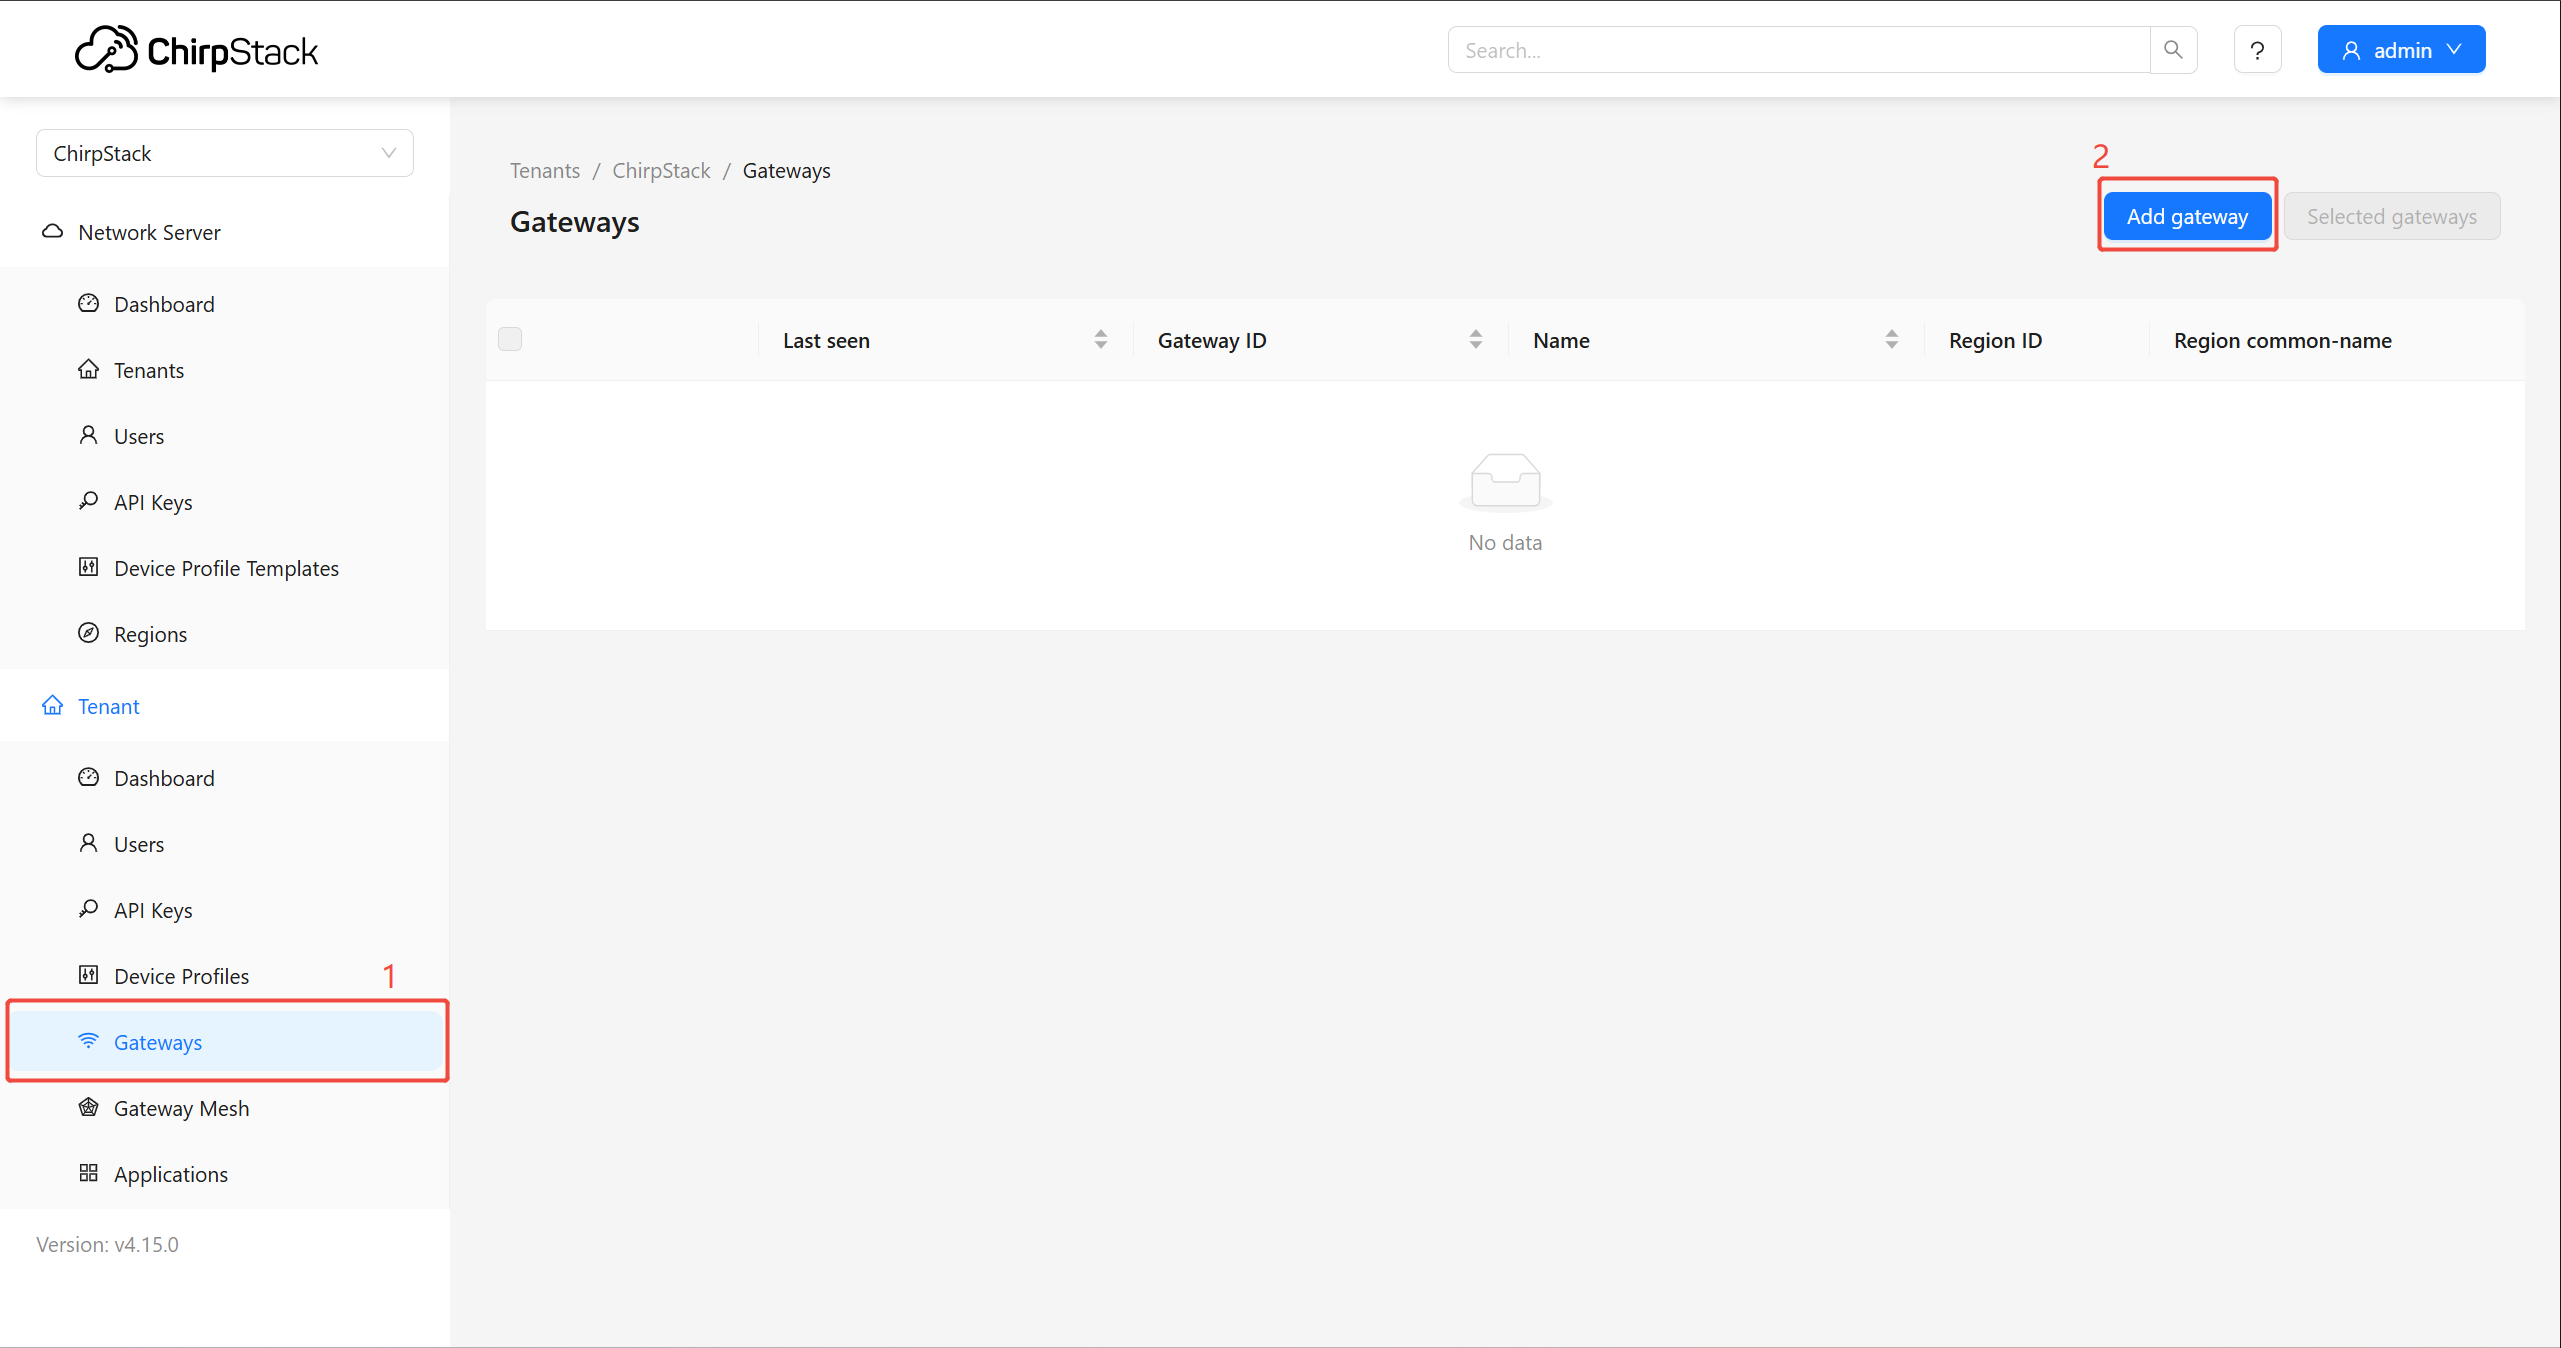
-
Step 6: Enter the
Gateway NameandGateway ID (EUI: 64)-
Gateway name: A name of your gateway
-
Gateway ID(EUI64): Gateway EUI can be found on the device label or Local Console
-
Stats interval(secs): The expected interval in seconds in which the gateway sends its statistics
-
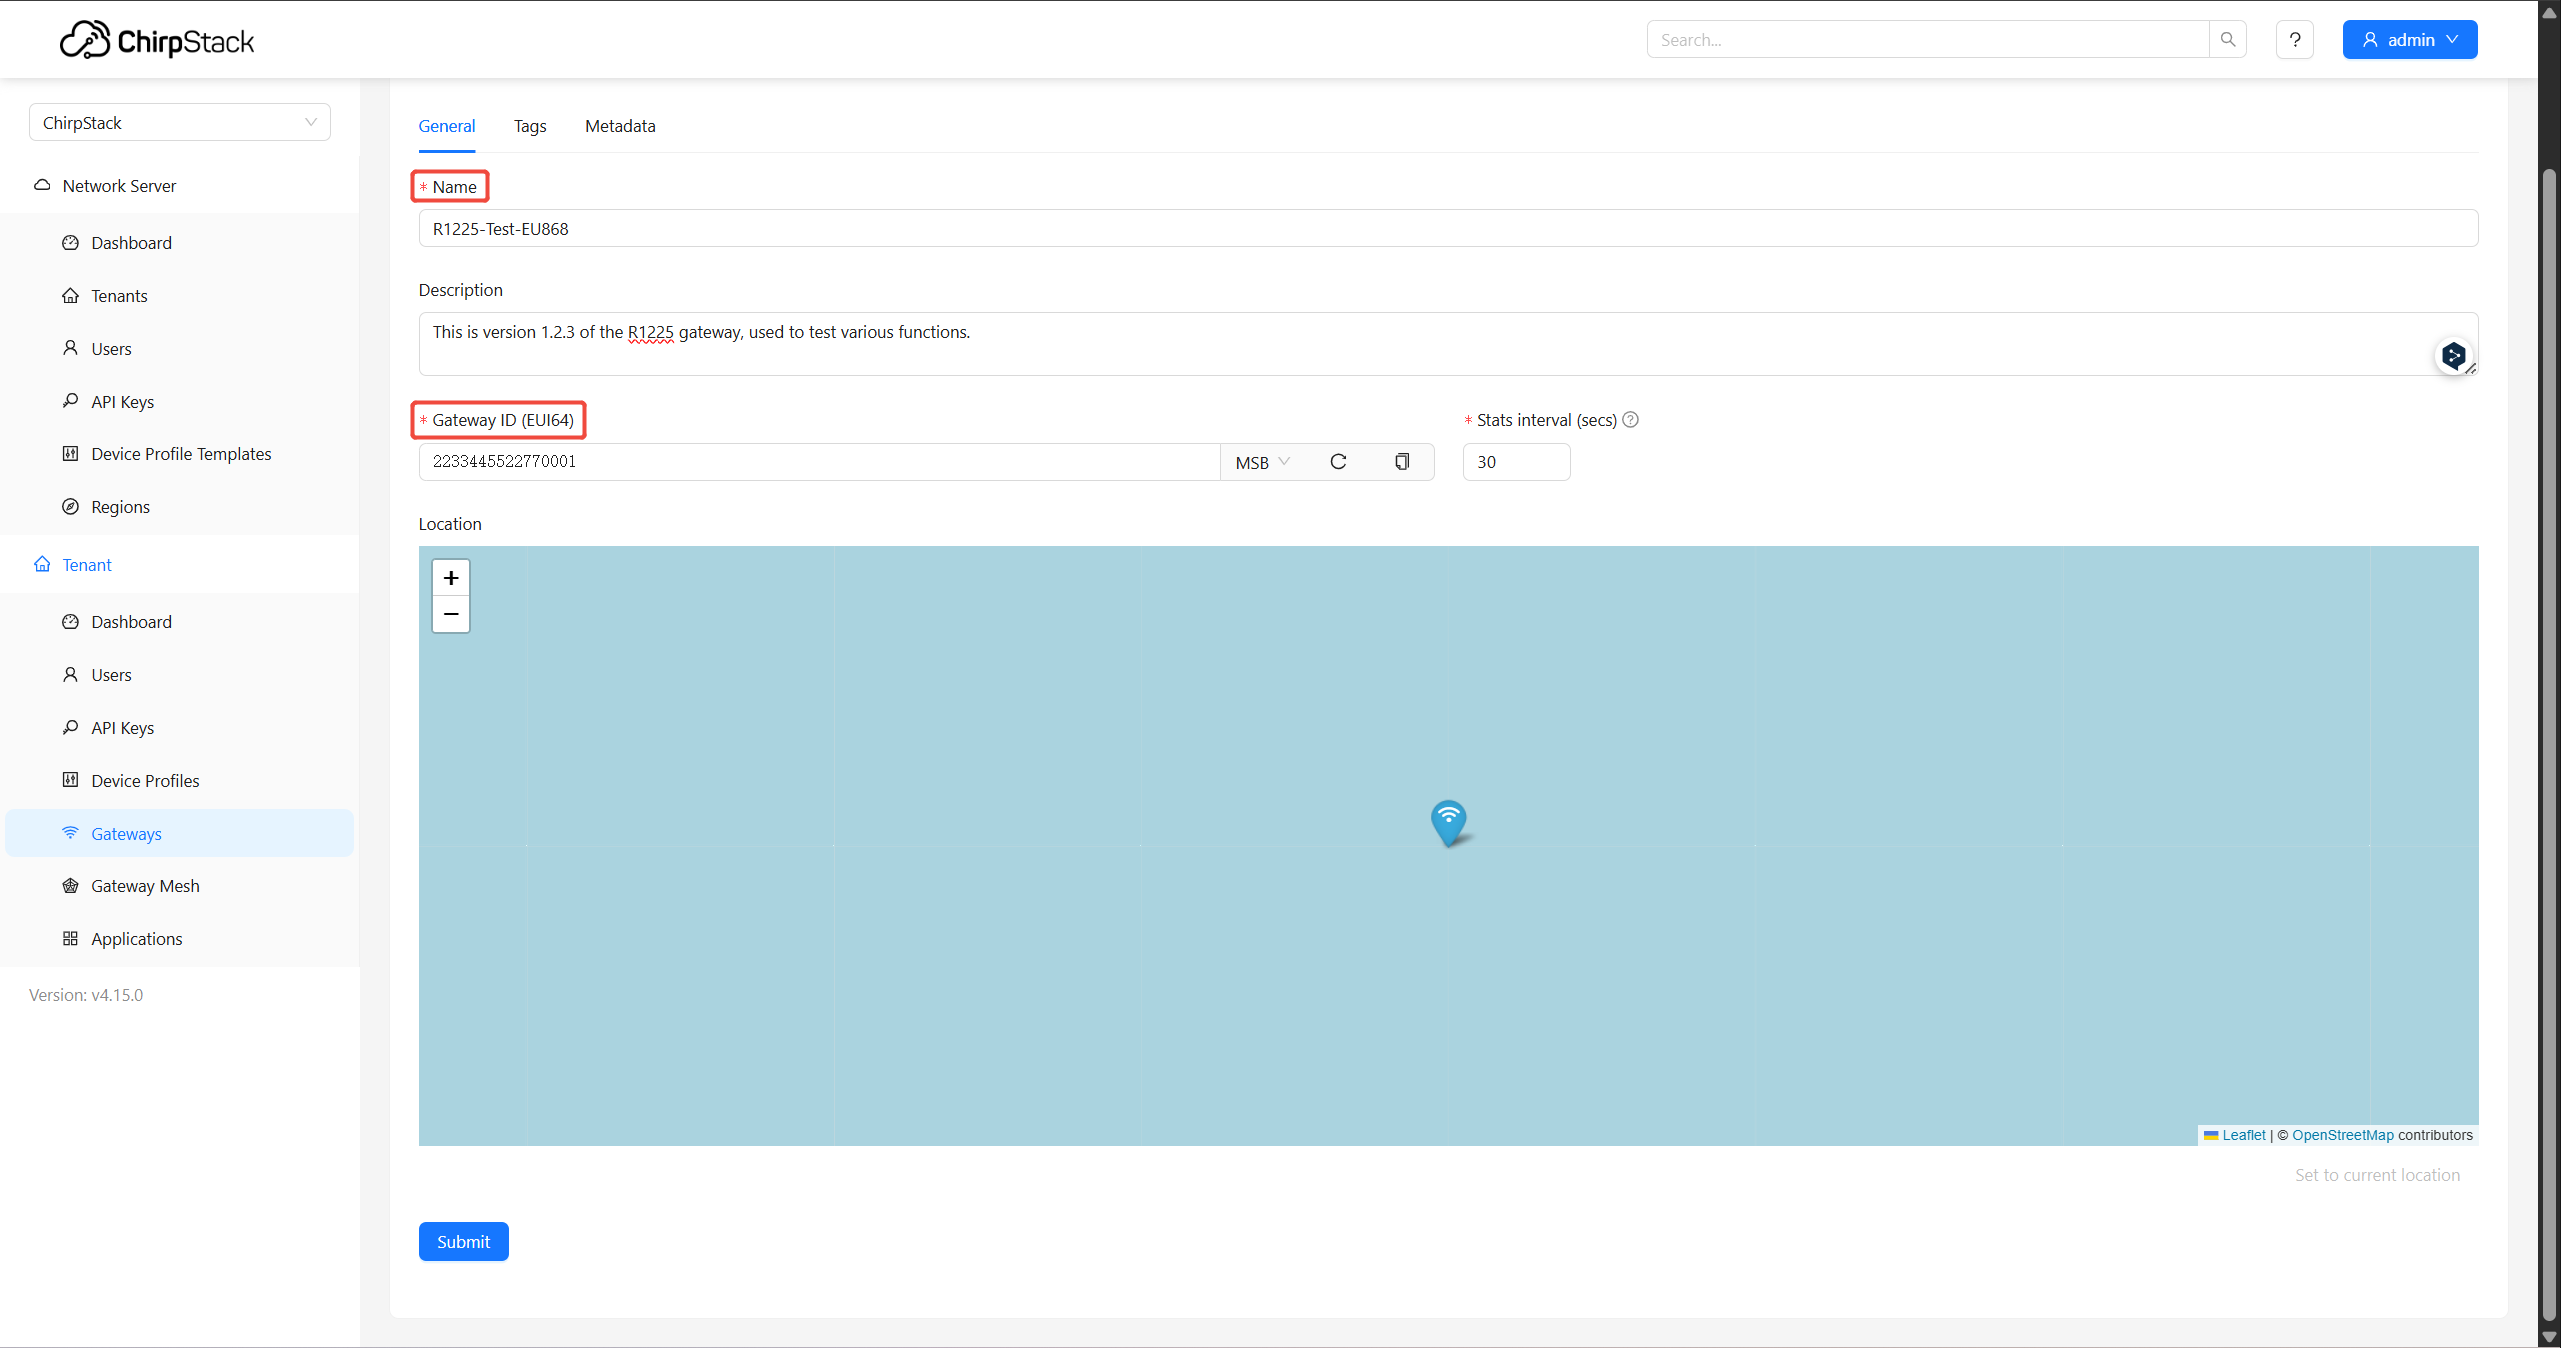
Then click Submit
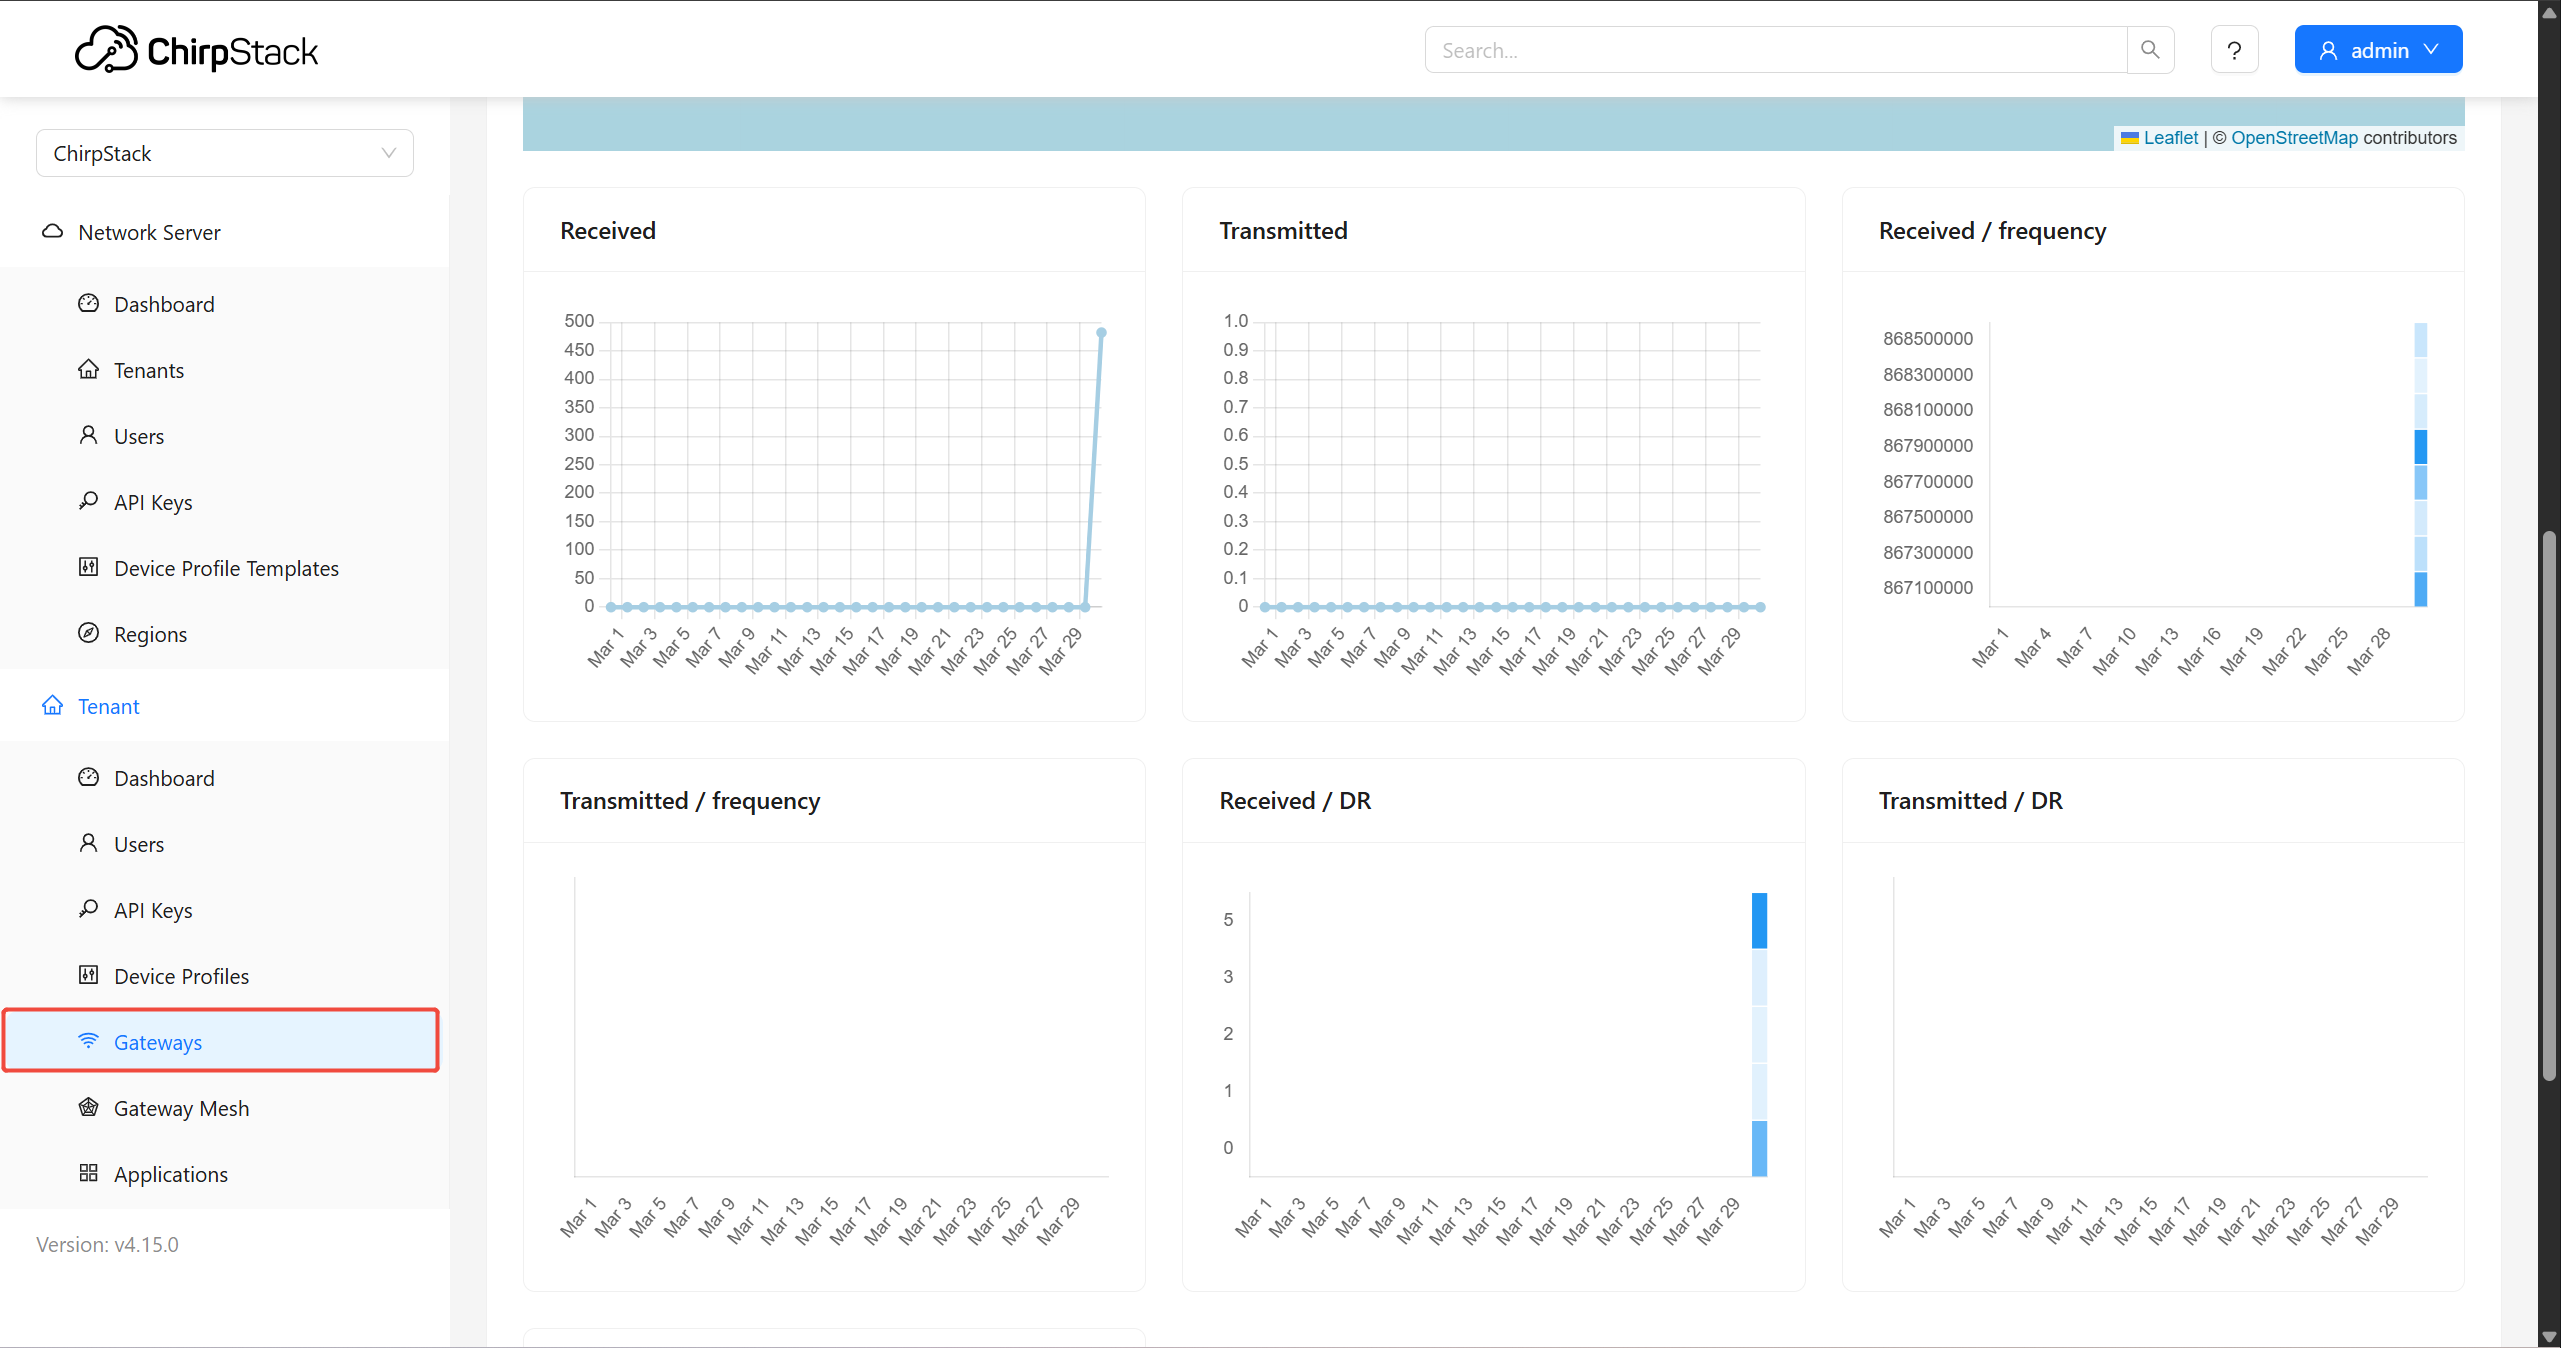
Checking the Gateway Connection Status
Upon completion of all configuration steps, the gateway should be displayed as Online on the ChirpStack platform.
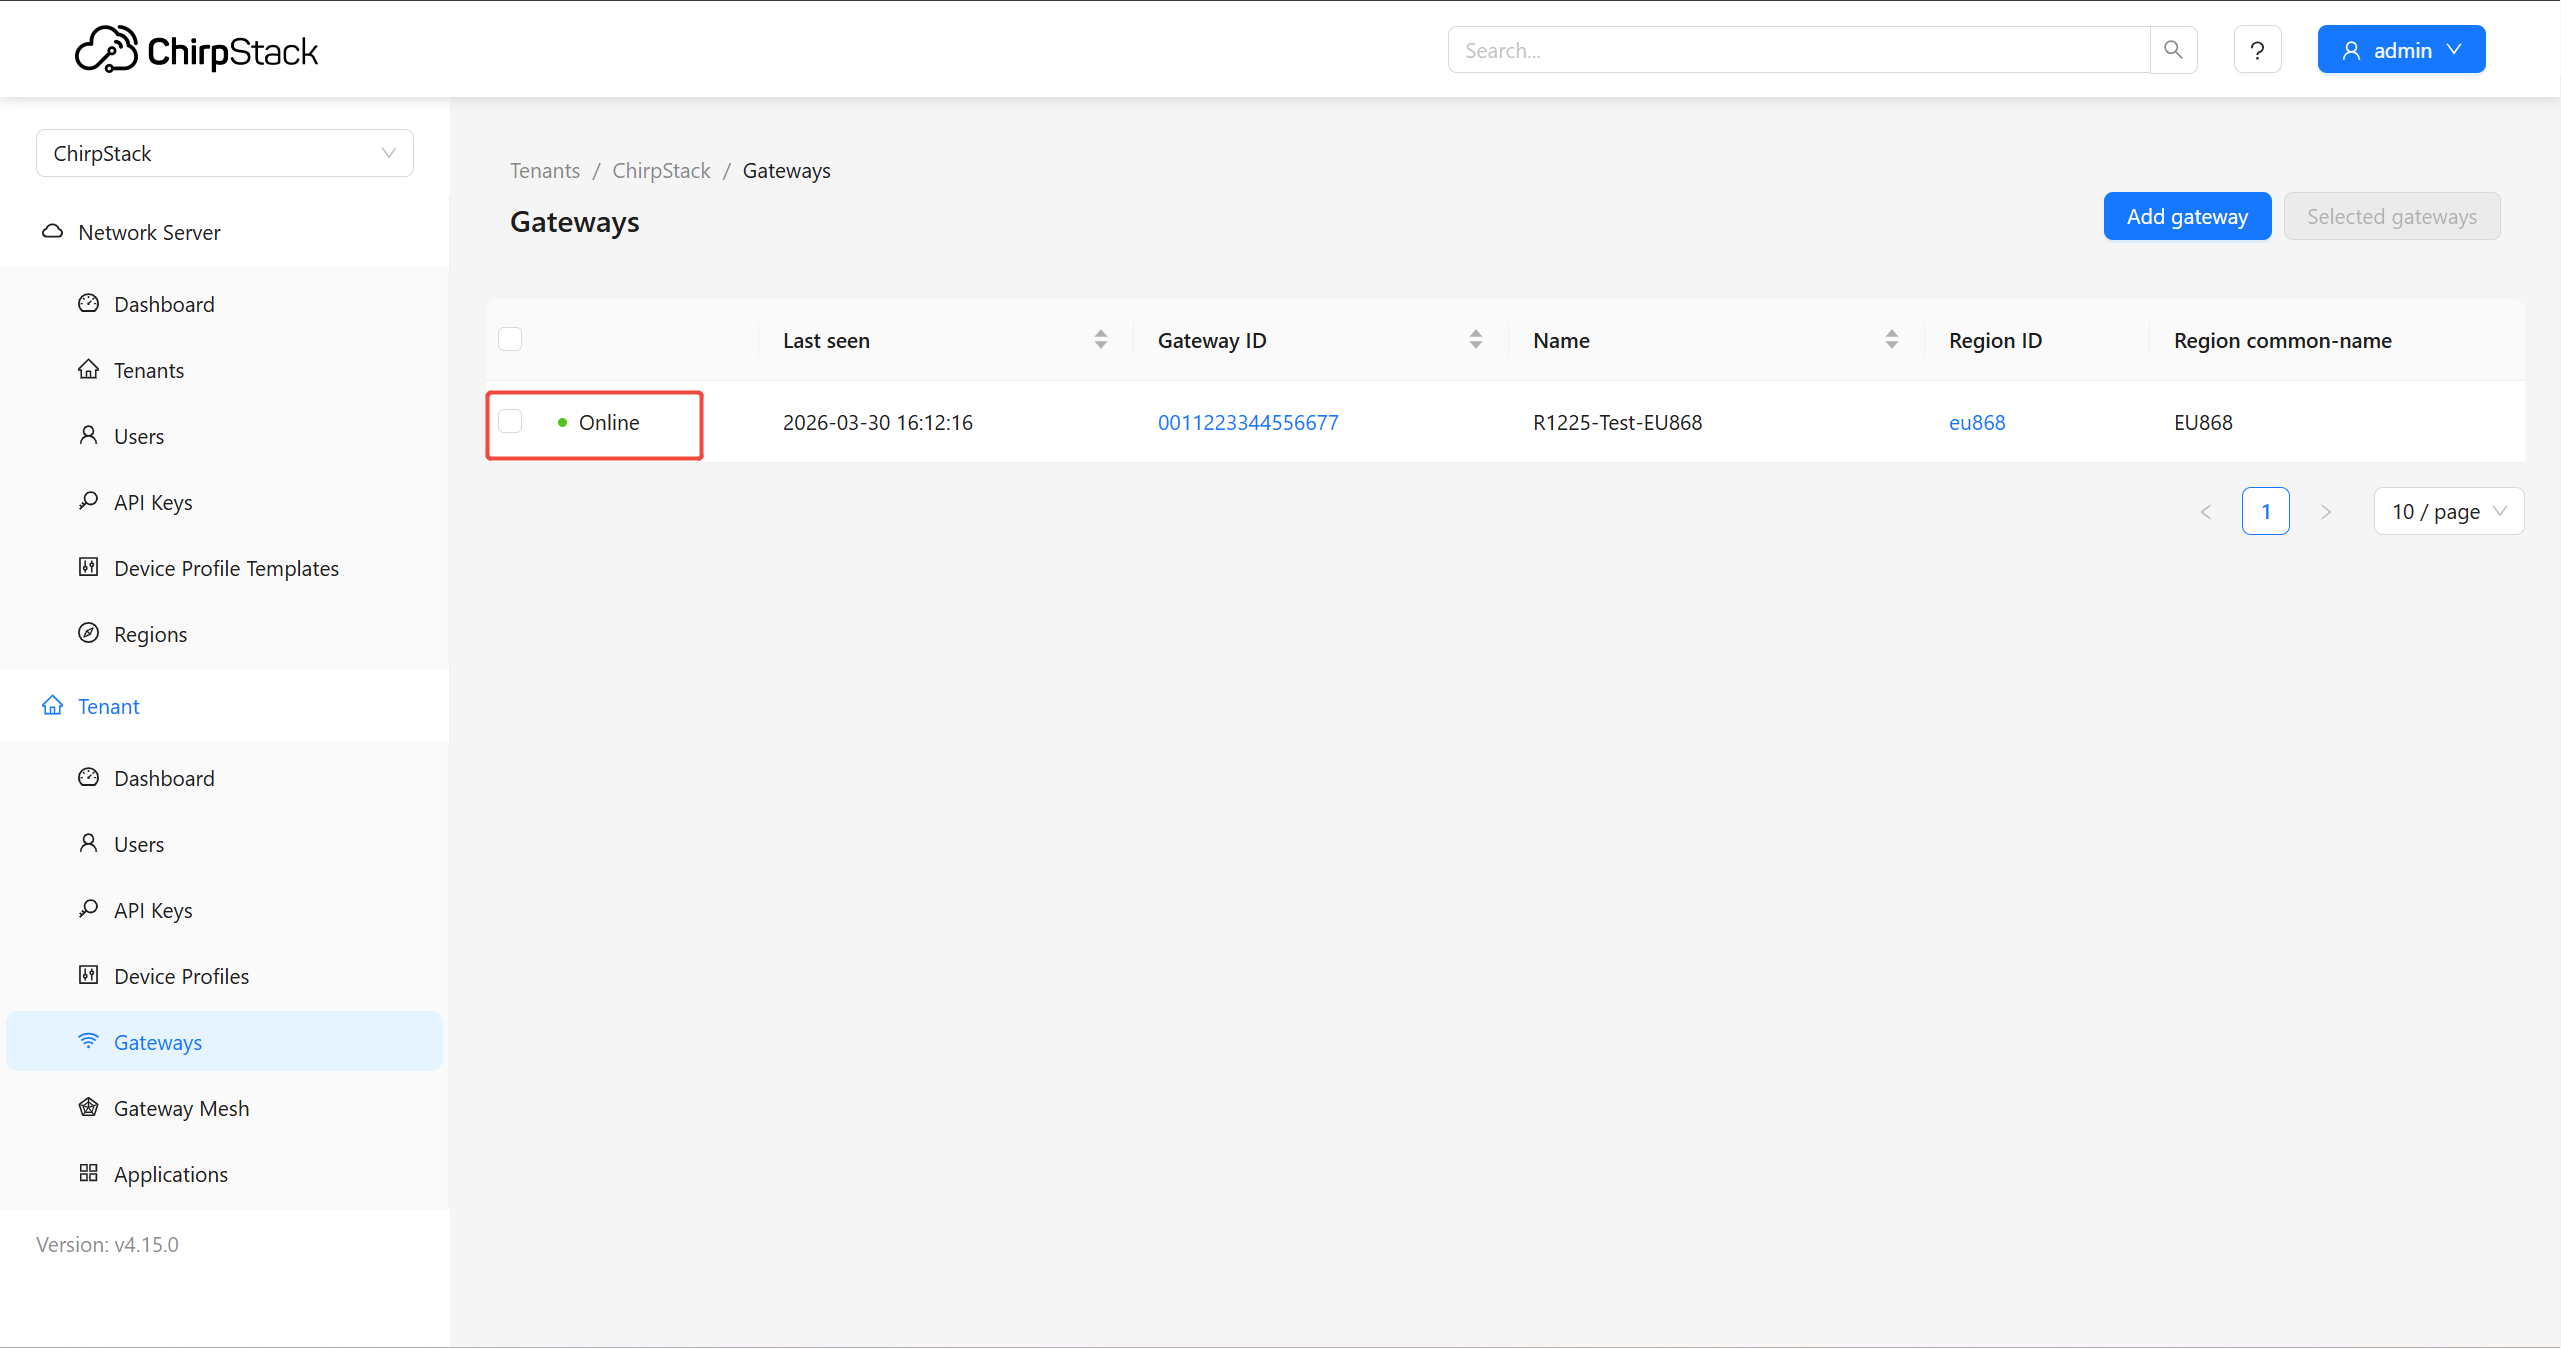
Gateway data
Navigate to Gateways, choose the gateway you want to check.