Getting Started with Raspberry Pi 4G HAT GNSS Functionalities
Introduction
The integration of GNSS into the 4G LTE module enhances its capabilities, enabling precise real-time positioning and reliable communication for IoT applications. With support for multi-constellation GNSS systems, the module delivers accurate and dependable location tracking, even in remote or underserved areas. These features make it ideal for scenarios like asset tracking, fleet management, and real-time remote monitoring.
Paired with 4G LTE connectivity, this solution ensures seamless data transmission to cloud or control systems, enabling efficient management of critical use cases such as wildlife conservation, agriculture automation, and emergency response. This combination offers a scalable and cost-effective approach to location-based automation, suitable for industries requiring mobility and accessibility.
Hardaware Preperation
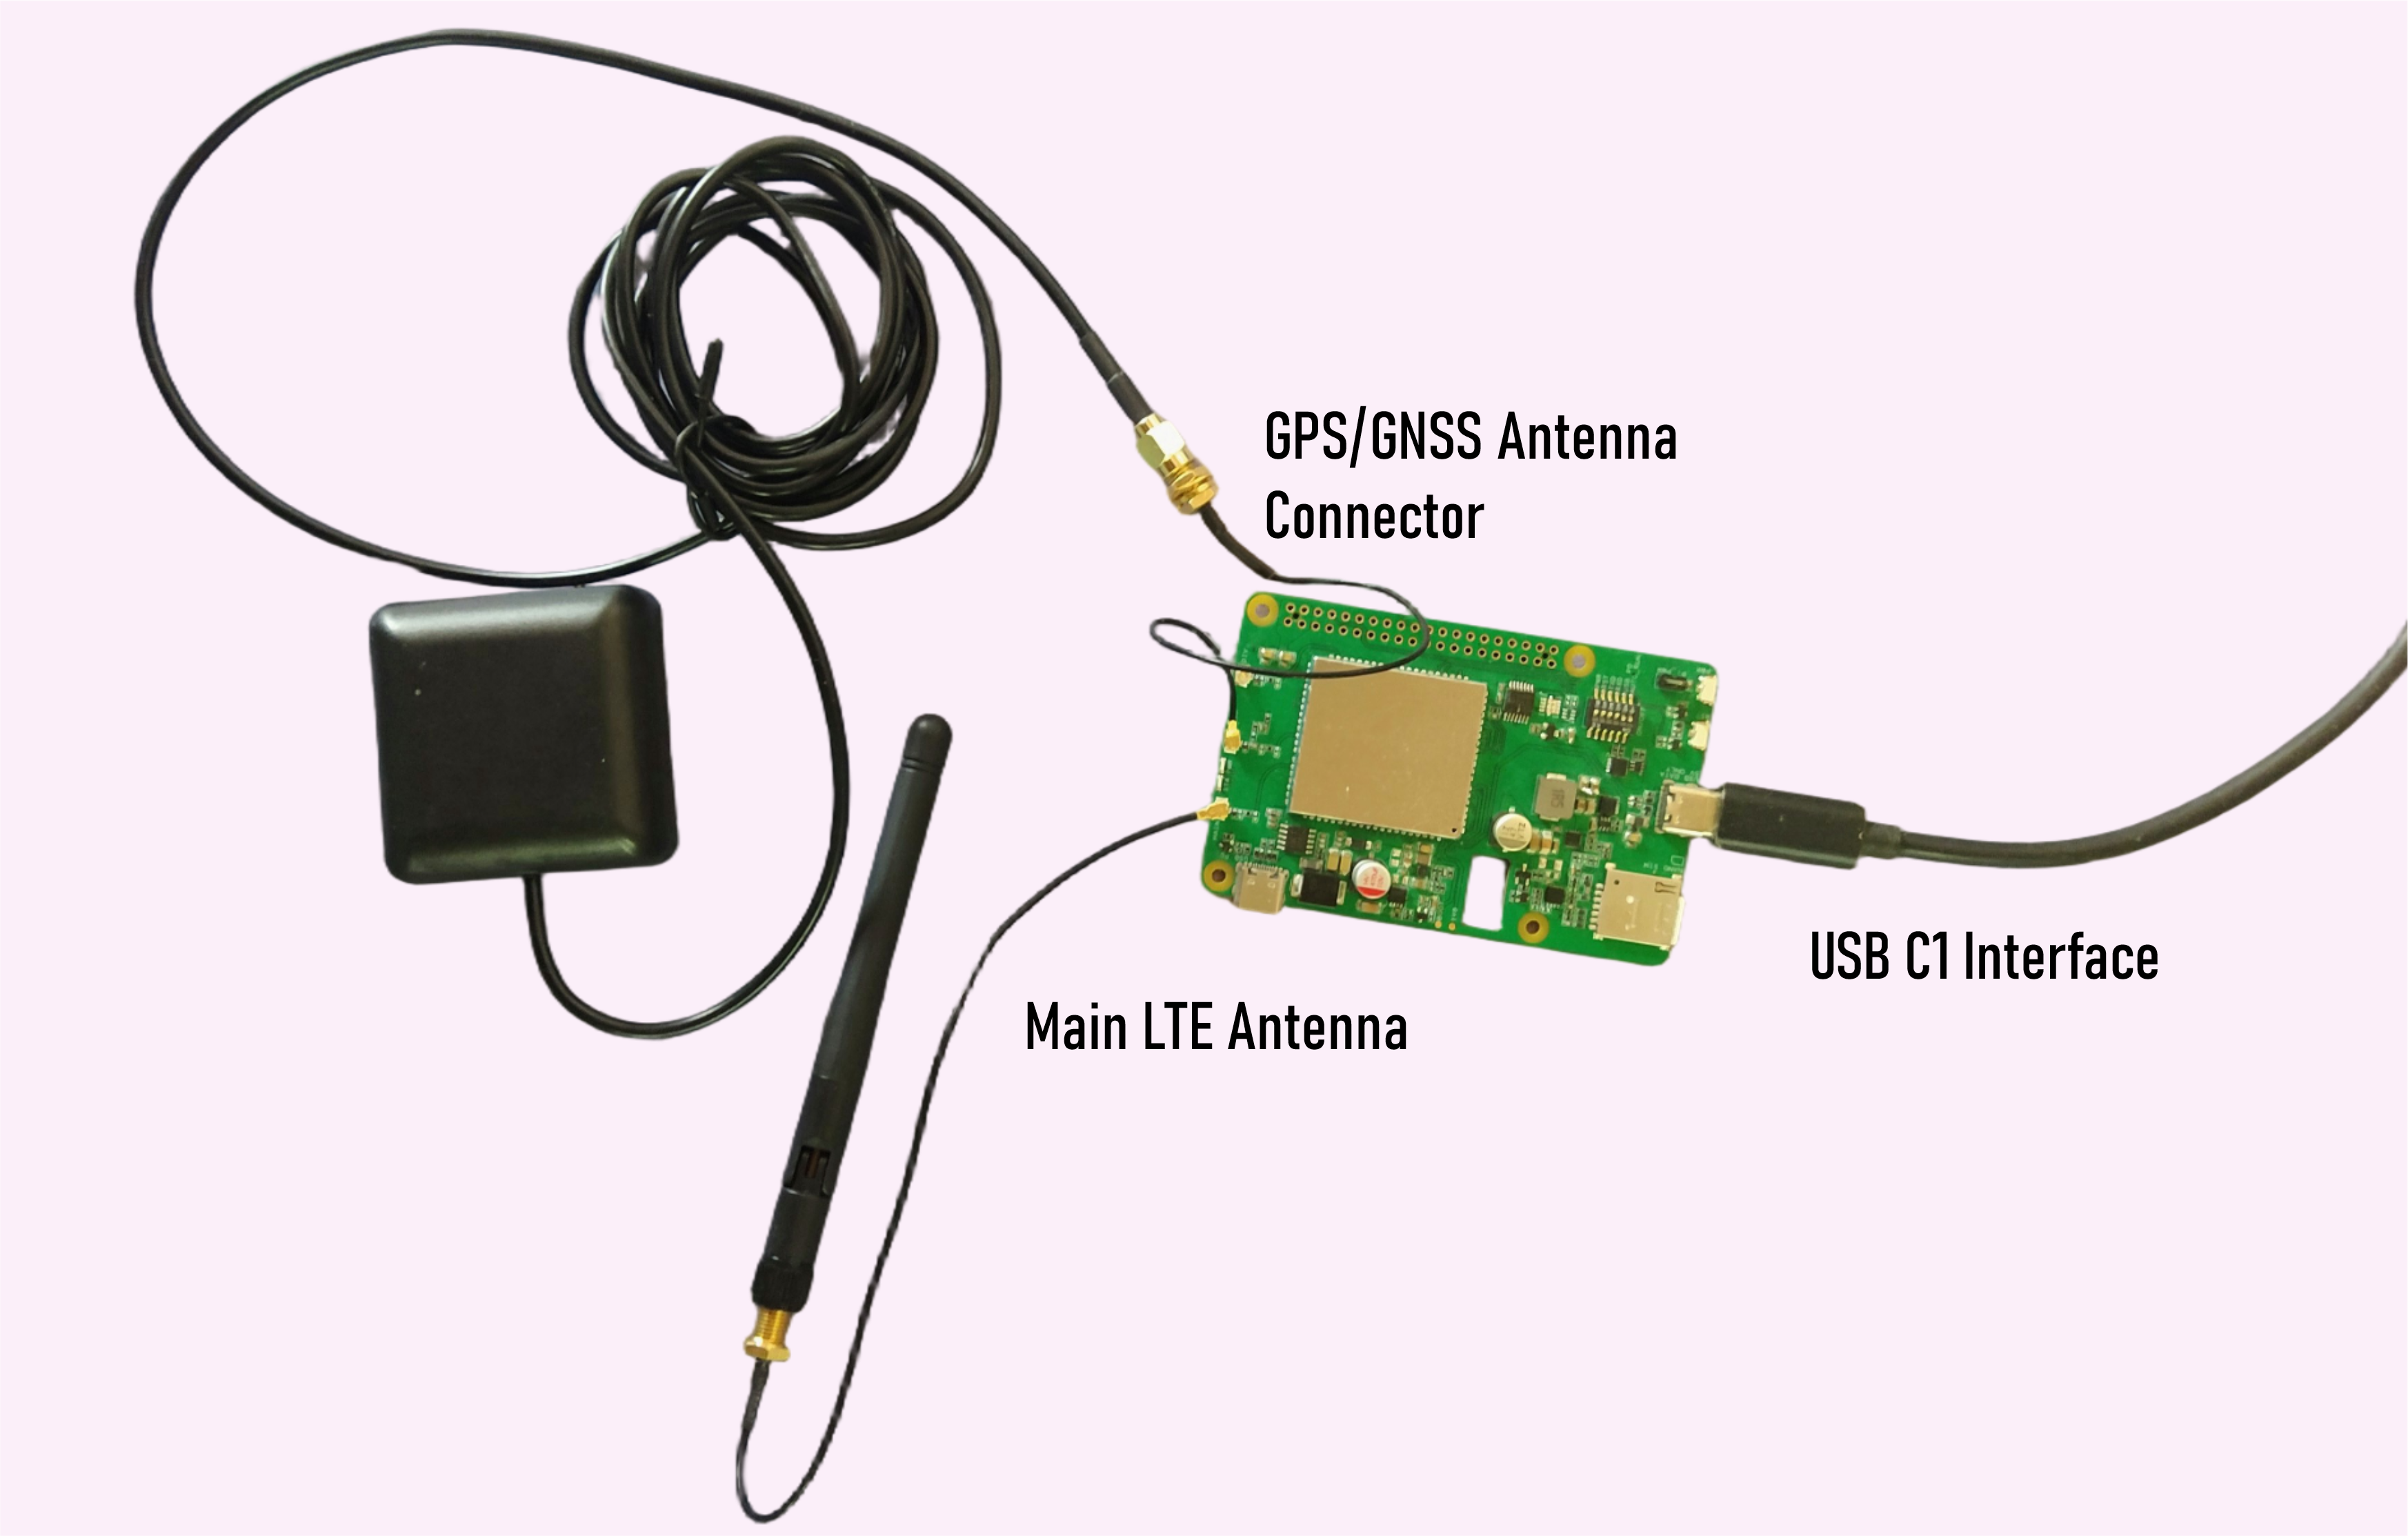
You need to connect your GNSS antenna. Furthermore, we will use a Python API to obtain the exact location in a human-readable and understandable format. Additionally, a 4G antenna should be installed.
Hardware preparation
| Raspberry Pi 5 | GPS Antenna | Raspberry Pi 4G LTE CAT4 HAT |
|---|---|---|
 |  |  |
If the necessary drivers for communicating with AT commands are not installed, you will need to install them
The Setup

Using GNSS with Raspberry Pi 4G LTE Hat or Windows Qcom Tool
Step 1: Turn on GNSS
- Open Minicom on Raspberry Pi or Qcom Tool on Windows via USB.
sudo minicom -D /dev/ttyUSB2 #for minicom on raspberry
- Enter the following command to activate GNSS:
AT+QGPS=1
Expected Response:
OK
- This turns on the GNSS functionality.
- After activation, NMEA sentences will be output from the "usbnmea" port by default.
Step 2: Obtain Positioning Information
- To retrieve the GNSS coordinates and other information, enter:
AT+QGPSLOC=0
Example Response:
+QGPSLOC: 063416.400,3143.2951N,11713.0655E,0.6,224.9,2,162.57,17.6,9.5,110620,07 OK
- Explanation of the Response:
- 063416.400: UTC Time (HHMMSS.SSS format)
- 3143.2951N: Latitude (31°43.2951'N)
- 11713.0655E: Longitude (117°13.0655'E)
- 0.6: Horizontal Dilution of Precision (HDOP)
- 224.9: Altitude in meters
- 2: Position fix type (2 = 2D fix, 3 = 3D fix)
- Other parameters provide detailed GNSS data.
Step 3: Turn off GNSS
- After retrieving the required data, deactivate GNSS to save power by entering:
AT+QGPSEND
Expected Response
OK
- This command shuts down the GNSS module, conserving resources.
Python Code Implementation
Step 1. Prepare the Directory and Virtual Environment
- Open a terminal on your Raspberry Pi.
- Create a new project folder and navigate into it:
mkdir GNSS_EX
cd GNSS_EX
- Set up a Python virtual environment:
python3 -m venv --system-site-packages env
- Activate the virtual environment:
source env/bin/activate
- Install the required libraries:
pip install pyserial geopy
Step 2. Prepare the Python Script
-
Open the Thonny Python IDE (pre-installed on Raspberry Pi).
-
Create a new file in Thonny and paste the provided code into the editor.
-
Update the usb_port parameter to match your Raspberry Pi's serial port for the 4G HAT. Typically, it might be
/dev/ttyUSB2or/dev/ttyUSB3. Example:
usb_port = "/dev/ttyUSB2"
- Save the file as test_gnss.py in the GNSS_EX folder.
import serial
import time
from geopy.geocoders import Nominatim


def send_at_command(serial_port, command, delay=1):
    """Send an AT command and read the response."""
    serial_port.write((command + '\r\n').encode())
    time.sleep(delay)
    response = serial_port.read_all().decode()
    print(f"Command: {command}\nResponse: {response}")
    return response


def parse_coordinates(response):
    """Parse coordinates from AT+QGPSLOC response."""
    if "+QGPSLOC:" in response:
        try:
            data = response.split(":")[1].strip().split(",")
            # Extract raw coordinates (with N/S/E/W)
            latitude_raw, longitude_raw = data[1], data[2]

            # Correct parsing by removing N/S/E/W at the end
            latitude = convert_to_decimal(latitude_raw[:-1], 'N' in latitude_raw)
            longitude = convert_to_decimal(longitude_raw[:-1], 'E' in longitude_raw)

            print(f"Latitude: {latitude}, Longitude: {longitude}")
            return latitude, longitude
        except (IndexError, ValueError) as e:
            print(f"Error parsing coordinates: {e}")
            return None, None
    return None, None


def convert_to_decimal(coord, positive=True):
    """Convert NMEA-style coordinate to decimal format."""
    # Split the coordinate into degrees and minutes
    degrees = int(float(coord) // 100)
    minutes = float(coord) % 100
    decimal = degrees + (minutes / 60)

    # If it's in the Southern or Western hemisphere, make it negative
    return decimal if positive else -decimal


def get_location(lat, lon):
    """Get a human-readable location using geopy."""
    geolocator = Nominatim(user_agent="gnss_locator")
    try:
        location = geolocator.reverse((lat, lon), exactly_one=True)
        return location.address if location else "Location not found"
    except Exception as e:
        print(f"Geocoding error: {e}")
        return "Error retrieving location"


def automate_gnss(port, baudrate=9600):
    """Automate GNSS commands and fetch location."""
    try:
        with serial.Serial(port, baudrate, timeout=1) as ser:
            print("Serial port connected.")

            # Turn on GNSS
            send_at_command(ser, "AT+QGPS=1", delay=2)

            # Get positioning information
            response = send_at_command(ser, "AT+QGPSLOC=0", delay=2)
            latitude, longitude = parse_coordinates(response)

            if latitude and longitude:
                print(f"Coordinates: Latitude = {latitude}, Longitude = {longitude}")
                location = get_location(latitude, longitude)
                print(f"Location: {location}")
            else:
                print("Unable to retrieve coordinates.")

            # Turn off GNSS
            send_at_command(ser, "AT+QGPSEND", delay=2)
            print("GNSS process completed.")

    except serial.SerialException as e:
        print(f"Error: {e}")


# Set your USB port (e.g., '/dev/ttyUSB0' or 'COM3' on Windows)
usb_port = "/dev/ttyUSB2"  # Update based on your system
automate_gnss(usb_port)
Step 3. Run the Script
- Open a terminal, ensure you're in the project directory:
cd GNSS_EX
- Activate the virtual environment:
source env/bin/activate
- Run the script using Python:
python test_gnss.py
- The output
Resources
-
[Web Page] LTE EG25-G
-
[Web Page] GNSS AT Commands Manual V1.4
Tech Support & Product Discussion
Thank you for choosing our products! We are here to provide you with different support to ensure that your experience with our products is as smooth as possible. We offer several communication channels to cater to different preferences and needs.