Raspberry Pi 5 uses PCIe hat/dual hat
Introduction
This tutorial primarily introduces the hardware connection configuration of the M.2 Hat/Dual Hat and how to boot the Raspberry Pi from an SSD. It also covers two installation methods: with and without a casing, and tests the SSD read/write speeds under different conditions.
Getting Start
Hardware Preparation
| Raspberry Pi5 8GB | M.2 Hat/dual Hat |
|---|---|
 |  |
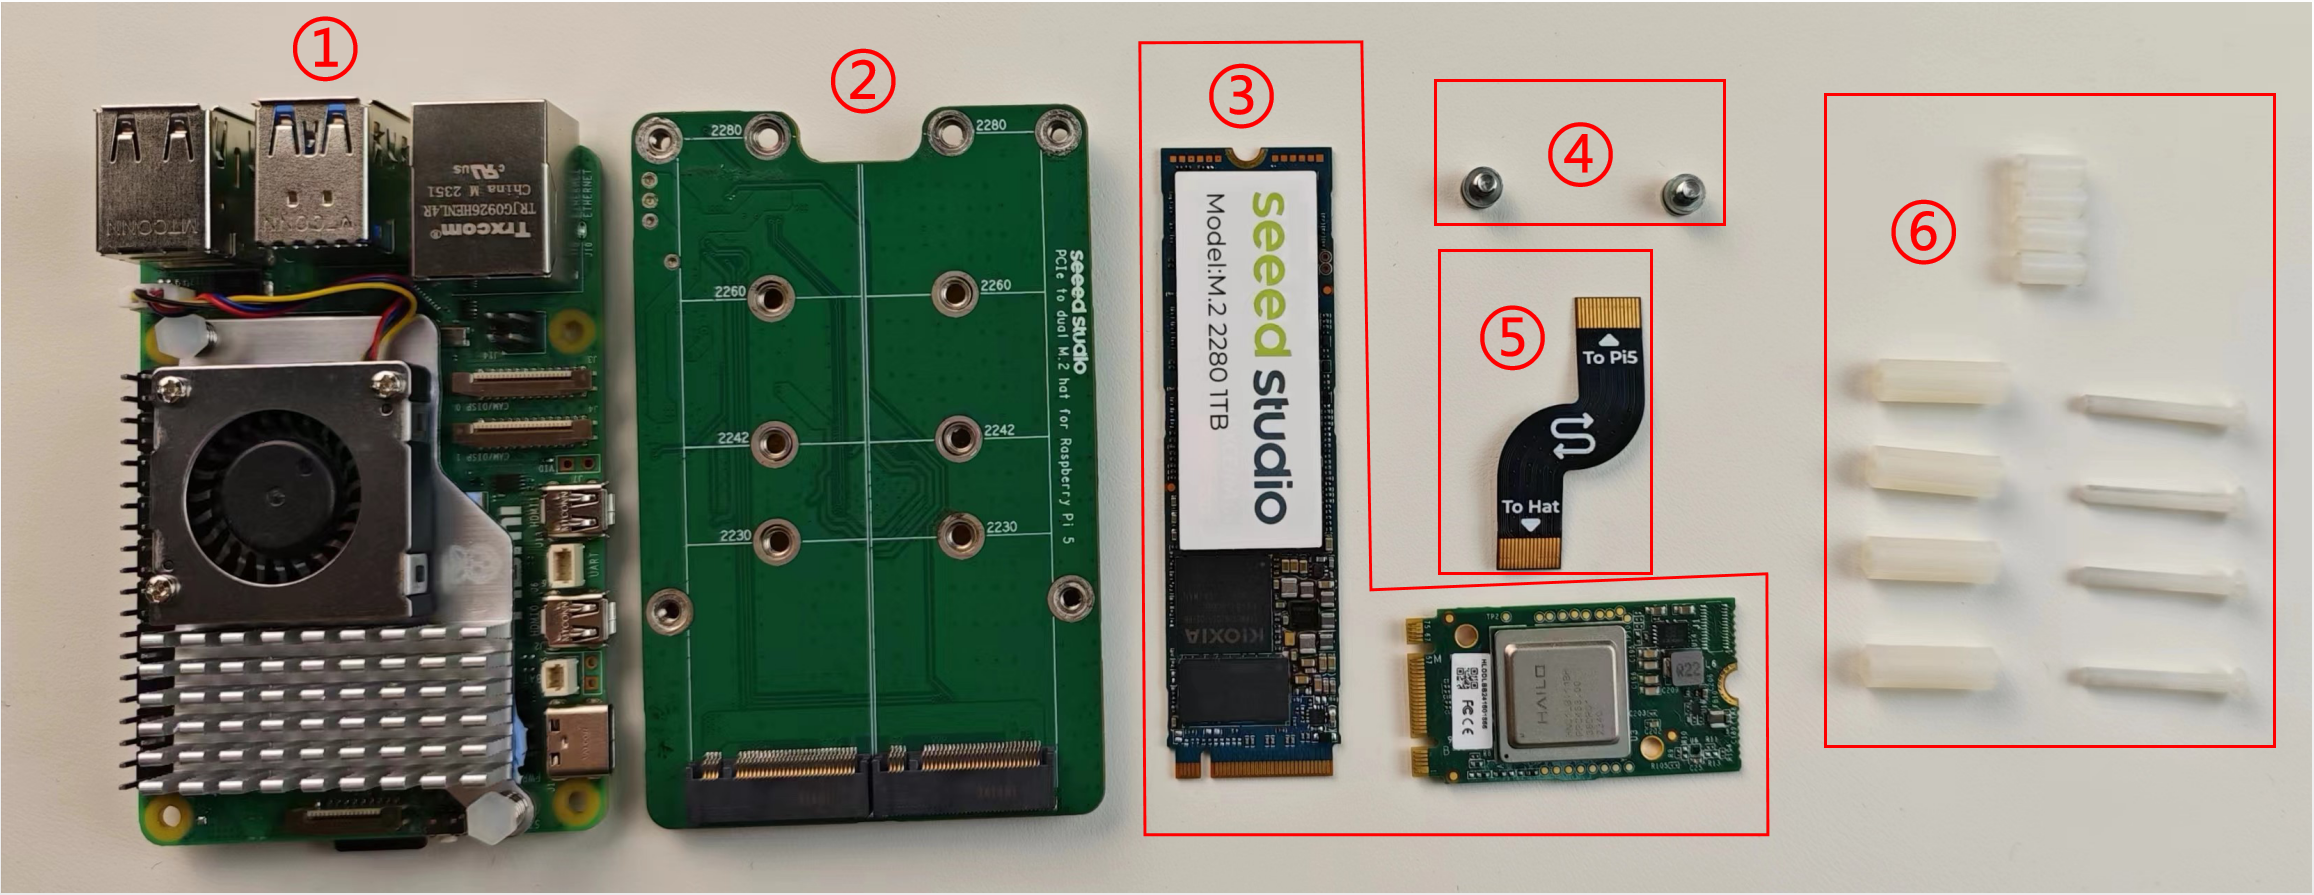
For installation without a casing, you need to prepare the following materials:
- ① Raspberry Pi 5
- ② M.2 Hat/dual Hat
- ③ SSD/AI Kit PCIe devices
- ④ PCIe devices fixing screw
- ⑤ PCIe connection cable between M.2 Hat and Raspberry Pi
- ⑥ Screw sleeve、long screws and nuts
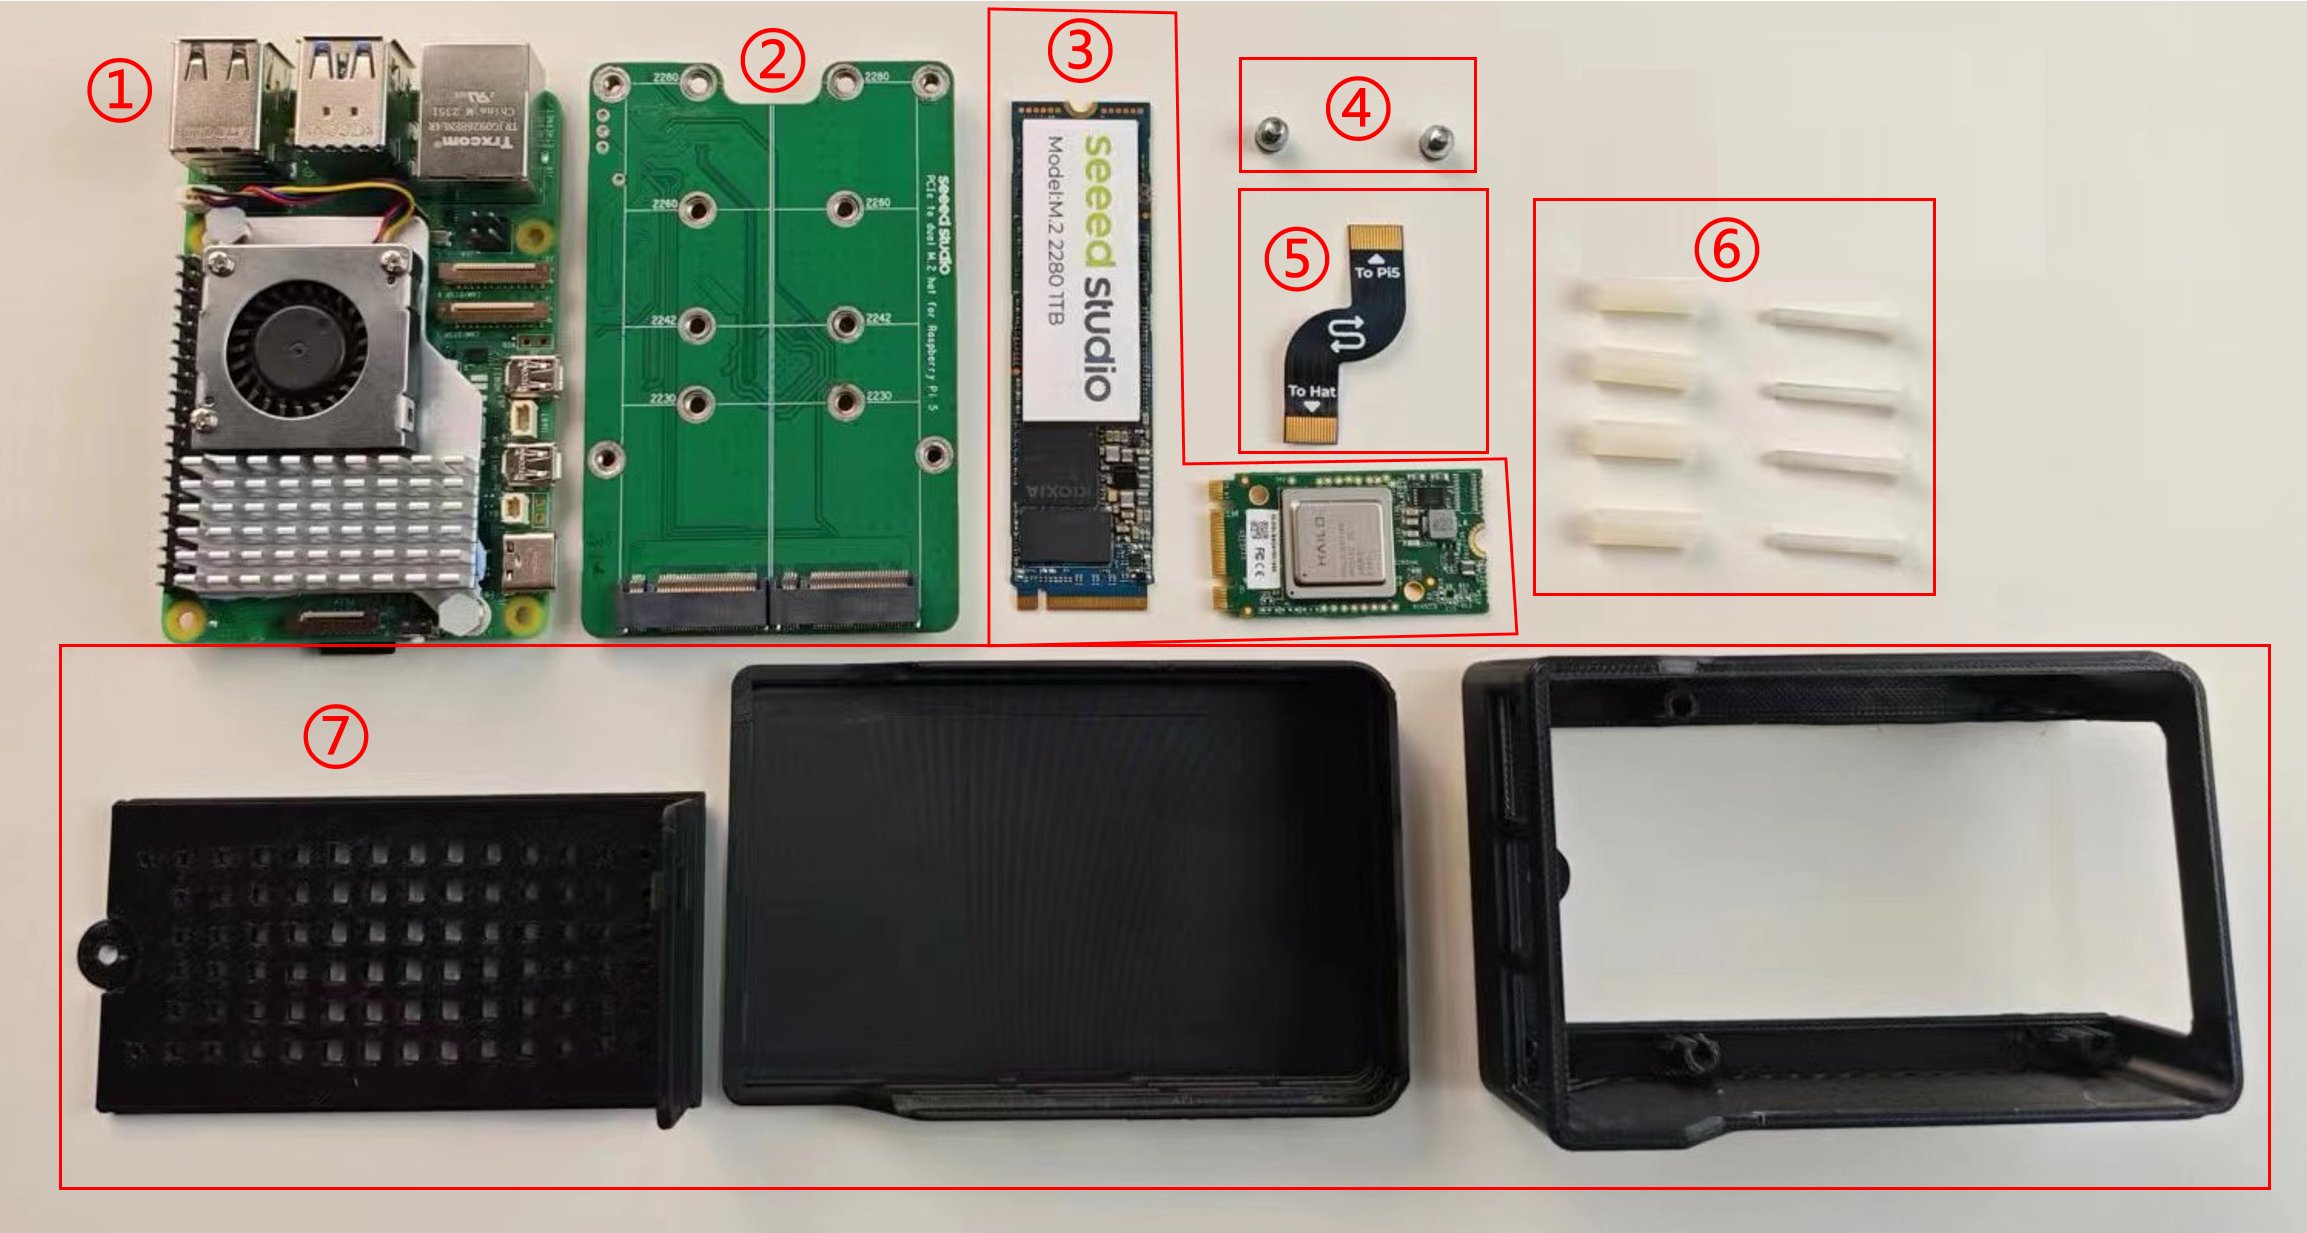
For installation with a casing, you need to prepare the following materials:
- ① Raspberry Pi 5
- ② M.2 Hat/dual Hat
- ③ SSD/AI Kit PCIe devices
- ④ PCIe devices fixing screw
- ⑤ PCIe connection cable between M.2 Hat and Raspberry Pi
- ⑥ Long screws and nuts
- ⑦ outer casing
Installation
Note: This is a note.
Wipe pogo pin and GPIO pad with alcohol cotton, and then connect it before you using M.2 dual Hat on raspberrypi

- Installation without housing
- Installation with housing
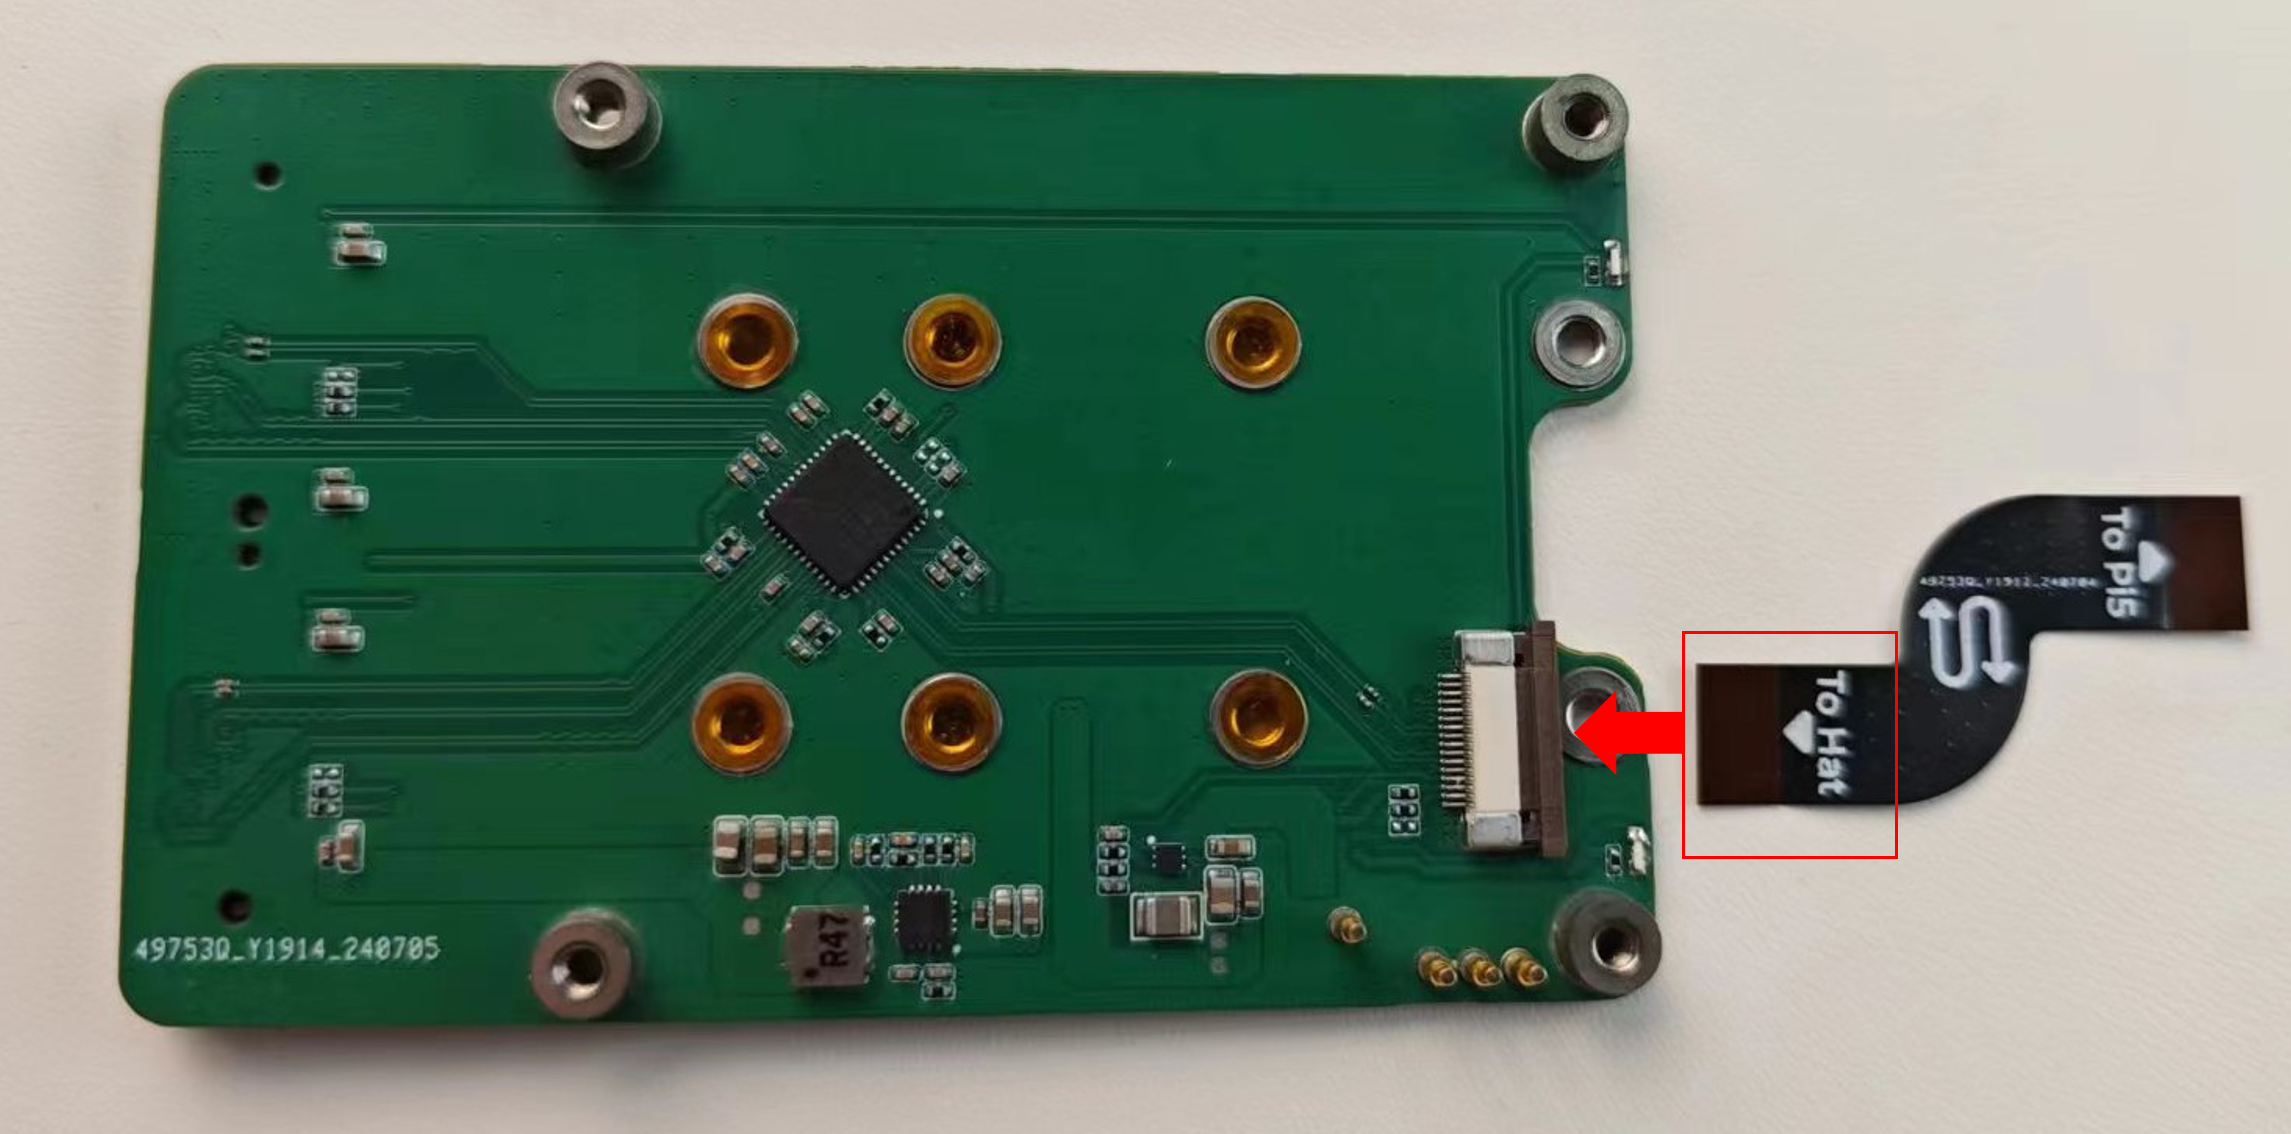
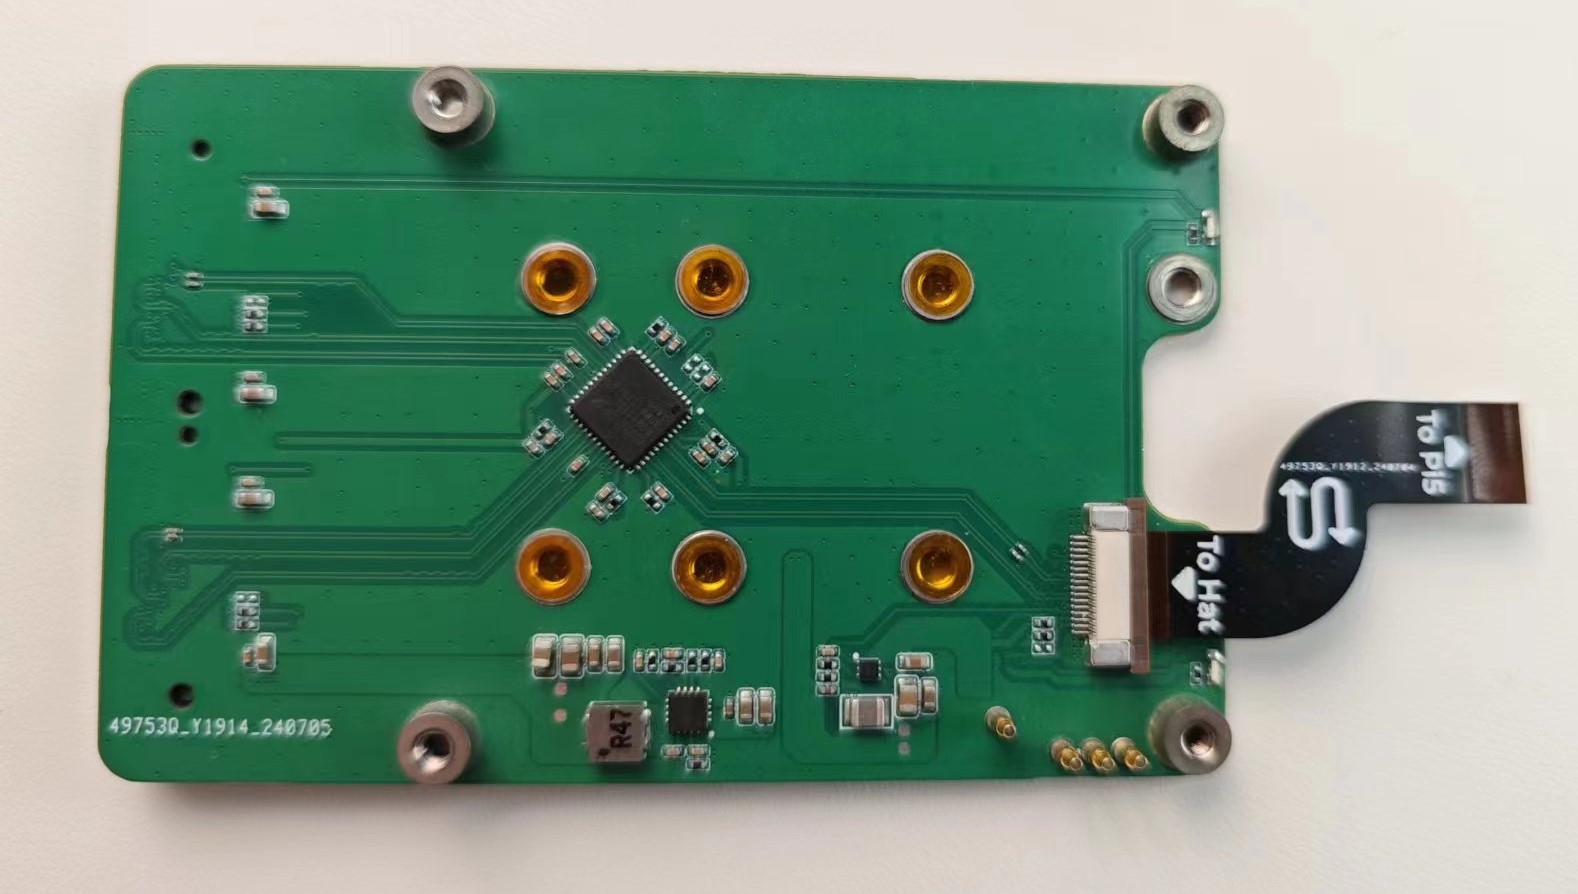
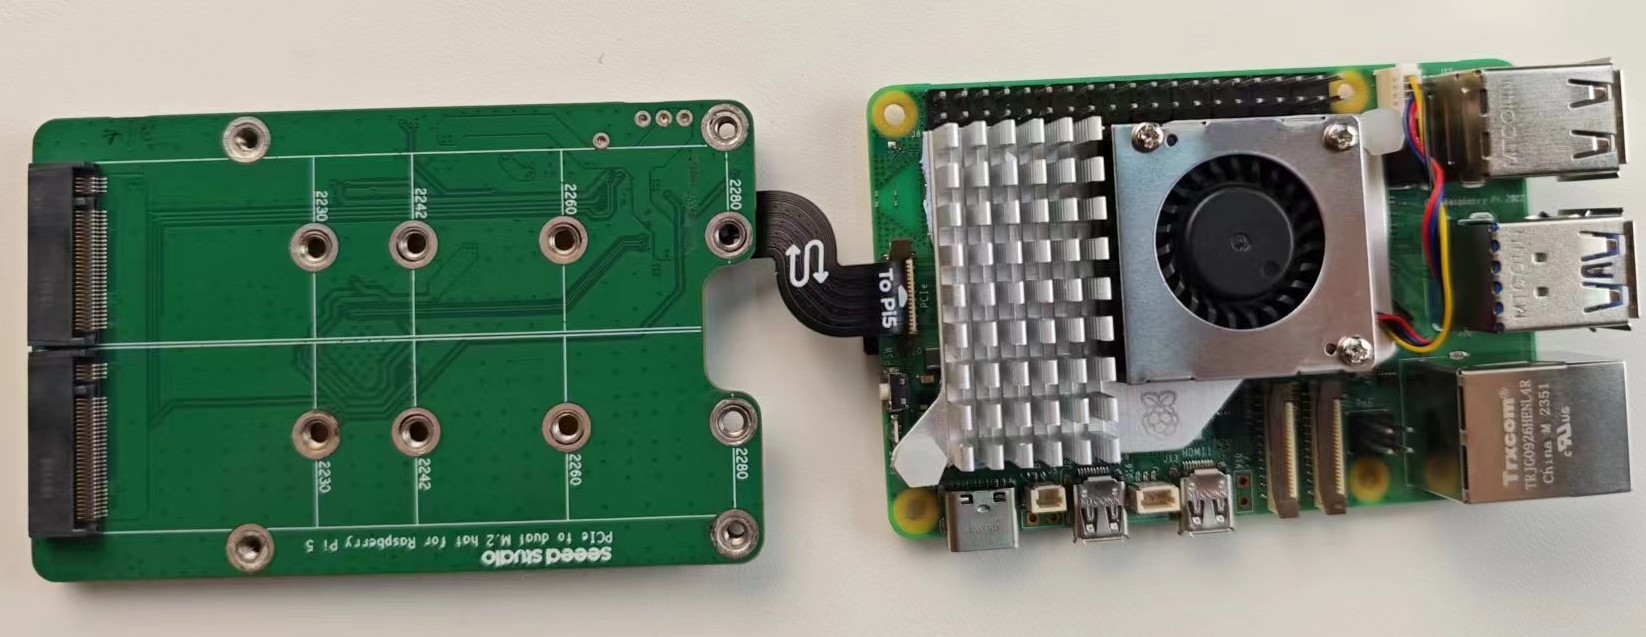
Step 1: Insert the PCIe connection cable into the M.2 Hat, paying attention to the insertion direction of the cable. Insert the PCIe interface of the M.2 Hat with the metal side facing downwards, as shown in the figure after insertion:
Step 2: Insert the PCIe connection cable into Raspberry Pi 5.
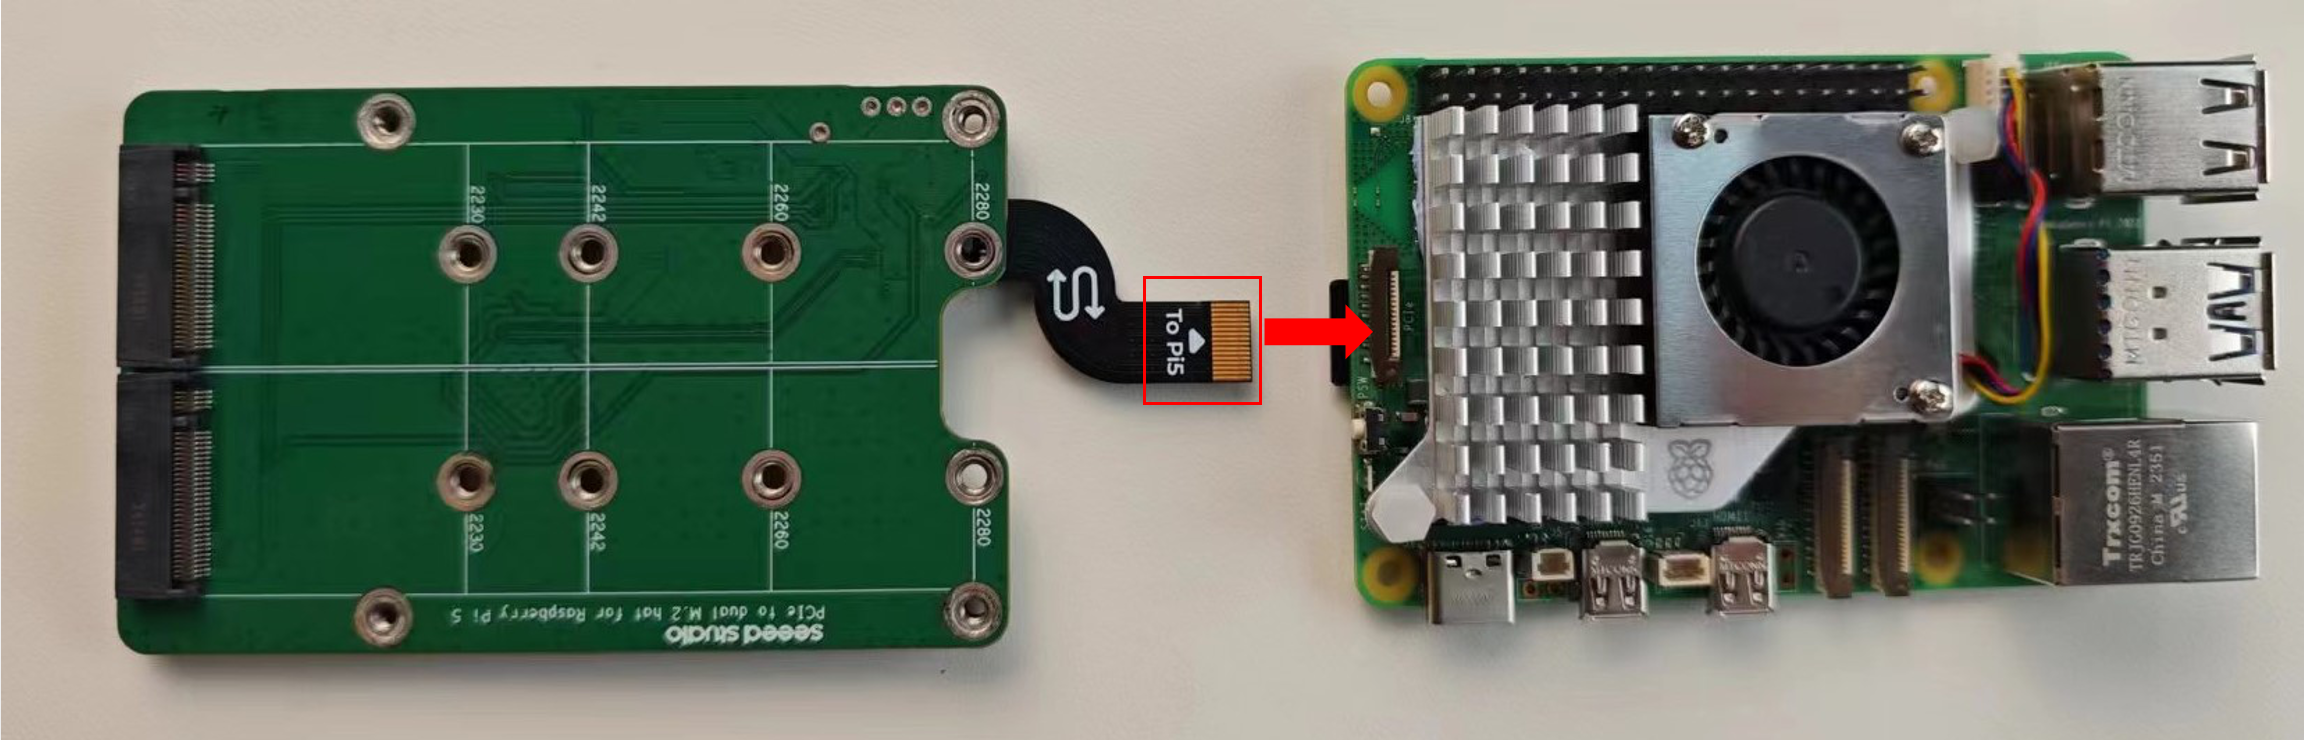
Please pay attention to the insertion direction of the cable. Insert the PCIe interface of Raspberry Pi 5 with the metal side facing up, as shown in the figure after insertion:
Step 3: Overlap the Raspberry Pi 5 with the M.2 Hat and insert the screw sleeve into the screw.
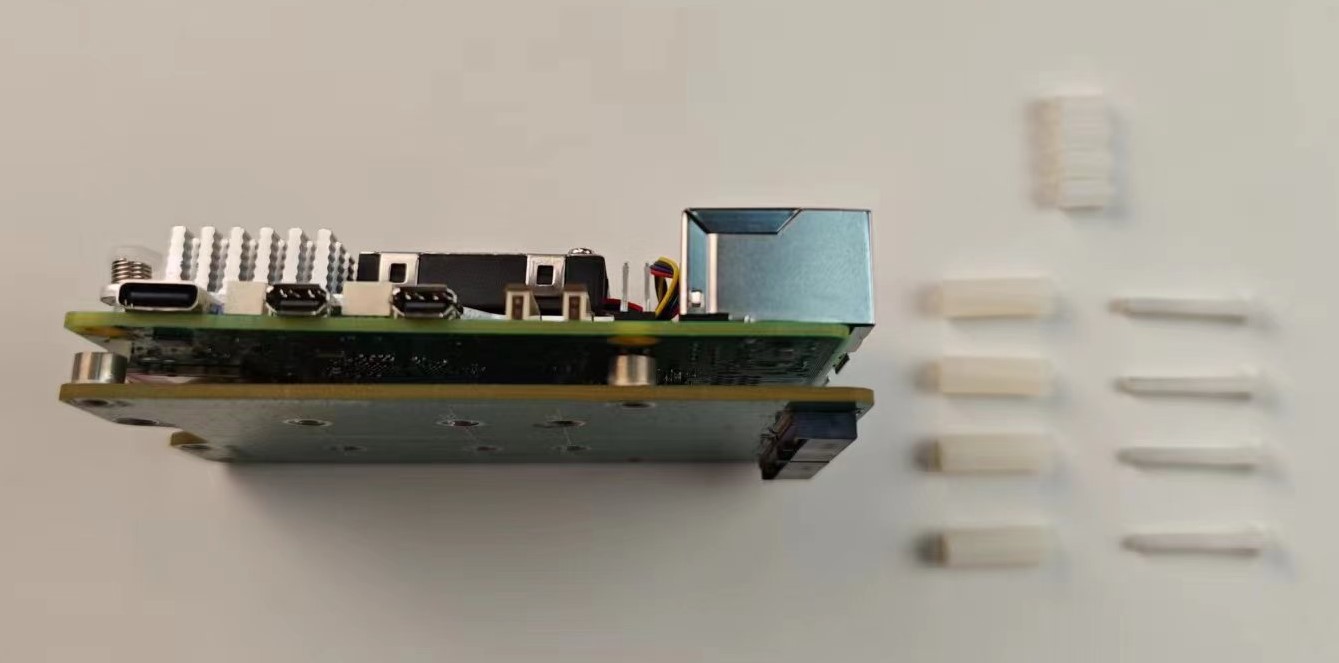
Then insert the screws into the screw holes of Raspberry Pi 5 and M.2 Hat, as shown in the figure:
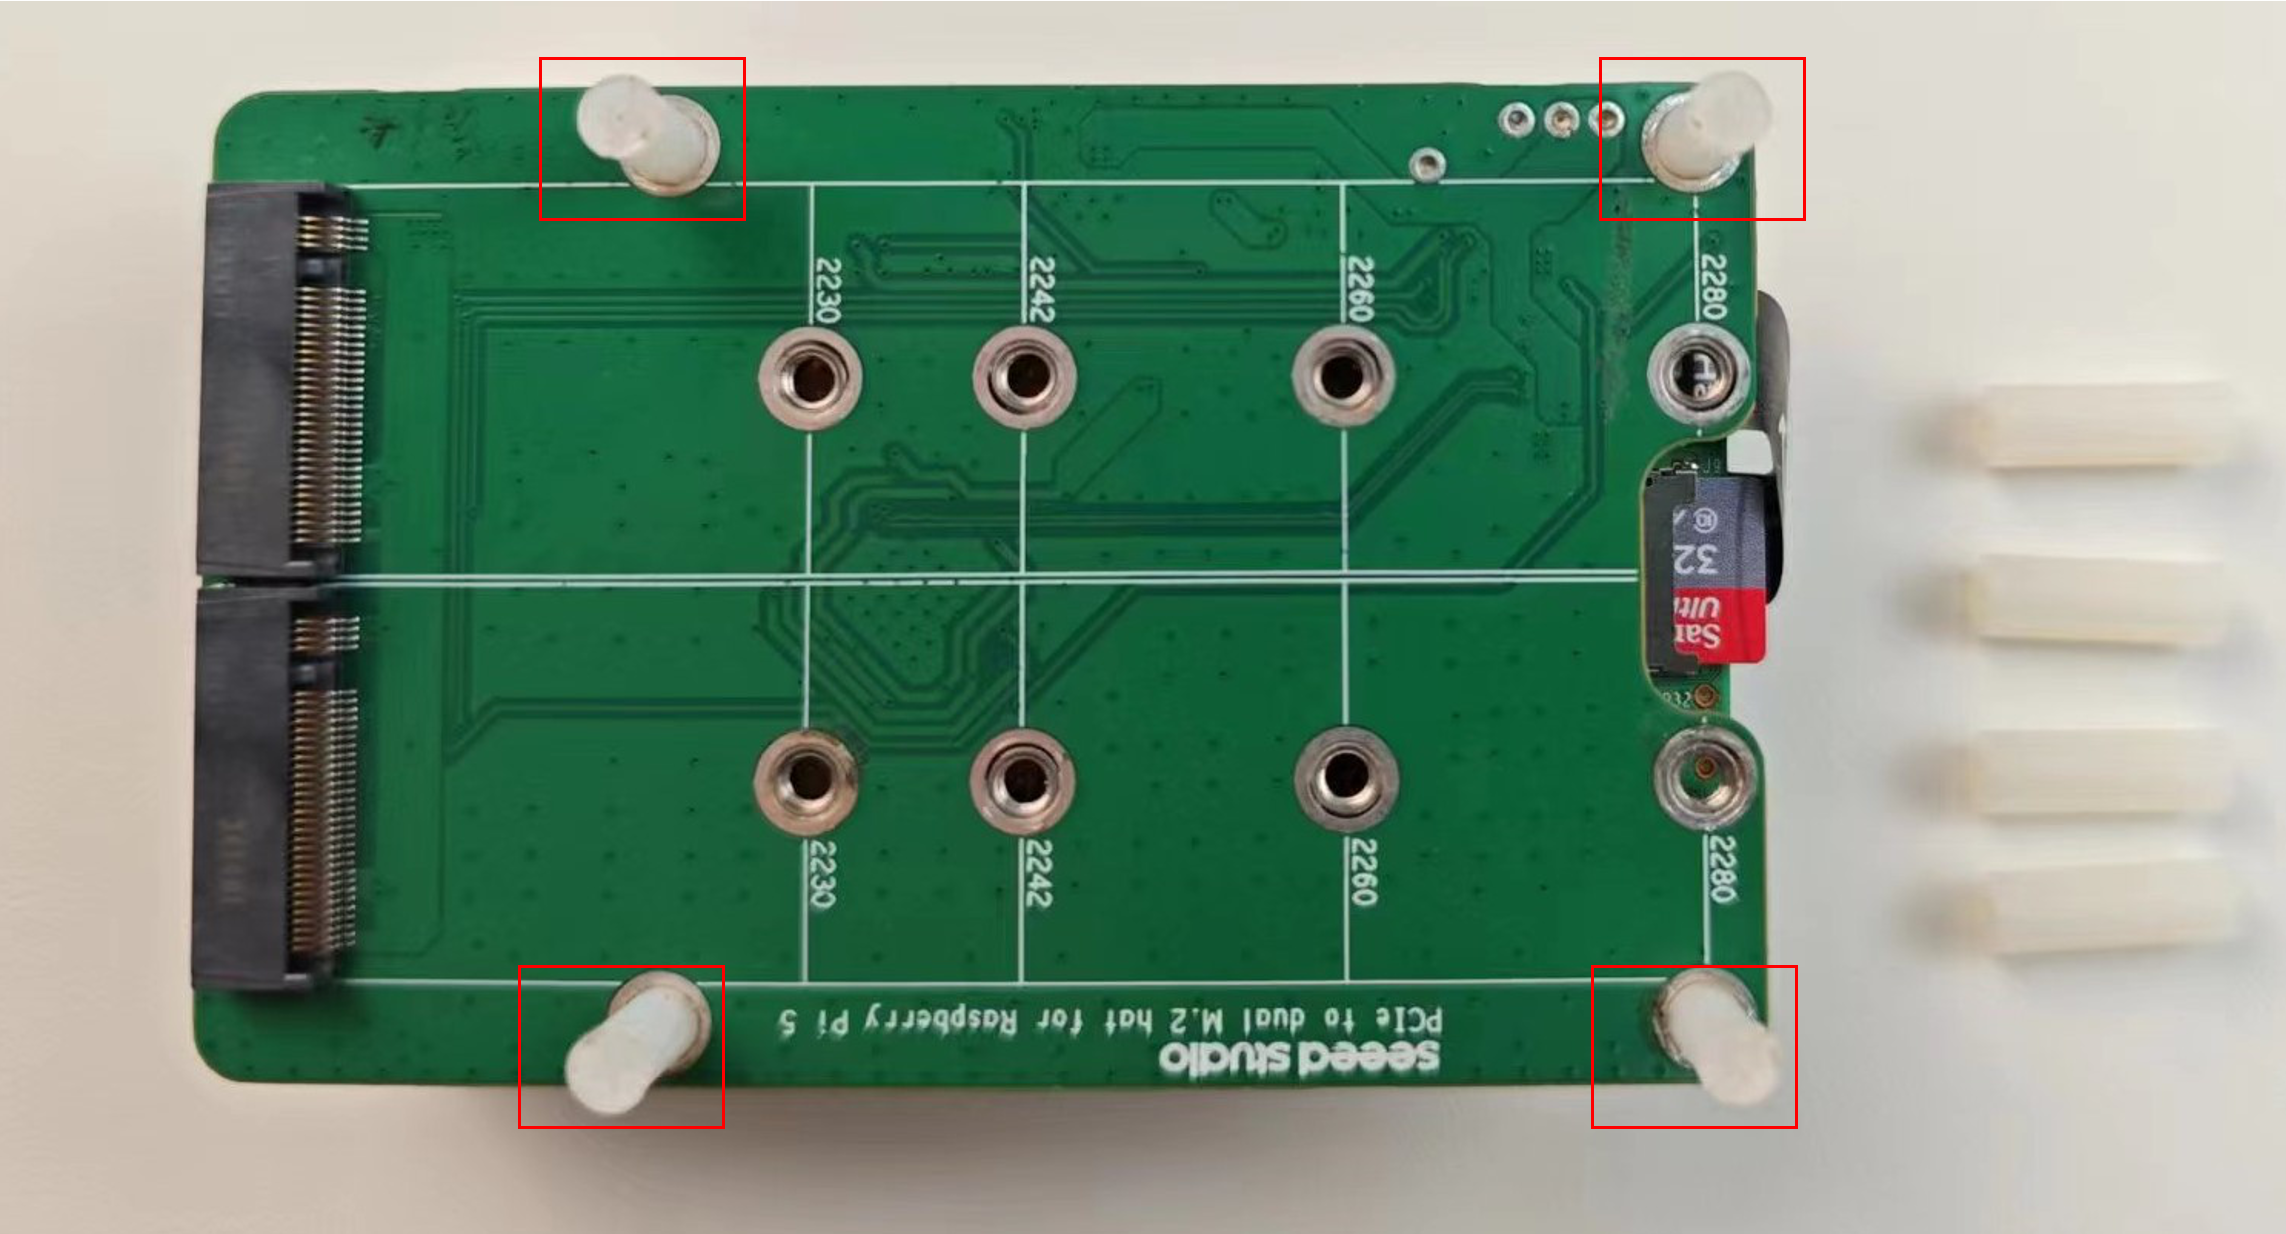
Step 4: Screw the stud into the screw and secure the screw to the circuit board, as shown in the figure:
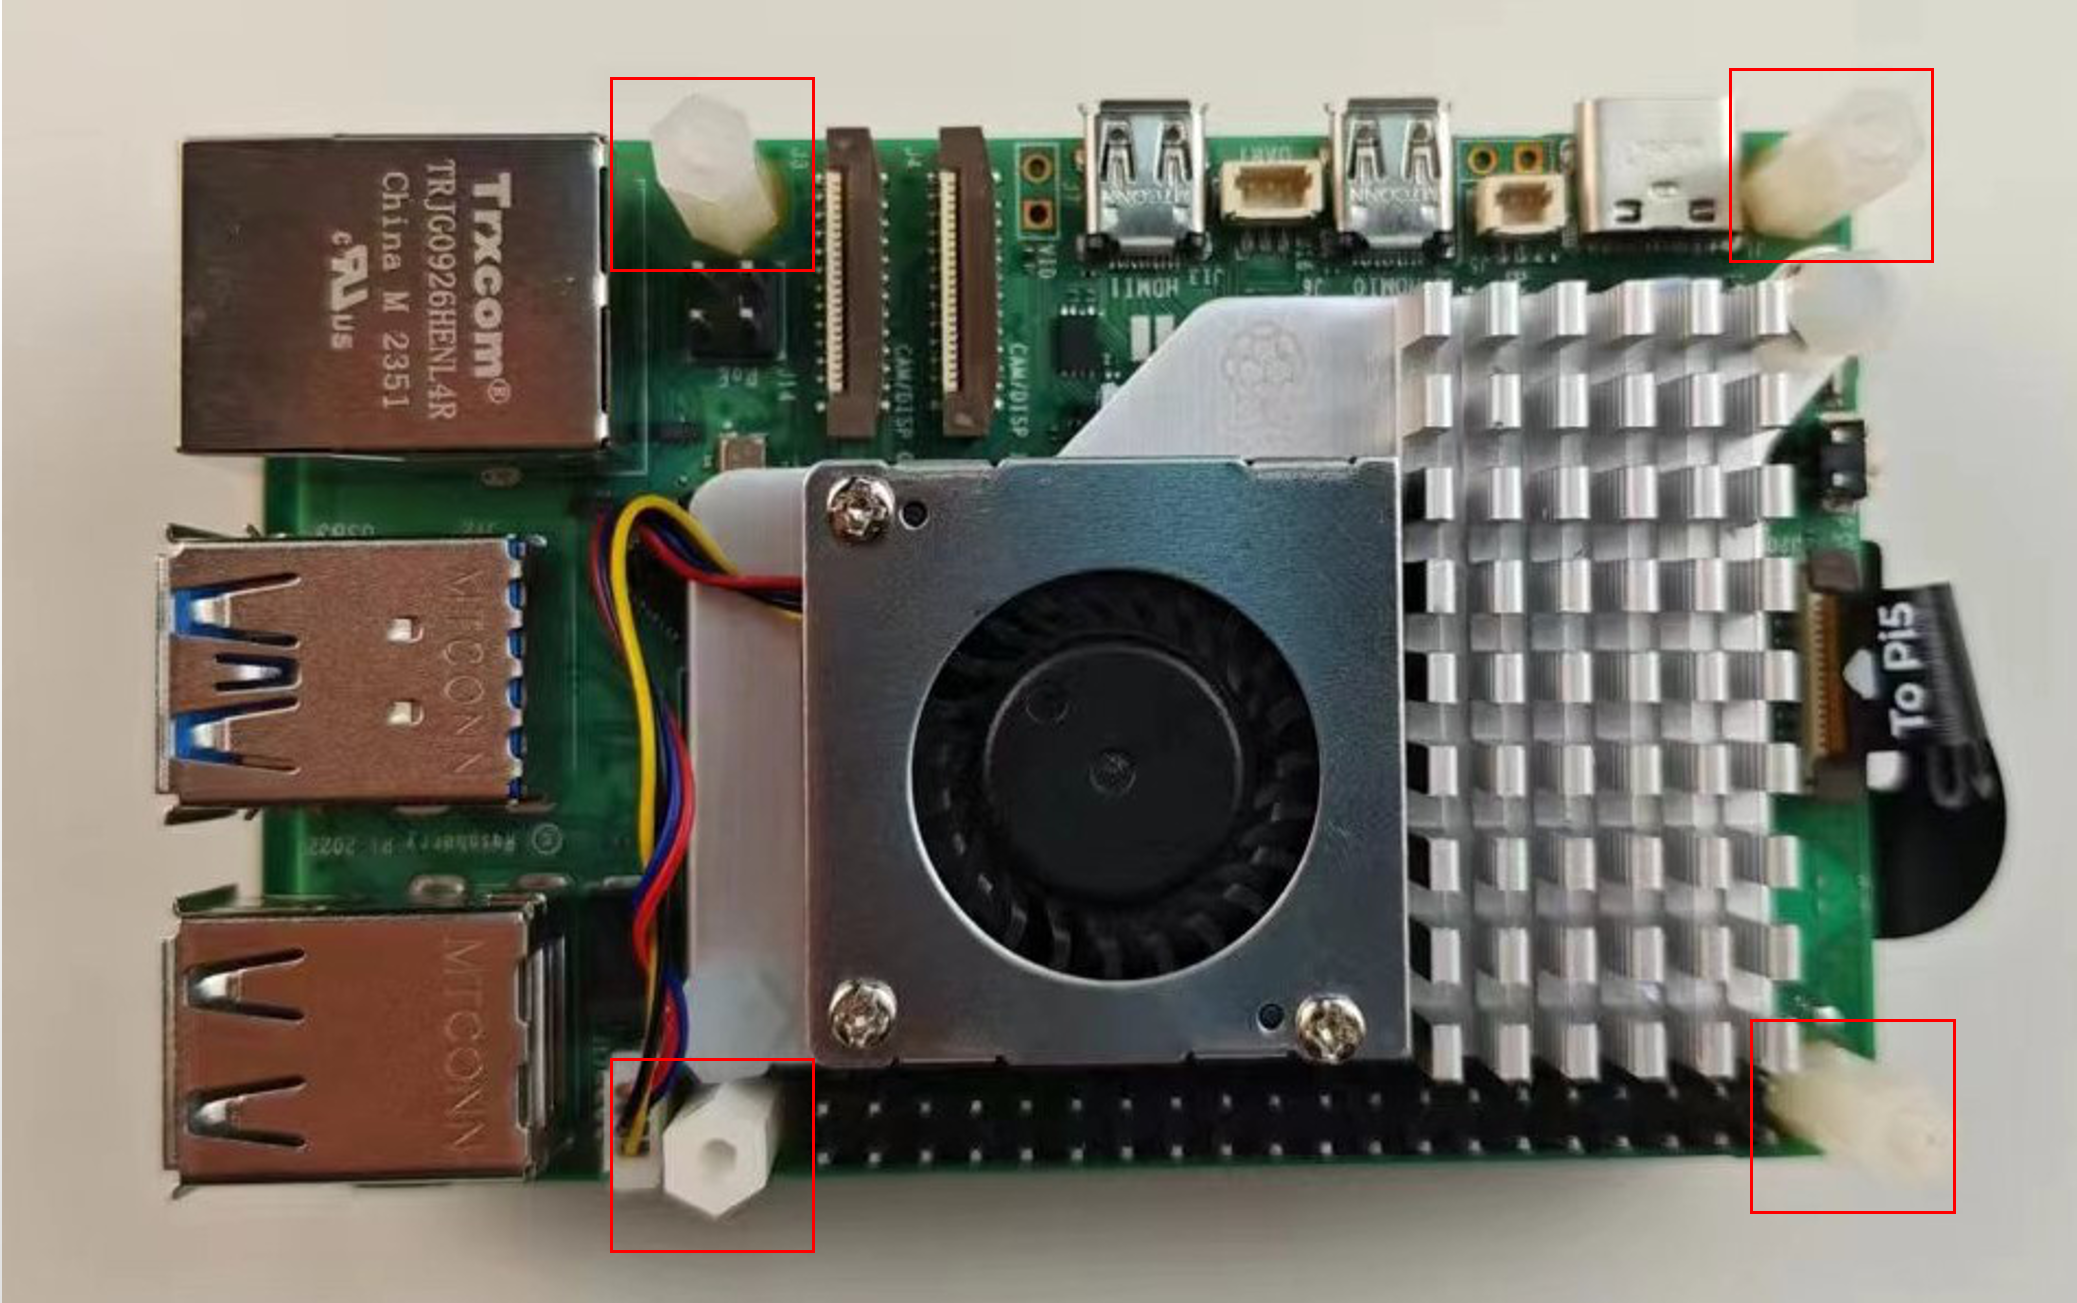
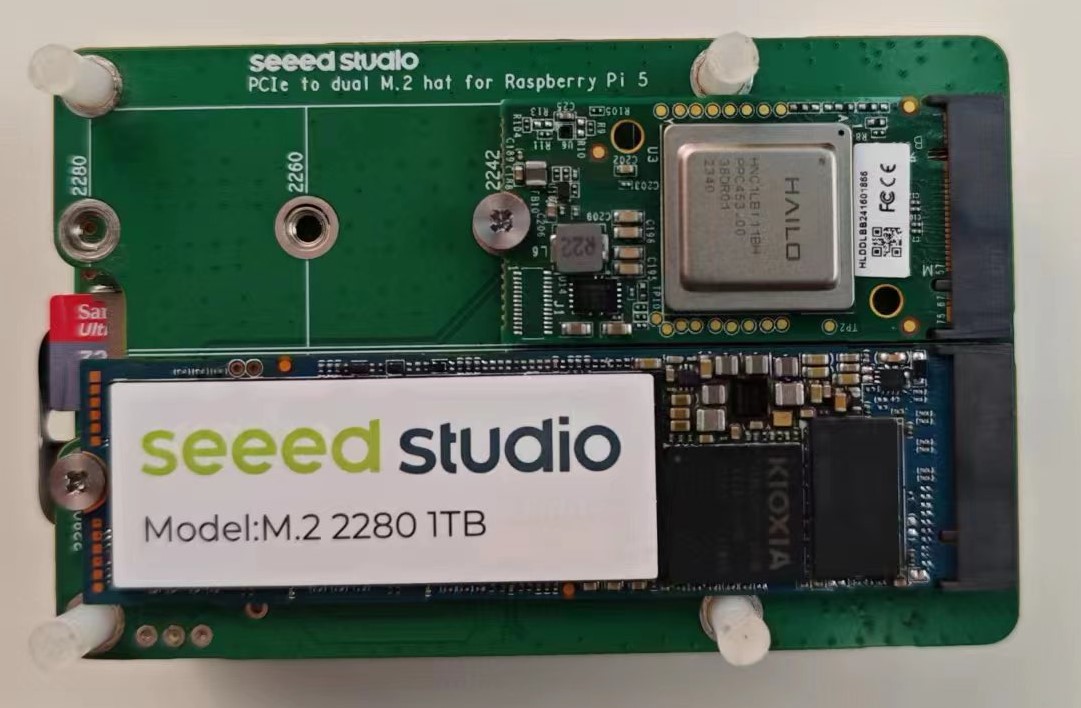
Step 5: Insert the SSD and AI Kit into M.2 dual Hat

Then insert the fixing screws to secure the SSD and AI Kit in the M.2 Hat, as shown in the figure:
Step 1: Insert the PCIe connection cable into the M.2 Hat. Please pay attention to the insertion direction of the cable. Plug the metal side downward into the PCIe interface of the M.2 Hat. After insertion, as shown in the figure:
Step 2: Plug the PCIe connection cable into the Raspberry Pi 5.
Please pay attention to the insertion direction of the cable. Plug it into the PCIe interface of Raspberry Pi 5 with the metal side facing up. After insertion, it is as shown in the figure:
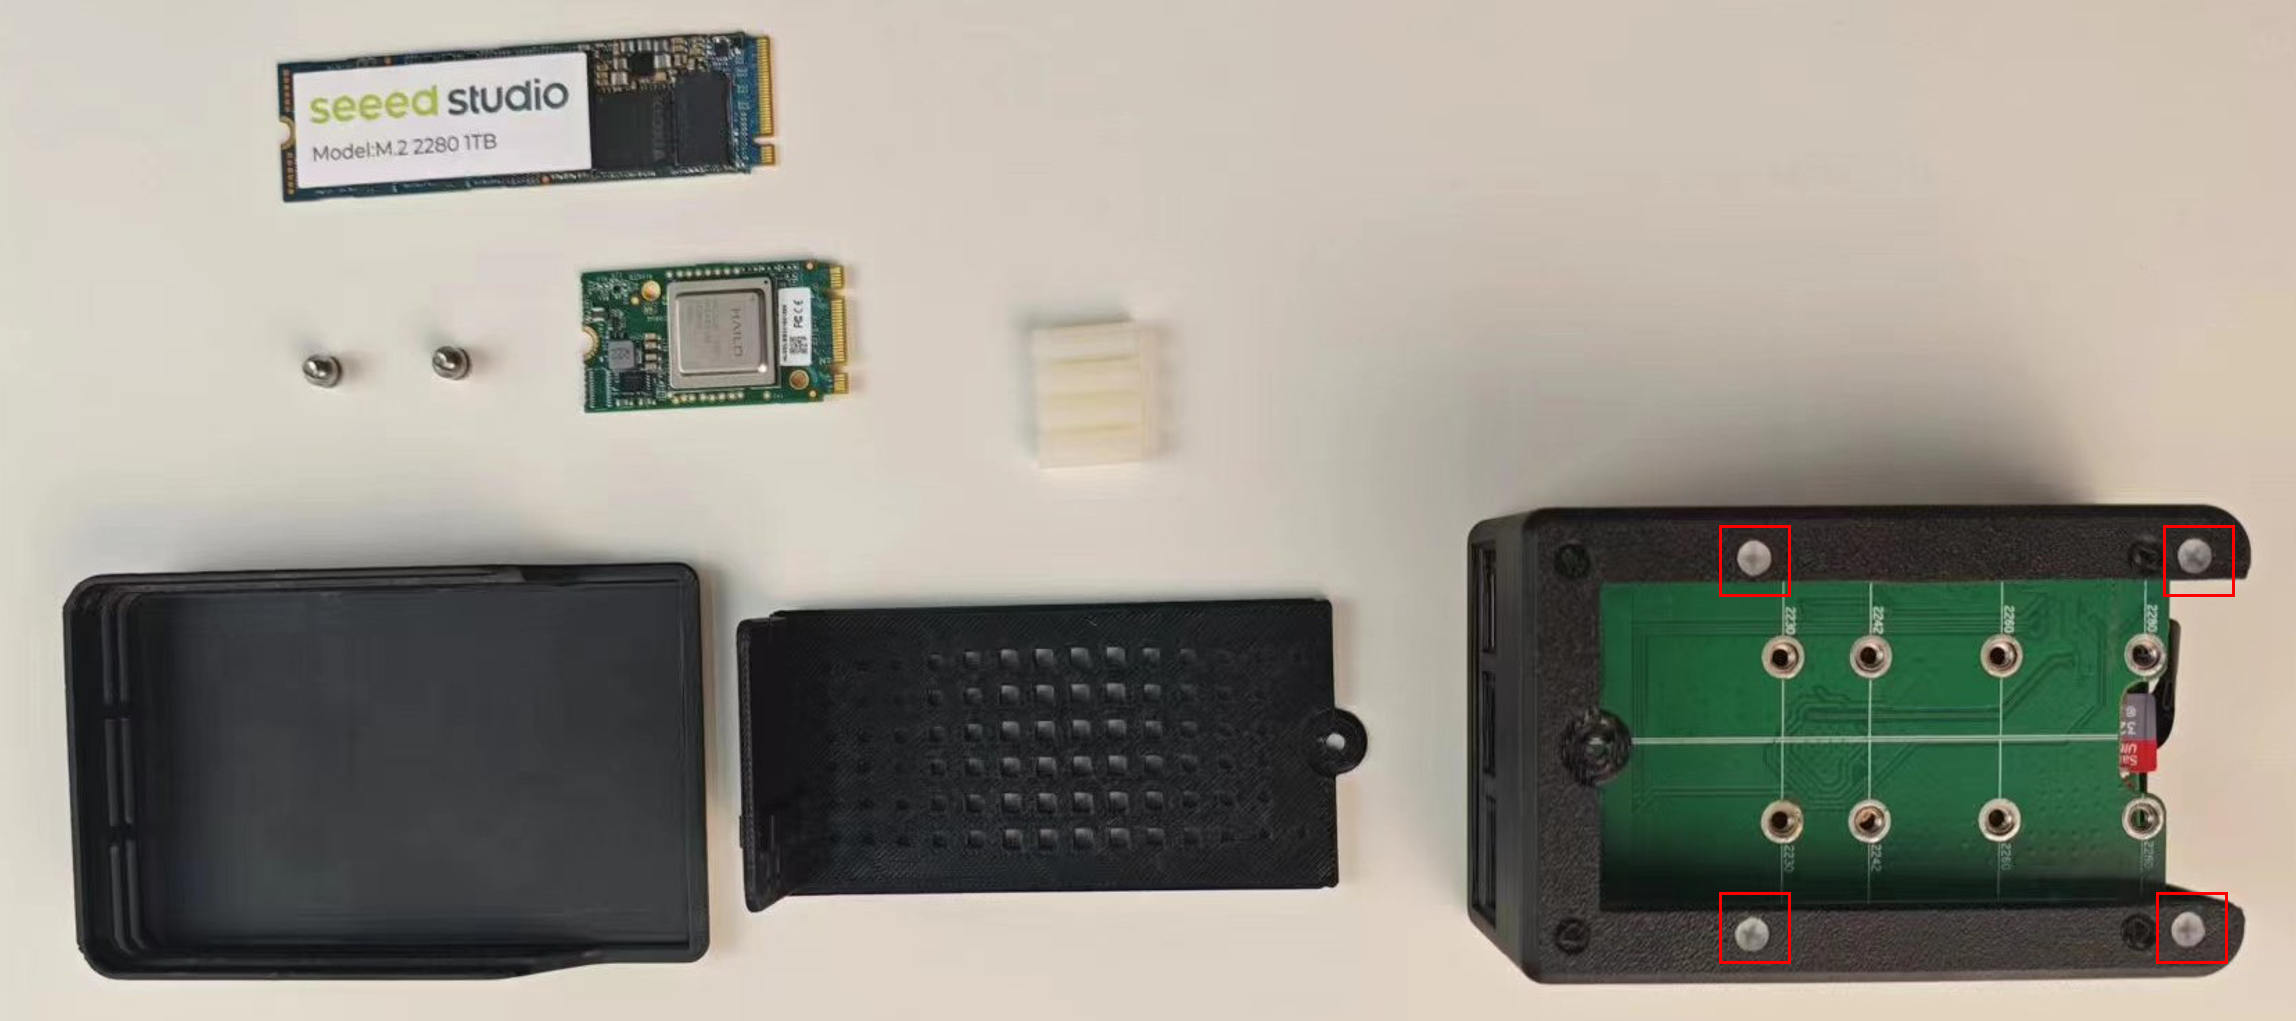
Step 3: Overlap the Raspberry Pi 5 and M.2 Hat, and prepare the shell, screws, nuts and PCIe devices
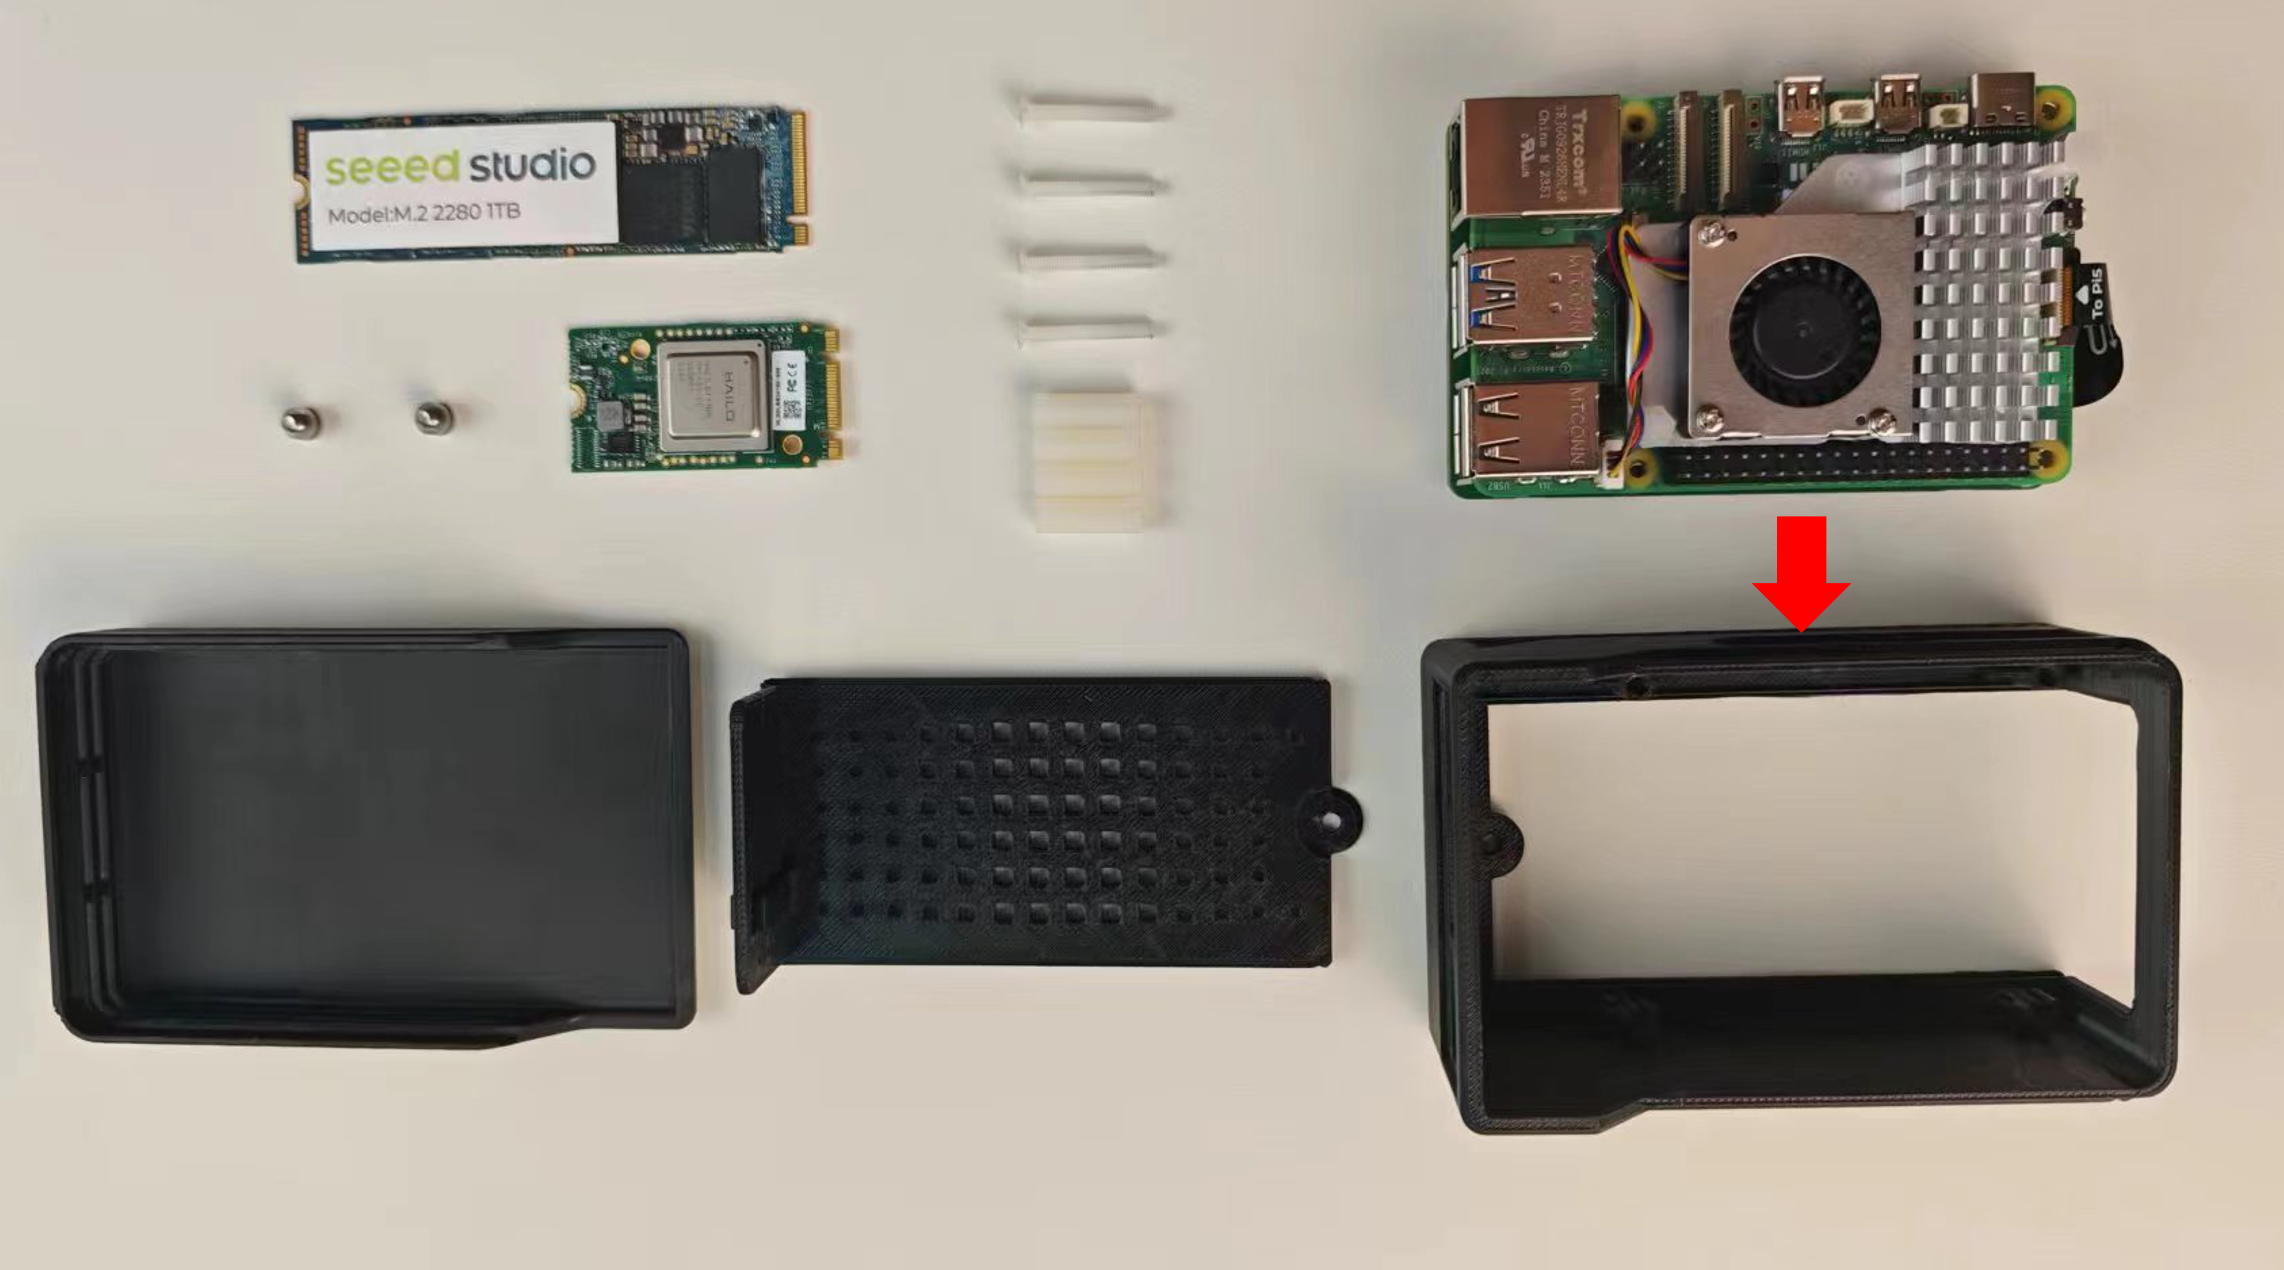
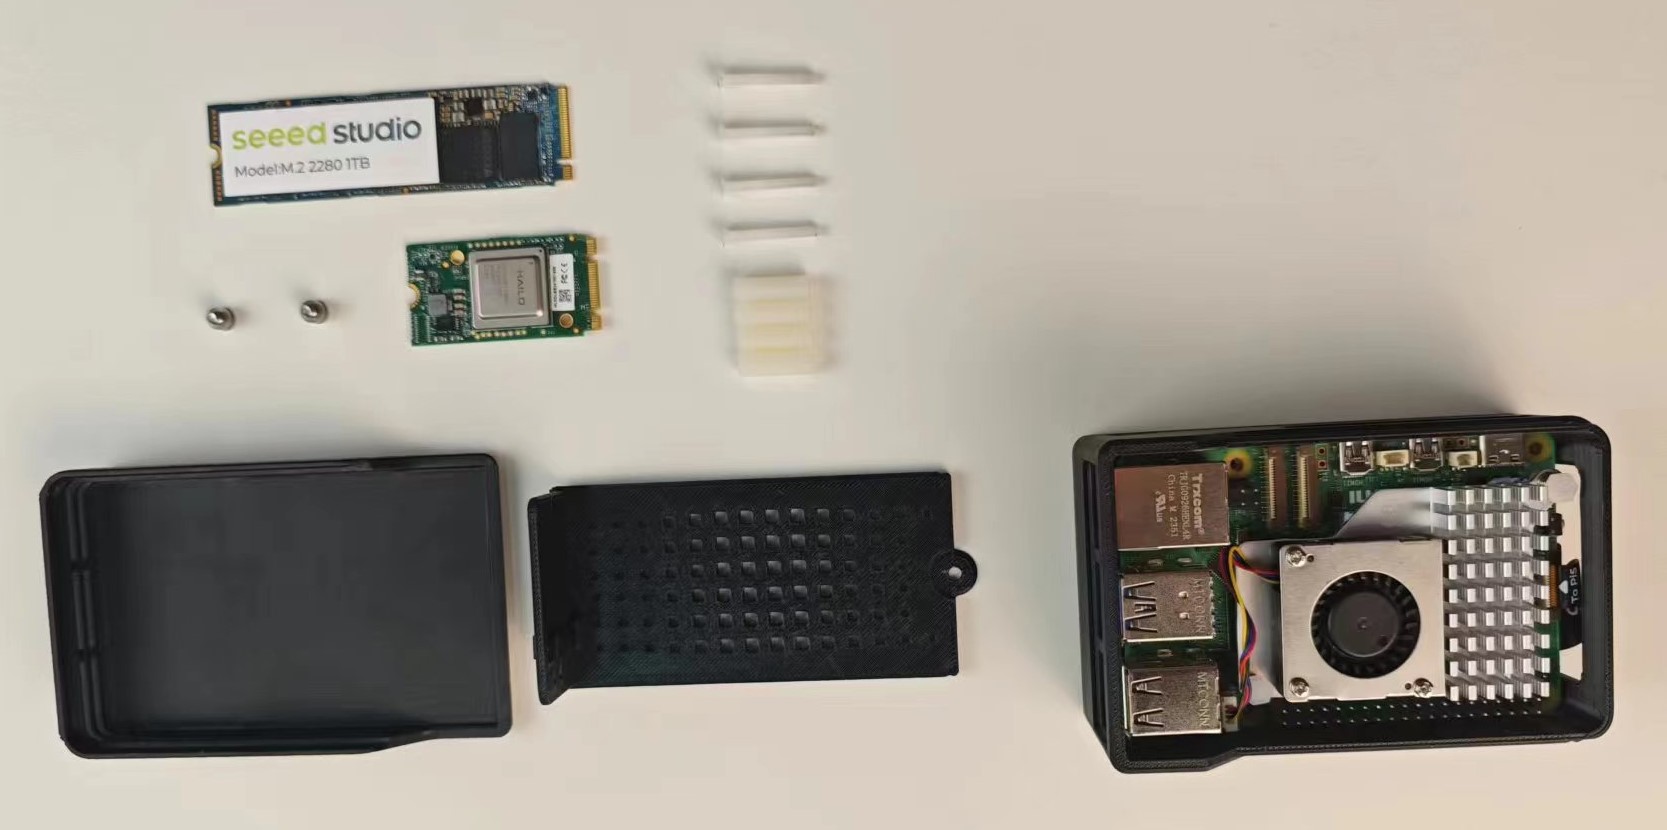
Place the overlapping M.2 Hat and Raspberry Pi into the case, with the Raspberry Pi on top, as shown in the picture:
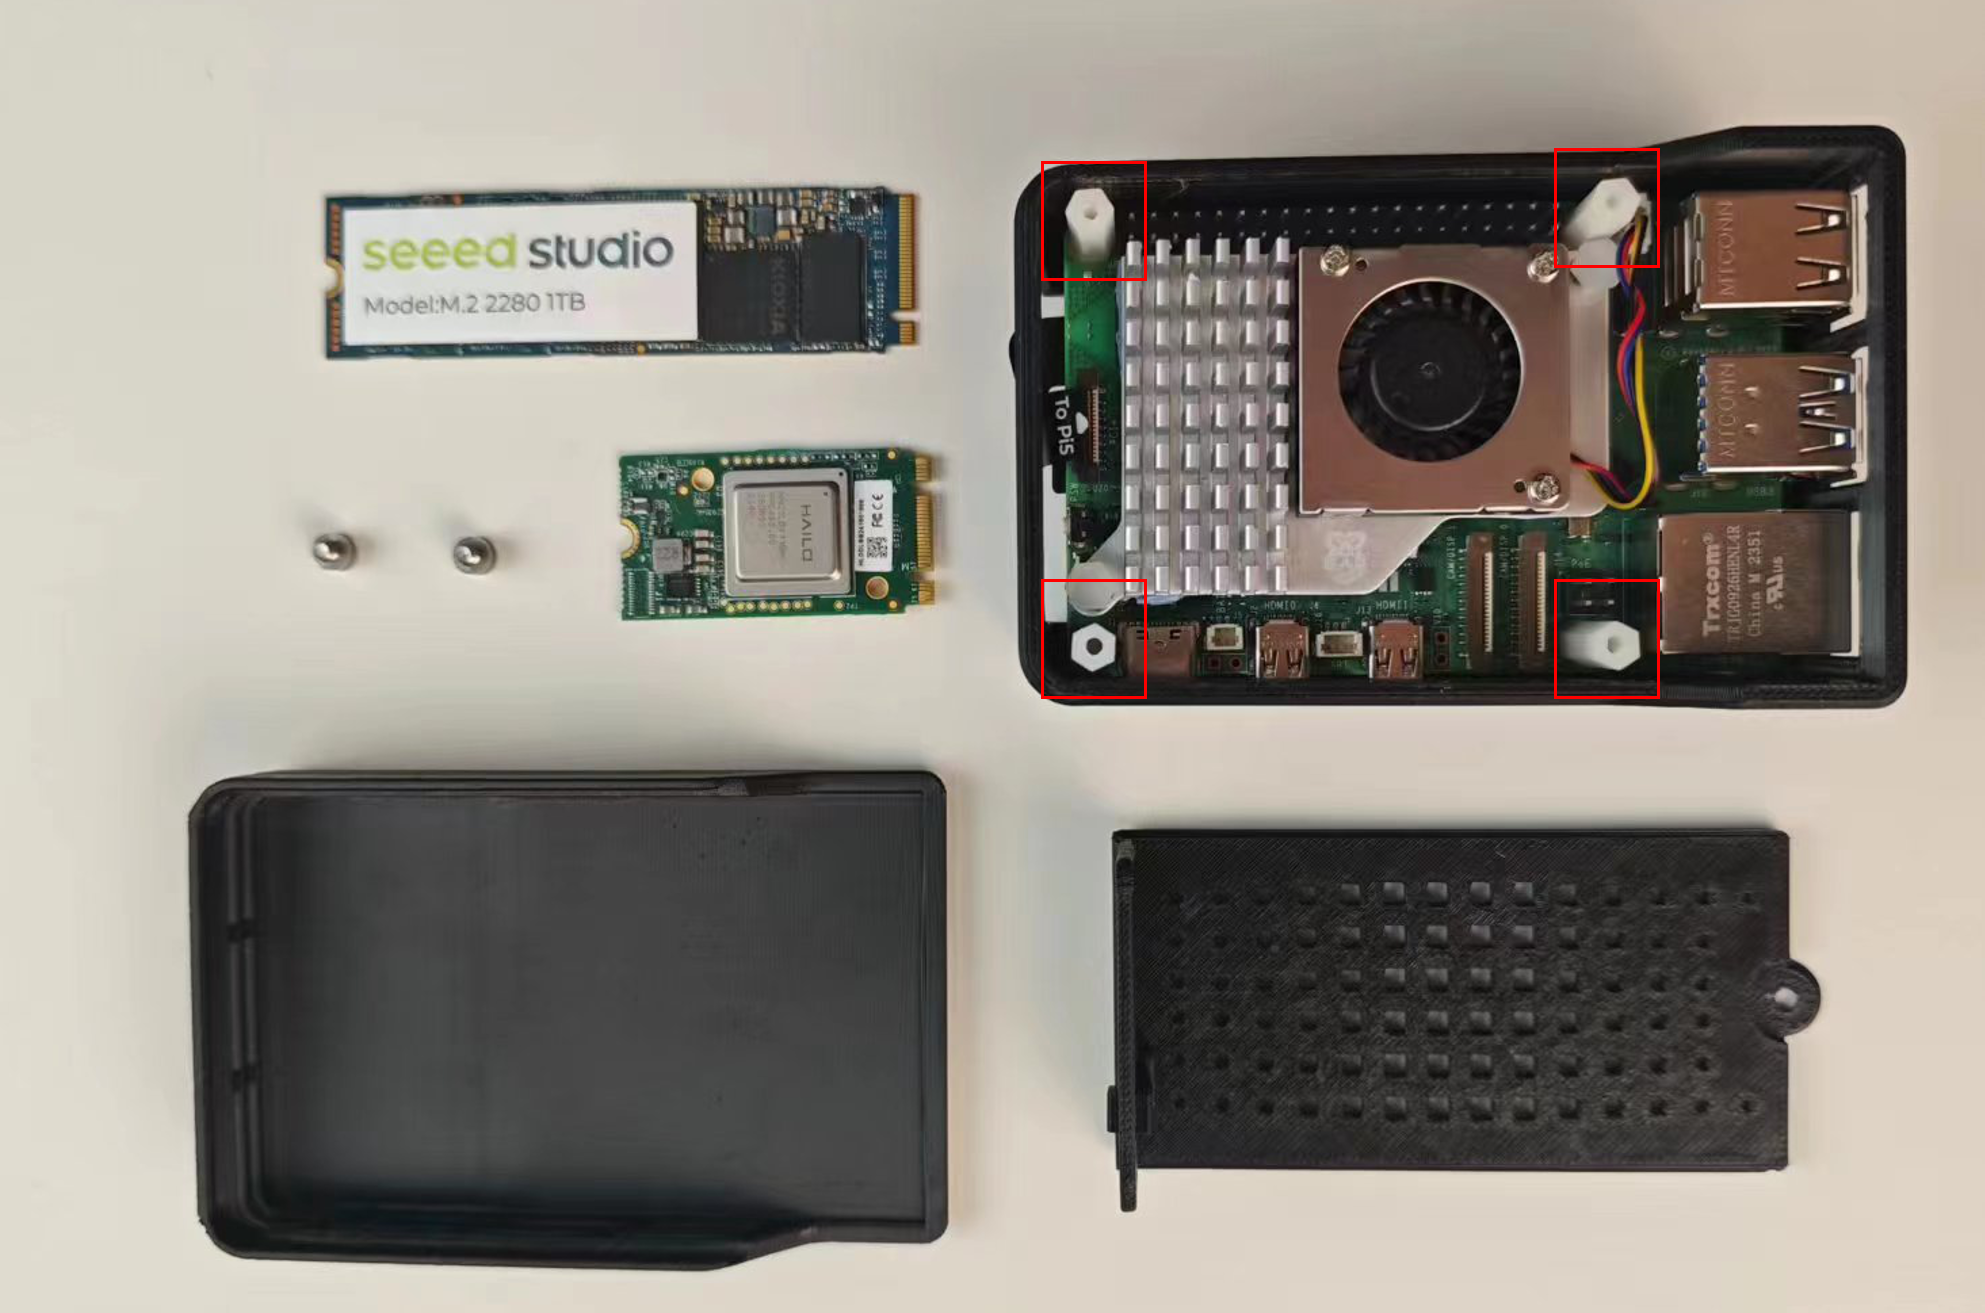
Step 4: Screw the screws into the reserved screw holes in the casing. This hole will connect the M.2 Hat and the Raspberry Pi, thereby fixing the M.2 Hat, Raspberry Pi 5 and the casing.
Step 5: Screw the studs into the screws to fix the M.2 Hat, Raspberry Pi 5 and case
Step 6: Insert the SSD and AI Kit into the M.2 Hat, as shown in the figure:
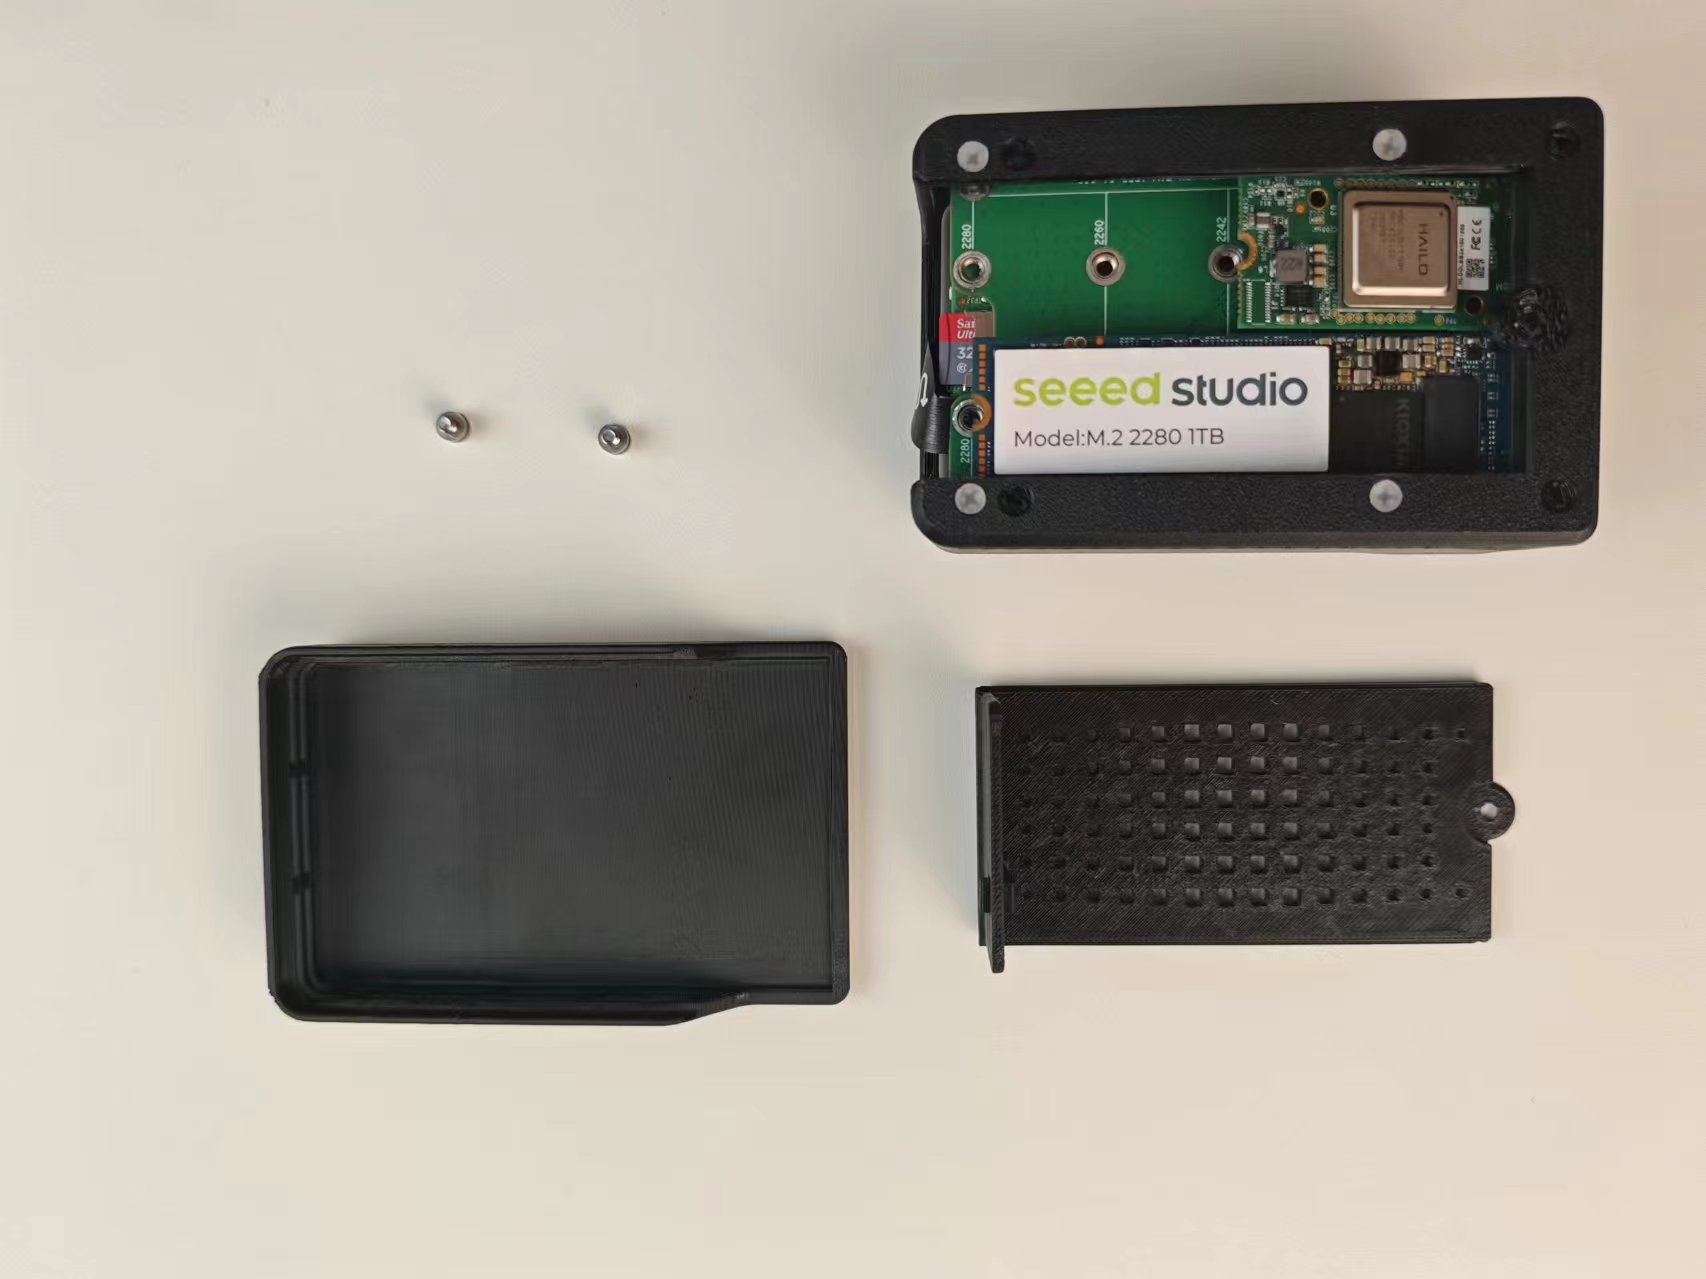
Step 7: Screw in the fixing screws to fix the SSD in the M.2 Hat
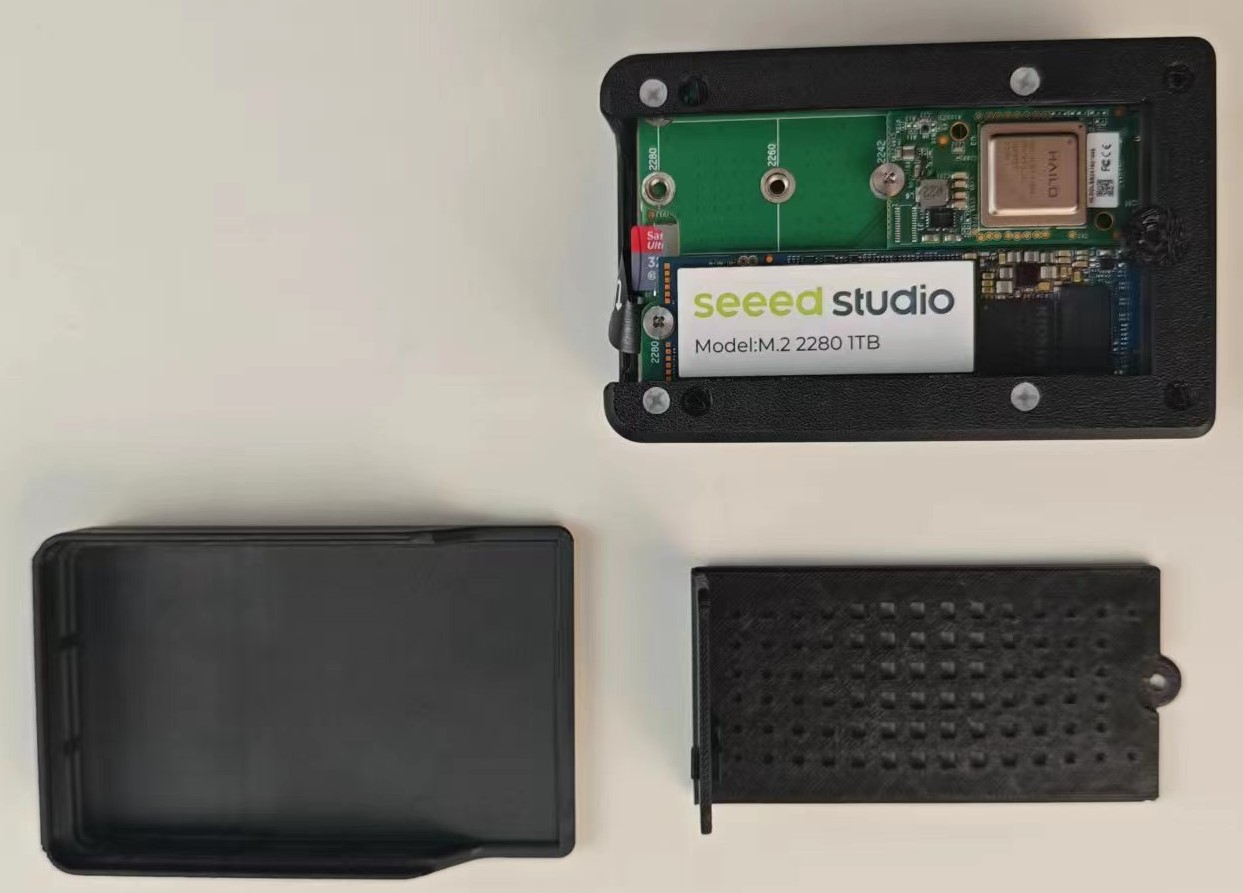
Step 8: Install the remaining shell
Use SD Card Copier tool to flash OS onto the NVME SSD On Raspberry Pi OS
This method works if you have an SD card and have booted the device successfully. Please make sure your system is the latest Raspberry Pi system (Bookworm or later) and and your RPi 5 firmware is updated to 2023-12-06 (Dec 6th) or newer, otherwise it may not recognize the NVME-related configurations.
Step 1:Ensure that your Raspberry Pi system is up-to-date (Bookworm or later), enter the following command to update the RPi 5 firmware:
  sudo apt update && sudo apt upgrade -y
  sudo rpi-eeprom-update  # If it is not post-December 2023 type the following into a terminal to start the configuration tool
  sudo raspi-config
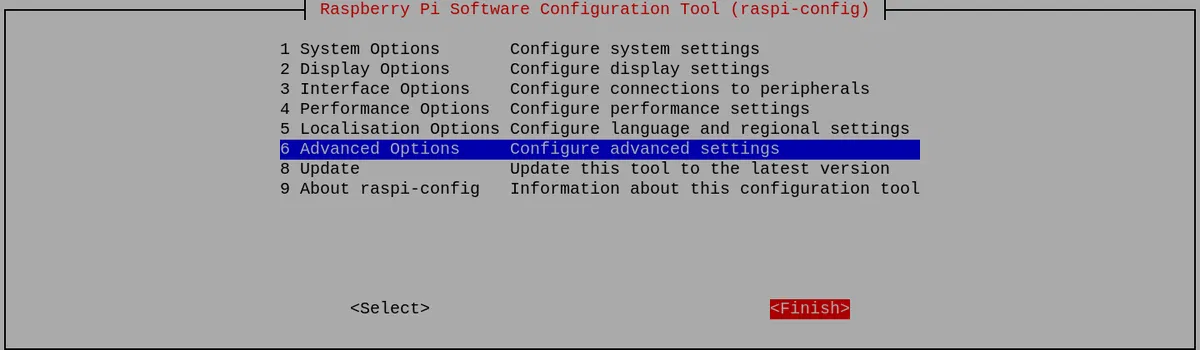
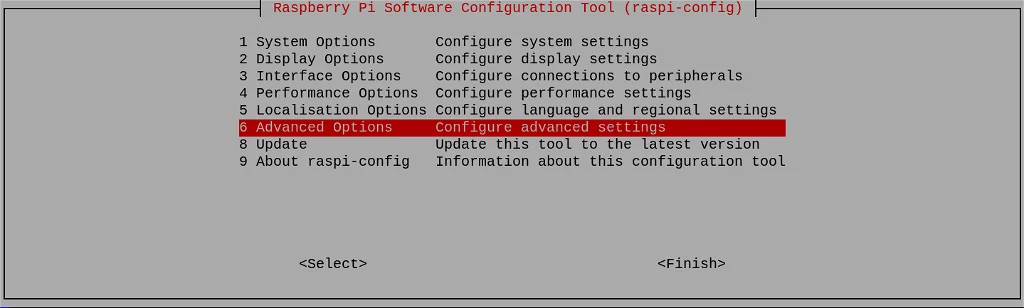
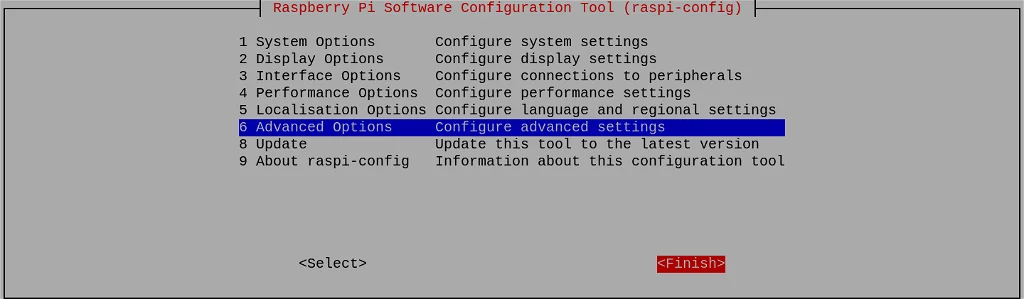
Scroll down to Advanced Options and press Enter:

Scroll down to Bootloader Version and press Enter:

And finally choose Latest, and press Enter:
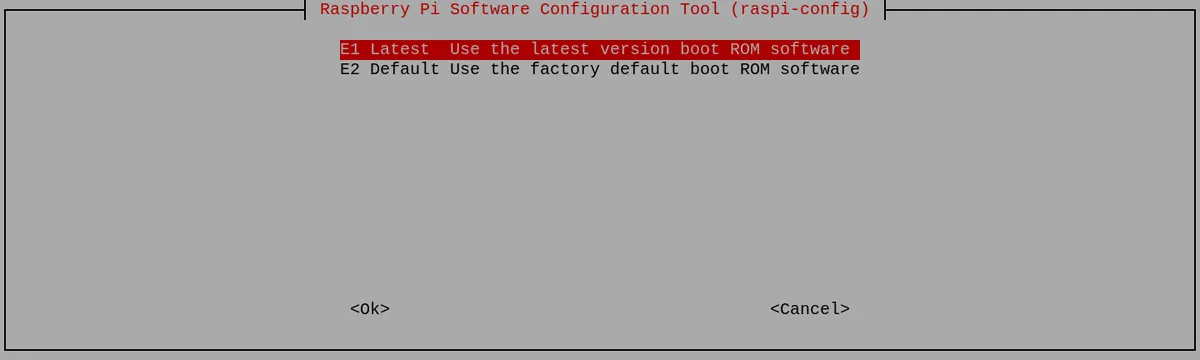
Select No here - you want the latest bootloader.
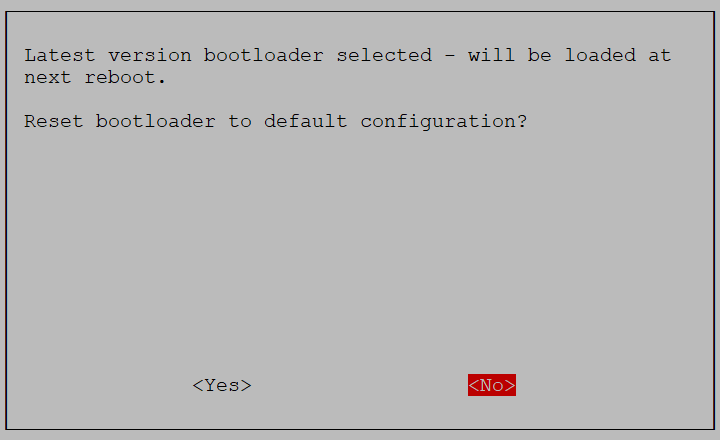
And exit from the tool by selecting Finish:
If asked to reboot, select Yes.

Step 2:Cick Applications =>Accessories =>SD Card Copier on the main screen, run the SD Card Copier program, and copy the OS to the NVME ssd as shown in the figure below.

Setting the Raspberry Pi to boot from the NVMe SSD
If you have easy access to your SD card slot you could turn off your Pi, pop out the SD card and (if everything's working as expected) it should automagically boot from your NVMe drive the next time you start it up. If you want to leave the SD card where it is and still boot from NVMe though, you'll need to change the boot order.
Step 1:Enter the following command:
sudo raspi-config
Scroll down to Advanced Options and press Enter:
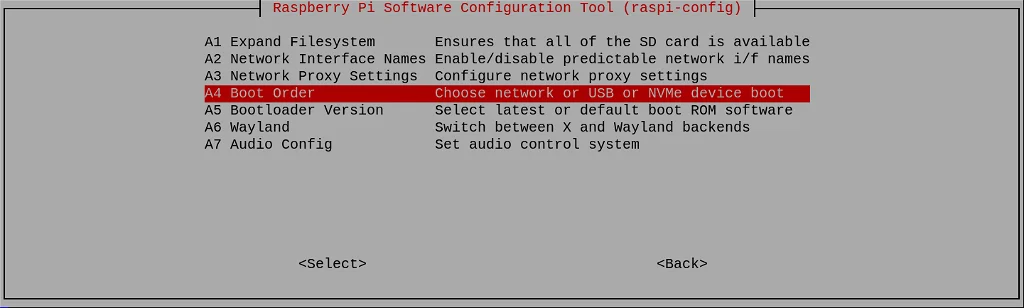
Step 2:Scroll down to Boot Order and press Enter:
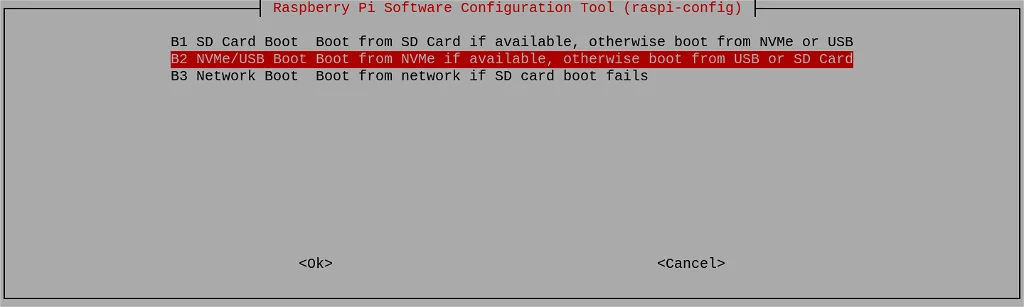
Step 3:Choose NVMe/USB Boot and press Enter:
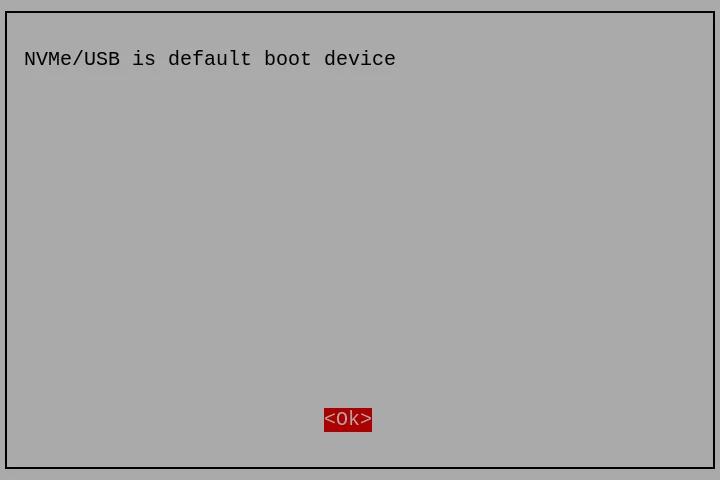
Configuration will be confirmed. Press Enter:
Step 4:Return to the first screen by selecting Back or pressing the Esc key. Then navigate to Finish using the right cursor key.
You will be asked whether you want to reboot now. Click Yes:

Modify PCIe
- M.2 Hat
- M.2 dual Hat
M.2 Hat supports PCIe Gen 2 and PCIe Gen 3 modes
Step 1: Enter the following command to open the /boot/firmware/config.txt file
sudo nano /boot/firmware/config.txt
Step 2:Add the following to the [all] section at the end of the /boot/firmware/config.txt file:
dtparam=pciex1_gen=3
Save the file and reboot again, you may see a speed increase!.
PCIe2.0 M.2 dual Hat supports PCIe Gen 2, and PCIe3.0 M.2 dual Hat supports PCIe Gen 2 and PCIe 3.
Step 1: Enter the following command to open the /boot/firmware/config.txt file
sudo nano /boot/firmware/config.txt
Step 2:Add the following to the [all] section at the end of the /boot/firmware/config.txt file:
dtparam=pciex1
dtparam=pciex1_gen=3
dtoverlay=pciex1-compat-pi5,no-mip,mmio-hi
Speed Benchmark
- M.2 hat
- M.2 dual Hat
- M.2 dual Hat with hailo8
This test show that raspberrypi boot from the SD card and use the SSD as backup storage:
# write speed command
sudo dd if=/dev/zero of=/mnt/nvme/testfile bs=1M count=1024 oflag=direct

# read speed command
sudo dd if=/mnt/nvme/testfile of=/dev/null bs=1M iflag=direc
| M.2 hat | Read Speed | Write Speed |
|---|---|---|
| PCIe 3.0 | 822MB/s | 716MB/s |
| PCIe 2.0 | 431 MB/s | 389MB/s |
This test show that raspberrypi boot from the SSD and use another SSD as backup storage:
# write speed command
dd if=/dev/zero of=tempfile bs=1M count=1024 oflag=direct
# read speed command
dd if=/dev/zero of=tempfile bs=1M count=1024
| M.2 dual Hat | Read & Read | Write & Write | Read & Write |
|---|---|---|---|
| PCIe 3.0 | average 454MB/s | average 407MB/s | 697MB/s 663MB/s |
| PCIe 2.0 | average 234MB/s | average 214MB/s | 414MB/s 324MB/s |
This test show that raspberrypi boot from the SSD and Hailo8 AI accelerator:
# write speed command
dd if=/dev/zero of=tempfile bs=1M count=1024 oflag=direct
# read speed command
dd if=/dev/zero of=tempfile bs=1M count=1024
| M.2 dual Hat with hailo8 | Read | Read & Hailo8 | Write | Write & Hailo8 |
|---|---|---|---|---|
| PCIe 3.0 | 812MB/S | 416MB/S 187FPS | 701MB/s | 340MB/s 188FPS |
| PCIe 2.0 | 429MB/S | 233MB/S/s 128FPS | 372MB/S | 273MB/S 111FPS |
Note: To test Hailo8 please check this link and prepare a video with 240 FPS.
Tech Support & Product Discussion
Thank you for choosing our products! We are here to provide you with different support to ensure that your experience with our products is as smooth as possible. We offer several communication channels to cater to different preferences and needs.