Flash JetPack OS to A205E Carrier Board or A205E Mini PC (NVIDIA Jetson Xavier NX supported)
In this wiki, we will show you how to flash Jetpack OS to the A205E Carrier Board or A205E Mini PC which supports NVIDIA Jetson Xavier module. We here will introduce you two ways to flash the system, and because the A205 Carrier Board is different to the official NVIDIA Jetson Carrier Board, the corresponding driver should be installed as well.


Getting Started
we can easily do this by using the Linux Terminal. For people who have Linux knowledge base, we highly recommand using Linux Terminal only.
Software Preparation
- NVIDIA account
- Ubuntu 18.04 OS on the Host Computer
!!!note In this tutorial, we will use Ubuntu 18.04 LTS based system to complete the installation.
Hardware Preparation (Force Recovery Mode)
- Host computer with Ubuntu 18.04 OS
- a USB Type-C data Cable
- Power adptor for A205E Carrier Board or A205E Mini PC
Before we can move on to the installation steps, we need to make sure that the board is in the force recovery mode
Step 1. Please locate the USB Type-C port, the Power Button, Reset Button and Recovery Button on the side of the A205E Carrier Board or A205E Mini PC.
| A205E Carrier Board | A205E Mini PC |
 |  |
TO put the A205E in Force Recovery Mode, please make sure A205E is powered off.
Step 2. Conenct the USB Type-C cable with the Type-C programming port on A205E Carrier Board or A205E Mini PC and the host computer.
Step 3. Connect the Power adptor for A205E Carrier Board or A205E Mini PC.
Step 4. Press and Hold the Recovery Key first, and then Press and Hold the Power Key, wait for the LED to be light up, then Release the Power Key, now Wait for 2 second and Release the Recovery Key.
Or
If the A205E Carrier Board or A205E Mini PC is in the Power On state, Press and Hold the Reset Key and the Recovery Key, Release the Reset Key for 2 Second, then Release the Recovery Key.
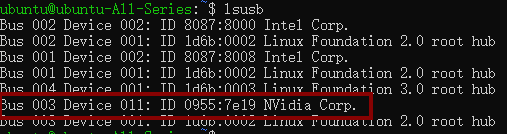
Step 5. On the Linux host PC screen, we can right click the mouse to open a Terminal and enter the command lsusb. When the returned content has the NVidia Corp. in it, it means that your A205 Carrier Board is in force recovery mode and you can proceed to the subsequent operations.
The ID depends on the modules on the carrier board and the information show as below:
- For Jetson Xavier NX: 0955:7e19 NVidia Corp
Flashing JetPack OS via Command Line
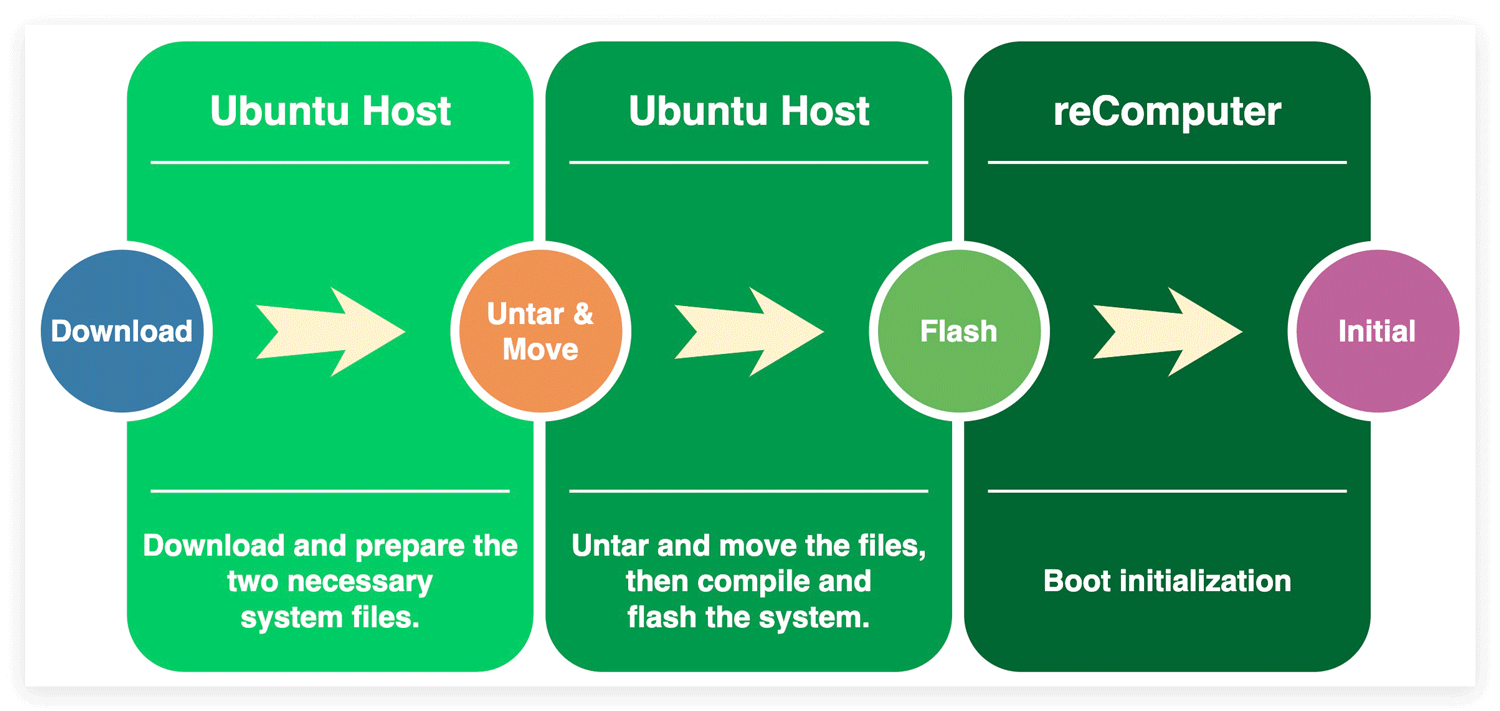
Here is the workflow of using Command Line scrpit to flash Jetpack OS:
Step 1. Download the proper NVIDIA Linux Driver Package
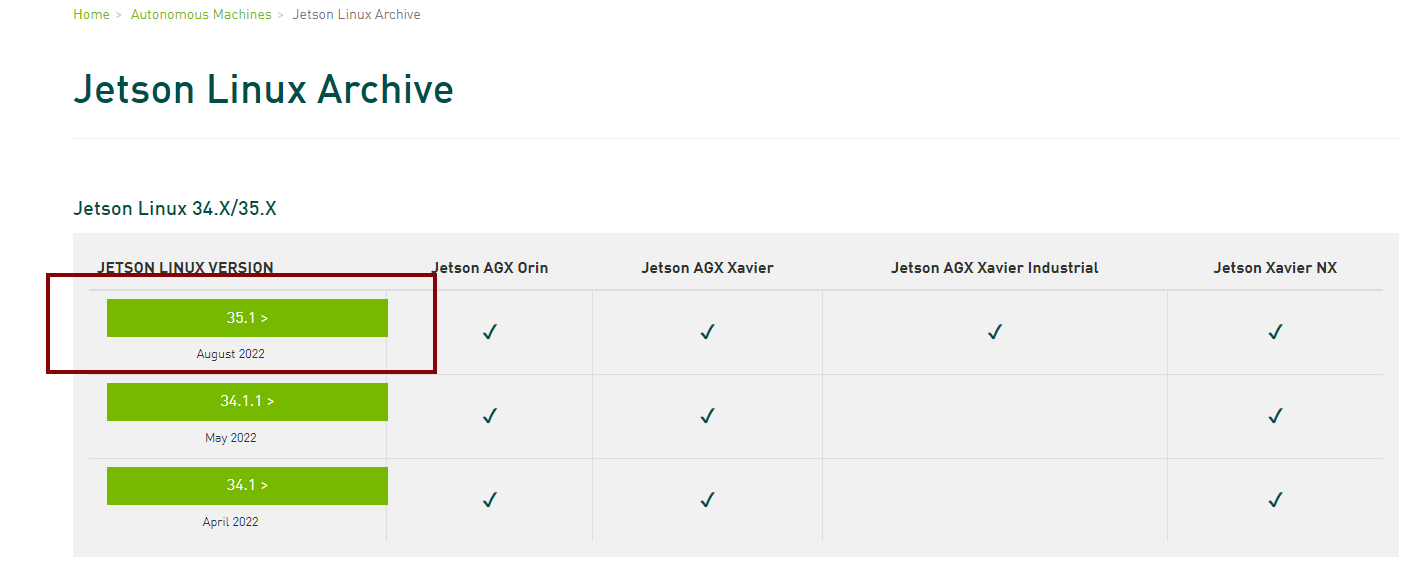
On the Linux host PC, we need to open a browser and go the Jetson Linux Archive. First we should check if the version of Jetson Linux is supported. In this case we are using the NVIDIA L4T 35.1.0(equivalent of Jetpack 5.0.2)
Once you find the proper version, click to go to the downloaded page. Find and click the "L4T Driver Package (BSP)" and "Sample Root Filesystem" to download the driver files. The names of the files are like Tegra_Linux_Sample-Root-Filesystem_Rxx.x.x_aarch64.tbz2 and Jetson-210_Linux_Rxx.x.x_aarch64.tbz2.
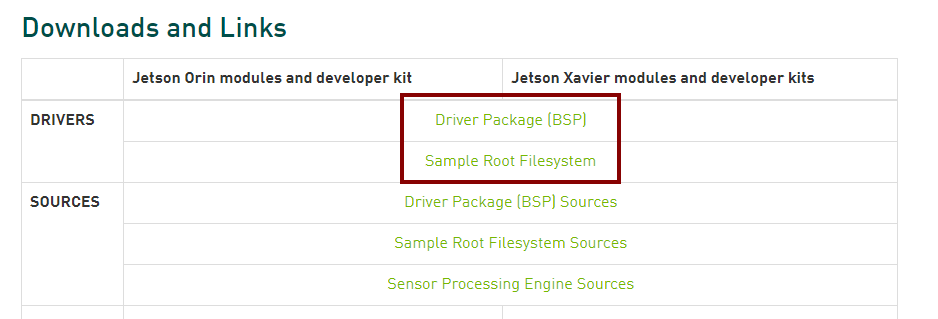
As the example, we choose the NVIDIA L4T 35.1.0 version, The names of the files should be:
- Tegra_Linux_Sample-Root-Filesystem_R35.1.0_aarch64.tbz2
- Jetson_Linux_R35.1.0_aarch64.tbz2
Step 2. Unzip Package Files and Assemble the Rootfs via Command Line
On the Linux Host PC, Please open a Terminal and use the command line below to unzip the files and assemble the rootfs:
tar xf ${L4T_RELEASE_PACKAGE}
cd Linux_for_Tegra/rootfs/
sudo tar xpf ../../${SAMPLE_FS_PACKAGE}
cd ..
sudo ./apply_binaries.sh
!!!Note
${XXX_XX_XXX} is where you put the names of the files.
- For example, the downloaded files are stored in
~/Downloads/, please open theTerminalon your Ubuntu Host Computer and enter following commands:
cd ~/Downlands/
mkdir Jetpack_502
mv Jetson_Linux_R35.1.0_aarch64.tbz2 Jetpack_502/
mv Tegra_Linux_Sample-Root-Filesystem_R35.1.0_aarch64.tbz2 Jetpack_502/
cd Jetpack_501/
tar xf Jetson_Linux_R35.1.0_aarch64.tbz2
cd Linux_for_Tegra/rootfs/
sudo tar xpf ../../Tegra_Linux_Sample-Root-Filesystem_R35.1.0_aarch64.tbz2
cd ..
sudo ./apply_binaries.sh
Step 3. Flash the System to the Board
In the example we use NVIDIA Jetson Xavier NX module and we can directly flash the system into the board execute following command:
cd ~/Downlands/Jetpack_502/Linux_for_Tegra
sudo ./flash.sh -r jetson-xavier-nx-devkit-emmc mmcblk0p1

Tech Support & Product Discussion
Thank you for choosing our products! We are here to provide you with different support to ensure that your experience with our products is as smooth as possible. We offer several communication channels to cater to different preferences and needs.