Color Detection with reTerminal and Pi camera with OpenCV

Introduction
Color detection, a core component of computer vision, involves identifying and analyzing colors in digital images or videos. Widely applied across industries, it enables tasks like object recognition in robotics, quality control in manufacturing, and even plays a role in restoring artworks. The algorithms behind color detection contribute to advancements in technology, influencing areas such as autonomous vehicles, medical imaging, and visual aesthetics in film and photography. In essence, color detection is a versatile tool that enhances our ability to interpret and interact with the visual world in numerous meaningful ways.
Getting Start
Before you start this project, you may need to prepare your hardware and software in advance as described here.
Hardware preparation
| reTerminal | PiCam |
|---|---|
 |  |
Software Preparation
We recommend installing the Bullesye or Bookworm version of Raspberry Pi 64 bit OS from their official website. If you prefer to install a new Raspbian OS, please follow the steps outlined in this guide.
We highly recommend checking out our previous tutorial on Getting started with OpenCV, as this tutorial serves as a continuation in our series.
Exploring Color Spaces in OpenCV
Color spaces are fundamental in image processing, and OpenCV supports several, each serving unique purposes. Let's delve into three common color spaces in OpenCV: CMYK, BGR, and HSV.
CMYK Color Space
CMYK (Cyan, Magenta, Yellow, Key/Black) is a subtractive color space used in color printing. Colors are created by subtracting varying percentages of cyan, magenta, yellow, and black from white light.
BGR Color Space
OpenCV's default color space is RGB, but it internally stores color in BGR (Blue, Green, Red). BGR is an additive color model, where varying intensities of blue, green, and red combine to form different shades.
Component Range:
- Blue (0-255): Intensity of the blue color.
- Green (0-255): Intensity of the green color.
- Red (0-255): Intensity of the red color.
HSV Color Space
HSV (Hue, Saturation, Value) represents colors in a cylindrical model derived from RGB color points. It mimics human perception of colors, with hue, saturation, and value components.
Component Range:
- Hue (0-179): Type of color in degrees.
- Saturation (0-255): Intensity or vividness of the color.
- Value (0-255): Brightness of the color.
Why HSV is important in Color detection problem?
HSV (Hue, Saturation, Value) is crucial in color detection tasks due to its ability to separate color information effectively. Unlike RGB or BGR, HSV isolates the type of color (Hue) from its intensity (Saturation) and brightness (Value), providing a more intuitive representation. This separation proves robust to changes in illumination, making color-based segmentation less sensitive to varying lighting conditions. Additionally, the natural representation of colors in HSV simplifies the process of defining color thresholds, facilitating precise criteria for identifying specific objects or regions in an image. Its widespread use in computer vision tasks, such as color-based object tracking and segmentation, highlights its importance in achieving accurate and reliable results.
How to Use the Code snippets
In the first code, you have the flexibility to interactively adjust trackbars, allowing you to visually identify the optimal color thresholds. By experimenting with these trackbars, you can pinpoint the specific color you're interested in and take note of the corresponding HSV minimum and maximum values. This hands-on approach provides an intuitive way for individuals to fine-tune color parameters, ensuring a more personalized and precise color identification experience
cd Seeed_Python_ReTerminal/samples/Opencv_and_piCam
Then
python hsvtest.py
Even you can use Thonny IDE to run the python script.
Here is the code for HSV Tuning
import cv2
import numpy as np

def empty(a):
  pass

def stackImages(scale,imgArray):
  rows = len(imgArray)
  cols = len(imgArray[0])
  rowsAvailable = isinstance(imgArray[0], list)
  width = imgArray[0][0].shape[1]
  height = imgArray[0][0].shape[0]
  if rowsAvailable:
      for x in range ( 0, rows):
          for y in range(0, cols):
              if imgArray[x][y].shape[:2] == imgArray[0][0].shape [:2]:
                  imgArray[x][y] = cv2.resize(imgArray[x][y], (0, 0), None, scale, scale)
              else:
                  imgArray[x][y] = cv2.resize(imgArray[x][y], (imgArray[0][0].shape[1], imgArray[0][0].shape[0]), None, scale, scale)
              if len(imgArray[x][y].shape) == 2: imgArray[x][y]= cv2.cvtColor( imgArray[x][y], cv2.COLOR_GRAY2BGR)
      imageBlank = np.zeros((height, width, 3), np.uint8)
      hor = [imageBlank]*rows
      hor_con = [imageBlank]*rows
      for x in range(0, rows):
          hor[x] = np.hstack(imgArray[x])
      ver = np.vstack(hor)
  else:
      for x in range(0, rows):
          if imgArray[x].shape[:2] == imgArray[0].shape[:2]:
              imgArray[x] = cv2.resize(imgArray[x], (0, 0), None, scale, scale)
          else:
              imgArray[x] = cv2.resize(imgArray[x], (imgArray[0].shape[1], imgArray[0].shape[0]), None,scale, scale)
          if len(imgArray[x].shape) == 2: imgArray[x] = cv2.cvtColor(imgArray[x], cv2.COLOR_GRAY2BGR)
      hor= np.hstack(imgArray)
      ver = hor
  return ver


path = 'captured_image.jpg'
cv2.namedWindow("TrackBars")
cv2.resizeWindow("TrackBars",640,240)
cv2.createTrackbar("Hue Min","TrackBars",0,179,empty)
cv2.createTrackbar("Hue Max","TrackBars",19,179,empty)
cv2.createTrackbar("Sat Min","TrackBars",110,255,empty)
cv2.createTrackbar("Sat Max","TrackBars",240,255,empty)
cv2.createTrackbar("Val Min","TrackBars",153,255,empty)
cv2.createTrackbar("Val Max","TrackBars",255,255,empty)

while True:
  img = cv2.imread(path)
  img= cv2.resize(img, (300, 300))
  imgHSV = cv2.cvtColor(img,cv2.COLOR_BGR2HSV)
  h_min = cv2.getTrackbarPos("Hue Min","TrackBars")
  h_max = cv2.getTrackbarPos("Hue Max", "TrackBars")
  s_min = cv2.getTrackbarPos("Sat Min", "TrackBars")
  s_max = cv2.getTrackbarPos("Sat Max", "TrackBars")
  v_min = cv2.getTrackbarPos("Val Min", "TrackBars")
  v_max = cv2.getTrackbarPos("Val Max", "TrackBars")
  print(h_min,h_max,s_min,s_max,v_min,v_max)
  lower = np.array([h_min,s_min,v_min])
  upper = np.array([h_max,s_max,v_max])
  mask = cv2.inRange(imgHSV,lower,upper)
  imgResult = cv2.bitwise_and(img,img,mask=mask)


  cv2.imshow("Original",img)
  cv2.imshow("HSV",imgHSV)
  cv2.imshow("Mask", mask)
  cv2.imshow("Result", imgResult)

  #imgStack = stackImages(0.6,([img,imgHSV],[mask,imgResult]))
  #cv2.imshow("Stacked Images", imgStack)

  cv2.waitKey(1)
Once you've determined the HSV minimum and maximum values using the trackbars in the first code snippet, you can seamlessly replace these numeric values with the corresponding color name and its identified range in the second snippet.
python colordetector.py
Here is the full code for Color Detection
import cv2
import numpy as np
from picamera2 import Picamera2

Your_color = "Green"

def detect_single_color(imageFrame, color_name, lower_range, upper_range, color_display):
    hsvFrame = cv2.cvtColor(imageFrame, cv2.COLOR_BGR2HSV)
    color_mask = cv2.inRange(hsvFrame, lower_range, upper_range)

    kernel = np.ones((5, 5), "uint8")
    color_mask = cv2.dilate(color_mask, kernel)
    result = cv2.bitwise_and(imageFrame, imageFrame, mask=color_mask)

    contours, hierarchy = cv2.findContours(color_mask, cv2.RETR_TREE, cv2.CHAIN_APPROX_SIMPLE)

    for pic, contour in enumerate(contours):
        area = cv2.contourArea(contour)
        if area > 800:
            x, y, w, h = cv2.boundingRect(contour)
            imageFrame = cv2.rectangle(imageFrame, (x, y), (x + w, y + h), color_display, 2)
            cv2.putText(imageFrame, f"{color_name} Colour", (x, y), cv2.FONT_HERSHEY_SIMPLEX, 1.0, color_display)

    return imageFrame

# Initialize PiCamera
picam2 = Picamera2()
picam2.preview_configuration.main.size = (1280, 720)
picam2.preview_configuration.main.format = "RGB888"
picam2.preview_configuration.align()
picam2.configure("preview")
picam2.start()

# Define your color range
my_color_lower = np.array([49, 105, 0], np.uint8)
my_color_upper = np.array([94, 255, 255], np.uint8)

# Start a while loop
while True:
    im = picam2.capture_array()

    # Example: Detecting your specified color
    result_frame = detect_single_color(im, Your_color, my_color_lower, my_color_upper, (0, 255, 0))  # Change the color display accordingly

    # Program Termination
    cv2.imshow("Single Color Detection in Real-Time", result_frame)
    if cv2.waitKey(10) & 0xFF == ord('q'):
        picam2.stop()
        cv2.destroyAllWindows()
        break
Application
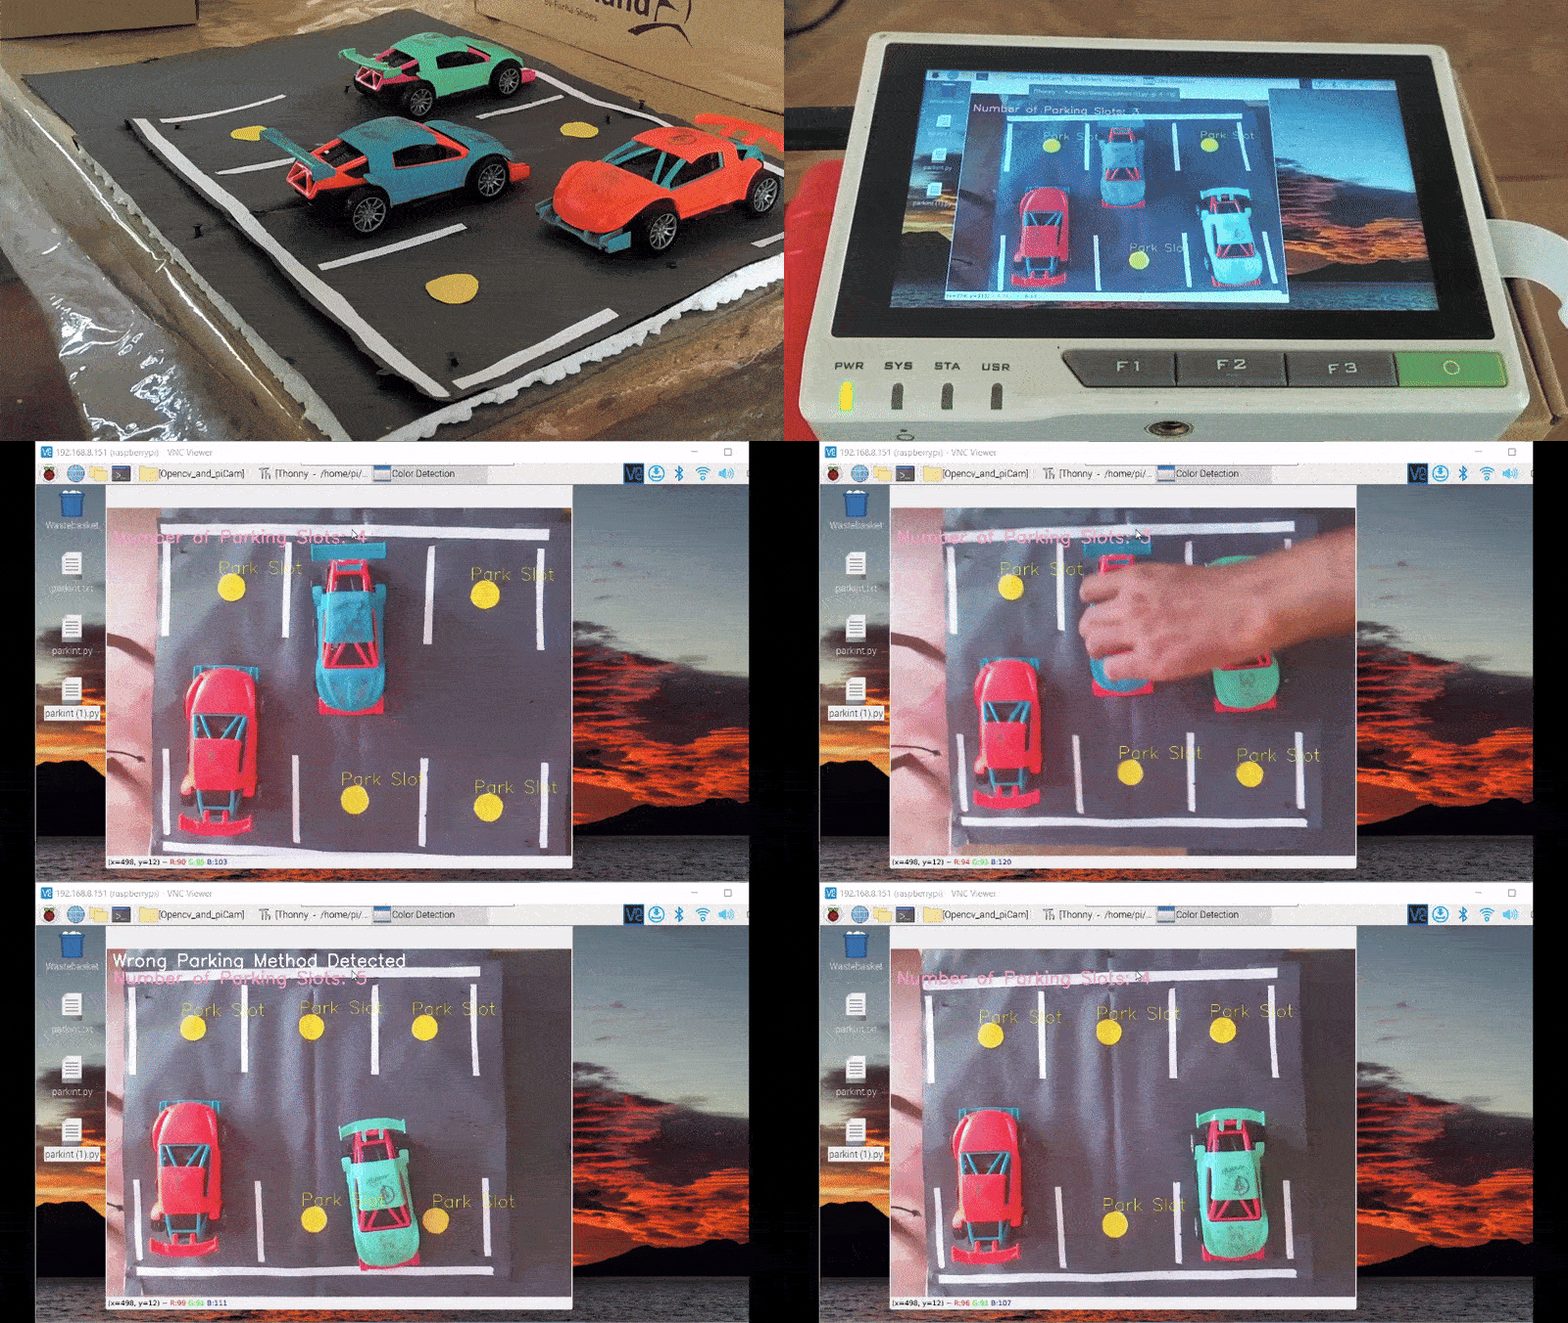
Color detection plays a pivotal role in diverse applications, from computer vision and manufacturing to medical imaging and art. In computer vision, it enables object recognition and tracking, contributing to tasks like robotic navigation and surveillance. Industries utilize color detection for sorting and quality control, ensuring products meet standards. Medical imaging relies on color-based segmentation for precise analysis, while entertainment industries employ it in film color grading and art restoration. From traffic sign recognition to biometric identification and environmental monitoring, the ability to detect and interpret colors is fundamental, shaping advancements in technology, automation, and various fields.Using simple techniques like color detection and shape detection of the OpenCV Computer Vision Library, we can effortlessly count parking slots and detect abnormal car parking scenarios.

Tech support
Thank you for choosing our products! We are here to provide you with different support to ensure that your experience with our products is as smooth as possible. We offer several communication channels to cater to different preferences and needs.