Getting start with reTerminal and Pi camera with OpenCV
Introduction
In this tutorial, we'll guide you through the process of setting up the reTerminal with a freshly installed Raspberry Pi OS Bullseye or BookWorm OS. Our goal is to interact with the PiCam and perform image processing and deep learning activities using the OpenCV library.
OpenCV
OpenCV (Open Source Computer Vision Library): OpenCV is a powerful and open-source computer vision library designed for real-time computer vision tasks. It provides a comprehensive set of tools and functions that enable developers to work with images and videos, offering solutions for tasks like image processing, object detection, face recognition, and more. Widely used in both academia and industry, OpenCV supports various programming languages, making it a versatile choice for computer vision applications across different platforms. Its flexibility and extensive documentation make it an invaluable resource for anyone involved in computer vision development.
Getting Start
Before you start this project, you may need to prepare your hardware and software in advance as described here.
Hardware preparation
| reTerminal | PiCam |
|---|---|
 |  |
Software Preparation
We recommend installing the Bullesye version or Bookworm version of Raspberry Pi 64 bit OS from their official website. If you prefer to install a new Raspbian OS, please follow the steps outlined in this guide
Install OpenCV
Feel free to skip the detailed installation process; we've got a shortcut for you. Follow these simplified steps if You are using Bullseye OS:
- Step 1 First, clone this Git repo onto your Raspberry Pi like this
git clone https://github.com/Seeed-Studio/Seeed_Python_ReTerminal
- Step 2 Next, utilize our script to effortlessly install the required Python packages and download the EfficientDet-Lite model. Navigate to this folder.
cd Seeed_Python_ReTerminal/samples/Opencv_and_piCam/ObjectDetection
- Step 3 The script install the required dependencies and download the TFLite models For this tutorial series.
sh setup.sh
Follow these step if You are using Bookworm OS:
- Step 1 In your Terminal execute following command to install
sudo apt-get install libopencv-dev python3-opencv
- Step 2 Next, clone this Git repo onto your Raspberry Pi like this
git clone https://github.com/Seeed-Studio/Seeed_Python_ReTerminal
Take a video stream
In new terminal window navigate to Opencv_and_piCam
cd Seeed_Python_ReTerminal/samples/Opencv_and_piCam
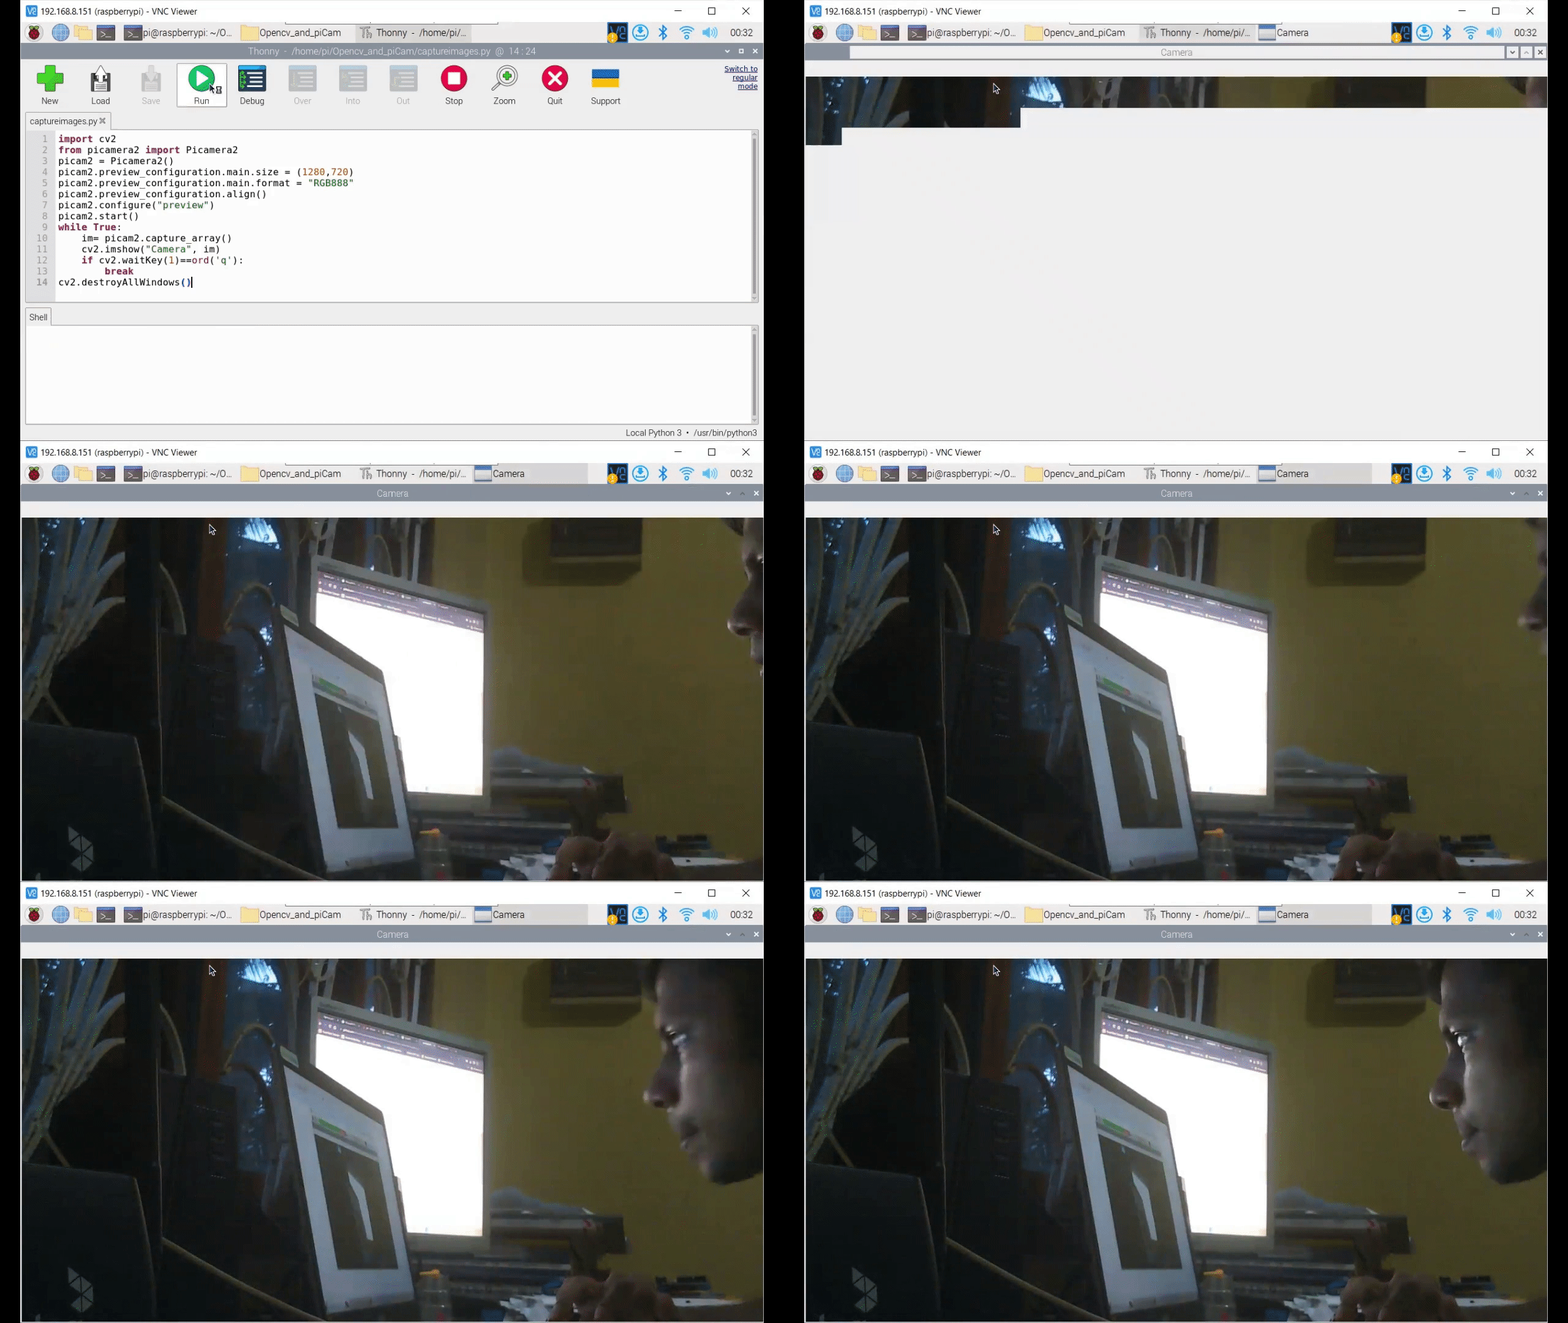
In this tutorial, we'll kick off with a 'Hello World' program using the PiCam and OpenCV on our reTerminal. You can locate the captureimages.py file in our cloned repository. We'll be exploring a live video stream, and if you press 'q', the stream will gracefully stop. Even you can use Thonny IDE to run the python script.
python captureimages.py
You will find a video stream like below.

Following your reference, we'll provide the entire code snippet for your convenience.
import cv2
from picamera2 import Picamera2
picam2 = Picamera2()
picam2.preview_configuration.main.size = (1280,720)
picam2.preview_configuration.main.format = "RGB888"
picam2.preview_configuration.align()
picam2.configure("preview")
picam2.start()
while True:
    im= picam2.capture_array()
    cv2.imshow("Camera", im)
    if cv2.waitKey(1)==ord('q'):
        break
cv2.destroyAllWindows()
Capture a photo and Save it
Here, we'll capture a still image using the PiCam and OpenCV on our ReTerminal. Find the saveimage.py file in our cloned repository. We'll be streaming live video, and if you press 's', a photo will be captured.Even you can use Thonny IDE to run the python script.
python saveimage.py
You will find a captured image in same directory.
Following your reference, we'll provide the entire code snippet for your convenience.
import cv2
from picamera2 import Picamera2

picam2 = Picamera2()
picam2.preview_configuration.main.size = (1280, 720)
picam2.preview_configuration.main.format = "RGB888"
picam2.preview_configuration.align()
picam2.configure("preview")
picam2.start()

try:
    while True:
        im = picam2.capture_array()
        cv2.imshow("Camera", im)

        # Save an image when a key is pressed (e.g., 's')
        key = cv2.waitKey(1)
        if key == ord('s'):
            # Save the image using OpenCV
            cv2.imwrite("captured_image.jpg", im)
            print("Image saved!")

        # Exit the loop when 'q' is pressed
        elif key == ord('q'):
            break

finally:
    # Release resources
    cv2.destroyAllWindows()
    picam2.stop()
    picam2.close()
Tech support
Thank you for choosing our products! We are here to provide you with different support to ensure that your experience with our products is as smooth as possible. We offer several communication channels to cater to different preferences and needs.