reBot-DM Bimanual Collaboration
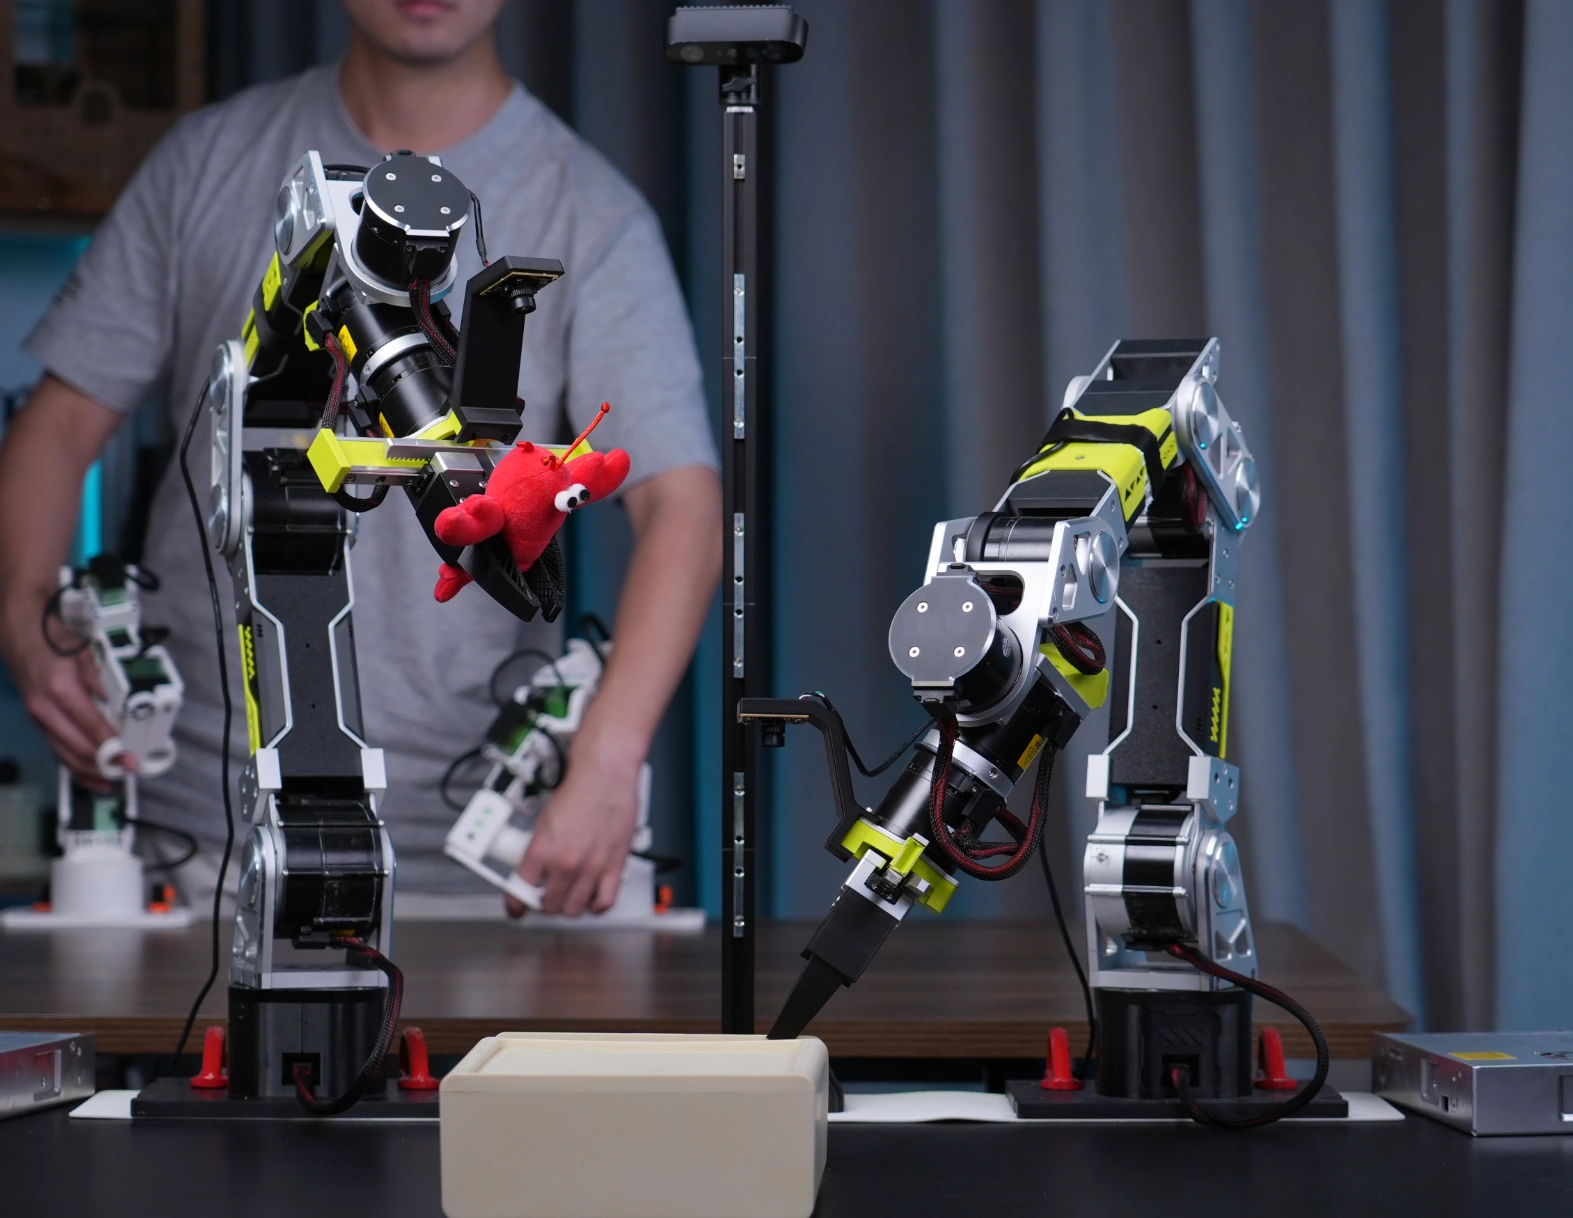
1. Environment Setup
Before using two arms, set up the environment by following the single-arm getting-started tutorials:
1.1 Activate the Existing Environment
After successfully completing the entire single-arm workflow, proceed to install the bimanual environment.
conda activate lerobot

cd ~
git clone https://github.com/xiehuangbao888/lerobot-robot-seeed-b601.git
cd lerobot-robot-seeed-b601
pip install -e .
1.2 Port Assignments Used in This Guide
| Device | Left | Right |
|---|---|---|
| Arm 102 leader | /dev/ttyUSB0 | /dev/ttyUSB1 |
| RS follower | can0 | can1 |
| DM follower, Damiao serial | /dev/ttyACM0 | /dev/ttyACM1 |
2. Bimanual Calibration
Keep the same robot.id and teleop.id during calibration and subsequent operations. Both RS and DM examples use bi_follower, and the two leaders use bi_leader. The id identifies calibration files, not the motor model. If you previously calibrated your DM arms with bi_follower_dm, continue using that ID in subsequent commands for those arms.
- DM
- RS
2.2 Calibrate Two DM Followers: Damiao Serial
sudo chmod 666 /dev/ttyACM*
lerobot-calibrate \
    --robot.type=bi_seeed_b601_follower \
    --robot.id=bi_follower \
    --robot.left_arm_config.motor_family=dm \
    --robot.left_arm_config.port=/dev/ttyACM0 \
    --robot.right_arm_config.motor_family=dm \
    --robot.right_arm_config.port=/dev/ttyACM1
2.1 Calibrate Two RS Followers
RS
left
sudo ip link set can0 down 2>/dev/null
sudo ip link set can0 type can bitrate 1000000
sudo ip link set can0 up
right
sudo ip link set can1 down 2>/dev/null
sudo ip link set can1 type can bitrate 1000000
sudo ip link set can1 up
lerobot-calibrate \
    --robot.type=bi_seeed_b601_follower \
    --robot.id=bi_follower \
    --robot.left_arm_config.motor_family=rs \
    --robot.left_arm_config.port=can0 \
    --robot.right_arm_config.motor_family=rs \
    --robot.right_arm_config.port=can1
2.3 Calibrate Two Leaders
lerobot-calibrate \
    --teleop.type=bi_seeed_102_leader \
    --teleop.id=bi_leader \
    --teleop.left_arm_config.port=/dev/ttyUSB0 \
    --teleop.right_arm_config.port=/dev/ttyUSB1
2.4 Calibration Procedure
- Follow the prompts to calibrate the left and right arms in order.
- If calibration already exists, press Enter to reuse it, or type
cand press Enter to recalibrate. - When prompted to position the arm manually at zero, move the entire current arm to the specified zero pose, fully close the empty gripper, and confirm.
- Follower calibration resets the zero positions of all motors in the entire follower arm, not just the gripper. Do not confirm zeroing at an arbitrary pose.
Exiting calibration does not automatically reset the arms. Calibration files are stored under ~/.cache/huggingface/lerobot/calibration/ by default, with subdirectories for the underlying device types and _left or _right appended to each side’s ID. Recheck calibration after replacing a physical arm or changing motor zero positions.
3. Bimanual Teleoperation
- DM
- RS
3.2 Teleoperate Two DM Arms: Damiao Serial
lerobot-teleoperate \
    --robot.type=bi_seeed_b601_follower \
    --robot.id=bi_follower \
    --robot.left_arm_config.motor_family=dm \
    --robot.left_arm_config.port=/dev/ttyACM0 \
    --robot.right_arm_config.motor_family=dm \
    --robot.right_arm_config.port=/dev/ttyACM1 \
    --teleop.type=bi_seeed_102_leader \
    --teleop.id=bi_leader \
    --teleop.left_arm_config.port=/dev/ttyUSB0 \
    --teleop.right_arm_config.port=/dev/ttyUSB1
3.1 Teleoperate Two RS Arms
lerobot-teleoperate \
    --robot.type=bi_seeed_b601_follower \
    --robot.id=bi_follower \
    --robot.left_arm_config.motor_family=rs \
    --robot.left_arm_config.port=can0 \
    --robot.right_arm_config.motor_family=rs \
    --robot.right_arm_config.port=can1 \
    --teleop.type=bi_seeed_102_leader \
    --teleop.id=bi_leader \
    --teleop.left_arm_config.port=/dev/ttyUSB0 \
    --teleop.right_arm_config.port=/dev/ttyUSB1
4. Data Collection
Verify that teleoperation works before running the recording commands. The examples record two 20-second episodes to check the data pipeline. Replace dataset.single_task with the task you actually demonstrate.
- DM
- RS
4.2 Two DM Arms: Damiao Serial and Three-Camera Recording
lerobot-record \
    --robot.type=bi_seeed_b601_follower \
    --robot.id=bi_follower \
    --robot.left_arm_config.motor_family=dm \
    --robot.left_arm_config.port=/dev/ttyACM0 \
    --robot.right_arm_config.motor_family=dm \
    --robot.right_arm_config.port=/dev/ttyACM1 \
    --robot.cameras='{
      top: {
        type: opencv,
        index_or_path: "/dev/video0",
        width: 640,
        height: 480,
        fps: 30,
        fourcc: "MJPG"
      },
      left_wrist: {
        type: opencv,
        index_or_path: "/dev/video2",
        width: 640,
        height: 480,
        fps: 30,
        fourcc: "MJPG"
      },
      right_wrist: {
        type: opencv,
        index_or_path: "/dev/video4",
        width: 640,
        height: 480,
        fps: 30,
        fourcc: "MJPG"
      }
    }' \
    --teleop.type=bi_seeed_102_leader \
    --teleop.id=bi_leader \
    --teleop.left_arm_config.port=/dev/ttyUSB0 \
    --teleop.right_arm_config.port=/dev/ttyUSB1 \
    --dataset.repo_id=seeed_rebot/test \
    --dataset.single_task="pick the cube" \
    --dataset.fps=30 \
    --dataset.num_episodes=2 \
    --dataset.episode_time_s=20 \
    --dataset.reset_time_s=10 \
    --dataset.push_to_hub=false \
    --display_data=false
4.1 Two RS Arms: Three-Camera Recording
lerobot-record \
    --robot.type=bi_seeed_b601_follower \
    --robot.id=bi_follower \
    --robot.left_arm_config.motor_family=rs \
    --robot.left_arm_config.port=can0 \
    --robot.right_arm_config.motor_family=rs \
    --robot.right_arm_config.port=can1 \
    --robot.cameras='{
      top: {
        type: opencv,
        index_or_path: "/dev/video0",
        width: 640,
        height: 480,
        fps: 30,
        fourcc: "MJPG"
      },
      left_wrist: {
        type: opencv,
        index_or_path: "/dev/video2",
        width: 640,
        height: 480,
        fps: 30,
        fourcc: "MJPG"
      },
      right_wrist: {
        type: opencv,
        index_or_path: "/dev/video4",
        width: 640,
        height: 480,
        fps: 30,
        fourcc: "MJPG"
      }
    }' \
    --teleop.type=bi_seeed_102_leader \
    --teleop.id=bi_leader \
    --teleop.left_arm_config.port=/dev/ttyUSB0 \
    --teleop.right_arm_config.port=/dev/ttyUSB1 \
    --dataset.repo_id=seeed_rebot/test \
    --dataset.single_task="pick the cube" \
    --dataset.fps=30 \
    --dataset.num_episodes=2 \
    --dataset.episode_time_s=20 \
    --dataset.reset_time_s=10 \
    --dataset.push_to_hub=false \
    --display_data=false
5. Training and Evaluation
This section follows the DM LeRobot guide, retaining its training methods and adapting evaluation, optional teleoperation, and the asynchronous inference client to the DM bimanual configuration above. Use a model trained on your bimanual dataset and keep calibration IDs, camera names, resolution, and frame rate consistent with recording. Replace dataset names, task descriptions, and model paths with your actual values. Training examples retain the source guide’s wandb options; for the bimanual environment above, use trackio.enable as supported by your installed version rather than mixing unsupported logging options.
- ACT
- SmolVLA
- Pi0
- Pi0.5
- GR00T N1.5
- PEFT (Optional)
- Multi-GPU (Optional)
- Async Inference (Optional)
Refer to the official tutorial ACT
Training
To train a policy to control your robot, use the python -m lerobot.scripts.train script. Some parameters are required. Here is an example command:
lerobot-train \
  --dataset.repo_id=${HF_USER}/rebot_test \
  --policy.type=act \
  --output_dir=outputs/train/act_rebot_test \
  --job_name=act_rebot_test \
  --policy.device=cuda \
  --wandb.enable=false \
  --steps=300000
If you want to train on a local dataset, make sure the repo_id matches the name used during data collection and add --policy.push_to_hub=false.
lerobot-train \
  --dataset.repo_id=seeed_rebot_b601_dm/test \
  --policy.type=act \
  --output_dir=outputs/train/act_rebot_test \
  --job_name=act_rebot_test \
  --policy.device=cuda \
  --wandb.enable=false \
  --policy.push_to_hub=false \
  --steps=300000
If you are using an RTX 50 series GPU, you need to add --dataset.video_backend=pyav to bypass missing APIs in the preview version of torchvision. The training command becomes:
lerobot-train \
  --dataset.repo_id=seeed_rebot_b601_dm/test \
  --dataset.video_backend=pyav \
  --policy.type=act \
  --output_dir=outputs/train/act_rebot_test \
  --policy.device=cuda \
  --wandb.enable=false \
  --policy.push_to_hub=false \
  --steps=300000
Command Explanation
- Dataset specification: We provide the dataset via the parameter
--dataset.repo_id=${HF_USER}/rebot_test. - Training steps: We modify the number of training steps using
--steps=300000. The algorithm defaults to 800000 steps; adjust based on your task difficulty. You can set it higher if unsure, since checkpoints are generated during training and evaluation can resume from any checkpoint. - Policy type: We provide the policy with
policy.type=act. Similarly, you can switch between policies such as [act,diffusion,pi0,pi0fast,sac,smolvla]. This will load the configuration fromconfiguration_act.py. Importantly, this policy will automatically adapt to your robot's motor states, motor actions, and the number of cameras, as this information is already stored in your dataset. - Device selection: We provide
policy.device=cudabecause we are training on an Nvidia GPU, but you can usepolicy.device=mpsfor training on Apple Silicon. - Visualization tool: We provide
wandb.enable=trueto visualize training charts using Weights and Biases. This is optional, but if you use it, ensure you have logged in by runningwandb login.
Evaluation
You can use the record function from lerobot/record.py but with a policy checkpoint as input. For instance, run this command to record 10 evaluation episodes:
lerobot-record \
  --robot.type=bi_seeed_b601_follower \
  --robot.left_arm_config.motor_family=dm \
  --robot.left_arm_config.port=/dev/ttyACM0 \
  --robot.right_arm_config.motor_family=dm \
  --robot.right_arm_config.port=/dev/ttyACM1 \
  --robot.cameras='{
      top: {
        type: opencv,
        index_or_path: "/dev/video0",
        width: 640,
        height: 480,
        fps: 30,
        fourcc: "MJPG"
      },
      left_wrist: {
        type: opencv,
        index_or_path: "/dev/video2",
        width: 640,
        height: 480,
        fps: 30,
        fourcc: "MJPG"
      },
      right_wrist: {
        type: opencv,
        index_or_path: "/dev/video4",
        width: 640,
        height: 480,
        fps: 30,
        fourcc: "MJPG"
      }
    }' \
  --robot.id=bi_follower \
  --display_data=false \
  --dataset.repo_id=seeed/eval_test123 \
  --dataset.single_task="Put lego brick into the transparent box" \
  --policy.path=outputs/train/act_rebot_test/checkpoints/last/pretrained_model
- The
--policy.pathparameter indicates the path to the weight file of your policy training results (e.g.,outputs/train/act_rebot_test/checkpoints/last/pretrained_model). If you upload the model training result weight file to Hub, you can also use the model repository (e.g.,${HF_USER}/act_rebot_test). - The dataset name
dataset.repo_idstarts witheval_. This operation will separately record videos and data during evaluation, which will be saved in the folder starting witheval_, such asseeed/eval_test123. - If you encounter
File exists: 'home/xxxx/.cache/huggingface/lerobot/xxxxx/seeed/eval_xxxx'during the evaluation phase, please delete the folder starting witheval_first and then run the program again. - When encountering
mean is infinity. You should either initialize with stats as an argument or use a pretrained model, please note that keywords likefrontandsidein the--robot.camerasparameter must be strictly consistent with those used when collecting the dataset.
Refer to the official tutorial SmolVLA.
SmolVLA is a lightweight robot foundation model provided by Hugging Face. It is designed to let you take your own recorded LeRobot dataset and fine-tune it quickly to get results on real robots.
Simply put, its inputs/outputs are:
- Input: multi-camera footage + robot's current state (sensors/joints, etc.) + a natural language task instruction
- Output: a continuous action chunk to drive the robotic arm to execute the task
pip install -e ".[smolvla]"
Collecting Datasets (Recommended)
SmolVLA is a "foundation model". To perform well on your tabletop, with your cameras, gripper, and objects, you typically need to fine-tune it with your own data.
- Start with ~50 episodes (too few may lead to poor learning/generalization).
- If your task has "variables" (e.g., different cube positions on the table), ensure each variation has enough demonstrations:
- Example: 5 positions × 10 episodes each = 50 episodes
- Experience: Recording only 25 episodes is often insufficient. Both data quality and quantity matter.
Training
Use smolvla_base (the pretrained 450M model) as a starting point and fine-tune on your dataset. The official example trains for 20k steps; on a single A100 this takes about 4 hours (for reference only; actual time varies by hardware).
If you don't have a GPU available, consider training via a Colab notebook (see the official tutorial).
lerobot-train \
  --policy.path=lerobot/smolvla_base \
  --dataset.repo_id=${HF_USER}/mydataset \
  --batch_size=64 \
  --steps=20000 \
  --output_dir=outputs/train/my_smolvla \
  --job_name=my_smolvla_training \
  --policy.device=cuda \
  --wandb.enable=true
Tips:
- If you run out of memory, reduce
--batch_sizefirst. Once it runs, gradually increase it. - For available parameters:
lerobot-train --help
Evaluation
The evaluation phase loads your fine-tuned model, lets the robot perform the task, and records the evaluation process as a new dataset (for reviewing videos and analyzing results).
lerobot-record \
  --robot.type=bi_seeed_b601_follower \
  --robot.left_arm_config.motor_family=dm \
  --robot.left_arm_config.port=/dev/ttyACM0 \
  --robot.right_arm_config.motor_family=dm \
  --robot.right_arm_config.port=/dev/ttyACM1 \
  --robot.id=bi_follower \
  --robot.cameras='{
      top: {
        type: opencv,
        index_or_path: "/dev/video0",
        width: 640,
        height: 480,
        fps: 30,
        fourcc: "MJPG"
      },
      left_wrist: {
        type: opencv,
        index_or_path: "/dev/video2",
        width: 640,
        height: 480,
        fps: 30,
        fourcc: "MJPG"
      },
      right_wrist: {
        type: opencv,
        index_or_path: "/dev/video4",
        width: 640,
        height: 480,
        fps: 30,
        fourcc: "MJPG"
      }
    }' \
  --dataset.single_task="Grasp a lego block and put it in the bin." \
  --dataset.repo_id=${HF_USER}/eval_DATASET_NAME_test \
  --dataset.episode_time_s=50 \
  --dataset.num_episodes=10 \
  --policy.path=${HF_USER}/FINETUNE_MODEL_NAME
How to fill in parameters:
--robot.left_arm_config.portand--robot.right_arm_config.port: use the serial ports of the left and right DM followers,/dev/ttyACM0and/dev/ttyACM1in this guide.--robot.id: Your robot ID (must match what you used during calibration/recording).--robot.cameras: Change to your real cameraindex_or_path, and ensure camera keys (e.g.,top,left_wrist,right_wrist) match exactly what you used when recording the dataset.--dataset.single_task: Should match the task description used when recording the dataset.--dataset.repo_id: The evaluation output dataset name; if you are logged into Hugging Face, it will be created/uploaded under your account.--policy.path:- If the model is local: fill in the weight path under the training output directory (e.g.,
outputs/train/my_smolvla/checkpoints/last/pretrained_model) - If the model is on Hub: fill in
${HF_USER}/FINETUNE_MODEL_NAME
- If the model is local: fill in the weight path under the training output directory (e.g.,
Optional: If you want to "manually teleoperate to adjust" between evaluation episodes, you can add teleop (fill in according to your device and configuration):
--teleop.type=bi_seeed_102_leader \
--teleop.left_arm_config.port=/dev/ttyUSB0 \
--teleop.right_arm_config.port=/dev/ttyUSB1 \
--teleop.id=bi_leader
Refer to the official tutorial Pi0.
π₀ (Pi0) is a Vision-Language-Action model proposed by Physical Intelligence for more "general" robot control. You can think of it as: it can both see camera images and understand a natural language instruction, then output actions to control the robotic arm.
Using it in LeRobot is simple: just set the policy type to --policy.type=pi0 during training (no need to repeat the general training/evaluation concepts covered in the ACT section).
pip install -e ".[pi]"
If you are using an older version of LeRobot (e.g., 0.4.0), you may need to install the pi dependency from the GitHub source (the official documentation will fix this in a subsequent patch):
pip install "lerobot[pi]@git+https://github.com/huggingface/lerobot.git"
Training
lerobot-train \
  --policy.type=pi0 \
  --dataset.repo_id=${HF_USER}/my_dataset \
  --job_name=pi0_training \
  --output_dir=outputs/pi0_training \
  --policy.pretrained_path=lerobot/pi0_base \
  --policy.repo_id=${HF_USER}/my_pi0_policy \
  --policy.compile_model=true \
  --policy.gradient_checkpointing=true \
  --policy.dtype=bfloat16 \
  --policy.freeze_vision_encoder=false \
  --policy.train_expert_only=false \
  --steps=3000 \
  --policy.device=cuda \
  --batch_size=32 \
  --wandb.enable=false
Common parameters (only Pi0-specific / most frequently adjusted):
--policy.pretrained_path=lerobot/pi0_base: Base model. Official also provideslerobot/pi0_libero(Libero dataset-oriented version), you can try switching based on your task.--policy.compile_model=true: Enables compilation optimization, training may be faster (first compilation is slower).--policy.gradient_checkpointing=true: Significantly saves VRAM, suitable when VRAM is tight.--policy.dtype=bfloat16: Mixed precision, more friendly for speed/VRAM (recommended when hardware supports it).--policy.train_expert_only=true(VRAM saving trick): Freezes the large model (VLM) part, only trains the "action expert" and projection layers; saves more VRAM but trainable capacity is more limited, suitable for getting started first or quick experiments with small data.
Evaluation
lerobot-record \
  --robot.type=bi_seeed_b601_follower \
  --robot.left_arm_config.motor_family=dm \
  --robot.left_arm_config.port=/dev/ttyACM0 \
  --robot.right_arm_config.motor_family=dm \
  --robot.right_arm_config.port=/dev/ttyACM1 \
  --robot.cameras='{
      top: {
        type: opencv,
        index_or_path: "/dev/video0",
        width: 640,
        height: 480,
        fps: 30,
        fourcc: "MJPG"
      },
      left_wrist: {
        type: opencv,
        index_or_path: "/dev/video2",
        width: 640,
        height: 480,
        fps: 30,
        fourcc: "MJPG"
      },
      right_wrist: {
        type: opencv,
        index_or_path: "/dev/video4",
        width: 640,
        height: 480,
        fps: 30,
        fourcc: "MJPG"
      }
    }' \
  --robot.id=bi_follower \
  --display_data=false \
  --dataset.repo_id=${HF_USER}/eval_my_pi0_test \
  --dataset.single_task="Put lego brick into the transparent box" \
  --dataset.episode_time_s=50 \
  --dataset.num_episodes=10 \
  --policy.path=outputs/pi0_training/checkpoints/last/pretrained_model
Refer to the official tutorial Pi0.5.
π₀.₅ (Pi0.5) is also a Vision-Language-Action model proposed by Physical Intelligence, which can be understood as an "upgraded version" of π₀, with a focus on enhanced open-world generalization capability.
To use it in LeRobot: just set the policy type to --policy.type=pi05.
pip install -e ".[pi]"
If you are using an older version of LeRobot (e.g., 0.4.0), you may need to install the pi dependency from the GitHub source (the official documentation will fix this in a subsequent patch):
pip install "lerobot[pi]@git+https://github.com/huggingface/lerobot.git"
Training
lerobot-train \
  --dataset.repo_id=${HF_USER}/my_dataset \
  --policy.type=pi05 \
  --output_dir=outputs/pi05_training \
  --job_name=pi05_training \
  --policy.repo_id=${HF_USER}/my_pi05_policy \
  --policy.pretrained_path=lerobot/pi05_base \
  --policy.compile_model=true \
  --policy.gradient_checkpointing=true \
  --policy.dtype=bfloat16 \
  --policy.freeze_vision_encoder=false \
  --policy.train_expert_only=false \
  --steps=3000 \
  --policy.device=cuda \
  --batch_size=32 \
  --wandb.enable=false
Common parameters (Pi0.5 related):
--policy.pretrained_path=lerobot/pi05_base: Base model. Official also provideslerobot/pi05_libero.--policy.train_expert_only=true(VRAM saving trick): Freezes the large model (VLM) part, only trains the "action expert" and projection layers.--policy.normalization_mapping=...: If your dataset normalization statistics don't match / are missing, you can use this mapping to force a normalization method.
Evaluation
lerobot-record \
  --robot.type=bi_seeed_b601_follower \
  --robot.left_arm_config.motor_family=dm \
  --robot.left_arm_config.port=/dev/ttyACM0 \
  --robot.right_arm_config.motor_family=dm \
  --robot.right_arm_config.port=/dev/ttyACM1 \
  --robot.cameras='{
      top: {
        type: opencv,
        index_or_path: "/dev/video0",
        width: 640,
        height: 480,
        fps: 30,
        fourcc: "MJPG"
      },
      left_wrist: {
        type: opencv,
        index_or_path: "/dev/video2",
        width: 640,
        height: 480,
        fps: 30,
        fourcc: "MJPG"
      },
      right_wrist: {
        type: opencv,
        index_or_path: "/dev/video4",
        width: 640,
        height: 480,
        fps: 30,
        fourcc: "MJPG"
      }
    }' \
  --robot.id=bi_follower \
  --display_data=false \
  --dataset.repo_id=${HF_USER}/eval_my_pi05_test \
  --dataset.single_task="Put lego brick into the transparent box" \
  --dataset.episode_time_s=50 \
  --dataset.num_episodes=10 \
  --policy.path=outputs/pi05_training/checkpoints/last/pretrained_model
Please refer to the official tutorial GR00T N1.5.
GR00T N1.5 is an open foundation model provided by NVIDIA. The key to using it in LeRobot is setting the policy type to --policy.type=groot. Note: GR00T N1.5 currently has higher environment requirements (depends on FlashAttention and requires a CUDA GPU). It is recommended to get ACT / Pi0 working first before trying GR00T.
Installation (Important)
As per the official documentation, GR00T N1.5 requires flash-attn to work, and can only be used on CUDA-capable devices.
Recommended steps (execute in order):
- Set up the base environment first (Python, CUDA, drivers, etc.) following the installation guide. Do not install
lerobotin this step. - Install PyTorch (version range as per official requirements):
pip install "torch>=2.2.1,<2.8.0" "torchvision>=0.21.0,<0.23.0"
If you are using RTX 50 series, you need: Python=3.10, CUDA=12.8, Torch=2.7.1
pip install torch==2.7.1 torchvision==0.22.1 torchaudio==2.7.1 --index-url https://download.pytorch.org/whl/cu128
- Install flash-attn dependency and flash-attn itself:
pip install ninja "packaging>=24.2,<26.0"
pip install "flash-attn>=2.5.9,<3.0.0" --no-build-isolation
python -c "import flash_attn; print(f'Flash Attention {flash_attn.__version__} imported successfully')"
If you are using RTX 50 series, you need: flash_attn=2.8.0
pip install flash_attn==2.8.0.post2 torch==2.7.1 --no-build-isolation
- Install LeRobot's groot dependency:
pip install "lerobot[groot]"
If flash-attn installation fails, it's usually related to (1) PyTorch/CUDA version mismatch, (2) missing build dependencies, or (3) environment being too new/too old. In this case, refer to the official GR00T documentation and PyTorch installation guide first.
Training (Fine-tuning)
The official provides a multi-GPU training example (accelerate launch --multi_gpu ...). If you only have one GPU, you can also try running it in single-process mode first (support / parameter details are subject to the official documentation).
Multi-GPU (variables need to be replaced):
accelerate launch \
  --multi_gpu \
  --num_processes=$NUM_GPUS \
  $(which lerobot-train) \
  --output_dir=$OUTPUT_DIR \
  --save_checkpoint=true \
  --batch_size=$BATCH_SIZE \
  --steps=$NUM_STEPS \
  --save_freq=$SAVE_FREQ \
  --log_freq=$LOG_FREQ \
  --policy.push_to_hub=true \
  --policy.type=groot \
  --policy.repo_id=$REPO_ID \
  --policy.tune_diffusion_model=false \
  --dataset.repo_id=$DATASET_ID \
  --wandb.enable=true \
  --wandb.disable_artifact=true \
  --job_name=$JOB_NAME
Parameter explanation (most commonly modified):
--dataset.repo_id: Your training dataset (username/dataset_nameon Hub or local cache correspondingrepo_id).--output_dir: Training output directory (weights/checkpoints will be placed here).--steps,--batch_size: Training steps and batch size. Large models are sensitive to VRAM; if it doesn't run, reducebatch_sizefirst.--policy.repo_id: If you want to push the model to Hub, fill in the model repository name you want to create.
Evaluation (Running on the Robot)
After training, you can use lerobot-record for evaluation/recording just like other policies. For reBot B601-DM bimanual users, refer to the following command:
lerobot-record \
  --robot.type=bi_seeed_b601_follower \
  --robot.left_arm_config.motor_family=dm \
  --robot.left_arm_config.port=/dev/ttyACM0 \
  --robot.right_arm_config.motor_family=dm \
  --robot.right_arm_config.port=/dev/ttyACM1 \
  --robot.cameras='{
      top: {
        type: opencv,
        index_or_path: "/dev/video0",
        width: 640,
        height: 480,
        fps: 30,
        fourcc: "MJPG"
      },
      left_wrist: {
        type: opencv,
        index_or_path: "/dev/video2",
        width: 640,
        height: 480,
        fps: 30,
        fourcc: "MJPG"
      },
      right_wrist: {
        type: opencv,
        index_or_path: "/dev/video4",
        width: 640,
        height: 480,
        fps: 30,
        fourcc: "MJPG"
      }
    }' \
  --robot.id=bi_follower \
  --display_data=true \
  --dataset.repo_id=${HF_USER}/eval_groot_rebot \
  --dataset.num_episodes=10 \
  --dataset.single_task="Grab the black cube and put it in the box" \
  --policy.path=${HF_USER}/groot-rebot \
  --dataset.episode_time_s=30 \
  --dataset.reset_time_s=10
License: This model follows the Apache 2.0 license (consistent with the original GR00T repository).
PEFT (Parameter-Efficient Fine-Tuning) is a set of "parameter-efficient adaptation" methods and tools for adapting large pretrained models to new tasks without updating all model parameters. For LeRobot's pretrained policies (e.g., SmolVLA, π₀, etc.), you can typically train only a small number of "adapter" parameters (e.g., LoRA) to achieve near full fine-tuning results while reducing VRAM usage and training cost.
Installation
Install LeRobot's optional peft dependency to use PEFT-related parameters:
pip install -e ".[peft]"
pip install "lerobot[peft]"
For more adaptation methods and concept explanations, refer to the official documentation: 🤗 PEFT Documentation
Example: Fine-tuning SmolVLA with LoRA (Libero's libero_spatial subtask)
The following example shows how to perform LoRA fine-tuning of lerobot/smolvla_base on the HuggingFaceVLA/libero dataset. Parameter names are based on the current LeRobot version; also refer to lerobot-train --help.
lerobot-train \
  --policy.path=lerobot/smolvla_base \
  --policy.repo_id=${HF_USER}/my_libero_smolvla_peft \
  --dataset.repo_id=HuggingFaceVLA/libero \
  --env.type=libero \
  --env.task=libero_spatial \
  --output_dir=outputs/train/my_libero_smolvla_peft \
  --job_name=my_libero_smolvla_peft \
  --policy.device=cuda \
  --steps=10000 \
  --batch_size=32 \
  --optimizer.lr=1e-3 \
  --peft.method_type=LORA \
  --peft.r=64
Key PEFT Parameters
--peft.method_type: Select the PEFT method. LoRA (Low-Rank Adapter) is one of the most commonly used methods.--peft.r: LoRA rank. Generally, higher rank means stronger expressive capacity, but also more parameters and VRAM usage.
Specifying Layers to Inject LoRA (Optional)
By default, PEFT typically injects LoRA into the most critical projection layers of the model (e.g., attention's q_proj, v_proj, etc.), and may additionally cover state/action-related projection layers. If you need to target different layers, use --peft.target_modules to specify target layers.
Common patterns include:
- By module name suffix list (example):
--peft.target_modules="['q_proj', 'v_proj']"
- Using a regular expression (example, adjust according to actual module names):
--peft.target_modules='(model\\.vlm_with_expert\\.lm_expert\\..*\\.(down|gate|up)_proj|.*\\.(state_proj|action_in_proj|action_out_proj|action_time_mlp_in|action_time_mlp_out))'
Specifying Certain Layers for Full Training (Optional)
If you want certain modules to be "fully trained" (instead of just injecting LoRA), use --peft.full_training_modules to specify them. For example, to fully train only state_proj:
--peft.full_training_modules="['state_proj']"
Learning Rate Recommendations (Experience Values)
LoRA's learning rate can typically be an order of magnitude larger than full fine-tuning (common experience: ~10x). For example, full fine-tuning commonly uses 1e-4, while LoRA can start from 1e-3; if you have learning rate decay (scheduler) enabled, the final learning rate is also commonly set around 1e-4 as a reference.
1. Training Steps
Method One: Multi-GPU Training via Command-Line Arguments
First, install the training acceleration system in your lerobot environment:
pip install accelerate
Then run the following command to start multi-GPU training:
accelerate launch \
  --multi_gpu \
  --num_processes=2 \
  $(which lerobot-train) \
  --dataset.repo_id=${HF_USER}/my_dataset \
  --policy.type=act \
  --policy.repo_id=${HF_USER}/my_trained_policy \
  --output_dir=outputs/train/act_multi_gpu \
  --job_name=act_multi_gpu \
  --wandb.enable=true
Key accelerate parameter explanation:
--multi_gpu: Enable multi-GPU training--num_processes=2: Number of GPUs to use (usually equals the number of GPUs)--mixed_precision=fp16: Use fp16 mixed precision (or bf16 if your hardware supports it)
Note that bf16 requires hardware support and is not available on all GPUs.
| Precision Type | Hardware Support |
|---|---|
| fp16 | Supported by almost all NVIDIA GPUs |
| bf16 | Only supported on newer GPUs (Ampere architecture and newer) |
If your GPU does not support bf16, choose fp16 in your accelerate configuration, or explicitly specify fp16 on the command line.
Method Two: Using an Accelerate Configuration File (Optional)
If you frequently perform multi-GPU training, you can save the above training configuration to avoid repetitive command-line input.
Tip: If you don't understand this section, or just want to get started quickly, you can skip this section and use Method One (command-line arguments).
The purpose of accelerate config is to:
Save your hardware environment (GPU count, mixed precision, etc.) as a configuration file,
so you don't need to repeatedly fill in these parameters when running accelerate launch in the future.
It does not change any LeRobot training logic; it just reduces repetitive parameter input.
If you only occasionally use multi-GPU, or this is your first attempt, it's perfectly fine not to use it.
Run:
accelerate config
In the interactive configuration process, for the common single-machine multi-GPU scenario, you can select as follows:
- Compute environment: This machine
- Number of machines: 1
- Number of processes: Number of GPUs to use (usually equals the number of GPUs)
- GPU ids to use: Press Enter directly (means use all GPUs)
- Mixed precision:
- Prefer fp16
- If you confirm the GPU supports bf16, you can also choose bf16
After configuration, you can train with:
accelerate launch $(which lerobot-train) \
  --dataset.repo_id=${HF_USER}/my_dataset \
  --policy.type=act \
  --policy.repo_id=${HF_USER}/my_trained_policy \
  --output_dir=outputs/train/act_multi_gpu \
  --job_name=act_multi_gpu \
  --wandb.enable=true
Impact of Multi-GPU Training on Training Parameters and Adjustment Strategies
LeRobot does not automatically adjust learning rate or training steps based on the number of GPUs, to avoid changing training behavior without the user's knowledge. This differs from other commonly used distributed training frameworks.
If you want to adjust hyperparameters for multi-GPU training, you need to do it manually following these steps.
Impact on Steps and Adjustment Strategy
Since multi-GPU increases the effective batch size (batch_size × num_gpus):
(To understand this intuitively: if training is like walking, one GPU takes one step of one meter, two GPUs take one step of two meters. To reach the same distance (total data learned by the model), dual-GPU training should halve the steps. Similarly, n GPUs = 1/n.)
Therefore, when training with multiple GPUs, you should appropriately reduce the number of training steps.
Single-GPU training:
- batch_size = 8
- steps = 100000
Dual-GPU training (effective batch size becomes 16):
- batch_size, if still set to 8
- steps can be reduced to 50000
accelerate launch --num_processes=2 $(which lerobot-train) \
  --batch_size=8 \
  --steps=50000 \
  --dataset.repo_id=lerobot/pusht \
  --policy=act
Impact on Learning Rate and Adjustment Strategy
When using multiple GPUs, each step update uses more samples.
If you want to keep the model's "learning speed" similar to single-GPU, you typically need to increase the learning rate proportionally to the number of GPUs.
- New learning rate = single-GPU learning rate × number of GPUs
For example:
If the single-GPU learning rate (optimizer.lr) is 1e-4, when using 2 GPUs, you can change it to 2e-4:
accelerate launch --num_processes=2 $(which lerobot-train) \
  --optimizer.lr=2e-4 \
  --dataset.repo_id=lerobot/pusht \
  --policy=act
Note:
These are not mandatory rules, but common best practices.
If you are unsure how to adjust, you can also:
- Keep the learning rate unchanged
- Keep the training steps unchanged
As long as the training process is stable, the results are still usable.
For more advanced configuration and troubleshooting, please refer to the Accelerate documentation. If you want to learn more about training on large numbers of GPUs, check out this excellent guide: Ultrascale Playbook.
Without async inference, LeRobot's control flow can be understood as conventional sequential/synchronous inference: the policy predicts an action chunk, then executes it, then waits for the next prediction. For larger models, this can cause noticeable pauses while the robot waits for new action chunks. The goal of async inference is to let the robot execute the current action chunk while pre-computing the next one, reducing idle time and improving responsiveness. Async inference applies to LeRobot-supported policies that output action chunks, such as ACT, OpenVLA, Pi0, SmolVLA. Since inference and actual control are decoupled, async inference also enables using more powerful machines for robot inference remotely.
You can read more about async inference in this blog post from Hugging Face.
Let's introduce some basic concepts:
- Client: Connects to the robotic arm and cameras, collects observations (images, robot pose, etc.), sends them to the server; also receives action chunks from the server and executes them in order.
- Server: The device providing compute power. Receives camera and robot data, infers (computes) action chunks, and sends them back to the client. It can be the same device connected to the robot and cameras, another computer on the same LAN, or a cloud server.
- Action chunk: A series of robotic arm action commands, produced by the policy through server-side inference.
- Synchronous inference: Predict one chunk, execute one chunk; the robot will have idle gaps waiting for the next chunk to be inferred. When the model is larger and compute is insufficient, the inference gap is significant — the arm moves, then pauses (inference), then moves again.
- Asynchronous inference: Unlike synchronous inference, while the robot executes the current chunk, the server is already computing the next chunk; overlapping parts are aggregated for more responsive control.
Three Async Inference Deployment Scenarios
1. Single-Machine Deployment
Robot, cameras, client, and server are all on the same device. This is the simplest case — the server listens on 127.0.0.1, and the client also connects to 127.0.0.1:port. The command examples in the official documentation follow this scenario.
2. LAN Deployment
Robot and cameras connect to a lightweight device, and the policy server runs on another high-compute device on the same LAN. In this case, the server must listen on an address accessible to other machines, and the client must connect to the server's LAN IP, not 127.0.0.1.
3. Cross-Network / Cloud Deployment
The policy server runs on a publicly accessible cloud host, and the client connects via a public network. This approach can leverage stronger GPUs on cloud hosts. With good network conditions, the round-trip time (network latency) may be relatively small compared to inference time, but this depends on your actual network environment.
Security note: The LeRobot async inference pipeline has unauthenticated gRPC + pickle deserialization risks. If the server hosts important information or services, it is not recommended to expose the service directly to the public internet when deploying on a public network. A safer approach is VPN, SSH tunneling, or at least restricting security group source IPs to your client's public IP.
Starting Async Inference Deployment
Step 1: Environment Configuration
First, install the additional dependencies required for async inference using pip. Both client and server need lerobot installed with the extra dependency:
pip install -e ".[async]"
Step 2: Network Configuration and Check
1. Proxy Issues
If your terminal has proxy environment variables configured and connection issues occur, you can temporarily unset them:
unset http_proxy https_proxy ftp_proxy all_proxy HTTP_PROXY HTTPS_PROXY FTP_PROXY ALL_PROXY
Note: The above command only affects the current terminal session. If you open a new terminal window, you need to run it again.
2. Allow Ports in Firewall / Security Groups
- Single-machine deployment: Usually can be skipped.
- LAN deployment: You need to allow the listening port on the server side. Example of allowing a listening port on LAN (run on the server):
sudo ufw allow 8080/tcp
- Cloud deployment: You need to allow the port in the cloud server's security group, and ideally restrict source IPs.
If running on a cloud server: Allow port 8080 in the security group on the server management page, or use another already-allowed port. Methods vary by cloud provider.
3. Confirm IP Address
Single-machine deployment can skip this step (IP is always 127.0.0.1).
4. Connection Test
- Single-machine deployment: Skip this step.
- LAN / Cloud deployment: It's recommended to test whether the client can access the server port:
nc -vz <LAN_IP_address> 8080
nc -vz <server_public_IP> 8080
Step 3: Start the Service
Scenario A: Single-Machine Deployment
Start the local service in one terminal:
python -m lerobot.async_inference.policy_server \
  --model_path=outputs/train/act_rebot_test/checkpoints/last/pretrained_model \
  --server_address=127.0.0.1:8080
After it starts successfully, you need to keep this terminal open and create a new terminal to run other commands.
Scenario B: LAN Deployment
Run on the server:
python -m lerobot.async_inference.policy_server \
  --model_path=outputs/train/act_rebot_test/checkpoints/last/pretrained_model \
  --server_address=0.0.0.0:8080
When the client connects, --server_address should use the server's LAN IP address: <LAN_IP_address>:8080.
Scenario C: Cloud Server Deployment
Run on the server:
python -m lerobot.async_inference.policy_server \
  --model_path=outputs/train/act_rebot_test/checkpoints/last/pretrained_model \
  --server_address=0.0.0.0:8080
When the client connects, --server_address should use the server's public IP address: <server_public_IP>:8080.
Step 4: Choose Inference Parameters
Run on the client:
python -m lerobot.async_inference.robot_client \
  --robot.type=bi_seeed_b601_follower \
  --robot.left_arm_config.motor_family=dm \
  --robot.left_arm_config.port=/dev/ttyACM0 \
  --robot.right_arm_config.motor_family=dm \
  --robot.right_arm_config.port=/dev/ttyACM1 \
  --robot.cameras='{
      top: {
        type: opencv,
        index_or_path: "/dev/video0",
        width: 640,
        height: 480,
        fps: 30,
        fourcc: "MJPG"
      },
      left_wrist: {
        type: opencv,
        index_or_path: "/dev/video2",
        width: 640,
        height: 480,
        fps: 30,
        fourcc: "MJPG"
      },
      right_wrist: {
        type: opencv,
        index_or_path: "/dev/video4",
        width: 640,
        height: 480,
        fps: 30,
        fourcc: "MJPG"
      }
    }' \
  --robot.id=bi_follower \
  --server_address=127.0.0.1:8080 \
  --actions_per_chunk=50 \
  --chunk_size_threshold=0.5 \
  --fixed_update_fps=30 \
  --visualize_action_queue=false
Key parameter explanation:
--server_address: Server address. Use127.0.0.1:portfor single-machine, and the server IP for LAN/cloud.--actions_per_chunk: Size of each action chunk (number of actions). Larger values mean lower inference frequency but more stable per-inference results; smaller values mean smoother motion but more server inference pressure.--chunk_size_threshold: Blending threshold between old and new action chunks. When the old chunk is executed to this ratio, blending with the new chunk begins.--fixed_update_fps: Control command sending frequency, corresponding to the smoothness of the robotic arm's motion.--visualize_action_queue: Whether to visualize the action queue size at runtime. When enabled, you can more intuitively see if the queue frequently hits bottom, helping you adjust actions_per_chunk and chunk_size_threshold.
Step 5: Adjust Parameters Based on Robot Behavior
In async inference, there are two additional parameters not present in synchronous inference that need adjustment:
--actions_per_chunk: Size of each action chunk. If the robot motion is choppy/jerky, increase this value; if the robot response has noticeable delay, decrease this value.--chunk_size_threshold: Blending threshold between old and new action chunks. Usually start trying from0.5.
Async inference needs to balance: the server's action chunk generation speed must be greater than or equal to the client's consumption speed. Otherwise, the action queue will empty and the robot will start stuttering (this can be seen in the queue visualization curve hitting bottom).
To resume training from a checkpoint, here is an example command to resume from the last checkpoint of the act_rebot_test policy:
lerobot-train \
  --config_path=outputs/train/act_rebot_test/checkpoints/last/pretrained_model/train_config.json \
  --resume=true