reBot Arm B601-DM Digital Twin & Control Stack
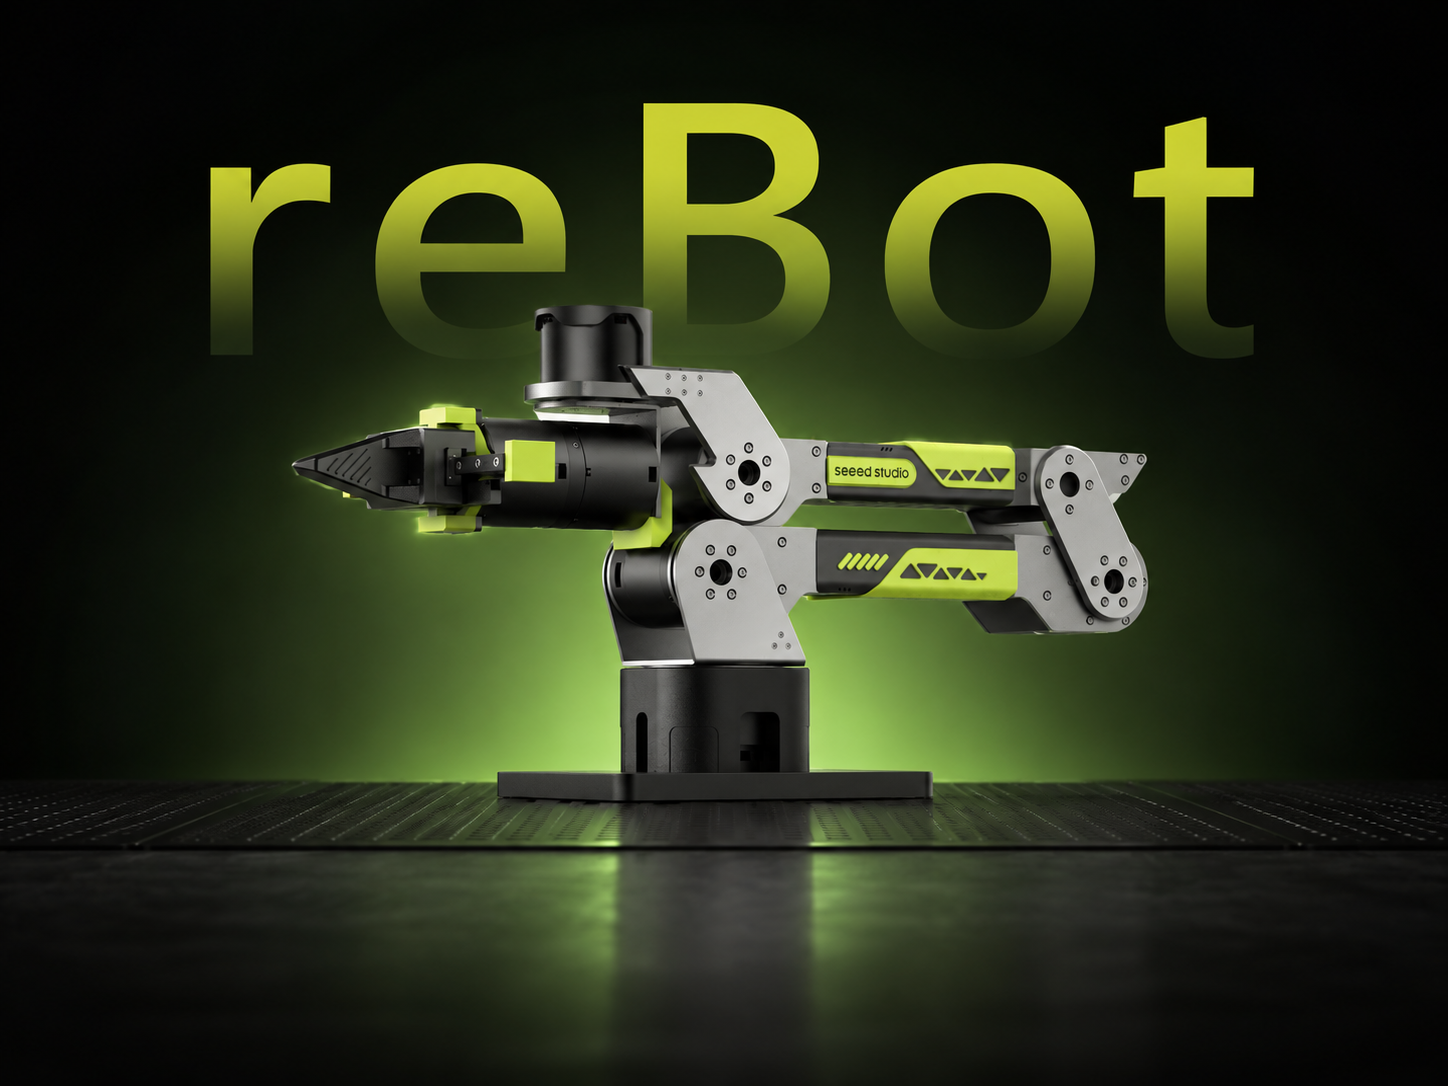




Three.js visualization · URDF loading · rosbridge bridge · LLM/MCP control
This guide is for developers. It explains how to run and extend the reBotArm_simulator-DM web console in the reBot Arm B601-DM Digital Twin & Control Stack. The console is a lightweight Node.js + Three.js front end that reads the URDF and STL meshes from the ROS2 workspace in the same repository, renders the 6-DOF body and gripper of the reBot Arm B601-DM in the browser, and talks to ROS2 over a rosbridge WebSocket. It supports the full development workflow: joint mirroring, control lock, gravity compensation, visual grasping, and LLM text control.
This guide uses Ubuntu 24.04 + ROS2 Jazzy as the ROS2 backend. The web front-end runs in any modern browser on Windows, macOS, or Linux. ROS2 Humble / Ubuntu 22.04 can follow the same workflow.
Project Features
-
Zero-build front-end
It does not depend on bundlers such as Webpack/Vite. All front-end assets are plain HTML/CSS/JS served directly by a Node.js static server, which keeps deployment and debugging costs very low. -
Direct URDF + STL loading
URDFLoaderreadsReBot_Arm_DM.urdfand the STL meshes fromsrc/rebotarm_bringup/description/in thereBotArm_ros2_DMworkspace in the same repository, so the body model does not need a second copy in the web directory. This URDF includes the complete gripper definition. During web rendering, the original gripper visuals underend_linkare hidden and four optimized gripper STL meshes are loaded fromsplit_meshes/grouped_gripper/. -
Bidirectional rosbridge bridge
ReBotRosClientwraps the rosbridge JSON protocol and subscribes to joint state, gripper state, arm status, virtual camera image, and vision detection results, and publishes single-joint commands, gripper commands, and target poses. -
LLM/MCP text control
The web page does not call ROS directly. Instead, it proxies through the Node.js server to a text-agent HTTP service running in the VM, and an MCP Server constrains natural-language intent into structured robot operations. -
One-click install and unified launch
setup.shautomatically installs system dependencies, clones the SDK, creates the Python virtual environment, installs dependencies, and runscolcon build. Therebotarmunified entry point provides commands such asstart web / dm / sim,doctor,status, andstop. It is idempotent: components that already exist and meet requirements are skipped automatically.
Wiring and Network Notes
The web simulator itself does not connect to hardware directly. All control commands are forwarded to ROS2 through rosbridge. Two things must be confirmed:
- Ubuntu host side: The USB2CAN serial bridge connects the arm CAN bus, the gripper motor is on the same CAN bus, and 24V power is connected. Confirm the host recognizes the serial port:
ls /dev/ttyACM*
Expected output
/dev/ttyACM0
Listing /dev/ttyACM0 (or ttyACM1, etc.) means the serial port is recognized.
- Web host side: Confirm you can reach the Ubuntu host's rosbridge port (default
9090). Test WebSocket connectivity from the web host's browser or terminal, for example:
# Confirm the Ubuntu host IP is reachable
ping <Ubuntu IP>

# Confirm the rosbridge port is open (rosbridge must already be running on Ubuntu)
curl -i http://<Ubuntu IP>:9090
If you need to temporarily open serial port permissions (on the Ubuntu side):
sudo chmod 666 /dev/ttyACM0
It is better to add the current user to the dialout group, which takes effect after re-login:
sudo usermod -a -G dialout $USER
Environment Requirements
| Item | Recommended |
|---|---|
| Operating system (backend) | Ubuntu 24.04; Ubuntu 22.04 also works |
| ROS2 | Jazzy; Humble also works |
| Python | System Python, 3.12 for Jazzy |
| Node.js | 18 or above |
| Browser | Chrome / Edge 90+, Firefox 90+, Safari 14+ |
| MuJoCo (optional) | 3.10+, only needed for the full physics simulation stack |
Installation Steps
Step 0. Complete the basic arm setup
Step 0
Before starting web simulator development, complete the steps in reBot Arm B601-DM Quick Start, including arm assembly, motor ID configuration, zero-point initialization, and basic connectivity checks.
The project repository already contains the ROS2 workspace, URDF, and STL meshes required by the web simulator. You do not need to build another workspace by following the reBot Arm B601-DM ROS2 Integration guide.
reBotArm_control_py is the core external dependency, providing real-robot drivers, inverse kinematics, dynamics computation, and gravity compensation. The web simulator does not directly import this SDK, but the rebotarmcontroller real-robot node on the ROS2 backend, the MuJoCo torque loop, and the gravity compensation feature all depend on it. If you only run the pure simulation mode with Fake Driver + web, the SDK is not required; once you want to control the real robot or use gravity compensation, it must be installed.
setup.sh automatically obtains the SDK from reBotArm_control_py and installs it at ~/ReBot_Arm_DigitalTwin_DM/reBotArm_ros2_DM/third_party/reBotArm_control_py/ (locked to a verified commit). If ~/reBotArm_control_py/ already exists, it is recognized automatically and not cloned again.
Directory structure after installation:
reBotArm_control_py/
├─ reBotArm_control_py/
│  ├─ actuator/          RebotArm class, JointGroup, motor control
│  ├─ controllers/       RebotArmEndPose (trajectory, IK, gravity compensation)
│  ├─ kinematics/        forward/inverse kinematics, load_robot_model, pad_q_for_model
│  └─ dynamics/          dynamics functions such as compute_generalized_gravity
├─ config/
│  └─ rebotarm_dm.yaml   DM motor config (ID, baud rate, limits, PID)
├─ urdf/                 Pinocchio dynamics model URDF
└─ pyproject.toml
The SDK's pyproject.toml declares requires-python >=3.10,<3.12, but this project references it via sys.path instead of pip install, so it works fine on Python 3.12. If pip install -e . reports a version conflict, skip that step and just make sure the directory is at reBotArm_ros2_DM/third_party/reBotArm_control_py/ or ~/reBotArm_control_py/ (the code searches these paths automatically).
Step 1. One-click install
Step 1
git clone https://github.com/Yang-Ci/ReBot_Arm_DigitalTwin_DM.git ~/ReBot_Arm_DigitalTwin_DM
cd ~/ReBot_Arm_DigitalTwin_DM
The setup.sh in the repository root is idempotent and sets up the entire environment automatically:
- Installs missing apt system packages (ROS 2, Node.js, ros-dev-tools, etc.)
- Clones the
reBotArm_control_pySDK tothird_party/(skipped if it already exists) - Creates the Python virtual environment (
reBotArm_ros2_DM/.venv, with--system-site-packages) - Installs the Python dependencies from
requirements.txt - Creates the web
.envfrom.env.example - Runs
rosdepdependency resolution andcolcon build --symlink-install
./setup.sh
The installer is idempotent: components that already exist and meet requirements are skipped, and it never deletes the existing SDK, virtual environment, or web .env; only missing items are installed. At the end it summarizes the installed, skipped, version-mismatched, and failed items.
Check only, without modifying the system:
./setup.sh --check
After installation, run diagnostics to confirm the environment is ready:
./rebotarm doctor
Expected output (summary)
[rebotarm-setup] Checking supported platform
[rebotarm-setup] Checking runtime versions
[rebotarm-setup] Checking reBotArm_control_py SDK
[rebotarm-setup] Checking project virtual environment
[rebotarm-setup] Checking web configuration
[rebotarm-setup] Resolving ROS dependencies and building the workspace

Installed/updated (6)
  - apt nodejs
  - SDK ...
  - virtual environment ...
  - Python requirements checked/updated in project venv
  - created .env from example
  - ROS workspace built with colcon

Already usable; skipped (5)
  - Ubuntu 24.04 supported
  - Python 3.12.3 compatible
  - Node.js v18.19.0 compatible
  - existing SDK preserved
  - critical Python and SDK imports pass

Setup complete. Next:
  ./rebotarm doctor
  ./rebotarm start web
  ./rebotarm start dm
A Setup complete message with an empty Failed or still missing section means success.
If setup.sh does not automatically install ROS 2 (for example, the ROS apt source has not yet been added to the system), the installer automatically downloads the official ros2-apt-source package from GitHub, adds the source, and retries. You do not need to configure the apt source manually.
Step 2. Configure environment variables
Step 2
setup.sh already created .env from .env.example. To change the port or proxy target, edit .env:
# reBotArm_simulator-DM/.env key fields
PORT=3001
REBOTARM_TEXT_AGENT_URL=http://localhost:8082
REBOTARM_MCP_URL=http://localhost:8081/mcp
If the web page runs on Windows and ROS2 runs in an Ubuntu VM, change REBOTARM_TEXT_AGENT_URL and REBOTARM_MCP_URL to the actual IP of the Ubuntu VM, for example http://<Ubuntu IP>:8082.
Step 3. Start the web server
Step 3
cd ~/ReBot_Arm_DigitalTwin_DM
./rebotarm start web
This command automatically sources the ROS2 environment and starts rosbridge (reusing an existing listener if the port is already in use) and the Node.js web server. After it starts, the terminal prints the access URL:
ROS WebSocket: ws://localhost:9090 (started by this command)
Web: http://localhost:3001
Ctrl+C stops processes started by this command.
Open http://localhost:3001 in a browser and wait for the URDF and STL to finish loading; the 3D model appearing means the front-end is working. The page is already connected to the local rosbridge by default, so you can operate directly in the "ROS2 Bridge" panel.
If you only want to run a pure web demo (without starting rosbridge), you can also start it manually from the web directory:
cd ~/ReBot_Arm_DigitalTwin_DM/reBotArm_simulator-DM
node server.js
In this case the page lets you drag joint sliders, use pose presets, and TCP drag, but it will not connect to any ROS node.
Launching the Project
The ./rebotarm command sources the environment internally, so you do not need to run source scripts/source_rebotarm_env.sh manually. However, if you run bare ros2 commands directly, each new terminal still needs to source first.
- Pure web demo
- Fake Driver simulation
- Full physics simulation
- Real robot control
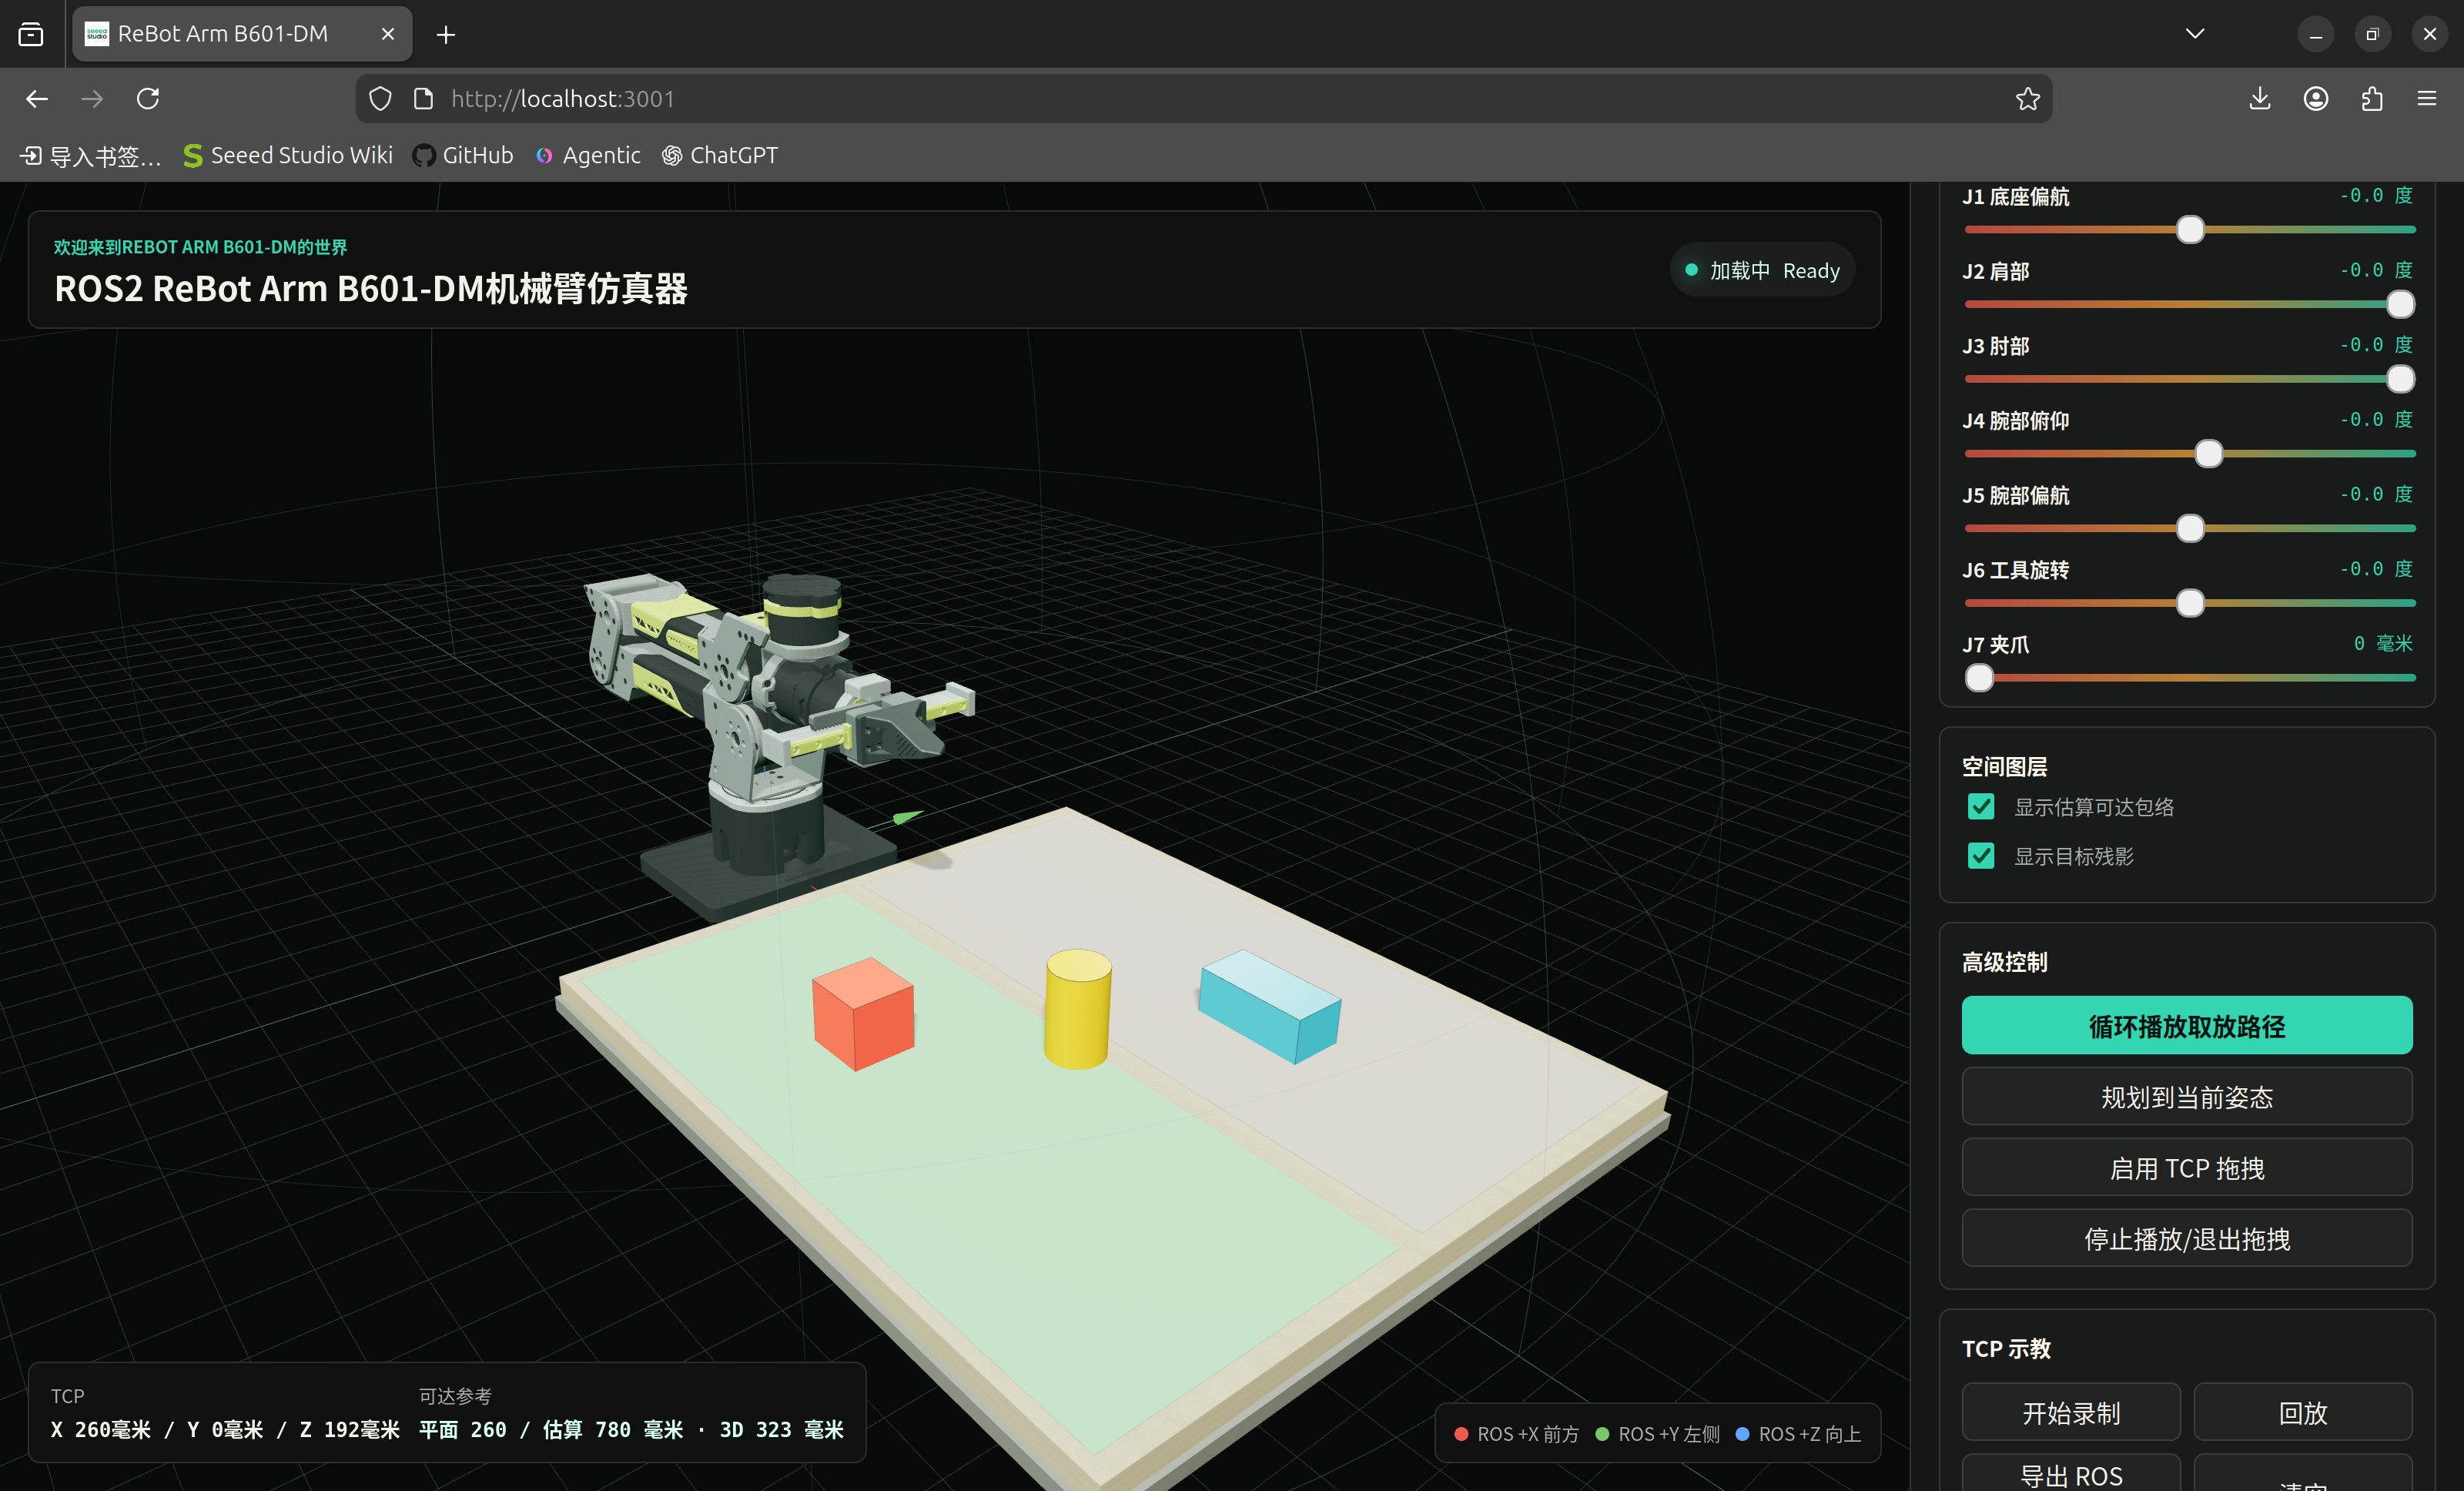
The lightest way to run: only the web server is started, with no ROS2 connection. Good for pose demonstration, teaching, and UI development:
cd ~/ReBot_Arm_DigitalTwin_DM/reBotArm_simulator-DM
node server.js
Open http://localhost:3001 in a browser. You can drag joint sliders, use pose presets, TCP drag, and teach-record, but all operations only affect the 3D model and will not drive any hardware or ROS node.
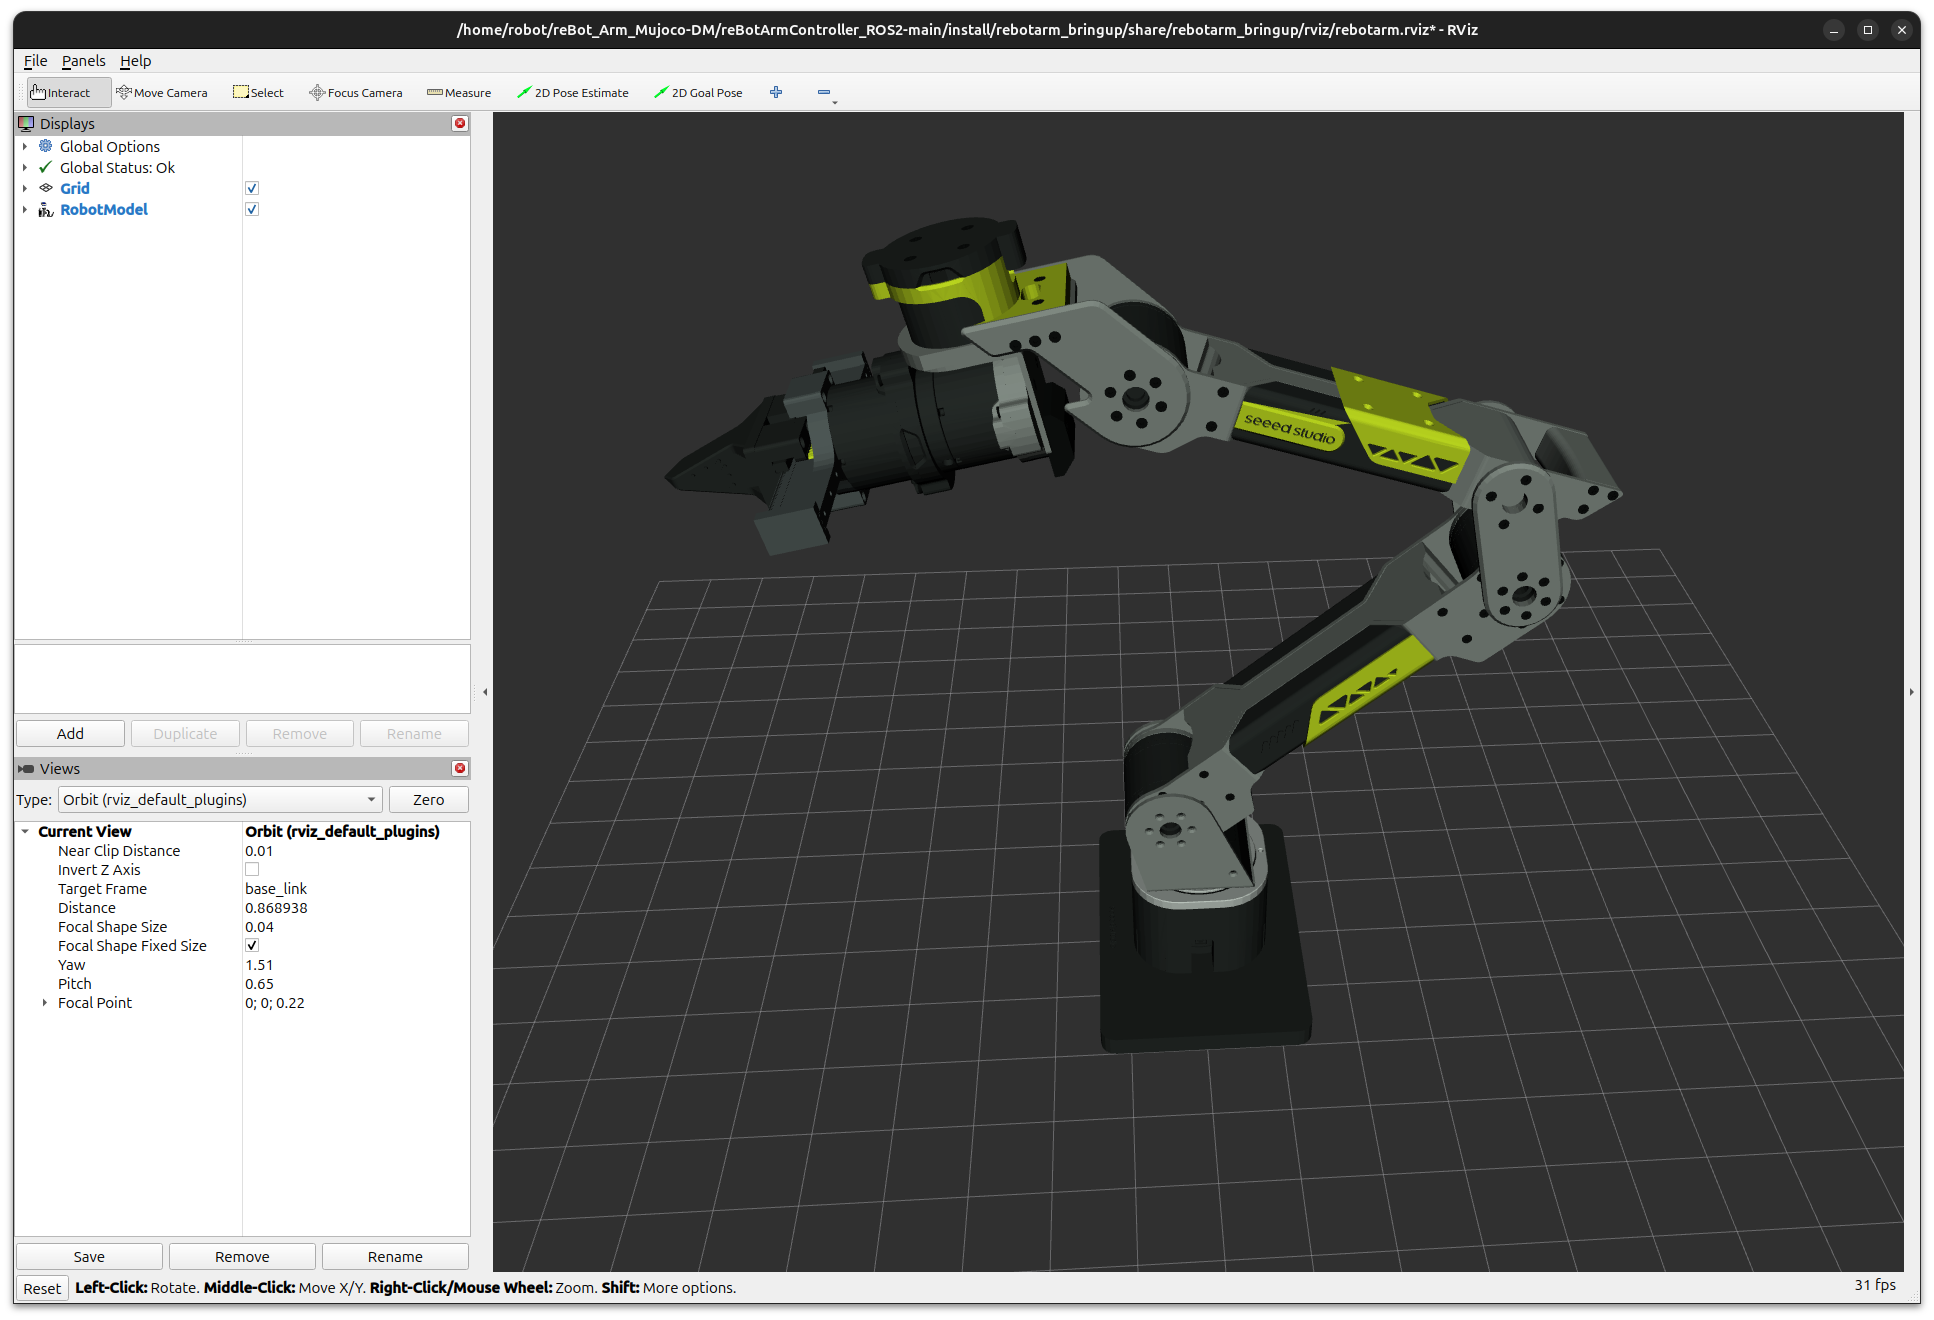
Start the Fake Driver, rosbridge, and the web server. The web page mirrors joint state through rosbridge and sends control commands. Good for verifying interfaces, joint directions, and limits.
Terminal 1 — start the Fake Driver:
cd ~/ReBot_Arm_DigitalTwin_DM/reBotArm_ros2_DM
source scripts/source_rebotarm_env.sh
ros2 launch rebotarm_bringup fake_bringup.launch.py
Terminal 2 — start rosbridge + web (one command):
cd ~/ReBot_Arm_DigitalTwin_DM
./rebotarm start web
After the page connects to ws://localhost:9090, check "Mirror real joint state to the web" to see the Fake Driver's joint state sync to the 3D model. After checking "Allow the web to send control to the real arm", joint sliders and Pose motion will send commands through rosbridge.
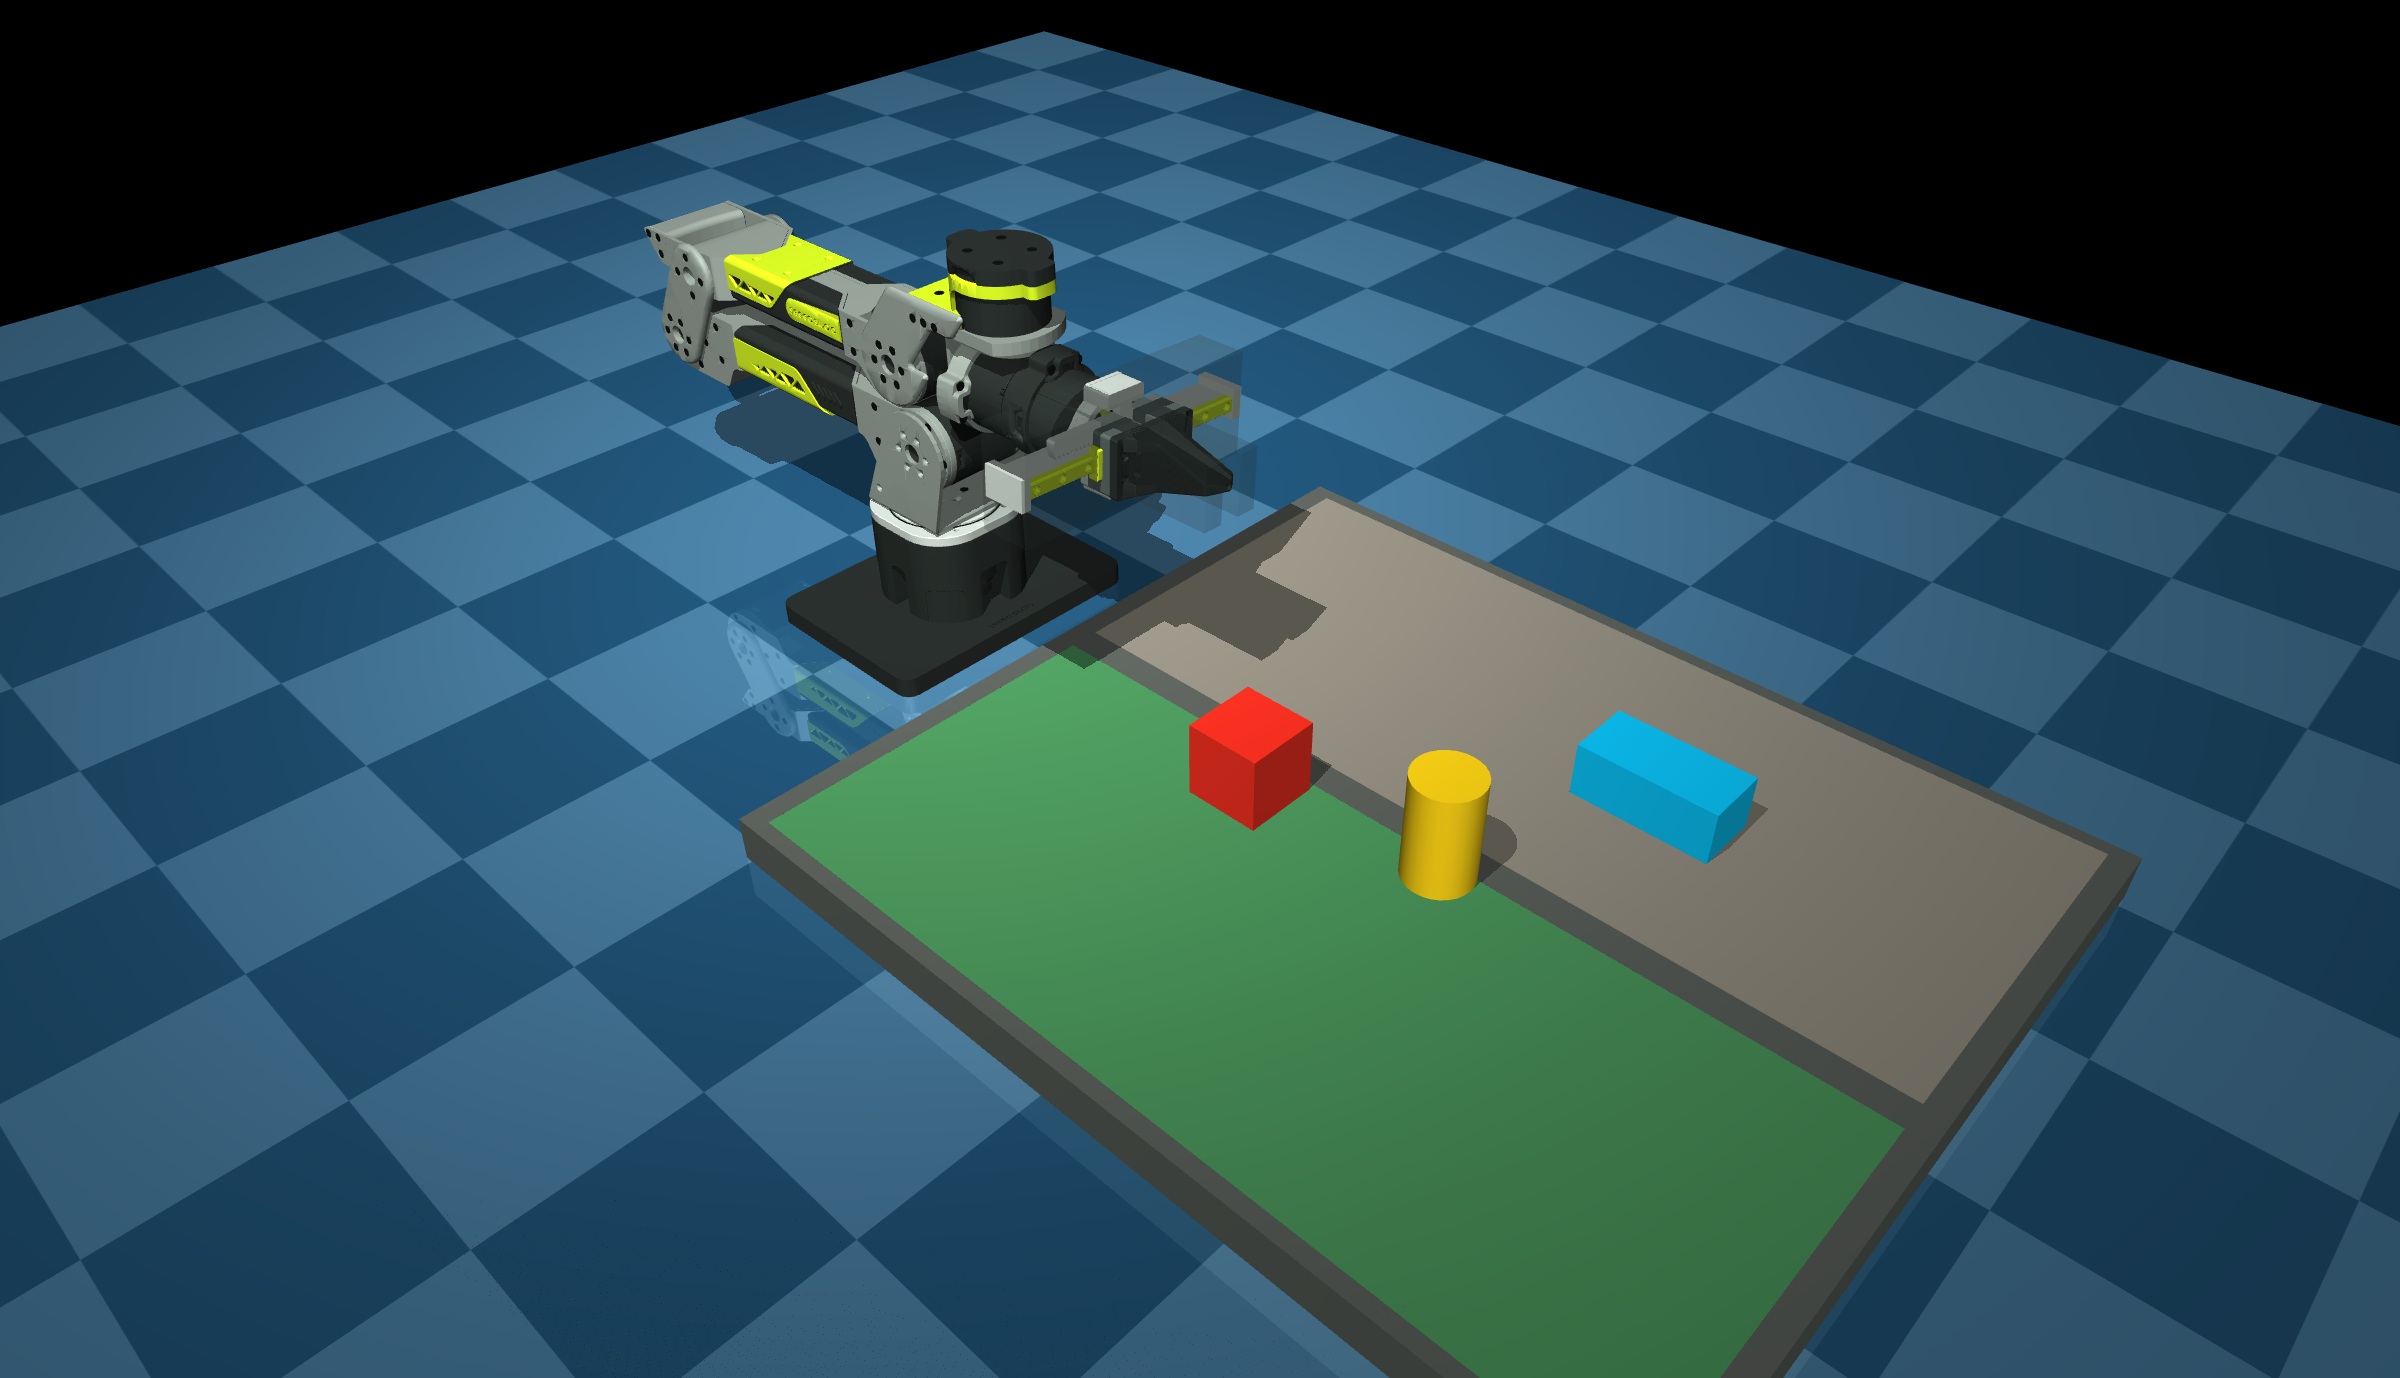
One command starts the full stack: Fake Driver, MuJoCo physics grasp, task server, virtual camera, color detector, and rosbridge:
cd ~/ReBot_Arm_DigitalTwin_DM
./rebotarm start sim
Expected output
[rebot-mujoco-all] starting fake_bringup...
[rebot-mujoco-all] starting mujoco_physics_grasp...
[rebot-mujoco-all] starting sim_task_server...
[rebot-mujoco-all] starting sim_rgb_camera...
[rebot-mujoco-all] starting sim_color_detector...
[rebot-mujoco-all] starting rosbridge_websocket on :9090...
All nodes start in sequence; success if there is no ERROR.
This script is internally equivalent to reBotArm_ros2_DM/scripts/start_rebot_mujoco_all.sh. By default it starts the Fake Driver, robot_state_publisher, MuJoCo physics grasp, task server, overhead RGB camera, color detector, and rosbridge. Then run ./rebotarm start web in another terminal to start the web page. After the browser connects to ROS, you can use the visual grasping demo.
Real-robot mode starts the real bringup/driver and rosbridge, and the web page controls through the same ROS interface. It is recommended to first verify interfaces, joint directions, and limits with the Fake Driver before switching to the real robot at low speed:
# Before starting, confirm the device node and grant permissions
ls /dev/ttyACM0
sudo chmod 666 /dev/ttyACM0

# Start the real-robot driver (auto-sources the environment)
cd ~/ReBot_Arm_DigitalTwin_DM
./rebotarm start dm
In another terminal, start rosbridge + web:
cd ~/ReBot_Arm_DigitalTwin_DM
./rebotarm start web
When connected to the real-robot controller, web commands drive real hardware. Always verify joint directions and limits under the Fake Driver first. When using the real robot for the first time, test the end joint with small movements. If anything is abnormal, immediately click "Disable" or cancel the control lock. Do not rely only on the web check-boxes; keep an emergency stop, limits, and operational-space isolation on site.
Project Architecture
ReBot_Arm_DigitalTwin_DM/
├─ setup.sh                         Idempotent one-click install and version check
├─ rebotarm                         Unified entry for start, stop, status, and diagnostics
├─ requirements.txt                 Python dependency version ranges
├─ PROJECT_ARCHITECTURE_ZH.md       Overall architecture, simulation principles, and debouncing notes
├─ reBotArm_ros2_DM/                ROS 2 workspace
│  ├─ scripts/                      One-click launch scripts and environment loading
│  ├─ third_party/                  reBotArm_control_py SDK for fresh installs
│  ├─ .venv/                        Project Python virtual environment (created by setup.sh)
│  └─ src/
│     ├─ rebotarm_msgs/             Custom msg/srv/action
│     ├─ rebotarmcontroller/        Real-robot driver, Fake Driver, hardware management
│     ├─ rebotarm_bringup/          URDF, STL, launch, motor config
│     ├─ rebotarm_mujoco/           MuJoCo simulation, IK, camera, vision
│     ├─ rebotarm_agent/            MCP Server and text agent
│     ├─ rebotarm_moveit_config/    MoveIt 2 configuration
│     └─ rebotarm_moveit_demos/     MoveIt 2 application demos
└─ reBotArm_simulator-DM/           Node.js + Three.js web console
   ├─ public/                       Pages, styles, front-end logic
   └─ split_meshes/grouped_gripper/ Web gripper meshes
Data flow: The browser accesses the Node.js static server over HTTP /api and communicates bidirectionally with ROS2 over rosbridge WebSocket; natural language is proxied by Node.js to the Text Agent / MCP Server and then converted into structured tool calls that enter ROS2. ROS2 drives the Fake/real driver and the arm downward, and connects to the MuJoCo physics simulation, the task server, and the virtual camera laterally. The web page, the LLM Agent, and the real robot do not hard-code calls to each other; they are decoupled through ROS2 topics, services, and actions.
The rebotarm unified entry point is the main way to operate the project:
| Command | Description |
|---|---|
./rebotarm start web | Start rosbridge + web server (auto-sources the environment) |
./rebotarm start dm | Start the DM real-robot driver (separate terminal, auto-sources the environment) |
./rebotarm start sim | Start the full MuJoCo simulation stack (do not start together with the real robot) |
./rebotarm doctor | Diagnostic check (equivalent to ./setup.sh --check) |
./rebotarm status | View process, port, serial port, and ROS node status |
./rebotarm stop | Stop background processes managed by start web |
All ./rebotarm commands internally run source scripts/source_rebotarm_env.sh, so you do not need to load the environment manually. However, if you run bare ros2 commands directly (such as manually starting a launch file), you still need to source first:
cd ~/ReBot_Arm_DigitalTwin_DM/reBotArm_ros2_DM
source scripts/source_rebotarm_env.sh
This script loads, in order, ROS2 (/opt/ros/jazzy/setup.bash), the Python venv (.venv/bin/activate), the cmeel paths (Pinocchio's C extensions), and the workspace (install/setup.bash).
Core module notes (click to expand)
server.js — Node.js static server
server.js is a zero-dependency Node.js HTTP server. Its main responsibilities:
- Serve the static front-end assets under
public/; - Read the URDF and STL meshes from the ROS2 workspace in the same repository and expose
/api/urdfand/api/description/meshes/<file>endpoints; - Serve the web-only gripper meshes
/api/gripper_meshes/<file>(fromsplit_meshes/grouped_gripper/); - Proxy LLM chat requests
/api/llm/chatand the health check/api/llm/healthto the text-agent HTTP service in the VM; - Provide the MCP config endpoint
/api/mcp/config, returningtextAgentUrlandmcpUrl.
Key path resolution (server.js):
const BRINGUP_DIR = path.resolve(
  path.join(ROOT, '..', 'reBotArm_ros2_DM', 'src', 'rebotarm_bringup')
);
const URDF_FILE = path.join(BRINGUP_DIR, 'description', 'urdf', 'ReBot_Arm_DM.urdf');
const MESHES_DIR = path.join(BRINGUP_DIR, 'description', 'meshes');
const GRIPPER_MESHES_DIR = path.join(ROOT, 'split_meshes', 'grouped_gripper');
server.js locates the ROS2 workspace through the relative path ../reBotArm_ros2_DM/.... If you move the web directory to another location, you need to update these paths accordingly, or keep a model copy of the same version as the ROS2 workspace in the web directory.
rebot-sim.js — 3D scene core
rebot-sim.js is the front-end core (about 1700 lines), responsible for:
- Initializing the Three.js scene, camera, renderer, and custom orbit controller;
- Loading the URDF through
URDFLoader;loader.packagesmapspackage://rebotarm_bringupto${origin}/apiso that mesh requests go through the Node.js endpoint; - Attaching the web-only gripper visual group (4 STLs) to the
end_link, with a drive range of 0–90mm; - Implementing the DLS (damped least squares) inverse kinematics solver
IKSolver, supporting TCP drag and target pose solving; - Providing pose presets, joint sliders, TCP drag, teach record/playback/export, reach envelope estimation, and target ghost;
- Exposing the API through the
window.reBotSimobject forrebot-ros-ui.jsto call.
Joint definitions (rebot-sim.js):
const jointDefs = [
  { name: 'joint1', label: 'J1 base yaw',    min: -2.8,  max: 2.8,  home: 0 },
  { name: 'joint2', label: 'J2 shoulder',     min: -3.14, max: 0,    home: 0 },
  { name: 'joint3', label: 'J3 elbow',       min: -3.14, max: 0,    home: 0 },
  { name: 'joint4', label: 'J4 wrist pitch', min: -1.87, max: 1.57, home: 0 },
  { name: 'joint5', label: 'J5 wrist yaw',   min: -1.57, max: 1.57, home: 0 },
  { name: 'joint6', label: 'J6 tool roll',   min: -3.14, max: 3.14, home: 0 },
  { name: 'gripper', label: 'J7 gripper', min: 0, max: 0.09, home: 0, unit: 'm' }
];
The web Three.js coordinate frame differs from the ROS frame. Three.js defaults to Y-up, while ROS defaults to Z-up. rebot-sim.js performs the conversion with threeToRos(v): { x: v.x, y: -v.z, z: v.y }. When developing custom pose features, you must use this conversion, otherwise the coordinates will be wrong.
rebot-ros-client.js — rosbridge client
ReBotRosClient extends EventTarget and wraps the rosbridge v2 JSON protocol, providing:
connect(url)/disconnect(): WebSocket connection management, with auto-reconnect (autoReconnect,reconnectDelay);subscribe(topic, type, callback, options): subscribe to a topic, supportingthrottleRatethrottling;callService(service, type, args): call a service and return a Promise;sendActionGoal(actionName, actionType, goal): call an action through/_action/send_goal;- High-level wrappers:
enable(),disable(),safeHome(),startGravityCompensation(),setGripper(),moveToPose(),solveMoveToPoseIK(),followJointTrajectory(); - Publishing wrappers:
publishJointCommand(),publishGripperCommand(),publishTargetPose().
The default namespace is rebotarm, and all topic/service paths are prefixed with /rebotarm/.
rebot-ros-ui.js — ROS control panel
rebot-ros-ui.js (about 1500 lines) is the business layer connecting ReBotRosClient and reBotSim, responsible for:
- Subscribing to joint state, gripper state, arm status, virtual camera image, vision detection results, and simulation animation events;
- Implementing the two switches "Mirror real joint state to the web" and "Allow the web to send control to the real arm";
- Joint command throttling (
COMMAND_INTERVAL_MS = 45ms) and mirror hold (MIRROR_HOLD_MS = 1800ms); - Gravity compensation start/stop and status query;
- Gripper control and wait-for-reach (
commandGripperAndWait); - IK check, Pose motion, trajectory sending, and low-level playback fallback;
- The full visual grasping flow (retreat, align, pre-descend, descend, grip, lift, transit);
- Simulation animation events (
attach_object/release_object) driving the web gripper to follow the object.
The control lock is an important safeguard against accidental operation. controlAllowed() checks uniformly: when ROS is not connected or the control lock is not checked, all control commands are intercepted and the page only updates the 3D model.
rebot-llm.js — LLM text control UI
rebot-llm.js implements the natural-language chat interface. The chain is:
web rebot-llm.js
  -> Node.js /api/llm/chat
  -> Text Agent HTTP service (default :8082)
  -> MCP Server (default :8081/mcp)
  -> ROS 2 service/action/topic
On startup it first calls /api/llm/health to health-check the text-agent; after success it enables the input box. Messages are proxied to the text-agent through /api/llm/chat, and the returned text and events (tool-call process) are rendered to the chat area. On stop, it sends { text: '__reset__', reset: true } to clear the context.
ROS2 interface overview (click to expand)
The key ROS2 interfaces that the web simulator subscribes to and publishes are listed below. The default namespace is rebotarm.
Subscribed topics
| Topic | Type | Description |
|---|---|---|
/rebotarm/joint_states | sensor_msgs/msg/JointState | Real-time position of 6 joints + gripper |
/rebotarm/gripper/state | rebotarm_msgs/msg/JointMotorState | Gripper position/velocity/torque |
/rebotarm/arm_status | rebotarm_msgs/msg/ArmStatus | Enable, mode, state machine |
/rebotarm/mujoco/overhead_rgb/image_raw | sensor_msgs/msg/Image | Desktop overhead RGB camera image |
/rebotarm/vision/color_blocks/detections | std_msgs/msg/String | Color block detection result (JSON) |
/rebotarm/sim/animation_event | std_msgs/msg/String | Simulation animation event (grasp/release) |
Published topics
| Topic | Type | Description |
|---|---|---|
/rebotarm/joints/<jointN>/cmd | rebotarm_msgs/msg/JointMotorCmd | Single-joint sparse command (mode=1 POS_VEL) |
/rebotarm/gripper/cmd | rebotarm_msgs/msg/JointMotorCmd | Gripper command (m, 0~0.09) |
/rebotarm/mujoco/target_pose | geometry_msgs/msg/PoseStamped | TCP drag target pose |
Services called
| Service | Type | Description |
|---|---|---|
/rebotarm/enable | std_srvs/srv/Trigger | Enable all motors |
/rebotarm/disable | std_srvs/srv/Trigger | Disable all motors |
/rebotarm/safe_home | std_srvs/srv/Trigger | Safe return to zero |
/rebotarm/gravity_compensation/start | std_srvs/srv/Trigger | Start gravity compensation |
/rebotarm/gravity_compensation/stop | std_srvs/srv/Trigger | Stop gravity compensation |
/rebotarm/gravity_compensation/status | std_srvs/srv/Trigger | Query gravity compensation status |
/rebotarm/gripper/set | rebotarm_msgs/srv/SetGripper | Gripper reach service |
/rebotarm/move_to_pose_ik | rebotarm_msgs/srv/MoveToPoseIK | IK solving service |
/rosapi/topics | rosapi_msgs/srv/Topics | Diagnostics: list all topics |
/rosapi/services | rosapi_msgs/srv/Services | Diagnostics: list all services |
Actions called
| Action | Type | Description |
|---|---|---|
/rebotarm/move_to_pose | rebotarm_msgs/action/MoveToPose | Cartesian pose motion |
/rebotarm/follow_joint_trajectory | control_msgs/action/FollowJointTrajectory | Joint trajectory execution |
When the _action/send_goal service for FollowJointTrajectory or MoveToPose is not found in the ROS2 environment, the web page automatically falls back to "low-level playback" mode: it publishes single-joint commands point by point according to the trajectory point timestamps and synchronizes interpolation in the 3D model. This lets the web page demonstrate trajectories even in a minimal environment with only the Fake Driver.
Gripper Units and Coordinate Conventions
The web and ROS interfaces use meters as the gripper unit:
close: 0.00 m
open:  0.09 m
The motor firmware uses radians (0.0 = closed, −5.0 = open). The conversion is done in the ROS2 controller's HardwareManager; the web page does not handle radians directly.
In the URDF, finger_left / finger_right are prismatic joints with limits 0~0.0285 (m). The web page maps the finger_left opening to the 0~0.09 m gripper command range through fingerOpeningToGripperCommand().
For the coordinate frame, the web Three.js defaults to Y-up, while ROS defaults to Z-up. All TCP poses are converted with threeToRos() before being published to ROS:
function threeToRos(v) {
  return { x: v.x, y: -v.z, z: v.y };
}
LLM/MCP Text Control
Natural-language control is not called directly from the browser to ROS. It is proxied through Node.js. The layered design lets the LLM understand intent while the MCP layer constrains the intent into structured robot operations.
Start the MCP Server and Text Agent
Start the MCP Server in the Ubuntu VM (locked mode by default, read-only):
cd ~/ReBot_Arm_DigitalTwin_DM/reBotArm_ros2_DM
source scripts/source_rebotarm_env.sh
ros2 launch rebotarm_agent rebotarm_mcp.launch.py
Simulation motion mode (motion allowed):
ros2 launch rebotarm_agent rebotarm_mcp.launch.py motion_mode:=allow
Start the text-agent HTTP service (for the web page to call):
cd ~/ReBot_Arm_DigitalTwin_DM/reBotArm_ros2_DM
./scripts/start_rebotarm_text_agent_http.sh
Expected output
[rebotarm-text-agent-http] MCP=http://127.0.0.1:8081/mcp
[rebotarm-text-agent-http] model=qwen-plus
INFO:     Uvicorn running on http://0.0.0.0:8082
When Uvicorn running on http://0.0.0.0:8082 appears, it is ready.
By default it listens on 0.0.0.0:8082, MCP points to http://127.0.0.1:8081/mcp, and the LLM uses qwen-plus by default.
Web usage
In the "LLM text control" panel on the web page, click "Start AI assistant". The page first health-checks the text-agent; after success it enables the input box. You can directly type natural-language commands, for example:
- Query arm status
- Move to X=0.3 Y=0 Z=0.3
- Open the gripper
- Grasp the red block
The text-agent's reply and tool-call process are rendered to the chat area.
Configure the proxy target
The web page locates the backend through REBOTARM_TEXT_AGENT_URL and REBOTARM_MCP_URL in .env. If the web page runs on Windows and ROS2 runs in an Ubuntu VM, change them to the actual IP of the VM:
REBOTARM_TEXT_AGENT_URL=http://<Ubuntu IP>:8082
REBOTARM_MCP_URL=http://<Ubuntu IP>:8081/mcp
After changing, restart ./rebotarm start web (or node server.js). On startup the page reads and displays the current proxy backend from /api/mcp/config.
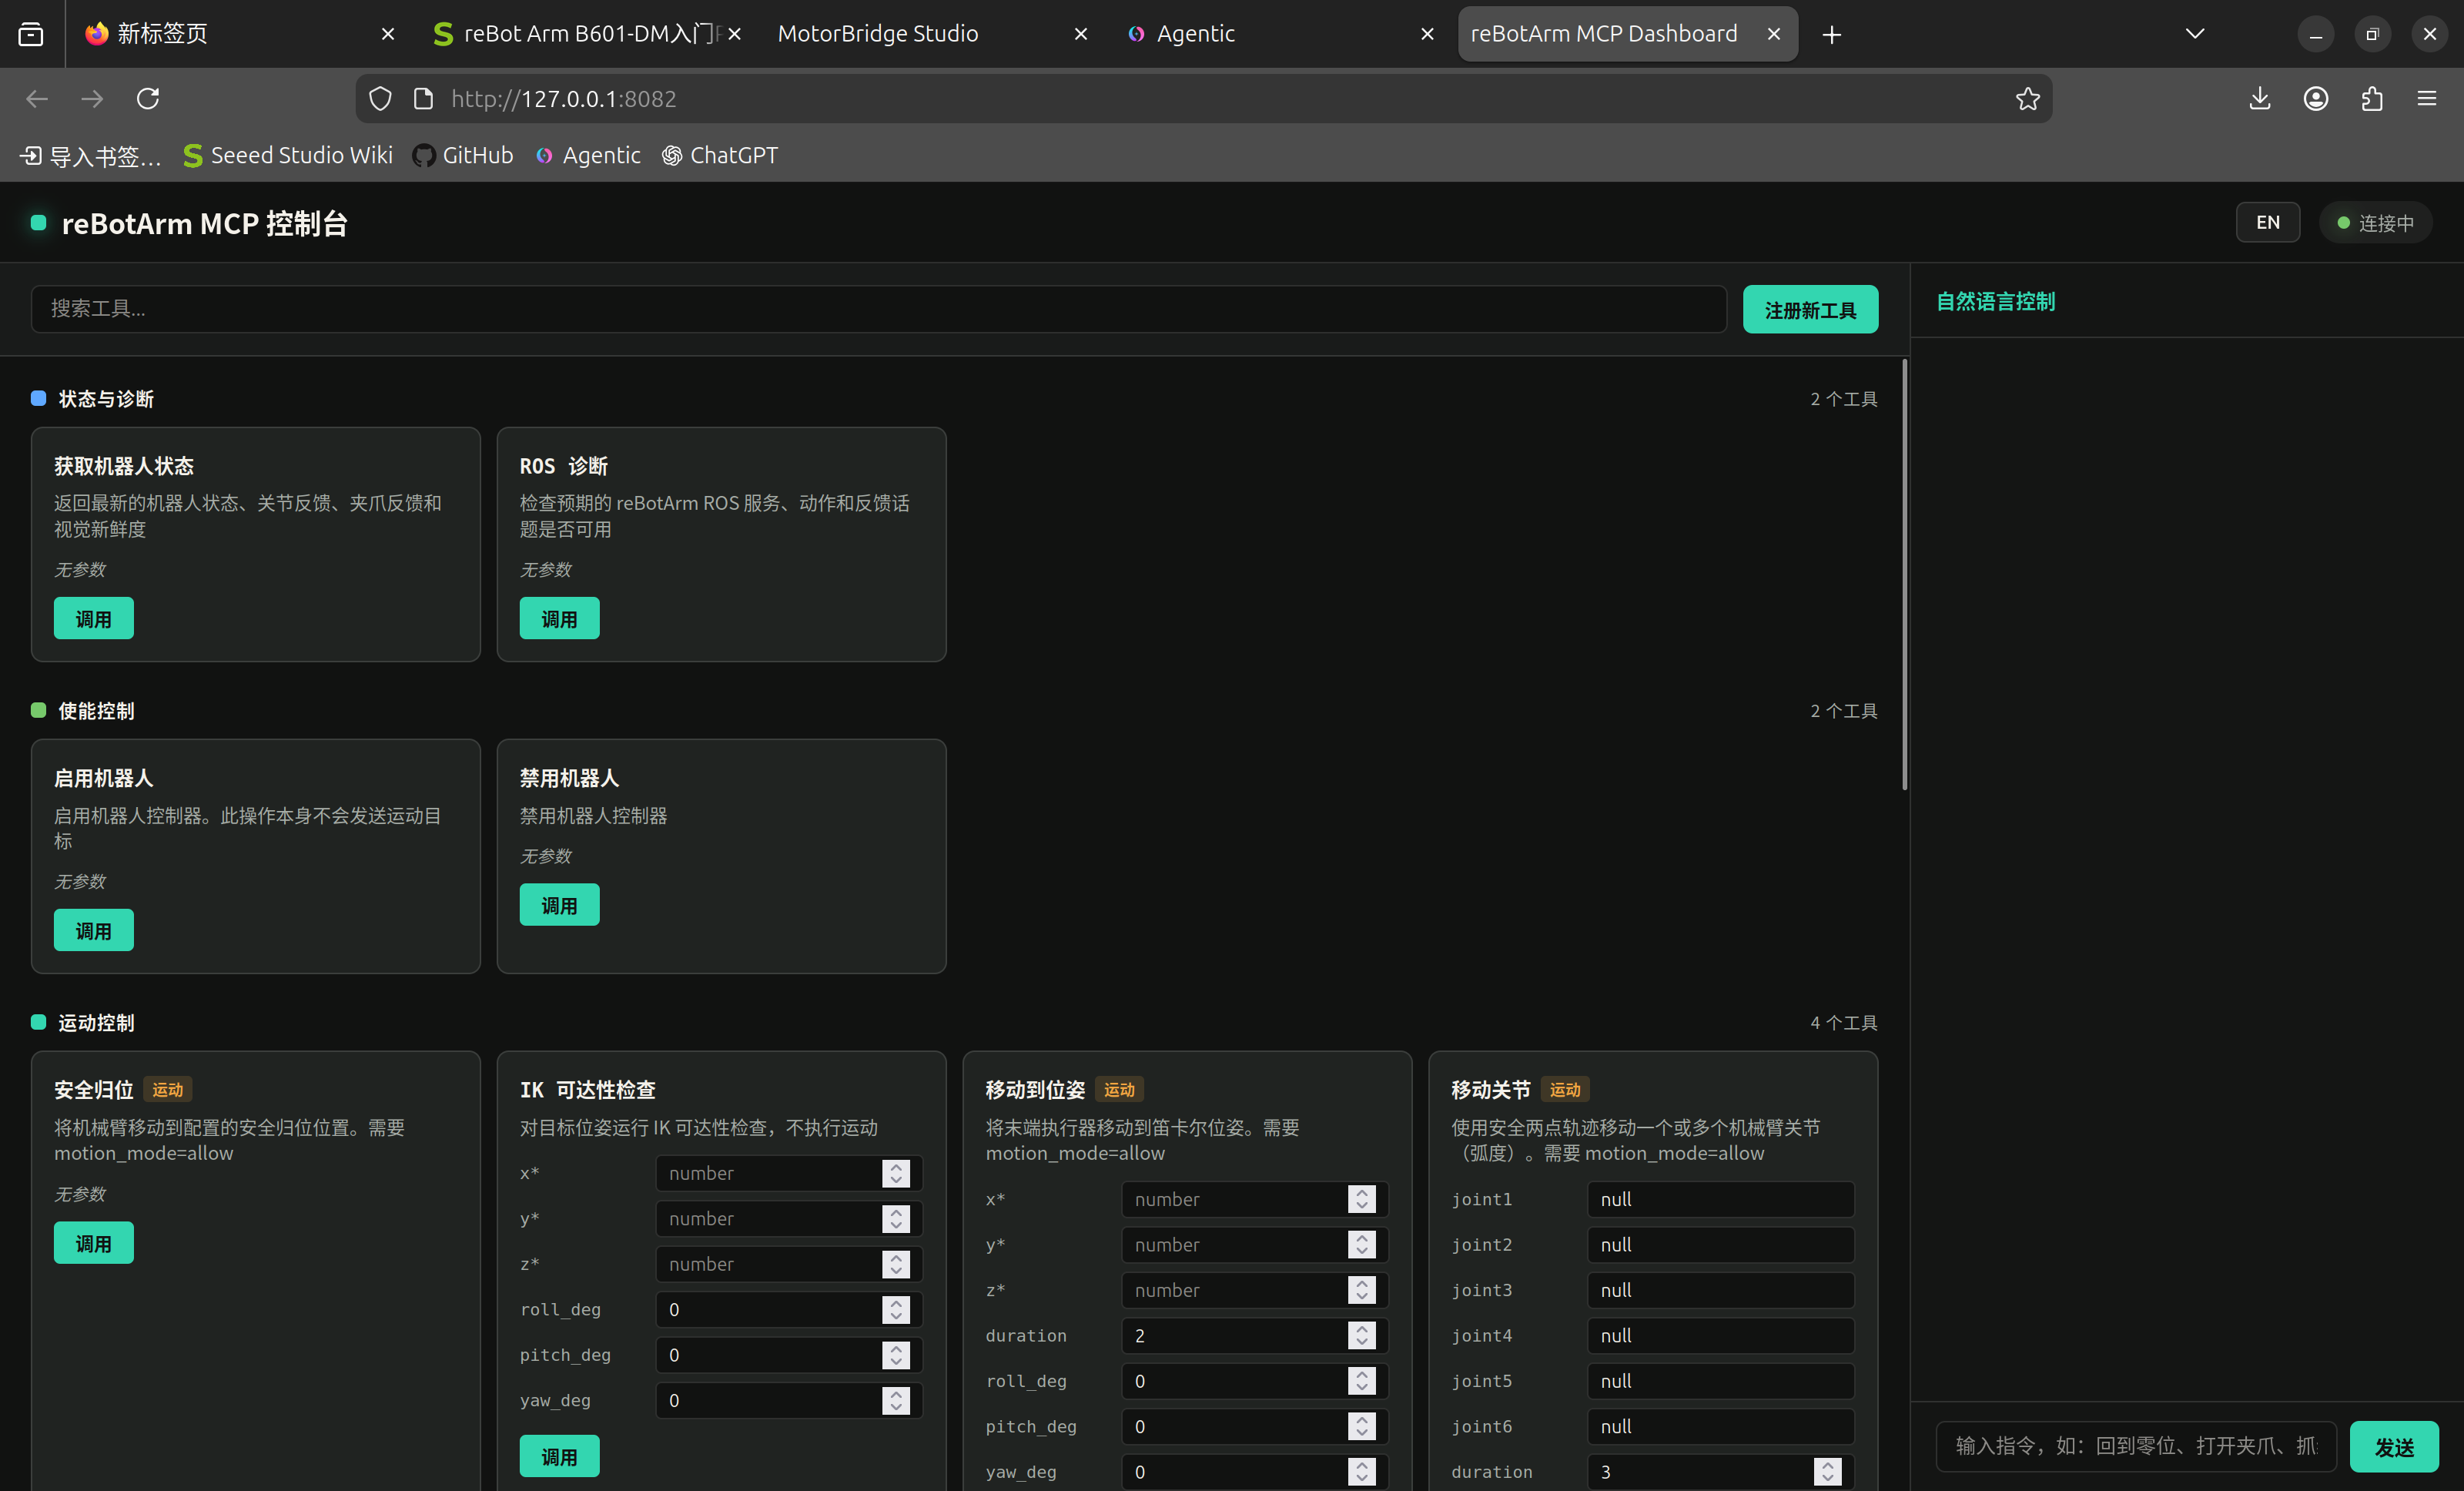
MCP Dashboard visualization panel
The MCP Dashboard is an independent debugging entry and does not need the web simulator. Starting it takes two steps:
Terminal 1 — start the MCP Server:
cd ~/ReBot_Arm_DigitalTwin_DM/reBotArm_ros2_DM
source scripts/source_rebotarm_env.sh
ros2 launch rebotarm_agent rebotarm_mcp.launch.py motion_mode:=allow
Terminal 2 — start the text-agent (includes the MCP Dashboard):
cd ~/ReBot_Arm_DigitalTwin_DM/reBotArm_ros2_DM
./scripts/start_rebotarm_text_agent_http.sh
Browser access:
http://localhost:8082/
Open http://<Ubuntu IP>:8082/ in a browser to access it; no extra installation is needed.
Features:
- Tool overview: automatically pulls all registered tools from the MCP Server and groups them by category (status & diagnostics, enable control, motion control, gripper control, gravity compensation, visual grasping, recording & playback);
- Search filter: the top search box filters tool names and descriptions in real time;
- Parameter form: automatically generates input boxes based on each tool's
inputSchema; fill in the parameters and click "Call" to directly call the corresponding MCP tool; - Motion tag: tools that require
motion_mode=alloware tagged with a "Motion" label; - Custom tool registration: click the "Register new tool" button, fill in the tool name, description, category, Webhook URL, and parameter Schema (JSON) to add a custom tool to the panel. When called, the parameters are POSTed as JSON to the Webhook URL;
- CN/EN switch: the language button in the top-right corner switches the CN/EN interface with one click; the choice is saved in the browser
localStorage; - Natural-language input: type natural-language commands in the chat box on the right; they go through the
/chatendpoint via the LLM → MCP chain, and the reply and tool-call process are displayed in the log area in real time.
The MCP Dashboard is an independent debugging entry and does not depend on the web simulator. As long as the MCP Server (:8081) and the Text Agent (:8082) are running, open http://<Ubuntu IP>:8082/ to view and call all 18 MCP tools.
Endpoint overview:
| Endpoint | Method | Description |
|---|---|---|
/ or /dashboard | GET | Returns the Dashboard HTML page (dark glass-panel theme, supports CN/EN switch) |
/tools | GET | Returns the MCP tool list JSON (name, description, parameter schema, category, custom flag) |
/call_tool | POST | Directly call the specified MCP tool, body: {"name":"...", "arguments":{...}} |
/register_tool | POST | Register a custom tool, body: {"name":"...", "description":"...", "category":"...", "webhook_url":"...", "parameters":{...}} |
/unregister_tool | POST | Delete a registered custom tool, body: {"name":"..."} |
/chat | POST | Natural-language conversation, body: {"text":"..."} |
/health | GET | Health check |
Secondary Development Guide
Modify joint limits or presets
Joint limits and preset poses are defined in the jointDefs and presets objects at the top of rebot-sim.js. After modifying, refresh the page to take effect; no rebuild is needed. Note that joint limits should be consistent with the <limit> in the URDF, otherwise the web model and ROS behavior will not match.
Add a custom ROS interface
If you need to subscribe to a new topic or call a new service, add it to REQUIRED_TOPICS or REQUIRED_SERVICES in rebot-ros-ui.js, and call client.subscribe() or client.callService() in the button events. ReBotRosClient already wraps the rosbridge protocol, so you do not need to write WebSocket communication by hand.
Extend LLM tools
LLM tools are defined by the MCP Server in rebotarm_agent. Adding a new tool requires implementing it in the rebotarm_agent package in the ROS2 workspace; after rebuilding, the text-agent exposes it automatically. No web-side changes are needed; the tool-call process is returned through the events field of /api/llm/chat and rendered.
Modify the web gripper meshes
The web-only gripper STLs are in split_meshes/grouped_gripper/, including gripper_base.stl, gripper_hardware.stl, left_finger.stl, and right_finger.stl. Replace these files and refresh the page. Do not add a second urdf/ or meshes/ copy in the web directory; at runtime only these four gripper STLs are used.
Modify the rosbridge connection address
The rosbridge WebSocket address is entered manually by the user in the "ROS2 Bridge" panel on the web page; it is not hard-coded by default. To change the default or preset address:
reBotArm_simulator-DM/public/js/ros/rebot-ros-client.js(the client default is empty and provided by the input box)reBotArm_simulator-DM/public/js/ros/rebot-ros-ui.js(reads the last address fromlocalStorage)
The page tries to load the last saved address when the input box is empty. Modify the default or directly enter the actual address in the web connection panel.
Key file quick reference (click to expand)
| File | Purpose |
|---|---|
reBotArm_simulator-DM/server.js | Node.js static server + LLM proxy |
reBotArm_simulator-DM/package.json | npm scripts (start / dev) |
reBotArm_simulator-DM/.env | Port and proxy target config |
reBotArm_simulator-DM/public/index.html | Single-page app entry and control panel layout |
reBotArm_simulator-DM/public/css/rebot-sim.css | Dark theme styles |
reBotArm_simulator-DM/public/js/rebot-sim.js | 3D scene, IK, teaching, drag core |
reBotArm_simulator-DM/public/js/rebot-llm.js | LLM chat UI |
reBotArm_simulator-DM/public/js/ros/rebot-ros-client.js | rosbridge WebSocket client |
reBotArm_simulator-DM/public/js/ros/rebot-ros-ui.js | ROS control panel UI and business logic |
reBotArm_simulator-DM/public/lib/three-r128.min.js | Three.js rendering engine |
reBotArm_simulator-DM/public/lib/STLLoader-umd.js | STL mesh loader |
reBotArm_simulator-DM/public/lib/URDFLoader.js | URDF parser |
reBotArm_simulator-DM/split_meshes/grouped_gripper/ | Web-only gripper STLs (4 files) |
FAQ
1. After opening the browser, it keeps showing "Loading Rebot_ARM-B601-DM arm model..."
If the page is stuck on the loading overlay, the URDF or STL mesh request failed. Open the Network panel in the browser developer tools and check whether /api/urdf and /api/description/meshes/*.STL return 200. Common causes:
- The
BRINGUP_DIRpath inserver.jsis resolved incorrectly (the web directory was moved to a non-monorepo location), sosrc/rebotarm_bringup/description/cannot be found; package://rebotarm_bringup/...in the URDF cannot be mapped; confirm thatloader.packagespoints to${origin}/api;- The STL file is missing or the path case does not match (Linux is case-sensitive).
2. After connecting to ROS, the status stays "offline"
Check in this order:
- Whether rosbridge is running on the Ubuntu side and listening on
0.0.0.0:9090(not127.0.0.1); - Whether the web host can reach the Ubuntu 9090 port (firewall, VM network mode);
- Whether the WebSocket address starts with
ws://(such asws://localhost:9090);
3. The joint slider cannot control the real robot
Controlling the real robot from the web page requires three unlock steps:
- Connect to ROS in the "ROS2 Bridge" panel (WebSocket connects to the rosbridge of the real-robot controller);
- Check "Allow the web to send control to the real arm" → click "OK" in the confirmation dialog;
- Click the "Enable" button.
All three steps are required. When the control lock is not checked, dragging the slider only moves the 3D model and does not send ROS commands.
4. The gripper does not sync to the web
The position of /rebotarm/gripper/state must be in meters (0~0.09), not radians. If it does not sync, check whether ros_publishers.py in the ROS2 controller uses gripper_position_m(). The web page also infers the gripper opening from finger_left in /rebotarm/joint_states as a fallback feedback source.
5. The LLM assistant fails to start
When the web page shows "Connection failed", confirm that the text-agent HTTP service is running in the Ubuntu VM:
cd ~/ReBot_Arm_DigitalTwin_DM/reBotArm_ros2_DM
./scripts/start_rebotarm_text_agent_http.sh
And confirm that REBOTARM_TEXT_AGENT_URL in .env points to the correct VM IP and port (default 8082). The page first calls /api/llm/health to health-check; on failure it shows the specific error in the message area.
6. The visual grasping demo does not work
Visual grasping depends on the full physics simulation stack. Check:
- Whether the MuJoCo overhead RGB camera is running and
/rebotarm/mujoco/overhead_rgb/image_rawhas an image; - Whether the color detector is running and
/rebotarm/vision/color_blocks/detectionshas results; - Whether the web camera preview shows a frame and the color recognition status shows "N / target X";
- Whether the target color selection is correct (auto/red/yellow/blue).
7. Front-end code changes do not take effect
Front-end assets are served statically by Node.js; after changing, refresh the browser. The current version does not register a Service Worker, so there is no offline cache causing the old version to not update. If the browser still shows old content, use a hard refresh (Ctrl+Shift+R) or clear the regular cache.
8. "URDFLoader" or "THREE" not found
These are third-party libraries under public/lib/, loaded by index.html through <script> tags. Confirm:
public/lib/three-r128.min.js,public/lib/URDFLoader.js, andpublic/lib/STLLoader-umd.jsexist;- The
<script>tag paths inindex.htmlare correct, and the load order is Three.js → STLLoader → URDFLoader → business scripts; - There are no 404s or load-order errors in the browser console.
9. setup.sh reports an error or installation fails
setup.sh is idempotent; failed components are listed in the final summary's Failed or still missing. Common cases:
- ROS apt source not configured: the installer automatically downloads the
ros2-apt-sourcepackage and adds the source, which requires sudo; - Python version mismatch: Jazzy needs 3.12, Humble needs 3.10; a mismatch is listed in
Version/platform mismatches; - SDK clone failed: check network and GitHub reachability, or manually clone to
reBotArm_ros2_DM/third_party/reBotArm_control_py/and rerun; colcon buildfailed: check whetherrosdepis initialized (sudo rosdep init && rosdep update), then rerun./setup.sh.
Contact
- Technical Support: Submit an Issue
- Project Repository: Github
- Forum: Seeed Studio Forum
References
- reBot Arm B601-DM Quick Start
- reBot Arm B601-DM ROS2 Integration
- reBot Arm B601-DM Visual Grasping Demo
- reBot Arm B601-DM Pinocchio and MeshCat
- reBot Arm B601-DM LeRobot Tutorial
- ROS2 Jazzy Documentation
- rosbridge_suite Documentation
- Three.js Documentation
- URDFLoader (gkjohnson)
- Model Context Protocol