reBot-RS Wrist Camera Palm Following
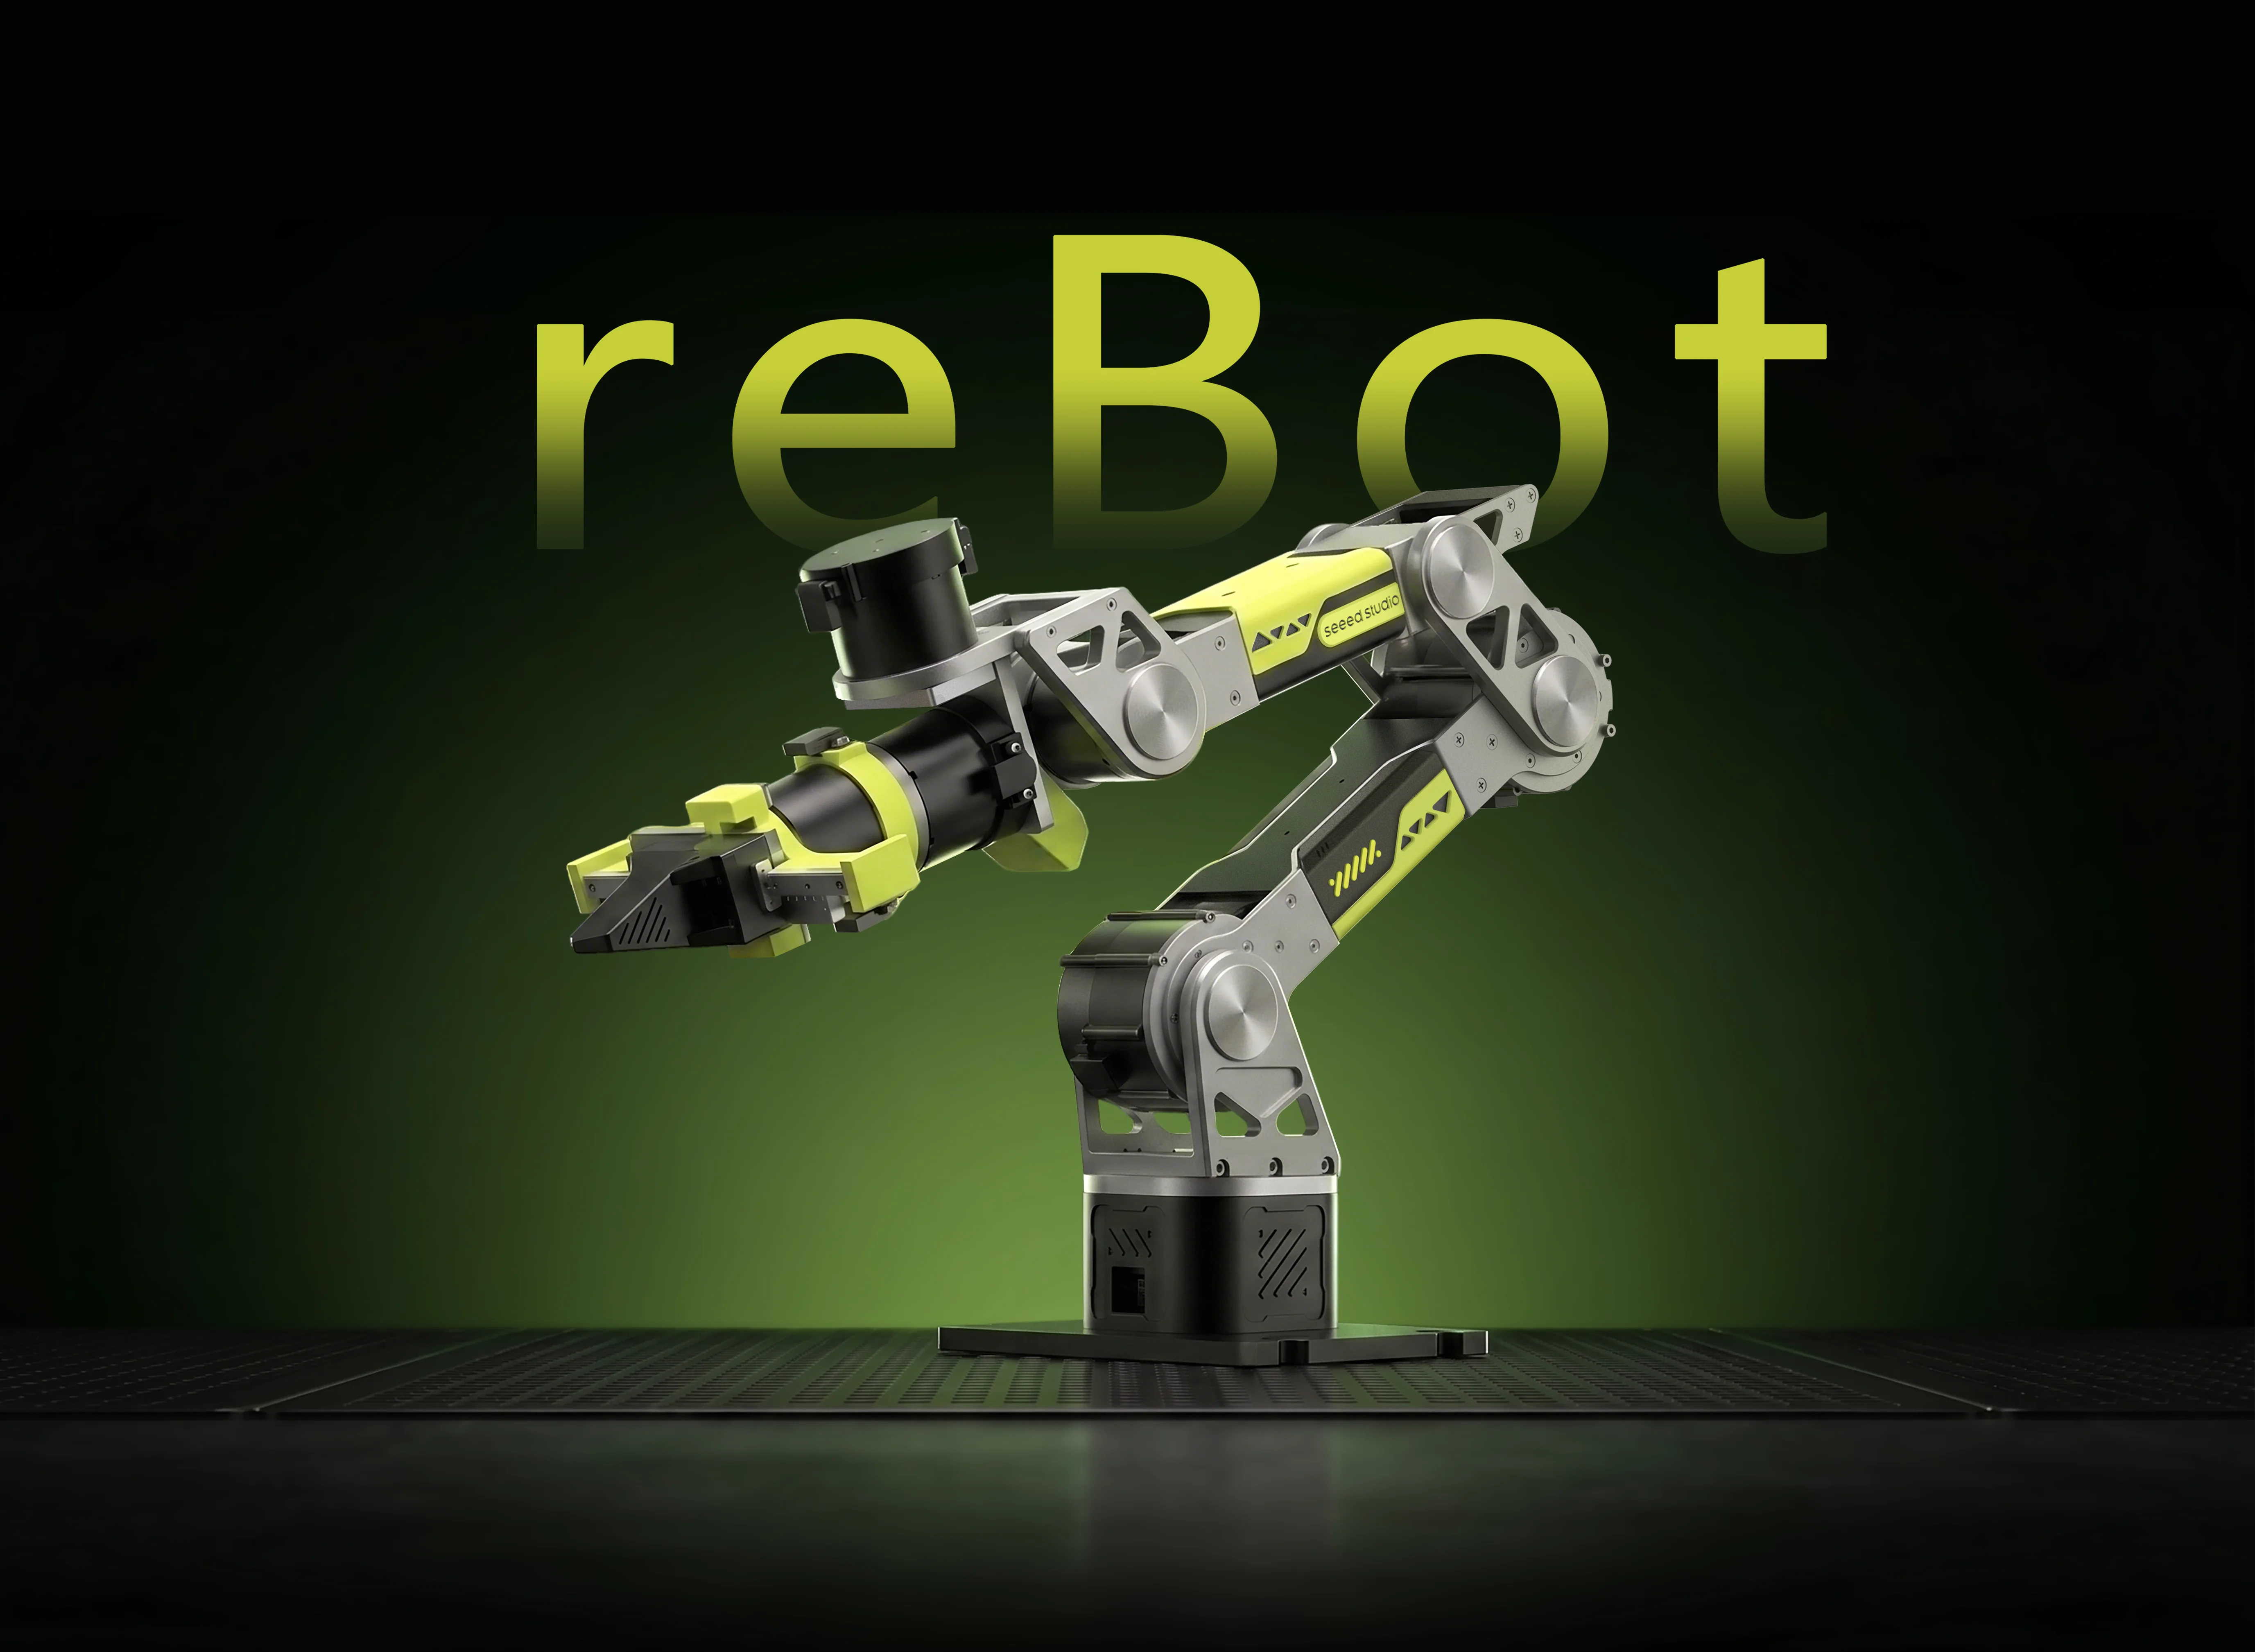



Wrist Depth Sensing · Palm Following · Pinch-to-Grip · Local Web Preview
This tutorial explains how to run reBot RS Camera Follow. A wrist-mounted depth camera captures color and depth images, while the program detects the palm and calculates follow commands for the arm. You can also control the gripper by pinching your thumb and index finger and use a local web page to view the camera, joint status, and robot model.
The project combines hand landmarks with aligned depth data to estimate the three-dimensional palm position. It filters the target, transforms coordinates, and calculates joint commands using the robot's kinematics. The web page previews data and manages the control process. Joint values may come from feedback, commands, or a model estimate; check the data-source label on the page.
Initialization enables the motors and moves the arm to HOME; exiting also moves the arm back to zero. Clear the entire motion area, secure the arm, check power, CAN and the HOME path, and make sure the hardware emergency stop is available. Start at low speed and within a small range when first running the system or after changing hardware. Software protections and the web display cannot replace collision detection or a hardware emergency stop.
System Architecture and Approach
System Architecture
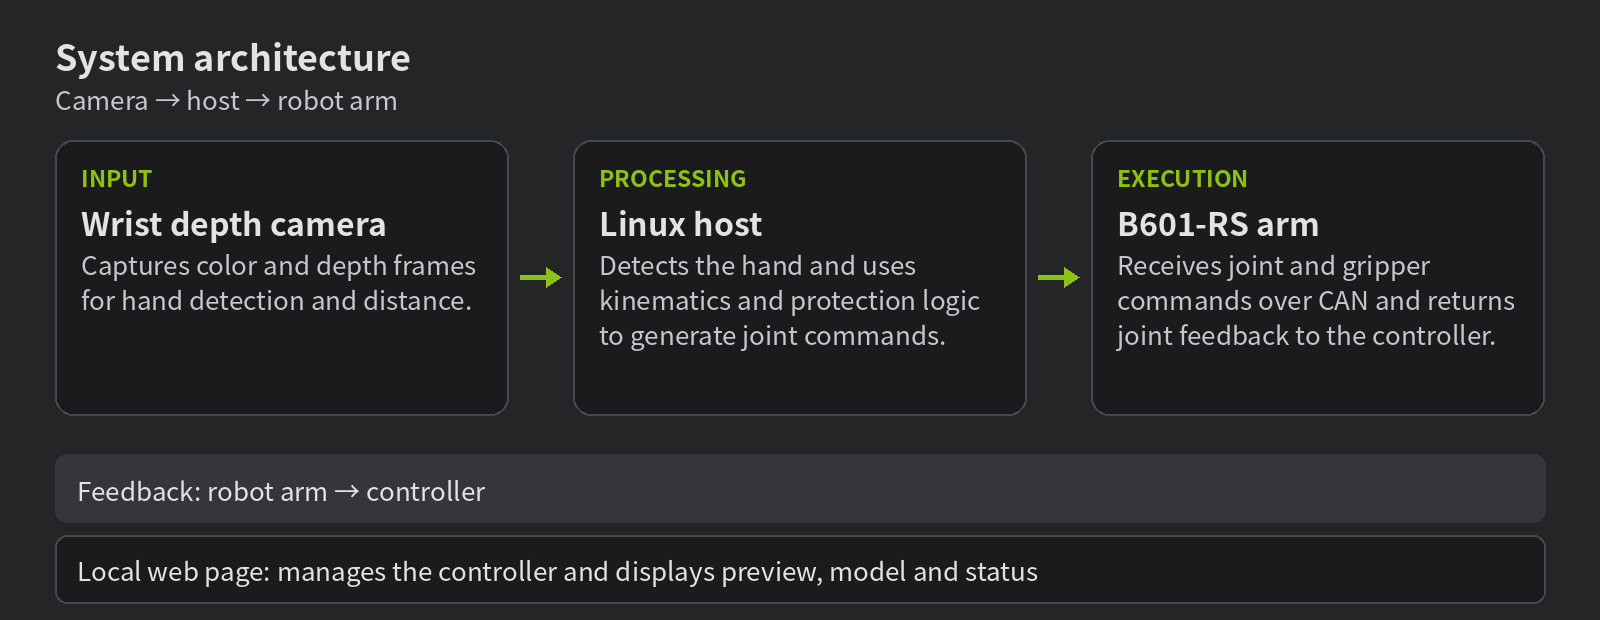
The wrist camera supplies color and depth frames to the host, which controls the arm over CAN and receives joint feedback. The local web page manages the controller and displays the preview and status.
The vision thread captures camera frames and detects the hand. The servo thread reads the latest target and uses the robot model and camera pose to calculate joint commands. The web page starts and manages the controller through a local service and receives status; it does not connect to CAN directly. The display may show actual feedback, commands, or estimates; check its data-source label.
Palm Following and Gripper Control
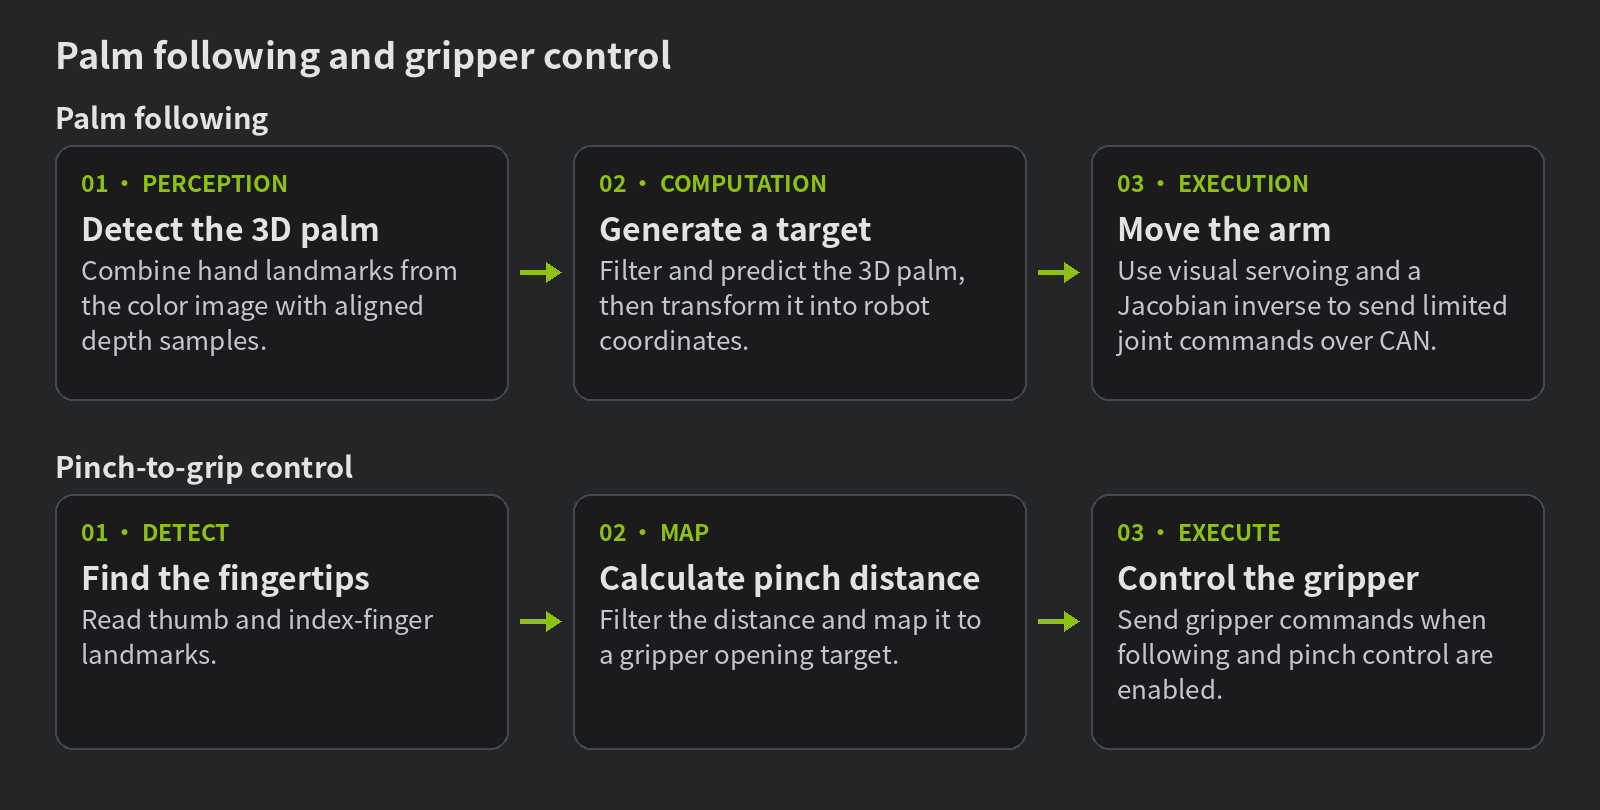
Palm following detects the 3D palm, calculates a follow target, and moves the arm. Gripper control uses fingertip positions and pinch distance to produce an opening command.
Because the camera is mounted on the wrist, the controller must transform camera coordinates into robot coordinates. If the palm is lost briefly, the program may extrapolate for a limited time; after a longer loss, it holds position. Motion may resume when the hand is detected again. Pinch control shares the hand detection result with following, and the web page also lets you hold the gripper at its current position.
Prerequisites
- A configured reBot Arm B601-RS, its power supply, and a working CAN interface. See the reBot-RS Quick Start first.
- A Linux computer. The reference environment uses Python 3.10; the project requires the camera SDK, Pinocchio, and motorbridge. System libraries and device permissions vary by machine.
- A wrist-mounted depth camera and a compatible mount. The web page can select Gemini 2, Gemini 305, Gemini 336, or RealSense D435i. See the camera pose requirements below.
Choose a Camera Mount
Gemini 2, D435i, and Gemini 336 use the V1 level mount, with a separate camera URDF for each model. The figure shows the shared mount's STL model from three views; its labels are in Chinese:
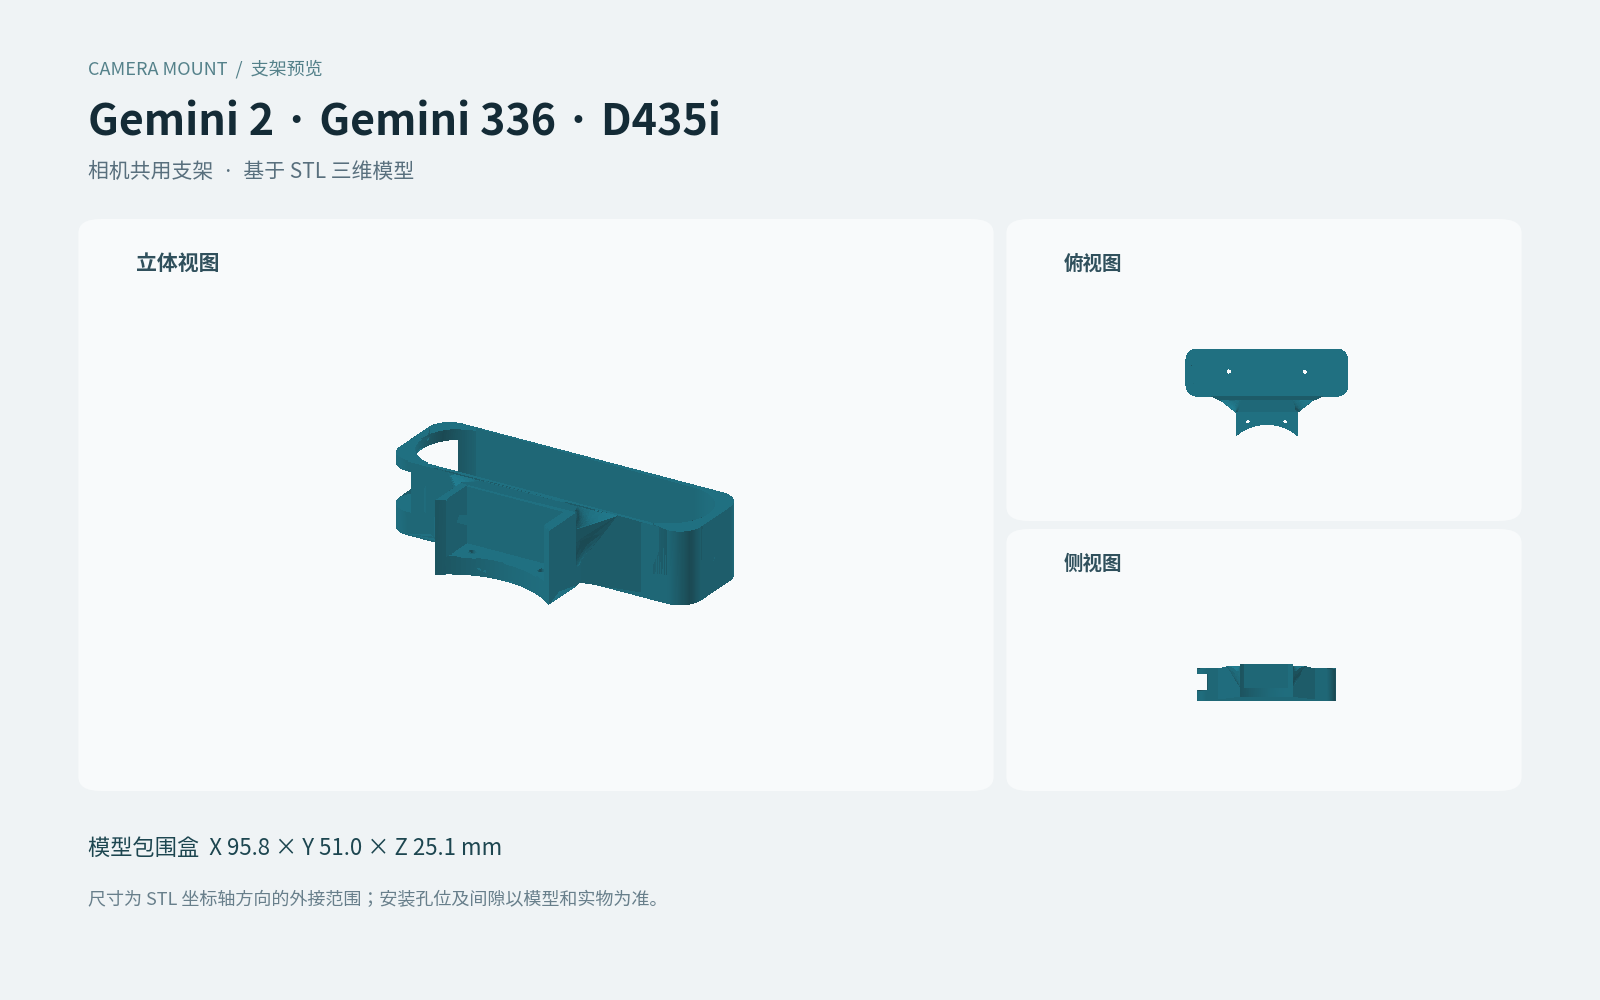
The figure lists the model bounding box as X 95.8 × Y 51.0 × Z 25.1 mm. Download STEP and STL files from the shared mount directory.
Gemini 305 uses a separate centered level mount, shown below as an STL model preview. The mount can also fit D405; camera options for the following program depend on what the project supports.
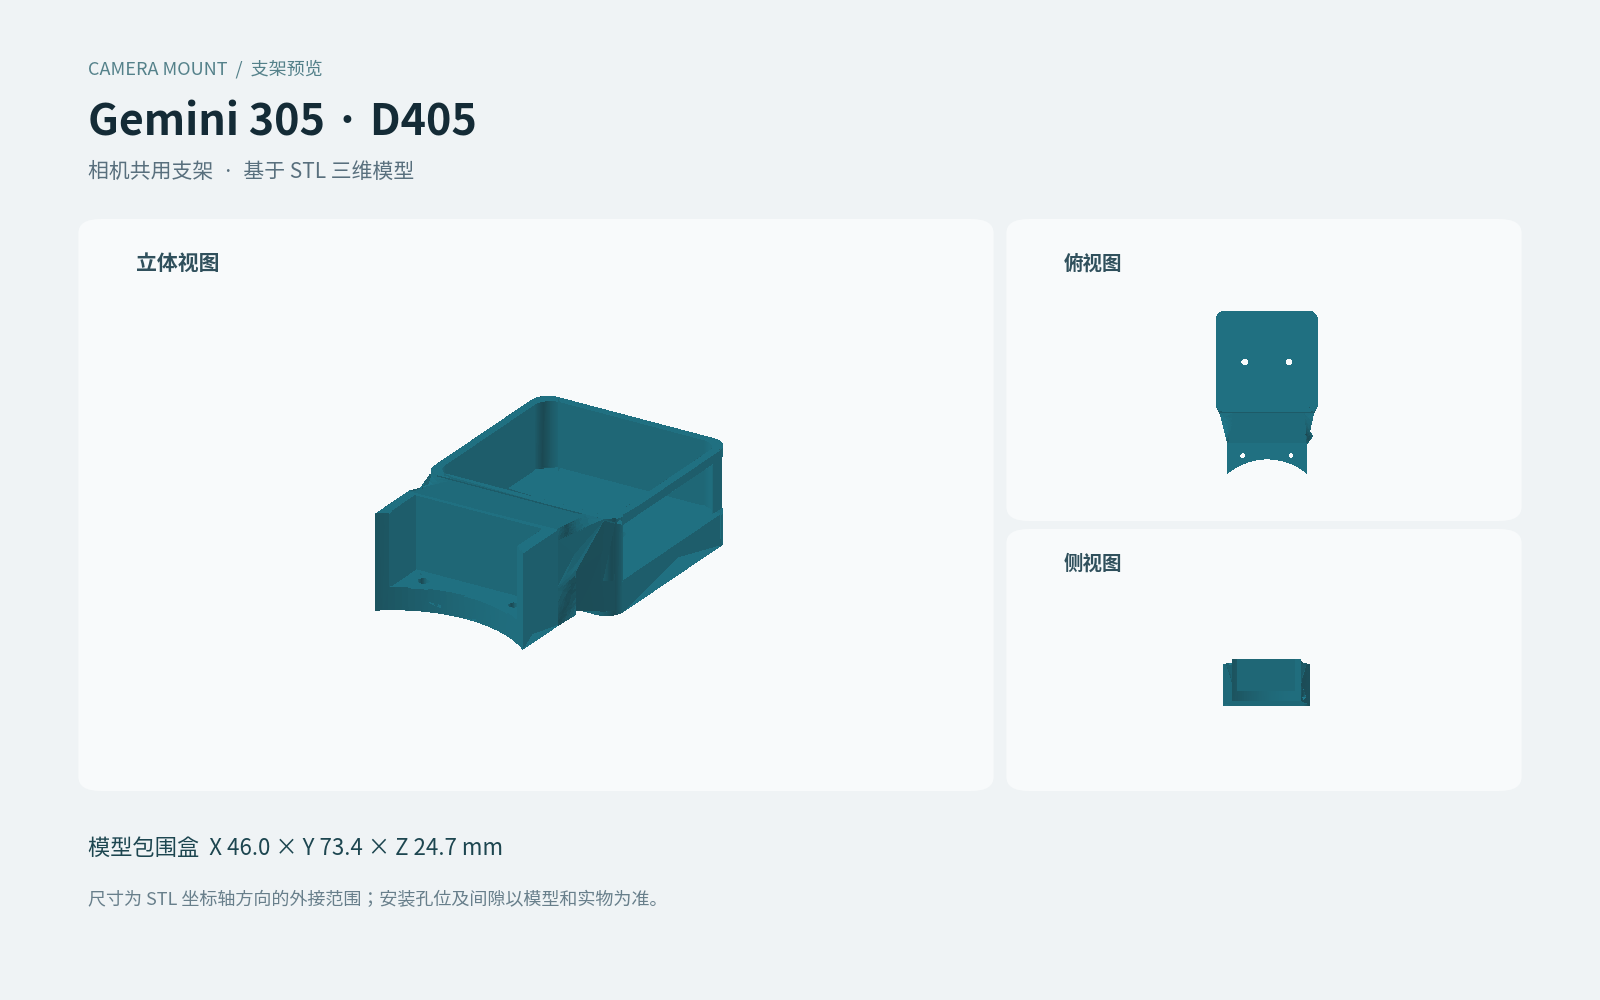
The figure labels are in Chinese and list the model bounding box as X 46.0 × Y 73.4 × Z 24.7 mm. See the mount STL model and model notes. The Gemini 305 camera housing is approximated in the URDF model.
The optical centers and mounting positions differ between cameras. These poses are nominal CAD assemblies. Before use, check the mounting, field of view, and URDF against the physical setup, then verify motion direction at low speed.
Install the Project and Dependencies
Get the project and create an environment
Step 1
Run the following in a Linux terminal:
git clone https://github.com/Yang-Ci/reBot_RS_Camera-Follow.git
cd reBot_RS_Camera-Follow
python3.10 -m venv .venv-arm
.venv-arm/bin/python -m pip install -r requirements.txt
Install and verify the SDK for your camera. For D435i, also install the RealSense Python bindings in this environment:
.venv-arm/bin/python -m pip install 'pyrealsense2>=2.54'
The project's requirements-d435i.txt provides a dependency set for D435i vision-only use; real robot control also requires the main dependencies. If installation fails, check the Python version, system libraries, device permissions, and camera SDK.
Check the bundled resources
Step 2
The robot controller, RS URDF, web model, and browser hand-detection resources are included in this repository. You do not need to clone other projects or set resource paths. Check the files from the project root:
ls vendor/rebot_control
ls assets/robot/description/urdf/ReBot_Arm_RS.urdf
ls web/lib/mediapipe
These commands should list the corresponding directories or file. Python dependencies and the camera SDK must still be installed. See the bundled resource notes for sources.
Check the Camera Pose
Gemini 2, D435i, Gemini 305, and Gemini 336 use the nominal CAD camera pose from their respective URDF files by default; no hand-eye calibration file is required. Gemini 2, D435i, and Gemini 336 use their corresponding V1 level models. D435i selects the optical frame according to the current color or infrared image. Gemini 305 uses the centered level mount model.
Before use, make sure the physical camera and mount match the selected URDF, then check the motion direction at low speed. Nominal CAD poses are not measured results. See the wrist model notes for details.
Check the Camera Preview
Start the web service from the project root:
python3 web/server.py
On the same computer, open http://127.0.0.1:8765. The service listens only on the local machine. The current web interface is in Chinese: select Real Robot Control (真机控制), select the connected camera, and click Open Camera (打开摄像头) to check the image before connecting the arm. The depth inset in Gemini previews helps check whether depth data is available; it is not a measurement or safety device.
For Computer Camera Simulation (电脑摄像头模拟), switch modes, click Enable Camera (开启摄像头), and allow browser access. This mode drives only the web model; it does not control the physical arm, estimate palm depth, or perform end-effector inverse kinematics.
To run Gemini 336 vision without connecting the arm:
.venv-arm/bin/python palm_follow_grasp.py --camera gemini336 --no-arm
If no image appears, check the camera connection, device permissions, SDK, and whether another program is using the camera. If the web model is missing, check that the repository's assets/ and web/lib/ resources are complete.
Start Real Robot Following
Check the equipment and workspace
Step 1
Close other programs using CAN and check the camera pose, joint zero positions, HOME, workspace, and hardware emergency stop. Make sure the paths from the current pose to HOME and back to zero are clear.
Select the camera and low-speed preset
Step 2
Select the camera on the web page. For the first run, use Low-Speed Validation (低速验证) and Keep Gripper Position (保持当前位置). The low-speed preset sets both follow and horizontal gains to 1.5 and limits end-effector speed to 0.10 m/s. These settings apply only to the current run and are not written to the configuration files.
Initialize the real robot
Step 3
Click Initialize Real Robot (初始化真机). The program takes over the camera, enables the arm, and moves it to HOME. Watch the actual motion; once HOME is reached, the arm waits for a start command.
Start palm following
Step 4
Press R, click Start Following (开始跟随), or hold an open palm for 3 seconds to start. Move your hand slowly to verify the actual motion direction and range. If Pinch Control (捏合控制) is selected, pinch your thumb and index finger to control the gripper while following is enabled.
Pause and exit
Step 5
Press Space to pause. Click Exit and Return to Zero (退出并回零), or press Q / Esc, to request that the program stop following, return to zero, and disable the motors. An exit request during initialization is processed after initialization finishes; use the hardware emergency stop in an emergency.
When the palm is lost briefly, the program may extrapolate for a limited time; after a longer loss it holds position. Motion may resume automatically when the hand is detected again. After a feedback or tabletop protection lock pauses the system, press R or click the resume control manually. The web model and gripper display may show commands or estimates and must not be used as safety evidence of actual position. See the web guide for operation and protection details.
Configuration and Troubleshooting
| Symptom | What to check |
|---|---|
| The camera preview works, but initialization fails | Check the selected camera model, URDF, CAN, HOME, joint zero positions, and the page's error message. |
| The following direction or position is wrong | Pause immediately and check the physical camera orientation, camera-to-arm transform, URDF, and joint zero positions. Do not mask the problem by increasing speed. |
| The hand or depth is not detected | Check lighting, whether the hand is in view, the depth image, and device connections; avoid occlusion. |
| The arm does not respond or a protection pauses it | Check whether another program is using CAN, the device feedback, and page messages. Do not bypass feedback protection. |
config/follow.yaml controls follow distance, gains, speed, and workspace parameters. When Gemini 336 is selected without a custom configuration, config/follow_gemini336.yaml is also applied. config/grasp.yaml maps the pinch gesture to the gripper. View the command-line options with:
.venv-arm/bin/python palm_follow_grasp.py --help
--no-arm is the vision-only option. --no-gripper and --no-follow still connect to the arm. Recheck the setup and validate at low speed after changing configuration or hardware.