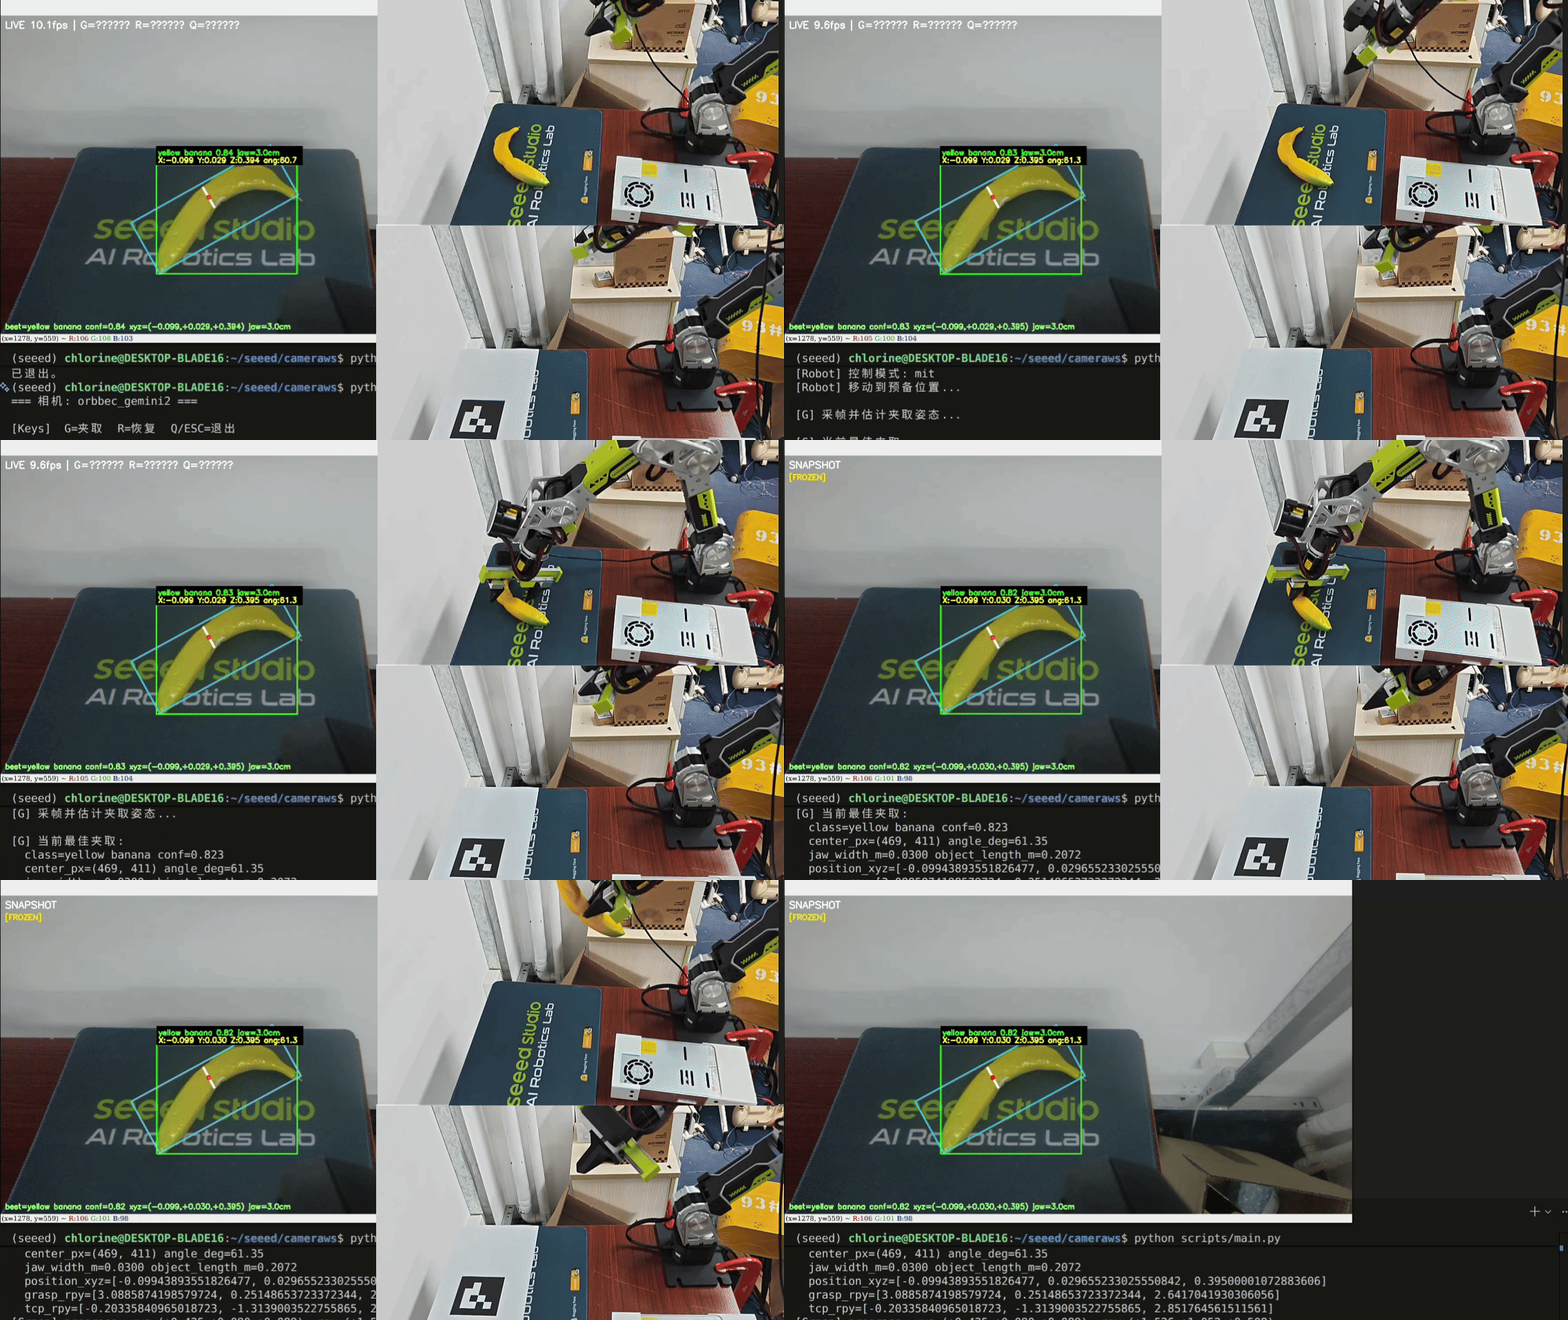
reBot Arm B601-RS Visual Grasping Demo
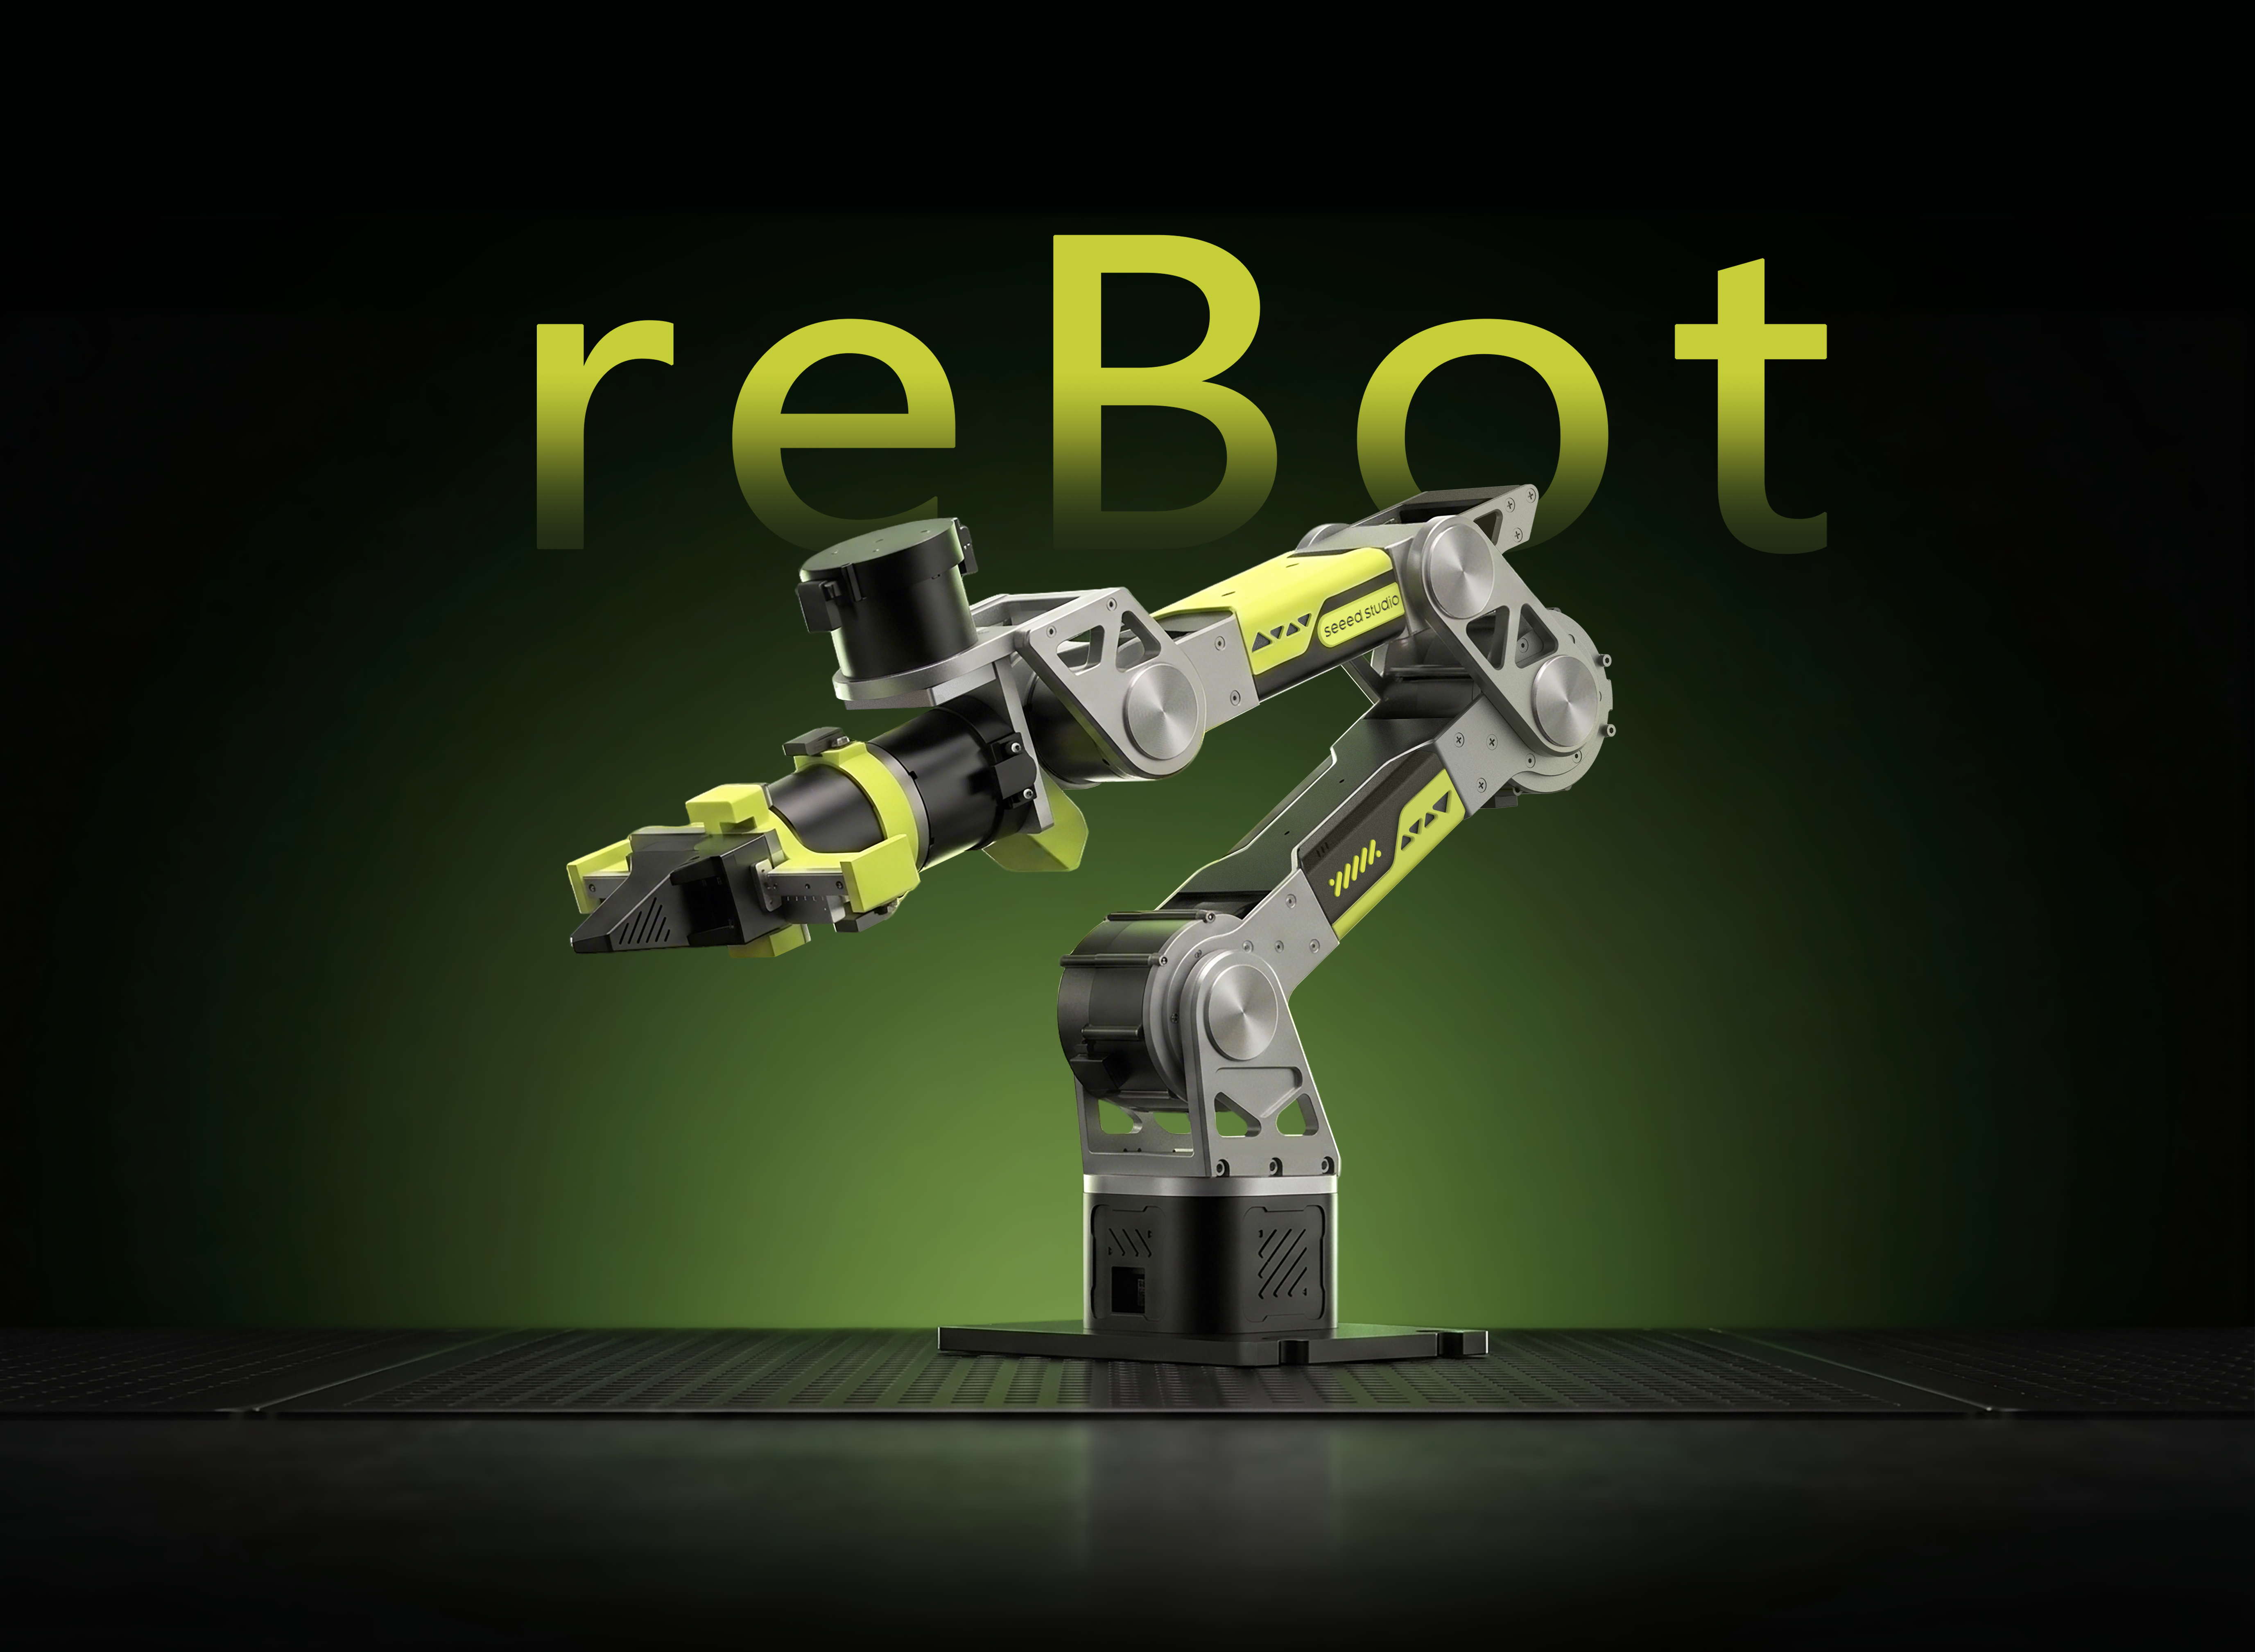




Depth Perception · Object Detection · Hand-Eye Calibration · Autonomous Grasping · Fully Open Source
How do the two grasping methods differ?
This page covers two visual grasping demos with different implementations. Compare their frameworks, calibration requirements, and startup flows, then choose a tutorial below.
Python SDK + YOLO / OBB
Use YOLO, an RGB-D depth camera, and the Python SDK for the complete workflow from environment setup and camera integration to hand-eye calibration and grasp debugging.
- Grasping logic
- Estimate grasp poses from detection boxes or OBB minimum-area rectangles; optionally use GraspNet for 6D pose estimation.
- Hand-eye calibration
- Complete Eye-in-Hand calibration with an ArUco marker before the first full grasping run.
- Startup
- Run Python scripts to verify detection, pose estimation, and robotic grasping step by step.
ROS 2 + YOLOE
Use ROS 2 and YOLOE to start the arm, Gemini 2 / D405 / D435i camera, and grasping nodes in separate terminals for picking and placing.
- Grasping logic
- The visual grasping node detects, grasps, and places objects. Text class names specify the grasp and place targets.
- Hand-eye calibration
- No calibration board is required; adjust offset parameters to compensate for small mounting and printed-part tolerances.
- Startup
- Start the arm, camera, and grasping node in separate terminals, then trigger picking and placing.
Choose a grasping method
Switch tabs to view the tutorial for your chosen method and follow its installation and running steps.
- Method 1 · Python SDK / OBB
- Method 2 · ROS 2 / YOLOE
Visual Grasping Method 1
This route uses Python SDK + RGB-D camera + YOLO / OBB without a ROS 2 workspace. The default route suits ordinary tabletop objects; enable the optional GraspNet module below when you need more complex 6D grasping.
1. Project Features
- Direct grasp pose estimation from YOLO + OBB The pipeline uses detection boxes or OBB minimum-area rectangles directly and takes the short axis as the gripper opening direction, avoiding complex 3D point-cloud processing.
- GraspNet-Baseline 6D grasp pose estimation (optional)
The project also supports GraspNet-Baseline (
graspnet/graspnet-baseline) for 6D grasp pose estimation from RGB-D point clouds, with YOLO bounding boxes used to select target candidates for more complex grasping experiments. - Robotic arm and gripper driver integration
The main grasping script is based on the robotic arm and end-pose controller from
reBotArm_control_py, with a lightweight grasp helper for gripper opening, force-controlled grasping, and TCP pose reading. - Open Source and Extensible All source code is open, and users can customize control algorithms and effects based on their own needs.
2. Specifications
The hardware for this tutorial is provided by Seeed Studio
| Parameter | Specification |
|---|---|
| Robot Arm Model | reBot Arm B601-RS |
| Degrees of Freedom | 6-DOF + Gripper |
| Camera Model | Orbbec Gemini 2 / RealSense D435i / D405 |
| Detection Method | YOLO + OBB Minimum-Area Rectangle |
| Communication Method | CAN Bus via USB2CAN adapter; USB 3.0 camera connection |
| Operating Voltage | 48V DC |
| Host Platform | Ubuntu 22.04+ PC |
| Recommended Python Version | Python 3.10 |
3. Bill of Materials (BOM)
| Component | Quantity | Included |
|---|---|---|
| reBot Arm B601-RS Robotic Arm | 1 | ✅ |
| Gripper | 1 | ✅ |
| USB2CAN Serial Bridge | 1 | ✅ |
| Power Adapter (48V) | 1 | ✅ |
| USB-C / Communication Cable | 1 | ✅ |
| RGB-D Depth Camera | 1 | ✅ |
| Camera Connector / Mounting Bracket | 1 | ✅ |
Wiring
- Connect the depth camera to the host via USB 3.0.
- Connect the USB2CAN adapter to the arm CAN bus.
- Make sure the 48V power supply, camera, and robotic arm are all connected securely.
- If you encounter permission issues, run:
sudo chmod a+rw /dev/bus/usb/*/*
sudo chmod 666 /dev/ttyUSB0
4. Environment Requirements
| Item | Requirement |
|---|---|
| Operating System | Ubuntu 22.04+ |
| Python | 3.10 |
5. Install the Basic Environment
Follow these steps in order. Steps 0–3 are required for the default route; choose the camera SDK in step 4 to match your hardware. GraspNet installation and running instructions are in the separate advanced module below.
Step 0. Complete the basic robotic arm preparation first
Before starting this tutorial, please finish the content in reBot Arm B601-RS Quick Start, including robotic arm assembly, zero-point initialization, motor ID configuration, and basic connectivity checks.
Step 1. Clone the repository
Prefer the official Seeed-Projects repository:
git clone https://github.com/Seeed-Projects/reBot-DevArm-Grasp.git rebot_grasp
cd rebot_grasp
Step 2. Create and configure the conda environment
conda env create -f environment.yml -n rebotarm
conda activate rebotarm
The terminal prompt shows rebotarm, indicating that this environment is active and subsequent dependencies will be installed into it.
If you want to use a different environment name, replace rebotarm in the command with your own name.
Step 3. Install the robotic arm SDK
git clone https://github.com/Seeed-Projects/reBotArm_control_py.git sdk/reBotArm_control_py
cd sdk/reBotArm_control_py
pip install -e .
cd ../..
If pip install -e . reports Multiple top-level packages discovered in a flat-layout, add explicit package discovery to pyproject.toml in reBotArm_control_py, then run pip install -e . again:
[tool.setuptools.packages.find]
include = ["reBotArm_control_py*"]
B601 DM and RS configurations are selected through the SDK configuration files. For B601-RS, confirm the following in sdk/reBotArm_control_py/config/rebotarm.yaml:
hardware_yaml: rebotarm_rs.yaml
The visual grasping programs read this SDK configuration and automatically select the matching arm control mode and gripper parameters.
Step 4. Install the depth camera SDK
This project supports RGB-D depth cameras such as Orbbec Gemini 2 and RealSense D435i / D405. Install the SDK that matches your camera; if your environment can already import the camera driver, you can skip this step.
Orbbec Gemini 2
The Orbbec Gemini 2 depth camera depends on pyorbbecsdk, the Python wrapper for Orbbec SDK v2. Prefer installing the prebuilt Python package first.
On Linux / Ubuntu, configure udev rules before using the camera for the first time, whichever installation method you choose. The rules allow ordinary users to access the USB device and are installed system-wide, so each machine only needs this setup once. Skip the corresponding commands if the rules are already configured.
- Option 1: Install from pip (recommended)
- Option 2: Get it from GitHub
pip install pyorbbecsdk2
Configure udev rules (Linux / Ubuntu)
pyorbbecsdk2 2.1.0 and later include an environment setup script. Keep your conda environment active and run the script from the installed package. It requests sudo permission and installs and reloads the udev rules automatically.
orbbec_sdk_dir="$(python -c 'import os, pyorbbecsdk; print(os.path.dirname(pyorbbecsdk.__file__))')"
python "$orbbec_sdk_dir/shared/setup_env.py"
If shared/setup_env.py cannot be found, run pip install --upgrade "pyorbbecsdk2>=2.1.0", then repeat the commands above. See the official Orbbec installation guide for details.
Keep the rebotarm environment active. Install the build dependencies, then compile the Python extension:
sudo apt-get update
sudo apt-get install -y cmake build-essential libusb-1.0-0-dev python3-dev

cd sdk
git clone https://github.com/orbbec/pyorbbecsdk.git
cd pyorbbecsdk
git checkout v2-main
python -m pip install pybind11
mkdir -p build
cd build
cmake .. -DCMAKE_BUILD_TYPE=Release \
  -DPython3_EXECUTABLE="$(python -c 'import sys; print(sys.executable)')" \
  -Dpybind11_DIR="$(python -m pybind11 --cmakedir)"
cmake --build . --parallel "$(nproc)"
cmake --install .
cd ..
Mainland China users can replace the GitHub clone command above with:
git clone https://gitee.com/orbbecdeveloper/pyorbbecsdk.git
After building, confirm that install/lib contains pyorbbecsdk*.so and the Orbbec shared libraries (under install/lib/pyorbbecsdk/ in newer versions), then install the Python package. See the official Orbbec source build guide for CMake and conda configuration.
pip install -e .
Configure udev rules (Linux / Ubuntu)
Run the following from the root of the cloned pyorbbecsdk repository. Newer versions use the environment setup script; older versions use install_udev_rules.sh:
if [ -f scripts/env_setup/setup_env.py ]; then
  python scripts/env_setup/setup_env.py
else
  sudo bash scripts/install_udev_rules.sh
  sudo udevadm control --reload-rules
  sudo udevadm trigger
fi
Return to the project root before continuing with verification and running steps:
cd ../..
If both installation methods fail, refer to the official Orbbec documentation below.
Verify installation
python -c "import pyorbbecsdk; print('pyorbbecsdk OK')"
RealSense D435i / D405
RealSense cameras depend on pyrealsense2. Usually you can install it directly with pip:
pip install pyrealsense2
python -c "import pyrealsense2; print('pyrealsense2 OK')"
If your system needs the full RealSense toolchain or udev rules, follow the official librealsense documentation.
The matching verification command prints pyorbbecsdk OK or pyrealsense2 OK without a ModuleNotFoundError.
SDK Resource Summary
| Resource | Link |
|---|---|
| Gemini 2 Product Page | https://www.orbbec.com.cn/index/Product/info.html?cate=38&id=51 |
| Development Resources | https://www.orbbec.com.cn/index/Download2025/info.html?cate=121&id=1 |
| Orbbec SDK v2 | https://github.com/orbbec/OrbbecSDK_v2 |
| SDK v2 API Documentation | https://orbbec.github.io/docs/OrbbecSDKv2_API_User_Guide/ |
| pyorbbecsdk | https://github.com/orbbec/pyorbbecsdk |
| pyorbbecsdk Documentation | https://orbbec.github.io/pyorbbecsdk/index.html |
| ROS2 Wrapper | https://github.com/orbbec/OrbbecSDK_ROS2/tree/v2-main |
| RealSense SDK | https://github.com/realsenseai/librealsense |
6. Directory Structure
rebot_grasp/
├── config/
│   ├── default.yaml              # Main configuration file
│   └── calibration/
│       └── <camera_type>/
│           ├── intrinsics.npz    # Camera intrinsics
│           └── hand_eye.npz      # Hand-eye calibration results
├── drivers/
│   ├── camera/
│   │   ├── base.py               # Camera abstract base class
│   │   ├── orbbec_gemini2.py     # Gemini 2 driver
│   │   └── realsense.py          # RealSense driver (alternative)
│   └── robot/
│       └── grasp_driver.py       # Lightweight grasp helper based on arm SDK
├── calibration/
│   ├── aruco_pose.py             # ArUco pose estimation
│   └── hand_eye.py               # Hand-eye calibration solver
├── utils/
│   ├── ordinary_grasp.py         # OBB grasp pose estimation and visualization
│   └── transforms.py             # Coordinate transformation utilities
├── scripts/
│   ├── main.py                   # Main grasping program
│   ├── set.py                    # Grasp and place program
│   ├── ordinary_grasp_pipeline.py
│   ├── object_detection.py
│   └── collect_handeye_eih.py
├── sdk/
│   ├── pyorbbecsdk/              # Orbbec SDK Python wrapper (source installation)
│   └── reBotArm_control_py/      # reBot Arm SDK
└── environment.yml               # Recommended conda environment file
7. Hand-Eye Calibration
Before running the full grasping pipeline, complete the Eye-in-Hand hand-eye calibration first.
Before running the calibration script, bring up and verify the CAN interface:
sudo ip link set can0 down 2>/dev/null
sudo ip link set can0 type can bitrate 1000000
sudo ip link set can0 up
ip -details link show can0
Before running it, make sure the following ArUco size parameter in config/default.yaml matches the actual printed marker:
calibration:
  aruco:
    marker_length_m: 0.1
After confirming the configuration, run automatic calibration:
python scripts/collect_handeye_eih.py
In automatic mode, the arm traverses 50 preset poses and records a sample whenever the ArUco marker is detected stably. Even if you interrupt the process with c or q, the script still tries to compute the calibration result from the collected samples.
If you want to move the robotic arm manually during collection, use manual mode:
python scripts/collect_handeye_eih.py --manual
In manual mode, the arm enters gravity-compensation mode. Move the end effector to a proper viewing angle, press Enter to capture, and press c or q to finish and compute the result.
If you find that the robotic arm's grasping accuracy cannot meet your requirements after calibration, you can set the X (front-back), Y (left-right), Z (up-down) parameters in config/default.yaml under calibration.hand_eye_compensation_m to provide positional compensation.
The calibration result is saved to:
config/calibration/<camera_type>/hand_eye.npz
Recommended sample count is at least 5 samples, with 15 or more recommended.
8. Running and Debugging
Verify the scenarios in this order: the first two do not connect to the robotic arm and help check the camera, detection, and grasp estimation. The next two connect to and control the robotic arm.
1. Verify object detection only
python scripts/object_detection.py
If you need to change the detection model or classes, modify config/default.yaml:
yolo:
  model_name: "yoloe-26l-seg.pt"
  device: "cpu"
  use_world: true
  custom_classes:
    - "yellow banana"
    - "water bottle"
    - "cup"
This step is useful to confirm:
- The camera opens correctly
- The YOLO model loads correctly
- YOLO object detection works as expected
2. Verify grasp estimation only
python scripts/ordinary_grasp_pipeline.py
If you need to adjust the grasp inference frequency or the pre-grasp retreat distance, modify:
grasp_pipeline:
  infer_every_live: 3
  grasp:
    depth_quantile: 0.5
    pregrasp_offset_m: 0.080
    insertion_depth_m: 0.015
    min_base_z_m: 0.00
This script does not connect to the robotic arm. It is only used to verify:
- Whether the OBB or minimum-area rectangle is reasonable
- Whether the grasp point lies near the target center area
- Whether the short-axis direction matches the expected gripper opening direction
Key controls:
- Left mouse button: inspect depth at the selected pixel
G: print the current best grasp poseQ/Esc: exit
3. Run the main grasping program
python scripts/main.py
To validate the target pose while skipping the grasp motion:
python scripts/main.py --dry-run
Verify the pose and workspace with --dry-run before executing a real grasp. In this mode, the current script still initializes the arm, moves to the ready pose, and performs cleanup and homing on exit. For vision-only verification, use the first two scripts, which do not connect to the arm.
Main program flow:
- Initialize the RGB-D camera and confirm the image stream is available.
- Enable the robotic arm and gripper.
- Move to the ready pose. If you want to change the startup ready pose, modify
config/default.yaml:
robot:
  ready_pose:
    x: 0.3
    y: 0.0
    z: 0.3
    roll: 0.0
    pitch: 0.7
    duration: 3.0
- Detect tabletop targets in real time.
- Estimate the grasp pose from the short axis.
- Press
Gto capture the current frame and execute grasping.
Runtime keys:
G: grasp the current best targetR: resume live previewQ/Esc: exit
4. scripts/set.py — Grasp and Place Program
Function: Grasp the banana and place it in the box.
python scripts/set.py
Completed flow:
- Camera and arm initialization, move to ready position
- Real-time camera preview + YOLO object detection and instance segmentation
- Press
Gto freeze frame, compute arm target pose via hand-eye transformation - Arm moves to grasp banana and lift
- Arm places banana in the box and returns to initial pose
- Press
Qto exit system, arm returns to zero position
9. GraspNet Advanced Module (Optional)
The default Python SDK / OBB route does not require GraspNet. Follow these steps only when you need 6D grasp pose estimation from RGB-D point clouds.
Step 1. Install GraspNet and CUDA operators
You do not need GraspNet for scripts/main.py or scripts/ordinary_grasp_pipeline.py. Configure it only when you want to run scripts/graspnet_camera_demo.py or scripts/grasp.py, which require GraspNet, CUDA-enabled PyTorch, the PointNet2/knn CUDA operators, and a pretrained checkpoint.
The GraspNet pointnet2 / knn extensions require a CUDA compiler. Before starting, make sure the active environment can find nvcc, and check that the CUDA version reported by nvcc matches the CUDA version used to build PyTorch:
nvcc --version
python -c "import torch; print(torch.__version__, torch.version.cuda)"
If nvcc is missing, or if the CUDA version reported by nvcc does not match torch.version.cuda, install a CUDA compiler that matches your current PyTorch CUDA version. For example, if PyTorch reports 13.0:
conda install -c nvidia cuda-nvcc=13.0
You can also install a PyTorch build that matches your current nvcc version instead. The two versions must match, otherwise building pointnet2 / knn will fail with The detected CUDA version (...) mismatches the version that was used to compile PyTorch (...).
cd sdk
git clone https://github.com/graspnet/graspnet-baseline.git
cd graspnet-baseline

# Install PyTorch for your CUDA version first, then install GraspNet runtime dependencies
pip install open3d tensorboard Pillow tqdm

# Configure CUDA build paths before building the local operators.
export CUDA_HOME=$CONDA_PREFIX
export TORCH_CUDA_ARCH_LIST="12.0"
export CPATH=$CONDA_PREFIX/lib/python3.10/site-packages/nvidia/cu13/include:$CPATH
export CPLUS_INCLUDE_PATH=$CONDA_PREFIX/lib/python3.10/site-packages/nvidia/cu13/include:$CPLUS_INCLUDE_PATH
export LD_LIBRARY_PATH=$CONDA_PREFIX/lib/python3.10/site-packages/nvidia/cu13/lib:$CONDA_PREFIX/lib:$LD_LIBRARY_PATH

# Build CUDA operators
cd pointnet2
pip install . --no-build-isolation
cd ../knn
pip install . --no-build-isolation
cd ..

# Install GraspNet API
git clone https://github.com/graspnet/graspnetAPI.git
cd graspnetAPI
sed -i "s/'sklearn'/'scikit-learn'/" setup.py
pip install .
cd ../../..
Note: If you follow the official graspnet-baseline repository documentation and use python setup.py install, CUDA / PyTorch related errors may occur. We recommend using pip install . --no-build-isolation so the extension is built against the PyTorch and CUDA configuration already installed in the active conda environment.
If building fails with fatal error: cusparse.h: No such file or directory, run find $CONDA_PREFIX -name cusparse.h and make sure the directory that contains cusparse.h is included in CPATH / CPLUS_INCLUDE_PATH. If you installed CUDA headers from conda cuda-toolkit, the include path is usually $CONDA_PREFIX/targets/x86_64-linux/include instead of the pip nvidia/cu13/include path shown above.
In addition, older GraspNet API dependencies may still use the deprecated sklearn package name. The sed command replaces it with the currently recommended scikit-learn package name to avoid The 'sklearn' PyPI package is deprecated during installation. Unless you also upgrade the older GraspNet API dependencies, keep its numpy==1.23.4 constraint because transforms3d==0.3.1 still uses old NumPy aliases such as np.float.
Configure Pretrained Model
Download the official GraspNet pretrained weights from the graspnet-baseline official repository Google, Baidu, then place checkpoint-rs.tar at:
sdk/graspnet-baseline/checkpoints/checkpoint-rs.tar
Then verify in config/default.yaml:
graspnet:
  checkpoint: "checkpoint-rs.tar"
The checkpoint field supports three forms: a file name is resolved under sdk/graspnet-baseline/checkpoints/; a relative path is resolved from the project root; an absolute path is used directly.
Step 2. Run the GraspNet camera estimation demo
python scripts/graspnet_camera_demo.py
This script runs GraspNet 6D grasp pose estimation with only the RGB-D camera, without connecting to the robotic arm. It keeps a live camera preview, uses YOLO bounding boxes to select the target area, and filters feasible GraspNet full-scene candidates by the target bbox.
Key controls:
G/Space: run GraspNet inference on the current frameR: resume live previewQ/Esc: exit
After inference, Open3D can visualize the point cloud and grasp candidates.
Step 3. Run the GraspNet robotic grasping program
python scripts/grasp.py
python scripts/grasp.py --dry-run
python scripts/grasp.py --target-class "light blue coffee cup"
This script connects the GraspNet estimate to the robotic arm execution flow. YOLO selects the target, GraspNet outputs a 6D grasp pose, hand-eye calibration transforms it into the robot base frame, and the script checks IK reachability before running the pre-grasp, grasp, and retreat motion sequence.
Running python scripts/grasp.py starts the full GraspNet robotic grasping flow and controls the robotic arm. --dry-run prints the target pose and candidate filtering result and skips the grasp motion; the current script still initializes the arm, moves to the ready pose, and performs cleanup and homing on exit. --target-class "light blue coffee cup" specifies the YOLO target class and only filters and grasps GraspNet candidates for that class.
10. FAQ
1. ModuleNotFoundError: No module named 'motorbridge'
This usually means the robotic arm SDK dependencies are not installed in the current Python environment. Please check:
conda activate rebotarm
conda env update -n rebotarm -f environment.yml
cd sdk/reBotArm_control_py && pip install -e .
2. Pressing G does not execute grasping
Common causes:
hand_eye.npzdoes not exist- The hand-eye calibration mode is not
eye_in_hand - The target pose is not reachable by IK
It is recommended to run:
python scripts/main.py --dry-run
3. The grasp depth is unstable
You can try adjusting:
grasp_pipeline.grasp.depth_quantile- The installation height of the camera relative to the workspace
- Reflective properties of the target surface
4. GraspNet reports that pointnet2_utils cannot be imported from pointnet2
This usually means the local CUDA extension under sdk/graspnet-baseline/pointnet2 was not built in the active conda environment, or Python is resolving a different pointnet2 package. Make sure the project environment is active, then rebuild both pointnet2 and knn in that same environment:
conda activate rebotarm
cd sdk/graspnet-baseline/pointnet2
pip install . --no-build-isolation

cd ../knn
pip install . --no-build-isolation
Verify:
python -c "from pointnet2 import pointnet2_utils; print('Submodule import works')"
5. CUDA architecture compatibility issues on newer GPUs when running GraspNet
If you see no kernel image is available for execution on the device, or PyTorch reports that the current GPU CUDA capability is unsupported, the installed PyTorch wheel likely does not include CUDA kernels for that GPU architecture. Install a PyTorch build that supports your current CUDA/GPU architecture, then rebuild the GraspNet local CUDA extensions.
python -c "import torch; print(torch.__version__, torch.version.cuda, torch.cuda.get_device_name(0))"

cd sdk/graspnet-baseline/pointnet2
pip install . --no-build-isolation

cd ../knn
pip install . --no-build-isolation
If you need to specify the build architecture manually, set TORCH_CUDA_ARCH_LIST before rebuilding. Choose the value according to your GPU architecture and PyTorch/CUDA version.
6. GraspNet inference reports RuntimeError: CPU not supported
The sampling operators in pointnet2 only support CUDA tensors. Confirm that CUDA is available, the GraspNet network and input point cloud are on GPU, and pointnet2 / knn were built against the PyTorch version in the active environment.
python -c "import torch; print(torch.cuda.is_available())"
If the output is False, fix the CUDA / PyTorch installation first. If it is True but the error remains, rebuild pointnet2 and knn.
Visual Grasping Method 2
1. Project Overview
This solution uses ROS2 and YOLO on the reBot Arm B601-RS for object detection, grasping, and placing. The system starts the arm, depth camera, and grasp nodes in separate terminals.
The depth camera currently supports Orbbec Gemini 2 and RealSense D405 / D435i. This workflow does not require a calibration board for hand-eye calibration. Because of mounting and printed-part tolerances, each arm may show a small grasping offset.
2. Environment Setup
Step 1. Install the robotic arm ROS2 workspace
First complete the installation and build of the rebotarm_ros2 workspace by following reBot Arm B601-RS ROS2 Integration.
Step 2. Install the camera
Choose one of the camera setups below and expand the matching section. Clone the Orbbec ROS2 SDK into the workspace and switch to the Build the workspace: Install udev rules: If a proxy is enabled, disable it before configuring again:Click to expand Gemini 2 setup
v2-main branch:cd ~/rebotarm_ros2/src
git clone https://github.com/xiehuangbao888/OrbbecSDK_ROS2.git
cd OrbbecSDK_ROS2
git checkout v2-maincd ~/rebotarm_ros2
colcon build --event-handlers console_direct+ --cmake-args -DCMAKE_BUILD_TYPE=Releasecd ~/rebotarm_ros2/src/OrbbecSDK_ROS2/orbbec_camera/scripts
sudo bash install_udev_rules.sh
sudo udevadm control --reload-rules && sudo udevadm triggerClick to expand D405 / D435i setup steps
v2.58.1:cd ~
git clone https://github.com/realsenseai/librealsense.git
cd librealsense
git checkout v2.58.1
sudo apt install -y v4l-utils
cd ~/librealsense
./scripts/setup_udev_rules.sh
unset http_proxy https_proxy HTTP_PROXY HTTPS_PROXY all_proxy ALL_PROXYcd ~/librealsense
mkdir -p build && cd build
cmake .. -DCMAKE_BUILD_TYPE=Release
make -j$(nproc)
sudo make install
sudo ldconfig
cd ~/rebotarm_ros2/src
git clone https://github.com/xiehuangbao888/realsense-ros.git
cd ~/rebotarm_ros2
colcon build --cmake-args -DUSE_LIFECYCLE_NODE=OFF
Step 3. Import the visual grasping package
cd ~/rebotarm_ros2/src/
git clone https://github.com/xiehuangbao888/rebot_visual_grasp.git
cd ~/rebotarm_ros2
colcon build --symlink-install
Step 4. Install the YOLO / YOLOE environment
grasp_yolo calls Ultralytics YOLOE from Python. Use a dedicated conda environment and do not use system /usr/bin/python3.
Create the environment
conda create -n yolo python=3.10
conda activate yolo

pip install -U ultralytics
pip install "numpy==1.26.4" transforms3d

# YOLOE open-vocabulary classes require the Ultralytics CLIP package, not the PyPI clip package
pip install git+https://github.com/ultralytics/CLIP.git
If you have an NVIDIA GPU, first confirm that CUDA is available. If the output is False, install a matching CUDA / PyTorch build. You can also continue on CPU, but the detection frame rate will be lower:
python -c "import torch; print(torch.cuda.is_available())"
Verify YOLOE:
python -c "from ultralytics import YOLOE; print('YOLOE OK')"
Download weights to ~/rebot_visual_model
mkdir -p ~/rebot_visual_model && cd ~/rebot_visual_model

# MobileCLIP (required by YOLOE set_classes, about 242MB)
wget -c https://github.com/ultralytics/assets/releases/download/v8.4.0/mobileclip2_b.ts

# YOLOE segmentation weights can also download on first run; placing them here is recommended
wget -c https://github.com/ultralytics/assets/releases/download/v8.4.0/yoloe-26s-seg.pt
Step 5. Build the workspace
cd ~/rebotarm_ros2
source /opt/ros/humble/setup.bash
colcon build --symlink-install
source ~/rebotarm_ros2/install/setup.bash
The visual grasping environment is now ready. In every new terminal, source the following before running visual grasping commands:
source /opt/ros/humble/setup.bash
source ~/rebotarm_ros2/install/setup.bash
3. Run the Project
Before starting, confirm that the arm is powered on, the CAN interface is can0, and Gemini 2, D405, or D435i is connected over USB. Then bring up CAN:
sudo ip link set can0 down 2>/dev/null
sudo ip link set can0 type can bitrate 1000000
sudo ip link set can0 up
Start the stack in separate terminals so the grasping logic is easier to follow. Gemini 2, D405, and D435i use different launch commands; pick the ones for your camera. If you want a one-click launch, you can write your own startup script.
Terminal A — Start the arm + RViz
Click to expand Gemini 2
source /opt/ros/humble/setup.bash
source ~/rebotarm_ros2/install/setup.bash

ros2 launch rebot_visual_grasp bringup_with_camera.launch.py model:=rs channel:=can0 use_rviz:=true
Click to expand D405
source /opt/ros/humble/setup.bash
source ~/rebotarm_ros2/install/setup.bash

ros2 launch rebot_visual_grasp bringup_with_d405.launch.py model:=rs channel:=can0 use_rviz:=true
Click to expand D435i
source /opt/ros/humble/setup.bash
source ~/rebotarm_ros2/install/setup.bash

ros2 launch rebot_visual_grasp bringup_with_d435i.launch.py model:=rs channel:=can0 use_rviz:=true
Terminal B — Start the camera
Click to expand Gemini 2
source /opt/ros/humble/setup.bash

ros2 launch orbbec_camera gemini2.launch.py
Click to expand D405
source /opt/ros/humble/setup.bash
source ~/rebotarm_ros2/install/setup.bash

ros2 launch realsense2_camera rs_launch.py \
  align_depth.enable:=true \
  depth_module.depth_profile:=640x360x30 \
  depth_module.color_profile:=640x360x30
Click to expand D435i
source /opt/ros/humble/setup.bash
source ~/rebotarm_ros2/install/setup.bash

ros2 launch realsense2_camera rs_launch.py \
  align_depth.enable:=true \
  depth_module.depth_profile:=640x360x30 \
  depth_module.color_profile:=640x360x30
Terminal C — Move to the observation pose + YOLO detection
Activate your conda environment first with Change the Python path to the YOLO environment you created. Change the Python path to the YOLO environment you created. Change the Python path to the YOLO environment you created.conda activate yolo. If the environment name is not yolo, replace it with your actual conda environment name.Click to expand Gemini 2
source /opt/ros/humble/setup.bash
source ~/rebotarm_ros2/install/setup.bash

~/miniconda3/envs/yolov8/bin/python -m rebot_visual_grasp.grasp_yolo --ros-args \
  -p yolo_model:=~/rebot_visual_model/yoloe-26s-seg.pt \
  -p target_class:="cube" \
  -p place_class:="box" \
  -p yolo_device:=gpu \
  -p grasp_z_offset_m:=0.01 \
  -p place_z_offset_m:=0.1 \
  -p grasp_x_offset_m:=-0.02 \
  -p grasp_y_offset_m:=0.002 \
  -p move_to_observation_on_start:=true \
  -p auto_publish_on_detect:=true
Click to expand D405
source /opt/ros/humble/setup.bash
source ~/rebotarm_ros2/install/setup.bash

~/miniconda3/envs/yolov8/bin/python -m rebot_visual_grasp.grasp_yolo --ros-args \
-p yolo_model:=/home/ubuntu/rebot_visual_model/yoloe-26s-seg.pt \
-p color_topic:=/camera/camera/color/image_raw \
-p depth_topic:=/camera/camera/aligned_depth_to_color/image_raw \
-p color_info_topic:=/camera/camera/color/camera_info \
-p optical_frame:=camera_color_optical_frame \
-p target_class:=cube \
-p place_class:=box \
-p yolo_device:=gpu \
-p grasp_z_offset_m:=0.01 \
-p grasp_y_offset_m:=-0.005 \
-p place_z_offset_m:=0.1 \
-p grasp_x_offset_m:=-0.01 \
-p move_to_observation_on_start:=true \
-p auto_publish_on_detect:=true
Click to expand D435i
source /opt/ros/humble/setup.bash
source ~/rebotarm_ros2/install/setup.bash

~/miniconda3/envs/yolov8/bin/python -m rebot_visual_grasp.grasp_yolo --ros-args \
  -p yolo_model:=~/rebot_visual_model/yoloe-26s-seg.pt \
  -p color_topic:=/camera/camera/color/image_raw \
  -p depth_topic:=/camera/camera/aligned_depth_to_color/image_raw \
  -p color_info_topic:=/camera/camera/color/camera_info \
  -p optical_frame:=camera_color_optical_frame \
  -p target_class:="cube" \
  -p place_class:="box" \
  -p yolo_device:=gpu \
  -p grasp_z_offset_m:=0.01 \
  -p place_z_offset_m:=0.1 \
  -p grasp_y_offset_m:=0.01 \
  -p grasp_x_offset_m:=-0.04 \
  -p move_to_observation_on_start:=true \
  -p auto_publish_on_detect:=true
| Parameter | Description |
|---|---|
yolo_device:=gpu | Use the GPU; set cpu if you do not have a discrete GPU. You can also use yolo_device:=0 for GPU 0 |
target_class | YOLOE text class name of the object to grasp; change it to match the real object. Supports the default YOLO classes |
place_class | YOLOE text class name of the place target; change it to match the real object. Supports the default YOLO classes |
grasp_x_offset_m | Forward/back offset in base_link; a negative value pulls the pose backward |
grasp_y_offset_m | Left/right grasp offset. 0.01 shifts 1 cm to the left; a negative value shifts to the right |
grasp_z_offset_m | Grasp height fine-tune. The default is for the flexible gripper, which is longer than the standard gripper |
place_z_offset_m | Extra lift used when placing, to control how high the object is released above the place point |
Terminal D — One-click grasp and place
The default trigger delay is 3 seconds.
source /opt/ros/humble/setup.bash
source ~/rebotarm_ros2/install/setup.bash

ros2 launch rebot_visual_grasp grasp_go.launch.py
To change the delay, append a parameter. For example, trigger after 5 seconds:
ros2 launch rebot_visual_grasp grasp_go.launch.py trigger_delay_s:=5.0
Terminal E — Return to home (optional)
On the newer rebotarm build, pressing Ctrl + C in the terminal returns the arm to home automatically. To home it manually:
source /opt/ros/humble/setup.bash
source ~/rebotarm_ros2/install/setup.bash
ros2 service call /rebotarm/safe_home std_srvs/srv/Trigger {}
Contact
- Technical support: Submit an Issue
- Project page: GitHub
- Forum: Seeed Studio Forum
References
- reBot Arm B601-RS Quick Start
- reBot Arm B601-RS ROS2 Integration
- rebot_visual_grasp
- OrbbecSDK_ROS2
- Orbbec Gemini 2 Product Page
- Orbbec Development Resources
- Orbbec SDK v2
- Orbbec SDK v2 API Guide
- pyorbbecsdk Repository
- pyorbbecsdk Documentation
- Orbbec ROS2 Wrapper
- realsense-ros
- RealSense SDK
- graspnet/graspnet-baseline
- Graspnet(Anygrasp) Docs