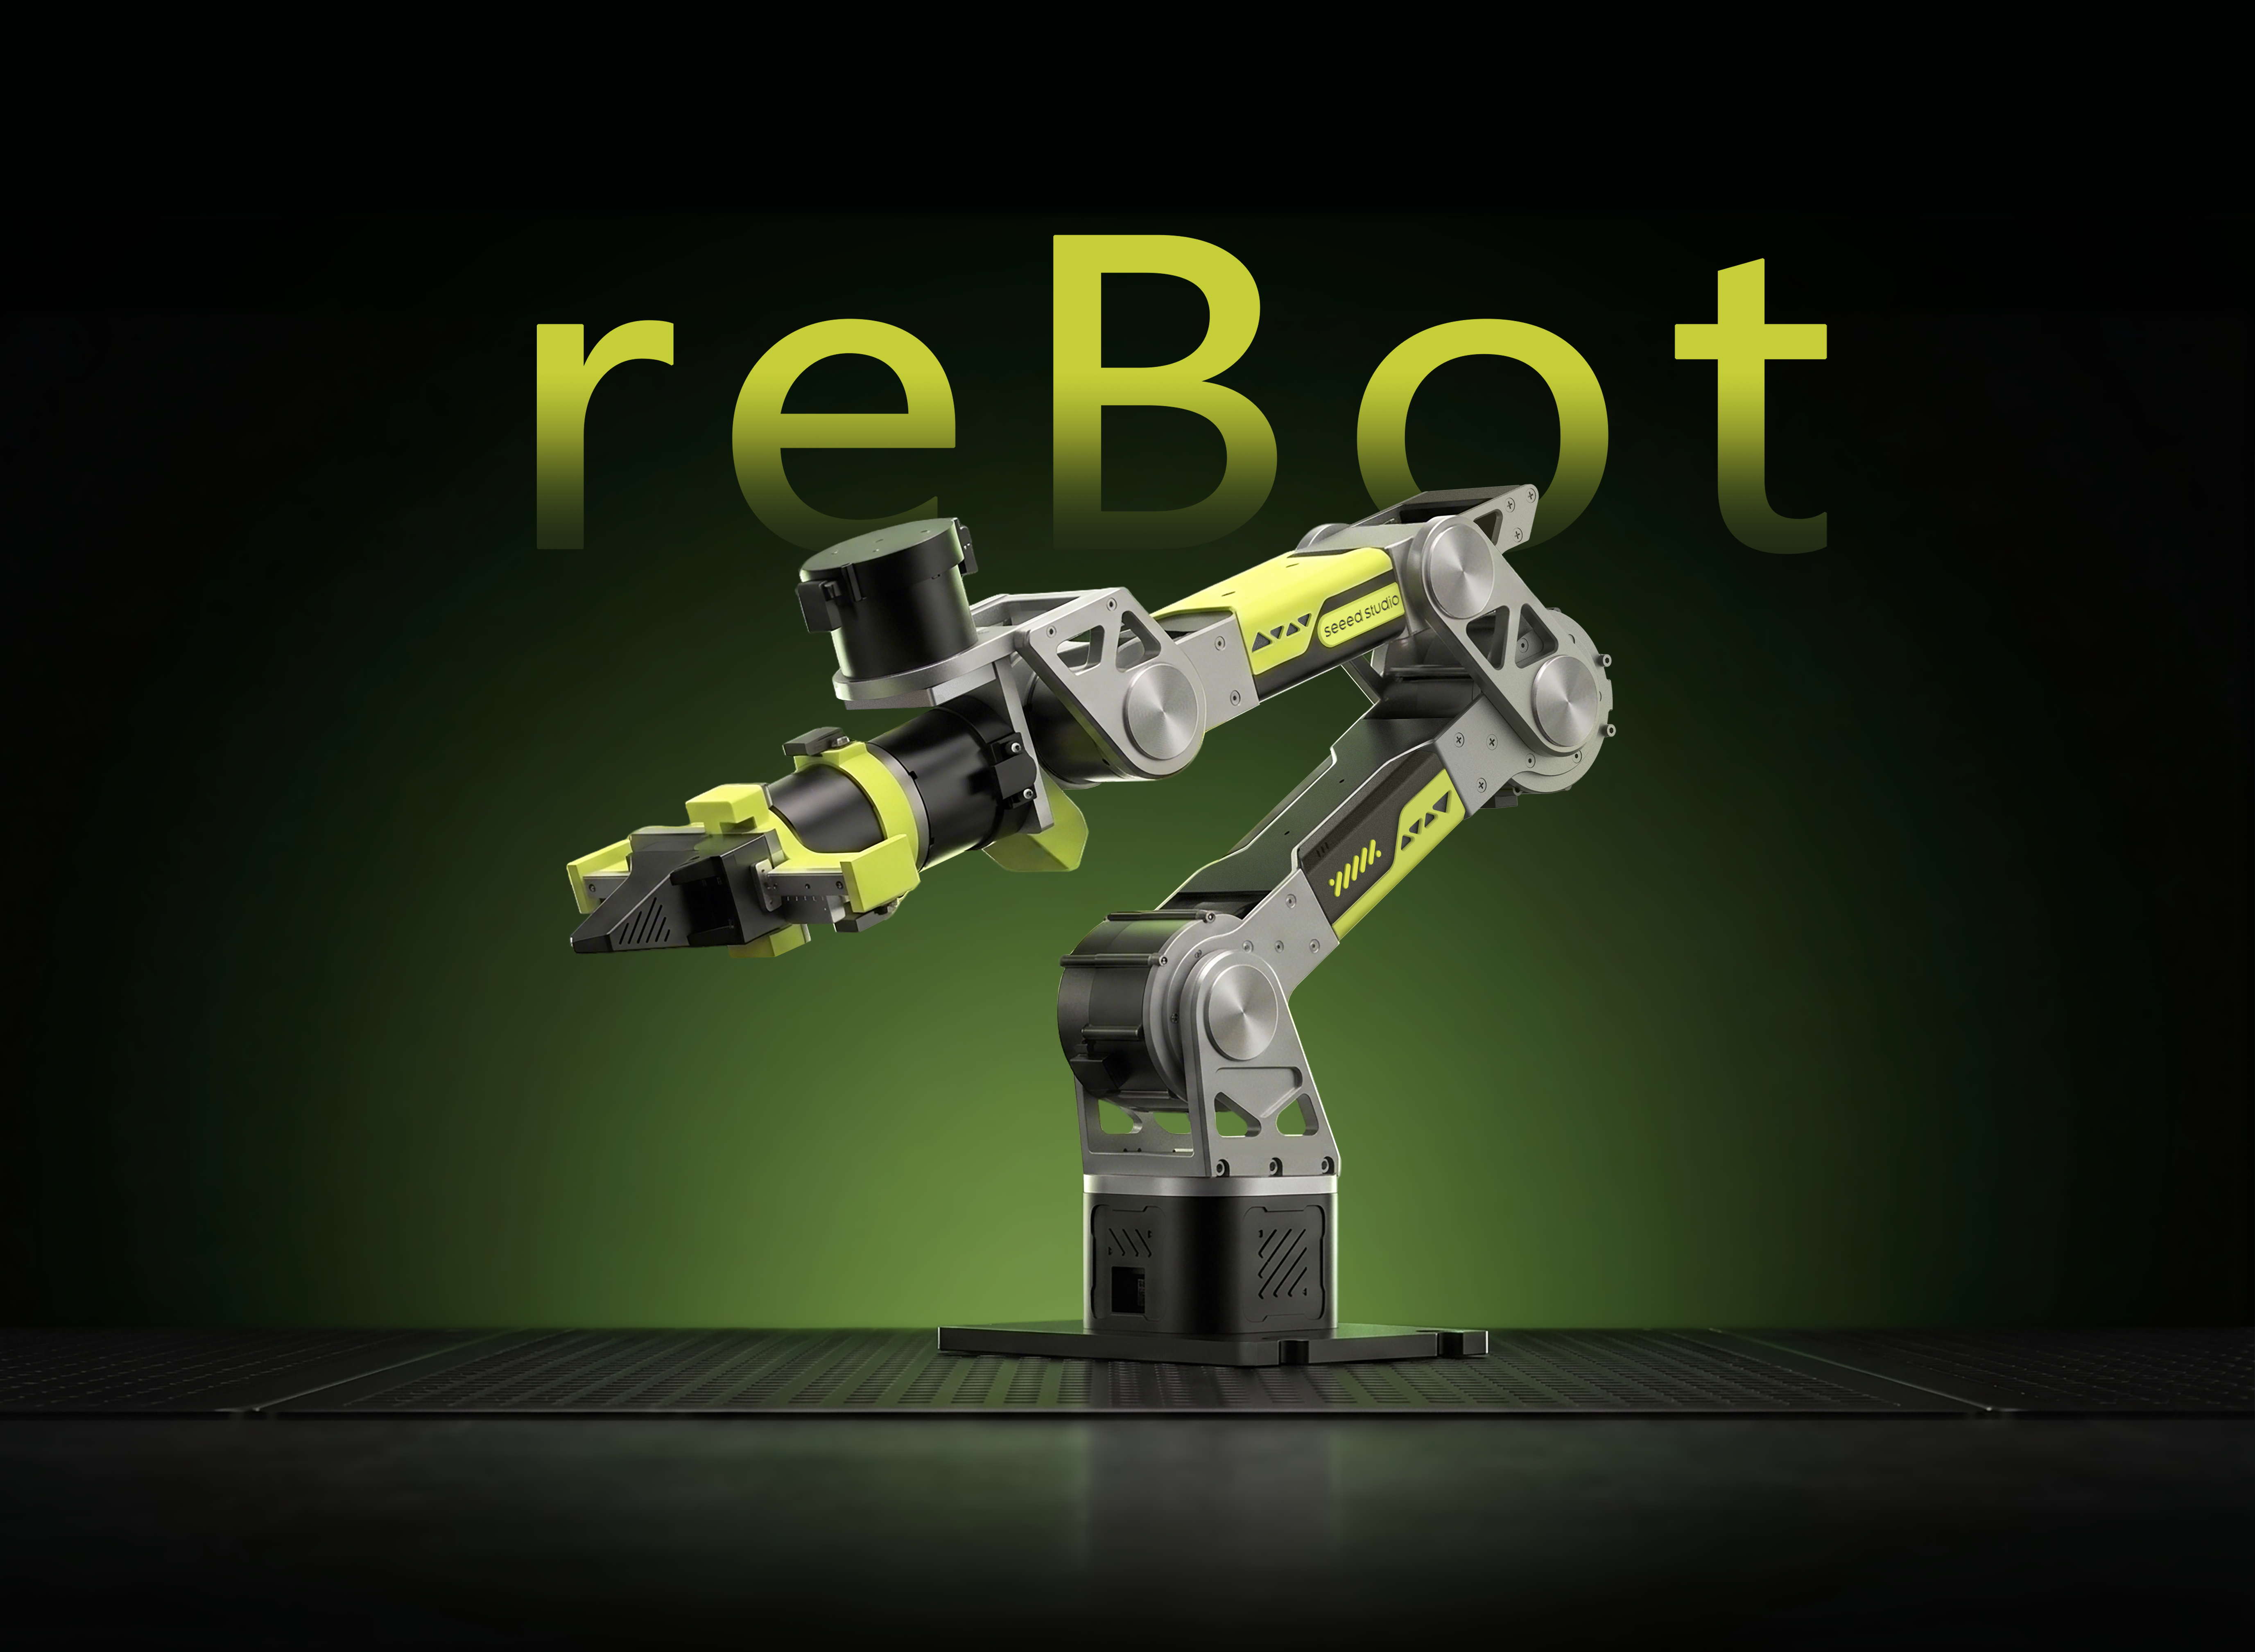
reBot Arm B601-RS ROS2 Integration Guide
![]()
![]()
![]()
![]()
![]()
ROS2 Control · SocketCAN · RViz Visualization · MoveIt 2 Support · Gravity Compensation
This tutorial shows how to control the reBot Arm B601-RS through the ROS2 workspace rebotarm_ros2. The workspace wraps the reBotArm_control_py Python SDK, including Pinocchio-based inverse kinematics, trajectory planning, and gravity compensation, into ROS2 topics, services, and actions. This makes it easier to use upper-level planning, RViz visualization, gravity compensation, gripper control, and custom application development.
This tutorial uses Ubuntu 24.04 + ROS2 Jazzy as the main reference environment. ROS2 Humble / Ubuntu 22.04 can follow the same workflow.
Project Features
-
Standard ROS2 Interfaces
Provides common interfaces such as/rebotarm/joint_states,/rebotarm/arm_status,FollowJointTrajectory,GripperCommand, andMoveToPose. -
Ready-to-use Kinematics, Trajectory Planning, and Gravity Compensation Nodes
Provides out-of-the-box forward/inverse kinematics, trajectory planning, gravity compensation, and RViz visualization support. -
MoveIt 2 Integration
Includes MoveIt 2 configuration and application demos, supporting simulated planning through the RViz MotionPlanning plugin and real hardware execution through the hardware control node.
Specifications
The hardware for this tutorial is provided by Seeed Studio.
| Parameter | Specification |
|---|---|
| Robot Arm Model | reBot Arm B601-RS |
| Degrees of Freedom | 6-DOF + Gripper |
| Communication | CAN |
| Default CAN Channel | can0 |
| Default Arm Control Mode | mit |
| Recommended System | Ubuntu 24.04 + ROS2 Jazzy + Python 3.12 |
| Reference System | Ubuntu 22.04 + ROS2 Humble + Python 3.10 |
Bill of Materials (BOM)
| Component | Quantity | Included |
|---|---|---|
| reBot Arm B601-RS Robotic Arm | 1 | ✅ |
| Gripper | 1 | ✅ |
| CAN Adapter | 1 | ✅ |
| Power Adapter | 1 | ✅ |
| Communication Cable | 1 | ✅ |
| Ubuntu Host PC | 1 | Self-prepared |
Wiring
- Connect the CAN adapter to the robot arm CAN bus.
- Connect the gripper motor to the same CAN bus.
- Power on the robot arm and connect the CAN adapter to the host.
- Confirm that the host recognizes the CAN interface:
ip -br link
Bring up the CAN interface:
sudo ip link set can0 down 2>/dev/null
sudo ip link set can0 type can bitrate 1000000 restart-ms 100
sudo ip link set can0 up
ip -details link show can0
Environment Requirements
| Item | Recommended Requirement |
|---|---|
| Operating System | Ubuntu 24.04, Ubuntu 22.04 can be used as reference |
| ROS2 | Jazzy, Humble can be used as reference |
| Python | System Python. Jazzy usually uses 3.12, while Humble usually uses 3.10 |
Installation Steps
Step 0. Complete Basic Robot Arm Preparation
Before starting the ROS2 integration, please complete the reBot Arm B601-RS Quick Start, including assembly, motor ID configuration, zero-position initialization, and other basic preparation.
Step 1. Install the ROS2 Version for Your Ubuntu System
Please refer to the Seeed Studio Wiki ROS2 installation guide or the official ROS2 documentation:
- ROS2 Jazzy Ubuntu Installation
- ROS2 Humble Ubuntu Installation
- Seeed Studio Wiki ROS2 Humble Installation
Step 2. Install Build Tools and ROS Dependencies
Install colcon, pip, Git, and the ROS packages required by this workspace. The following commands use the ROS_DISTRO value in the current terminal:
sudo apt update
sudo apt install -y python3-colcon-common-extensions python3-pip git
sudo apt install -y \
  ros-${ROS_DISTRO}-control-msgs \
  ros-${ROS_DISTRO}-trajectory-msgs \
  ros-${ROS_DISTRO}-tf-transformations \
  ros-${ROS_DISTRO}-robot-state-publisher \
  ros-${ROS_DISTRO}-rviz2 \
  ros-${ROS_DISTRO}-pinocchio
Verify after installation:
source /opt/ros/${ROS_DISTRO}/setup.bash
python3 -c "import pinocchio; print('pinocchio', pinocchio.__version__)"
Step 3. Clone the Code Repository
Prefer the official Seeed-Projects repository:
git clone https://github.com/Seeed-Projects/reBotArmController_ROS2.git rebotarm_ros2
cd rebotarm_ros2
You can also use the current development repository:
git clone https://github.com/EclipseaHime017/reBotArmController_ROS2.git rebotarm_ros2
cd rebotarm_ros2
Step 4. Install motorbridge
Install motorbridge from the official PyPI source:
python3 -m pip install --user --break-system-packages --index-url https://pypi.org/simple motorbridge
If you use Ubuntu 22.04 / ROS2 Humble, you can usually remove --break-system-packages:
python3 -m pip install --user --index-url https://pypi.org/simple motorbridge
Step 5. Get the Low-level SDK
mkdir -p third_party
git clone https://github.com/vectorBH6/reBotArm_control_py.git third_party/reBotArm_control_py
Step 6. Build the Workspace
source /opt/ros/${ROS_DISTRO}/setup.bash
colcon build --symlink-install
source install/setup.bash
Verify the executable entries:
ros2 pkg executables rebotarmcontroller
Expected entries include at least:
rebotarmcontroller reBotArmController
rebotarmcontroller GravityCompensation
rebotarmcontroller GripperControl
rebotarmcontroller MoveTo
rebotarmcontroller MoveToPose
Quick Start
Before using the robot arm, note the following: The robot arm controller has a high degree of freedom. Before enabling the controller or powering the arm, make sure the workspace is clear of people and obstacles. Review every motion command carefully to avoid accidents. Dangerous operation is strictly prohibited; you are responsible for any consequences.
Start the Full System
First confirm that the CAN interface is up:
ip -details link show can0
The full bringup starts:
reBotArmControllercontrol noderobot_state_publisher- Optional RViz
cd your/path/to/rebotarm_ros2
source install/setup.bash
ros2 launch rebotarm_bringup bringup.launch.py model:=rs channel:=can0
If you only use B601-RS for a long time, you can manually change default_model in src/rebotarm_bringup/config/rebotarm_hardware.yaml to rs. After that, you can omit model:=rs and only keep the actual CAN channel parameter:
ros2 launch rebotarm_bringup bringup.launch.py channel:=can0
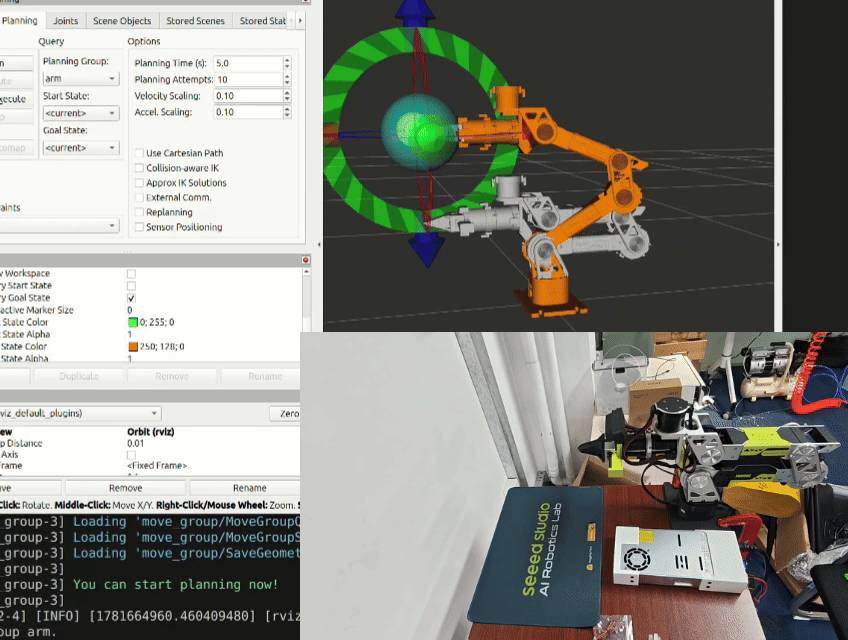
Start RViz Visualization
ros2 launch rebotarm_bringup bringup.launch.py model:=rs channel:=can0 use_rviz:=true
If the model appears too small in RViz, adjust the view from the Views panel on the left:
- Set
Target Frametobase_link - Change the view type to
Move Camera - Adjust
Distance, for example to1.0or1.5 - Confirm that
Fixed Frameis set tobase_link
Start Only the Control Node
If URDF and RViz are not needed:
ros2 launch rebotarm_bringup driver.launch.py model:=rs channel:=can0
Use ros launch to start the node, because the launch file passes the hardware configuration from rebotarm_bringup/config.
ROS2 Namespace
The default namespace is:
/rebotarm
Therefore, all topics, services, and actions are prefixed with /rebotarm, for example:
/rebotarm/joint_states
/rebotarm/enable
/rebotarm/move_to_pose
If you need multiple robot arms, you can change the namespace at launch time:
ros2 launch rebotarm_bringup bringup.launch.py model:=rs channel:=can0 arm_namespace:=right_arm
In this case, /rebotarm/joint_states becomes /right_arm/joint_states.
Common APIs
Status Topics
| API | Type | Description |
|---|---|---|
/rebotarm/joint_states | sensor_msgs/msg/JointState | 6-axis joint positions, velocities, and efforts, including visual gripper joints for RViz |
/rebotarm/arm_status | rebotarm_msgs/msg/ArmStatus | Control mode, enabled state, state machine, and error codes |
/rebotarm/joints/<joint>/state | rebotarm_msgs/msg/JointMotorState | Single-joint motor state |
/rebotarm/gripper/state | rebotarm_msgs/msg/JointMotorState | Gripper motor state |
Examples:
ros2 topic echo /rebotarm/joint_states --once
ros2 topic echo /rebotarm/arm_status --once
Services
| API | Type | Description |
|---|---|---|
/rebotarm/enable | std_srvs/srv/Trigger | Enable the robot arm |
/rebotarm/disable | std_srvs/srv/Trigger | Disable the robot arm |
/rebotarm/safe_home | std_srvs/srv/Trigger | Move back to the safe home position |
/rebotarm/set_zero | rebotarm_msgs/srv/SetZero | Set zero position for all joints or a single joint |
/rebotarm/move_to_pose_ik | rebotarm_msgs/srv/MoveToPoseIK | IK pre-check and target joint solution |
/rebotarm/gripper/set | rebotarm_msgs/srv/SetGripper | Set gripper motor position in rad |
/rebotarm/gripper/open | rebotarm_msgs/srv/GripperCommand | Open the gripper according to the configured value |
/rebotarm/gripper/close | rebotarm_msgs/srv/GripperCommand | Close the gripper according to the configured value |
/rebotarm/gravity_compensation/start | std_srvs/srv/Trigger | Start gravity compensation |
/rebotarm/gravity_compensation/stop | std_srvs/srv/Trigger | Stop gravity compensation |
Actions
| API | Type | Description |
|---|---|---|
/rebotarm/move_to_pose | rebotarm_msgs/action/MoveToPose | End-effector pose motion |
/rebotarm/follow_joint_trajectory | control_msgs/action/FollowJointTrajectory | Standard joint trajectory compatible entry point |
/rebotarm/gripper/command | control_msgs/action/GripperCommand | Standard gripper action |
Basic Control Examples
1. Enable the Robot Arm
ros2 service call /rebotarm/enable std_srvs/srv/Trigger
2. Move to an End-effector Pose
ros2 action send_goal /rebotarm/move_to_pose rebotarm_msgs/action/MoveToPose \
  "{target_pose: {position: {x: 0.30, y: 0.0, z: 0.30}, orientation: {x: 0.0, y: 0.0, z: 0.0, w: 1.0}}, duration: 2.0}"
The move_to_pose action is executed by the SDK end-pose controller. The B601-RS arm control mode defaults to mit in rebotarm_hardware.yaml.
3. Send a Joint Target
ros2 action send_goal /rebotarm/follow_joint_trajectory \
  control_msgs/action/FollowJointTrajectory \
  "{trajectory: {joint_names: ['joint1','joint2','joint3','joint4','joint5','joint6'],
    points: [{positions: [0.1,0,0,0,0,0], time_from_start: {sec: 5}}]}}"
4. Control the Gripper
ros2 service call /rebotarm/gripper/open rebotarm_msgs/srv/GripperCommand "{}"
ros2 service call /rebotarm/gripper/close rebotarm_msgs/srv/GripperCommand "{}"
You can also send an explicit gripper motor position:
ros2 service call /rebotarm/gripper/set rebotarm_msgs/srv/SetGripper "{position: 5.0}"
5. Safe Home and Disable
ros2 service call /rebotarm/safe_home std_srvs/srv/Trigger
ros2 service call /rebotarm/disable std_srvs/srv/Trigger
Demo Examples
All examples assume that reBotArmController is already running:
cd your/path/to/rebotarm_ros2
source install/setup.bash
ros2 launch rebotarm_bringup bringup.launch.py model:=rs channel:=can0
Joint Motion Example
Control all 6 joints at once. The unit is rad:
ros2 run rebotarmcontroller MoveTo -- \
  0.20 -0.20 -0.20 -0.20 0.10 -0.10 \
  --duration 8.0
Control only one joint:
ros2 run rebotarmcontroller MoveTo -- --joint joint3 --position -0.20 --duration 5.0
End-effector Pose Example
ros2 run rebotarmcontroller MoveToPose -- --x 0.30 --y 0.0 --z 0.30 --qw 1.0 --duration 2.0
Gravity Compensation Example
ros2 run rebotarmcontroller GravityCompensation
The script first calls /rebotarm/enable, then starts gravity compensation. When you press Ctrl+C, the script calls the following services in order:
/rebotarm/gravity_compensation/stop/rebotarm/safe_home/rebotarm/disable
This stops gravity compensation first, then moves the arm back to the safe home position and disables it.
You can also call the services manually:
ros2 service call /rebotarm/enable std_srvs/srv/Trigger
ros2 service call /rebotarm/gravity_compensation/start std_srvs/srv/Trigger
ros2 service call /rebotarm/gravity_compensation/stop std_srvs/srv/Trigger
ros2 service call /rebotarm/safe_home std_srvs/srv/Trigger
ros2 service call /rebotarm/disable std_srvs/srv/Trigger
Interactive Gripper Example
ros2 run rebotarmcontroller GripperControl
After launch, enter:
o / open    Open the gripper
c / close   Close the gripper
q / quit    Quit
Configuration
Default configuration files are located at:
src/rebotarm_bringup/config/
| File | Description |
|---|---|
rebotarm_hardware.yaml | ROS2 upper-layer hardware selection and SDK parameter overrides for B601-RS |
driver_params.yaml | ROS parameter examples |
The default_model at the top of rebotarm_hardware.yaml may default to dm. If you want B601-RS to be the default model, change it to:
default_model: rs
After this change, B601-RS will be used automatically when model:=... is not explicitly passed.
Common launch parameters:
| Parameter | Default | Description |
|---|---|---|
hardware_config | Built-in rebotarm_hardware.yaml from bringup | ROS2 upper-layer hardware configuration path |
model | rs | This tutorial explicitly passes rs to select the B601-RS configuration |
channel | can0 | SocketCAN channel |
joint_state_rate | 100.0 | Publish rate of /rebotarm/joint_states |
cmd_arbitration | reject | Low-level arm joint command arbitration during trajectory execution, reject or preempt |
arm_namespace | rebotarm | ROS namespace prefix |
frame_id | base_link | Robot arm base frame |
ee_frame_id | gripper_end | End-effector frame |
use_rviz | false | Whether to start bringup RViz |
disable_after_safe_home | true | Controls whether motors are disabled after safe home completes |
Default key configuration for B601-RS in rebotarm_hardware.yaml:
| Item | Default |
|---|---|
| Communication channel | can0 |
| Arm control mode | mit |
| Gripper open position | 5.0 |
| Gripper close position | 0.0 |
| Gravity compensation output gain for joints 2/3 | 1.5 |
Low-level Command Topics
The ROS2 workspace also provides low-level motor debugging topics:
| API | Type | Description |
|---|---|---|
/rebotarm/joints/<joint>/cmd/mit | rebotarm_msgs/msg/JointMitCmd | Single-joint MIT raw command |
/rebotarm/joints/<joint>/cmd/pos_vel | rebotarm_msgs/msg/JointPosVelCmd | Single-joint position-velocity raw command |
/rebotarm/gripper/cmd/mit | rebotarm_msgs/msg/JointMitCmd | Gripper MIT raw command |
/rebotarm/gripper/cmd/pos_vel | rebotarm_msgs/msg/JointPosVelCmd | Gripper position-velocity raw command |
Low-level command topics are intended for debugging and experiments. They do not perform IK, trajectory planning, or URDF validity checks. For application-level motion, prefer services and actions such as /move_to_pose, /follow_joint_trajectory, and /gripper/set.
MoveIt 2
MoveIt 2 is a motion planning framework for robot arms. Here it is mainly responsible for inverse kinematics, collision checking, trajectory planning, and trajectory execution. The demo package keeps application flows separated from the low-level driver. For more details, see the official MoveIt 2 Documentation.
MoveIt-related content is split into two packages:
| Package | Purpose |
|---|---|
rebotarm_moveit_config | Robot model, SRDF, kinematics, joint limits, controller and RViz config |
rebotarm_moveit_demos | Application demos based on MoveIt 2 |
The MoveIt environment uses simulated hardware through ros2_control and move_group for planning and execution. It is suitable for validating the model, IK, trajectory planning, and demo flow in RViz.
This repository also supports real hardware. Before connecting real hardware, make sure the arm zero configuration, joint directions, joint limits, velocity limits, and gripper open/close range are correct, or keep the default repository configuration.
MoveIt Environment Setup
Make sure the ROS2 environment is available first. The following command installs dependencies for the currently sourced ROS_DISTRO:
sudo apt update
sudo apt install -y \
  ros-${ROS_DISTRO}-moveit \
  ros-${ROS_DISTRO}-moveit-configs-utils \
  ros-${ROS_DISTRO}-moveit-kinematics \
  ros-${ROS_DISTRO}-moveit-planners-ompl \
  ros-${ROS_DISTRO}-moveit-simple-controller-manager \
  ros-${ROS_DISTRO}-ros2-control \
  ros-${ROS_DISTRO}-ros2-controllers \
  ros-${ROS_DISTRO}-xacro
The MoveIt config and demos are included in this workspace. After installing dependencies, rebuild the workspace:
cd your/path/to/rebotarm_ros2
colcon build --symlink-install
source install/setup.bash
Verify the MoveIt packages and demo entry points:
ros2 pkg list | grep rebotarm_moveit
ros2 pkg executables rebotarm_moveit_demos
Expected entries include at least:
rebotarm_moveit_demos draw_square
rebotarm_moveit_demos pick_place
Use MoveIt
MoveIt planning can be used through the RViz GUI or by calling nodes, in both simulation and real scenes.
Use MoveIt in Simulation
MoveIt uses the ros2_control virtual hardware interface for RViz simulation:
cd your/path/to/rebotarm_ros2
source install/setup.bash
ros2 launch rebotarm_moveit_config demo.launch.py model:=rs
By default this starts:
move_grouprobot_state_publisherros2_control_nodejoint_state_broadcasterrebotarm_controllergripper_controller- RViz with the MoveIt MotionPlanning plugin
RViz opens automatically and loads the B601-RS model. You can control motion through the GUI panel on the left.
To run the MoveIt environment without RViz:
ros2 launch rebotarm_moveit_config demo.launch.py model:=rs use_rviz:=false
Use MoveIt with reBotArm Hardware
For real scenes, start the hardware control node first, then start the MoveIt environment for real hardware:
ros2 launch rebotarm_bringup driver.launch.py model:=rs channel:=can0
In another terminal:
cd your/path/to/rebotarm_ros2
source install/setup.bash
ros2 launch rebotarm_moveit_config hardware.launch.py model:=rs
Before running any demo on real hardware, make sure the robot arm workspace is clear of people and obstacles, verify the planned path in RViz first, and be ready to stop the controller at any time.
Run the Draw-square Demo
Start the MoveIt environment first, then run in another terminal:
cd your/path/to/rebotarm_ros2
source install/setup.bash
ros2 launch rebotarm_moveit_demos draw_square.launch.py model:=rs
draw_square moves gripper_tcp through the four corners of a coplanar rectangle. Default parameters are in:
src/rebotarm_moveit_demos/config/draw_square_rs.yaml
Common parameters:
| Parameter | Description |
|---|---|
start_point | Joint reset position before the demo starts |
rectangle_center | Rectangle center in base_link |
rectangle_width / rectangle_height | Rectangle dimensions in meters |
tcp_rpy | TCP orientation, defaulting to a downward-facing gripper |
tcp_yaw_offsets | Alternative IK yaw values used to avoid large joint6 wraps |
draw_square is useful for verifying whether MoveIt IK, trajectory planning, and execution are working correctly. If planning fails, first check whether the start joint state, rectangle center, TCP orientation, and joint limits are reasonable.
Run the Pick-place Demo
Start the MoveIt environment first, then run in another terminal:
cd your/path/to/rebotarm_ros2
source install/setup.bash
ros2 launch rebotarm_moveit_demos pick_place.launch.py model:=rs
Default parameters are in:
src/rebotarm_moveit_demos/config/pick_place_rs.yaml
Common parameters:
| Parameter | Description |
|---|---|
ready_point | Ready joint position used before and after pick/place |
pick_position | Object bottom-center position in base_link |
pick_tcp_rpy / place_tcp_rpy | TCP orientation for pick and place |
object_dimensions | Planning-scene object dimensions in meters |
max_gripper_width | Maximum total gripper opening, default 0.09m |
open_gripper_position / grasp_gripper_position / closed_gripper_position | Simulated single-side gripper joint positions |
hardware_open_gripper_position / hardware_closed_gripper_position | Hardware gripper motor open/close positions |
pick_place adds a target object to the planning scene, opens the gripper, moves to the pick pose, closes the gripper, moves to the place pose, and releases the object. Simulated gripper joint positions and real hardware gripper motor positions are different parameters. Before running on real hardware, confirm the gripper open/close direction and limits.
MoveIt Configuration Files
| File | Description |
|---|---|
rebotarm_moveit_config/config/rebotarm_rs.urdf.xacro | B601-RS robot model used by MoveIt, including the gripper and gripper_tcp |
rebotarm_moveit_config/config/rebotarm_rs.ros2_control.xacro | ros2_control mock hardware description for simulation |
rebotarm_moveit_config/config/rebotarm_rs.srdf | MoveIt groups, end effector, default states, and semantic configuration |
rebotarm_moveit_config/config/kinematics.yaml | IK solver configuration |
rebotarm_moveit_config/config/joint_limits.yaml | Joint limits used by MoveIt planning |
rebotarm_moveit_config/config/ompl_planning.yaml | OMPL planner parameters |
rebotarm_moveit_config/config/moveit_controllers.yaml | MoveIt trajectory execution controller configuration for simulation |
rebotarm_moveit_config/config/moveit_hardware_controllers.yaml | MoveIt trajectory execution controller configuration for real hardware |
rebotarm_moveit_config/config/ros2_controllers.yaml | ros2_control controller configuration for simulation |
rebotarm_moveit_config/config/initial_positions.yaml | Initial joint positions for simulated hardware |
rebotarm_moveit_demos/config/draw_square_rs.yaml | Draw-square demo parameters |
rebotarm_moveit_demos/config/pick_place_rs.yaml | Pick-place demo parameters |
FAQ
1. socketcan write failed: Network is down appears at startup
This means the CAN interface has not been brought up yet. First check the interface:
ip -details link show can0
Restart CAN:
sudo ip link set can0 down 2>/dev/null
sudo ip link set can0 type can bitrate 1000000 restart-ms 100
sudo ip link set can0 up
2. can0 cannot be found
First confirm that the CAN adapter is plugged in and check the interface name:
ip -br link
If you use PCAN-USB:
sudo modprobe peak_usb
ip -br link
If the interface name is not can0, replace channel when launching:
ros2 launch rebotarm_bringup bringup.launch.py model:=rs channel:=can1
3. Robot model is not displayed in RViz
Check the following:
- Whether the workspace has been sourced:
source install/setup.bash - Whether
Fixed Frameis set tobase_link - Whether
robot_state_publisherstarted correctly - Whether the URDF mesh path is
package://rebotarm_bringup/description/...
If the model is displayed but the view is inconvenient, switch the view type to Move Camera in the RViz Views panel, set Target Frame to base_link, and adjust Distance.
4. MoveIt planning fails
If the demo prints MoveIt planning failed, check the following:
- Confirm that
demo.launch.pyorhardware.launch.pyhas been started and thatmove_groupis running correctly. - Confirm that the current joint state is not stale and that
/joint_statesor/rebotarm/joint_statesis being published normally. - Confirm that the target point is inside the reachable workspace and that the target orientation does not cause the wrist or gripper to collide with the arm body.
- Confirm that the joint limits and velocity limits in
joint_limits.yamlmatch the current robot arm. - Plan manually in the RViz MotionPlanning plugin first. Run the demo only after confirming the path is collision-free.
5. FastDDS SHM port warning appears
If the terminal shows something like:
[RTPS_TRANSPORT_SHM Error] Failed init_port fastrtps_port7002: open_and_lock_file failed
This is usually caused by leftover FastDDS shared-memory lock files after a previous ROS2 process exited abnormally. If services and actions still respond normally, this warning usually does not affect control.
To clean it up, stop the related ROS2 processes first, then run:
pkill -f ros2
pkill -f reBotArmController
rm -f /dev/shm/fastrtps_port*
If you want to temporarily bypass shared memory transport, set the following before launching ROS2:
export FASTDDS_BUILTIN_TRANSPORTS=UDPv4
6. What if I use Humble?
Humble users can follow the same workflow, replace jazzy with humble in the commands, and install the corresponding dependencies according to the Humble official documentation. After switching ROS2 distributions, run colcon build again.
7. pinocchio cannot be found
If a node or verification command reports:
ModuleNotFoundError: No module named 'pinocchio'
First make sure the Pinocchio package for your ROS2 distribution is installed:
sudo apt install -y ros-${ROS_DISTRO}-pinocchio
Then make sure the current terminal has sourced the ROS2 environment:
source /opt/ros/${ROS_DISTRO}/setup.bash
python3 -c "import pinocchio; print(pinocchio.__version__)"
If it still cannot be found, check whether the current Python search path contains the ROS2 Python package path:
python3 -c "import sys; print('\n'.join(sys.path))"
After sourcing Jazzy, you should see a path similar to /opt/ros/jazzy/lib/python3.12/site-packages. If you use Humble, replace jazzy with humble in the commands.
Contact
- Technical Support: Submit an Issue
- Project Repository: Github
- Forum: Seeed Studio Forum