reBot Arm B601-RS Digital Twin & Control Stack
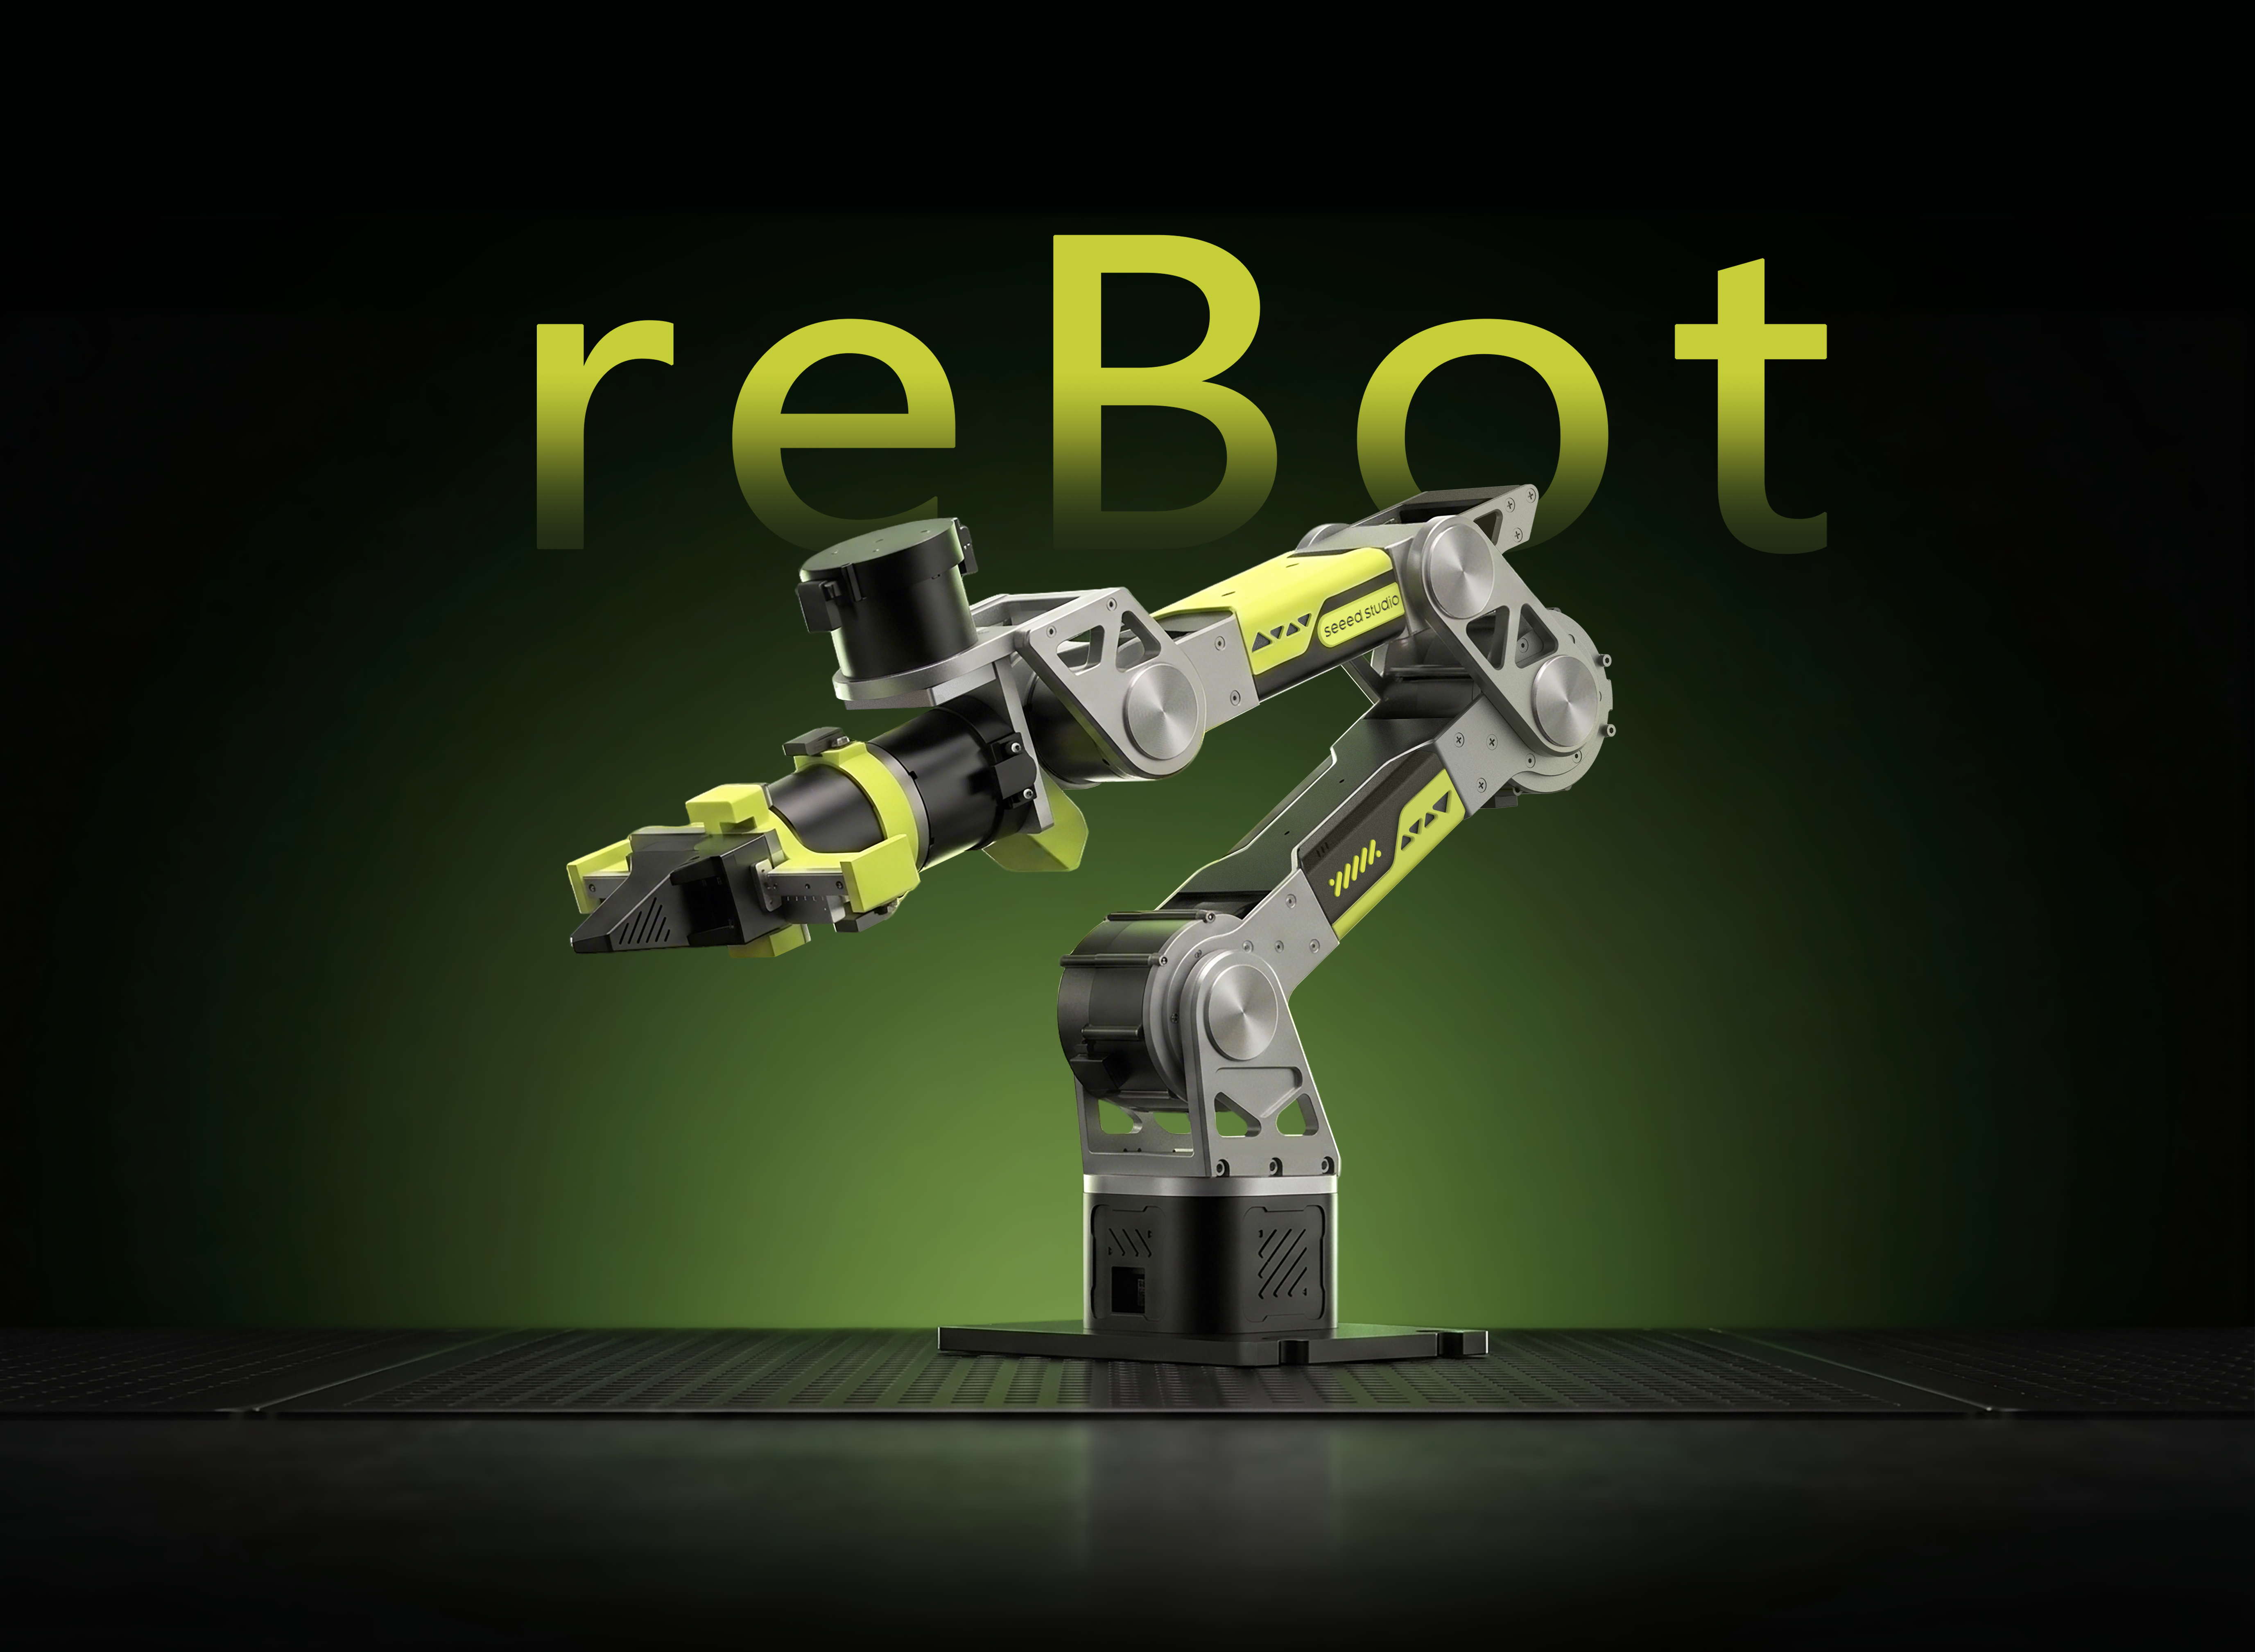




Three.js visualization · ROS 2 · SocketCAN · MuJoCo simulation · LLM/MCP control
The reBot Arm B601-RS Digital Twin & Control Stack integrates a Three.js web console, a ROS 2 real-robot driver, an RS-specific MuJoCo dynamics scene, vision detection, trajectory and inverse kinematics, and an optional LLM/MCP grasping agent. This guide explains how to install, launch, and develop on the full system.
Project Features
-
RS-specific arm model
The web console and ROS 2 use
ReBot_Arm_RS.urdfand its matching STL meshes. The web server reads the model from therebotarm_ros2_RSworkspace first and keeps an offline fallback copy. -
RobStride + SocketCAN real-robot link
The real robot uses the Linux SocketCAN interface
can0at1 Mbpsby default. The controller communicates with RobStride motors throughreBotArm_control_py. -
MIT 125 Hz online control
The web console updates targets at up to 60 Hz, while the real-robot controller generates an online reference limited by velocity, acceleration, and jerk at 125 Hz and sends MIT
q/dq/kp/kd/taucommands. Web target updates do not block the motor control loop. -
Real-robot and simulation namespace isolation
The real robot uses
/rebotarmby default and simulation uses/rebotarm_rs. The same web console can switch control targets, and you can run the real robot and Fake Driver at the same time to compare interfaces. -
RS-specific MuJoCo scene
MuJoCo supports
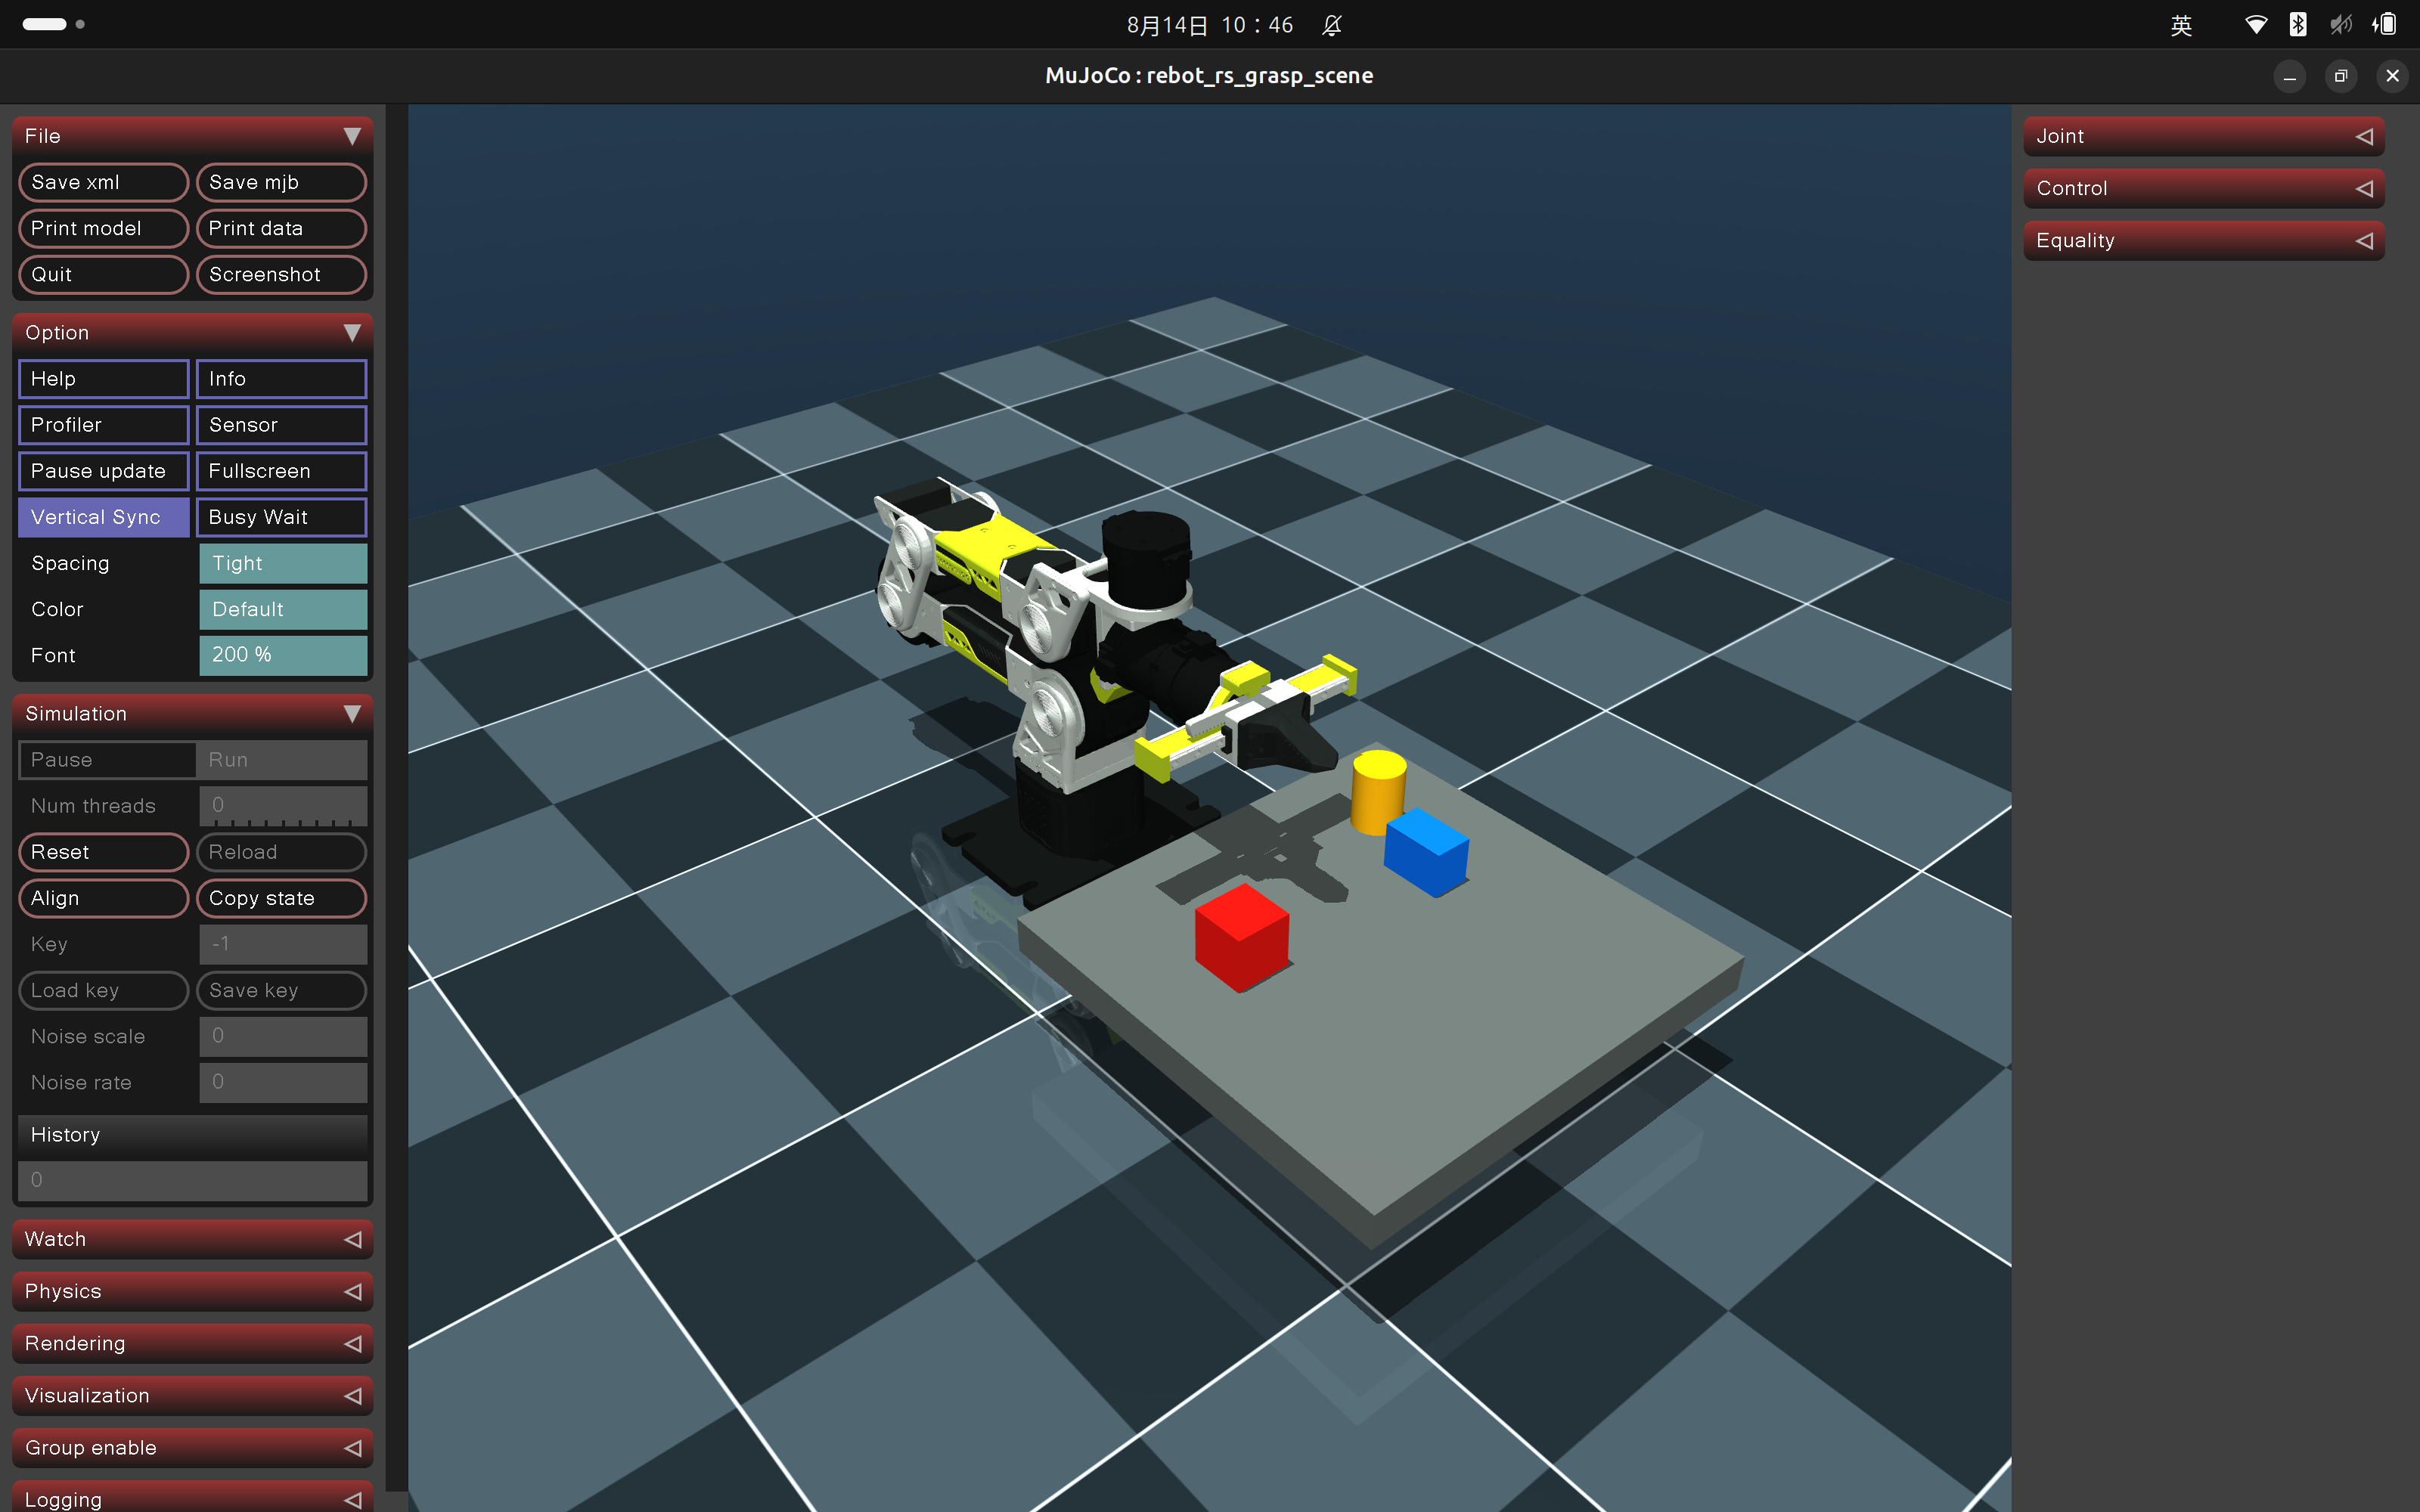
physicsandkinematicmodes. The defaultphysicsmode includes gravity, contact, tabletop objects, an overhead camera, color detection, and physical grasping validation. -
Feedback-driven web animation
In real-robot mode, the solid model shows actual feedback and the translucent model shows the control target. The web console applies adaptive low-pass filtering, a feedback dead zone, and display interpolation to rosbridge measurements so that local animation is not mistaken for the real arm pose.
-
Safety state machine
The system arbitrates trajectories, gravity compensation, safe homing, and continuous web commands. Disabling from a non-zero pose runs safe homing first and verifies it; if verification fails, the arm remains enabled to avoid dropping suddenly.
-
Visual grasping and LLM/MCP Agent
The simulation scene provides red, blue, and yellow objects with overhead detection, IK, grasping, lift validation, and placing support. MCP tools can be used independently or connected to a large language model to call structured robot operations through natural language.
Wiring and Network Notes
RS Real-Robot CAN Wiring
- Secure the arm and clear its range of motion.
- Connect the RobStride motor CAN bus, power supply, and USB-CAN adapter.
- Verify that CAN_H, CAN_L, and GND are wired correctly and configure the termination resistor according to the hardware requirements.
- After power-on, confirm that the target CAN adapter appears in Ubuntu.
Configure can0:
sudo ip link set can0 down 2>/dev/null || true
sudo ip link set can0 type can bitrate 1000000
sudo ip link set can0 up
ip -details link show can0
Observe bus frames in read-only mode:
candump can0
Continuous CAN frames mean the interface is receiving data. Press Ctrl+C to exit candump.
If the interface enters
BUS-OFF, first check power, grounding, baud rate, termination resistors, motor IDs, and CAN wiring. Do not mask hardware faults by repeatedly restarting the controller.
Web and ROS 2 Networking
The web console communicates with ROS 2 over the rosbridge WebSocket, using port 9090 by default:
Web console: http://<Ubuntu-IP>:3002
rosbridge:   ws://<Ubuntu-IP>:9090
MCP Server:  http://<Ubuntu-IP>:8081/mcp
Text Agent:  http://<Ubuntu-IP>:8082
You can use localhost when the web console and ROS 2 run on the same machine. When accessing from another computer on the LAN, do not enter the browser computer's own localhost; use the IP of the Ubuntu host running the ROS 2 services instead.
The project startup script sets the ROS 2 discovery range to LOCALHOST by default, so Wi-Fi roaming or IP changes do not split same-machine nodes into different DDS networks. This does not affect access to the HTTP/WebSocket ports from other devices. To let another computer join the ROS graph directly, set the same value in the relevant terminals:
export REBOTARM_ROS_DISCOVERY_RANGE=SUBNET
Environment Requirements
| Item | Recommended requirement |
|---|---|
| Backend OS | Ubuntu 24.04 |
| ROS 2 | Jazzy |
| Compatible reference environment | Ubuntu 22.04 + ROS 2 Humble (real-robot use requires your own regression testing) |
| Python | 3.12 (Jazzy) or 3.10 (Humble) |
| Node.js | 18 or newer |
| Browser | Current stable Chrome, Chromium, Edge, or Firefox |
| CAN tools | iproute2, can-utils |
| Real-robot CAN | can0, 1 Mbps |
| MuJoCo | Installed by the project Python environment |
Installation Steps
Step 1: Get the project
Step 1
git clone https://github.com/Yang-Ci/ReBot_Arm_DigitalTwin_RS.git ~/ReBot_Arm_DigitalTwin_RS
cd ~/ReBot_Arm_DigitalTwin_RS
The commands below use ~/ReBot_Arm_DigitalTwin_RS as the project directory. If your directory is different, replace the paths accordingly.
Step 2: Read-only environment check
Step 2
cd ~/ReBot_Arm_DigitalTwin_RS
./setup.sh --check
This command only checks the system and does not modify the environment. Checks include:
- Ubuntu, Python, and Node.js versions;
- ROS 2, rosbridge, MoveIt, and build tools;
- SocketCAN tools and
can0; - the Python virtual environment and key modules;
- ROS 2 workspace build results;
- the web
package.jsonand.env.
Step 3: One-click install and build
Step 3
./setup.sh --yes
./rebotarm doctor
The installation script installs missing ROS 2, Node.js, SocketCAN, and build dependencies, creates rebotarm_ros2_RS/.venv, installs the Python dependencies for the RS real robot, MuJoCo, and Agent, runs rosdep, and builds the ROS 2 workspace with:
colcon build --symlink-install
The control SDK and MuJoCo models are tracked by the main repository as ordinary files. They are not Git submodules and do not contain nested Git repositories. Existing .env files, SDKs, and models are not reset by the installation script.
If the system dependencies are already complete, you only need to prepare and rebuild the ROS workspace:
./scripts/setup_rs_workspace.sh
After modifying Python packages, this is usually enough:
source scripts/rs_env.sh
cd rebotarm_ros2_RS
colcon build --symlink-install
Step 4: Configure web environment variables
Step 4
On first install, reBotArm_simulator-RS/.env is created from .env.example. Key fields:
PORT=3002
HTTPS=0
REBOTARM_TEXT_AGENT_URL=http://localhost:8082
REBOTARM_MCP_URL=http://localhost:8081/mcp
MOTORBRIDGE_WS_URL=ws://127.0.0.1:9002
MOTORBRIDGE_WS_TOKEN=
If the web console and ROS 2/Agent are not on the same machine, change the proxy addresses to the backend machine's IP. API keys and tokens should only be stored in environment variables or the uncommitted local .env.
Launching the Project
- Pure web demo
- Full RS MuJoCo simulation
- RS real robot control
- Dual real/Fake debugging
Start only the Node.js web server, without rosbridge or ROS 2:
cd ~/ReBot_Arm_DigitalTwin_RS/reBotArm_simulator-RS
npm start
Open the browser at:
http://localhost:3002
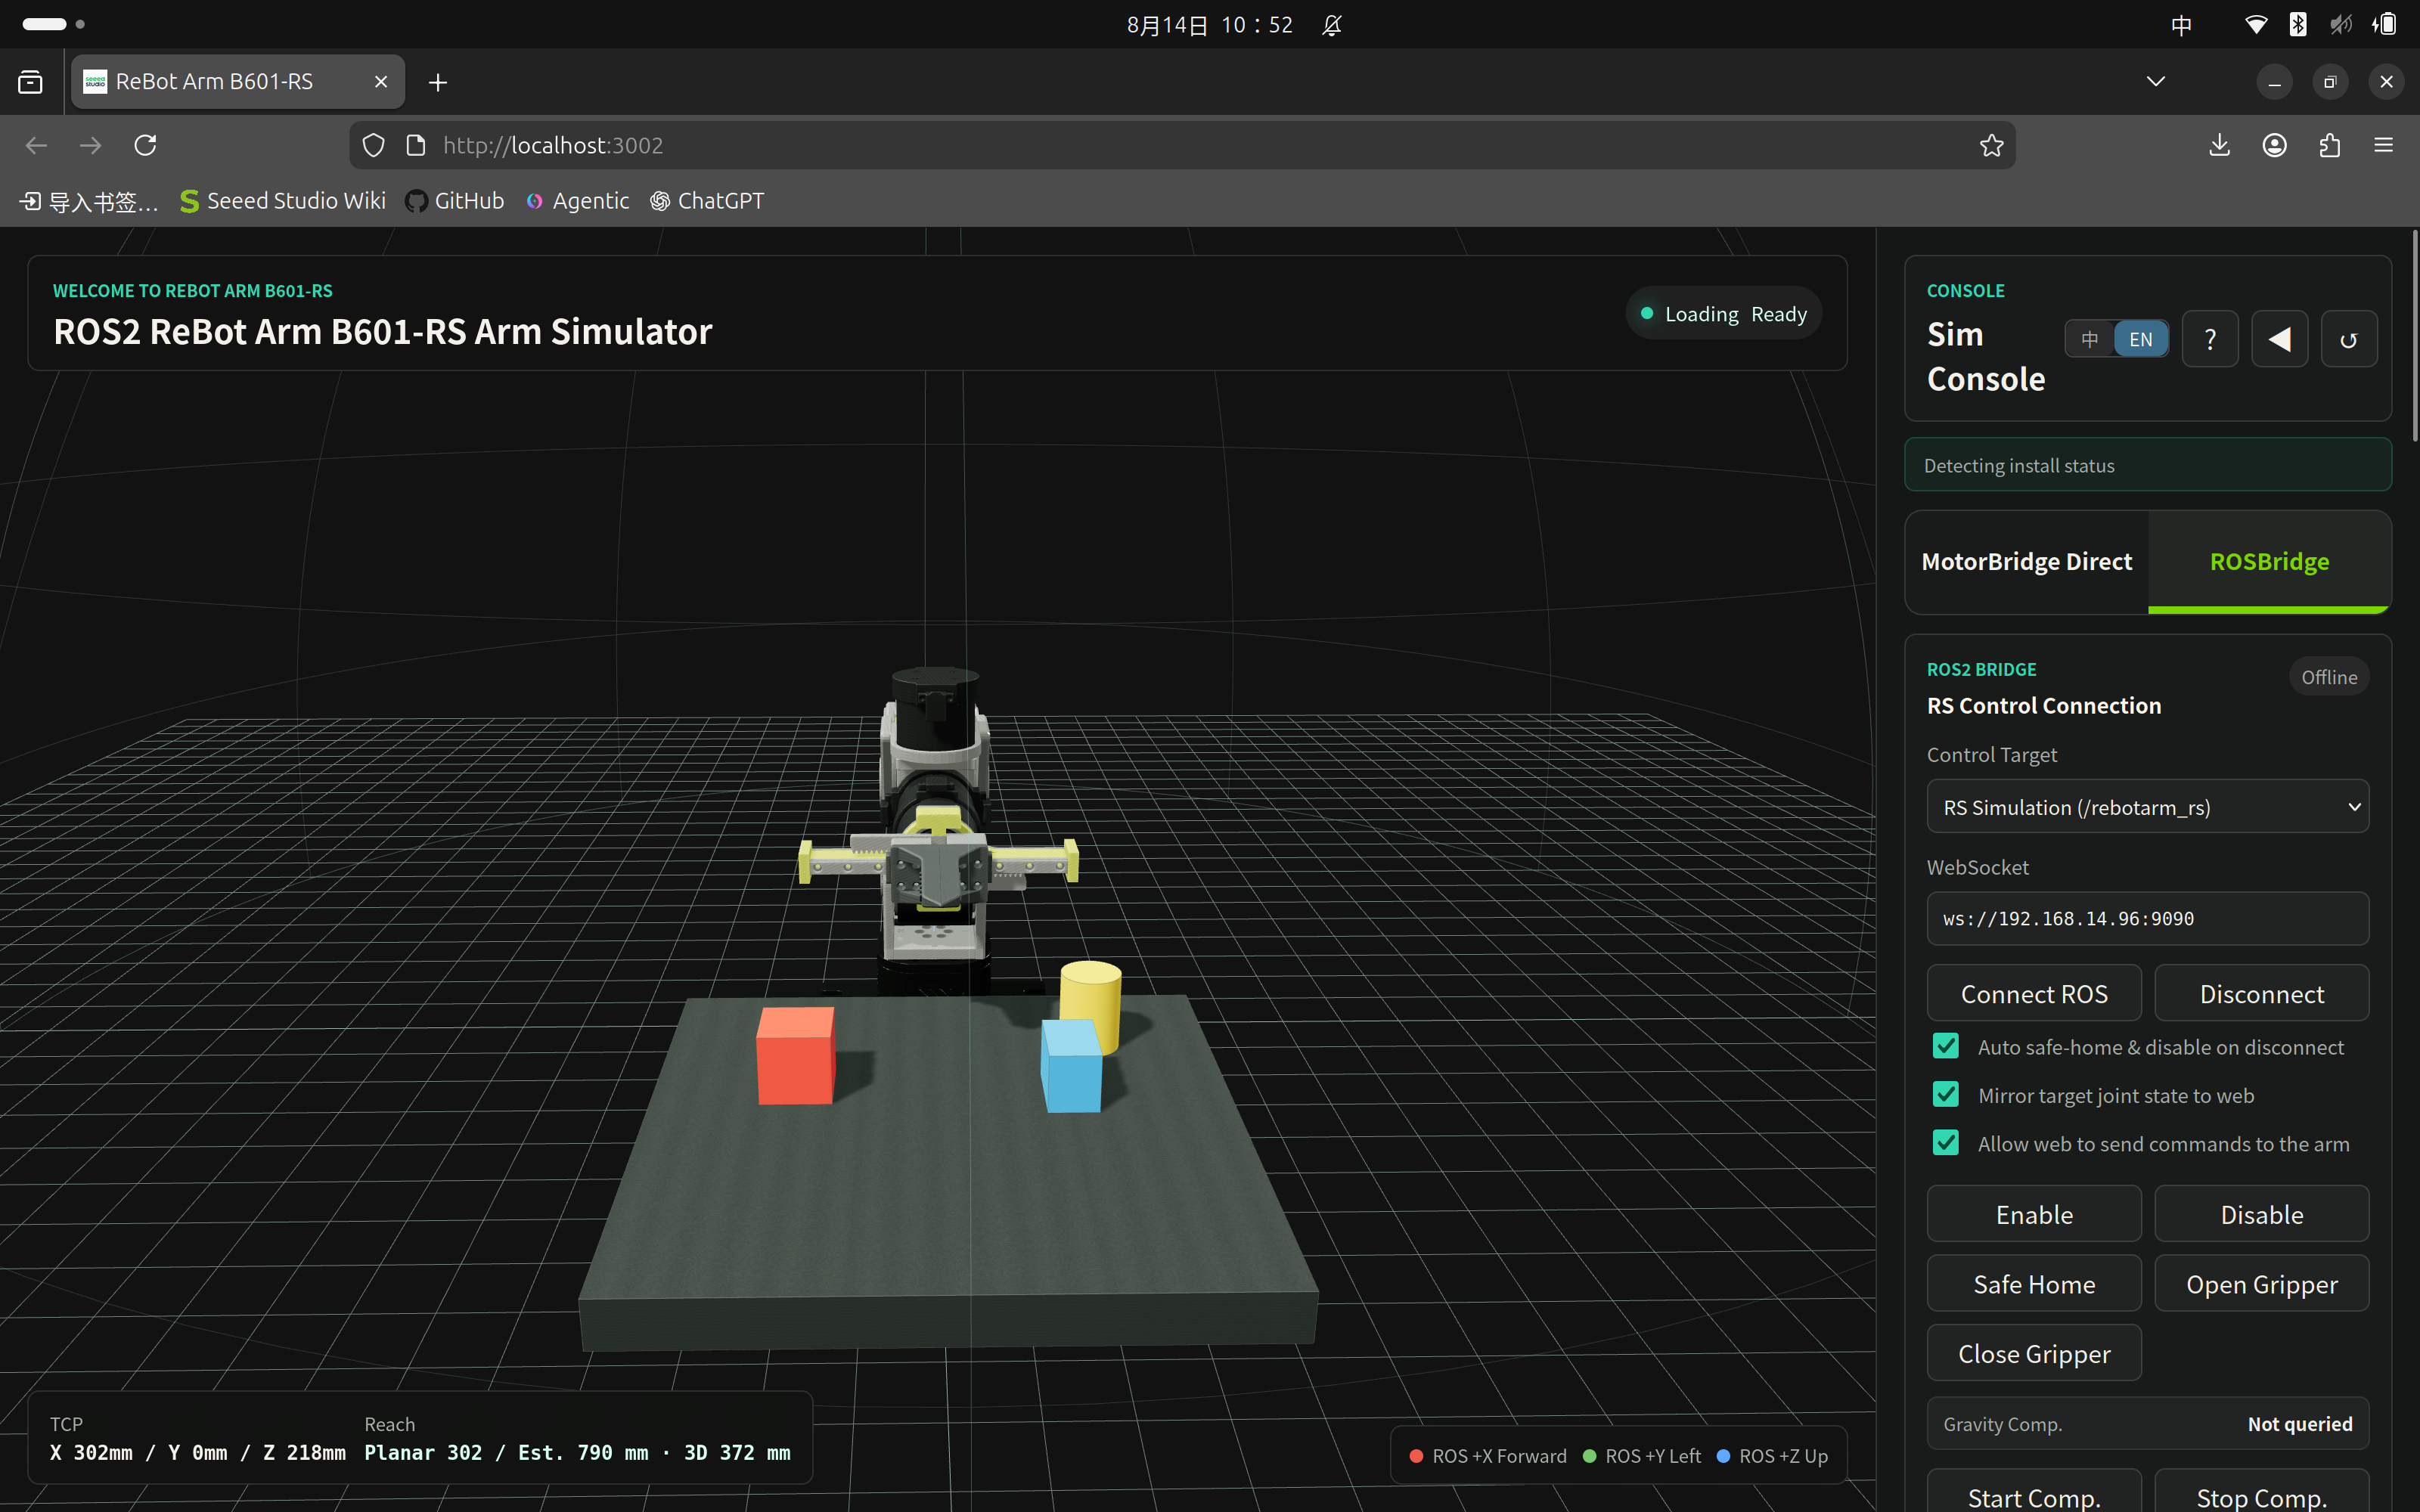
This mode is suitable for developing the 3D model, UI, pose presets, and front-end features. Without the ROS 2 backend, the web console cannot control the real robot or the full MuJoCo scene.
Terminal 1 starts Fake Driver, MuJoCo, camera, detection, MCP Agent, and rosbridge:
cd ~/ReBot_Arm_DigitalTwin_RS
./rebotarm start rs_sim
Terminal 2 starts the web console:
cd ~/ReBot_Arm_DigitalTwin_RS
./rebotarm start web
Open http://localhost:3002, select the control target "RS Simulation (/rebotarm_rs)", and enter ws://localhost:9090 as the ROS WebSocket.
Common simulation options:
# No native MuJoCo window; suitable for automated tests
REBOTARM_MUJOCO_VIEWER=false ./rebotarm start rs_sim

# Kinematic following only; does not validate contact, gravity, or physical grasping
REBOTARM_MUJOCO_MODE=kinematic ./rebotarm start rs_sim

# Do not start the MCP Agent
REBOTARM_START_AGENT=false ./rebotarm start rs_sim

# After confirming there are no active tasks, clean up leftover simulation processes, then start
./rebotarm start rs_sim --force
Visual grasping must use the default
physicsmode. Thekinematicmode directly synchronizes joint positions and cannot be used to evaluate control gains, contact stability, or grasping force.
First configure and check SocketCAN:
sudo ip link set can0 down 2>/dev/null || true
sudo ip link set can0 type can bitrate 1000000
sudo ip link set can0 up
ip -details -statistics link show can0
After confirming that the emergency stop works and the workspace is clear, start the real-robot controller in terminal 1:
cd ~/ReBot_Arm_DigitalTwin_RS
REBOTARM_RS_HARDWARE_CONFIRM=I_UNDERSTAND_RS_WILL_MOVE \
  ./rebotarm start rs
Start the web console and rosbridge in terminal 2:
./rebotarm start web
Open http://localhost:3002 and select "RS Real Robot (/rebotarm)". For the first test, follow this order:
- Check that the web console reports connected, the arm status is normal, and there are no motor errors.
- Click enable.
- Set the speed to
0.2-0.4 rad/s. - Move one joint by a small amount at a time and confirm direction, limits, and feedback.
- Then test TCP dragging, trajectories, or gravity compensation.
- When finished, perform safe homing and disable, then press
Ctrl+Cin the controller terminal.
Do not use Ctrl+Z to pause the real-robot controller, and do not treat a web button as a physical emergency stop. If an old controller instance is left behind, the real-robot startup script asks the old instance to exit safely and cleans up the residual resources confirmed to belong to that controller.
export REBOTARM_RS_HARDWARE_CONFIRM=I_UNDERSTAND_RS_WILL_MOVE
./scripts/start_rs_dual.sh
This script starts:
- the real robot
/rebotarm; - the Fake Driver
/rebotarm_rs; - rosbridge
9090.
It is used to compare interfaces, joint directions, and status. It does not start the full MuJoCo stack, vision, Agent, or web server. Confirm the namespace selected in the web console again before sending commands.
Unified Command Line
| Command | Description |
|---|---|
./rebotarm doctor | Read-only environment check, equivalent to ./setup.sh --check |
./rebotarm start web | Start or reuse rosbridge and start the web server |
./rebotarm start rs_sim | Start the full RS MuJoCo simulation stack |
./rebotarm start rs | Start the RS real-robot controller; the hardware confirmation variable is required |
./rebotarm status | View registered processes, ports, and can0 |
./rebotarm stop | Stop the web/rosbridge child processes registered by start web |
Simulation and real-robot processes running in the foreground should be ended normally with Ctrl+C in their own terminals.
Project Architecture
ReBot_Arm_DigitalTwin_RS/
|-- setup.sh                              One-click check, install, and build
|-- rebotarm                              Unified start, status, and stop entry
|-- requirements-rs-hardware.txt          RS real-robot Python dependencies
|-- requirements-rs-mujoco.txt            MuJoCo/Agent Python dependencies
|-- scripts/
|   |-- rs_env.sh                         Load ROS, venv, and workspace
|   |-- setup_rs_workspace.sh             Prepare and build the ROS 2 workspace
|   |-- start_rs_sim.sh                   Full RS simulation stack
|   |-- start_rs_hardware.sh              RS real-robot controller
|   |-- start_rs_dual.sh                  Real-robot/Fake dual-namespace startup
|   `-- start_rs_text_agent.sh            Text Agent HTTP service
|-- rebotarm_ros2_RS/
|   |-- src/rebotarmcontroller/           Real-robot controller and Fake Driver
|   |-- src/rebotarm_msgs/                Custom msg/srv/action
|   |-- src/rebotarm_bringup/             Config, URDF, meshes, and launch
|   |-- src/rebotarm_mujoco_rs/           RS MuJoCo, camera, detection, and tasks
|   |-- src/rebotarm_agent/               MCP Server and Text Agent
|   |-- src/rebotarm_moveit_config/       MoveIt configuration
|   |-- src/rebotarm_moveit_demos/        Trajectory and picking/placing examples
|   `-- third_party/reBotArm_control_py/  Plain-source control SDK
`-- reBotArm_simulator-RS/
    |-- server.js                           Static server and Agent proxy
    |-- public/index.html                   Web entry point
    |-- public/js/rebot-sim.js              Three.js, IK, scene, and animation
    |-- public/js/ros/rebot-ros-client.js   rosbridge client
    |-- public/js/ros/rebot-ros-ui.js       ROS UI, control, and feedback logic
    |-- public/js/rebot-llm.js              LLM chat UI
    |-- description/                         Standalone fallback model for the web
    `-- split_meshes/grouped_gripper/        Optional web gripper meshes
System Data Flow
Web Commands to RS Real Robot
User drags a joint slider or TCP handle
  -> Three.js / browser DLS IK
  -> 30 ms slider damping, 1 deg input dead zone, max 60 Hz throttle
  -> rosbridge WebSocket
  -> JointMitCmd ROS topic
  -> command state arbitration
  -> 125 Hz velocity/acceleration/jerk-limited online reference
  -> MIT q/dq/kp/kd/tau
  -> reBotArm_control_py
  -> MotorBridge + SocketCAN can0
  -> RobStride motors
A new web target only updates the endpoint of the online trajectory. Even if the browser temporarily stops sending the next frame, the 125 Hz control loop continues generating a continuous reference. The command QoS depth is 1, so a new target overwrites the old unprocessed target and avoids replaying a backlog of positions after dragging stops.
RS Real-Robot Feedback to Web
RobStride encoder/status
  -> SocketCAN can0
  -> SDK status cache
  -> 20 Hz real-robot sync query
  -> 60 Hz ROS JointState publication
  -> rosbridge subscription throttle
  -> adaptive low-pass + feedback dead zone
  -> 32-120 ms display interpolation
  -> Three.js solid feedback model
The translucent model represents the control target. The target shadow disappears automatically when the joint and gripper errors are small enough. Display filtering only affects the web picture and does not change the targets sent to the motors.
MuJoCo Simulation Chain
Web console or Agent
  -> ROS 2 commands, services, or actions
  -> Fake RS Driver (100 Hz)
  -> MuJoCo Sync (250 Hz)
  -> RS MJCF dynamics and collision
  -> joint/object states, overhead camera, and color detection
  -> Web console and MCP Agent
Web Control Notes
Control Target and Namespace
| Mode | Namespace | Web model source |
|---|---|---|
| RS real robot | /rebotarm | Real-robot /joint_states feedback |
| RS simulation | /rebotarm_rs | Uses the actual MuJoCo state first |
After switching modes, the web console recreates the rosbridge client and interface paths according to the target namespace.
Joints and Gripper
- J1-J6 are controlled in radians, with limits consistent with the RS URDF.
- The web speed range is
0.05-1.50 rad/swith a default of1.2 rad/s. - J1-J6 use
30 msslider damping and a1 deginput dead zone by default; the final position is committed forcefully when you release the slider. - J7/the gripper is shown as opening width on the web, with a range of
0-71.5 mm. - The gripper is converted to the RS motor range
0-5 radwhen publishing, and ROS feedback is converted back to millimeters. - J7 does not go through the J1-J6 radian damping or input dead zone; only the latest target is sent per browser render frame.
TCP Dragging and IK
The web console uses damped least squares (DLS) to solve TCP targets. The RS version adapts the damping according to the singularity level, then sends the joint solution through the same MIT online control chain.
The web Three.js scene uses Y-up and ROS uses Z-up. The coordinate conversion logic is in rebot-sim.js; when extending pose features, reuse the existing conversion instead of exchanging form values directly.
Pose input uses meters: X is forward, Y is left, and Z is up. If a target is unreachable, first increase Z or reduce the horizontal distance, then check orientation constraints and joint limits.
Teaching and Trajectory Playback
The web console can record joint trajectories and call:
/<namespace>/follow_joint_trajectory
The RS real-robot action server uses continuous monotone cubic Hermite position/velocity references and automatically extends trajectory segments that are too short, keeping ordinary real-robot trajectory speeds below about 0.60 rad/s. Callers must wait for the action result or real-robot feedback and should not finish the playback animation early according to the original request duration.
Enable, Safe Homing, and Disable
- The real-robot controller needs to be enabled after every startup.
safe_homesmoothly returns to zero and validates angle and velocity.- Clicking disable from a non-zero pose enters
SAFE_HOMINGfirst. - If homing validation fails, the motors stay enabled and a failure result is returned.
set_zerorewrites the motor zero point and is not an ordinary homing button. Only call it when the mechanical structure is actually at the calibrated pose.
Gravity Compensation
RS gravity compensation starts from the currently measured pose and switches in MIT joint by joint, so the zero pose is not mistaken for the target. Repeated starts are idempotent; stopping keeps the last measured position.
Web joint, TCP, trajectory, and gripper commands are rejected during gravity compensation. Related services:
/<namespace>/gravity_compensation/start
/<namespace>/gravity_compensation/stop
/<namespace>/gravity_compensation/status
ROS 2 Interfaces
The examples below use the real-robot /rebotarm. For simulation, replace the prefix with /rebotarm_rs.
Status Topics
| Topic | Type | Description |
|---|---|---|
/rebotarm/joint_states | sensor_msgs/msg/JointState | Unified six-axis and gripper status |
/rebotarm/joints/<name>/state | rebotarm_msgs/msg/JointMotorState | Single-motor position, velocity, torque, and status code |
/rebotarm/gripper/state | rebotarm_msgs/msg/JointMotorState | Raw gripper motor status |
/rebotarm/control_target | sensor_msgs/msg/JointState | Final target from the web console or action layer |
/rebotarm/control_reference | sensor_msgs/msg/JointState | ROS sample of the 125 Hz online trajectory reference; effort carries the reference acceleration |
/rebotarm/arm_status | rebotarm_msgs/msg/ArmStatus | Enable state, mode, state machine, and error codes |
Low-Level Command Topics
| Topic | Type | Description |
|---|---|---|
/rebotarm/joints/<joint1..joint6>/cmd/mit | rebotarm_msgs/msg/JointMitCmd | Default joint command from the web console for the real robot |
/rebotarm/joints/<joint1..joint6>/cmd/pos_vel | rebotarm_msgs/msg/JointPosVelCmd | Position-velocity command |
/rebotarm/gripper/cmd/mit | rebotarm_msgs/msg/JointMitCmd | RS gripper MIT command |
/rebotarm/gripper/cmd/pos_vel | rebotarm_msgs/msg/JointPosVelCmd | Gripper position-velocity command |
/rebotarm/mujoco/target_pose | geometry_msgs/msg/PoseStamped | TCP target pose |
Before publishing low-level commands yourself, check arm_status.state_machine. Do not preempt control during GRAVITY_COMP, SAFE_HOMING, or trajectory execution.
Services
| Service | Type | Description |
|---|---|---|
/rebotarm/enable | std_srvs/srv/Trigger | Enable the arm |
/rebotarm/disable | std_srvs/srv/Trigger | Safely disable; homes first when necessary |
/rebotarm/safe_home | std_srvs/srv/Trigger | Safe homing with validation |
/rebotarm/set_zero | rebotarm_msgs/srv/SetZero | Write the motor zero point; use with caution |
/rebotarm/gravity_compensation/start | std_srvs/srv/Trigger | Start gravity compensation |
/rebotarm/gravity_compensation/stop | std_srvs/srv/Trigger | Stop gravity compensation |
/rebotarm/gravity_compensation/status | std_srvs/srv/Trigger | Query gravity compensation status |
/rebotarm/move_to_pose_ik | rebotarm_msgs/srv/MoveToPoseIK | Pose IK solving |
/rebotarm/gripper/set | rebotarm_msgs/srv/SetGripper | Gripper position control |
/rebotarm/gripper/open | rebotarm_msgs/srv/GripperCommand | Open the gripper |
/rebotarm/gripper/close | rebotarm_msgs/srv/GripperCommand | Close the gripper |
Example:
source scripts/rs_env.sh
ros2 service call /rebotarm/gravity_compensation/status std_srvs/srv/Trigger '{}'
ros2 service call /rebotarm/safe_home std_srvs/srv/Trigger '{}'
Actions
| Action | Type | Description |
|---|---|---|
/rebotarm/follow_joint_trajectory | control_msgs/action/FollowJointTrajectory | Joint trajectory |
/rebotarm/gripper/command | control_msgs/action/GripperCommand | Gripper action |
/rebotarm/move_to_pose | rebotarm_msgs/action/MoveToPose | Cartesian pose motion |
MuJoCo and Vision Interfaces
| Interface | Type/Use |
|---|---|
/rebotarm_rs/mujoco/joint_states | Actual MuJoCo joint states |
/rebotarm_rs/mujoco/object_states | Scene object states as JSON |
/rebotarm_rs/mujoco/overhead_rgb/image_raw | Overhead RGB camera |
/rebotarm_rs/vision/color_blocks/detections | Color object detection JSON |
/rebotarm_rs/mujoco/reset | Reset the simulation |
/rebotarm_rs/mujoco/record/start | Start recording |
/rebotarm_rs/mujoco/record/stop | Stop recording |
/rebotarm_rs/mujoco/record/replay | Replay a recording |
/rebotarm_rs/mujoco/record/clear | Clear recordings |
Visual Grasping
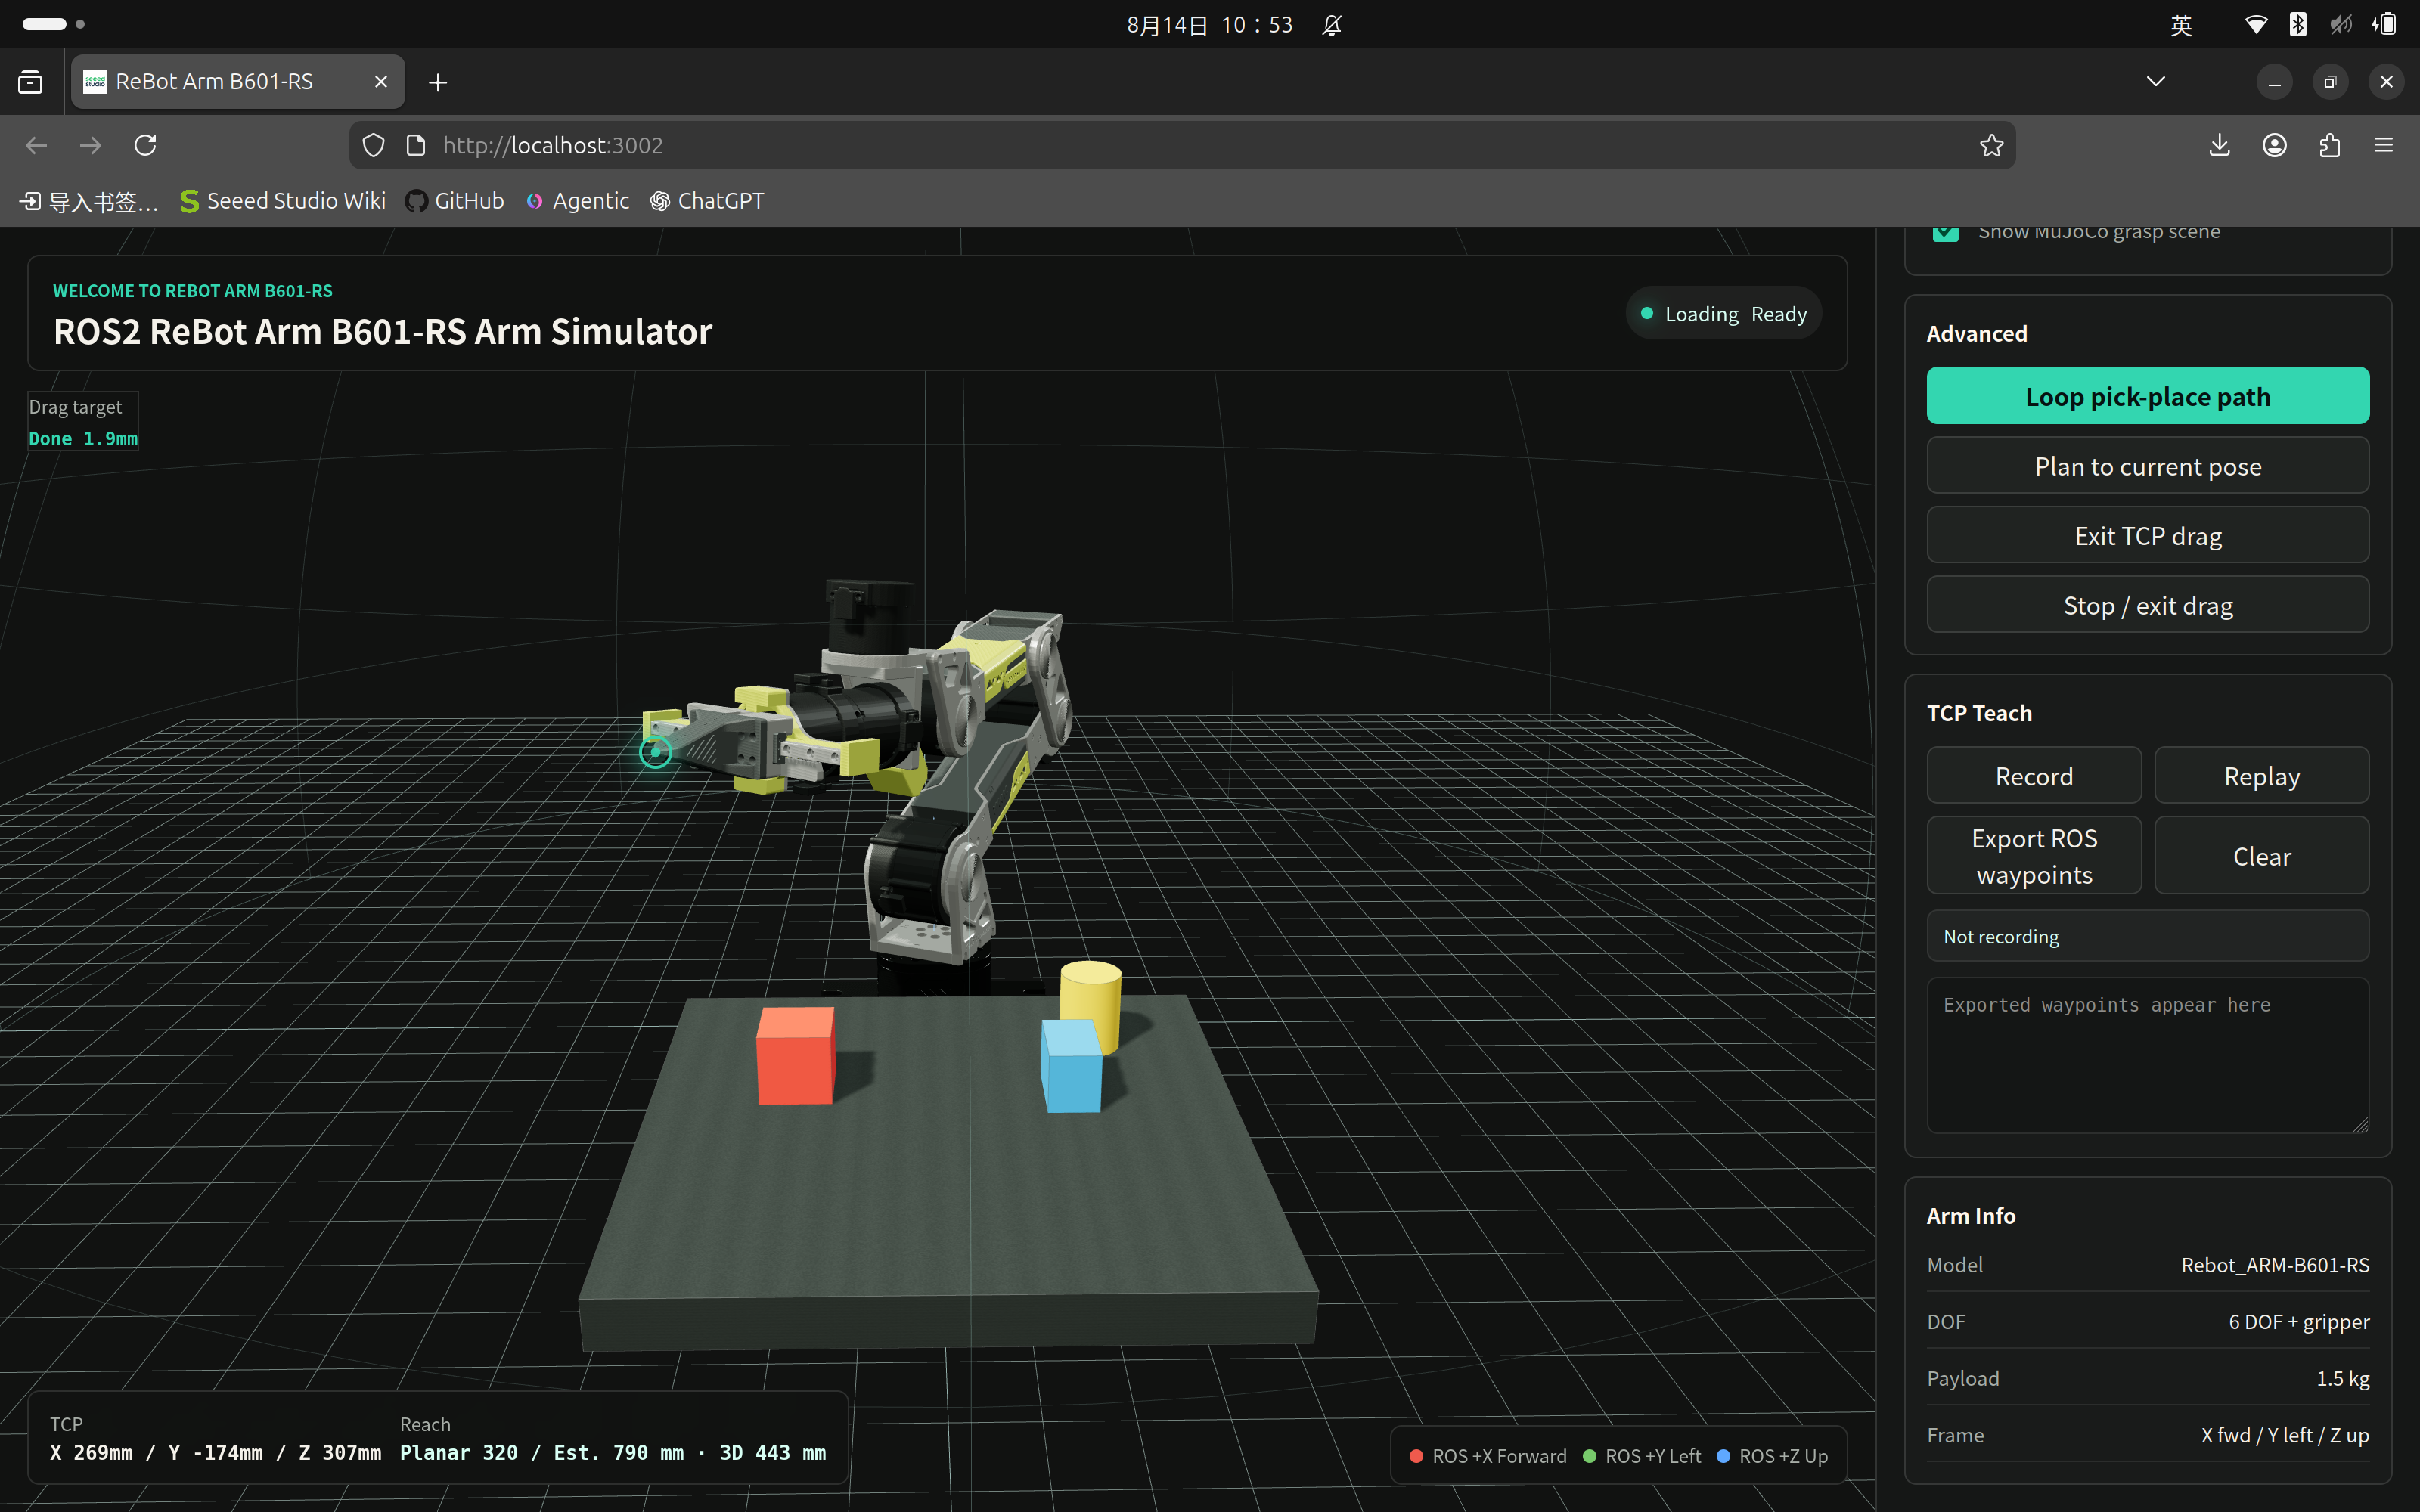
The full simulation includes a red cube, a blue cuboid, and a yellow cylinder by default. The web console can select a target color or choose automatically, then perform alignment, pre-grasp, descending, closing, lifting, and placing.
Grasp success is not only about trajectory completion. The system also checks whether the MuJoCo object was actually lifted, preventing a false success report when the gripper closes empty or the trajectory completes without picking up the object.
Troubleshoot visual grasping:
source scripts/rs_env.sh
ros2 topic echo /rebotarm_rs/vision/color_blocks/detections --once
ros2 topic echo /rebotarm_rs/mujoco/object_states --once
ros2 service list | grep rebotarm_rs
If the gripper closes but does not lift the object:
- confirm that
physicsmode is used; - check whether the camera and color detection are publishing continuously;
- check the target width, orientation, and grasping height;
- review the contact stability and physical lift validation results in the logs;
- avoid starting multiple grasping or IK requests at the same time.
LLM/MCP Text Control
Architecture
Web rebot-llm.js
  -> Node.js /api/llm/chat
  -> Text Agent (default :8082)
  -> MCP Server (default :8081/mcp)
  -> ROS 2 service/action/topic
The LLM understands natural language, and the MCP layer constrains intention into structured tool calls. Without an LLM configuration, the MCP detection, IK, joint, gripper, and grasping tools can still be called directly.
Start the Text Agent
The full simulation starts the MCP Agent by default. To enable the natural-language entry point, open another terminal:
cd ~/ReBot_Arm_DigitalTwin_RS
export DASHSCOPE_API_KEY='your-key'
export REBOTARM_LLM_MODEL='qwen-plus'
./scripts/start_rs_text_agent.sh
Default addresses:
MCP Server: http://127.0.0.1:8081/mcp
Dashboard:  http://localhost:8082
On the web console you can:
- query arm and ROS status;
- open or close the gripper;
- check whether a target pose is reachable;
- move to a specified pose;
- grasp an object of a specified color.
Before enabling motion tools in a real-robot environment, explicitly check the Agent's motion permission and namespace. The natural-language entry point cannot bypass the arm backend safety state machine or replace the physical emergency stop.
Key Control Parameters
The real-robot default configuration is located at:
rebotarm_ros2_RS/src/rebotarm_bringup/config/rebotarm_hardware.yaml
Current RS key parameters:
rate: 125
control:
  arm_control_mode: mit
  mit_kp: [80, 150, 150, 50, 50, 50]
  mit_kd: [5, 10, 10, 5, 4, 4]
  stream_acceleration_limit: 4.0
  stream_jerk_limit: 30.0
  stream_natural_frequency: 8.0
gravity_compensation:
  kp: 2.0
  kd: 1.0
Other default frequencies:
| Layer | Default frequency | Description |
|---|---|---|
| Web joint target | Up to 60 Hz | Sliders and TCP IK continuously update the target |
| Real-robot sync feedback query | 20 Hz | Refresh the RobStride measurement cache |
| ROS real-robot state | 60 Hz | Publish feedback, target, and reference from the cache |
| RS MIT control | 125 Hz | Online smoothing and motor commands |
| Fake Driver | 100 Hz | Simulation control and state |
| MuJoCo Sync | 250 Hz | Default dynamics synchronization |
| MuJoCo object state | 30 Hz | Scene and Agent |
| Overhead camera | 8 Hz | RGB image |
| Color detection | 10 Hz | Detection results |
Before adjusting gains, record all of the following at the same time:
/rebotarm/control_target
/rebotarm/control_reference
/rebotarm/joint_states
If the target is discontinuous, check the web input layer; if the reference is discontinuous, check the online trajectory; if the reference is continuous but feedback overshoots, check MIT gains, load, friction, current, and temperature rise; only check feedback filtering and rosbridge arrival intervals when the web animation alone is jittery.
Secondary Development Guide
Modify Web Joint Limits or Pose Presets
File:
reBotArm_simulator-RS/public/js/rebot-sim.js
Joint definitions are in jointDefs and presets are in presets. When modifying joint limits, verify the RS URDF, SDK configuration, and real mechanical limits together; do not only change the display range on the web.
Modify Web Command Frequency, Filtering, and Damping
File:
reBotArm_simulator-RS/public/js/ros/rebot-ros-ui.js
This file handles web command throttling, real-robot feedback filtering, the feedback dead zone, interpolation, the target shadow, control locks, and vision logic. Do not compensate for web animation latency by increasing the real-robot MIT gains.
Add Custom ROS Interfaces
The client wrapper is located at:
reBotArm_simulator-RS/public/js/ros/rebot-ros-client.js
Add Topic, Service, or Action paths in the UI layer and call the client's subscribe(), callService(), or sendActionGoal(). Interfaces should always be generated from the current namespace to avoid sending simulation commands to the real robot.
Modify the RS URDF or Mesh
ROS 2 primary models:
rebotarm_ros2_RS/src/rebotarm_bringup/description/urdf/ReBot_Arm_RS.urdf
rebotarm_ros2_RS/src/rebotarm_bringup/description/meshes_rs/
The web server reads the models above first. If the web directory is copied and run alone, it uses:
reBotArm_simulator-RS/description/urdf/ReBot_Arm_RS.urdf
reBotArm_simulator-RS/description/meshes_rs/
Keep both copies in sync when modifying them and check Linux filename case.
Modify MuJoCo
| File/directory | Role |
|---|---|
rebotarm_ros2_RS/src/rebotarm_mujoco_rs/models/ | RS MJCF and STL |
rebotarm_mujoco_rs/mujoco_sync.py | Sync frequency, dynamics, and PD |
rebotarm_mujoco_rs/scene_camera.py | Overhead camera |
rebotarm_mujoco_rs/scene_detector.py | Color detection |
rebotarm_mujoco_rs/task_server.py | Tasks, recording, and replay |
rebotarm_mujoco_rs/launch/mujoco_rs.launch.py | Launch parameters |
Extend MCP Tools
The MCP Server is located at:
rebotarm_ros2_RS/src/rebotarm_agent/rebotarm_agent/rebotarm_mcp_server.py
When adding a tool:
- define a clear input schema and units;
- separate read-only tools from motion tools;
- validate namespace, state, and motion permission in motion tools;
- call the backend through ROS 2 Service/Action/Topic instead of bypassing the controller directly;
- rebuild the workspace and test error, timeout, and cancellation paths in simulation.
Verification Commands
source scripts/rs_env.sh
python3 -m pytest rebotarm_ros2_RS/src/rebotarmcontroller/test -q

bash -n setup.sh rebotarm scripts/*.sh

node --check reBotArm_simulator-RS/server.js
node --check reBotArm_simulator-RS/public/js/rebot-sim.js
node --check reBotArm_simulator-RS/public/js/ros/rebot-ros-client.js
node --check reBotArm_simulator-RS/public/js/ros/rebot-ros-ui.js
node --check reBotArm_simulator-RS/public/js/rebot-llm.js
Runtime checks:
./rebotarm status
ros2 node list
ros2 topic list | grep rebotarm
ros2 service list | grep rebotarm
ros2 action list | grep rebotarm
FAQ
1. The web page stays on the model loading screen
Open the browser developer tools Network panel and check whether these requests return 200:
/api/urdf
/api/description/meshes/*.STL
Common causes:
- the RS URDF or STL does not exist;
- the web directory was moved alone and the fallback model is incomplete;
- the
package://mapping in the URDF is incorrect; - Linux filename case does not match;
- the load order of Three.js, STLLoader, or URDFLoader is wrong.
2. ROS shows "disconnected"
ss -ltnp | grep 9090
ros2 node list
./rebotarm status
Confirm that rosbridge listens on 0.0.0.0:9090 and that the WebSocket address starts with ws://. Remote browsers should enter the Ubuntu IP, not the browser computer's localhost.
3. The web console connects, but sliders cannot control the real robot
Check in order:
- The web console is on the RS real robot
/rebotarm. - The ROS WebSocket is connected.
- The web control lock is enabled.
- The arm is enabled.
arm_statusis not inGRAVITY_COMP,TRAJ_RUNNING, orSAFE_HOMING.- There are no CAN or motor errors in the real-robot controller.
4. The web model jitters or the target shadow persists
- Confirm that only one controller and one state publisher exist for the same namespace.
- Check whether
/joint_stateshas multiple publishers. - Record
control_target,control_reference, andjoint_statesat the same time. - Check CAN error counters and feedback arrival intervals.
- Do not run trajectory playback and manual continuous dragging at the same time.
A long-lived target shadow usually means actual feedback has not reached the target; this is not necessarily a web rendering problem.
5. No CAN feedback, or BUS-OFF
ip -details -statistics link show can0
candump can0
Check:
- whether the baud rate is
1 Mbps; - whether CAN_H/CAN_L are reversed;
- termination resistors at both ends;
- motor power and common ground;
- motor IDs and SDK configuration;
- USB-CAN driver and interface name.
Stop the real-robot test immediately if the error counter keeps increasing.
6. The arm does not power off immediately after clicking disable
If the arm is not near the zero pose, the controller performs safe homing first and validates it. This is expected behavior. If homing fails, the system keeps the arm enabled to prevent falling from a non-zero pose. Use the physical emergency stop in an emergency.
7. Gravity compensation fails to start or cannot control
- Confirm that the arm is enabled.
- Query
/gravity_compensation/status. - Confirm that no trajectory or safe homing is running.
- Other motion commands are rejected during gravity compensation.
- Support any load that may fall when switching modes.
8. Visual grasping does not work
Confirm that the full rs_sim is running in physics mode, then check:
ros2 topic echo /rebotarm_rs/mujoco/overhead_rgb/image_raw --once
ros2 topic echo /rebotarm_rs/vision/color_blocks/detections --once
ros2 topic echo /rebotarm_rs/mujoco/object_states --once
If the button shows that a task is queued, wait for the current serial action to finish and do not start multiple grasping requests repeatedly.
9. The LLM assistant fails to connect
Confirm that the Text Agent is started:
./scripts/start_rs_text_agent.sh
Check REBOTARM_TEXT_AGENT_URL and REBOTARM_MCP_URL in reBotArm_simulator-RS/.env. The web console checks the backend through /api/llm/health. Do not write API keys into web source code or commit them to the repository.
10. The page still shows an old version after modifying the front end
The RS web console includes Service Worker/PWA support. First use Ctrl+Shift+R for a hard refresh; if it still does not update, clear site data or unregister the Service Worker in browser developer tools, then reload the page.
11. setup.sh or colcon build fails
- Confirm that the Ubuntu, ROS 2, and Python versions match.
- Confirm that rosdep is initialized and can update.
- Run
./setup.sh --checkto see the missing items. - Confirm that
numpy,scipy,mujoco,pinocchio,motorbridge, andfastmcpcan be imported inrebotarm_ros2_RS/.venv. - Back up user files before deleting or resetting them, and do not solve build problems with destructive commands.
Quick Command Table
# Check and install
./setup.sh --check
./setup.sh --yes
./rebotarm doctor

# Full simulation
./rebotarm start rs_sim
./rebotarm start web

# Natural-language Agent
export DASHSCOPE_API_KEY='your-key'
./scripts/start_rs_text_agent.sh

# RS real robot
sudo ip link set can0 type can bitrate 1000000
sudo ip link set can0 up
REBOTARM_RS_HARDWARE_CONFIRM=I_UNDERSTAND_RS_WILL_MOVE ./rebotarm start rs

# Status and stop
./rebotarm status
./rebotarm stop
References
- ROS 2 Jazzy documentation: https://docs.ros.org/en/jazzy/
- rosbridge_suite: https://github.com/RobotWebTools/rosbridge_suite
- Three.js: https://threejs.org/docs/
- URDFLoader: https://github.com/gkjohnson/urdf-loaders
- MuJoCo: https://mujoco.readthedocs.io/
- Model Context Protocol: https://modelcontextprotocol.io/
- B601-RS project documentation:
README.md,USER_MANUAL_ZH.md,DEVELOPER_GUIDE_ZH.md,DATA_FLOW_RS_ZH.md