12. Robot Datasets and Task Design
Chapter 12 of the Seeed Embodied Intelligence Beginner's Course — what an Episode is, what is in one data record, timestamps and synchronization, start/end conditions, consistency vs diversity, data quantity vs quality, and a worked data-creation example.
12.1 What Is an Episode?
12.1 What Is an Episode?
Starting from this chapter, every operation you do means you've switched roles — you're no longer the "driver," you're the "teacher." Every action you take will be recorded and become the model's textbook. The basic unit of this textbook is the Episode.
An Episode is one complete task demonstration. From when the arm is at its starting pose and the task begins, until task completion, all data continuously recorded by the system constitutes one Episode.
12.2 What Exactly Is in One Data Record?
12.2 What Exactly Is in One Data Record?
Recall Chapter 9 — this should look familiar. Yes, it's what we learned before: Observation, State, Action.
Note the source of Action: it records the target action given (via the Leader), not the position the Follower actually reached afterward. This precisely matches the definition of behavioral cloning — the model learns "under this observation and state, what the human intended to do at that moment."
12.3 Timestamps and Data Synchronization
12.3 Timestamps and Data Synchronization
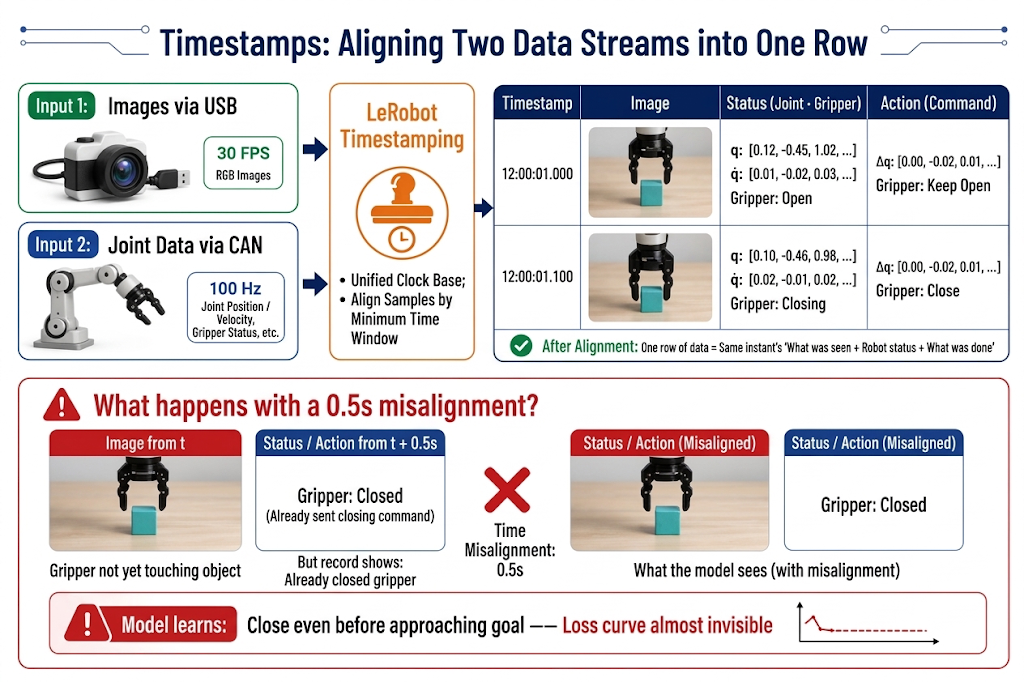
Images go over USB, joint data goes over CAN — the two data streams naturally arrive at the computer at different times. LeRobot timestamps each frame of data, thereby aligning images, states, and actions from "the same moment" into one row.
12.4 Task Design: Start and End Conditions
12.4 Task Design: Start and End Conditions
Before collecting data, write out the task definition clearly in text. A good task definition answers two questions: Where does it start? When is it done?
Start Condition: Give the Model a "Fixed Starting Point"
- Fixed initial arm pose: every Episode starts from the same safe pose (e.g., a standard pose near zero). If starting poses vary wildly, the model's first step is to learn "how to enter the task from any pose," adding unnecessary difficulty.
End Condition: Draw a Clear "Finish Line" for the Episode
- Successful end: task goal achieved (e.g., "block fully inside the box, gripper released, arm lifted away").
- Failure termination: an unrecoverable situation occurs (object dropped, container knocked over, arm enters a dangerous pose) — stop recording this Episode immediately.
12.5 Task Consistency vs. Diversity
12.5 Task Consistency vs. Diversity: The Core Tension in Data Design
This is the most critical section of the chapter. High-quality demonstration data must simultaneously satisfy two seemingly contradictory requirements.
Consistency: Teaching One "Way of Doing It"
- Consistent operation style: for the same task, all Episodes should use the same strategy (e.g., always approach the block from the right, grasp it, and lower it into the box from above). If half the data grasps from the left and half from the right, the model learns the "average" of two approaches — often a weird path that grasps nothing.
- Consistent rhythm: movement speed and pause positions should be roughly stable — if you set 20 seconds, complete it within 20 seconds. Data that varies in speed makes the model's actions inconsistent in speed.
- Consistent workflow: every run should go through the full "approach → grasp → transport → place → retract" workflow without skipping steps.
- Controlled scene initial state: objects should be placed within a designated area (the area can be large, but boundaries must be clear); remove unrelated items from the workspace.
- Fixed camera position: cameras must not move during collection — to the model, moving the camera 5 cm means the world has changed.
Diversity: Enough "Variations" Seen
- Diverse target positions: blocks appear at various positions in the workspace (grid coverage, not random scattering).
- Diverse initial poses: block orientation and relative position to obstacles should vary.
12.6 Success and Failure Criteria
12.6 Success and Failure Criteria
| Unqualified Standard (Ambiguous) | Qualified Standard (Measurable) |
|---|---|
| "As long as the object is roughly grasped." | "The gripper is fully closed and grasps the center of the block." |
| "As long as the block is placed inside the box." | "The block is placed near the center of the box rather than randomly near the edge." |
| "Just pick up the block and put it into the box." | "The entire motion should be smooth, and the duration of each recorded episode should remain reasonably consistent." |
For failed segments during recording, the principle is simple: re-record this Episode. Don't hold onto failed data hoping "maybe the model will learn from it" — the model will indeed learn, including from the failures.
"Task complete" must be an objectively determinable state, not "looks about right." Good success criteria look like this:
12.7 Data Quantity vs. Data Quality
12.7 Data Quantity vs. Data Quality
Empirical reference (for a single tabletop task in a clean environment such as a data collection box; if no data collection box, increase the dataset size):
| Data Amount | Expected Effect |
|---|---|
| 50 Episodes | Pipeline works; model starts working in the data-covered area (starting level for introductory tasks) |
| 50–100 Episodes | Success rate reaches a usable range; the sweet spot for most single-task experiments |
| 100+ Episodes | Diminishing returns, unless the task is complex or success rate requirements are very high |
For multi-task, increase data proportionally to complexity. Of course, data can be supplemented after training — when you find the model's performance isn't great, you can add more data.
But put this sentence before the numbers:
- 50 high-quality Episodes are better than 200 sloppy ones.
- If there's a problem with data collection, don't hesitate — re-record this Episode immediately.
- If you want strong generalization, you'll need hundreds or thousands of Episodes.
12.8 Single-Task vs. Multi-Task Datasets
12.8 Single-Task vs. Multi-Task Datasets
- Single-task dataset: one dataset contains only one task (e.g., "block into box"). The model has a single goal, data requirements are small, and success rate is easier to achieve. Your first model must start with a single task.
- Multi-task dataset: one dataset contains multiple tasks (grasp block, open drawer, put block in drawer); each Episode is labeled with
task_indexto indicate which task it belongs to. Data utilization is high and it's the direction toward general policies, but tasks compete for model capacity, requiring more data per task to learn well.
12.9 Data Collection Iteration
12.9 Data Collection Iteration
Collect in batches with iterative validation: collect 50 → train → evaluate on real robot → collect more for failure scenarios → retrain. If the model's overall direction is right but precision is poor, adding data helps; if model behavior is completely wrong, there's a problem with task or data design, and no amount of additional data will help.
12.10 Data Creation Example
12.10 Data Creation Example
Scene Design
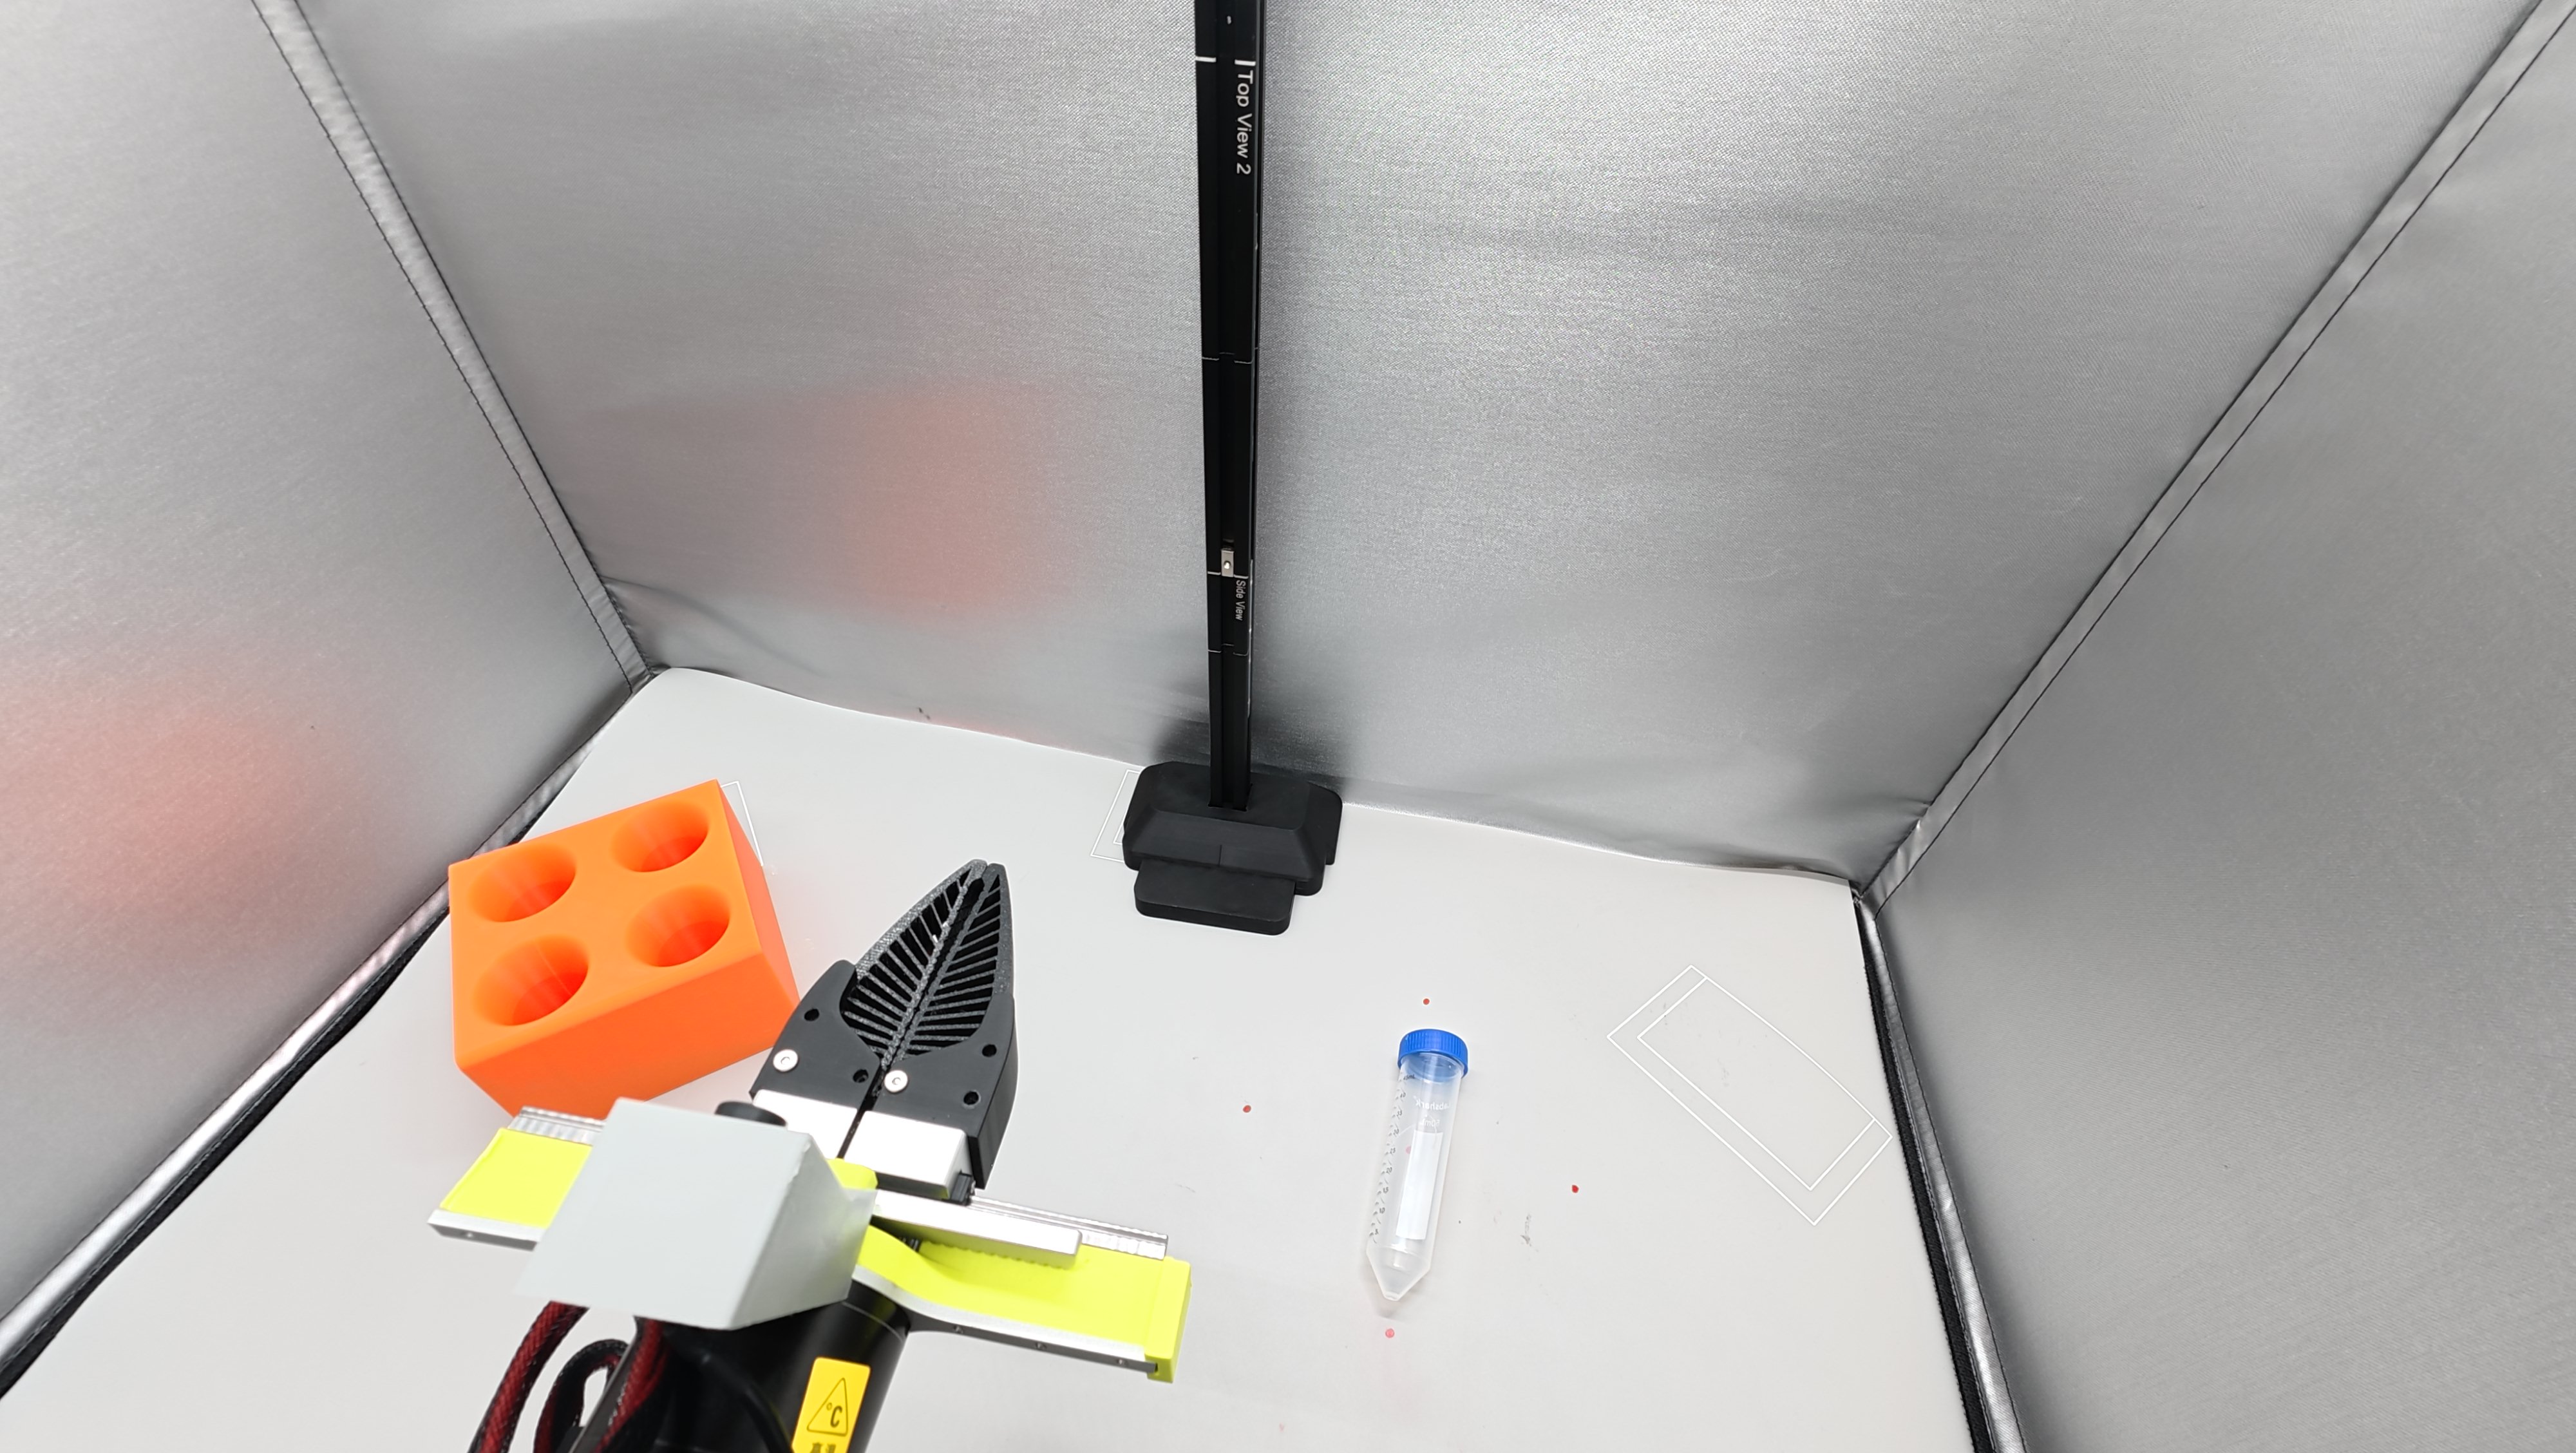
- Place test tubes into a test tube rack. Note: secure the rack bottom with double-sided tape to prevent it from moving; keep cameras and arm in fixed positions, and keep lighting unchanged.
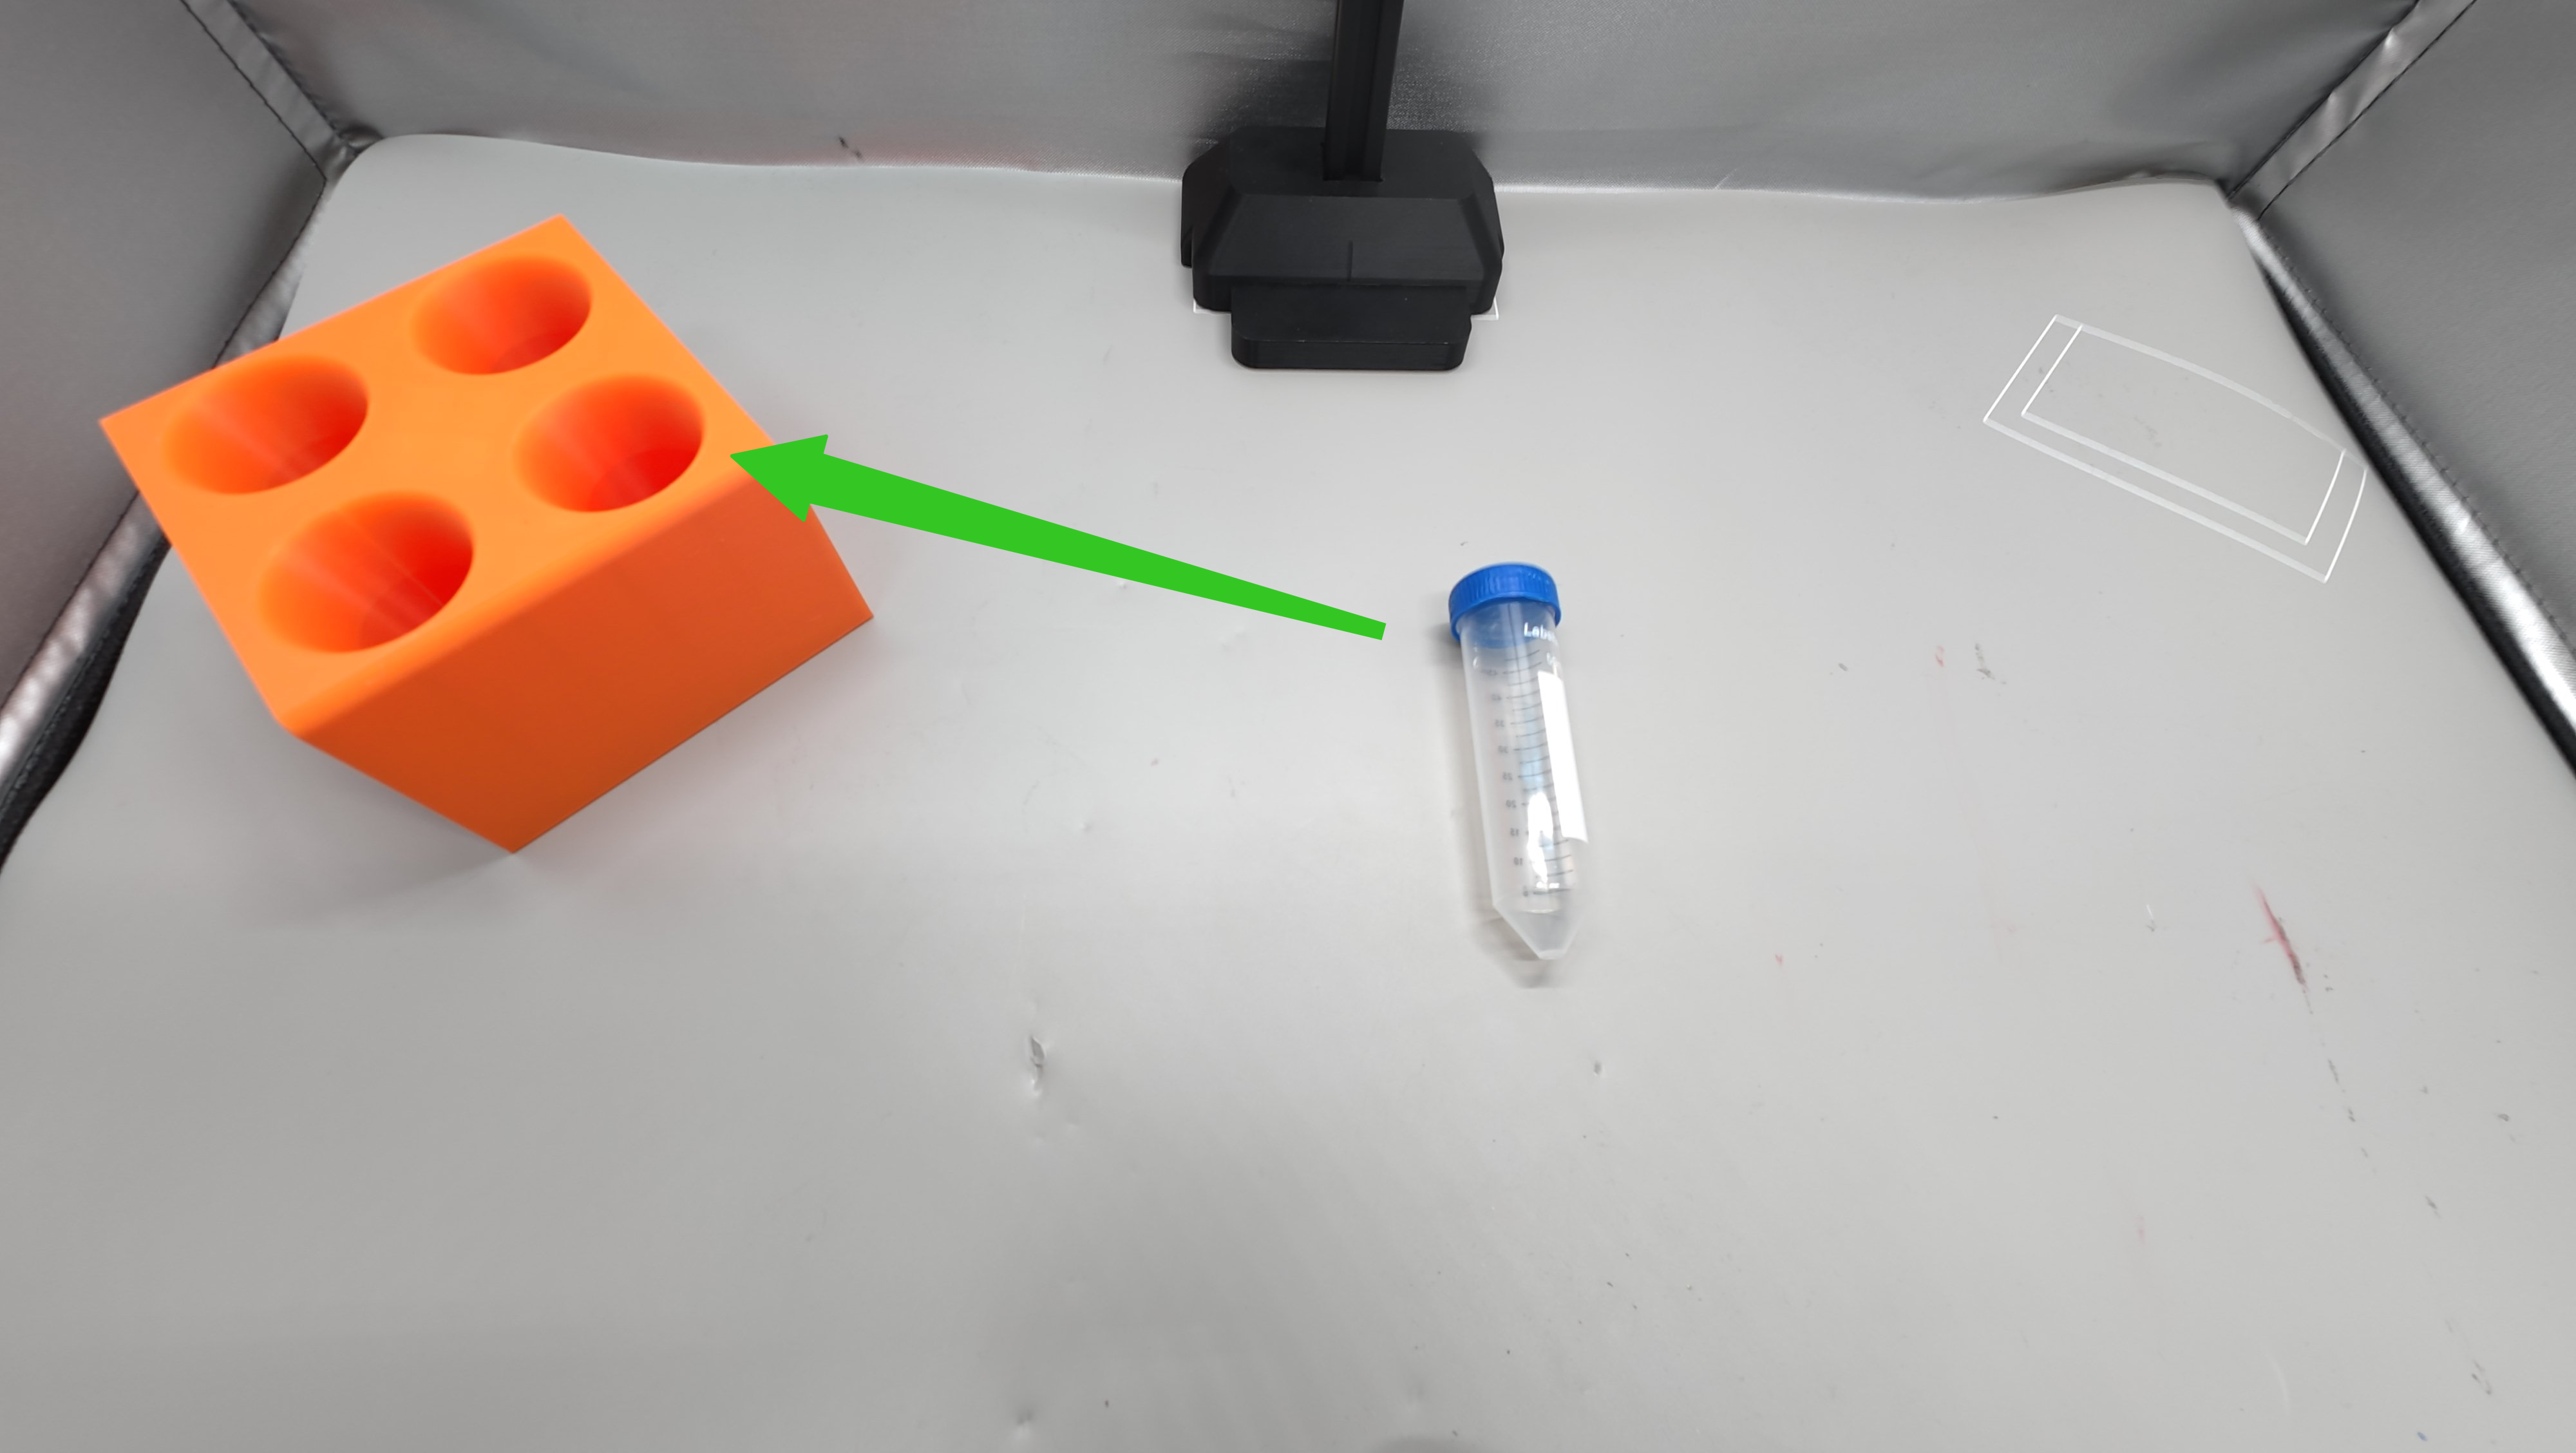
- Place test tubes according to the points shown in the figure; 1→2→3→4→5 is one round. Collect for 10 rounds.
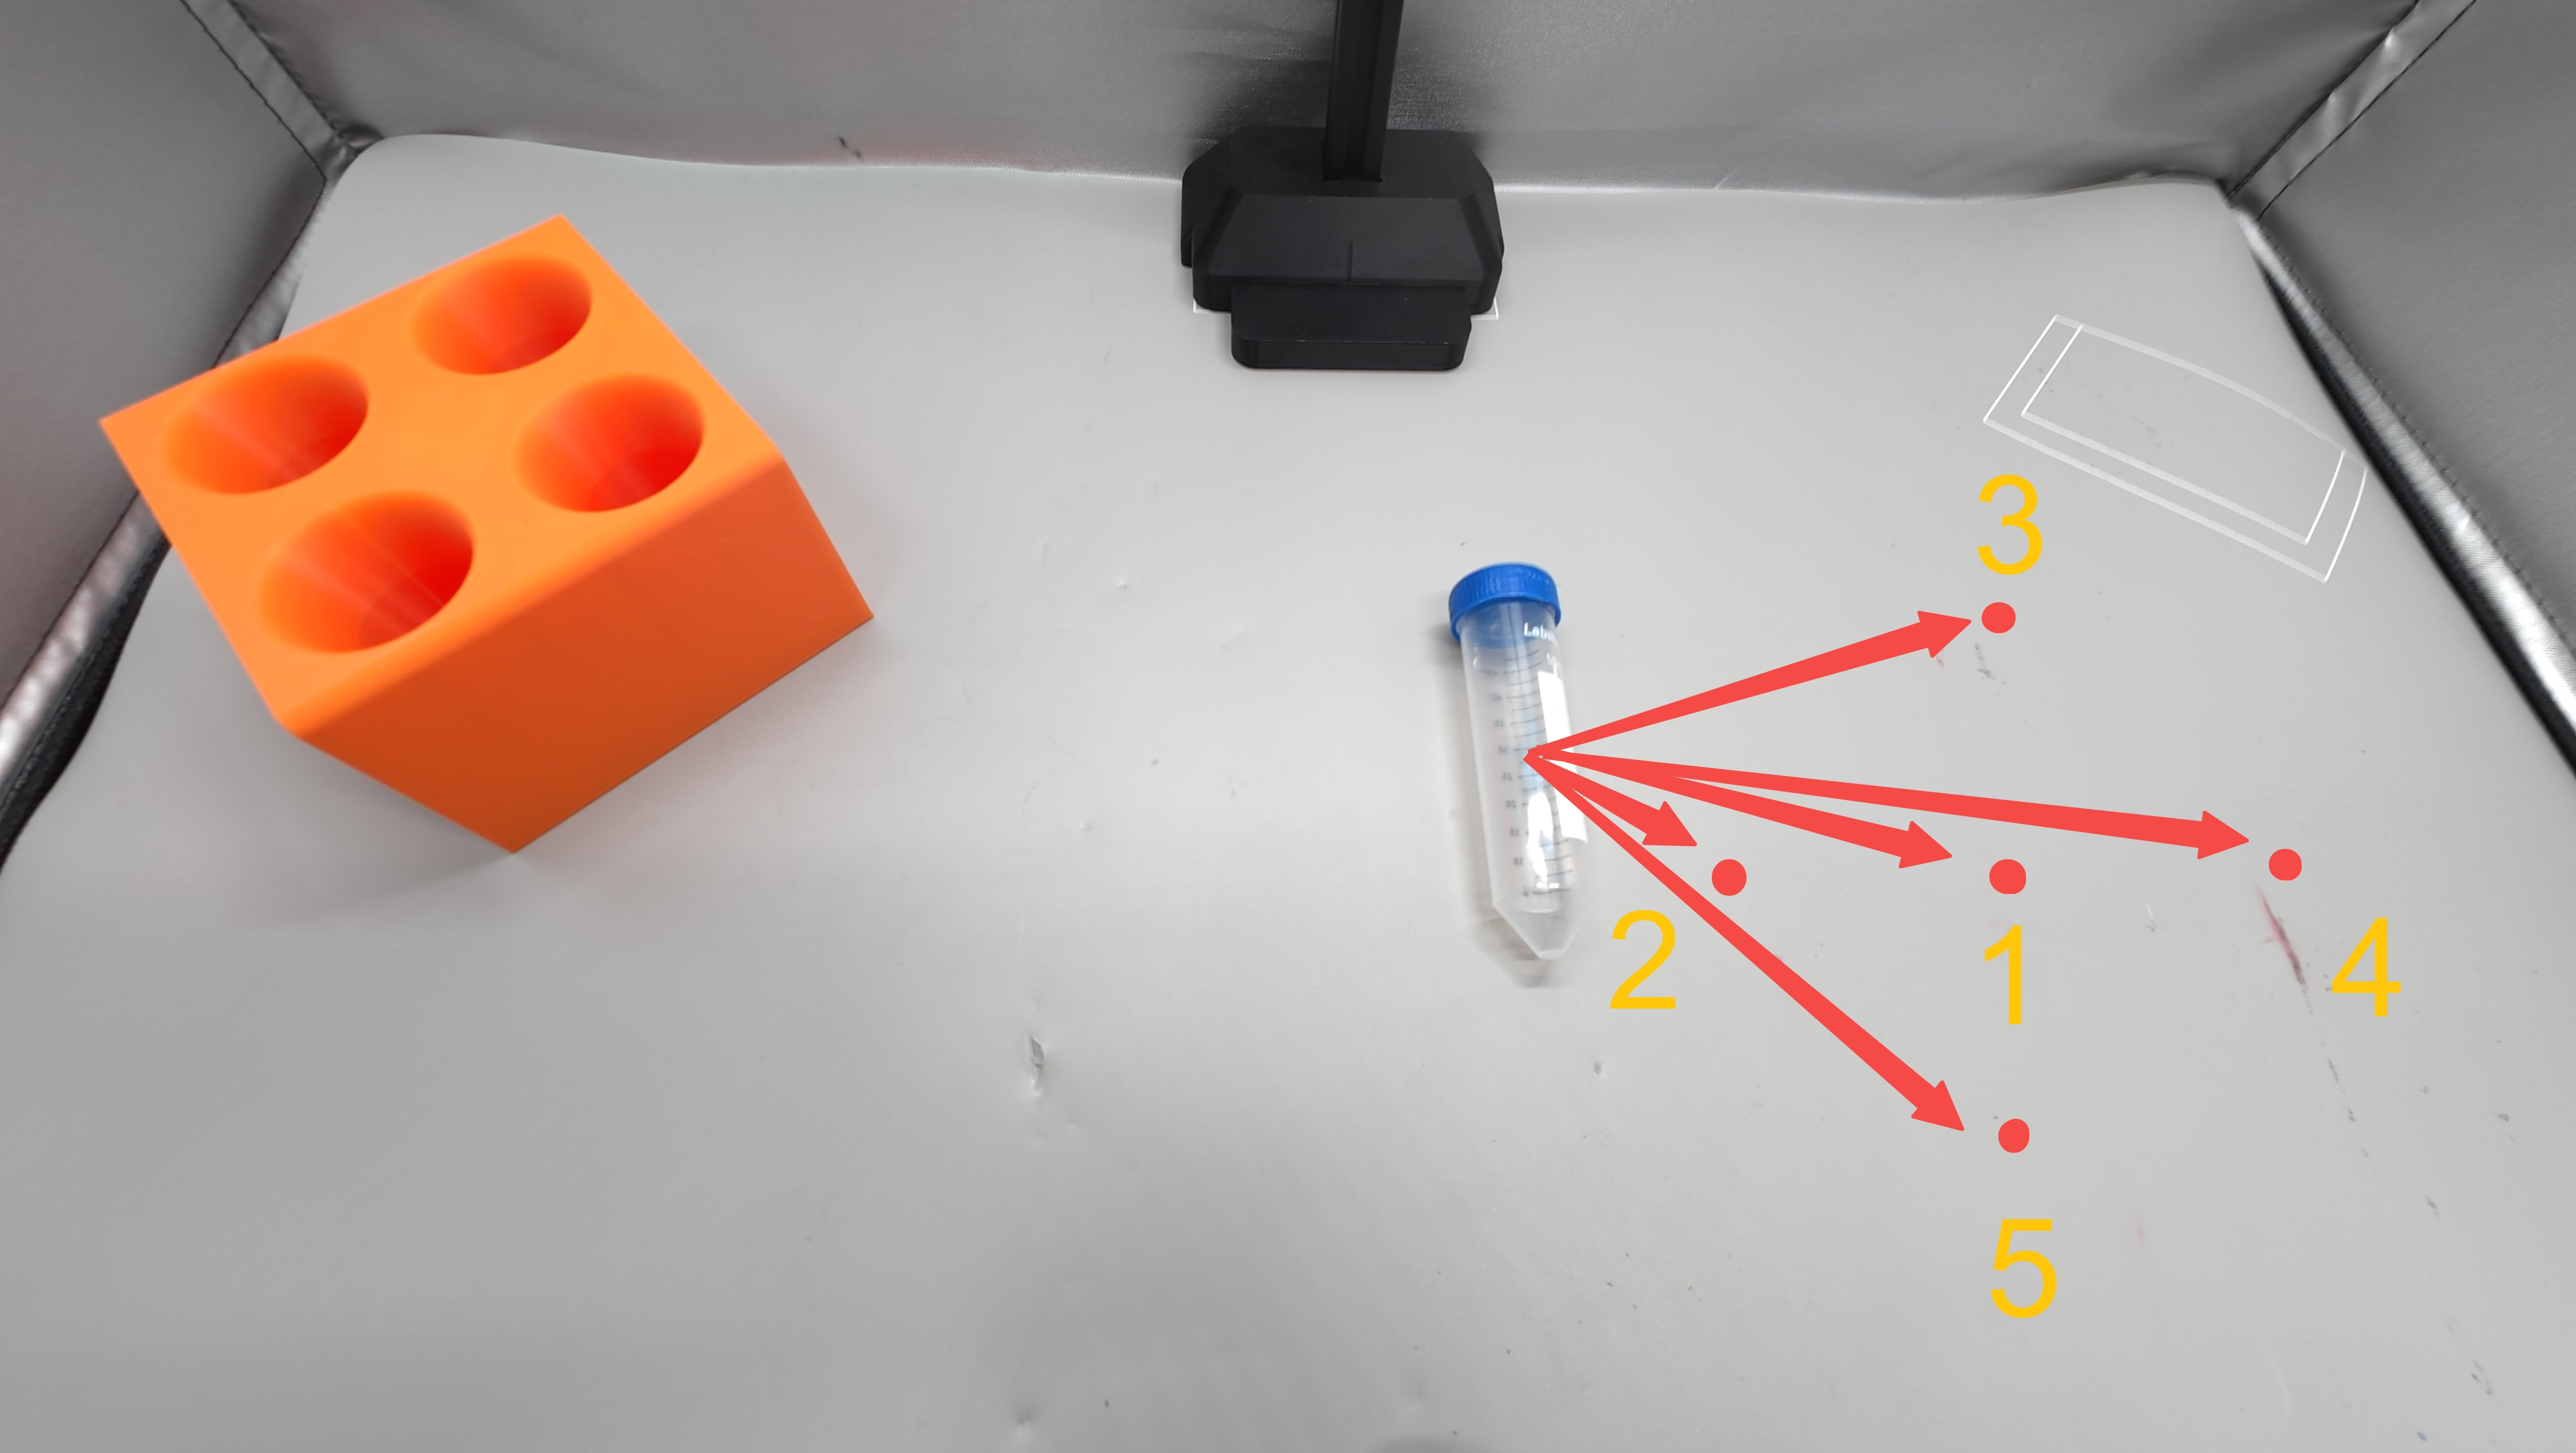
The most headache-inducing problem for beginners recording data is "how to place objects to practice thoroughly" — random placement either clusters everything in a small area (the model only recognizes that spot and fails at other positions) or scatters them irregularly (some areas are over-practiced, others never touched). It's like only practicing problems you already know during review, then failing when the exam changes the format; or like only showing a robot one flavor of snack, so it has no idea where to start at a buffet. Here's a simple and standardized method:
- Mark points: use a pencil to mark 5 points in the data collection area (collection box / desk mat), arranged in a cross shape — 1 in the center, one each at top, bottom, left, and right.
- Set spacing: adjacent points should be separated by 5–10 cm, ensuring all five points are within the arm's workspace and clearly visible in both camera feeds.
- Allocate: collect 10 Episodes at each point; 5 points × 10 = 50 Episodes, which meets the target. Also note: don't collect 10 Episodes at point 1, then 10 at point 2, etc.; instead, collect 1 Episode at each point (5 points = 1 round), and do 10 rounds this way.
Grasping and Placement Design
- Initial position
- Grasp the object
- Move the arm directly above the test tube (always move to the tube's center at the same height above it).
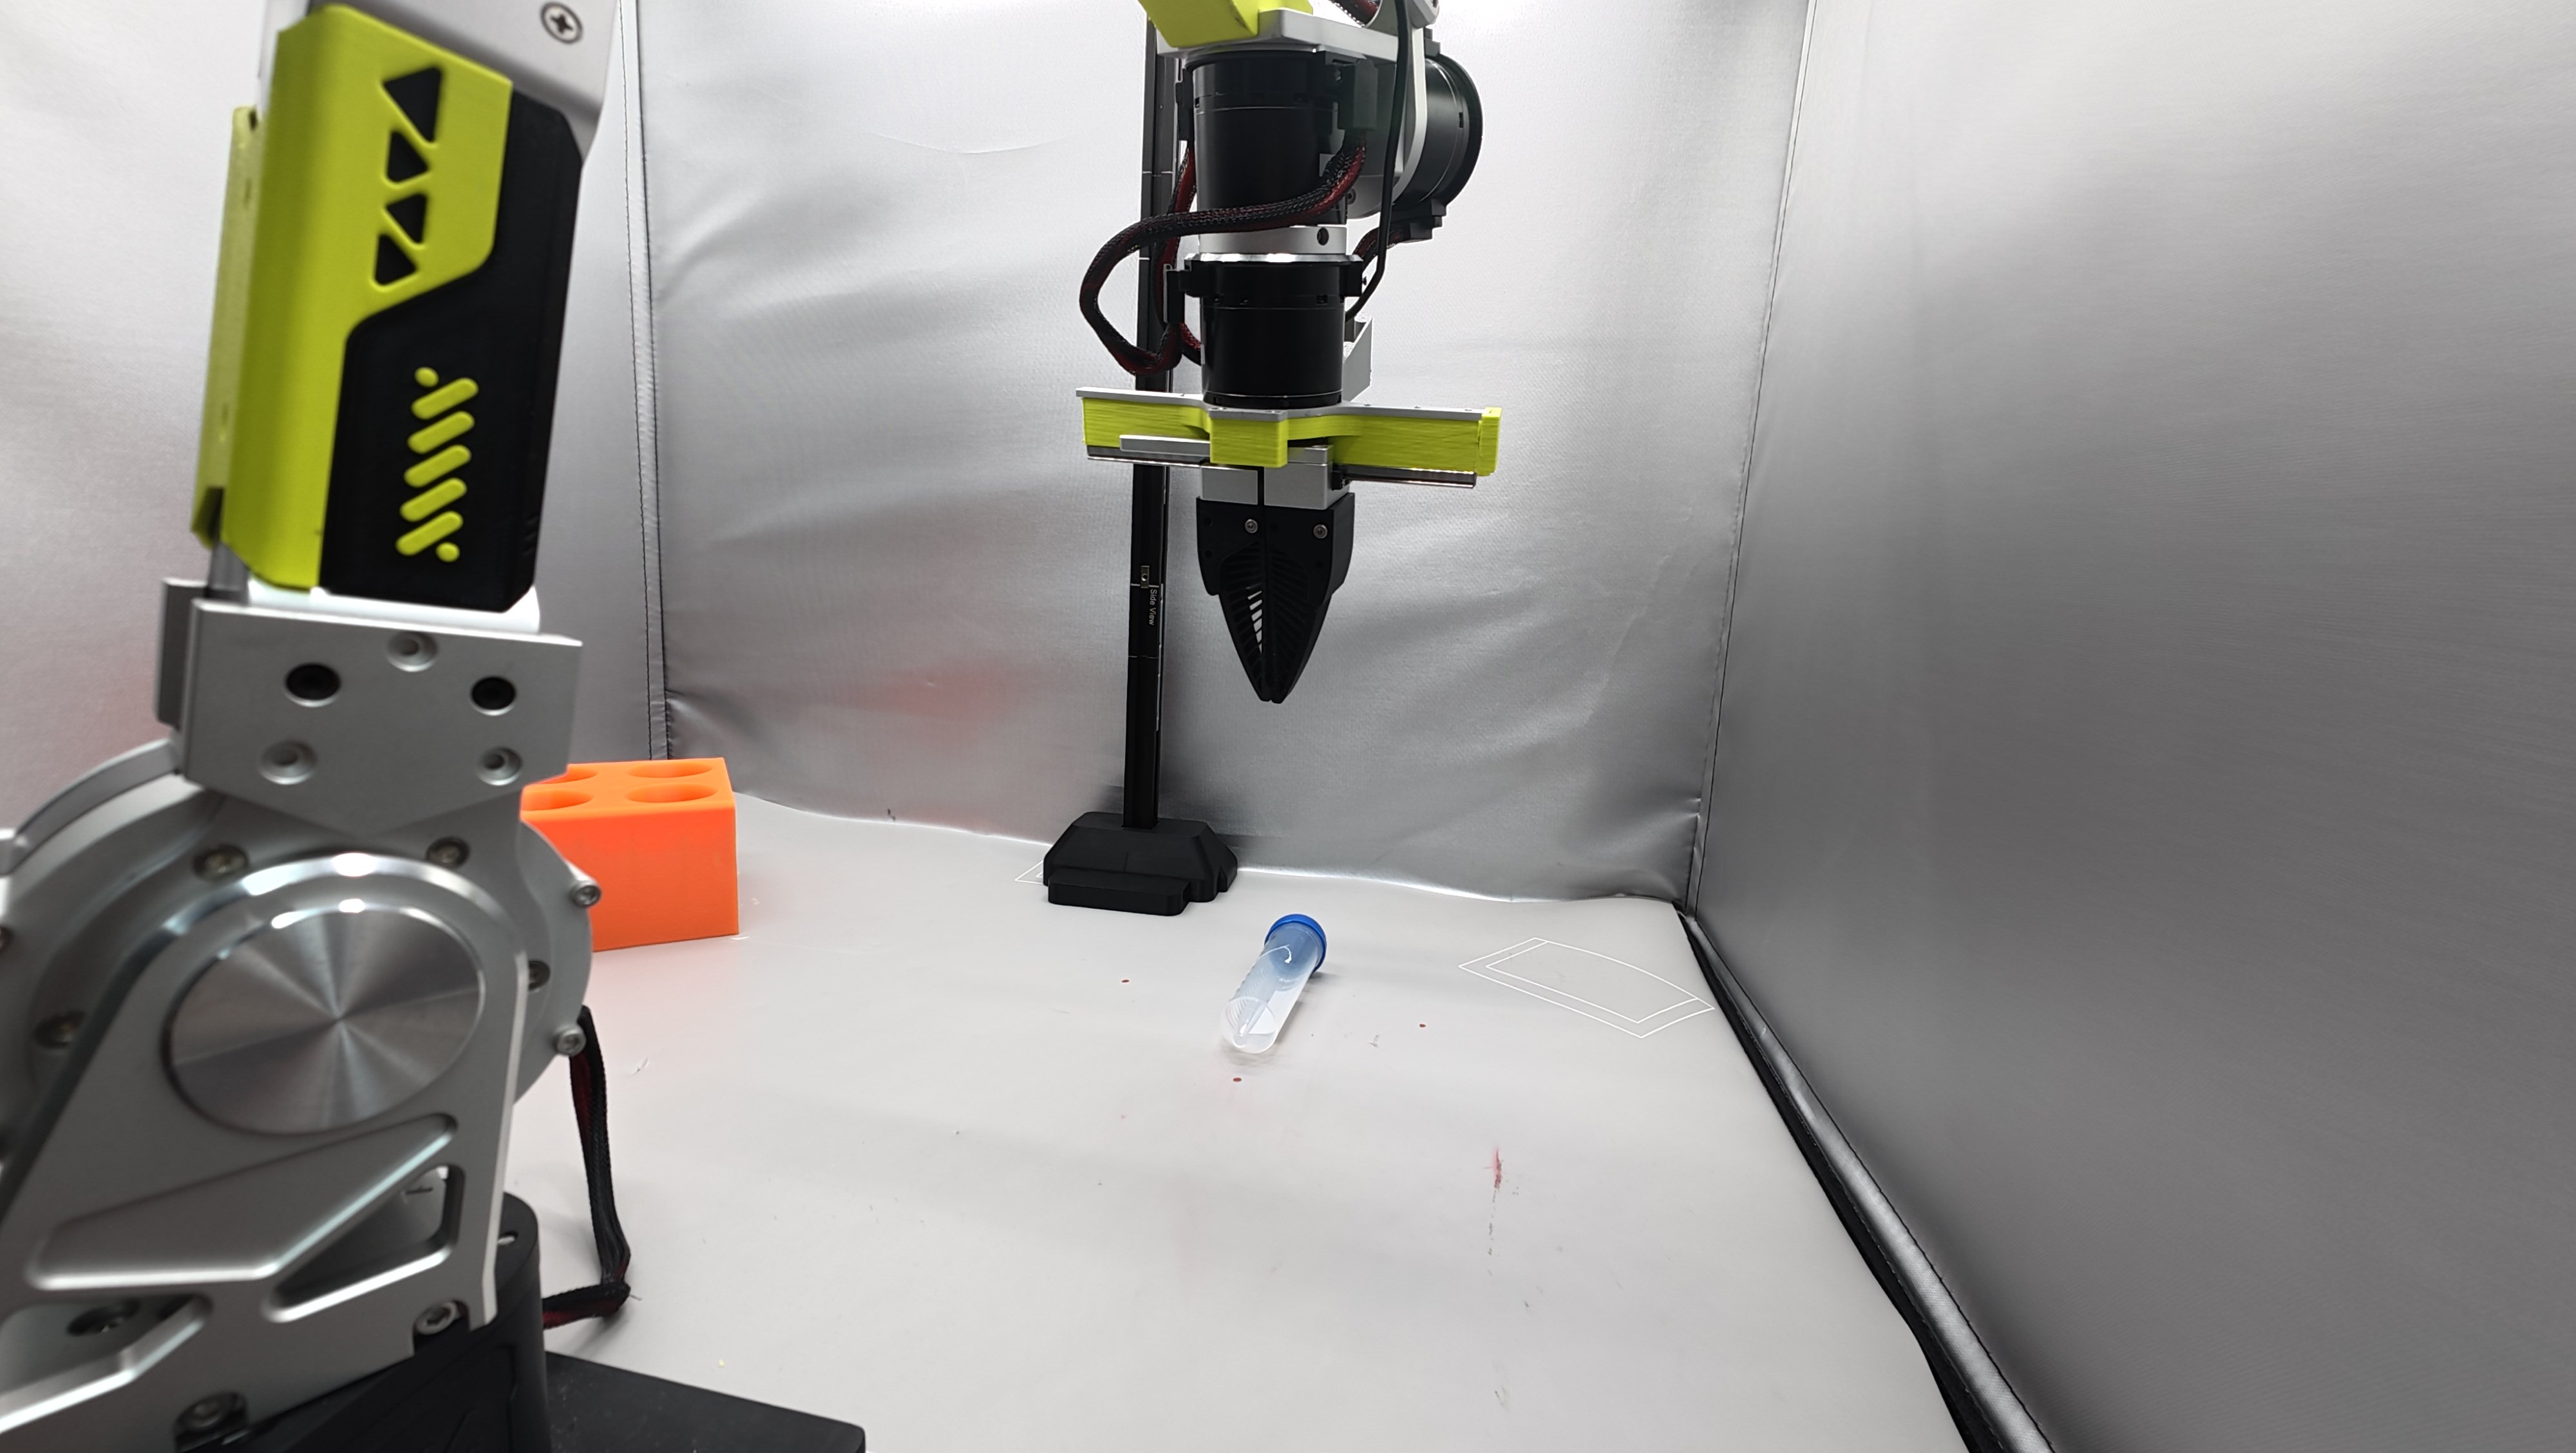
- Open the gripper (why start at a fixed distance? To avoid bumping the tube while opening the gripper and shifting its position).
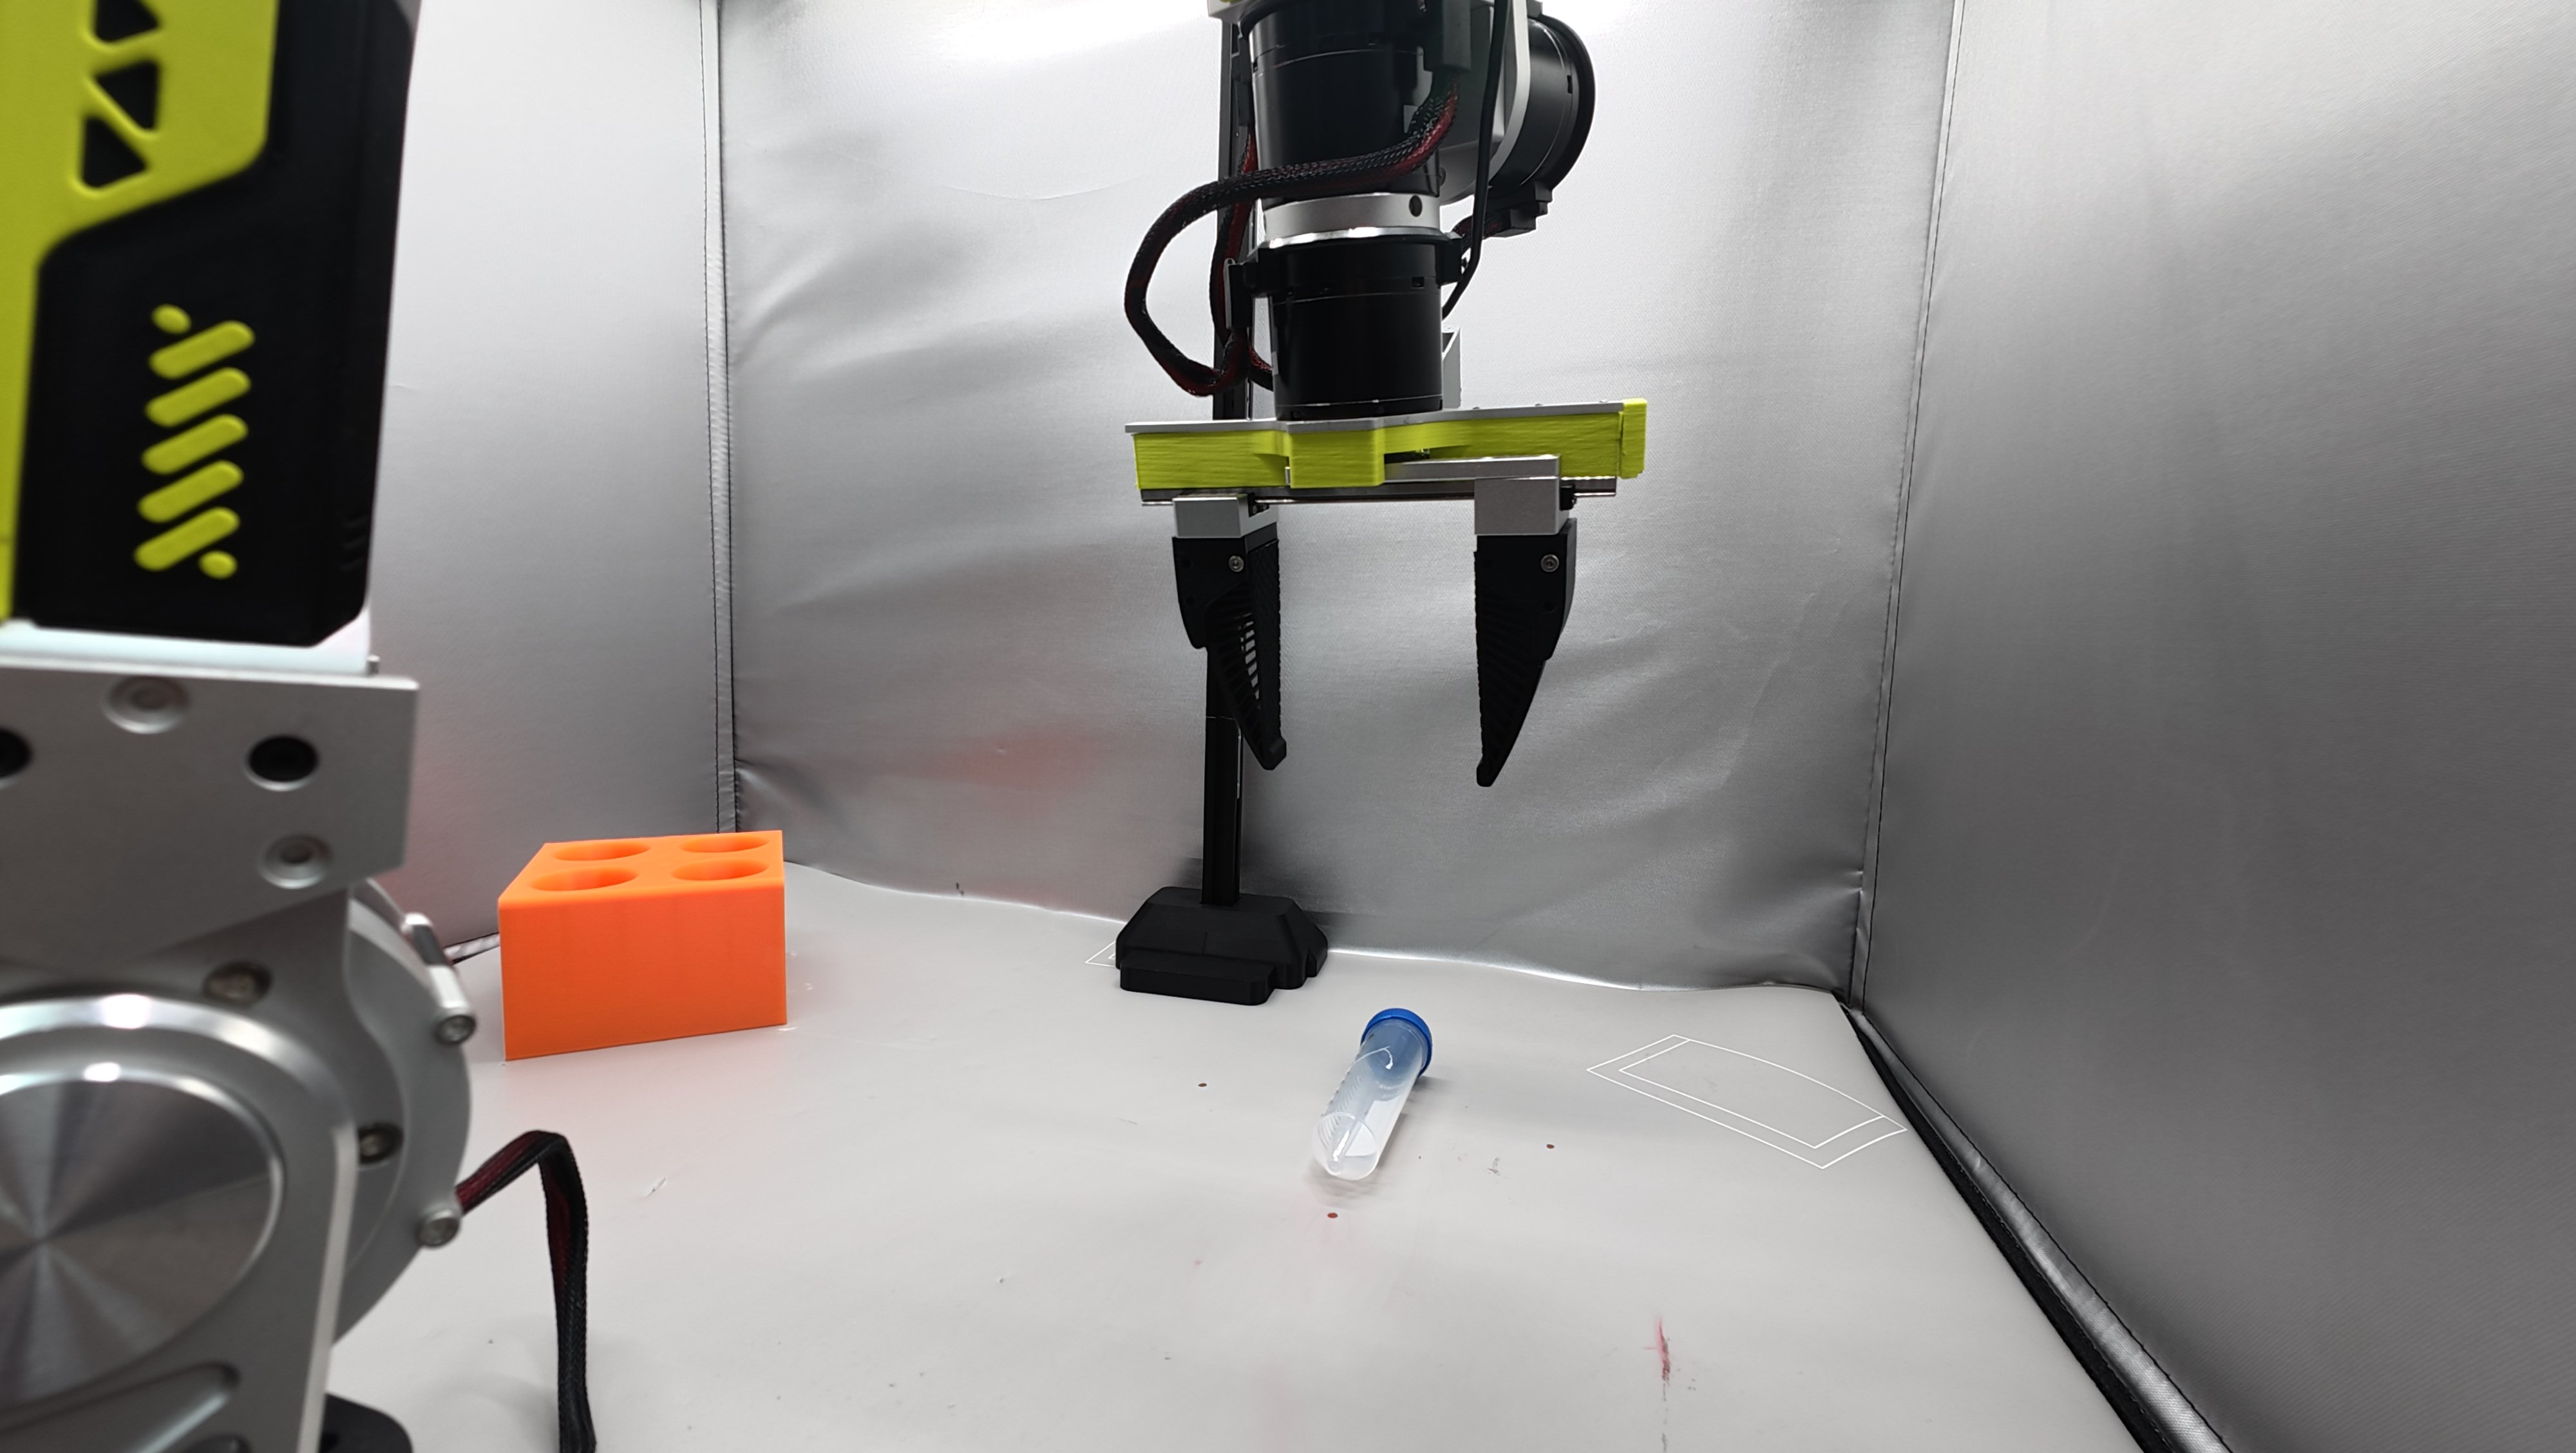
- Grasp with the same force and speed each time.
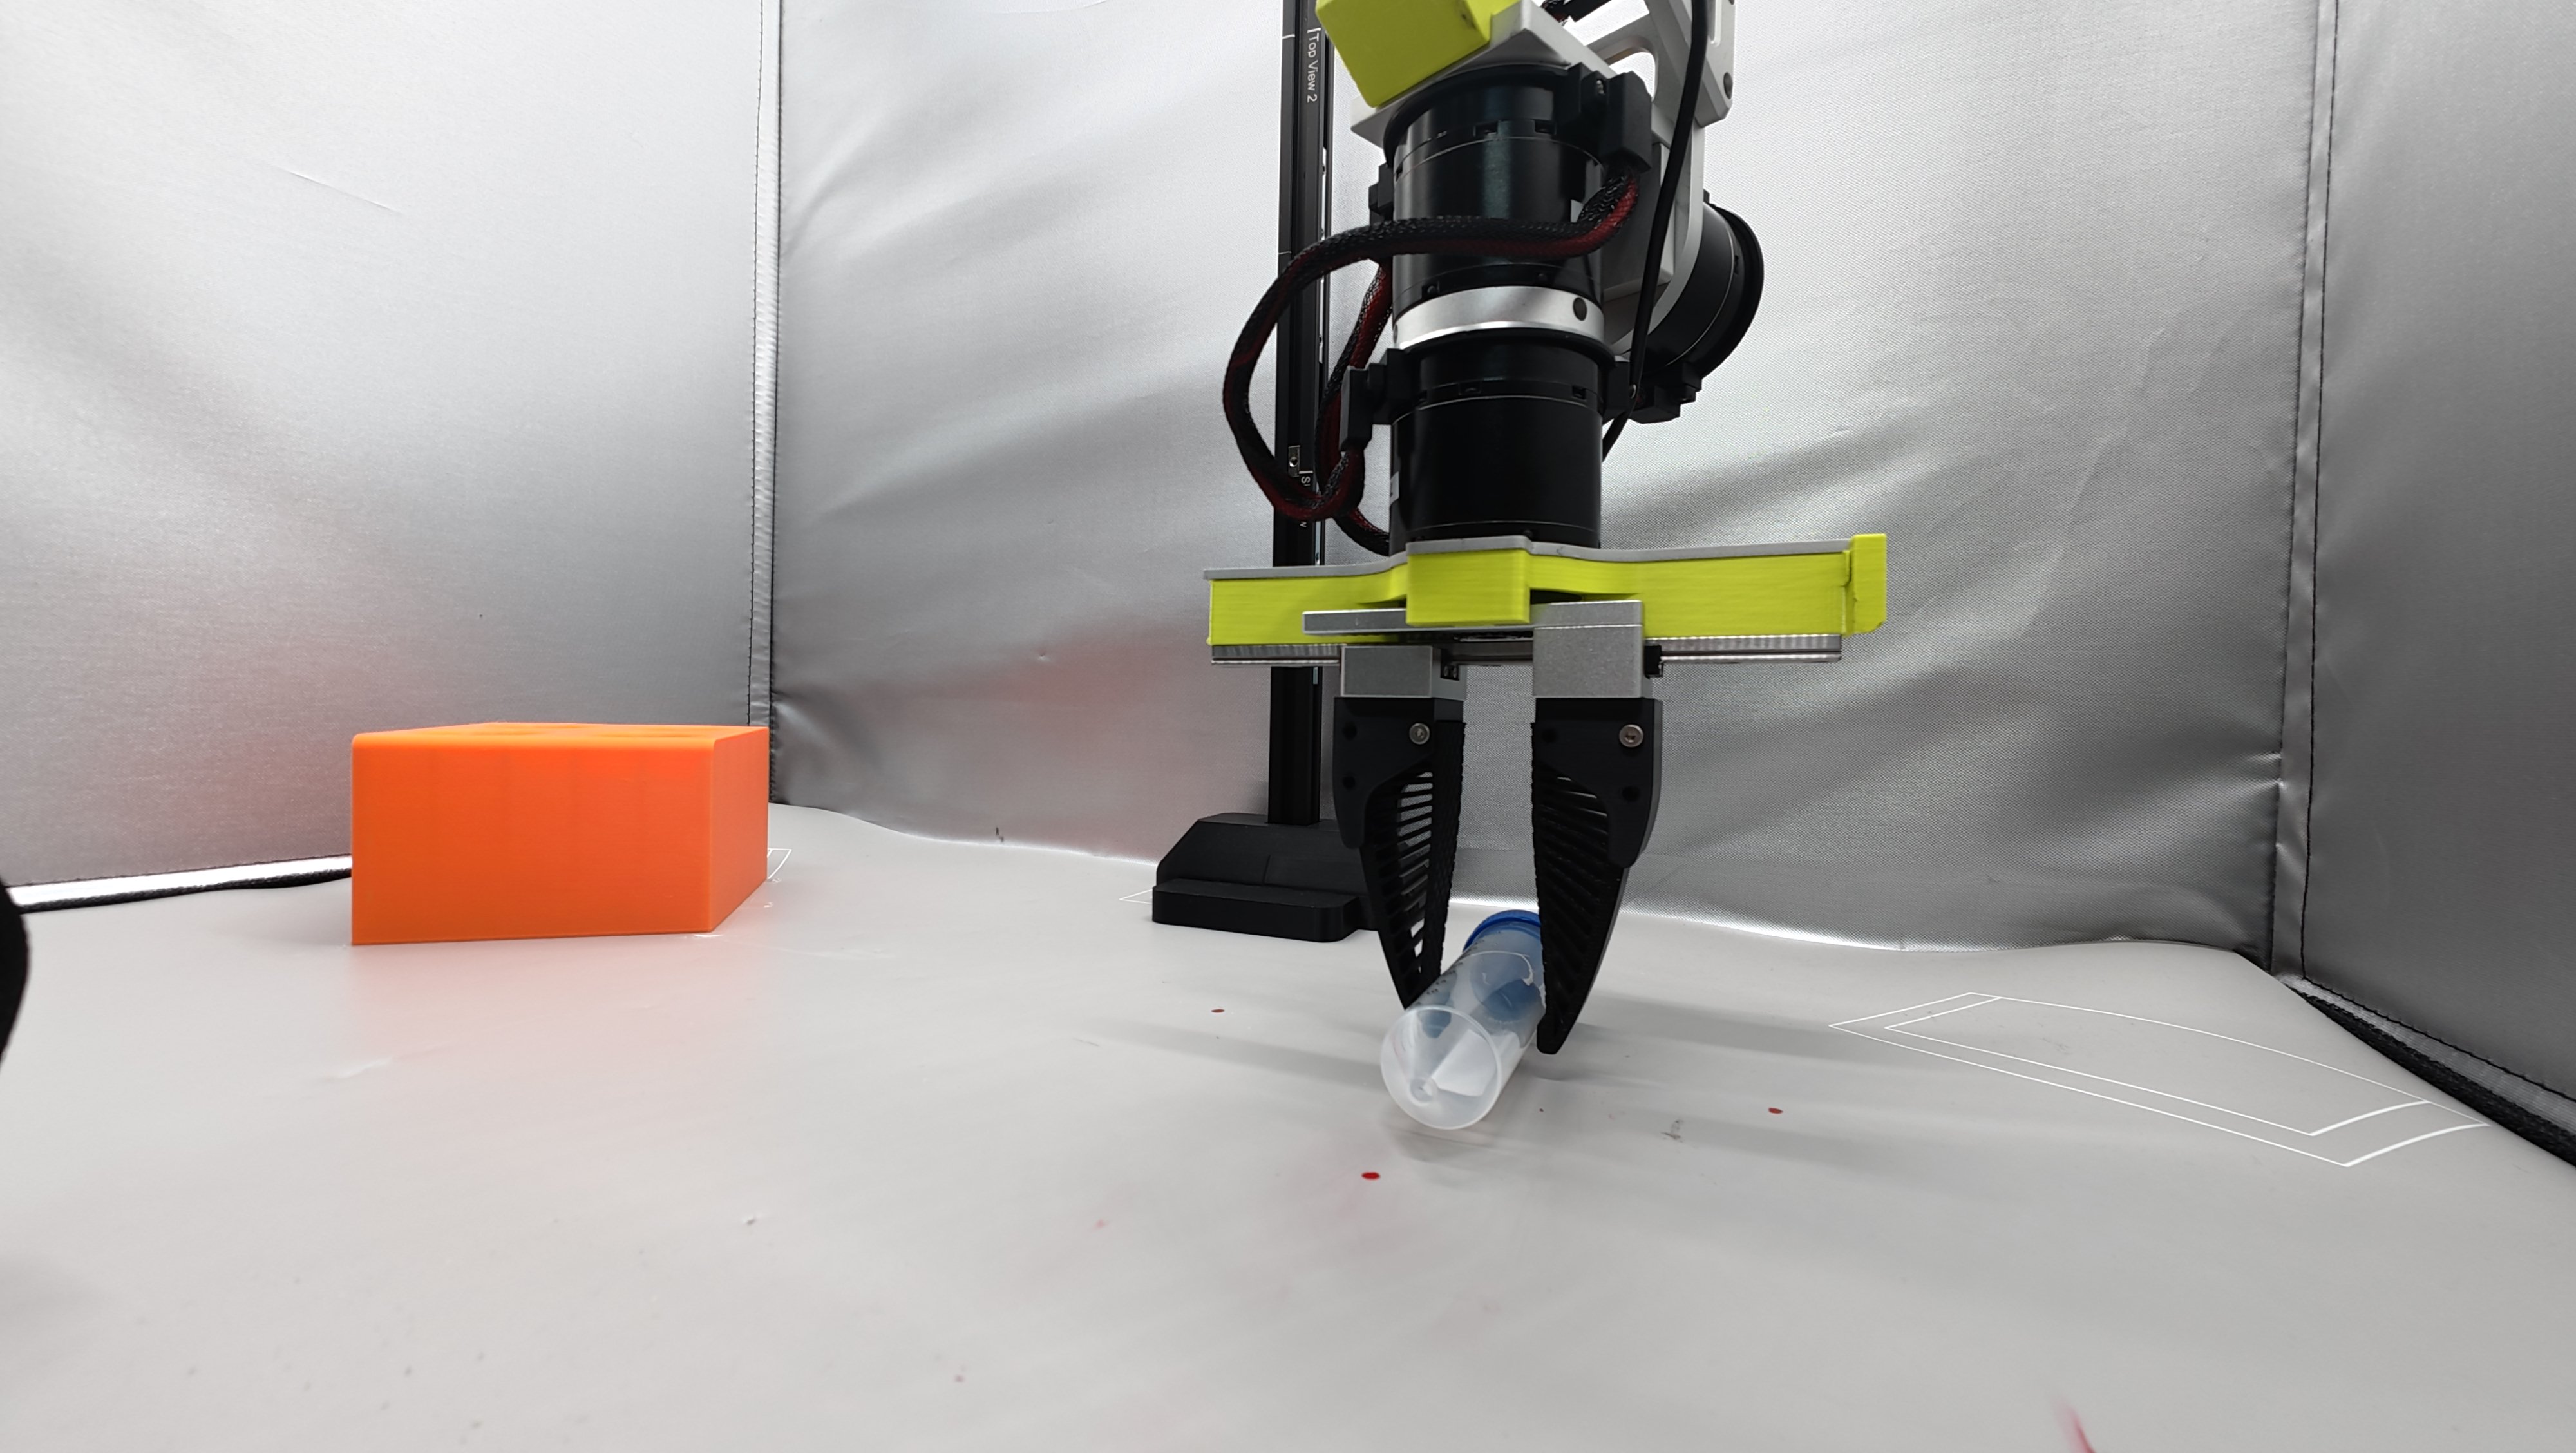
- Place the object
- Move directly above the center of the test tube rack.
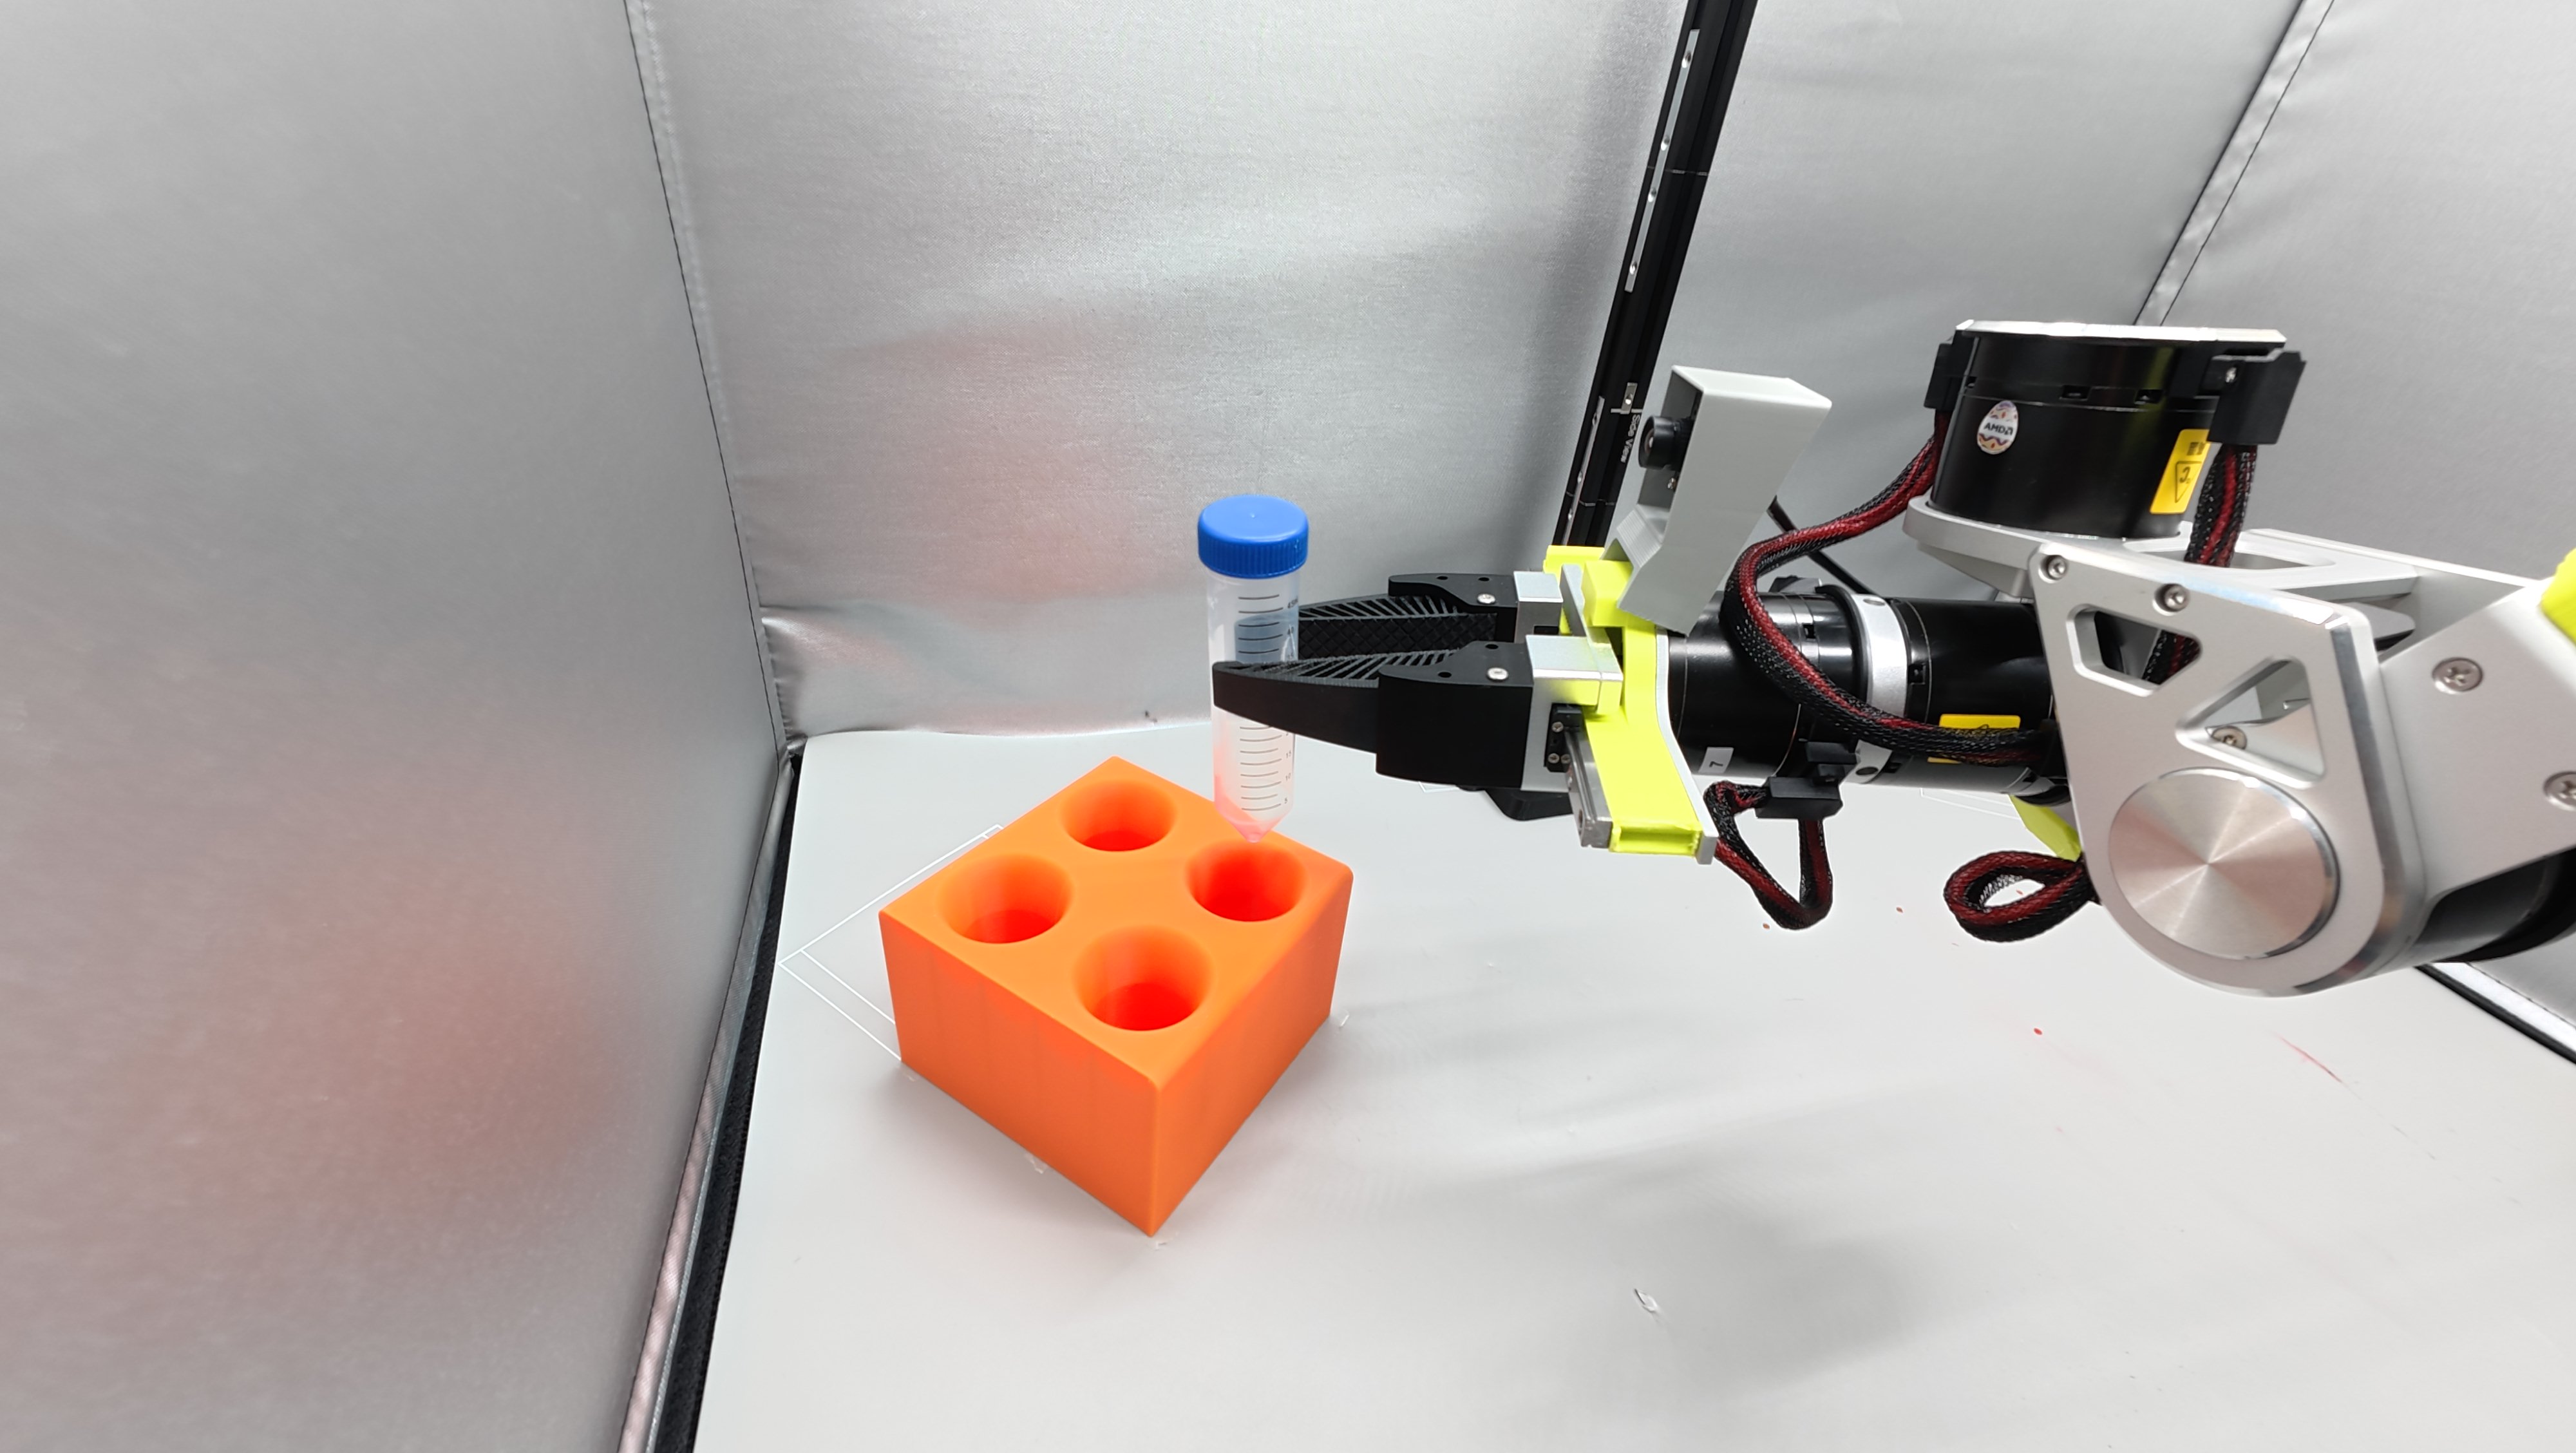
- Open the gripper at constant speed and lift the arm; you should see the tube settle smoothly into the rack.
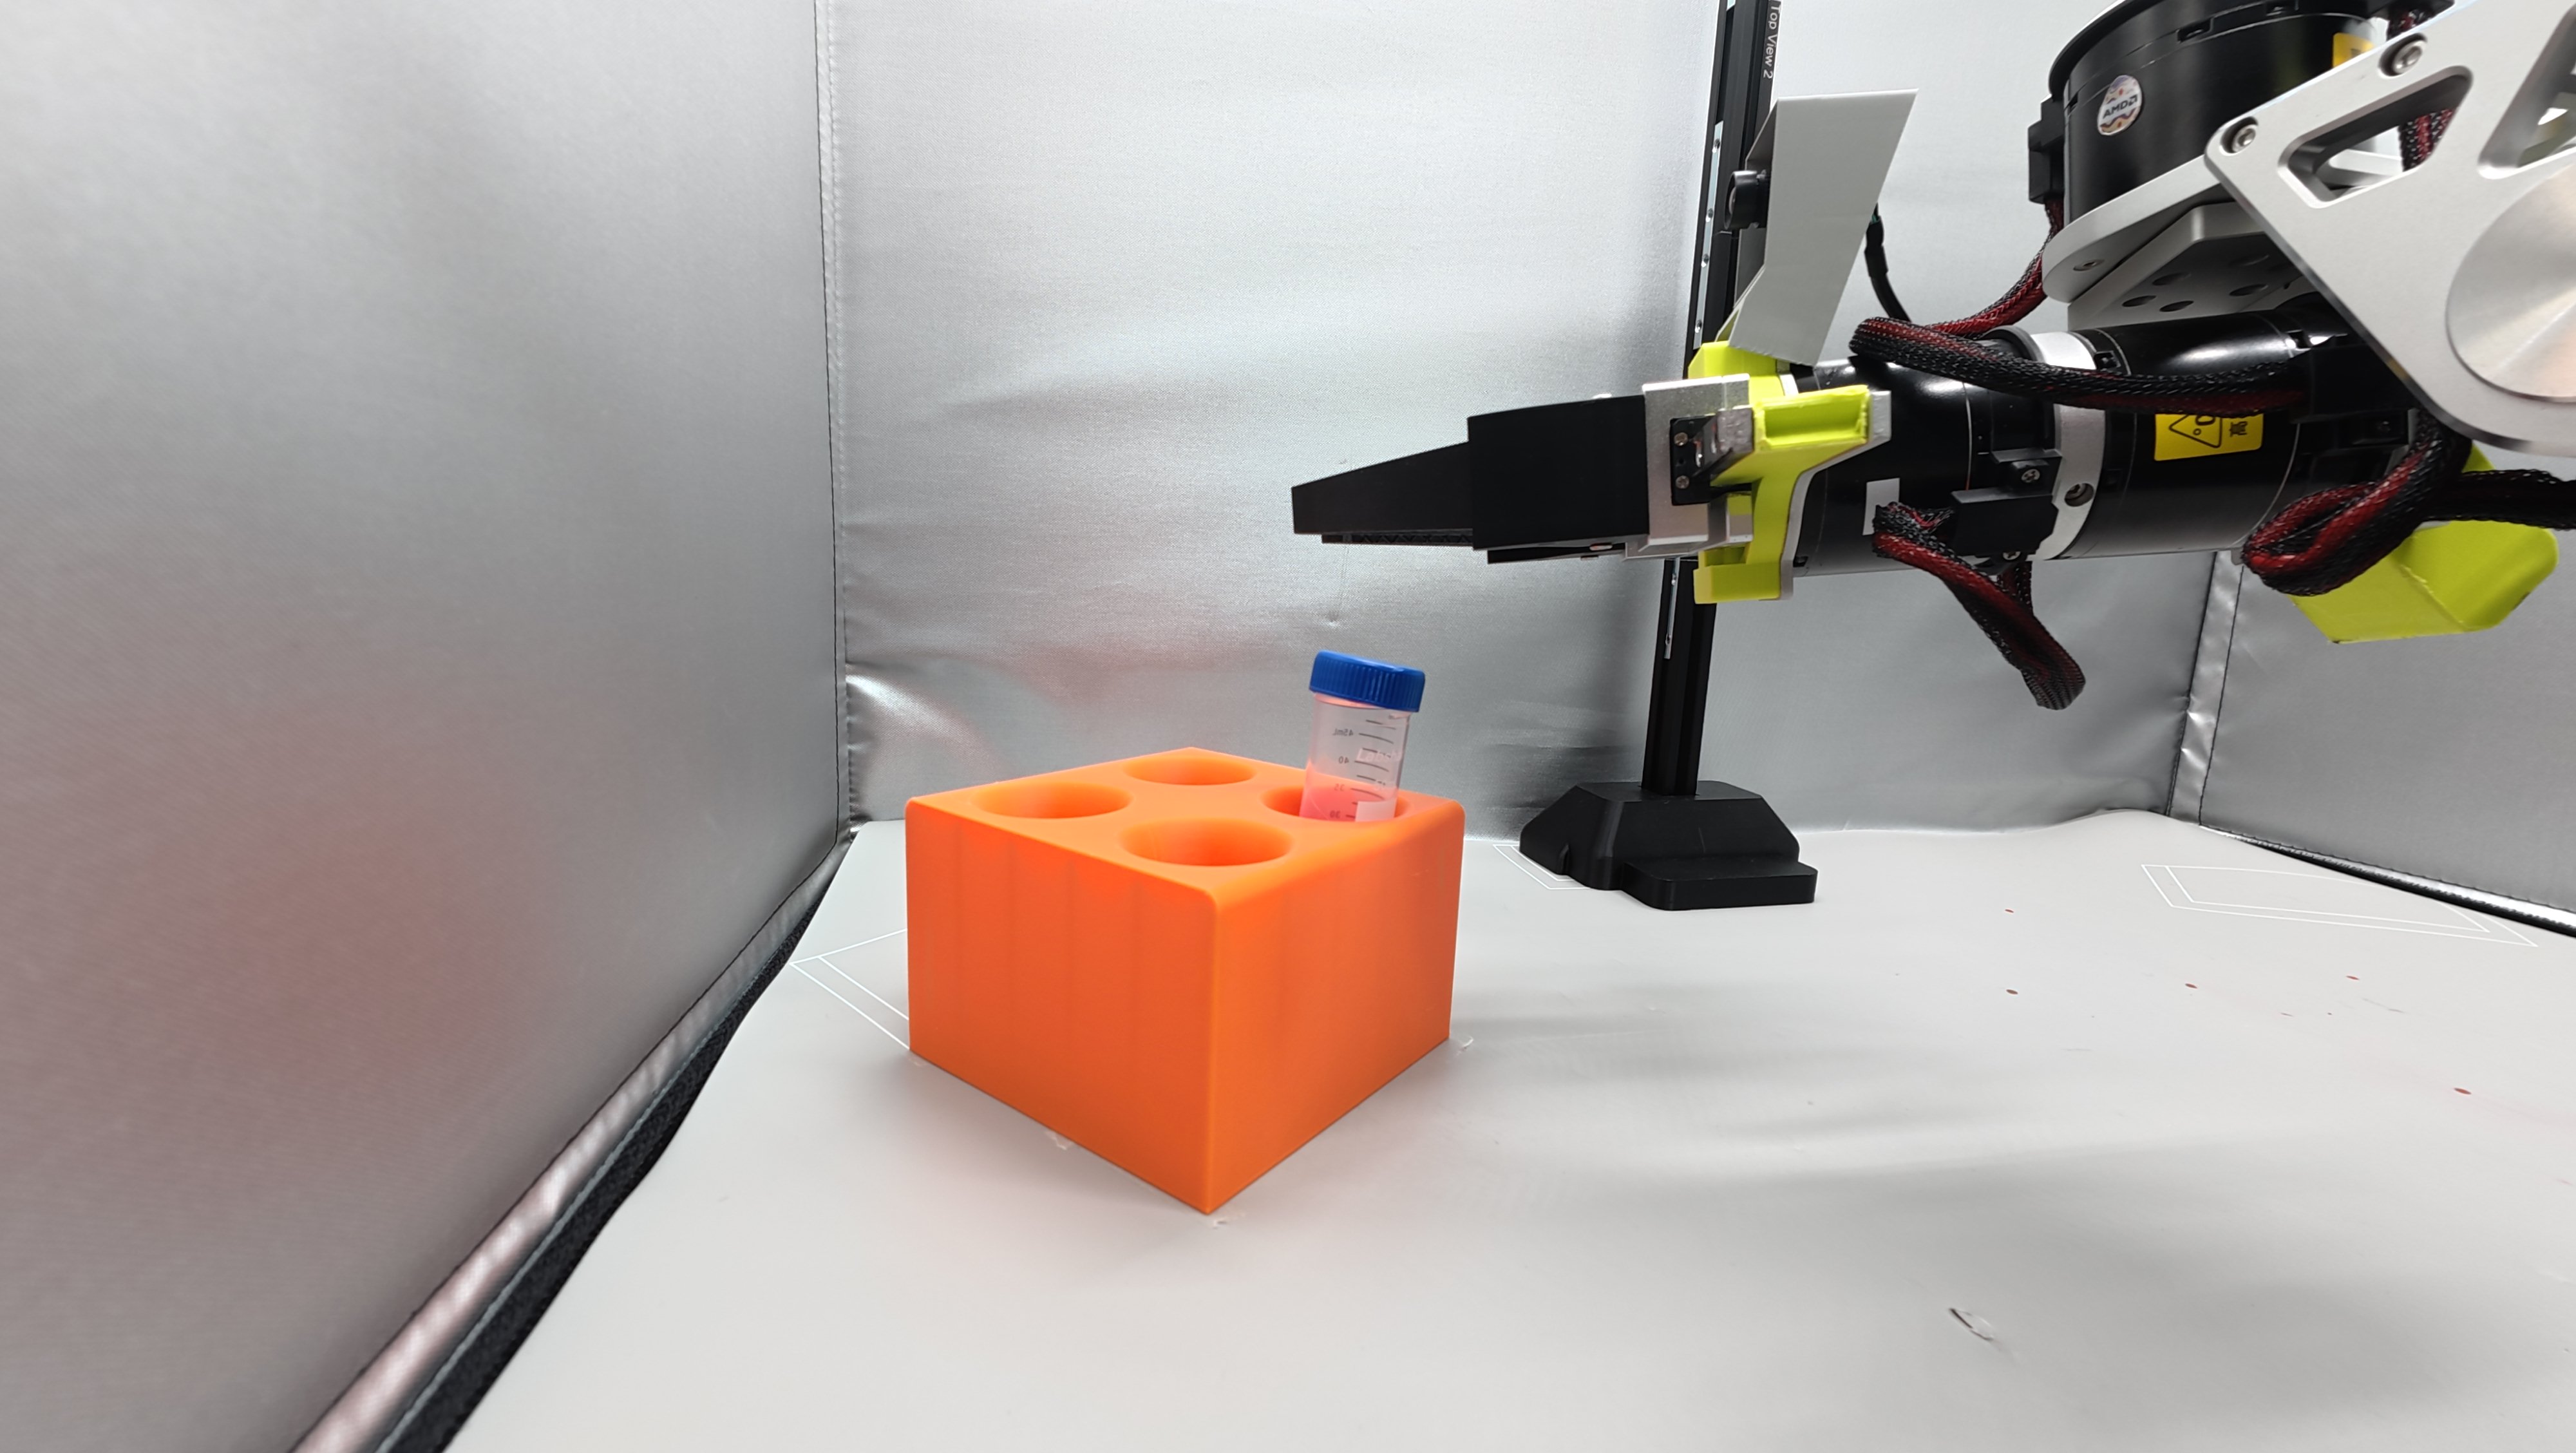
- After placing the tube, return the arm to its home position.
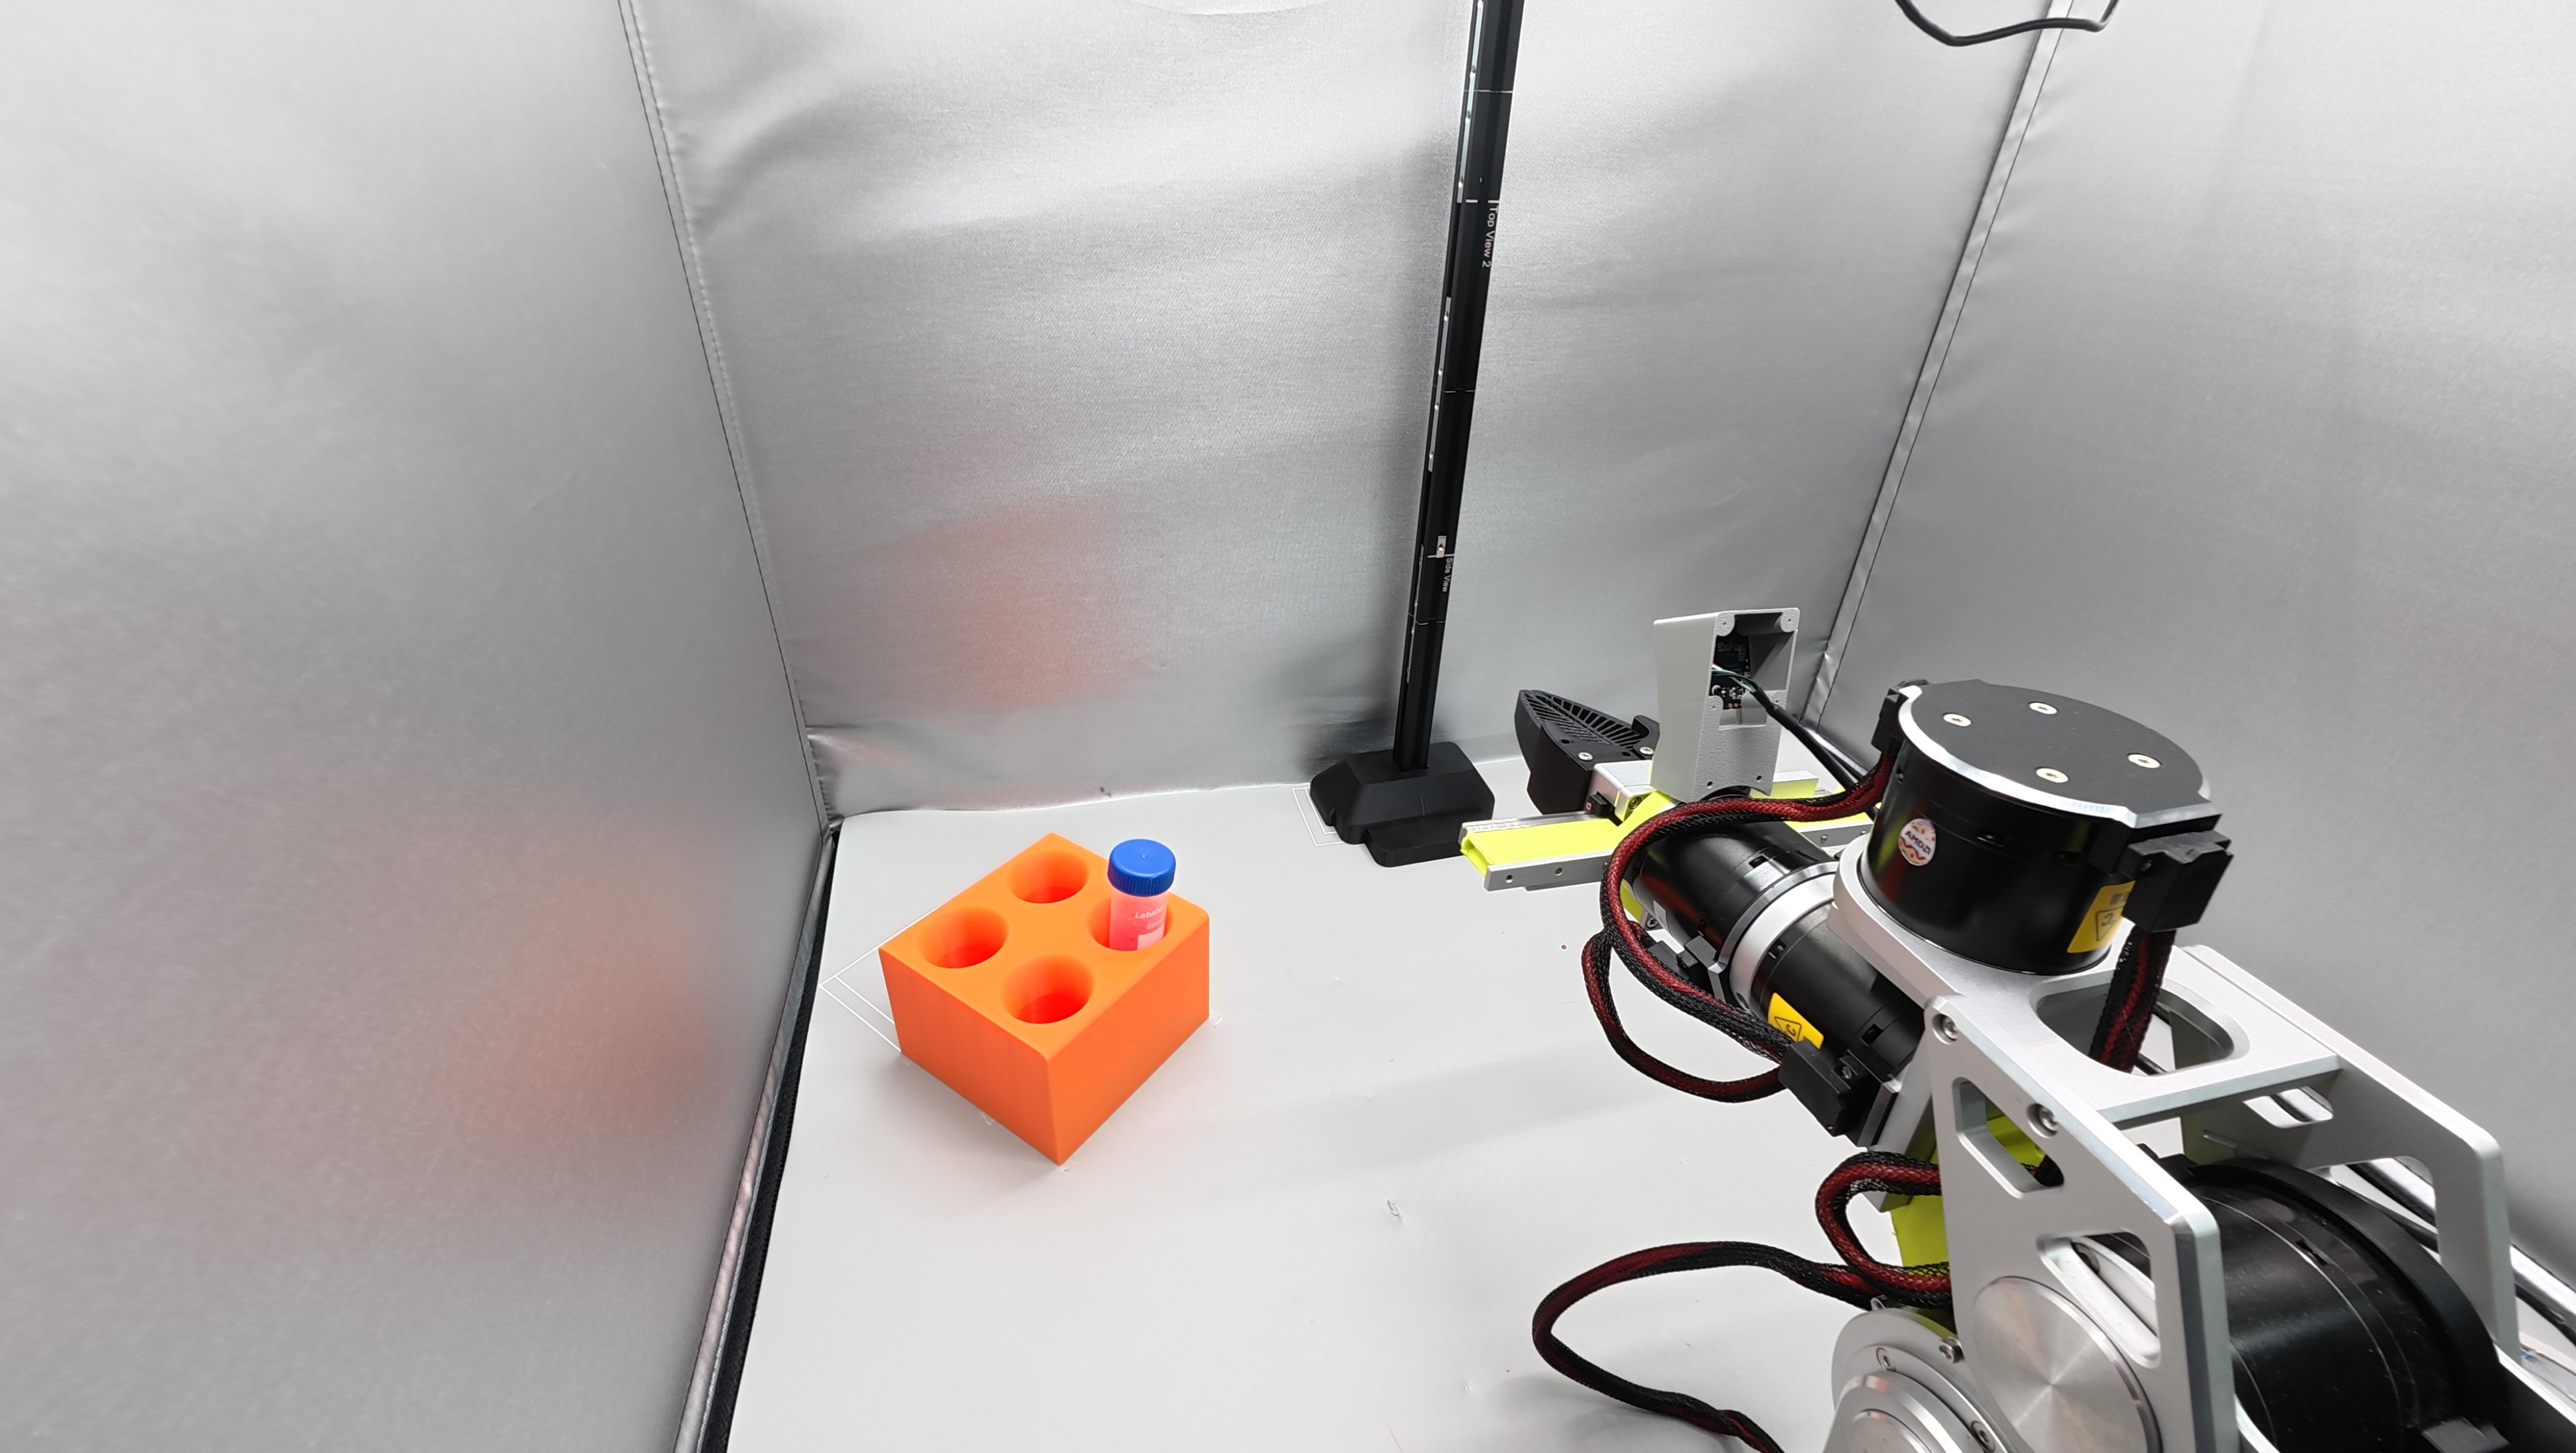
That's it — one perfect Episode is done. Now just repeat this 50 times.
Design Questions
Why can't I move the test tube rack, cameras, tube positions, or change lighting?
- Dispelling the misconception: "Moving everything freely" produces noise, not diversity.
- Generalization budget theory: with limited data, variations spent on one dimension teach the model that dimension — spending on target position teaches it to grasp tubes at different positions; spending on camera position variations makes the model learn both grasping and viewpoint differences, requiring far more data and yielding poor results.
- What if I really need variations: it's not about "don't fix" during recording, but about the supplementary data iteration later — consciously expanding the boundaries to achieve the generalization we're after.