reCamera connects to XIAO via HTTP
This document demonstrates how to enable communication between the reCamera and XIAO via HTTP, transmitting data to XIAO so that you can integrate the reCamera into your own projects.

Preparation
reCamera
HTTP API and Network connection
Firstly, prepare your reCamera's C++ supervisor project and the running environment.
-
Step 1. Download the Supervisor_add_detection_http project, compile it and copy the .exe file to the reCamera terminal directory.(For detailed instructions, refer to the wiki: Real-time YOLO object detection using reCamera based on Cpp / Environment Preparation / Pre-compilation.) This is a supervisor project, we will only use the photo YOLO detection interface for demonstration purposes.If you have your own project, you can add new HTTP APIs and project code within this project.
-
Step 2. Connect the reCamera to the PC using a USB cable, use MobaXterm to access the reCamera terminal (192.168.42.1), and navigate to /etc/init.d/ to remove the three auto-start programs: S93sscma-supervisor, S03node-red, and S91sscma-node.(For detailed instructions, refer to the wiki: Real-time YOLO object detection using reCamera based on Cpp / Environment Preparation / reCamera Preparation.)
Secondly, reCamera and XIAO must be on the same 2.4GHz local area network (LAN) to communicate. ReCamera has an internal wireless network card that can connect to WiFi. Typically, you can connect to WiFi through the camera's Node-RED web. However, when running a custom C++ project, you must disable Node-RED and restart reCamera.(Reference: Seeed Studio Wiki). Therefore, we need to establish the WiFi connection via the Linux terminal.
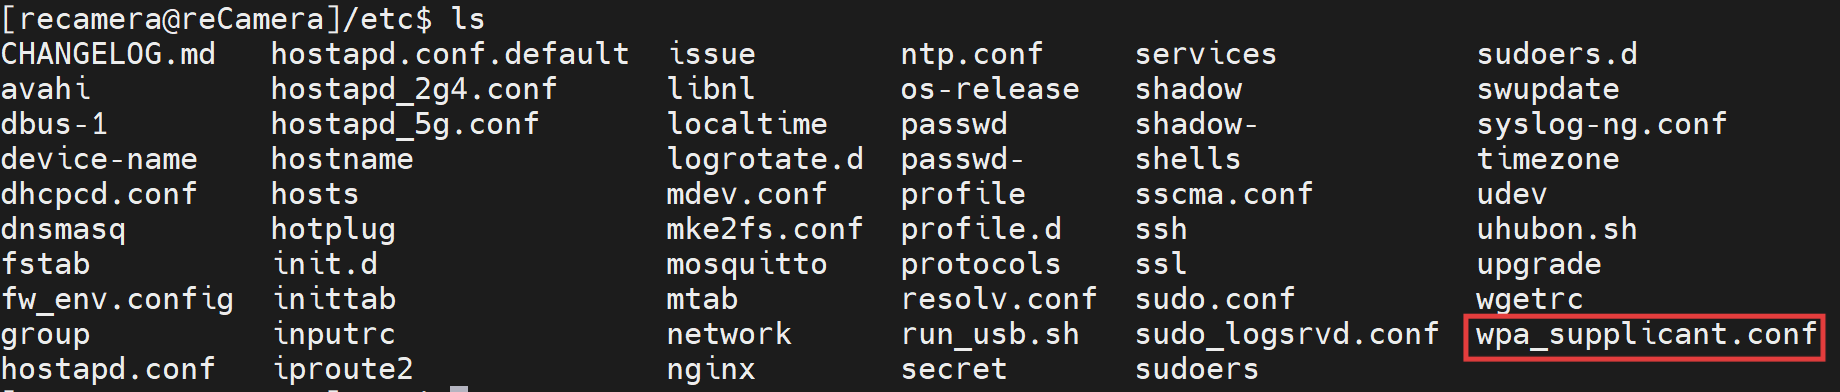
cd /etc/
ls
You can see the wpa_supplicant.conf :
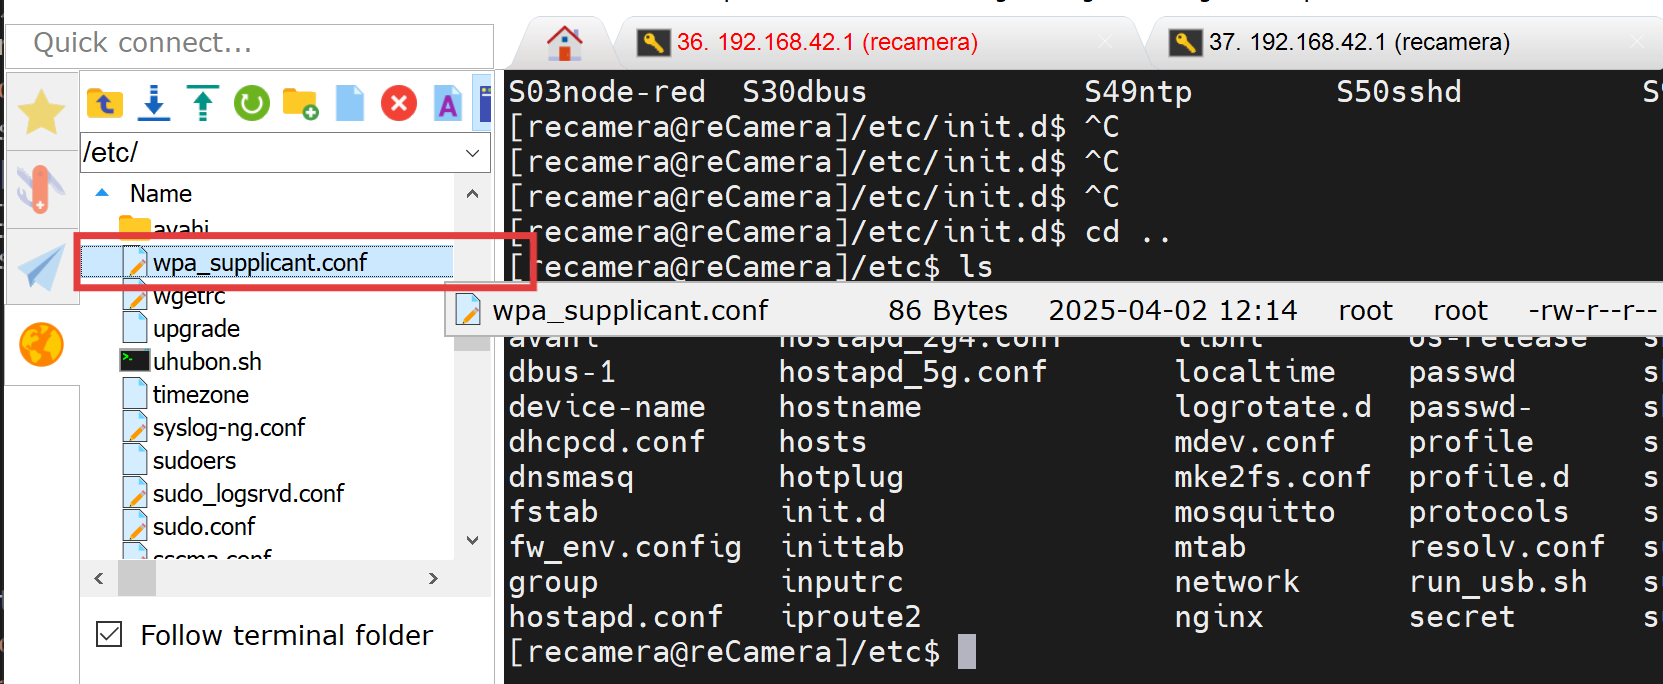
You can also view it in the left file directory:
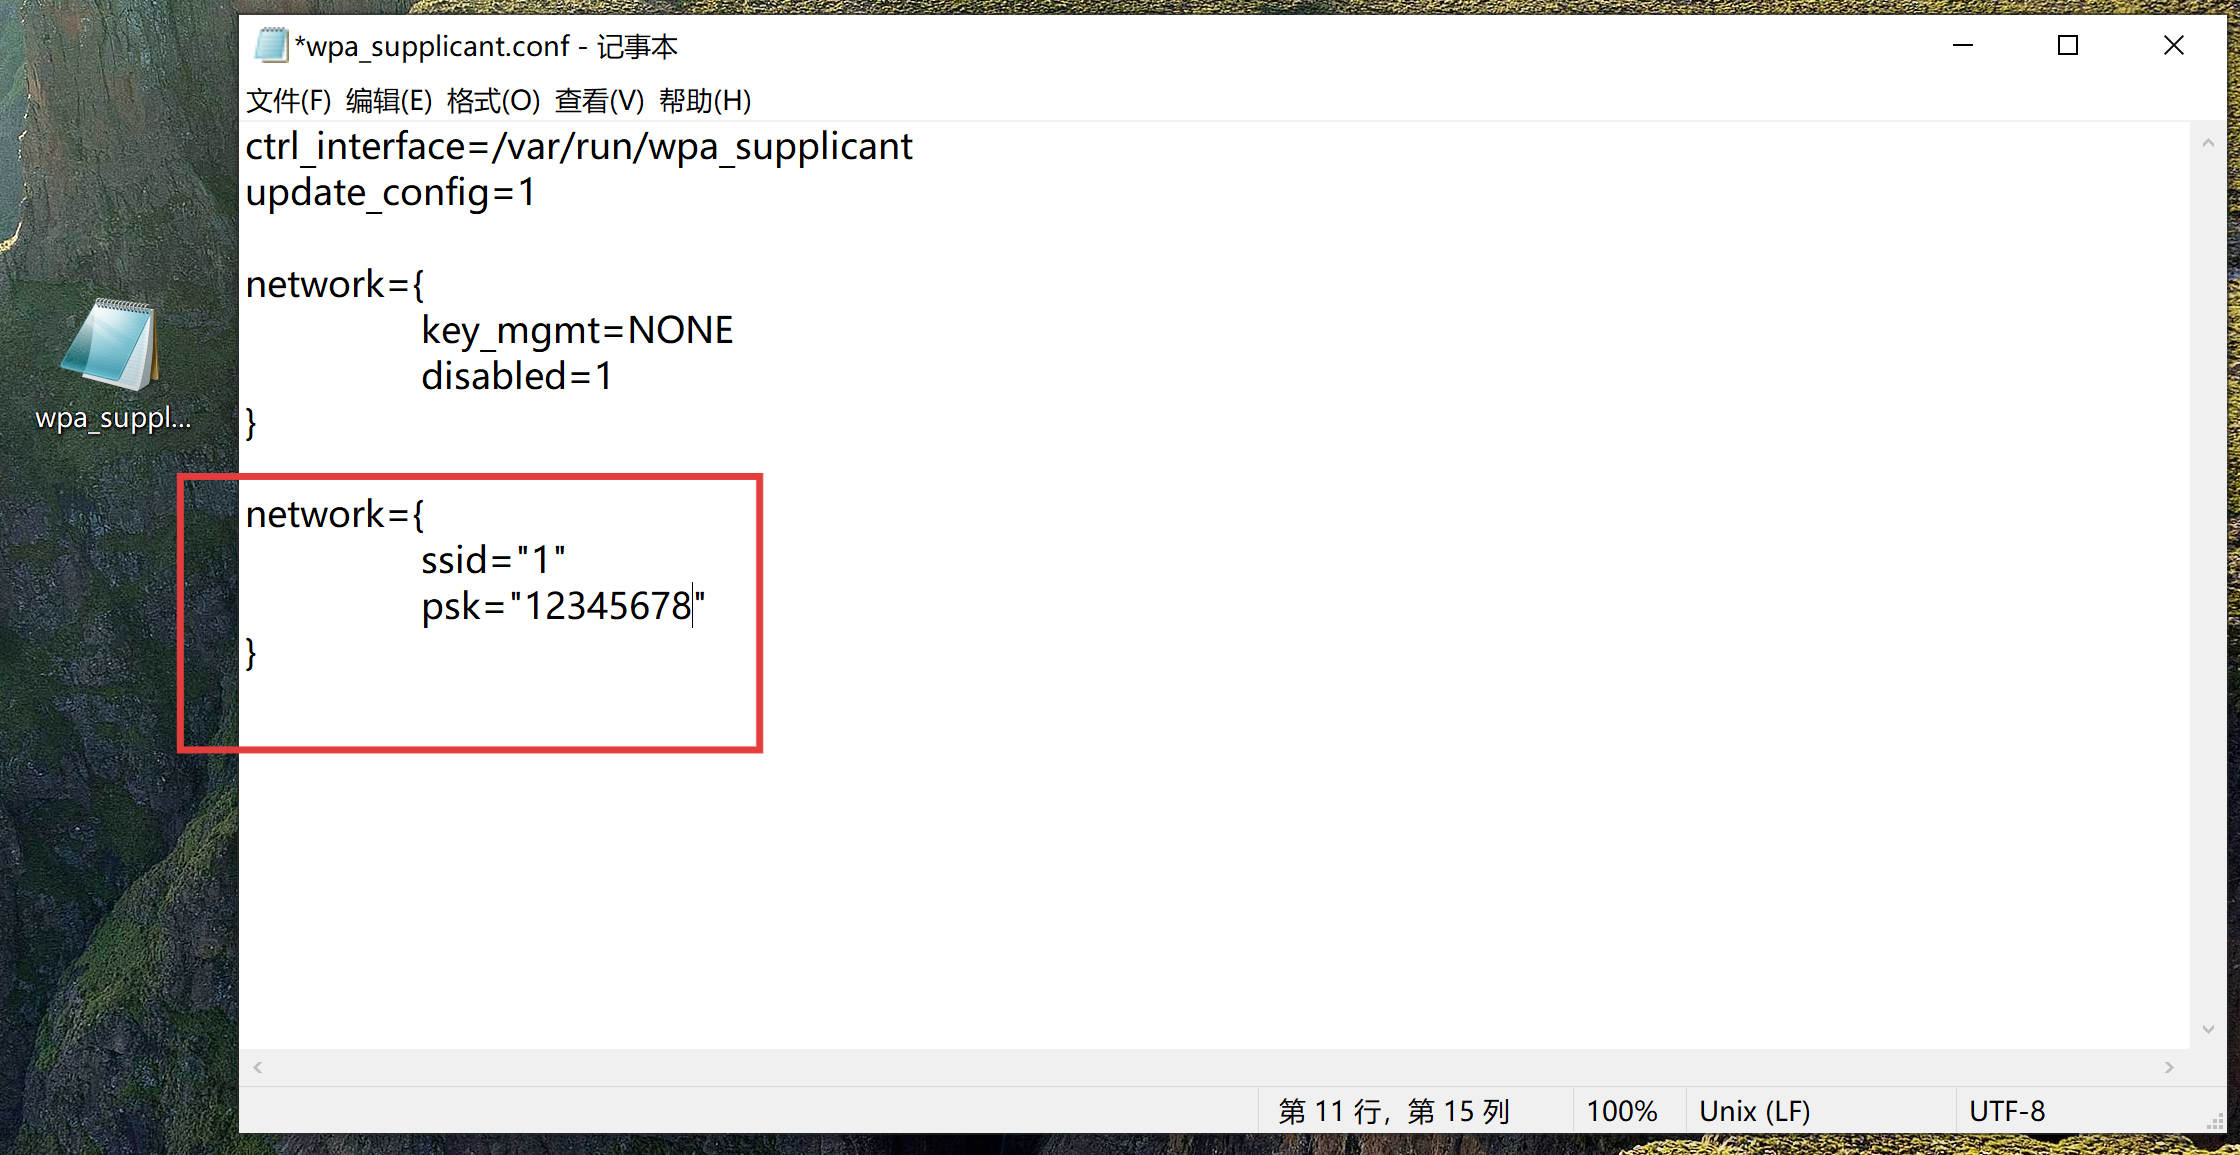
Drag the file(s) to the desktop and open it with Notepad.Add the network as shown in the image, and change it to your SSID and password. Note : Do not include extra spaces on either side of the equals sign.
Delete the original file in reCamera terminal: /etc/.
sudo rm wpa_supplicant.conf
Open your PC windows powershell and copy the file to the reCamera terminal : /home/recamera/:
scp "C:\Users\{your username}\Desktop\wpa_supplicant.conf" [email protected]:/home/recamera
Copy the file from /home/recamera/ to : /etc/:
sudo scp wpa_supplicant.conf /etc/
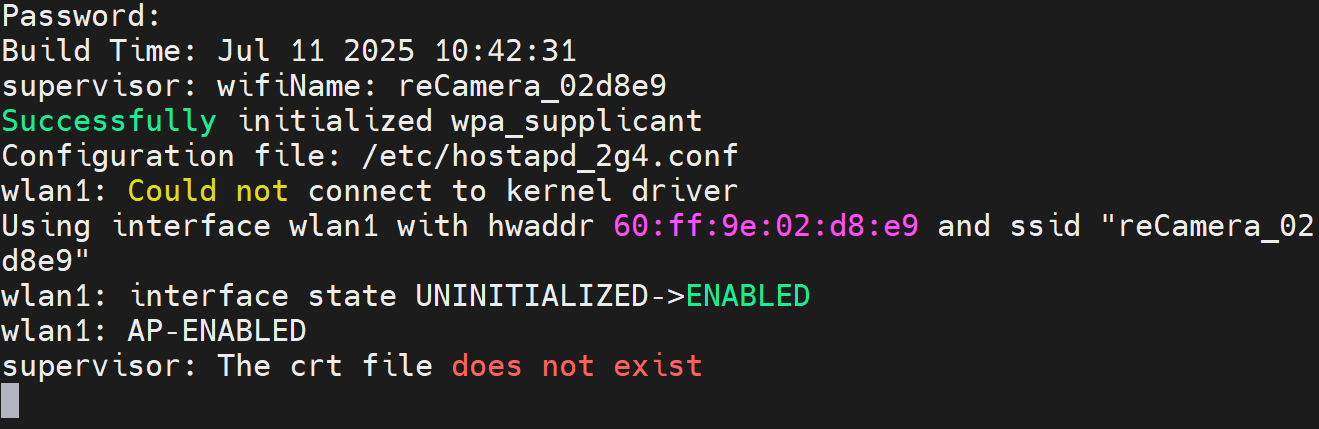
Restart the reCamera.Then, run the program.
sudo ./Supervisor_add_detection_http
Ensure your reCamera is connected to your WiFi network.
XIAO
Network connection and send HTTP requests
It is necessary to download Arduino to flash the program for XIAO (ESP32-C3).
Step 1. Download and Install the latest version of Arduino IDE according to your operating system.Launch the Arduino application.
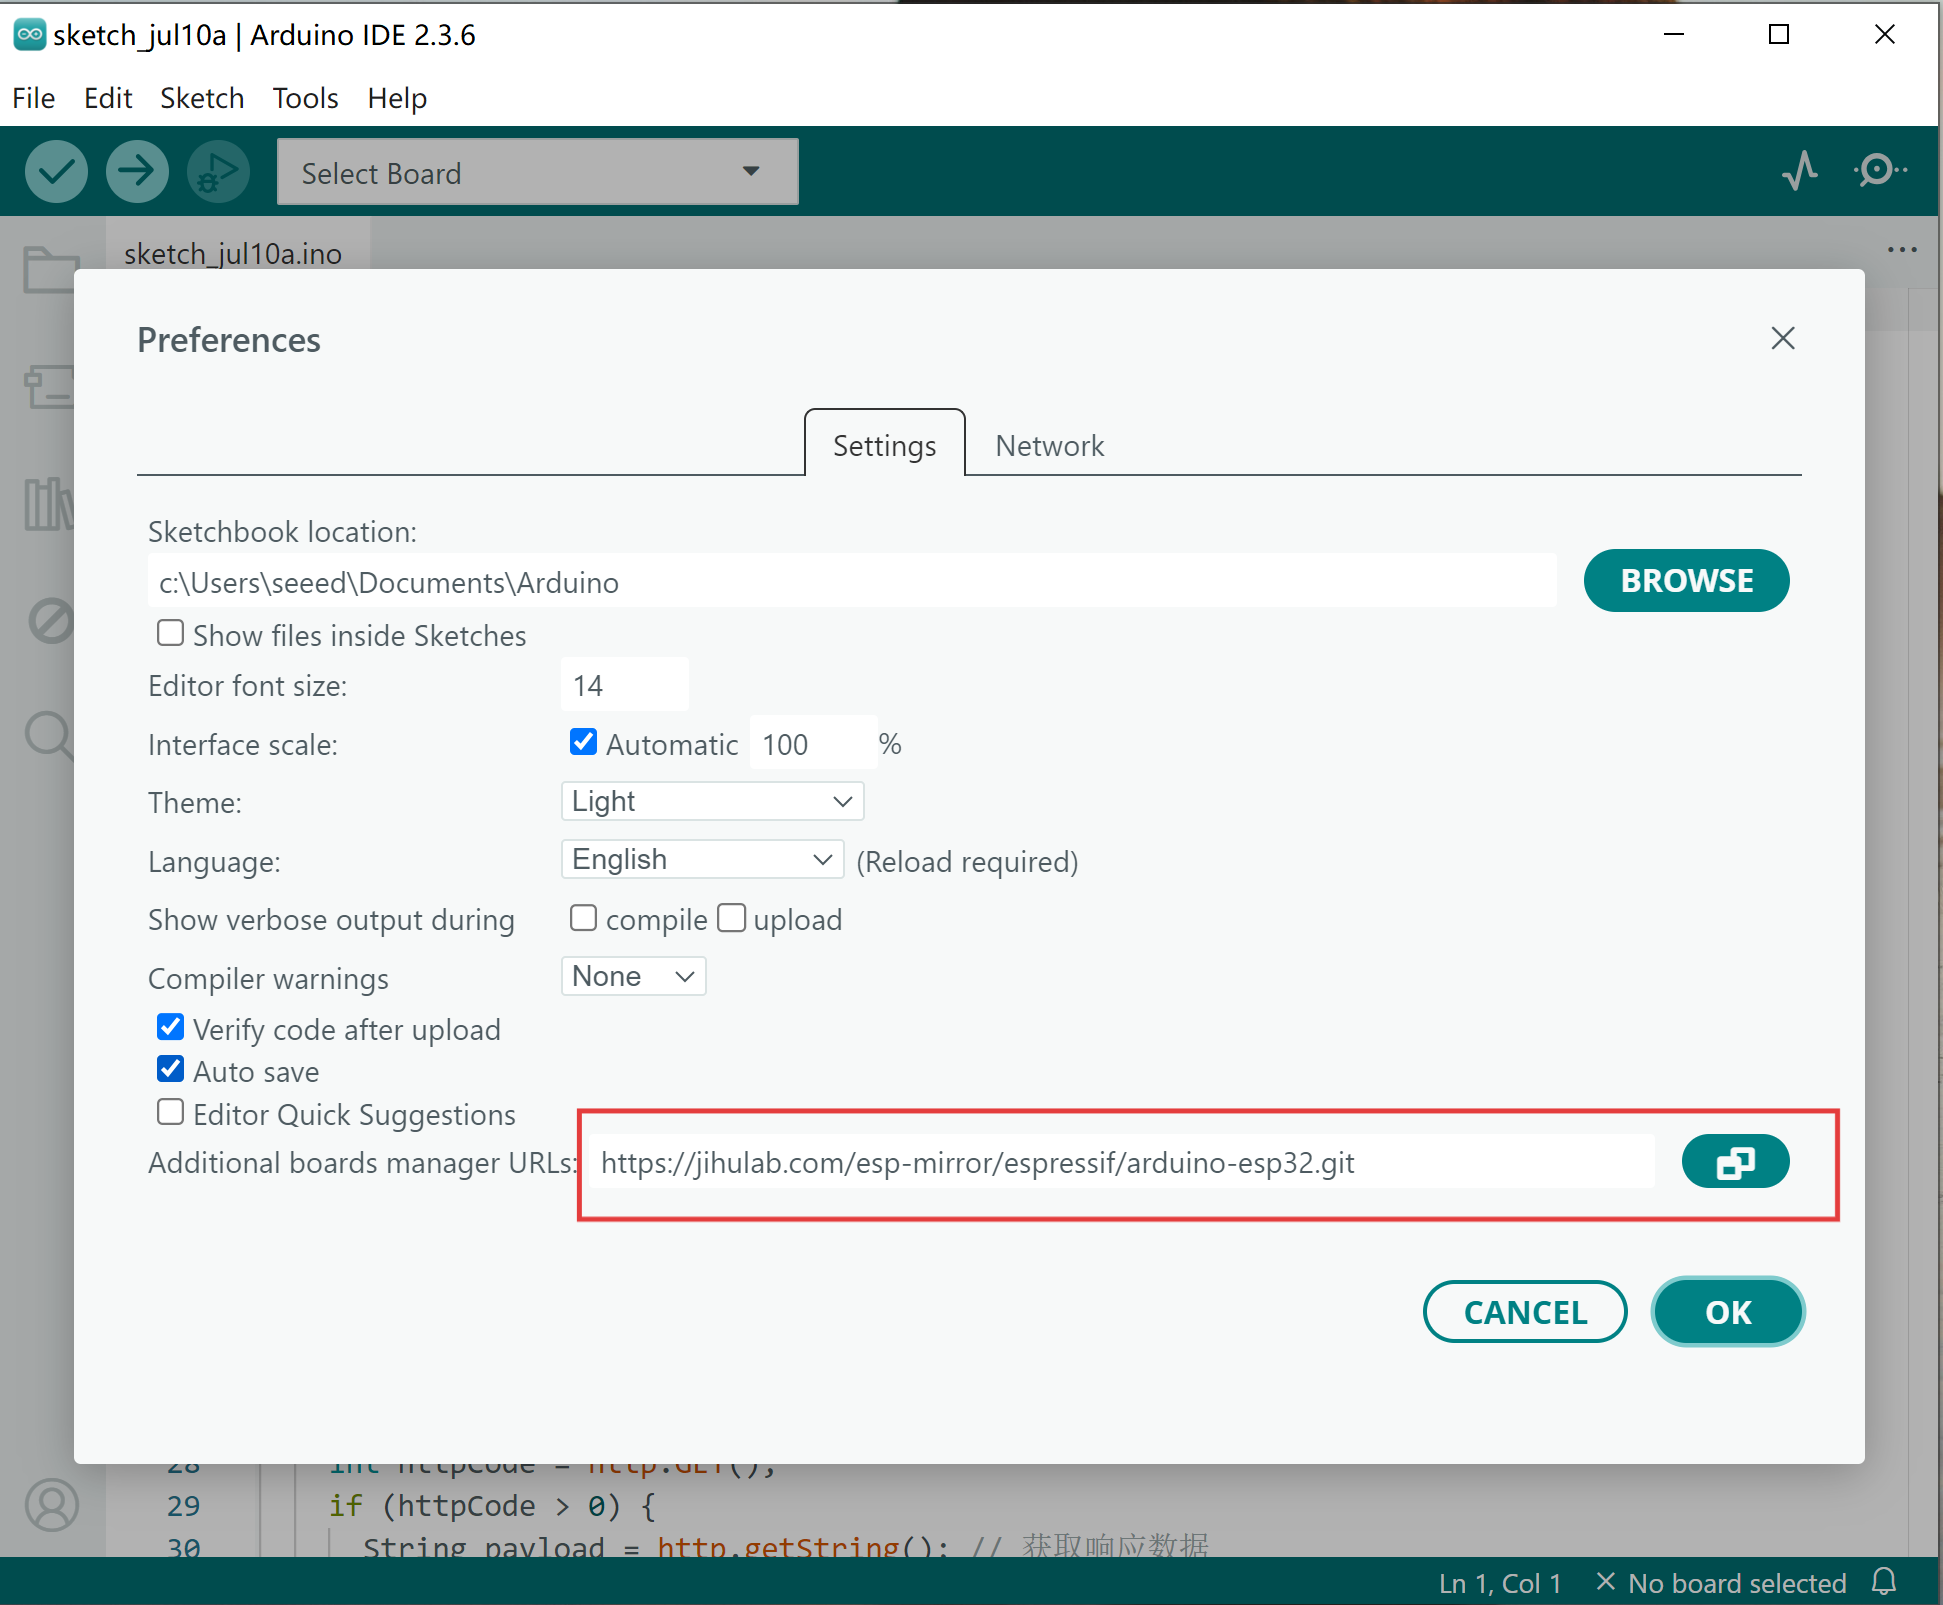
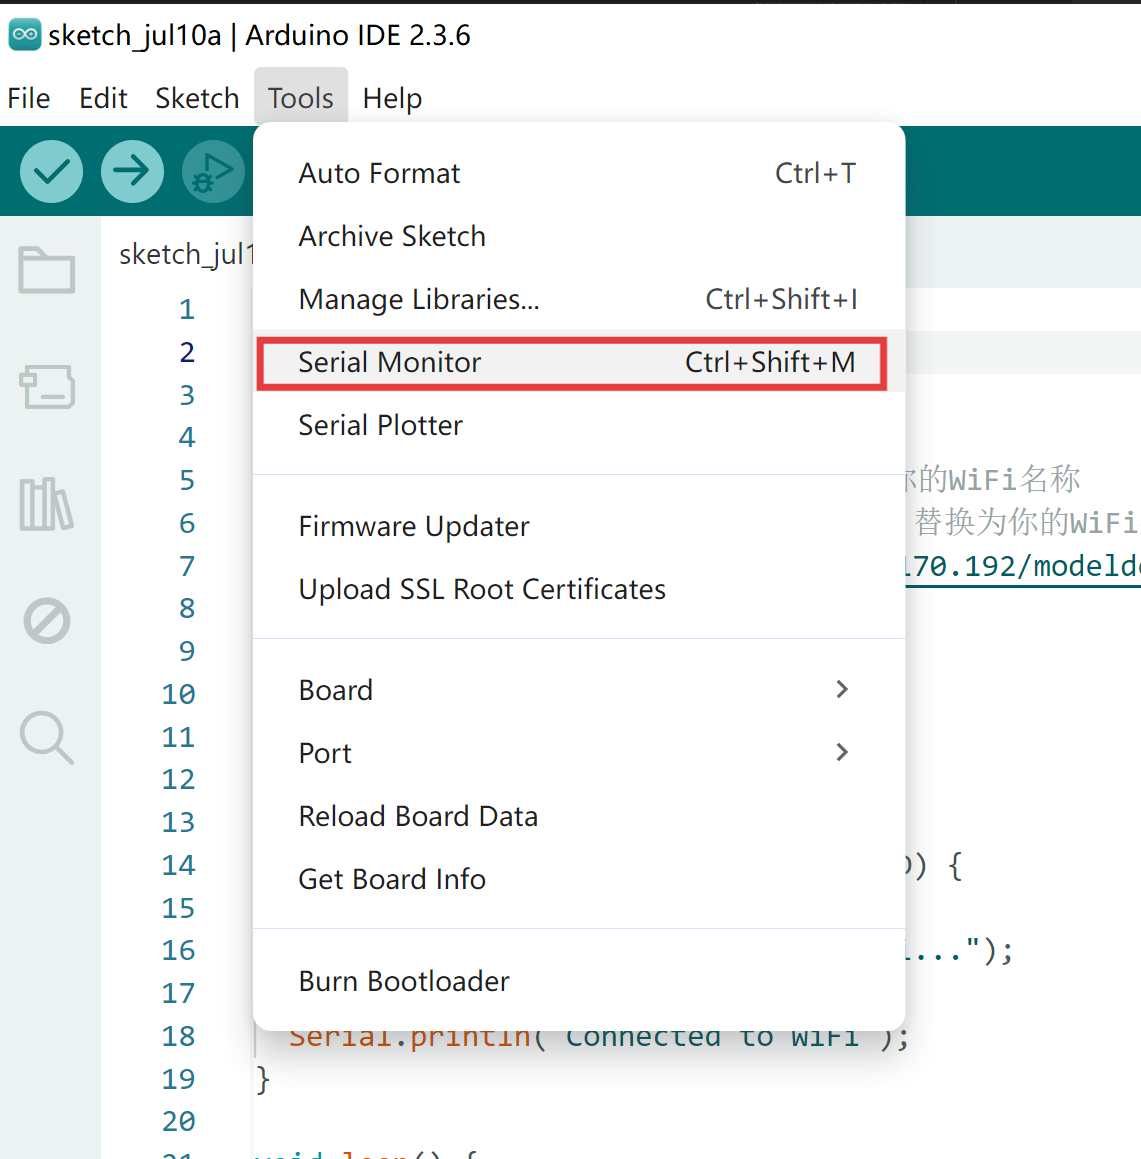
Step 2. Add ESP32 board package to your Arduino IDE Navigate to File > Preferences, and fill "Additional Boards Manager URLs" with the url below: https://jihulab.com/esp-mirror/espressif/arduino-esp32.git
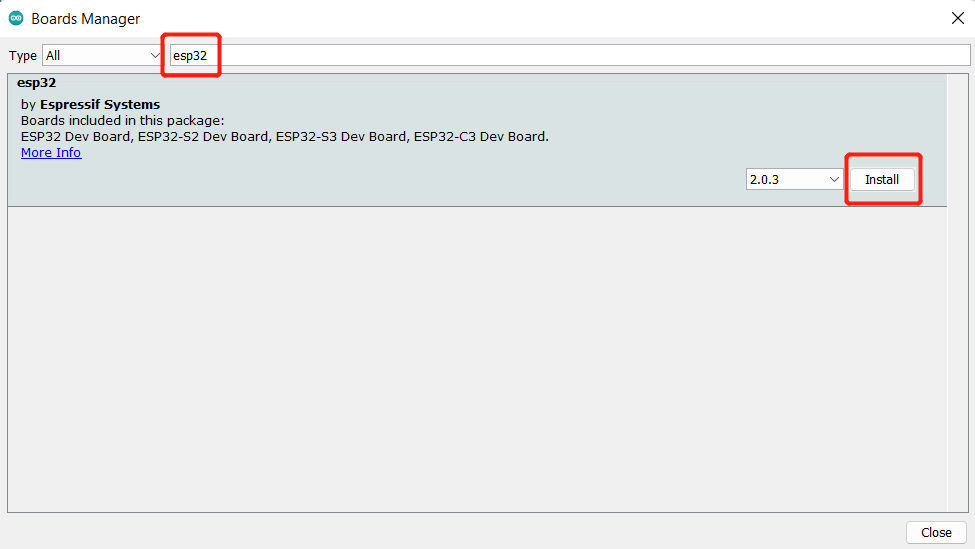
Navigate to Tools > Board > Boards Manager..., type the keyword "esp32" in the search box, select the latest version of esp32, and install it.
Step 3. Select your board and port
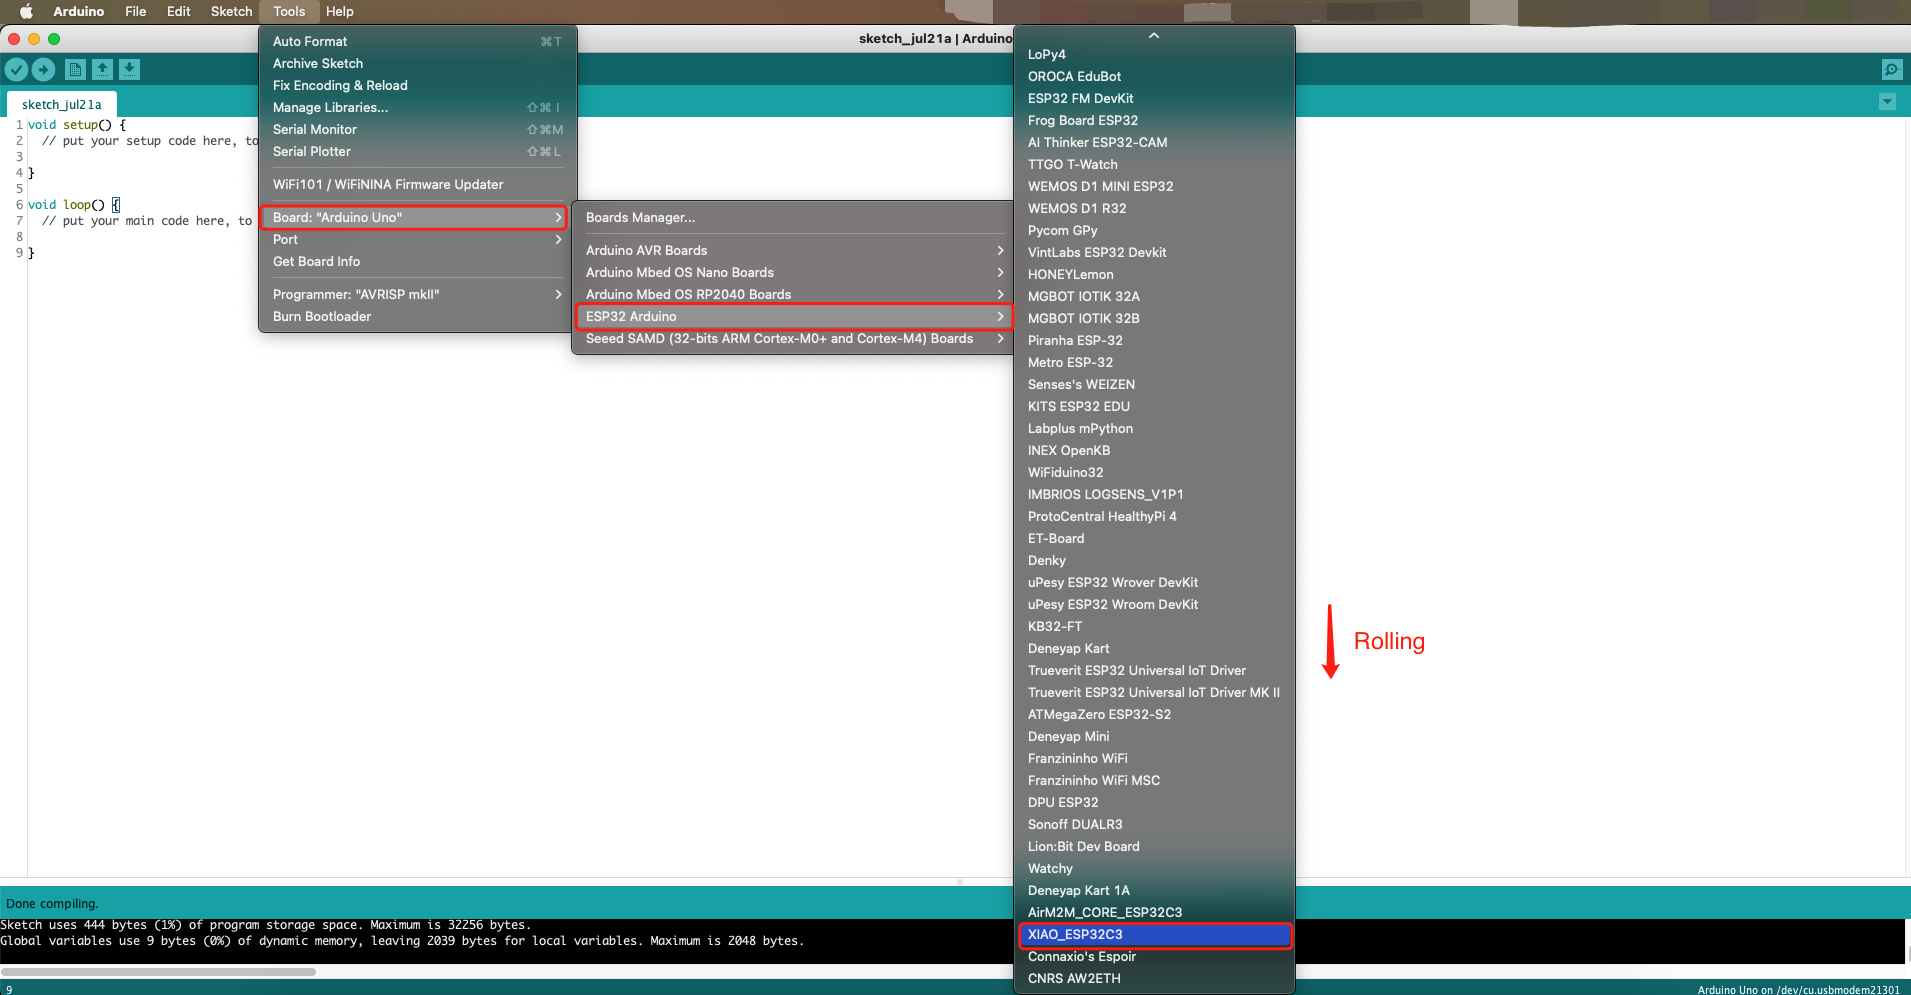
Board Navigate to Tools > Board > ESP32 Arduino and select "XIAO_ESP32C3". The list of board is a little long and you need to roll to the buttom to reach it.
Port Navigate to Tools > Port and select the serial port name of the connected XIAO ESP32C3. This is likely to be COM3 or higher (COM1 and COM2 are usually reserved for hardware serial ports).
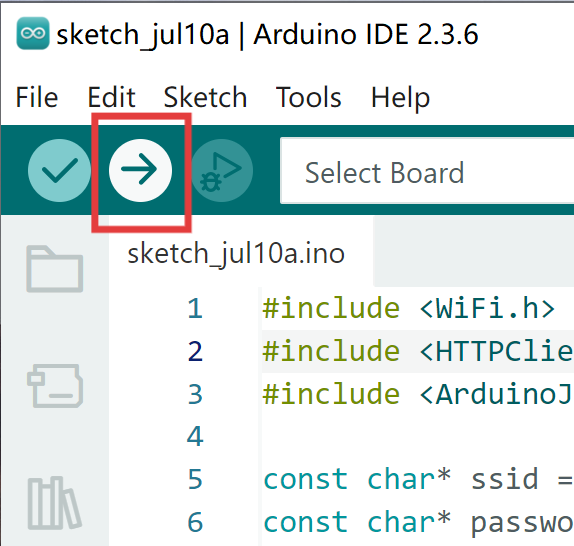
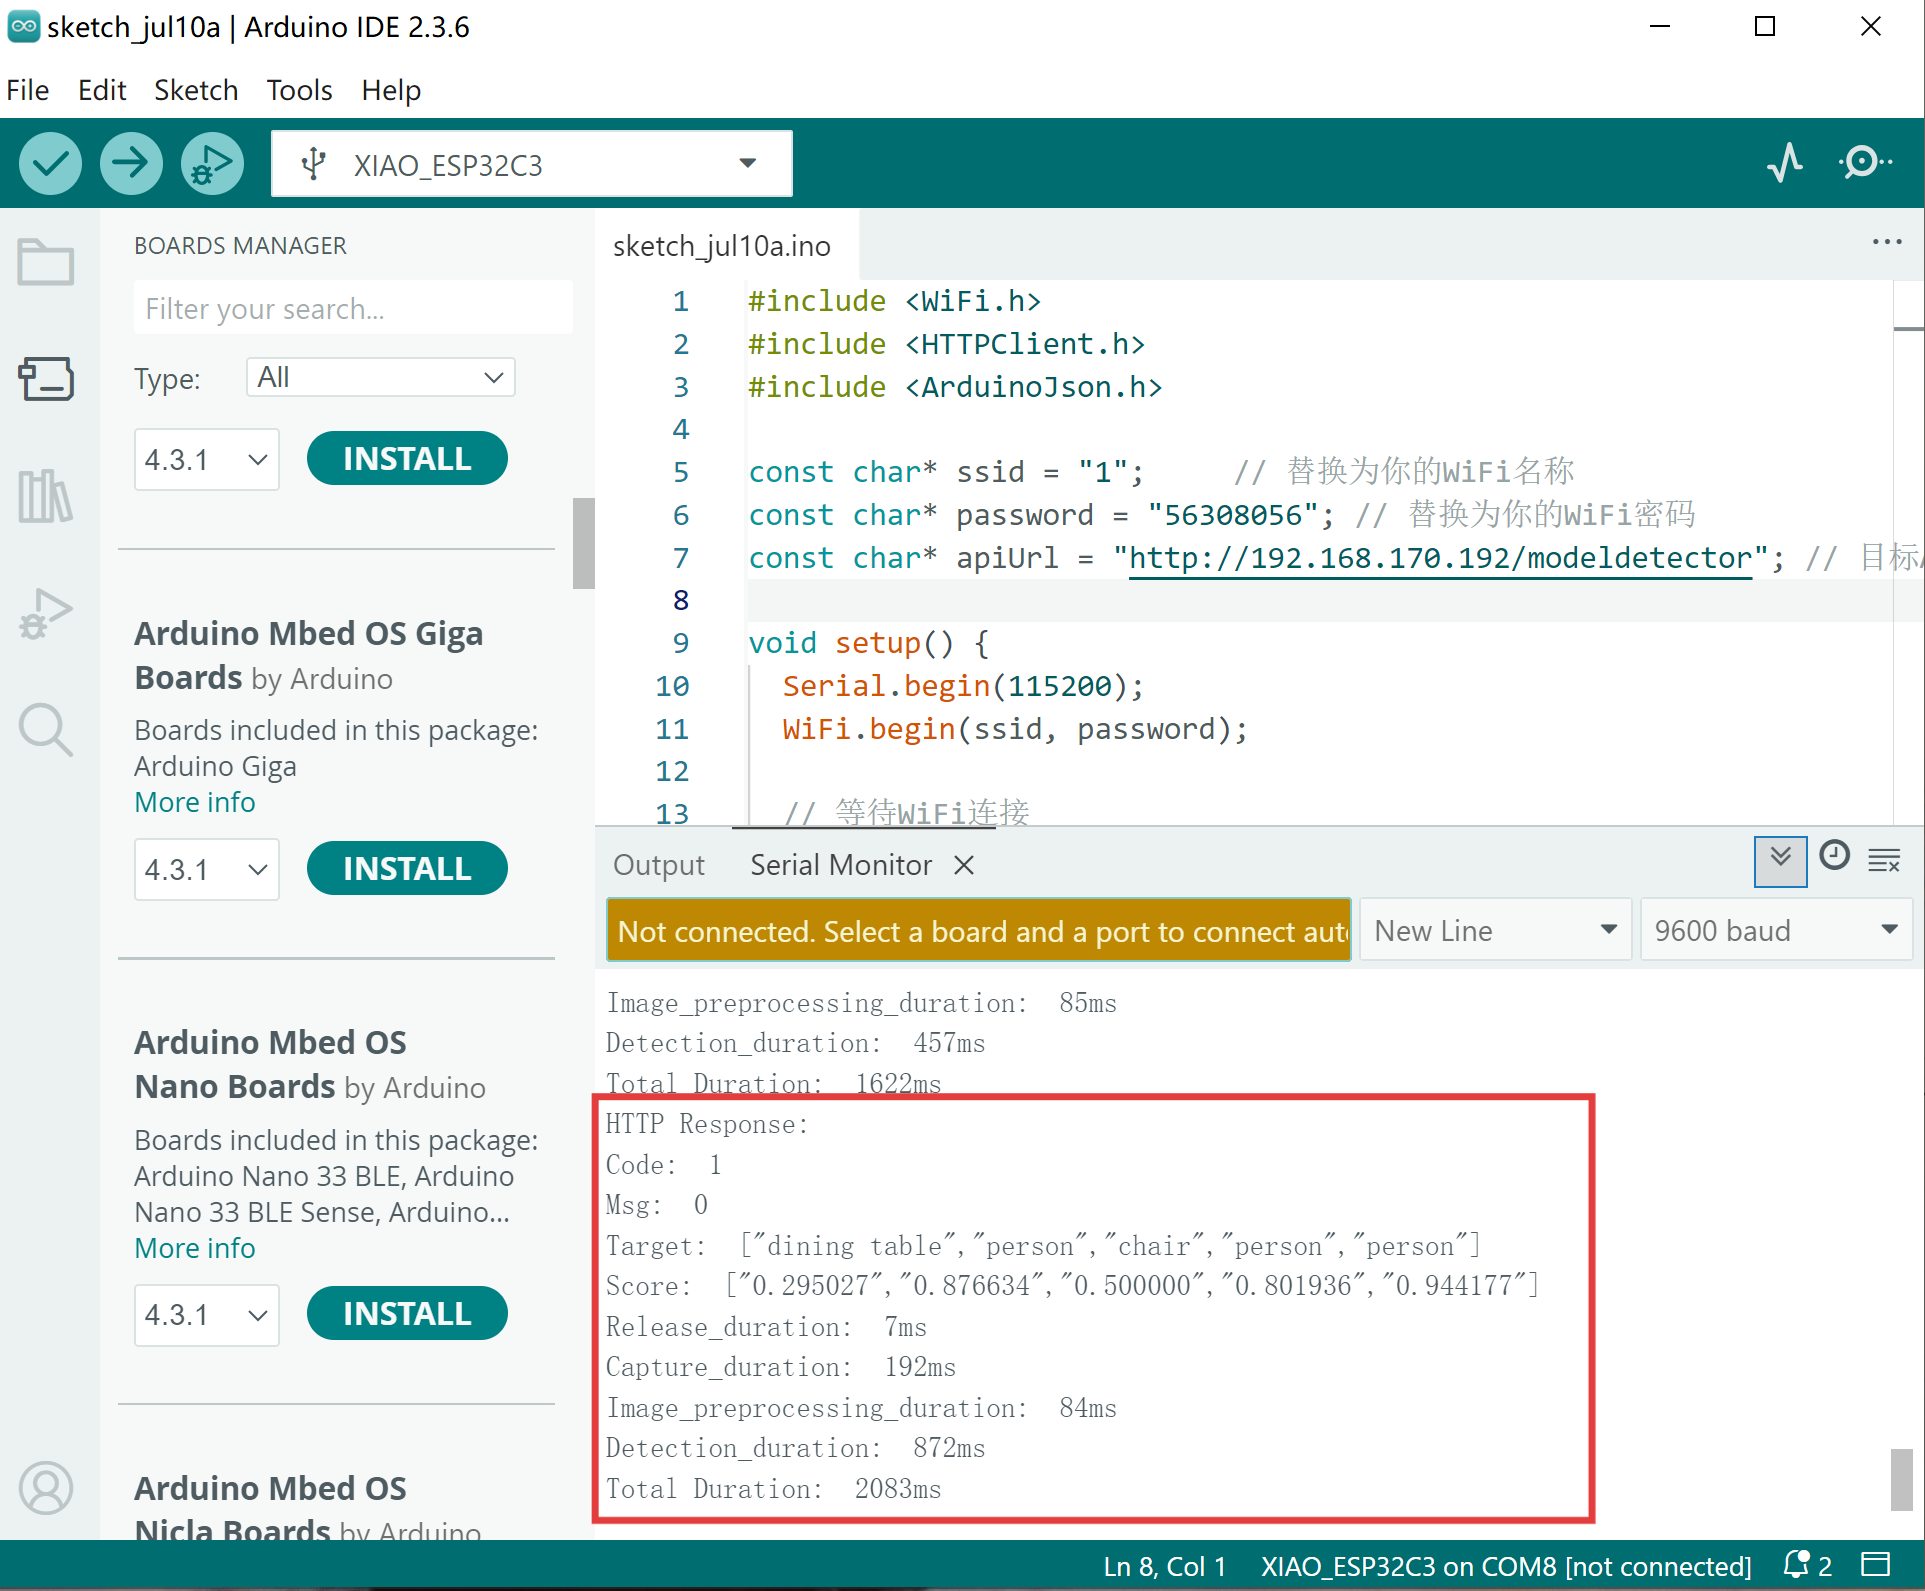
Step 4. Write the following program and click the upload button to compile and upload. The reCamera and XIAO must be on the same 2.4GHz local area network (LAN) to communicate.
#include <WiFi.h>
#include <HTTPClient.h>
#include <ArduinoJson.h>
#include <Adafruit_NeoPixel.h>
#ifdef __AVR__
#include <avr/power.h> // Required for 16 MHz Adafruit Trinket
#endif
// Which pin on the Arduino is connected to the NeoPixels?
#define PIN A0 // On Trinket or Gemma, suggest changing this to 1
// How many NeoPixels are attached to the Arduino?
#define NUMPIXELS 60 // Popular NeoPixel ring size
Adafruit_NeoPixel pixels(NUMPIXELS, PIN, NEO_GRB + NEO_KHZ800);
#define DELAYVAL 500
const char* ssid = {"your wifi name"};
const char* password = {"your wifi password"};
const char* apiUrl = "http://{"your wifi ip"}/modeldetector";
void setup() {
Serial.begin(115200);
WiFi.begin(ssid, password);
while (WiFi.status() != WL_CONNECTED) {
delay(1000);
Serial.println("Connecting to WiFi...");
}
Serial.println("Connected to WiFi");
#if defined(__AVR_ATtiny85__) && (F_CPU == 16000000)
clock_prescale_set(clock_div_1);
#endif
// END of Trinket-specific code.
pixels.begin();
}
void loop() {
if (WiFi.status() == WL_CONNECTED) {
HTTPClient http;
http.begin(apiUrl);
http.addHeader("Content-Type", "application/json");
int httpCode = http.GET();
if (httpCode > 0) {
String payload = http.getString();
Serial.println("HTTP Response:");
// Serial.println(payload);
DynamicJsonDocument doc(1024);
DeserializationError error = deserializeJson(doc, payload);
if (error) {
Serial.print("JSON read failed: ");
Serial.println(error.c_str());
}
else {
Serial.print("Code: ");
Serial.println(doc["Code"].as<String>());
Serial.print("Msg: ");
Serial.println(doc["Msg"].as<String>());
Serial.print("Target: ");
Serial.println(doc["Target"].as<String>());
Serial.print("Score: ");
Serial.println(doc["Score"].as<String>());
Serial.print("Release_duration: ");
Serial.print(doc["Release_duration"].as<String>());
Serial.println("ms");
Serial.print("Capture_duration: ");
Serial.print(doc["Capture_duration"].as<String>());
Serial.println("ms");
Serial.print("Image_preprocessing_duration: ");
Serial.print(doc["Image_preprocessing_duration"].as<String>());
Serial.println("ms");
Serial.print("Detection_duration: ");
Serial.print(doc["Detection_duration"].as<String>());
Serial.println("ms");
Serial.print("Total Duration: ");
Serial.print(doc["Duration"].as<String>());
Serial.println("ms");
if (doc["Target"].as<String>().indexOf("person") != -1){
pixels.clear();
pixels.show();
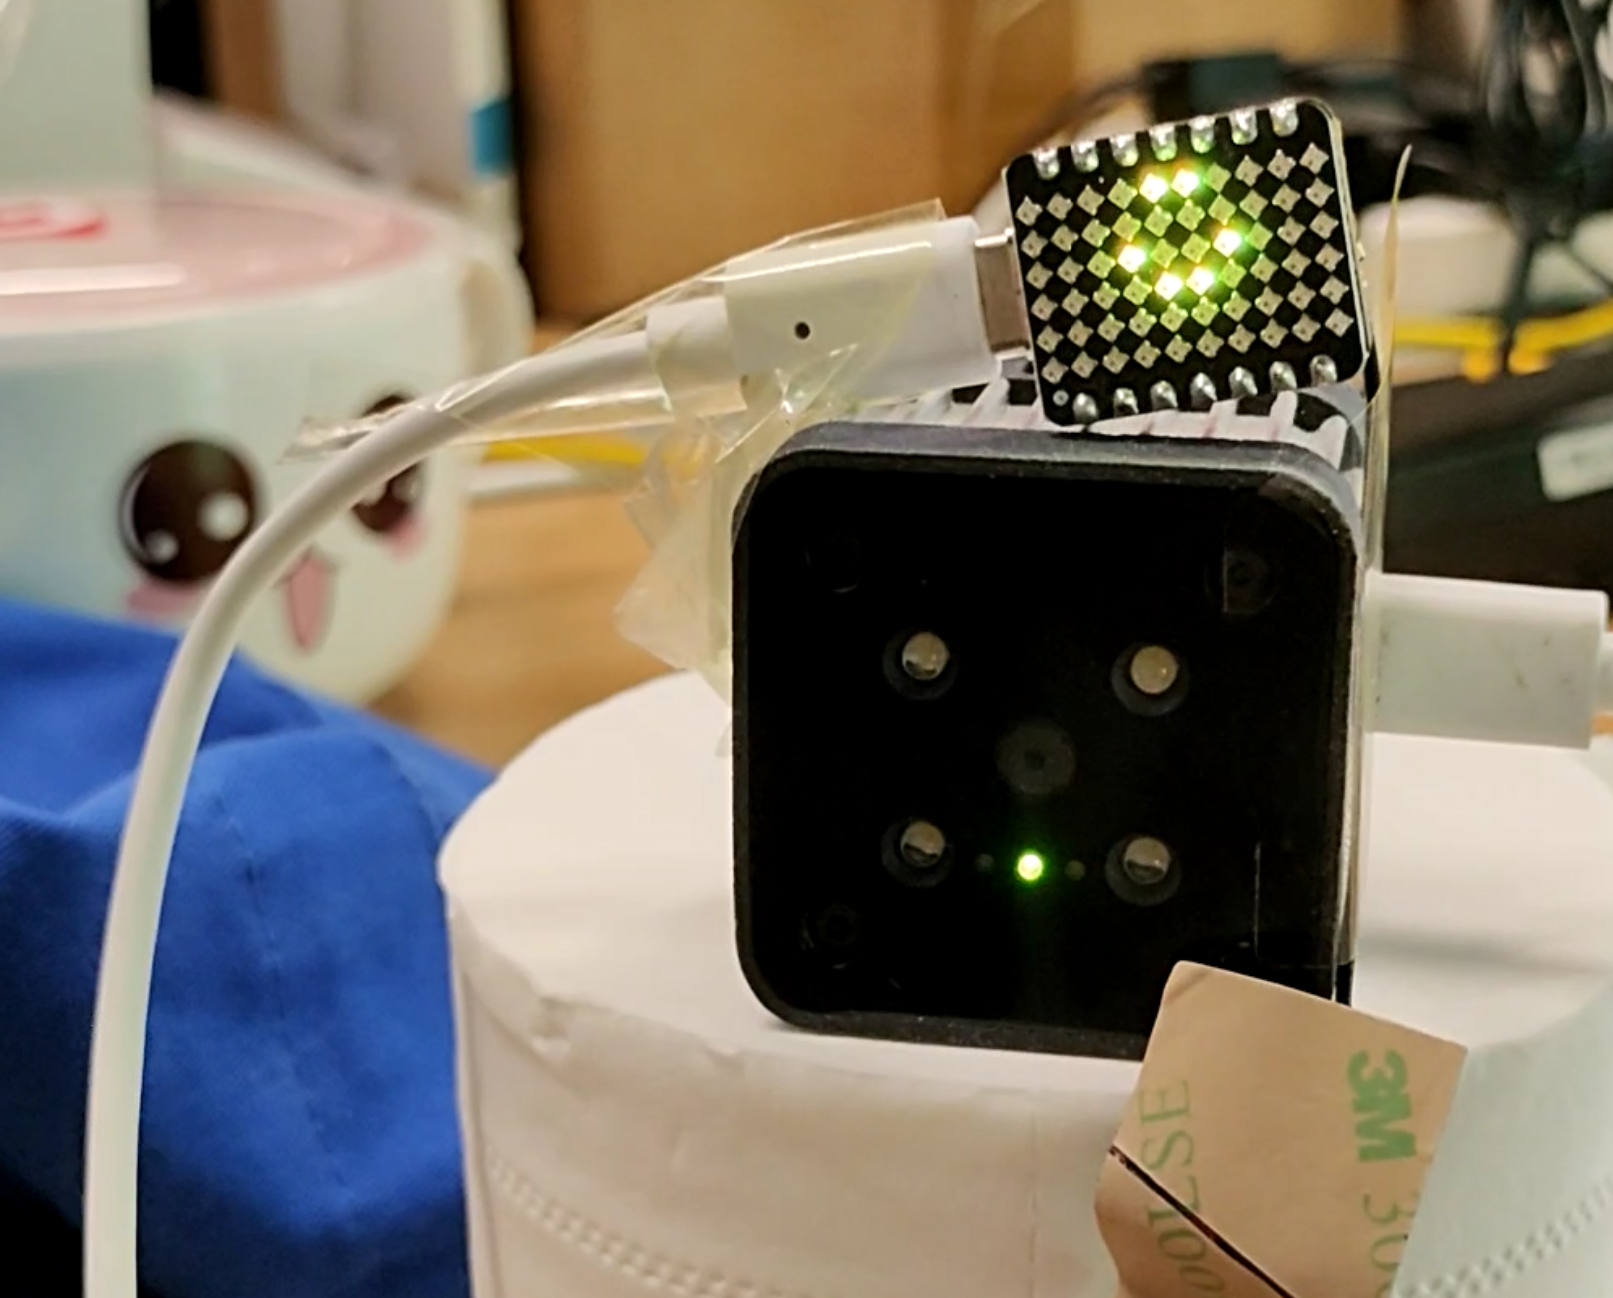
int smileyLEDs[] = {21,26,29,32,35,39};
int numLEDs = sizeof(smileyLEDs) / sizeof(smileyLEDs[0]);
for (int i = 0; i < numLEDs; i++) {
pixels.setPixelColor(smileyLEDs[i], pixels.Color(2, 2, 0)); // yellow
}
pixels.show();
printf("Target contains 'person'\n");
} else {
pixels.clear();
pixels.show();
printf("Target does not contain 'person'\n");
}
}
} else {
pixels.clear();
pixels.show();
Serial.print("HTTP get failed: ");
Serial.println(httpCode);
}
http.end();
} else {
pixels.clear();
pixels.show();
Serial.println("WiFi disconnected");
}
delay(5000);
}
Note: Modify to your WiFi name (SSID), password, and reCamera wlan0 IP address.
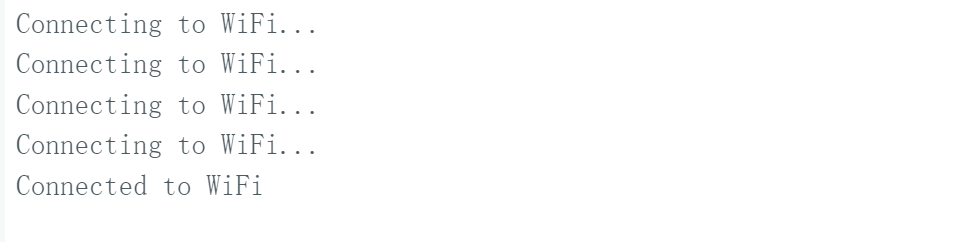
Wait for the upload to complete,and you can see XIAO has successfully connected to WiFi in the serial monitor.
Running
Ensure your reCamera is running the Supervisor project and has successfully connected to WiFi.
sudo ./Supervisor_add_detection_http
You can see the Json results of HTTP service in the serial monitor of XIAO.
When person face the camera, XIAO displays a smiling face, thus realizing a smiley camera that you can DIY yourself.
For more details, please refer to our GitHub repository.
Tech Support & Product Discussion
Thank you for choosing our products! We are here to provide you with different support to ensure that your experience with our products is as smooth as possible. We offer several communication channels to cater to different preferences and needs.