Train a Sound Model
reCamera Pro includes a local sound training platform called Acoustic Lab. You can collect environmental sound samples, train custom sound models, and deploy them as sound-triggered events — all on-device, without an internet connection.
Accessing Acoustic Lab
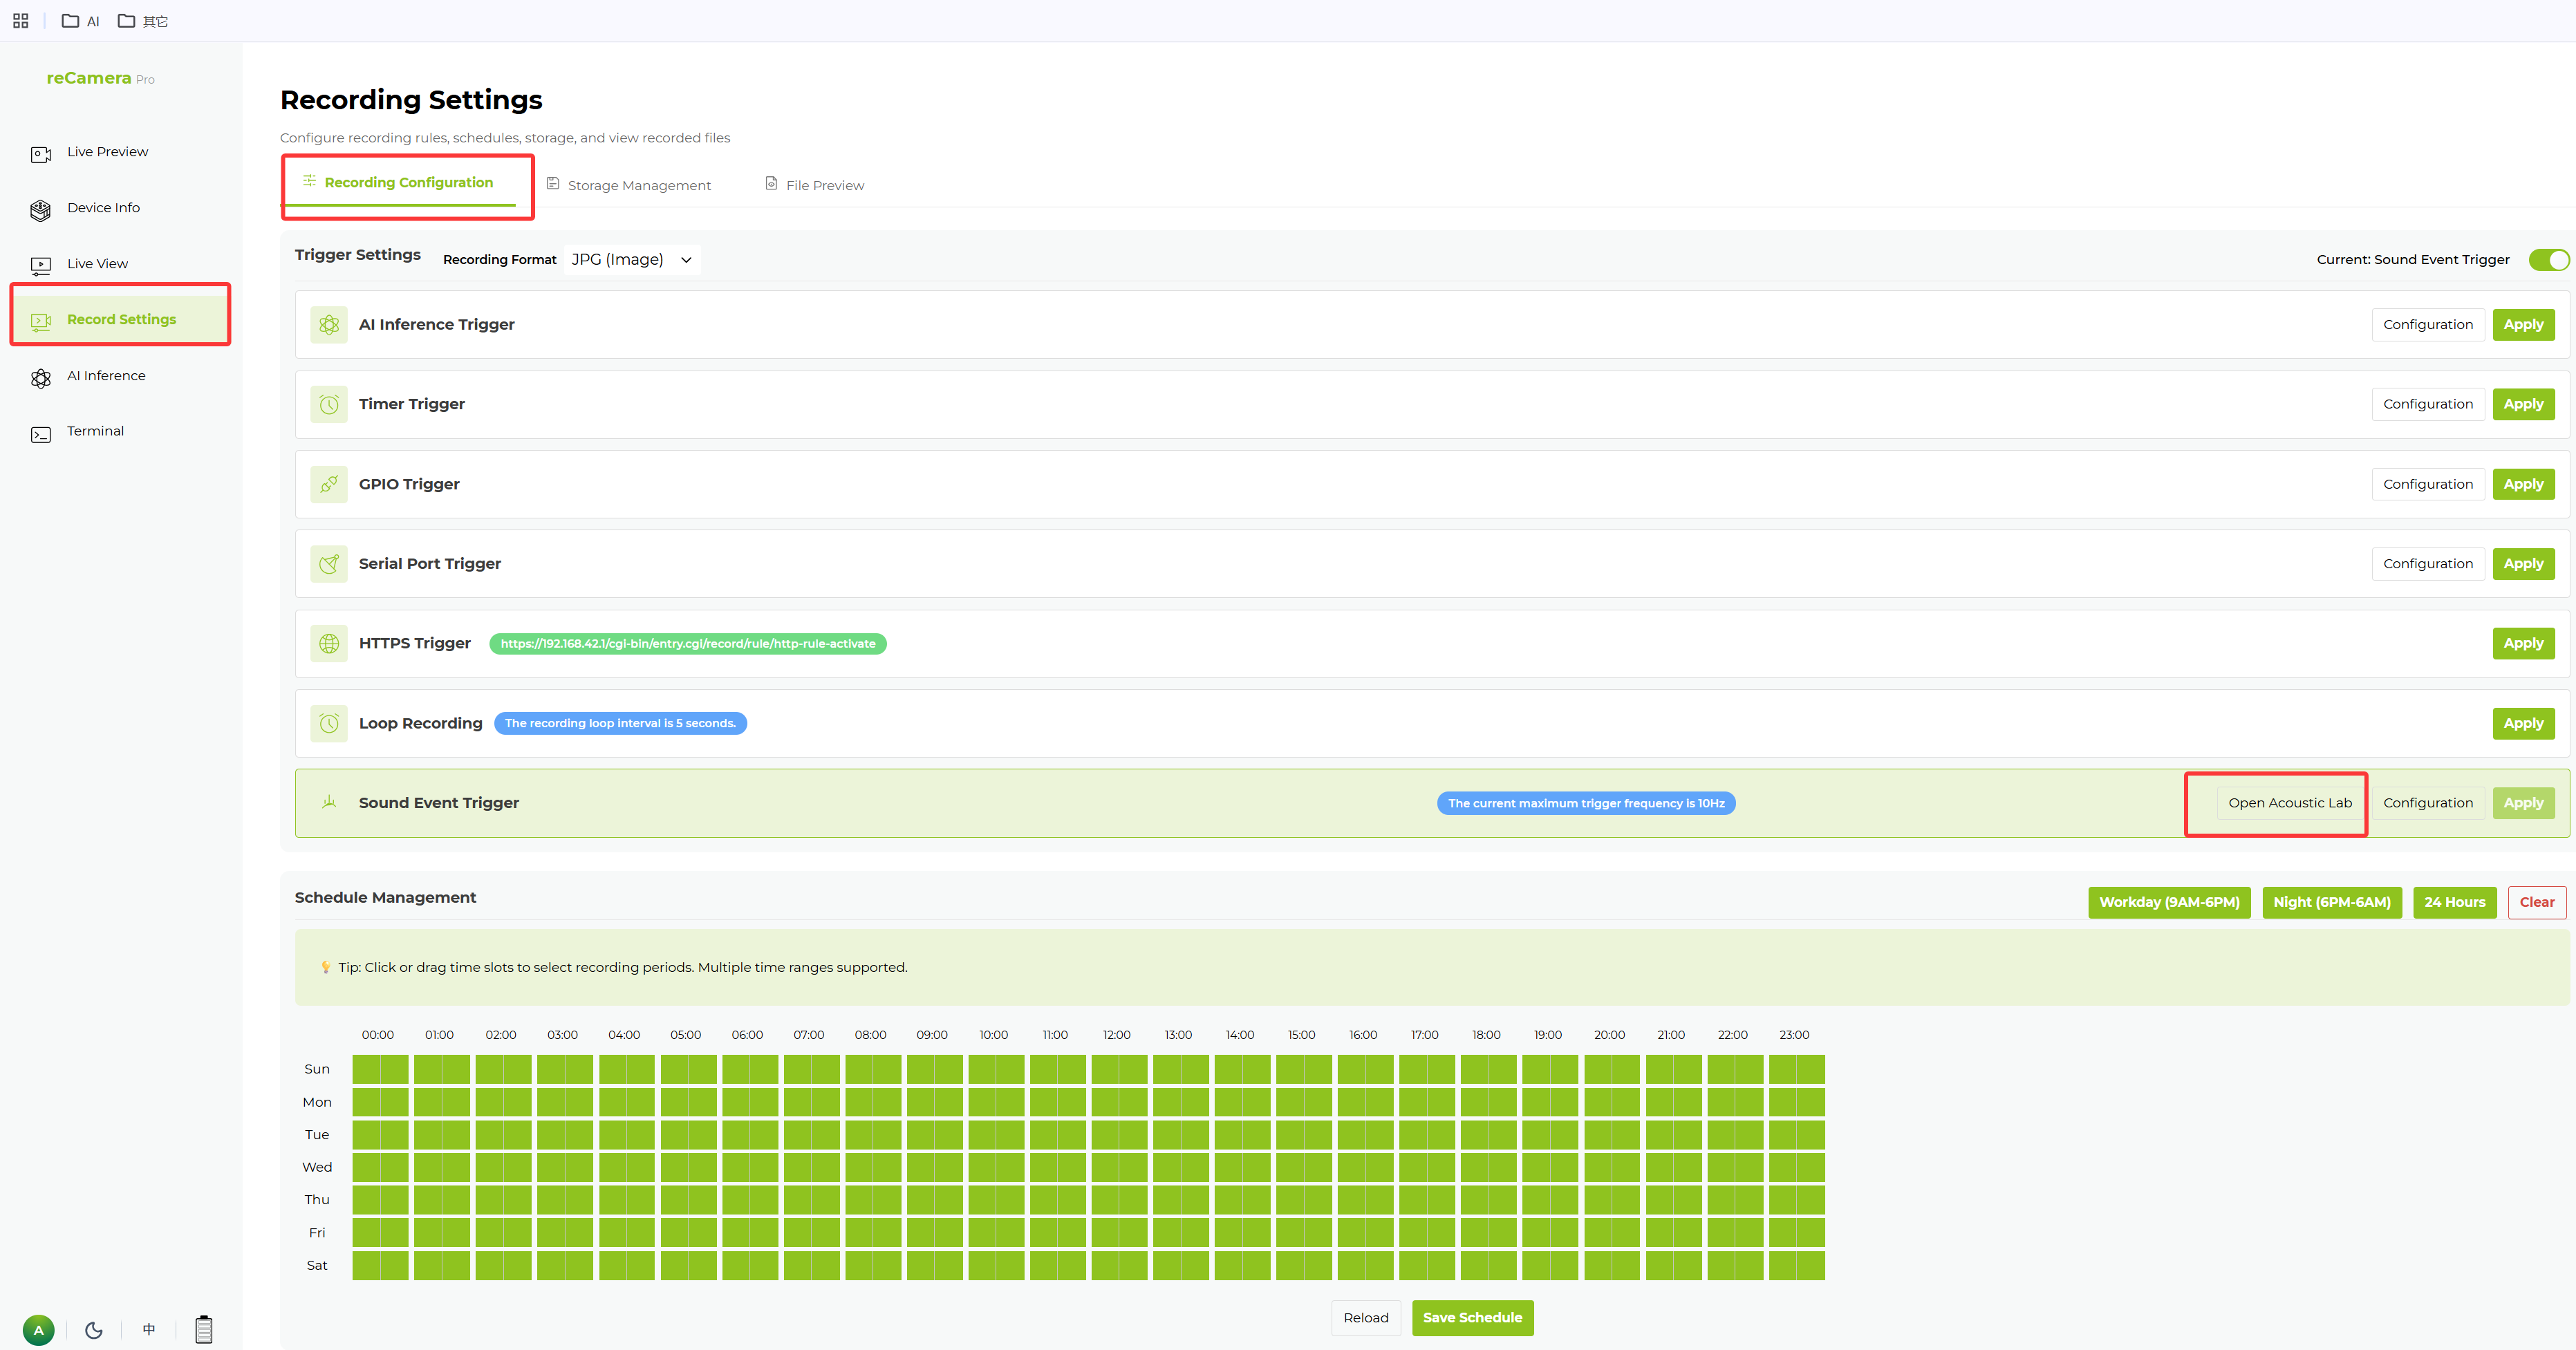
- Click Record Settings in the Web UI.
- Click Recording Configuration.
- Below the Sound Event Trigger button, click Open Acoustic Lab.
Interface overview
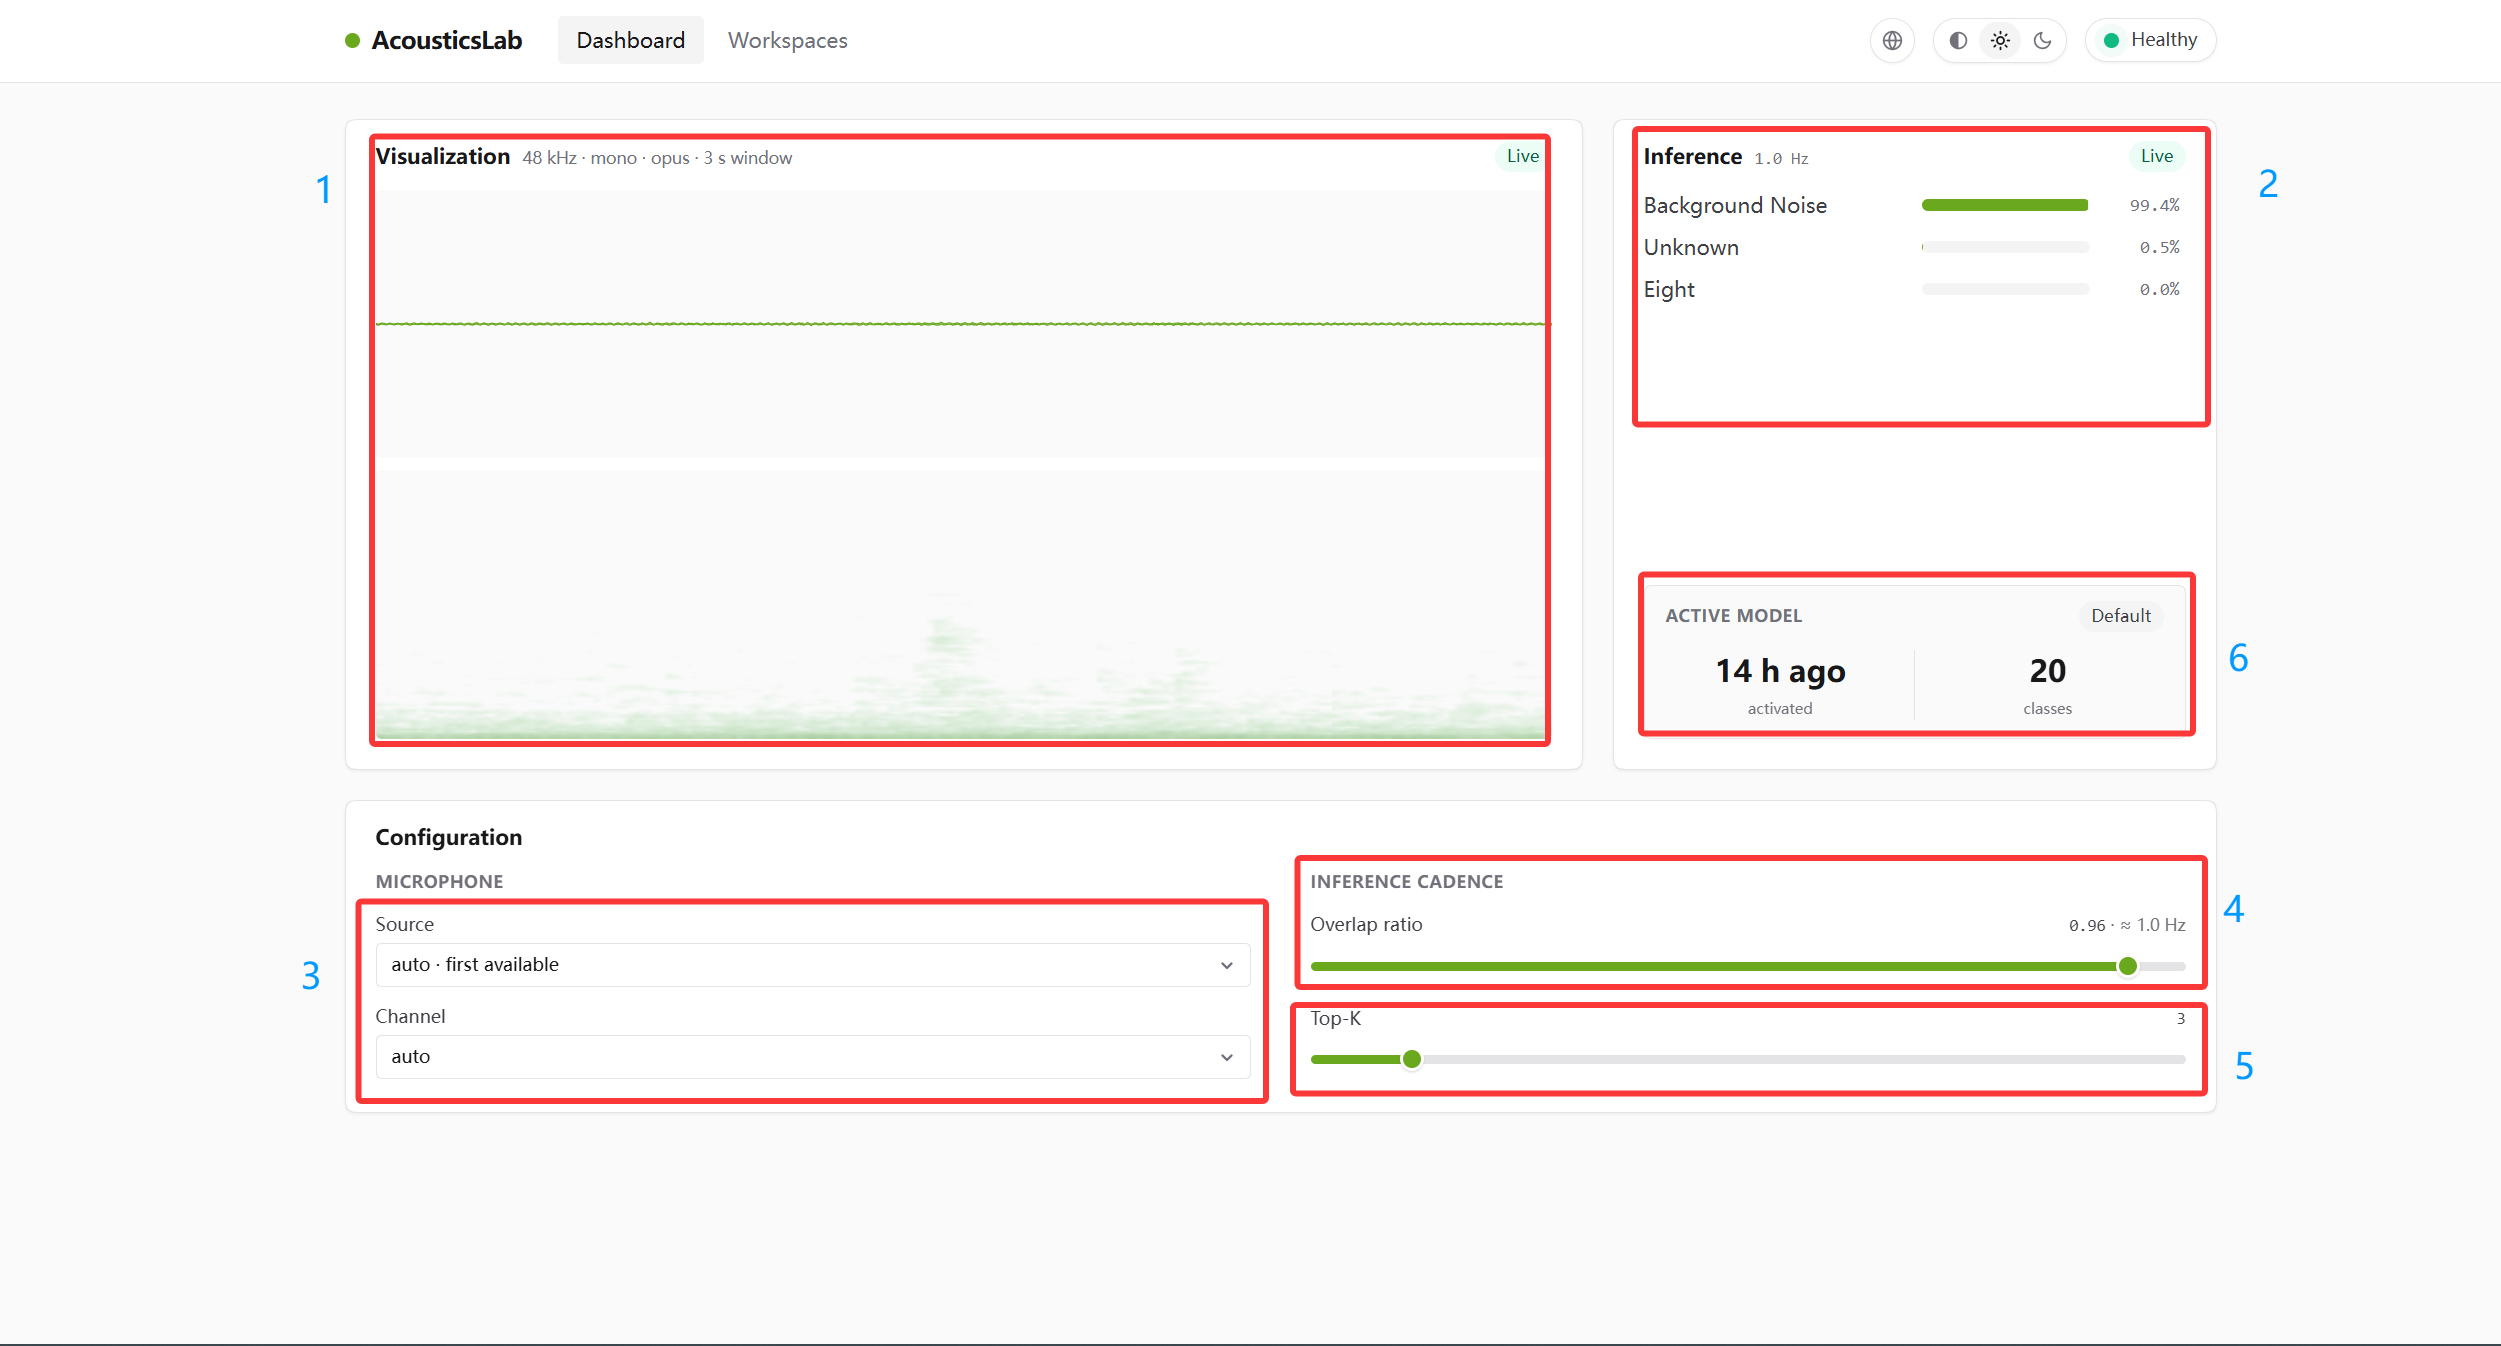
The main Acoustic Lab interface includes:
- Real-time Audio Spectrogram — frequency spectrum of current audio
- Real-time Confidence Leaderboard — confidence ranking of current sounds
- Microphone Configuration — input source and channel count
- Audio Sampling Frequency — lower = faster response, more resources
- Confidence Leaderboard Display Precision — numeric precision
- Status Information — algorithm runtime + number of sound models in workspace
Local training
1. Audio acquisition
- Click Workspace, then New workspace. Name it and click Create.
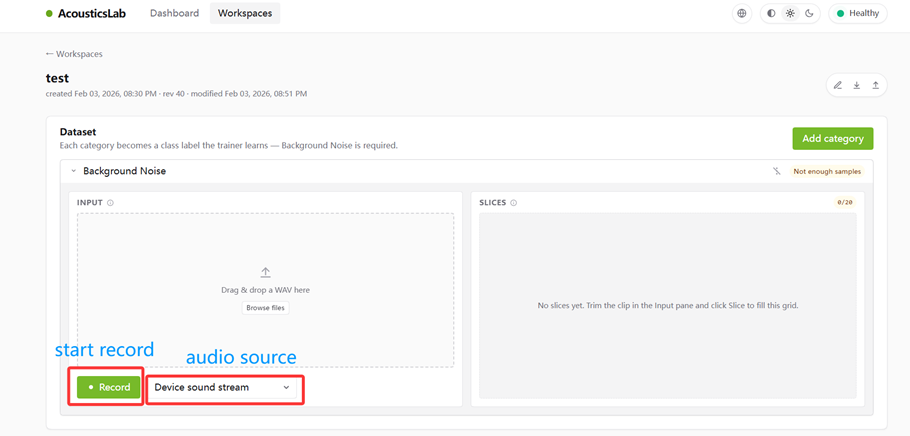
- In the Dataset area, first collect background noise (recommended: 20 seconds). Click Background Noise → Record. The dropdown lets you select the microphone input source; the default is device audio.
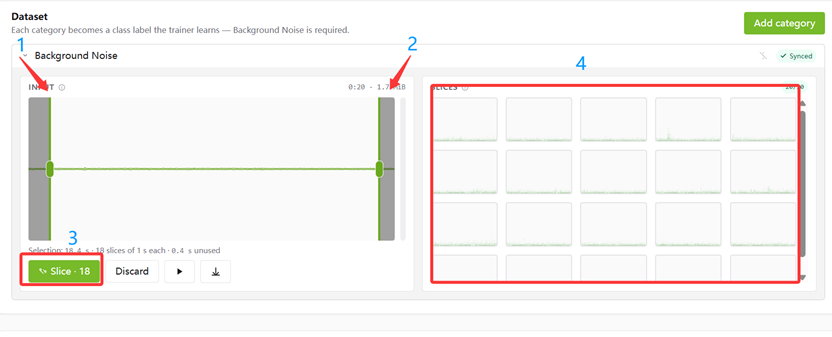
- After recording, click Stop, then Slice to split the background noise into 1-second segments:
- (1) Trim from beginning
- (2) Trim from end
- (3) Split the sample
- (4) Split samples display area
- Click Add category to add a sound category and name it.
- Click Record to record sound samples (recommended: 10 seconds). Slice the same way.
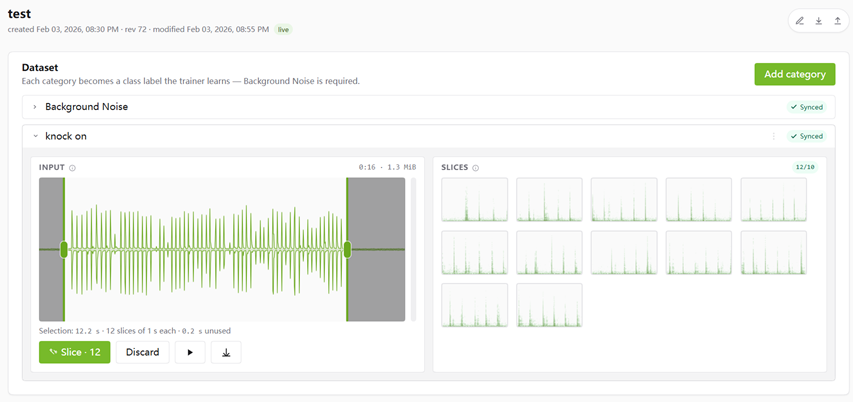
2. Start training
- Click Hyperparameter to review training parameters (keep defaults unless you have specific needs).
- Click Train model to start.
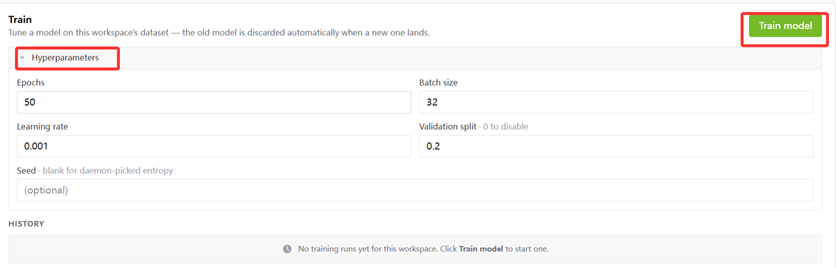
Training on SenseCraft
Go to the SenseCraft model training platform and click Audio Classification Detection.
1. Select audio input source
Multiple input sources are available. The default is computer audio.
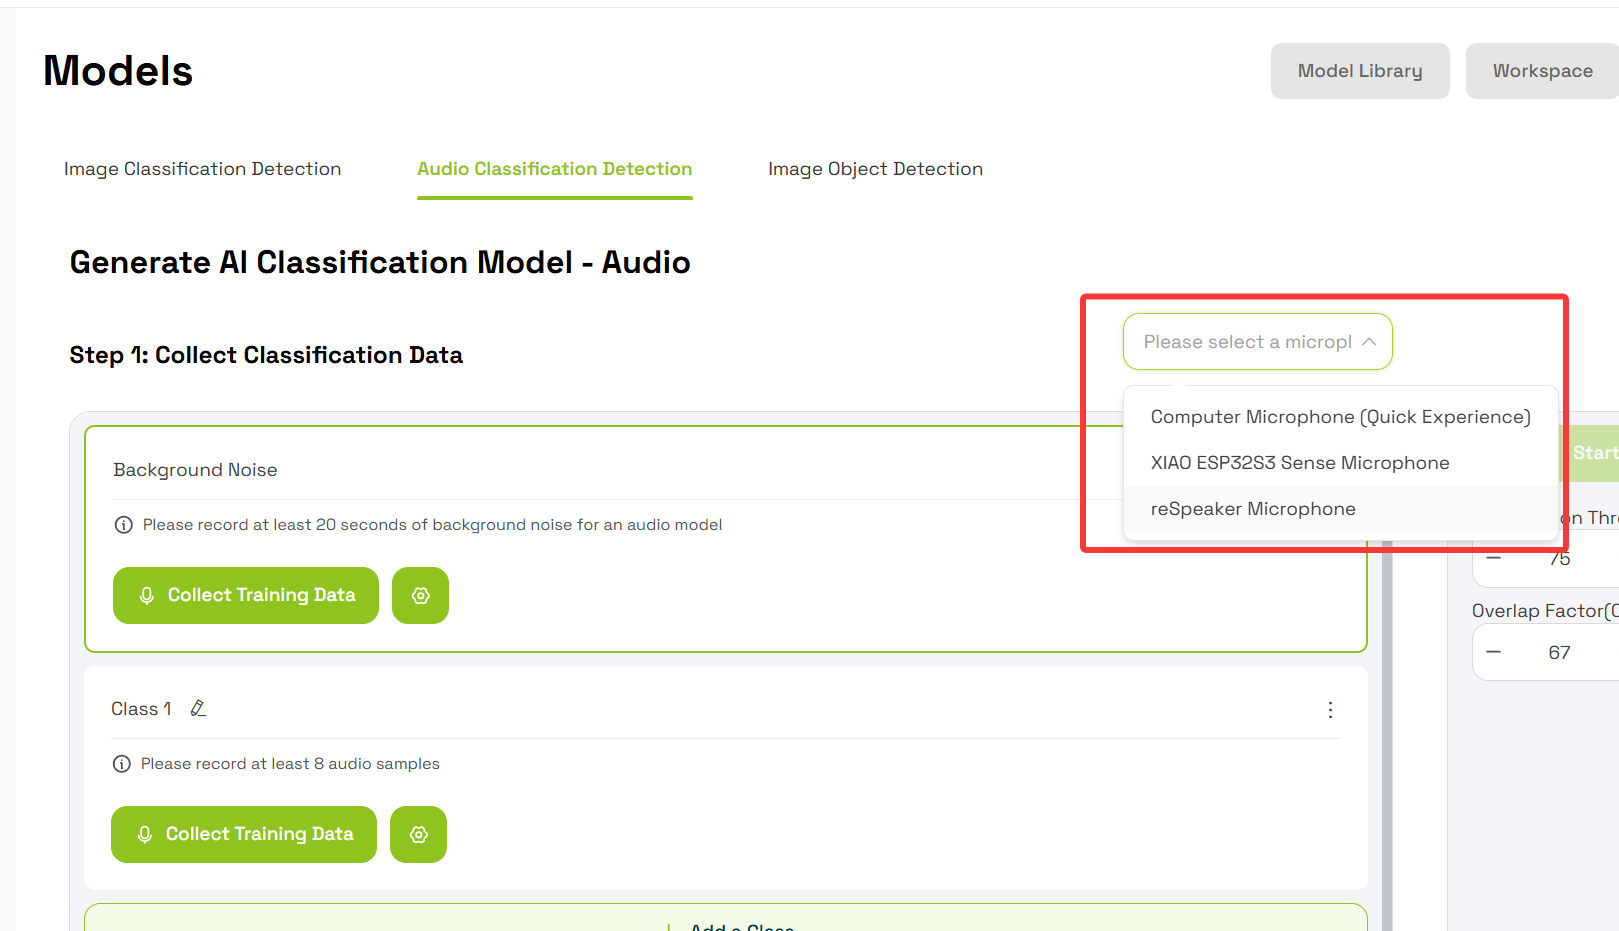
SenseCraft does not yet support device audio input, which may affect model recognition accuracy after deployment. See SenseCraft model accuracy below.
2. Collect background noise
Collect at least 20 seconds of environmental background noise. Click Collect Training Data.
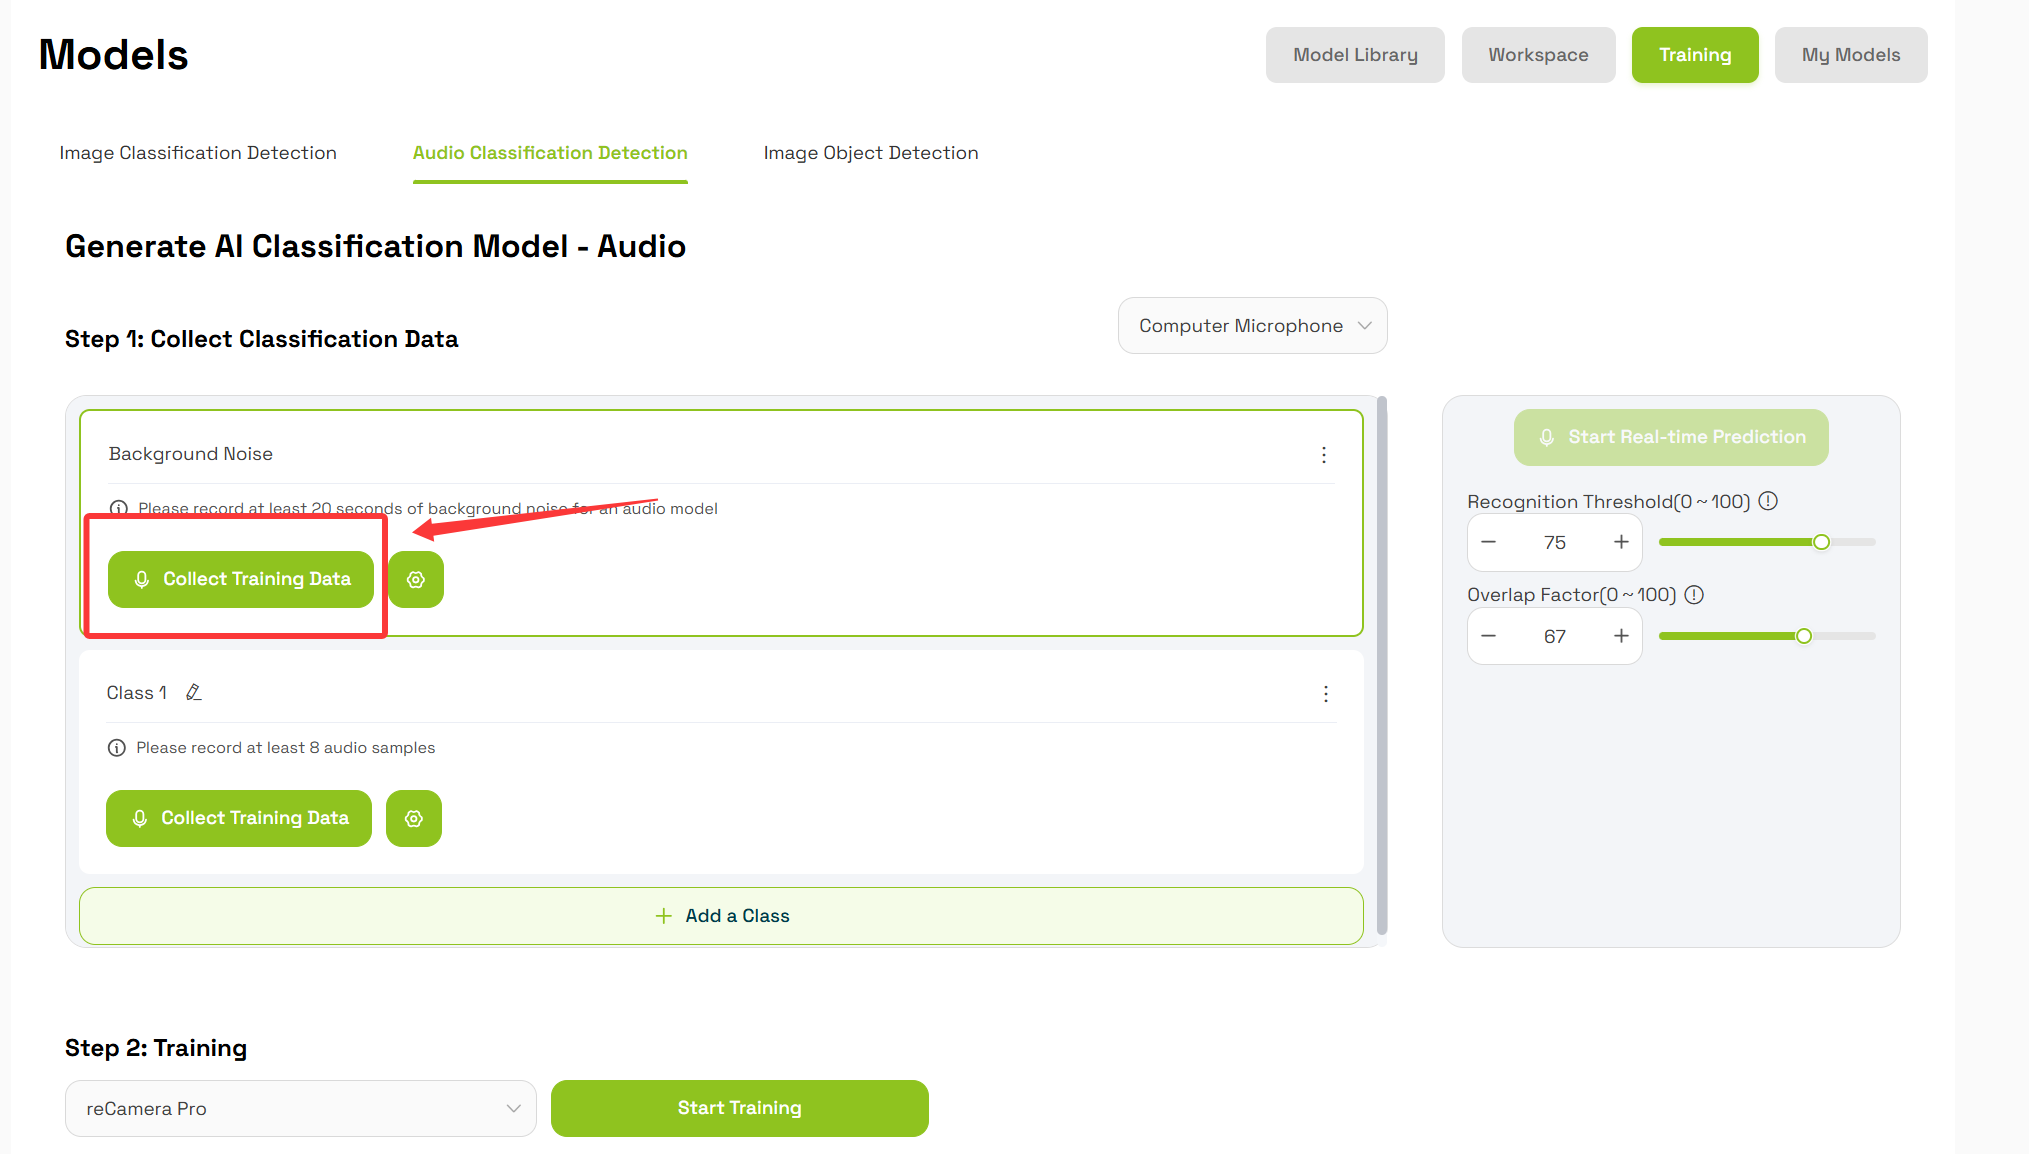
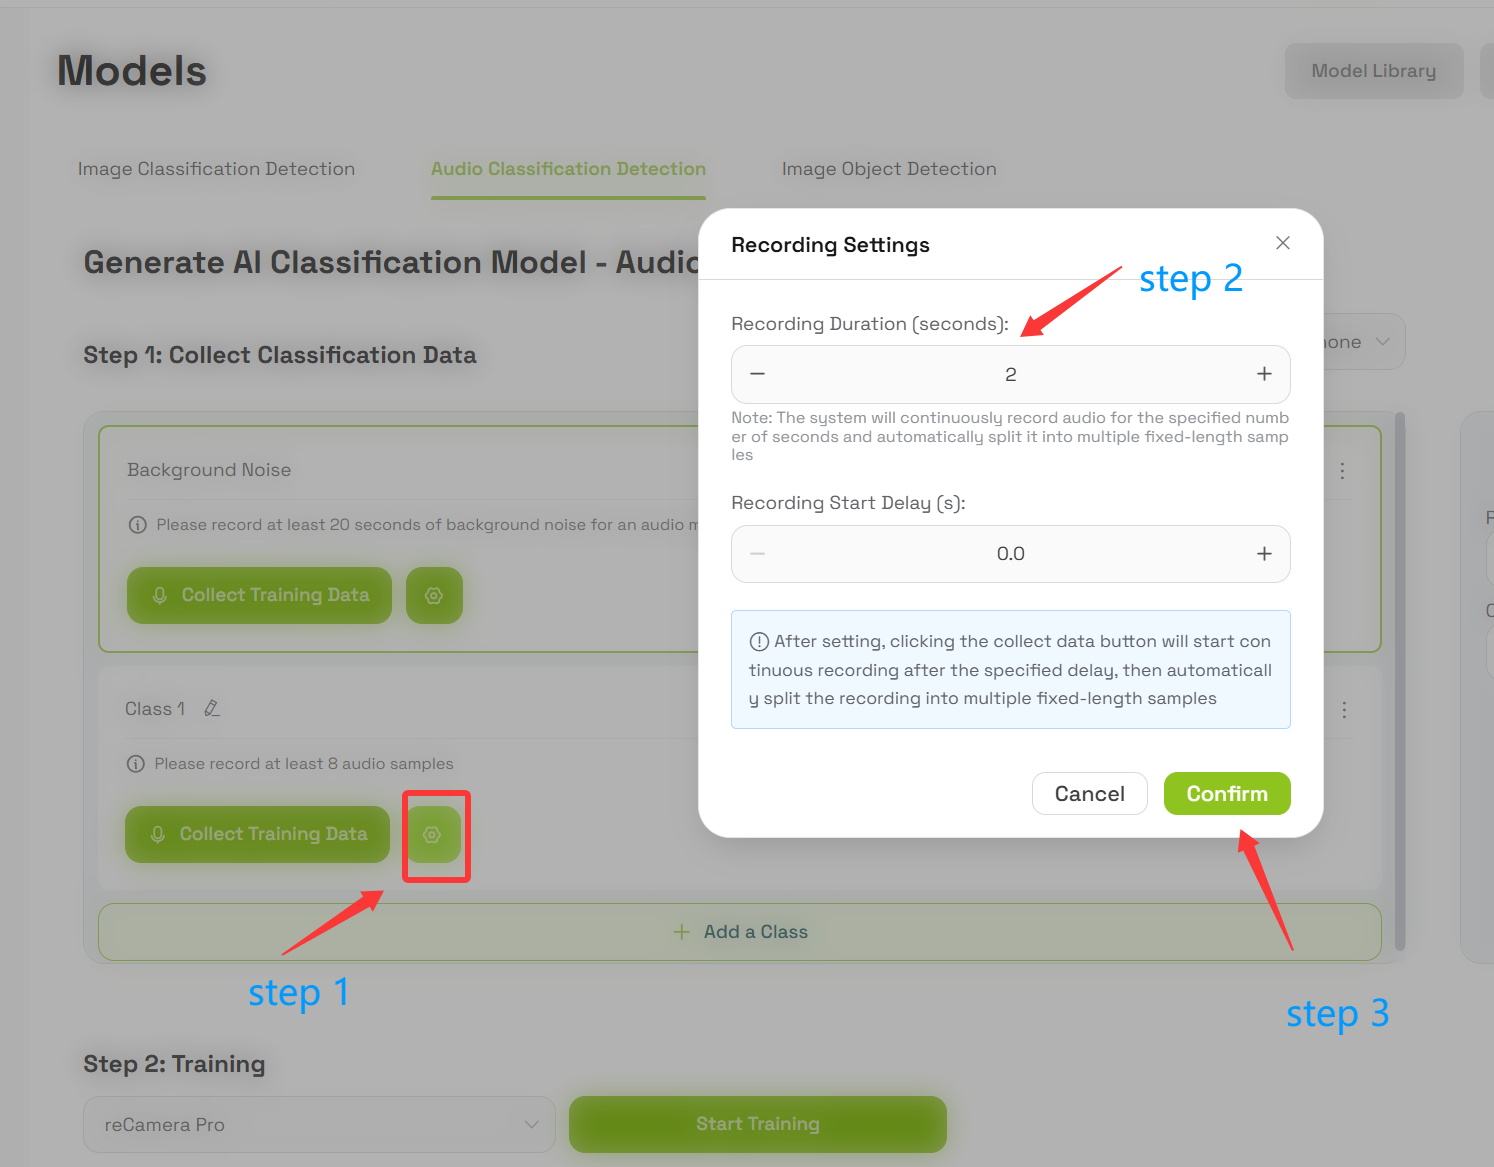
3. Collect sound samples
Set the duration of each audio segment (default: 2 seconds).
4. Train
Click Train Model.
Deploy the model
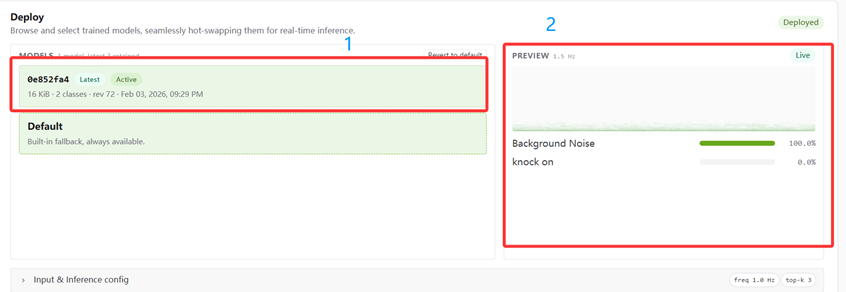
- In Acoustic Lab, find the Deploy option at the bottom. In the MODELS list, select your trained model and deploy it.
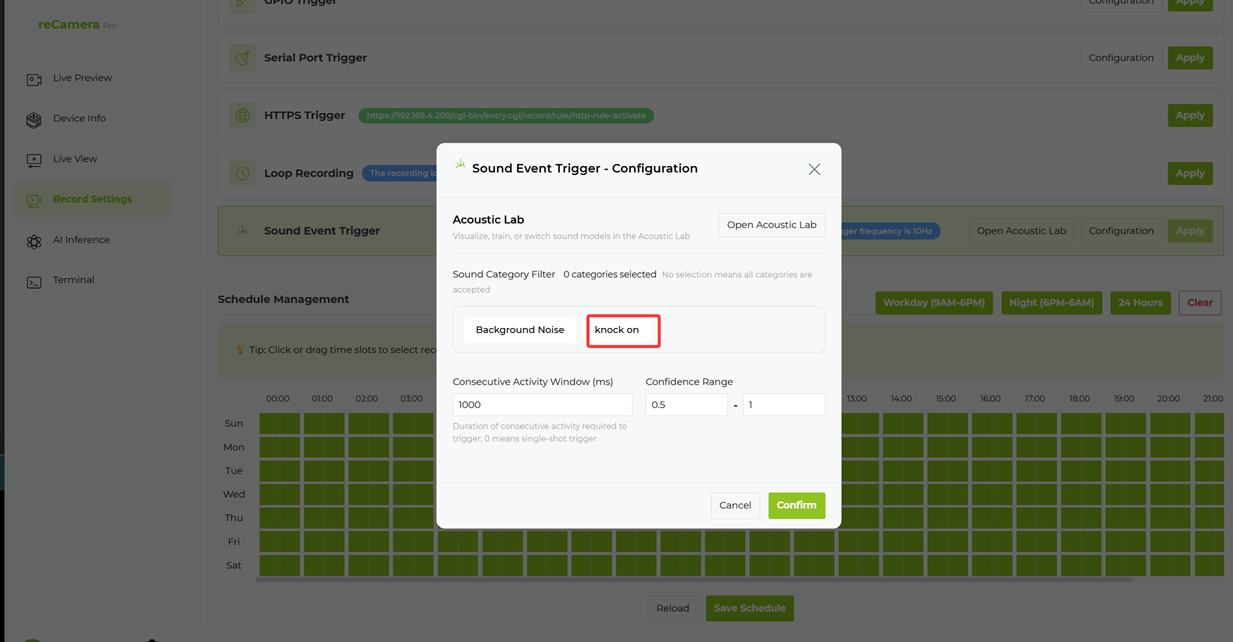
- Return to the Web UI main interface → Record Settings → Sound Event Trigger → Configuration.
- Select your trained sound category and click Confirm.
Troubleshooting
Trained model not found in the deployment list
- Confirm training completed and a model file was generated.
- Check that you are in the same workspace used during training.
- Refresh the Acoustic Lab page.
Sound trigger is insensitive or triggers falsely
- Re-collect at least 20 seconds of background noise.
- Adjust the confidence threshold in hyperparameters.
- Confirm microphone input source and channel configuration.
SenseCraft model accuracy drops after deployment
The audio features from SenseCraft training differ from on-device inference. To optimize:
- When deploying on SenseCraft, check the option to include the dataset.
- Open the workspace on the device. Based on actual detection results, add 5+ seconds of device-microphone recordings:
- A. False recognition of non-target sounds → record that sound as background noise, add slices.
- B. False recognition of target sounds → record that sound in the target category, add slices.
- Retrain on the device and switch to the new model.
Related pages
Tech Support & Product Discussion
Thank you for choosing our products! We are here to provide you with different support to ensure that your experience with our products is as smooth as possible. We offer several communication channels to cater to different preferences and needs.