Experimental Debian 13 Image
Introduction
reCamera Pro is powered by the RV1126B chip and is available with 2 GB or 4 GB of memory. It ships with Buildroot firmware for a quick start with AI inference. This page provides a Debian 13 image for users who need more flexibility for development and deployment.
After flashing the Debian 13 image, you can compile your own applications with CMake, install required dependencies with apt, and run Docker containers. The image is compatible with Seeed's factory drivers and requires no device tree changes. The camera, microphone, speaker, and Wi-Fi work as expected; Bluetooth is not supported.
This firmware is currently experimental. Seeed does not maintain it at this time; it is provided as an additional development option.
Downloads
Download the Image
Download the Flashing Tool and Driver
This guide uses SocToolKit on Windows to flash the image. Download the following files:
Prepare for Flashing
Install the Driver
- Extract the downloaded
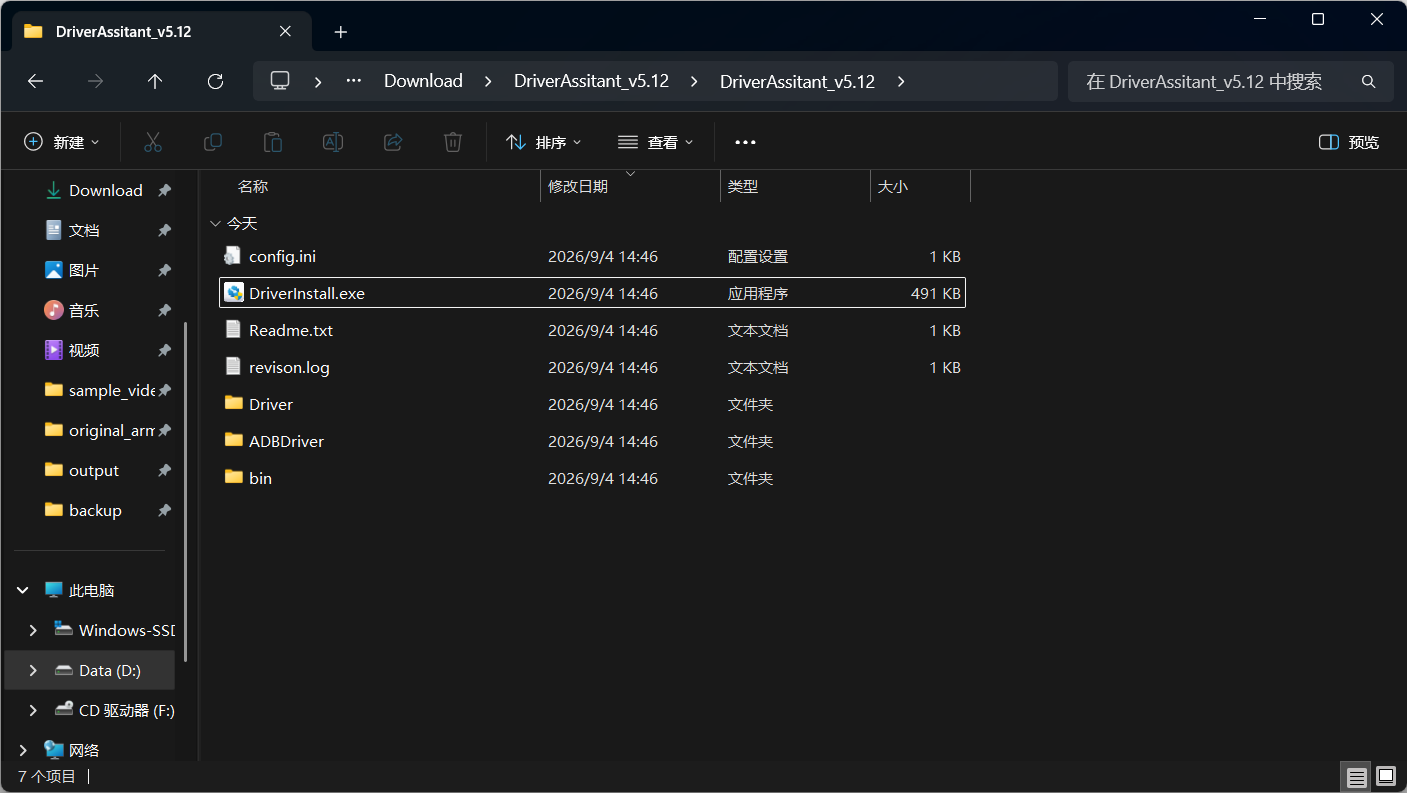
DriverAssistant_v5.12.ziparchive. - Open the extracted directory and run
DriverInstall.exe.
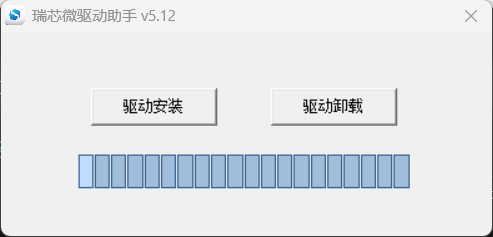
- Click Driver Install.
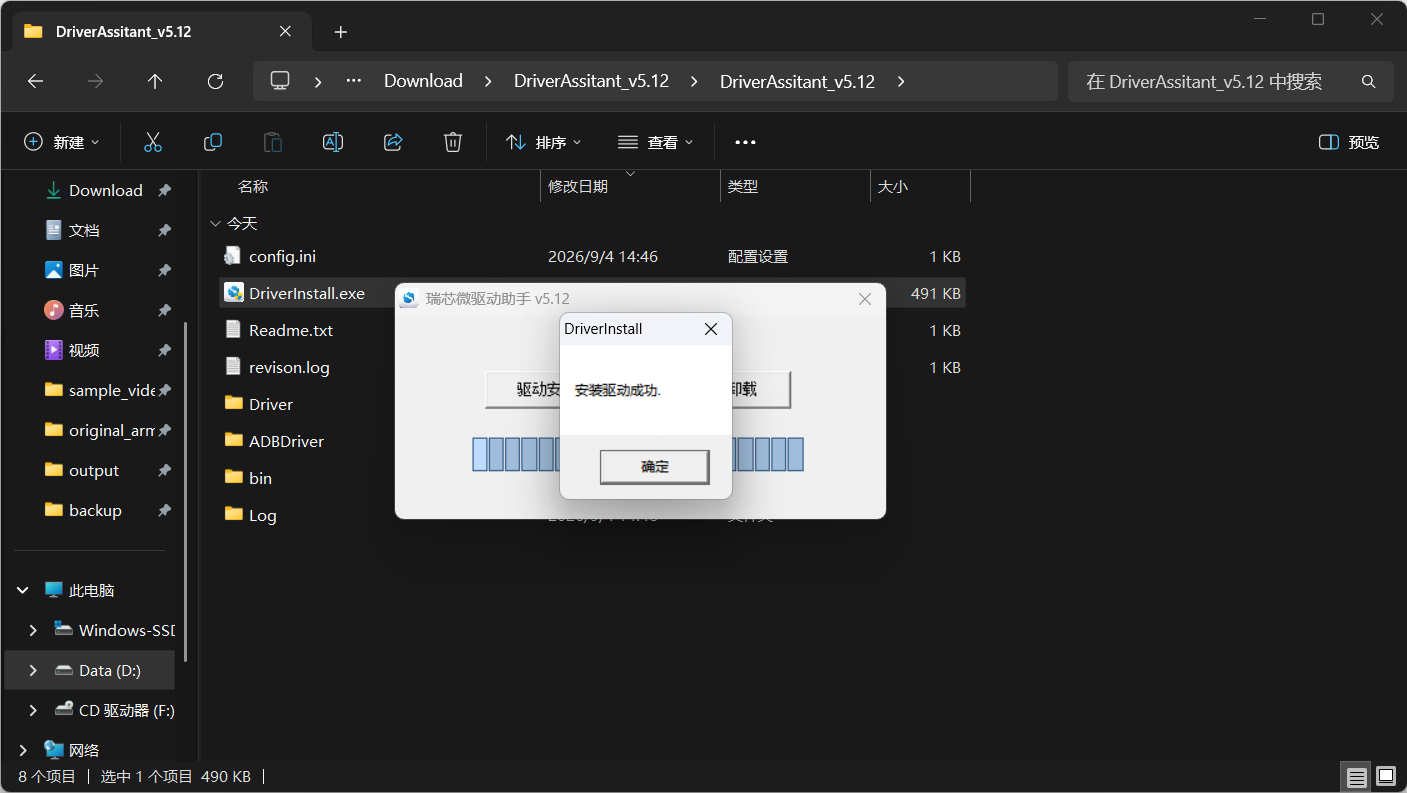
The following screen indicates that the driver was installed successfully.
Configure SocToolKit
- Extract
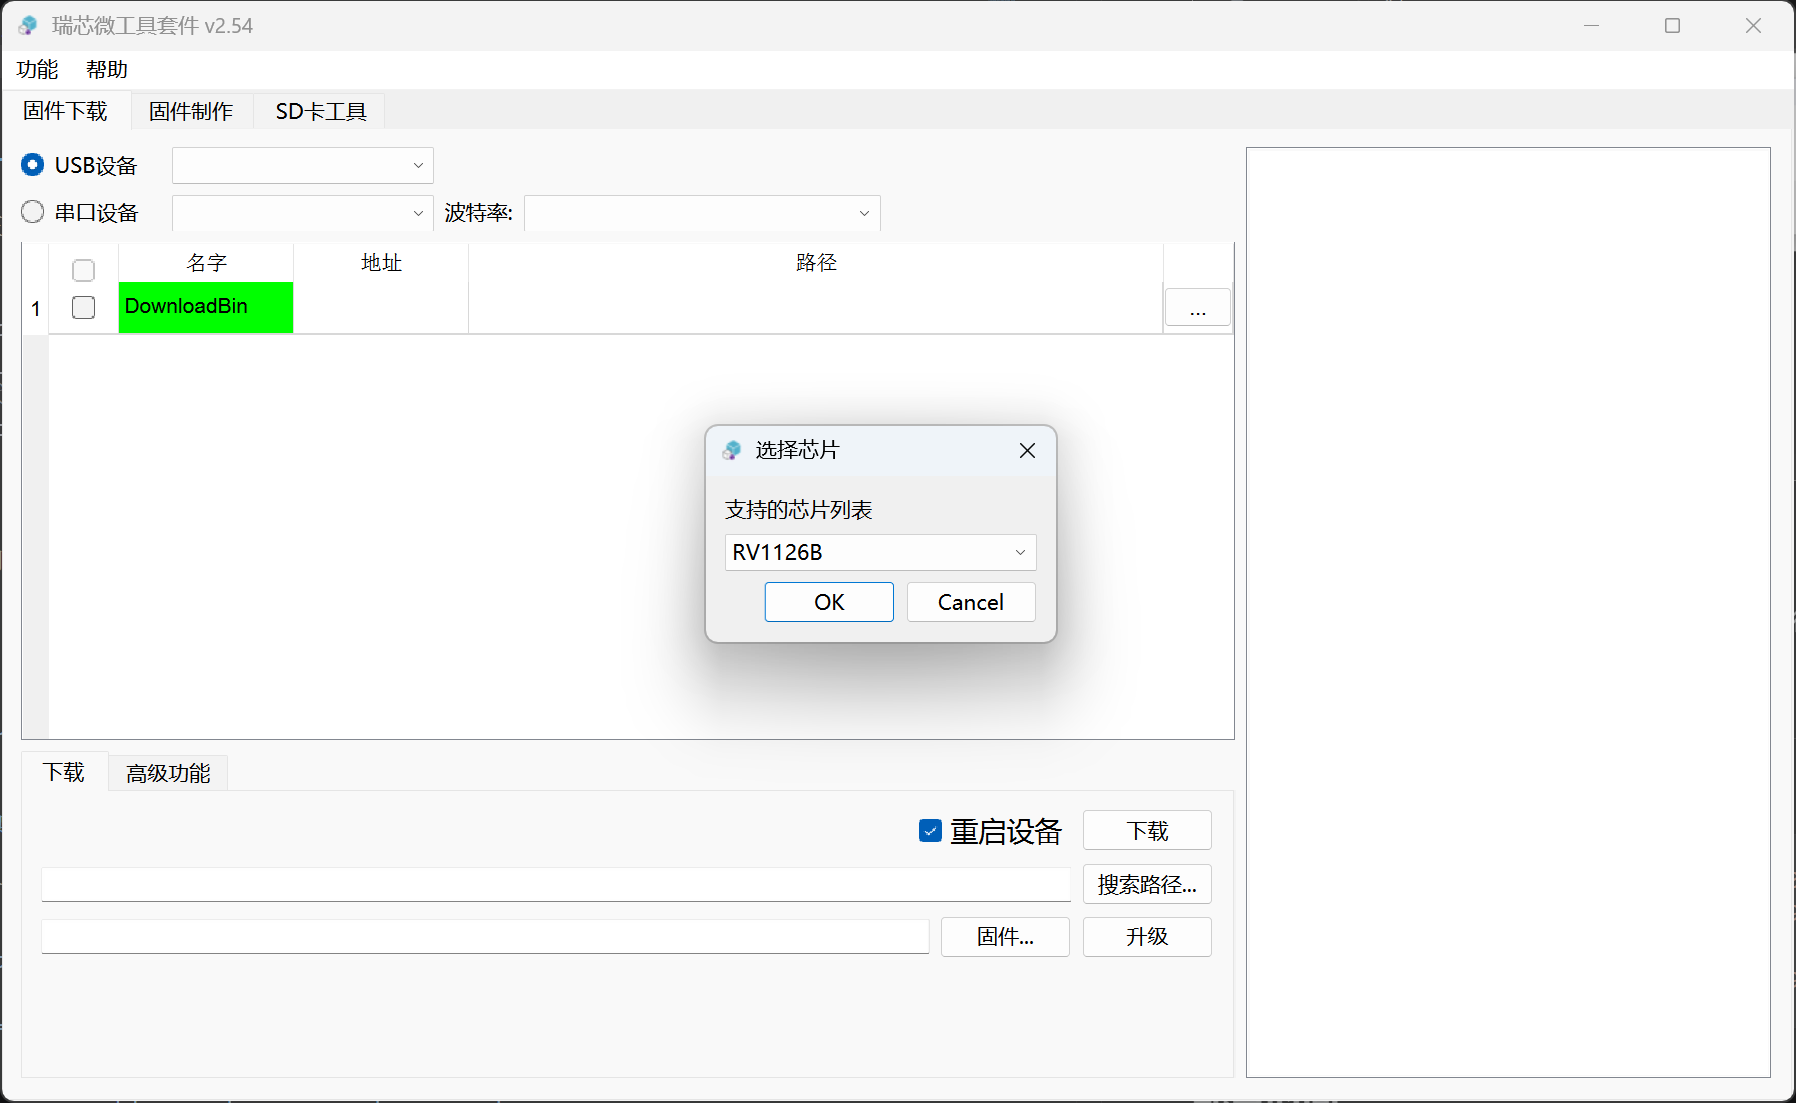
SocToolKit-window.zip, open the extracted directory, and runSocToolKit.exe. - Select the RV1126B chip in the tool.
- Extract
recamera_pro_debian13_img.tar.gz. - In SocToolKit, right-click and select the last item in the context menu.
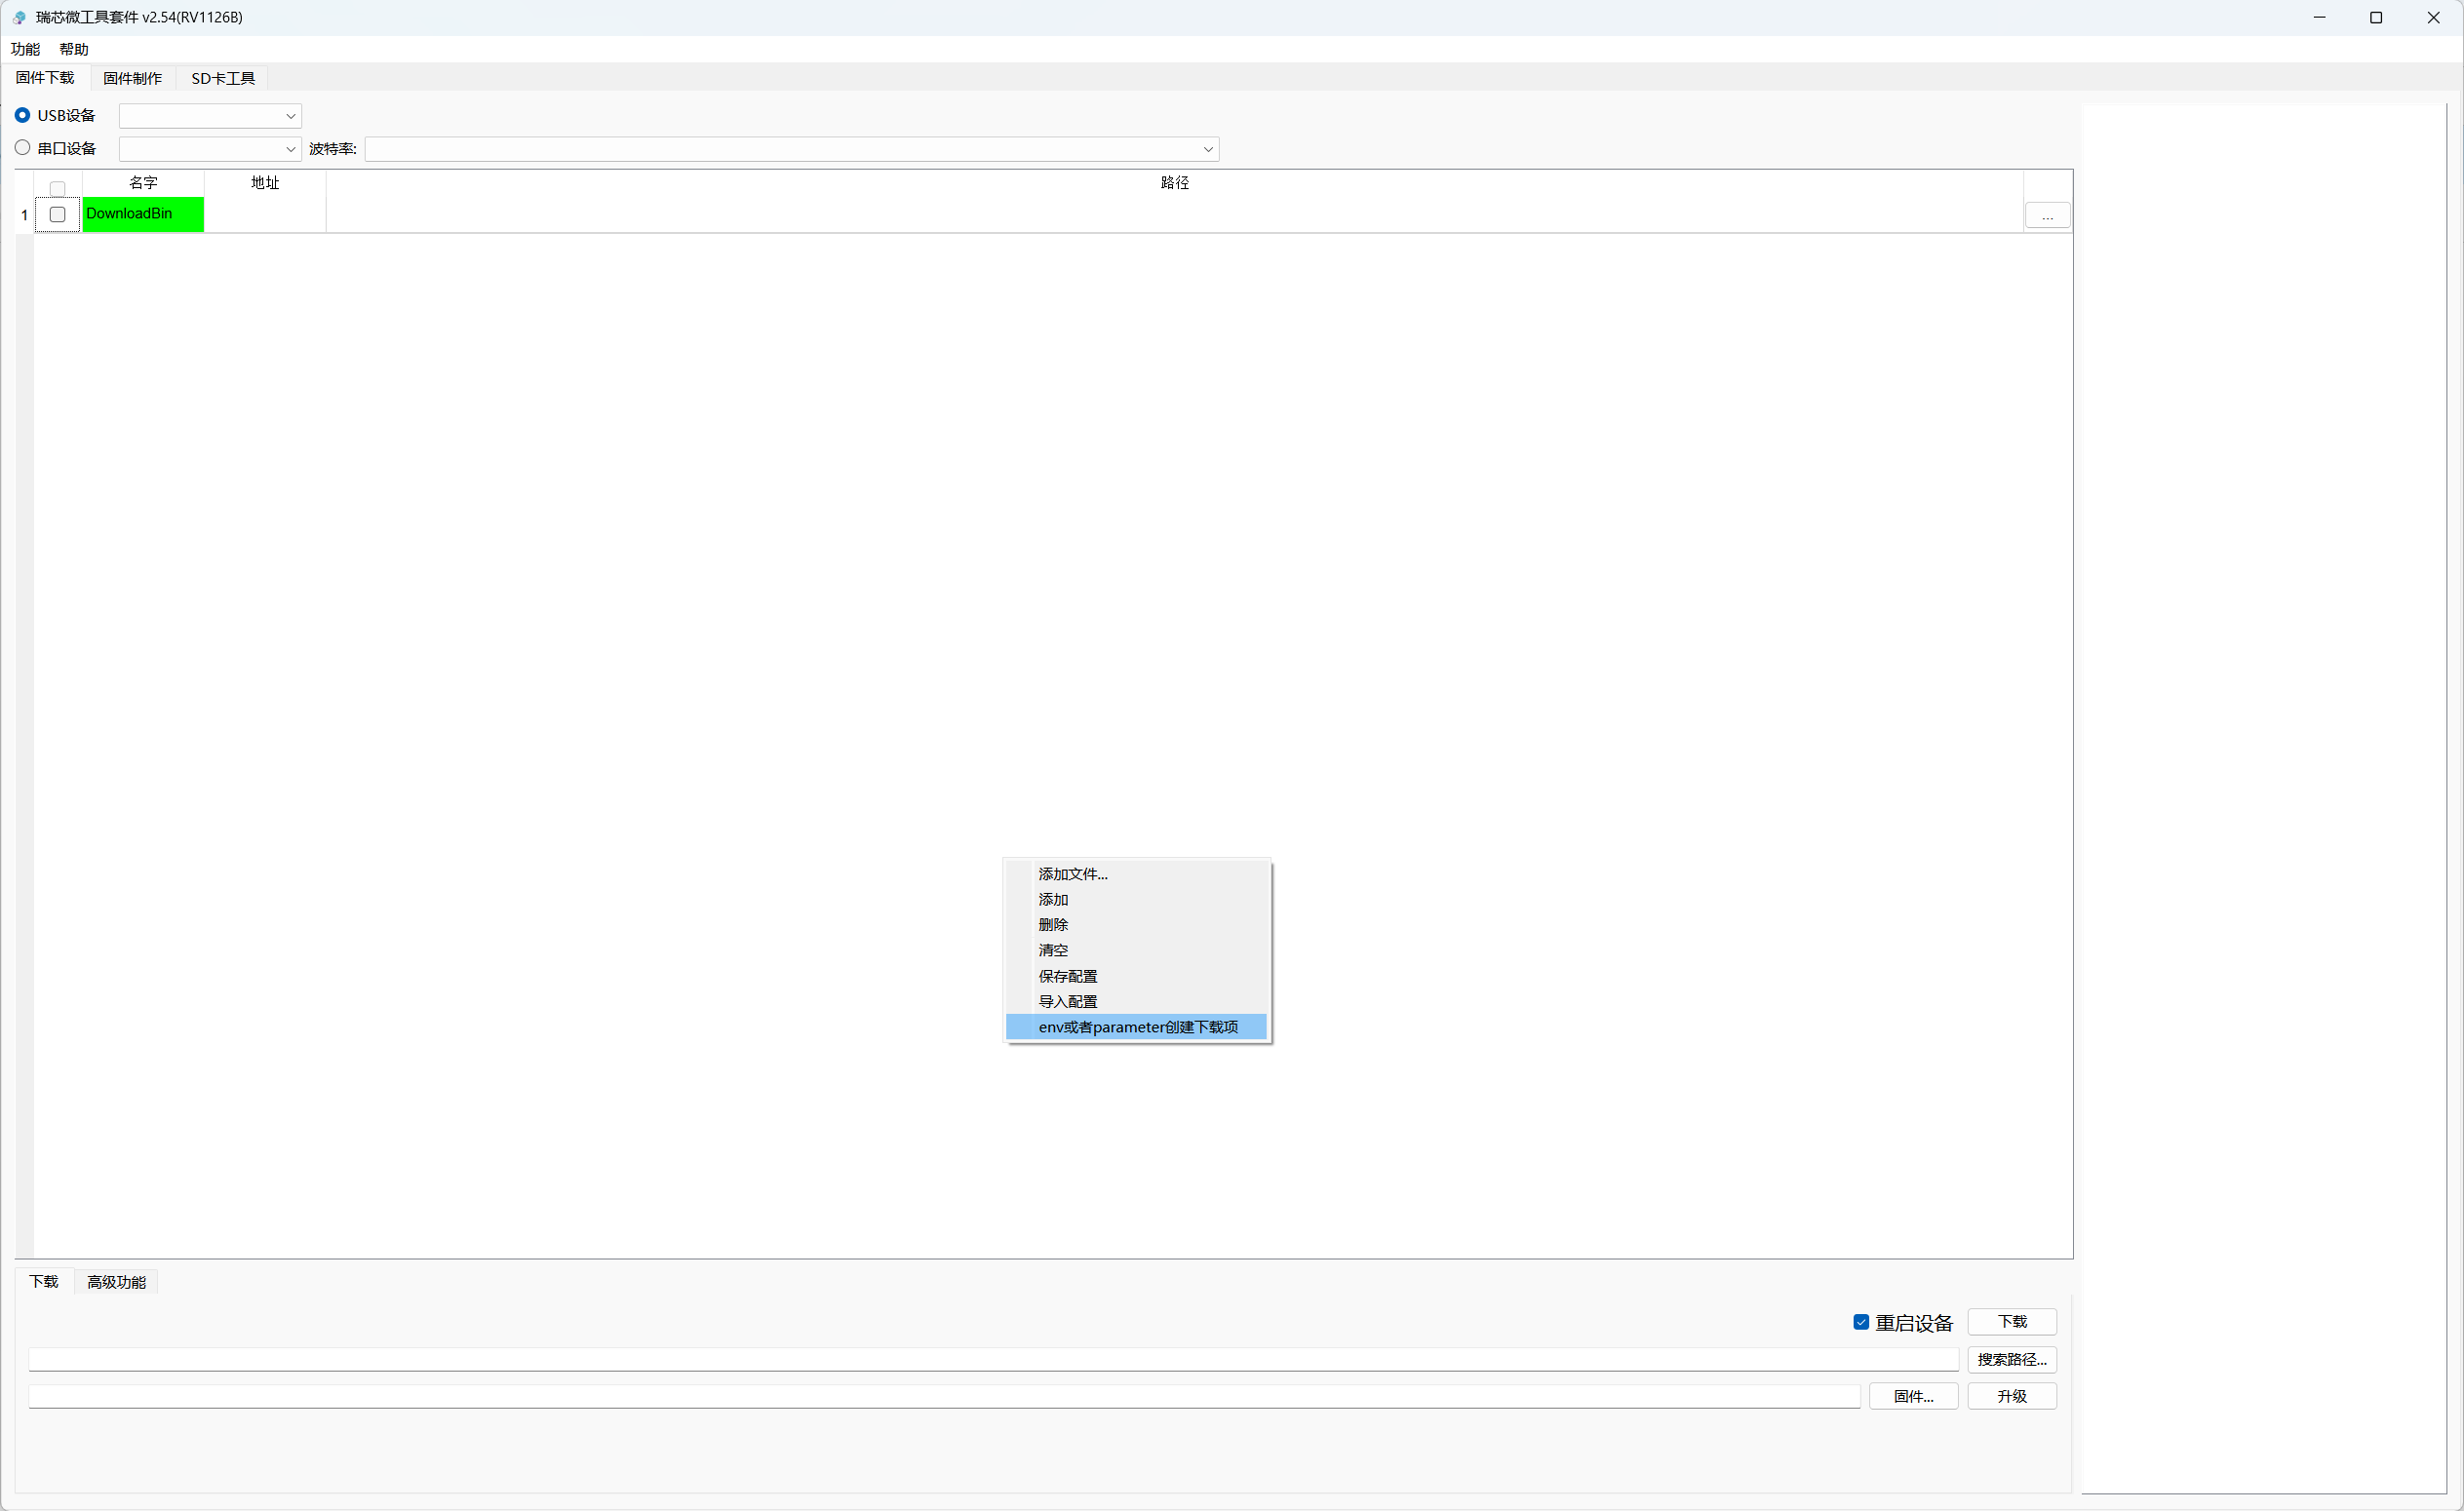
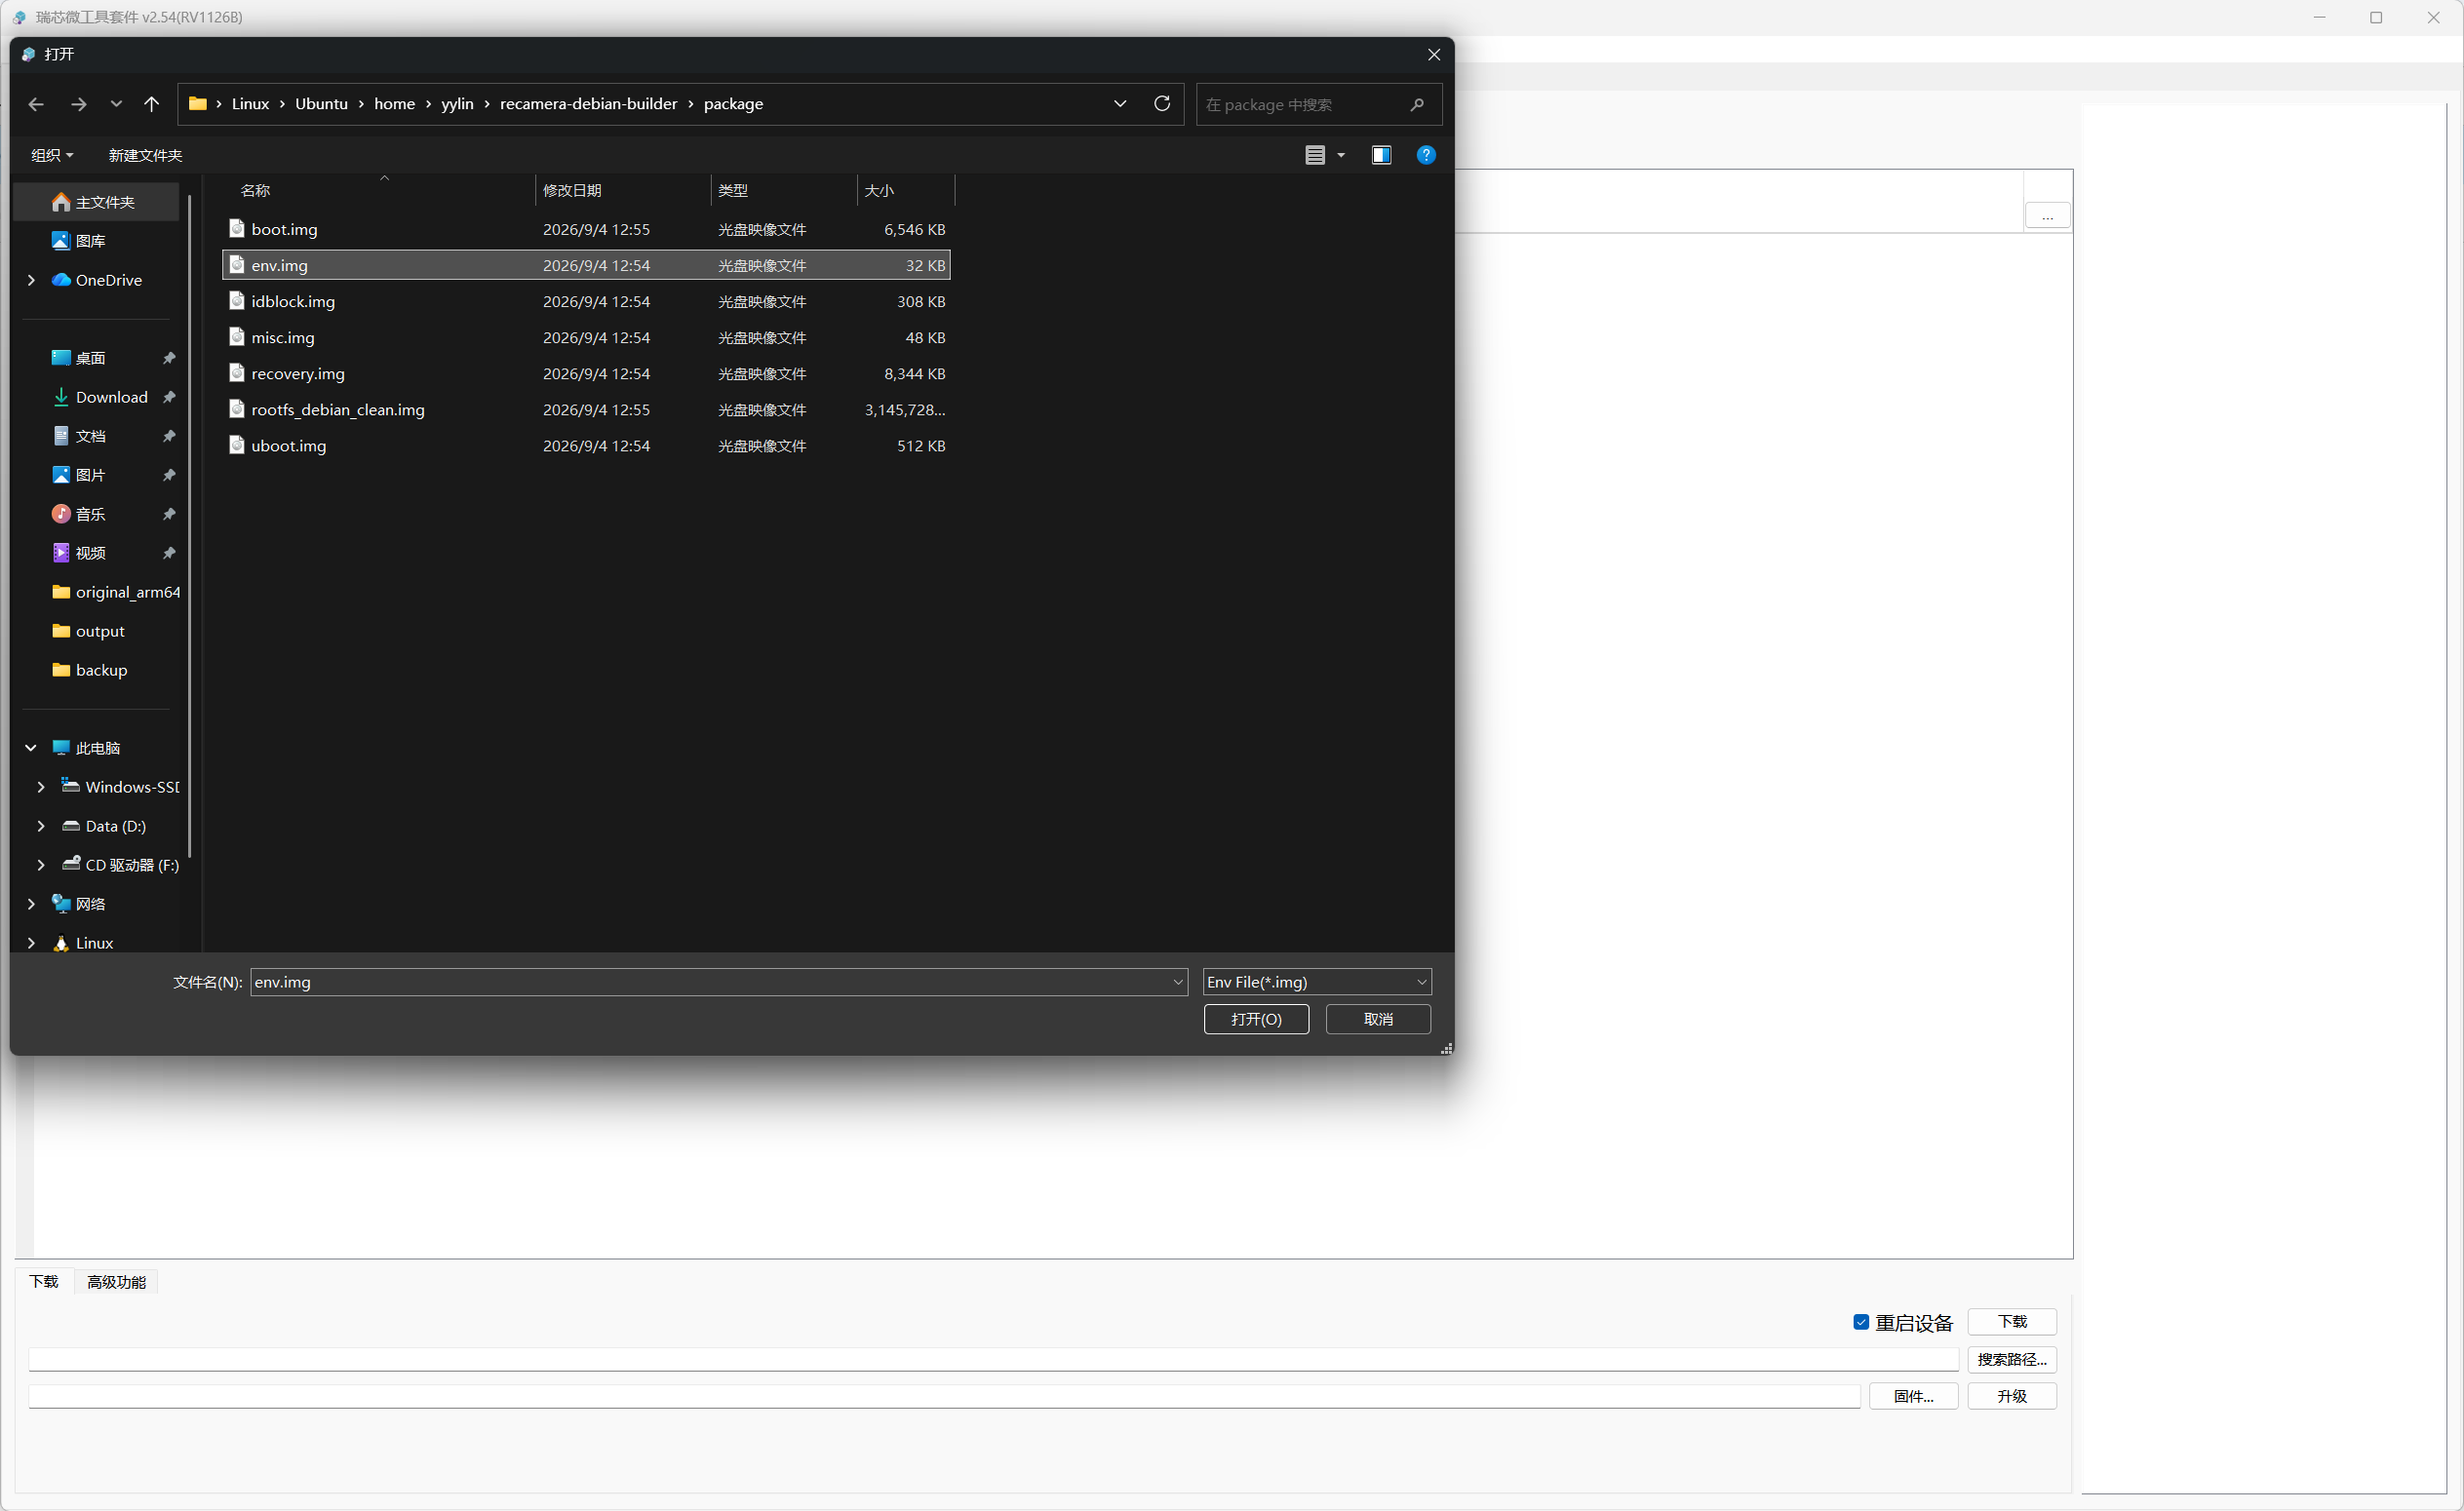
- Select the
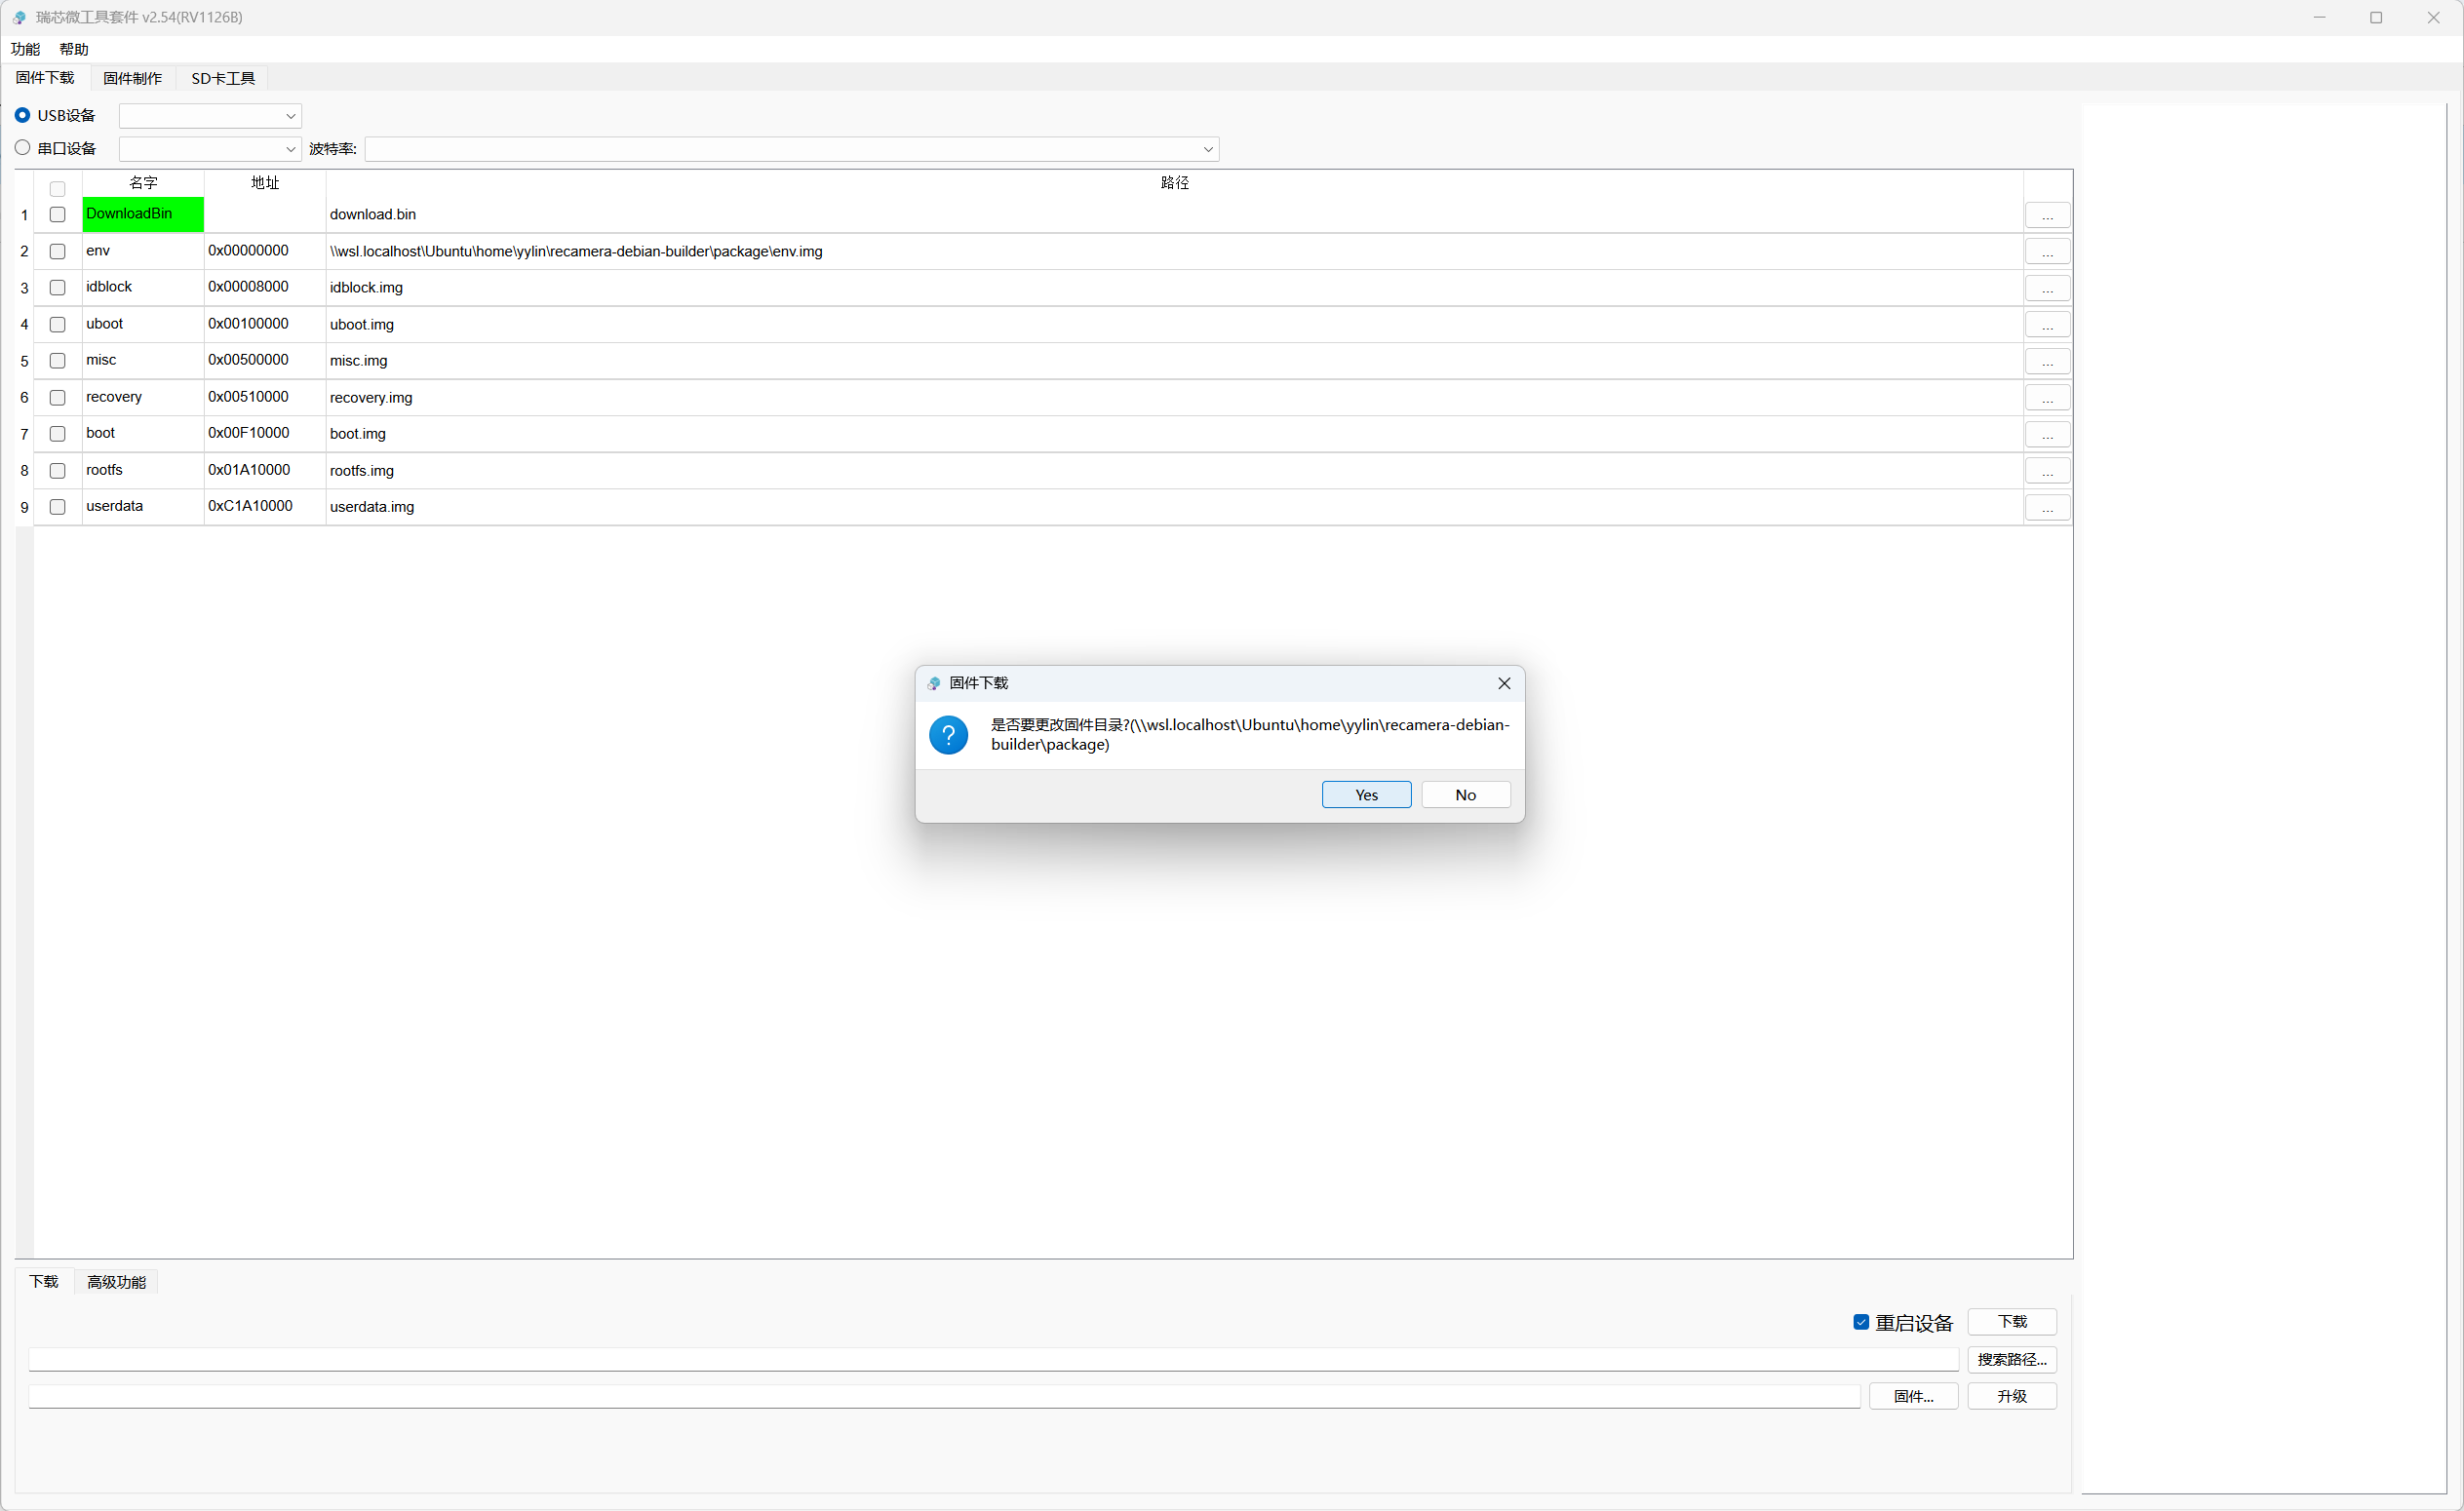
env.imgfile in the extracted firmware directory.
- Click Yes in the confirmation dialog.
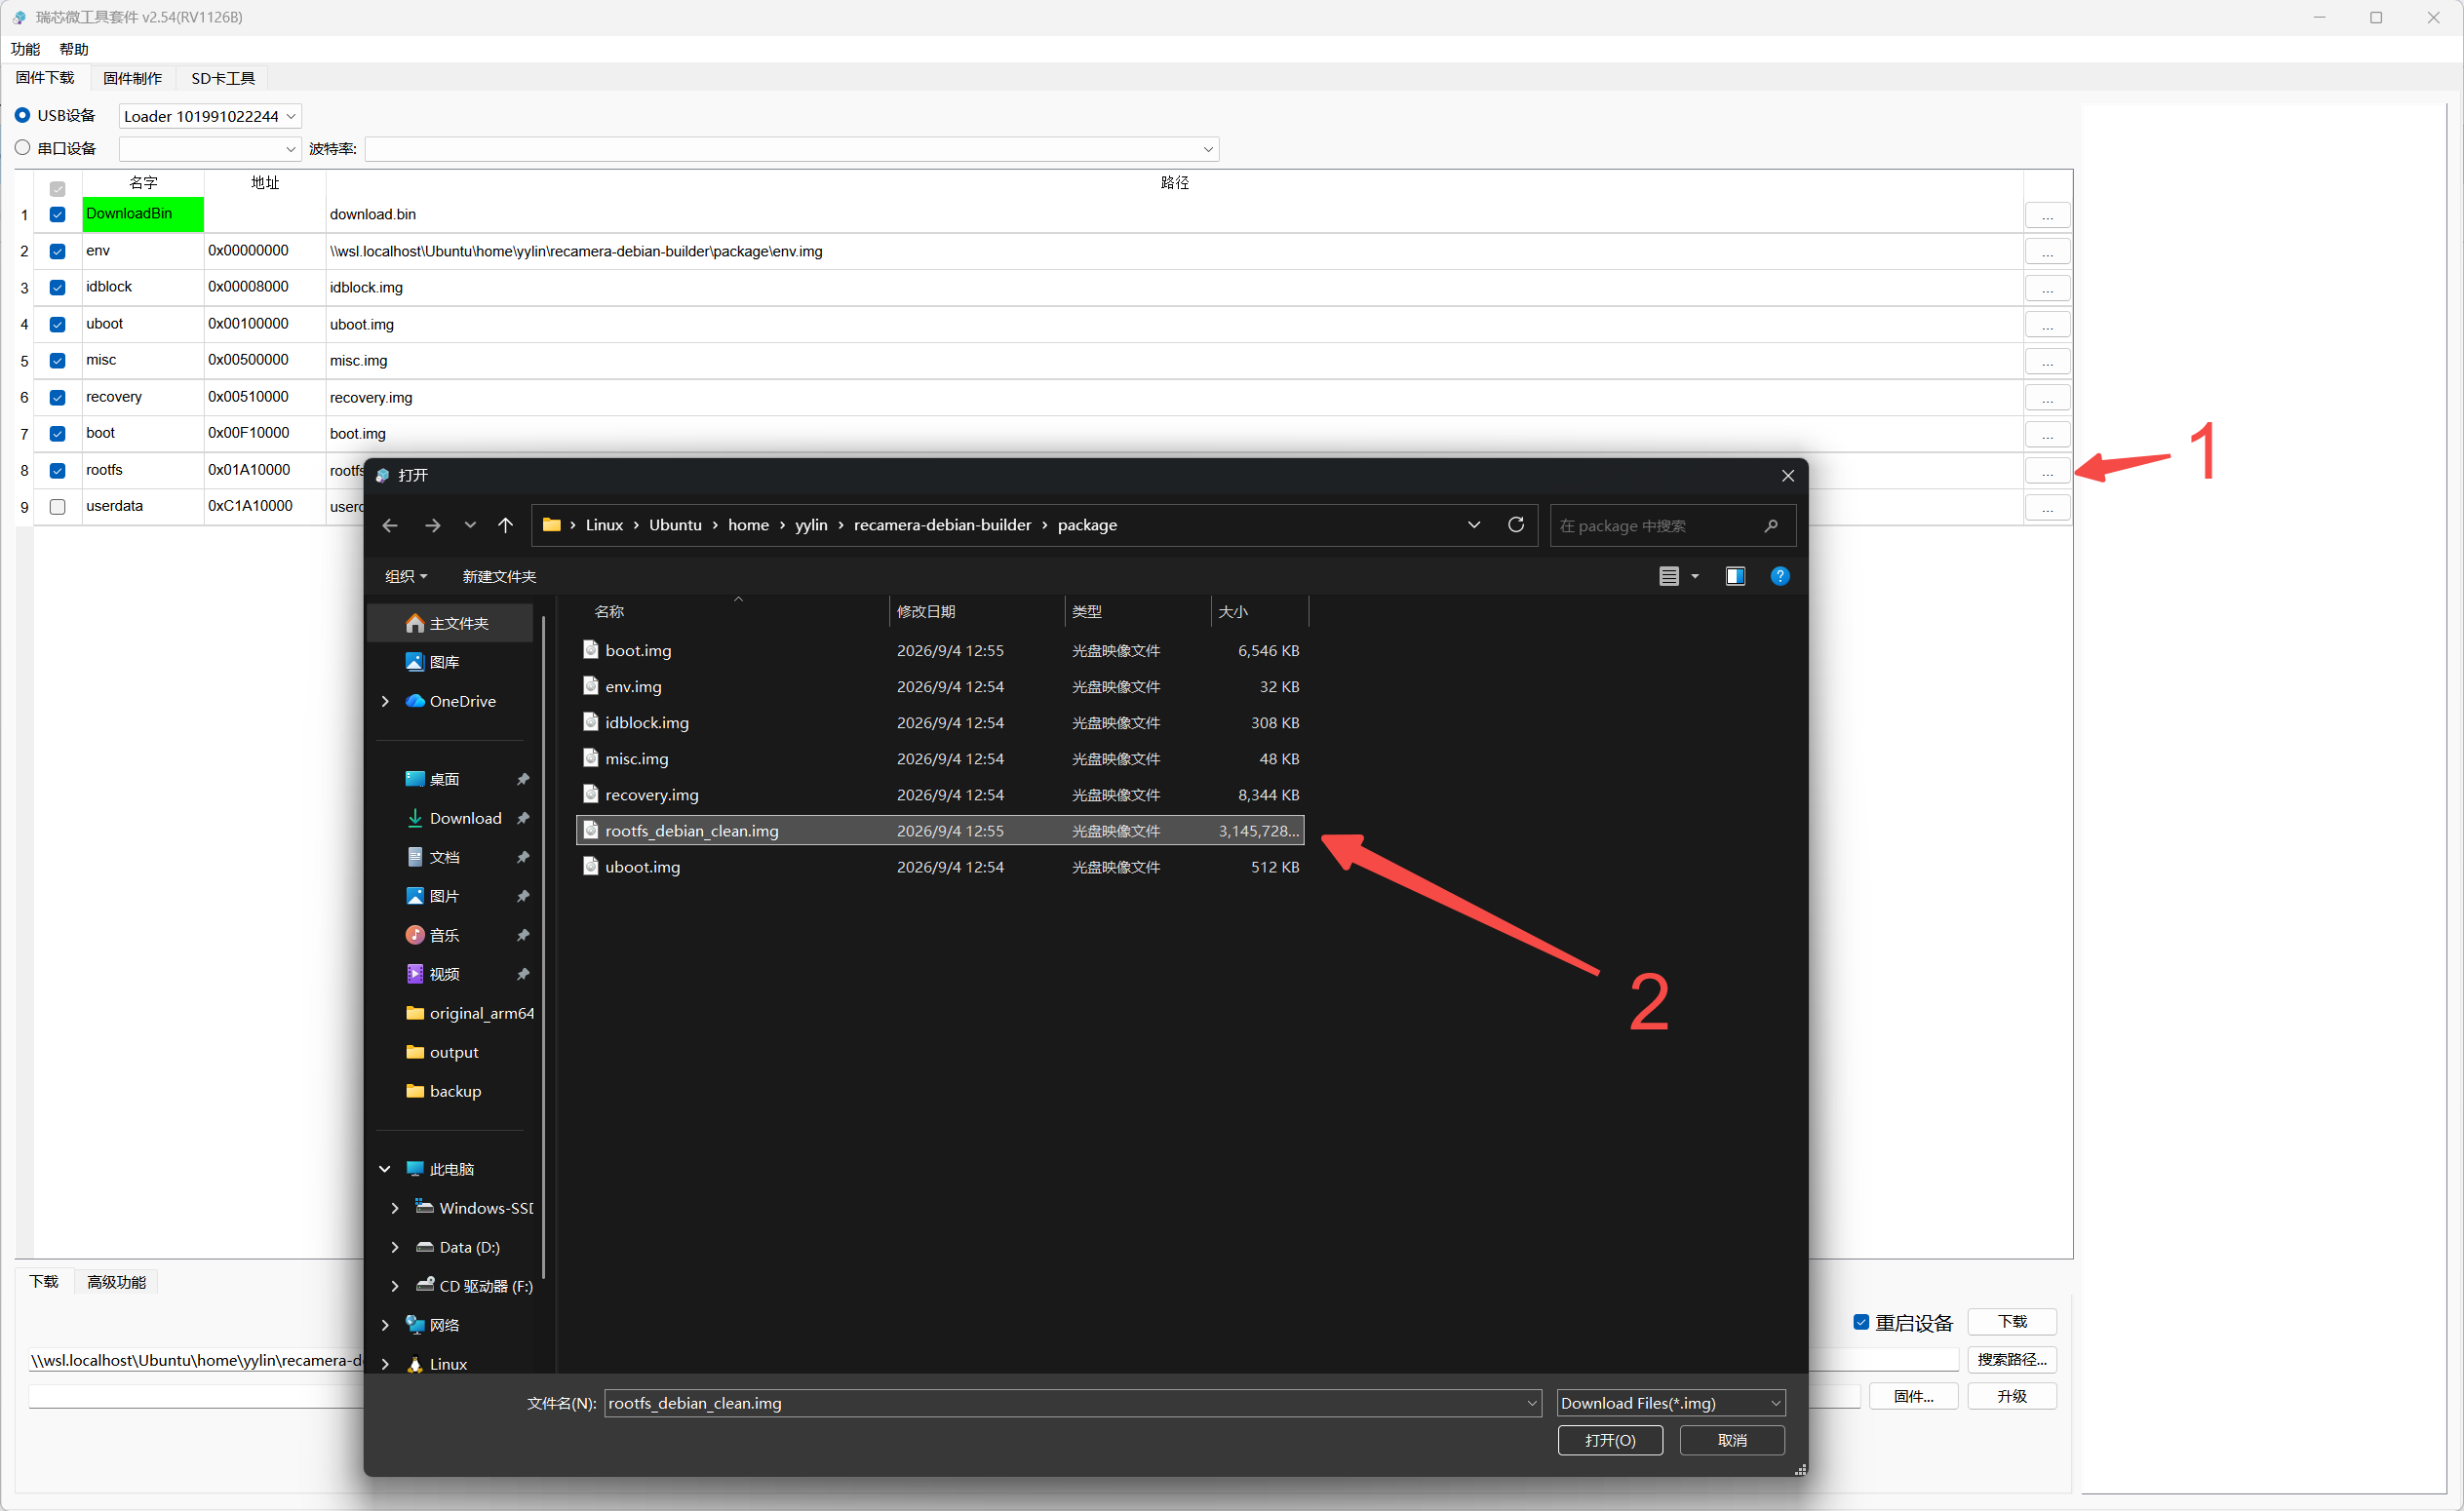
- Select the
rootfsentry and click the ellipsis (...) on its right. Replace its image file withrootfs_debian_clean.imgfrom the extracted firmware directory.
Put reCamera Pro into Loader Mode
- Connect the USB 3.0 port on reCamera Pro to your Windows computer using a USB cable, then power the device through its DC port.
- Locate the
BOOTandRESETpinholes on the side of the device. - Press and hold
BOOT, then briefly pressRESETto restart the device. - Keep holding
BOOTfor approximately 5 seconds after pressingRESET, then release it. The device enters Loader mode.
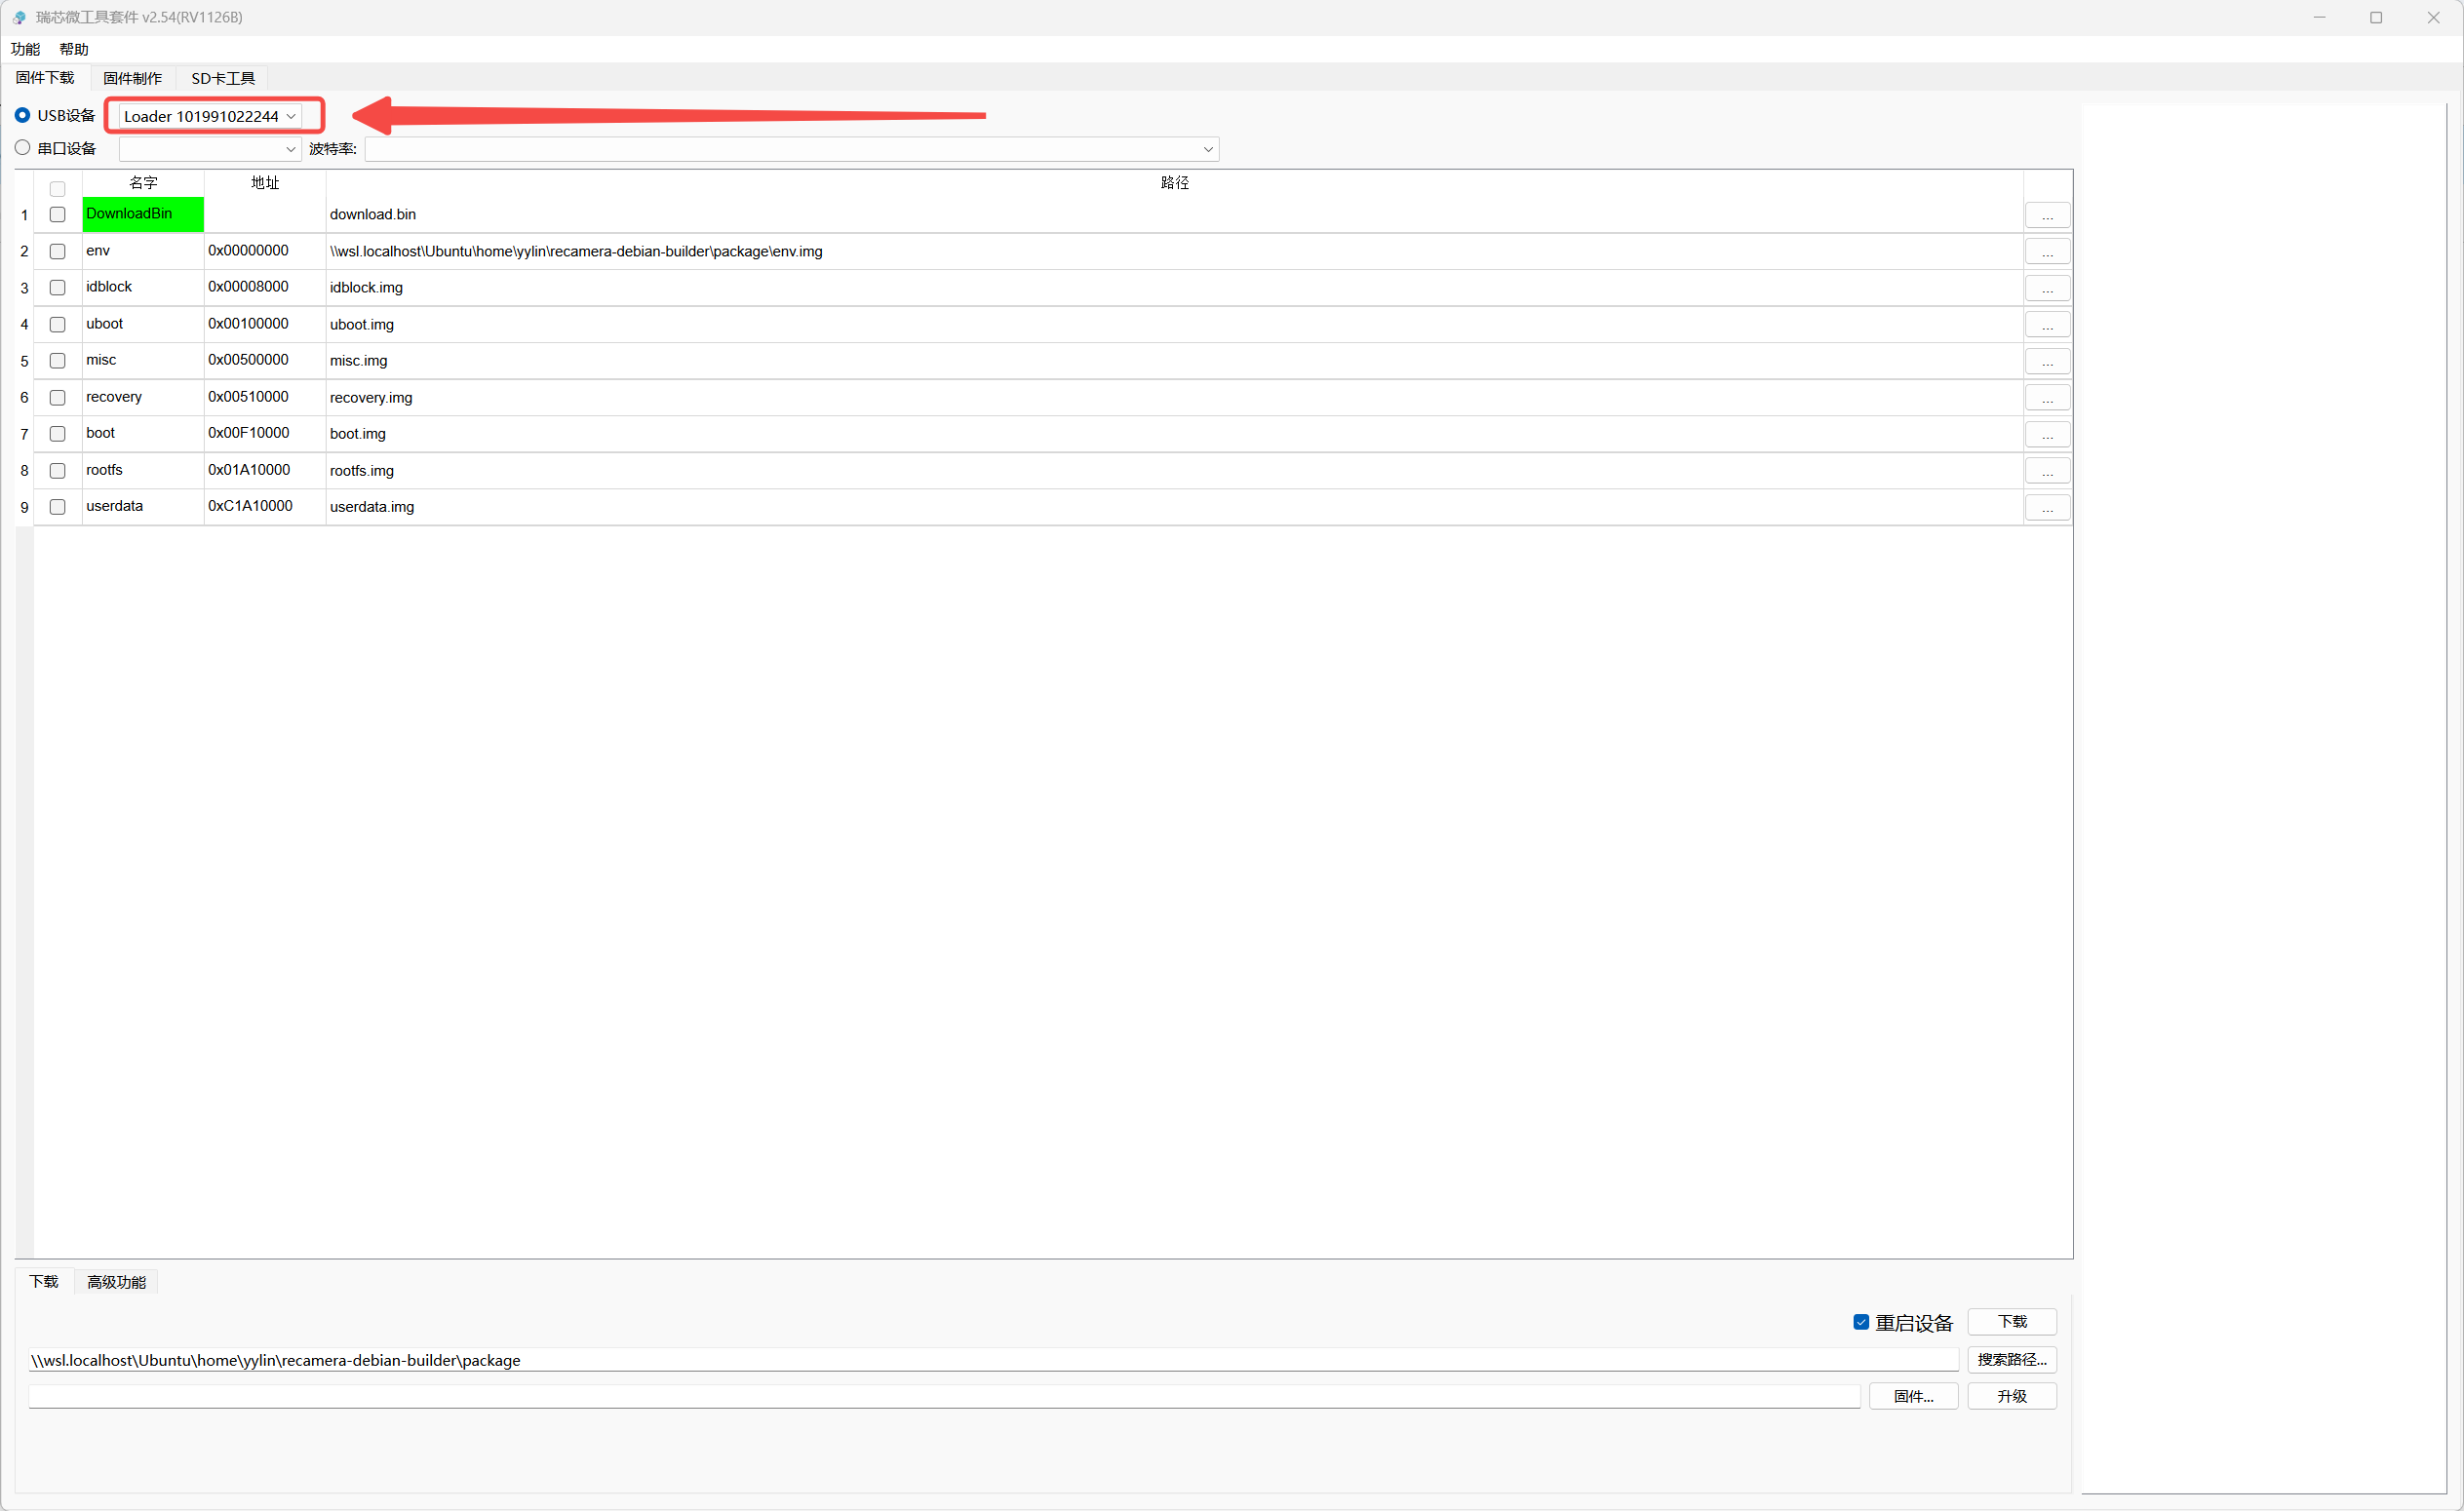
SocToolKit should now indicate that the device has been detected.
Flash the Firmware
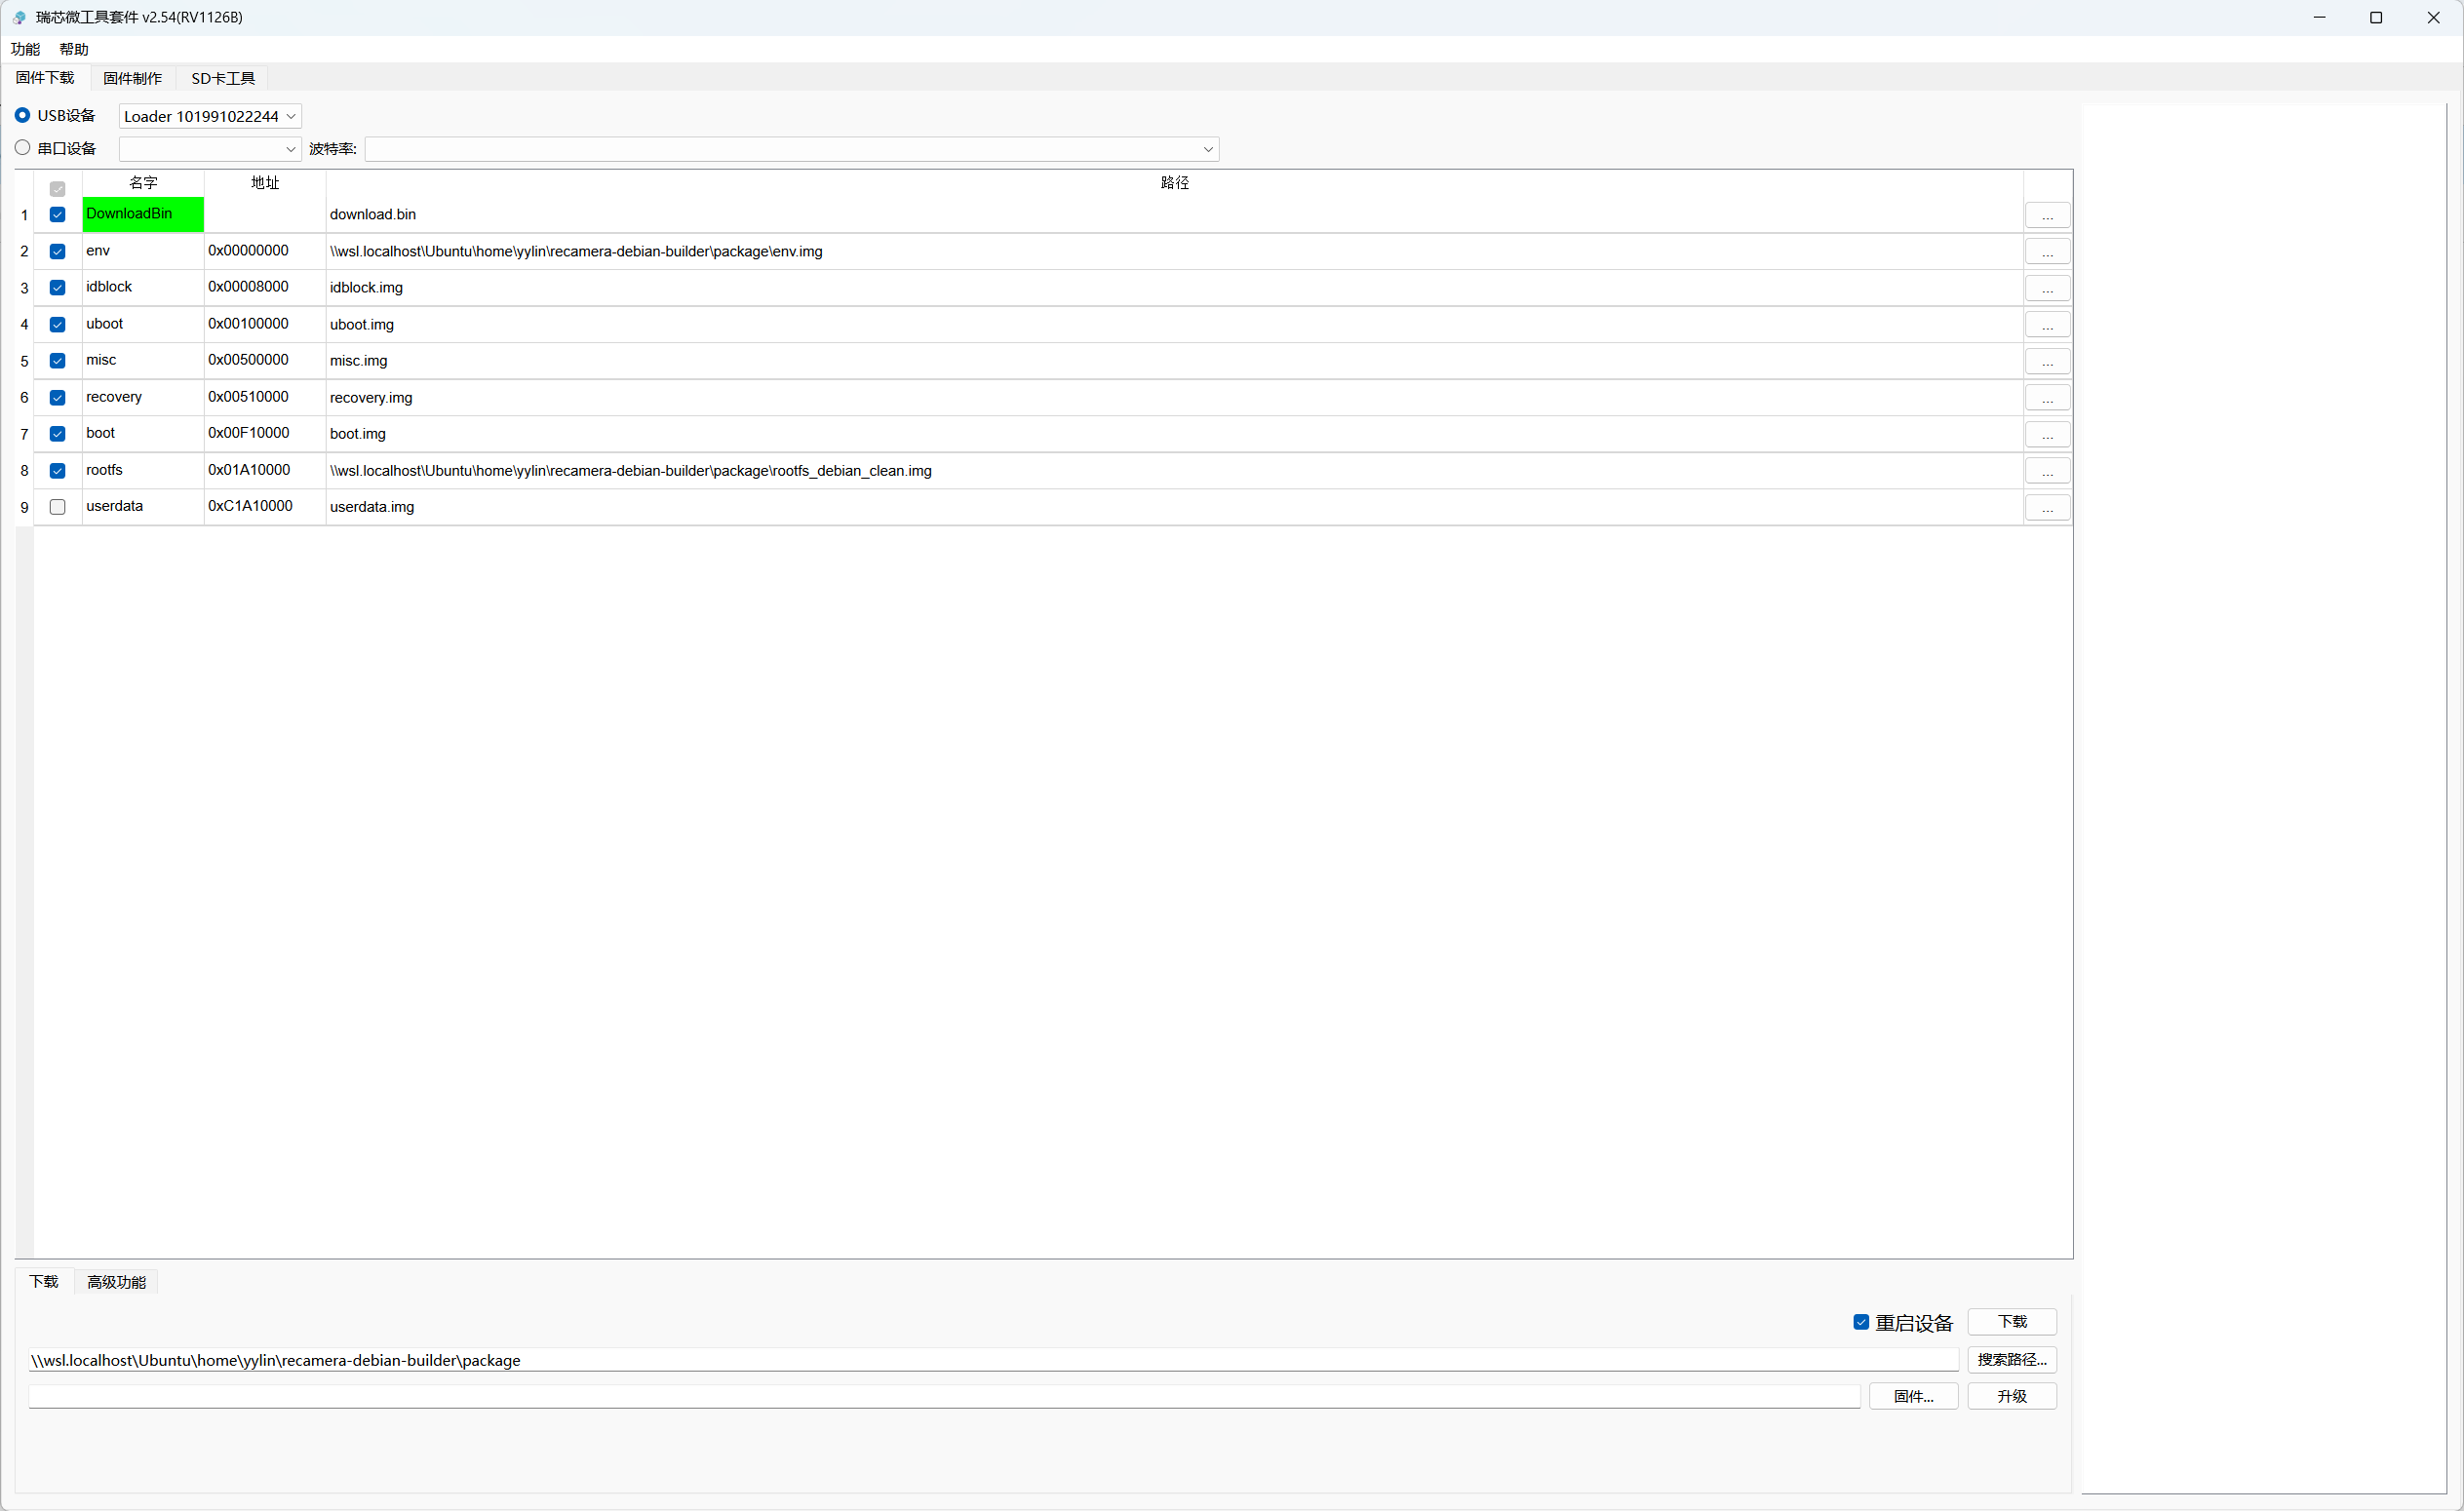
After SocToolKit detects the device and loads the firmware, select all partitions except userdata.
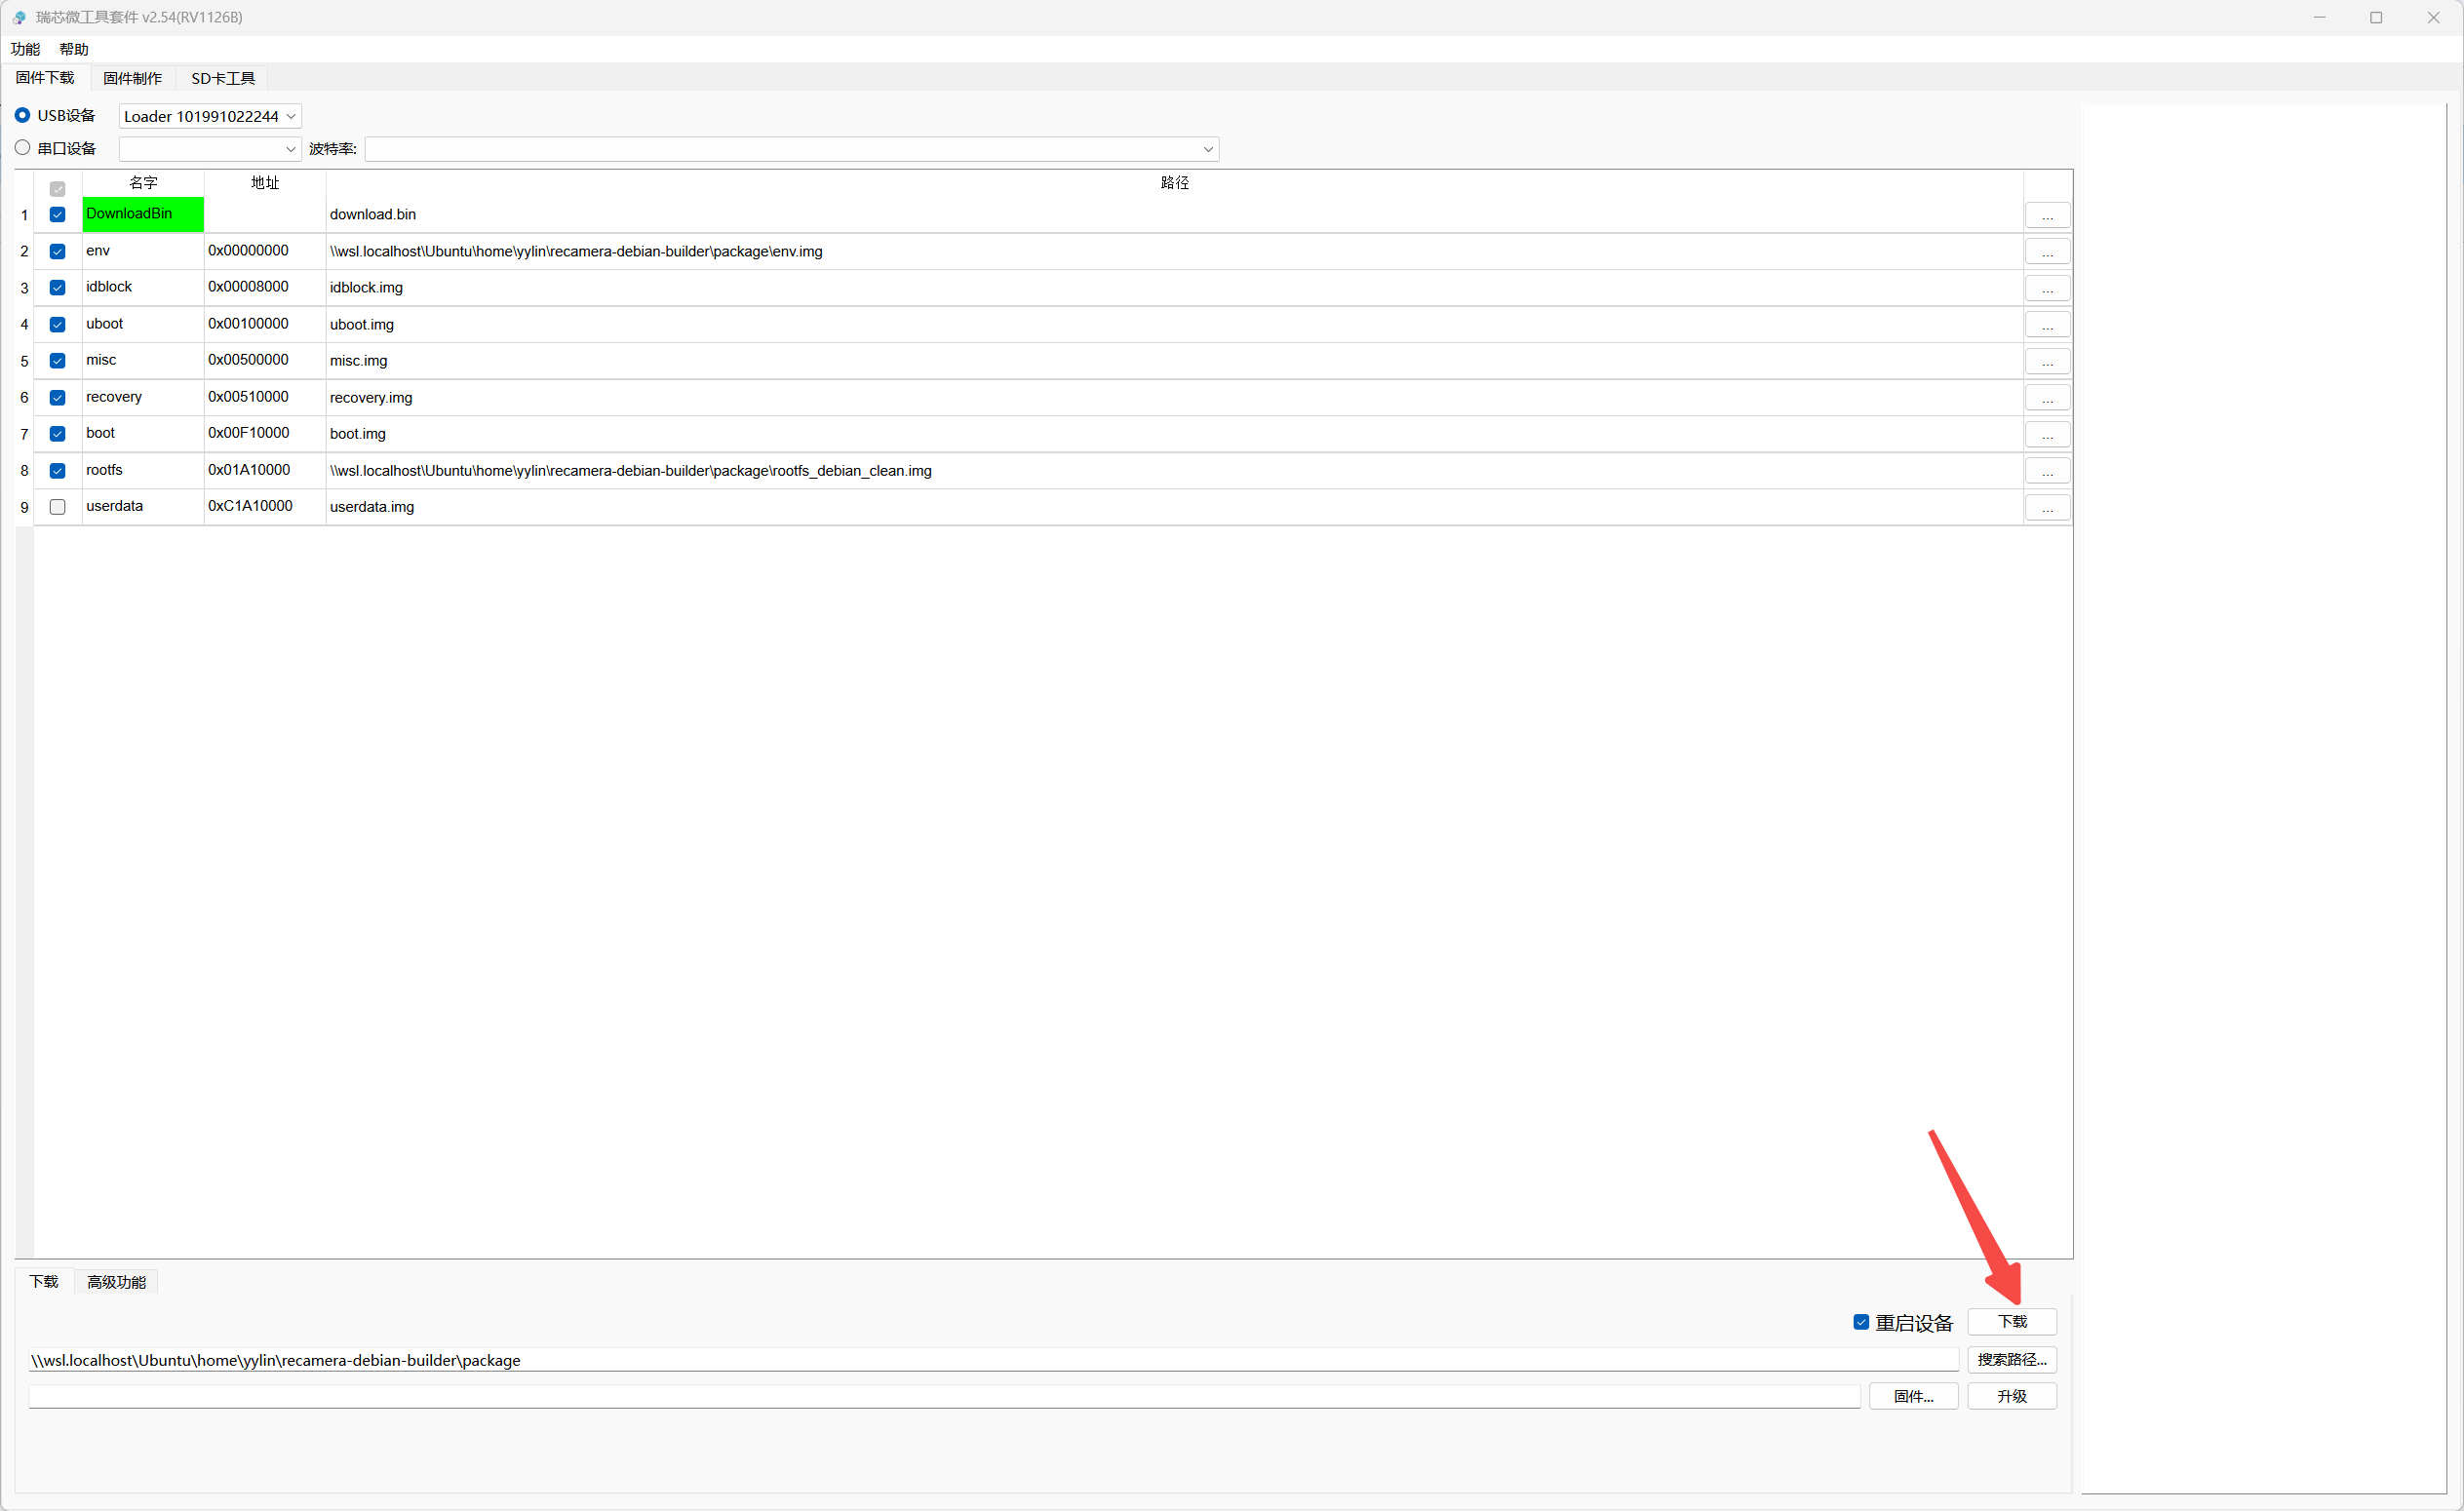
Click Download to start flashing the firmware.
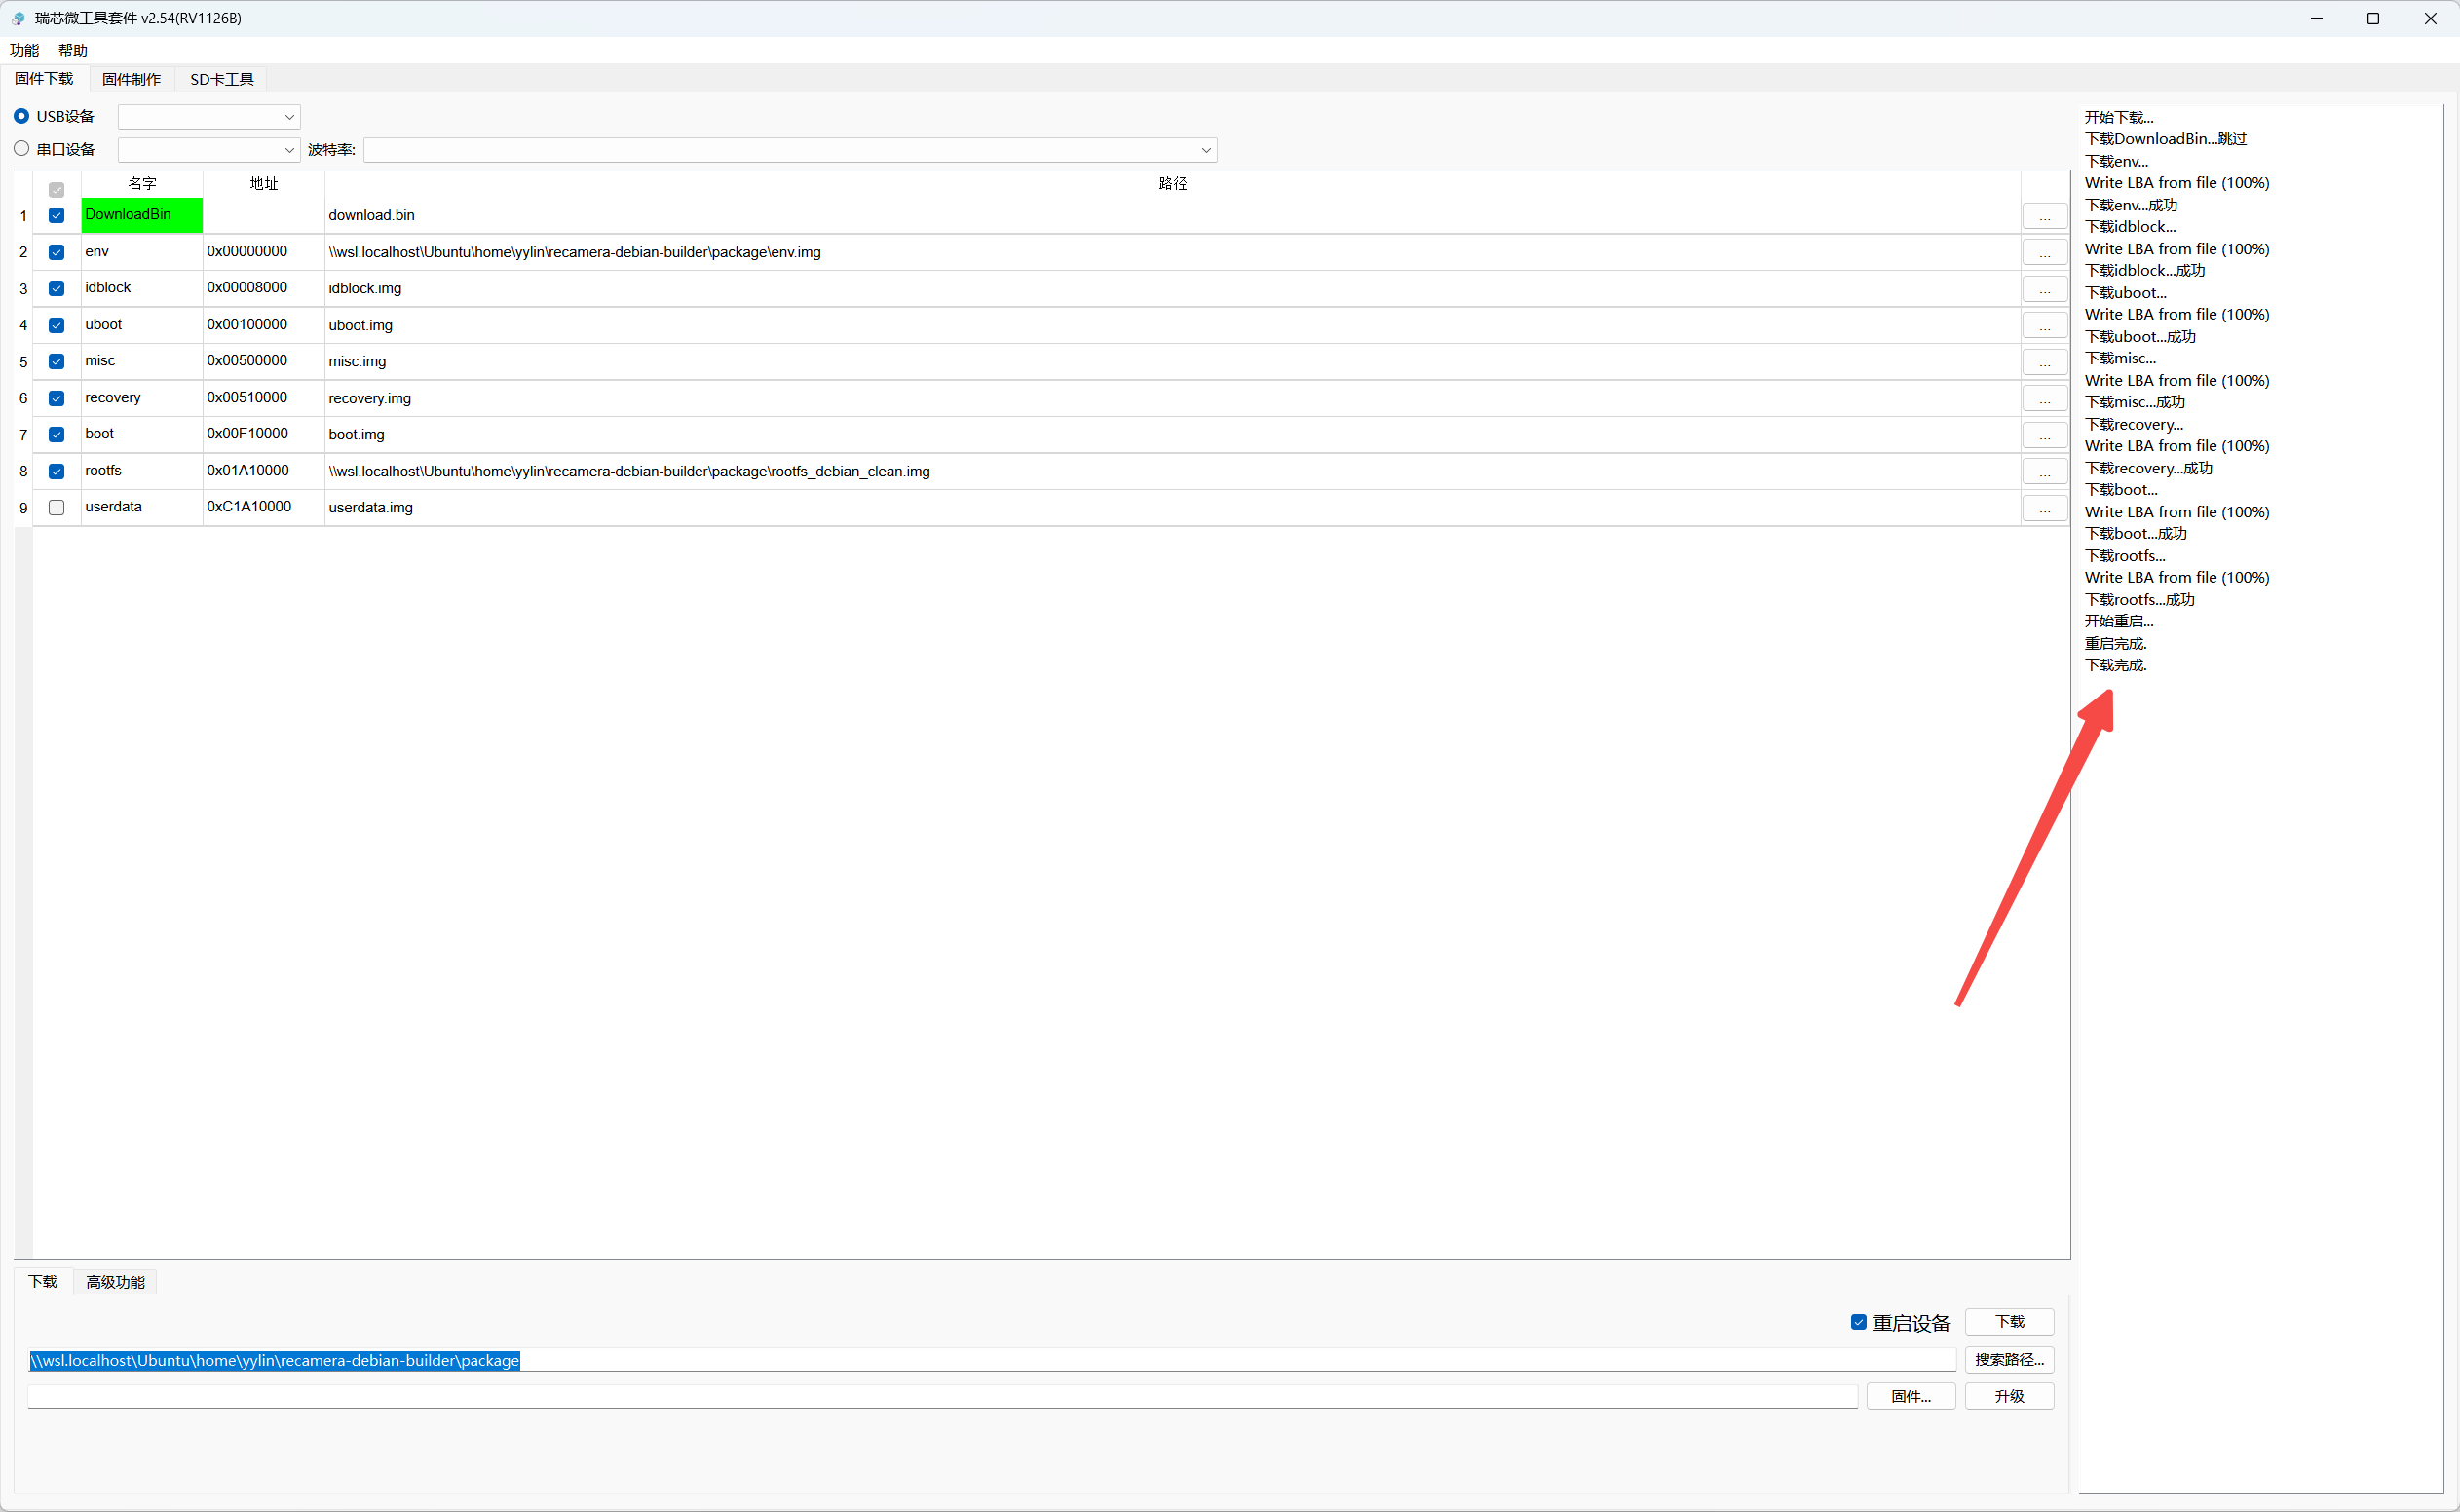
When flashing is complete, the interface should look like the following:
Flash on Linux
You can also flash the firmware to reCamera Pro from Linux using Rockchip's upgrade_tool. This section uses Ubuntu 24.04 as an example.
Flashing overwrites the system data on the device. Back up important data and make sure the device is in Loader mode before continuing.
Prepare the Environment
Clone the Rockchip tools repository and verify that it contains upgrade_tool:
cd ~

git clone https://github.com/rockchip-linux/rkbin.git

cd ~/rkbin/tools

ls -lh upgrade_tool
Then clone Linux_Upgrade_Tool and make upgrade_tool executable:
cd ~

git clone https://github.com/vicharak-in/Linux_Upgrade_Tool.git

cd Linux_Upgrade_Tool

chmod +x upgrade_tool

sudo ./upgrade_tool -v
Confirm that your Ubuntu host is connected to reCamera Pro and that the device is in Loader mode:
sudo ./upgrade_tool LD
Expected output is similar to:
List of rockusb connected(1)
DevNo=1 Vid=0x2207,Pid=0x110f,LocationID=18     Mode=Loader     SerialNo=f28999835716f3be
This confirms that the device is connected and in Loader mode.
Flash the Firmware
Make sure that all image files have been downloaded and extracted. Then use upgrade_tool to write each partition to the device. Replace the example image paths below with the actual path to your extracted firmware files:
# 1. env
sudo ./upgrade_tool WL 0x00000000 "/home/seeed/recaemra_pro/debian_img/env.img"

# 2. idblock
sudo ./upgrade_tool WL 0x00000040 "/home/seeed/recaemra_pro/debian_img/idblock.img"

# 3. uboot
sudo ./upgrade_tool WL 0x00000800 "/home/seeed/recaemra_pro/debian_img/uboot.img"

# 4. misc
sudo ./upgrade_tool WL 0x00002800 "/home/seeed/recaemra_pro/debian_img/misc.img"

# 5. recovery
sudo ./upgrade_tool WL 0x00002880 "/home/seeed/recaemra_pro/debian_img/recovery.img"

# 6. boot
sudo ./upgrade_tool WL 0x00007880 "/home/seeed/recaemra_pro/debian_img/boot.img"

# 7. Debian rootfs
sudo ./upgrade_tool WL 0x0000d080 "/home/seeed/recaemra_pro/debian_img/rootfs.img"

# reboot
sudo ./upgrade_tool RD
About the New Firmware
After flashing, connect the device to your network using an Ethernet cable. This image does not support the original USB-C virtual network adapter. You can find the device IP address in your router or Wi-Fi management interface. SSH is enabled in the image, so you can log in through SSH directly. If a network connection is unavailable, use the UART serial console at a baud rate of 1500000.
The system provides only the root user, with the default password 123123. Change the password immediately after the first login:
passwd
Then complete the following system configuration steps.
Temporarily Configure an HTTP Proxy
If you need an HTTP proxy to access the network, for example when using apt, set the following environment variables temporarily. Skip this step if you do not use a proxy. Replace the example address and port with those of your proxy server.
export http_proxy="http://192.168.4.78:7890"
export https_proxy="http://192.168.4.78:7890"
# Optional: bypass the proxy for local addresses
export no_proxy="localhost,127.0.0.1,::1,192.168.0.0/16"
Configure the Time
On the first boot, the system time may be set to 1970, which causes SSL certificate validation to fail. Since the system does not have automatic time synchronization configured through systemd, set the correct time manually before updating the package index:
date -s "2026-09-02 15:20:00"

apt update
Configure Camera Orientation
First, find the sensor node that supports flip controls:
for dev in /dev/v4l-subdev*; do
    echo
    echo "========== $dev =========="
    v4l2-ctl -d "$dev" --list-ctrls 2>&1 | \
        grep -Ei 'flip|mirror|horizontal|vertical|rotate'
done
You will typically see output similar to the following:
========== /dev/v4l-subdev2 ==========
                horizontal_flip 0x00980914 (bool)   : default=0 value=1
                  vertical_flip 0x00980915 (bool)   : default=0 value=1
              vertical_blanking 0x009e0901 (int)    : min=90 max=63375 step=1 default=90 value=90
            horizontal_blanking 0x009e0902 (int)    : min=4294965822 max=4294965822 step=1 default=4294965822 value=-1474 flags=read-only
By default, both horizontal and vertical flipping may be enabled. Adjust the command according to the device node shown in the previous output; this example uses /dev/v4l-subdev2:
v4l2-ctl -d /dev/v4l-subdev2 \
  --set-ctrl=horizontal_flip=0,vertical_flip=0
Verify the settings:
v4l2-ctl -d /dev/v4l-subdev2 \
  --get-ctrl=horizontal_flip,vertical_flip
Expected output:
horizontal_flip: 0
vertical_flip: 0
Test the Camera
Use V4L2 to capture one NV12 raw frame, then use FFmpeg to convert it to JPEG:
v4l2-ctl -d /dev/video12 \
  --set-fmt-video=width=3840,height=2160,pixelformat=NV12 \
  --stream-mmap=4 \
  --stream-count=1 \
  --stream-to=/tmp/frame.nv12

ffmpeg \
  -f rawvideo \
  -pixel_format nv12 \
  -video_size 3840x2160 \
  -i /tmp/frame.nv12 \
  -frames:v 1 \
  -q:v 2 \
  -y /tmp/camera.jpg
When the command finishes, view the ISP-processed, correctly oriented JPEG image at /tmp/camera.jpg.
Configure the Microphone and Speaker
Install the required dependencies:
apt install ffmpeg alsa-utils
View the available recording and playback devices:
arecord -l

aplay -l
Configure Docker
Install Docker:
apt install docker-cli
Confirm that Docker is installed correctly:
command -v docker
docker --version
dockerd --version
Expected output is similar to:
/usr/bin/docker
Docker version 26.1.5+dfsg1, build a72d7cd
Docker version 26.1.5+dfsg1, build 411e817
Configure Docker
Create the Docker daemon configuration file to set the data directory and disable the default network:
cat >/etc/docker/daemon.json <<'EOF'
{
  "data-root": "/userdata/docker",
  "storage-driver": "overlay2",
  "iptables": false,
  "bridge": "none"
}
EOF
Stop Docker and remove leftover runtime files:
service docker stop 2>/dev/null || true

rm -f /var/run/docker.pid
rm -f /var/run/docker.sock
rm -rf /var/run/docker/containerd
Restart Docker:
service docker restart
Test Docker
Confirm that the Docker daemon is running:
ps aux | grep '[d]ockerd'
Run a test container:
docker run --rm hello-world
If Docker is configured correctly, the output includes:
Hello from Docker!
This message shows that your installation appears to be working correctly.

To generate this message, Docker took the following steps:
 1. The Docker client contacted the Docker daemon.
 2. The Docker daemon pulled the "hello-world" image from the Docker Hub.
    (arm64v8)
 3. The Docker daemon created a new container from that image which runs the
    executable that produces the output you are currently reading.
 4. The Docker daemon streamed that output to the Docker client, which sent it
    to your terminal.

To try something more ambitious, you can run an Ubuntu container with:
 $ docker run -it ubuntu bash

Share images, automate workflows, and more with a free Docker ID:
 https://hub.docker.com/

For more examples and ideas, visit:
 https://docs.docker.com/get-started/
Install GStreamer Tools and Capture Camera Data
Install the required tools:
apt update

apt install -y \
  gstreamer1.0-tools \
  gstreamer1.0-plugins-base \
  gstreamer1.0-plugins-good \
  gstreamer1.0-plugins-bad \
  gstreamer1.0-libav
Use the following command to capture one frame and save it as a JPEG image:
gst-launch-1.0 -e \
  v4l2src device=/dev/video12 num-buffers=1 \
  ! video/x-raw,format=NV12,width=3840,height=2160,framerate=30/1 \
  ! videoconvert \
  ! jpegenc quality=95 \
  ! filesink location=/tmp/camera.jpg
When the command finishes, view the ISP-processed image at /tmp/camera.jpg.
Tech Support & Product Discussion
Thank you for choosing our products! We are here to provide you with different levels of support to ensure your experience with our products is as smooth as possible. We offer multiple communication channels to cater to different preferences and needs.