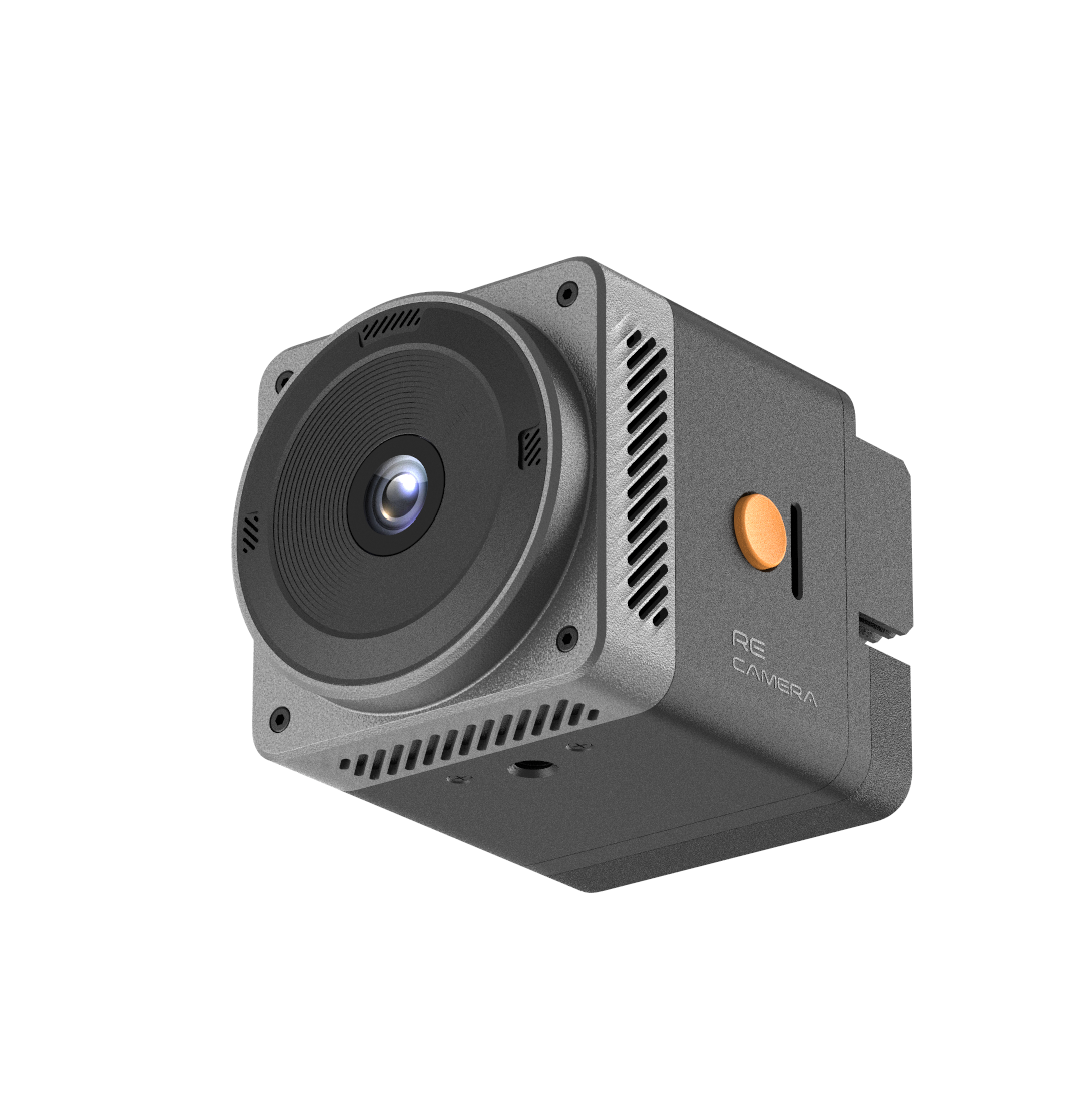
reCamera Pro Quick Start Guide
Introduction
Welcome to reCamera Pro. This guide will assist you in completing the hardware connection, logging into the device Web interface, configuring the wireless network, and troubleshooting common connection failures.
1. Hardware Connection
Before starting the configuration, please ensure that you have prepared the following hardware:
- Data Cable: A USB Type-C cable with data transmission capabilities (do not use a cable that only supports charging).
- Power Supply: A DC power cable (specification requirements: 12V, 1A, the standard factory power supply is: 12V, 2A).
Connection Steps
- As shown in the figure below, plug the 12V DC power cable into the device's power interface, connect one end of the USB Type-C cable to the reCamera Pro, and connect the other end to your Windows host machine (Host PC).
- Observe the device status indicator. When the green light is solid, it indicates that the device has successfully booted and entered the operating state.
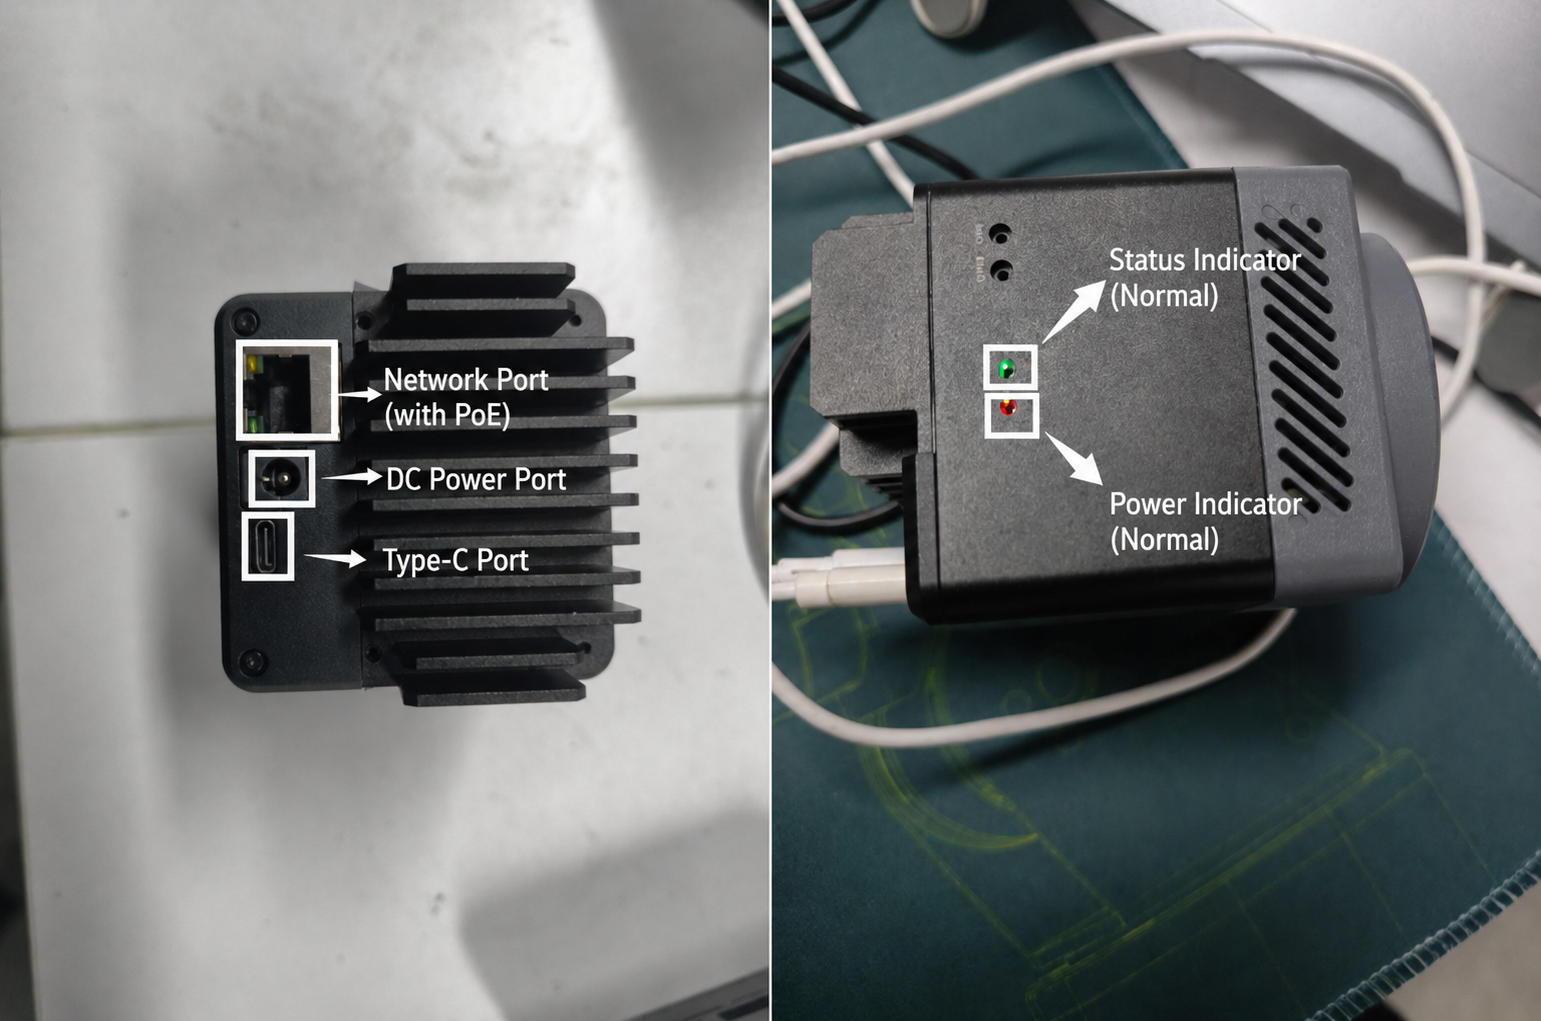
Status indicator explanation
The green LED indicates the system status, while the red LED serves as the power indicator. The following table describes the device status corresponding to each state of the green LED.
- breathing : At this moment, the representative device is in the process of powering on.
- Solid on : The equipment is operating normally.
- off : Abnormal state, the core process is not running.
- 100 ms blink : Currently in the OTA process.
- Short green blink : An SD card with a dirty filesystem has been detected.
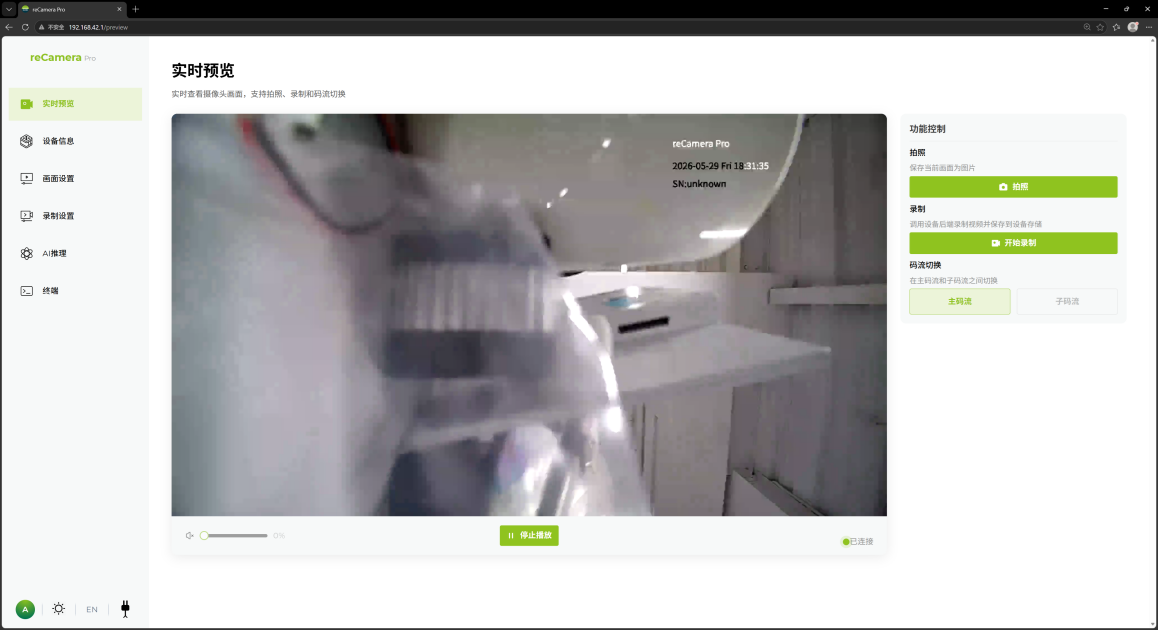
2. Log in to the Device Web Management Interface
reCamera Pro has a built-in intuitive Web management system, allowing you to configure it directly via a browser.
Before attempting to log in to the Web interface, please ensure the USB Type-C cable is properly connected to the computer, and the device has completed its boot initialization.
Operating Steps
- Open a browser on the host machine (Chrome or Edge browser is recommended).
- Enter the default IP address in the address bar:
192.168.42.1and press Enter. - After entering the login interface, input your device login password.
- Check the two compliance and remember options below the login button, and click login to enter the reCamera Pro system main interface (defaults to the "Real-time Preview" page).
If the page fails to load after entering 192.168.42.1 under the Windows system, please jump directly to the 4. Frequently Asked Questions and Troubleshooting (FAQ) section at the bottom of this document to perform a network adapter check.
3. Wireless Network (Wi-Fi) Configuration
To enable the device to access the Internet or allow wireless management within the local area network, please configure a Wi-Fi connection for it.
Operating Steps
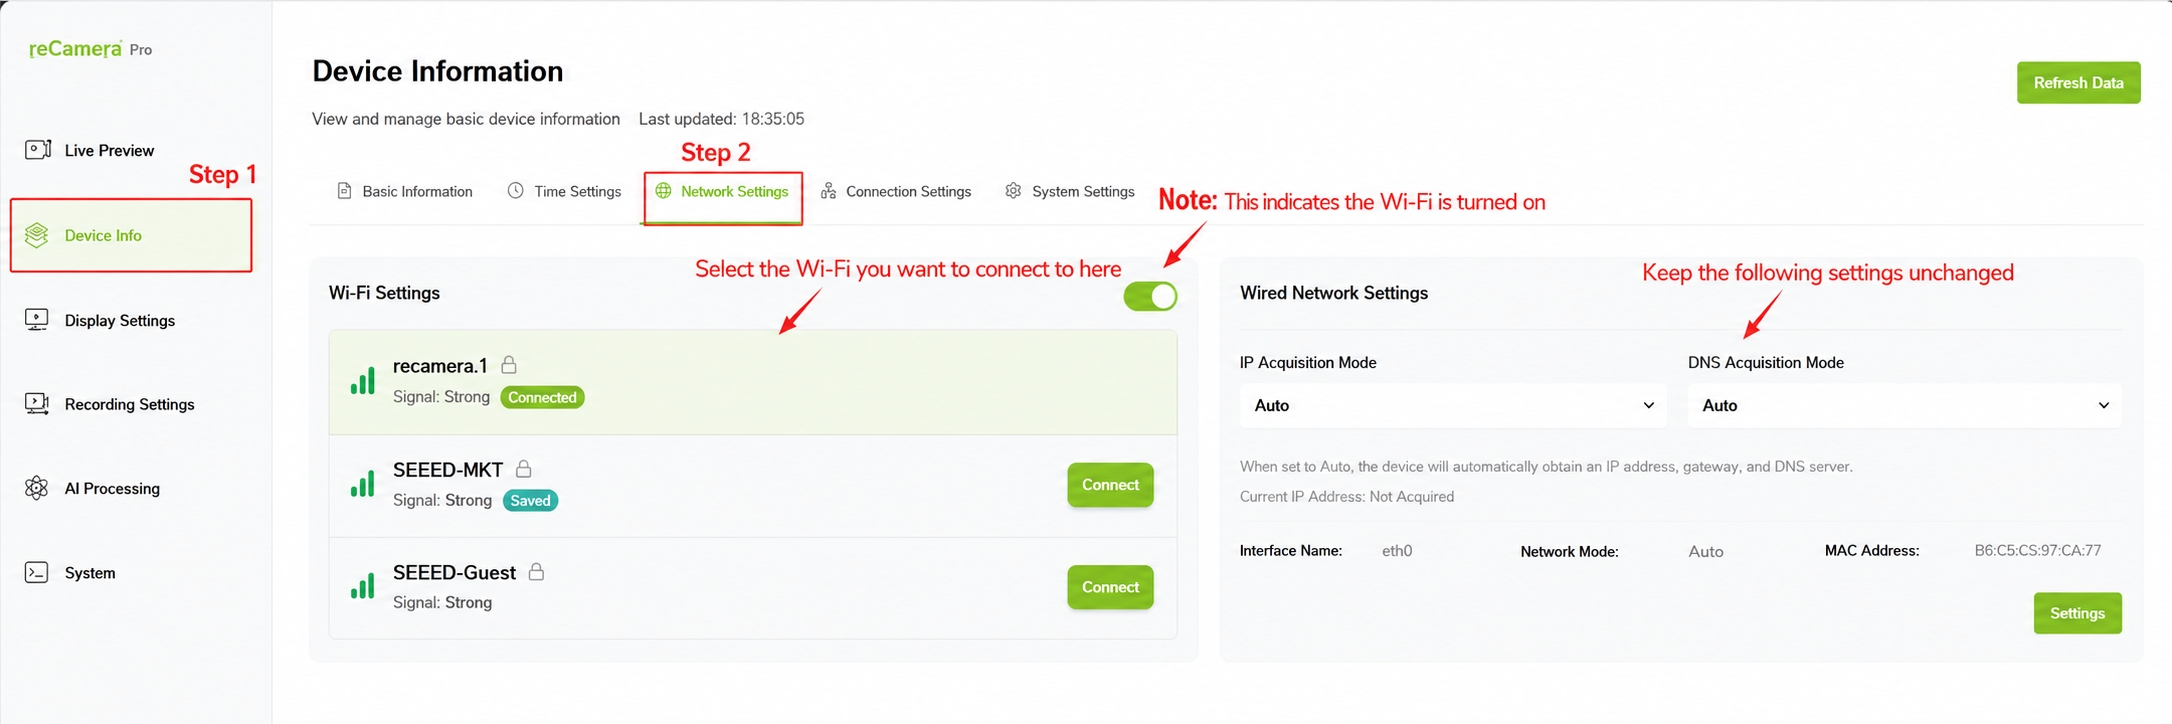
- After successfully logging into the Web main interface, click Device Info on the left navigation bar.
- In the secondary menu or the right configuration area, click Network Settings.
- Enable the Wi-Fi function (if it is turned off by default), and the system will automatically scan for nearby wireless networks.
- Select your Wi-Fi SSID from the list of available networks, enter the correct wireless password, and click connect.
Wireless Remote Connection (Optional Step)
After successfully connecting to Wi-Fi, you can click on the connected Wi-Fi name to view its detailed network information (e.g., assigned IP address, MAC address, etc.).
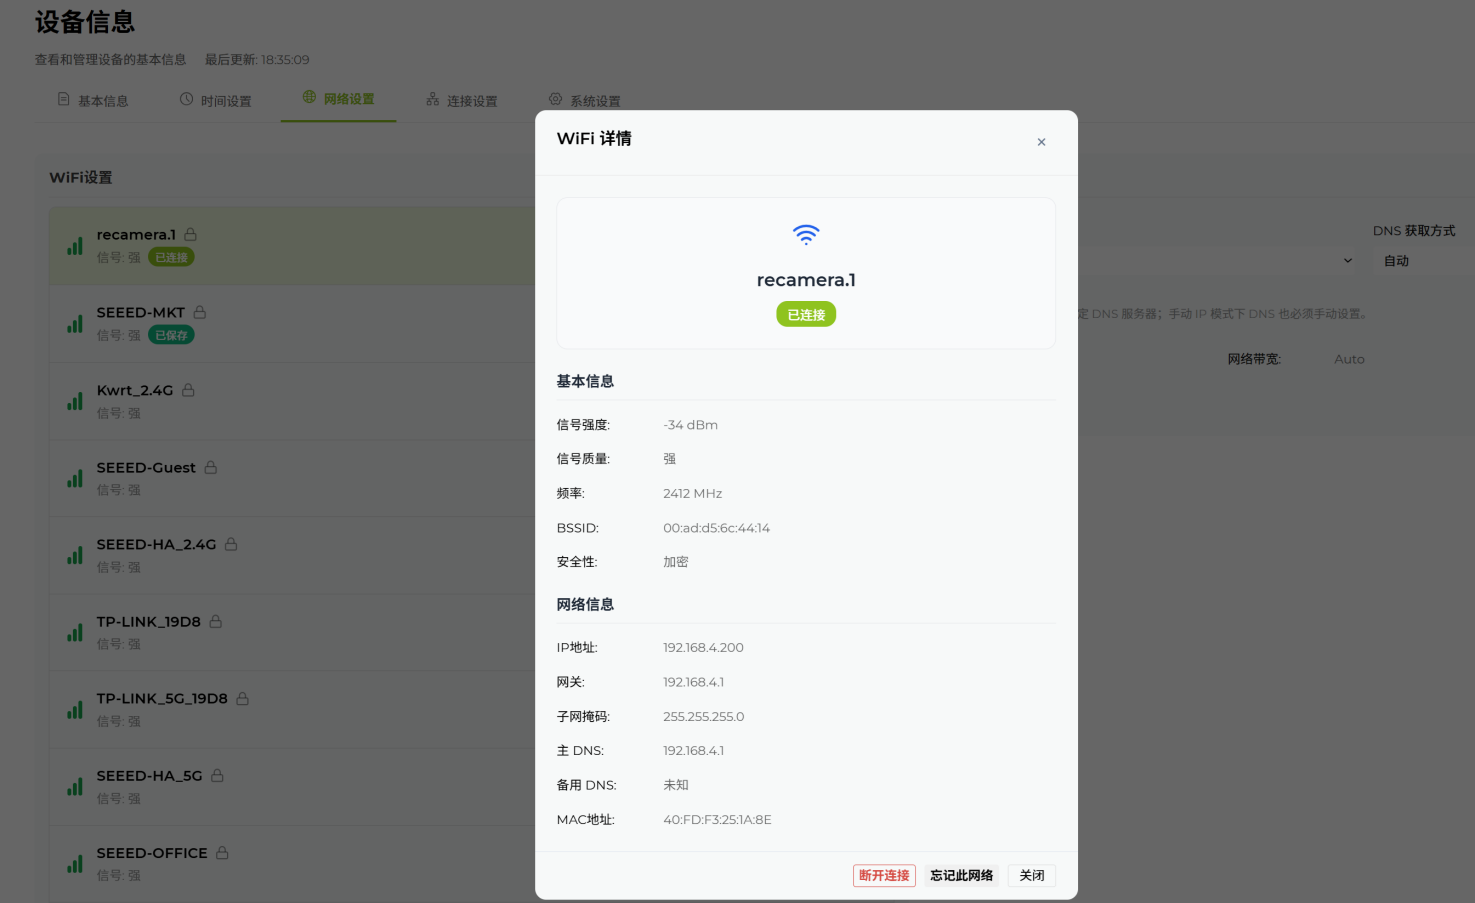
After obtaining the local area network IP assigned by Wi-Fi (e.g., 192.168.4.200), as long as your computer and reCamera Pro are within the same local area network, you can directly enter this IP address (e.g., http://192.168.4.200) in the browser to log in to the device.
At this point, you can safely unplug the USB Type-C cable to achieve full wireless operation and management.
4. Frequently Asked Questions and Troubleshooting (FAQ)
Q1: What should I do if I cannot enter the login interface via 192.168.42.1 under the Windows system?
If you cannot open the Web interface after connecting the Type-C cable, it is usually because the virtual network card of the Windows system did not correctly obtain an IP address. Please follow these steps to troubleshoot:
- Open the Control Panel on the Windows host machine.
- Click to enter Network and Internet -> Network and Sharing Center -> Change adapter settings in sequence.
- In the pop-up list of network connections, find the virtual network card named something like
Remote NDIS based Internet Sharing Deviceor related to reCamera (you can try unplugging and plugging the device to see which network port disappears and reappears, that port is the virtual network card interface of reCamera Pro). - Right-click on this network adapter and select Properties.
- Double-click Internet Protocol Version 4 (TCP/IPv4) in the list.
- Ensure the configuration has checked Obtain an IP address automatically and Obtain DNS server address automatically.
- Click OK to save the settings, and access
192.168.42.1again in the browser.
Q2: After connecting the reCamera to the computer via the USB cable, the computer was unable to access the internet
If your MAC computer fails to access the internet after connecting the reCamera via a USB cable, it is because the virtual network card will take over the WIFI of your MAC, preventing your MAC from connecting to the internet. Please follow the steps below to solve the problem:
- Open the System Settings of your MAC -> Network.
- In the lower right corner (or the bottom right side), locate an icon which is a circle with three dots '...' inside (or a downward arrow, depending on your MAC version).
- Click Set Service Order...(Set Service Order...).
- In the popped-up list, drag the WIFI to the top to ensure it is placed before the USB virtual network card (such as USB_Gadget).
- Click "OK" to save. Then, when using the MAC for internet access, it will preferentially use the WIFI connection. Only when accessing the reCamera will it use the USB connection.
Technical Support and Product Discussion
Thank you for choosing our products! We are here to provide you with various support to ensure your experience with our products is as smooth as possible. We offer multiple communication channels to meet different preferences and needs.