reCamera Pro GPIO Pin Usage Guide
Introduction
This article describes how to use GPIO pins on the reCamera Pro. You will learn how to determine the target GPIO pin using the pin number calculation formula, export and configure pin direction and level via the sysfs interface, and use Python scripts to control GPIO outputs or read input levels.
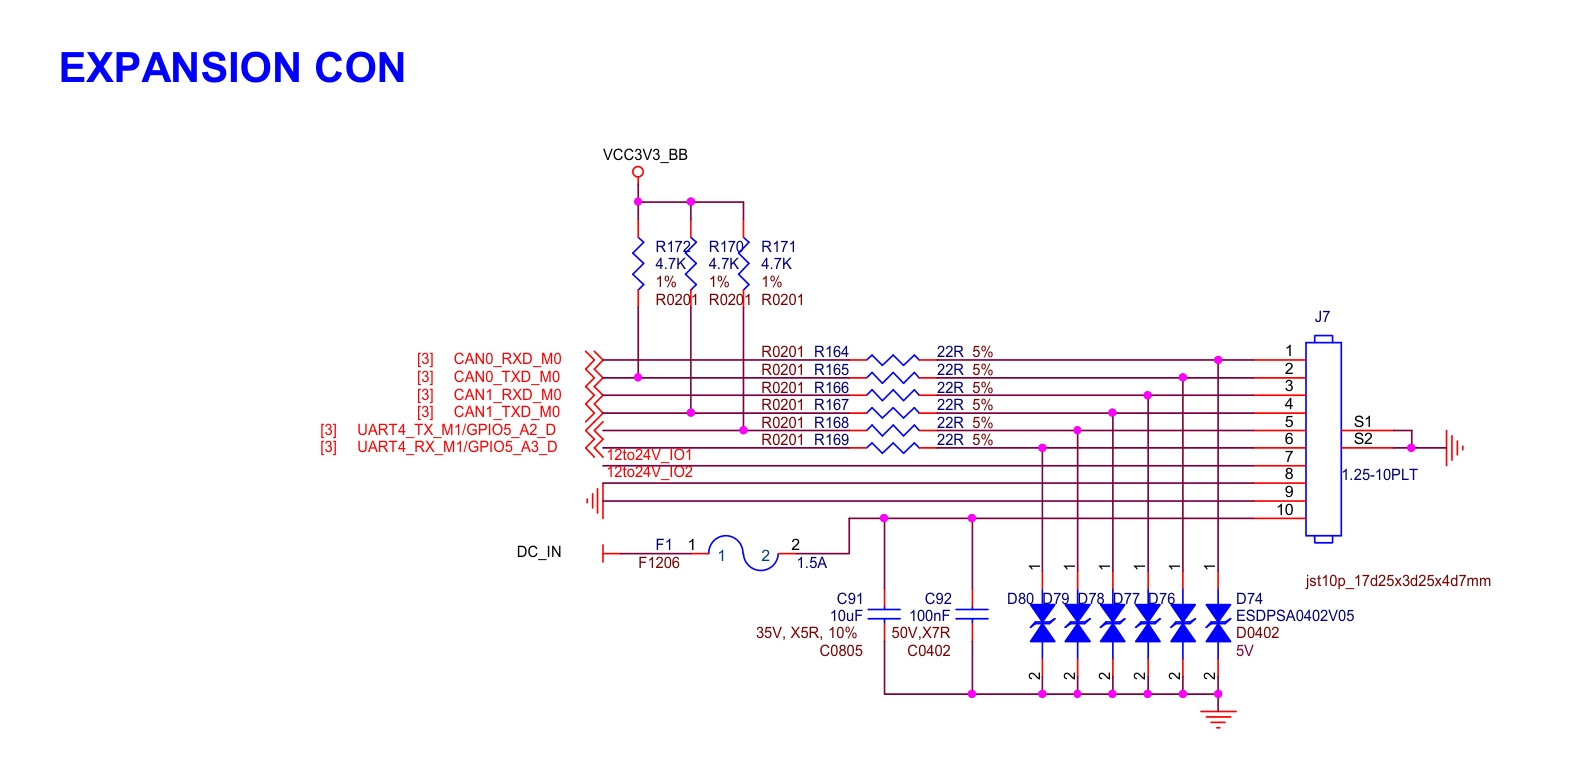
On the reCamera Pro, there are only two exposed general-purpose GPIOs, and their output voltage ranges from 12V to 21V (depending on the DC-IN input), which is not suitable for most devices. However, you can reconfigure the UART or CAN pins on the expansion interface as general-purpose GPIOs. These pins output a standard 3.3V level.
Locating GPIO Pins
First, refer to the images below to find the GPIO pin positions you need:

Pin Number Calculation Formula
The GPIO pin number is calculated using the following formula:
GPIO bank × 32 + offset within bank
The offset within the bank is calculated as: group number × 8 + pin number within group.
For example, for GPIO5_A2:
- Bank number is 5
- Offset within the bank is
0 × 8 + 2 = 2
Therefore, the pin number is:
5 × 32 + 2 = 162
The mapping of bank letters to numbers is as follows:
| Letter | Number |
|---|---|
| A | 0 |
| B | 1 |
| C | 2 |
| D | 3 |
| ... | ... |
Exporting a GPIO Pin
First, you need to access the device's terminal. You can do this in either of the following ways:
- Connect to the device via SSH
- Use the terminal feature in the WebUI
Navigate to the GPIO sysfs Interface
cd /sys/class/gpio
Export the GPIO Pin
echo 162 > export
Set the GPIO Pin Direction
The pin direction supports the following two modes:
- Output:
out - Input:
in(default mode)
echo out > direction
Set the GPIO Pin Level
The level supports the following two states:
- High level:
1 - Low level:
0
echo 1 > value
Python Code Reference
The following Python script demonstrates how to control a GPIO pin to output high and low levels:
import os
import time

GPIO = 162  # The GPIO pin number calculated earlier

GPIO_PATH = f"/sys/class/gpio/gpio{GPIO}"

def write_file(path, value):
    with open(path, "w") as f:
        f.write(str(value))

# 1. Export the GPIO
if not os.path.exists(GPIO_PATH):
    write_file("/sys/class/gpio/export", GPIO)
    time.sleep(0.1)  # Wait for export to complete

# 2. Set to output mode (use 'in' for input mode)
write_file(f"{GPIO_PATH}/direction", "out")

# 3. Set high level
write_file(f"{GPIO_PATH}/value", 1)
time.sleep(1)

# 4. Set low level
write_file(f"{GPIO_PATH}/value", 0)
time.sleep(1)

# To read the pin level, you can use the following code:
# with open(f"/sys/class/gpio/gpio{GPIO}/value", "r") as f:
#     value = f.read().strip()
#     print(value)
Resources
Technical Support and Product Discussion
Thank you for choosing our products! We are here to provide you with different support options to ensure your experience with our products is as smooth as possible. We offer multiple communication channels to suit different preferences and needs.