Image Quality and Low Light
Use the Web UI to tune how reCamera Pro encodes video and how the image looks — including low-light and day/night behavior. All settings are on the live view page: the preview window is on the left, the configuration area on the right.
Basic Settings: video encoding
In Basic Settings you configure the encoding parameters of the main stream and the sub-stream separately.
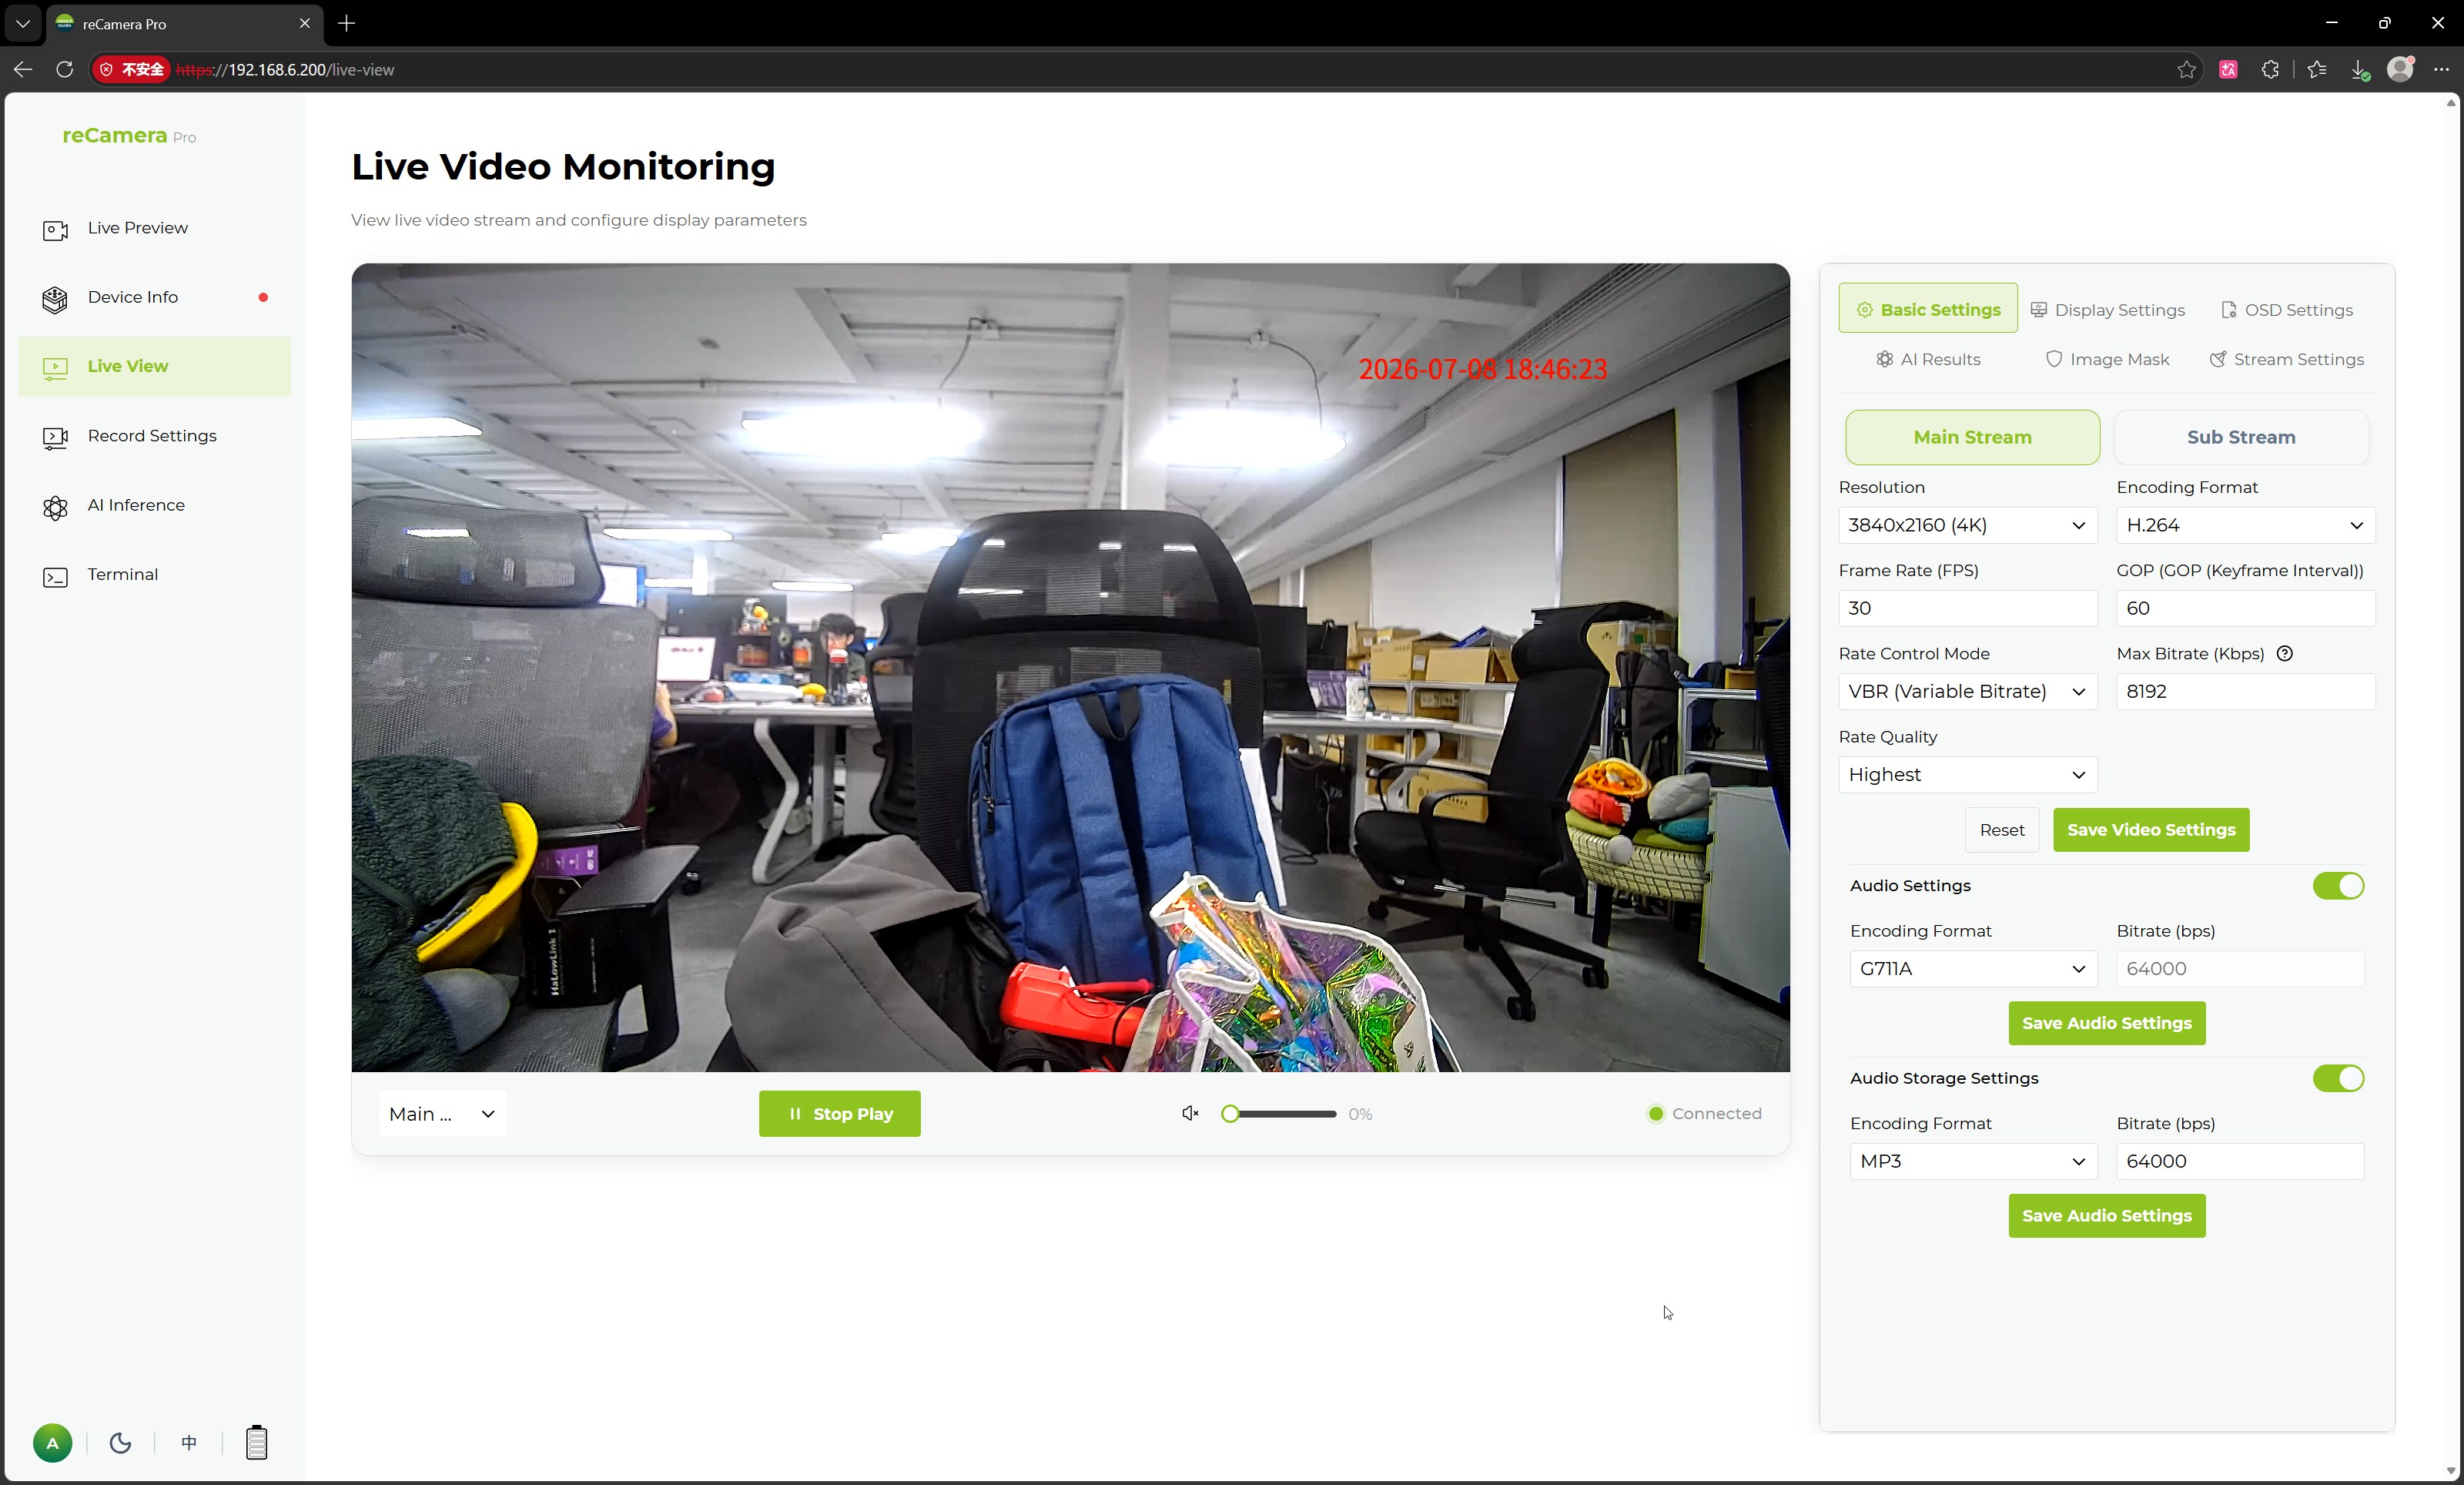
| Parameter | Description |
|---|---|
| Resolution | Video output resolution, e.g. 1920×1080 (1080P) |
| Encoding Format | Video codec, e.g. H.264 |
| Frame Rate (FPS) | Video frame rate, e.g. 30 FPS |
| GOP | Keyframe interval — how often keyframes are generated |
| Bitrate Control Mode | Bitrate control method, e.g. VBR (variable bitrate) |
| Max Bitrate | Maximum bitrate of the video stream, in Kbps |
| Bitrate Quality | Encoding quality level |
Choose which stream to configure based on your scenario:
- Main stream — high-definition preview, video storage, and AI analysis.
- Sub-stream — low-bandwidth preview, remote viewing, or multi-channel access.
After changing anything, click Save Video Settings to apply. Click Reset to restore or re-enter parameters.
The page also provides Audio Settings and Audio Storage Settings switches, so you can enable or disable audio capture and audio storage as needed.
Display Settings: orientation and day/night
Display Settings adjusts how the camera renders the image.
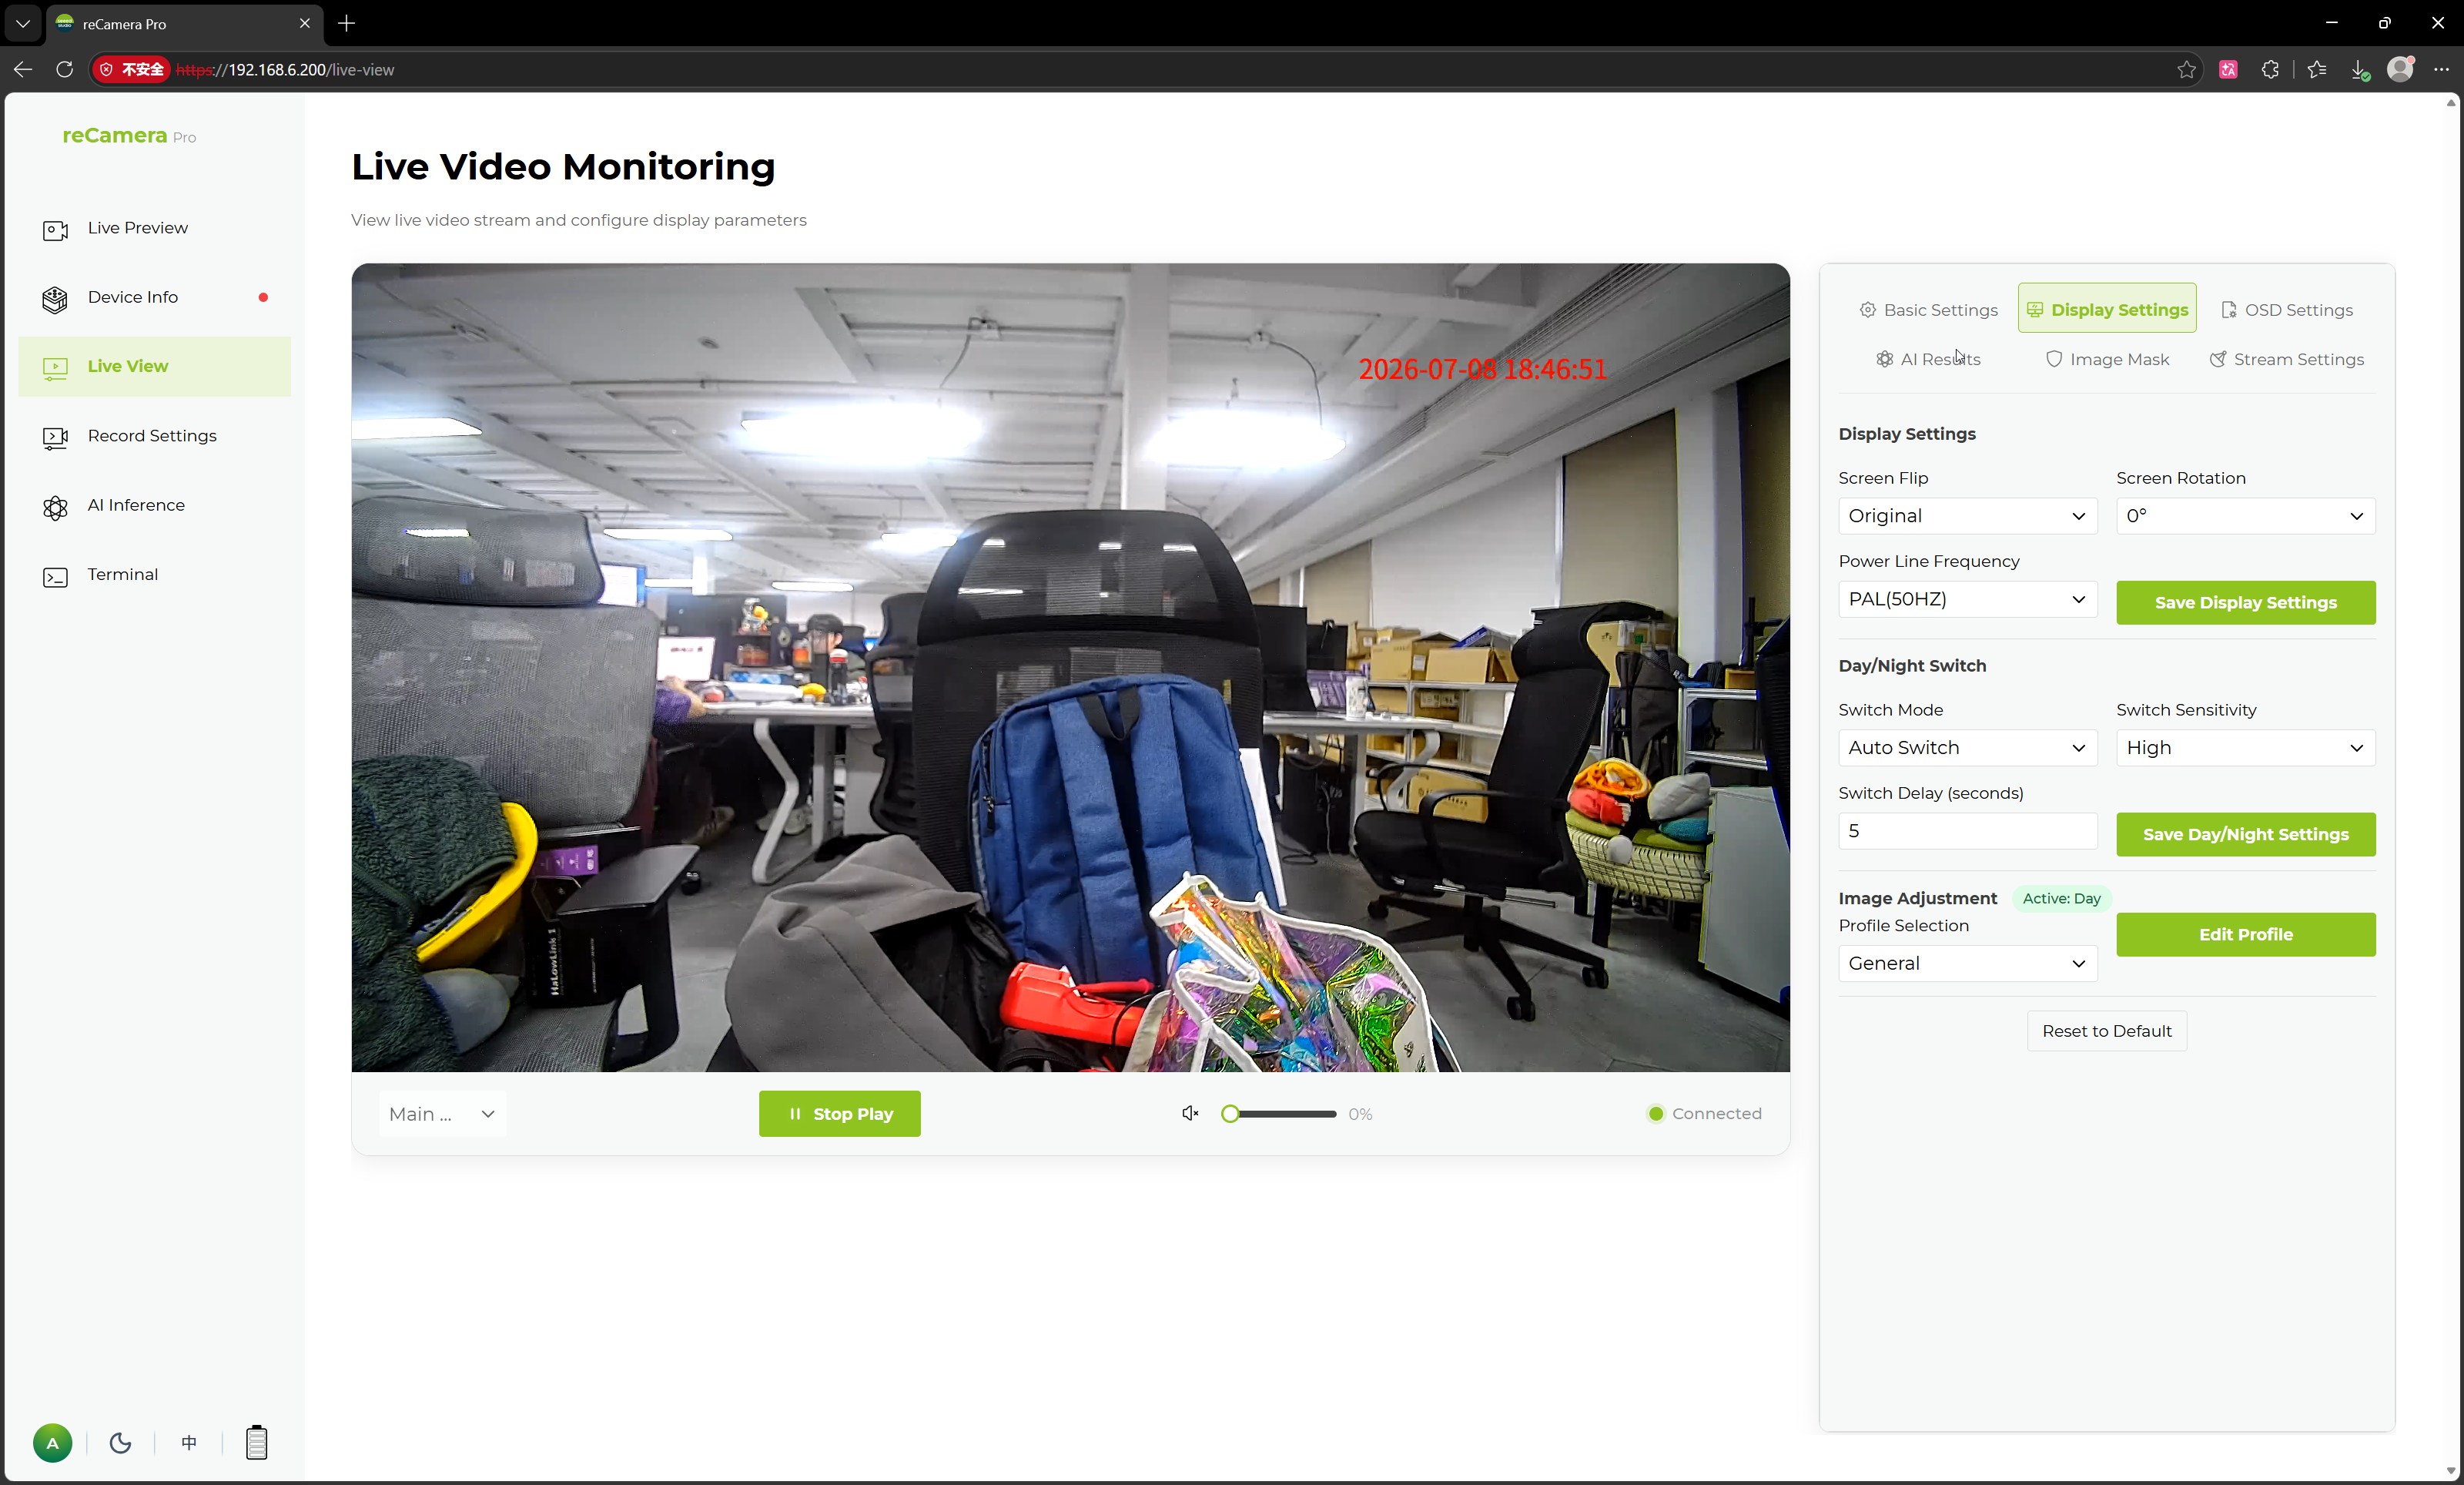
| Parameter | Description |
|---|---|
| Flip | Mirror/flip the image to match the installation orientation |
| Rotate | Rotation angle, e.g. 0° |
| Video Standard | Video standard, e.g. PAL (50HZ) |
Day/night switching is configured on the same page:
| Parameter | Description |
|---|---|
| Switch Mode | How day/night mode switches, e.g. automatic |
| Switch Threshold Sensitivity | Light-level sensitivity that triggers the switch |
| Switch Hysteresis Time | Delay before switching back, to avoid frequent toggling |
Image adjustment for low light
In the basic image adjustment area you can select a profile and tune:
- Brightness
- Contrast
- Saturation
- Sharpness
- Hue
- Exposure Mode
- Gain Mode
Practical low-light tips:
- Set Exposure Mode so the camera can lengthen exposure time in dim scenes; watch motion blur on moving subjects.
- Raise Gain only as much as needed — high gain adds noise, which also hurts AI detection accuracy.
- Use automatic day/night switching with a moderate threshold and enough hysteresis time for 24/7 installations.
- Re-check the image with your real scene lighting (indoor, outdoor, backlight, night) instead of judging on the default test scene.
After changing anything, click Save Display Settings / Save Configuration to apply.
Related pages
- Preview, Capture and Manual Recording
- Configure Detection: Classes, Thresholds and Rate
- Watch the Stream in an External Player (RTSP)
Tech Support & Product Discussion
Thank you for choosing our products! We are here to provide you with different support to ensure that your experience with our products is as smooth as possible. We offer several communication channels to cater to different preferences and needs.