Convert and Quantize Models for reCamera Pro with RKNN-Toolkit2
Introduction
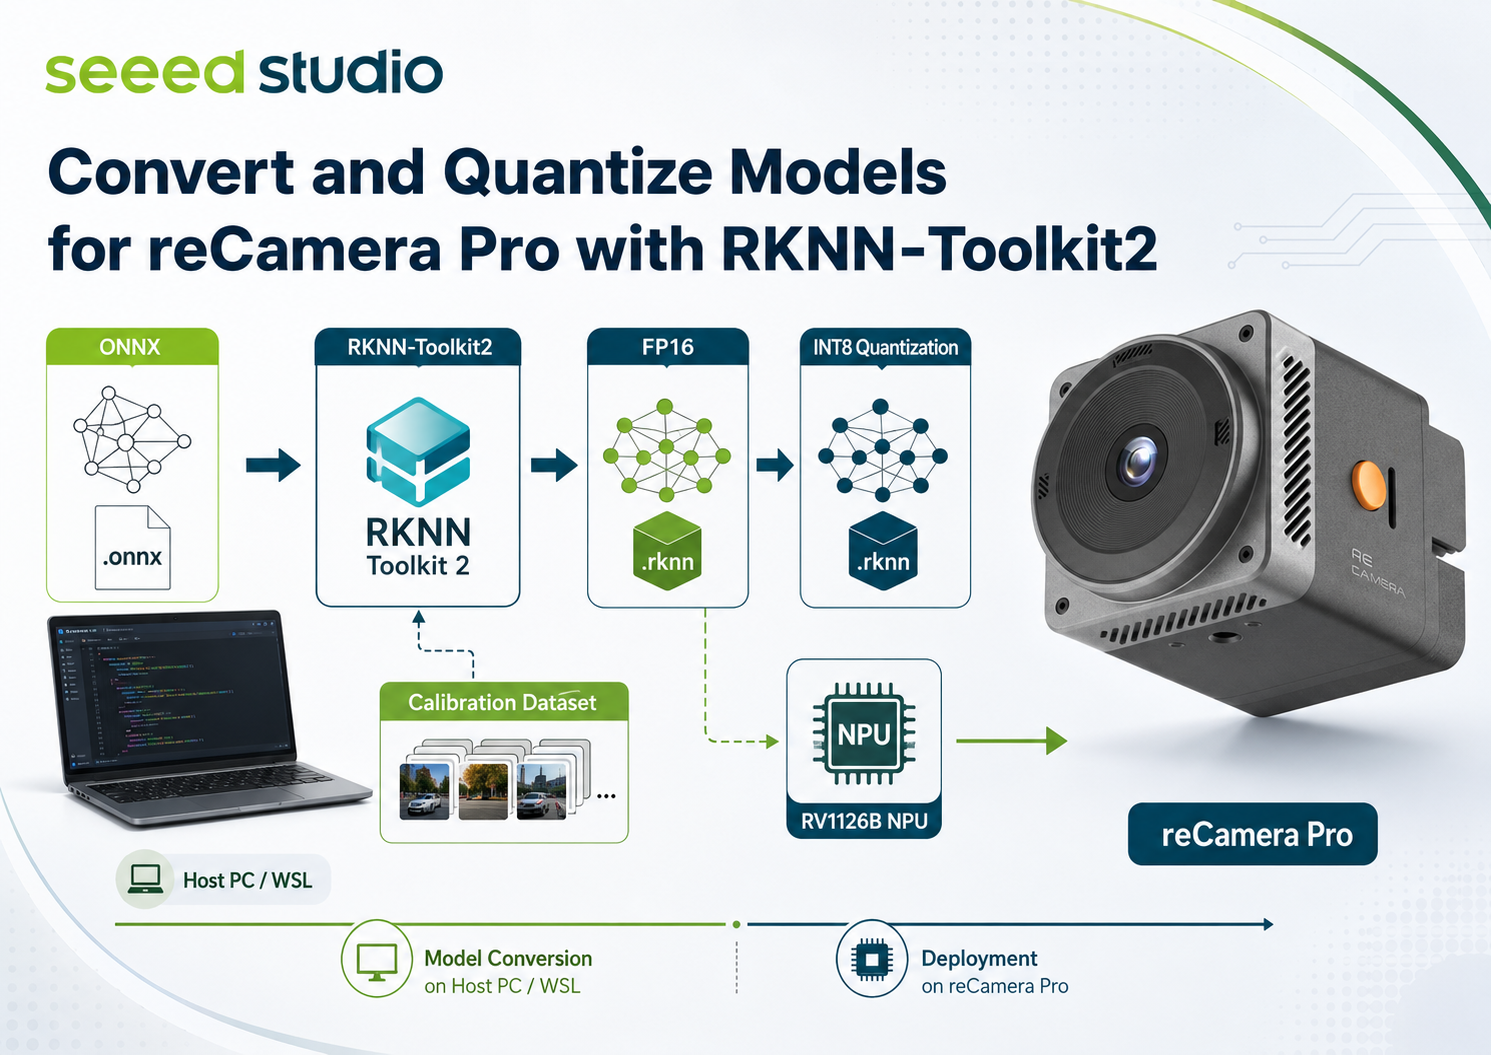
reCamera Pro uses the Rockchip RV1126B. To run a custom neural-network model on its NPU, export the model to ONNX and compile it to an RKNN model for RV1126B on an x86_64 Linux PC or WSL environment.
This guide creates an FP16 baseline and an INT8-quantized model. Conversion occurs on the host PC; a connected reCamera Pro is needed only for final validation and deployment.
This guide uses RKNN-Toolkit2 2.3.2, Python 3.10, and target_platform='rv1126b'. Keep the Toolkit version aligned with the RKNN Runtime supplied by reCamera Pro firmware. Do not use instructions intended for a different reCamera product or Rockchip SoC.
1. Requirements
The configuration used in the examples in this guide is as follows:
- An x86_64 Linux PC or WSL 2 environment. Do not convert models on reCamera Pro itself.
- Python 3.10.
- RKNN-Toolkit2 2.3.2 for x86_64 and its bundled requirements.
- An ONNX model with known input shape, preprocessing, and output semantics.
- For INT8 quantization: representative calibration images. Labels are not required.
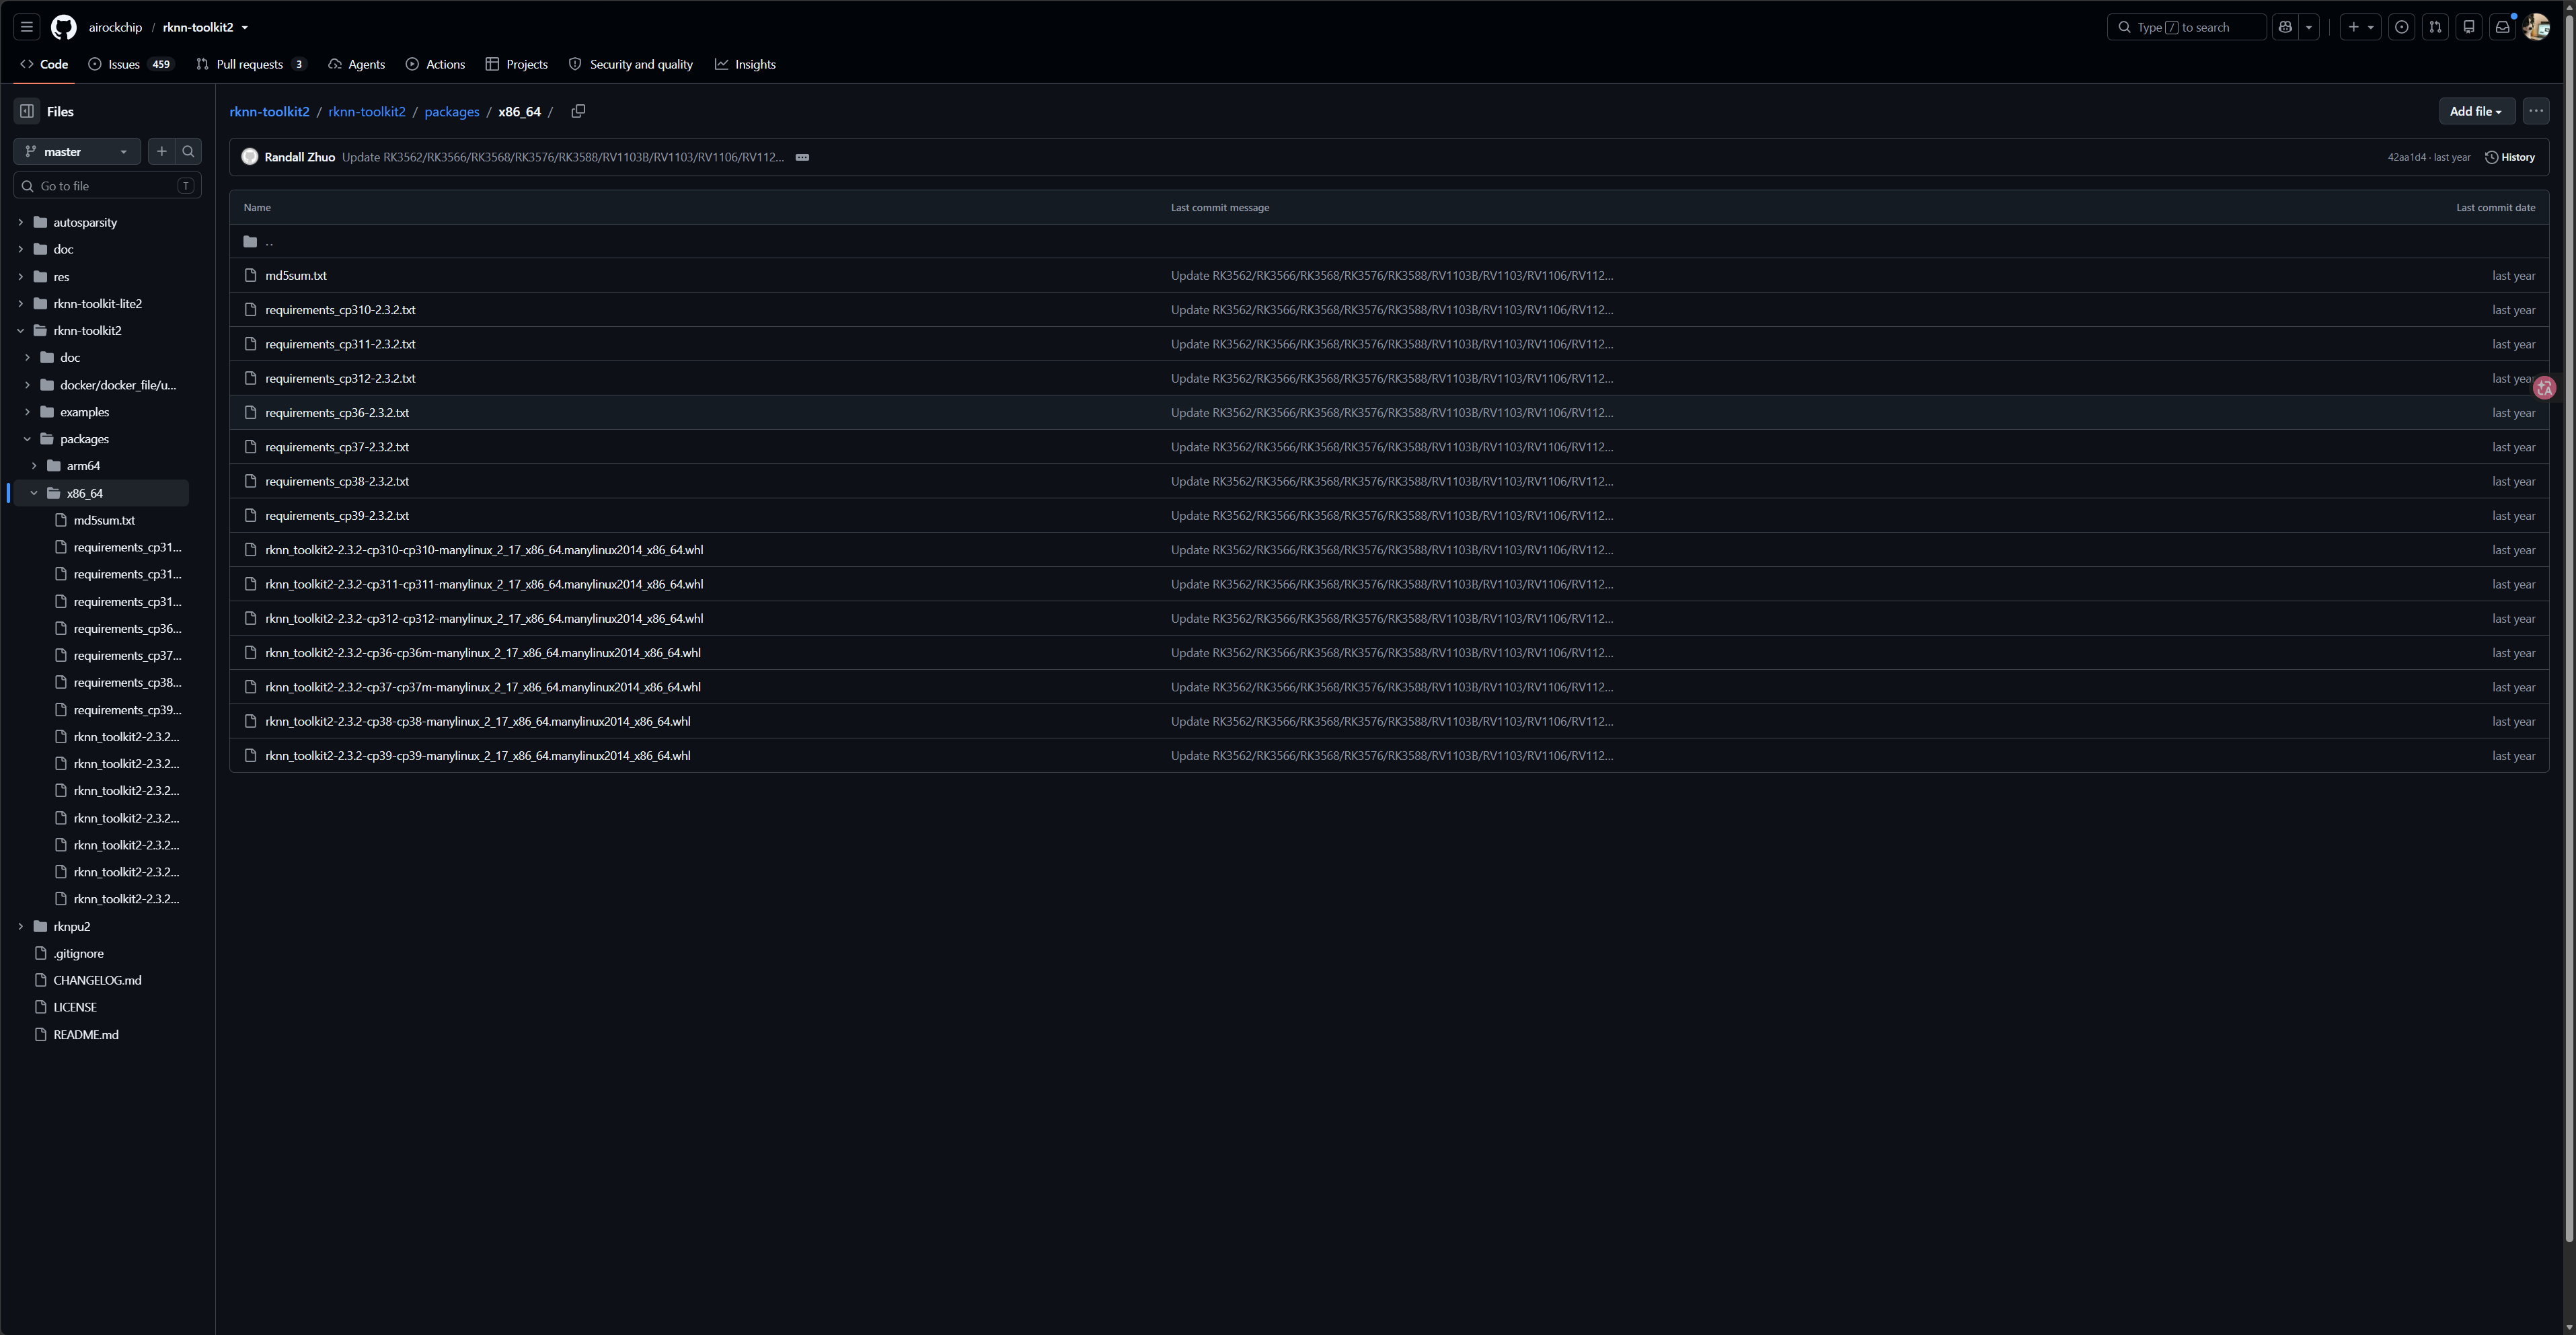
The Python version can be changed. RKNN-Toolkit2 currently supports Python 3.6 to 3.12. Install the wheel matching your Python version; the digits after cp in the wheel filename identify its CPython version.
Before conversion, record the model source and license, export command, checksum, input layout, color order, resize policy, normalization, and post-processing. This is the model contract your reCamera Pro application must reproduce.
Always generate the FP16 model first. It is the baseline for checking the graph and preprocessing before investigating INT8 accuracy or performance.
2. Prepare RKNN-Toolkit2
Download the 2.3.2 release from the official Rockchip repository. In the release package, choose the wheel and requirements under rknn-toolkit2/packages/x86_64 that match CPython 3.10.
Create an isolated environment and install the wheel. Replace PATH_TO_TOOLKIT and the wheel filename with the paths in your downloaded package.
python3.10 -m venv rknn-2.3.2
source rknn-2.3.2/bin/activate

python -m pip install --upgrade pip
python -m pip install -r PATH_TO_TOOLKIT/rknn-toolkit2/packages/x86_64/requirements_cp310*.txt
python -m pip install PATH_TO_TOOLKIT/rknn-toolkit2/packages/x86_64/rknn_toolkit2-2.3.2-*-cp310-*.whl

python -c "from rknn.api import RKNN; print('RKNN-Toolkit2 import succeeded')"
RKNN-Toolkit2 is the host-side conversion toolkit. Do not use rknn-toolkit-lite2 for conversion; it is for running models on supported target systems. An RV1126B .rknn must be built with target_platform='rv1126b'.
3. Confirm the ONNX Input Contract
Prefer a static batch-1 ONNX input. Inspect the model with Netron, ONNX checker, model-inspect, or its export program. Confirm these values from the original model implementation; do not infer them from a filename.
| Item | Example | Why it matters |
|---|---|---|
| Input name and shape | images, [1, 3, 640, 640] | Required by load_onnx() |
| Layout | NCHW or NHWC | Must match the exported graph |
| Channel order | RGB or BGR | A channel swap can severely reduce accuracy |
| Input range and normalization | [0,255] to [0,1] | Must be applied exactly once |
| Resize policy | stretch, crop, or letterbox | Must be identical at runtime |
| Outputs and post-processing | scores, boxes, masks, etc. | Needed to interpret predictions |
For example, if the application supplies uint8 RGB pixels in [0,255] and the model expects floats in [0,1], use mean_values=[[0, 0, 0]] and std_values=[[255, 255, 255]]. RKNN applies (input - mean) / std. If normalization is inside the ONNX graph, use identity values (mean=[0,0,0], std=[1,1,1]) so it is not applied twice.
Use model-inspect to inspect the model inputs and outputs:
pip install model-inspect-tool

model-inspect ./yolov8n.onnx
An example output is shown below:
Format:  onnx
Path:    /home/yylin/rknn_test/rknn_model_zoo/examples/yolov8/model/yolov8n.onnx
Backend: onnx
Dynamic: false

Inputs:
  name=images, shape=[1, 3, 640, 640], dtype=float

Outputs:
  name=318, shape=[1, 64, 80, 80], dtype=float
  name=onnx::ReduceSum_326, shape=[1, 80, 80, 80], dtype=float
  name=331, shape=[1, 1, 80, 80], dtype=float
  name=338, shape=[1, 64, 40, 40], dtype=float
  name=onnx::ReduceSum_346, shape=[1, 80, 40, 40], dtype=float
  name=350, shape=[1, 1, 40, 40], dtype=float
  name=357, shape=[1, 64, 20, 20], dtype=float
  name=onnx::ReduceSum_365, shape=[1, 80, 20, 20], dtype=float
  name=369, shape=[1, 1, 20, 20], dtype=float
4. Directly Export an Ultralytics YOLO Model to RKNN
For Ultralytics YOLO models, Ultralytics can export directly to RKNN. It creates the intermediate ONNX model and invokes RKNN-Toolkit2 for you, so you do not need to write a separate ONNX conversion script.
Install Ultralytics in the RKNN-Toolkit2 environment prepared above:
python -m pip install ultralytics
The following example exports an FP16 RKNN model for reCamera Pro. Replace yolo11n.pt with your trained checkpoint, for example runs/detect/train/weights/best.pt.
from ultralytics import YOLO

model = YOLO('yolo11n.pt')
model.export(format='rknn', name='rv1126b', imgsz=640)
Equivalent CLI command:
yolo export model=yolo11n.pt format=rknn name=rv1126b imgsz=640
The export normally creates a directory such as yolo11n_rknn_model/, containing an RKNN file named similarly to yolo11n-rv1126b.rknn. Here, name='rv1126b' selects the Rockchip target; it is not an output-directory name.
To create an INT8 model, pass quantize=8 and the YAML definition of a representative YOLO dataset. Ultralytics uses the image paths from that dataset to generate the calibration list required by RKNN-Toolkit2.
from ultralytics import YOLO

model = YOLO('runs/detect/train/weights/best.pt')
model.export(
    format='rknn',
    name='rv1126b',
    imgsz=640,
    quantize=8,
    data='path/to/data.yaml',
)
yolo export model=runs/detect/train/weights/best.pt format=rknn name=rv1126b imgsz=640 quantize=8 data=path/to/data.yaml
data must point to a valid YOLO dataset YAML whose image paths are accessible from the host. Use images representative of the reCamera Pro deployment scenario, and keep separate held-out images for accuracy evaluation. Ultralytics does not turn a successful export into a guarantee of task accuracy or device performance.
Use this route for a quick Ultralytics YOLO export. Use the ONNX workflow below when your model is not an Ultralytics model, when you need explicit control over Toolkit2 settings, or when you need to diagnose the exported ONNX graph.
5. Create an FP16 RKNN Baseline
Create convert_onnx_to_rknn.py. Change the model path, input name, shape, and normalization for your own model.
from rknn.api import RKNN

ONNX_MODEL = 'model.onnx'
RKNN_MODEL = 'model-fp16-rv1126b.rknn'

rknn = RKNN(verbose=True)

# Example only: uint8 RGB [0,255] becomes model-domain [0,1].
rknn.config(
    target_platform='rv1126b',
    mean_values=[[0, 0, 0]],
    std_values=[[255, 255, 255]],
)

ret = rknn.load_onnx(
    model=ONNX_MODEL,
    inputs=['images'],                     # Replace with your ONNX input name.
    input_size_list=[[1, 3, 640, 640]],    # Replace with your static shape.
)
if ret != 0:
    raise RuntimeError('Failed to load ONNX model')

# No calibration dataset: build a non-quantized FP16 baseline.
ret = rknn.build(do_quantization=False)
if ret != 0:
    raise RuntimeError('Failed to build RKNN model')

if rknn.export_rknn(RKNN_MODEL) != 0:
    raise RuntimeError('Failed to export RKNN model')
rknn.release()
print(f'Created {RKNN_MODEL}')
python convert_onnx_to_rknn.py
sha256sum model-fp16-rv1126b.rknn
If the toolkit reports an unsupported operator, dynamic input, or invalid graph, fix or re-export the ONNX model. Do not delete operators merely to make the build complete.
6. Prepare an INT8 Calibration Dataset
INT8 calibration images must resemble deployment inputs. As a practical starting point, use about 100--500 images and cover expected lighting, backgrounds, object sizes, viewpoints, motion blur, camera noise, and important failure cases. Keep calibration images separate from accuracy-evaluation images. If the calibration set is too small, the INT8 model may produce results that differ from the original ONNX model.
The list has one image path per line; PNG, JPEG, BMP, and NPY inputs are commonly used.
find calibration/images -type f \( -iname '*.jpg' -o -iname '*.jpeg' -o -iname '*.png' \) \
  | sort > calibration/dataset.txt

wc -l calibration/dataset.txt
head -n 3 calibration/dataset.txt
Calibration data must use the same channel order, resize policy, and numeric input convention as inference. Unrepresentative images, RGB/BGR mistakes, or mismatched preprocessing can cause a large INT8 accuracy drop.
7. Build the INT8 RKNN Model
Copy the FP16 script to convert_onnx_to_rknn_int8.py, then replace the model name and build block with:
RKNN_MODEL = 'model-int8-rv1126b.rknn'

ret = rknn.build(
    do_quantization=True,
    dataset='calibration/dataset.txt',
)
if ret != 0:
    raise RuntimeError('Failed to build INT8 RKNN model')
python convert_onnx_to_rknn_int8.py
sha256sum model-int8-rv1126b.rknn
The default INT8 configuration is normally a good first test. Only experiment with quantization algorithms, hybrid quantization, or weight compression after measuring their effect on your task.
8. Validate Before Deployment
Successful build() and export_rknn() confirms that RKNN-Toolkit2 compiled the graph for RV1126B. It does not by itself prove task accuracy, correct post-processing, or on-device latency.
- Run the original ONNX model and FP16 RKNN configuration on held-out samples; compare decoded task results, not only raw tensors.
- Compare FP16 and INT8 results on those same samples and investigate unacceptable regression.
- On reCamera Pro, load the exported
.rknnwith the firmware-matched RKNN Runtime. Query tensor attributes and verify input type, layout, size, preprocessing, and post-processing. - Measure warmed-up latency and sustained behavior on the device.
The host-side RKNN simulator and RV1126B NPU are different execution environments. Host comparison checks conversion and preprocessing; final acceptance requires testing the exported .rknn on reCamera Pro.
9. Troubleshooting
| Symptom | Check first |
|---|---|
load_onnx() fails | Validate ONNX, exporter opset, input name, static shape, and external-data files. |
| Unsupported operator | Re-export or use a semantically equivalent supported operation. |
| INT8 build fails | Verify all dataset paths, input count, dtype/shape, and image readability. |
| INT8 accuracy is poor | Check RGB/BGR, resize policy, mean/std, calibration coverage, and post-processing. |
| Host works but device fails | Confirm rv1126b, model checksum, Toolkit/Runtime 2.3.2 alignment, and tensor attributes. |
| Device inference is slow | Measure after warm-up; check preprocessing and post-processing as well as NPU execution. |
10. Next Steps
Keep the ONNX source, conversion script, calibration-list checksum, .rknn checksum, and preprocessing/post-processing contract with the exported model. Next, integrate the model with the reCamera Pro RKNN Runtime C API and test it on the device.