Trigger Capture from External Devices
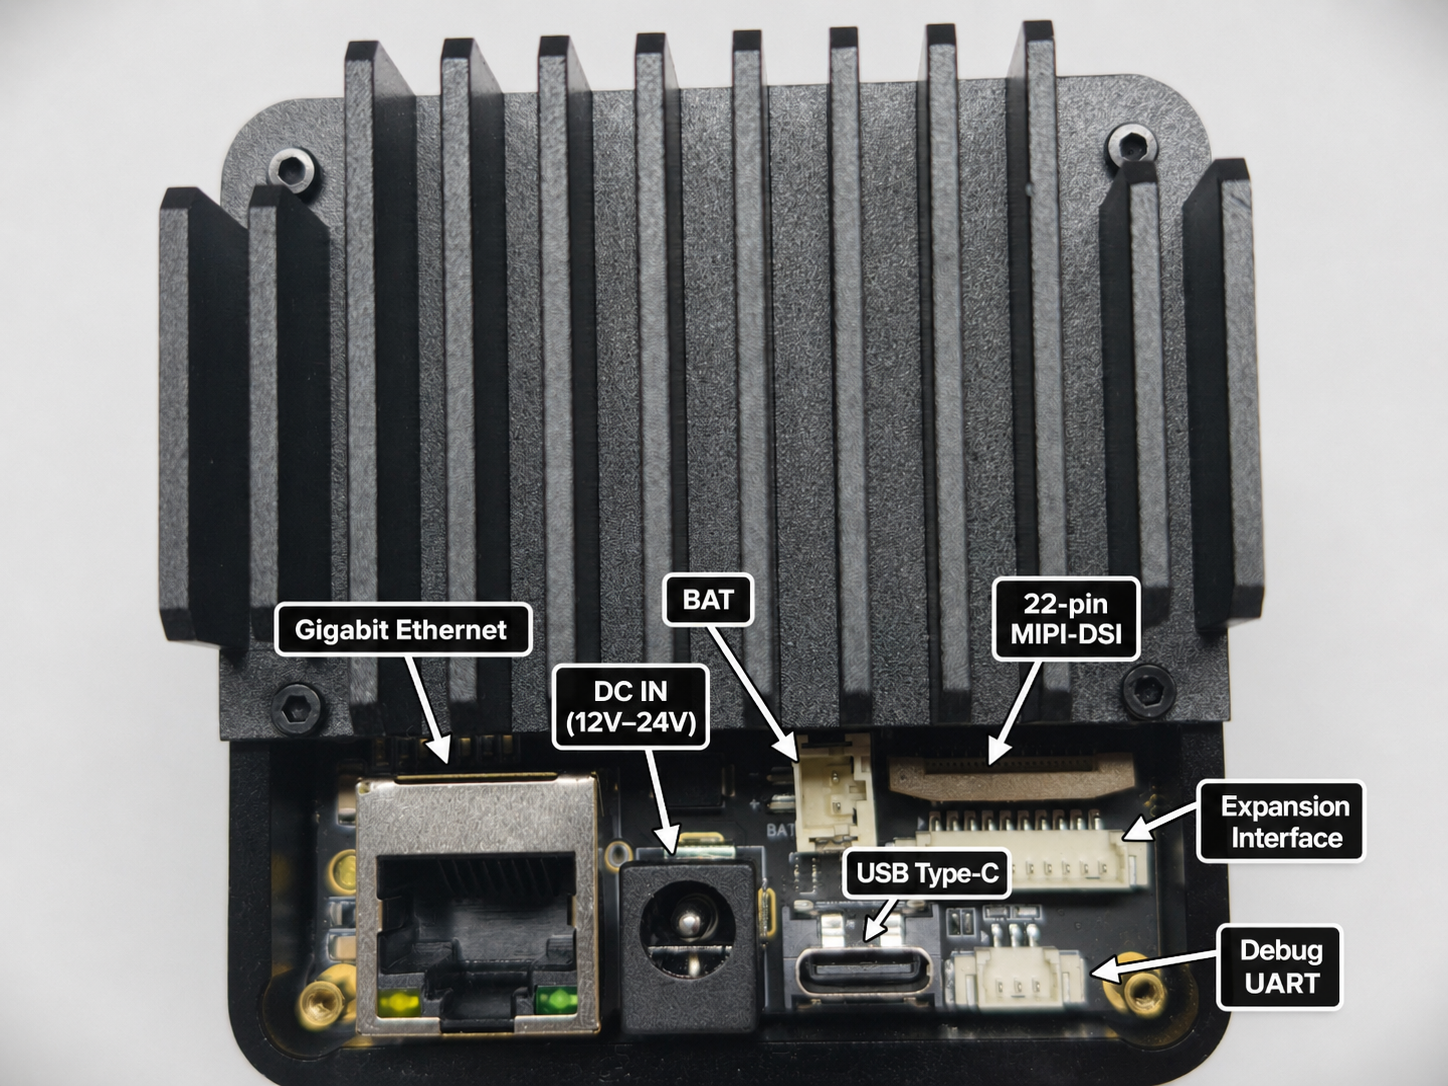
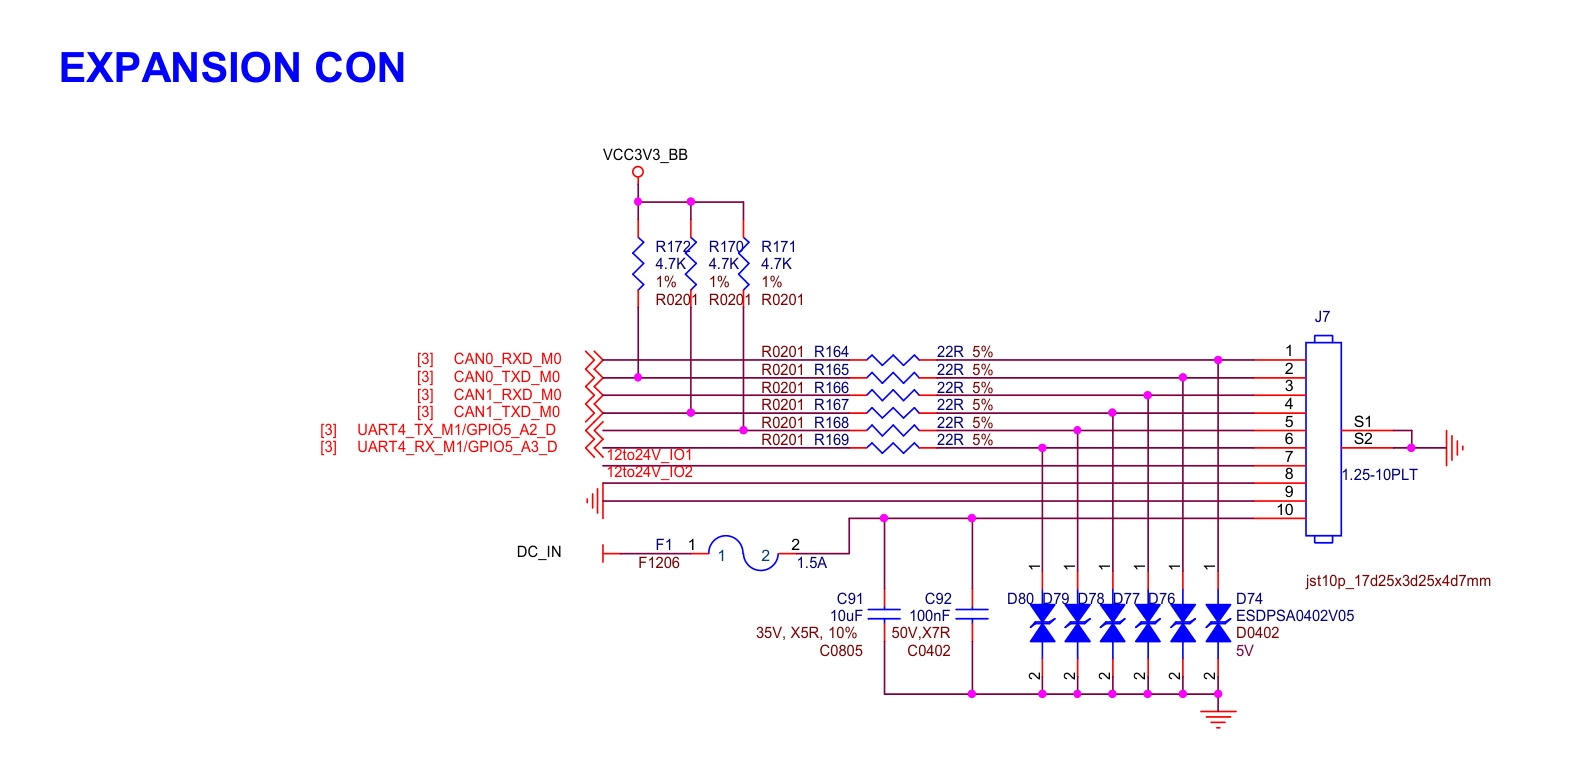
reCamera Pro has two serial ports: a DEBUG UART for system debugging, and a UART interface on the expansion port for Web UI triggering and receiving AI inference data. Combined with GPIO and HTTPS triggers, you can integrate the camera with external controllers, sensors, and automation systems.
Connecting the DEBUG UART
The debug serial port baud rate is 1500000, and the hardware interface is MX1.25.
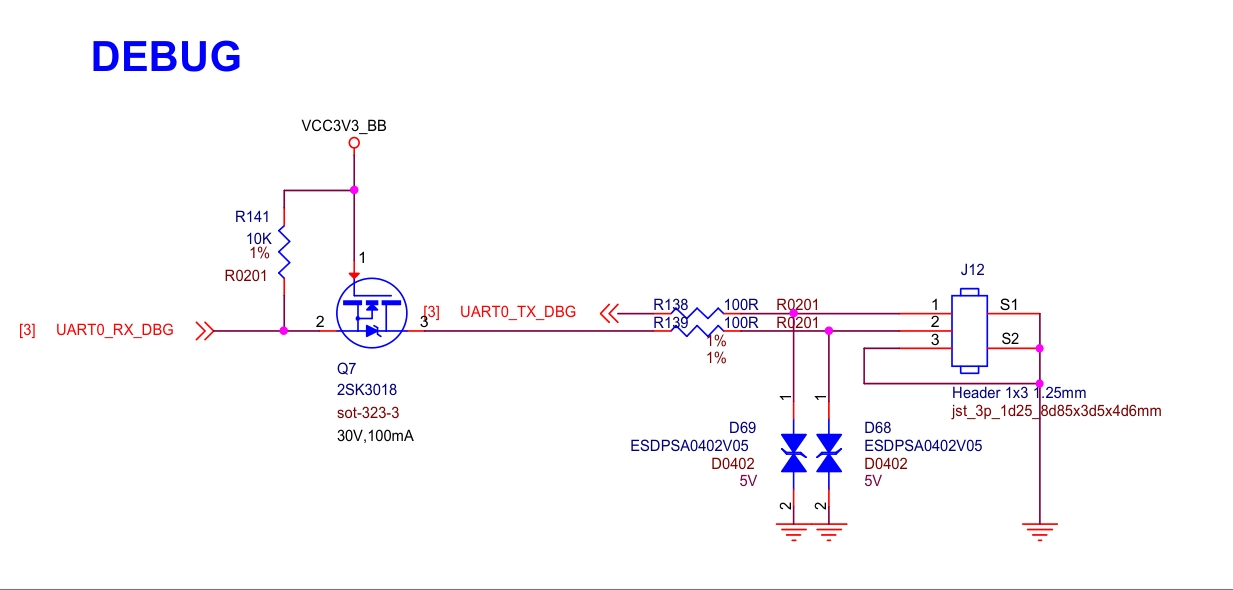
- Prepare a USB-to-serial converter.
- Connect TX→RX, RX→TX, and GND→GND between the converter and the device.
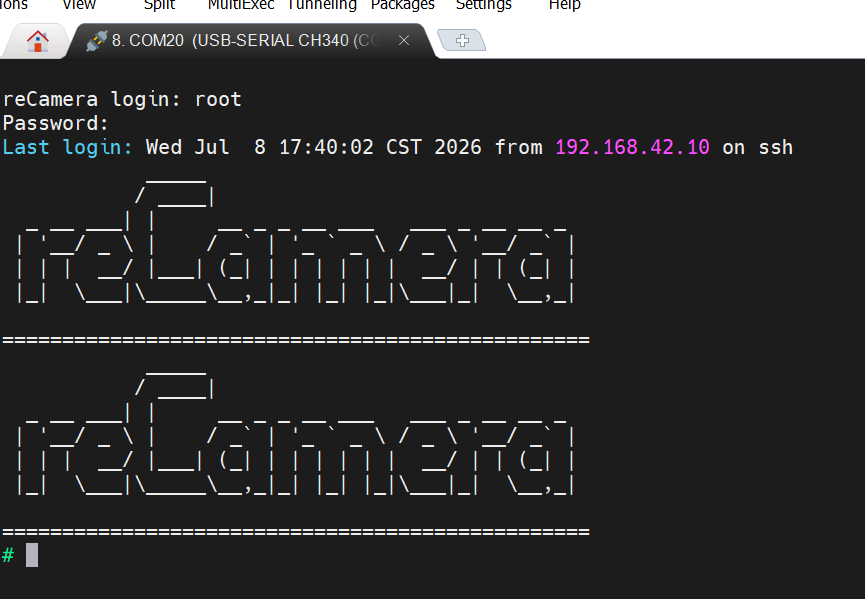
- Power on the device to see debugging information on the converter.
Using the expansion UART for triggering
Connect the expansion port
- Prepare a 10-pin MX1.25 cable and plug it into the expansion interface.
- Connect TX→RX, RX→TX, and GND→GND to your USB-to-TTL tool per the expansion diagram above.
Set the baud rate
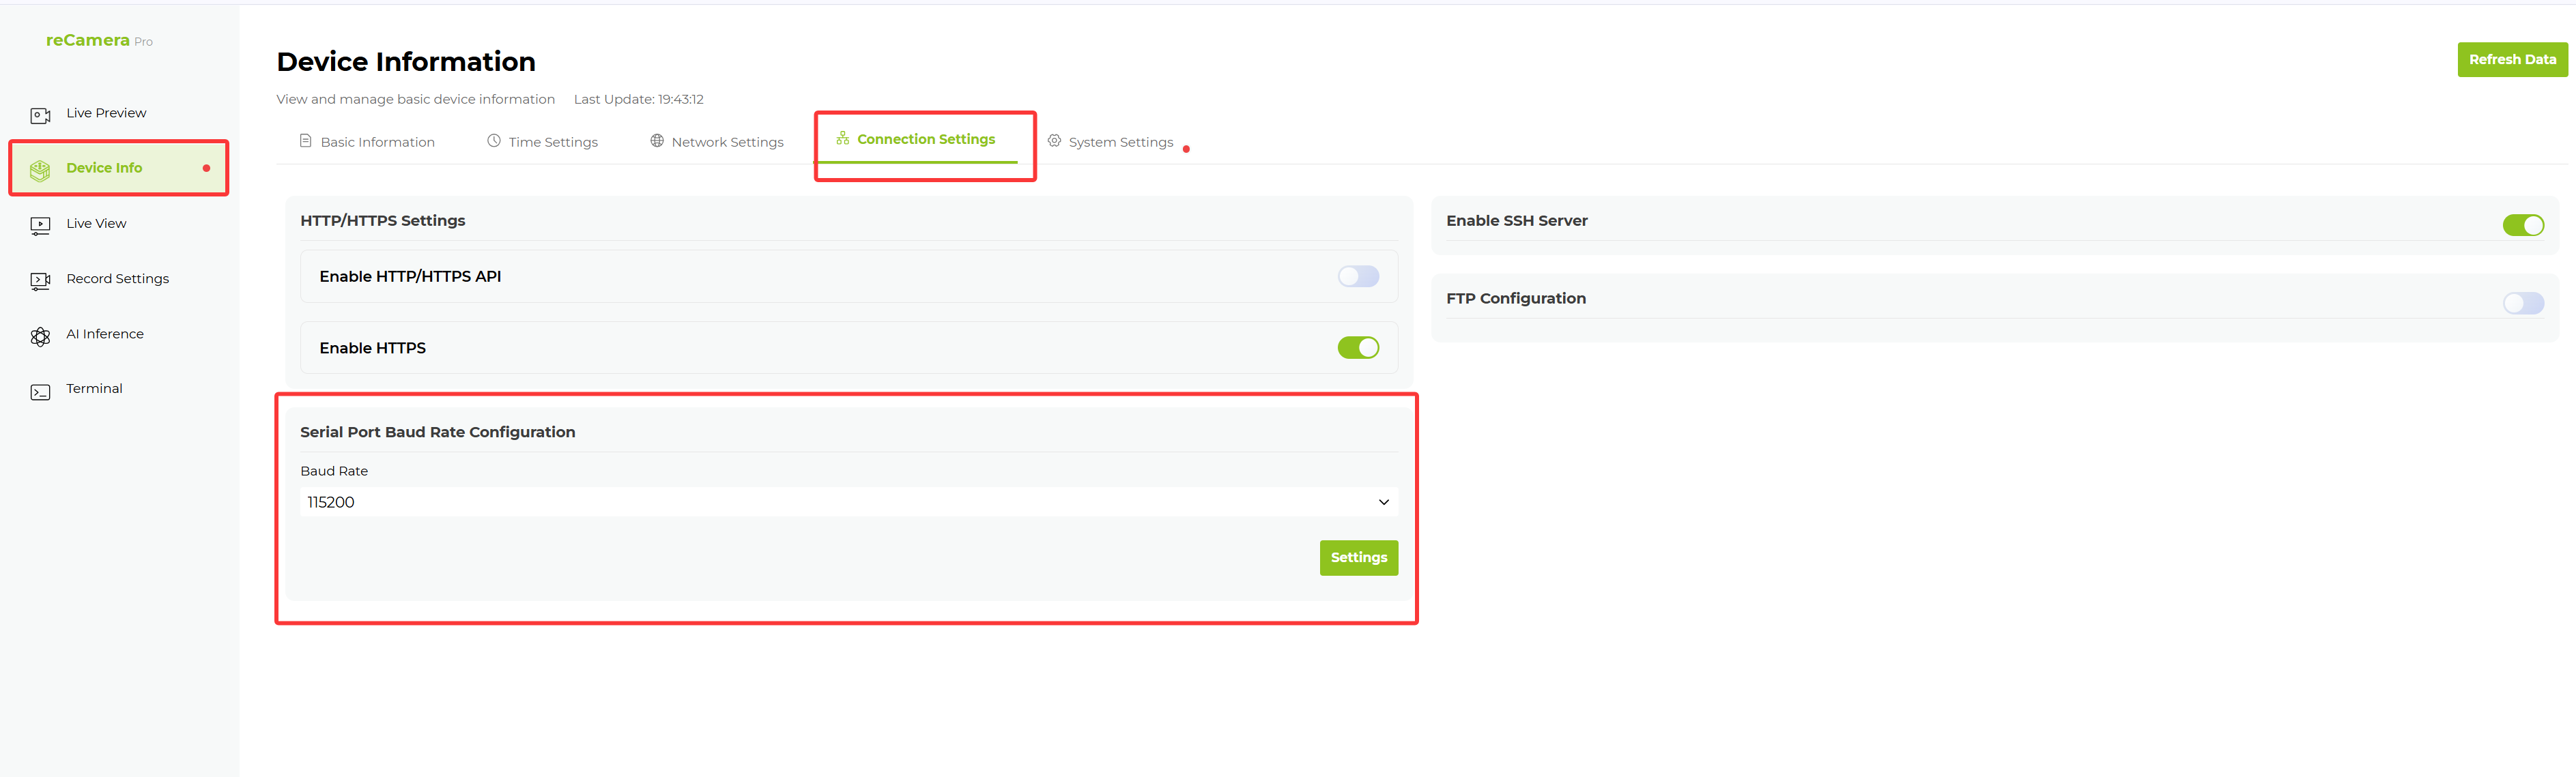
In Device Info → Connection Settings, set the serial port baud rate.
Serial port trigger
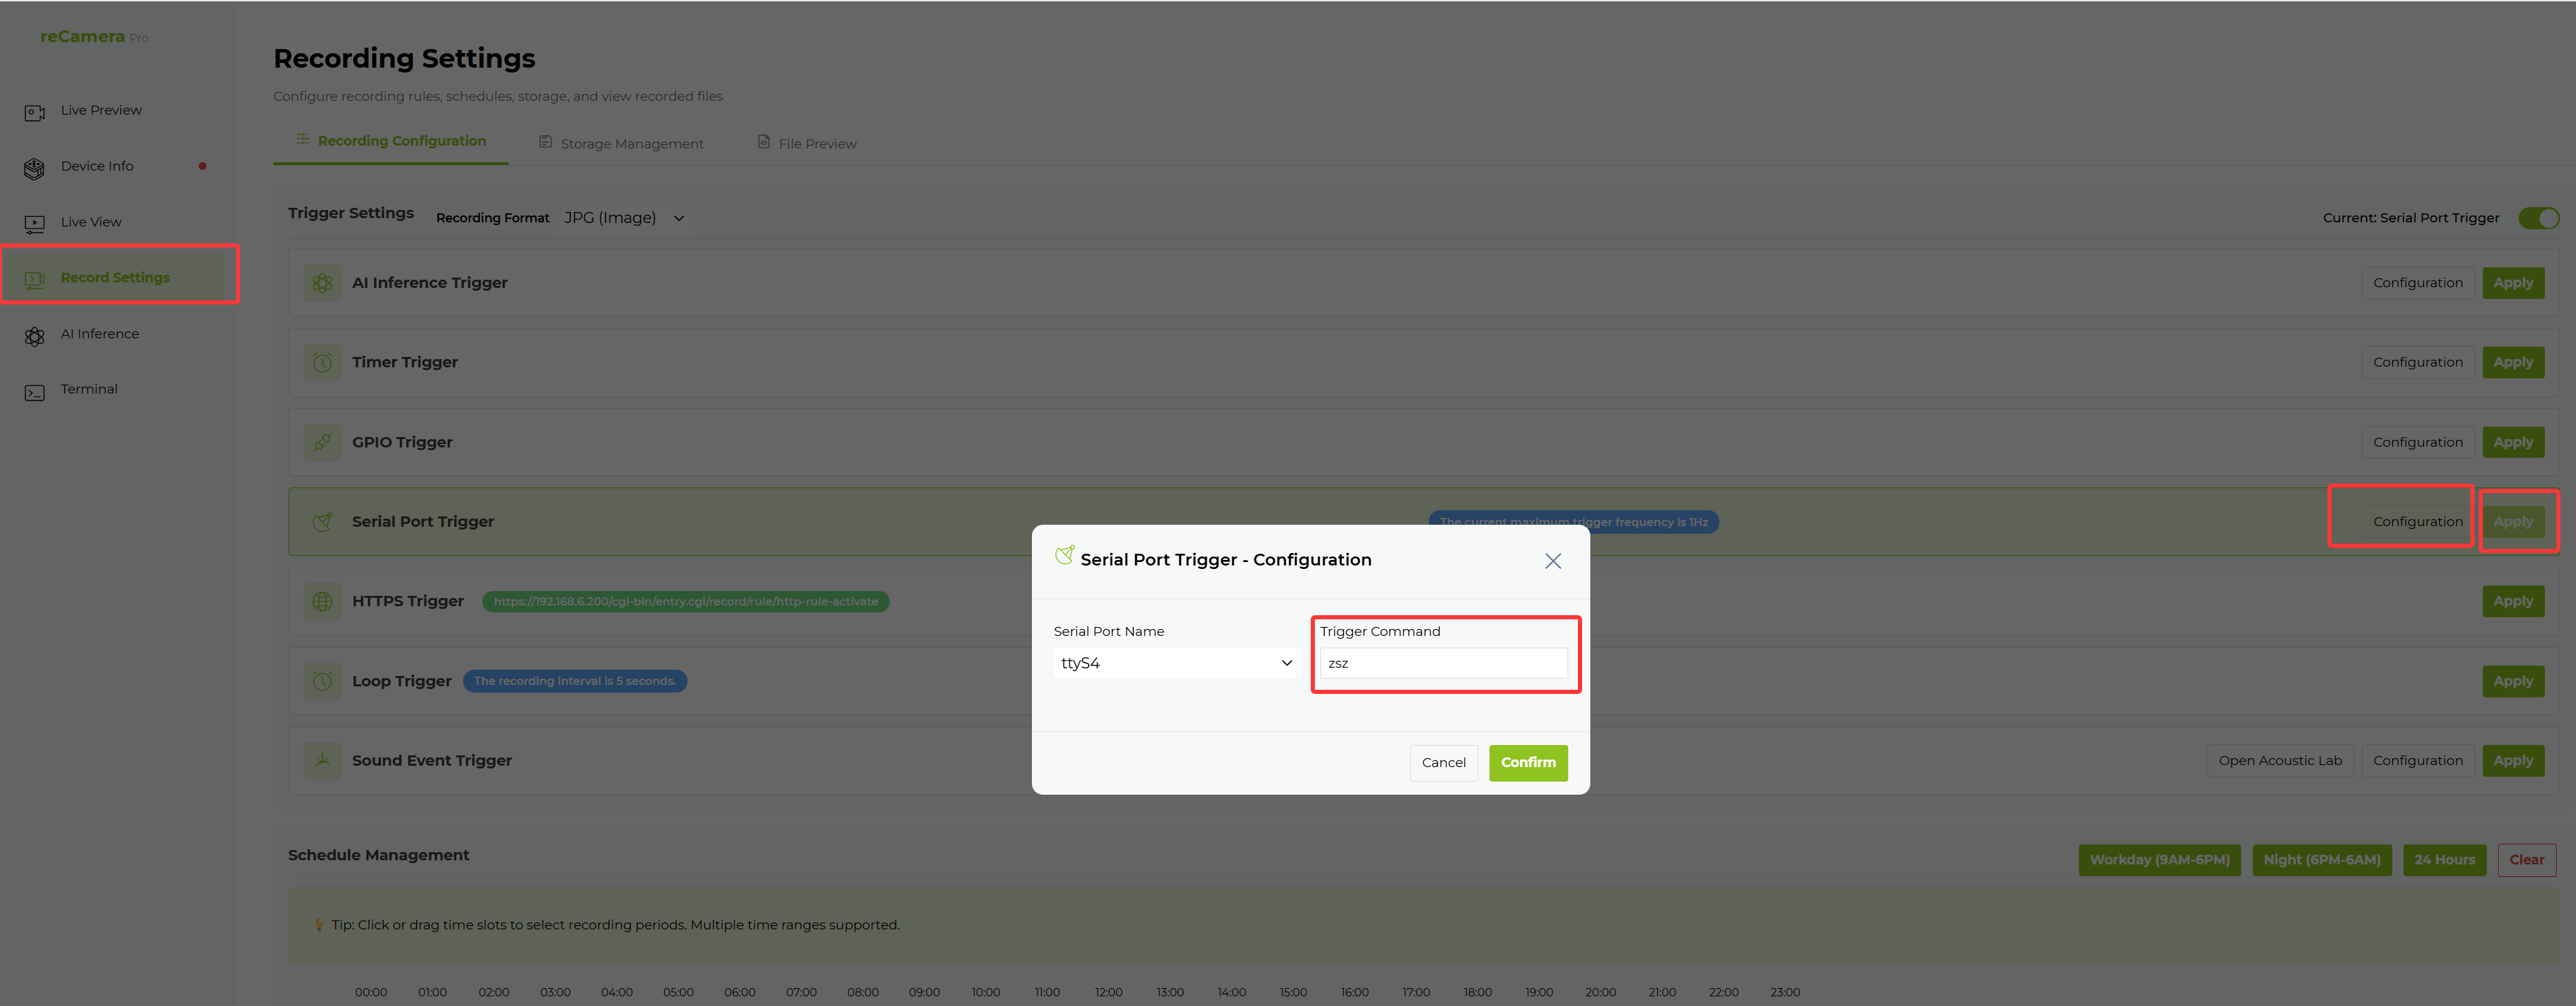
- In Recording Settings → Recording Configuration → Serial Port Trigger, click Configure to set the trigger command.
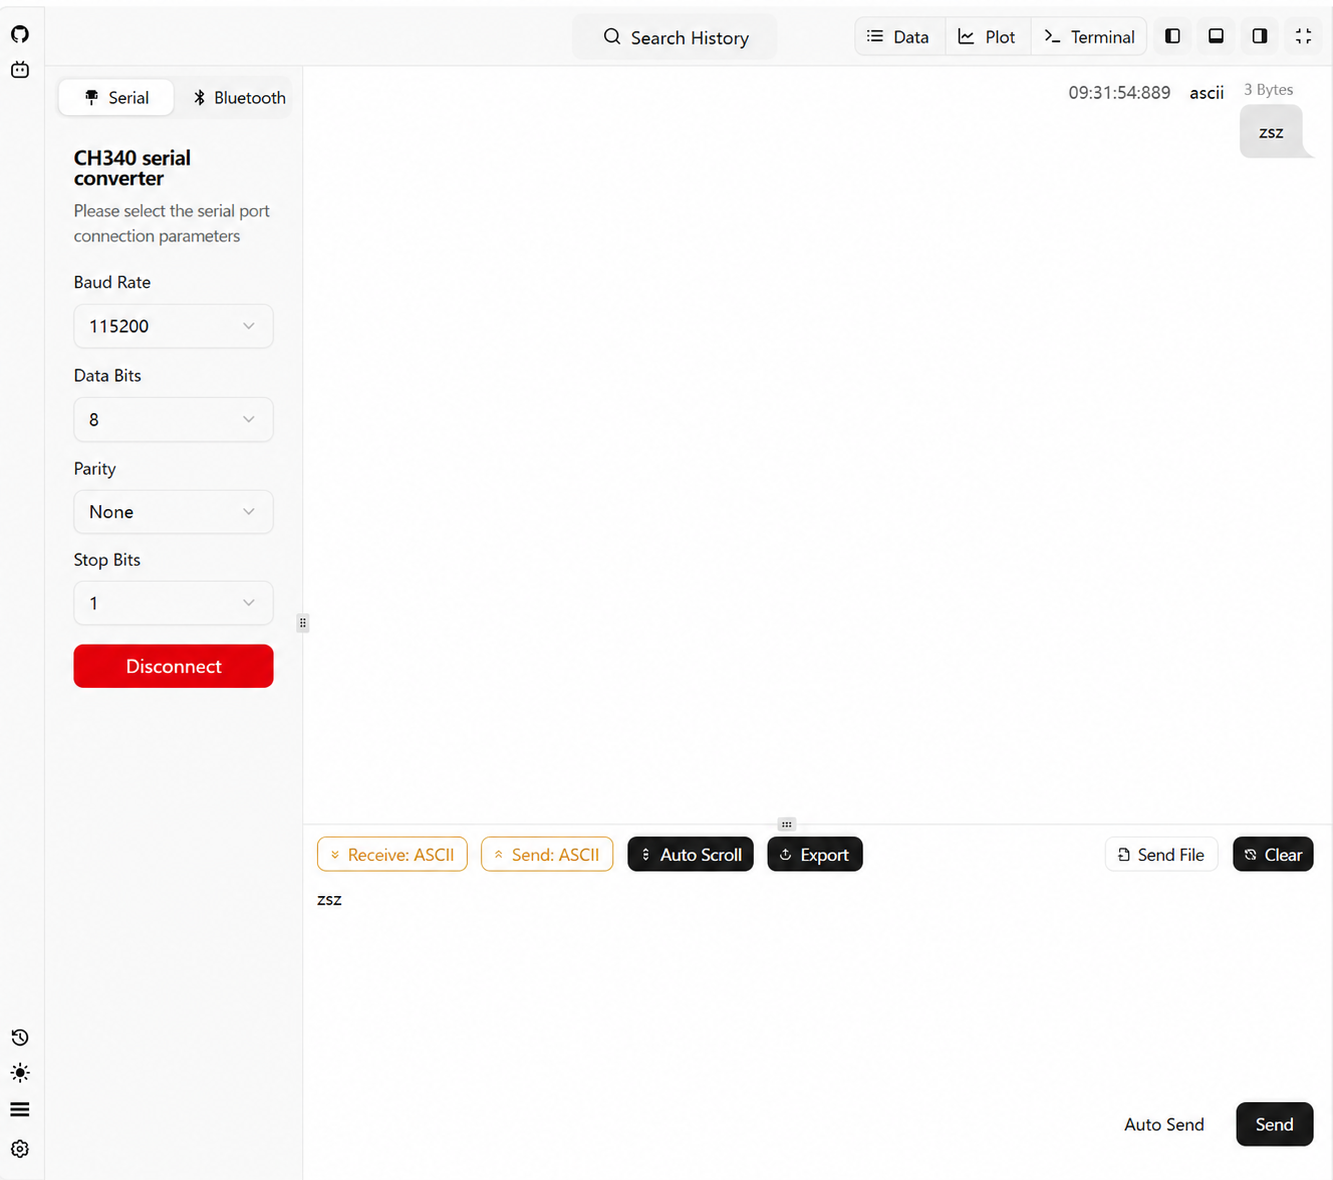
- Open your serial port tool, select the correct serial port, and send the trigger command.
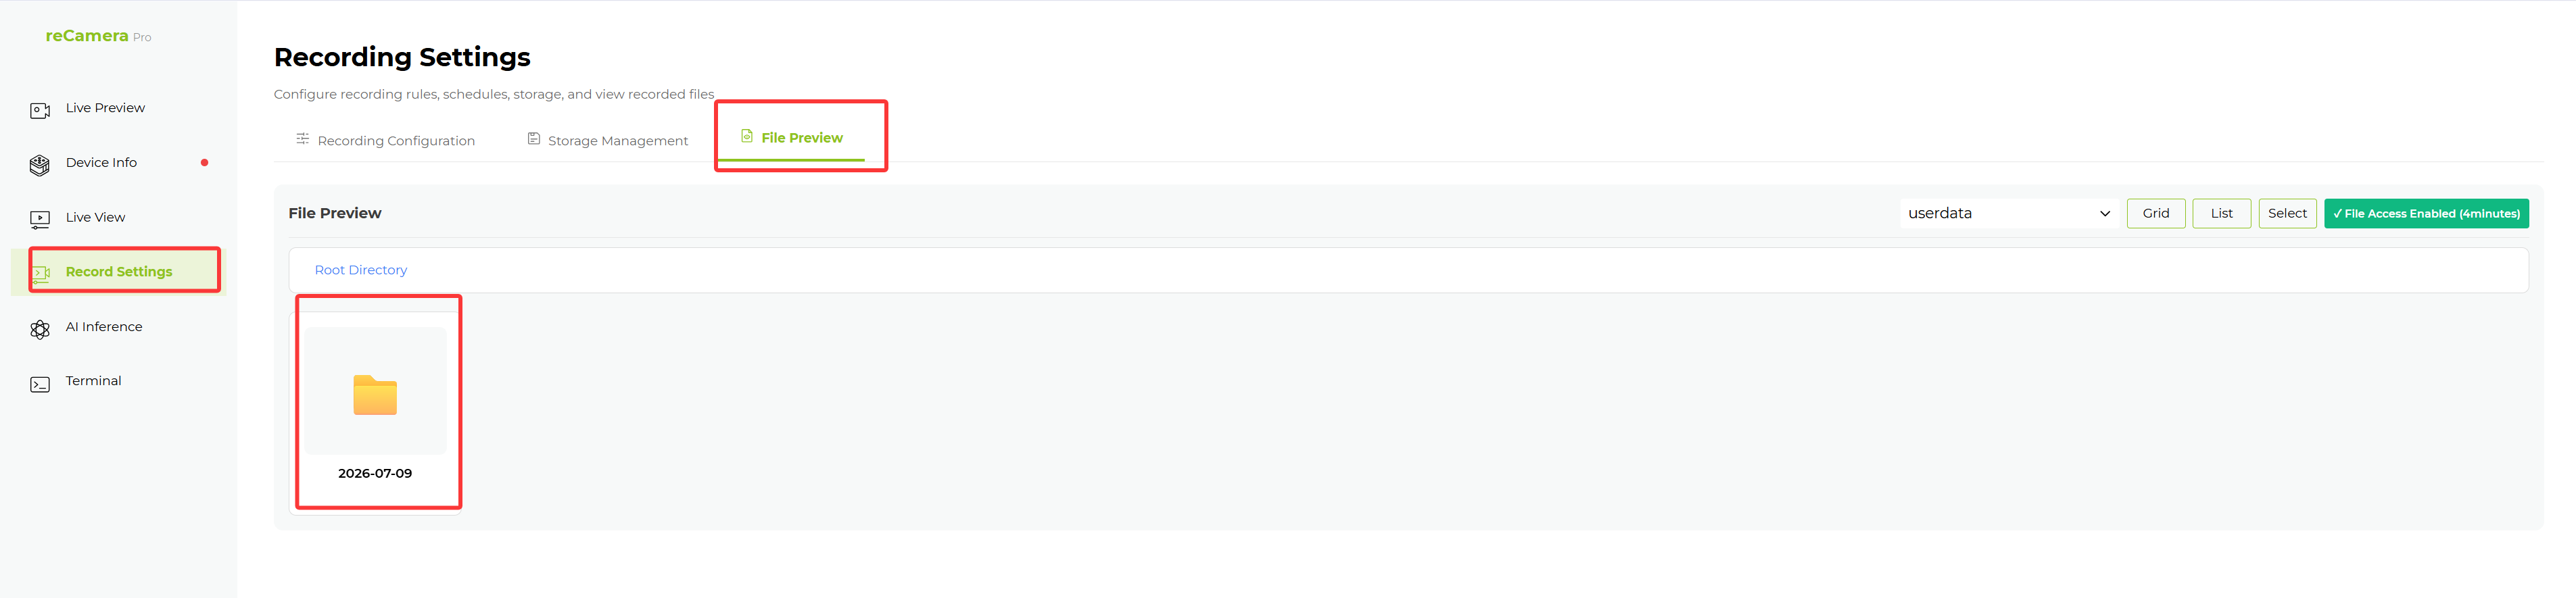
- In Recording Settings → File Preview, view the captured photo or video.
The trigger command can only be sent in ASCII format. HEX sending and Chinese characters are not supported.
Receive AI inference results
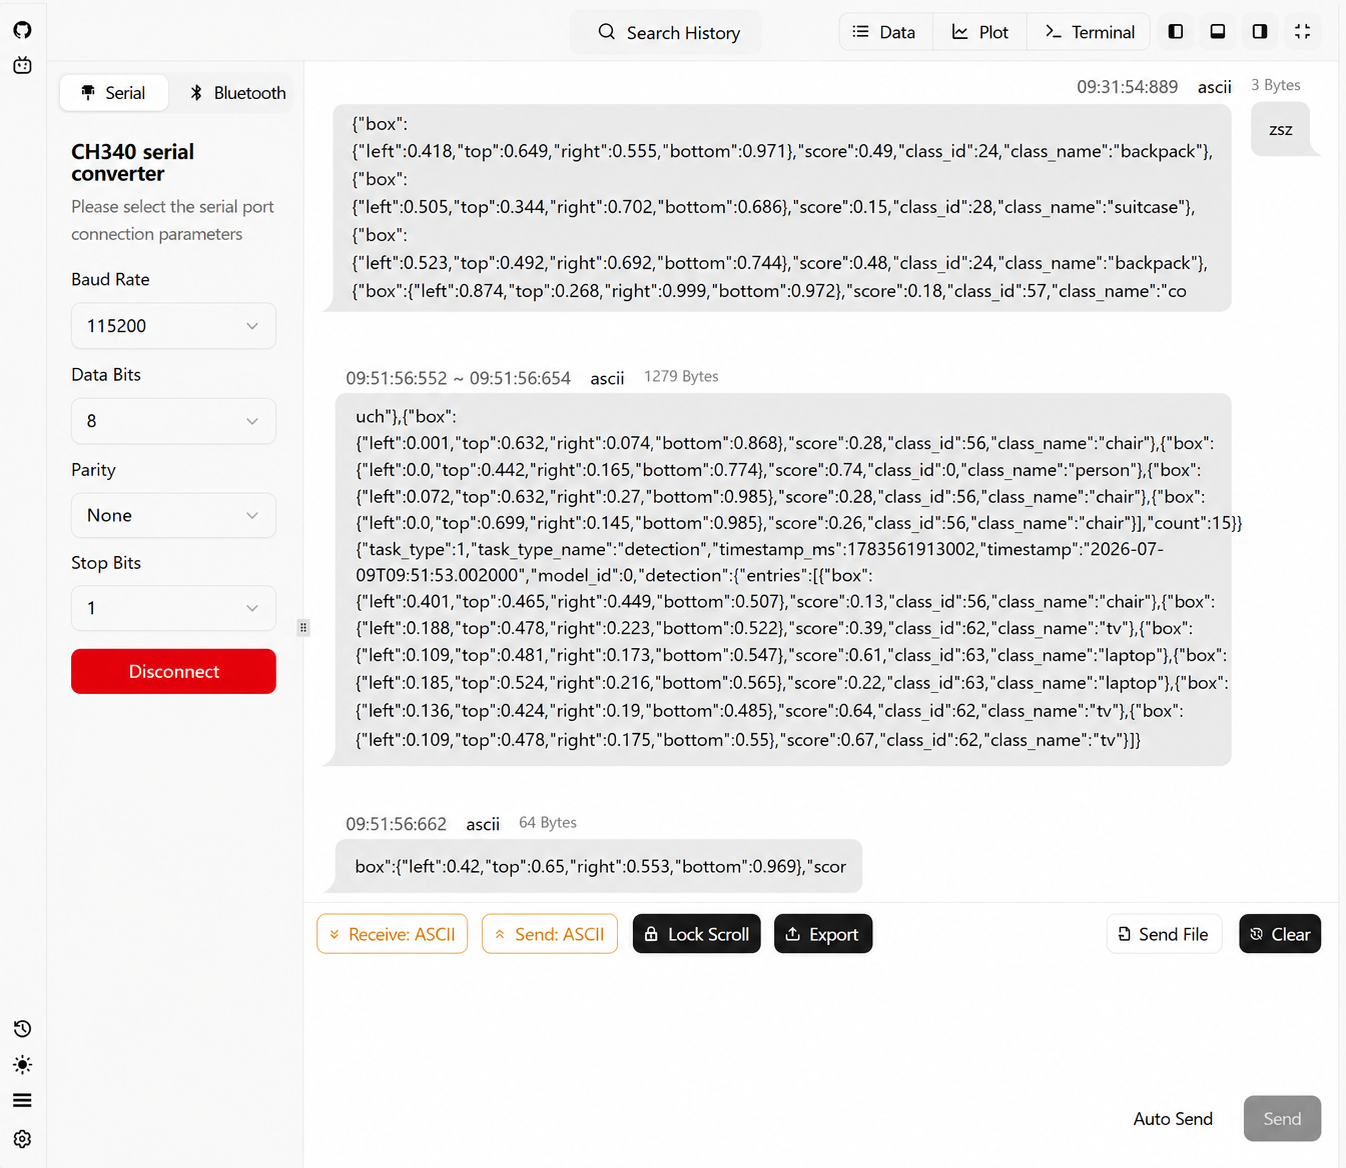
- In AI Inference → Output Method, select Serial Port.
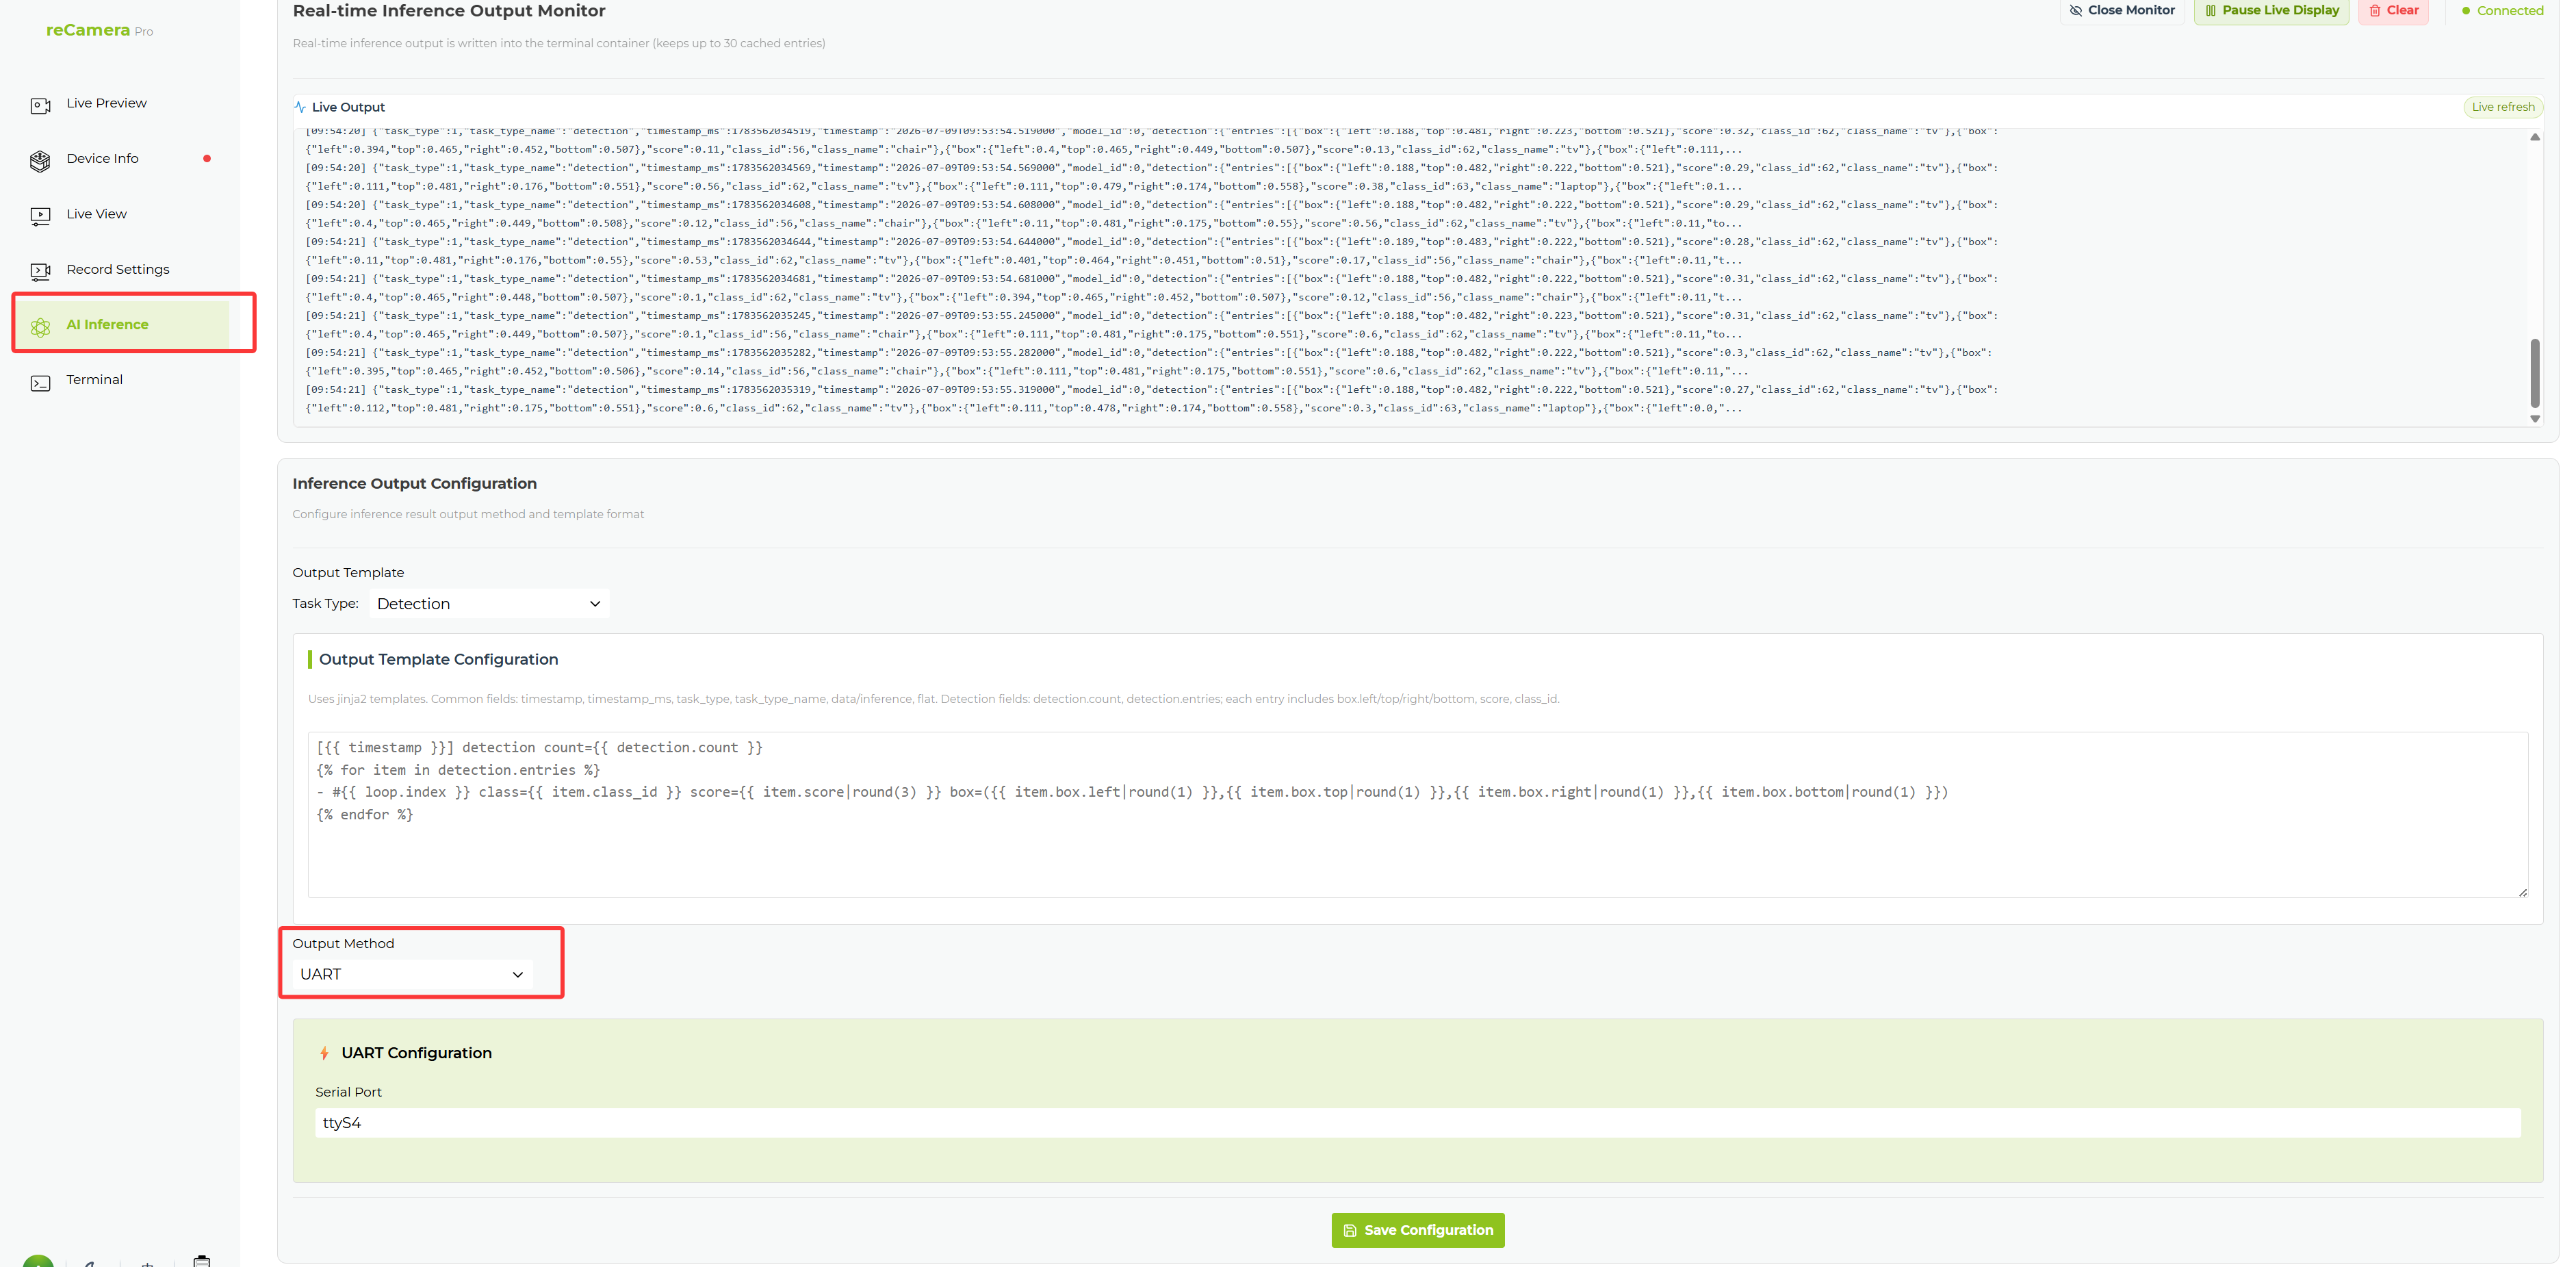
- Open your serial port tool to see the inference results.
GPIO trigger
GPIO trigger is configured in Recording Settings → Recording Configuration → GPIO Trigger:
| Configuration Item | Description |
|---|---|
| GPIO Pin Name | Select the GPIO pin |
| Pin State | Default pin state, e.g. floating |
| Trigger Signal | Trigger level, e.g. high level |
| Debounce Duration | Debounce time in milliseconds |
Suitable for integration with external sensors, buttons, door magnets, PIR sensors, or relays.
HTTPS trigger
HTTPS trigger is configured in Recording Settings → Recording Configuration → HTTPS Trigger. The page displays the HTTPS trigger address that external systems can call.
Suitable for integration with third-party platforms, alarm systems, or automation scripts.
Related pages
Tech Support & Product Discussion
Thank you for choosing our products! We are here to provide you with different support to ensure that your experience with our products is as smooth as possible. We offer several communication channels to cater to different preferences and needs.