How to Install Antenna for reComputer Super and Classic
This guide walks you through installing antennas on the reComputer Super series and the reComputer Classic series. The procedures differ between the two product lines, so please follow the section that matches your device.
reComputer Super Series
The Wi-Fi card in the reComputer Super has two antenna ports — one for the primary antenna and one for the auxiliary antenna. You can install one or both antennas.
What you need:
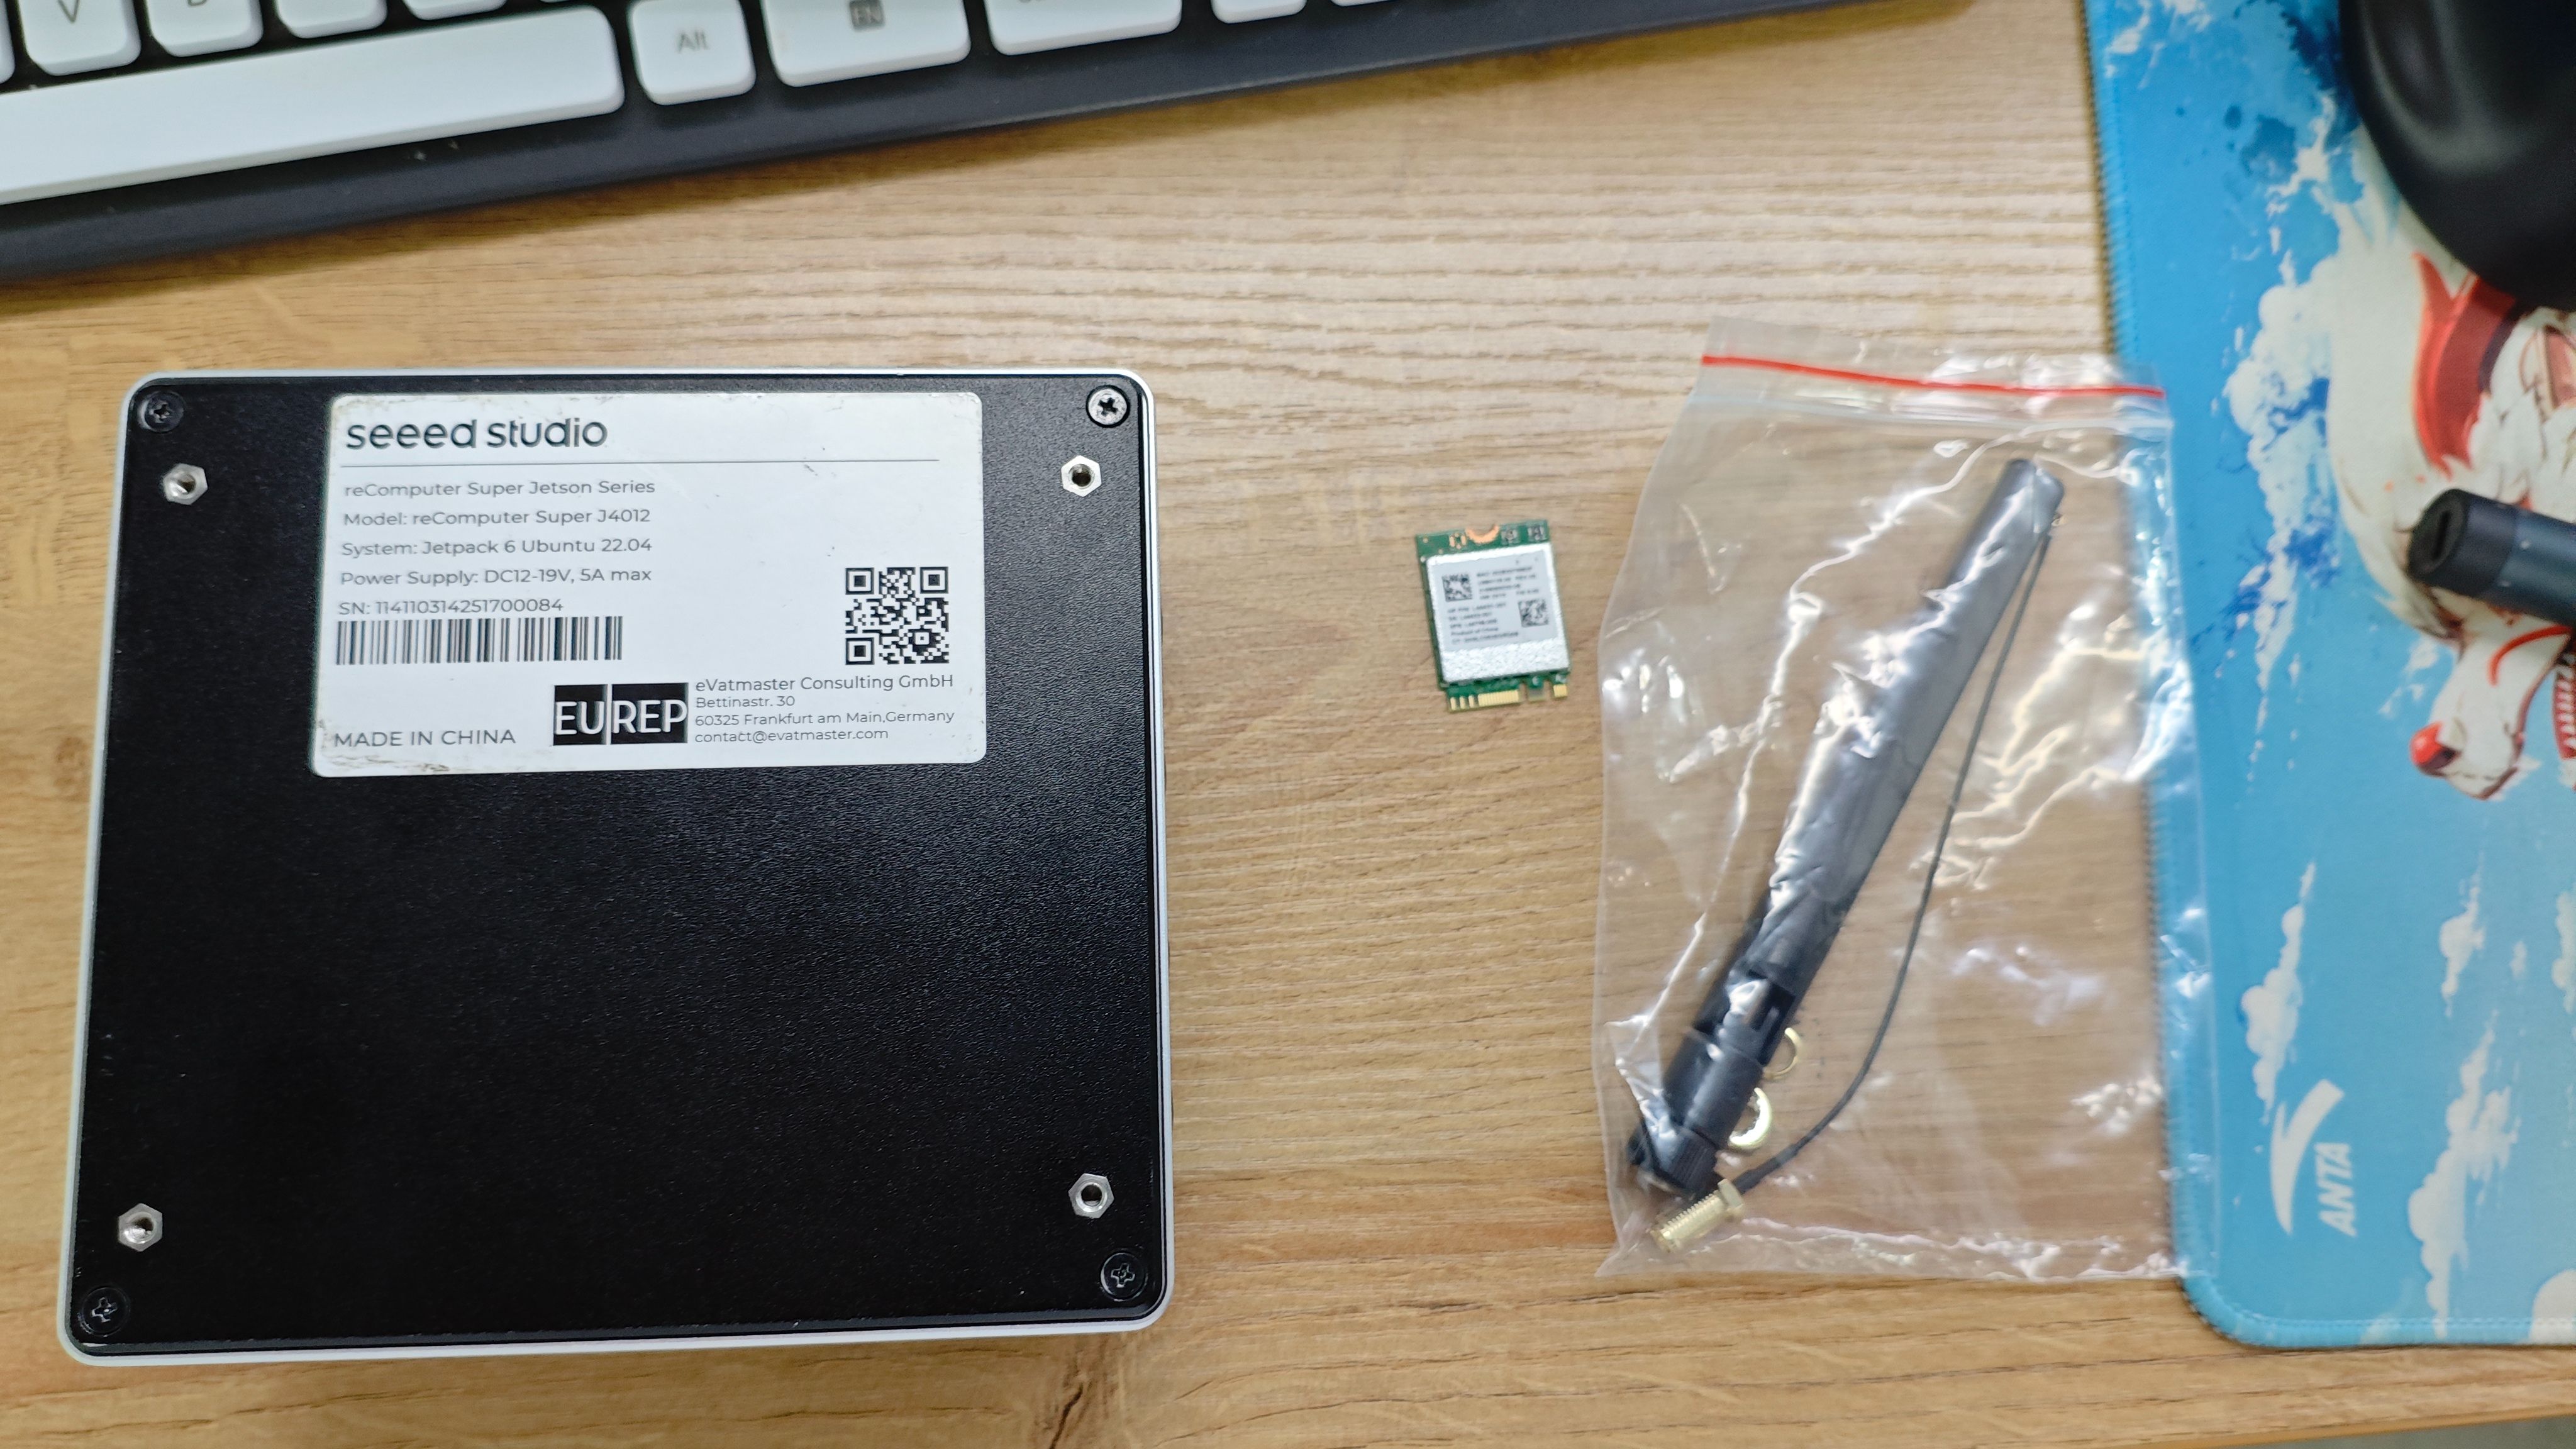
- reComputer Super unit
- M.2 Wi-Fi card (if not already installed)
- Antenna(s) with pigtail cable
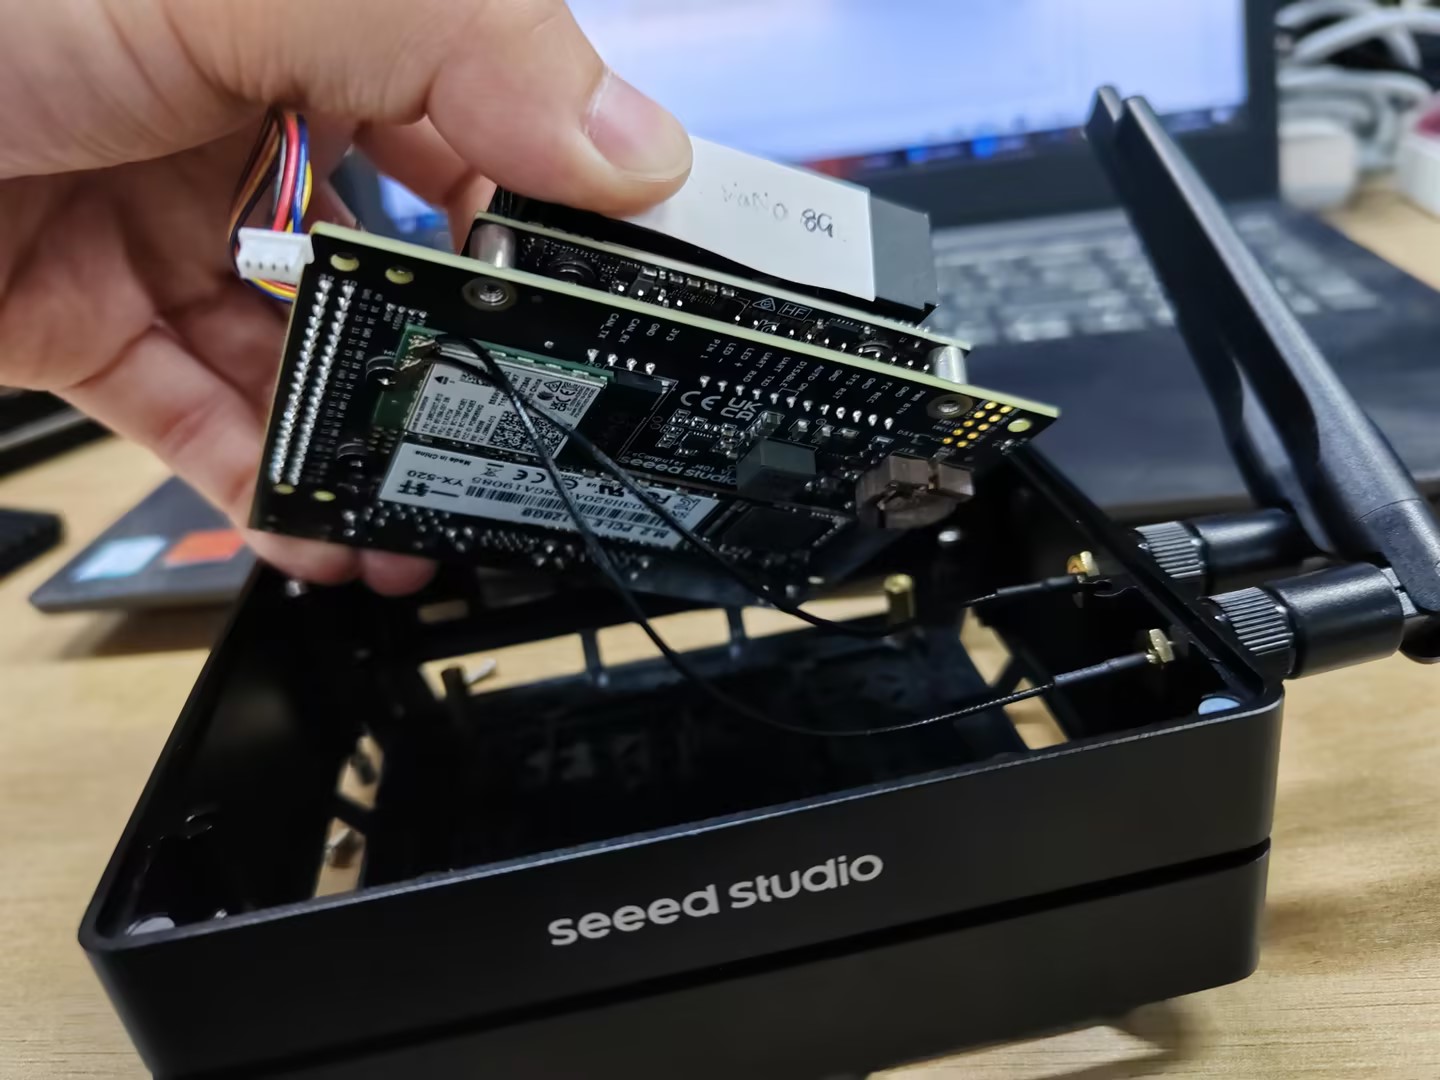
Step 1. Remove the bottom cover and install the Wi-Fi card.
Unscrew the bottom cover. If the Wi-Fi card is not yet installed, seat it into the M.2 slot on the carrier board now.
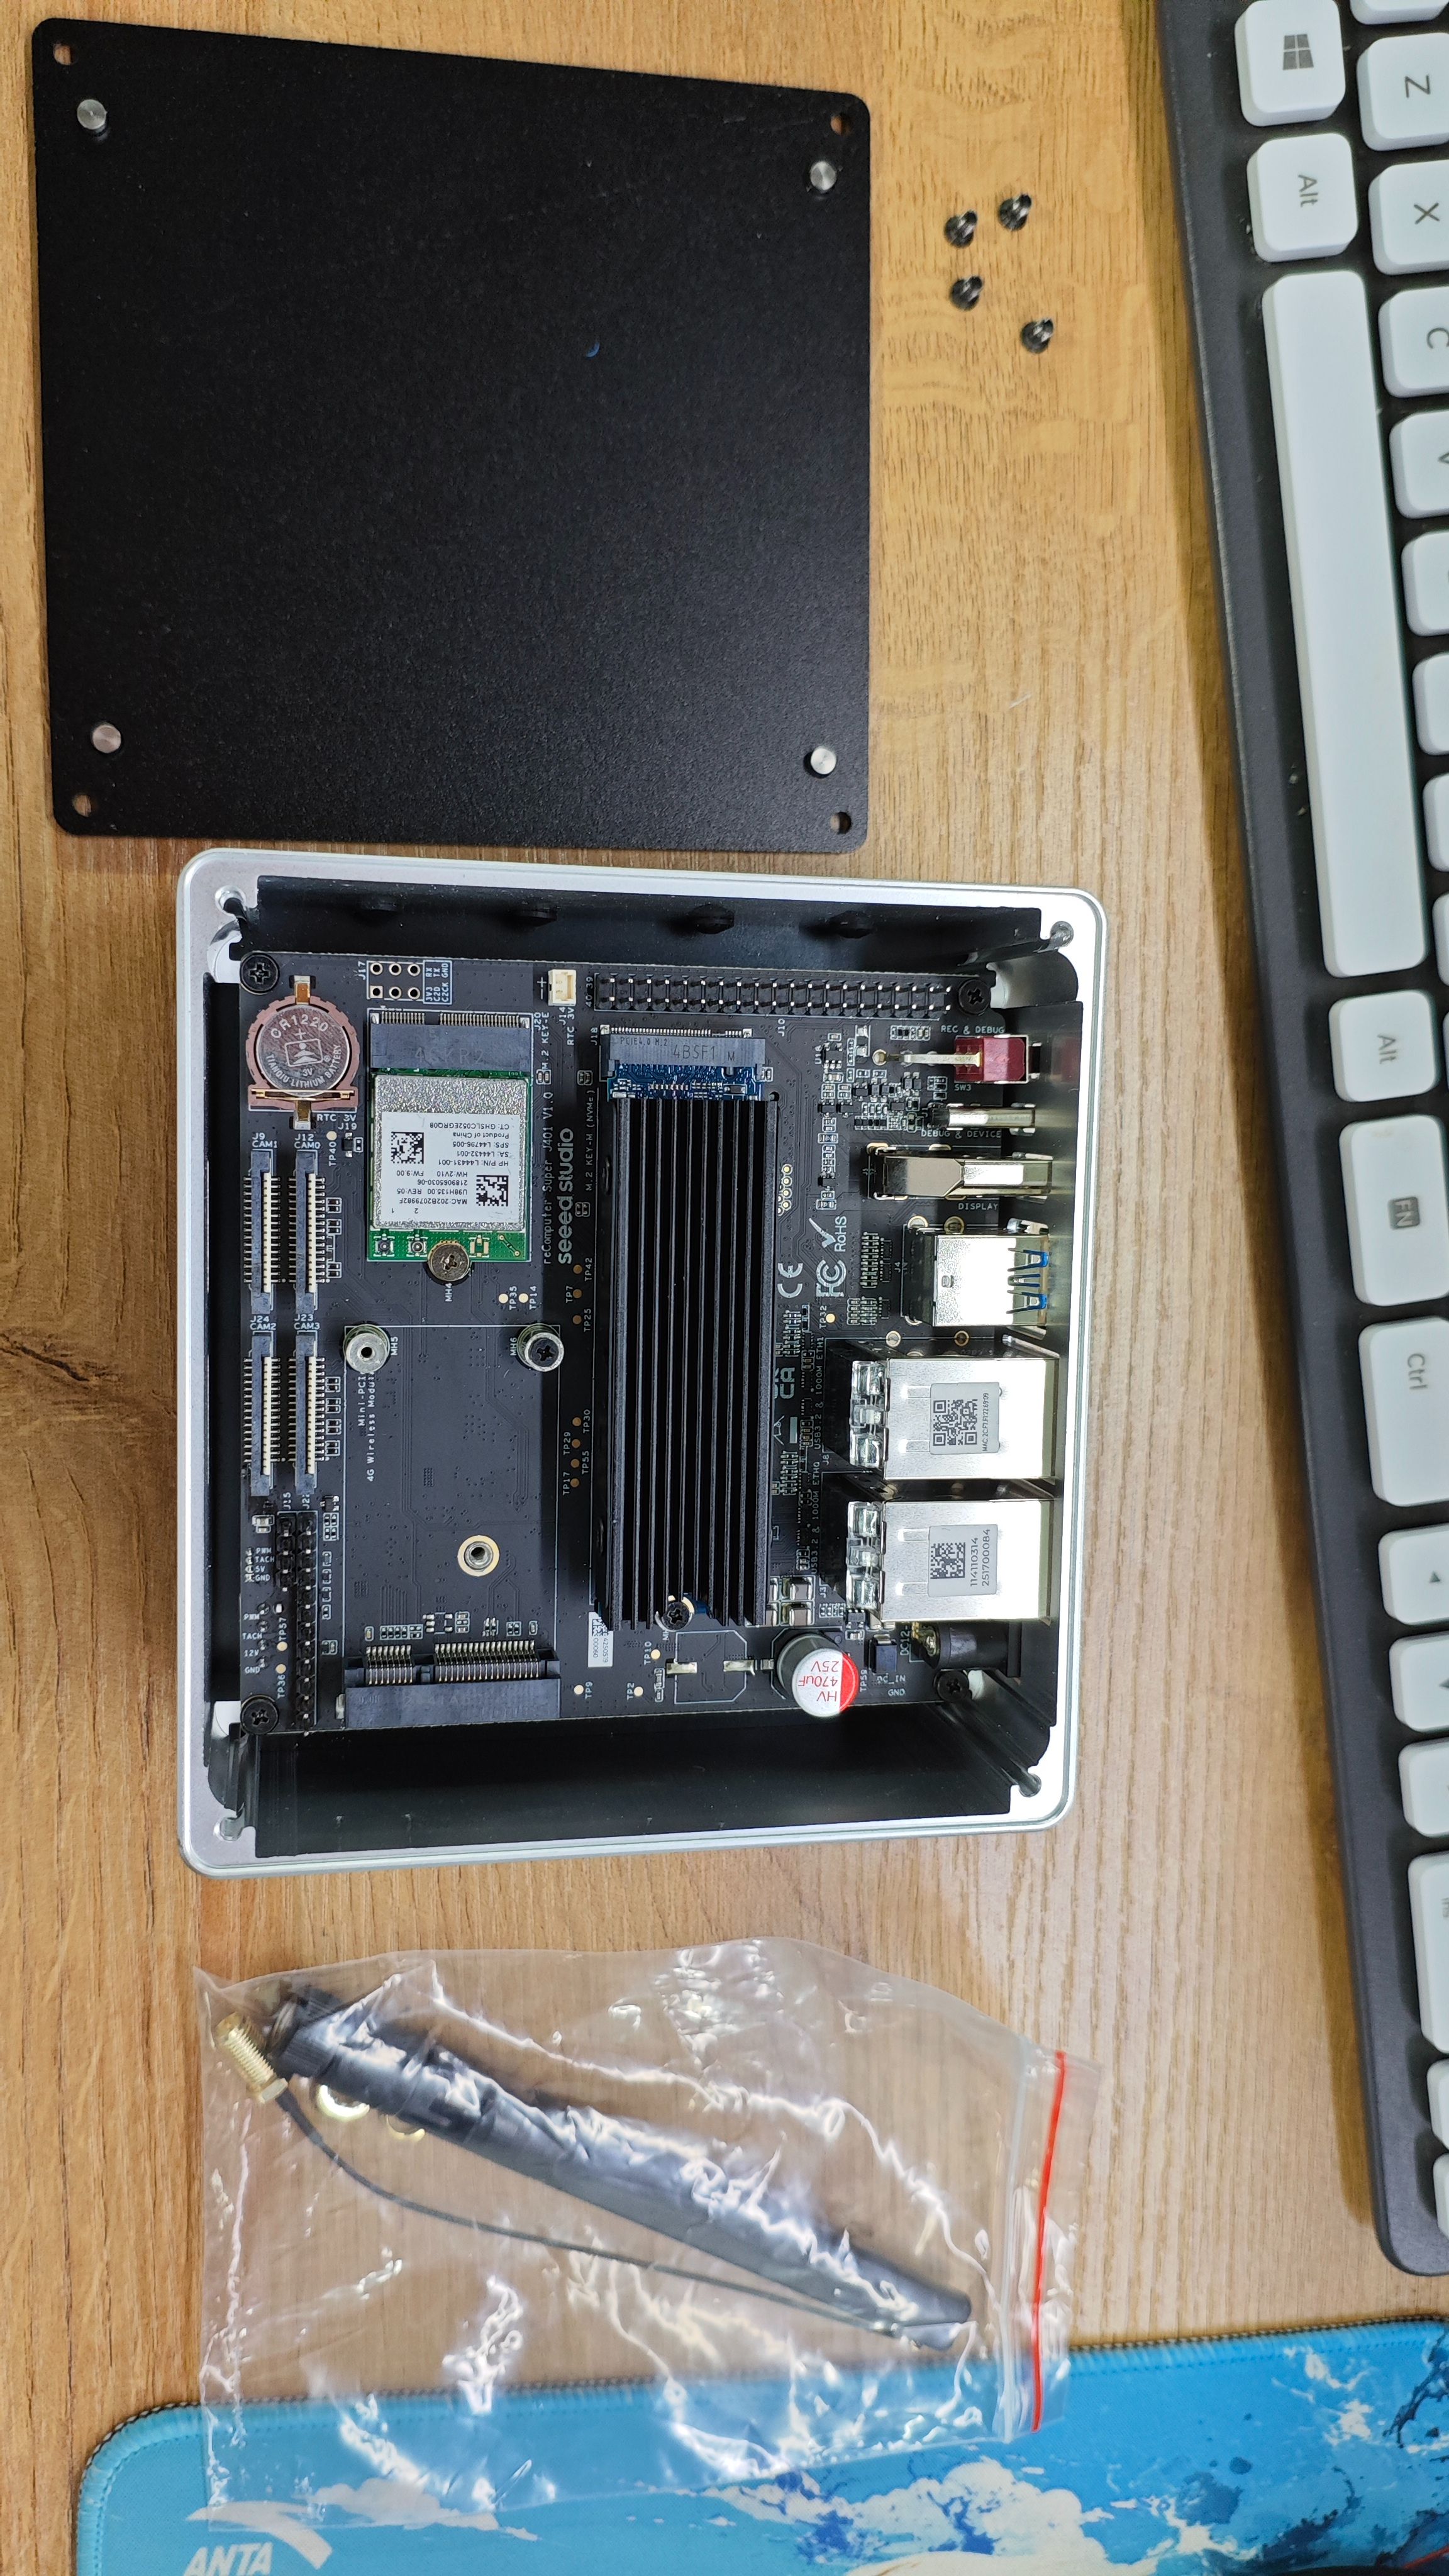
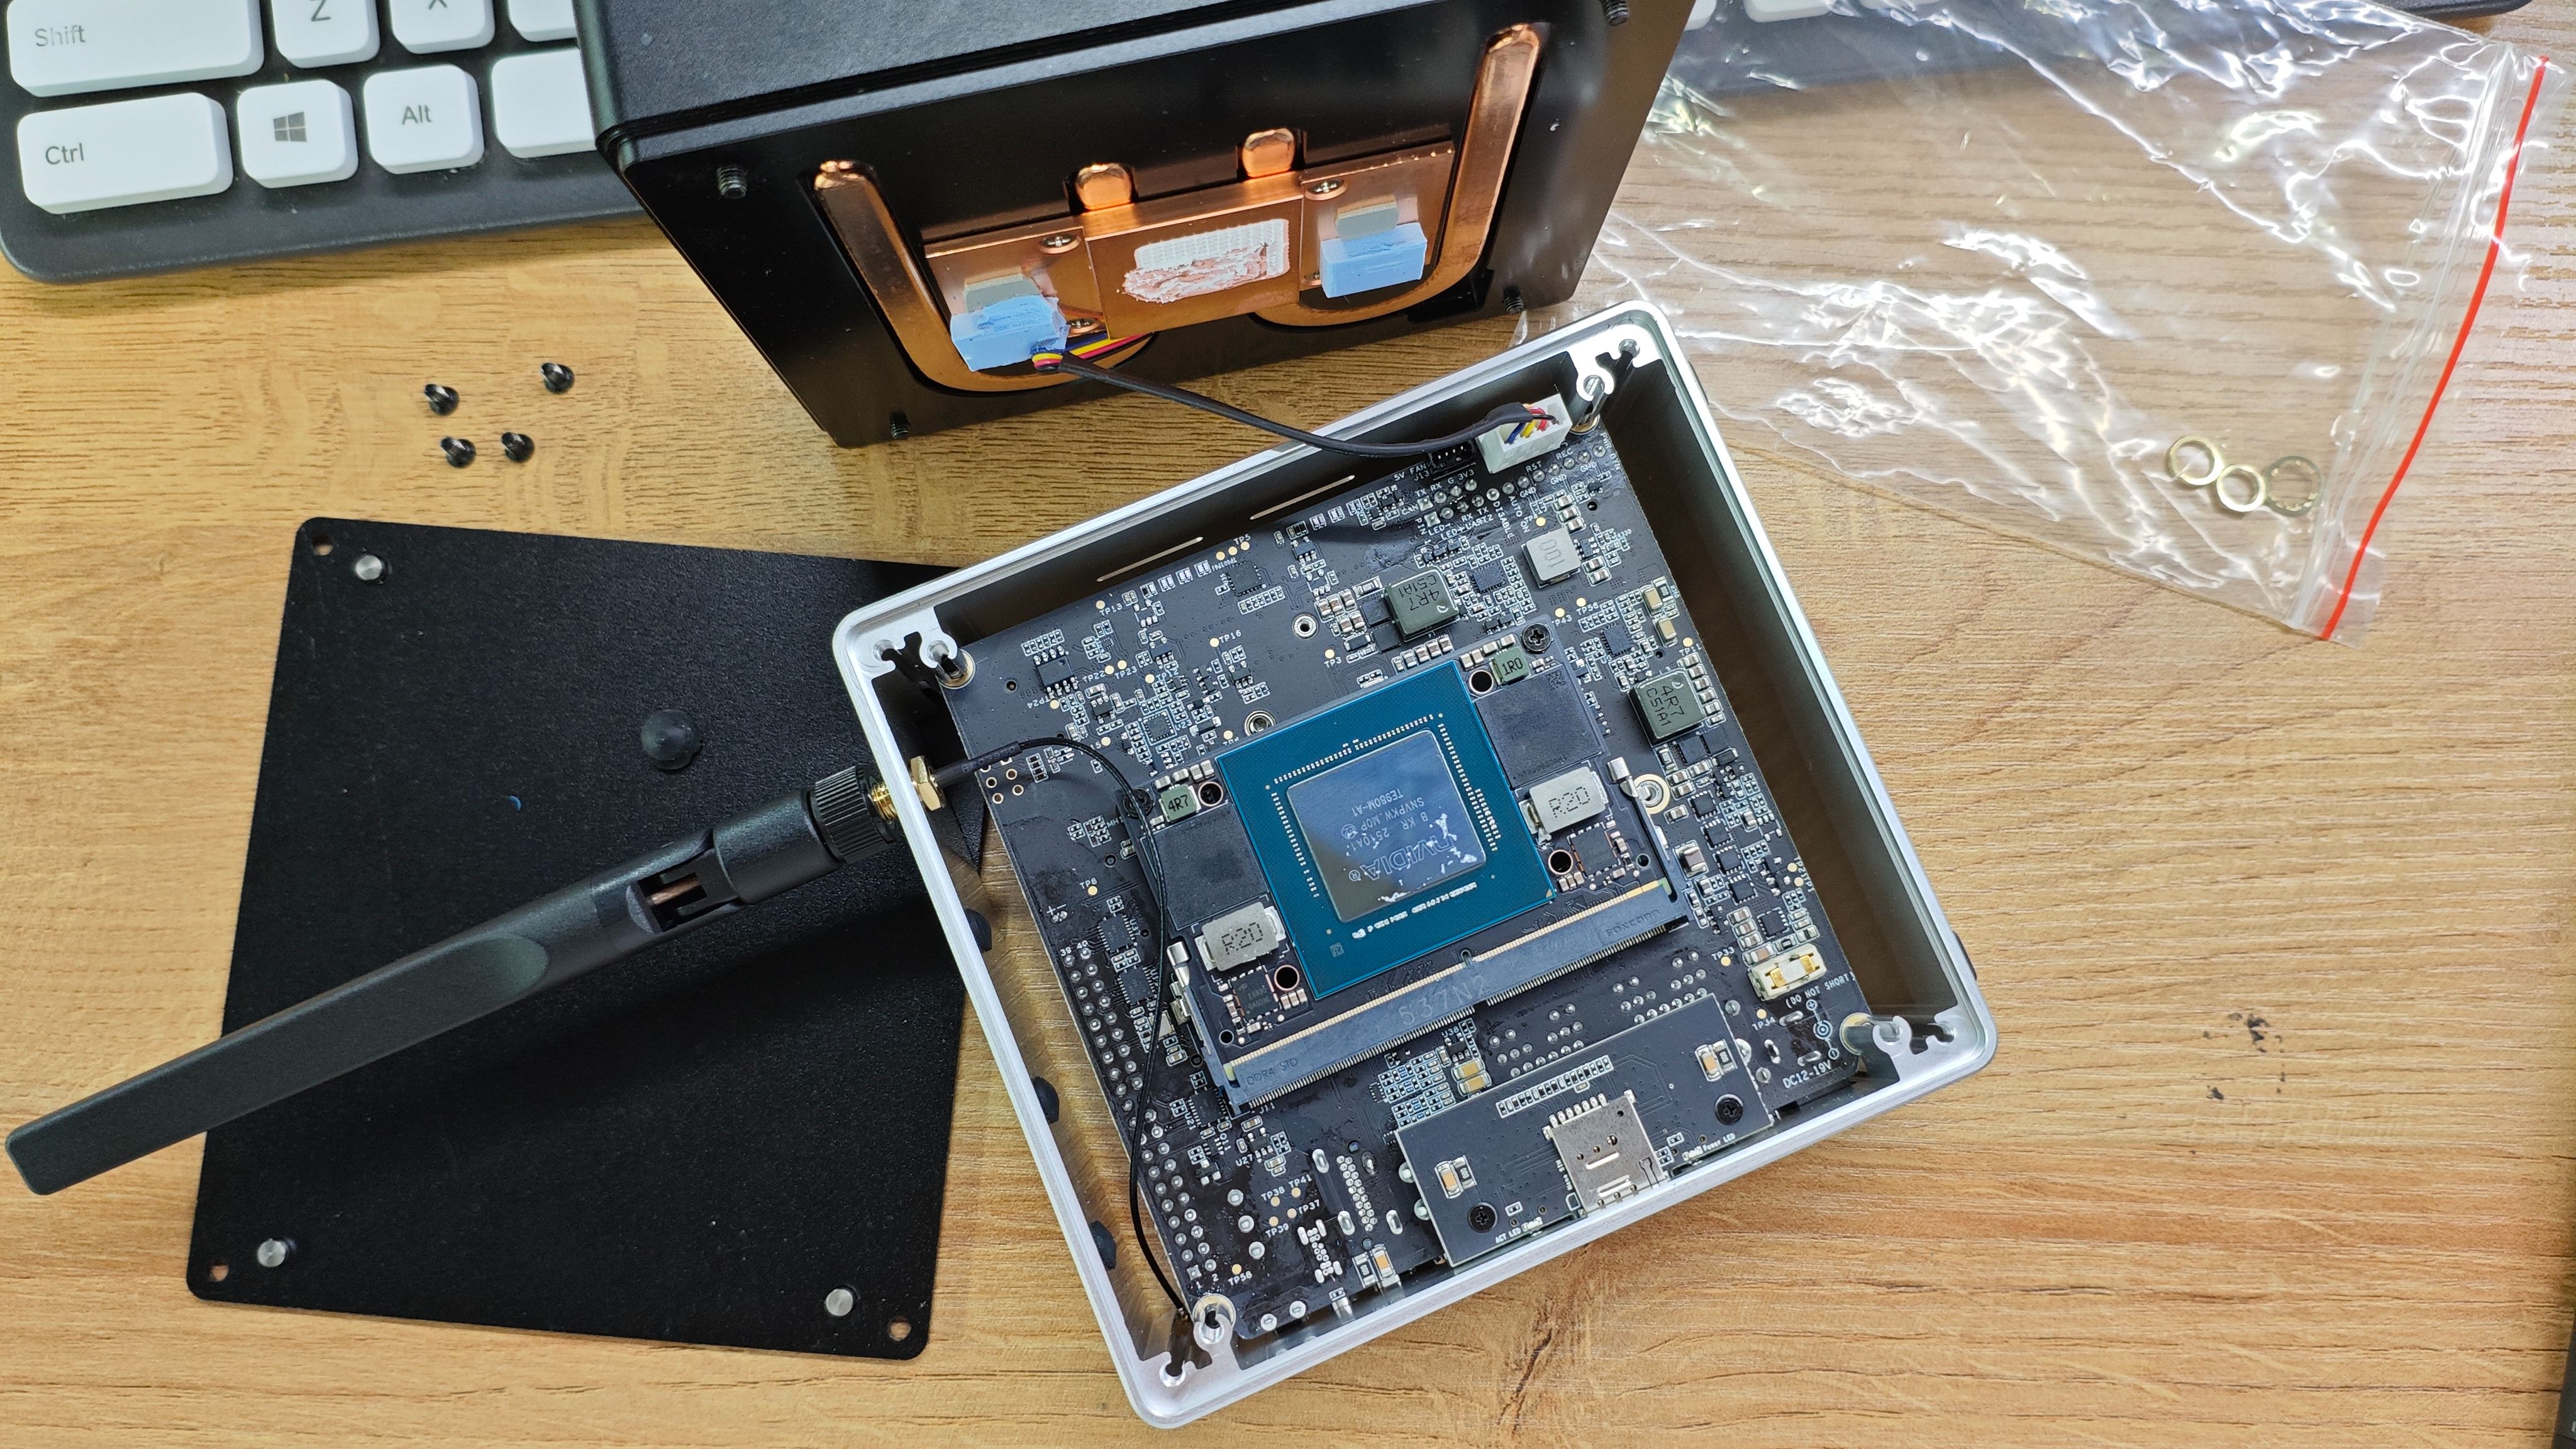
Step 2. Remove the top heatsink module.
Unscrew and lift off the top heatsink/fan assembly.

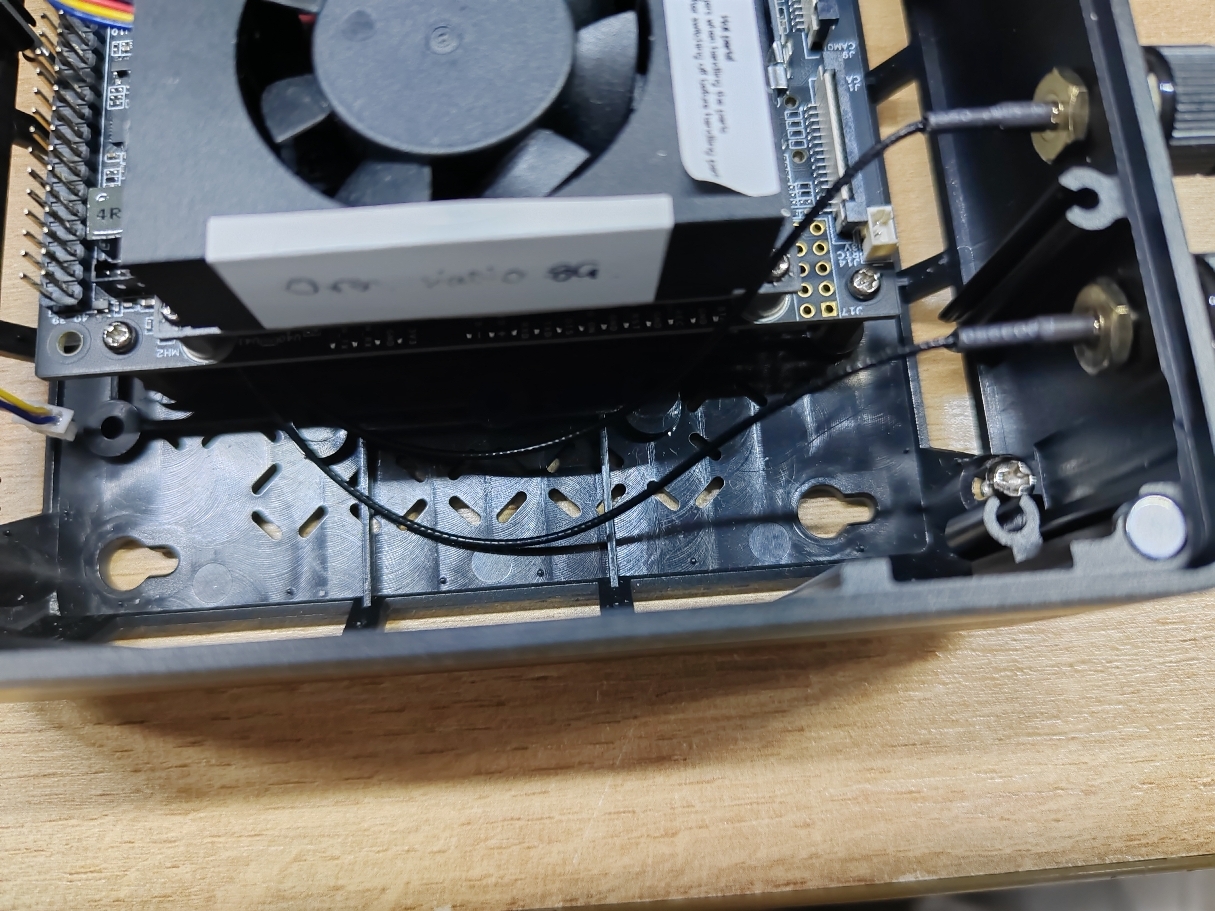
Step 3. Remove the rubber plug and thread the antenna through.
With the heatsink removed, locate the rubber plug on the rear panel of the chassis. Remove it and thread the antenna cable through the opening from the outside in.
Step 4. Connect the antenna to the Wi-Fi card, then reinstall the heatsink.
Snap the antenna cable connector onto the Wi-Fi card's antenna port. Repeat for the second antenna if needed. Then reinstall the heatsink module and the bottom cover.
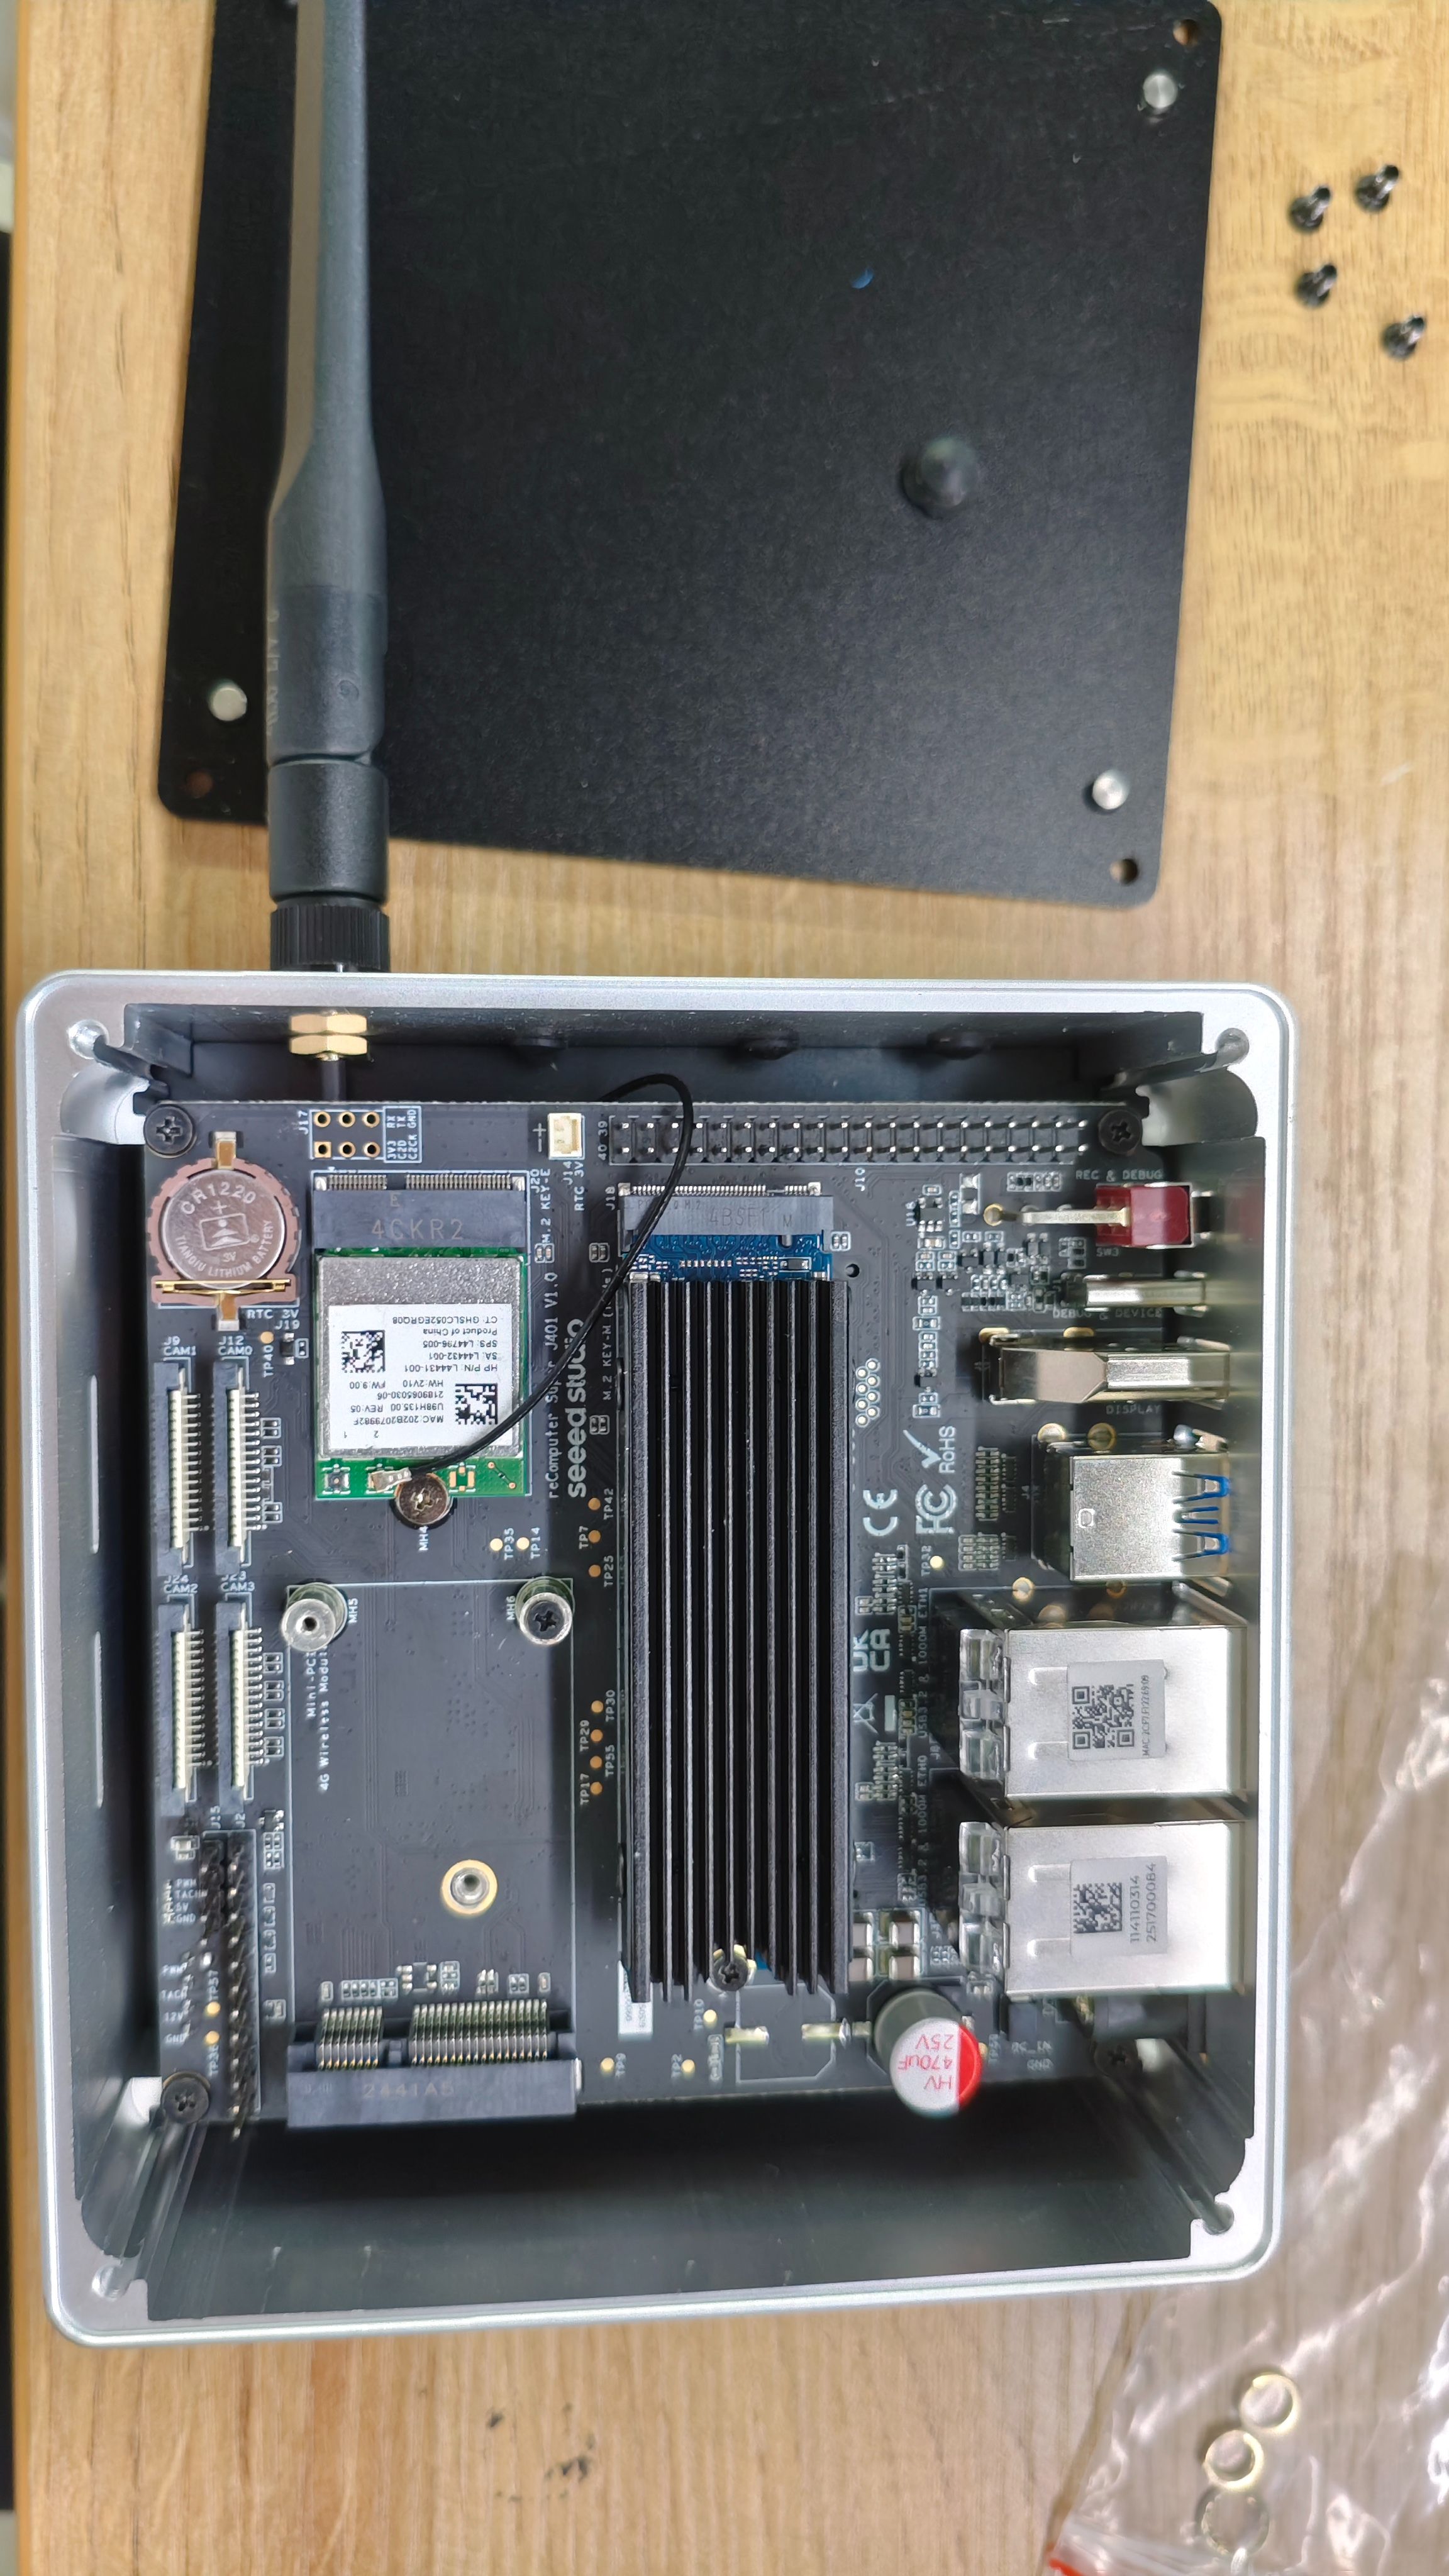
Both antenna ports on the Wi-Fi card are interchangeable — either cable can go to the primary or auxiliary port.
reComputer Classic Series
The reComputer Classic uses a carrier board with a 4G module mounted on its underside. The antenna cable must be routed carefully along the board edge when reassembling.
Step 1. Fix one end of the antenna to the chassis.
Thread the antenna connector through the opening on the back panel of the chassis and secure it in place.
Step 2. Remove the carrier board and connect the antenna to the 4G module.
Lift the carrier board out of the chassis. Connect the other end of the antenna cable to the 4G module on the back side of the carrier board.
Step 3. Reinstall the carrier board.
Carefully lower the carrier board back into the chassis. Make sure the antenna cable runs along the edge of the board — do not let it get pinched under the board.
Route the antenna cable along the side edge of the carrier board before closing the chassis. If the cable is pinched or kinked it may affect signal quality.
Tech Support & Product Discussion
Thank you for choosing our products! We are here to provide you with different support to ensure that your experience with our products is as smooth as possible. We offer several communication channels to cater to different preferences and needs.