AWS IoT Core Intergate With reComputer R1000
Introduction
AWS IoT Core is a service that assists in securely connecting and managing Internet of Things (IoT) devices. It enables devices to communicate with each other and with the cloud, facilitating the development of smart and connected applications. AWS IoT Core streamlines the integration of IoT devices into the broader AWS ecosystem, offering a reliable and scalable platform for building IoT solutions. In this guide, we will discuss how to connect our reComputer R1000 to the AWS IoT cloud.
Getting Start
Before you start this project, you may need to prepare your hardware and software in advance as described here.
Hardware Preparation
| reComputer R1000 |
|---|
 |
Create AWS Account
If you don't have an AWS account, you can easily create one. Please follow this link for guidance on how to set up your account.
Register the device
- Step 1: Search IoT core and navigate to it.
- Step 2: Next in the side bar navigate to Manage topic and under All Devices go to Things.
What is a Thing? AWS IoT refers to Internet of Things (IoT) devices as "things" on the AWS platform. Each IoT device, such as the reComputer R1000 Device in this context, is represented as a "thing" in AWS. Importantly, once created, the name of a "thing" cannot be changed.
- Step 3: Next press on Create things
- Step 4: We are going to create for single reComputer R1000 Device. So click Create Single Thing.
- Step 5: Give a Thing name.
- Step 6: Also A thing type for your reference in the future
What is a Thing Type?
Thing types enable you to store descriptions and configuration information that are common to all things associated with the same thing type. This simplifies the management of things in the registry. For instance, you can define a 'Factory_HMI' thing type. For this demonstration we used edge_controller as a thing type.
- Step 7 : Generate Certificates
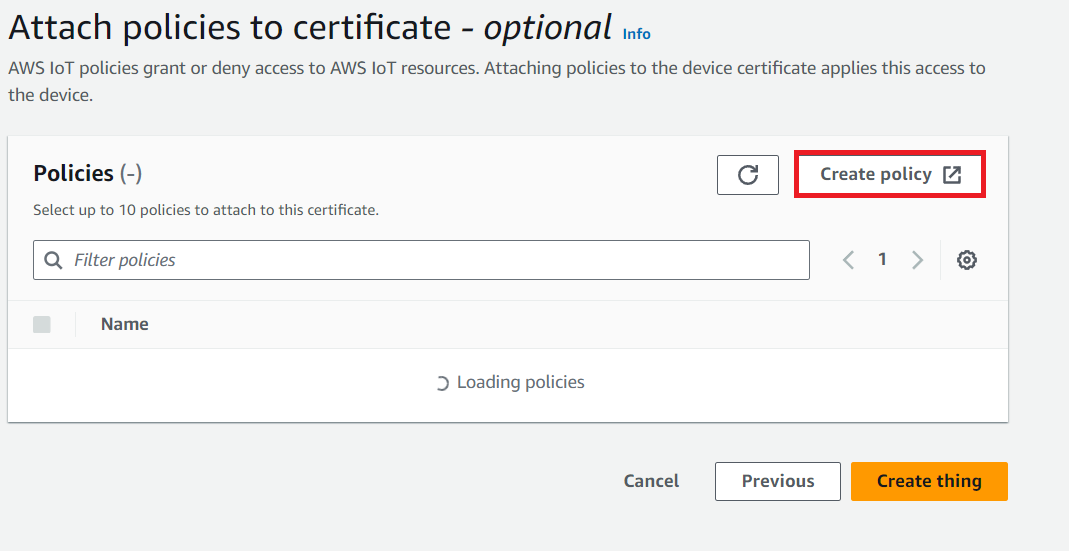
- Step 8: To Attach policies you need to create. click on Create policy
AWS IoT Core policies are JSON documents following IAM policy conventions. They support named policies, enabling multiple identities to reference the same policy document. Named policies are versioned for easy rollback. These policies provide control over access to the AWS IoT Core data plane, encompassing operations such as connecting to the AWS IoT Core message broker, sending/receiving MQTT messages, and accessing or updating a thing's Device Shadow.

- Step 9: Give an appropriate name to the policy and set policy effect Policy action and Policy resources as following.
The policy includes:
Effect: Specifies whether the action is allowed or denied.
Action: Specifies the specific action that the policy permits or denies.
Resource: Specifies the resource or resources on which the action is allowed or denied.
- Step 10: Attach Policy by policy that you made and press Create thing
- Step 11:Next you can download certificates and keys. Make sure to download Device certificate, Private and Public keys and Root CA certificate.
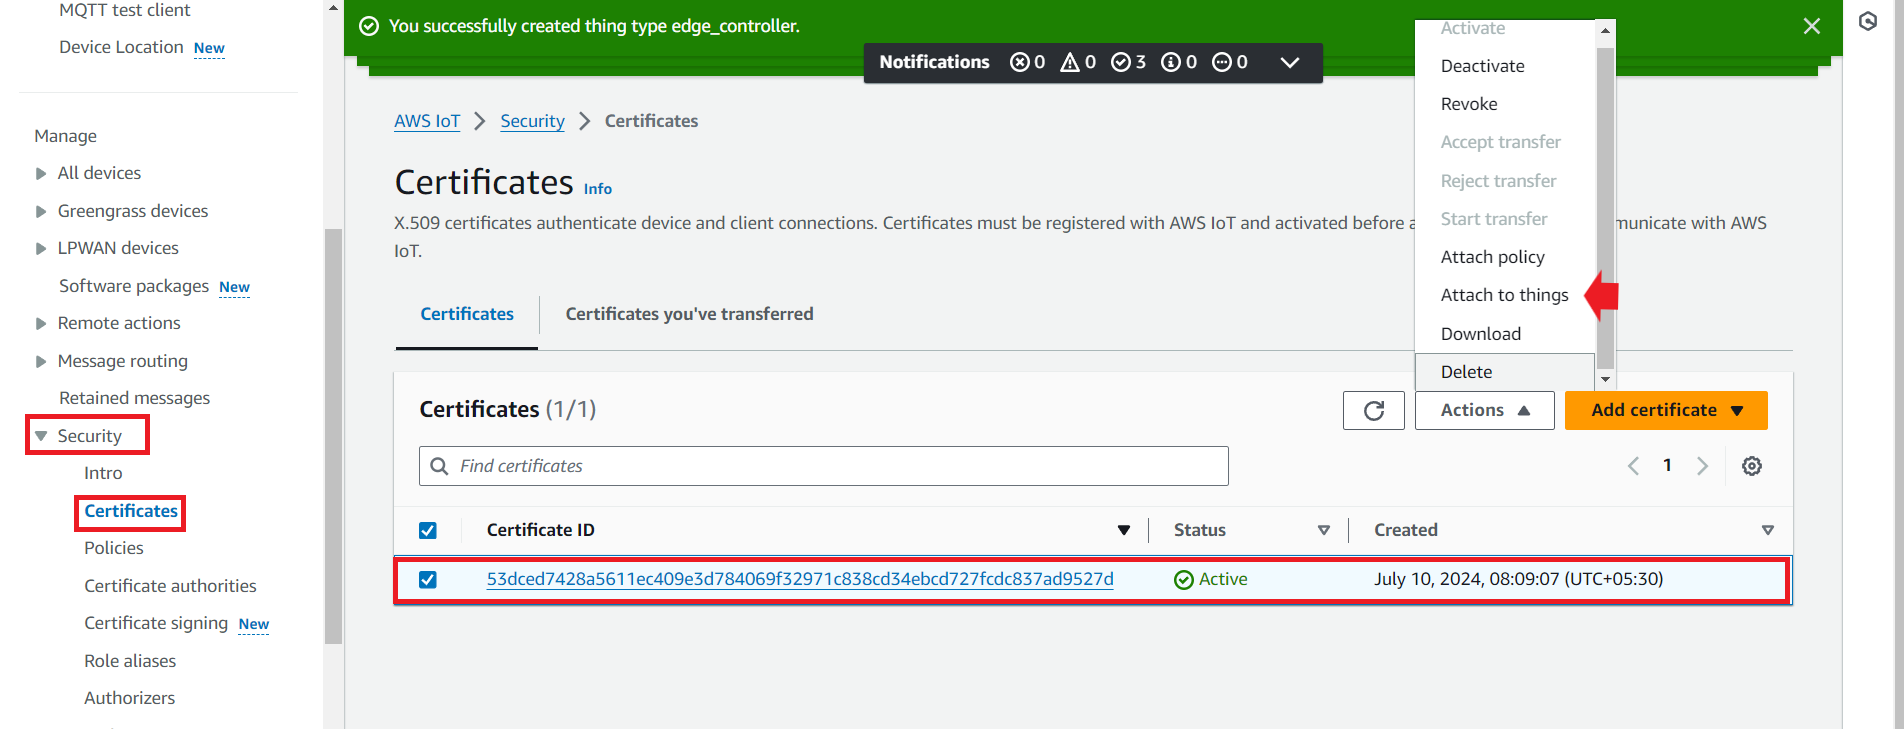
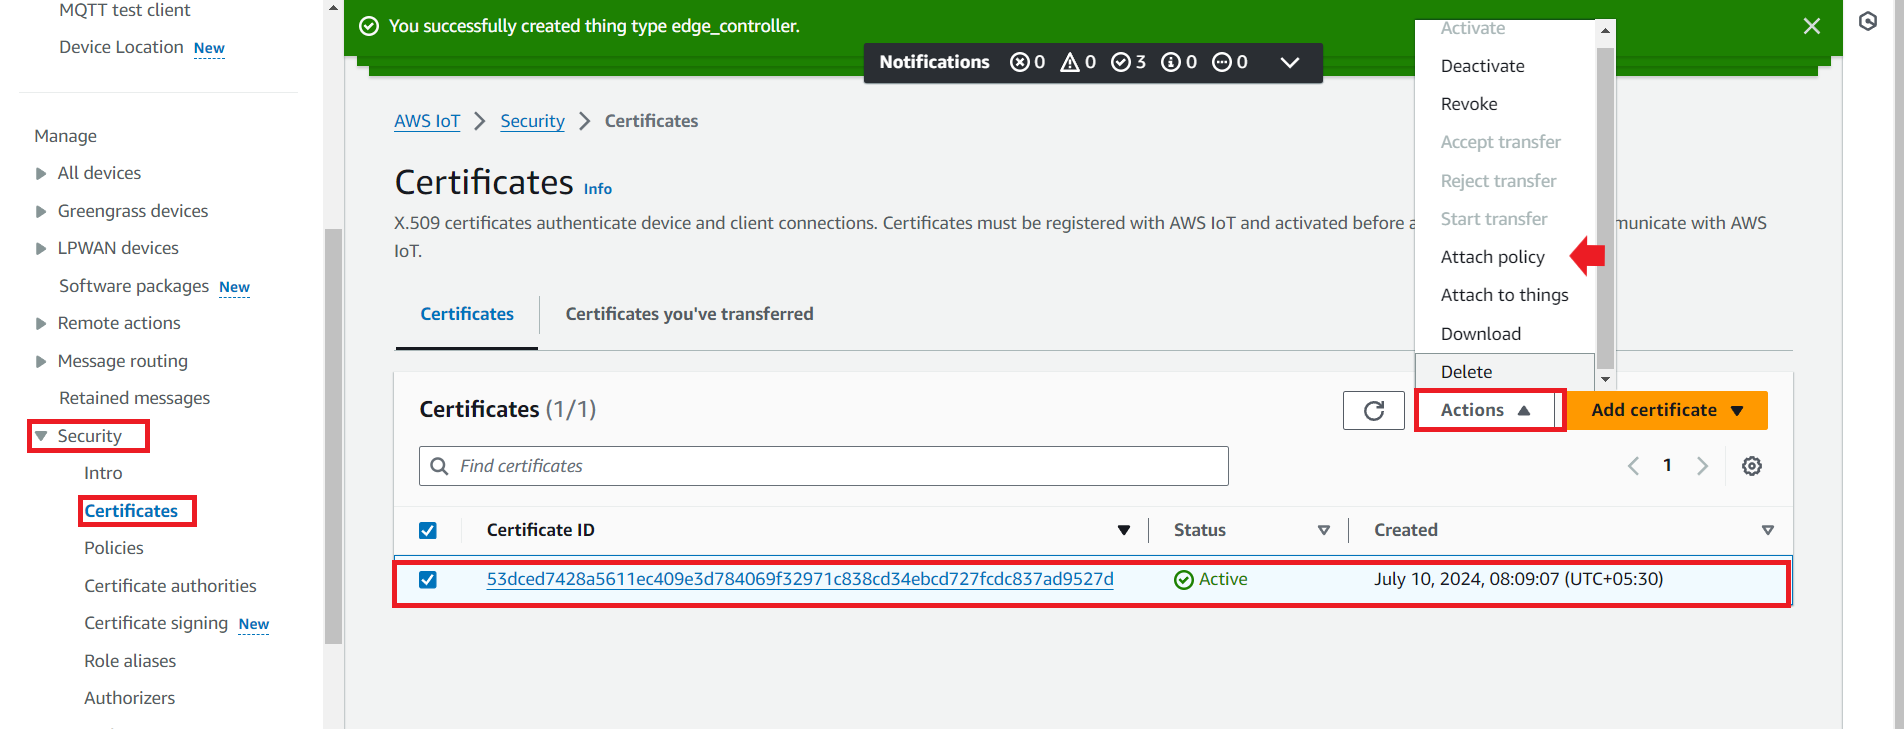
- Step 12 : Attach to the thing (reComputer R1000) For that go to Security >> Certificates
When you create and enroll a certificate independently from an AWS IoT thing, it lacks policies for AWS IoT operations and isn't associated with any thing object. This explains how to establish these connections for a registered certificate. The certificate authenticates the device with AWS IoT for connection. Linking the certificate to a thing resource creates the relationship between the device (via the certificate) and the thing resource. To grant the device permission for AWS IoT actions, such as connecting and publishing messages, it's essential to attach a suitable policy to the device's certificate.
After selecting the thing that you made from Actions drop down menu then press Attach to thing.

- Step 13: Attach the policy also.

Prepare reComputer R1000
- Step 01:Create a Virtual Environmnet. Execute these commands one by one, and you will end up with a virtual environment.
mkdir AWS_project
cd AWS_project
python -m venv --system-site-packages env
source env/bin/activate
- Step 02: Install Mqtt library
pip3 install "paho-mqtt<2.0.0"
Run the code
To accomplish this, download our test Python file. Ensure that your device certificates, key files (public and private keys), root access file, and this Python file are in the same folder on your Device. Additionally, you need to modify the connection URL.
To do that :
- Step 01: Go to Settings
- Step 02 : Then you will find the URL
- Step 03 : Replace those file names with yours and run the file
- Step 04 : Direct to the folder and Run the file.
Test the Connection
Go to MQTT test Client under the Test tab and type the topic name to subscribe. In this case it is device/data.
The output is some thing like this. The massage from reComputer-R1000 is pop up in the console.
Tech Support & Product Discussion
Thank you for choosing our products! We are here to provide you with different support to ensure that your experience with our products is as smooth as possible. We offer several communication channels to cater to different preferences and needs.