reComputer R1000 with Home Assistant
Introduction
The reComputer r1000, designed for Building Automation Systems, features multiple isolated RS485 channels that support both high and low-speed communication. It is compatible with BACnet, Modbus RTU, and Modbus TCP/IP protocols, making it versatile for various automation needs. This guide provides a concise introduction to installing Home Assistant on the reComputer r1000, enabling seamless integration and control of your smart home devices.
Home Assistant is a free and open-source software for home automation, serving as a central control system or smart home hub for various devices. Designed with local control in mind, it ensures your Building Management System (BMS) operates independently of remote servers or internet connections, enhancing security and reliability. This means your BMS can run 24/7 without the vulnerabilities associated with cloud-connected devices, providing a robust and secure automation solution.
Getting Start
Before you start this project, you may need to prepare your hardware in advance as described here.
Hardware Preparation
| reComputer R1000 |
|---|
 |
During the HA installation process, we tested using wireless connectivity.
Software Preparation
The reComputer comes with a pre-installed Bookworm 64 bit version. This guide covers the steps for installing Home Assistant Supervised on that system.
Why Home Assistant Supervised?
There are a few methods to install Home Assistant on your reComputer. You can opt for a full installation of Home Assistant, or if you plan to run Home Assistant alongside other applications on top of your operating system, the supervised method is ideal. Another option is to use Docker, but this requires setting up separate Docker containers as add-ons. This guide focuses on the more complex installation process of the Supervised method. Don't worry—we'll walk you through it step by step.
Home Assistant Supervised Installation - Bookworm
Step 1: Update and Install Dependencies
sudo apt update
sudo apt-get install -y jq wget curl udisks2 apparmor-utils libglib2.0-bin network-manager dbus systemd-journal-remote systemd-resolved
Step 2: Start and Enable Network Manager
Check the status of Network Manager
sudo systemctl status NetworkManager.service
NetworkManager does not start, start and enable
sudo systemctl start NetworkManager
sudo systemctl enable NetworkManager
Step 3: Modify Boot Parameters
Edit the cmdline.txt file:
sudo nano /boot/firmware/cmdline.txt
Add the following at the end of the line:
systemd.unified_cgroup_hierarchy=false lsm=apparmor
Reboot the system:
sudo reboot
Step 4: Install Docker
sudo curl -fsSL get.docker.com | sh
sudo gpasswd -a $USER docker
newgrp docker
Step 5: Install OS Agent
wget https://github.com/home-assistant/os-agent/releases/download/1.6.0/os-agent_1.6.0_linux_aarch64.deb
sudo dpkg -i os-agent_1.6.0_linux_aarch64.deb
Step 6: Install Home Assistant Supervised
wget https://github.com/home-assistant/supervised-installer/releases/download/1.6.0/homeassistant-supervised.deb
sudo dpkg -i homeassistant-supervised.deb
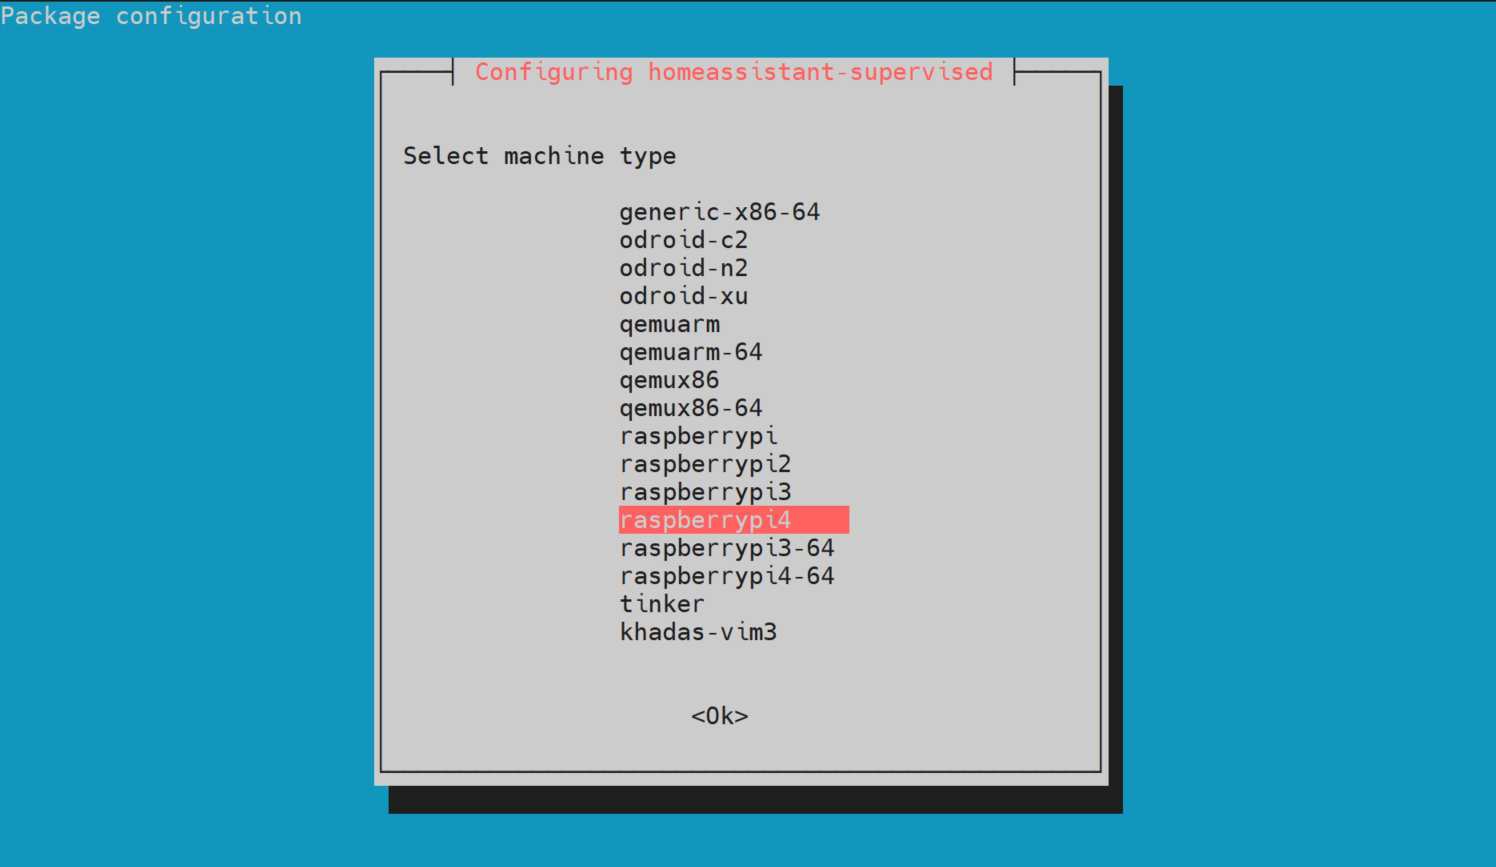
Upon successful correction, a blue screen will appear, allowing you to select Raspberry Pi4 64 model.
After a few minutes, the installation will begin.
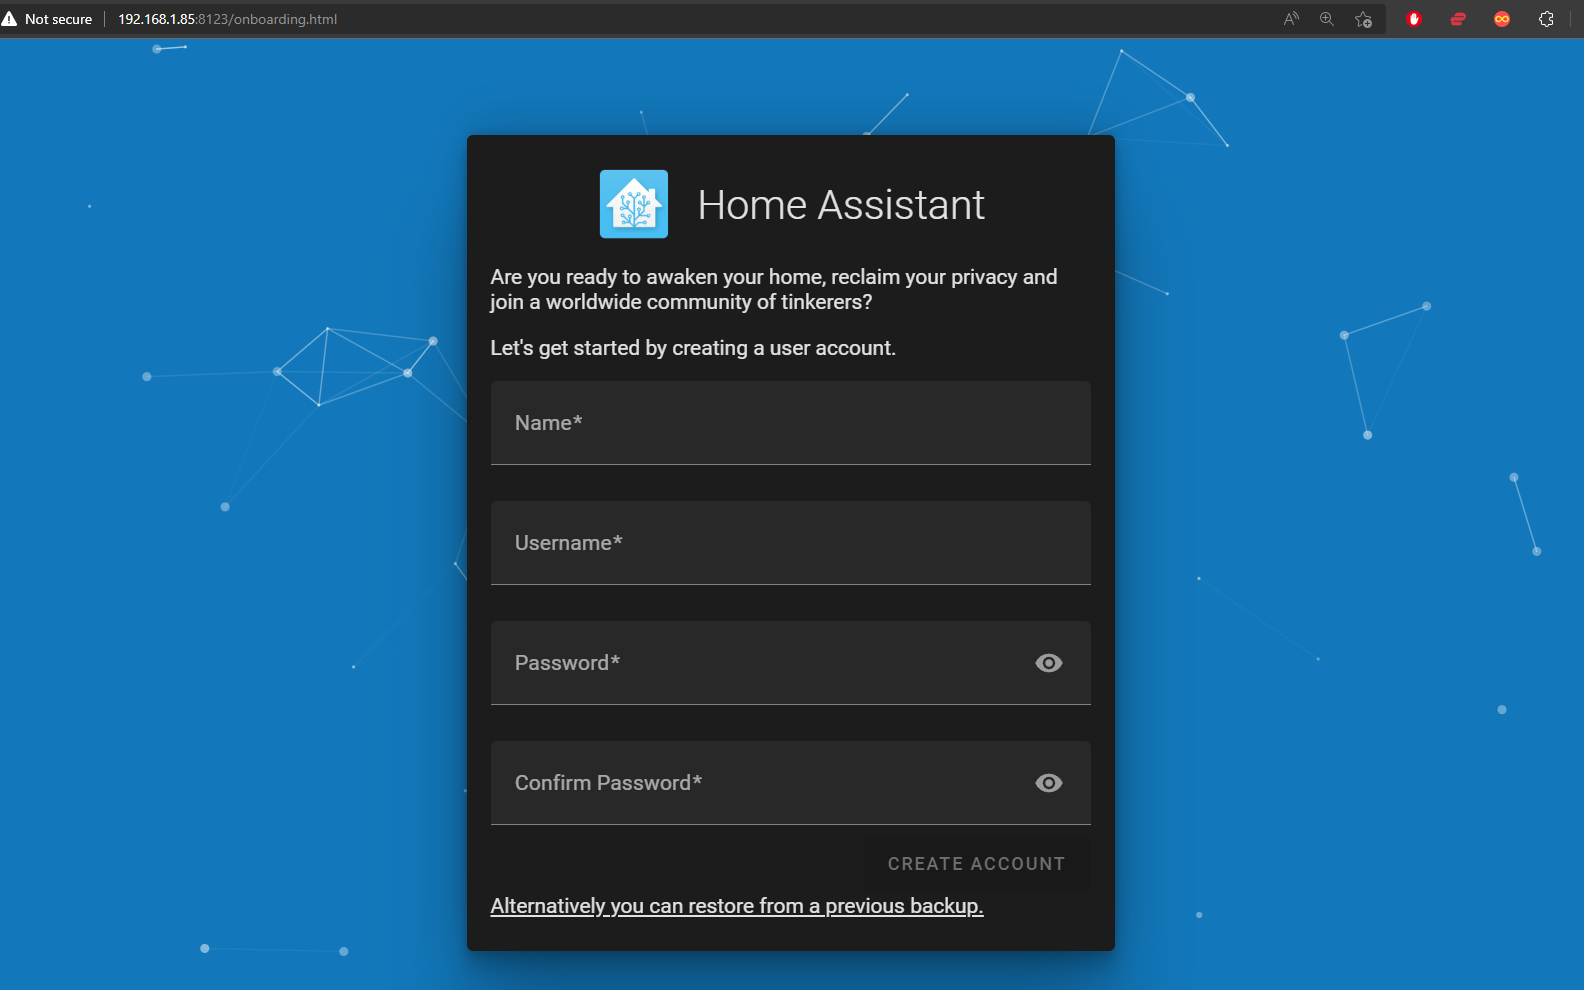
You can then view the Home Assistant Dashboard UI on a web browser using <your_recomputer_ip>:8123.
It will take some time to finish the initial startup process. Once it has finished starting up, create an account and follow the initial setup instructions
If there are warnings in notifications, please reboot the reComputer.
Tech Support & Product Discussion
Thank you for choosing our products! We are here to provide you with different support to ensure that your experience with our products is as smooth as possible. We offer several communication channels to cater to different preferences and needs.