How to install CODESYS for reComputer R1000
Introduction
CODESYS is a popular automation software development platform widely used in industrial control and automation systems. Its full name is Controller Development System, which was first developed by the German company 3S-Smart Software Solutions. This article mainly introduces how to download and install CODESYS, and finally deploy the CODESYS project to reComputer R1000
Before you start this project, you may need to prepare your hardware and software in advance as described here.
Hardware Preparation
| reComputer R1000 |
|---|
 |
Software Preparation
Getting Start
Install CODESYS
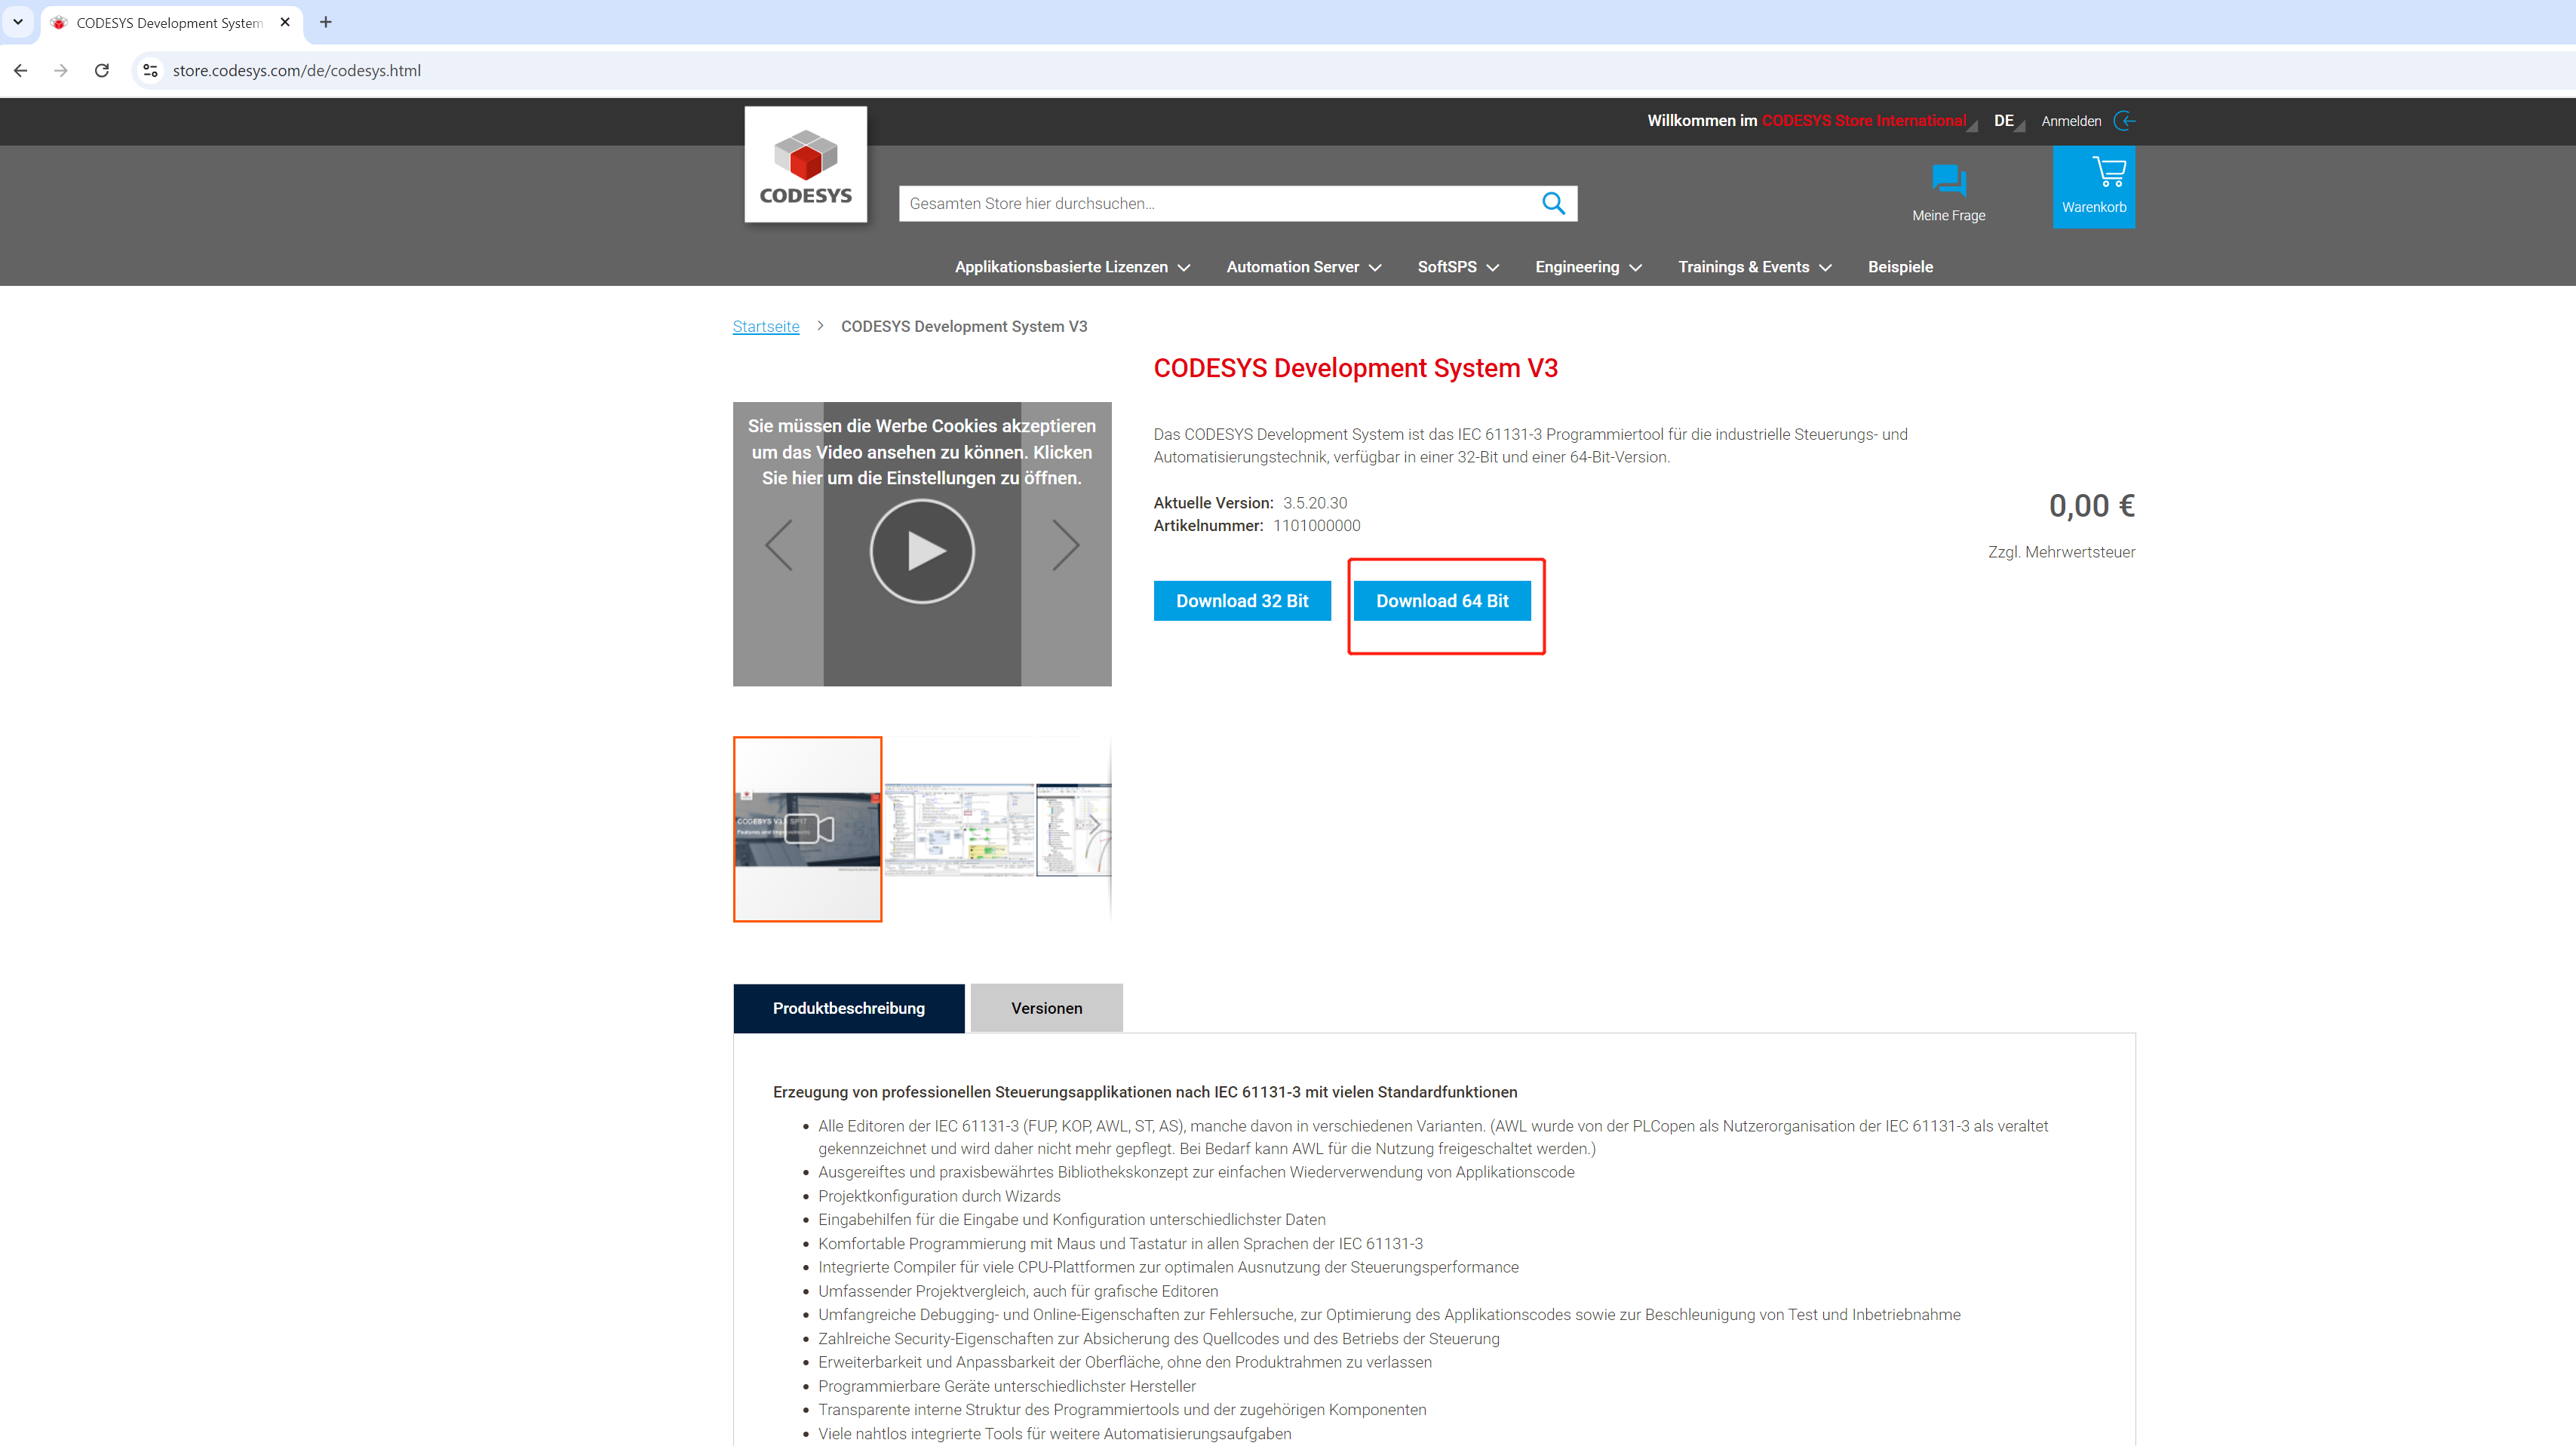
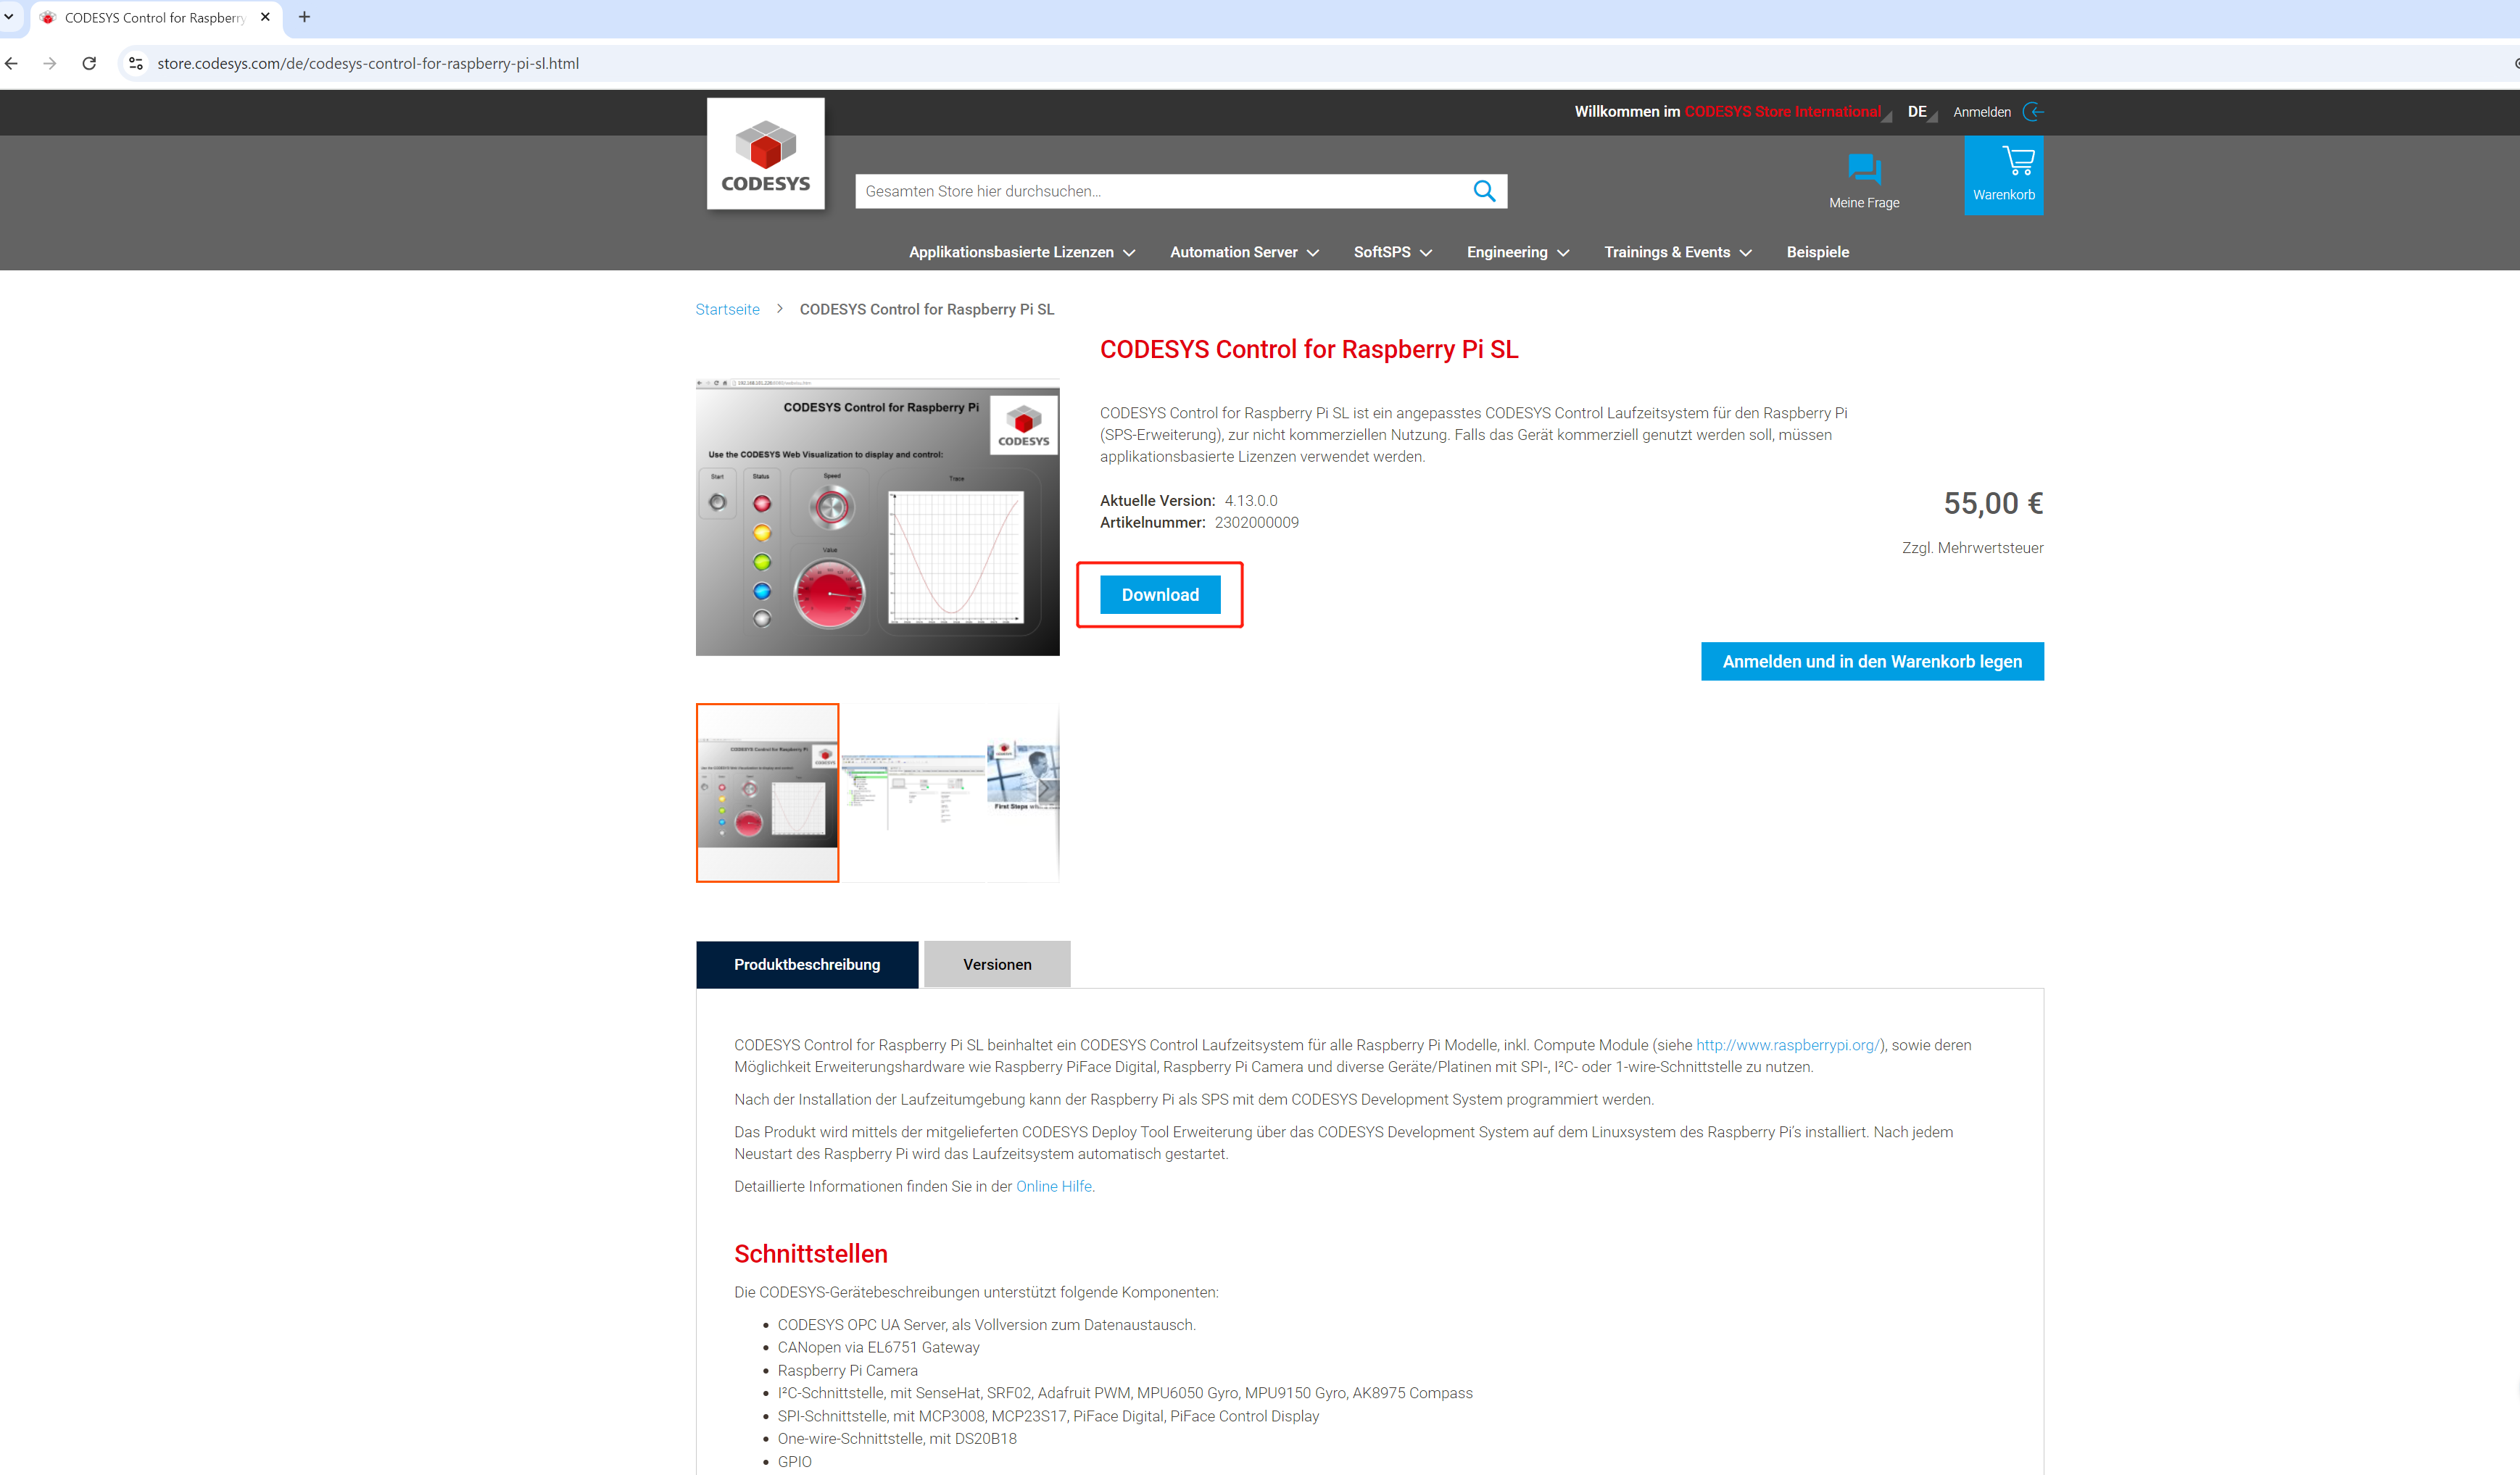
Step 1: Go to the CODESYS store, find CODESYS Development System V3 and download it, then find CODESYS Control for Raspberry Pi SL and download it.
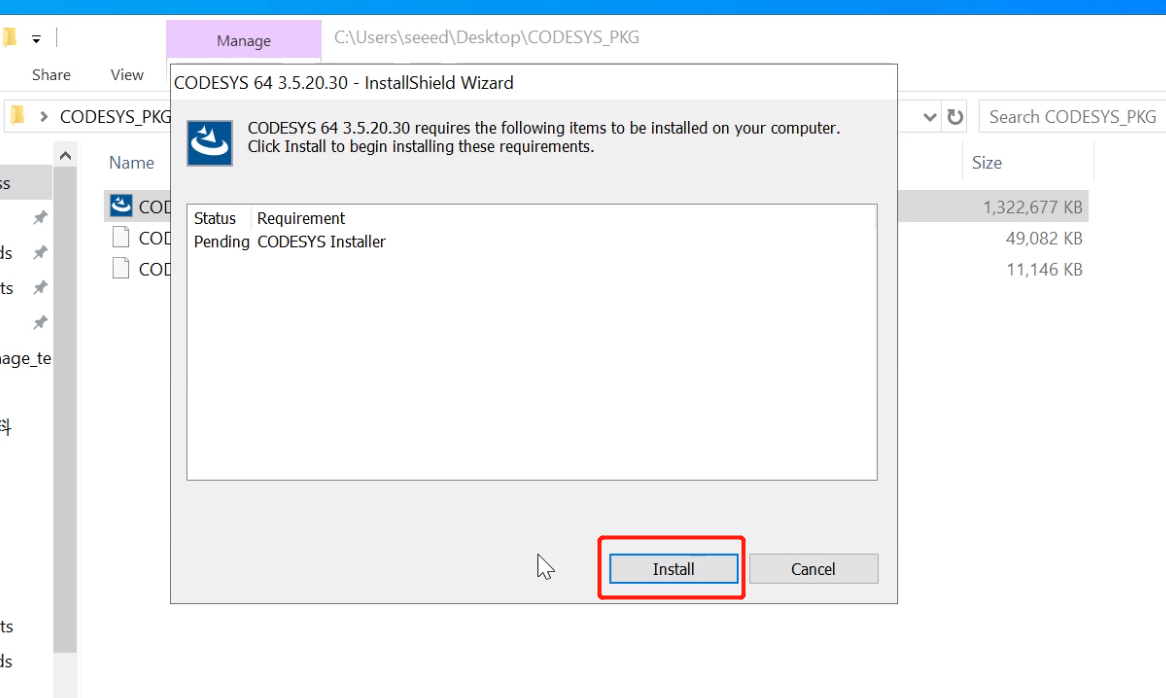
Step 2: Double-click the downloaded CODESYS 64 3.5.20.30.exe file and click install to download the CODESYS Installer.
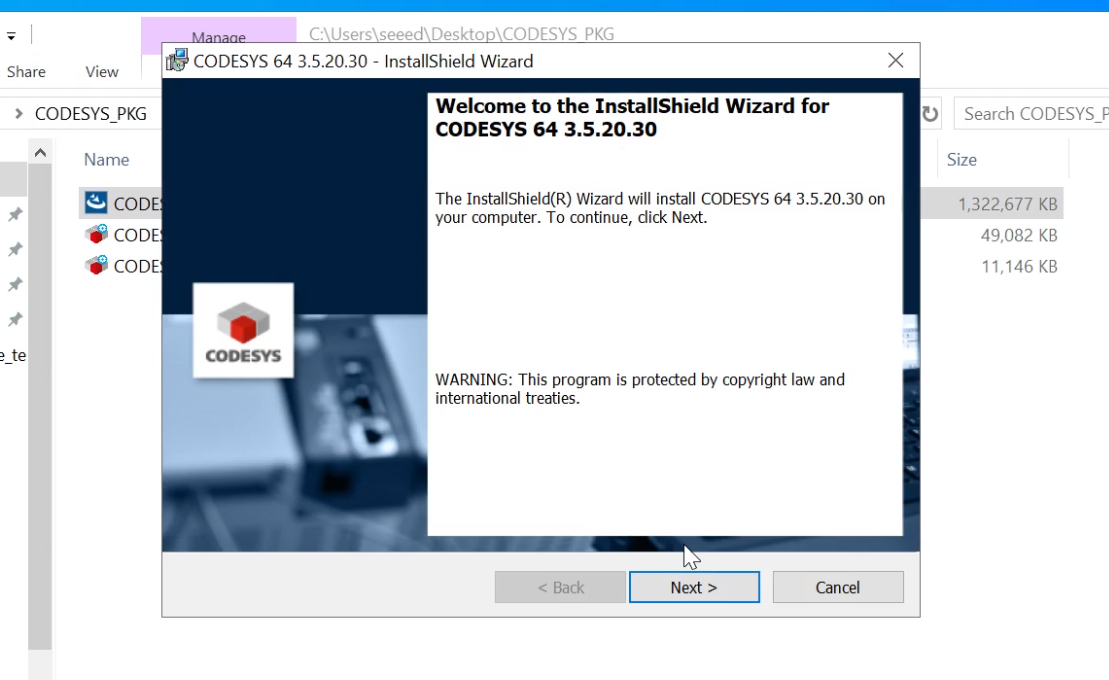
Step 3: After the CODESYS Installer is downloaded, the InstallShield Wizard will pop up automatically. Click Next to start installing CODESYS.
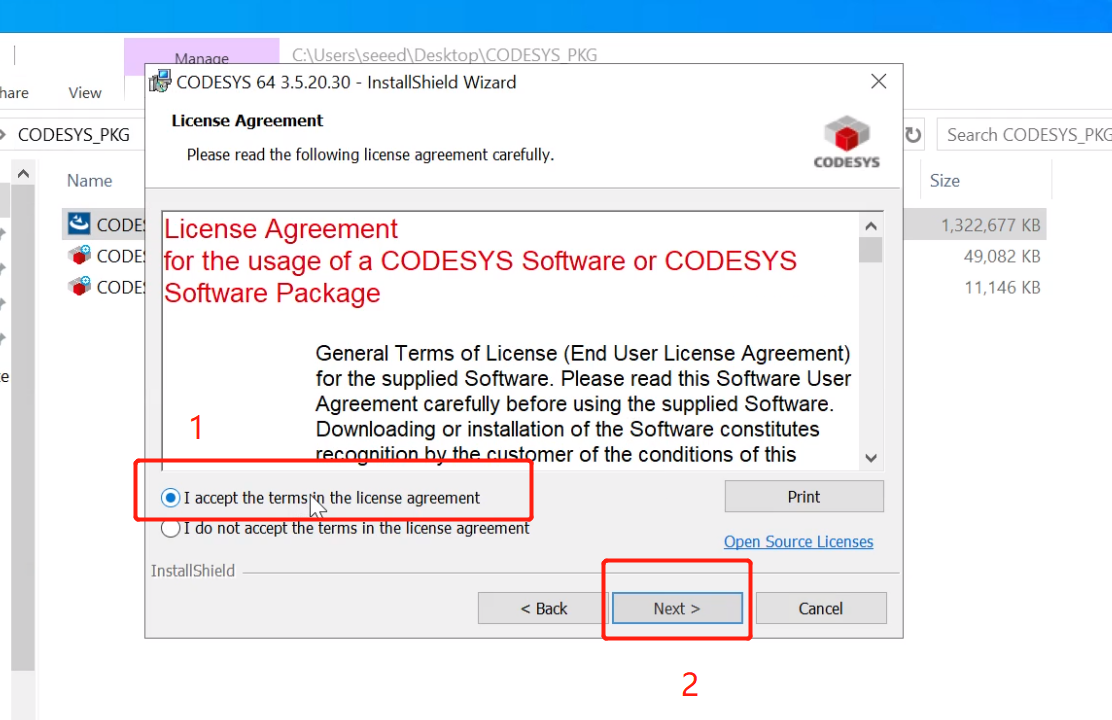
Step 4: Click to accept the license, then click Next to proceed to the next step.
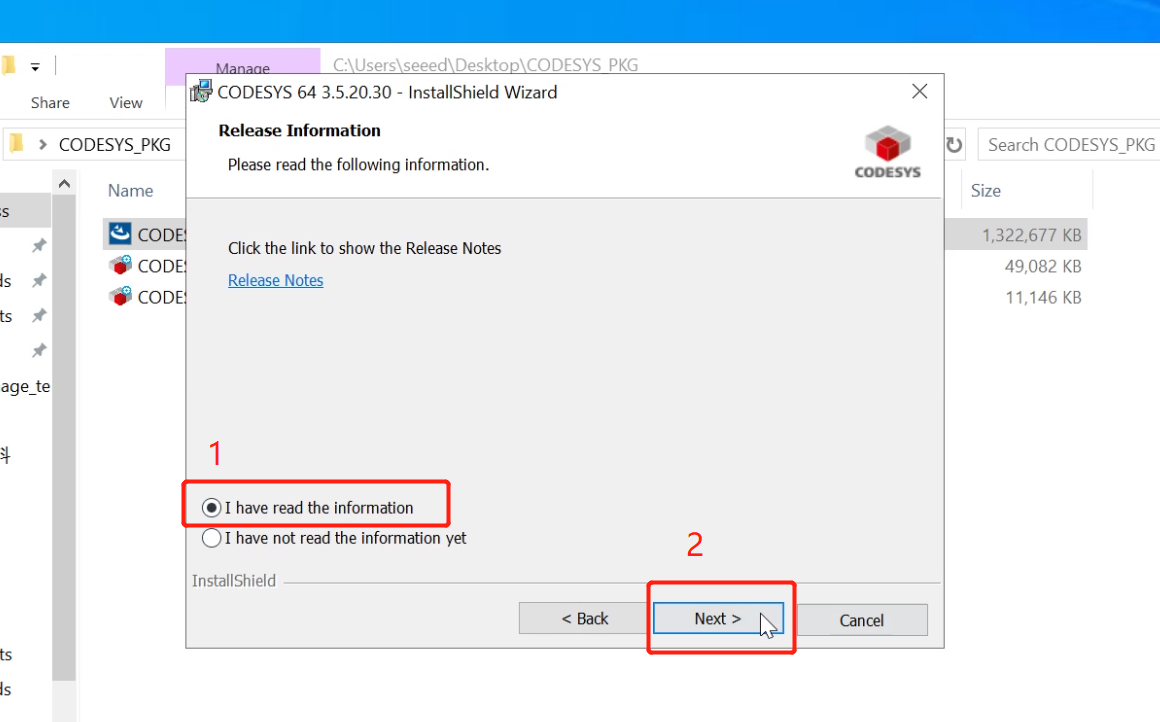
Step 5: Click I have read the information, then click Next
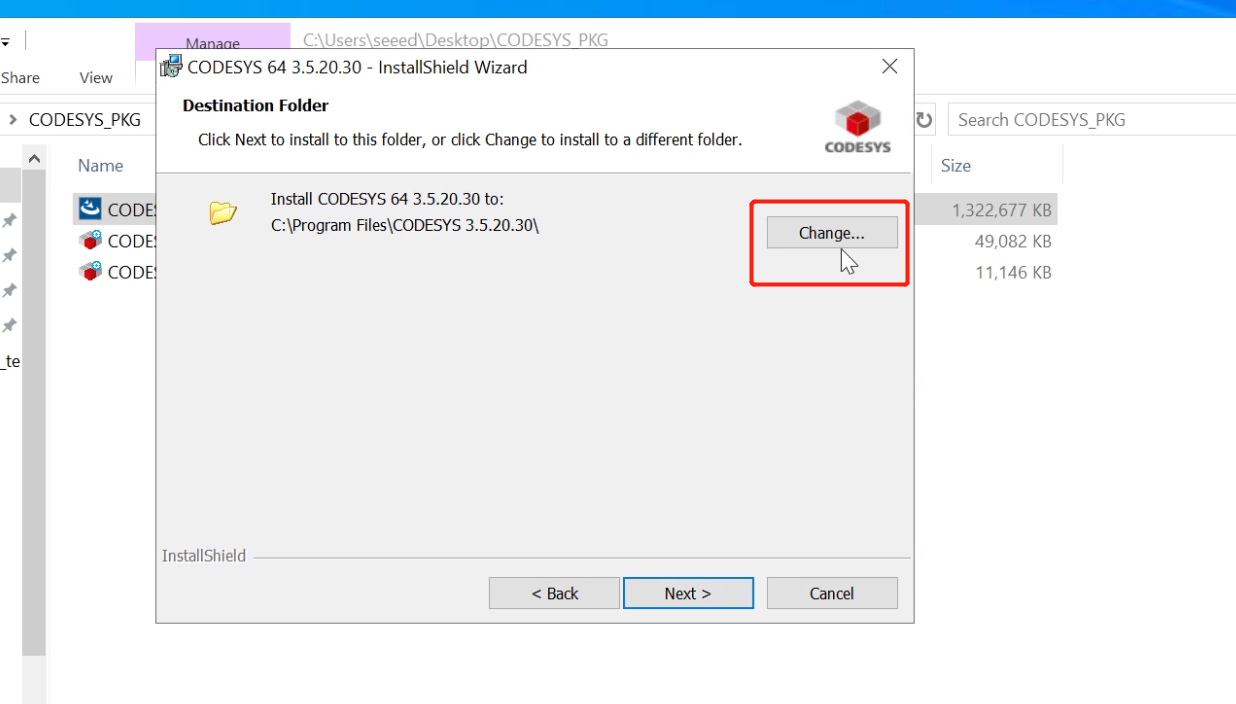
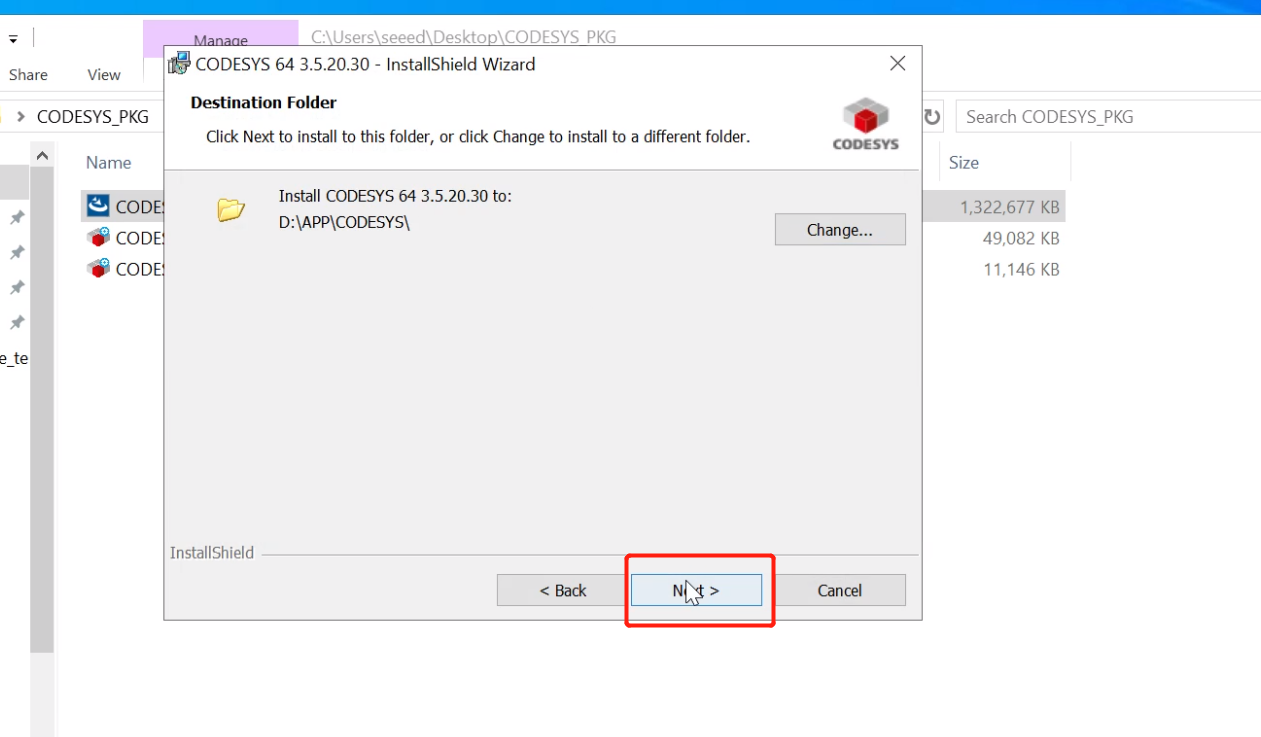
Step 6: Modify the installation directory and click Next after the modification is completed.

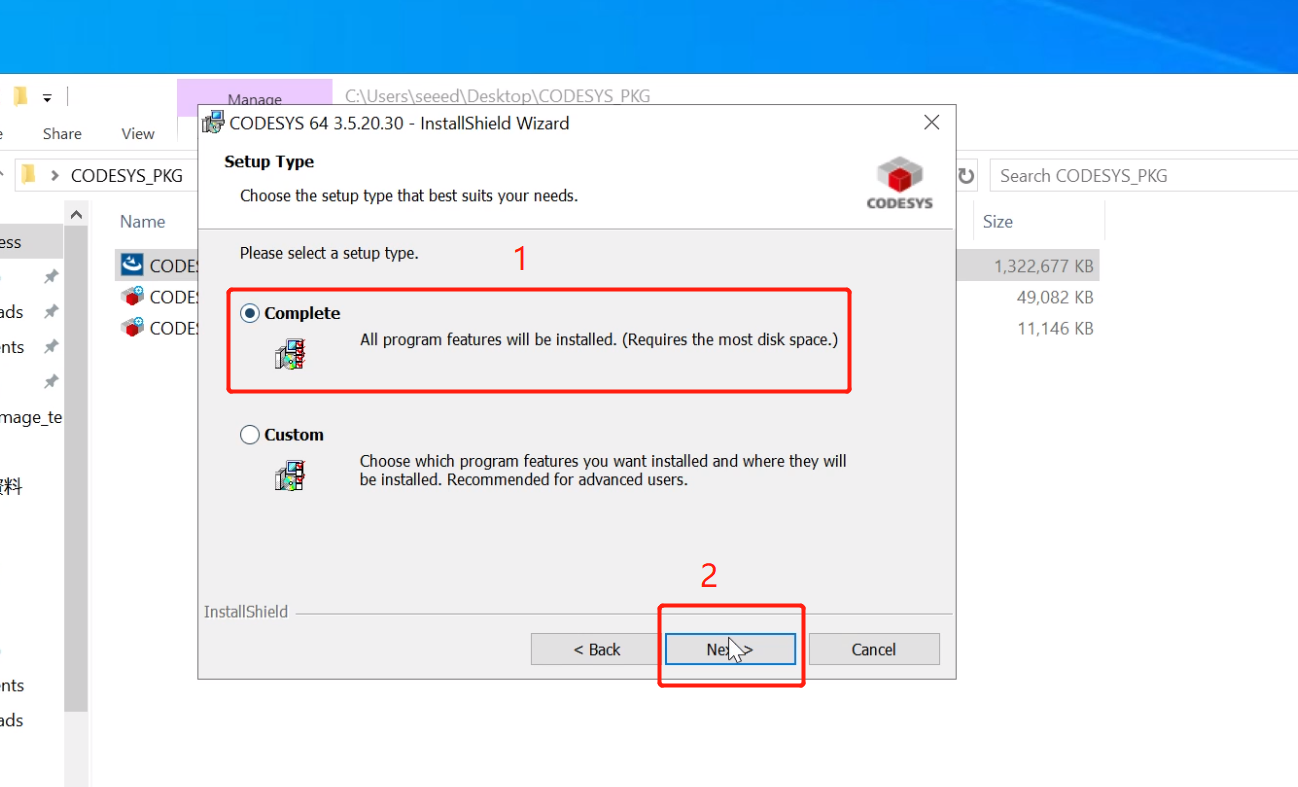
Step 7: Select Complete to fully install CODESYS, then click Next
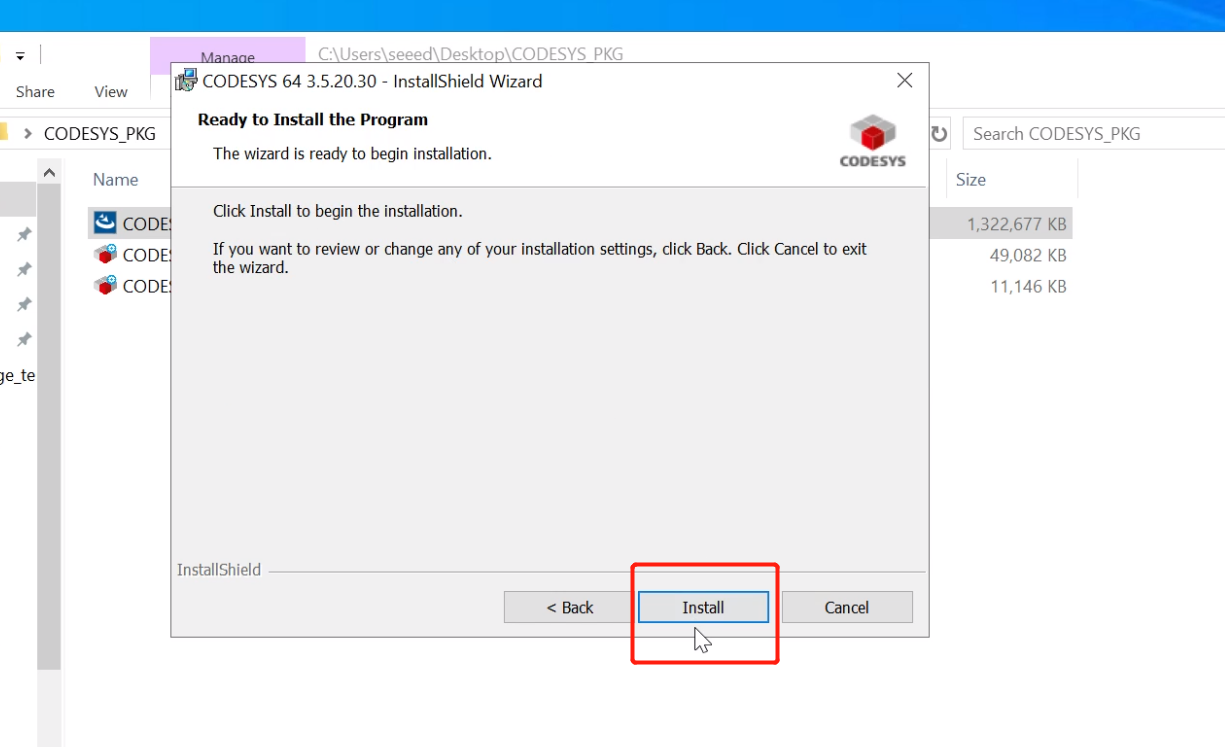
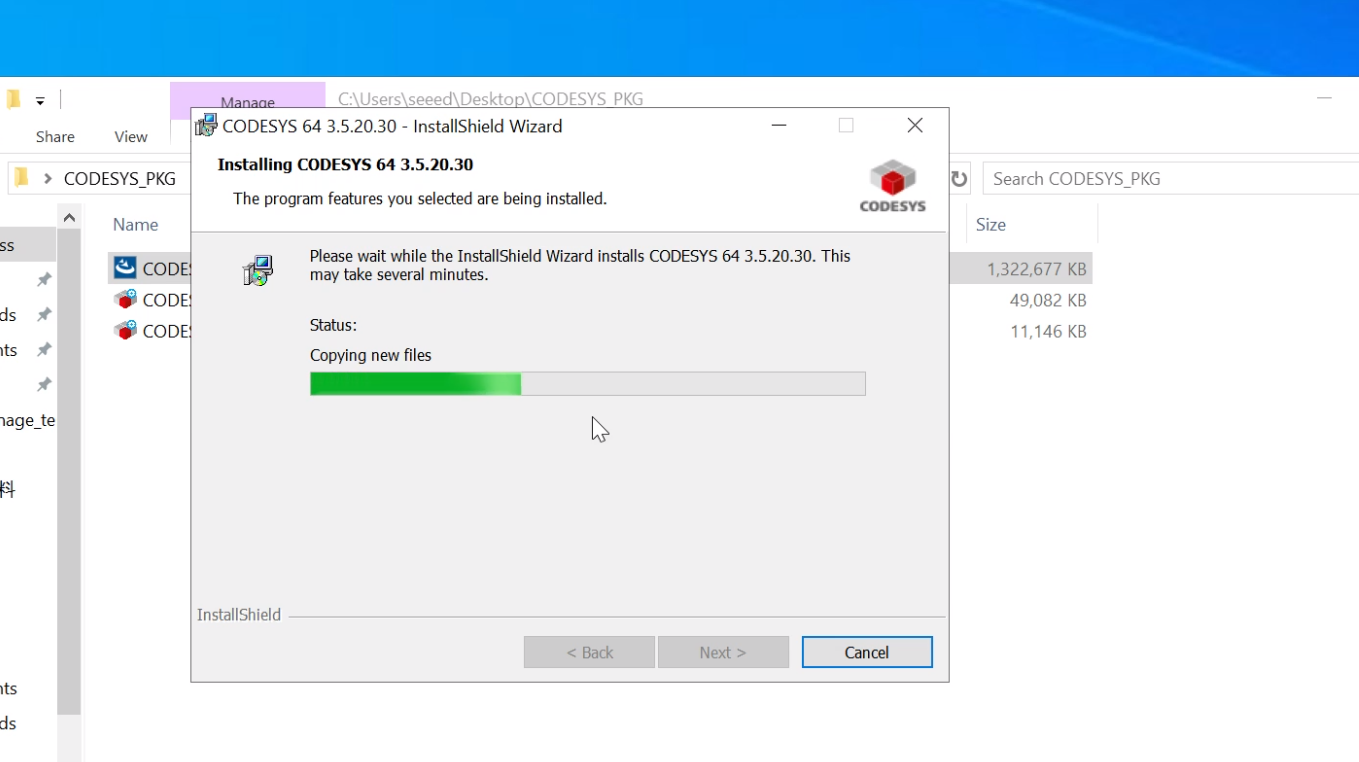
Step 8: Click Install to start the installation. It will take some time, just wait for the installation to complete
Update dependency packages
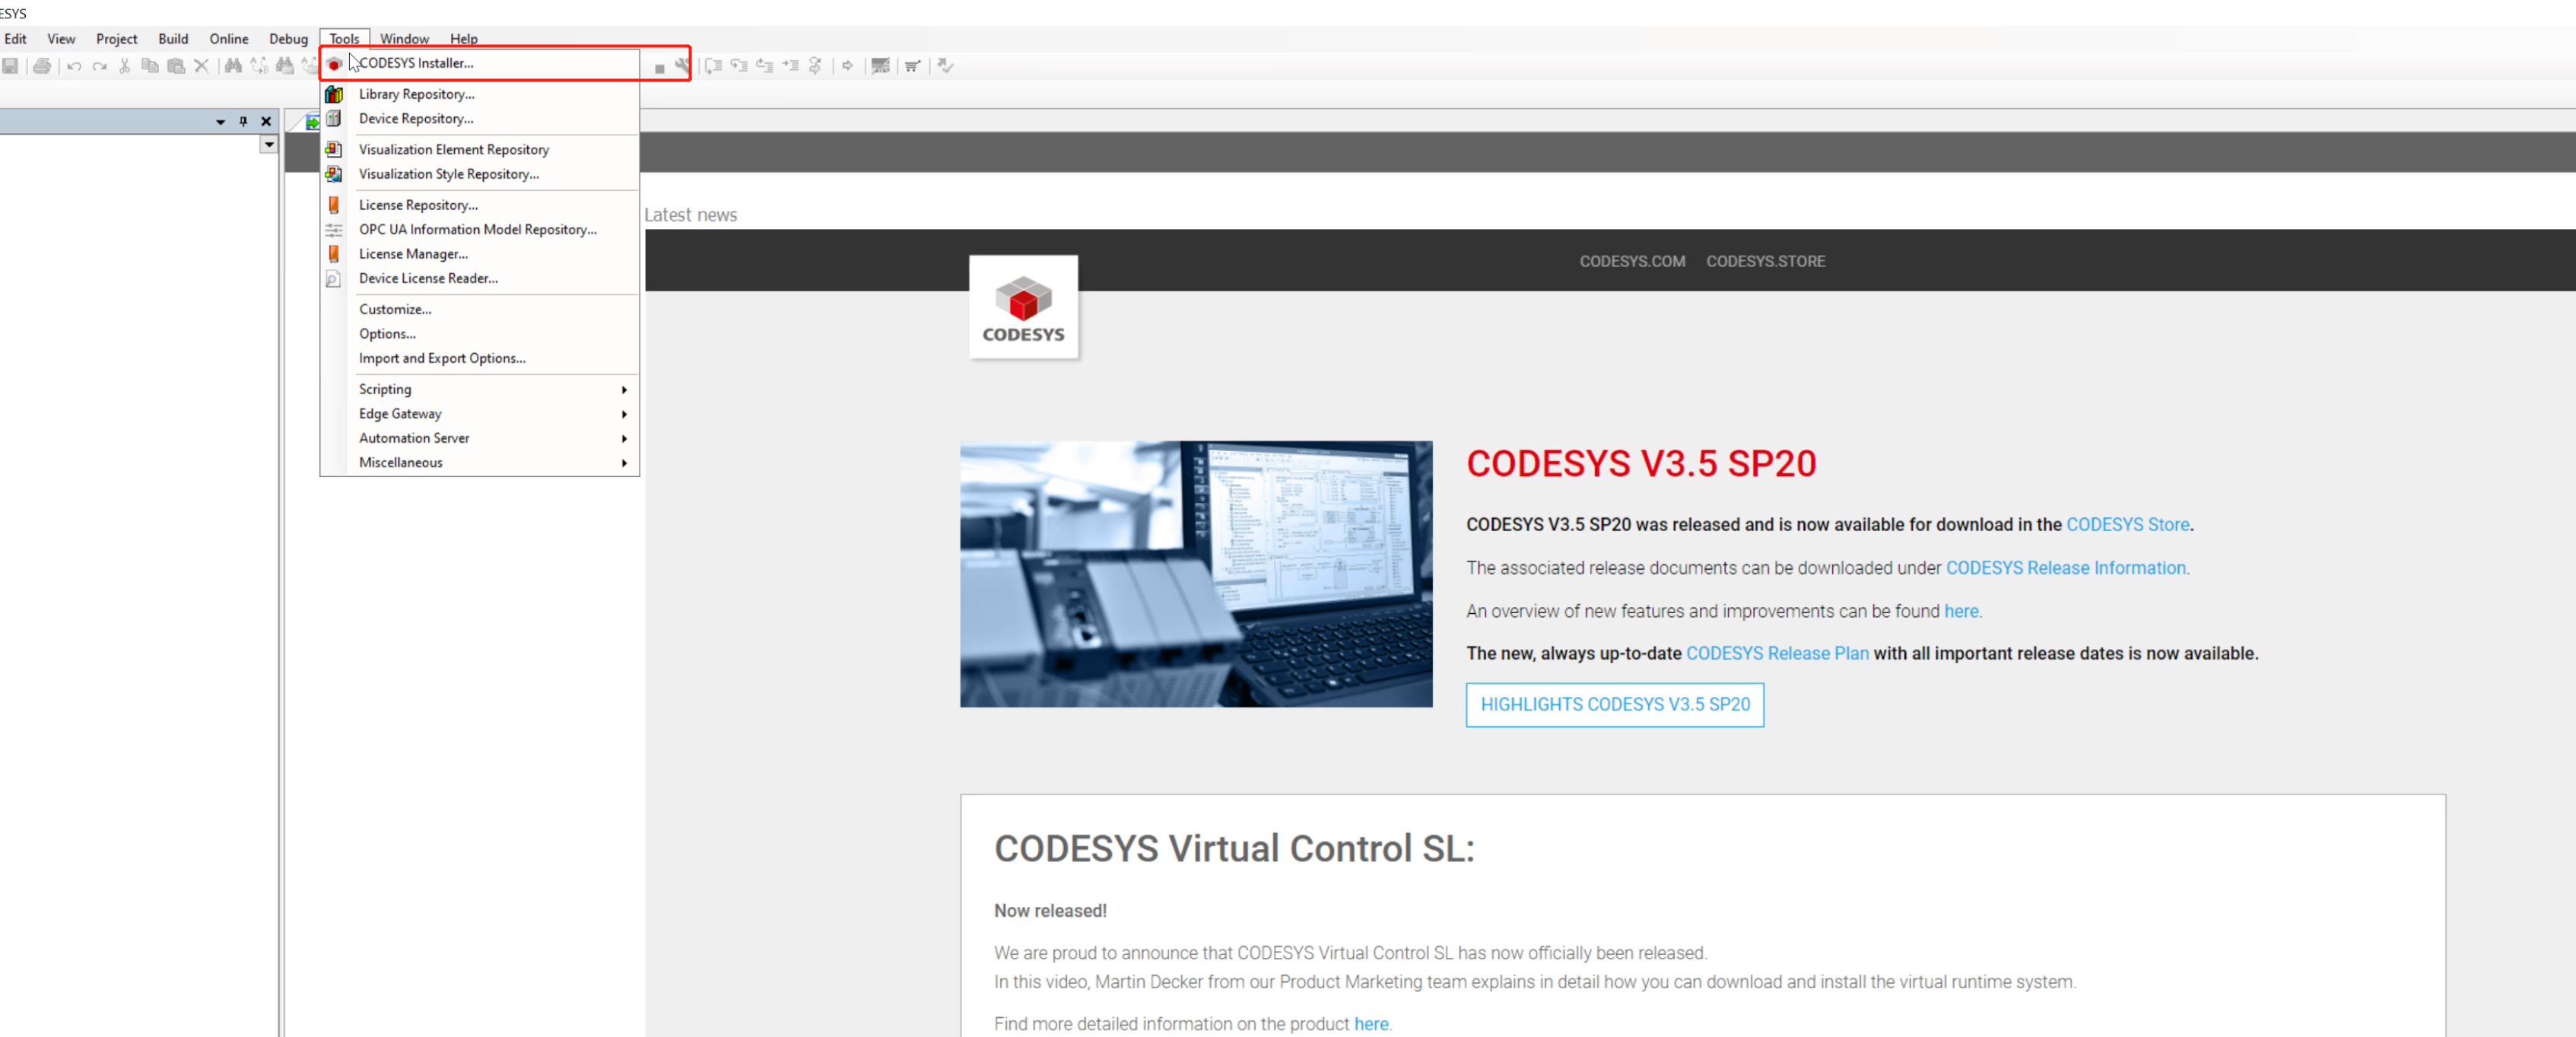
Step 1: After the installation is complete, open CODESYS V3.5 SP20 Patch 3, click Tools--->CODESYS Installer..
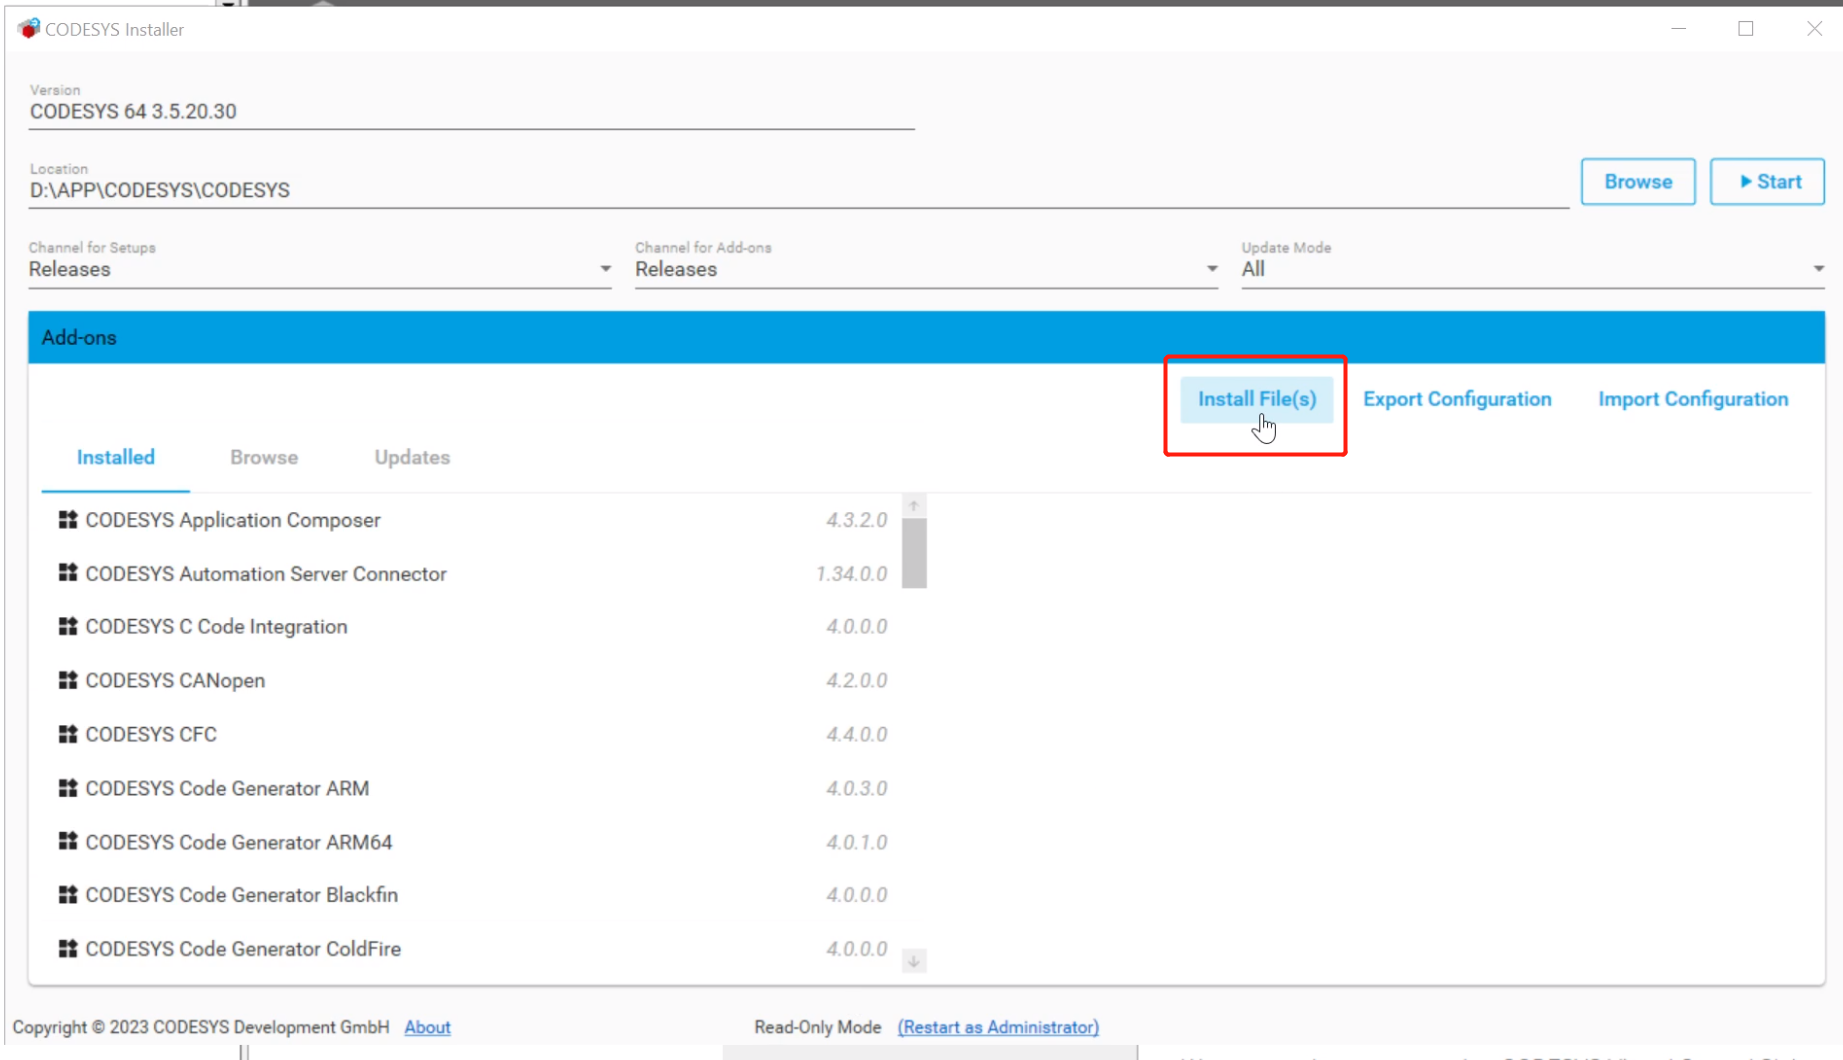
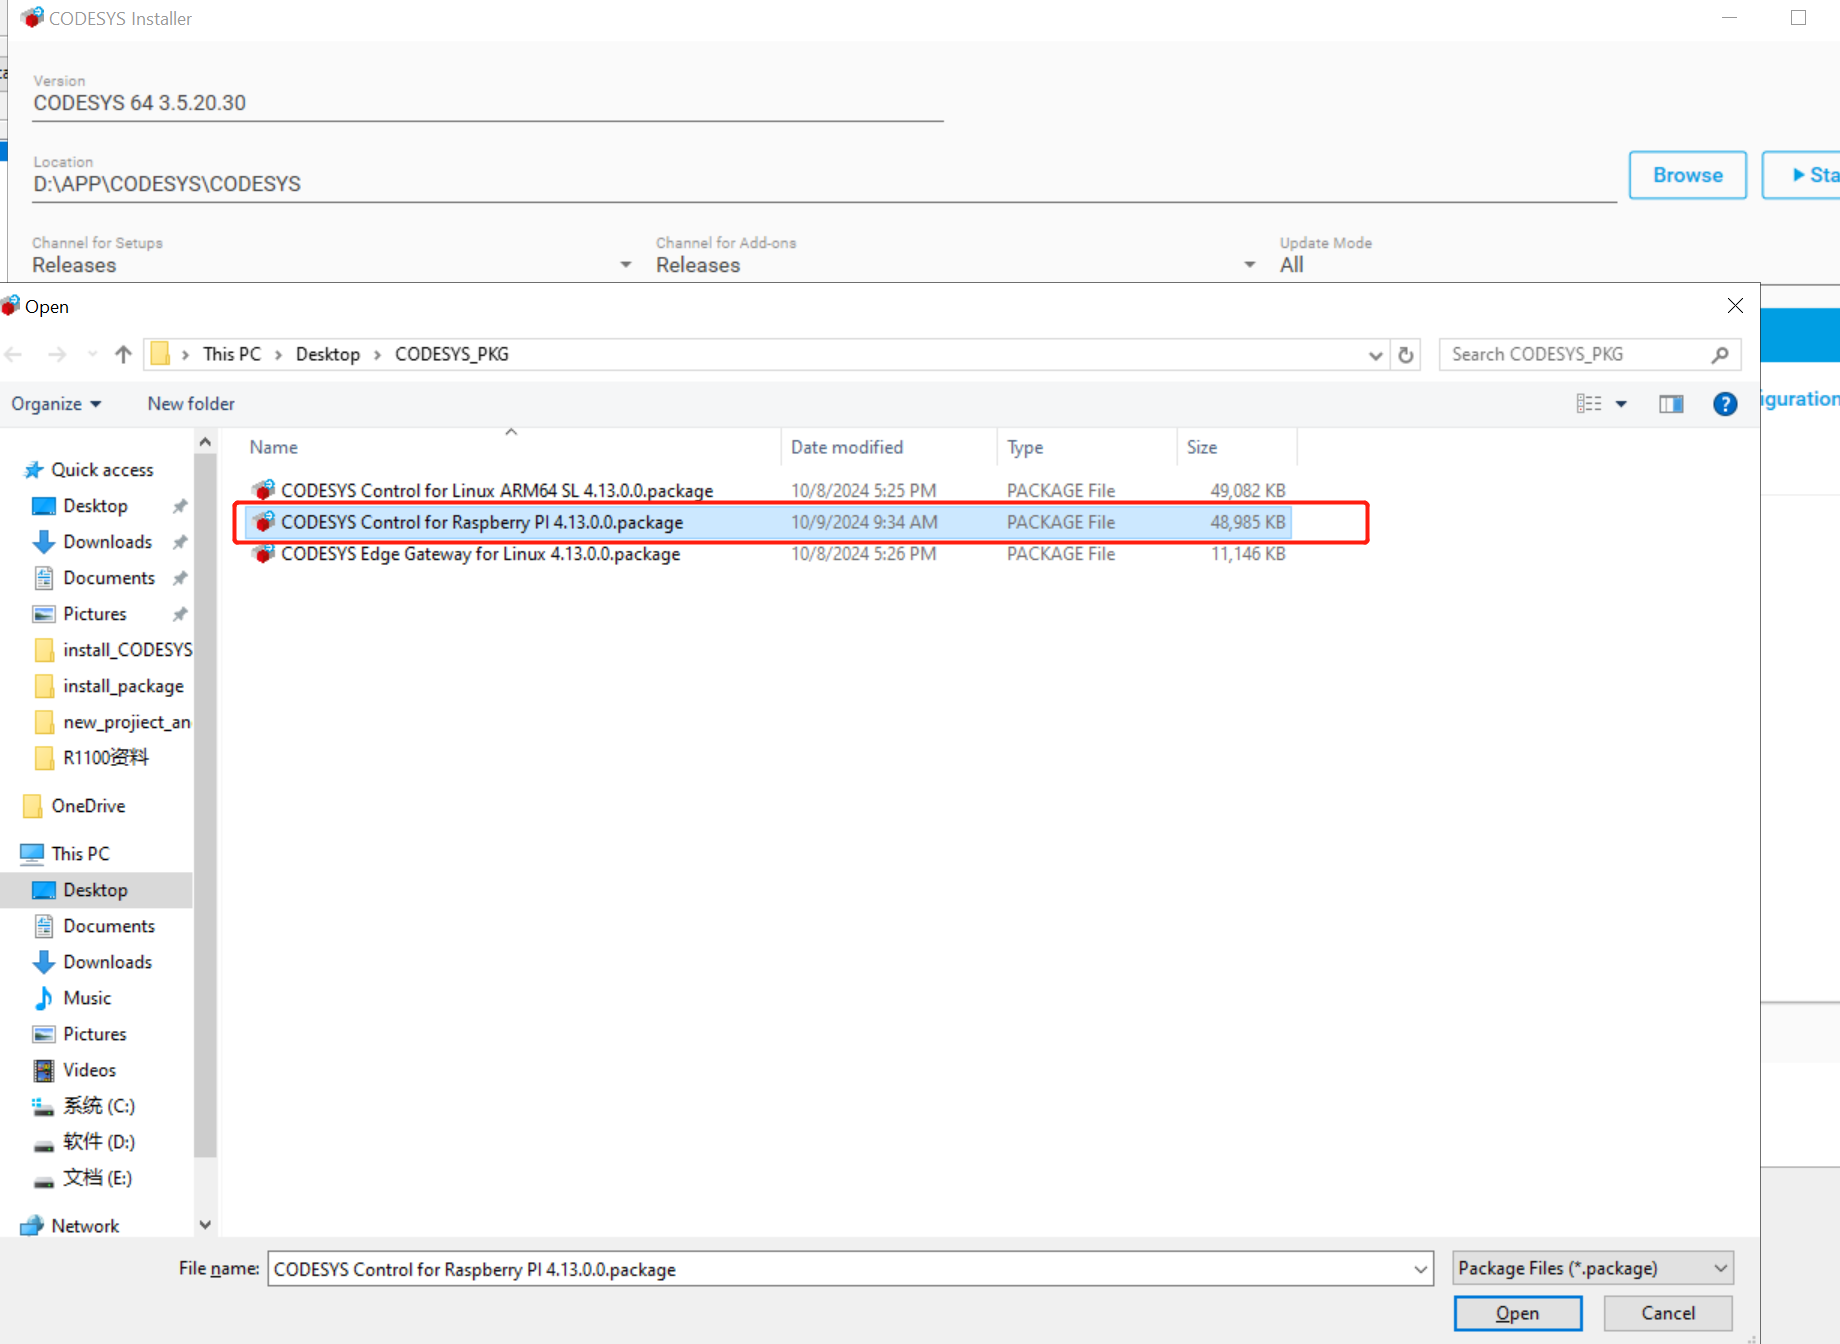
Step 2: In the new window, click Install File(s), then select the package to be installed. After selecting, the package will be parsed
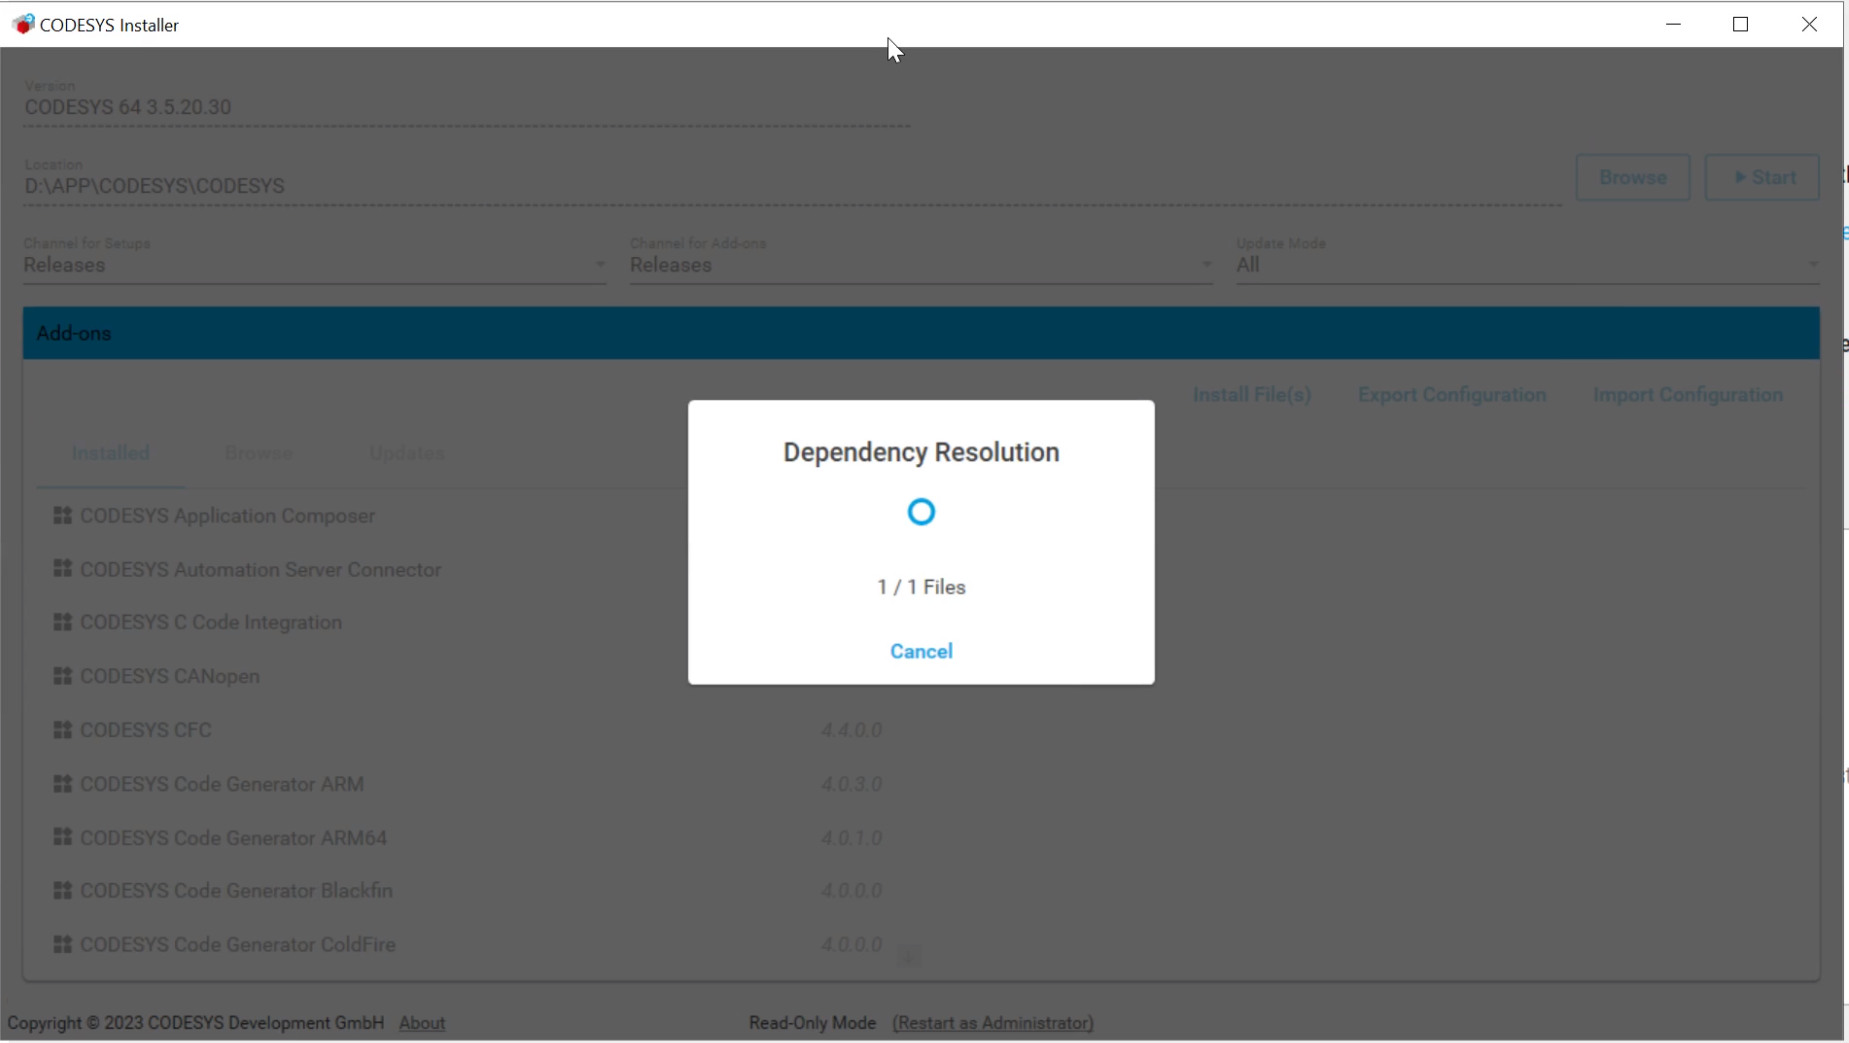
Step 3: Click I accept the license agreement(s), then click Continue to start the installation

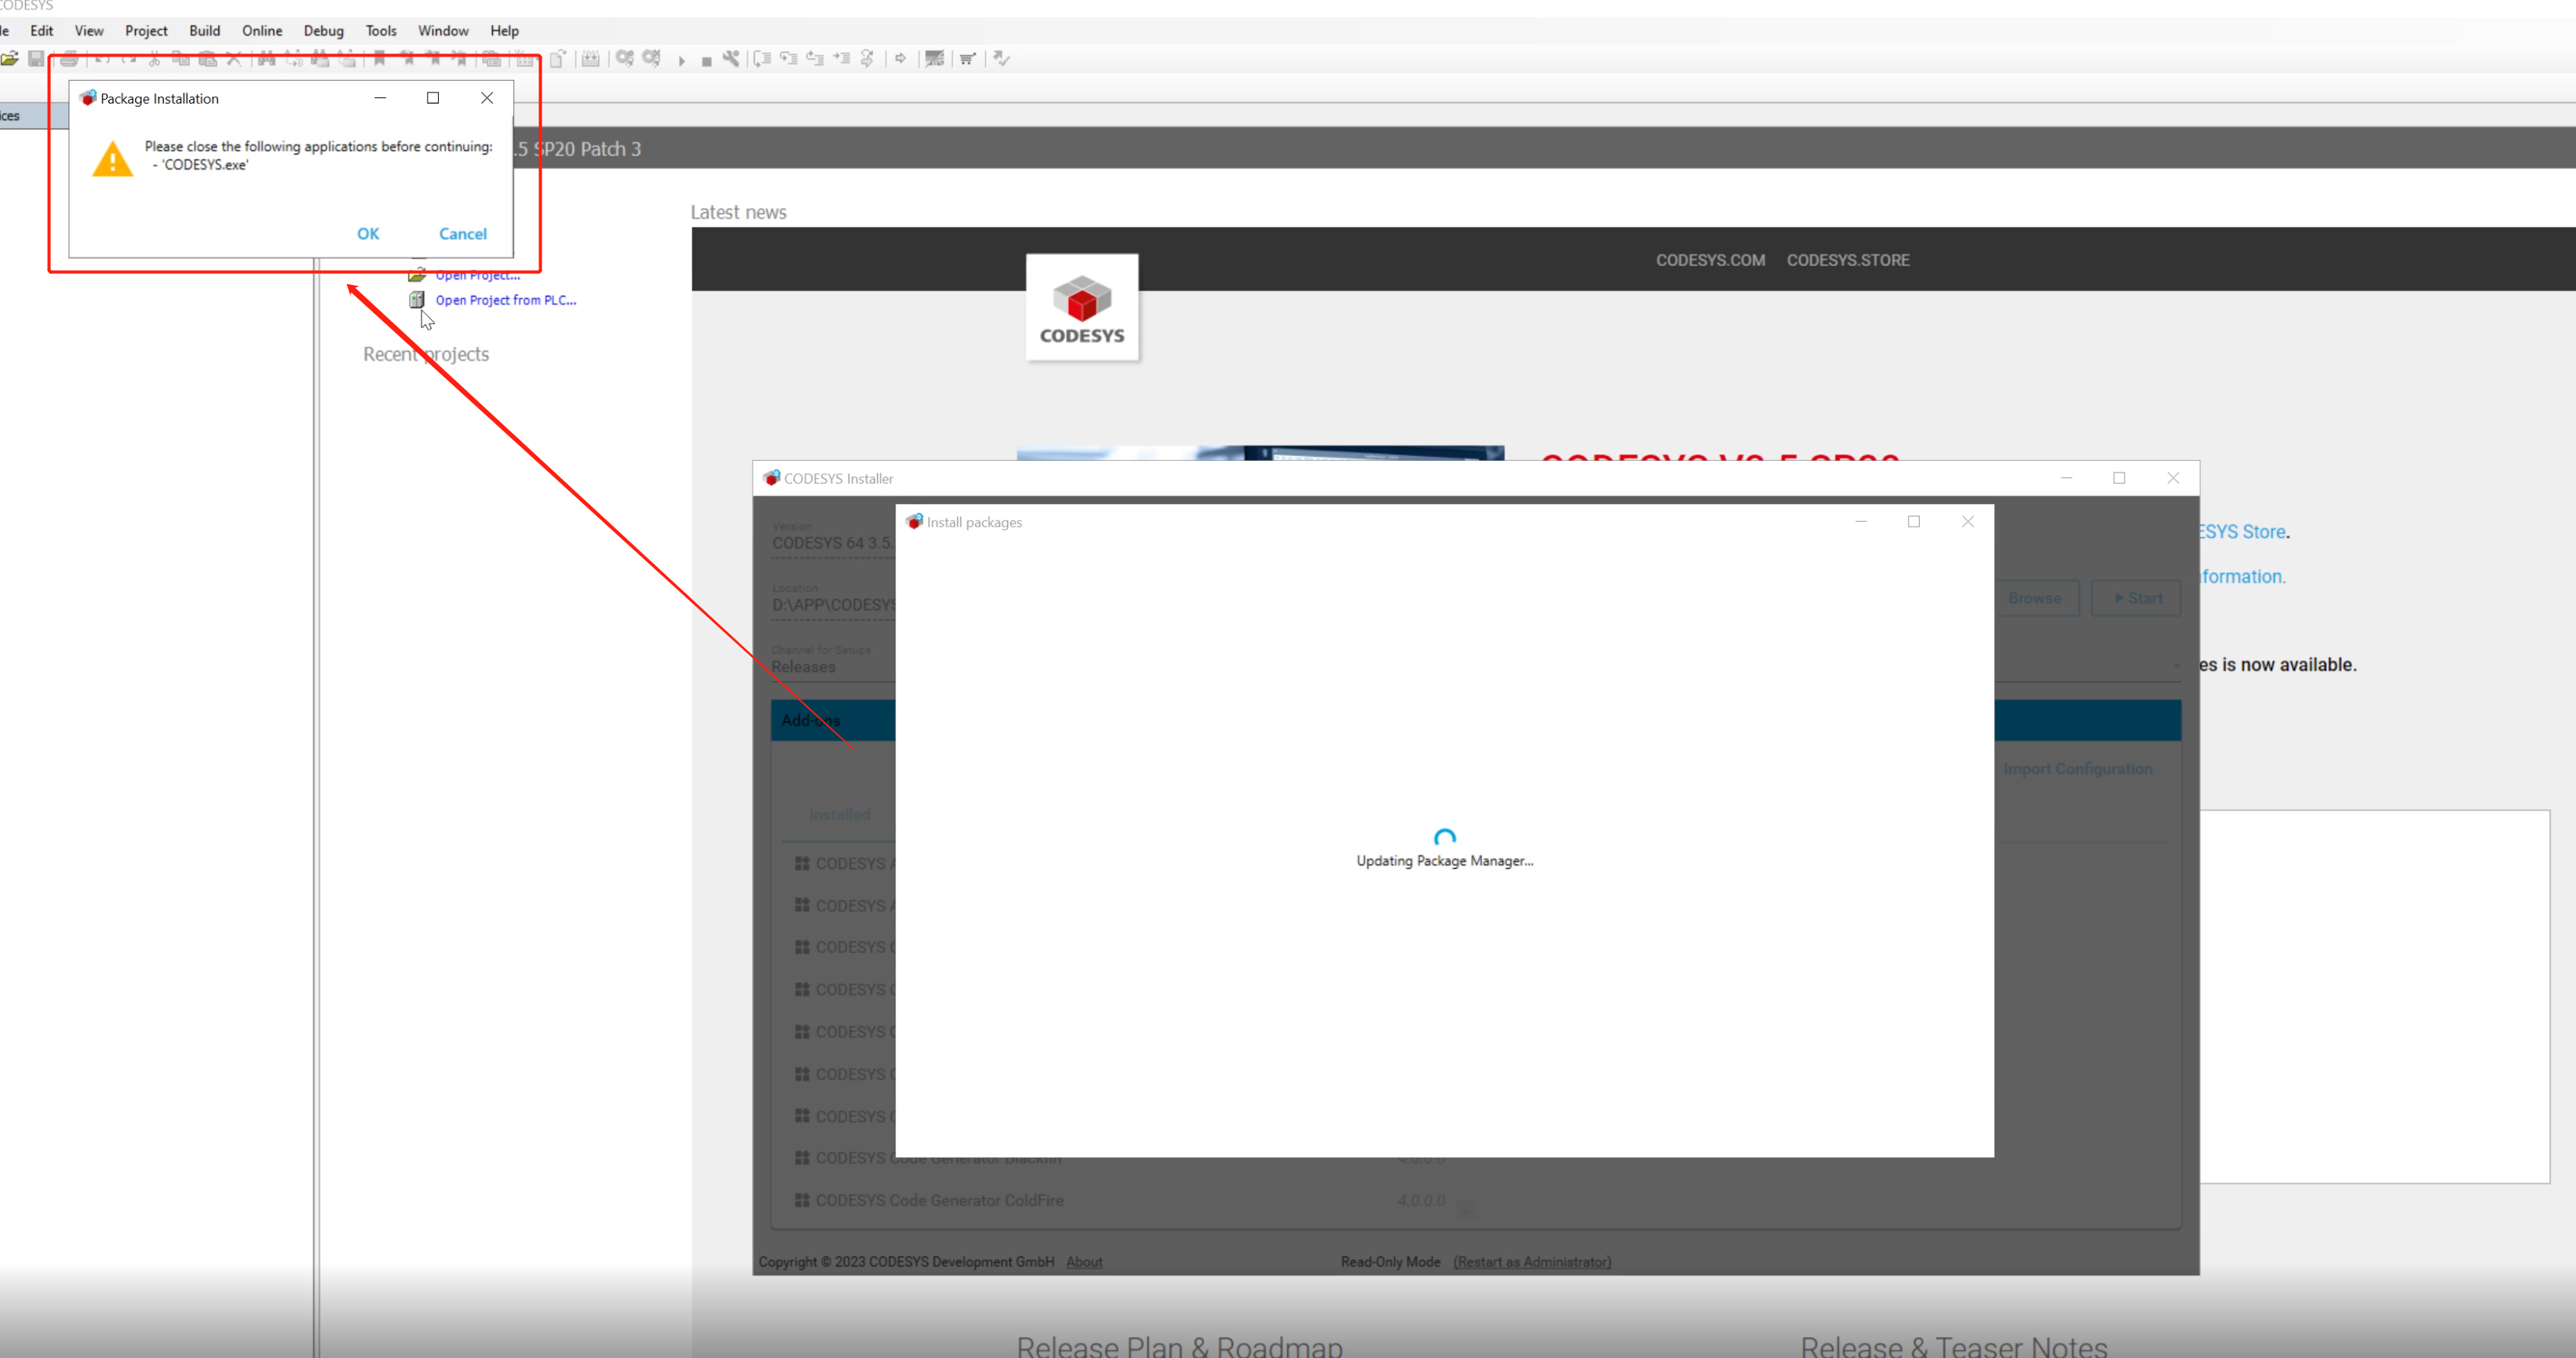
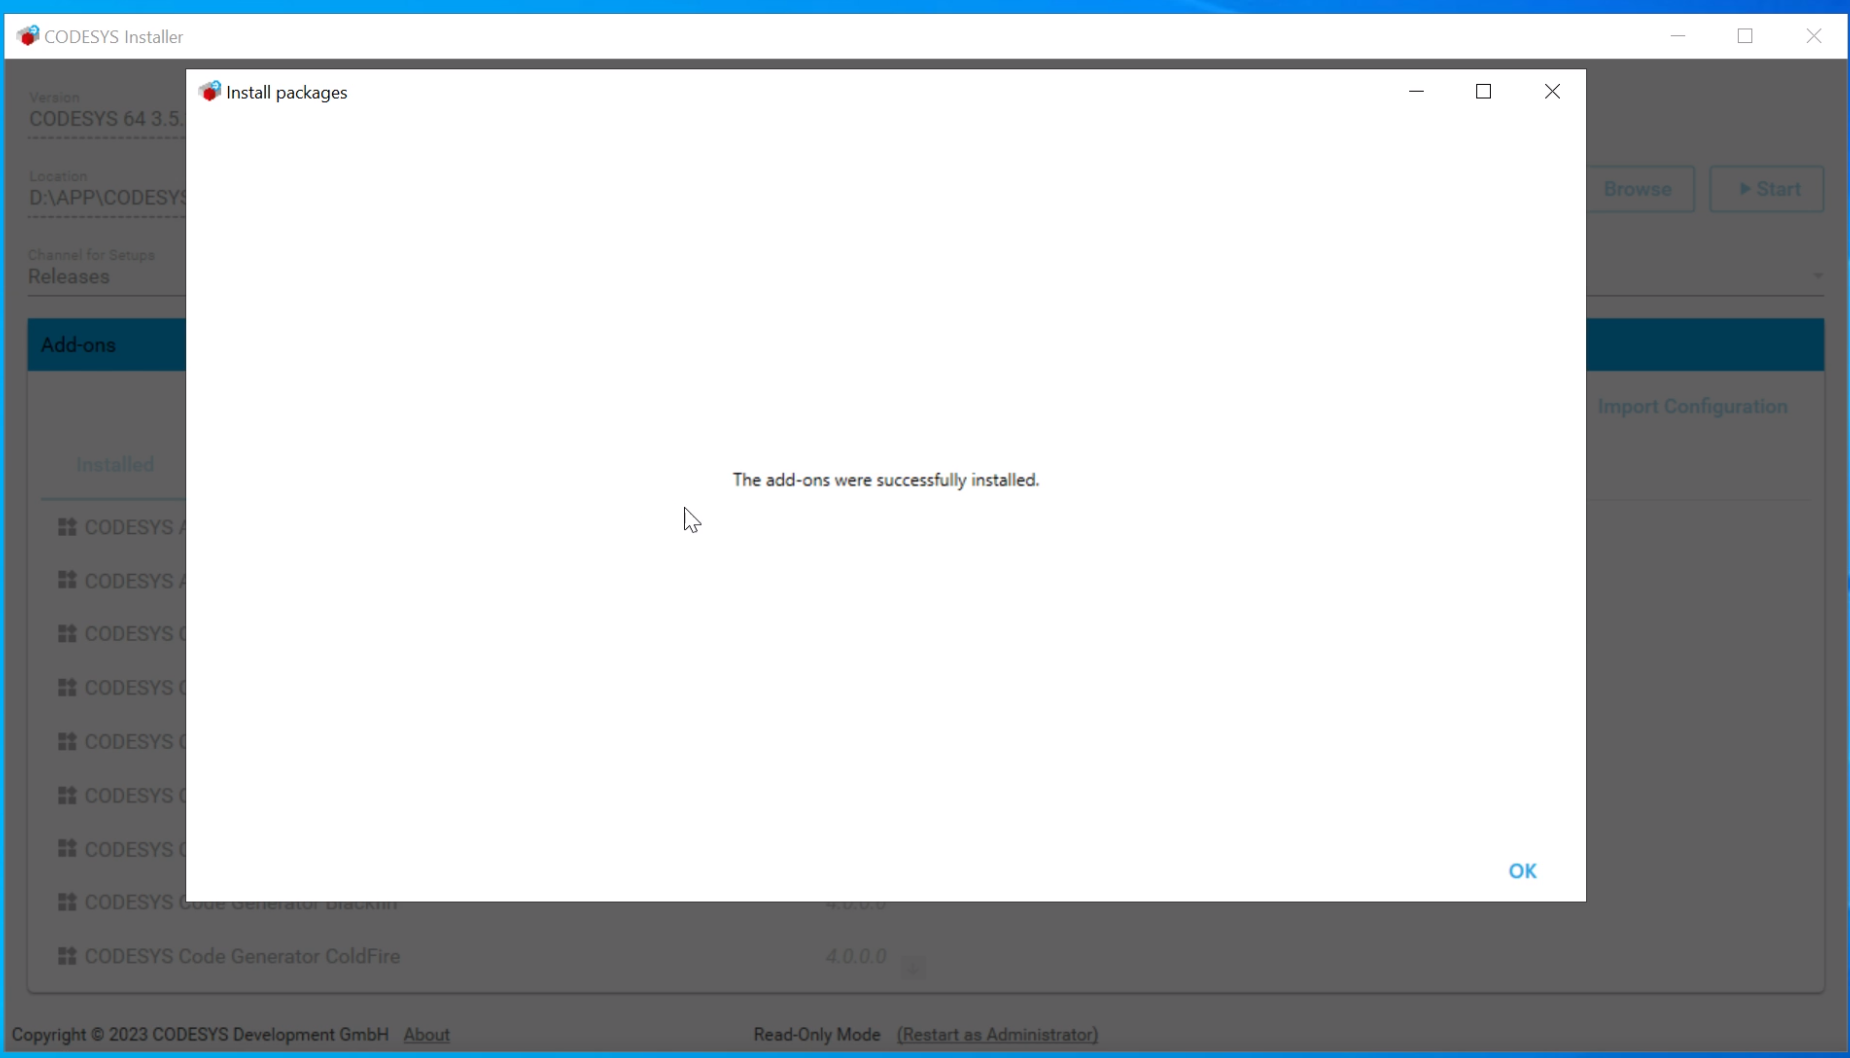
Step 4: A pop-up window will appear, asking you to close CODESYS V3.5 SP20 Patch 3. Close CODESYS and then click OK. CODESYS will start installing the new package.
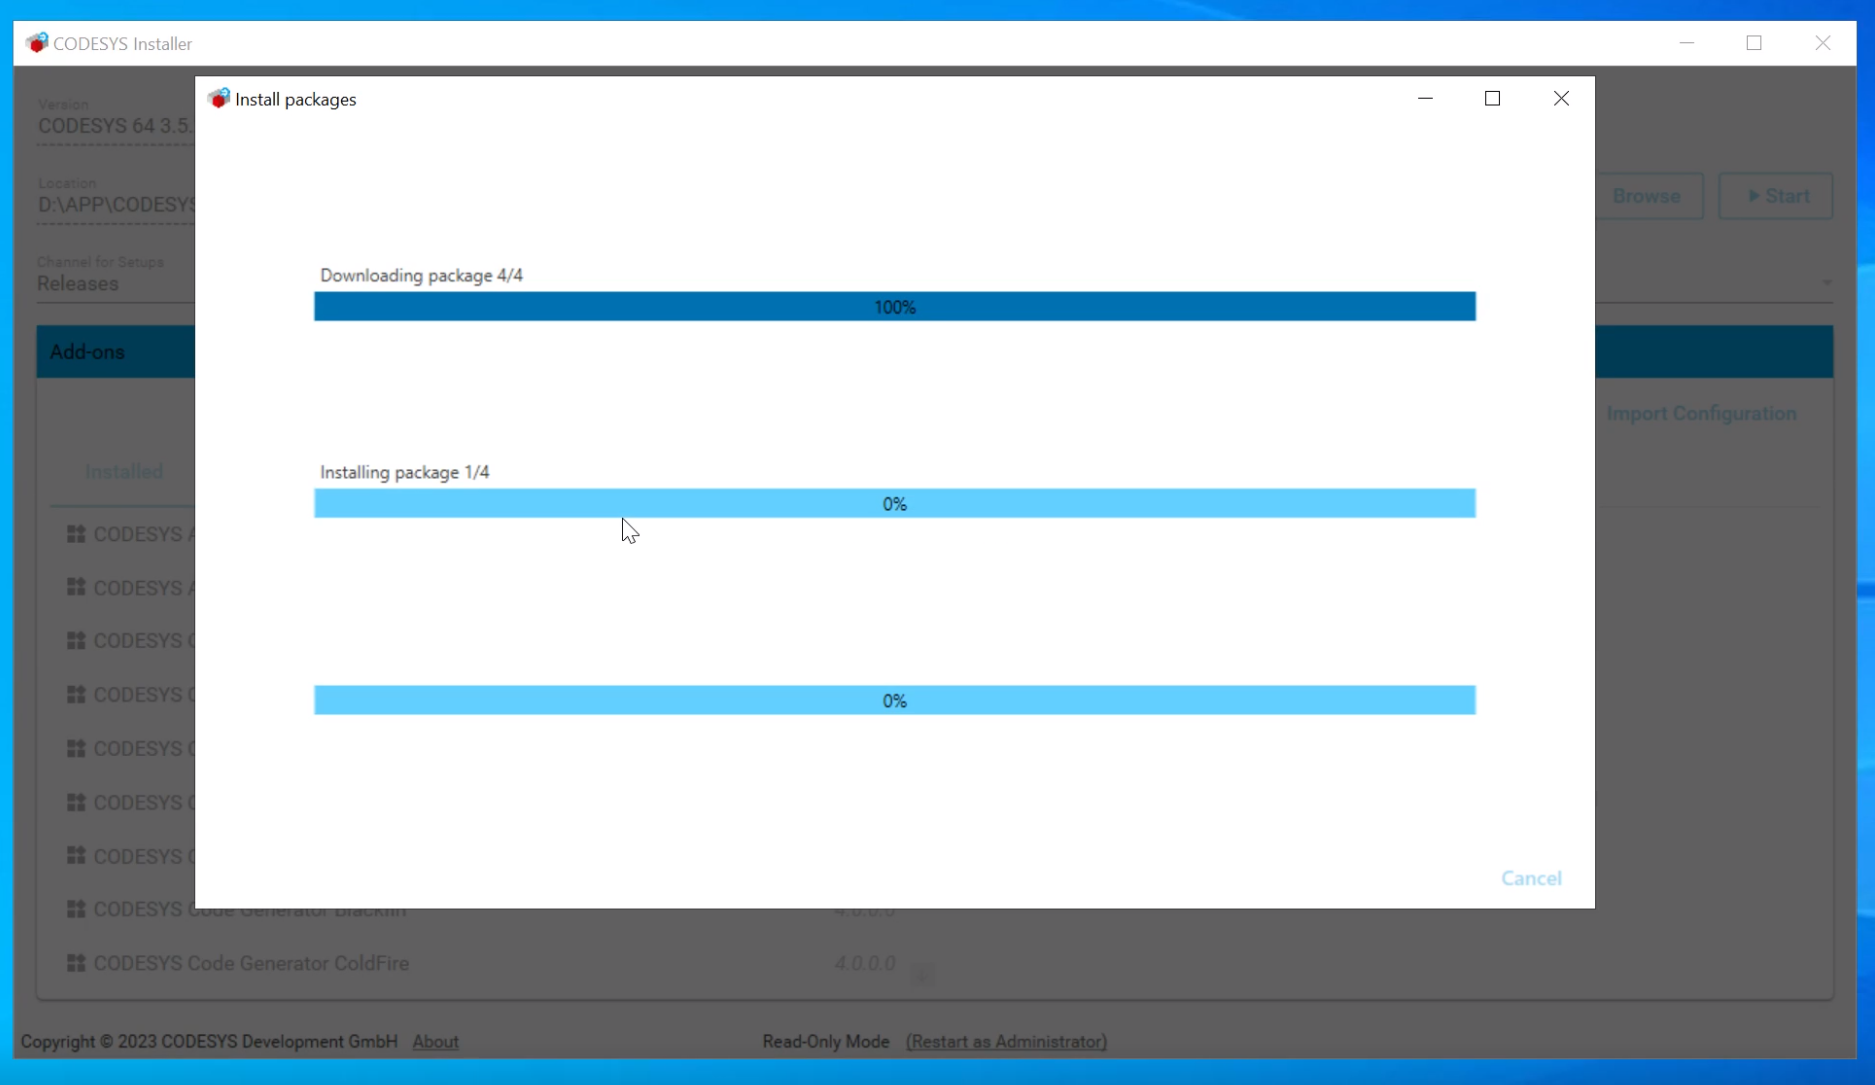
Step 5: Wait for the installation to complete
Deployment CODESYS run-time
CODESYS Runtime refers to the CODESYS runtime system, which is the software installed on the target device to execute the PLC program created with the CODESYS development environment. CODESYS Runtime turns the target device (such as embedded systems, industrial computers, Raspberry Pi, etc.) into a programmable logic controller (PLC).
Step 1: Make sure reComputer R1000 and the host computer are in the same network segment
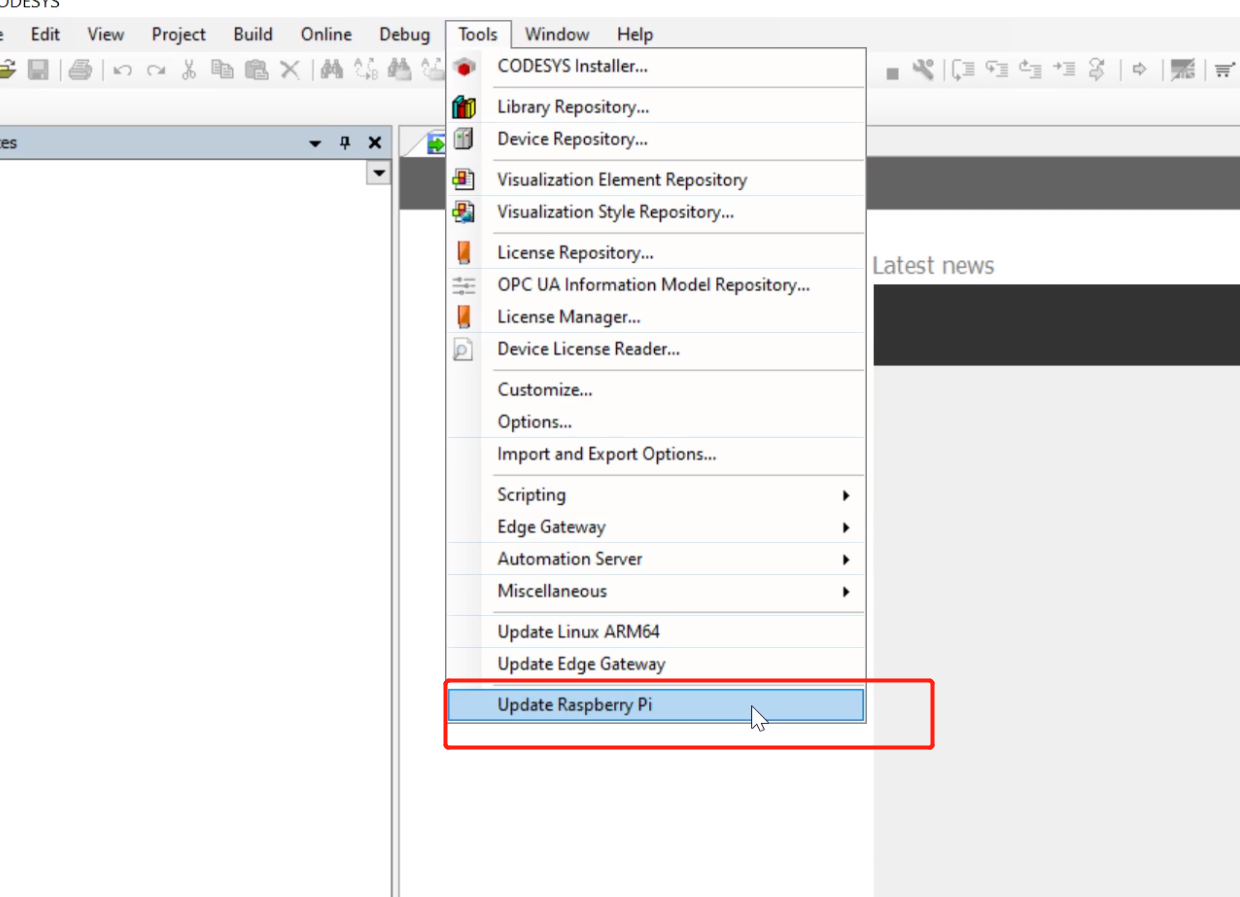
Step 2: Click Tools--->Update Raspberry Pi
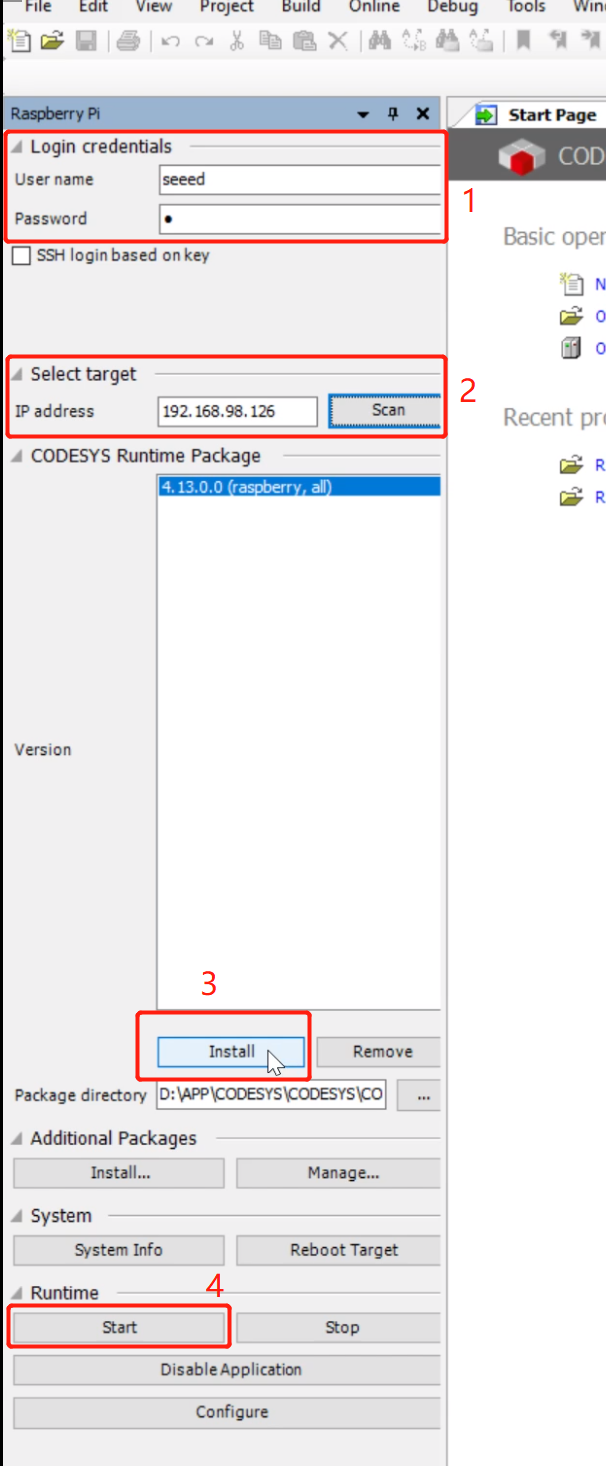
Step 3: Enter the username and password of reComputer R1000, IP address, then click Install to download run time to reComputer R1000, and finally click Start to start run time
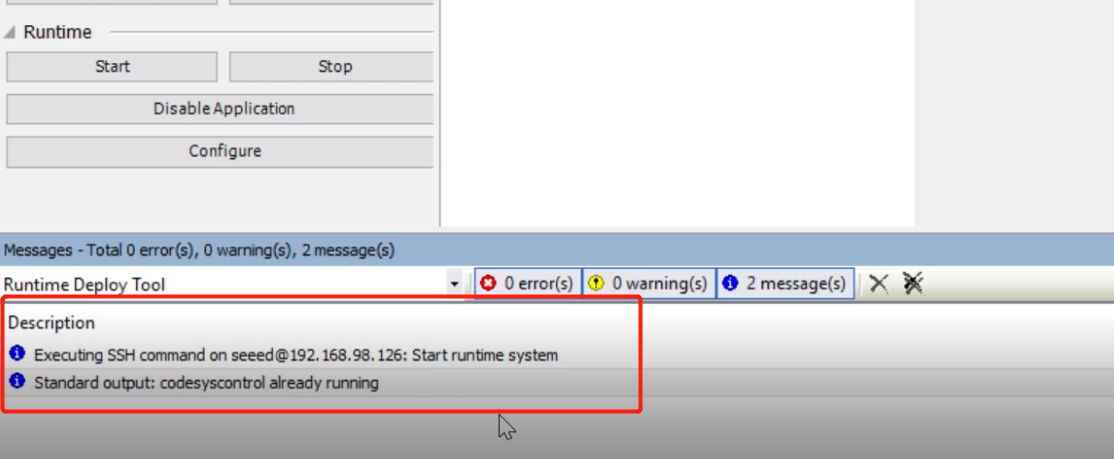
Step 4: When the following message appears in the message bar, it means that reComputer R1000 has successfully run run time
Deploy a new project
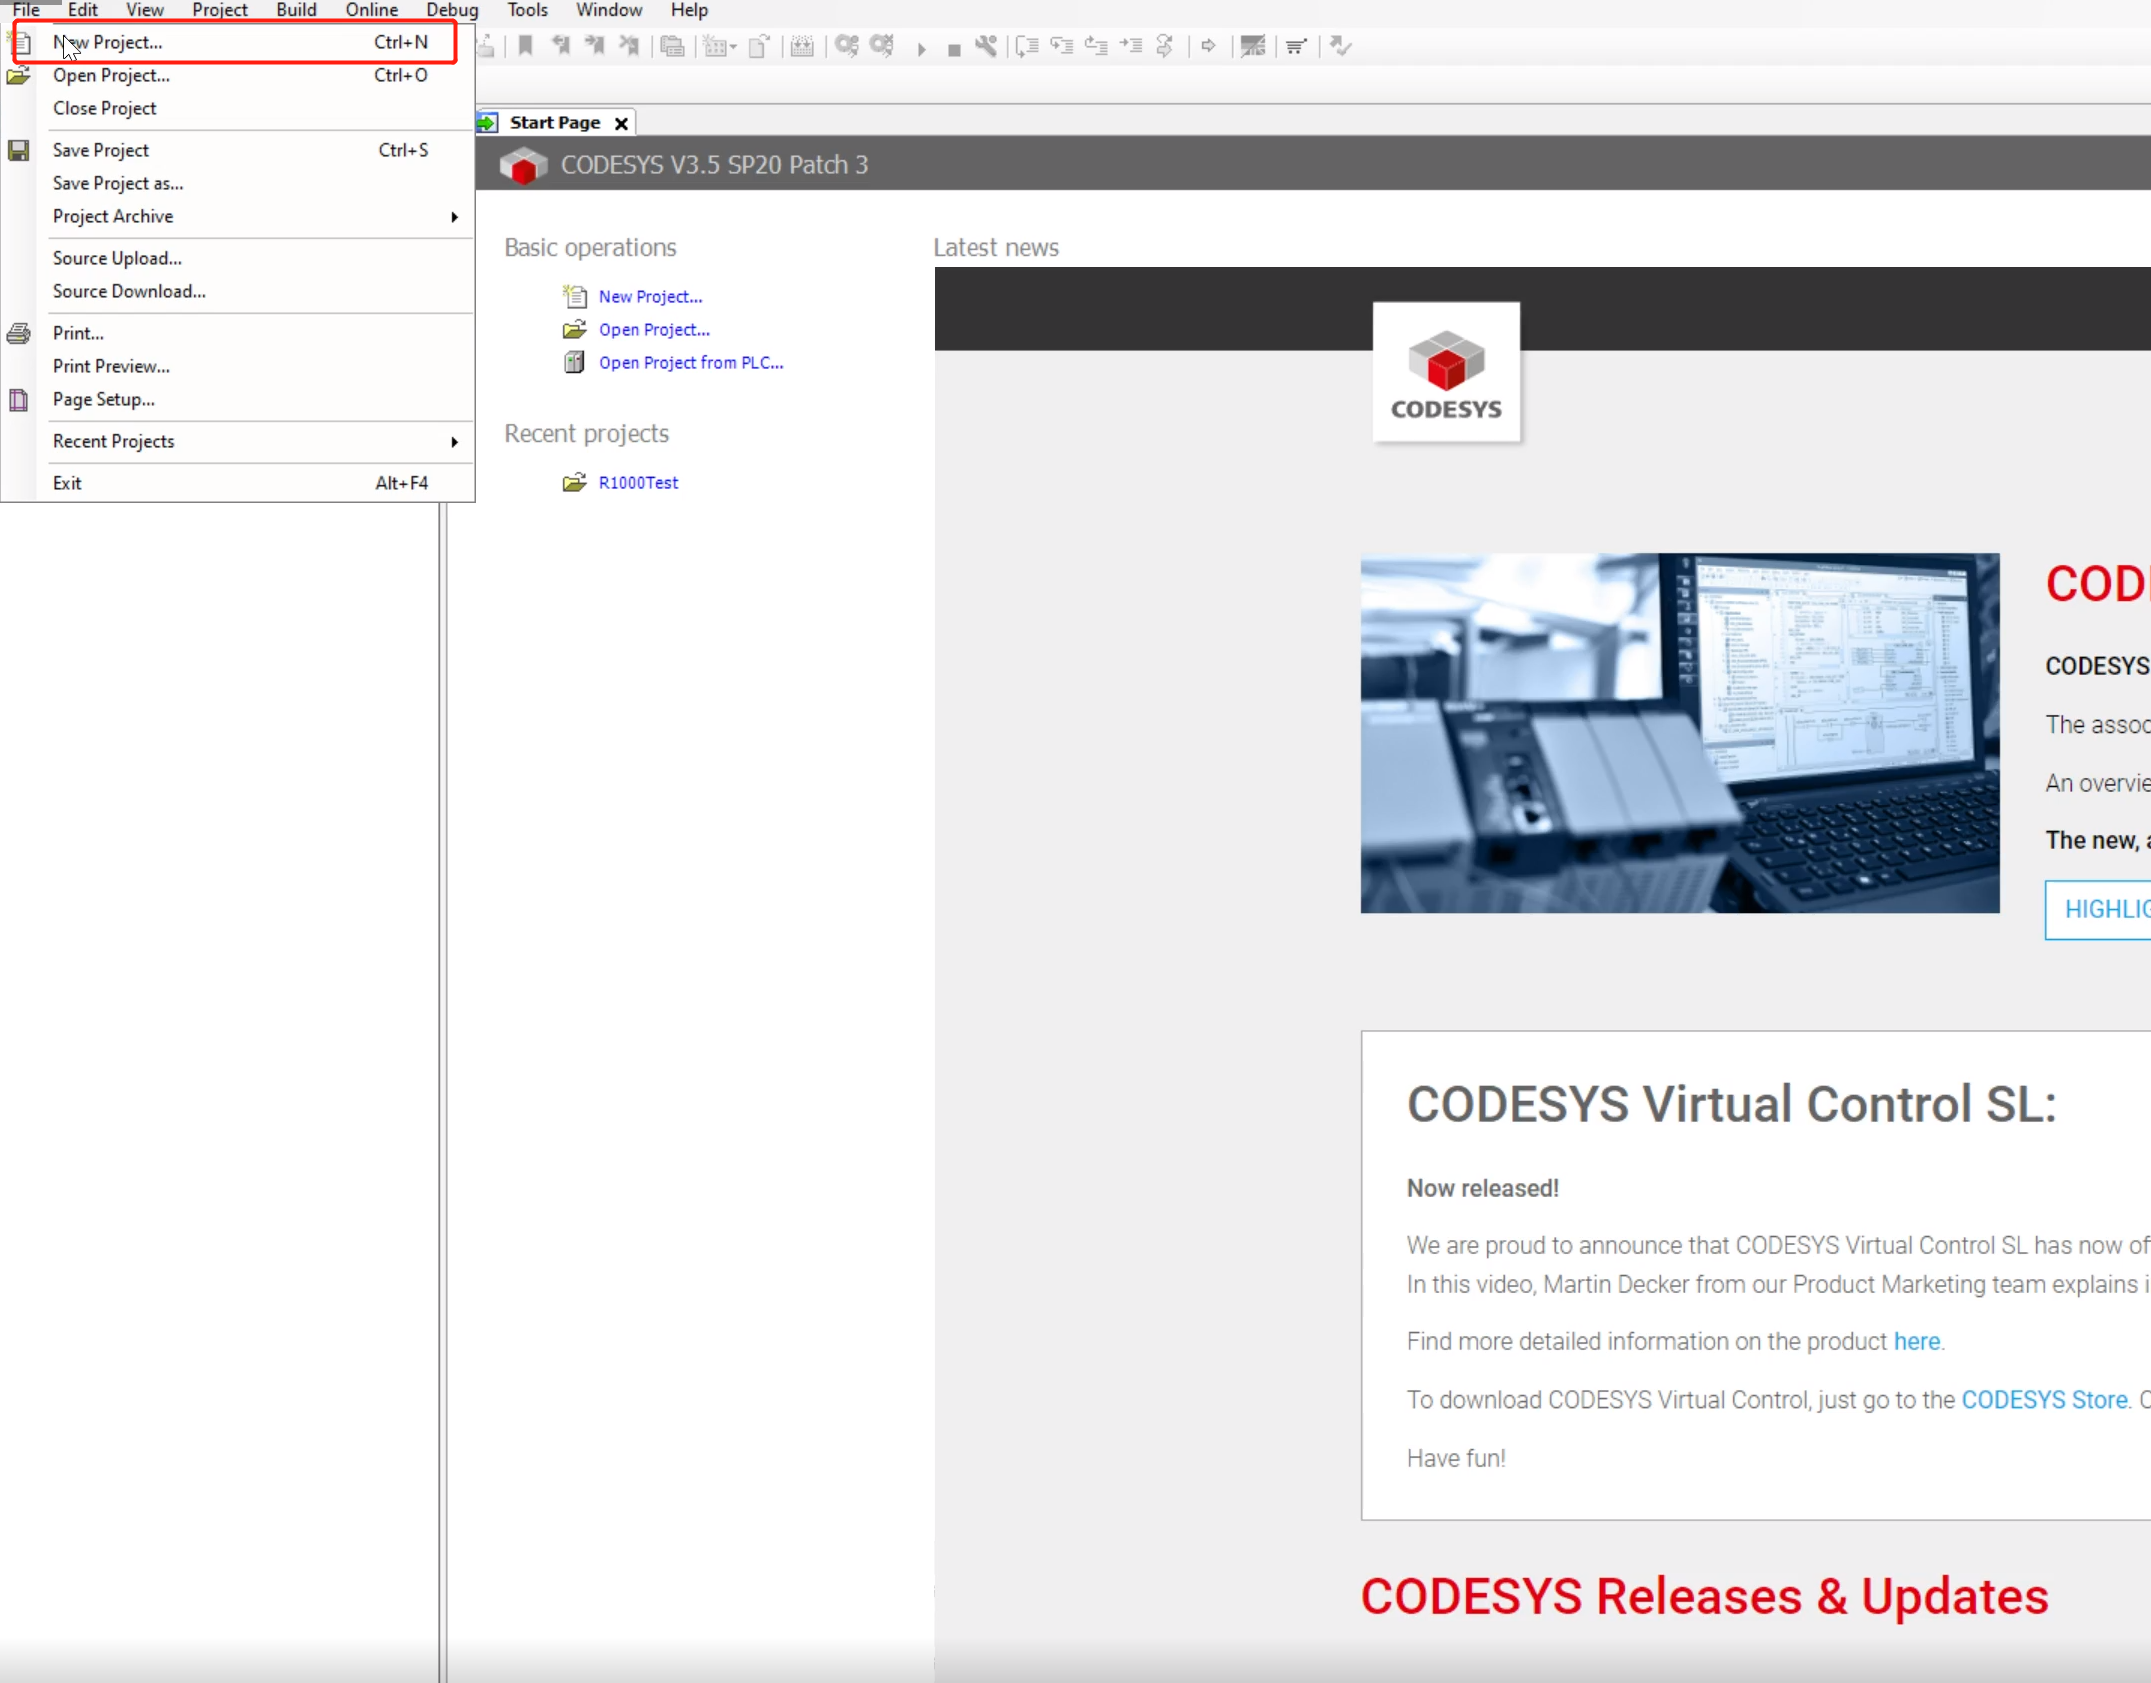
Step 1: Click File--->New project to create a new project
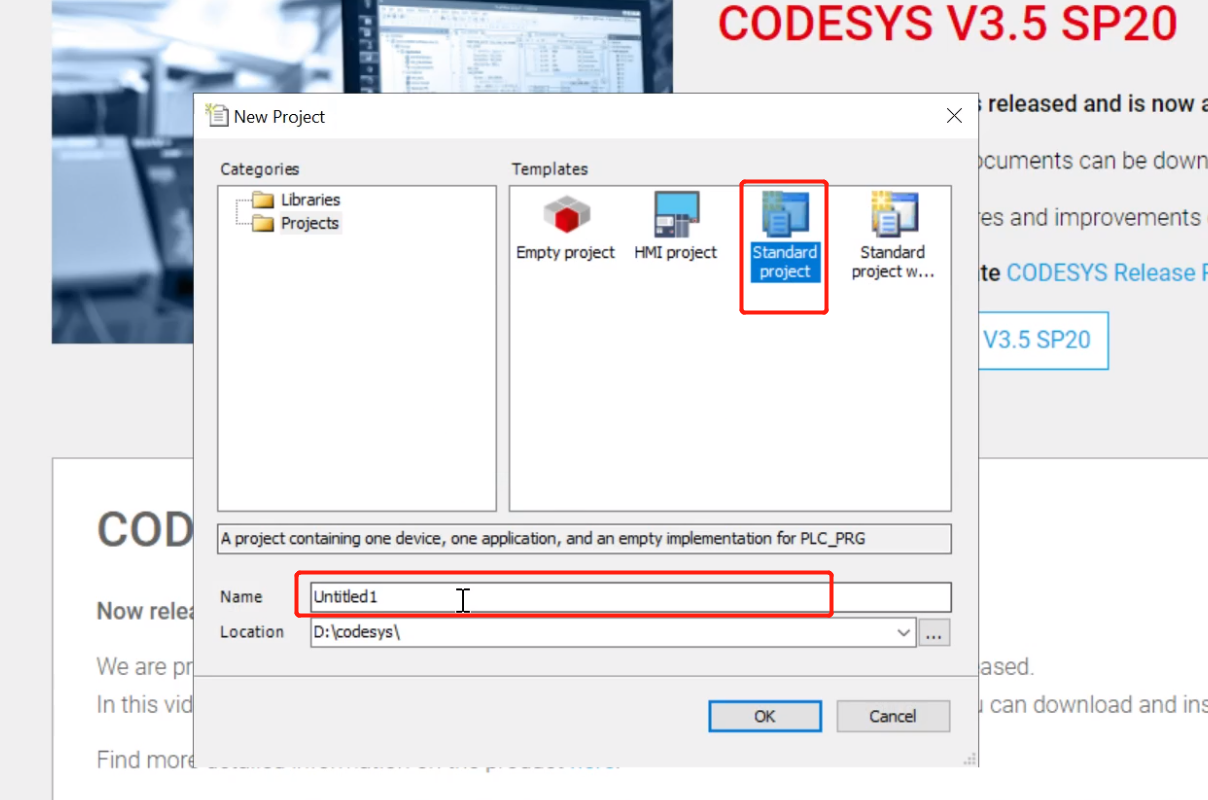
Step 2: Enter the project name, select Project--->Standard project, and finally click OK
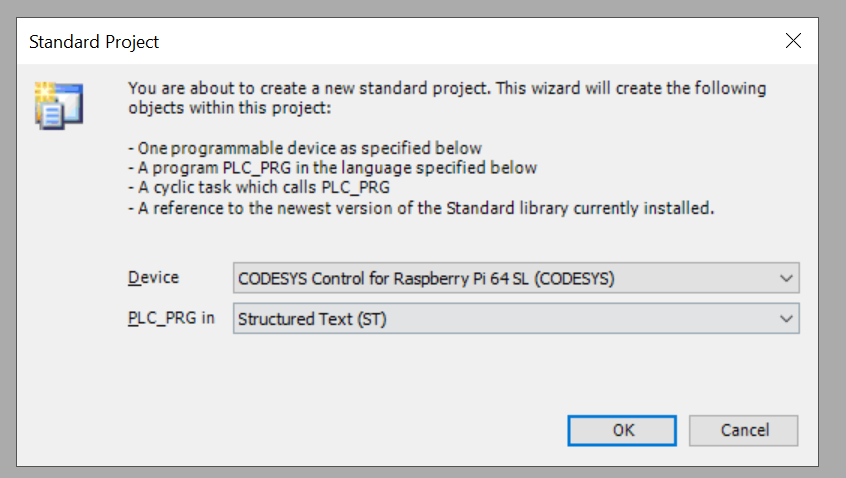
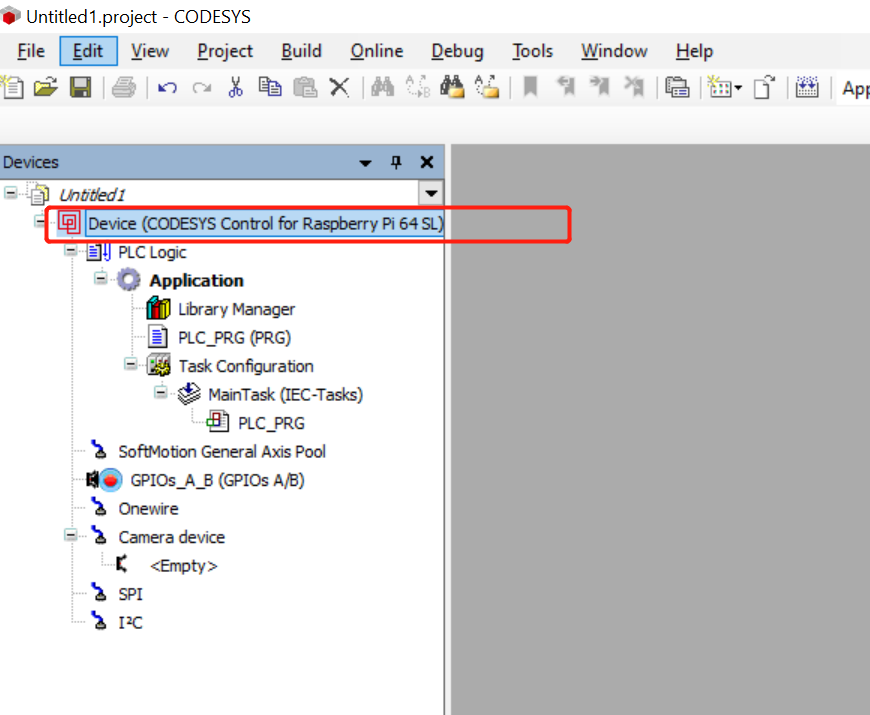
Step 3: Select CODESYS Control for Raspberry Pi 64 SL (CODESYS) in the Device column, select Structured Text (ST) in PLC_PRG in, and finally click OK. A new project is created. Later, we will demonstrate how to deploy the project.
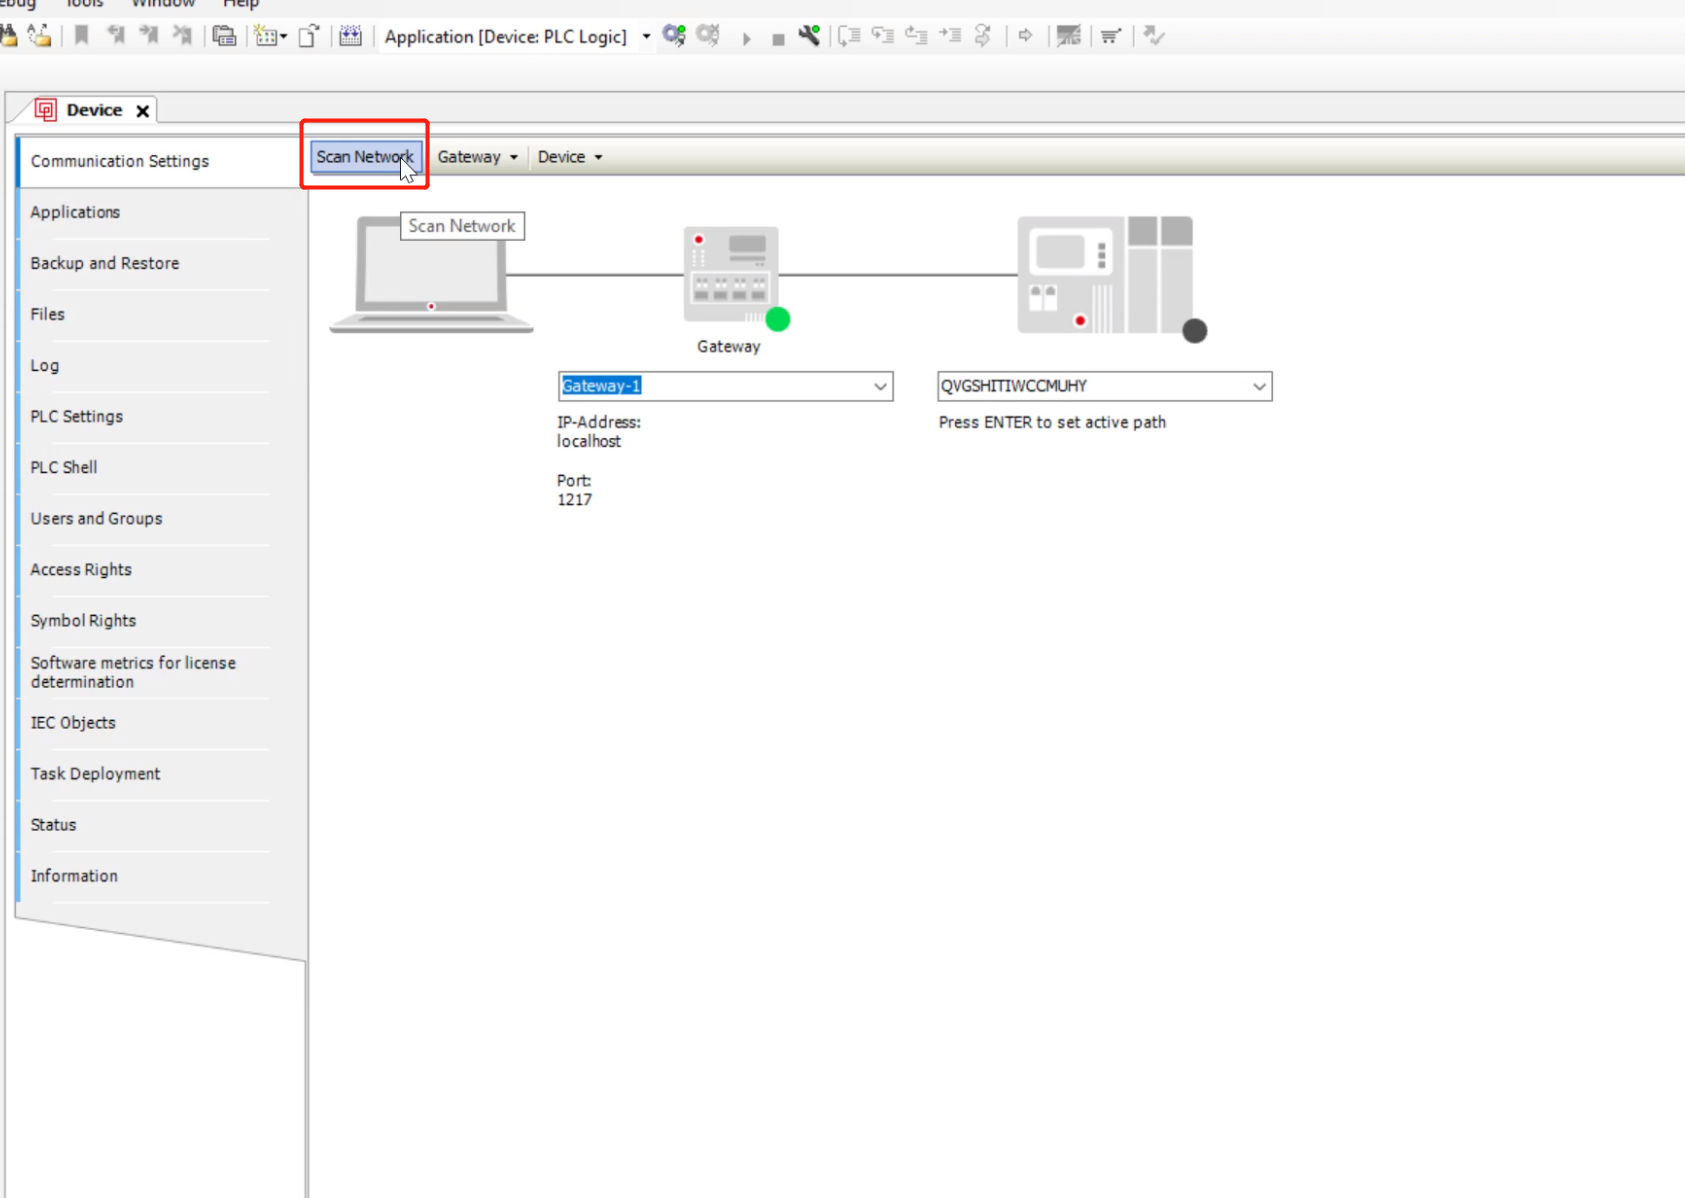
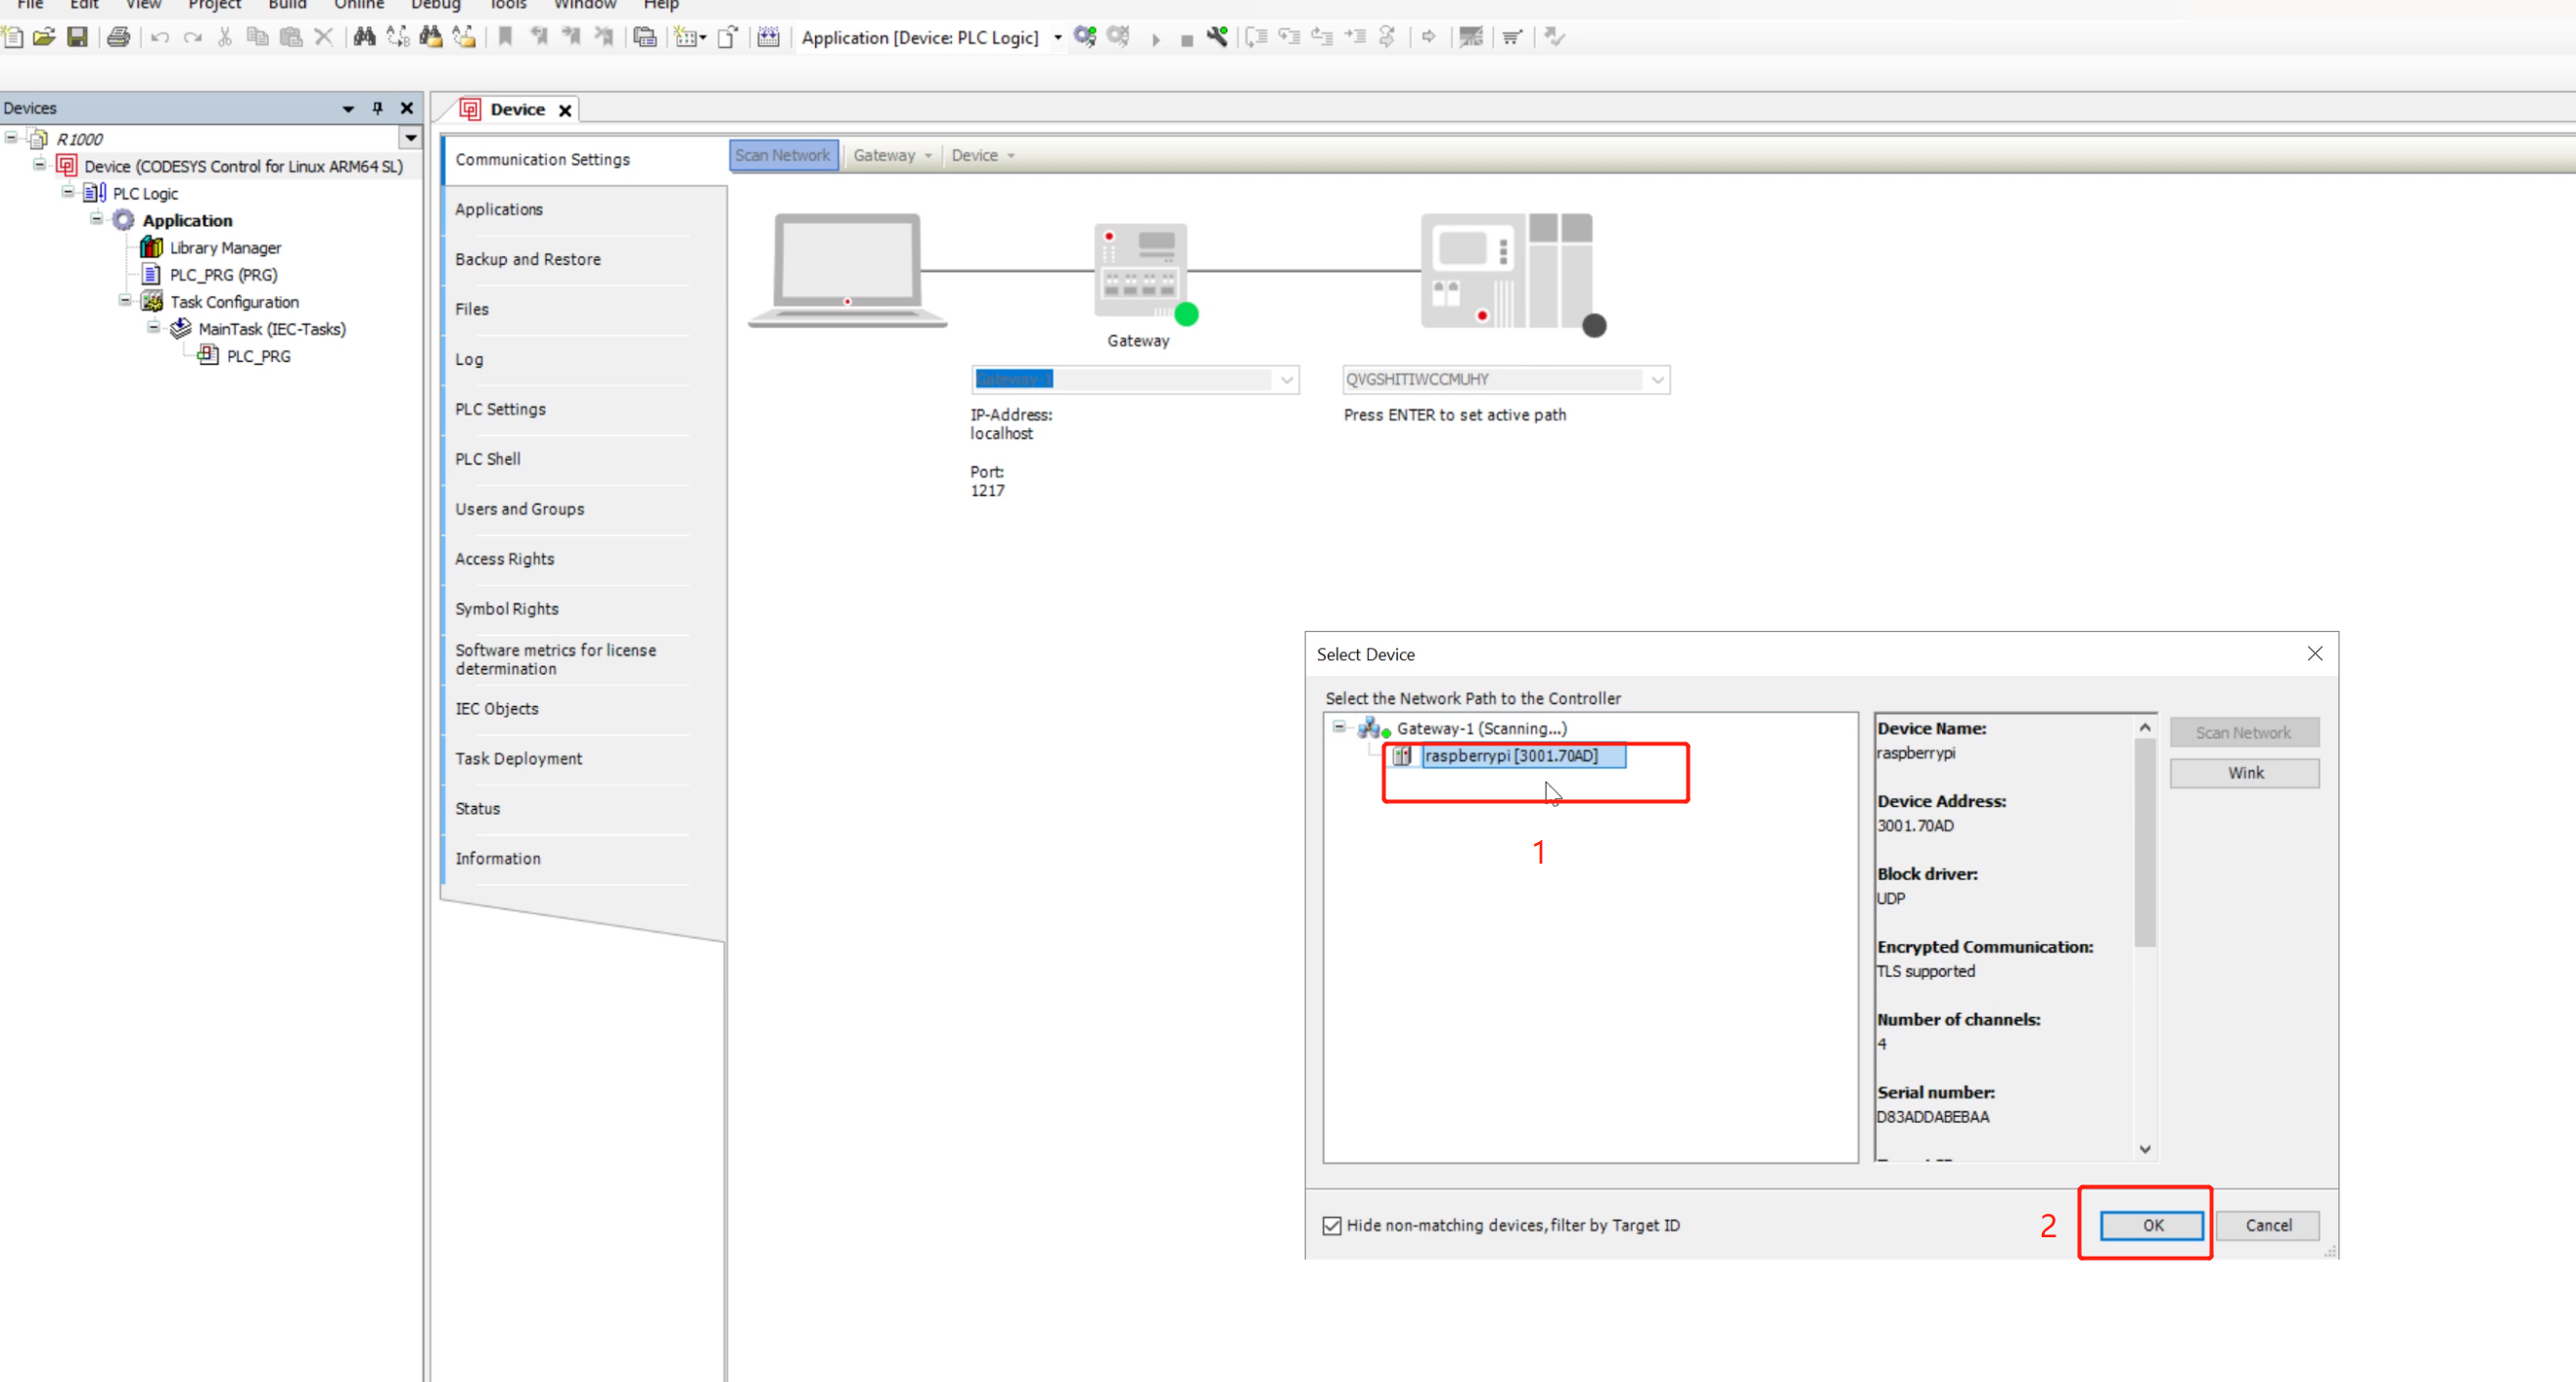
Step 4: After creating the project, double-click it. In the new pop-up window, click Scan Network, which can find the reComputer R1000 in the same network segment.
Step 5: Select R1000 and click OK
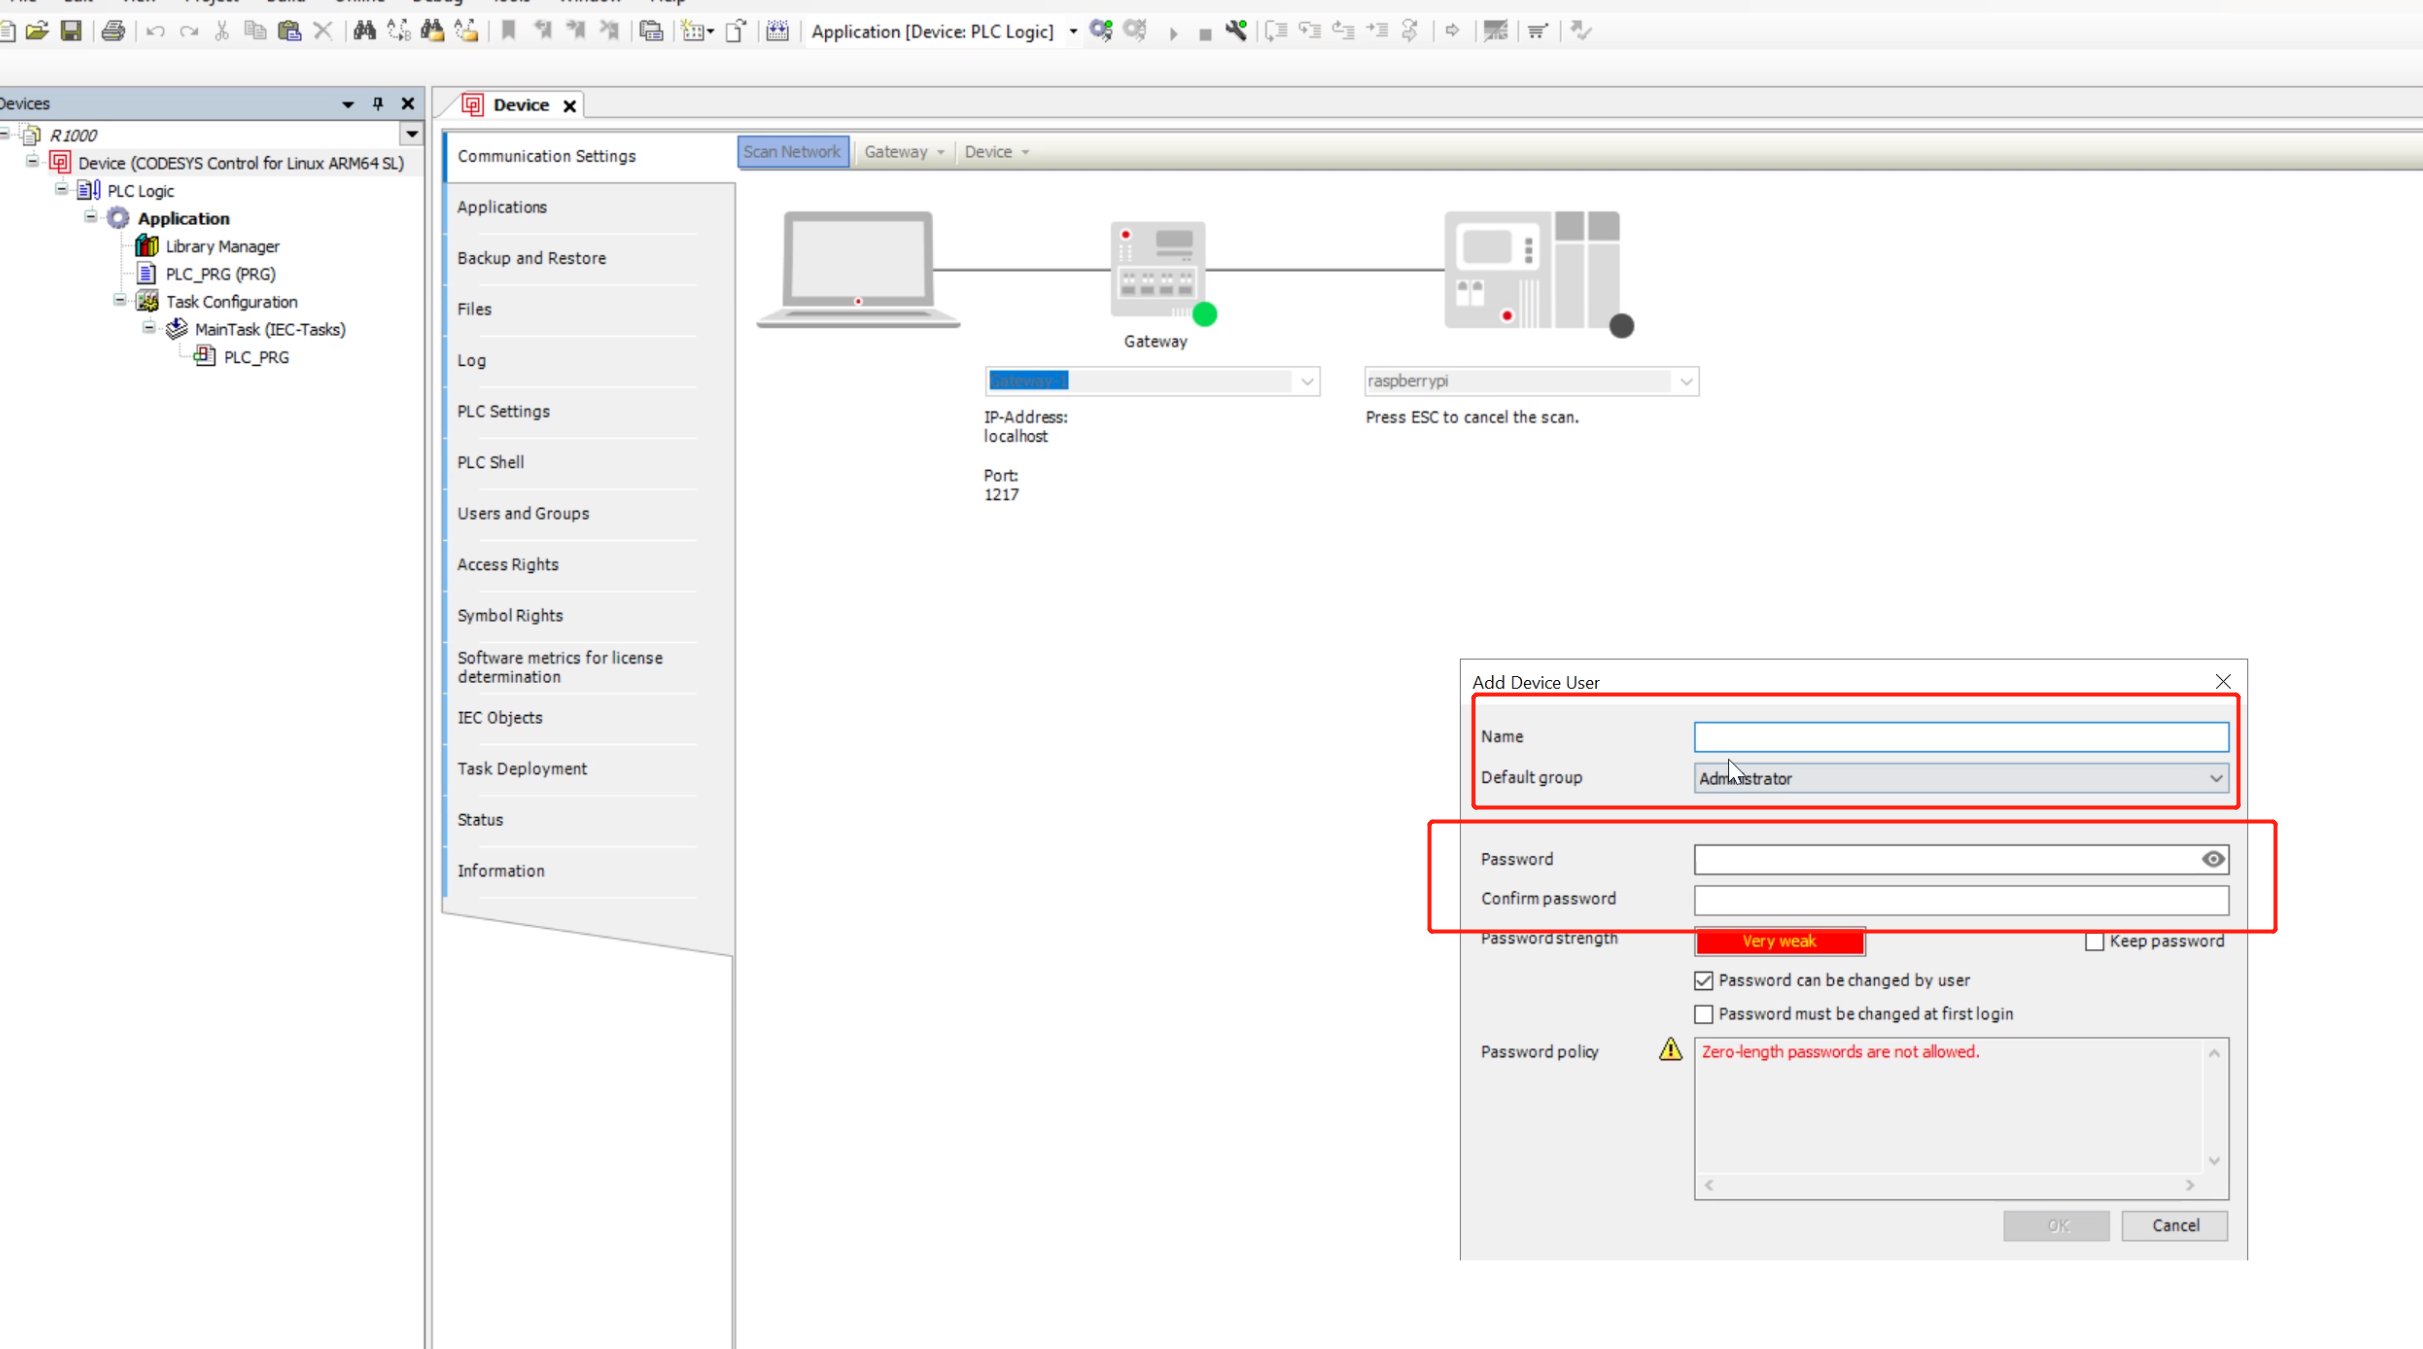
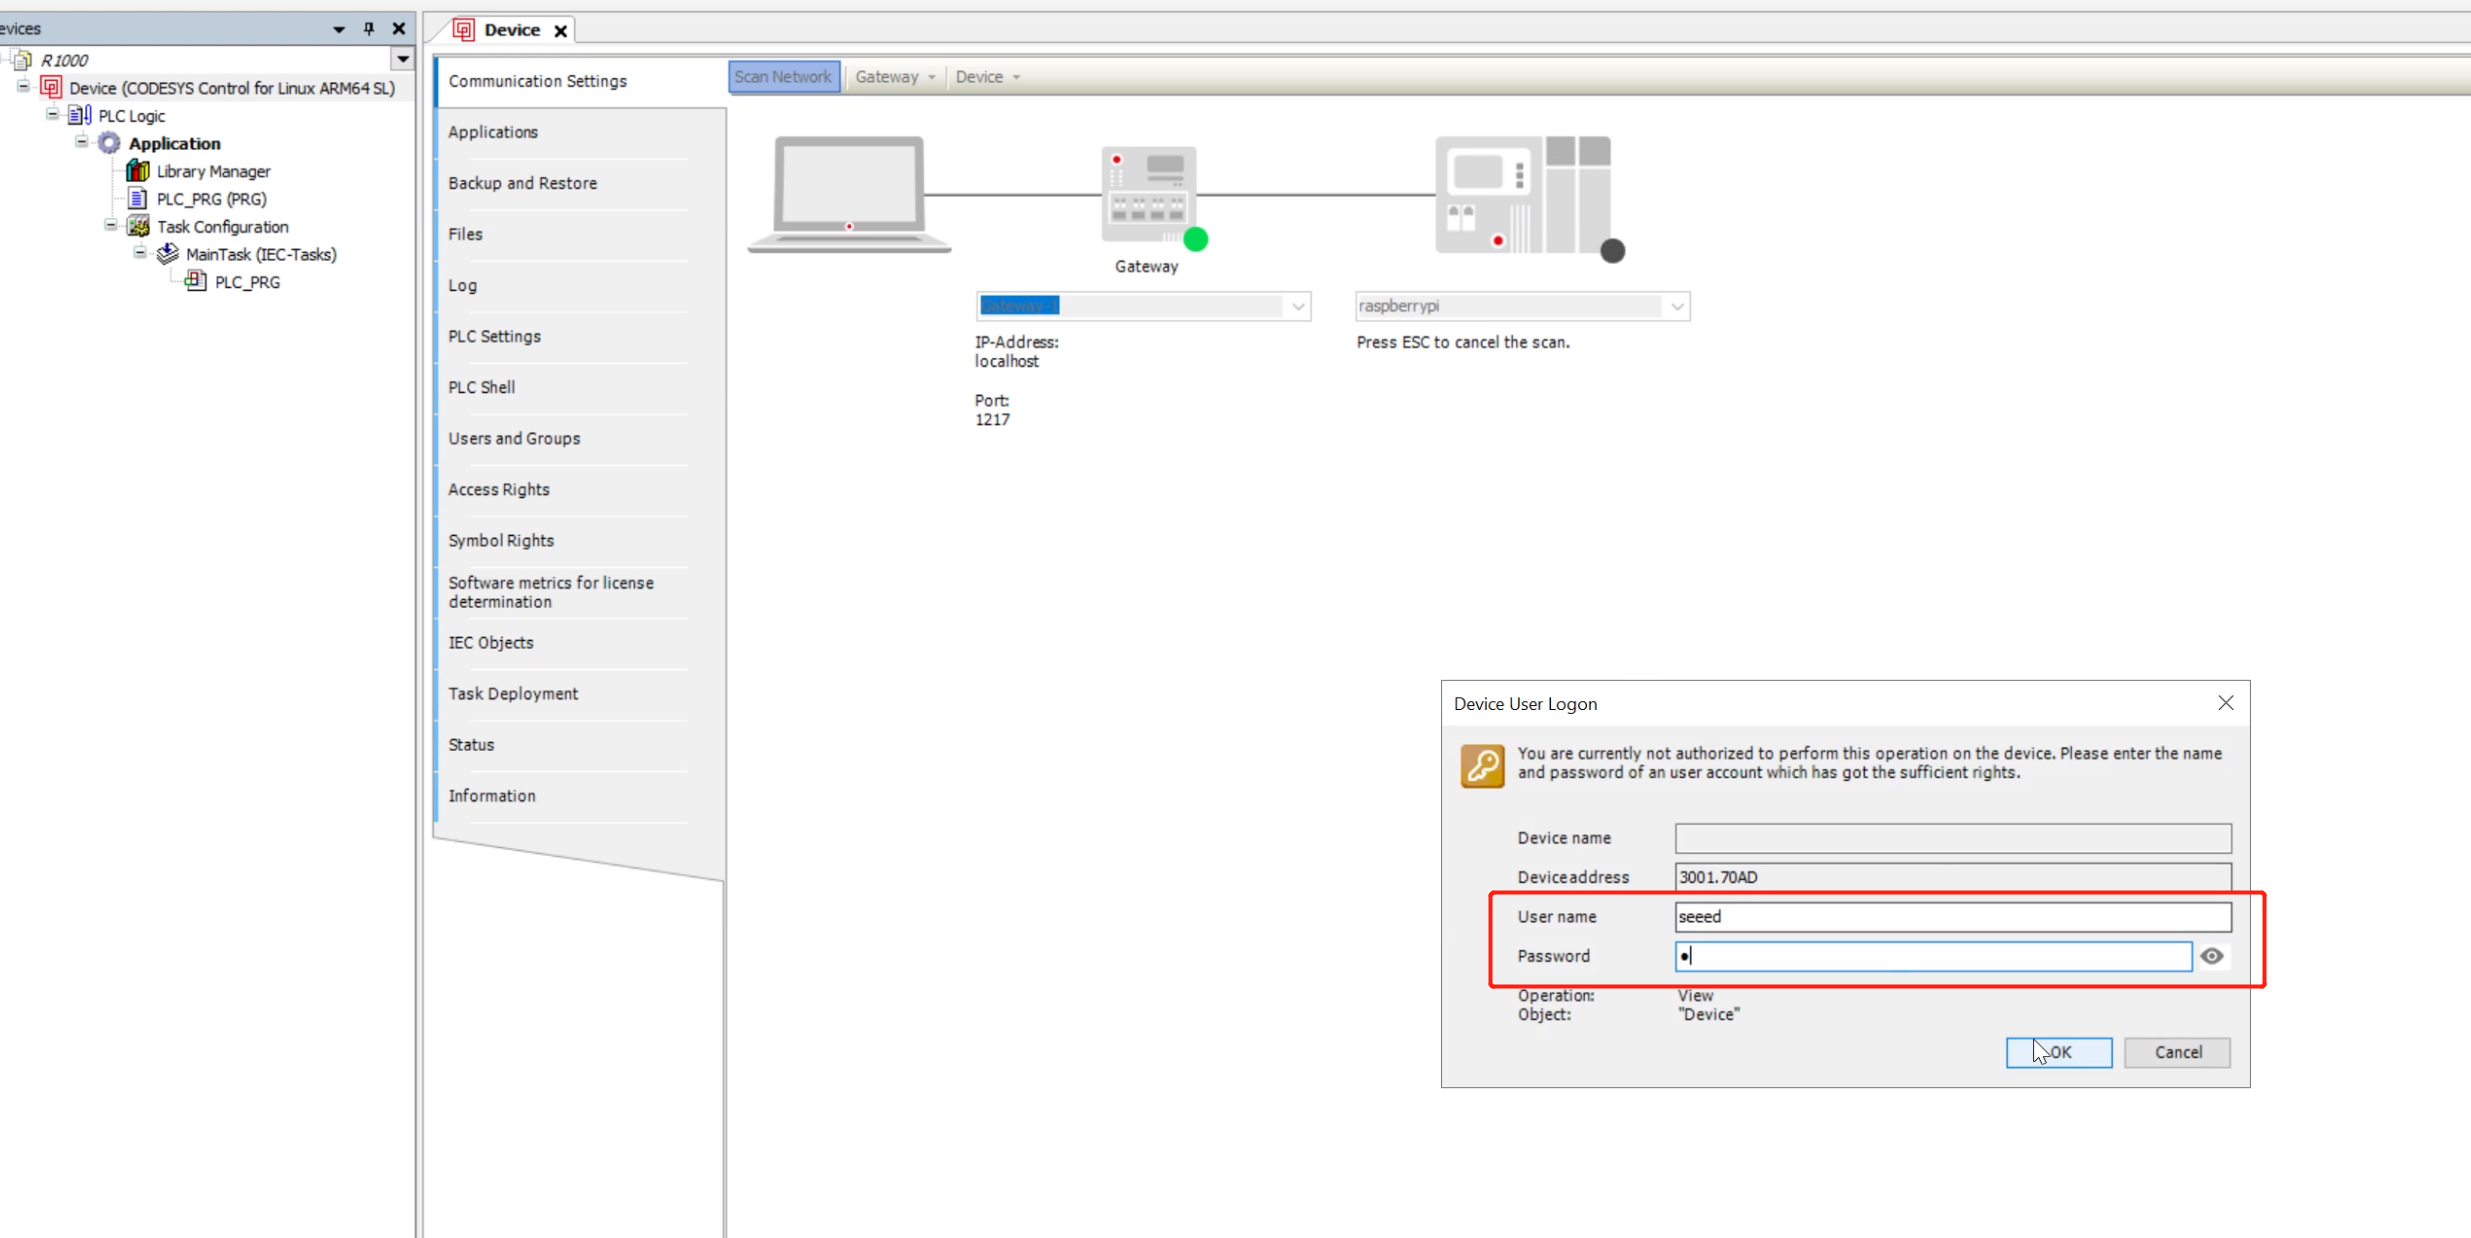
Step 6: In the Add Device User window, fill in the reComputer R1000 username and password, and finally click OK
Step 7: Then the Device User Login window will pop up, fill in the reComputer R1000 username and password again, and finally click OK
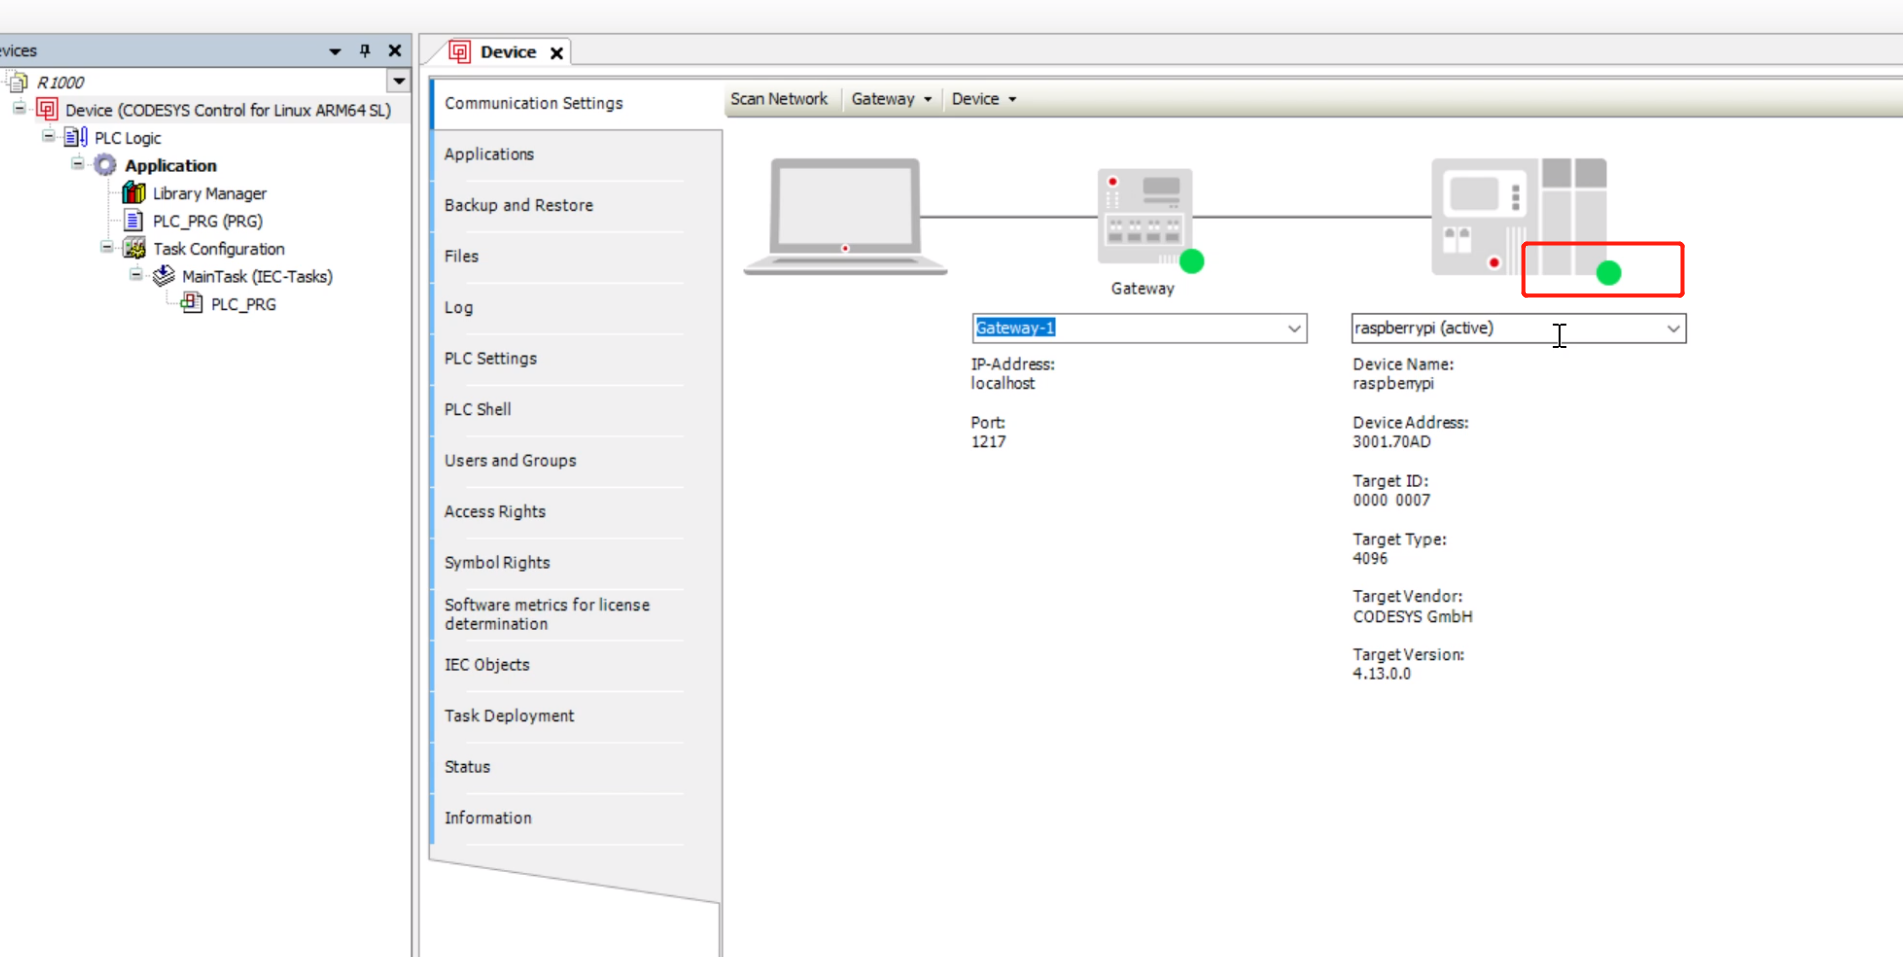
Step 8: After the connection is successful, you can see that the status lights are all green
Step 9: Click the Deploy button on the toolbar as shown to compile and deploy the current project to reComputer R1000

Step 10: Click the Start button on the toolbar to start the current project in reComputer R1000

Tech Support & Product Discussion
Thank you for choosing our products! We are here to provide you with different support to ensure that your experience with our products is as smooth as possible. We offer several communication channels to cater to different preferences and needs.