reSpeaker XVF3800 + Agora Conversational AI Agent v2 Edge Conversational Client Deployment Guide
Goal: Make ESP32S3 work together with reSpeaker XVF3800 to establish a stable, low-latency, bidirectional audio link via Agora RTC. Project source code: https://github.com/Seeed-Projects/ESP32S3_reSpeaker_agora/tree/main Seeed-Projects: https://github.com/Seeed-Projects/ESP32S3_reSpeaker_agora/tree/main
Introduction
In this tutorial, we will guide you to use Seeed Studio reSpeaker XVF3800 (XIAO ESP32-S3) as an edge voice device to establish a stable, low-latency, bidirectional audio link via Agora RTC, and directly call Agora Conversational AI Agent API v2 on the device to complete the conversational loop of ASR → LLM → TTS: the device captures microphone audio and sends it uplink; the cloud AI generates spoken replies and sends them downlink; the device plays them back in real time—delivering a “phone-call-like” voice conversation experience.
Choose Your Backend
This guide provides two backend options. Pick the one that fits your scenario:
| Option | Best for | Server Needed | Link |
|---|---|---|---|
| Agora Conversational AI Agent v2 (Cloud, direct) | Fastest setup / minimum infra | No | You are here ✅ |
| TEN Framework (Self-hosted, pluggable ASR/LLM/TTS) | Custom pipeline / provider switching / advanced features | Yes (Docker) | 👉 Go to TEN Framework version |
Table of Contents
- Key Features
- System Architecture
- Prerequisites
- Firmware and Hardware Notes
- ESP32 Deployment
- Verification and Testing
- FAQ
- References
Key Features
- Real-time voice conversation: low-latency, bidirectional audio link based on Agora RTC
- Direct AI Agent v2 integration: the device connects directly to Agora Conversational AI Agent API v2
- XVF3800 button control: I2C polling of buttons to start/stop conversations
- Acoustic Echo Cancellation (AEC): AEC integrated in the device audio pipeline to improve conversation quality
- G.711 μ-law codec: efficient codec/decoder for embedded voice scenarios
- Configurable AI backend: sample supports OpenAI / Azure OpenAI, etc.
- 8 kHz sample rate: optimized for voice conversation scenarios
System Architecture
Architecture Overview
┌─────────────────────────────────────────────────────────────────────┐
│                          System Architecture                          │
├─────────────────────────────────────────────────────────────────────┤
│                                                                     │
│  ┌─────────────────┐                    ┌─────────────────────────┐ │
│  │   ESP32-S3 Device│                    │   Agora Conversational  │ │
│  │   (Edge)         │                    │      AI Agent v2        │ │
│  ├─────────────────┤                    ├─────────────────────────┤ │
│  │ • Microphone cap.│ ──── Agora RTC ──→ │ • ASR (speech recog.)   │ │
│  │ • WiFi           │     real-time audio│ • LLM (large language)  │ │
│  │ • Speaker play   │ ←── Agora RTC ──── │ • TTS (speech synth.)   │ │
│  │ • Button control │                    │ • Agent mgmt/auth       │ │
│  └─────────────────┘                    └─────────────────────────┘ │
│                                                                     │
└─────────────────────────────────────────────────────────────────────┘
Edge Audio Processing Pipeline
Microphone (XVF3800)
    ↓ I2S (DIN)
I2S Capture
    ↓
AEC / Audio Processing
    ↓
RTC Encode (G.711 μ-law, 8kHz)
    ↓
Agora RTC Uplink → AI Agent v2
    ↓
(Cloud: ASR → LLM → TTS)
    ↓
Agora RTC Downlink ← AI Agent v2
    ↓
RTC Decode
    ↓
I2S Playback (DOUT)
    ↓
Speaker (3.5mm / AIC3104)
Prerequisites
Hardware Requirements
| Hardware | Description |
|---|---|
| Seeed Studio XIAO ESP32-S3 | Main controller board (PSRAM version recommended) |
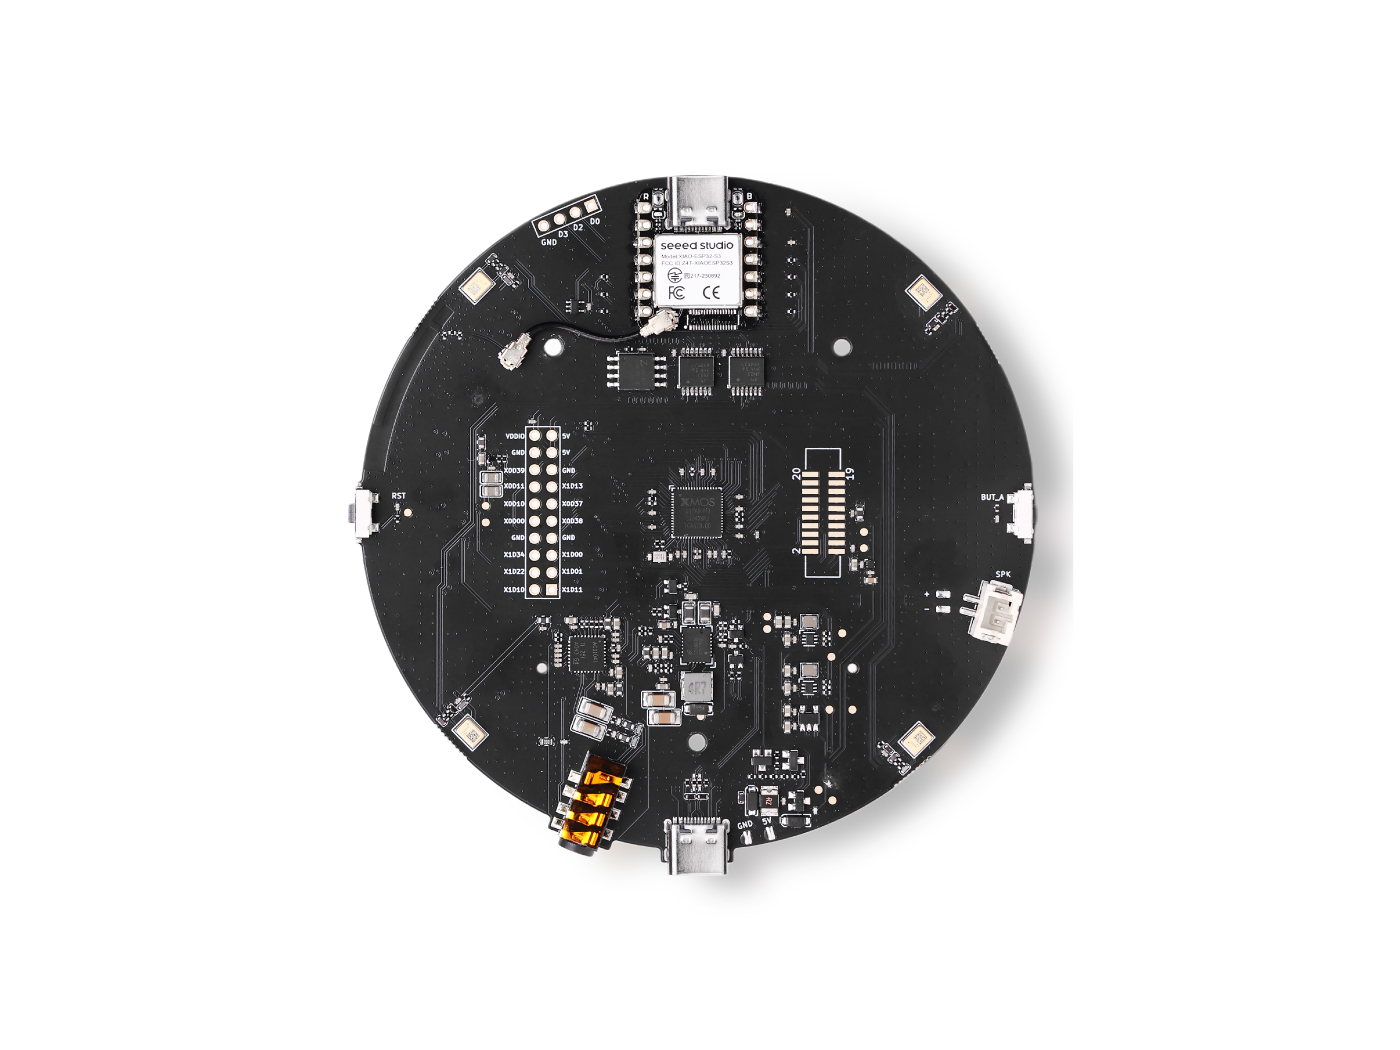
| reSpeaker XVF3800 | 4-mic array expansion board (with DSP) |
| Speaker | Connect to the 3.5mm audio jack for playback |
| USB-C data cable | For flashing firmware and power supply |
In this project, audio codec/decoding is handled by XVF3800 together with AIC3104. ESP32-S3 transfers audio data via I2S and controls the codec/buttons via I2C.
Software Requirements
| Software | Recommended Version | Purpose |
|---|---|---|
| ESP-IDF | v5.2.3 | ESP32 development framework |
| ESP-ADF | v2.7 | ESP32 audio development framework |
| Python | 3.8+ | Toolchain/build dependencies |
| Git | Latest | Code fetch and management |
Enable Conversational AI (Agora Console)
This section ensures your Agora project has the Enable Conversational AI switch turned on in the Console, and that you have prepared the required App ID / App Certificate / RTC Token for subsequent calls. If you skip this step, the device may join the RTC channel successfully but still fail to trigger the Conversational AI Engine conversation pipeline.
What You Need
- An Agora account
- An Agora Project (recommended: create with Secured mode: APP ID + Token (Recommended))
- Project information:
- App ID
- App Certificate (for server-side token generation)
- RTC Token (temporary or server-generated) (for RTC join testing)
1) Sign up / Log in to Agora (Overview)
- Supports email/phone registration and third-party login.
- After registration, log in to Agora Console; you are usually guided to create a project.
2) Create an Agora Project (Overview)
On the Projects page in Agora Console:
- Click Create New
- Fill in Project name / Use case
- Authentication method: APP ID + Token (recommended)
- Submit to create
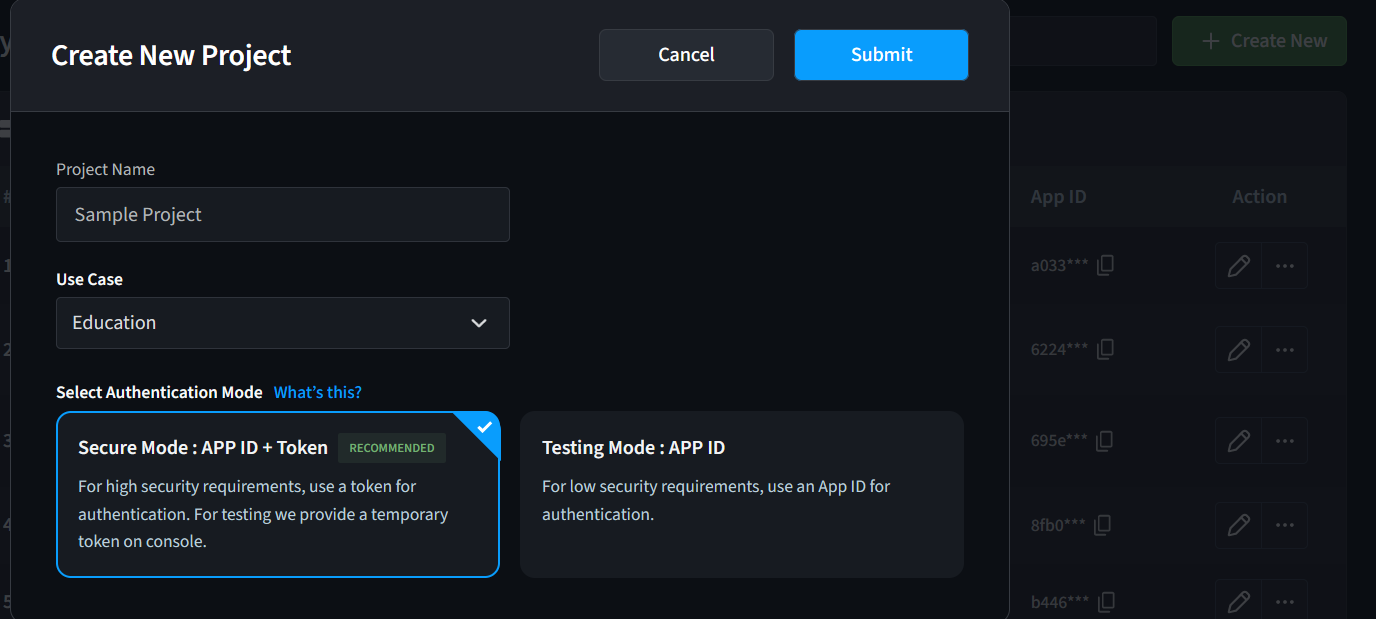
It is safer for production, and aligns better with the official recommended authentication flow for Conversational AI / RTC integration.
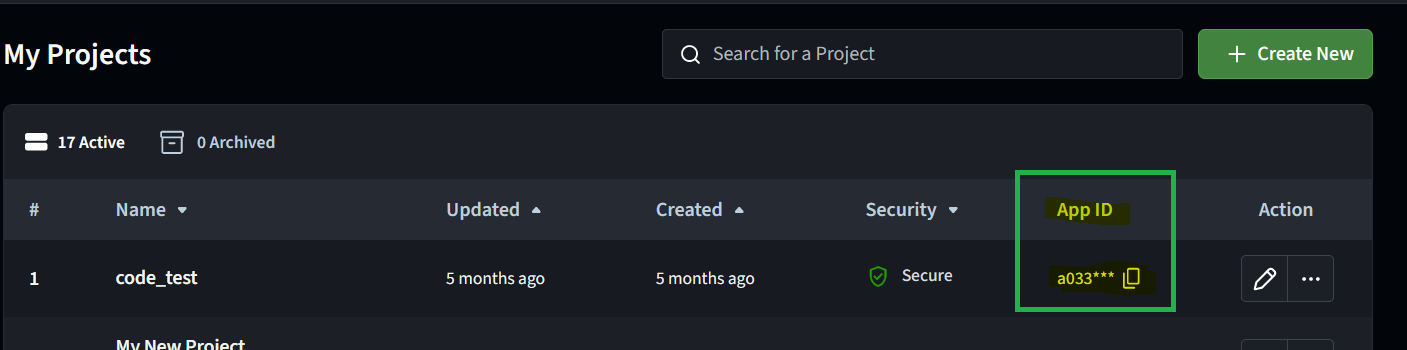
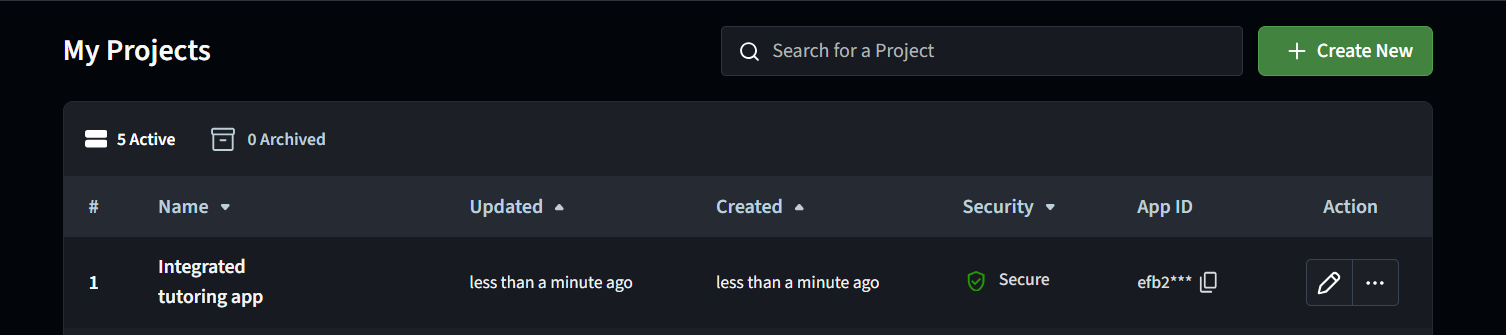
3) Get the App ID
In the Projects list, find your project and copy the App ID.
4) Get the App Certificate (for server-side token generation)
- In the Projects list, click the ✏️ (edit/configure) icon on the right of the project.

- On the project configuration page, copy App Certificate from the Primary Certificate section.
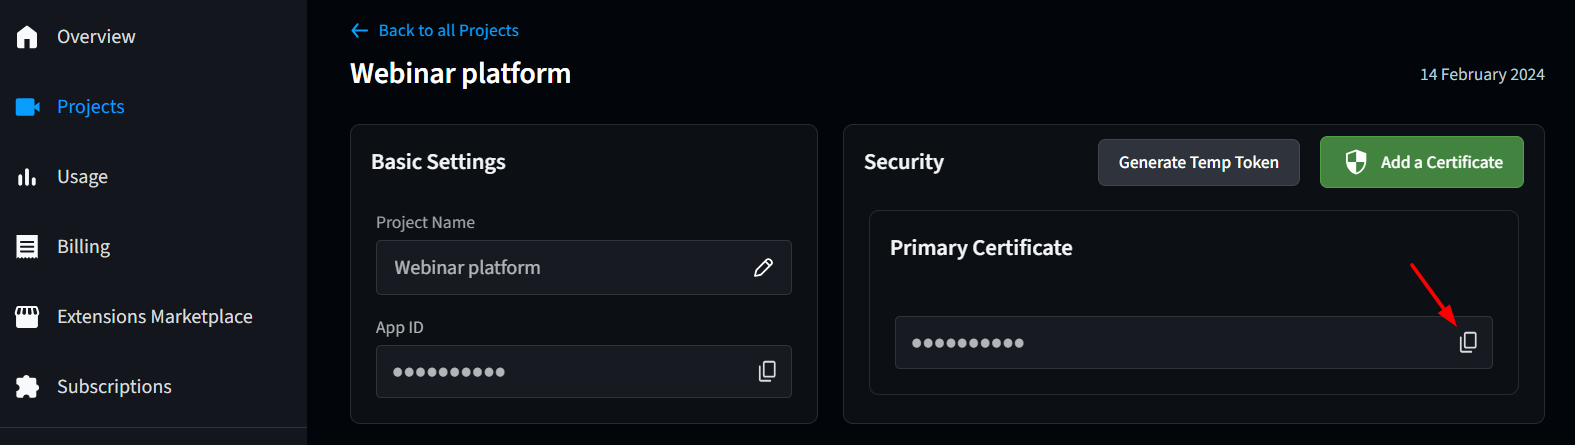
App Certificate is sensitive information. Do not commit it to public repositories or print it in public logs.
5) Generate an RTC Token (for quick testing)
Two common methods:
-
Generate a temporary token in the Console (Temp Token)
- Go to the project configuration page
- Click Generate Temp Token in the Security panel
- Enter Channel name → Generate → copy the Token
-
Use Agora Token Builder (web)
- Fill in App ID / App Certificate, channel name, UID, etc. to generate a Token (useful for quick validation before you implement server-side token generation)
6) Turn on Enable Conversational AI (Critical)
Before using Conversational AI Engine, you must enable it in the Console for your app:
- Go to Projects, find the target project, and click ✏️ to enter configuration.
- In All features, find Conversational AI > Configurations
- Turn on the Enable Conversational AI toggle.
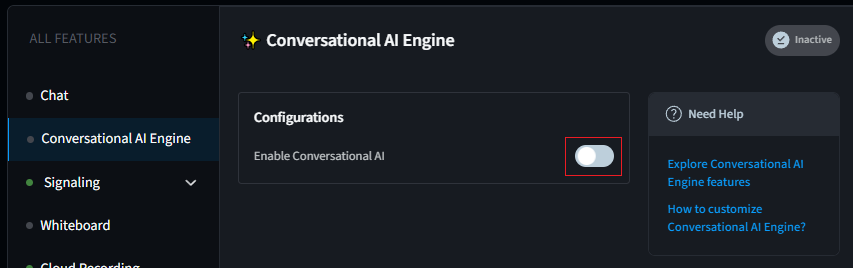
If you are seeing the old UI, switch to the new Console first (the page typically provides an entry such as “Switch to the new version”).
Firmware and Hardware Notes
Key Pin Mapping (reSpeaker XVF3800 + XIAO ESP32-S3)
| Interface | Function | ESP32-S3 Pin |
|---|---|---|
| I2C | Codec control + buttons | SDA=GPIO5, SCL=GPIO6 |
| I2S | Audio data | BCLK=GPIO8, WS=GPIO7, DOUT=GPIO44, DIN=GPIO43 |
| Power | Power/Flashing | USB-C (XIAO ESP32-S3) |
The default ESP-ADF board configuration is usually prepared for Korvo-2-V3. Its pin mapping is different from XVF3800. If you do not configure according to this guide, common symptoms include codec not detected over I2C / no audio on I2S.
ESP32 Deployment
Clone this repository
git clone https://github.com/AgoraIO-Conversational-AI/esp32-client/tree/main/esp32-respeaker
Development Environment Setup
Step 1: Install ESP-IDF v5.2.3
mkdir -p ~/esp
cd ~/esp
git clone -b v5.2.3 --recursive https://github.com/espressif/esp-idf.git

cd esp-idf
./install.sh esp32s3

# (Recommended) Create an environment load alias (write into ~/.bashrc or ~/.zshrc)
alias get_idf='. $HOME/esp/esp-idf/export.sh'
Step 2: Install ESP-ADF v2.7
cd ~/esp
git clone -b v2.7 --recursive https://github.com/espressif/esp-adf.git

export ADF_PATH=~/esp/esp-adf
echo 'export ADF_PATH=~/esp/esp-adf' >> ~/.bashrc  # or ~/.zshrc
Step 3: Apply IDF patches (required by ESP-ADF)
cd ~/esp/esp-idf
git apply $ADF_PATH/idf_patches/idf_v5.2_freertos.patch
Download Agora IoT SDK
Extract the Agora IoT SDK into the project components/ directory (using the project root as an example):
cd /path/to/esp32-client-Respeaker-convo/components

wget https://rte-store.s3.amazonaws.com/agora_iot_sdk.tar
tar -xvf agora_iot_sdk.tar
After extraction, the directory structure should look like:
components/agora_iot_sdk/
├── CMakeLists.txt
├── include/
│   └── agora_rtc_api.h
└── libs/
    ├── libagora-cjson.a
    ├── libahpl.a
    └── librtsa.a
Configure ESP-ADF Board Pins (Critical)
This project uses the ESP-ADF Korvo-2-V3 board as a base, but you must replace its pin mapping with the XVF3800 configuration.
Method A (Recommended): overwrite board_pins_config.c directly
cp board_configs/board_pins_config_respeaker.c $ADF_PATH/components/audio_board/esp32_s3_korvo2_v3/board_pins_config.c
Verify it takes effect:
grep "TAG =" $ADF_PATH/components/audio_board/esp32_s3_korvo2_v3/board_pins_config.c
Expected output includes:
static const char *TAG = "RESPEAKER_XVF3800";
Because codec (AIC3104) control and I2S capture/playback rely on the correct I2C/I2S pin mapping. If pins are wrong, you will see issues like I2C timeout / cannot detect 0x18 / no sound, etc.
Project Parameter Configuration
Edit main/app_config.h and configure the following:
1) WiFi
#define WIFI_SSID                "Your_WiFi_SSID"
#define WIFI_PASSWORD            "Your_WiFi_Password"
2) Agora account info
#define AGORA_APP_ID             "your_agora_app_id"
#define AGORA_API_KEY            "your_agora_api_key"
#define AGORA_API_SECRET         "your_agora_api_secret"
3) RTC channel and UID
#define CONVO_CHANNEL_NAME       "your_unique_channel"
#define CONVO_RTC_TOKEN          ""  // Optional: tokens recommended in production
#define CONVO_AGENT_RTC_UID      1001
#define CONVO_REMOTE_RTC_UID     1000
4) LLM configuration (examples: OpenAI / Azure OpenAI)
#define LLM_URL                  "https://api.openai.com/v1/chat/completions"
#define LLM_API_KEY              "sk-your-openai-api-key"
#define LLM_MODEL                "gpt-4o-mini"
#define LLM_SYSTEM_MESSAGE       "You are a helpful AI assistant."
#define LLM_URL                  "https://your-resource.openai.azure.com/openai/deployments/..."
#define LLM_API_KEY              "your-azure-api-key"
#define LLM_MODEL                "gpt-4"
5) TTS configuration (example: Azure TTS)
#define TTS_VENDOR               "azure"
#define TTS_API_KEY              "your-azure-speech-key"
#define TTS_REGION               "tts-region"
#define TTS_VOICE_NAME           "en-US-JennyNeural"
6) ASR configuration
#define ASR_LANGUAGE "en-US"
Build and Flash
Step 1: Load ESP-IDF environment
get_idf
# or
. $HOME/esp/esp-idf/export.sh
Step 2: Enter the project directory and set the target
cd /path/to/esp32-client-Respeaker-convo
idf.py set-target esp32s3
Step 3: Build
idf.py build
Step 4: Flash and monitor
# Linux
idf.py -p /dev/ttyUSB0 flash monitor

# macOS
idf.py -p /dev/cu.usbmodem* flash monitor

# Windows
idf.py -p COM3 flash monitor
If you see “permission denied”, run:
sudo usermod -aG dialout $USER
# Then log out and log back in
Verification and Testing
Startup Log Checklist
On successful startup, the serial log typically includes:
- WiFi connected and IP acquired
- AIC3104 detected (I2C address is usually
0x18) - Audio pipeline started successfully
- Agora RTC joined successfully (or ready)
Example (for reference only):
WiFi connected
got ip: 192.168.x.x
Found device at address 0x18
AIC3104 Codec initialized successfully
agora_rtc_join_channel success
Start a Conversation (Button Control)
- Power on and wait until the device is ready
- Press the SET button once: start/join the conversation (Agent joins the RTC channel)
- Speak to the microphone and wait for the speaker to play the AI reply
- Press SET again (or press MUTE) to stop the conversation
FAQ
Q1: I2C timeout / AIC3104 (0x18) not found
Possible causes:
- ESP-ADF
board_pins_config.cwas not replaced as described in this guide - Incorrect I2C pin mapping (should be SDA=GPIO5, SCL=GPIO6)
- Hardware connection issue (XIAO and XVF3800 are not properly plugged in)
Suggested checks:
- Repeat the “Configure ESP-ADF Board Pins” step, then run
idf.py fullcleanand rebuild - Check whether the startup log can detect
0x18
Q2: Recording/uplink works, but no speaker output
Common causes:
- I2S DIN/DOUT direction is misconfigured (DIN=GPIO43, DOUT=GPIO44)
- Speaker not connected to the 3.5mm jack or volume is too low
- AEC/audio pipeline did not start correctly
Q3: Build errors or missing dependencies
Suggestions:
- Confirm ESP-IDF / ESP-ADF versions match this guide
- Re-initialize submodules (if the project uses submodules):
git submodule update --init --recursive - Do a full clean:
idf.py fullclean
References
- Agora Console (App ID / API Key)
- Agora RTC documentation and IoT SDK documentation
- ESP-IDF v5.2.3 documentation
- ESP-ADF v2.7 documentation
- reSpeaker XVF3800 introduction and firmware update guide
- ESP32 Conversational AI Clients
Technical Support and Product Discussion
Thank you for choosing our products! We are here to provide different kinds of support to ensure your experience is as smooth as possible. We offer multiple communication channels to match different preferences and needs.