reSpeaker XVF3800 + Agora ten-framework Edge Conversational Client Deployment Guide
Goal: Make ESP32S3 work together with reSpeaker XVF3800, and build a stable, low-latency, bidirectional voice link via Agora RTC. Source code: https://github.com/Seeed-Projects/seeed-respeaker-agora-tenframework Seeed-Projects: https://github.com/Seeed-Projects/seeed-respeaker-agora-tenframework
Introduction
In this tutorial, we will guide you to use Seeed XIAO ESP32-S3 with reSpeaker XVF3800 for audio capture and playback, and use Agora RTC to complete the real-time audio connection between the device and the backend. The backend runs as an AI Agent. The project provides a standardized configuration method (.env / property.json), supports one-click Docker deployment, dynamic token authentication, and pluggable providers (ASR/LLM/TTS can be replaced as needed). It automatically completes the full loop of ASR → LLM → TTS, and streams synthesized speech back to the device for playback—delivering a low-latency “say once, get one reply” conversational experience.
Choose Your Backend
This guide provides two backend options. Pick the one that fits your scenario:
| Option | Best for | Server Needed | Link |
|---|---|---|---|
| Agora Conversational AI Agent v2 (Cloud, direct) | Fastest setup / minimum infra | No | 👉 Go to Agent v2 version |
| TEN Framework (Self-hosted, pluggable ASR/LLM/TTS) | Custom pipeline / provider switching / advanced features | Yes (Docker) | You are here ✅ |
Table of Contents
- Agora Assistant – Quick Start Guide
- System Architecture
- Prerequisites
- Firmware Update
- Server-side Deployment
- ESP32-side Deployment
- Validation & Testing
- FAQ
- References
Agora Assistant – Quick Start Guide
Architecture Overview
- Wake Word Detection – Continuously listens for a predefined activation phrase.
- Speech-to-Text (STT) – Converts user speech into text using a speech recognition engine.
- RAG-powered LLM – Retrieves relevant context from a vector database and uses an LLM to generate an intelligent response.
- Text-to-Speech (TTS) – Converts the generated response into natural speech.
Core Directory Structure
ai_agents/
├── esp32-client/   # XIAO ESP32-S3 edge side: capture/play audio + Agora connection + conversation interaction
├── server/         # Server side: AI Agent orchestration / LLM / ASR / TTS, etc. (works with edge side)
├── agents/         # TEN Agent examples and extensions
├── playground/     # Web frontend UI
├── .env.example    # Environment variable template
├── docker-compose.yml  # Docker compose file
└── Dockerfile      # Docker image build file
System Architecture
┌─────────────────────────────────────────────────────────────────────┐
│                           System Architecture                         │
├─────────────────────────────────────────────────────────────────────┤
│                                                                     │
│  ┌─────────────────┐                    ┌─────────────────────────┐ │
│  │  ESP32-S3 Device │                    │      AI Agent Server    │ │
│  │  (Edge Side)     │                    │        (Backend)        │ │
│  ├─────────────────┤                    ├─────────────────────────┤ │
│  │ • Microphone In  │ ──── Agora RTC ──→ │ • ASR Speech Recognition│ │
│  │ • Wi-Fi          │   Real-time audio  │ • LLM Large Language    │ │
│  │ • Speaker Out    │ ←── Agora RTC ──── │ • TTS Speech Synthesis  │ │
│  └─────────────────┘                    └─────────────────────────┘ │
│                                                                     │
└─────────────────────────────────────────────────────────────────────┘

Workflow:
1. ESP32-S3 connects to the network and joins an Agora channel
2. The edge side captures microphone audio and publishes it to Agora
3. The server receives audio and runs the ASR → LLM → TTS pipeline
4. The backend sends response audio back; the device plays it, enabling real-time voice conversation
Prerequisites
Hardware Requirements
| Hardware | Notes |
|---|---|
| Seeed Studio XIAO ESP32-S3 | Main controller board |
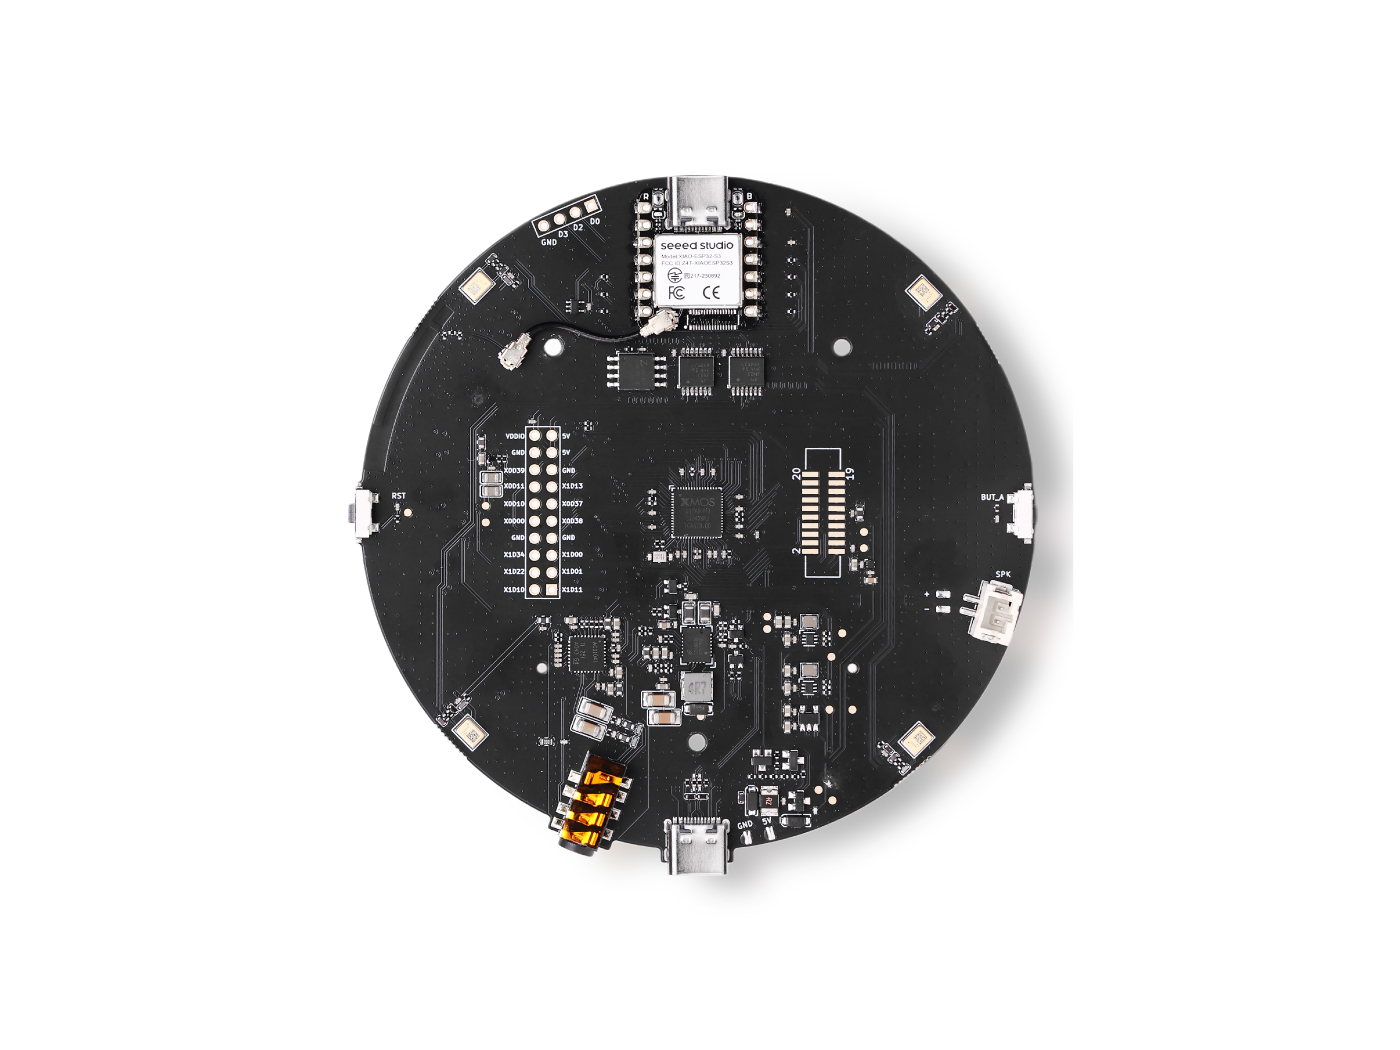
| ReSpeaker XVF3800 | Audio expansion board (microphone array + speaker interface) |
| Speaker | At least one speaker for playing AI responses |
| USB-C data cable | For flashing firmware and powering the device |
Accounts & API Keys
Before deployment, you need to register and obtain API keys for the following services:
🔹 Agora – Required
- Visit https://console.agora.io/
- Sign up for a free account
- Create a new project
- Copy the App ID and App Certificate
🔹 Deepgram (ASR) – Required
- Visit https://console.deepgram.com/
- Sign up for a free account (free quota available)
- Go to the API Keys page
- Create a new API key
🔹 OpenAI (LLM) – Required
- Visit https://platform.openai.com/
- Sign up and add a payment method
- Go to the API Keys page
- Create a new secret key
🔹 Cartesia (TTS) – Required
- Visit https://cartesia.ai/sonic
- Sign up for a free account (free quota available)
- Go to API Key → New API Key
- Copy the API key
Software Requirements
| Software | Version | Purpose |
|---|---|---|
| Docker Desktop | Latest | Containerized server deployment |
| Git | Latest | Clone the repository |
| ESP-IDF | v5.2.3 | ESP32 development framework |
| ESP-ADF | v2.7 | ESP32 audio development framework |
Firmware Update
To achieve the best playback experience, we recommend updating the XMOS firmware to the latest version.
Download Firmware
You can download the firmware from here.
Update Steps
On your computer, plug in ReSpeaker XMOS XVF3800 with XIAO ESP32S3 and run the firmware update tool, then select the firmware.
For a detailed guide, please refer to this page。
Firmware update is a required step, and it is strongly recommended for the best audio experience and stability.
Server-side Deployment
Windows Deployment (Recommended)
Step A: Install and Configure Docker Desktop (first time only)
-
Download and install Docker Desktop
Visit https://www.docker.com/products/docker-desktop/ to download and install.
-
Installation options
- Check Use WSL 2 instead of Hyper-V (if available)
-
Verify installation
- Open Docker Desktop after installation
- Wait until the tray icon shows Docker is running
-
(Recommended) Enable WSL Integration
- Docker Desktop →
Settings→Resources→WSL Integration - Enable your commonly used WSL distro (e.g., Ubuntu)
- Docker Desktop →
Step B: Clone the repo and configure environment variables
-
Open PowerShell or Windows Terminal
-
Clone the repository
git clone https://github.com/Seeed-Projects/seeed-respeaker-agora-tenframework.git
cd esp32-client-agora/ai_agents -
Copy the environment template
PowerShell:
Copy-Item .env.example .envCMD:
copy .env.example .env -
Edit the
.envfile and fill in your API keysOpen
.envwith Notepad or VS Code and update the key fields:# ==============================
# Agora RTC (Required)
# ==============================
AGORA_APP_ID=your_agora_app_id
AGORA_APP_CERTIFICATE=your_agora_app_certificate
# ==============================
# Deepgram ASR (Required)
# ==============================
DEEPGRAM_API_KEY=your_deepgram_api_key
# ==============================
# OpenAI LLM (Required)
# ==============================
OPENAI_API_KEY=your_openai_api_key
OPENAI_MODEL=gpt-4o
OPENAI_PROXY_URL= # Optional: set if you need a proxy
# ==============================
# Cartesia TTS (Required)
# ==============================
Cartesia_TTS_KEY=your_cartesia_api_key
# ==============================
# Server config (usually no changes needed)
# ==============================
LOG_PATH=/tmp/ten_agent
LOG_STDOUT=true
GRAPH_DESIGNER_SERVER_PORT=49483
SERVER_PORT=8080
WORKERS_MAX=100
Step C: Start Docker services
docker compose up -d
Check container status (optional):
docker compose ps
You should see output similar to:
NAME            STATUS    PORTS
ten_agent_dev   running   0.0.0.0:3000->3000/tcp, 0.0.0.0:49483->49483/tcp
Step D: Enter the container and run the example
-
Enter the container
docker exec -it ten_agent_dev bash -
Install and run the Voice Assistant example
cd agents/examples/voice-assistant
task install
task run -
Wait for the service to start
When you see logs like below, the service is running:
[INFO] Server started on port 8080
[INFO] Waiting for connections...
Step E: Verify the services
- API server: http://localhost:8080
- Frontend UI: http://localhost:3000
- TMAN Designer: http://localhost:49483
Common Commands
# View container logs
docker compose logs -f

# Stop services
docker compose down

# Restart services
docker compose restart

# Full cleanup (including volumes)
docker compose down -v
Linux/Mac Deployment
Step 1: Install Docker
Ubuntu/Debian:
sudo apt update
sudo apt install docker.io docker-compose
sudo systemctl start docker
sudo systemctl enable docker
sudo usermod -aG docker $USER
# Log out and log back in to take effect
macOS:
# Install Docker Desktop via Homebrew
brew install --cask docker
# Then launch the Docker Desktop app
Step 2: Clone and configure
git clone https://github.com/zhannn668/esp32-client-agora.git
cd esp32-client-agora/ai_agents
cp .env.example .env
Step 3: Edit environment variables
nano .env
# or use vim
vim .env
Fill in your API keys (refer to the Windows section above).
Step 4: Start the services
docker compose up -d
docker exec -it ten_agent_dev bash
cd agents/examples/voice-assistant
task install
task run
ESP32-side Deployment
Development Environment Setup
Install ESP-IDF (v5.2.3)
Windows
-
Download the ESP-IDF v5.2.3 offline installer
https://docs.espressif.com/projects/esp-idf/zh_CN/v5.2.3/esp32/get-started/windows-setup.html
-
Run the installer
- Choose an install path (recommended default:
C:\Espressif) - After installation, a shortcut “ESP-IDF 5.2 PowerShell” will appear in the Start menu
- Choose an install path (recommended default:
-
Verify installation
Open “ESP-IDF 5.2 PowerShell” and run:
idf.py --version
Linux
# Create an install directory
mkdir -p ~/esp
cd ~/esp

# Clone ESP-IDF
git clone -b v5.2.3 --recursive https://github.com/espressif/esp-idf.git

# Install toolchain
cd esp-idf
./install.sh esp32s3

# Configure environment variables (add to ~/.bashrc)
echo 'alias get_idf=". $HOME/esp/esp-idf/export.sh"' >> ~/.bashrc
source ~/.bashrc
Install ESP-ADF (v2.7)
Windows
-
Clone ESP-ADF
In ESP-IDF PowerShell:
cd C:\Espressif\frameworks
git clone --recursive https://github.com/espressif/esp-adf.git
cd esp-adf
git checkout v2.7
git submodule update --init --recursive -
Set the ADF_PATH environment variable
Option 1: System settings
- Open “System Properties” → “Advanced” → “Environment Variables”
- Create a new user variable:
ADF_PATH=C:\Espressif\frameworks\esp-adf
Option 2: Command line
setx ADF_PATH "C:\Espressif\frameworks\esp-adf"Important: Restart ESP-IDF PowerShell after setting it.
Linux
cd ~/esp
git clone --recursive https://github.com/espressif/esp-adf.git
cd esp-adf
git checkout v2.7
git submodule update --init --recursive

# Add env var
echo 'export ADF_PATH=$HOME/esp/esp-adf' >> ~/.bashrc
source ~/.bashrc
Apply the IDF Patch
ESP-ADF requires applying a FreeRTOS patch to ESP-IDF:
cd $IDF_PATH
git apply $ADF_PATH/idf_patches/idf_v5.2_freertos.patch
Modify ESP-ADF Board Pin Configuration (Critical!)
Because the pinout of ReSpeaker XVF3800 differs from the default Korvo-2 V3, you must modify the framework’s board config:
File location:
- Windows:
C:\Espressif\frameworks\esp-adf\components\audio_board\esp32_s3_korvo2_v3\board_pins_config.c - Linux/Mac:
$ADF_PATH/components/audio_board/esp32_s3_korvo2_v3/board_pins_config.c
- This file is in the ESP-ADF framework directory, not in your project directory.
- Changes will affect all projects using this board configuration.
- It’s recommended to back up the original file first:
cp board_pins_config.c board_pins_config.c.backup
Update I2C pins – Find get_i2c_pins() and change it to:
esp_err_t get_i2c_pins(i2c_port_t port, i2c_config_t *i2c_config)
{
    // ReSpeaker XVF3800 I2C configuration
    i2c_config->sda_io_num = GPIO_NUM_5;   // ReSpeaker I2C SDA
    i2c_config->scl_io_num = GPIO_NUM_6;   // ReSpeaker I2C SCL
    return ESP_OK;
}
Update I2S pins – Find get_i2s_pins() and change it to:
esp_err_t get_i2s_pins(int port, board_i2s_pin_t *i2s_config)
{
    // ReSpeaker XVF3800 I2S configuration
    i2s_config->bck_io_num   = GPIO_NUM_8;   // BCLK
    i2s_config->ws_io_num    = GPIO_NUM_7;   // WS/LRCK
    i2s_config->data_out_num = GPIO_NUM_44;  // DOUT
    i2s_config->data_in_num  = GPIO_NUM_43;  // DIN
    i2s_config->mck_io_num   = -1;           // Disable MCLK
    return ESP_OK;
}
Download Agora IoT SDK
-
Download the SDK
-
Extract into the components directory
cd esp32-client-agora/ai_agents/esp32-client/components
tar -xvf agora_iot_sdk.tar
Initialize the esp32-camera submodule
cd esp32-client-agora
git submodule update --init --recursive
Build & Flash
Configure AI Agent parameters
Edit ai_agents/esp32-client/main/app_config.h. If you use a LAN IP, make sure ESP32 and the server are in the same LAN; if you use a public IP, you can ignore this.
#pragma once

// ==============================
// AI Agent server configuration
// ==============================
// Change to your Server IP (the computer running Docker)
#define TENAI_AGENT_URL       "http://192.168.x.x:8080"

// ==============================
// Agent graph selection
// ==============================
#define CONFIG_GRAPH_OPENAI     // Use OpenAI graph

// ==============================
// Greeting and prompt
// ==============================
#define GREETING               "Can I help You?"
#define PROMPT                 ""

// ==============================
// Graph configuration
// ==============================
#if defined(CONFIG_GRAPH_OPENAI)
#define GRAPH_NAME             "voice_assistant"
#define V2V_MODEL              "gpt-realtime"
#define LANGUAGE               "en-US"
#define VOICE                  "ash"
#endif

// ==============================
// Agent identity configuration
// ==============================
#define AI_AGENT_NAME          "tenai0125-11"
#define AI_AGENT_CHANNEL_NAME  "test_channel_12345"  // Channel name
#define AI_AGENT_USER_ID        12345                 // User ID

// ==============================
// Audio codec configuration
// ==============================
#define CONFIG_USE_G711U_CODEC

// ==============================
// Agora App ID
// ==============================
#define AGORA_APP_ID "your_agora_app_id"
Build firmware
-
Open ESP-IDF terminal
- Windows: “ESP-IDF 5.2 PowerShell”
- Linux/Mac: run
get_idf
-
Enter the project directory
cd esp32-client-agora/ai_agents/esp32-client -
Set the target chip
idf.py set-target esp32s3 -
Configure Wi-Fi and FreeRTOS
idf.py menuconfigConfigure the following items:
-
Wi-Fi configuration:
Agora Demo for ESP32 --->
    (your WiFi SSID) WiFi SSID
(your WiFi password) WiFi Password -
Enable FreeRTOS backward compatibility:
Component config --->
    FreeRTOS --->
        Kernel --->
            [*] configENABLE_BACKWARD_COMPATIBILITY
-
-
Build
idf.py buildOn success you will see:
Project build complete. To flash, run:
idf.py flash
Flash firmware
-
Connect the board
- Connect XIAO ESP32-S3 to your computer via USB-C cable
-
Identify the serial port
- Windows: Device Manager → Ports, find COM port (e.g., COM3)
- Linux: usually
/dev/ttyUSB0or/dev/ttyACM0 - macOS: usually
/dev/cu.usbmodem*
-
Flash and monitor
# Windows
idf.py -p COM3 flash monitor

# Linux/Mac
idf.py -p /dev/ttyUSB0 flash monitor
Linux permission issue: if you see permission denied, run:
sudo usermod -aG dialout $USER
# then log out and log back in -
Flash success indication
Seeing logs like below indicates success:
Hard resetting via RTS pin...
Connecting...
Validation & Testing
Check ESP32 boot logs
When it starts successfully, the serial output should include these key logs:
I (xxxx) wifi: connected with YourWiFi, aid = 1
got ip: 192.168.x.x

~~~~~Initializing AIC3104 Codec~~~~
W (xxxx) AIC3104_NG: Found device at address 0x18
AIC3104 detected, page register = 0x00
~~~~~AIC3104 Codec initialized successfully~~~~

I (xxxx) AUDIO_PIPELINE: Pipeline started
~~~~~agora_rtc_join_channel success~~~~
Agora: Press [SET] key to join the Ai Agent ...
Success Checklist
| Item | Meaning |
|---|---|
WiFi connected | Wi-Fi connected successfully |
got ip: xxx.xxx.xxx.xxx | IP address acquired |
Found device at address 0x18 | AIC3104 detected |
AIC3104 Codec initialized successfully | Codec initialized successfully |
agora_rtc_join_channel success | RTC channel joined successfully |
Run a Voice Conversation Test
- Press the SET button on the board to start the AI Agent
- Speak into the microphone
- Watch serial logs; you should see audio send/receive logs
- The speaker plays the AI reply
FAQ
Server-side Issues
Q1: Docker containers fail to start
A: Check the following:
- Make sure Docker Desktop is running
- Check whether the port is already in use:
netstat -an | grep 8080 - View detailed logs:
docker compose logs
Q: task command not found after entering the container
A: Ensure you are using the correct image. Run docker compose pull to update the image.
ESP32-side Issues
Q2: Build error i2c driver install error
A: I2C driver conflict. Make sure the code uses the legacy I2C API (driver/i2c.h) instead of the new one (driver/i2c_master.h).
Q: Runtime I2C timeout ESP_ERR_TIMEOUT
A: Possible causes:
- Hardware wiring issue – check I2C lines/cables
- Wrong pin configuration – verify
board_pins_config.cwas updated correctly - Wrong I2C address – check the scanned address in logs
Debug logs:
W (xxxx) AIC3104_NG: Scanning I2C bus...
W (xxxx) AIC3104_NG: Found device at address 0x??
If the address is not 0x18, you need to change AIC3104_ADDR in aic3104_ng.h.
Q: No audio output
A: Check:
- Whether AIC3104 initializes successfully (check serial logs)
- Whether I2S pins are configured correctly
- Whether the speaker is connected correctly
Q: Network buffer error Not enough space
A: This is a runtime network issue and can usually be ignored temporarily:
- Check network quality
- Reduce audio bitrate
- Increase network buffer size
Q: Still errors after modifying board_pins_config.c
A:
- Confirm you edited the correct file path
- Run
idf.py fullcleanfor a full clean - Rebuild with
idf.py build
References
Official Documentation
| Resource | Link |
|---|---|
| ESP-IDF Programming Guide | https://docs.espressif.com/projects/esp-idf/zh_CN/v5.2.3/esp32s3/ |
| ESP-ADF Programming Guide | https://docs.espressif.com/projects/esp-adf/zh_CN/latest/ |
| Agora RTC Docs | https://docs.agora.io/en/rtc/overview/product-overview |
| TEN Framework Docs | https://doc.theten.ai |
| ReSpeaker XVF3800 Firmware Guide | https://wiki.seeedstudio.com/cn/respeaker_xvf3800_introduction/ |
API Services
| Service | Console |
|---|---|
| Agora | https://console.agora.io/ |
| Deepgram | https://console.deepgram.com/ |
| OpenAI | https://platform.openai.com/ |
| ElevenLabs | https://elevenlabs.io/ |
Chip Datasheets
| Datasheet | Link |
|---|---|
| TI AIC3104 Datasheet | https://www.ti.com/product/TLV320AIC3104 |
| XIAO ESP32-S3 Wiki | https://wiki.seeedstudio.com/xiao_esp32s3_getting_started/ |
Project Repositories
| Repo | Link |
|---|---|
| TEN Framework | https://github.com/TEN-framework/ten-framework |
| ESP32 Client Agora | https://github.com/zhannn668/esp32-client-agora |
Technical Support & Product Discussion
Thanks for choosing our product! We’re here to provide support to make your experience as smooth as possible. We offer multiple communication channels to match different preferences and needs.