Work with Tesserae
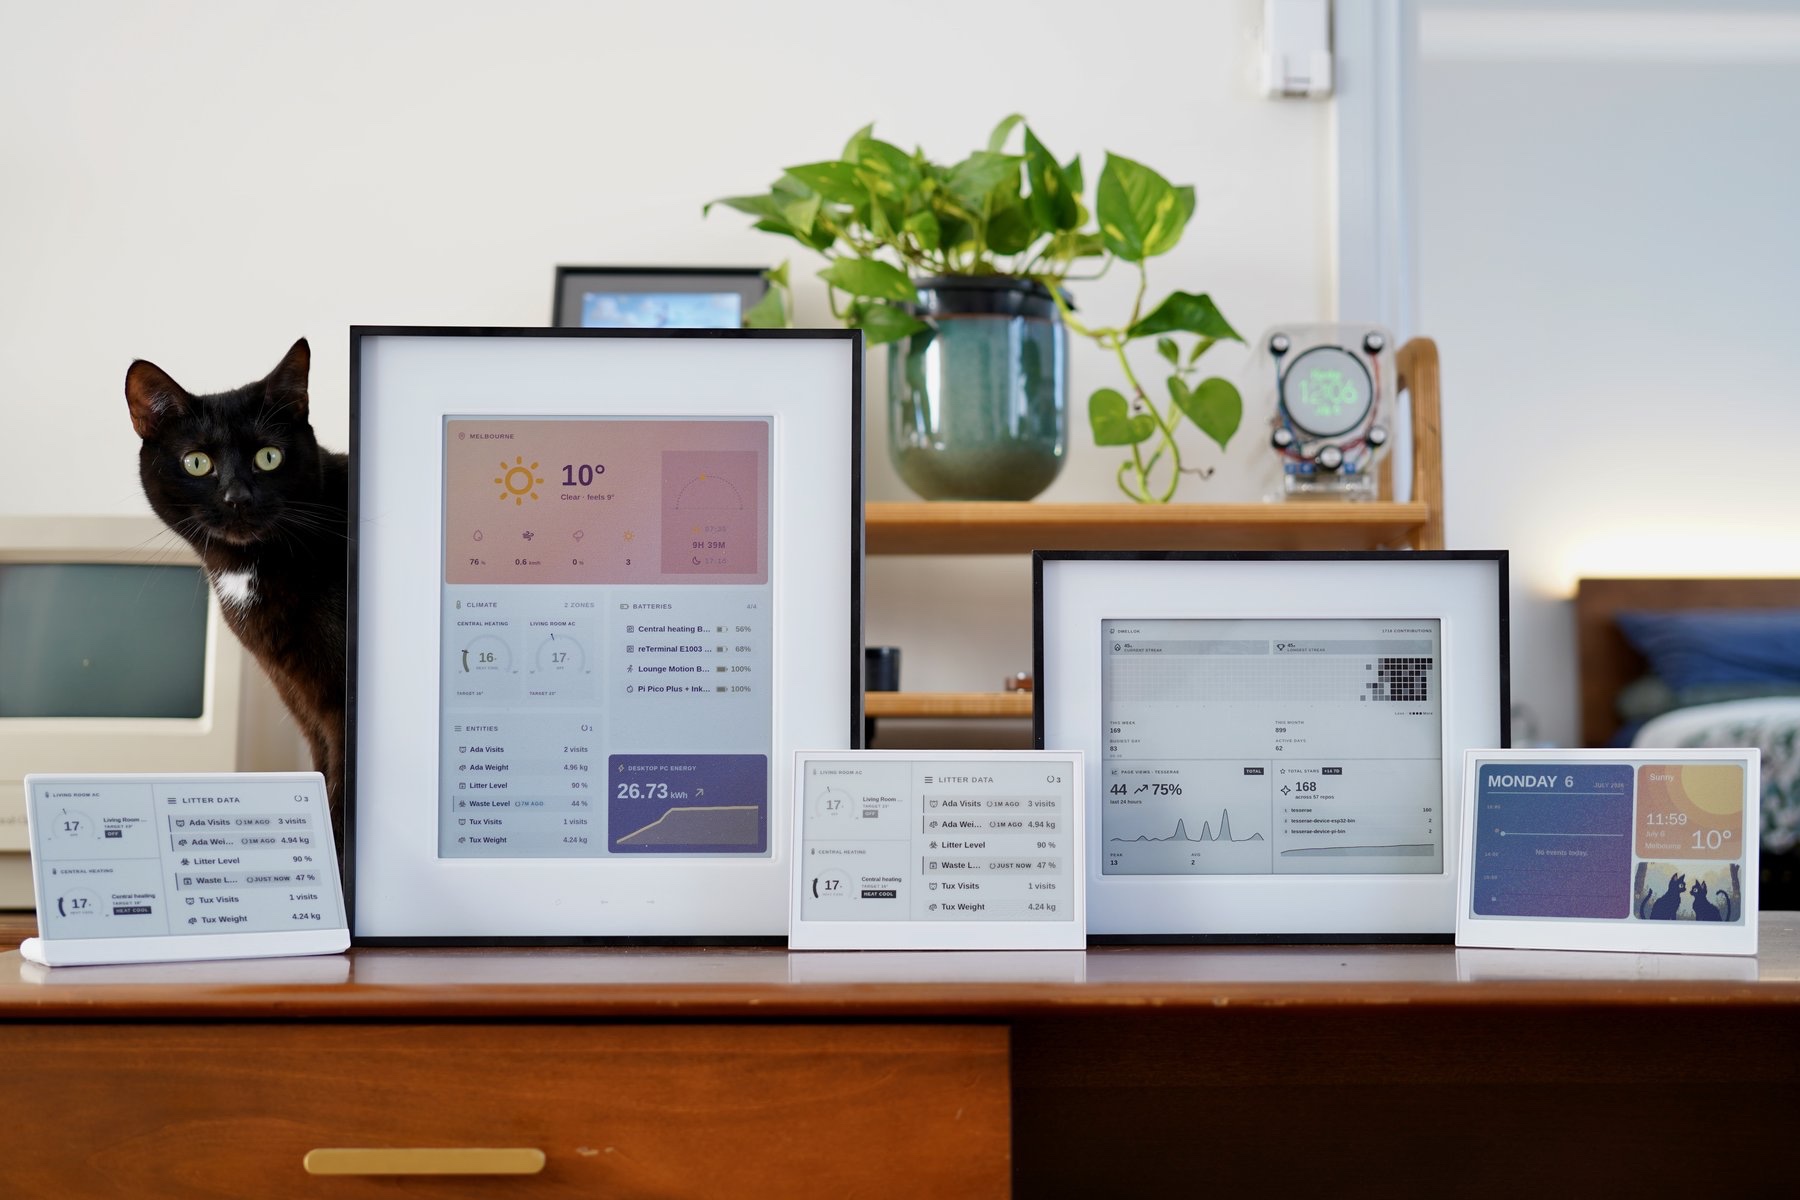
This guide takes a reTerminal E Series device or a reTerminal Sticky from the box to a dashboard on the wall with Tesserae. You flash the firmware once from the browser, connect the device to your own Tesserae server, and design its pages in the web editor. The steps are the same on every device. Where they differ, pick your device in the tabs.
Tesserae drives every panel at its full capability. The E1002 and E1004 paint in all six Spectra™ 6 colours, the E1003 paints in 16 levels of grey, and the Sticky in 4. The server renders each frame into the exact bytes the panel expects, so the device only has to paint it.
What is Tesserae?
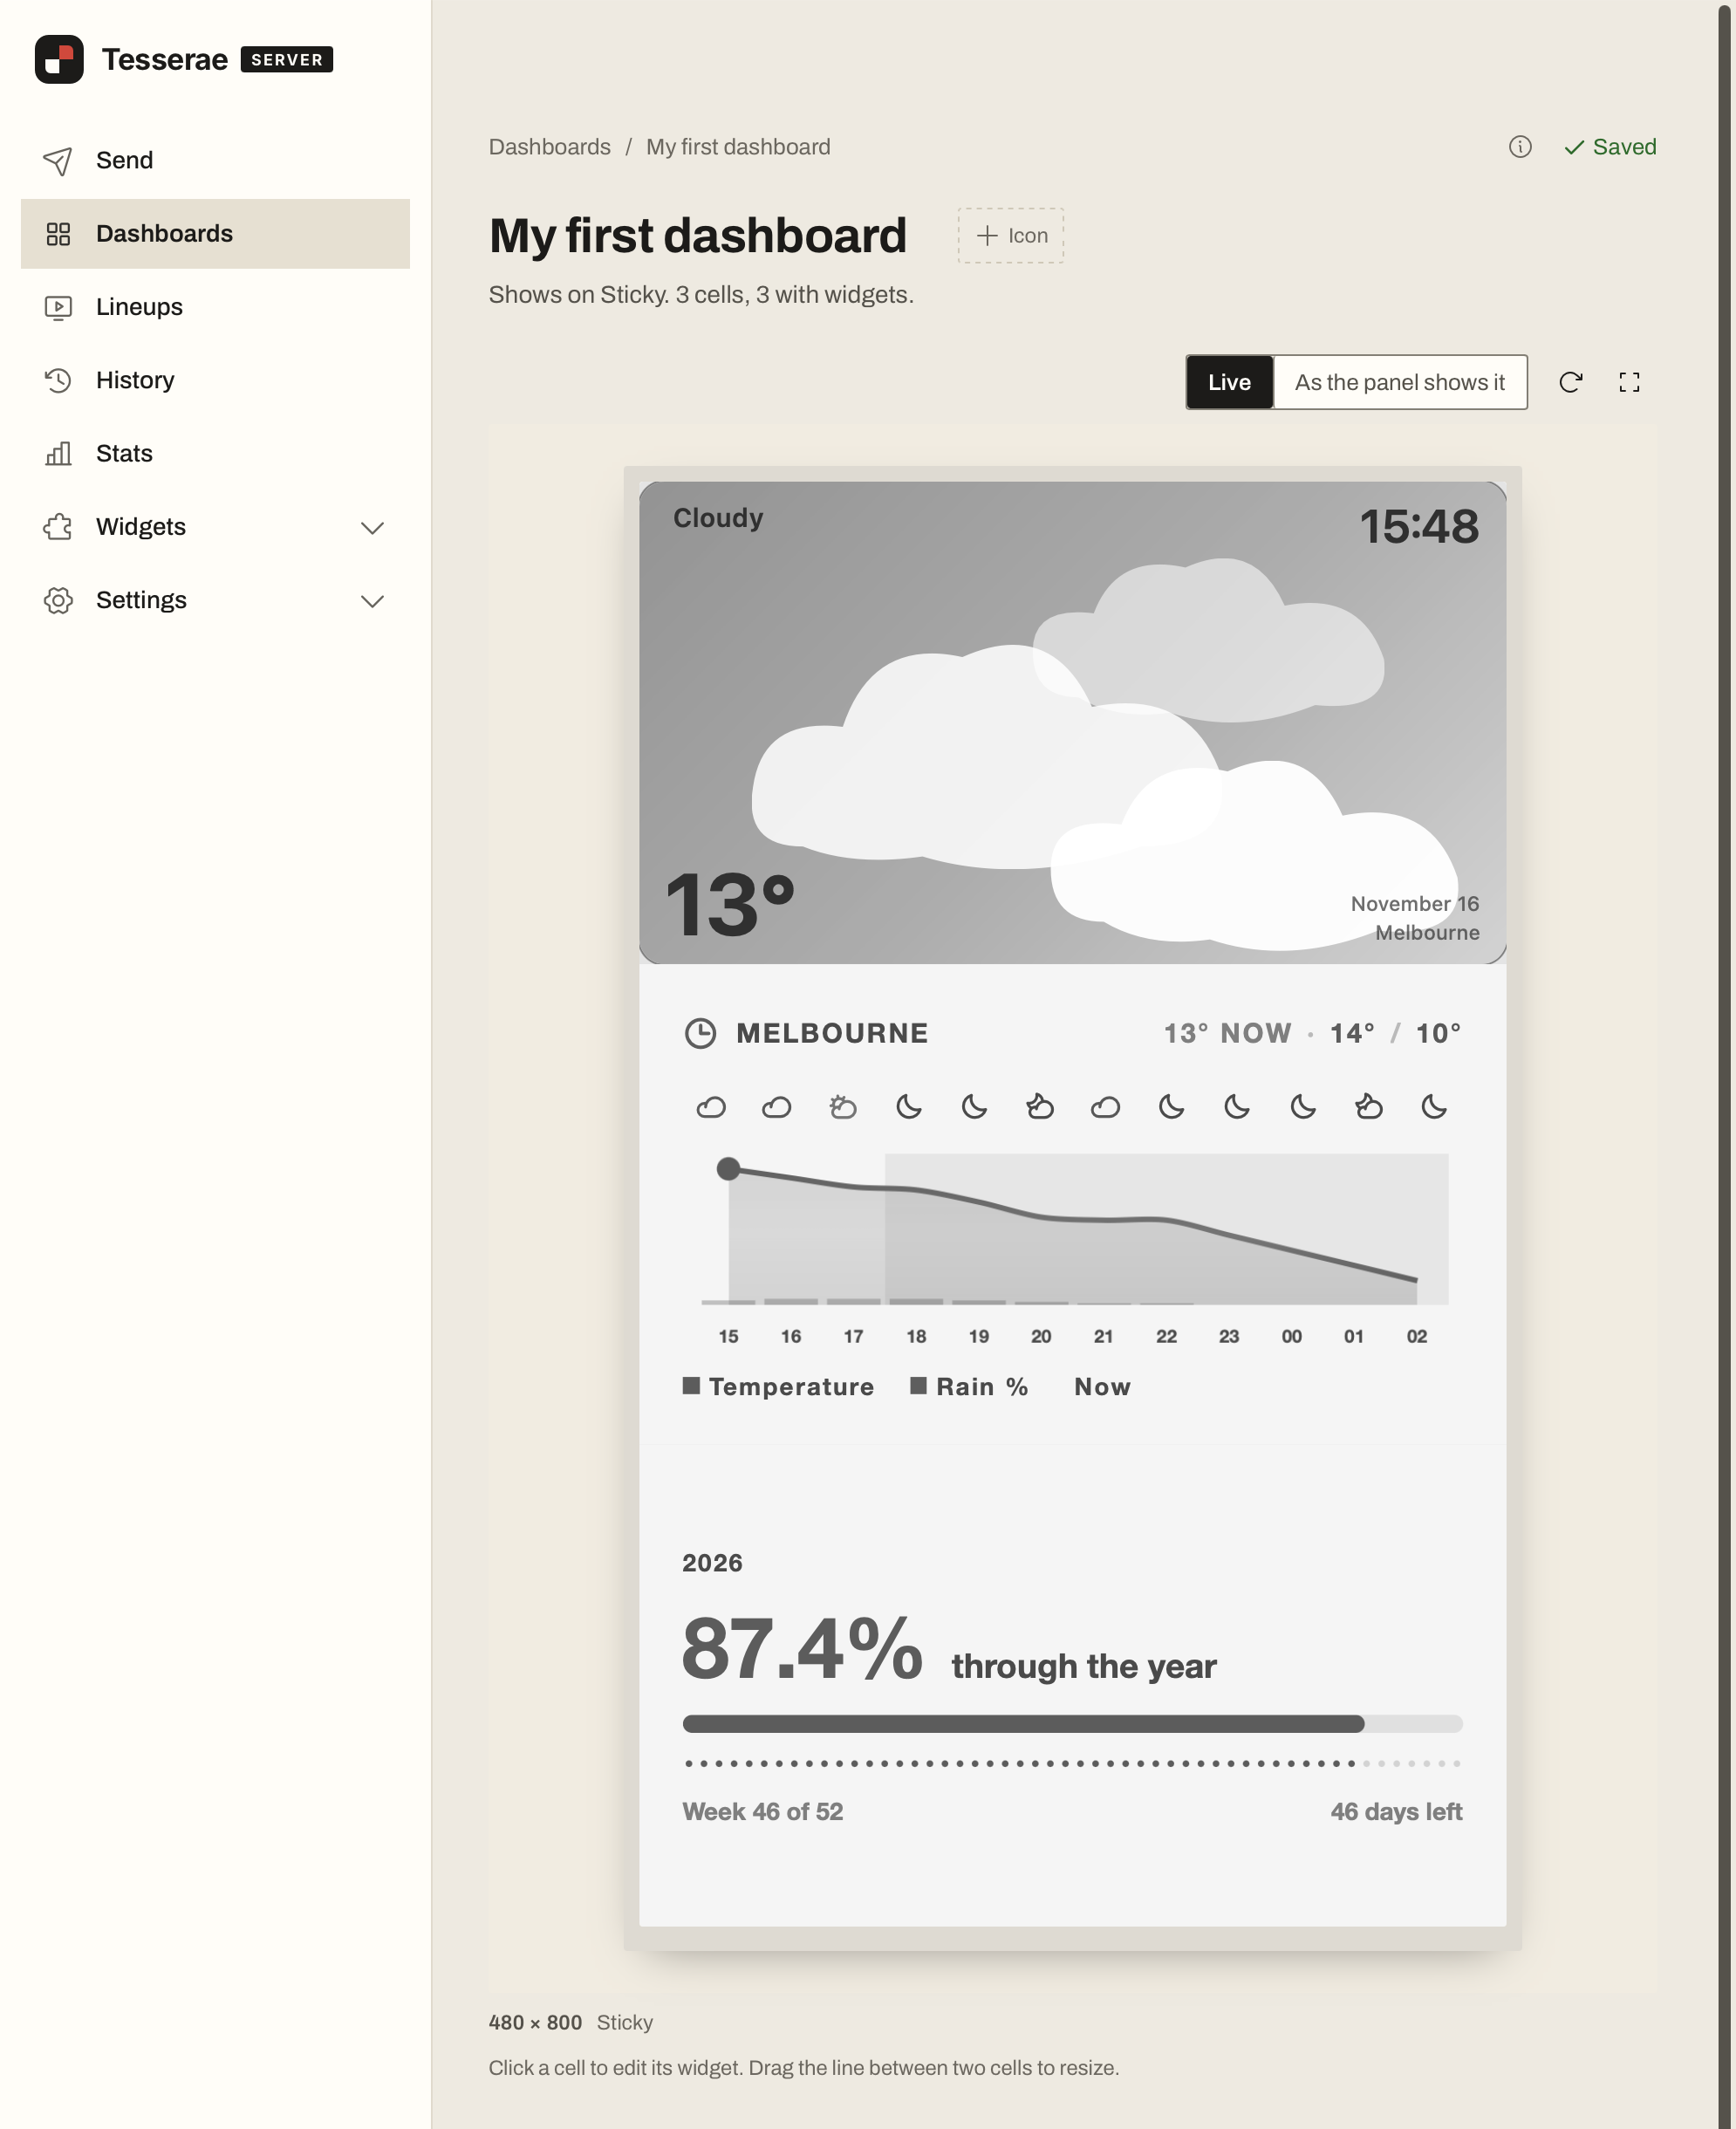
Tesserae is an open source, self-hosted dashboard server for e-paper displays. You run it at home as a Home Assistant App, a Docker container, or a plain install on macOS, Linux, Windows or a Raspberry Pi. You compose dashboards from widgets in the browser, and each device fetches its frame, paints it and goes back to sleep. Nothing leaves your network unless you choose to.
The project began with the reTerminal E Series and grew alongside it. The E1001 was one of the first devices Tesserae supported, and the E Series remains among the most-flashed hardware on the project's web flasher.
Why use Tesserae?
- Self-hosted and private: the server runs on your own hardware, with no account and no subscription. A hosted option, Tesserae Cloud, is available if you would rather not run a server.
- Built for Home Assistant: Tesserae installs as a Home Assistant App. It shows your entities on the panel, and on touch devices it can call services back. With MQTT discovery turned on, each panel appears in Home Assistant as a device.
- Every colour the panel has: Spectra™ 6 colour on the E1002 and E1004, 16-level greyscale on the E1003. Photos are dithered on the server, so they look right on each panel.
- Widgets and templates: weather, calendars, transit, tasks, photos, Home Assistant and more, plus community widgets, themes and complete dashboard templates from the catalog.
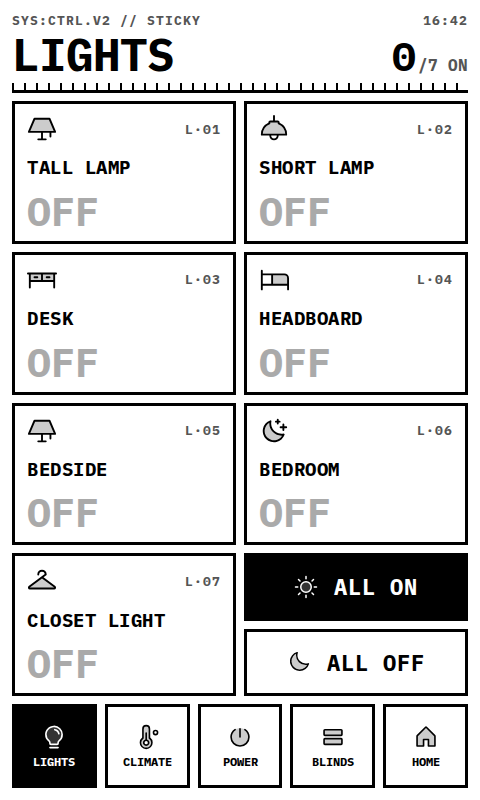
- Touch and buttons: the front buttons and touchscreens can rotate pages, jump to a dashboard, force a refresh or fire a webhook. On the Sticky and E1003, tap regions on a page act as controls.
- Battery-first firmware: the device stays in deep sleep between refreshes. Firmware updates are signed and delivered over the air by your own server, so you only flash from the browser once.
- Open source: the server and the device firmware are on GitHub.
Compatible Hardware
| reTerminal E1001 | reTerminal E1002 |
|---|---|
 |  |
| 7.5" Monochrome 800 × 480 | 7.3" Spectra™ 6 (Colour) 800 × 480 Full colour in Tesserae |
| reTerminal E1003 | reTerminal E1004 |
|---|---|
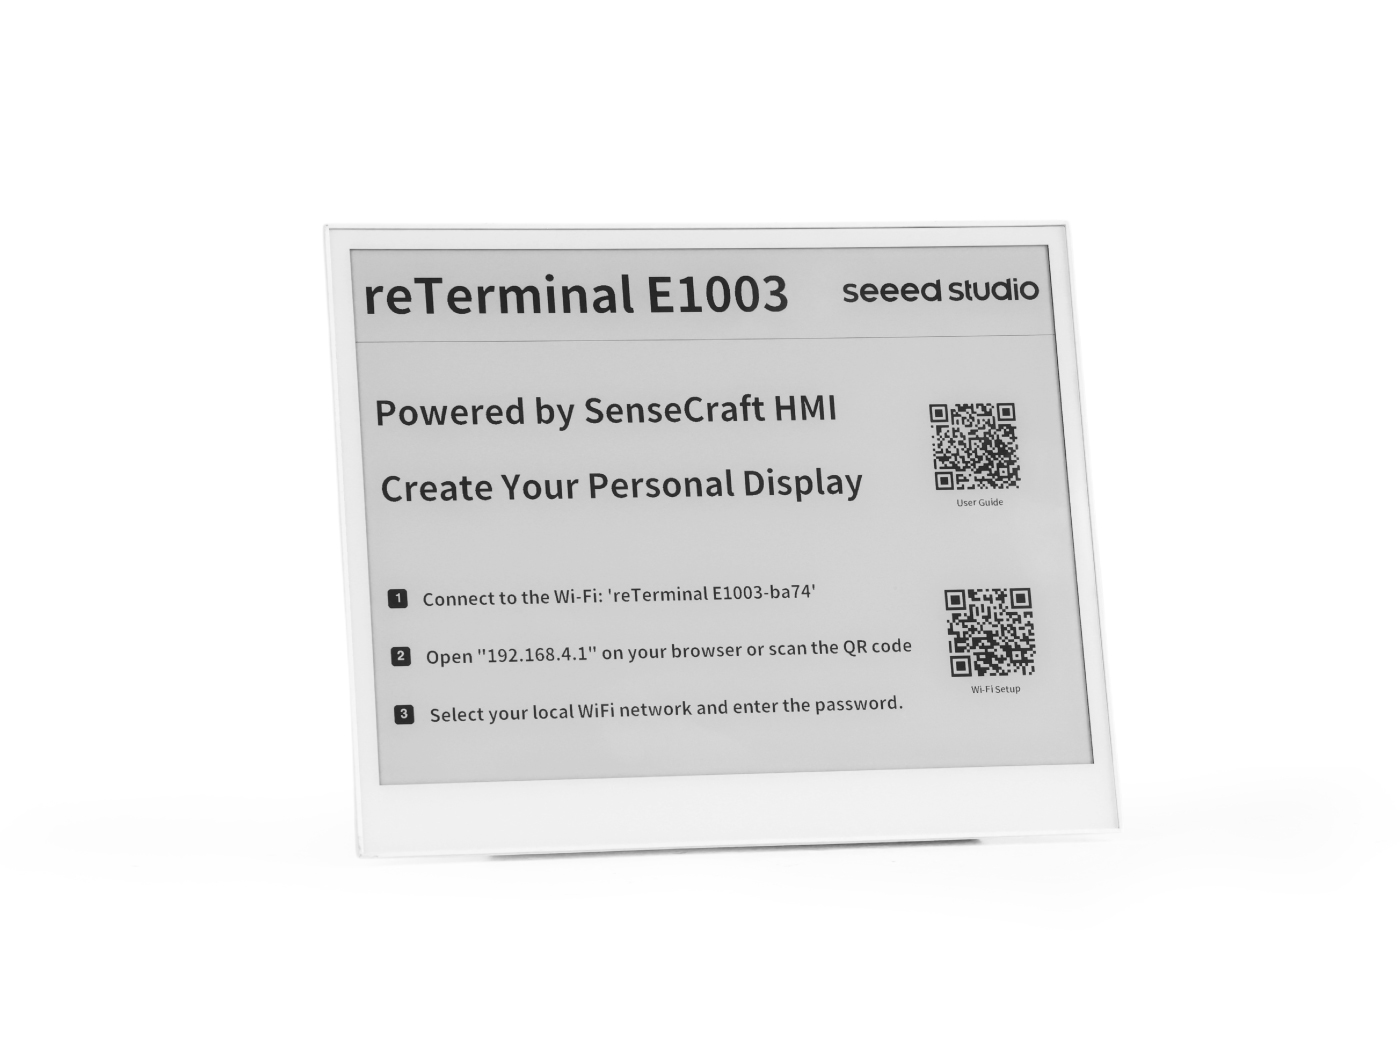 | 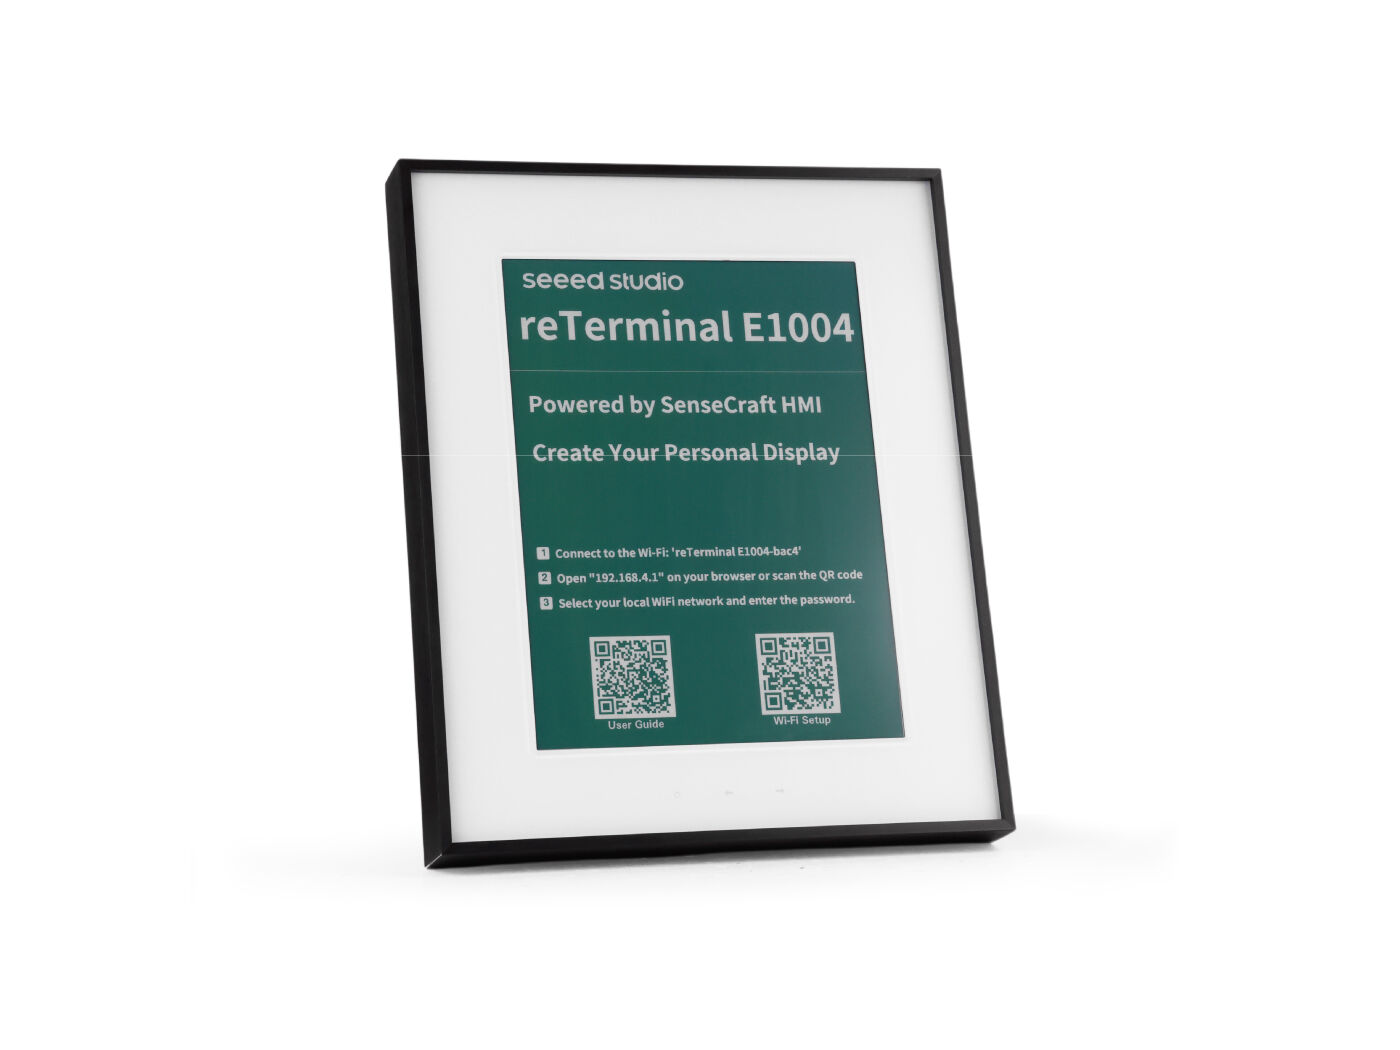 |
| 10.3" Monochrome 16-level greyscale, 1872 × 1404 Touch supported | 13.3" Spectra™ 6 (Colour) 1200 × 1600 Full colour in Tesserae |
| reTerminal Sticky |
|---|
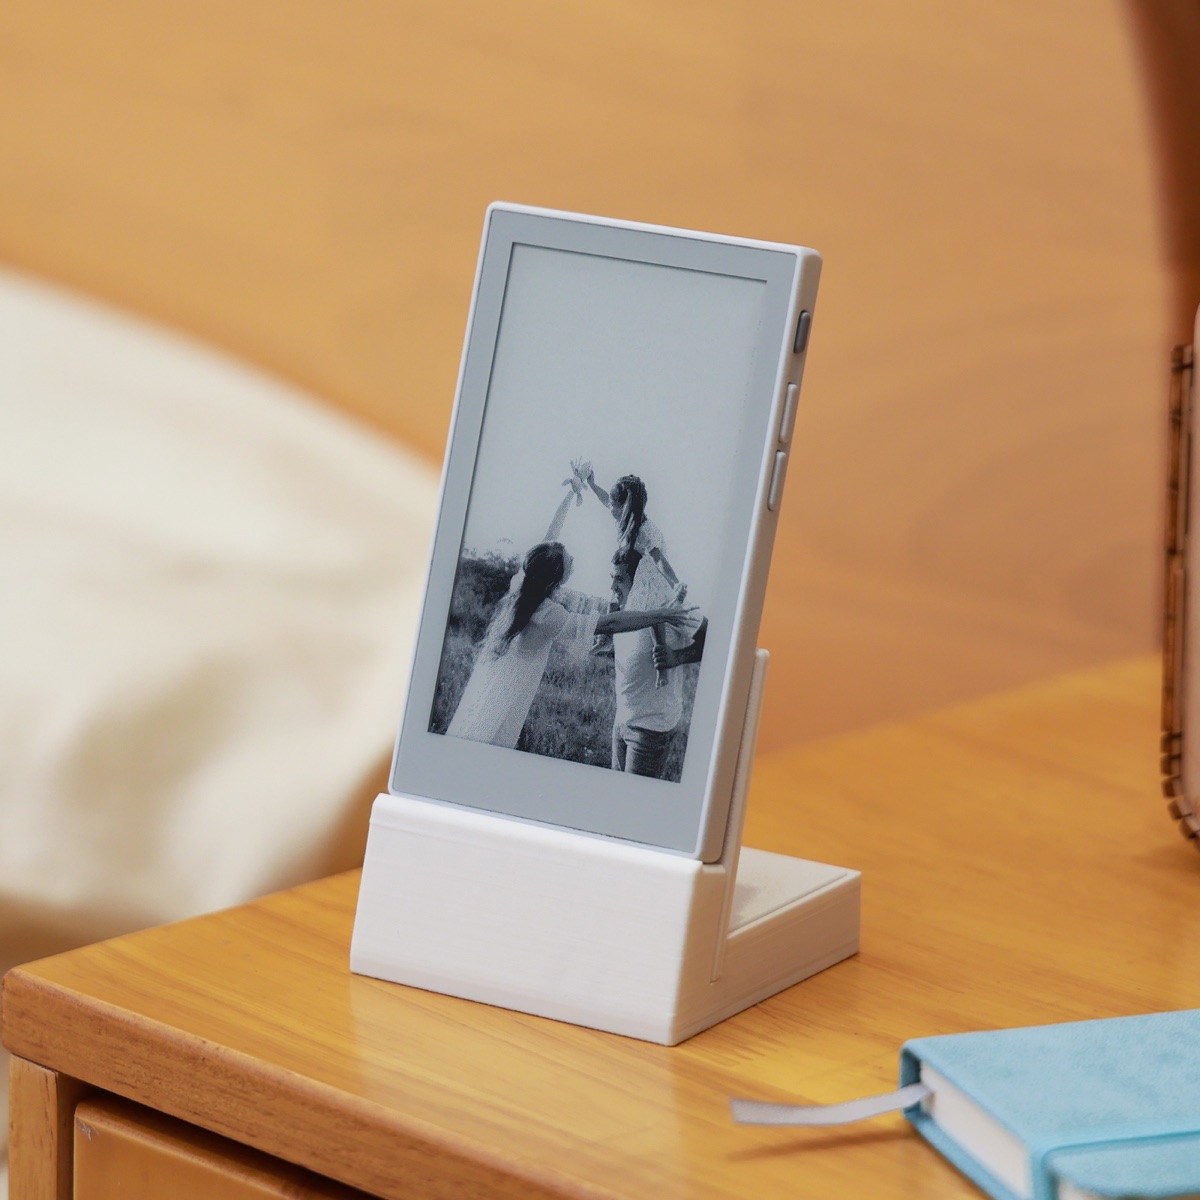 |
| 4-level greyscale, 480 × 800 portrait Touch supported |
The same firmware also runs on the XIAO ePaper family, including the EE02 13.3" Spectra™ 6 kit, the EE03 10.3" kit, the XIAO 7.5" ePaper Panel and the TRMNL 7.5" (OG) DIY Kit. See the Tesserae compatibility list for every supported board.
What You Need
- A reTerminal E Series device or reTerminal Sticky
- A USB-C cable that carries data (a charge-only cable powers the device but the computer can't see it)
- Desktop Chrome or Edge (the flasher uses Web Serial, which Firefox and Safari don't support)
- A 2.4 GHz Wi-Fi network
- A computer, Raspberry Pi or Home Assistant install to run the Tesserae server
Step 1: Install the Tesserae Server
Pick the route that suits your setup. Each one ends with the Tesserae web UI open in your browser on port 8765. Note that address, for example http://192.168.1.50:8765, because the device needs it in Step 3.
| Route | Best for |
|---|---|
| Home Assistant App | You already run Home Assistant OS or Supervised |
| Docker | A Raspberry Pi, NAS or Linux machine that already runs containers |
| Proxmox VE | A homelab server running Proxmox |
| macOS, Linux or Raspberry Pi | A computer that stays on, without containers |
| Windows | A Windows PC that stays on |
| Tesserae Cloud | No server of your own |
Tesserae is protected by a single password and is designed for a trusted home network. Don't expose it directly to the internet. For remote access, use a VPN such as Tailscale or WireGuard.
Home Assistant App
- In Home Assistant, open Settings → Apps → App store.
- Open the menu at the top right, choose Repositories, and add:
https://github.com/dmellok/homeassistant-tesserae-addon
- Find Tesserae in the App store, click Install, then Start, and open it from the sidebar. Home Assistant signs you in.
Your devices reach Tesserae at Home Assistant's own address on port 8765, for example http://homeassistant.local:8765. If you run the Mosquitto broker App, Tesserae uses it automatically, so your panels can appear in Home Assistant later (see Step 5).
Docker
On a Raspberry Pi, NAS or Linux machine with Docker installed:
mkdir ~/tesserae && cd ~/tesserae
curl -fsSLO https://raw.githubusercontent.com/dmellok/tesserae/main/docker-compose.yml
docker compose up -d
Before you save any credentials, set a secret key so they stay readable if the container is ever rebuilt. Generate one:
python3 -c "import secrets; print(secrets.token_hex(32))"
Add it to docker-compose.yml under environment::
TESSERAE_SECRET_KEY: "<the key>"
Run docker compose up -d again, browse to the machine's address on port 8765 and choose a password.
Proxmox VE
One command on the Proxmox host creates an unprivileged Debian 13 container, installs the newest Tesserae release and starts it as a service:
COMMUNITY_SCRIPTS_URL=https://raw.githubusercontent.com/dmellok/tesserae/main/scripts/proxmox \
  bash -c "$(curl -fsSL https://raw.githubusercontent.com/dmellok/tesserae/main/scripts/proxmox/ct/tesserae.sh)"
- When asked for a release channel, press Enter or wait ten seconds to take stable.
- In the container dialog, choose Default to use the script's sizes, or Advanced to set CPU, RAM, disk and network yourself. Keep the script's default resource sizes, including its 16 GB disk; Tesserae also installs Chromium for rendering. If you use Advanced, allow enough disk space for the application, browser dependencies and future updates.
- When it finishes, the script prints the container's address. Open
http://<container-ip>:8765and choose a password.
To update later, run update inside the container.
macOS, Linux or Raspberry Pi
In a terminal:
curl -fsSL https://raw.githubusercontent.com/dmellok/tesserae/main/install.sh | bash
Browse to the machine's address on port 8765 and choose a password. On a Raspberry Pi, a 64-bit OS and at least 2 GB of RAM are recommended.
Windows
In PowerShell:
iwr https://raw.githubusercontent.com/dmellok/tesserae/main/install.ps1 -UseBasicParsing | iex
Browse to the PC's address on port 8765 and choose a password. If the device can't reach the server later, allow port 8765 through Windows Firewall on private networks.
Tesserae Cloud
Tesserae Cloud runs the server for you and works with the same devices. Sign in with your email, then create a claim code under Settings → Panels → Add a panel. In Step 3, choose Cloud and enter the claim code instead of a server address.
First run
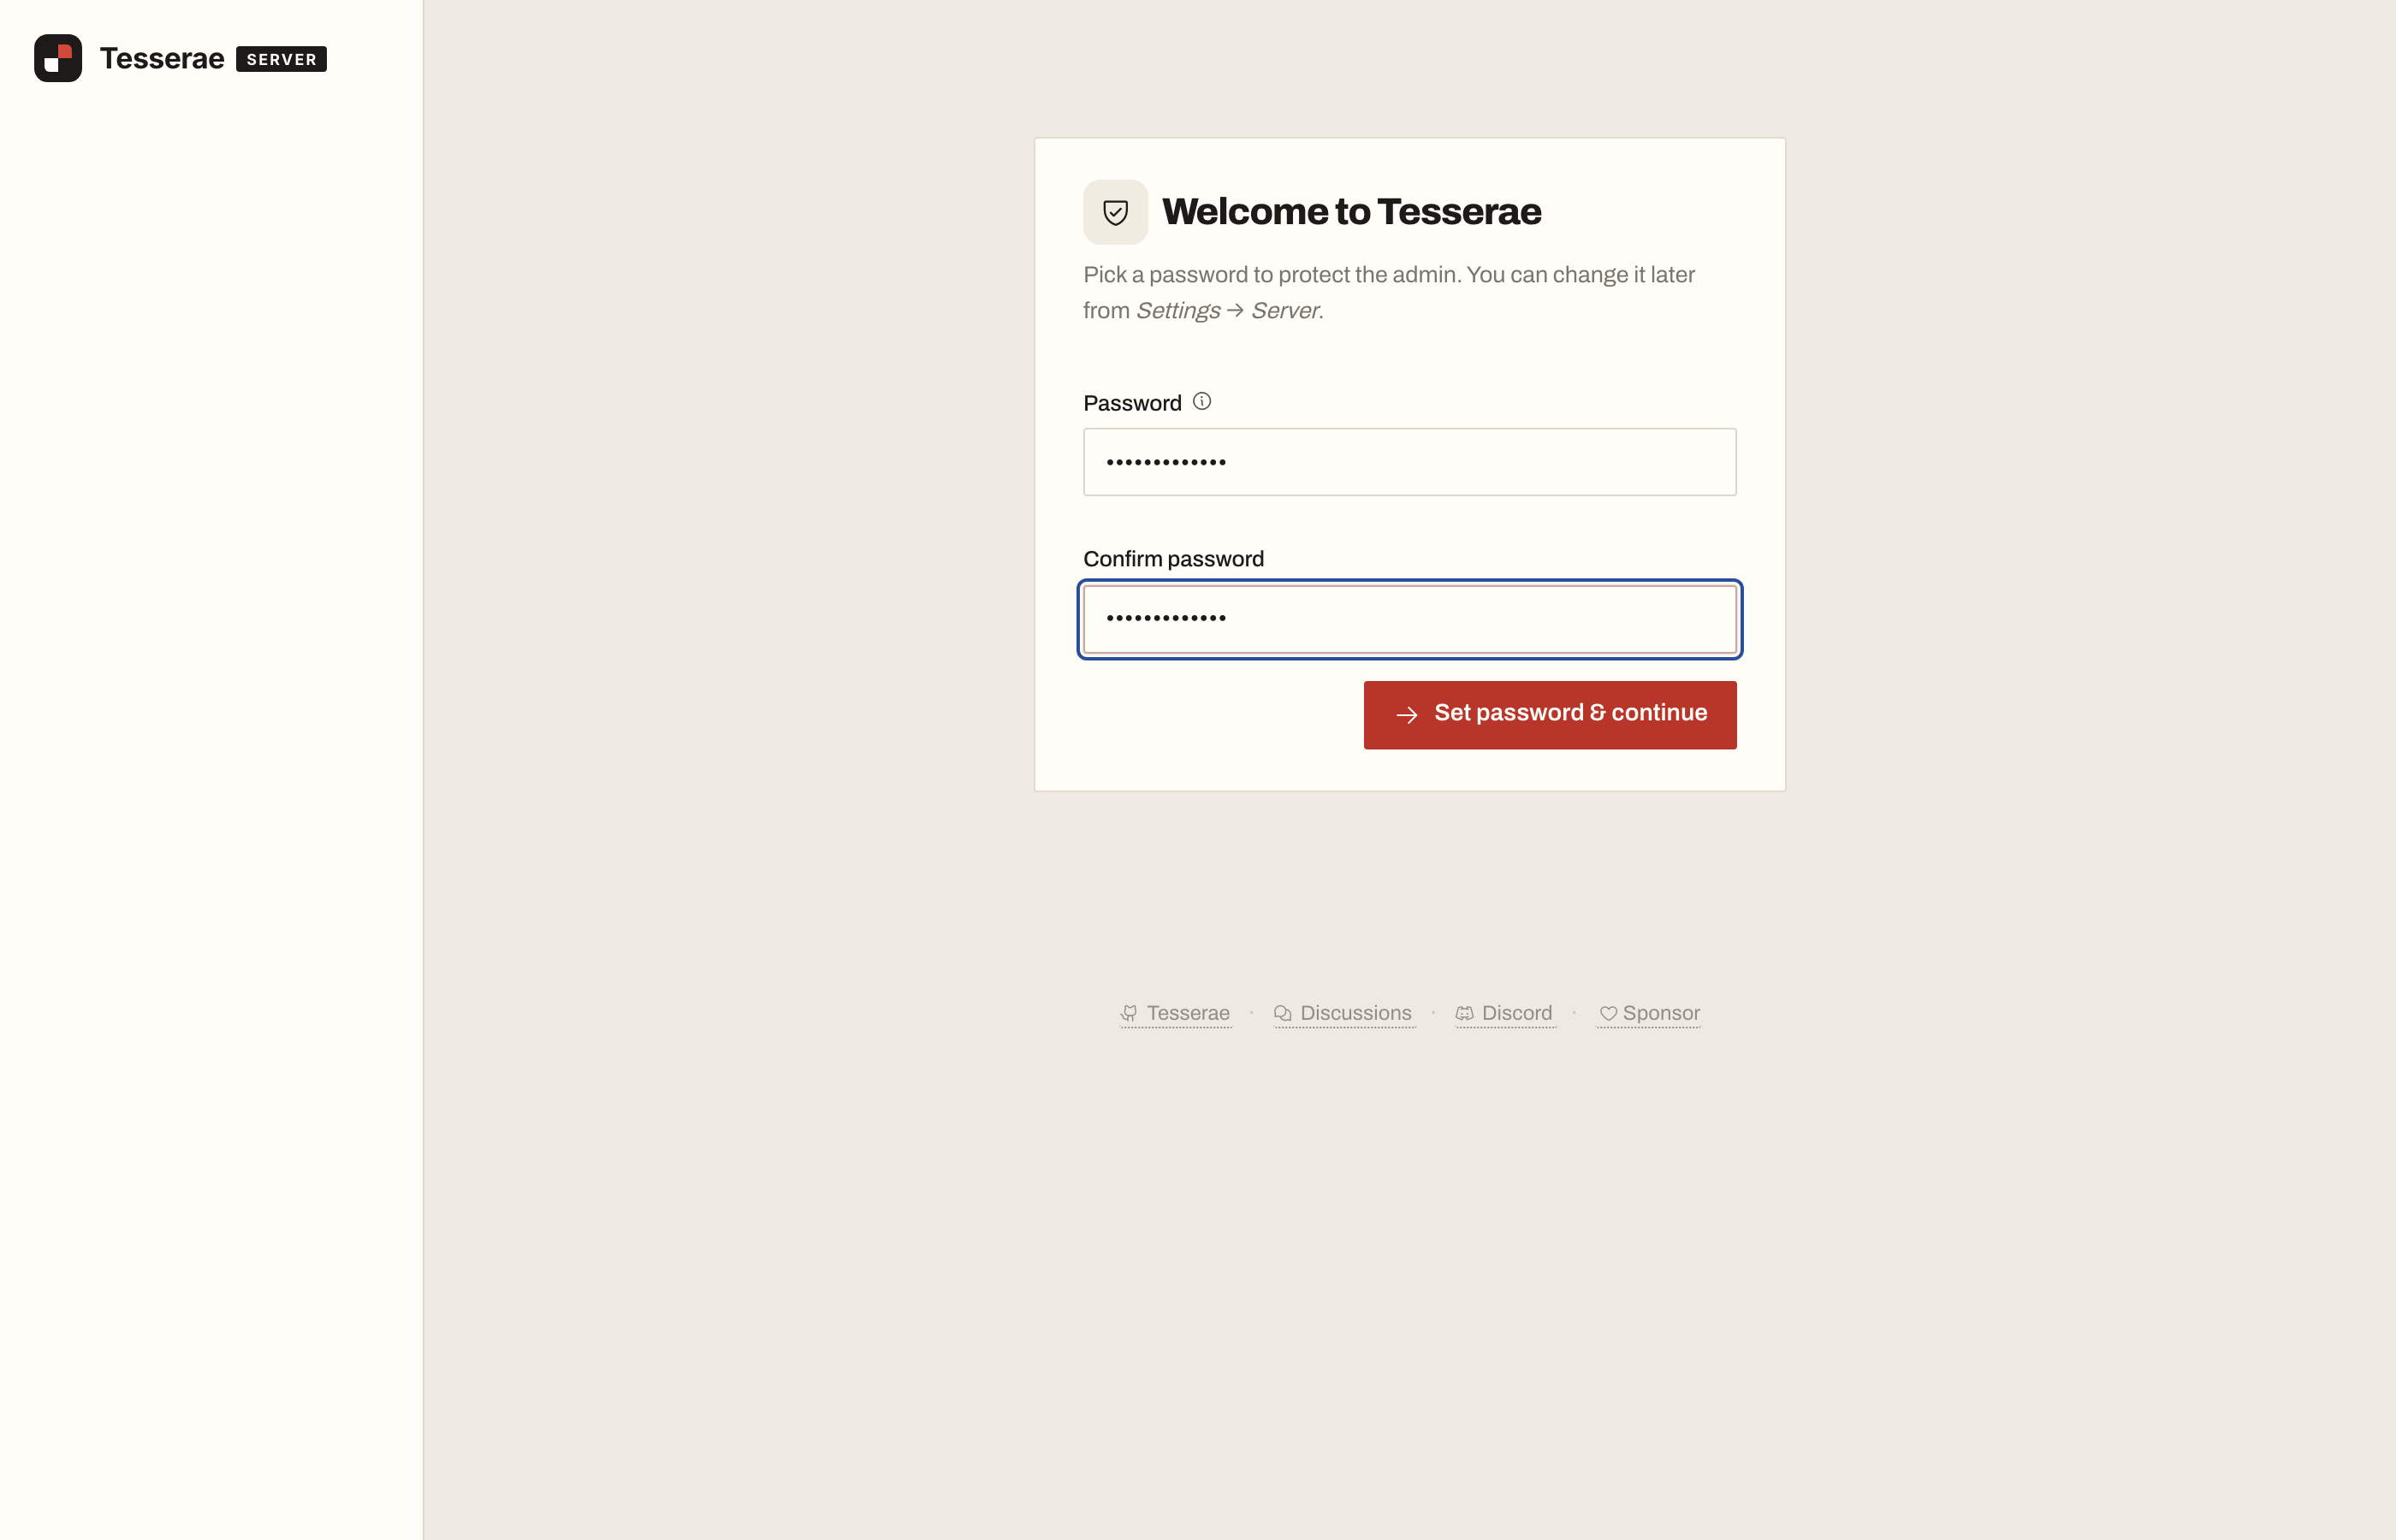
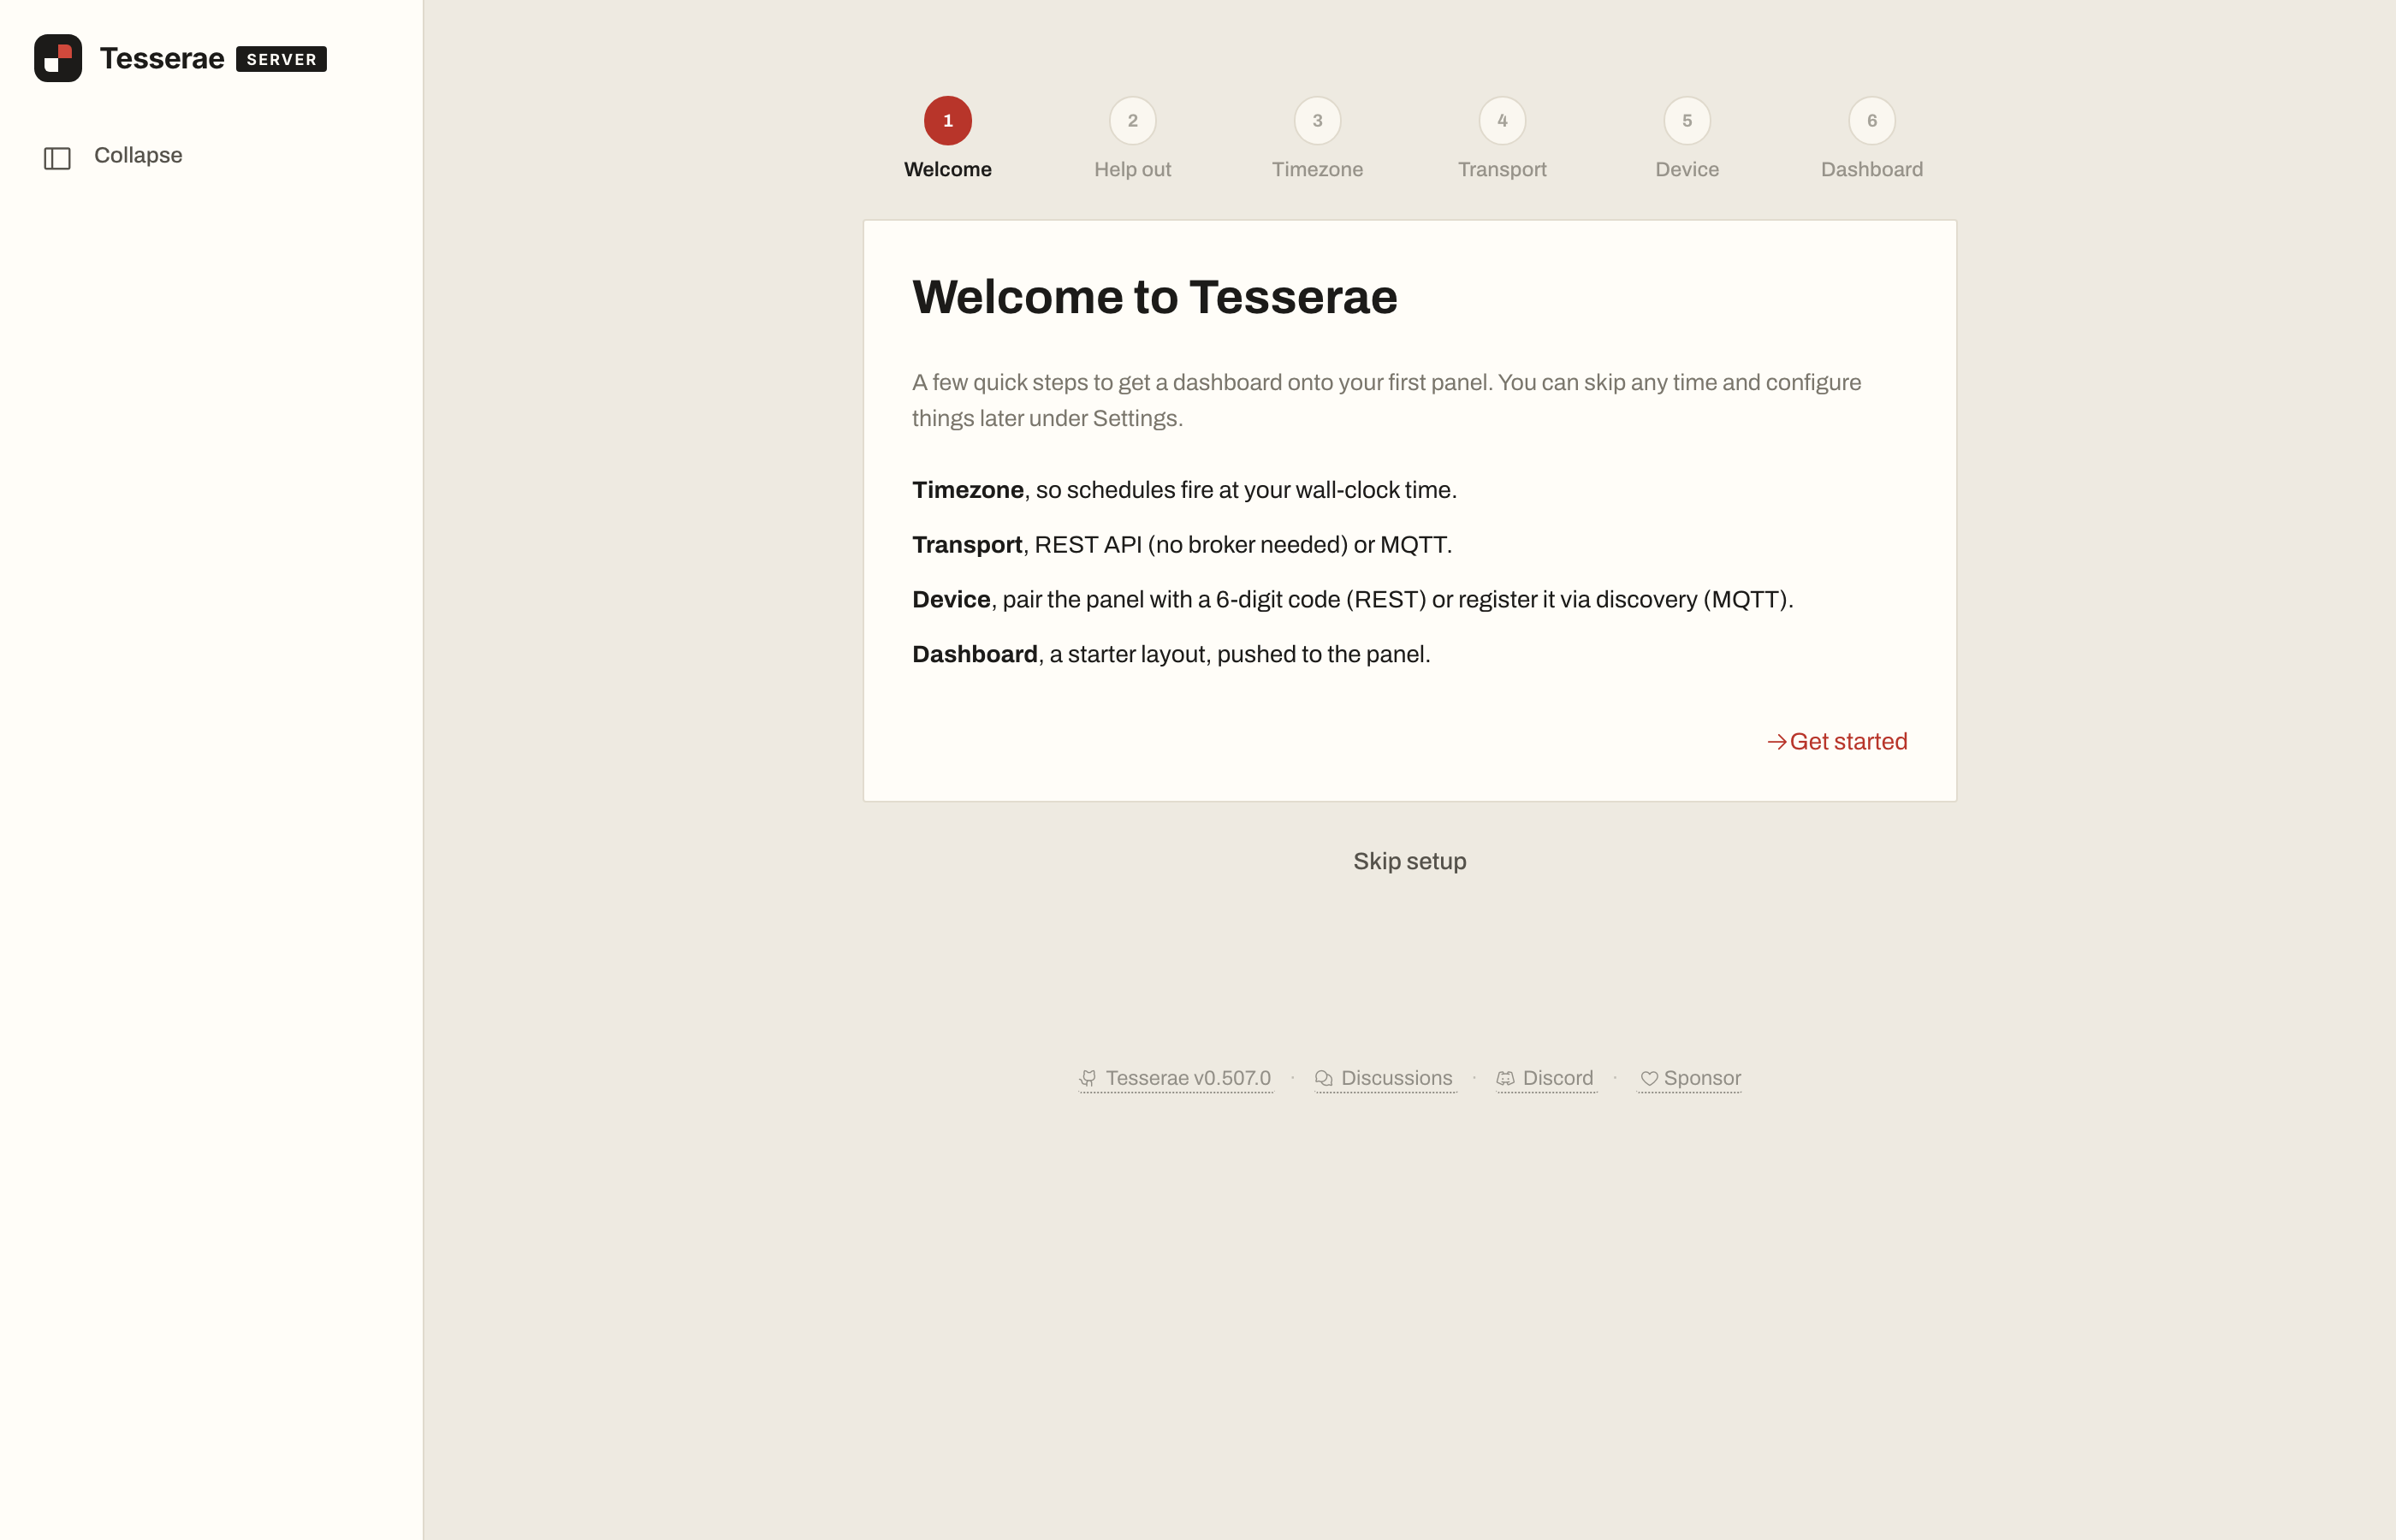
The first time you open Tesserae (except as a Home Assistant App, which signs you in), choose a password. A short setup wizard follows:
- Help out: choose whether to send an anonymous install count to the Tesserae project, or keep the install offline.
- Timezone: confirm the detected timezone, so schedules run at your local time.
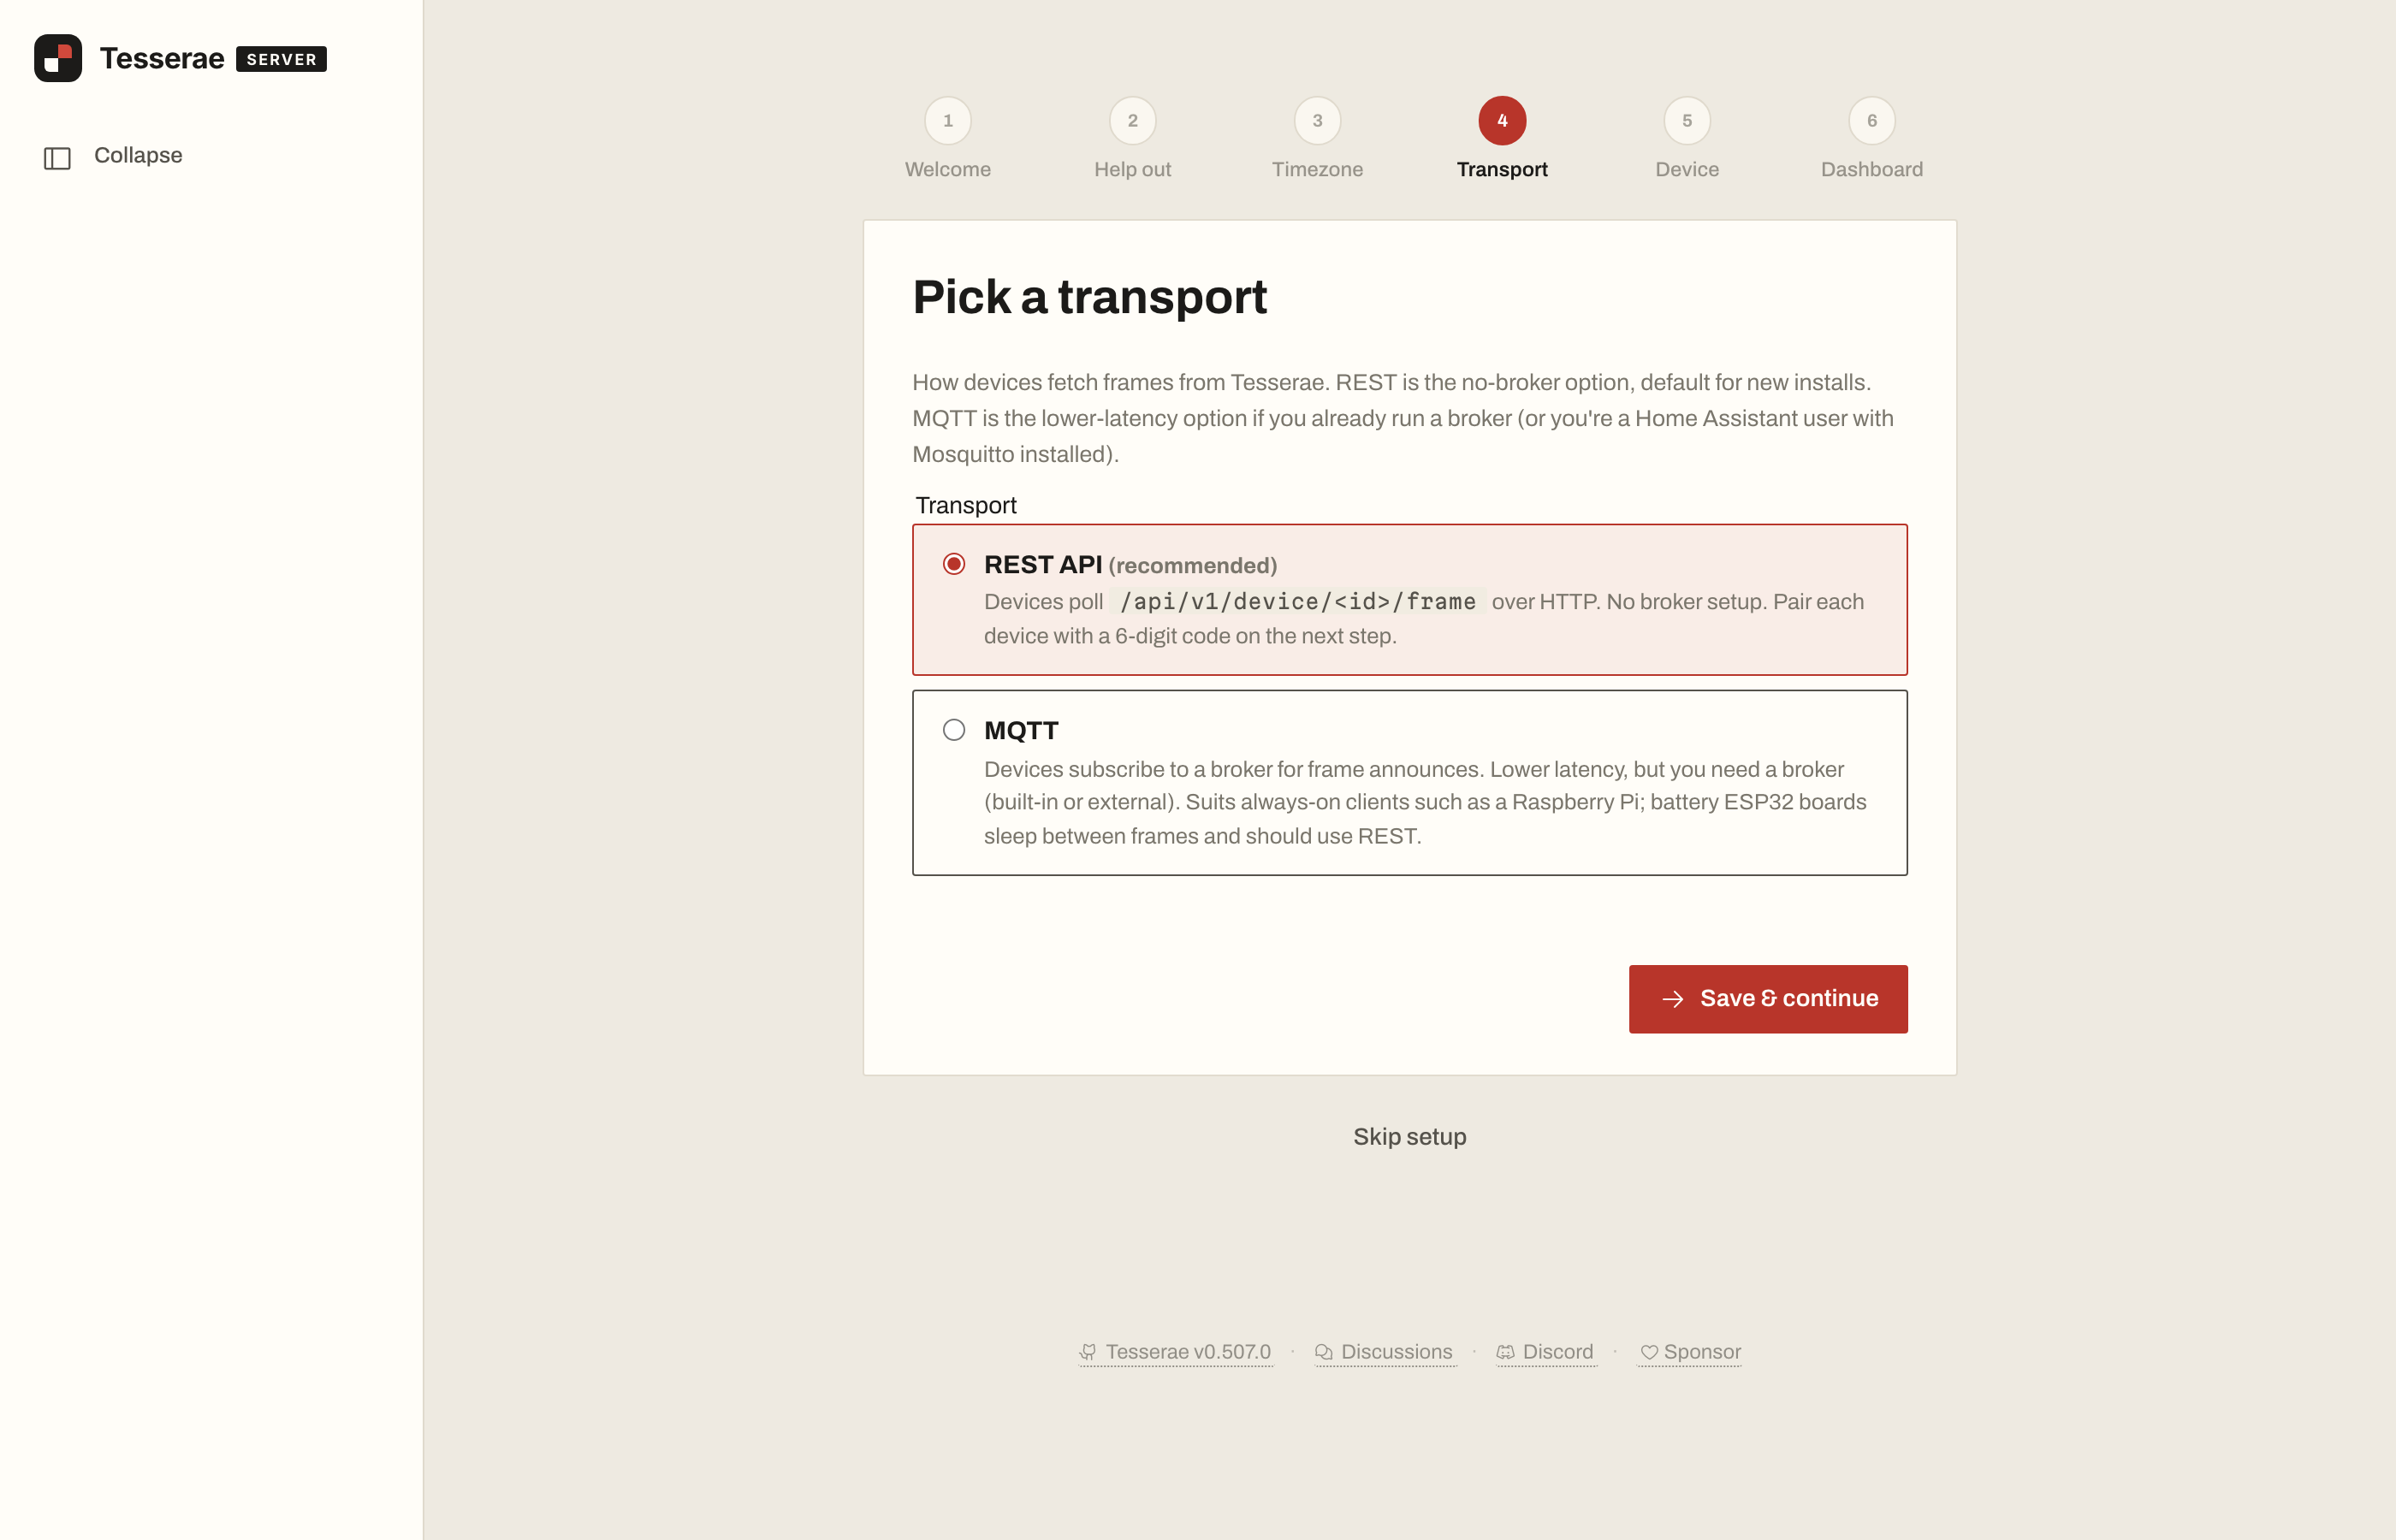
- Transport: leave REST API selected. It's the right choice for battery devices like the reTerminal and Sticky.
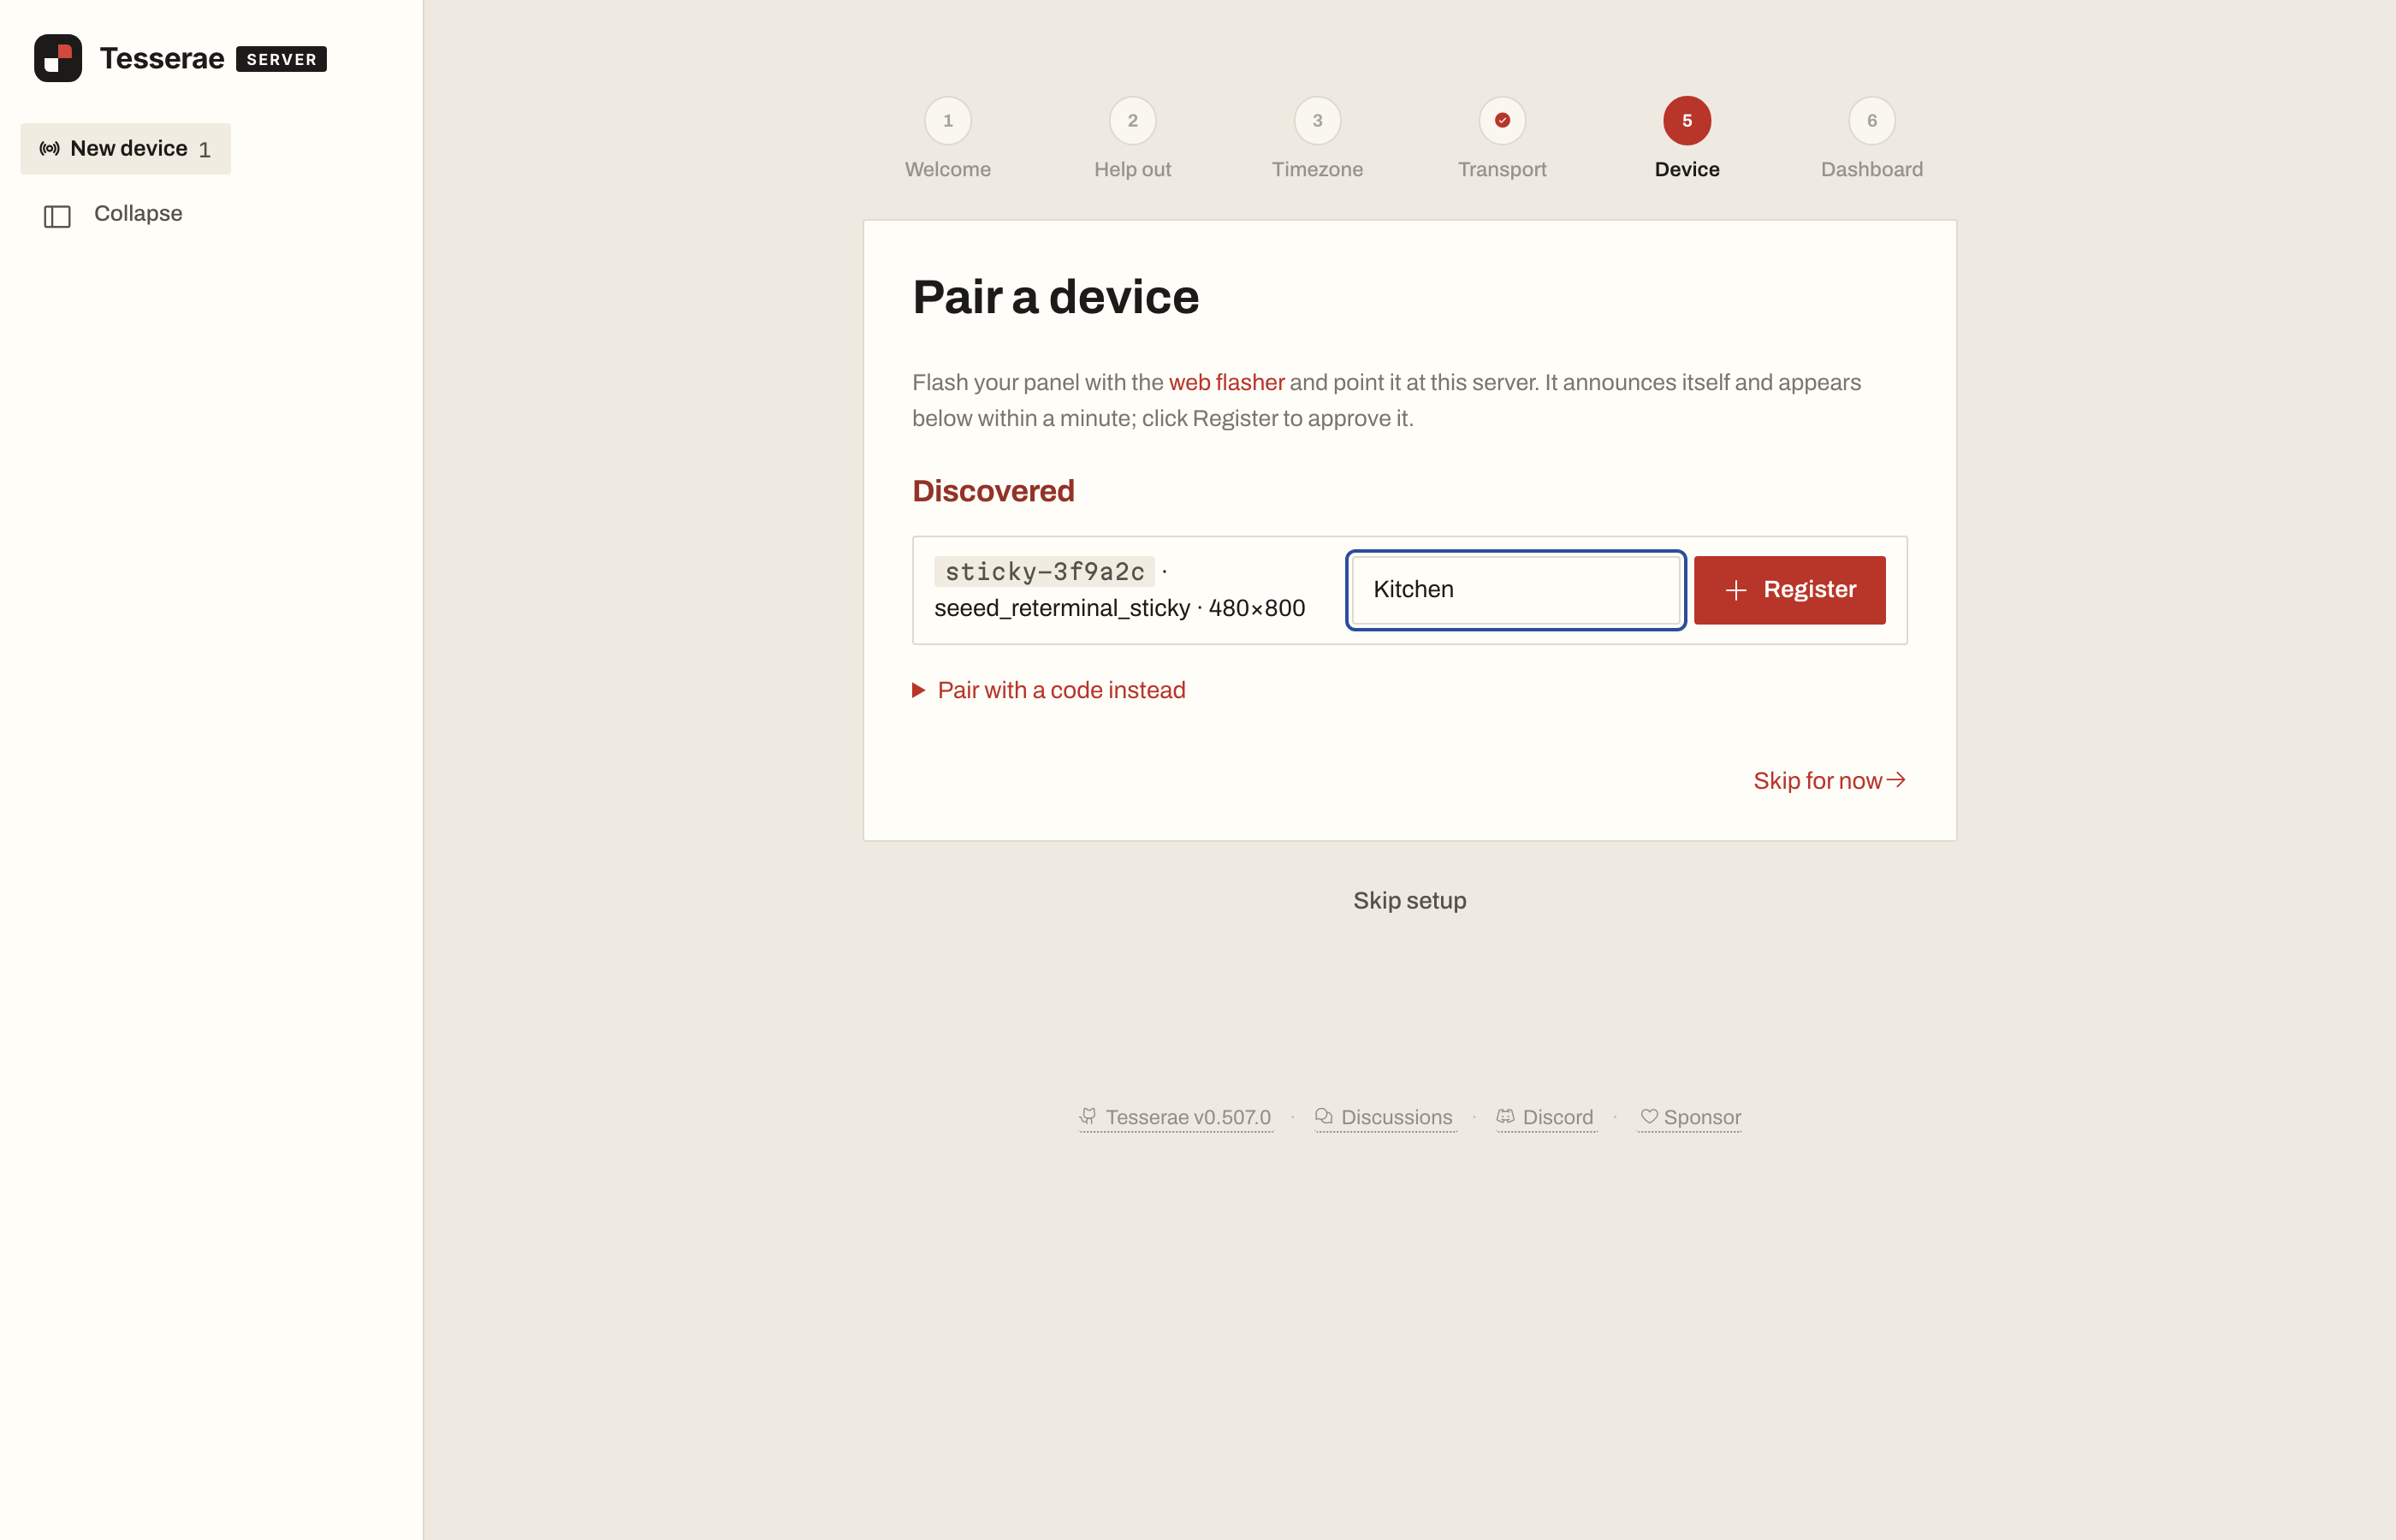
- Device: the page waits for a panel to announce itself. Click Skip for now and approve the device in Step 4, or leave this page open while you flash: when the device appears under Discovered, give it a name and click Register. You don't need a pairing code.
- Dashboard: choose I'll set this up later, or come back after Step 4 to create a starter dashboard bound to your device.
Step 2: Flash the Tesserae Firmware
- reTerminal E Series
- reTerminal Sticky
The reTerminal E Series connects through a WCH CH340 USB-serial chip, and macOS has no built-in driver for it. Install WCH's CH34x driver, then enable it under System Settings → General → Login Items & Extensions → Driver Extensions. Linux and current Windows versions usually install a compatible driver automatically. If Windows does not detect a serial port, install the WCH CH341SER driver; Windows 10 and earlier may require it. On Linux, if the port doesn't appear, run sudo usermod -aG dialout $USER and log out and back in.
- Connect the device to your computer with the USB-C data cable.
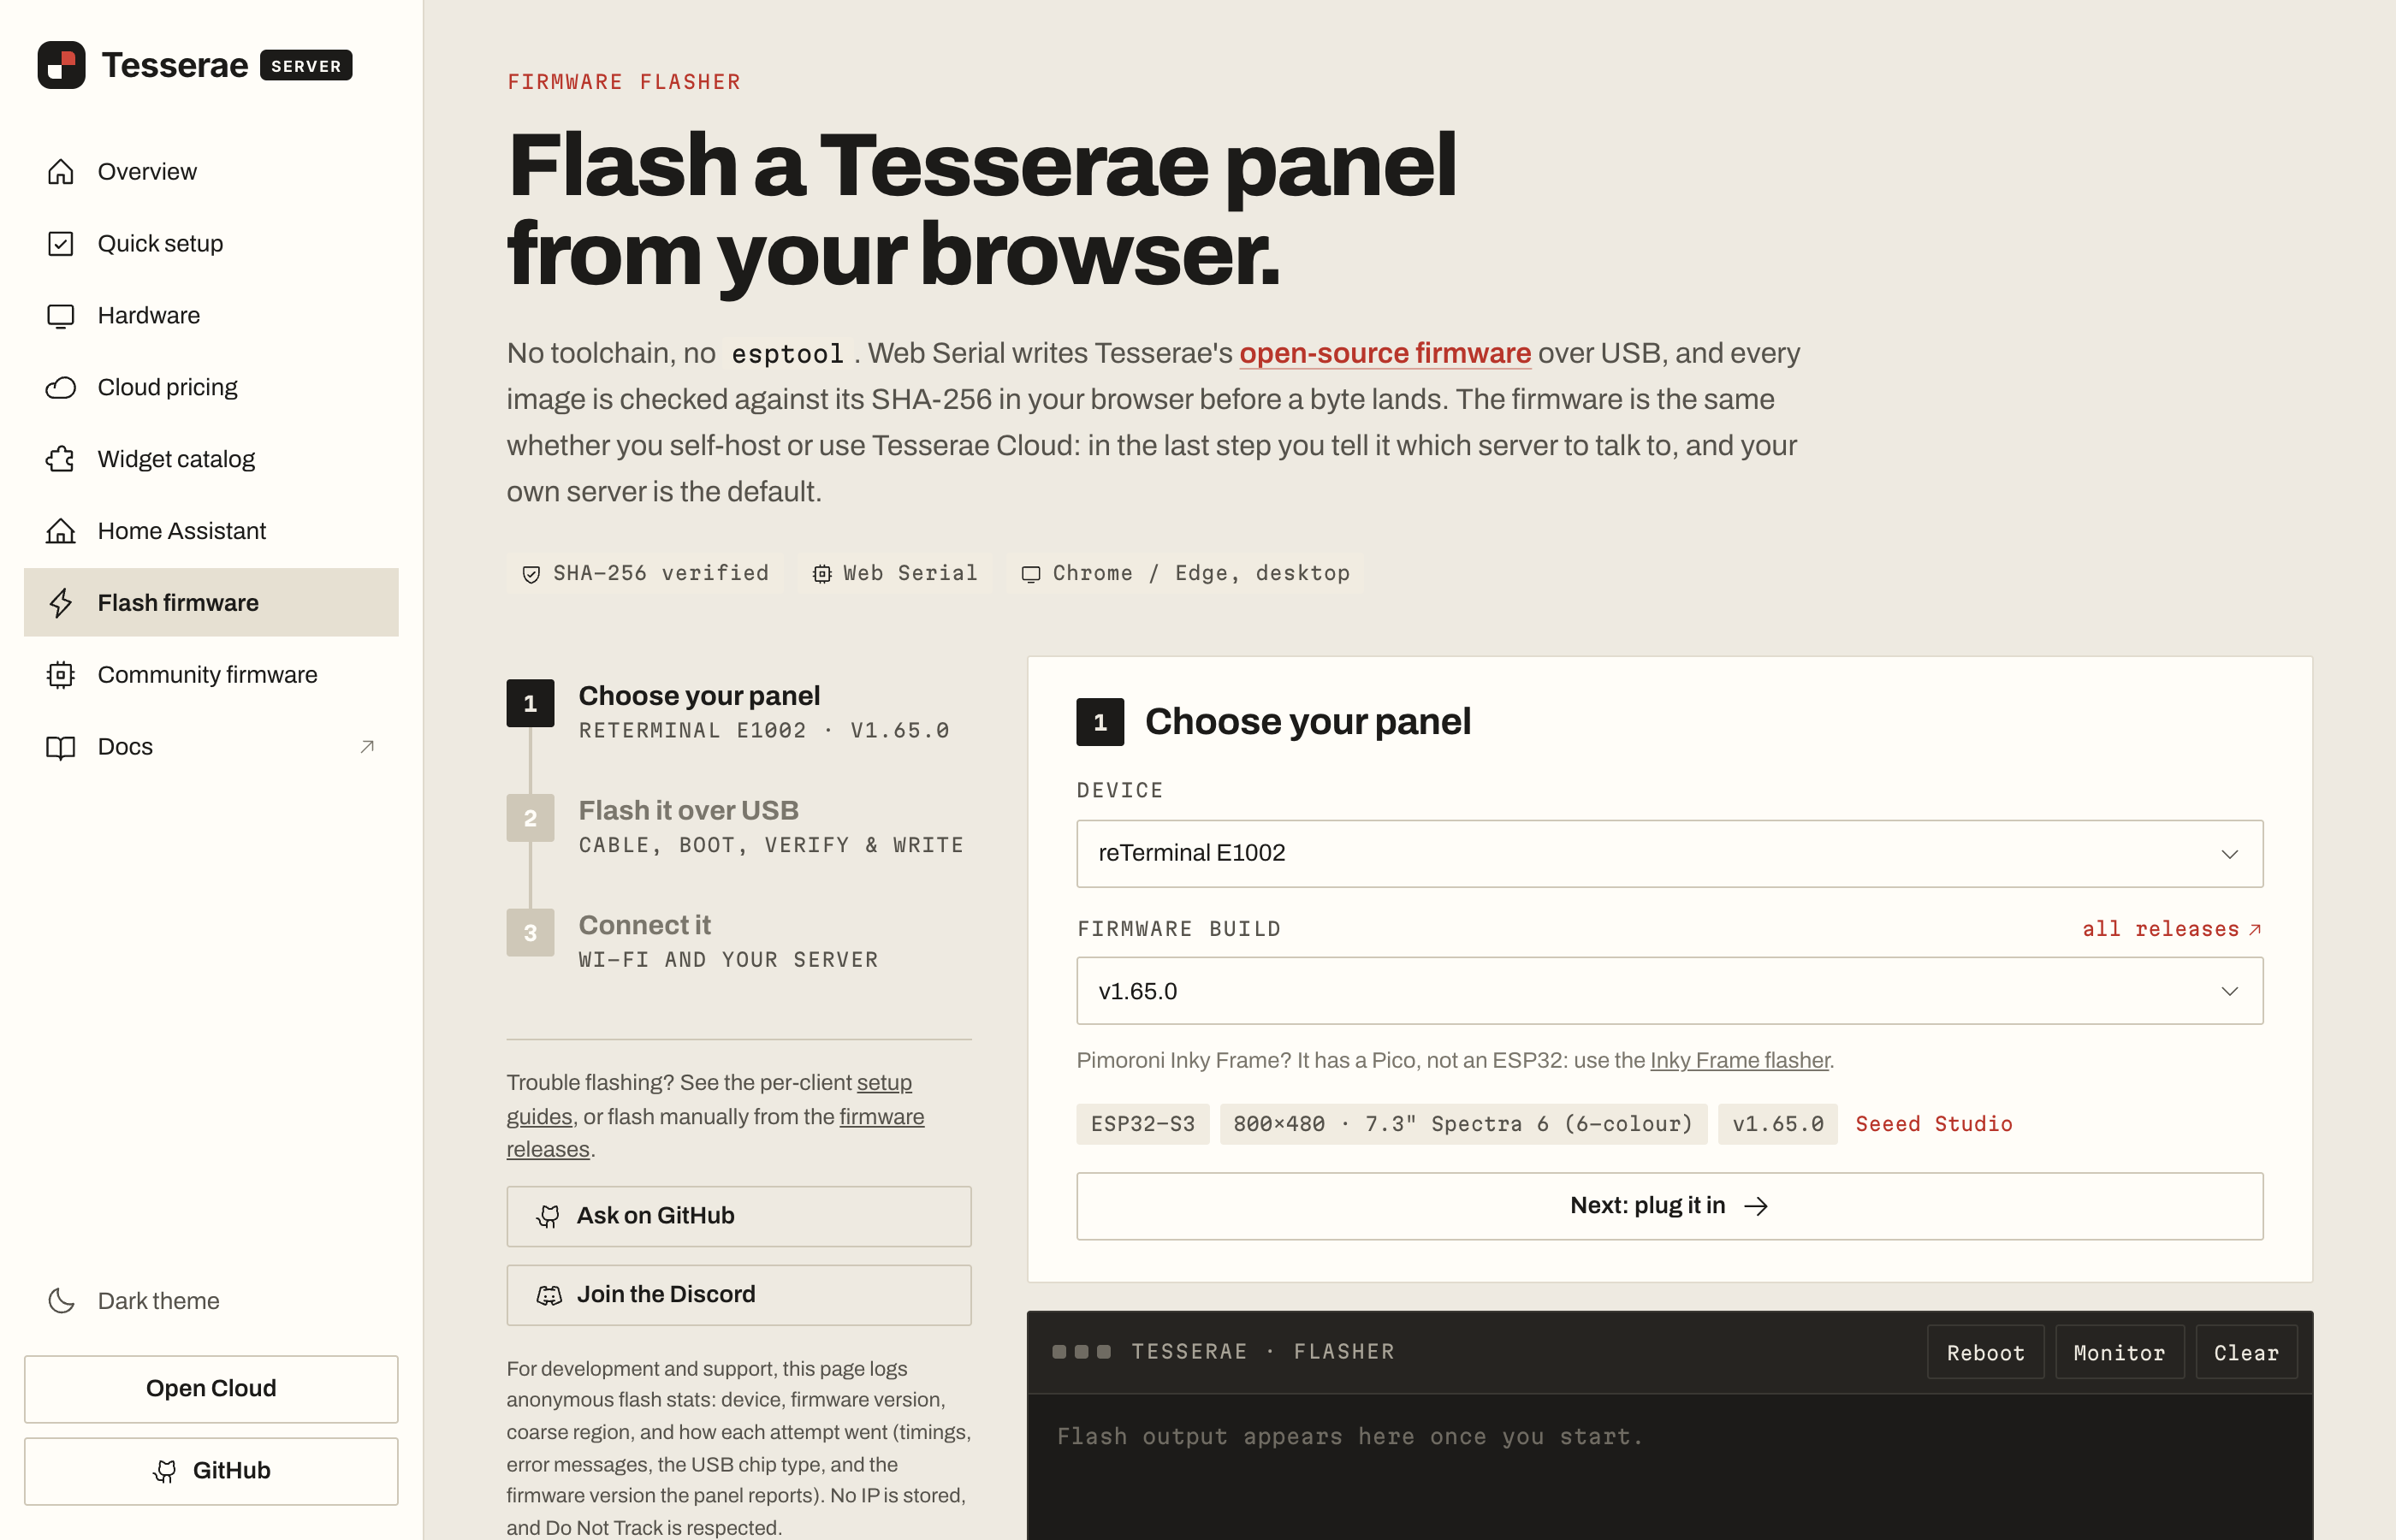
- Open tesserae.ink/flash in Chrome or Edge.
- Under Choose your panel, select your reTerminal model, then pick the newest version under Firmware build.
- Click Next: plug it in, then Connect & flash, and pick the device's serial port.
- Wait 60 to 90 seconds. Leave the cable connected until the flasher confirms success.
When flashing finishes, the flasher's Connect it step can send your Wi-Fi details and server address to the device over the same cable. Choose My own Tesserae server, enter the address from Step 1, and skip to Step 4.
Sticky owners can flash Tesserae straight from the Sticky Playground.
-
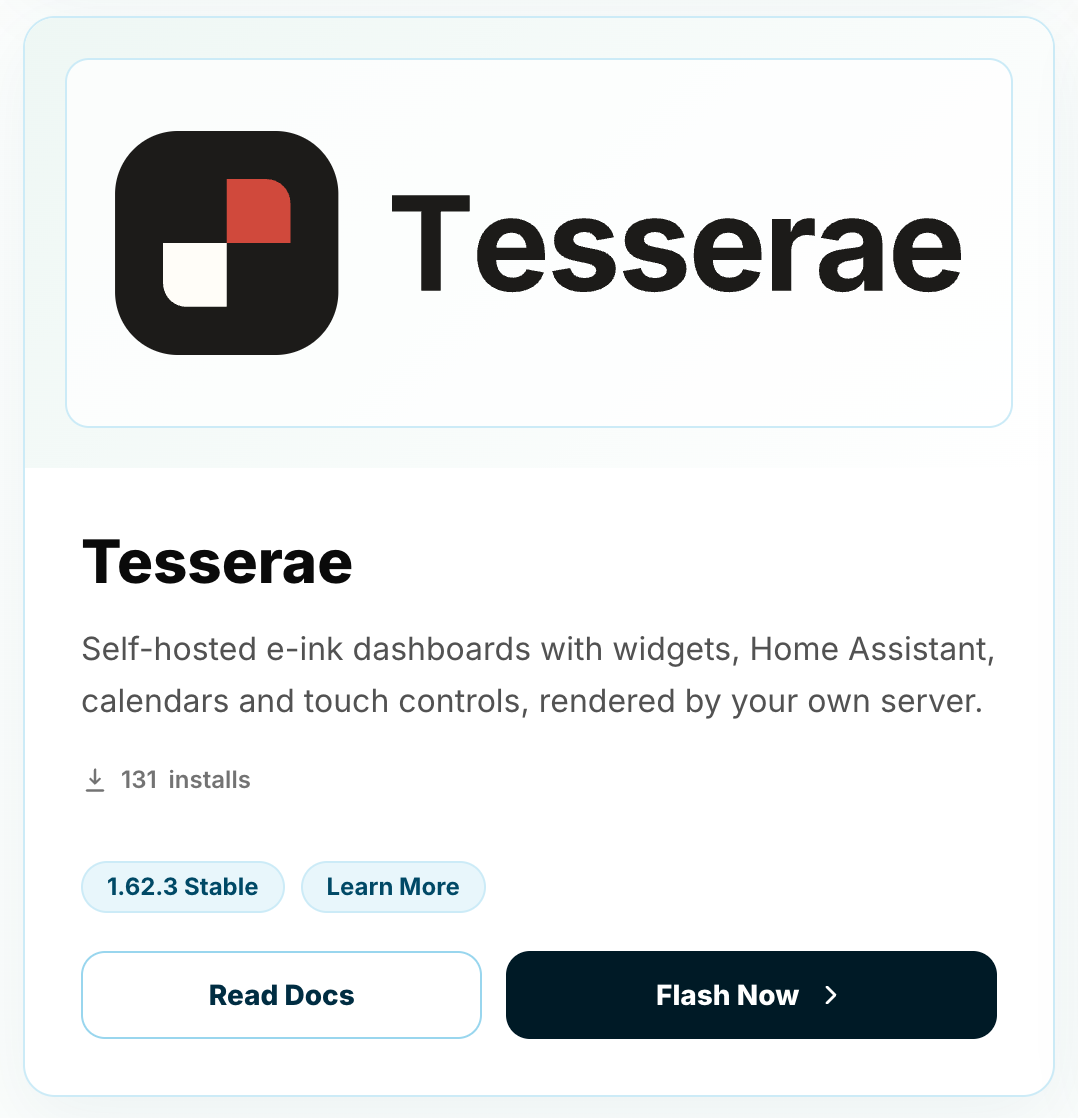
Open the Tesserae page in the Sticky Playground, or find the Tesserae card in the Playground and click Flash Now.
-
Connect the Sticky to your computer with the USB-C data cable, and keep it connected until flashing is complete.
-
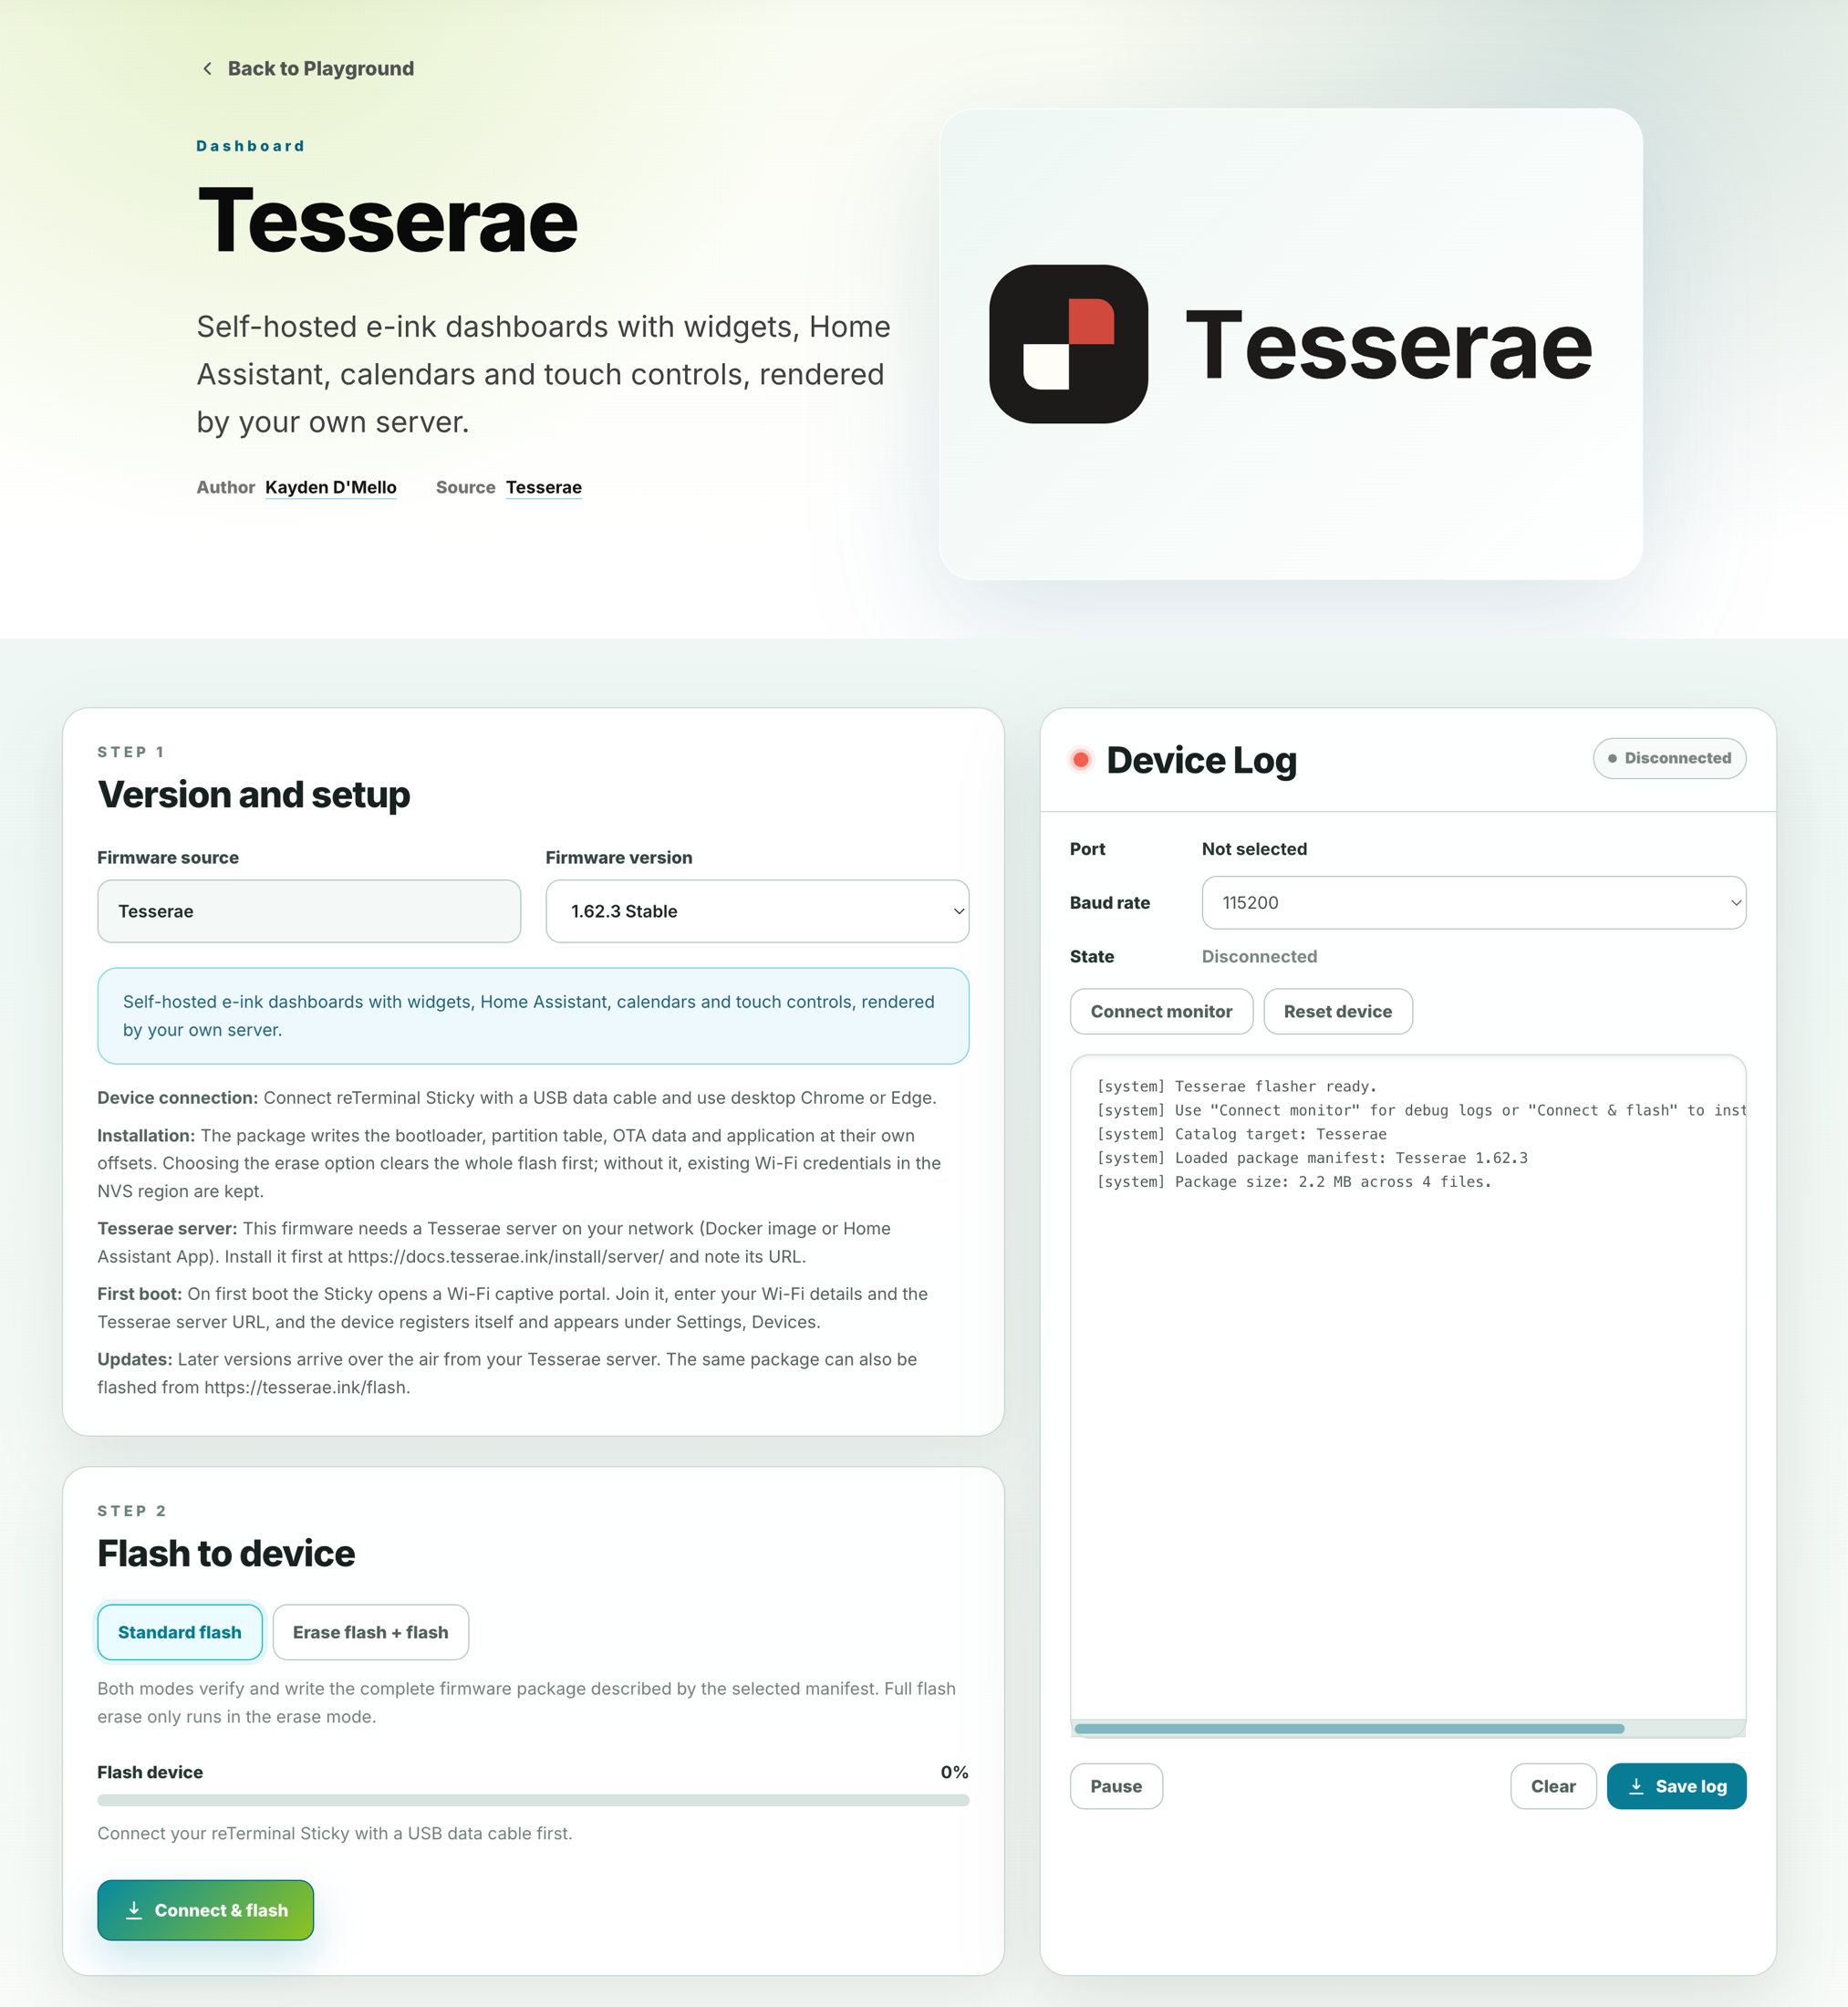
Under Version and setup, select the Tesserae firmware version shown on the page.
-
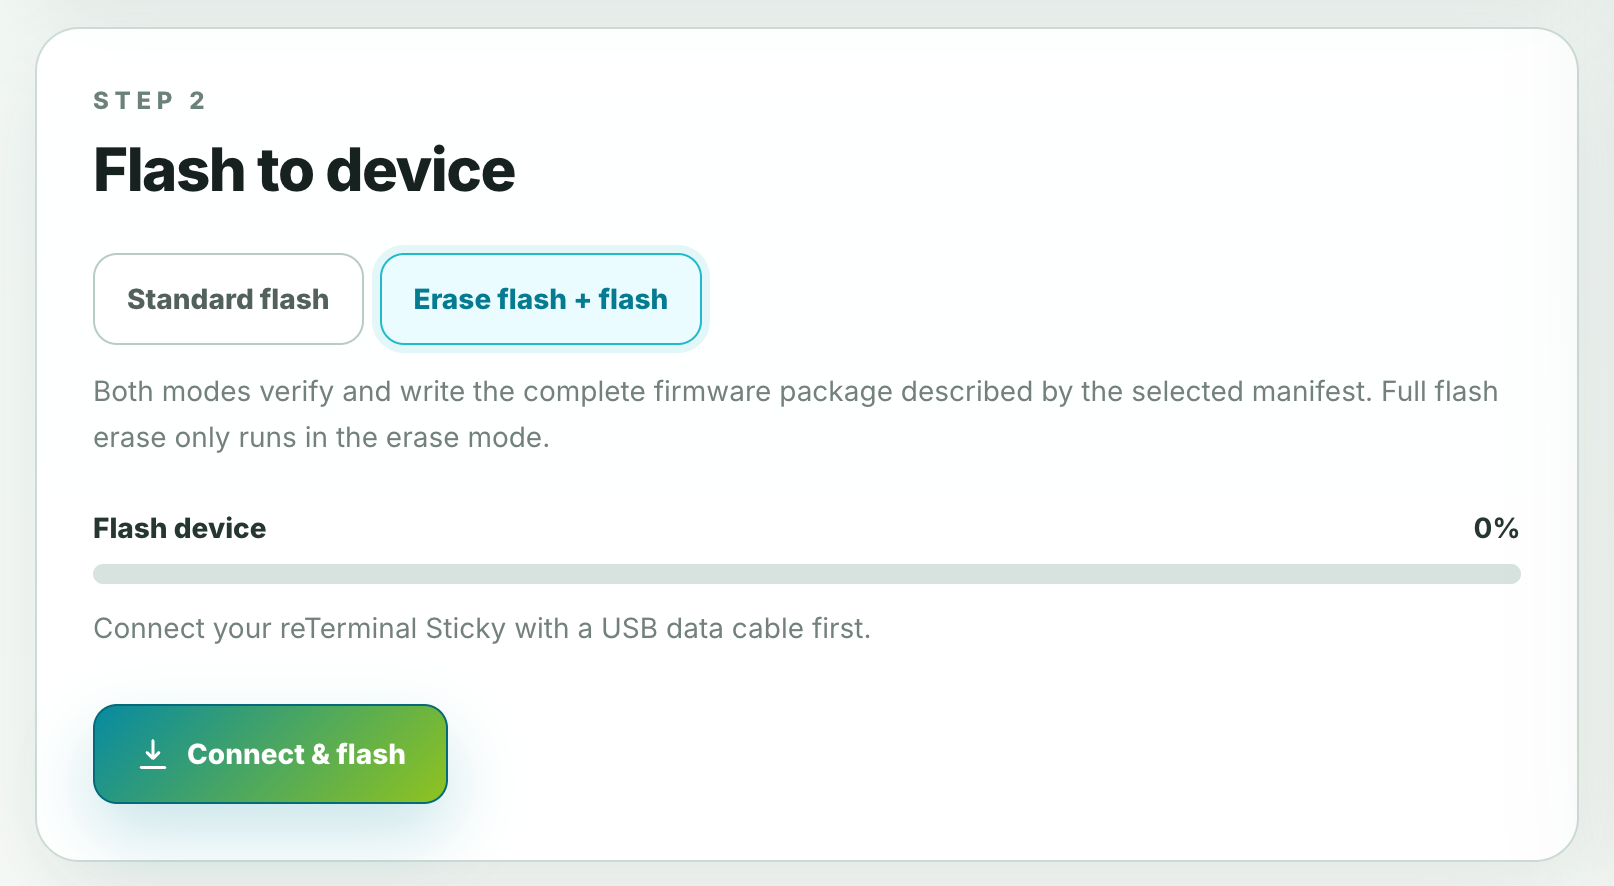
Under Flash to device, choose a flash mode:
- Standard flash writes the firmware and keeps the Sticky's saved Wi-Fi settings.
- Erase flash + flash clears the whole flash first. Use it when you are coming from a different firmware.
-
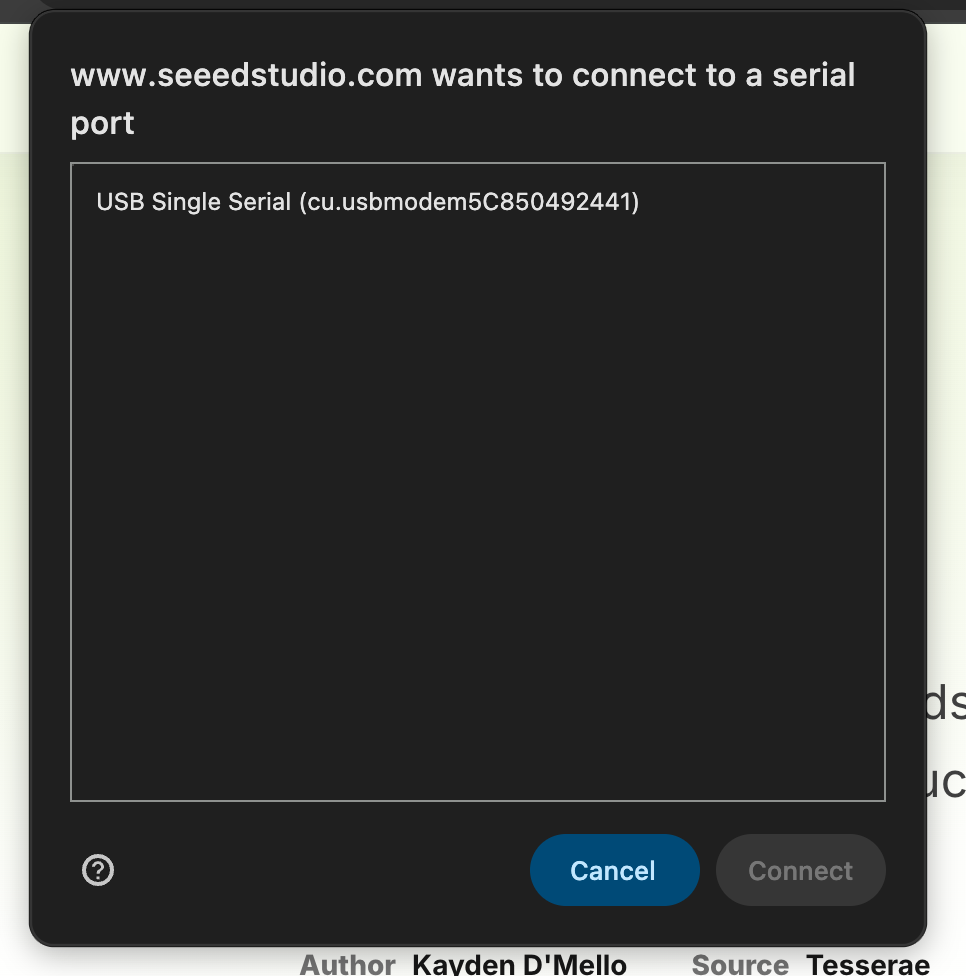
Click Connect & flash. When Chrome or Edge asks, select the Sticky's serial port, which appears as USB Single Serial, and click Connect.
-
Wait until the progress bar and the Device Log show that flashing is complete. The Playground resets the device for you.
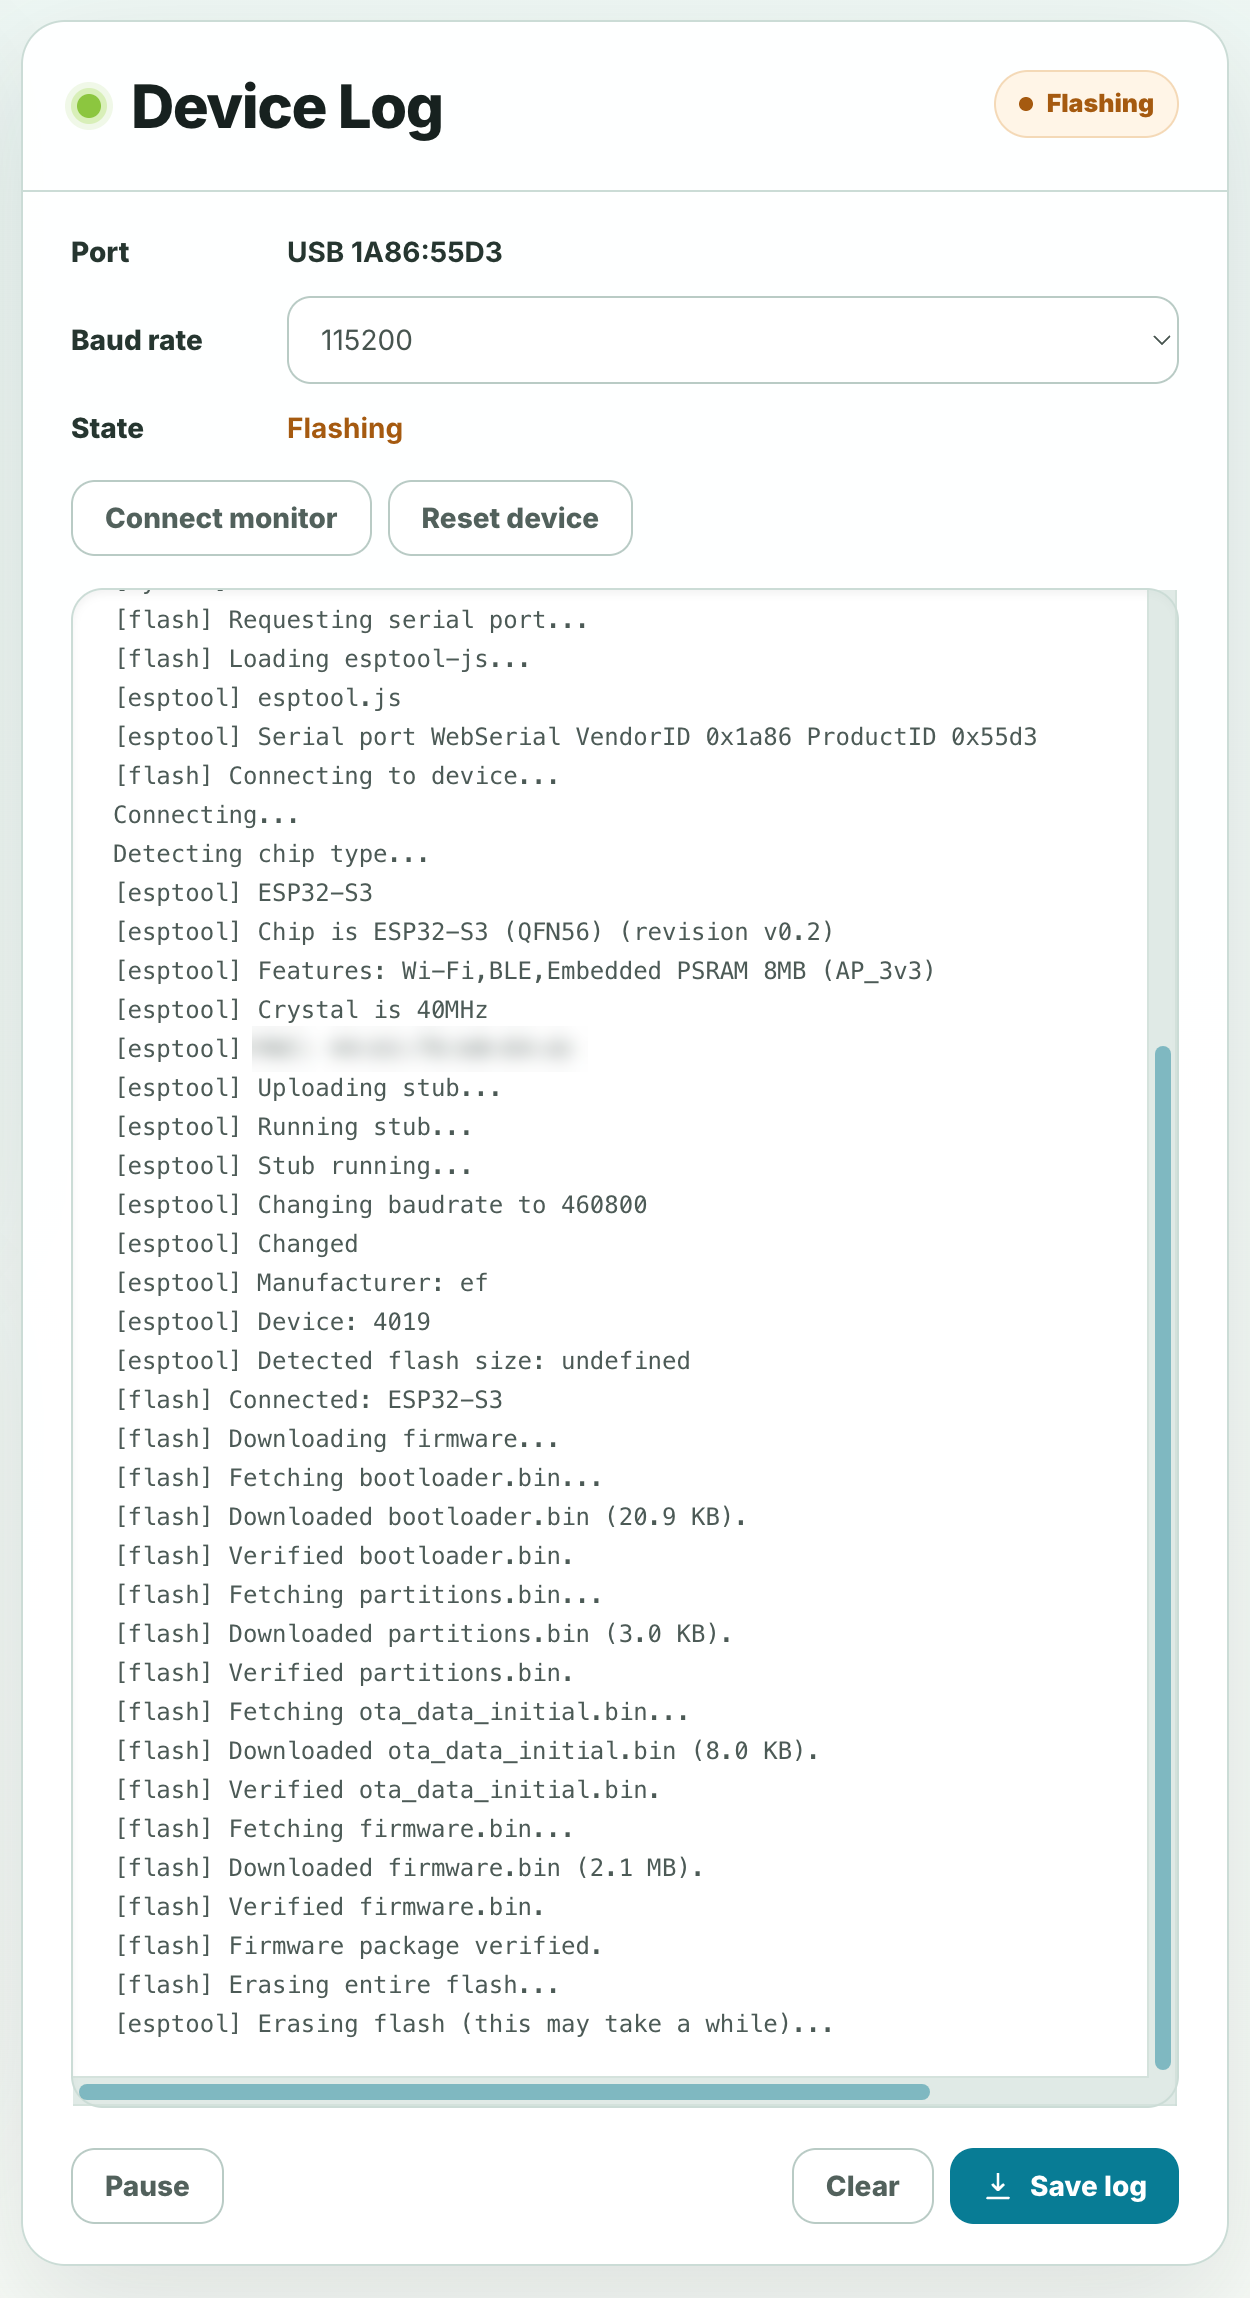
The Playground uses the same firmware package as tesserae.ink/flash, so you can use either.
Flashing Tesserae replaces the firmware currently on the device. You can go back at any time by flashing another firmware.
Step 3: Connect to Wi-Fi
After flashing, the device shows a Setup mode screen with a QR code, the setup network's name and its password.
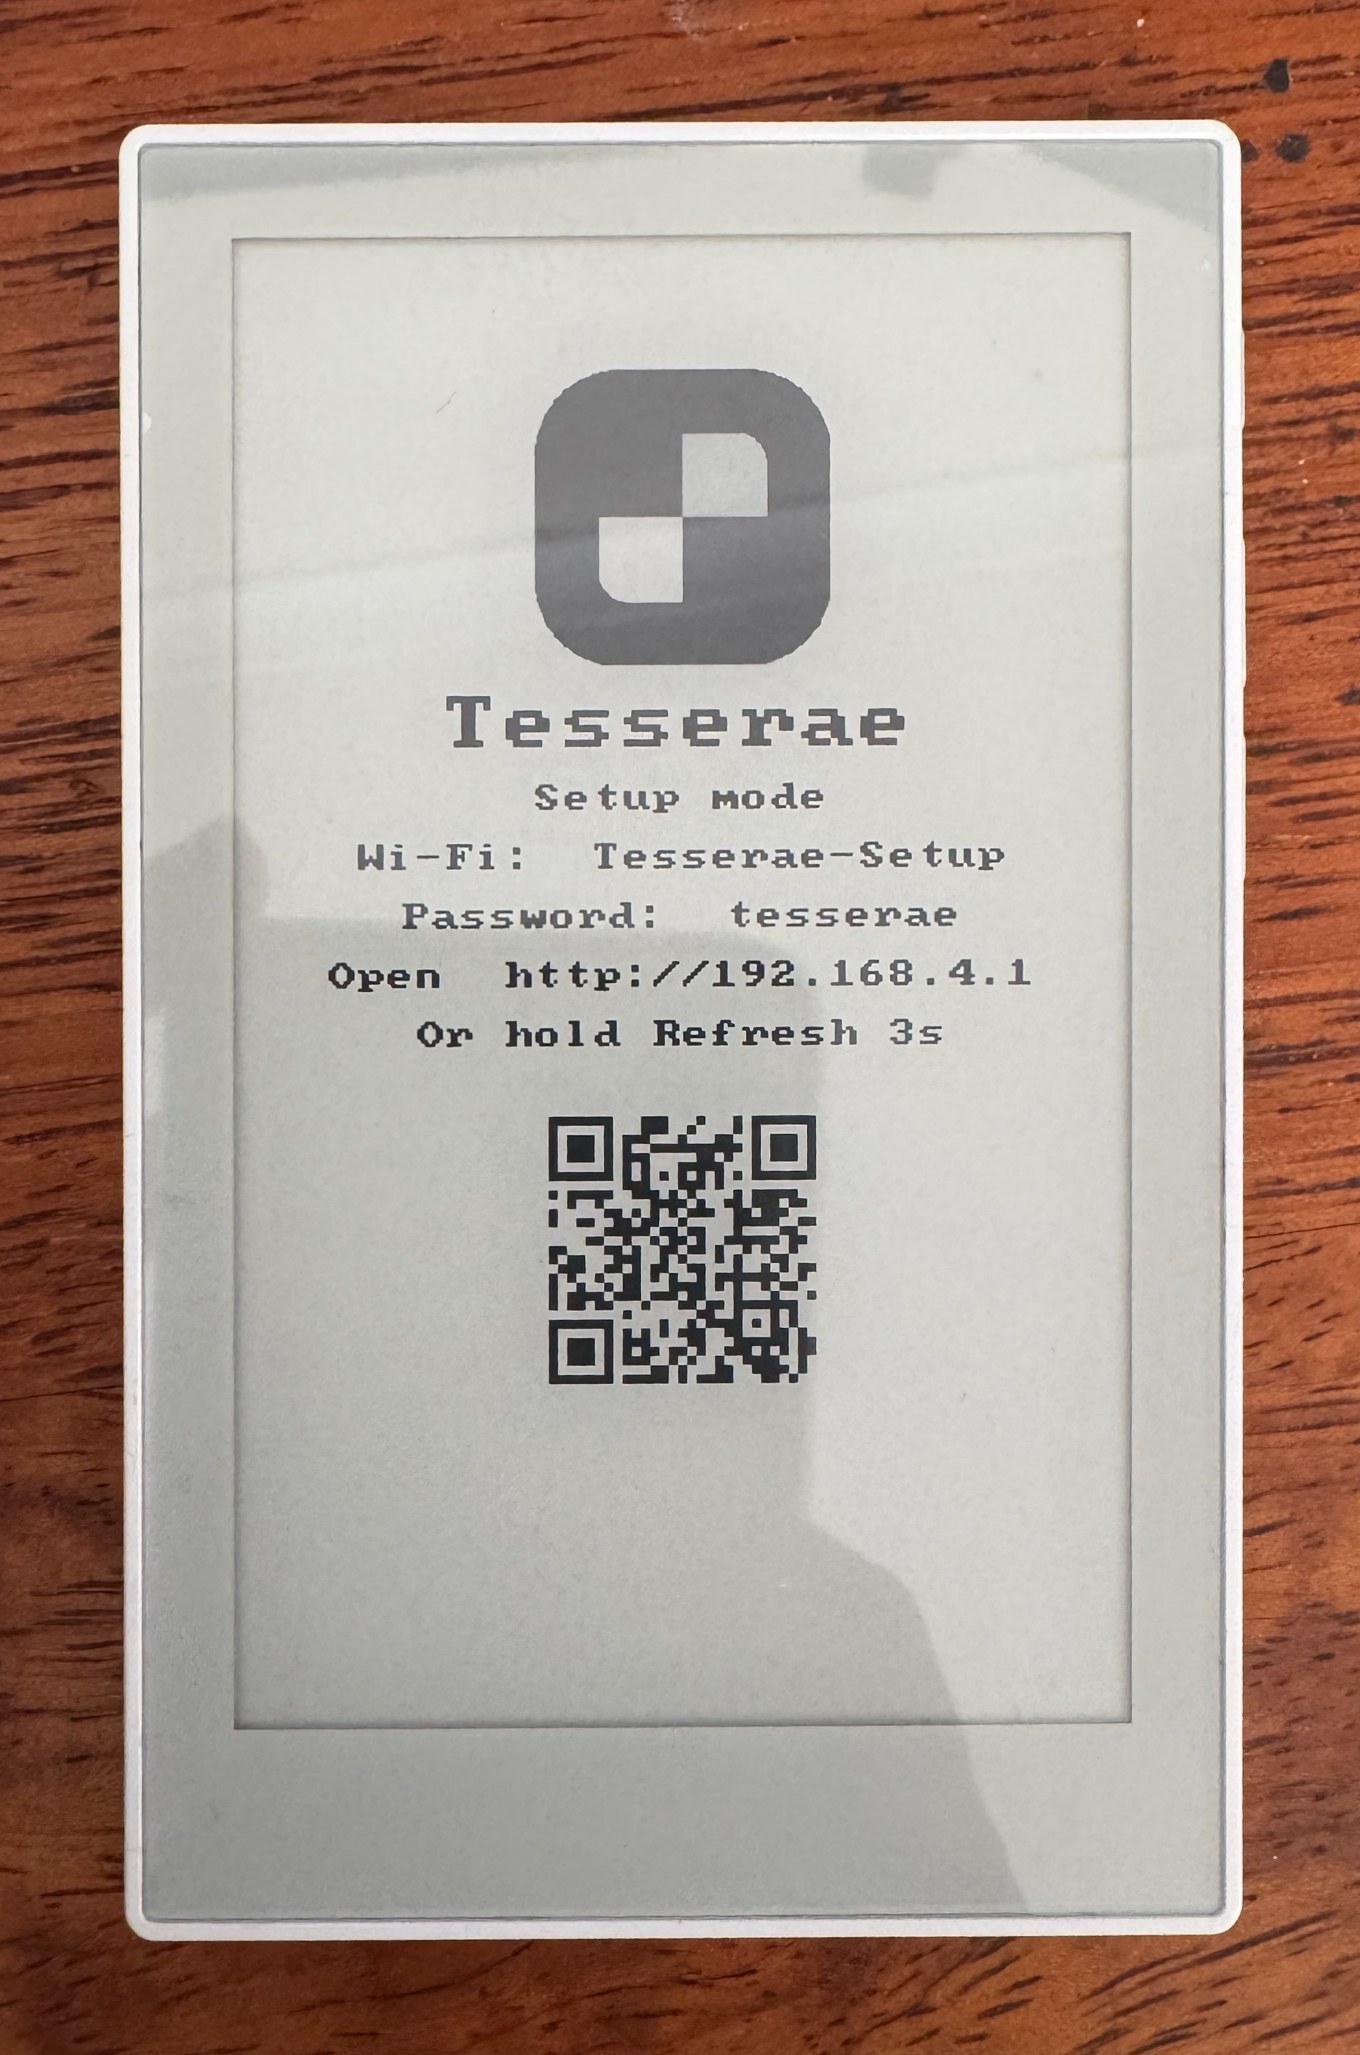
- On your phone or computer, join the Wi-Fi network Tesserae-Setup (password
tesserae), either by scanning the QR code or by picking it from the list. - The setup page opens on its own. If it doesn't, browse to
http://192.168.4.1. - Enter your 2.4 GHz Wi-Fi name and password, or pick your network from the list the device scanned.
- Choose how the device reaches Tesserae:
- Local (the default): enter your Tesserae server address, for example
http://192.168.1.50:8765. Leave Pairing code blank and you'll approve the device in Step 4. - Cloud: enter the eight-digit claim code from Settings → Panels → Add a panel in Tesserae Cloud.
- Relay: for a device on a different network from your server. Enter the pairing code from Settings → Cloud relay → Add a remote panel on your server.
- Local (the default): enter your Tesserae server address, for example
- Tap Save & restart. The device joins your Wi-Fi and announces itself to the server.
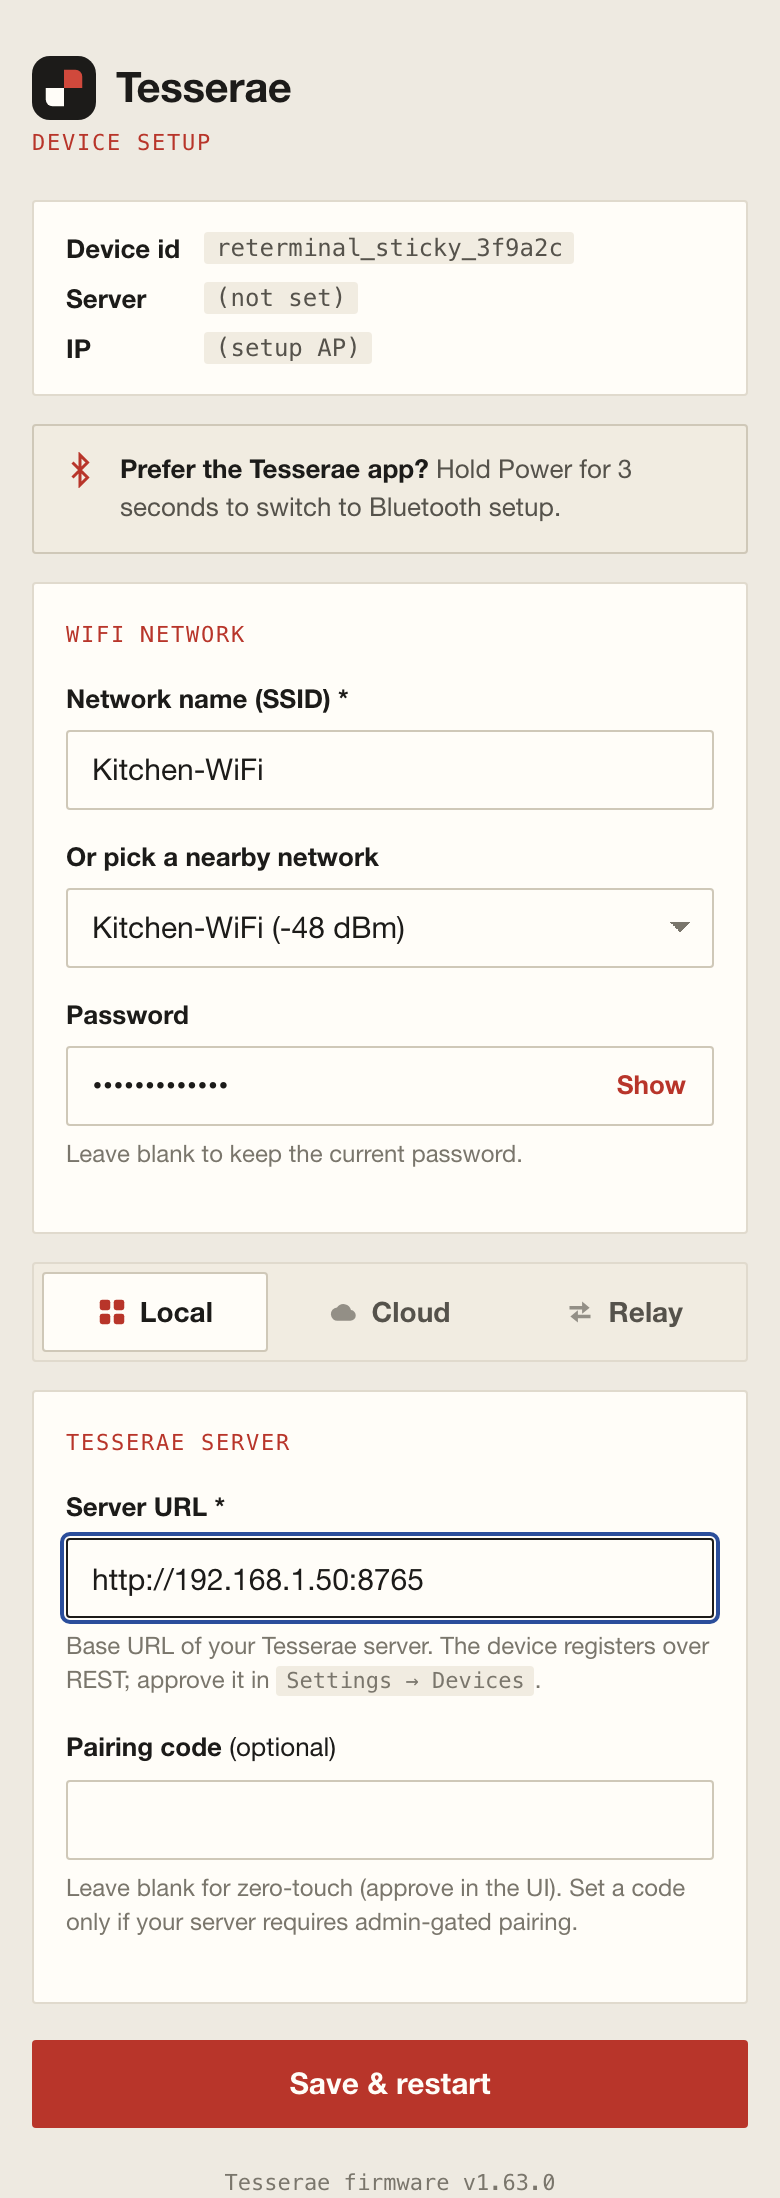
The setup network stays up for 15 minutes after the last visitor leaves. If it has timed out, restart the device, or press a front button on boards that have one, to bring the setup screen back.
Step 4: Register the Device in Tesserae
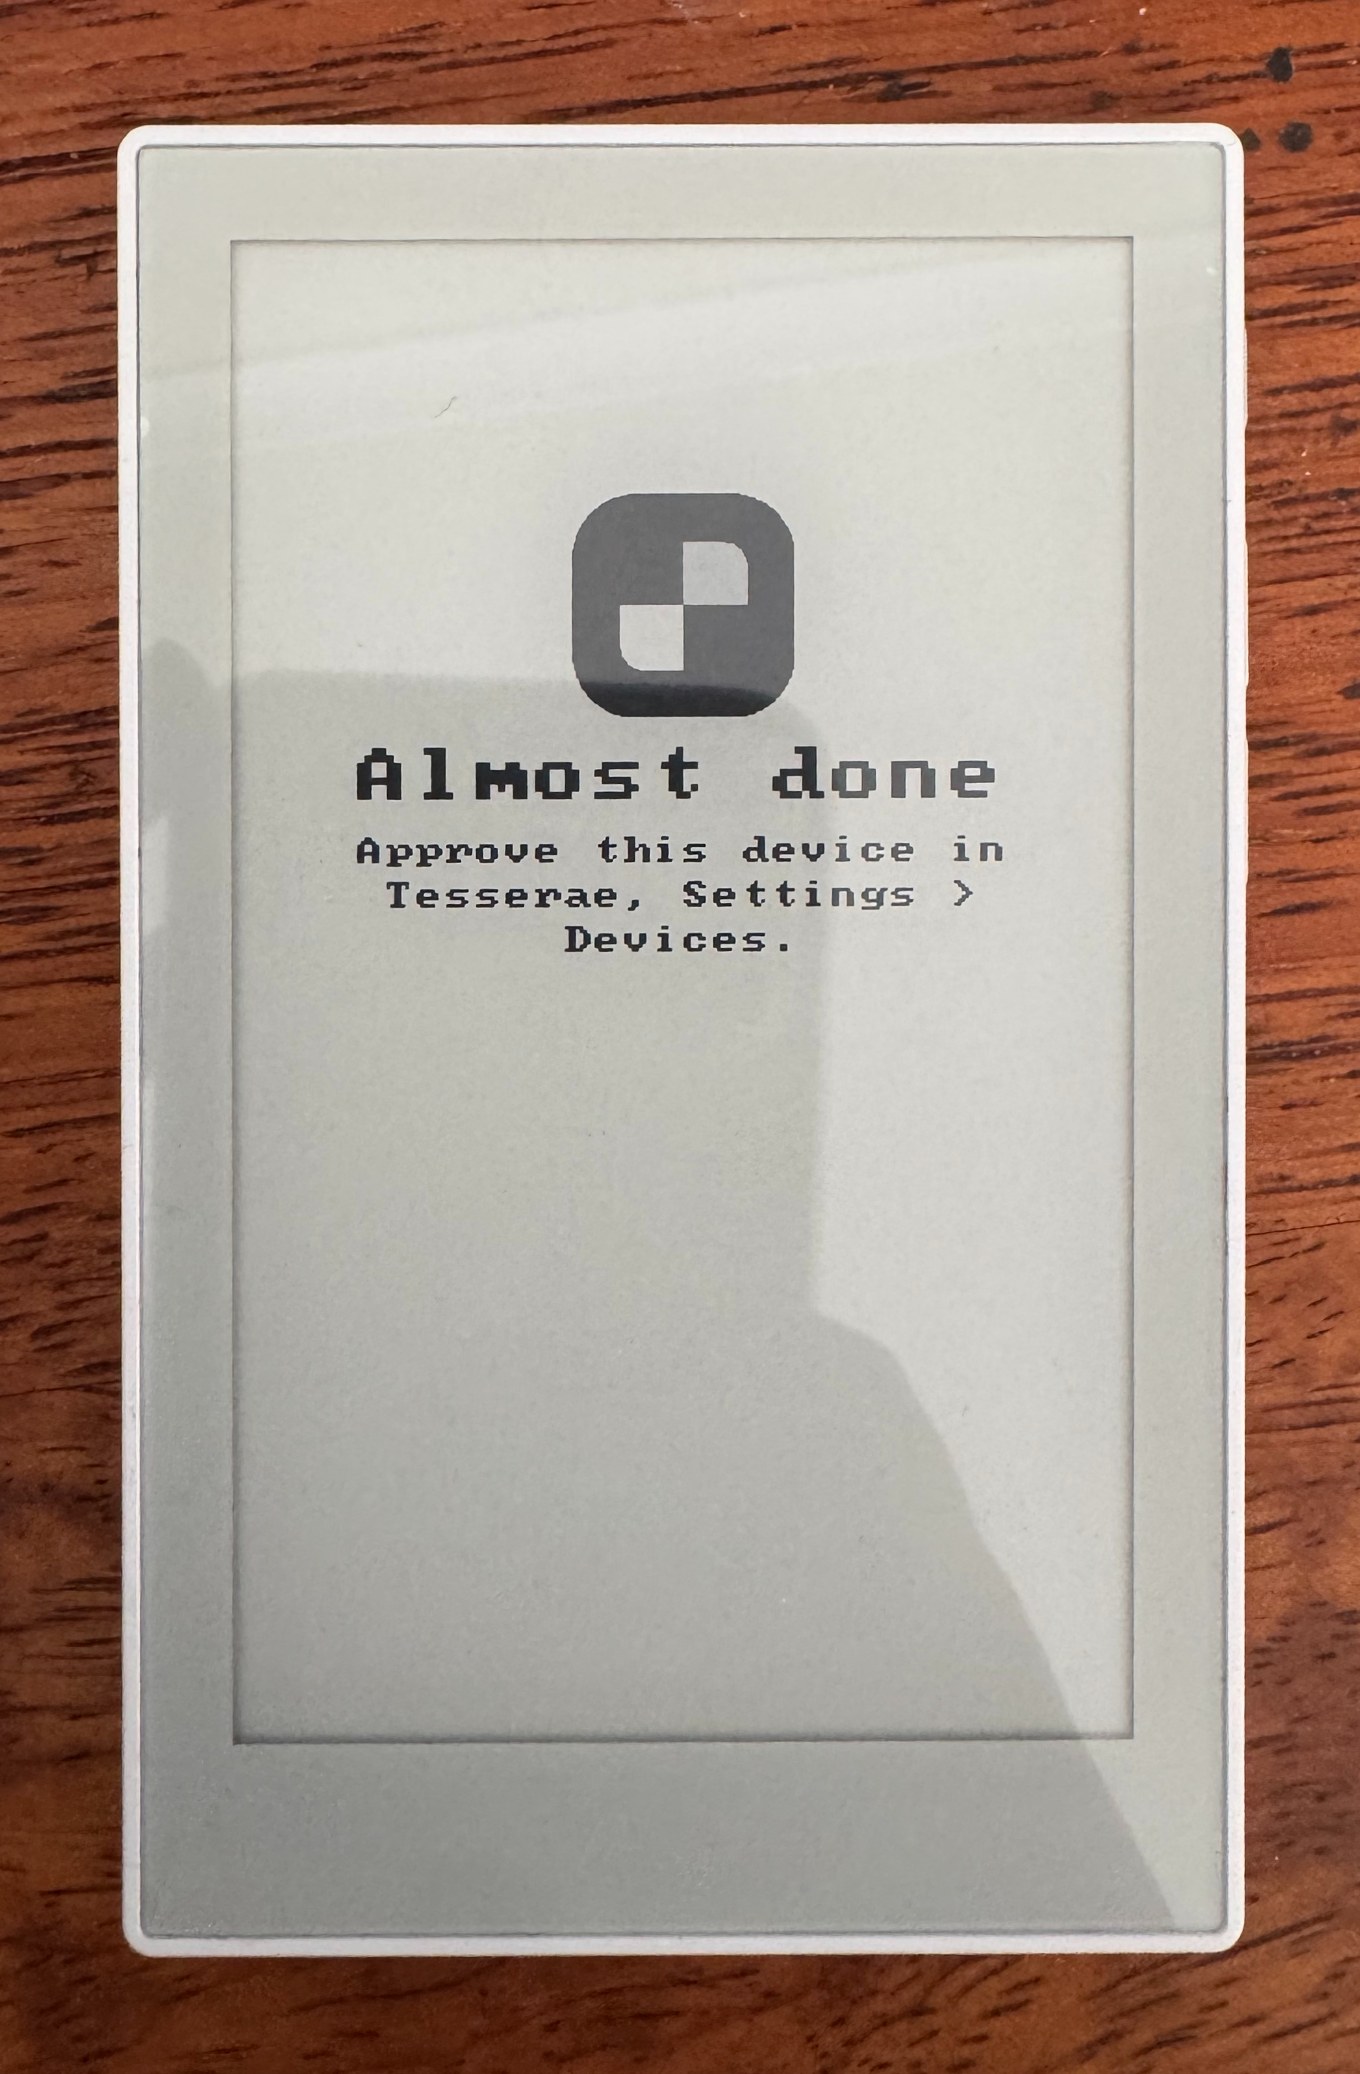
New devices wait for your approval, so nobody else's device can attach itself to your server. Until you approve it, the device shows Almost done and asks you to approve it in Tesserae under Settings → Devices.
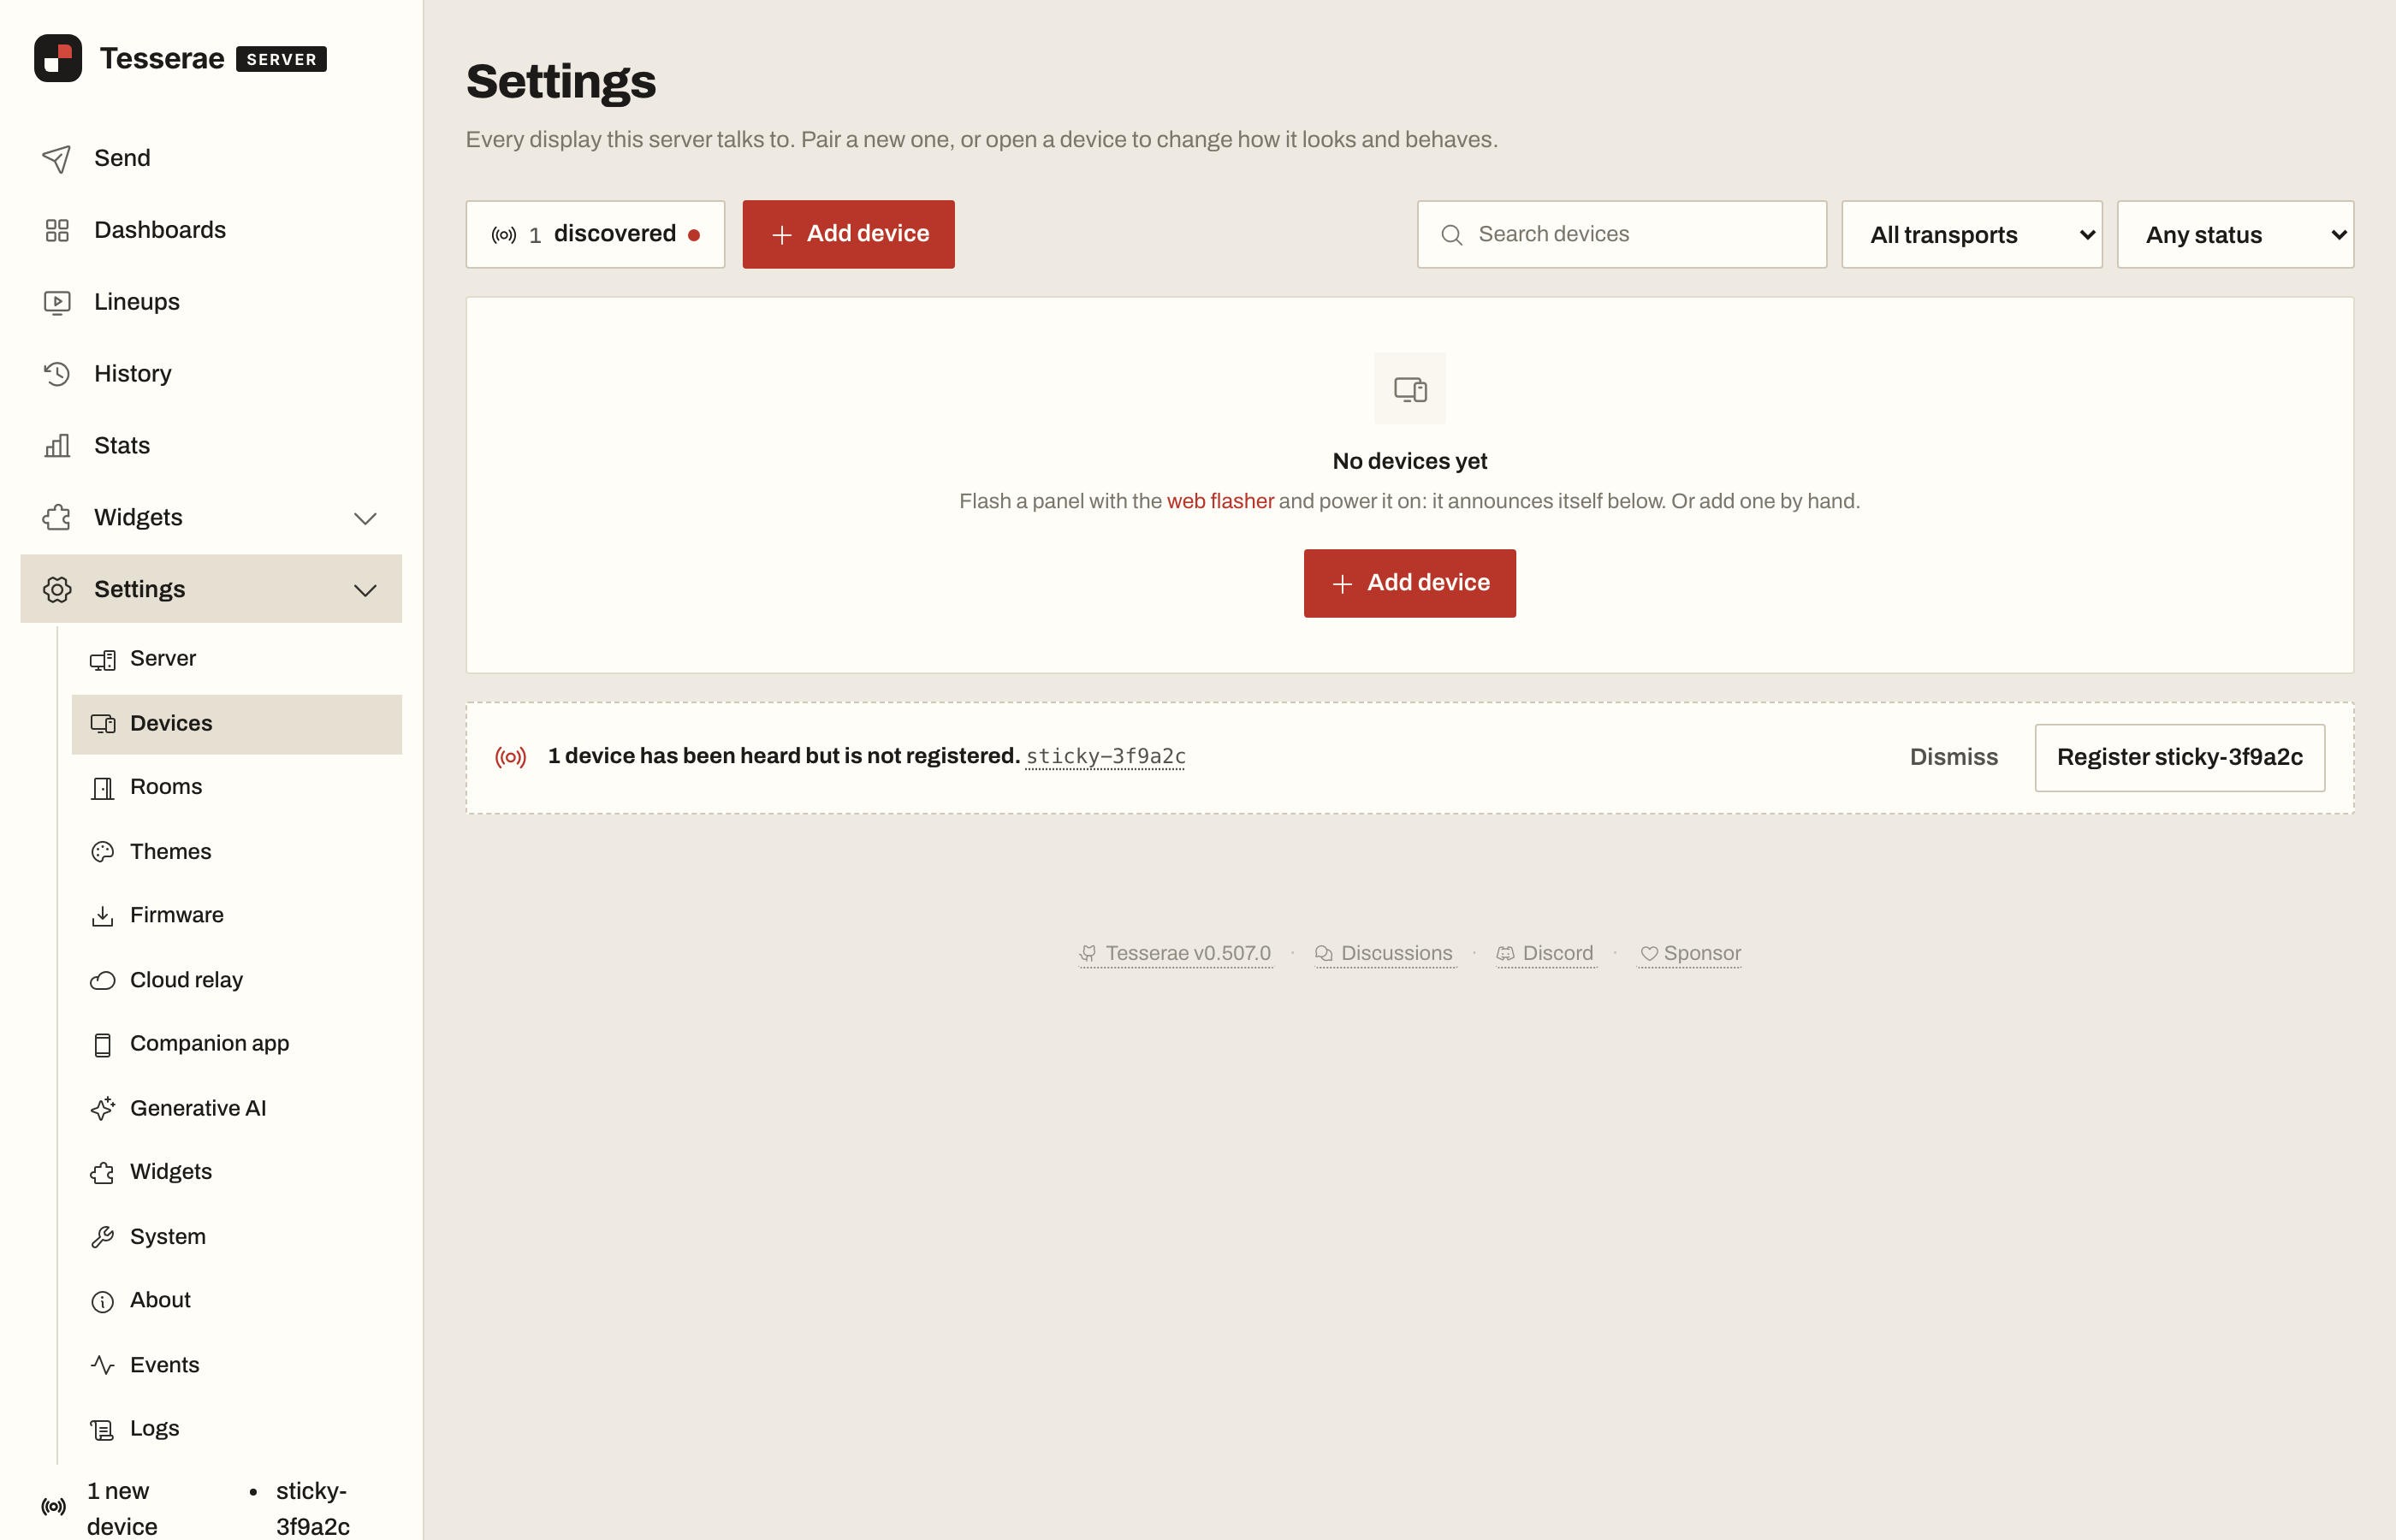
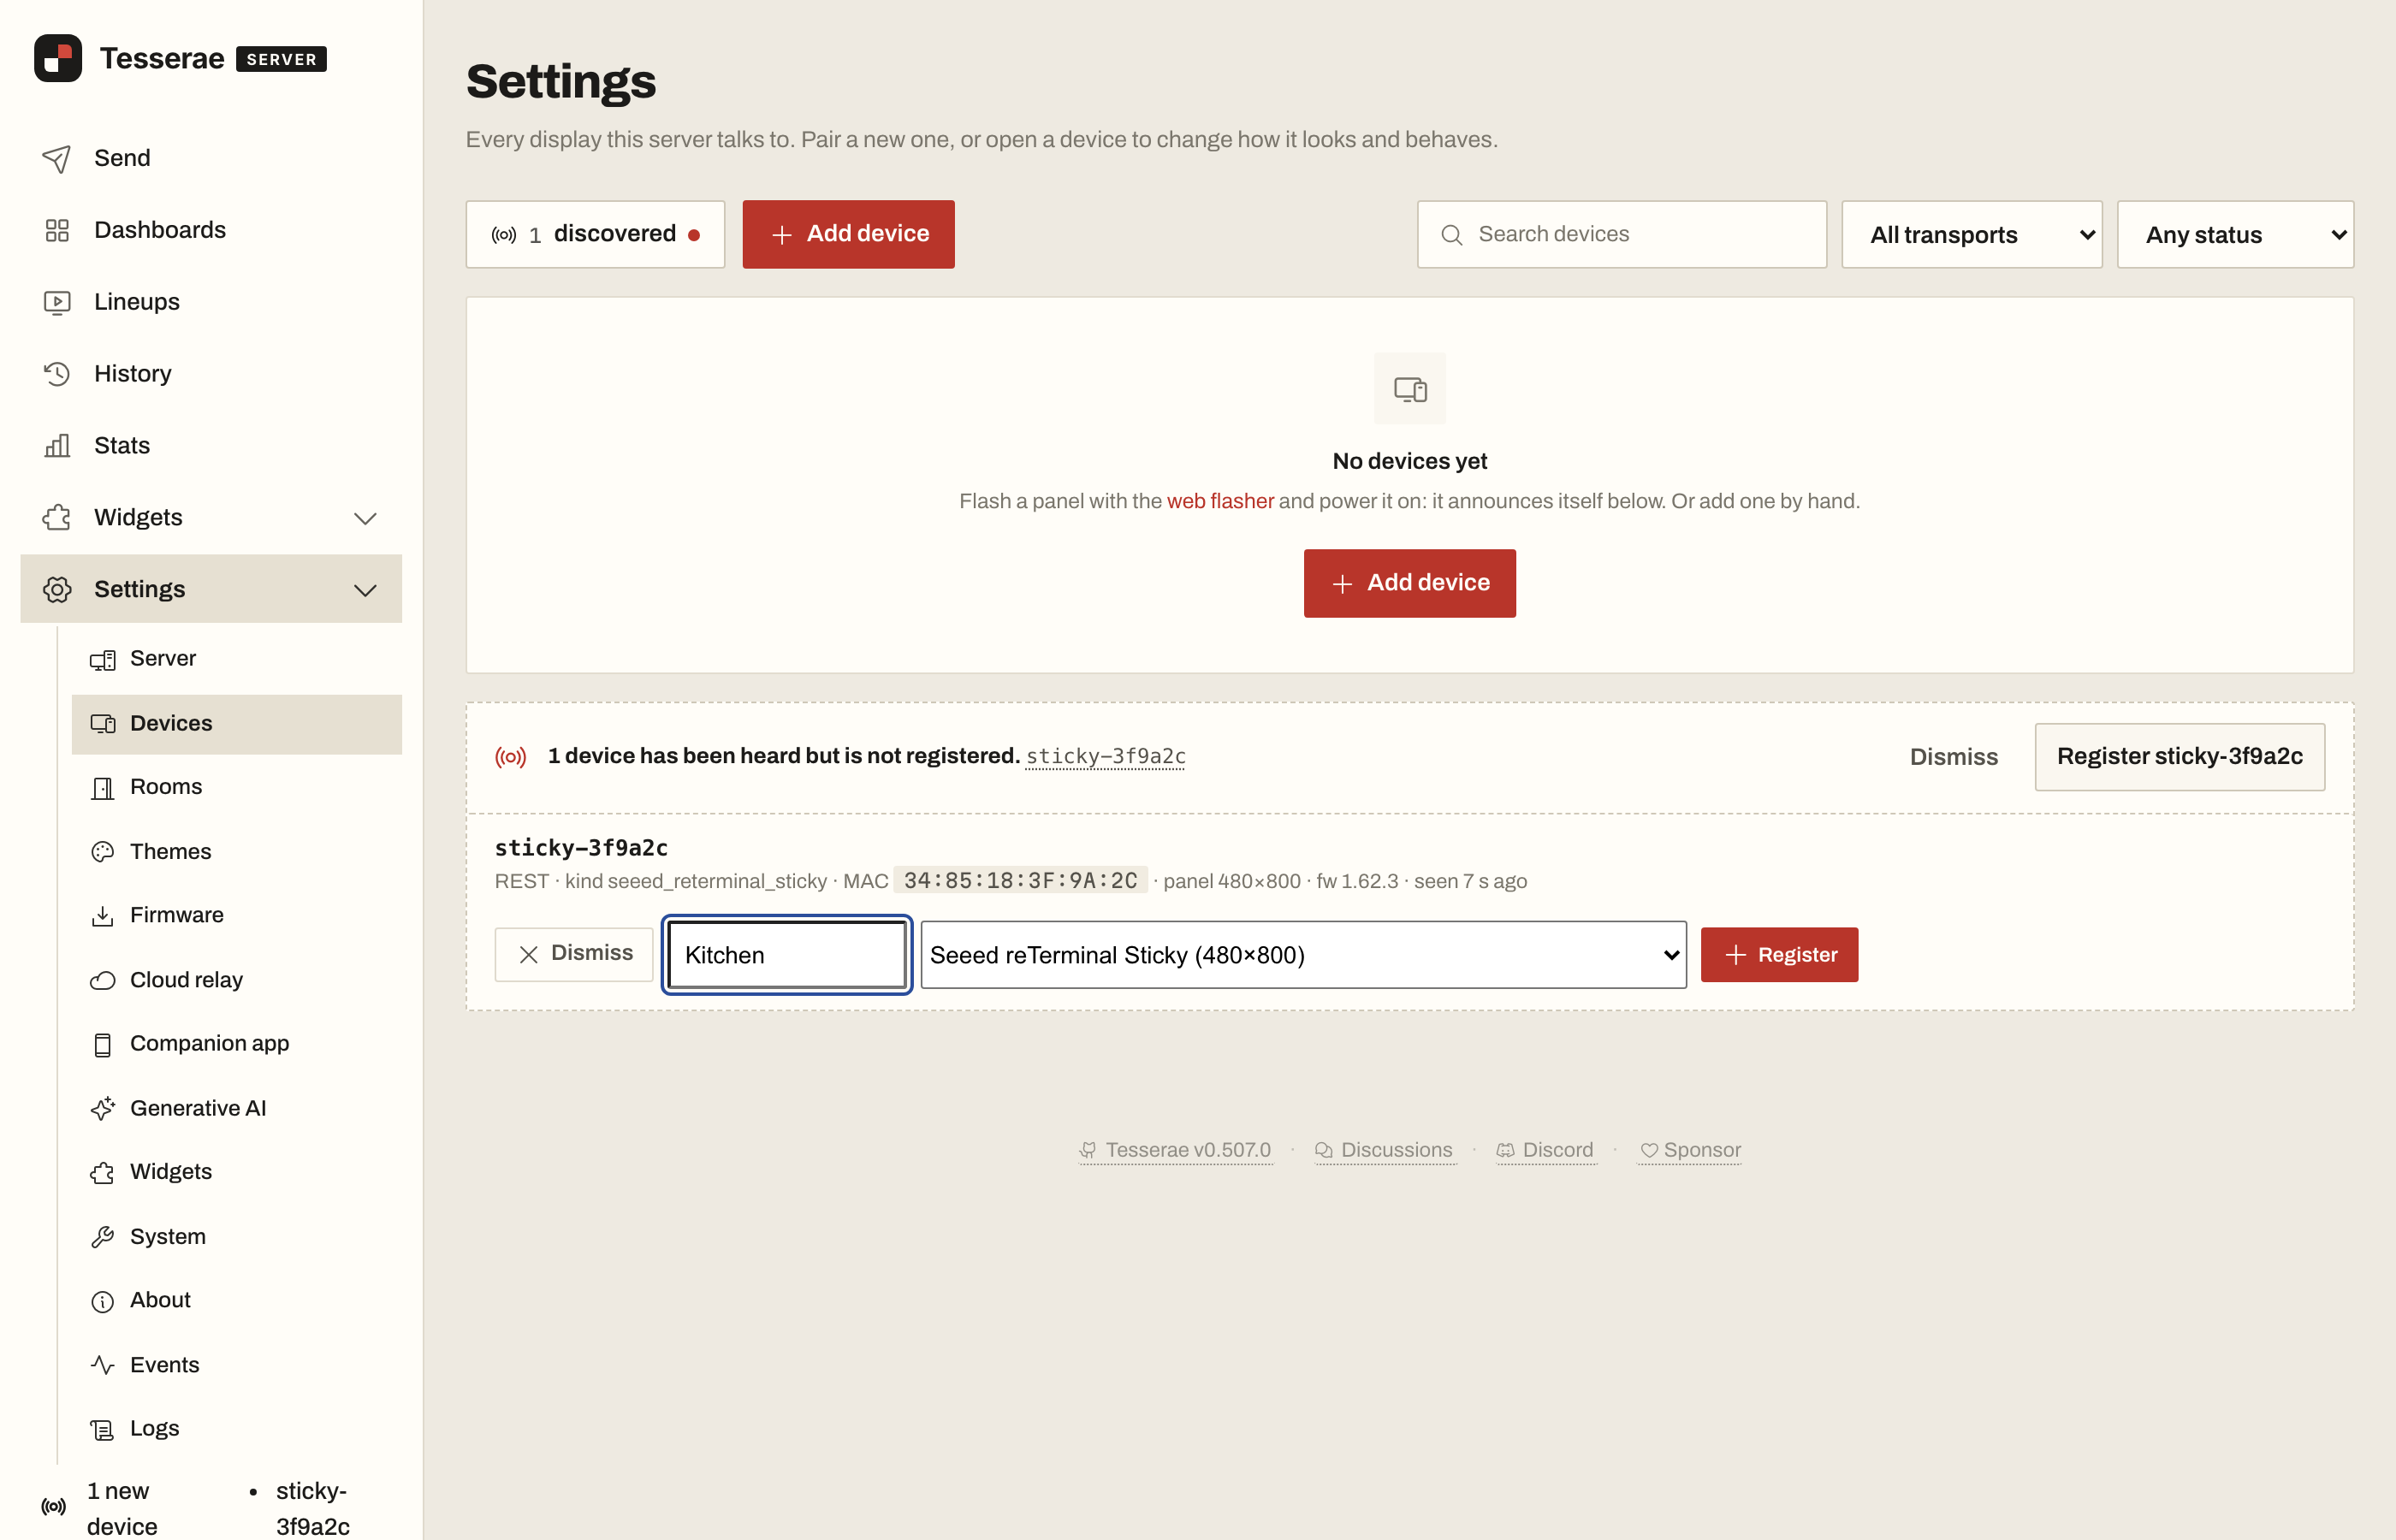
- In the Tesserae web UI, a New device badge appears in the sidebar. Open Settings → Devices, where a banner reads "1 device has been heard but is not registered".
- Click Register on the banner. Tesserae shows the device's model, panel size and firmware version, with the model already selected.
- Give it a display name, such as "Kitchen" or "Hallway", and click Register.
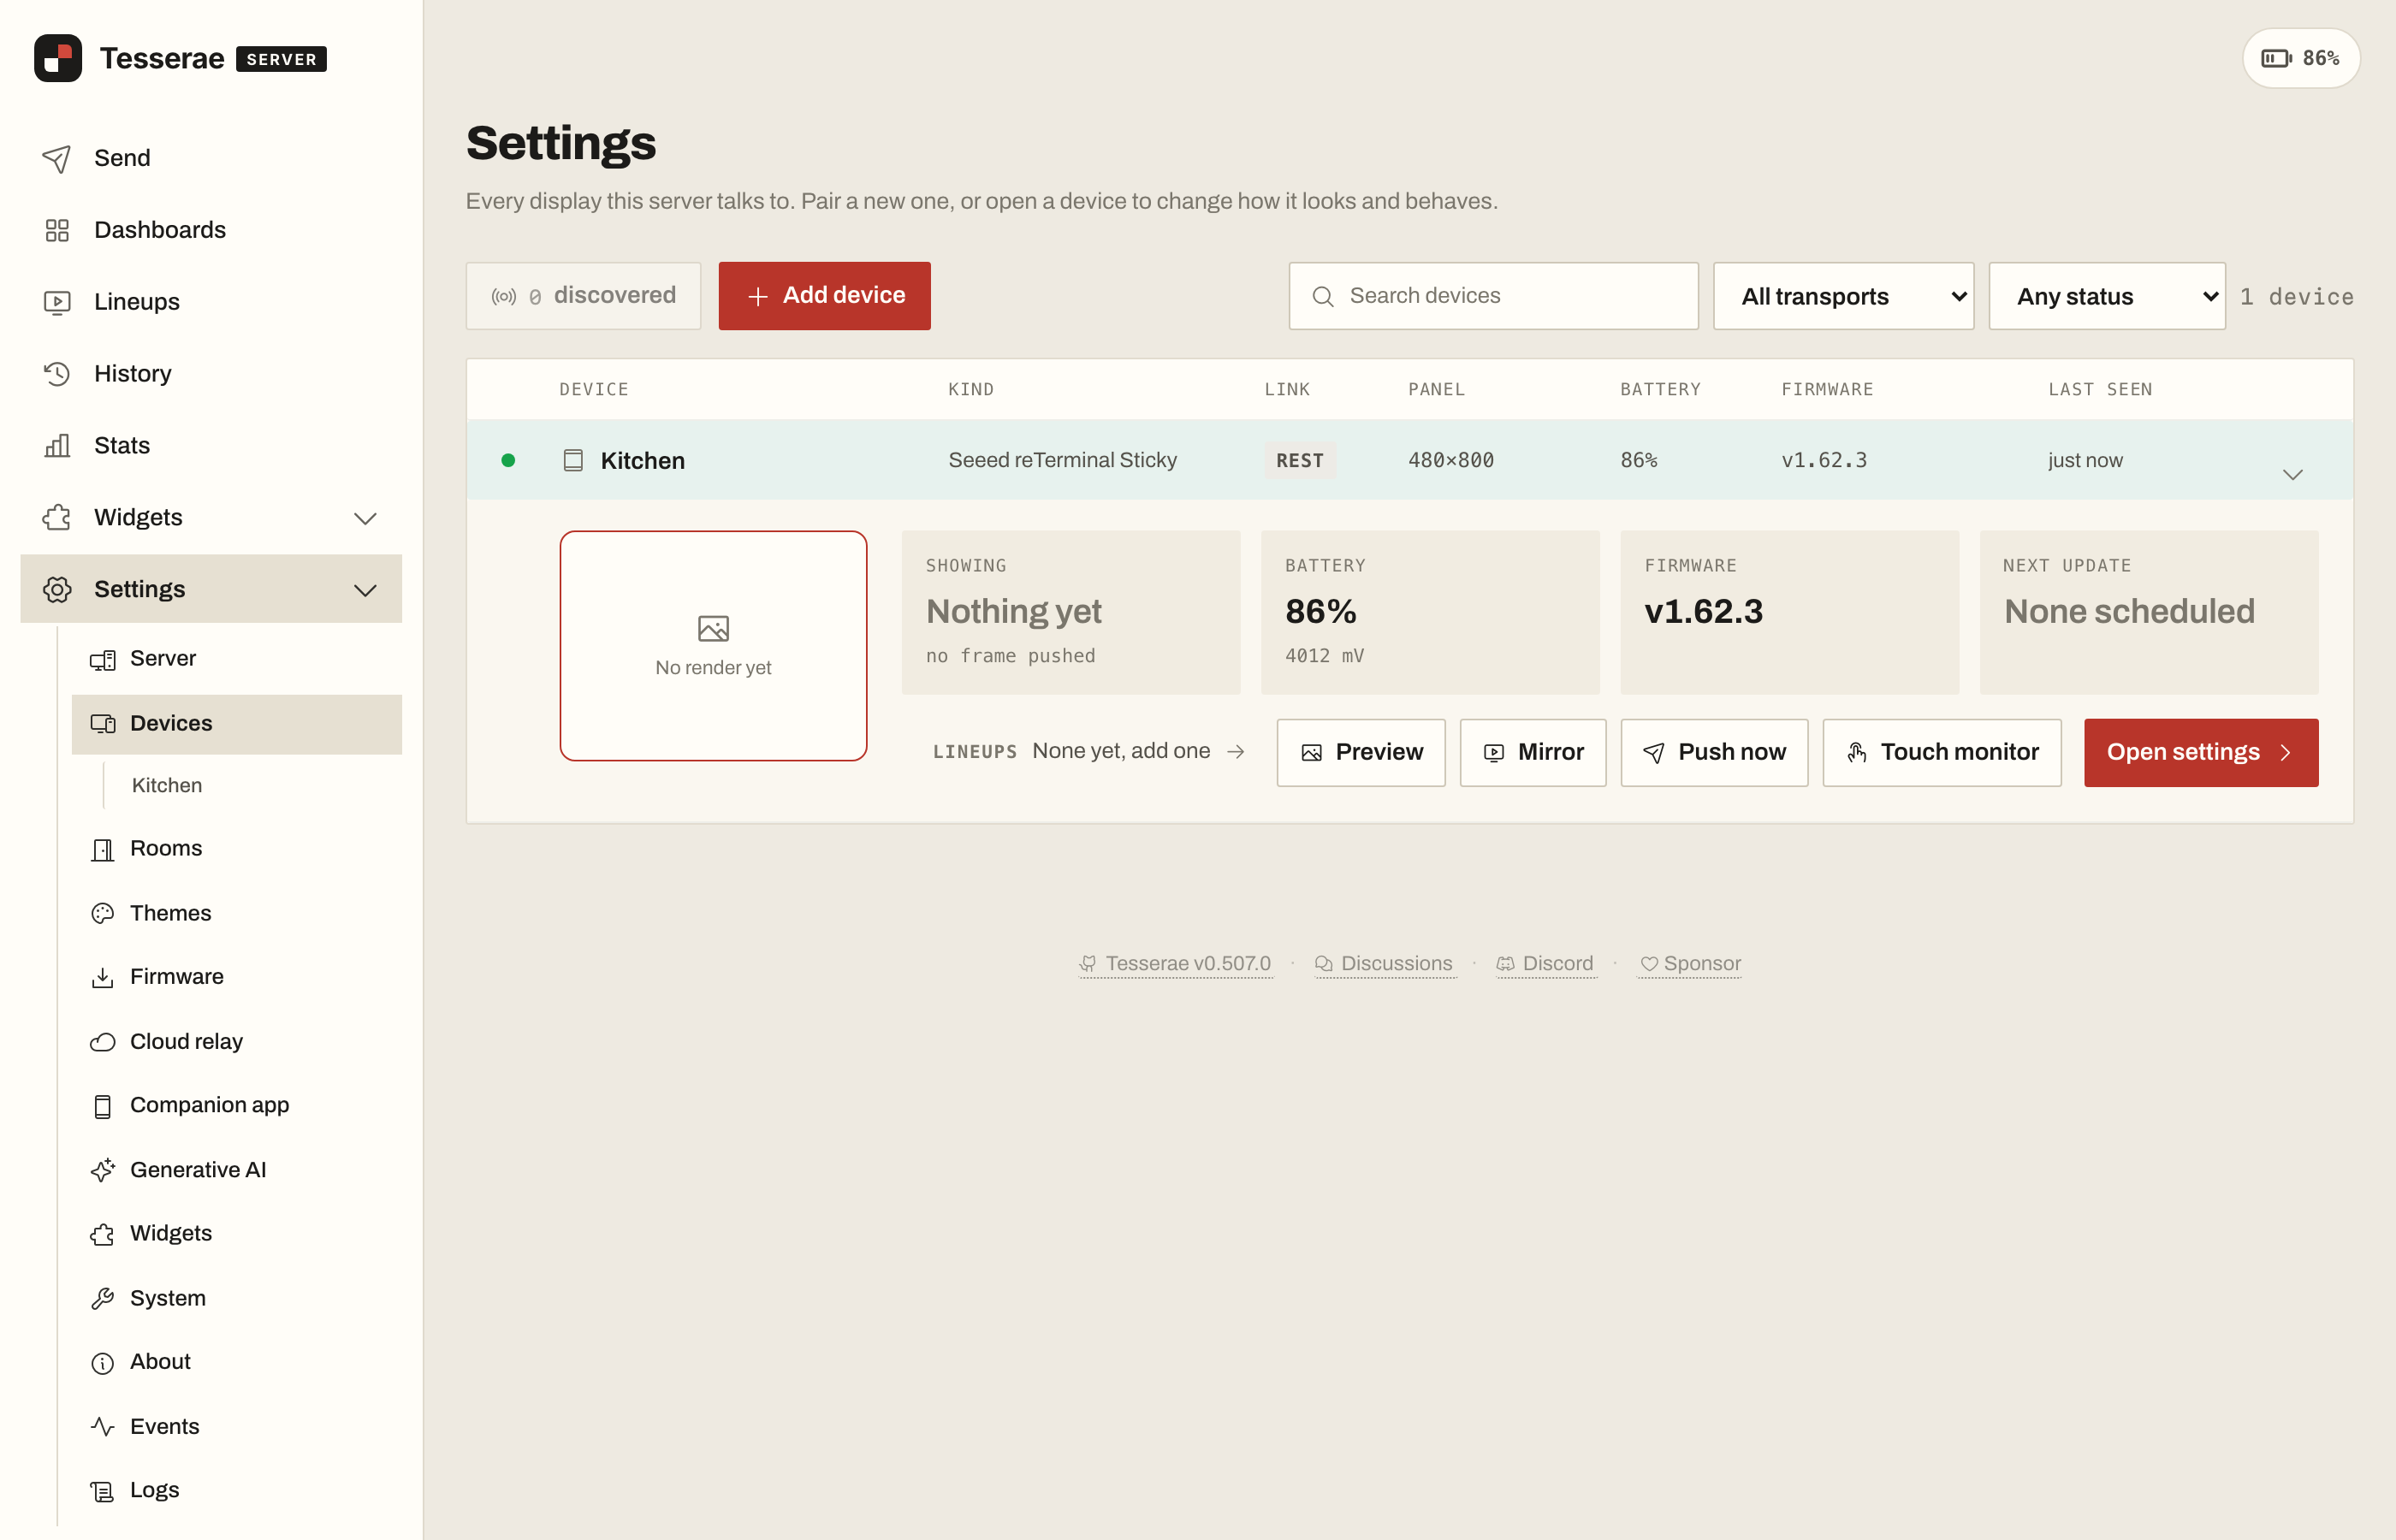
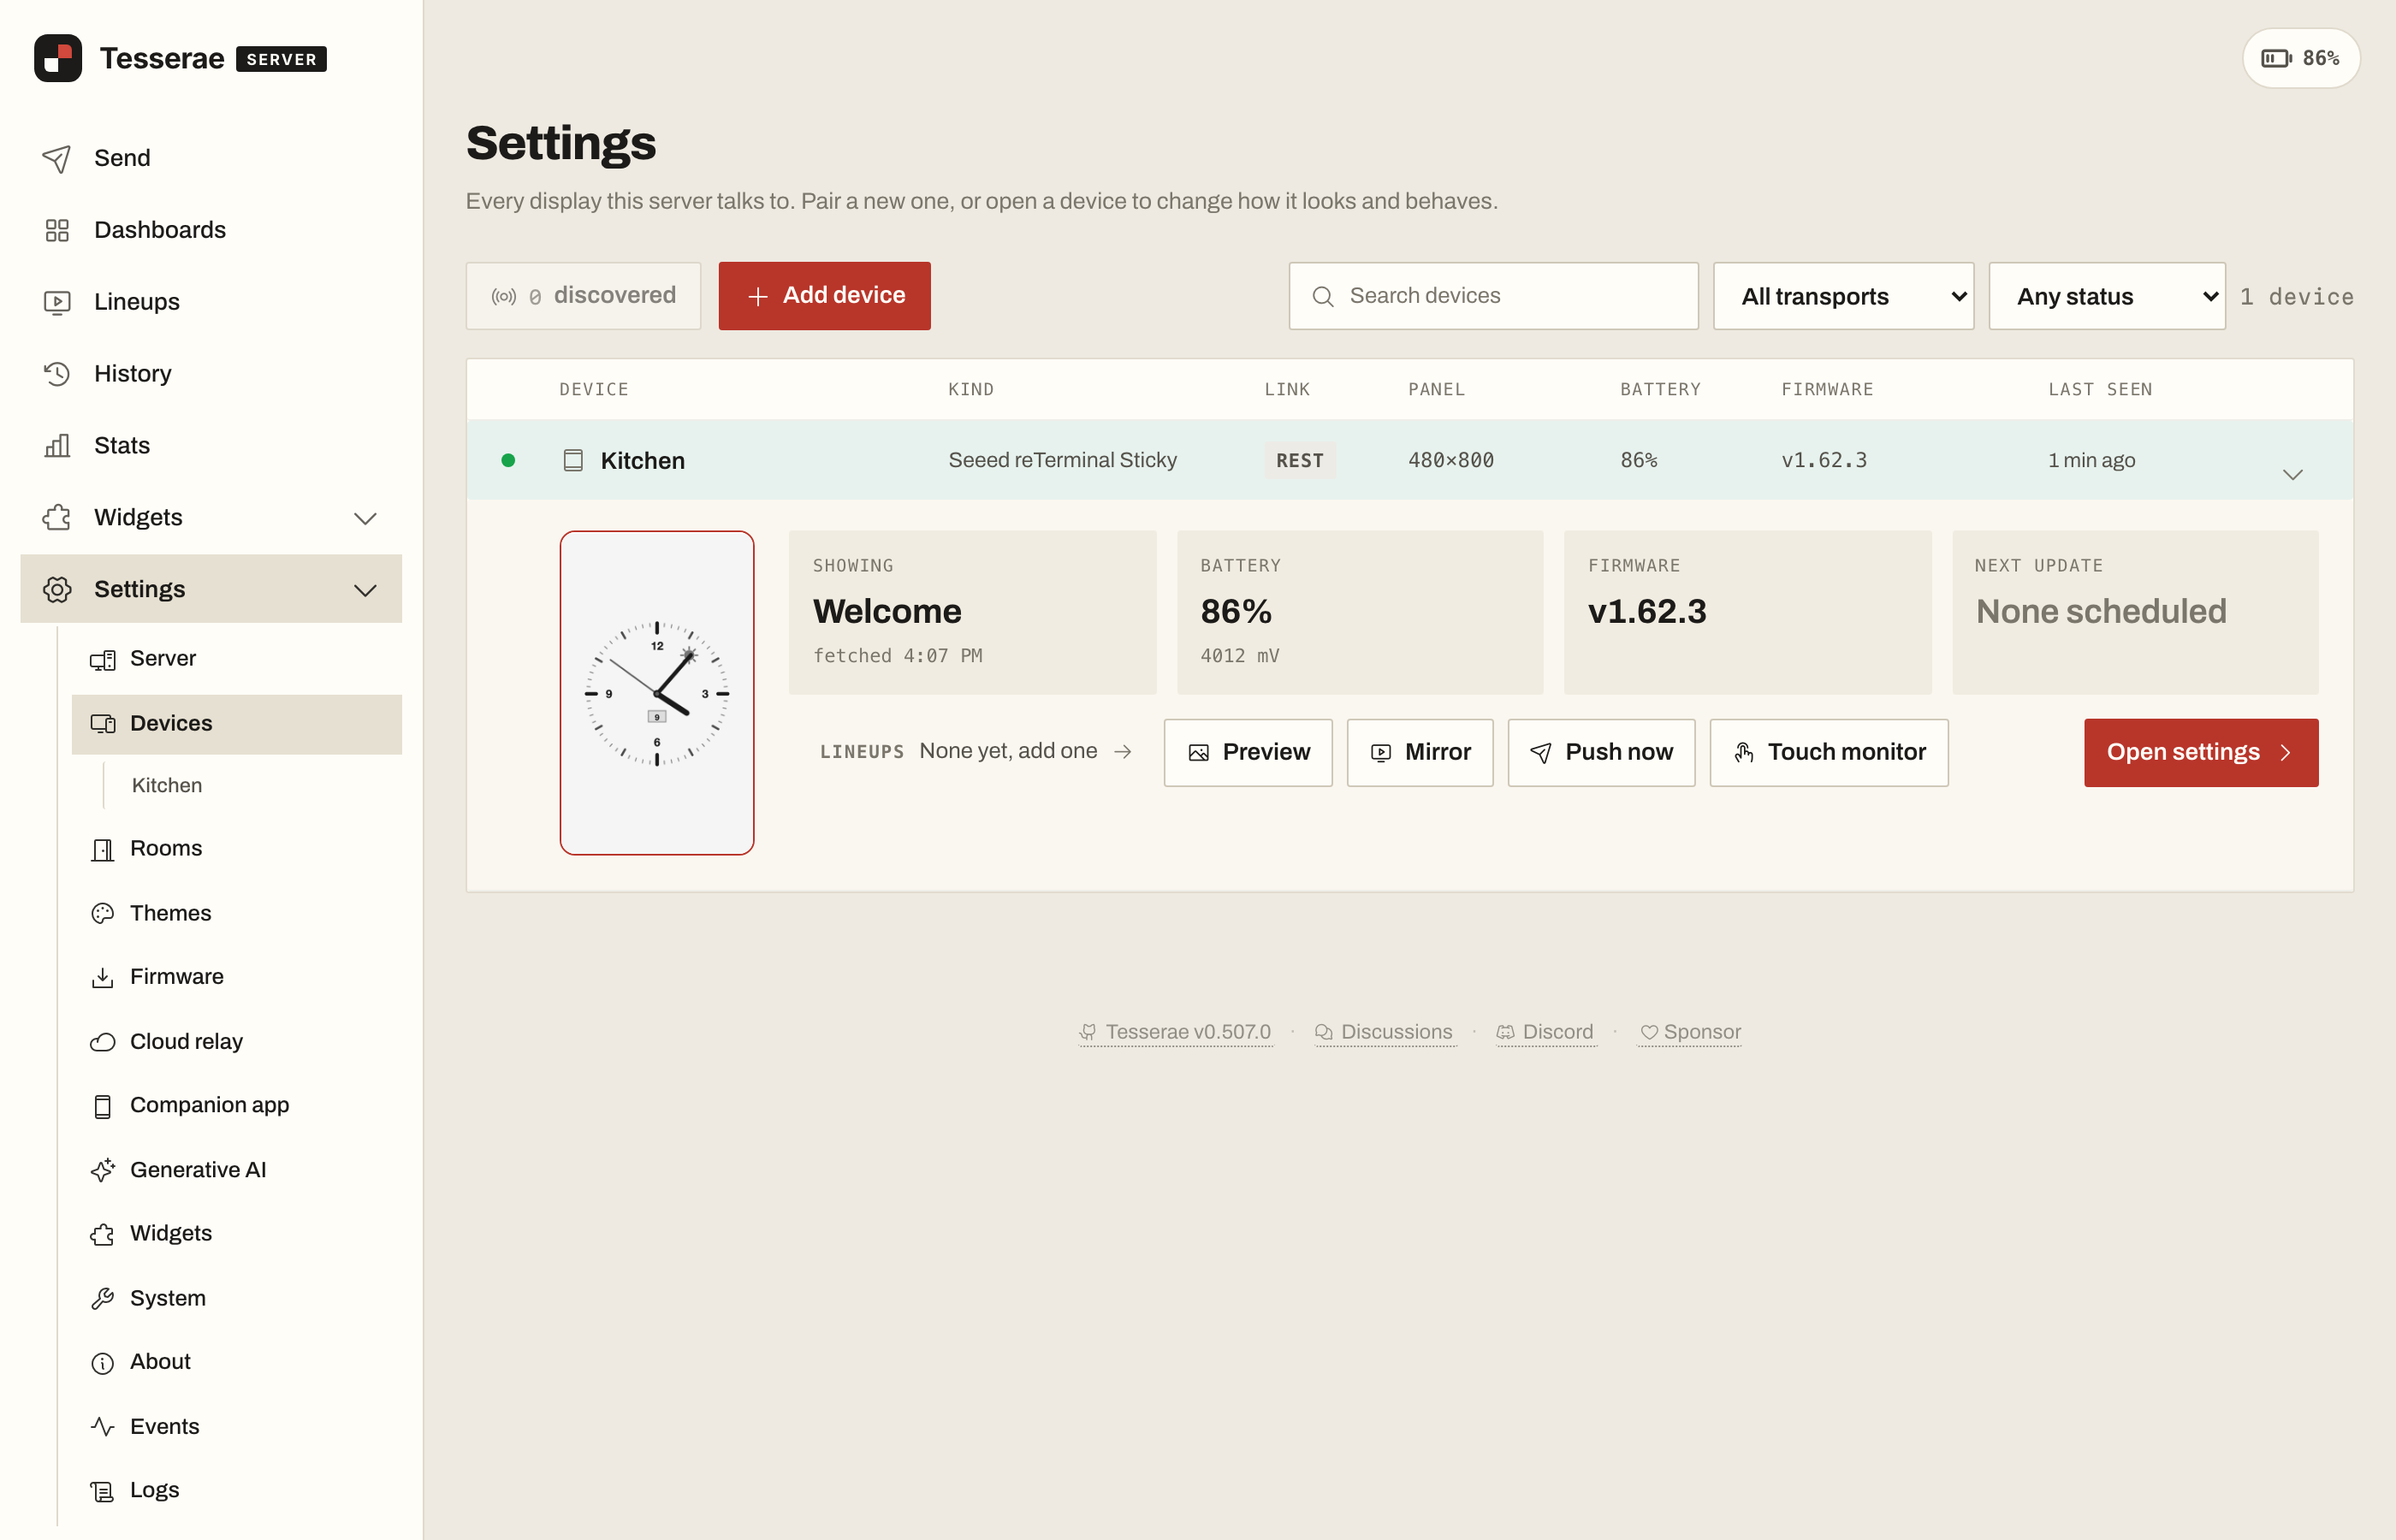
- The device collects its access token on its next check-in and moves to the Devices list. Its card shows what it's showing, battery, firmware version and the next scheduled update.
Step 5: Build a Dashboard and Push It
- Open Dashboards → New dashboard and give it a name, or install a ready-made template from Settings → Widgets → Browse catalog.
- The editor takes you through the steps: choose your device as the display, pick a layout, and choose a widget for each cell.
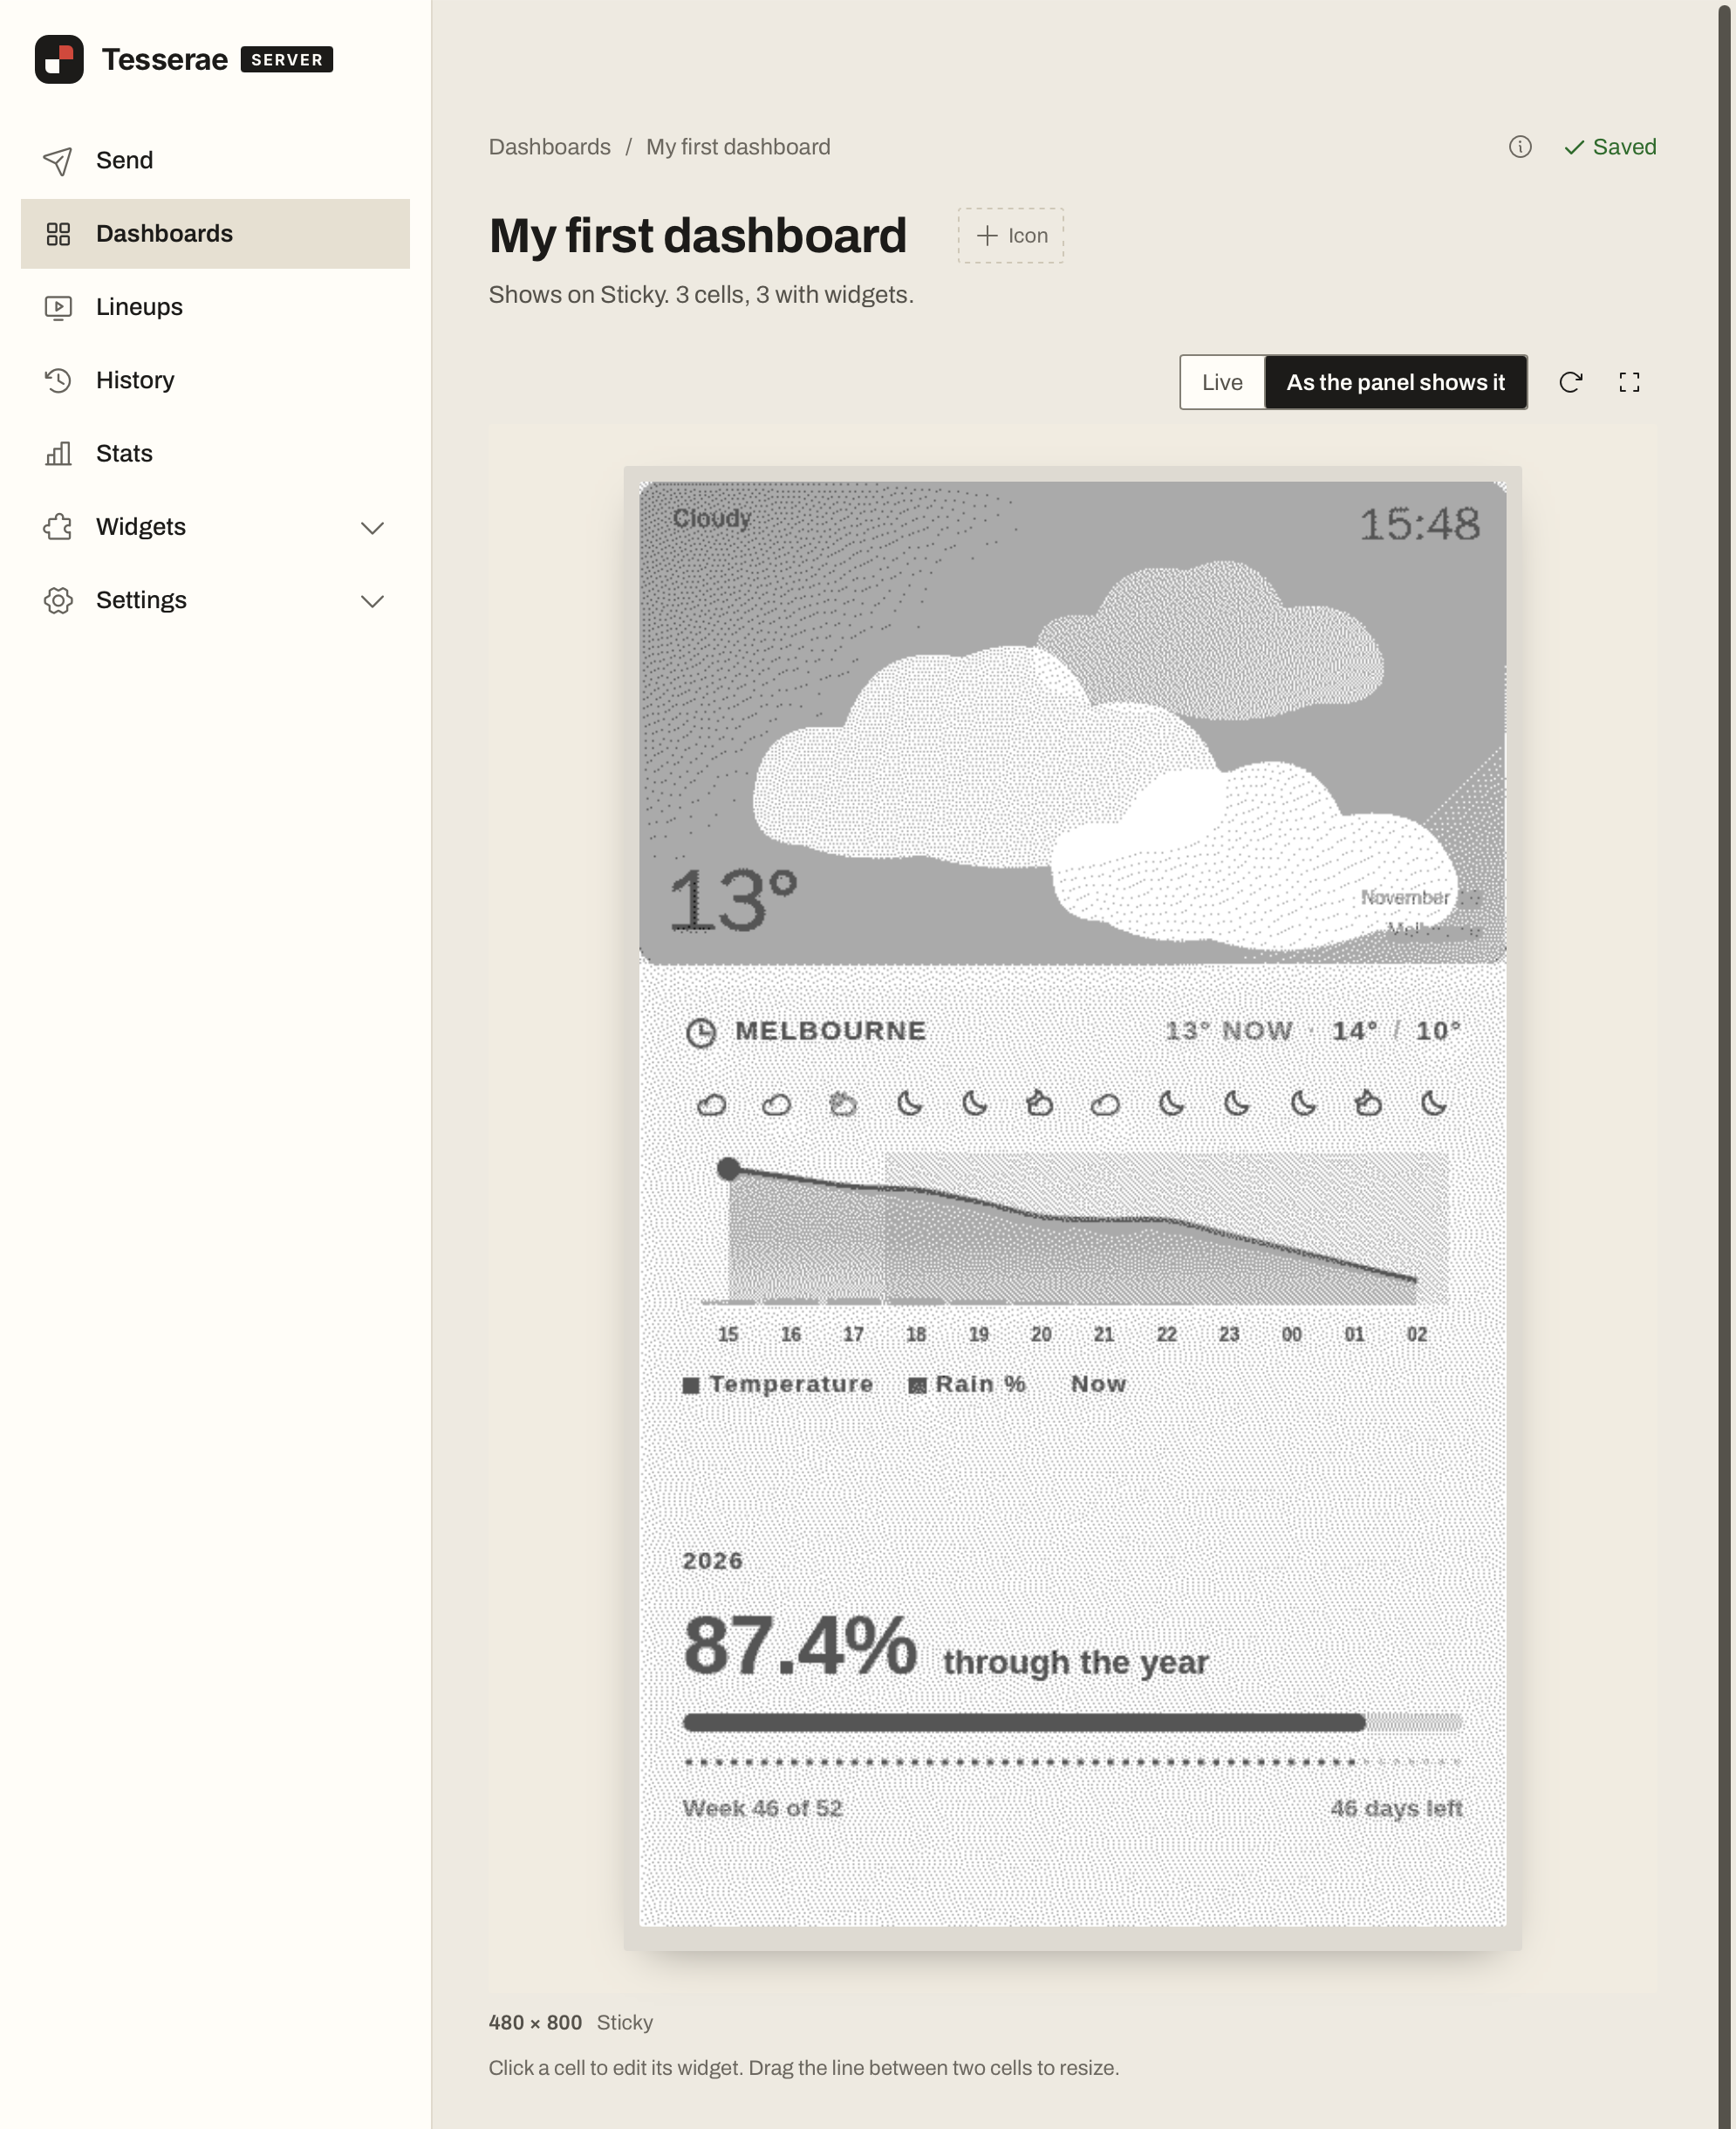
- Switch the preview from Live to As the panel shows it to see the exact frame your device will paint, with its colours or greys.
- Click the Push to button, which carries your device's name. The device paints the new frame on its next wake.
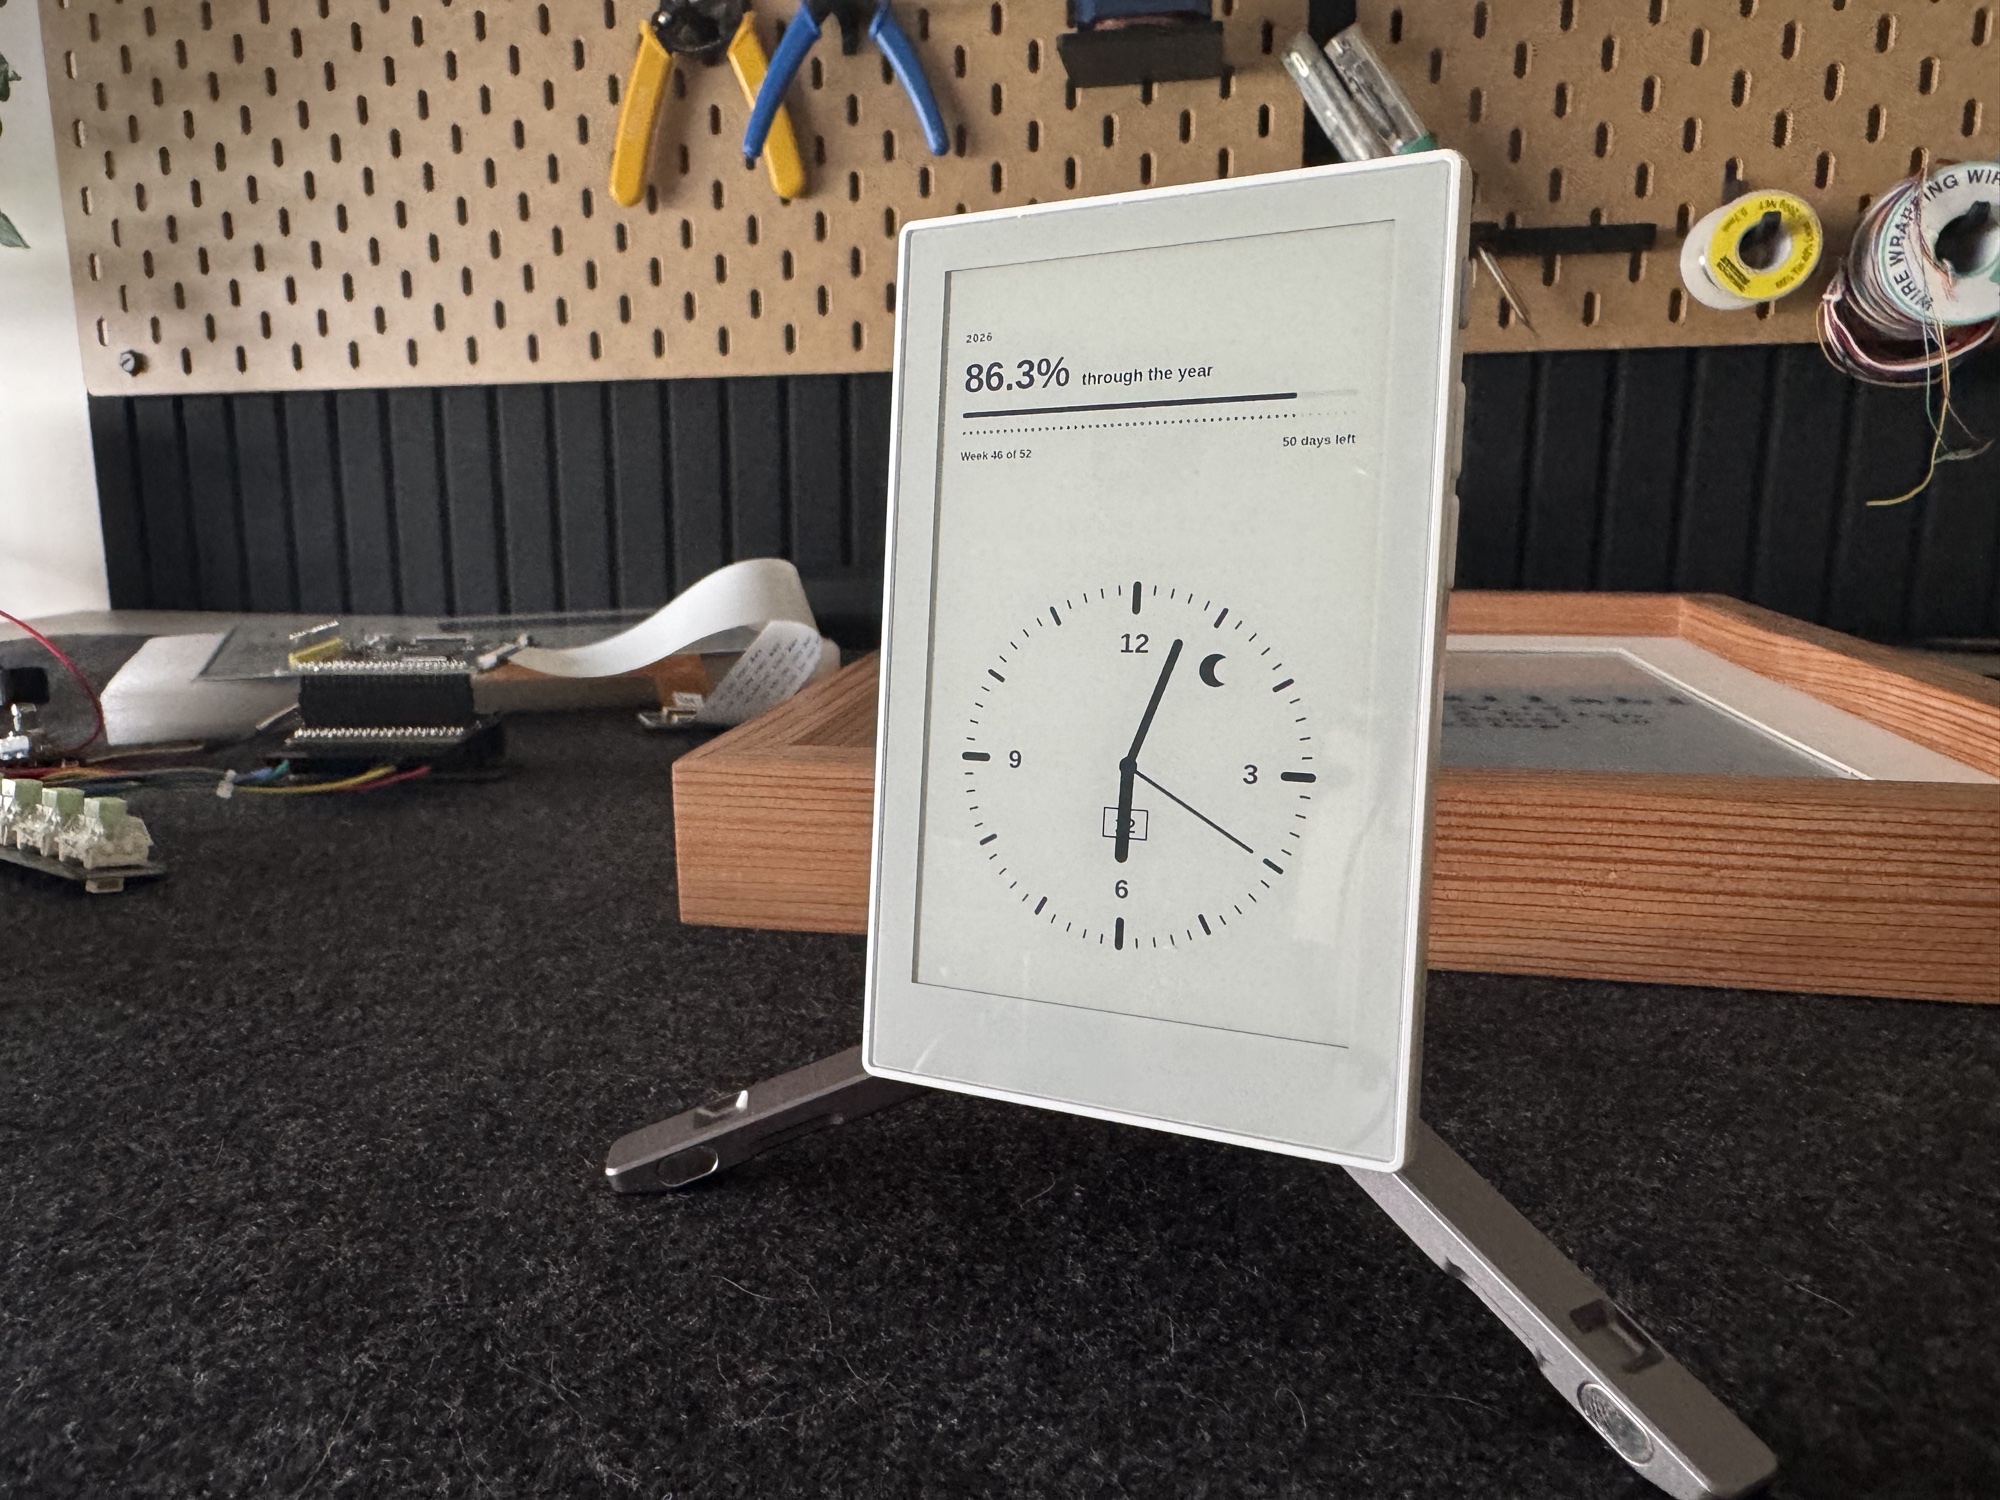
Back on the setup wizard's Dashboard step, Create a starter dashboard makes a clock sized to your device and bound to it. Click Push to panel to confirm everything is connected, then open it in the editor to make it yours.
Some tips for each panel:
- E1001 and Sticky: bold, high-contrast type reads best.
- E1002 and E1004: give each element its own colour block. A full Spectra™ 6 refresh takes about 30 seconds on the E1002 and about 40 on the E1004. That is normal for the panel.
- E1003: photos and gradients render in 16 levels of grey, and the tall canvas suits lists and agendas.
To change what a device shows through the day, open Lineups and choose Set up a display. You can pick the pages, how often they refresh and when the device stays quiet overnight. For battery-powered devices, Smart sync renders each frame just before the device wakes, so it always paints fresh content without wasting battery.
Connect your data
- Home Assistant: add a long-lived access token and your Home Assistant URL in Settings → Widgets → Home Assistant Core. To have each panel appear as a device in Home Assistant, turn on Home Assistant discovery in Settings → Server. The App already uses Home Assistant's Mosquitto broker if you run one.
- Calendars: add iCal URLs in Settings → Widgets → Calendar Feeds.
- More widgets: community widgets, themes and templates are in Settings → Widgets → Browse catalog.
Buttons and Touch
- reTerminal E Series
- reTerminal Sticky
The three front buttons work out of the box:
| Button | Default action |
|---|---|
| Left | Previous dashboard |
| Right | Next dashboard |
| Refresh | Render and paint the current dashboard again |
Change the mapping for each device under Controls → Button map on its device card. A button can also jump straight to a specific dashboard or fire a webhook. Hold Refresh for about 3 seconds and release it to switch to Bluetooth setup through the Tesserae companion app. Keep holding it for 20 seconds to factory reset, which erases the saved Wi-Fi and server settings and returns the device to the setup screen.
The E1003 also supports touch. See the Touch section in the Sticky tab; it works the same way on both devices.
- Press the power button once to wake the Sticky and fetch the current page right away.
- Hold the power button for about 3 seconds and release it to switch to Bluetooth setup through the Tesserae companion app.
- Hold the power button for 20 seconds to factory reset. This erases the saved Wi-Fi and server settings and returns the Sticky to the setup screen.
Touch
Touch is off by default to save battery. To turn it on, open the device card, go to General, and switch on Touch input. Tap regions on a page then act as buttons. They can toggle Home Assistant lights, switch pages or trigger actions, and the panel confirms each tap with a partial refresh in under a second.
Touch keeps the touch controller powered through deep sleep. For longer battery life, set Touch wake to Double tap or swipe, which draws about 1 mA. With that setting a single tap doesn't wake the panel, but a double tap or a swipe does. Touch works best on USB power.
Turn on Beep on interaction if you want the buzzer to confirm each tap or press before the panel repaints.
Firmware Updates
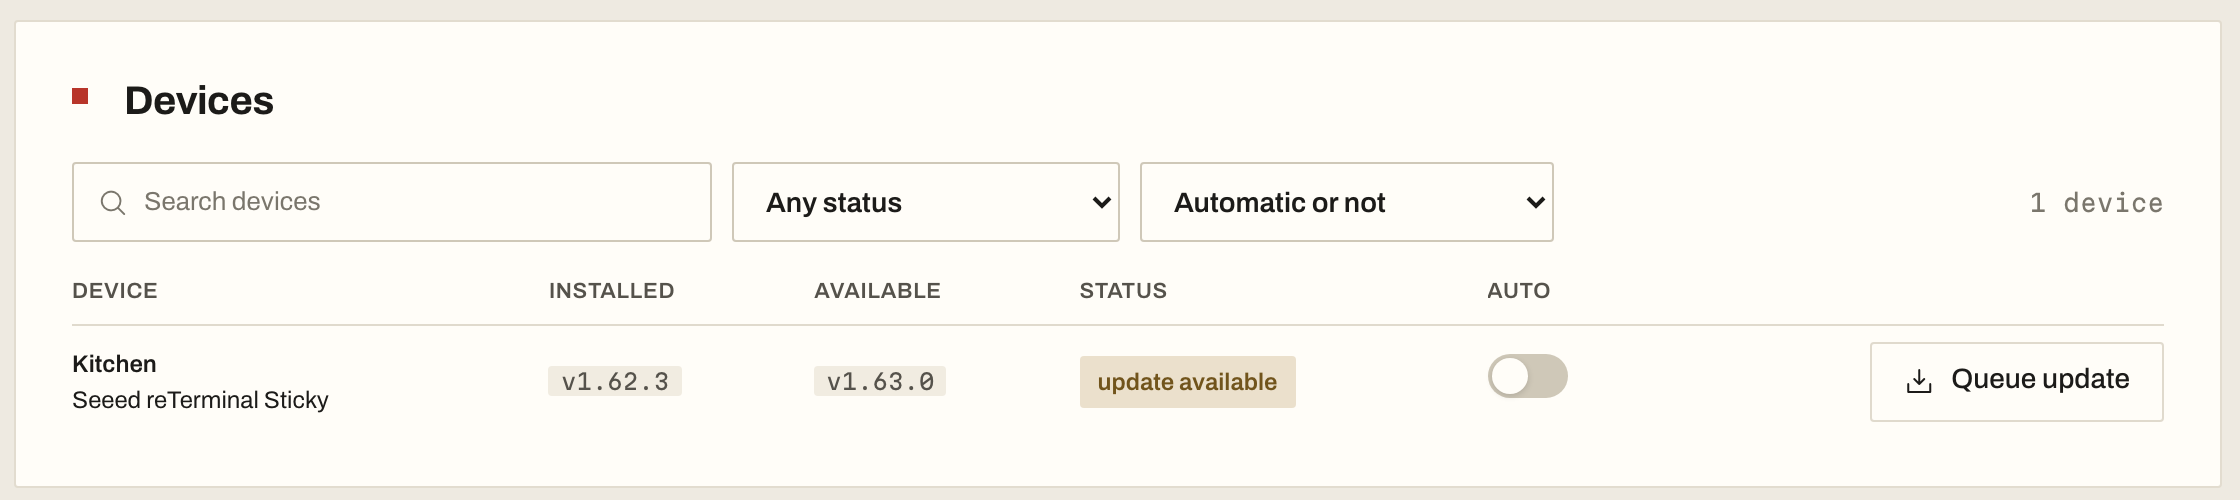
Firmware updates arrive over the air. Settings → Firmware in the Tesserae web UI shows the installed and available version for each device. Click Queue update, or switch on Auto, and the device downloads, verifies and installs the signed update on its next wake. You only need to flash from the browser again for a fresh install or for recovery.
Tesserae checks for new firmware when online features are on (Settings → System → Online features). On an offline install, download the descriptor-<kind>.json file from the firmware release and import it under Manual import.
FAQ
Q1: The flasher can't find my device
- Use a USB-C cable that carries data, and a USB port that supports data. Front-panel ports on some desktop towers don't.
- Use Chrome or Edge. Firefox and Safari don't support Web Serial.
- On macOS with a reTerminal E Series, install and enable the CH340 driver (see Step 2).
- Close any other program that may be using the serial port.
Q2: The device doesn't appear under Discovered
- Check that the device has left setup mode. If it still shows the setup screen, enter the Wi-Fi details again.
- Make sure your Wi-Fi network is 2.4 GHz.
- Check that the server address works from another device on the same network, for example by opening
http://<your-server>:8765in a browser.
Q3: The device says "Can't reach the server" or "Wi-Fi unavailable"
The device shows the problem on the panel and retries on its own. If the Wi-Fi drops, it retries every minute for about 12 minutes, then opens the setup portal once for 15 minutes. After that it keeps retrying the saved network in the background and rejoins when the network is back. To open the setup portal again, restart the device or press a front button.
Q4: The frame downloads but the panel doesn't paint
The battery may be too low for a panel refresh. Connect USB power, let it charge for an hour and try again.
Special Thanks
Special thanks to the Seeed Studio team for their support throughout the reTerminal E Series and Sticky bring-up, and in particular to Mason Cao and Lily Li.
Thanks also to the Tesserae contributors who helped make the project possible, in particular skynet01, charmmmz, theiereman, vaibhav8a, partridgeworks, bablokb, varanu5 and Frankynov, and to the wider community for the widgets, firmware testing and hardware reports behind this integration.
Resources
- [Website] Tesserae: project home, compatibility list and the browser flasher
- [Docs] Tesserae documentation: server install, devices, touch, buttons, Lineups and Home Assistant
- [Docs] Seeed ePaper quickstart: the same steps, with notes for each device
- [GitHub] Tesserae server
- [GitHub] Tesserae device firmware: source, releases and issue tracker
- [GitHub] Tesserae Home Assistant App
- [Community] GitHub Discussions
- [Wiki] Getting Started with reTerminal E1003
- [Wiki] Getting Started with reTerminal E1004
Tech Support & Product Discussion
Thank you for choosing our products! We are here to provide you with different support to ensure that your experience with our products is as smooth as possible. We offer several communication channels to cater to different preferences and needs.