Arduino Cookbook: ePaper Display (reTerminal E Series)
If you want to quickly preview project results or try the basic demo firmware before setting up a development environment, open the reTerminal E-Series Firmware Hub. You can choose a supported reTerminal E Series device and flash demo firmware directly from a browser.
This page focuses on driving the ePaper screen from Arduino. If you want to use the onboard LED, buzzer, buttons, SHT4x sensor, battery monitor, or microSD card slot, head over to Arduino Cookbook: Onboard Peripherals. For RTC, low-power modes, the onboard microphone, and capacitive touch drawing, see Arduino Cookbook: RTC, Low Power, Audio & Touch.
The shared boilerplate — Arduino IDE setup, ESP32 board package, installing Seeed_GFX, generating driver.h — also lives in Work with Arduino. Skim that first if you are new to Arduino on Seeed ePaper.
Introduction
The reTerminal E Series is Seeed Studio's industrial HMI line, built on the XIAO ESP32-S3 and featuring integrated ePaper displays. This cookbook walks through everything you need to render text, graphics, and images on the screen:
- Hardware overview & buying links for E1001 / E1002 / E1003 / E1004.
- Arduino IDE environment setup for all four models (XIAO_ESP32S3 board, OPI PSRAM).
- A first Hello World on each model using the Seeed_GFX library (with the matching
BOARD_SCREEN_COMBO). - Panel-specific advanced examples with Seeed_GFX — 4-level grayscale on E1001 and 16-level grayscale on E1003.
- An alternative Hello World using the popular GxEPD2 library.
- Troubleshooting tips for ePaper refresh issues and upload failures.
Materials Required
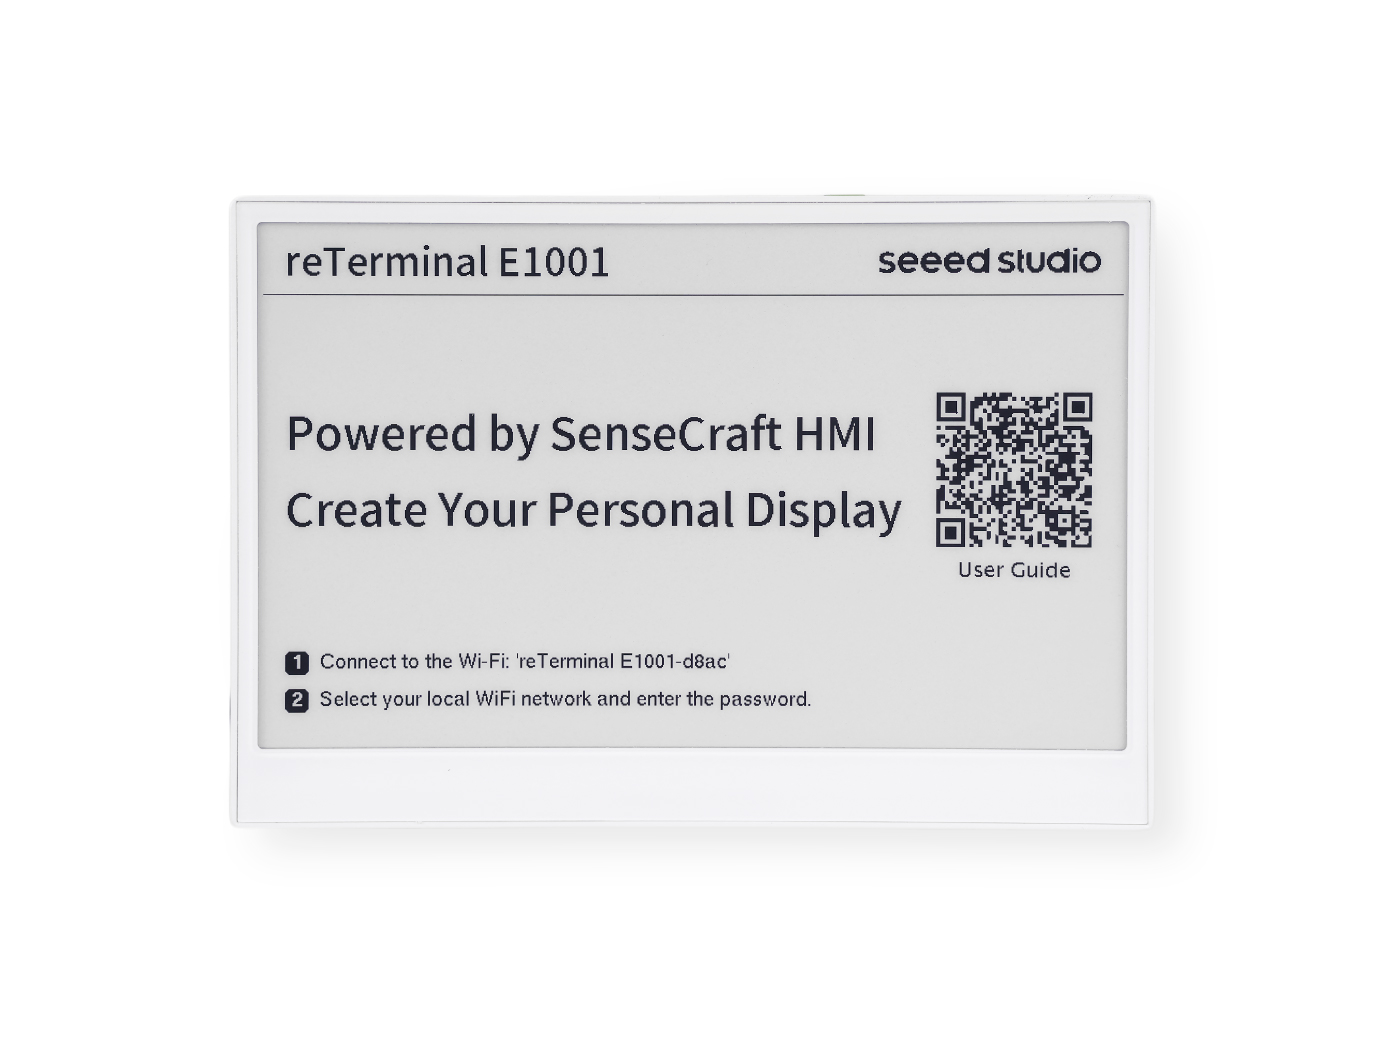
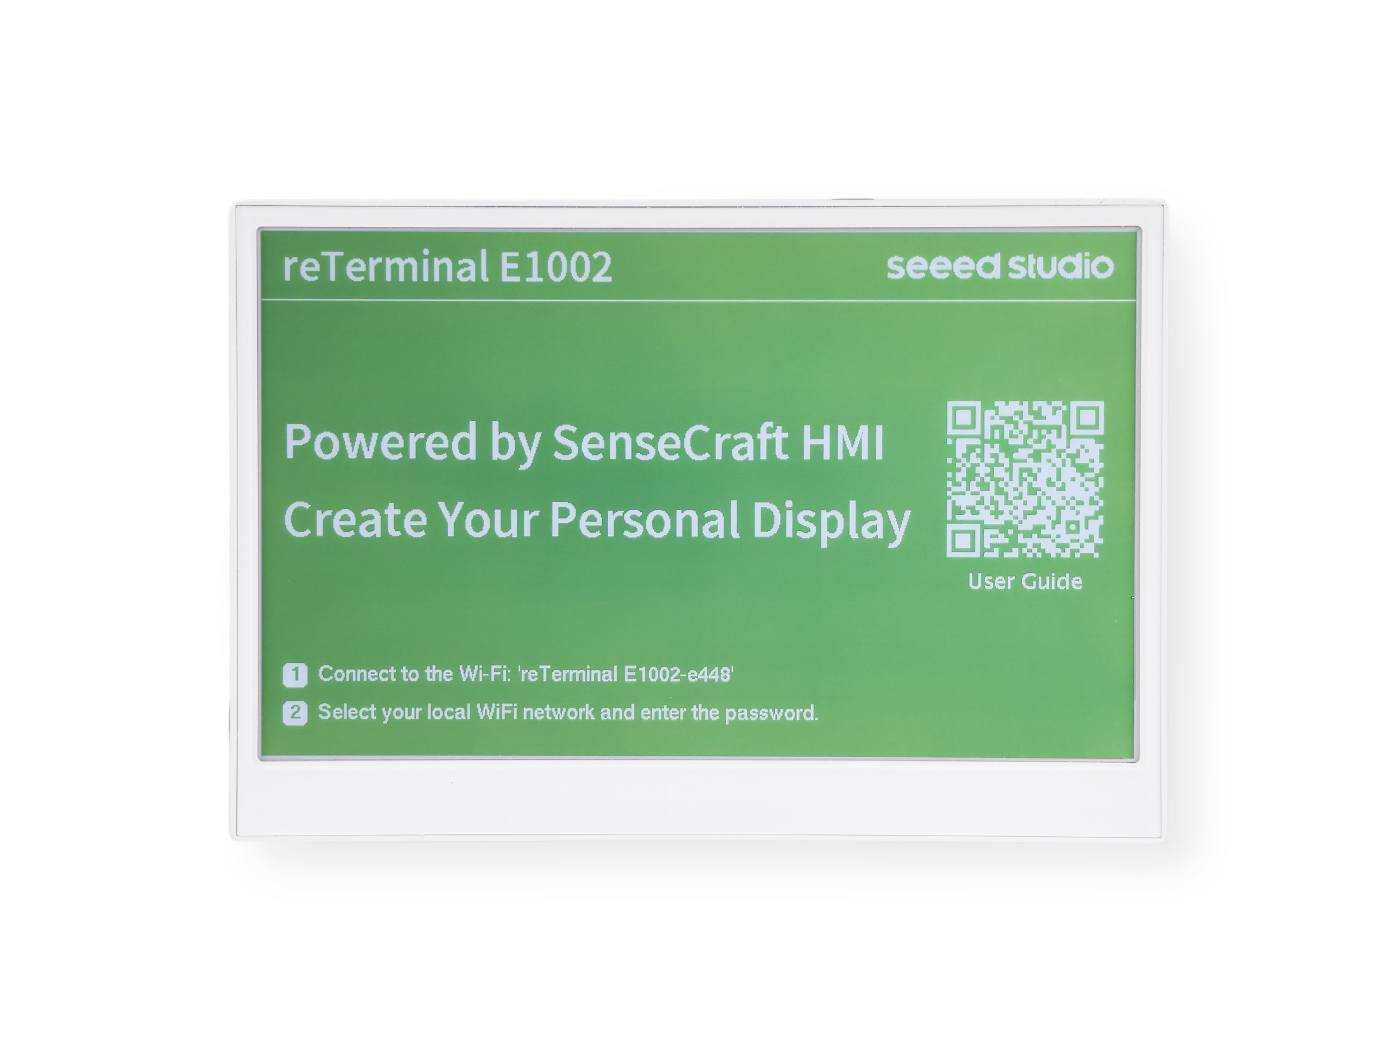
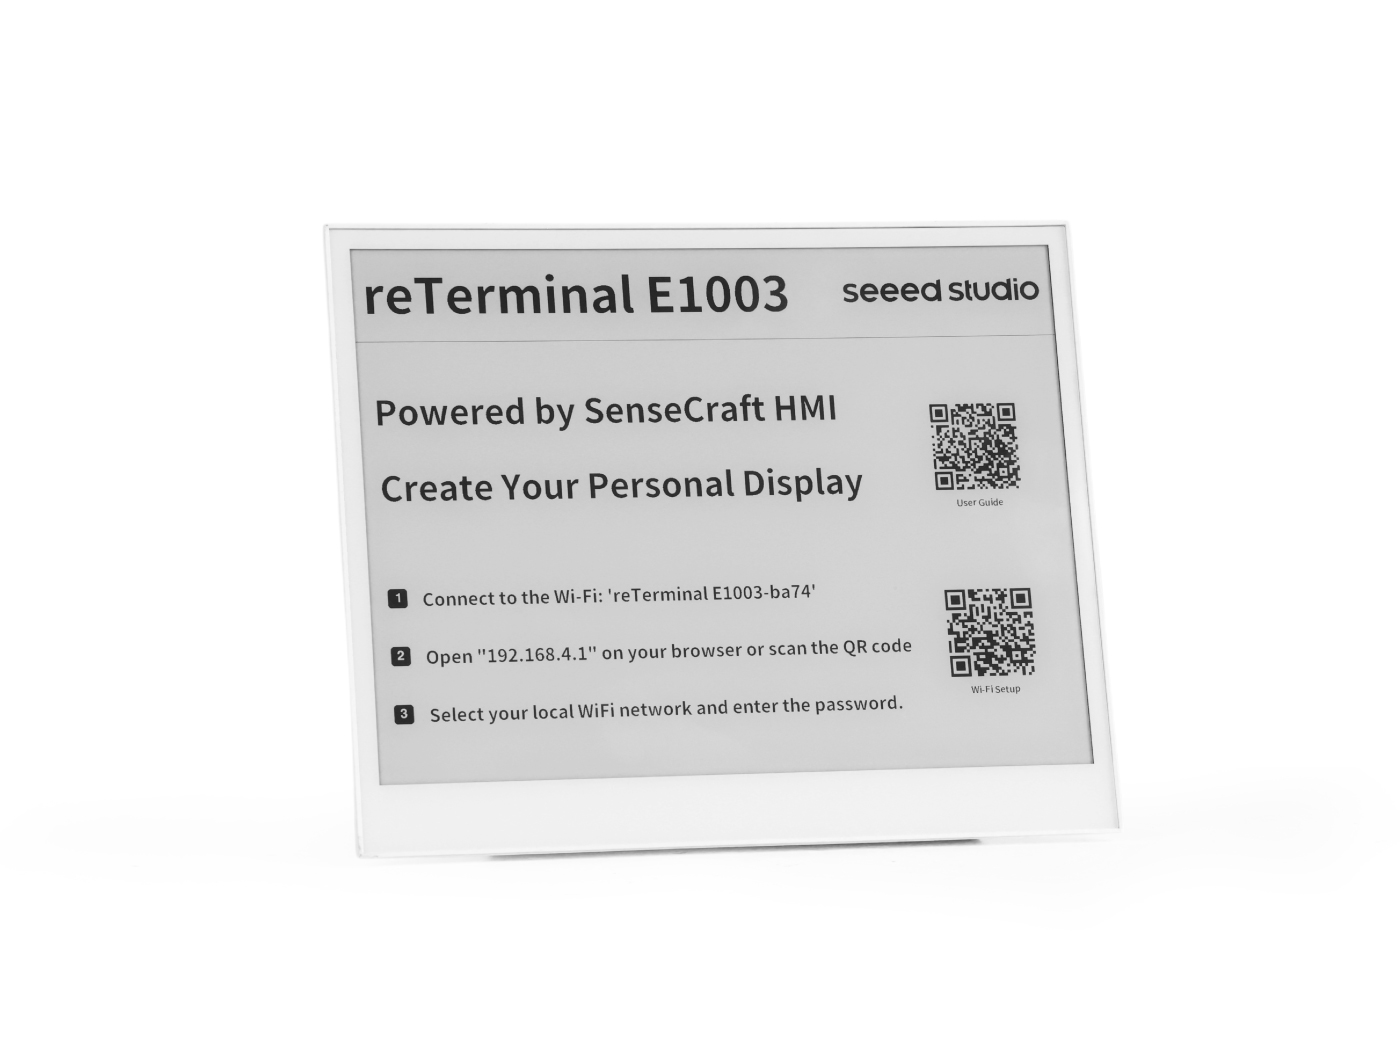
To complete this tutorial, please prepare one of the following reTerminal E Series devices:
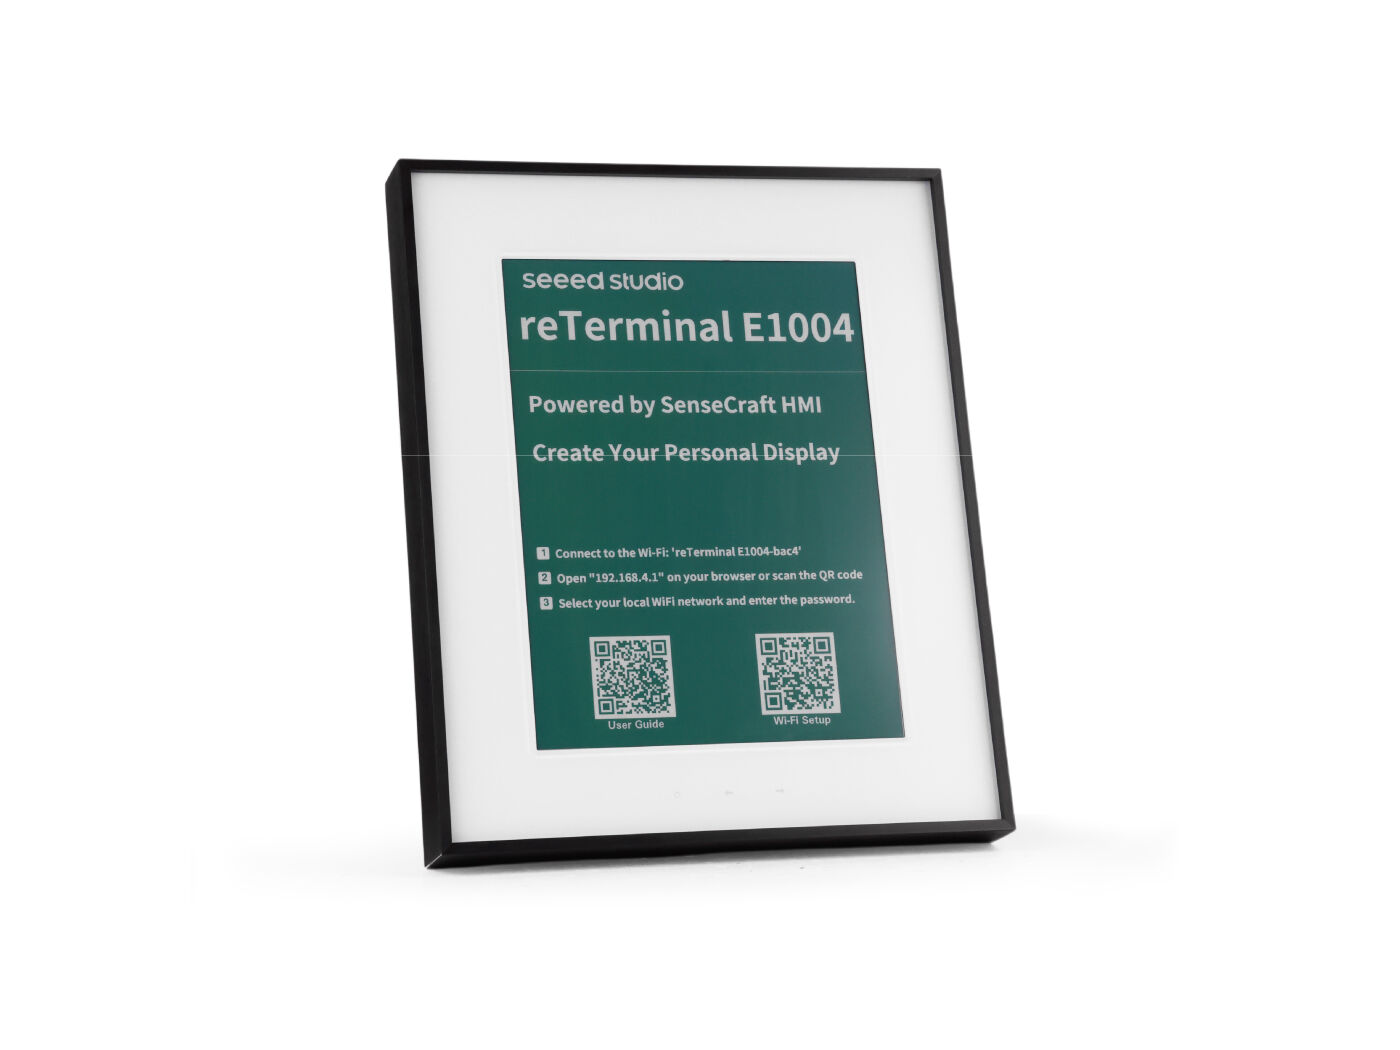
| reTerminal E1001 | reTerminal E1002 | reTerminal E1003 | reTerminal E1004 |
|---|---|---|---|
 |  |  |  |
Environmental Preparation
To program reTerminal E Series ePaper Display with Arduino, you'll need to set up the Arduino IDE with ESP32 support.
If this is your first time using Arduino, we highly recommend you to refer to Getting Started with Arduino.
Arduino IDE Setup
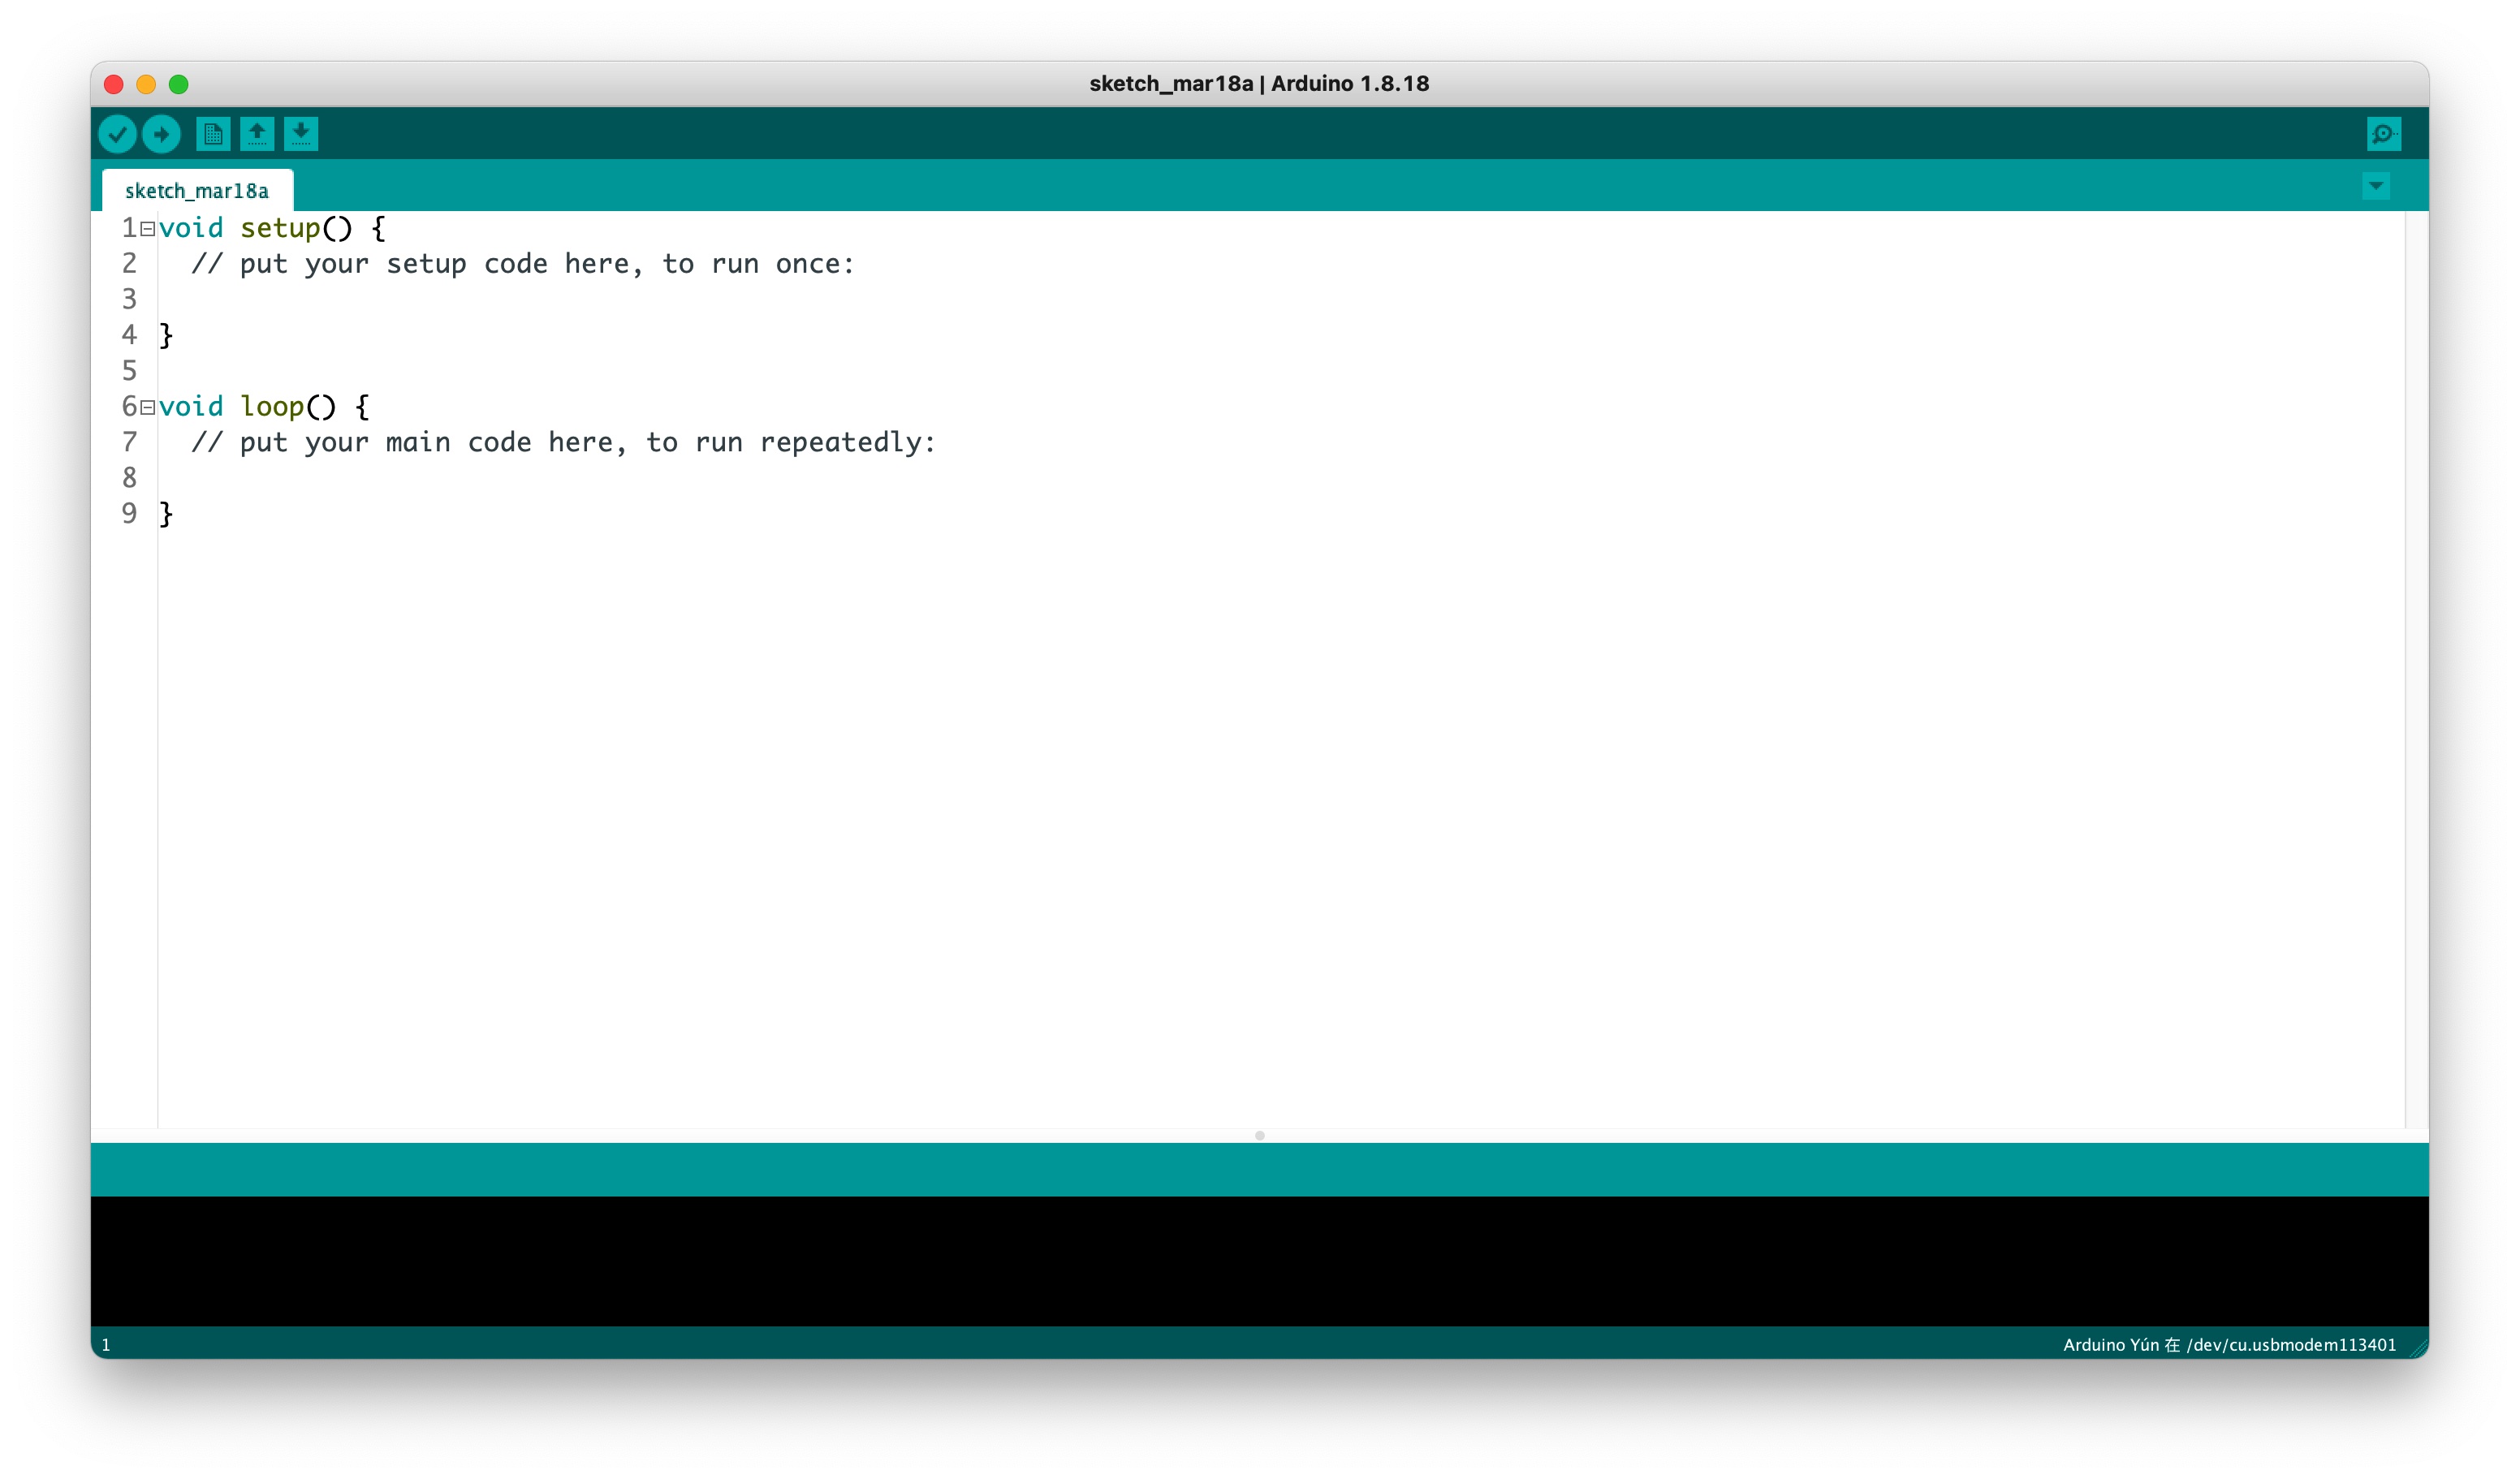
Step 1. Download and install the Arduino IDE and launch the Arduino application.
Step 2. Add ESP32 board support to Arduino IDE.
In Arduino IDE, go to File > Preferences and add the following URL to the "Additional Boards Manager URLs" field:
https://raw.githubusercontent.com/espressif/arduino-esp32/gh-pages/package_esp32_index.json
Step 3. Install ESP32 board package.
Navigate to Tools > Board > Boards Manager, search for "esp32" and install the ESP32 package by Espressif Systems.
Step 4. Select the correct board.
Go to Tools > Board > ESP32 Arduino and select XIAO_ESP32S3.
Step 5. Connect your reTerminal E Series ePaper Display to your computer using a USB-C cable.
Step 6. Select the correct port from Tools > Port.
ePaper Display Programming
The reTerminal E1001 features a 7.5-inch black and white ePaper display, while the reTerminal E1002 is equipped with a 7.3-inch full color ePaper display. Both displays provide excellent visibility in various lighting conditions with ultra-low power consumption, making them ideal for industrial applications that require always-on displays with minimal power usage.
Using the Seeed_GFX Library
To control the ePaper display, we'll use the Seeed_GFX library, which provides comprehensive support for various Seeed Studio display devices.
Step 1. Download the Seeed_GFX library from GitHub:
Step 2. Install the library by adding the ZIP file in Arduino IDE. Go to Sketch > Include Library > Add .ZIP Library and select the downloaded ZIP file.
If you have previously installed the TFT_eSPI library, you may need to temporarily remove or rename it from your Arduino libraries folder to avoid conflicts, as Seeed_GFX is a fork of TFT_eSPI with additional features for Seeed Studio displays.
- Programming reTerminal E1001
- Programming reTerminal E1002
- Programming reTerminal E1003
- Programming reTerminal E1004
Programming reTerminal E1001 (7.5-inch Black & White ePaper)
Let's explore a simple example that demonstrates basic drawing operations on the black and white ePaper display.
Step 1. Open the example sketch from the Seeed_GFX library: File > Examples > Seeed_GFX > ePaper > Basic > HelloWorld
Step 2. Enable OPI PSRAM in the Arduino IDE: Tools > PSRAM > OPI PSRAM
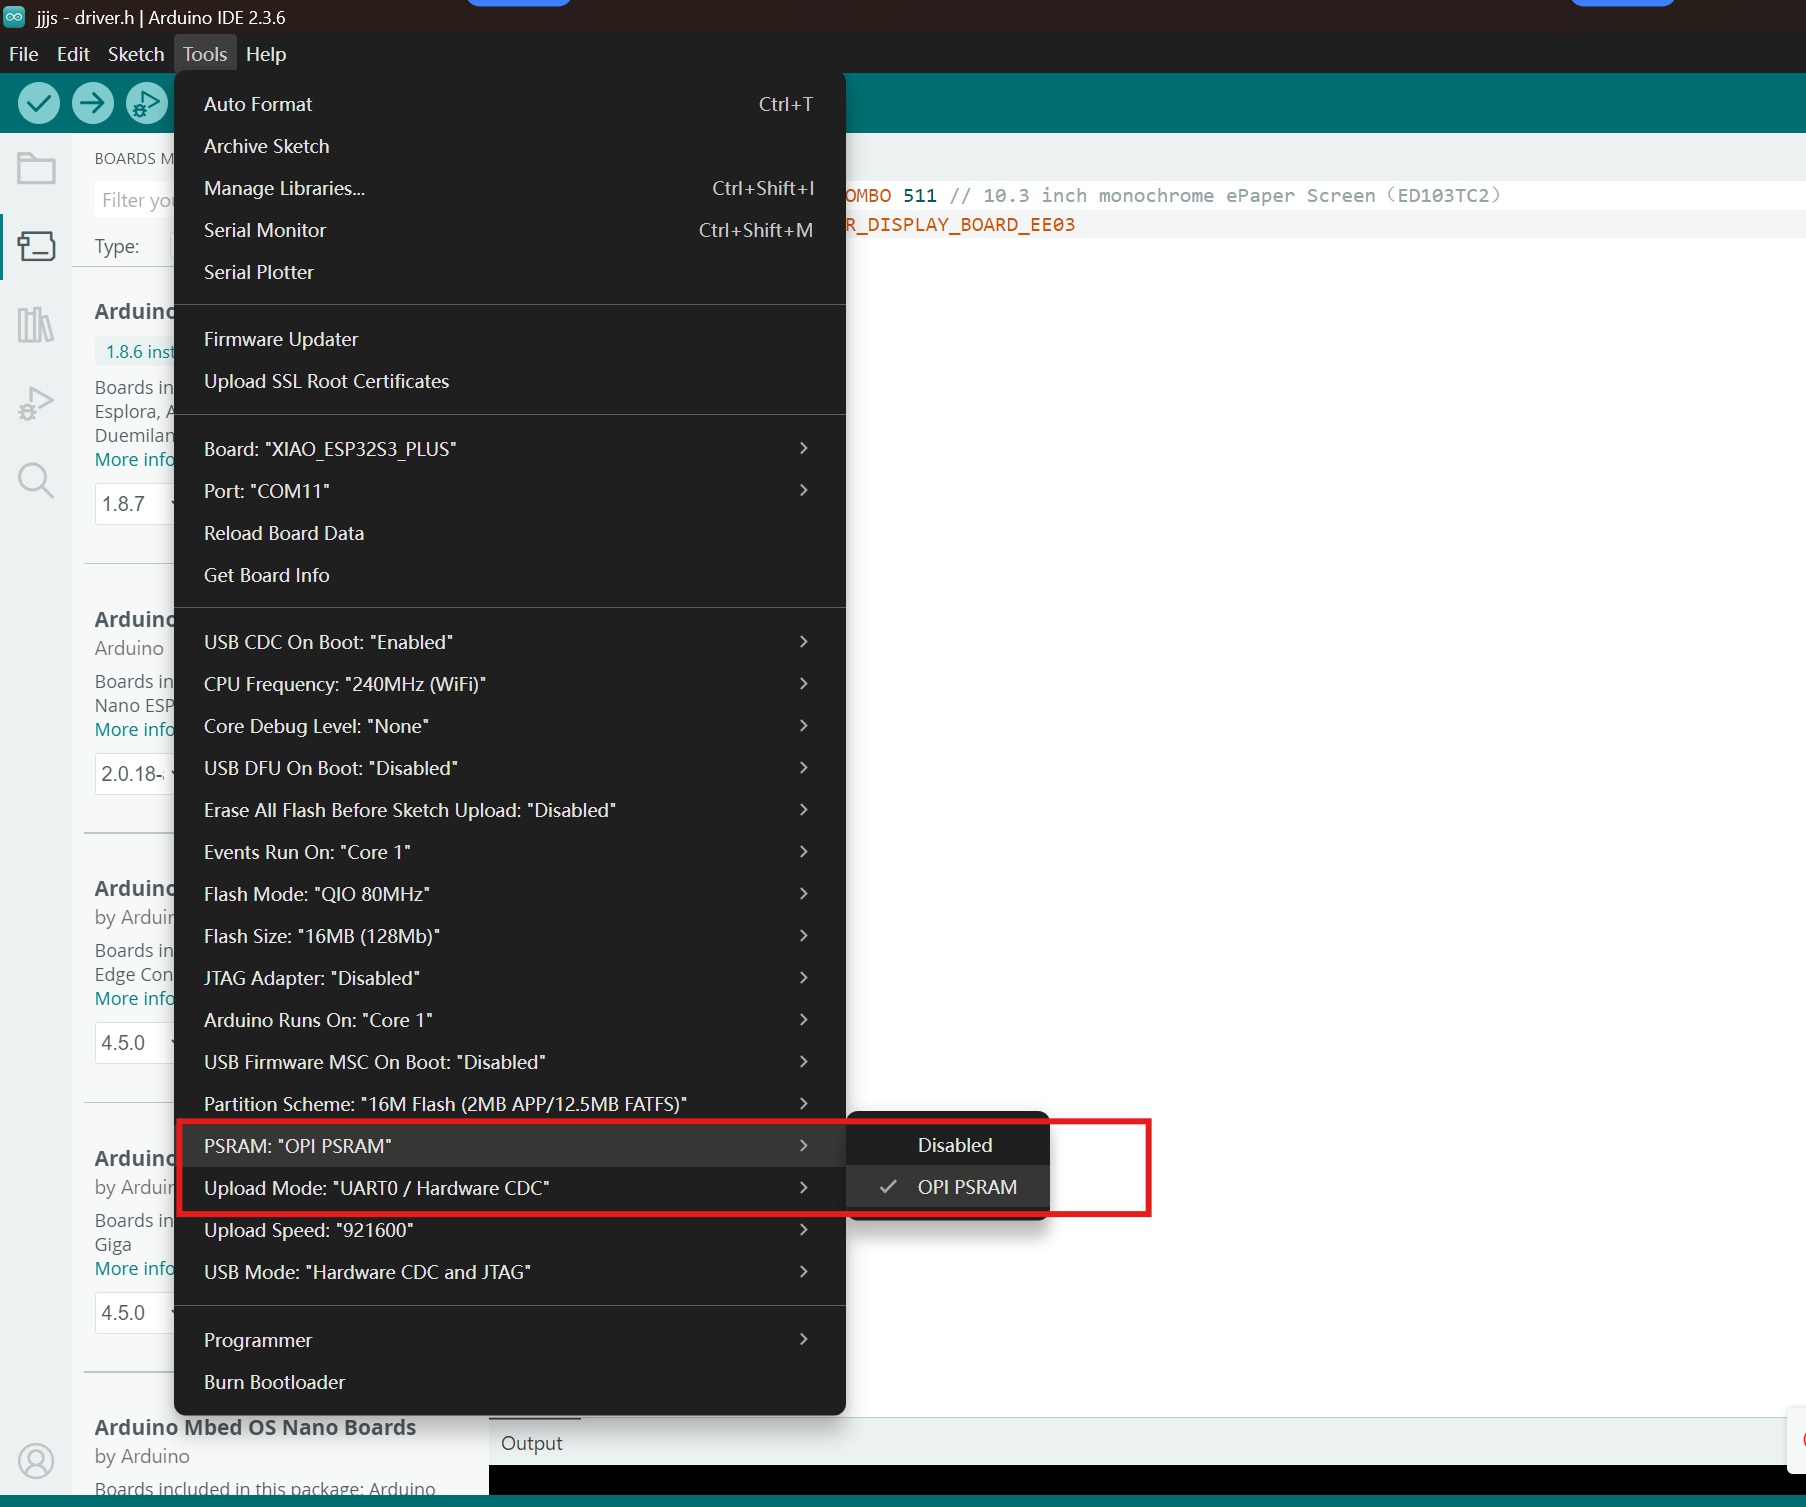
Step 3. Create a new file named driver.h in the same folder as your sketch. You can do this by clicking the arrow button in the Arduino IDE and selecting "New Tab", then naming it driver.h.

Step 4. Copy the generated configuration code and paste it into the driver.h file. The code should look like this:
#define BOARD_SCREEN_COMBO 520 // reTerminal E1001 (UC8179)
Step 5. Upload the sketch to your reTerminal E1001. You should see the display showing various graphics including lines, text, and shapes demonstrating the basic drawing capabilities.

Programming reTerminal E1002 (7.3-inch Full Color ePaper)
The full color ePaper display supports red, black, and white colors, allowing for more visually rich interfaces.
Step 1. Open the color example sketch from the Seeed_GFX library: File > Examples > Seeed_GFX > ePaper > Colorful > HelloWorld
Step 2. Enable OPI PSRAM in the Arduino IDE: Tools > PSRAM > OPI PSRAM
Step 3. Create a new file named driver.h in the same folder as your sketch, following the same process as before.

Step 4. Copy the generated configuration code and paste it into the driver.h file. The code should look like this:
#define BOARD_SCREEN_COMBO 521 // reTerminal E1002 (UC8179C)
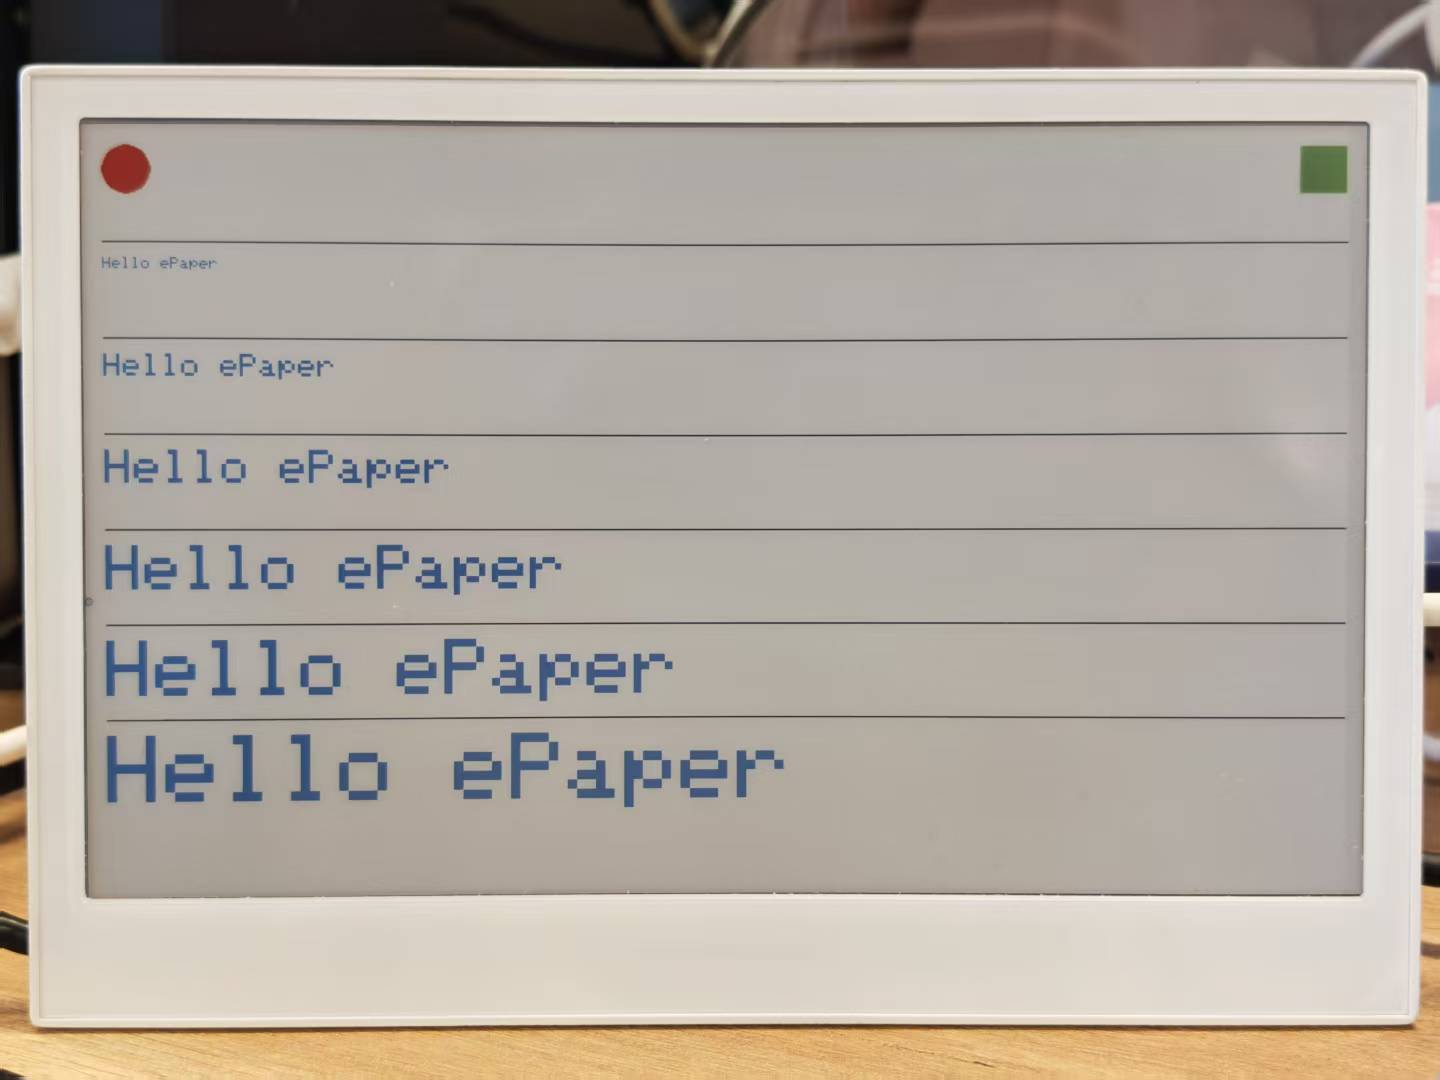
Step 5. Upload the sketch to your reTerminal E1002. The display will show colorful graphics demonstrating the full color capabilities of the ePaper display.
Programming reTerminal E1003 (10.3-inch ePaper)
Follow the same workflow using the Seeed_GFX library to configure and drive the ePaper on reTerminal E1003.
Step 1. Open an example sketch from the Seeed_GFX library: File > Examples > Seeed_GFX > ePaper > Basic > HelloWorld
Step 2. Enable OPI PSRAM in the Arduino IDE: Tools > PSRAM > OPI PSRAM
Step 3. Create a new file named driver.h in the same folder as your sketch.
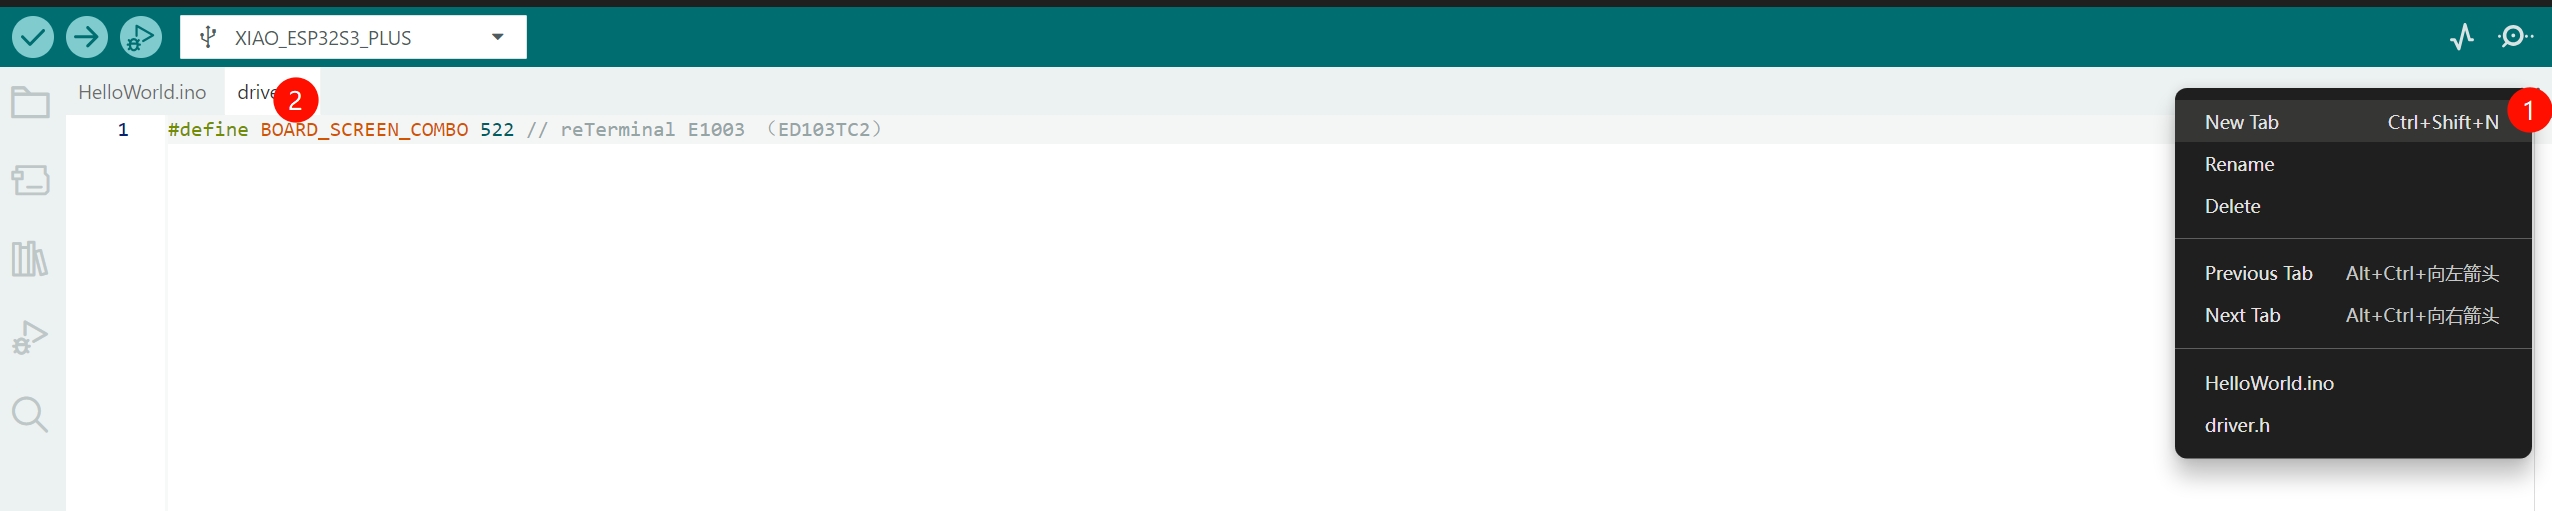
Step 4. Copy the generated configuration code and paste it into the driver.h file for E1003.
#define BOARD_SCREEN_COMBO 522 // reTerminal E1003 (ED103TC2)
Step 5. Upload the sketch to your reTerminal E1003 to verify drawing primitives, text rendering, and full-screen refresh behaviors.
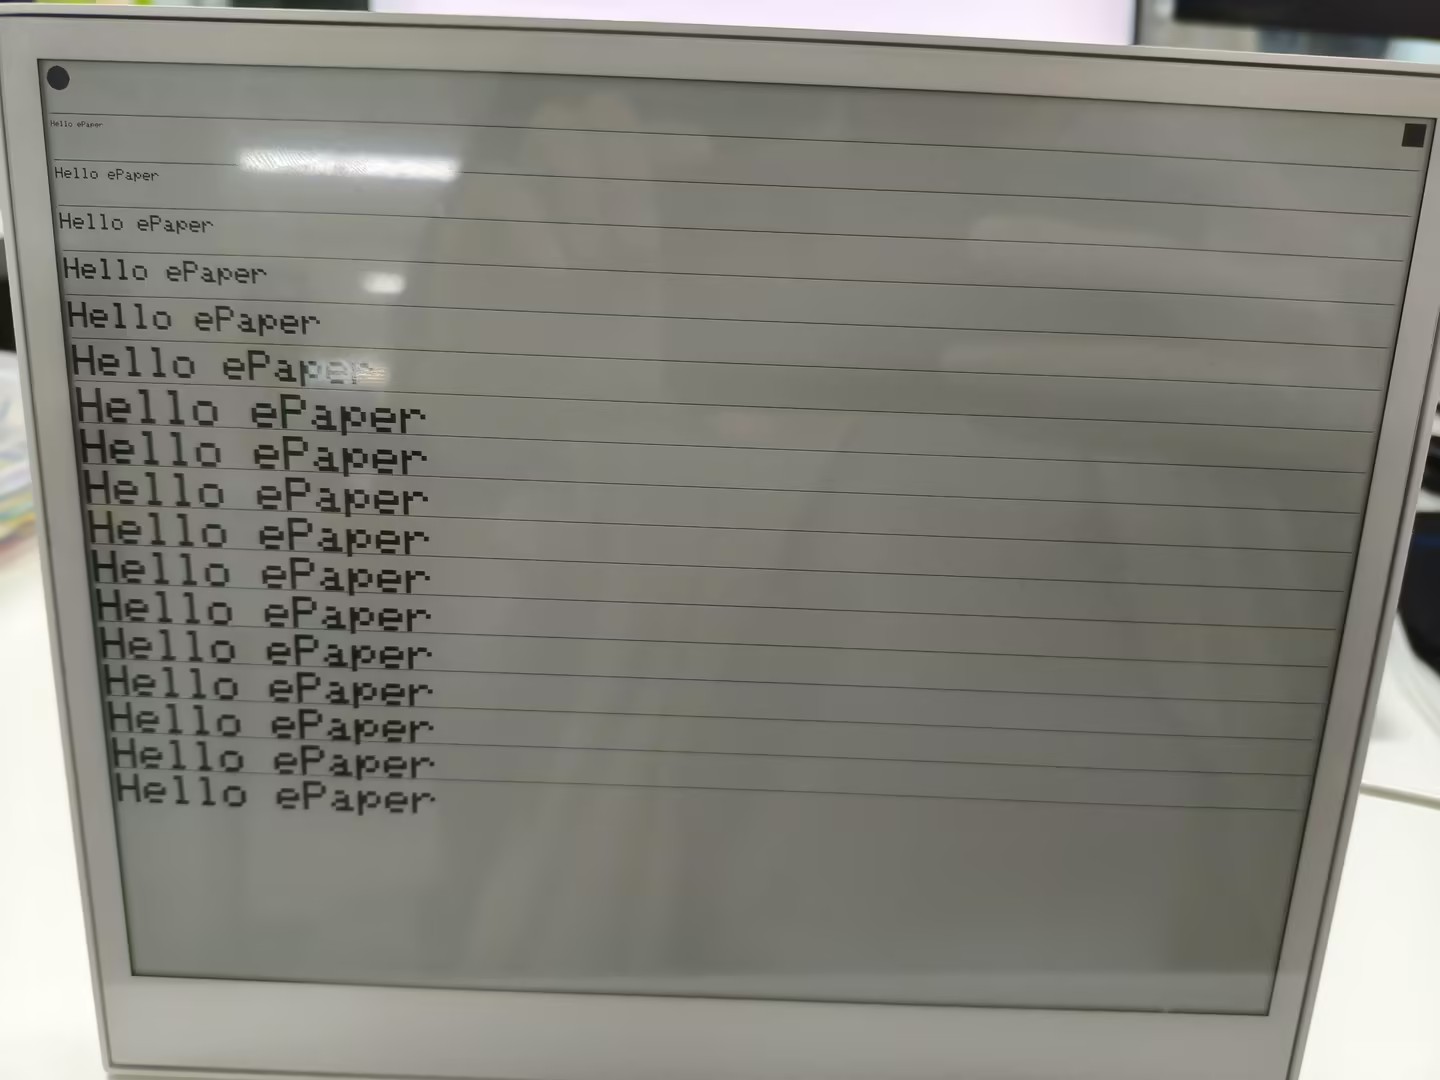
Programming reTerminal E1004 (13.3-inch Full Color ePaper)
Use the Seeed_GFX library to configure and drive the E Ink® Spectra™ 6 full-color ePaper display on reTerminal E1004.
Step 1. Open the color example sketch from the Seeed_GFX library: File > Examples > Seeed_GFX > ePaper > Basic > HelloWorld
Step 2. Enable OPI PSRAM in the Arduino IDE: Tools > PSRAM > OPI PSRAM
Step 3. Create a new file named driver.h in the same folder as your sketch.
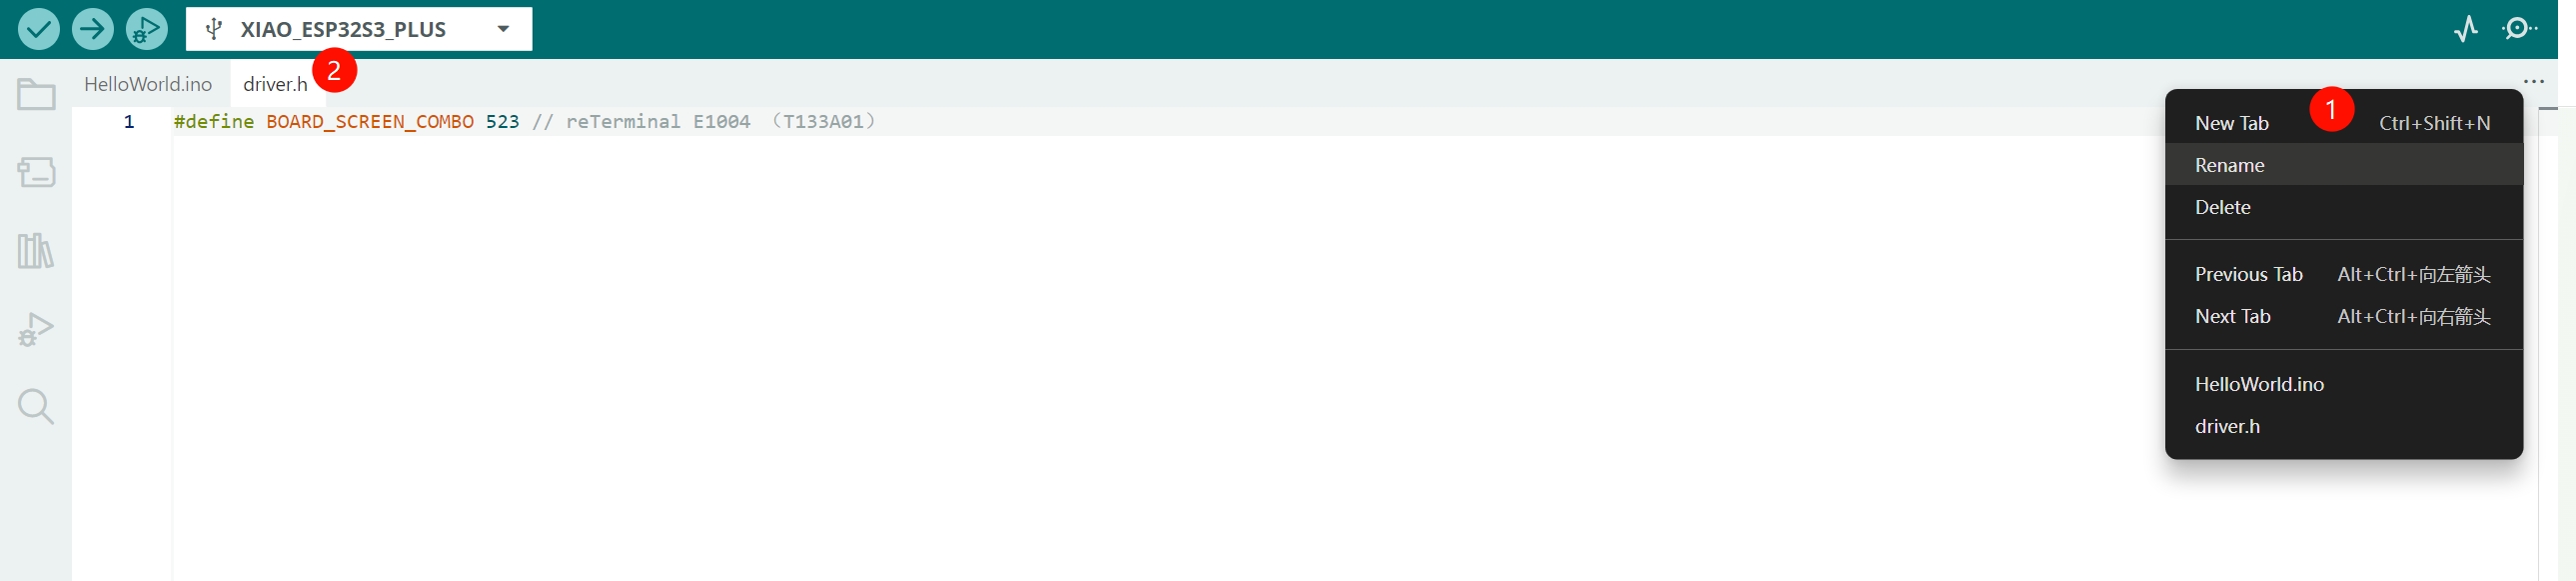
Step 4. Copy the generated configuration code and paste it into the driver.h file for E1004.
#define BOARD_SCREEN_COMBO 523 // reTerminal E1004 (T133A01)
Step 5. Upload the sketch to your reTerminal E1004 to verify color rendering, drawing primitives, text rendering, and full-screen refresh behaviors.
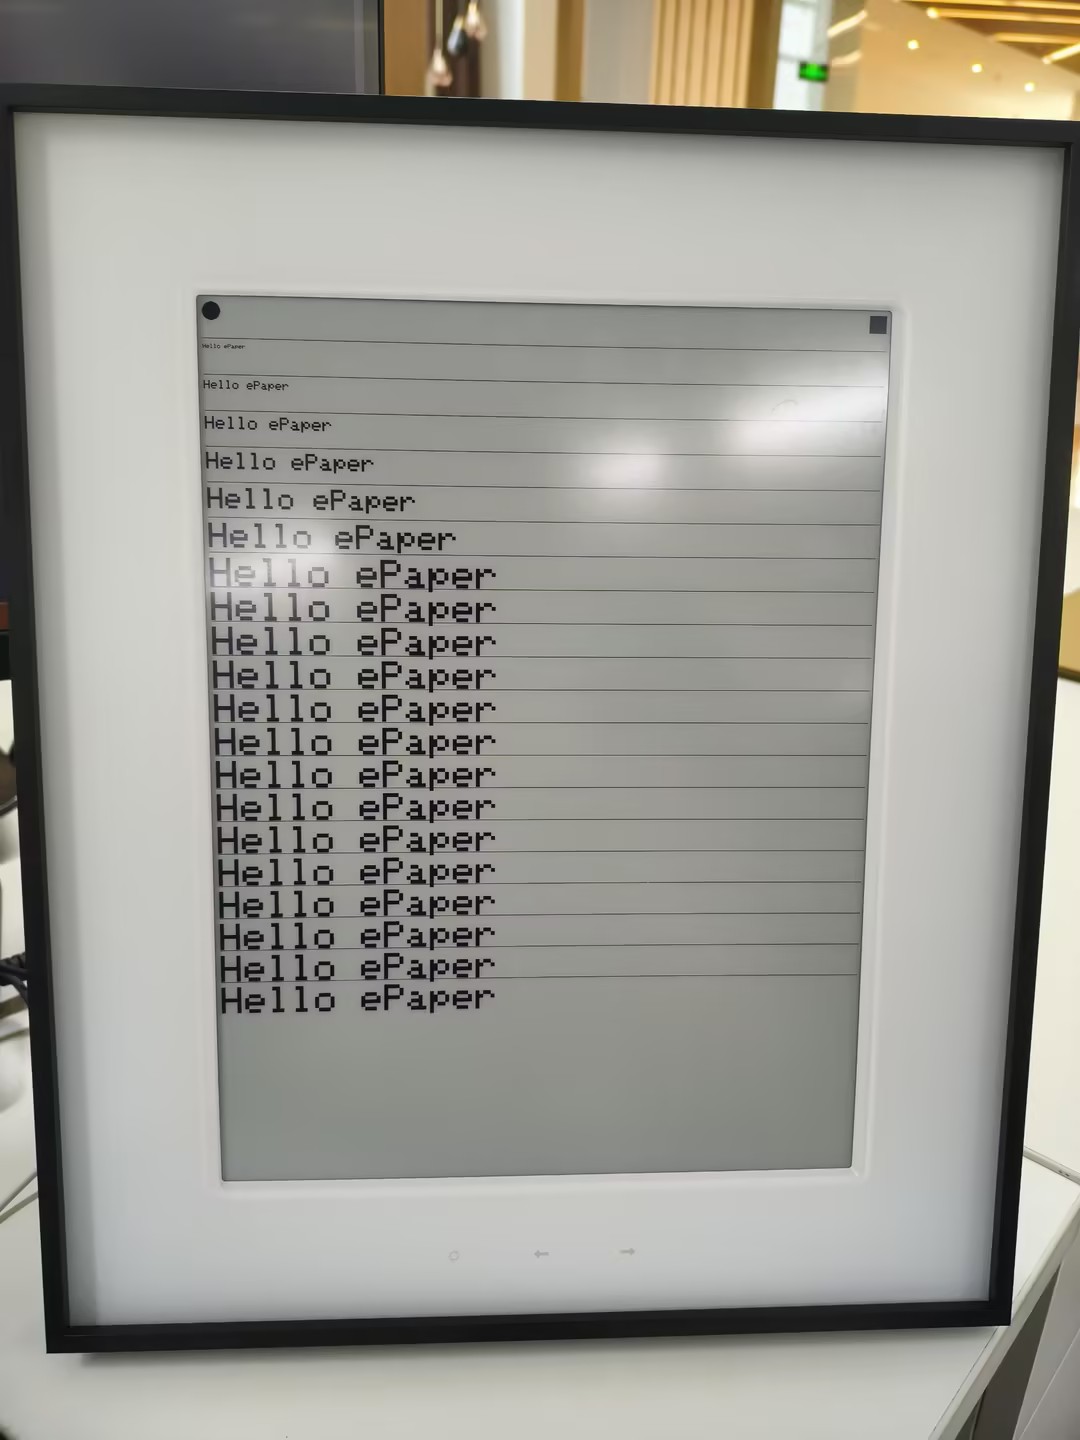
Multi-Level Grayscale with Seeed_GFX
The Hello World sketches above are intentionally minimal so they fit on every model. The monochrome panels on E1001 and E1003 actually support multi-level grayscale on top of plain black-and-white — 4 levels on E1001 and 16 levels on E1003 — and Seeed_GFX exposes both modes through epaper.initGrayMode(...) plus a set of TFT_GRAY_* palette constants. The two examples below walk through each.
- E1001 — 4-Level Grayscale
- E1003 — 16-Level Grayscale
4-Level Grayscale on reTerminal E1001
The reTerminal E1001's 7.5" monochrome panel can render 4 levels of grayscale instead of pure black and white. Seeed_GFX exposes this through epaper.initGrayMode(GRAY_LEVEL4) and four palette constants:
| Constant | Rendered Shade |
|---|---|
TFT_GRAY_0 | Black |
TFT_GRAY_1 | Dark gray |
TFT_GRAY_2 | Light gray |
TFT_GRAY_3 | White |
The example below first paints four horizontal stripes — one per gray level — so you can visually verify the palette, then blits an 800×480 grayscale bitmap onto the screen. The Seeed_GFX library already ships this as a ready-to-flash example, including the pre-converted image.h, so you don't need to generate any bitmap data yourself.
Step 1. Open the example sketch from the Seeed_GFX library: File > Examples > Seeed_GFX > ePaper > Gray > GrayLevel4. The sketch and its accompanying image.h will open in the editor.
Step 2. Enable OPI PSRAM in the Arduino IDE: Tools > PSRAM > OPI PSRAM.
Step 3. Add a driver.h file alongside the example (same workflow as the Hello World) and select the E1001 board–screen combo:
#define BOARD_SCREEN_COMBO 520 // reTerminal E1001 (UC8179)
Step 4. Upload the sketch. The display first shows four grayscale stripes — black at the top, then dark gray, light gray, and white at the bottom — and then clears and renders the bitmap from image.h.
For reference, the example sketch looks like this:
/*
 * 4-Level Grayscale demo for reTerminal E1001
 * (Seeed_GFX/examples/ePaper/Gray/Shape/Shape.ino)
 *
 * The 7.5" monochrome panel supports 4 gray levels:
 *   TFT_GRAY_0  black
 *   TFT_GRAY_1  dark gray
 *   TFT_GRAY_2  light gray
 *   TFT_GRAY_3  white
 */
#include "TFT_eSPI.h"
#include "image.h"

#ifdef EPAPER_ENABLE  // Defined when an ePaper combo is selected in driver.h
EPaper epaper;
#endif

void setup() {
#ifdef EPAPER_ENABLE
  epaper.begin();
  epaper.fillScreen(TFT_WHITE);
  epaper.update();
  epaper.initGrayMode(GRAY_LEVEL4);

  // Draw four horizontal stripes, one per gray level
  epaper.fillRect(0, 0,                       epaper.width(), epaper.height() / 4, TFT_GRAY_0);
  epaper.fillRect(0, epaper.height() * 1 / 4, epaper.width(), epaper.height() / 4, TFT_GRAY_1);
  epaper.fillRect(0, epaper.height() * 2 / 4, epaper.width(), epaper.height() / 4, TFT_GRAY_2);
  epaper.fillRect(0, epaper.height() * 3 / 4, epaper.width(), epaper.height() / 4, TFT_GRAY_3);
  epaper.update();

  // Then clear and show a 800x480 grayscale bitmap from image.h
  epaper.fillScreen(TFT_GRAY_3);
  epaper.pushImage(0, 0, 800, 480, (uint16_t *)L4_GRAY);
  epaper.update();
#endif
}

void loop() {
  // Nothing to do — ePaper holds the last frame without power
}
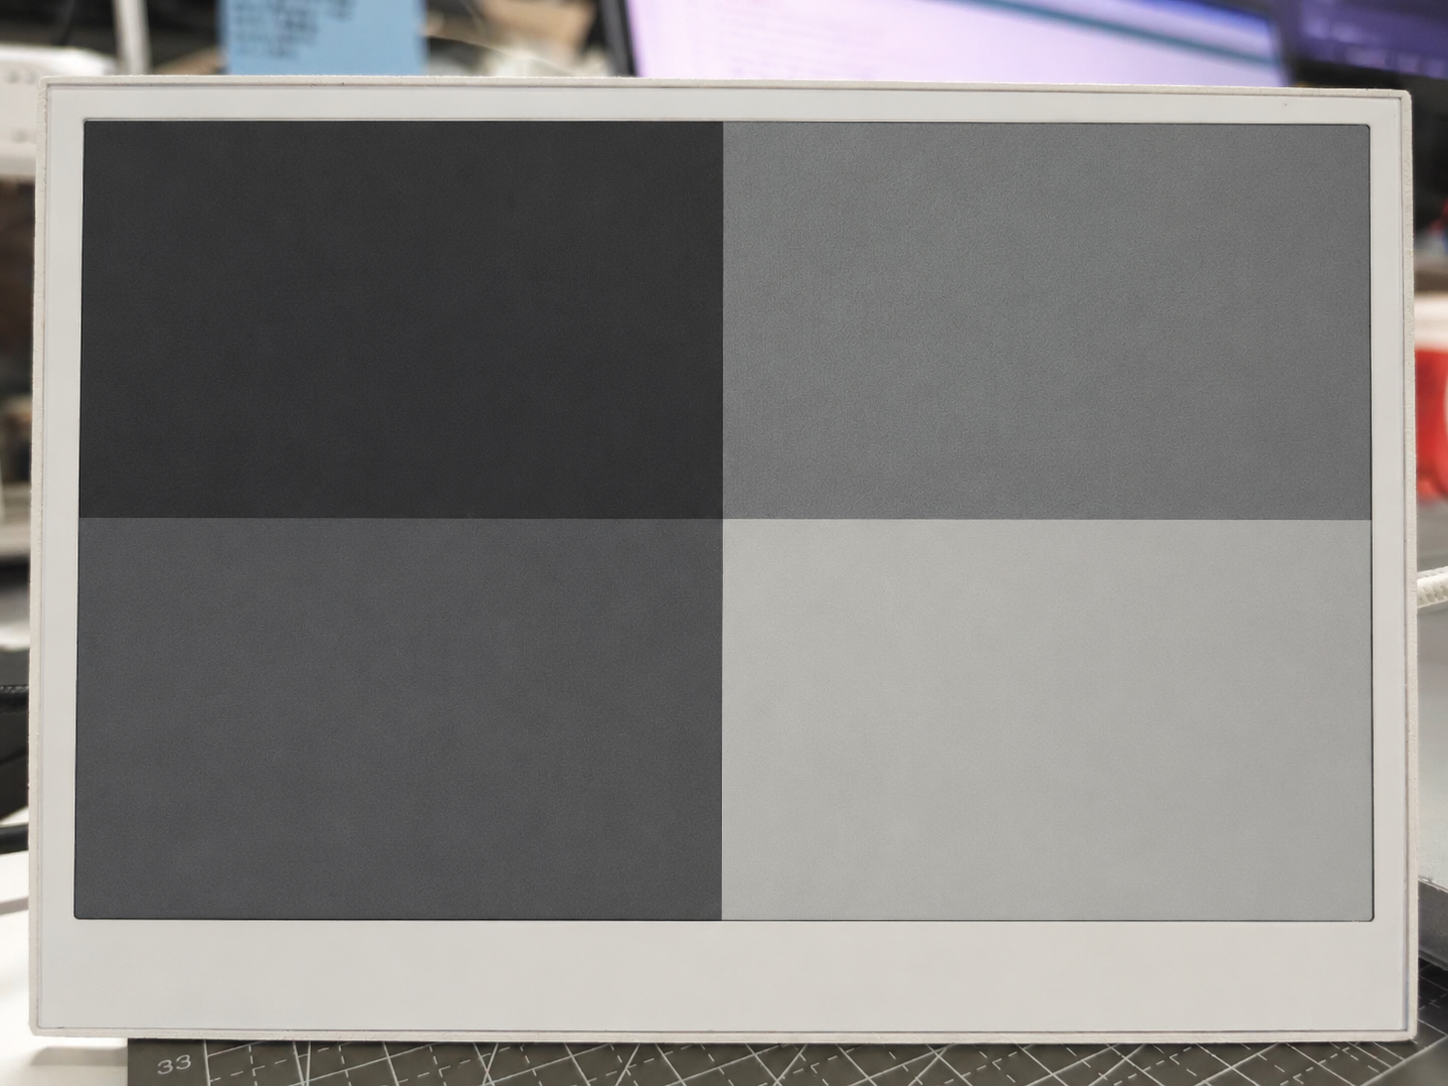
The L4_GRAY array in image.h is just an 800×480 grayscale bitmap pre-converted to a C array. To swap in your own picture, regenerate the array from a 800×480 grayscale source using any standard "image to C array" converter and replace L4_GRAY in image.h. The sketch itself does not need to change.
4-level grayscale refresh is roughly 4× slower than a 1-bit black-and-white update because the controller drives every pixel through four target voltages instead of two. Use it for static content like photos, illustrations, or detail-heavy dashboards, and stick to standard 1-bit mode for fast UI updates.
16-Level Grayscale on reTerminal E1003
The reTerminal E1003's 10.3" panel raises the bar to 16 levels of grayscale at 1404×1872 resolution. Seeed_GFX exposes this through epaper.initGrayMode(GRAY_LEVEL16) and sixteen palette constants from TFT_GRAY_0 (black) all the way up to TFT_GRAY_15 (white):
| Constant | Rendered Shade |
|---|---|
TFT_GRAY_0 | Black |
TFT_GRAY_1 … TFT_GRAY_14 | 14 intermediate grays (darkest → lightest) |
TFT_GRAY_15 | White |
The example below paints 16 horizontal bands — one per gray level — so you can visually verify the full palette on the panel. The Seeed_GFX library already ships this as a ready-to-flash example, with the matching driver.h pre-configured for E1003, so you don't need to wire anything up manually.
Step 1. Open the example sketch from the Seeed_GFX library: File > Examples > Seeed_GFX > ePaper > Gray > GrayLevel16. The sketch opens together with its bundled driver.h (already set to BOARD_SCREEN_COMBO 522 for the E1003 ED103TC2 panel) — you should not need to edit it.
Step 2. Enable OPI PSRAM in the Arduino IDE: Tools > PSRAM > OPI PSRAM.
Step 3. Upload the sketch. The display shows 16 horizontal grayscale bands, from pure black at the top to pure white at the bottom.
For reference, the example sketch looks like this:
/* This is a 4-color electronic ink screen, but in GRAY_LEVEL16 mode
   it can render 16 levels of gray (TFT_GRAY_0 ~ TFT_GRAY_15).

   TFT_GRAY_0   -> black
   ...
   TFT_GRAY_15  -> white
*/

#include "TFT_eSPI.h"
#include "image.h"

#ifdef EPAPER_ENABLE  // Only compile this code if EPAPER_ENABLE is defined in User_Setup.h
EPaper epaper;
#endif

void setup()
{
#ifdef EPAPER_ENABLE
  epaper.begin();
  epaper.fillScreen(TFT_WHITE);
  epaper.update();                       // refresh once to clear the screen
  epaper.initGrayMode(GRAY_LEVEL16);     // switch to 16-level gray mode

  // 16 levels of gray: TFT_GRAY_0 (black) ... TFT_GRAY_15 (white)
  const uint8_t grayLevels[16] = {
    TFT_GRAY_0,  TFT_GRAY_1,  TFT_GRAY_2,  TFT_GRAY_3,
    TFT_GRAY_4,  TFT_GRAY_5,  TFT_GRAY_6,  TFT_GRAY_7,
    TFT_GRAY_8,  TFT_GRAY_9,  TFT_GRAY_10, TFT_GRAY_11,
    TFT_GRAY_12, TFT_GRAY_13, TFT_GRAY_14, TFT_GRAY_15
  };

  int16_t screenW = epaper.width();
  int16_t screenH = epaper.height();
  int16_t bandH   = screenH / 16;        // height of each gray band

  for (uint8_t i = 0; i < 16; i++) {
    int16_t y = i * bandH;
    // Make the last band absorb any remainder pixels so the screen is fully covered
    int16_t h = (i == 15) ? (screenH - y) : bandH;
    epaper.fillRect(0, y, screenW, h, grayLevels[i]);
  }

  epaper.update();
#endif
}

void loop()
{
  // Nothing to do — ePaper holds the last frame without power
}
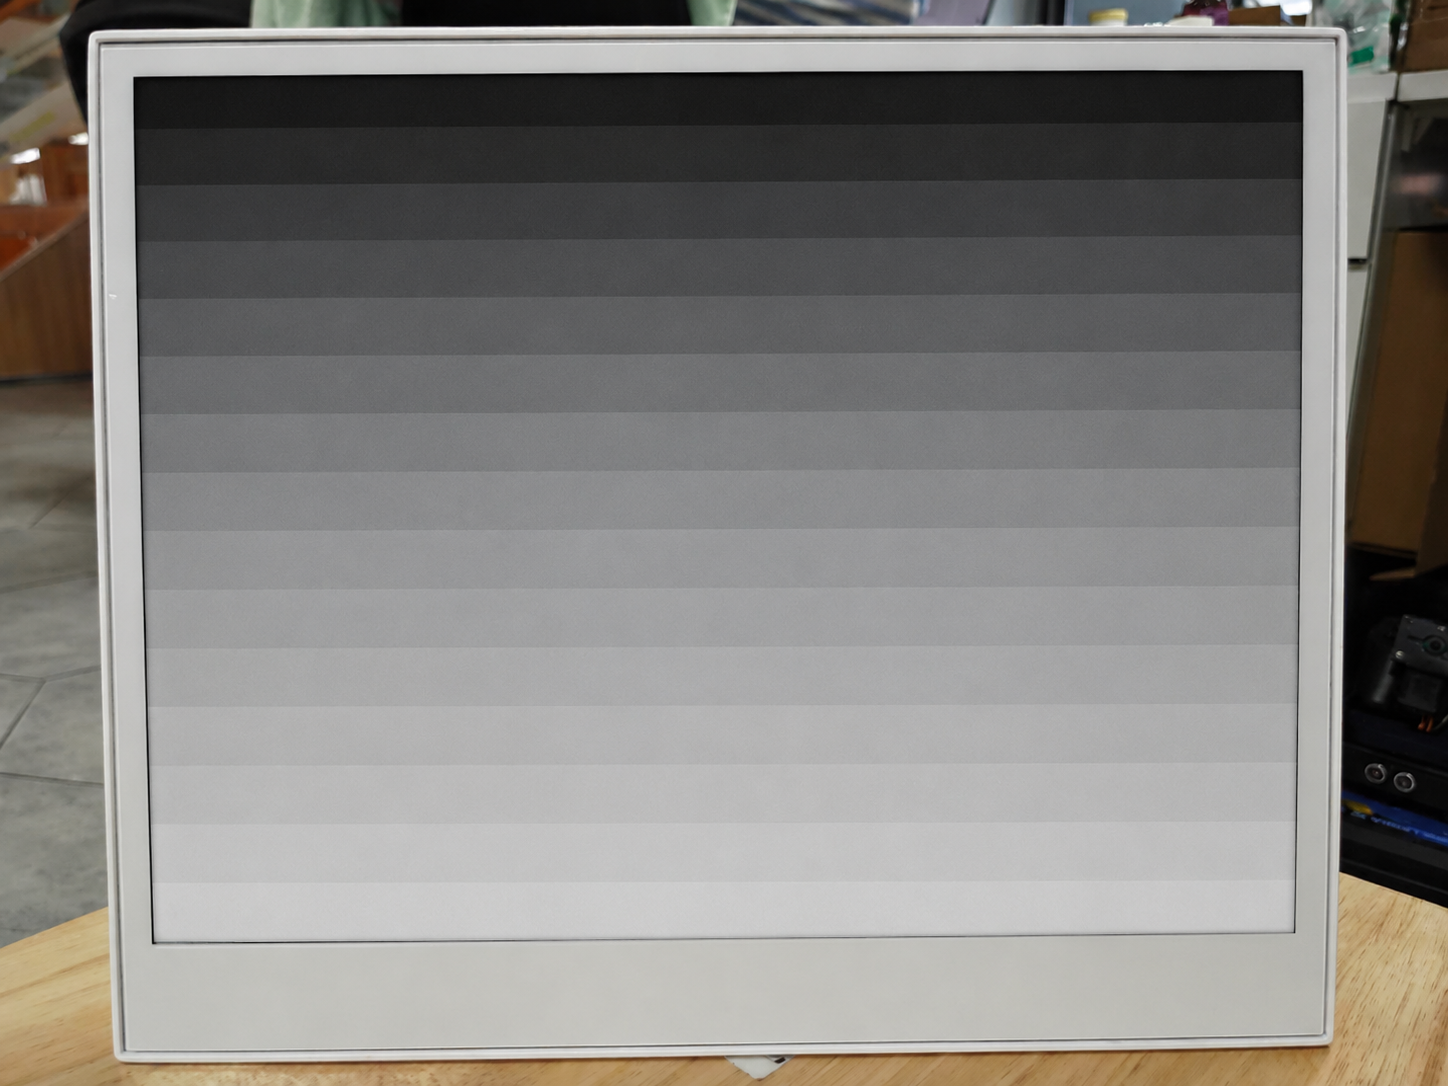
16-level grayscale is the slowest refresh mode on this panel because every pixel has to settle through 16 voltage targets instead of 2. Use it for static photo-style content and dashboards, and fall back to standard 1-bit mode for fast UI updates.
Using the GxEPD2 Library
Besides Seeed_GFX, you can also use the GxEPD2 library to drive the reTerminal's ePaper display. Seeed has forked the popular GxEPD2 library and added dedicated support for the reTerminal E10xx series, making it the recommended choice for reTerminal users.
Installing the Seeed_GxEPD2 Library
To use this library with reTerminal products, you need to install Seeed_GxEPD2 — Seeed's custom fork specifically adapted for the reTerminal E10xx series.
Step 1. Go to the Seeed_GxEPD2 GitHub repository. Click the "Code" button and then select "Download ZIP" to save the library to your computer.
Step 2. In the Arduino IDE, install the library from the downloaded file. Navigate to Sketch > Include Library > Add .ZIP Library... and select the ZIP file you just downloaded.
Step 3. The Seeed_GxEPD2 library requires the Adafruit GFX Library to function, which you must also install. The easiest way to do this is through the Library Manager: go to Tools > Manage Libraries..., search for "Adafruit GFX Library", and click "Install".
Seeed_GxEPD2 is Seeed's custom fork of the original GxEPD2 library, with dedicated drivers and optimizations for the reTerminal E10xx series. We strongly recommend using this fork instead of the upstream library to ensure full compatibility with your reTerminal device.
- reTerminal E1001
- reTerminal E1002
- reTerminal E1003
- reTerminal E1004
Programming reTerminal E1001 (7.5" Black & White Screen)
The reTerminal E1001 features a 7.5" black and white ePaper display (800×480, GDEY075T7 panel, UC8179 controller). The example below demonstrates multiple screens including a splash, system info, typography, geometry, patterns, and a dashboard layout.
After installing the Seeed_GxEPD2 library, you can find this example in the Arduino IDE via File > Examples > Seeed_GxEPD2 > GxEPD2_reTerminal_E1001, or locate it manually at Seeed_GxEPD2/examples/GxEPD2_reTerminal_E1001/GxEPD2_reTerminal_E1001.ino.Click here to view the full code
#include <SPI.h>
#include <GxEPD2_BW.h>
#include <Fonts/FreeMonoBold9pt7b.h>
#include <Fonts/FreeMonoBold12pt7b.h>
#include <Fonts/FreeSansBold24pt7b.h>
#include <Fonts/FreeSansBold18pt7b.h>
#include <Fonts/FreeSansBold12pt7b.h>
#include <Fonts/FreeSans9pt7b.h>
#include <Fonts/FreeMono9pt7b.h>

// ===== Pin mapping =====
#define EPD_SCK_PIN   7
#define EPD_MOSI_PIN  9
#define EPD_CS_PIN    10
#define EPD_DC_PIN    11
#define EPD_RES_PIN   12
#define EPD_BUSY_PIN  13

SPIClass hspi(HSPI);

// ===== Display: 7.5" B&W 800x480 =====
#define MAX_DISPLAY_BUFFER_SIZE 16000u
#define MAX_HEIGHT(EPD) \
    (EPD::HEIGHT <= MAX_DISPLAY_BUFFER_SIZE / (EPD::WIDTH / 8) \
         ? EPD::HEIGHT \
         : MAX_DISPLAY_BUFFER_SIZE / (EPD::WIDTH / 8))

GxEPD2_BW<GxEPD2_750_GDEY075T7, MAX_HEIGHT(GxEPD2_750_GDEY075T7)>
    display(GxEPD2_750_GDEY075T7(EPD_CS_PIN, EPD_DC_PIN, EPD_RES_PIN, EPD_BUSY_PIN));

void setup()
{
  Serial.begin(115200);
  delay(200);
  Serial.println(F("[E1001] GxEPD2 reTerminal E1001 Demo (7.5\" B&W)"));

  pinMode(EPD_RES_PIN, OUTPUT);
  pinMode(EPD_DC_PIN,  OUTPUT);
  pinMode(EPD_CS_PIN,  OUTPUT);

  hspi.begin(EPD_SCK_PIN, -1, EPD_MOSI_PIN, -1);
  display.epd2.selectSPI(hspi, SPISettings(2000000, MSBFIRST, SPI_MODE0));
  display.init(0);

  Serial.println(F("[E1001] Screen 1: Splash"));
  showSplashScreen();
  delay(3000);

  Serial.println(F("[E1001] Screen 2: System Info"));
  showSystemInfo();
  delay(3000);

  Serial.println(F("[E1001] Screen 3: Typography"));
  showTypographyDemo();
  delay(3000);

  Serial.println(F("[E1001] Screen 4: Geometry"));
  showGeometryDemo();
  delay(3000);

  Serial.println(F("[E1001] Screen 5: Patterns"));
  showPatternDemo();
  delay(3000);

  Serial.println(F("[E1001] Screen 6: Dashboard"));
  showDashboardDemo();

  Serial.println(F("[E1001] Demo complete. Hibernating."));
  delay(2000);
  display.hibernate();
}

void loop() {}

// =====================================================================
void drawCenteredText(const char* text, int16_t y, const GFXfont* font)
{
  display.setFont(font);
  int16_t tbx, tby; uint16_t tbw, tbh;
  display.getTextBounds(text, 0, 0, &tbx, &tby, &tbw, &tbh);
  display.setCursor((display.width() - tbw) / 2 - tbx, y);
  display.print(text);
}

// =====================================================================
// Screen 1: Splash
// =====================================================================
void showSplashScreen()
{
  const uint16_t W = display.width();
  const uint16_t H = display.height();
  display.setRotation(0);
  display.setFullWindow();
  display.firstPage();
  do {
    display.fillScreen(GxEPD_WHITE);
    display.drawRect(10, 10, W - 20, H - 20, GxEPD_BLACK);
    display.drawRect(14, 14, W - 28, H - 28, GxEPD_BLACK);

    display.setTextColor(GxEPD_BLACK);
    drawCenteredText("reTerminal E1001", H / 2 - 60, &FreeSansBold24pt7b);
    drawCenteredText("7.5\" e-Paper Display", H / 2 - 10, &FreeSansBold12pt7b);
    display.drawFastHLine(W / 4, H / 2 + 10, W / 2, GxEPD_BLACK);
    drawCenteredText("GxEPD2 + UC8179 Driver Demo", H / 2 + 45, &FreeSansBold12pt7b);
    drawCenteredText("800 x 480 pixels | Black & White", H / 2 + 75, &FreeSans9pt7b);
    drawCenteredText("Seeed Studio x GxEPD2", H - 40, &FreeSans9pt7b);
  } while (display.nextPage());
}

// =====================================================================
// Screen 2: System Info
// =====================================================================
void showSystemInfo()
{
  const uint16_t W = display.width();
  const uint16_t H = display.height();
  display.setRotation(0);
  display.setFullWindow();
  display.firstPage();
  do {
    display.fillScreen(GxEPD_WHITE);
    display.fillRect(0, 0, W, 40, GxEPD_BLACK);
    display.setTextColor(GxEPD_WHITE);
    drawCenteredText("System Information", 30, &FreeSansBold12pt7b);

    display.setTextColor(GxEPD_BLACK);
    display.setFont(&FreeMonoBold9pt7b);

    const char* labels[] = {"MCU", "Display", "Panel", "Controller", "Interface", "Color Depth"};
    char chipBuf[48];
    snprintf(chipBuf, sizeof(chipBuf), "ESP32-S3 @ %lu MHz", (unsigned long)ESP.getCpuFreqMHz());
    const char* values[] = {chipBuf, "800 x 480", "GDEY075T7", "UC8179", "SPI (HSPI) @ 2MHz", "B&W (1-bit)"};

    int y = 95;
    for (int i = 0; i < 6; i++) {
      display.setCursor(50, y);
      display.print(labels[i]);
      display.setCursor(250, y);
      display.print(": ");
      display.print(values[i]);
      y += 48;
      if (i < 5) display.drawFastHLine(50, y - 18, W - 100, GxEPD_BLACK);
    }

    display.drawFastHLine(30, H - 40, W - 60, GxEPD_BLACK);
    drawCenteredText("reTerminal E1001 | GxEPD2 Demo", H - 20, &FreeSans9pt7b);
  } while (display.nextPage());
}

// =====================================================================
// Screen 3: Typography
// =====================================================================
void showTypographyDemo()
{
  const uint16_t W = display.width();
  const uint16_t H = display.height();
  display.setRotation(0);
  display.setFullWindow();
  display.firstPage();
  do {
    display.fillScreen(GxEPD_WHITE);
    display.fillRect(0, 0, W, 40, GxEPD_BLACK);
    display.setTextColor(GxEPD_WHITE);
    drawCenteredText("Typography Demo", 30, &FreeSansBold12pt7b);

    display.setTextColor(GxEPD_BLACK);
    int y = 85, x = 40;

    display.setFont(&FreeSansBold24pt7b);
    display.setCursor(x, y); display.print("Sans Bold 24pt");
    y += 65;

    display.setFont(&FreeSansBold18pt7b);
    display.setCursor(x, y); display.print("Sans Bold 18pt");
    y += 50;

    display.setFont(&FreeSansBold12pt7b);
    display.setCursor(x, y); display.print("Sans Bold 12pt - Clean and Modern");
    y += 42;

    display.setFont(&FreeSans9pt7b);
    display.setCursor(x, y); display.print("Sans 9pt - Body text for dense info display.");
    y += 40;

    display.drawFastHLine(x, y, W - 80, GxEPD_BLACK);
    y += 25;

    display.setFont(&FreeMonoBold12pt7b);
    display.setCursor(x, y); display.print("Mono Bold 12pt");
    y += 38;

    display.setFont(&FreeMono9pt7b);
    display.setCursor(x, y); display.print("Mono 9pt: 0123456789 ABCDEF");
    y += 38;

    display.setFont(&FreeSansBold18pt7b);
    display.setCursor(x, y); display.print("0 1 2 3 4 5 6 7 8 9");

    drawCenteredText("Multiple fonts supported", H - 20, &FreeSans9pt7b);
  } while (display.nextPage());
}

// =====================================================================
// Screen 4: Geometry
// =====================================================================
void showGeometryDemo()
{
  const uint16_t W = display.width();
  const uint16_t H = display.height();
  display.setRotation(0);
  display.setFullWindow();
  display.firstPage();
  do {
    display.fillScreen(GxEPD_WHITE);
    display.fillRect(0, 0, W, 40, GxEPD_BLACK);
    display.setTextColor(GxEPD_WHITE);
    drawCenteredText("Geometry Demo", 30, &FreeSansBold12pt7b);
    display.setTextColor(GxEPD_BLACK);

    // Rectangles
    for (int i = 0; i < 4; i++)
      display.drawRect(40 + i * 80, 60, 60, 50, GxEPD_BLACK);
    display.fillRect(40 + 4 * 80, 60, 60, 50, GxEPD_BLACK);

    // Circles
    for (int i = 0; i < 4; i++)
      display.drawCircle(70 + i * 90, 170, 25 + i * 3, GxEPD_BLACK);
    for (int i = 0; i < 3; i++)
      display.fillCircle(70 + (i + 4) * 90, 170, 25 + i * 3, GxEPD_BLACK);

    // Triangles
    for (int i = 0; i < 5; i++) {
      int tx = 50 + i * 120, sz = 40 + i * 5;
      display.drawTriangle(tx, 270 + sz, tx + sz / 2, 270, tx + sz, 270 + sz, GxEPD_BLACK);
    }

    // Fan of lines
    int fcx = 150, fcy = 410;
    for (int a = 0; a < 180; a += 12) {
      float rad = a * 3.14159f / 180.0f;
      display.drawLine(fcx, fcy, fcx + (int)(60 * cosf(rad)), fcy - (int)(60 * sinf(rad)), GxEPD_BLACK);
    }

    // Concentric circles
    for (int r = 8; r <= 56; r += 8)
      display.drawCircle(400, 400, r, GxEPD_BLACK);

    // Rounded rects
    for (int i = 0; i < 3; i++)
      display.drawRoundRect(550 + i * 8, 340 + i * 8, 120 - i * 16, 100 - i * 16, 8 + i * 4, GxEPD_BLACK);

    drawCenteredText("Adafruit GFX primitives on 7.5\" e-Paper", H - 15, &FreeSans9pt7b);
  } while (display.nextPage());
}

// =====================================================================
// Screen 5: Patterns
// =====================================================================
void showPatternDemo()
{
  const uint16_t W = display.width();
  const uint16_t H = display.height();
  display.setRotation(0);
  display.setFullWindow();
  display.firstPage();
  do {
    display.fillScreen(GxEPD_WHITE);
    display.fillRect(0, 0, W, 40, GxEPD_BLACK);
    display.setTextColor(GxEPD_WHITE);
    drawCenteredText("Pattern Demo", 30, &FreeSansBold12pt7b);
    display.setTextColor(GxEPD_BLACK);
    display.setFont(&FreeSans9pt7b);

    int bx = 30, by = 55, bw = 150, bh = 150, gap = 30;

    // Checkerboard
    display.setCursor(bx + 25, by + 15); display.print("Checker");
    by += 20;
    for (int py = 0; py < bh / 12; py++)
      for (int px = 0; px < bw / 12; px++)
        if ((px + py) & 1)
          display.fillRect(bx + px * 12, by + py * 12, 12, 12, GxEPD_BLACK);

    // H-stripes
    int bx2 = bx + bw + gap; int by2 = by - 20;
    display.setCursor(bx2 + 25, by2 + 15); display.print("H-Stripes");
    by2 += 20;
    for (int py = 0; py < bh; py += 8)
      if ((py / 8) & 1)
        display.fillRect(bx2, by2 + py, bw, 8, GxEPD_BLACK);

    // V-stripes
    int bx3 = bx2 + bw + gap; int by3 = by2 - 20;
    display.setCursor(bx3 + 25, by3 + 15); display.print("V-Stripes");
    by3 += 20;
    for (int px = 0; px < bw; px += 8)
      if ((px / 8) & 1)
        display.fillRect(bx3 + px, by3, 8, bh, GxEPD_BLACK);

    // Dot grid
    int bx4 = bx3 + bw + gap; int by4 = by3 - 20;
    display.setCursor(bx4 + 30, by4 + 15); display.print("Dot Grid");
    by4 += 20;
    for (int py = 0; py < bh; py += 12)
      for (int px = 0; px < bw; px += 12)
        display.fillCircle(bx4 + px + 6, by4 + py + 6, 3, GxEPD_BLACK);

    // Dither gradient (bottom)
    int gx = 30, gy = 310, gw = W - 60, gh = 120;
    display.setFont(&FreeSans9pt7b);
    display.setCursor(gx, gy - 5); display.print("Dither Gradient:");
    display.drawRect(gx, gy, gw, gh, GxEPD_BLACK);
    for (int py = 0; py < gh; py++)
      for (int px = 0; px < gw; px++) {
        int density = (px * 255) / gw;
        if ((((px * 7 + py * 13) ^ (px * py)) & 0xFF) < density)
          display.drawPixel(gx + px, gy + py, GxEPD_BLACK);
      }

    drawCenteredText("Fill patterns and dithering", H - 15, &FreeSans9pt7b);
  } while (display.nextPage());
}

// =====================================================================
// Screen 6: Dashboard
// =====================================================================
void drawCard(int x, int y, int w, int h, const char* title, const char* value, const char* unit)
{
  display.drawRoundRect(x, y, w, h, 6, GxEPD_BLACK);
  display.fillRoundRect(x + 2, y + 2, w - 4, 26, 4, GxEPD_BLACK);
  display.setTextColor(GxEPD_WHITE);
  display.setFont(&FreeSansBold12pt7b);
  int16_t tbx, tby; uint16_t tbw, tbh;
  display.getTextBounds(title, 0, 0, &tbx, &tby, &tbw, &tbh);
  display.setCursor(x + (w - tbw) / 2 - tbx, y + 22);
  display.print(title);

  display.setTextColor(GxEPD_BLACK);
  display.setFont(&FreeSansBold18pt7b);
  display.getTextBounds(value, 0, 0, &tbx, &tby, &tbw, &tbh);
  display.setCursor(x + (w - tbw) / 2 - tbx, y + h / 2 + 12);
  display.print(value);

  display.setFont(&FreeSans9pt7b);
  display.getTextBounds(unit, 0, 0, &tbx, &tby, &tbw, &tbh);
  display.setCursor(x + (w - tbw) / 2 - tbx, y + h - 10);
  display.print(unit);
}

void showDashboardDemo()
{
  const uint16_t W = display.width();
  const uint16_t H = display.height();
  display.setRotation(0);
  display.setFullWindow();
  display.firstPage();
  do {
    display.fillScreen(GxEPD_WHITE);
    display.fillRect(0, 0, W, 40, GxEPD_BLACK);
    display.setTextColor(GxEPD_WHITE);
    drawCenteredText("Dashboard Demo", 30, &FreeSansBold12pt7b);
    display.setTextColor(GxEPD_BLACK);

    int cw = 170, ch = 130, gap = 20;
    int sx = (W - 4 * cw - 3 * gap) / 2;
    int row1Y = 60;

    char uptBuf[16]; snprintf(uptBuf, sizeof(uptBuf), "%lu", millis() / 1000);
    char heapBuf[16]; snprintf(heapBuf, sizeof(heapBuf), "%lu", (unsigned long)(ESP.getFreeHeap() / 1024));

    drawCard(sx,                       row1Y, cw, ch, "Temp",     "23.5",  "Celsius");
    drawCard(sx + cw + gap,            row1Y, cw, ch, "Humidity", "65",    "% RH");
    drawCard(sx + 2 * (cw + gap),      row1Y, cw, ch, "Heap",    heapBuf, "kB free");
    drawCard(sx + 3 * (cw + gap),      row1Y, cw, ch, "Uptime",  uptBuf,  "seconds");

    // Log area
    int logY = row1Y + ch + 20;
    display.drawRoundRect(sx, logY, W - 2 * sx, 200, 6, GxEPD_BLACK);
    display.fillRoundRect(sx + 2, logY + 2, W - 2 * sx - 4, 26, 4, GxEPD_BLACK);
    display.setTextColor(GxEPD_WHITE);
    display.setFont(&FreeSansBold12pt7b);
    display.setCursor(sx + 15, logY + 22);
    display.print("Activity Log");
    display.setTextColor(GxEPD_BLACK);
    display.setFont(&FreeMono9pt7b);

    const char* logs[] = {
      "[00:01] System boot - ESP32-S3",
      "[00:02] Panel: GDEY075T7 800x480",
      "[00:03] UC8179 controller ready",
      "[00:04] SPI @ 2MHz (HSPI)",
      "[00:05] Demo sequence started",
    };
    int ly = logY + 50;
    for (int i = 0; i < 5; i++) {
      display.setCursor(sx + 15, ly);
      display.print(logs[i]);
      ly += 28;
    }

    // Progress bar
    int barY = logY + 210;
    display.setFont(&FreeSansBold12pt7b);
    display.setCursor(sx, barY + 15);
    display.print("Progress:");
    int barX = sx + 170, barW = W - 2 * sx - 180, barH = 20;
    display.drawRect(barX, barY, barW, barH, GxEPD_BLACK);
    display.fillRect(barX + 2, barY + 2, barW - 4, barH - 4, GxEPD_BLACK);
    display.setFont(&FreeSans9pt7b);
    display.setCursor(barX + barW + 8, barY + 14);
    display.print("100%");

    drawCenteredText("E-paper: zero power to maintain image", H - 15, &FreeSans9pt7b);
  } while (display.nextPage());
}
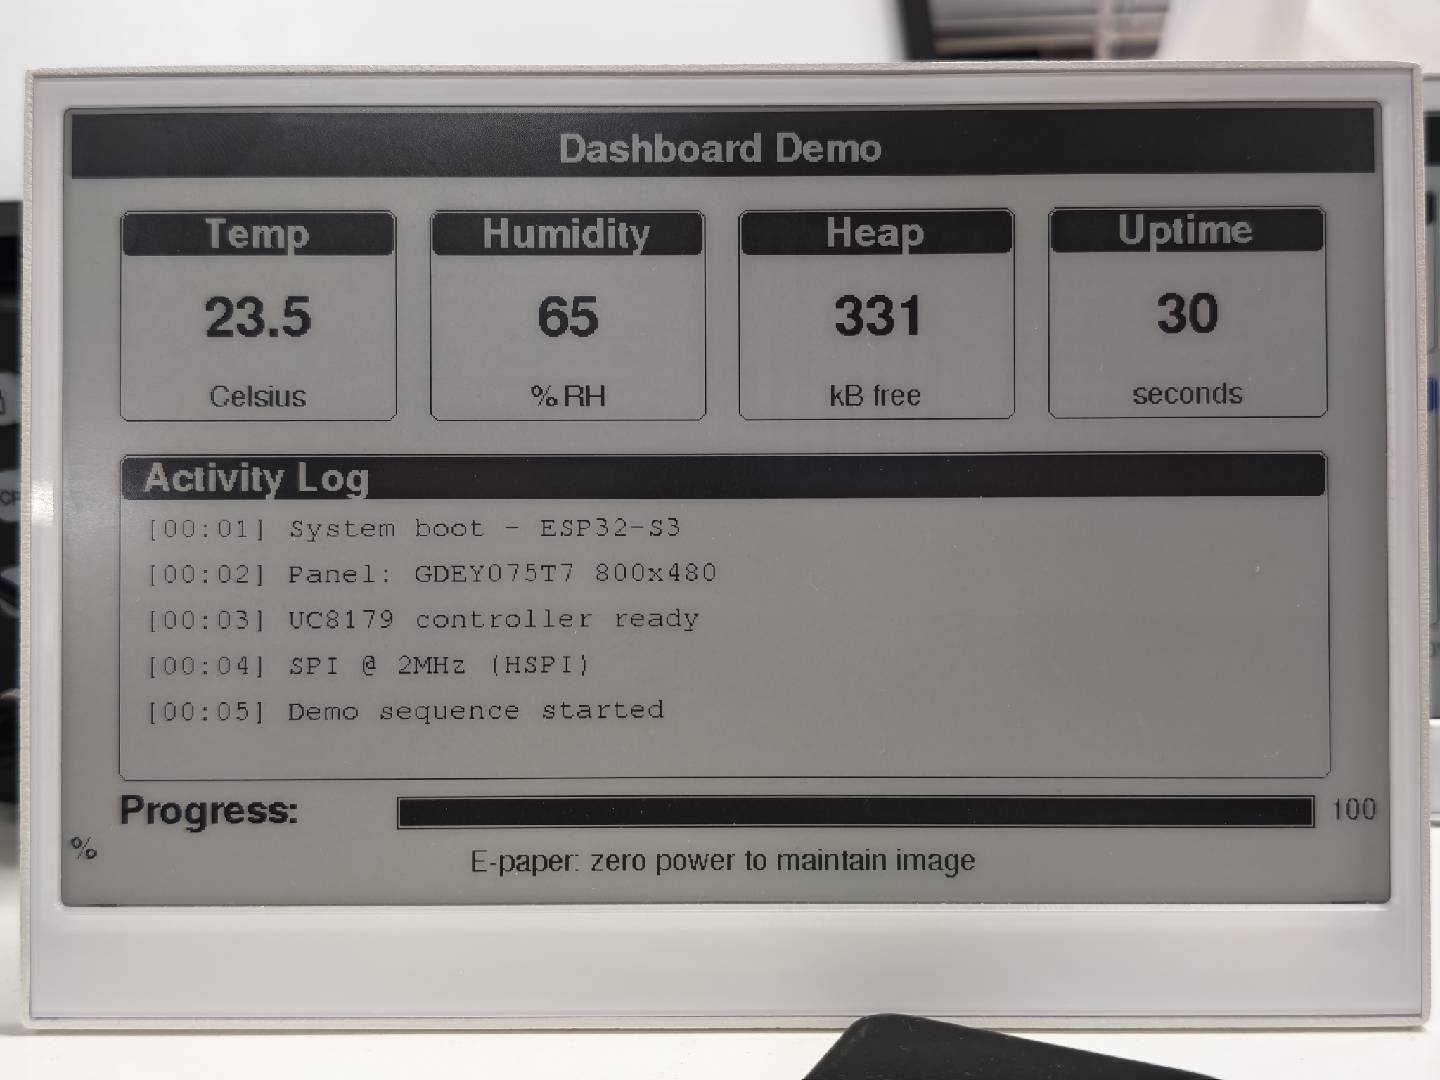
The following figure shows the actual display effect of the E1001 example:
Programming reTerminal E1002 (7.3" 6-Color Screen)
The reTerminal E1002 features a 7.3" 6-color ePaper display (800×480, GDEP073E01 panel, ED2208 controller). It supports Black, White, Red, Green, Blue, and Yellow. The example below demonstrates color rendering across multiple screens.
After installing the Seeed_GxEPD2 library, you can find this example in the Arduino IDE via File > Examples > Seeed_GxEPD2 > GxEPD2_reTerminal_E1002, or locate it manually at Seeed_GxEPD2/examples/GxEPD2_reTerminal_E1002/GxEPD2_reTerminal_E1002.ino.Click here to view the full code
#include <SPI.h>
#include <GxEPD2_7C.h>
#include <Fonts/FreeMonoBold9pt7b.h>
#include <Fonts/FreeMonoBold12pt7b.h>
#include <Fonts/FreeSansBold24pt7b.h>
#include <Fonts/FreeSansBold18pt7b.h>
#include <Fonts/FreeSansBold12pt7b.h>
#include <Fonts/FreeSans9pt7b.h>
#include <Fonts/FreeMono9pt7b.h>

// ===== Pin mapping =====
#define EPD_SCK_PIN   7
#define EPD_MOSI_PIN  9
#define EPD_CS_PIN    10
#define EPD_DC_PIN    11
#define EPD_RES_PIN   12
#define EPD_BUSY_PIN  13

SPIClass hspi(HSPI);

// ===== Display: 7.3" 6-Color 800x480 =====
#define MAX_DISPLAY_BUFFER_SIZE 16000u
#define MAX_HEIGHT(EPD) \
    (EPD::HEIGHT <= (MAX_DISPLAY_BUFFER_SIZE) / (EPD::WIDTH / 2) \
         ? EPD::HEIGHT \
         : (MAX_DISPLAY_BUFFER_SIZE) / (EPD::WIDTH / 2))

GxEPD2_7C<GxEPD2_730c_GDEP073E01, MAX_HEIGHT(GxEPD2_730c_GDEP073E01)>
    display(GxEPD2_730c_GDEP073E01(EPD_CS_PIN, EPD_DC_PIN, EPD_RES_PIN, EPD_BUSY_PIN));

// Convenience color names for the GDEP073E01 6-color palette.
// Note: GxEPD_ORANGE is intentionally NOT used — this panel has no orange,
// and the driver would silently map it to the closest available color
// (usually yellow or red), producing wrong-looking renders.
#define C_BLACK   GxEPD_BLACK
#define C_WHITE   GxEPD_WHITE
#define C_GREEN   GxEPD_GREEN
#define C_BLUE    GxEPD_BLUE
#define C_RED     GxEPD_RED
#define C_YELLOW  GxEPD_YELLOW

void setup()
{
  Serial.begin(115200);
  delay(200);
  Serial.println(F("[E1002] GxEPD2 reTerminal E1002 Demo (7.3\" 6-Color)"));

  pinMode(EPD_RES_PIN, OUTPUT);
  pinMode(EPD_DC_PIN,  OUTPUT);
  pinMode(EPD_CS_PIN,  OUTPUT);

  hspi.begin(EPD_SCK_PIN, -1, EPD_MOSI_PIN, -1);
  display.epd2.selectSPI(hspi, SPISettings(2000000, MSBFIRST, SPI_MODE0));
  display.init(0);

  // E1002 is a 6-color panel. Each full refresh itself takes ~25-30s, and
  // we want each rendered page to stay visible for a good while before the
  // next refresh kicks in. Keep PAGE_HOLD_MS >= 60s.
  const uint32_t PAGE_HOLD_MS = 60000;

  Serial.println(F("[E1002] Screen 1: Splash"));
  showSplashScreen();
  delay(PAGE_HOLD_MS);

  Serial.println(F("[E1002] Screen 2: Color Palette"));
  showColorPalette();
  delay(PAGE_HOLD_MS);

  Serial.println(F("[E1002] Screen 3: Color Typography"));
  showColorTypography();
  delay(PAGE_HOLD_MS);

  Serial.println(F("[E1002] Screen 4: Color Geometry"));
  showColorGeometry();
  delay(PAGE_HOLD_MS);

  Serial.println(F("[E1002] Screen 5: Color Patterns"));
  showColorPatterns();
  delay(PAGE_HOLD_MS);

  Serial.println(F("[E1002] Screen 6: Dashboard"));
  showDashboard();
  delay(PAGE_HOLD_MS);

  Serial.println(F("[E1002] Demo complete. Hibernating."));
  display.hibernate();
}

void loop() {}

// =====================================================================
void drawCenteredText(const char* text, int16_t y, const GFXfont* font)
{
  display.setFont(font);
  int16_t tbx, tby; uint16_t tbw, tbh;
  display.getTextBounds(text, 0, 0, &tbx, &tby, &tbw, &tbh);
  display.setCursor((display.width() - tbw) / 2 - tbx, y);
  display.print(text);
}

// =====================================================================
// Screen 1: Splash
// =====================================================================
void showSplashScreen()
{
  const uint16_t W = display.width();
  const uint16_t H = display.height();
  display.setRotation(0);
  display.setFullWindow();
  display.firstPage();
  do {
    display.fillScreen(C_WHITE);

    // Colorful top stripe — 6 native colors
    int stripeH = 12, stripeY = 10;
    uint16_t colors[] = {C_RED, C_YELLOW, C_GREEN, C_BLUE, C_BLACK, C_RED};
    int stripeW = (W - 20) / 6;
    for (int i = 0; i < 6; i++)
      display.fillRect(10 + i * stripeW, stripeY, stripeW, stripeH, colors[i]);

    display.drawRect(10, 30, W - 20, H - 40, C_BLACK);

    display.setTextColor(C_BLACK);
    drawCenteredText("reTerminal E1002", H / 2 - 60, &FreeSansBold24pt7b);

    display.setTextColor(C_RED);
    drawCenteredText("7.3\" 6-Color e-Paper", H / 2 - 10, &FreeSansBold12pt7b);

    display.drawFastHLine(W / 4, H / 2 + 15, W / 2, C_BLUE);

    display.setTextColor(C_GREEN);
    drawCenteredText("GxEPD2 + GDEP073E01 Demo", H / 2 + 50, &FreeSansBold12pt7b);

    display.setTextColor(C_BLUE);
    drawCenteredText("800 x 480 | 6 Colors", H / 2 + 85, &FreeSans9pt7b);

    // Bottom colorful stripe (reversed order)
    uint16_t bottomColors[] = {C_BLUE, C_GREEN, C_YELLOW, C_RED, C_BLACK, C_BLUE};
    for (int i = 0; i < 6; i++)
      display.fillRect(10 + i * stripeW, H - 22, stripeW, stripeH, bottomColors[i]);

    display.setTextColor(C_BLACK);
    drawCenteredText("Seeed Studio x GxEPD2", H - 35, &FreeSans9pt7b);
  } while (display.nextPage());
}

// =====================================================================
// Screen 2: Color Palette
// =====================================================================
void showColorPalette()
{
  const uint16_t W = display.width();
  const uint16_t H = display.height();
  display.setRotation(0);
  display.setFullWindow();
  display.firstPage();
  do {
    display.fillScreen(C_WHITE);
    display.fillRect(0, 0, W, 40, C_BLACK);
    display.setTextColor(C_WHITE);
    drawCenteredText("6-Color Palette", 30, &FreeSansBold12pt7b);

    const uint16_t swatchColors[] = {C_BLACK, C_WHITE, C_RED, C_GREEN, C_BLUE, C_YELLOW};
    const char* names[] = {"Black", "White", "Red", "Green", "Blue", "Yellow"};
    int sw = 110, sh = 140, gap = 18;
    int sx = (W - 6 * sw - 5 * gap) / 2;
    int sy = 70;

    for (int i = 0; i < 6; i++) {
      int x = sx + i * (sw + gap);
      display.fillRoundRect(x, sy, sw, sh, 6, swatchColors[i]);
      display.drawRoundRect(x, sy, sw, sh, 6, C_BLACK);
      display.setFont(&FreeSansBold12pt7b);
      display.setTextColor(C_BLACK);
      int16_t tbx, tby; uint16_t tbw, tbh;
      display.getTextBounds(names[i], 0, 0, &tbx, &tby, &tbw, &tbh);
      display.setCursor(x + (sw - tbw) / 2 - tbx, sy + sh + 25);
      display.print(names[i]);
    }

    // Mixed-color row: circles on different backgrounds (5 combos)
    int row2Y = sy + sh + 60;
    display.setFont(&FreeSans9pt7b);
    display.setTextColor(C_BLACK);
    display.setCursor(sx, row2Y - 5);
    display.print("Color combinations:");

    int cx = sx + 40;
    uint16_t bgColors[] =  {C_RED,    C_GREEN, C_BLUE,   C_YELLOW, C_BLACK};
    uint16_t fgColors[] =  {C_YELLOW, C_RED,   C_YELLOW, C_BLUE,   C_RED};
    for (int i = 0; i < 5; i++) {
      int x = cx + i * 130;
      display.fillRoundRect(x, row2Y + 10, 80, 80, 8, bgColors[i]);
      display.fillCircle(x + 40, row2Y + 50, 25, fgColors[i]);
    }

    // Bottom row: colored bars as gradient (5 bars, no orange)
    int barY = row2Y + 110;
    display.setTextColor(C_BLACK);
    display.setCursor(sx, barY - 5);
    display.print("Full-width color bars:");
    uint16_t barColors[] = {C_RED, C_YELLOW, C_GREEN, C_BLUE, C_BLACK};
    int barH = 18;
    for (int i = 0; i < 5; i++)
      display.fillRect(sx, barY + 10 + i * (barH + 4), W - 2 * sx, barH, barColors[i]);

    drawCenteredText("All 6 native colors on the GDEP073E01 panel", H - 15, &FreeSans9pt7b);
  } while (display.nextPage());
}

// =====================================================================
// Screen 3: Color Typography
// =====================================================================
void showColorTypography()
{
  const uint16_t W = display.width();
  const uint16_t H = display.height();
  display.setRotation(0);
  display.setFullWindow();
  display.firstPage();
  do {
    display.fillScreen(C_WHITE);
    display.fillRect(0, 0, W, 40, C_BLUE);
    display.setTextColor(C_WHITE);
    drawCenteredText("Color Typography", 30, &FreeSansBold12pt7b);

    int y = 82, x = 40;

    display.setTextColor(C_BLACK);
    display.setFont(&FreeSansBold24pt7b);
    display.setCursor(x, y); display.print("Black");
    display.setTextColor(C_RED);
    display.setCursor(x + 200, y); display.print("Red");
    display.setTextColor(C_GREEN);
    display.setCursor(x + 340, y); display.print("Green");
    display.setTextColor(C_BLUE);
    display.setCursor(x + 530, y); display.print("Blue");
    y += 58;

    display.setTextColor(C_YELLOW);
    display.setFont(&FreeSansBold18pt7b);
    display.setCursor(x, y); display.print("Yellow text - warm and bright");
    y += 48;

    display.setTextColor(C_RED);
    display.setFont(&FreeSansBold18pt7b);
    display.setCursor(x, y); display.print("Red - emphasis and warnings");
    y += 52;

    display.drawFastHLine(x, y, W - 80, C_RED);
    y += 22;

    // Inverted: white text on color rectangles (4 combos)
    display.setFont(&FreeSansBold12pt7b);
    int bx = x, bw = 220, bh = 40, bgap = 16;
    uint16_t tColors[] = {C_RED, C_GREEN, C_BLUE, C_BLACK};
    const char* labels[] = {"White on Red", "White on Green", "White on Blue", "White on Black"};
    for (int i = 0; i < 4; i++) {
      int by2 = y + i * (bh + bgap);
      display.fillRoundRect(bx, by2, bw, bh, 4, tColors[i]);
      display.setTextColor(C_WHITE);
      display.setCursor(bx + 10, by2 + 28);
      display.print(labels[i]);
    }

    // Right column: Black bg with all native colors
    int rbx = bx + bw + 50;
    display.fillRoundRect(rbx, y, 310, 218, 6, C_BLACK);
    display.setFont(&FreeSansBold18pt7b);
    int ry = y + 38;
    uint16_t rColors[] = {C_RED, C_GREEN, C_BLUE, C_YELLOW, C_WHITE};
    const char* rLabels[] = {"Red",  "Green", "Blue", "Yellow", "White"};
    for (int i = 0; i < 5; i++) {
      display.setTextColor(rColors[i]);
      display.setCursor(rbx + 20, ry);
      display.print(rLabels[i]);
      ry += 38;
    }

    display.setTextColor(C_BLACK);
    drawCenteredText("6-color text rendering", H - 15, &FreeSans9pt7b);
  } while (display.nextPage());
}

// =====================================================================
// Screen 4: Color Geometry
// =====================================================================
void showColorGeometry()
{
  const uint16_t W = display.width();
  const uint16_t H = display.height();
  display.setRotation(0);
  display.setFullWindow();
  display.firstPage();
  do {
    display.fillScreen(C_WHITE);
    display.fillRect(0, 0, W, 40, C_GREEN);
    display.setTextColor(C_WHITE);
    drawCenteredText("Color Geometry", 30, &FreeSansBold12pt7b);
    display.setTextColor(C_BLACK);

    // Colored rectangles cascade (5 colors)
    uint16_t rcColors[] = {C_RED, C_YELLOW, C_GREEN, C_BLUE, C_BLACK};
    for (int i = 0; i < 5; i++)
      display.fillRect(40 + i * 55, 60 + i * 14, 110, 65, rcColors[i]);

    // Colored circles (5 colors)
    uint16_t ccColors[] = {C_BLUE, C_RED, C_GREEN, C_YELLOW, C_BLACK};
    for (int i = 0; i < 5; i++)
      display.fillCircle(500 + i * 60, 100, 25, ccColors[i]);

    // Colored triangles (5 colors)
    int ty = 210;
    uint16_t triColors[] = {C_RED, C_GREEN, C_BLUE, C_YELLOW, C_BLACK};
    for (int i = 0; i < 5; i++) {
      int tx2 = 60 + i * 130;
      display.fillTriangle(tx2, ty + 60, tx2 + 30, ty, tx2 + 60, ty + 60, triColors[i]);
    }

    // Olympic rings
    int oly = 340, ox = 200;
    uint16_t olyColors[] = {C_BLUE, C_BLACK, C_RED, C_YELLOW, C_GREEN};
    int olyX[] = {0, 70, 140, 35, 105};
    int olyY[] = {0, 0, 0, 35, 35};
    for (int i = 0; i < 5; i++)
      for (int r = 0; r < 4; r++)
        display.drawCircle(ox + olyX[i], oly + olyY[i], 30 - r, olyColors[i]);

    // 6-color swatch grid (2 rows x 3 cols)
    int wx = 560, wy = 310;
    display.fillRect(wx,        wy,      45, 45, C_RED);
    display.fillRect(wx + 45,   wy,      45, 45, C_YELLOW);
    display.fillRect(wx + 90,   wy,      45, 45, C_GREEN);
    display.fillRect(wx,        wy + 45, 45, 45, C_BLUE);
    display.fillRect(wx + 45,   wy + 45, 45, 45, C_BLACK);
    display.fillRect(wx + 90,   wy + 45, 45, 45, C_WHITE);
    display.drawRect(wx + 90,   wy + 45, 45, 45, C_BLACK);

    // Concentric circles (5 colors)
    uint16_t concColors[] = {C_RED, C_YELLOW, C_GREEN, C_BLUE, C_BLACK};
    for (int r = 0; r < 5; r++) {
      for (int t = 0; t < 3; t++)
        display.drawCircle(150, 410, 55 - r * 11 + t, concColors[r]);
    }

    display.setTextColor(C_BLACK);
    drawCenteredText("Colorful GFX primitives", H - 15, &FreeSans9pt7b);
  } while (display.nextPage());
}

// =====================================================================
// Screen 5: Color Patterns
// =====================================================================
void showColorPatterns()
{
  const uint16_t W = display.width();
  const uint16_t H = display.height();
  display.setRotation(0);
  display.setFullWindow();
  display.firstPage();
  do {
    display.fillScreen(C_WHITE);
    display.fillRect(0, 0, W, 40, C_RED);
    display.setTextColor(C_WHITE);
    drawCenteredText("Color Patterns", 30, &FreeSansBold12pt7b);
    display.setTextColor(C_BLACK);
    display.setFont(&FreeSans9pt7b);

    int bx = 30, by = 55, bw = 150, bh = 150, gap = 25;
    uint16_t pColors[] = {C_RED, C_GREEN, C_BLUE, C_YELLOW, C_BLACK};
    const int nColors = 5;

    // Colored checkerboard
    display.setCursor(bx + 10, by + 15);
    display.print("Color Check");
    by += 20;
    for (int py = 0; py < bh / 15; py++)
      for (int px = 0; px < bw / 15; px++)
        display.fillRect(bx + px * 15, by + py * 15, 15, 15, pColors[(px + py) % nColors]);

    // Horizontal color stripes
    int bx2 = bx + bw + gap; int by2 = by - 20;
    display.setCursor(bx2 + 10, by2 + 15); display.print("H-Stripes");
    by2 += 20;
    for (int py = 0; py < bh; py += 15) {
      int ci = (py / 15) % nColors;
      display.fillRect(bx2, by2 + py, bw, 15, pColors[ci]);
    }

    // Vertical color stripes
    int bx3 = bx2 + bw + gap; int by3 = by2 - 20;
    display.setCursor(bx3 + 10, by3 + 15); display.print("V-Stripes");
    by3 += 20;
    for (int px = 0; px < bw; px += 15) {
      int ci = (px / 15) % nColors;
      display.fillRect(bx3 + px, by3, 15, bh, pColors[ci]);
    }

    // Colored dot grid
    int bx4 = bx3 + bw + gap; int by4 = by3 - 20;
    display.setCursor(bx4 + 10, by4 + 15); display.print("Color Dots");
    by4 += 20;
    for (int py = 0; py < bh; py += 18)
      for (int px = 0; px < bw; px += 18) {
        int ci = (px / 18 + py / 18) % nColors;
        display.fillCircle(bx4 + px + 9, by4 + py + 9, 6, pColors[ci]);
      }

    // Full-width color bar sequence
    int barY = by4 + bh + 20;
    display.setCursor(bx, barY - 5);
    display.print("Color bar sequence:");
    for (int i = 0; i < nColors; i++)
      display.fillRect(bx, barY + 10 + i * 24, W - 2 * bx, 20, pColors[i]);

    drawCenteredText("Patterns with the 6 native colors", H - 15, &FreeSans9pt7b);
  } while (display.nextPage());
}

// =====================================================================
// Screen 6: Dashboard
// =====================================================================
void drawColorCard(int x, int y, int w, int h, const char* title,
                   const char* value, const char* unit, uint16_t accent)
{
  display.drawRoundRect(x, y, w, h, 6, C_BLACK);
  display.fillRoundRect(x + 2, y + 2, w - 4, 26, 4, accent);
  display.setTextColor(C_WHITE);
  display.setFont(&FreeSansBold12pt7b);
  int16_t tbx, tby; uint16_t tbw, tbh;
  display.getTextBounds(title, 0, 0, &tbx, &tby, &tbw, &tbh);
  display.setCursor(x + (w - tbw) / 2 - tbx, y + 22);
  display.print(title);

  display.setTextColor(accent);
  display.setFont(&FreeSansBold18pt7b);
  display.getTextBounds(value, 0, 0, &tbx, &tby, &tbw, &tbh);
  display.setCursor(x + (w - tbw) / 2 - tbx, y + h / 2 + 12);
  display.print(value);

  display.setTextColor(C_BLACK);
  display.setFont(&FreeSans9pt7b);
  display.getTextBounds(unit, 0, 0, &tbx, &tby, &tbw, &tbh);
  display.setCursor(x + (w - tbw) / 2 - tbx, y + h - 10);
  display.print(unit);
}

void showDashboard()
{
  const uint16_t W = display.width();
  const uint16_t H = display.height();
  display.setRotation(0);
  display.setFullWindow();
  display.firstPage();
  do {
    display.fillScreen(C_WHITE);
    display.fillRect(0, 0, W, 40, C_BLACK);
    display.setTextColor(C_WHITE);
    drawCenteredText("Dashboard", 30, &FreeSansBold12pt7b);
    display.setTextColor(C_BLACK);

    int cw = 170, ch = 130, gap = 20;
    int sx = (W - 4 * cw - 3 * gap) / 2;
    int row1Y = 60;

    char uptBuf[16]; snprintf(uptBuf, sizeof(uptBuf), "%lu", millis() / 1000);
    char heapBuf[16]; snprintf(heapBuf, sizeof(heapBuf), "%lu", (unsigned long)(ESP.getFreeHeap() / 1024));

    drawColorCard(sx,                    row1Y, cw, ch, "Temp",     "23.5",  "Celsius",  C_RED);
    drawColorCard(sx + cw + gap,         row1Y, cw, ch, "Humidity", "65",    "% RH",     C_BLUE);
    drawColorCard(sx + 2 * (cw + gap),   row1Y, cw, ch, "Heap",    heapBuf, "kB free",  C_GREEN);
    drawColorCard(sx + 3 * (cw + gap),   row1Y, cw, ch, "Uptime",  uptBuf,  "seconds",  C_BLACK);

    // Log area with colored markers
    int logY = row1Y + ch + 20;
    display.drawRoundRect(sx, logY, W - 2 * sx, 200, 6, C_BLACK);
    display.fillRoundRect(sx + 2, logY + 2, W - 2 * sx - 4, 26, 4, C_BLUE);
    display.setTextColor(C_WHITE);
    display.setFont(&FreeSansBold12pt7b);
    display.setCursor(sx + 15, logY + 22);
    display.print("Activity Log");
    display.setFont(&FreeMono9pt7b);

    const char* logs[] = {
      " System boot - ESP32-S3",
      " Panel: GDEP073E01 6-Color",
      " ED2208 controller ready",
      " SPI @ 2MHz (HSPI)",
      " Demo: 6 screens completed",
    };
    uint16_t logColors[] = {C_GREEN, C_BLUE, C_YELLOW, C_RED, C_GREEN};
    int ly = logY + 50;
    for (int i = 0; i < 5; i++) {
      display.fillCircle(sx + 20, ly - 4, 5, logColors[i]);
      display.setTextColor(C_BLACK);
      display.setCursor(sx + 30, ly);
      display.print(logs[i]);
      ly += 28;
    }

    // Multi-color progress bar
    int barY = logY + 210;
    display.setFont(&FreeSansBold12pt7b);
    display.setTextColor(C_BLACK);
    display.setCursor(sx, barY + 15);
    display.print("Progress:");
    int barX = sx + 170, barW = W - 2 * sx - 210, barH = 20;
    display.drawRect(barX, barY, barW, barH, C_BLACK);
    uint16_t barColors[] = {C_RED, C_YELLOW, C_GREEN, C_BLUE, C_BLACK};
    int segW = barW / 5;
    for (int i = 0; i < 5; i++)
      display.fillRect(barX + i * segW, barY + 1, segW, barH - 2, barColors[i]);

    display.setTextColor(C_GREEN);
    display.setFont(&FreeSans9pt7b);
    display.setCursor(barX + barW + 8, barY + 14);
    display.print("100%");

    display.setTextColor(C_BLACK);
    drawCenteredText("6-color ePaper: vivid and power-efficient", H - 15, &FreeSans9pt7b);
  } while (display.nextPage());
}
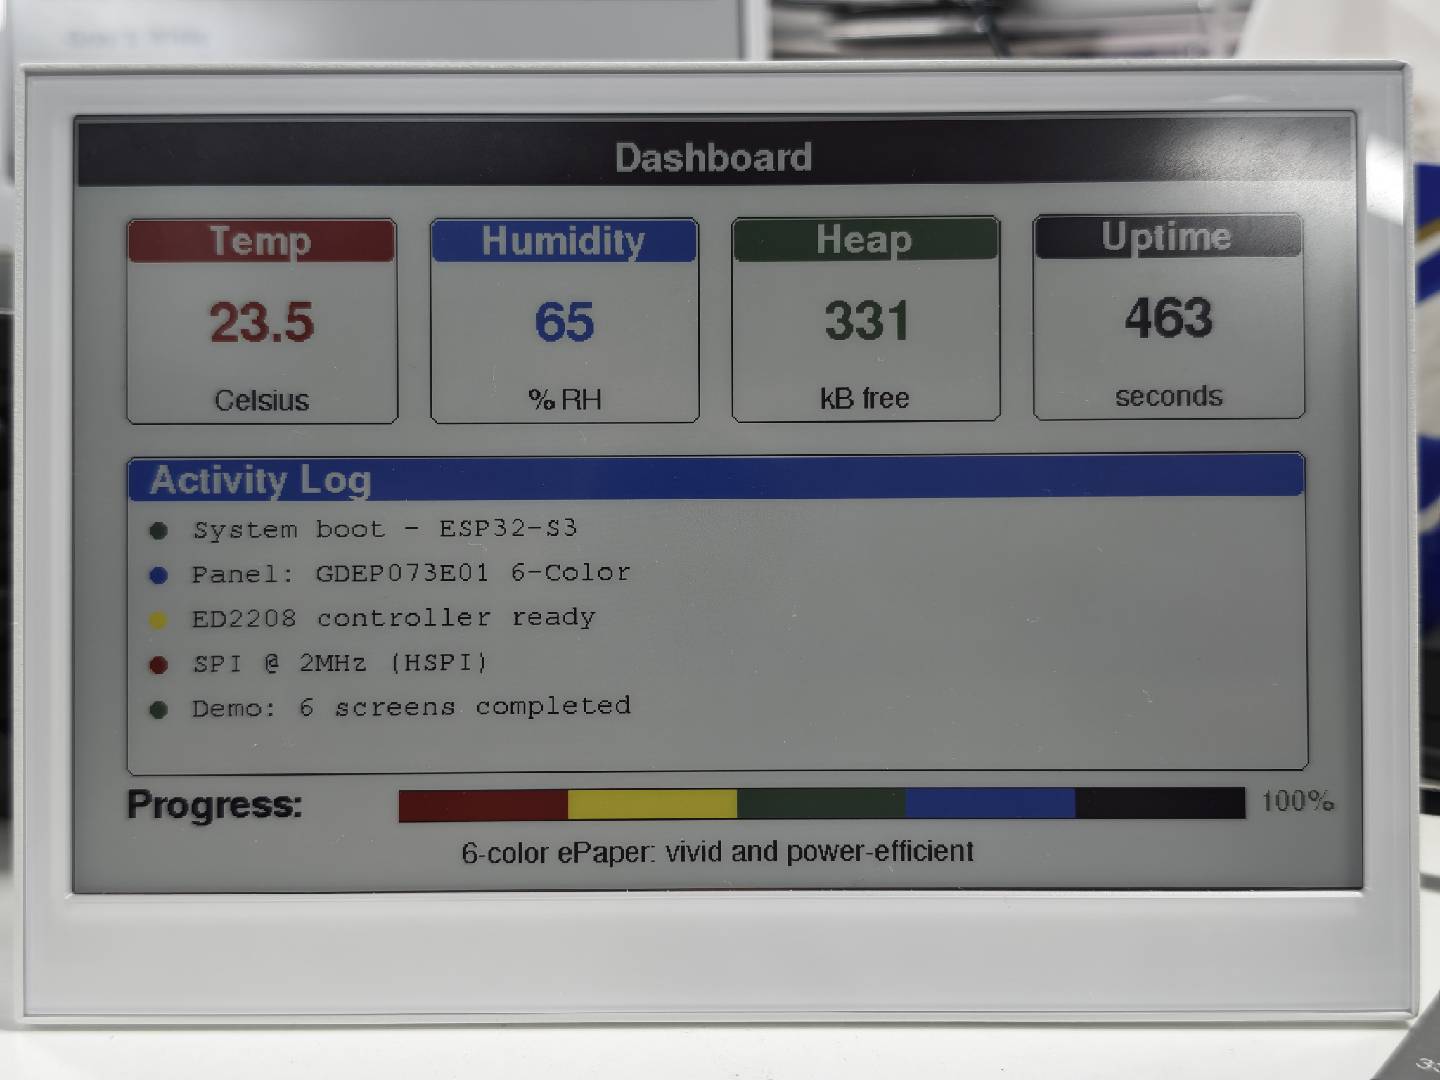
The following figure shows the actual display effect of the E1002 example:
Programming reTerminal E1003 (10.3" Monochrome Screen)
The reTerminal E1003 features a 10.3" monochrome ePaper display (1872×1404, ED103TC2 panel, IT8951 controller). It supports 16-level grayscale and requires OPI PSRAM. This example depends on a custom driver file GxEPD2_ED103TC2_1872x1404.h included in the example folder.
After installing the Seeed_GxEPD2 library, you can find this example in the Arduino IDE via File > Examples > Seeed_GxEPD2 > GxEPD2_reTerminal_E1003, or locate it manually at Seeed_GxEPD2/examples/GxEPD2_reTerminal_E1003/.
The E1003 requires OPI PSRAM to be enabled in the Arduino IDE: Tools > PSRAM > OPI PSRAM. The ~321 kB framebuffer lives in PSRAM.
Click here to view the full code
#include <SPI.h>
#include <GxEPD2_BW.h>
#include <Fonts/FreeMonoBold9pt7b.h>
#include <Fonts/FreeMonoBold12pt7b.h>
#include <Fonts/FreeSansBold24pt7b.h>
#include <Fonts/FreeSansBold18pt7b.h>
#include <Fonts/FreeSansBold12pt7b.h>
#include <Fonts/FreeSans9pt7b.h>
#include <Fonts/FreeMono9pt7b.h>

#include "GxEPD2_ED103TC2_1872x1404.h"

#define DBG Serial0

// ===== reTerminal E1003 pin mapping =====
#define EPD_SCK_PIN       7
#define EPD_MISO_PIN      8
#define EPD_MOSI_PIN      9
#define EPD_CS_PIN        10
#define EPD_RES_PIN       12
#define EPD_BUSY_PIN      13
#define EPD_TFT_ENABLE    11
#define EPD_ITE_ENABLE    21

SPIClass hspi(HSPI);

// ===== Display object =====
#define MAX_DISPLAY_BUFFER_SIZE 65536u
#define MAX_HEIGHT(EPD) \
    (EPD::HEIGHT <= MAX_DISPLAY_BUFFER_SIZE / (EPD::WIDTH / 8) \
         ? EPD::HEIGHT \
         : MAX_DISPLAY_BUFFER_SIZE / (EPD::WIDTH / 8))

GxEPD2_BW<GxEPD2_ED103TC2_1872x1404, MAX_HEIGHT(GxEPD2_ED103TC2_1872x1404)>
    display(GxEPD2_ED103TC2_1872x1404(EPD_CS_PIN, -1, EPD_RES_PIN, EPD_BUSY_PIN));

// ===== Layout constants =====
static const int HEADER_H = 96;
static const int FOOTER_H = 72;
static const int PAGE_MARGIN = 48;
static const int PANEL_GAP = 24;

// ===== Forward declarations =====
void showSplashScreen();
void showSystemInfo();
void showGeometryDemo();
void showPatternDemo();
void showTypographyDemo();
void showDashboardDemo();

void drawCenteredText(const char* text, int16_t y, const GFXfont* font);
void drawCenteredTextInBox(const char* text, int16_t x, int16_t y, int16_t w, int16_t h, const GFXfont* font);
void drawPageHeader(const char* title, const char* subtitle);
void drawPageFooter(const char* text);
void drawPanelFrame(int x, int y, int w, int h);
void drawCardShell(int x, int y, int w, int h, const char* title);
void drawMetricCard(int x, int y, int w, int h, const char* title, const char* value, const char* unit);
void drawInfoCard(int x, int y, int w, int h, const char* label, const char* value, const GFXfont* valueFont);
void drawTypographyCard(int x, int y, int w, int h, const char* title, const char* sample, const GFXfont* font);

// ===== Setup =====
void setup()
{
  DBG.begin(115200);
  delay(100);
  DBG.println();
  DBG.println(F("=================================================="));
  DBG.println(F("[E1003] GxEPD2 reTerminal E1003 Demo"));
  DBG.print  (F("[E1003] PSRAM = ")); DBG.print(ESP.getPsramSize() / 1024);
  DBG.println(F(" kB"));
  DBG.println(F("=================================================="));

  pinMode(EPD_TFT_ENABLE, OUTPUT); digitalWrite(EPD_TFT_ENABLE, HIGH);
  pinMode(EPD_ITE_ENABLE, OUTPUT); digitalWrite(EPD_ITE_ENABLE, HIGH);
  delay(50);

  pinMode(EPD_RES_PIN, OUTPUT);
  pinMode(EPD_CS_PIN,  OUTPUT); digitalWrite(EPD_CS_PIN, HIGH);

  hspi.begin(EPD_SCK_PIN, EPD_MISO_PIN, EPD_MOSI_PIN, -1);
  display.epd2.selectSPI(hspi, SPISettings(10000000, MSBFIRST, SPI_MODE0));

  display.init(0, true, 10, false);
  DBG.println(F("[E1003] display initialized"));

  // --- Run demo screens ---
  DBG.println(F("[E1003] Screen 1: Splash"));
  showSplashScreen();
  delay(5000);

  DBG.println(F("[E1003] Screen 2: System Info"));
  showSystemInfo();
  delay(5000);

  DBG.println(F("[E1003] Screen 3: Typography"));
  showTypographyDemo();
  delay(5000);

  DBG.println(F("[E1003] Screen 4: Geometry"));
  showGeometryDemo();
  delay(5000);

  DBG.println(F("[E1003] Screen 5: Patterns"));
  showPatternDemo();
  delay(5000);

  DBG.println(F("[E1003] Screen 6: Dashboard"));
  showDashboardDemo();

  DBG.println(F("[E1003] Demo complete. Hibernating."));
  delay(2000);
  display.hibernate();
}

void loop() {}

// =====================================================================
// Helpers
// =====================================================================
void drawCenteredText(const char* text, int16_t y, const GFXfont* font)
{
  display.setFont(font);
  int16_t tbx, tby;
  uint16_t tbw, tbh;
  display.getTextBounds(text, 0, 0, &tbx, &tby, &tbw, &tbh);
  display.setCursor((display.width() - tbw) / 2 - tbx, y);
  display.print(text);
}

void drawCenteredTextInBox(const char* text, int16_t x, int16_t y, int16_t w, int16_t h, const GFXfont* font)
{
  if (!text) return;
  display.setFont(font);
  int16_t tbx, tby;
  uint16_t tbw, tbh;
  display.getTextBounds(text, 0, 0, &tbx, &tby, &tbw, &tbh);
  const int16_t cx = x + (w - tbw) / 2 - tbx;
  const int16_t cy = y + (h - tbh) / 2 - tby;
  display.setCursor(cx, cy);
  display.print(text);
}

void drawPageHeader(const char* title, const char* subtitle)
{
  const uint16_t W = display.width();
  display.fillRect(0, 0, W, HEADER_H, GxEPD_BLACK);

  display.setTextColor(GxEPD_WHITE);
  drawCenteredText(title, 40, &FreeSansBold18pt7b);

  if (subtitle && subtitle[0] != '\0') {
    drawCenteredText(subtitle, 78, &FreeSans9pt7b);
  }

  display.setTextColor(GxEPD_BLACK);
}

void drawPageFooter(const char* text)
{
  const uint16_t W = display.width();
  const uint16_t H = display.height();

  display.drawFastHLine(64, H - 60, W - 128, GxEPD_BLACK);
  display.setFont(&FreeSans9pt7b);
  drawCenteredText(text, H - 34, &FreeSans9pt7b);
}

void drawPanelFrame(int x, int y, int w, int h)
{
  display.drawRoundRect(x, y, w, h, 16, GxEPD_BLACK);
  display.drawRoundRect(x + 2, y + 2, w - 4, h - 4, 14, GxEPD_BLACK);
}

void drawCardShell(int x, int y, int w, int h, const char* title)
{
  drawPanelFrame(x, y, w, h);
  display.fillRoundRect(x + 4, y + 4, w - 8, 38, 10, GxEPD_BLACK);
  display.setTextColor(GxEPD_WHITE);
  drawCenteredTextInBox(title, x + 10, y + 8, w - 20, 24, &FreeSansBold12pt7b);
  display.setTextColor(GxEPD_BLACK);
}

void drawMetricCard(int x, int y, int w, int h, const char* title, const char* value, const char* unit)
{
  drawCardShell(x, y, w, h, title);
  drawCenteredTextInBox(value, x + 18, y + 58, w - 36, h - 108, &FreeSansBold24pt7b);

  if (unit && unit[0] != '\0') {
    display.setFont(&FreeSans9pt7b);
    drawCenteredTextInBox(unit, x + 20, y + h - 36, w - 40, 20, &FreeSans9pt7b);
  }
}

void drawInfoCard(int x, int y, int w, int h, const char* label, const char* value, const GFXfont* valueFont)
{
  drawCardShell(x, y, w, h, label);
  display.setTextColor(GxEPD_BLACK);
  drawCenteredTextInBox(value, x + 20, y + 54, w - 40, h - 78, valueFont);
}

void drawTypographyCard(int x, int y, int w, int h, const char* title, const char* sample, const GFXfont* font)
{
  drawCardShell(x, y, w, h, title);
  drawCenteredTextInBox(sample, x + 20, y + 54, w - 40, h - 78, font);
}

// =====================================================================
// Screen 1: Splash screen
// =====================================================================
void showSplashScreen()
{
  const uint16_t W = display.width();
  const uint16_t H = display.height();

  display.setRotation(0);
  display.setFullWindow();
  display.firstPage();
  do {
    display.fillScreen(GxEPD_WHITE);

    // Outer frame
    display.drawRect(24, 24, W - 48, H - 48, GxEPD_BLACK);
    display.drawRect(34, 34, W - 68, H - 68, GxEPD_BLACK);

    // Hero panel in the center
    const int heroX = 140;
    const int heroY = 150;
    const int heroW = W - 280;
    const int heroH = H - 420;

    drawPanelFrame(heroX, heroY, heroW, heroH);

    display.fillRoundRect(heroX + 6, heroY + 6, heroW - 12, 54, 12, GxEPD_BLACK);
    display.setTextColor(GxEPD_WHITE);
    drawCenteredTextInBox("reTerminal E1003", heroX + 20, heroY + 14, heroW - 40, 30, &FreeSansBold18pt7b);

    display.setTextColor(GxEPD_BLACK);
    drawCenteredTextInBox("10.3\" e-Paper Display", heroX + 40, heroY + 96, heroW - 80, 90, &FreeSansBold24pt7b);
    drawCenteredTextInBox("GxEPD2 + IT8951 Driver Demo", heroX + 40, heroY + 210, heroW - 80, 64, &FreeSansBold18pt7b);

    display.drawFastHLine(heroX + 120, heroY + 292, heroW - 240, GxEPD_BLACK);
    drawCenteredTextInBox("1872 x 1404 pixels | ED103TC2 panel", heroX + 40, heroY + 316, heroW - 80, 44, &FreeSansBold12pt7b);
    drawCenteredTextInBox("Powered by ESP32-S3 + PSRAM", heroX + 40, heroY + 366, heroW - 80, 34, &FreeSans9pt7b);

    // Bottom three badges
    const int badgeY = H - 180;
    const int badgeW = (W - 2 * PAGE_MARGIN - 2 * PANEL_GAP) / 3;
    const int badgeH = 92;
    const int badgeX1 = PAGE_MARGIN;
    const int badgeX2 = badgeX1 + badgeW + PANEL_GAP;
    const int badgeX3 = badgeX2 + badgeW + PANEL_GAP;

    drawPanelFrame(badgeX1, badgeY, badgeW, badgeH);
    drawPanelFrame(badgeX2, badgeY, badgeW, badgeH);
    drawPanelFrame(badgeX3, badgeY, badgeW, badgeH);

    drawCenteredTextInBox("Large Canvas", badgeX1 + 12, badgeY + 12, badgeW - 24, badgeH - 24, &FreeSansBold12pt7b);
    drawCenteredTextInBox("High Contrast", badgeX2 + 12, badgeY + 12, badgeW - 24, badgeH - 24, &FreeSansBold12pt7b);
    drawCenteredTextInBox("Low Power Image Hold", badgeX3 + 12, badgeY + 12, badgeW - 24, badgeH - 24, &FreeSansBold12pt7b);

    // Footer note
    drawCenteredText("Seeed Studio x GxEPD2", H - 70, &FreeSans9pt7b);

  } while (display.nextPage());
}

// =====================================================================
// Screen 2: System information
// =====================================================================
void showSystemInfo()
{
  const uint16_t W = display.width();
  const uint16_t H = display.height();

  display.setRotation(0);
  display.setFullWindow();
  display.firstPage();
  do {
    display.fillScreen(GxEPD_WHITE);
    drawPageHeader("System Information", "Hardware, memory and display details laid out as cards");

    const int contentX = PAGE_MARGIN;
    const int contentY = HEADER_H + 18;
    const int contentW = W - 2 * PAGE_MARGIN;
    const int contentH = H - HEADER_H - FOOTER_H - 36;
    const int gapX = PANEL_GAP;
    const int gapY = 16;
    const int cardW = (contentW - gapX) / 2;
    const int cardH = (contentH - 4 * gapY) / 5;

    char psramBuf[32], heapBuf[32], chipBuf[64], dispBuf[32], uptimeBuf[32];
    snprintf(psramBuf, sizeof(psramBuf), "%lu kB", (unsigned long)(ESP.getPsramSize() / 1024));
    snprintf(heapBuf,  sizeof(heapBuf),  "%lu kB free", (unsigned long)(ESP.getFreeHeap() / 1024));
    snprintf(chipBuf,  sizeof(chipBuf),  "ESP32-S3 @ %lu MHz", (unsigned long)(ESP.getCpuFreqMHz()));
    snprintf(dispBuf,  sizeof(dispBuf),  "%d x %d", display.width(), display.height());
    unsigned long sec = millis() / 1000;
    snprintf(uptimeBuf, sizeof(uptimeBuf), "%lu.%01lu s", sec, (millis() % 1000) / 100);

    struct InfoCardSpec {
      const char* label;
      const char* value;
      const GFXfont* font;
    };

    InfoCardSpec cards[] = {
      {"MCU",        chipBuf,     &FreeSansBold18pt7b},
      {"PSRAM",      psramBuf,    &FreeSansBold18pt7b},
      {"Heap",       heapBuf,     &FreeSansBold18pt7b},
      {"Display",    dispBuf,     &FreeSansBold18pt7b},
      {"Panel",      "E Ink ED103TC2", &FreeSansBold12pt7b},
      {"Controller", "IT8951",    &FreeSansBold18pt7b},
      {"Interface",  "SPI (HSPI/SPI3) @ 10MHz", &FreeSansBold12pt7b},
      {"Color",      "Monochrome (BW)", &FreeSansBold18pt7b},
      {"Library",    "GxEPD2",    &FreeSansBold18pt7b},
      {"Uptime",     uptimeBuf,   &FreeSansBold18pt7b},
    };

    for (int i = 0; i < 10; i++) {
      const int col = i % 2;
      const int row = i / 2;
      const int x = contentX + col * (cardW + gapX);
      const int y = contentY + row * (cardH + gapY);
      drawInfoCard(x, y, cardW, cardH, cards[i].label, cards[i].value, cards[i].font);
    }

    drawPageFooter("reTerminal E1003 | GxEPD2 Demo");

  } while (display.nextPage());
}

// =====================================================================
// Screen 3: Typography showcase
// =====================================================================
void showTypographyDemo()
{
  const uint16_t W = display.width();
  const uint16_t H = display.height();

  display.setRotation(0);
  display.setFullWindow();
  display.firstPage();
  do {
    display.fillScreen(GxEPD_WHITE);
    drawPageHeader("Typography Demo", "Font families and sizes shown in a balanced card grid");

    const int contentX = PAGE_MARGIN;
    const int contentY = HEADER_H + 18;
    const int contentW = W - 2 * PAGE_MARGIN;
    const int contentH = H - HEADER_H - FOOTER_H - 36;
    const int gapX = PANEL_GAP;
    const int gapY = PANEL_GAP;
    const int cardW = (contentW - gapX) / 2;
    const int cardH = (contentH - 2 * gapY) / 3;

    drawTypographyCard(contentX,                    contentY,                    cardW, cardH, "FreeSans Bold 24pt", "Display Title", &FreeSansBold24pt7b);
    drawTypographyCard(contentX + cardW + gapX,     contentY,                    cardW, cardH, "FreeSans Bold 18pt", "Section Heading", &FreeSansBold18pt7b);
    drawTypographyCard(contentX,                    contentY + cardH + gapY,     cardW, cardH, "FreeSans Bold 12pt", "Clean and readable", &FreeSansBold12pt7b);
    drawTypographyCard(contentX + cardW + gapX,     contentY + cardH + gapY,     cardW, cardH, "FreeSans 9pt", "Body text for dense data", &FreeSans9pt7b);
    drawTypographyCard(contentX,                    contentY + 2 * (cardH + gapY), cardW, cardH, "FreeMono Bold 12pt", "0123456789 ABCDEF", &FreeMonoBold12pt7b);
    drawTypographyCard(contentX + cardW + gapX,     contentY + 2 * (cardH + gapY), cardW, cardH, "FreeMono 9pt", "Code / tables / logs", &FreeMono9pt7b);

    drawPageFooter("Typography is easier to scan when the page is divided into readable blocks");

  } while (display.nextPage());
}

// =====================================================================
// Screen 4: Geometric shapes
// =====================================================================
void showGeometryDemo()
{
  const uint16_t W = display.width();
  const uint16_t H = display.height();

  display.setRotation(0);
  display.setFullWindow();
  display.firstPage();
  do {
    display.fillScreen(GxEPD_WHITE);
    drawPageHeader("Geometry & Shapes Demo", "Each panel gets enough space to breathe");

    const int contentX = PAGE_MARGIN;
    const int contentY = HEADER_H + 18;
    const int contentW = W - 2 * PAGE_MARGIN;
    const int contentH = H - HEADER_H - FOOTER_H - 36;
    const int gapX = PANEL_GAP;
    const int gapY = PANEL_GAP;
    const int panelW = (contentW - gapX) / 2;
    const int panelH = (contentH - gapY) / 2;

    // Top-left: rectangles
    const int p1x = contentX;
    const int p1y = contentY;
    drawCardShell(p1x, p1y, panelW, panelH, "Rectangles");
    for (int i = 0; i < 4; i++) {
      display.drawRect(p1x + 80 + i * 130, p1y + 100 + i * 10, 100, 70, GxEPD_BLACK);
    }
    display.fillRect(p1x + 650, p1y + 100, 120, 90, GxEPD_BLACK);
    display.drawRect(p1x + 620, p1y + 70, 160, 150, GxEPD_BLACK);

    // Top-right: circles
    const int p2x = contentX + panelW + gapX;
    const int p2y = contentY;
    drawCardShell(p2x, p2y, panelW, panelH, "Circles");
    for (int i = 0; i < 5; i++) {
      display.drawCircle(p2x + 130 + i * 120, p2y + 150, 28 + i * 7, GxEPD_BLACK);
    }
    for (int i = 0; i < 4; i++) {
      display.fillCircle(p2x + 170 + i * 150, p2y + 340, 18 + i * 6, GxEPD_BLACK);
    }

    // Bottom-left: triangles and line fan
    const int p3x = contentX;
    const int p3y = contentY + panelH + gapY;
    drawCardShell(p3x, p3y, panelW, panelH, "Triangles and Lines");
    for (int i = 0; i < 5; i++) {
      int tx = p3x + 90 + i * 120;
      int ty = p3y + 120;
      int sz = 70 + i * 10;
      display.drawTriangle(tx, ty + sz, tx + sz / 2, ty, tx + sz, ty + sz, GxEPD_BLACK);
    }
    const int fanCx = p3x + 180;
    const int fanCy = p3y + 380;
    for (int angle = 0; angle < 180; angle += 12) {
      const float rad = angle * 3.1415926f / 180.0f;
      const int ex = fanCx + (int)(150.0f * cosf(rad));
      const int ey = fanCy - (int)(150.0f * sinf(rad));
      display.drawLine(fanCx, fanCy, ex, ey, GxEPD_BLACK);
    }

    // Bottom-right: concentric circles and rounded rectangles
    const int p4x = contentX + panelW + gapX;
    const int p4y = contentY + panelH + gapY;
    drawCardShell(p4x, p4y, panelW, panelH, "Rounded Shapes");
    const int ccx = p4x + 240;
    const int ccy = p4y + 235;
    for (int r = 30; r <= 150; r += 24) {
      display.drawCircle(ccx, ccy, r, GxEPD_BLACK);
    }
    const int rrx = p4x + 520;
    const int rry = p4y + 120;
    for (int i = 0; i < 4; i++) {
      display.drawRoundRect(rrx + i * 14, rry + i * 14,
                            250 - i * 28, 230 - i * 28,
                            24 - i * 3, GxEPD_BLACK);
    }

    drawPageFooter("Adafruit GFX primitives on a wide e-paper canvas");

  } while (display.nextPage());
}

// =====================================================================
// Screen 5: Patterns
// =====================================================================
void showPatternDemo()
{
  const uint16_t W = display.width();
  const uint16_t H = display.height();

  display.setRotation(0);
  display.setFullWindow();
  display.firstPage();
  do {
    display.fillScreen(GxEPD_WHITE);
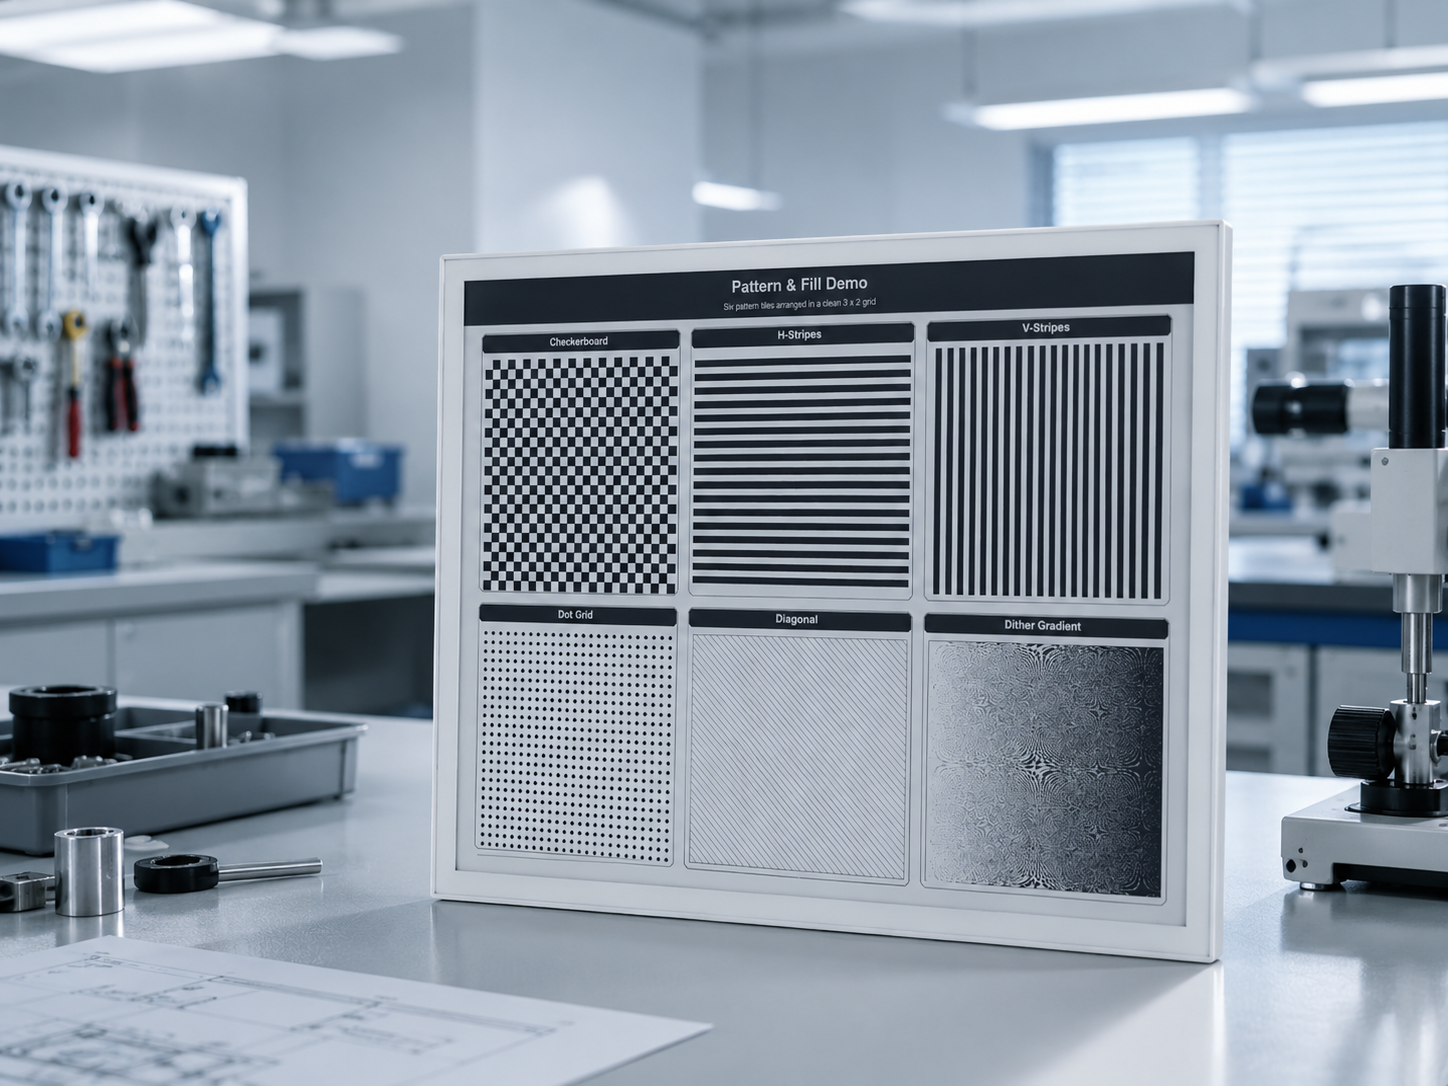
    drawPageHeader("Pattern & Fill Demo", "Six pattern tiles arranged in a clean 3 x 2 grid");

    const int contentX = PAGE_MARGIN;
    const int contentY = HEADER_H + 18;
    const int contentW = W - 2 * PAGE_MARGIN;
    const int contentH = H - HEADER_H - FOOTER_H - 36;
    const int gapX = PANEL_GAP;
    const int gapY = PANEL_GAP;
    const int tileW = (contentW - 2 * gapX) / 3;
    const int tileH = (contentH - gapY) / 2;

    struct TileSpec {
      const char* title;
    };

    TileSpec tiles[] = {
      {"Checkerboard"},
      {"H-Stripes"},
      {"V-Stripes"},
      {"Dot Grid"},
      {"Diagonal"},
      {"Dither Gradient"},
    };

    for (int i = 0; i < 6; i++) {
      const int col = i % 3;
      const int row = i / 3;
      const int x = contentX + col * (tileW + gapX);
      const int y = contentY + row * (tileH + gapY);
      drawCardShell(x, y, tileW, tileH, tiles[i].title);

      const int innerX = x + 16;
      const int innerY = y + 58;
      const int innerW = tileW - 32;
      const int innerH = tileH - 74;

      if (i == 0) {
        const int sz = 22;
        for (int py = 0; py < innerH / sz + 1; py++) {
          for (int px = 0; px < innerW / sz + 1; px++) {
            if ((px + py) & 1) {
              display.fillRect(innerX + px * sz, innerY + py * sz, sz, sz, GxEPD_BLACK);
            }
          }
        }
      } else if (i == 1) {
        for (int py = 0; py < innerH; py += 14) {
          if ((py / 14) & 1) {
            display.fillRect(innerX, innerY + py, innerW, 14, GxEPD_BLACK);
          }
        }
      } else if (i == 2) {
        for (int px = 0; px < innerW; px += 14) {
          if ((px / 14) & 1) {
            display.fillRect(innerX + px, innerY, 14, innerH, GxEPD_BLACK);
          }
        }
      } else if (i == 3) {
        for (int py = 0; py < innerH; py += 22) {
          for (int px = 0; px < innerW; px += 22) {
            display.fillCircle(innerX + px + 11, innerY + py + 11, 4, GxEPD_BLACK);
          }
        }
      } else if (i == 4) {
        display.drawRect(innerX, innerY, innerW, innerH, GxEPD_BLACK);
        for (int d = -innerH; d < innerW; d += 18) {
          int x0 = innerX + max(0, d);
          int y0 = innerY + max(0, -d);
          int x1 = innerX + min(innerW - 1, d + innerH - 1);
          int y1 = innerY + min(innerH - 1, -d + innerW - 1);
          display.drawLine(x0, y0, x1, y1, GxEPD_BLACK);
        }
      } else {
        display.drawRect(innerX, innerY, innerW, innerH, GxEPD_BLACK);
        for (int py = 0; py < innerH; py++) {
          for (int px = 0; px < innerW; px++) {
            int density = (px * 255) / innerW;
            if ((((px * 7 + py * 13) ^ (px * py)) & 0xFF) < density) {
              display.drawPixel(innerX + px, innerY + py, GxEPD_BLACK);
            }
          }
        }
      }
    }

    drawPageFooter("Patterns are easier to compare when each sample gets the same amount of space");

  } while (display.nextPage());
}

// =====================================================================
// Screen 6: Dashboard-style layout
// =====================================================================
void showDashboardDemo()
{
  const uint16_t W = display.width();
  const uint16_t H = display.height();

  display.setRotation(0);
  display.setFullWindow();
  display.firstPage();
  do {
    display.fillScreen(GxEPD_WHITE);
    drawPageHeader("Dashboard Demo", "A large, readable layout with metrics, logs and a status bar");

    const int contentX = PAGE_MARGIN;
    const int contentY = HEADER_H + 18;
    const int contentW = W - 2 * PAGE_MARGIN;
    const int contentH = H - HEADER_H - FOOTER_H - 36;
    const int gapX = PANEL_GAP;
    const int gapY = PANEL_GAP;

    // Top row metrics
    const int metricH = 220;
    const int metricW = (contentW - 3 * gapX) / 4;

    char uptimeBuf[16];
    snprintf(uptimeBuf, sizeof(uptimeBuf), "%lu", millis() / 1000);

    char heapBuf[16];
    snprintf(heapBuf, sizeof(heapBuf), "%lu", (unsigned long)(ESP.getFreeHeap() / 1024));

    drawMetricCard(contentX + 0 * (metricW + gapX), contentY, metricW, metricH, "Temperature", "23.5", "Celsius");
    drawMetricCard(contentX + 1 * (metricW + gapX), contentY, metricW, metricH, "Humidity", "65", "% RH");
    drawMetricCard(contentX + 2 * (metricW + gapX), contentY, metricW, metricH, "Free Heap", heapBuf, "kB");
    drawMetricCard(contentX + 3 * (metricW + gapX), contentY, metricW, metricH, "Uptime", uptimeBuf, "seconds");

    // Activity log panel
    const int logY = contentY + metricH + gapY;
    const int logH = 460;
    drawCardShell(contentX, logY, contentW, logH, "Activity Log");

    const char* logEntries[] = {
      "[00:00:01] System boot complete - ESP32-S3 @ 240MHz",
      "[00:00:02] PSRAM initialized: 8192 kB available",
      "[00:00:03] IT8951 controller detected (FW: eSee_d.v.0)",
      "[00:00:03] Panel: ED103TC2 1872x1404, VCOM=-1.40V",
      "[00:00:04] SPI bus configured: HSPI @ 10MHz",
      "[00:00:05] Display driver ready - full refresh mode",
      "[00:00:06] Demo sequence started...",
    };

    display.setFont(&FreeMono9pt7b);
    const int lineX = contentX + 24;
    const int lineY = logY + 72;
    const int lineH = 48;

    for (int i = 0; i < 7; i++) {
      display.setCursor(lineX, lineY + i * lineH);
      display.print(logEntries[i]);
      if (i < 6) {
        display.drawFastHLine(contentX + 20, lineY + i * lineH + 18, contentW - 40, GxEPD_BLACK);
      }
    }

    // Bottom status strip
    const int statusY = logY + logH + gapY;
    const int statusH = contentH - metricH - logH - 2 * gapY;
    drawPanelFrame(contentX, statusY, contentW, statusH);

    display.fillRoundRect(contentX + 4, statusY + 4, contentW - 8, 42, 10, GxEPD_BLACK);
    display.setTextColor(GxEPD_WHITE);
    drawCenteredTextInBox("Progress", contentX + 20, statusY + 10, 160, 24, &FreeSansBold12pt7b);

    const int barX = contentX + 180;
    const int barY = statusY + 18;
    const int barW = contentW - 360;
    const int barH = 28;

    display.setTextColor(GxEPD_BLACK);
    display.drawRect(barX, barY, barW, barH, GxEPD_BLACK);
    display.fillRect(barX + 2, barY + 2, barW - 4, barH - 4, GxEPD_BLACK);

    display.setFont(&FreeSans9pt7b);
    display.setCursor(barX + barW + 16, barY + 22);
    display.print("100% - Demo Complete!");

    display.setFont(&FreeSans9pt7b);
    display.setCursor(contentX + 24, statusY + statusH - 18);
    display.print("E-paper is ideal for dashboards: the image stays visible without refresh power");

    drawPageFooter("Wide screens work better when the key information is grouped into strong blocks");

  } while (display.nextPage());
}
The following figure shows the actual display effect of the E1003 example:
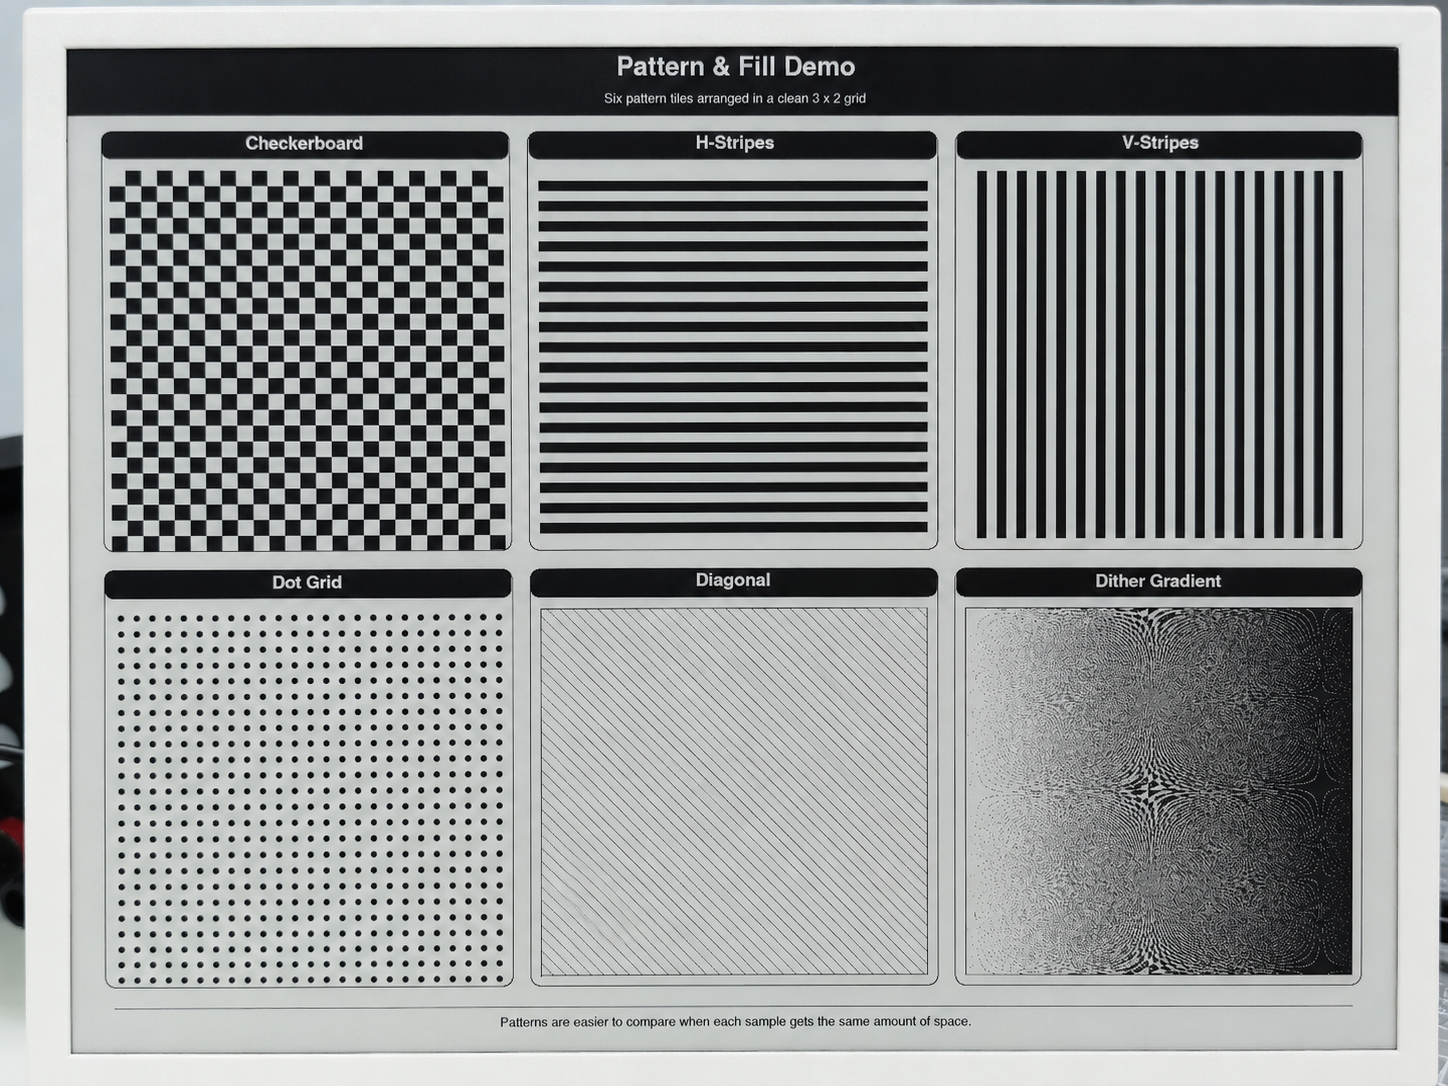
The full source code for the E1003 example (including all 6 demo screens with complete implementations for Splash, System Info, Typography, Geometry, Patterns, and Dashboard) is available in the repository at Seeed_GxEPD2/examples/GxEPD2_reTerminal_E1003/. The example includes helper functions for centered text, page headers/footers, card-style layouts optimized for the large 10.3" display.
Programming reTerminal E1004 (13.3" 6-Color Screen)
The reTerminal E1004 features a 13.3" 6-color ePaper display (1200×1600, T133A01 panel, dual-chip controller, Spectra 6). It supports Black, White, Red, Green, Blue, and Yellow. This example depends on a custom driver file GxEPD2_T133A01_1200x1600.h included in the example folder.
After installing the Seeed_GxEPD2 library, you can find this example in the Arduino IDE via File > Examples > Seeed_GxEPD2 > GxEPD2_reTerminal_E1004, or locate it manually at Seeed_GxEPD2/examples/GxEPD2_reTerminal_E1004/.
The E1004 requires OPI PSRAM to be enabled in the Arduino IDE: Tools > PSRAM > OPI PSRAM. The ~937 KB framebuffer lives in PSRAM.
Click here to view the full code
#include <SPI.h>
#include <GxEPD2_7C.h>
#include "GxEPD2_T133A01_1200x1600.h"

// reTerminal serial monitor uses UART0.  With "USB CDC On Boot: Enabled",
// Serial = USB CDC, Serial0 = UART0 (the physical TX/RX pads on the board).
// All driver-level diagnostic output is sent through Serial0.
#define DBG Serial0
#include <Fonts/FreeMonoBold9pt7b.h>
#include <Fonts/FreeMonoBold12pt7b.h>
#include <Fonts/FreeSansBold24pt7b.h>
#include <Fonts/FreeSansBold18pt7b.h>
#include <Fonts/FreeSansBold12pt7b.h>
#include <Fonts/FreeSans9pt7b.h>
#include <Fonts/FreeMono9pt7b.h>

// ===== Pin mapping =====
#define EPD_SCK_PIN   7
#define EPD_MISO_PIN  8
#define EPD_MOSI_PIN  9
#define EPD_CS_PIN    10
#define EPD_DC_PIN    11
#define EPD_CS1_PIN   2
#define EPD_RES_PIN   38
#define EPD_BUSY_PIN  13
#define EPD_ENABLE_PIN 12

SPIClass hspi(HSPI);

// ===== Display: 13.3" 6-Color 1200x1600, dual-chip =====
#define MAX_DISPLAY_BUFFER_SIZE 24000u
#define MAX_HEIGHT(EPD) \
    (EPD::HEIGHT <= (MAX_DISPLAY_BUFFER_SIZE) / (EPD::WIDTH / 2) \
         ? EPD::HEIGHT \
         : (MAX_DISPLAY_BUFFER_SIZE) / (EPD::WIDTH / 2))

GxEPD2_7C<GxEPD2_T133A01_1200x1600, MAX_HEIGHT(GxEPD2_T133A01_1200x1600)>
    display(GxEPD2_T133A01_1200x1600(EPD_CS_PIN, EPD_DC_PIN, EPD_RES_PIN,
                                      EPD_BUSY_PIN, EPD_CS1_PIN, EPD_ENABLE_PIN));

// Color shorthand — T133A01 is a Spectra 6 panel.  Only these six
// colors are physically reproducible; the demo never references
// GxEPD_ORANGE because the panel has no native orange ink.
#define C_BLACK   GxEPD_BLACK
#define C_WHITE   GxEPD_WHITE
#define C_GREEN   GxEPD_GREEN
#define C_BLUE    GxEPD_BLUE
#define C_RED     GxEPD_RED
#define C_YELLOW  GxEPD_YELLOW

void setup()
{
  Serial.begin(115200);
  DBG.begin(115200);     // hardware UART0 (where the user's serial monitor is attached)
  delay(200);
  Serial.println(F("[E1004] GxEPD2 reTerminal E1004 Demo (13.3\" 6-Color)"));
  DBG.println(F("[E1004] GxEPD2 reTerminal E1004 Demo (13.3\" 6-Color)"));

  hspi.begin(EPD_SCK_PIN, EPD_MISO_PIN, EPD_MOSI_PIN, -1);
  // Match Seeed_GFX: 10 MHz SPI clock (XIAO_SPI_Frequency.h)
  display.epd2.selectSPI(hspi, SPISettings(10000000, MSBFIRST, SPI_MODE0));
  display.init(115200);  // enable diagnostic prints over Serial0/UART0

  // E1004 is a 13.3" 6-color panel — full refresh itself takes around 40s.
  // Keep each rendered page visible for at least 60s before moving on.
  const uint32_t PAGE_HOLD_MS = 60000;

  Serial.println(F("[E1004] Screen 1: Splash"));
  showSplashScreen();
  delay(PAGE_HOLD_MS);

  Serial.println(F("[E1004] Screen 2: Color Palette"));
  showColorPalette();
  delay(PAGE_HOLD_MS);

  Serial.println(F("[E1004] Screen 3: Typography"));
  showColorTypography();
  delay(PAGE_HOLD_MS);

  Serial.println(F("[E1004] Screen 4: Geometry"));
  showColorGeometry();
  delay(PAGE_HOLD_MS);

  Serial.println(F("[E1004] Screen 5: Patterns"));
  showColorPatterns();
  delay(PAGE_HOLD_MS);

  Serial.println(F("[E1004] Screen 6: Dashboard"));
  showDashboard();
  delay(PAGE_HOLD_MS);

  Serial.println(F("[E1004] Demo complete. Hibernating."));
  display.hibernate();
}

void loop() {}

// =====================================================================
void drawCenteredText(const char* text, int16_t y, const GFXfont* font)
{
  display.setFont(font);
  int16_t tbx, tby; uint16_t tbw, tbh;
  display.getTextBounds(text, 0, 0, &tbx, &tby, &tbw, &tbh);
  display.setCursor((display.width() - tbw) / 2 - tbx, y);
  display.print(text);
}

// =====================================================================
// Screen 1: Splash
// =====================================================================
void showSplashScreen()
{
  const uint16_t W = display.width();
  const uint16_t H = display.height();
  display.setRotation(0);
  display.setFullWindow();
  display.firstPage();
  do {
    display.fillScreen(C_WHITE);

    // Colorful top band (5 panel colors, excluding white)
    uint16_t colors[] = {C_RED, C_YELLOW, C_GREEN, C_BLUE, C_BLACK};
    int stripeW = (W - 40) / 5;
    for (int i = 0; i < 5; i++)
      display.fillRect(20 + i * stripeW, 20, stripeW, 16, colors[i]);

    display.drawRect(20, 50, W - 40, H - 70, C_BLACK);
    display.drawRect(24, 54, W - 48, H - 78, C_BLACK);

    display.setTextColor(C_BLACK);
    drawCenteredText("reTerminal E1004", H / 2 - 120, &FreeSansBold24pt7b);

    display.setTextColor(C_RED);
    drawCenteredText("13.3\" 6-Color e-Paper", H / 2 - 60, &FreeSansBold18pt7b);

    display.drawFastHLine(W / 4, H / 2 - 20, W / 2, C_BLUE);

    display.setTextColor(C_GREEN);
    drawCenteredText("GxEPD2 + T133A01 Driver", H / 2 + 20, &FreeSansBold18pt7b);

    display.setTextColor(C_BLUE);
    drawCenteredText("1200 x 1600 | Dual-Chip | 6 Colors", H / 2 + 70, &FreeSansBold12pt7b);

    display.setTextColor(C_RED);
    drawCenteredText("PSRAM framebuffer | ~937 KB", H / 2 + 110, &FreeSans9pt7b);

    // Bottom colorful band (reverse order)
    for (int i = 0; i < 5; i++)
      display.fillRect(20 + i * stripeW, H - 36, stripeW, 16, colors[4 - i]);

    display.setTextColor(C_BLACK);
    drawCenteredText("Seeed Studio x GxEPD2", H - 50, &FreeSans9pt7b);
  } while (display.nextPage());
}

// =====================================================================
// Screen 2: Color Palette
// =====================================================================
void showColorPalette()
{
  const uint16_t W = display.width();
  const uint16_t H = display.height();
  display.setRotation(0);
  display.setFullWindow();
  display.firstPage();
  do {
    display.fillScreen(C_WHITE);
    display.fillRect(0, 0, W, 50, C_BLACK);
    display.setTextColor(C_WHITE);
    drawCenteredText("6-Color Palette", 38, &FreeSansBold18pt7b);

    const uint16_t swatchColors[] = {C_BLACK, C_WHITE, C_RED, C_GREEN, C_BLUE, C_YELLOW};
    const char* names[] = {"Black", "White", "Red", "Green", "Blue", "Yellow"};
    int sw = 160, sh = 180, gap = 14;
    int sx = (W - 6 * sw - 5 * gap) / 2;
    int sy = 90;

    for (int i = 0; i < 6; i++) {
      int x = sx + i * (sw + gap);
      display.fillRoundRect(x, sy, sw, sh, 8, swatchColors[i]);
      display.drawRoundRect(x, sy, sw, sh, 8, C_BLACK);
      display.setFont(&FreeSansBold12pt7b);
      display.setTextColor(C_BLACK);
      int16_t tbx, tby; uint16_t tbw, tbh;
      display.getTextBounds(names[i], 0, 0, &tbx, &tby, &tbw, &tbh);
      display.setCursor(x + (sw - tbw) / 2 - tbx, sy + sh + 30);
      display.print(names[i]);
    }

    // Color combos (circles on colored backgrounds)
    int row2Y = sy + sh + 85;
    display.setFont(&FreeSansBold12pt7b);
    display.setTextColor(C_BLACK);
    display.setCursor(sx, row2Y - 10);
    display.print("Color combinations:");

    int cx = sx + 20;
    uint16_t bgCols[] = {C_RED, C_GREEN, C_BLUE, C_YELLOW, C_BLACK};
    uint16_t fgCols[] = {C_YELLOW, C_RED, C_GREEN, C_BLUE, C_RED};
    for (int i = 0; i < 5; i++) {
      int x = cx + i * 180;
      display.fillRoundRect(x, row2Y + 10, 150, 120, 10, bgCols[i]);
      display.fillCircle(x + 75, row2Y + 70, 40, fgCols[i]);
    }

    // Full-width bars
    int barY = row2Y + 180;
    display.setTextColor(C_BLACK);
    display.setCursor(sx, barY - 10);
    display.print("Full-width color bars:");
    uint16_t barCols[] = {C_RED, C_YELLOW, C_GREEN, C_BLUE, C_BLACK};
    for (int i = 0; i < 5; i++)
      display.fillRect(sx, barY + 10 + i * 32, W - 2 * sx, 24, barCols[i]);

    // Large circle ring composition
    int ringY = barY + 240;
    display.setTextColor(C_BLACK);
    display.setCursor(sx, ringY - 10);
    display.print("Overlapping circles:");
    uint16_t ringColors[] = {C_RED, C_YELLOW, C_GREEN, C_BLUE, C_BLACK};
    for (int i = 0; i < 5; i++)
      display.fillCircle(sx + 100 + i * 200, ringY + 100, 80, ringColors[i]);

    drawCenteredText("All 6 colors on 13.3\" e-Paper", H - 30, &FreeSans9pt7b);
  } while (display.nextPage());
}

// =====================================================================
// Screen 3: Typography
// =====================================================================
void showColorTypography()
{
  const uint16_t W = display.width();
  const uint16_t H = display.height();
  display.setRotation(0);
  display.setFullWindow();
  display.firstPage();
  do {
    display.fillScreen(C_WHITE);
    display.fillRect(0, 0, W, 50, C_BLUE);
    display.setTextColor(C_WHITE);
    drawCenteredText("Color Typography", 38, &FreeSansBold18pt7b);

    int y = 110, x = 50;

    // Large colored headings
    display.setTextColor(C_BLACK);
    display.setFont(&FreeSansBold24pt7b);
    display.setCursor(x, y); display.print("Black 24pt");
    display.setTextColor(C_RED);
    display.setCursor(x + 420, y); display.print("Red 24pt");
    y += 75;

    display.setTextColor(C_GREEN);
    display.setFont(&FreeSansBold24pt7b);
    display.setCursor(x, y); display.print("Green");
    display.setTextColor(C_BLUE);
    display.setCursor(x + 280, y); display.print("Blue");
    display.setTextColor(C_YELLOW);
    display.setCursor(x + 500, y); display.print("Yellow");
    y += 85;

    display.setTextColor(C_YELLOW);
    display.setFont(&FreeSansBold18pt7b);
    display.setCursor(x, y); display.print("Yellow 18pt - warm sunshine");
    y += 72;

    display.drawFastHLine(x, y, W - 100, C_RED);
    y += 35;

    // Color text on color backgrounds
    display.setFont(&FreeSansBold12pt7b);
    uint16_t bgColors[] = {C_RED, C_GREEN, C_BLUE, C_YELLOW, C_BLACK, C_WHITE};
    const char* labels[] = {
      " White on Red ", " White on Green ", " White on Blue ",
      " Black on Yellow ", " Red on Black ", " Black on White "
    };
    uint16_t fgText[] = {C_WHITE, C_WHITE, C_WHITE, C_BLACK, C_RED, C_BLACK};
    for (int i = 0; i < 6; i++) {
      int bx = (i < 3) ? x : x + 500;
      int by = y + (i % 3) * 65;
      display.fillRoundRect(bx, by, 400, 45, 6, bgColors[i]);
      display.setTextColor(fgText[i]);
      display.setCursor(bx + 15, by + 32);
      display.print(labels[i]);
    }
    y += 240;

    // Right-side: black box with colored text
    int rbx = x, rby = y;
    display.fillRoundRect(rbx, rby, W - 100, 420, 10, C_BLACK);
    display.setFont(&FreeSansBold24pt7b);
    int ry = rby + 60;
    uint16_t rColors[] = {C_RED, C_GREEN, C_BLUE, C_YELLOW, C_WHITE};
    const char* rLabels[] = {"Red on Dark", "Green on Dark", "Blue on Dark",
                              "Yellow on Dark", "White on Dark"};
    for (int i = 0; i < 5; i++) {
      display.setTextColor(rColors[i]);
      display.setCursor(rbx + 30, ry);
      display.print(rLabels[i]);
      ry += 65;
    }

    display.setTextColor(C_BLACK);
    drawCenteredText("6-color text on 13.3\" panel", H - 30, &FreeSans9pt7b);
  } while (display.nextPage());
}

// =====================================================================
// Screen 4: Geometry
// =====================================================================
void showColorGeometry()
{
  const uint16_t W = display.width();
  const uint16_t H = display.height();
  display.setRotation(0);
  display.setFullWindow();
  display.firstPage();
  do {
    display.fillScreen(C_WHITE);
    display.fillRect(0, 0, W, 50, C_GREEN);
    display.setTextColor(C_WHITE);
    drawCenteredText("Color Geometry", 38, &FreeSansBold18pt7b);
    display.setTextColor(C_BLACK);

    // Cascading colored rectangles
    uint16_t rColors[] = {C_RED, C_YELLOW, C_GREEN, C_BLUE, C_BLACK};
    for (int i = 0; i < 5; i++)
      display.fillRect(50 + i * 55, 80 + i * 15, 150, 90, rColors[i]);

    // Colored circles row
    uint16_t cColors[] = {C_BLUE, C_RED, C_GREEN, C_BLACK, C_YELLOW};
    for (int i = 0; i < 5; i++)
      display.fillCircle(600 + i * 100, 160, 40, cColors[i]);

    // Colored triangles
    int ty = 300;
    uint16_t triColors[] = {C_RED, C_GREEN, C_BLUE, C_YELLOW, C_BLACK};
    for (int i = 0; i < 5; i++) {
      int tx = 60 + i * 170;
      display.fillTriangle(tx, ty + 80, tx + 40, ty, tx + 80, ty + 80, triColors[i]);
    }

    // Olympic rings
    int ox = 250, oy = 500;
    uint16_t olyColors[] = {C_BLUE, C_BLACK, C_RED, C_YELLOW, C_GREEN};
    int olyX[] = {0, 90, 180, 45, 135};
    int olyY[] = {0, 0, 0, 50, 50};
    for (int i = 0; i < 5; i++)
      for (int r = 0; r < 5; r++)
        display.drawCircle(ox + olyX[i], oy + olyY[i], 40 - r, olyColors[i]);

    // Color mosaic (right side)
    int mx = 700, my = 450;
    display.setFont(&FreeSansBold12pt7b);
    display.setTextColor(C_BLACK);
    display.setCursor(mx, my - 10);
    display.print("Color Mosaic:");
    for (int py = 0; py < 6; py++)
      for (int px = 0; px < 6; px++) {
        uint16_t c = rColors[(px + py) % 5];
        display.fillRect(mx + px * 55, my + 10 + py * 55, 50, 50, c);
      }

    // Concentric colored circles (bottom)
    int cx = 300, cy = 850;
    uint16_t ccColors[] = {C_BLUE, C_GREEN, C_YELLOW, C_RED, C_BLACK};
    for (int i = 0; i < 5; i++)
      for (int r = 0; r < 5; r++)
        display.drawCircle(cx, cy, 70 - i * 12 + r, ccColors[i]);

    // Fan of colored lines
    int fx = 800, fy = 900;
    for (int a = 0; a < 180; a += 8) {
      float rad = a * 3.14159f / 180.0f;
      uint16_t lc = rColors[(a / 8) % 5];
      display.drawLine(fx, fy, fx + (int)(100 * cosf(rad)), fy - (int)(100 * sinf(rad)), lc);
    }

    // Large rounded rects (bottom section)
    int rrY = 1050;
    display.fillRoundRect(60, rrY, 250, 150, 15, C_RED);
    display.fillRoundRect(340, rrY, 250, 150, 15, C_GREEN);
    display.fillRoundRect(620, rrY, 250, 150, 15, C_BLUE);
    display.fillRoundRect(900, rrY, 250, 150, 15, C_YELLOW);

    display.setTextColor(C_WHITE);
    display.setFont(&FreeSansBold18pt7b);
    display.setCursor(90, rrY + 90); display.print("Red");
    display.setCursor(370, rrY + 90); display.print("Green");
    display.setCursor(660, rrY + 90); display.print("Blue");
    display.setTextColor(C_BLACK);
    display.setCursor(910, rrY + 90); display.print("Yellow");

    display.setTextColor(C_BLACK);
    drawCenteredText("GFX primitives on 13.3\" e-Paper", H - 30, &FreeSans9pt7b);
  } while (display.nextPage());
}

// =====================================================================
// Screen 5: Patterns
// =====================================================================
void showColorPatterns()
{
  const uint16_t W = display.width();
  const uint16_t H = display.height();
  display.setRotation(0);
  display.setFullWindow();
  display.firstPage();
  do {
    display.fillScreen(C_WHITE);
    display.fillRect(0, 0, W, 50, C_RED);
    display.setTextColor(C_WHITE);
    drawCenteredText("Color Patterns", 38, &FreeSansBold18pt7b);
    display.setTextColor(C_BLACK);
    display.setFont(&FreeSansBold12pt7b);

    uint16_t pColors[] = {C_RED, C_GREEN, C_BLUE, C_YELLOW, C_BLACK};
    int bx = 40, by = 75, bw = 230, bh = 230, gap = 30;

    // Color checkerboard
    display.setCursor(bx + 20, by + 20);
    display.print("Color Checker");
    int tby2 = by + 30;
    for (int py = 0; py < bh / 20; py++)
      for (int px = 0; px < bw / 20; px++)
        display.fillRect(bx + px * 20, tby2 + py * 20, 20, 20, pColors[(px + py) % 5]);

    // Horizontal stripes
    int bx2 = bx + bw + gap;
    display.setCursor(bx2 + 20, by + 20);
    display.print("H-Stripes");
    int tby3 = by + 30;
    for (int py = 0; py < bh; py += 20) {
      int ci = (py / 20) % 5;
      display.fillRect(bx2, tby3 + py, bw, 20, pColors[ci]);
    }

    // Vertical stripes
    int bx3 = bx2 + bw + gap;
    display.setCursor(bx3 + 20, by + 20);
    display.print("V-Stripes");
    int tby4 = by + 30;
    for (int px = 0; px < bw; px += 20) {
      int ci = (px / 20) % 5;
      display.fillRect(bx3 + px, tby4, 20, bh, pColors[ci]);
    }

    // Color dot grid
    int bx4 = bx3 + bw + gap;
    display.setCursor(bx4 + 20, by + 20);
    display.print("Color Dots");
    int tby5 = by + 30;
    for (int py = 0; py < bh; py += 24)
      for (int px = 0; px < bw; px += 24) {
        int ci = (px / 24 + py / 24) % 5;
        display.fillCircle(bx4 + px + 12, tby5 + py + 12, 8, pColors[ci]);
      }

    // Full-width rainbow bars
    int barY = tby5 + bh + 30;
    display.setFont(&FreeSansBold12pt7b);
    display.setCursor(bx, barY - 10);
    display.print("Rainbow bars:");
    for (int i = 0; i < 5; i++)
      display.fillRect(bx, barY + 10 + i * 30, W - 2 * bx, 24, pColors[i]);

    // Diamond pattern
    int diaY = barY + 210;
    display.setCursor(bx, diaY - 10);
    display.print("Diamond pattern:");
    for (int py = 0; py < 5; py++)
      for (int px = 0; px < 10; px++) {
        int cx2 = bx + 50 + px * 100;
        int cy2 = diaY + 20 + py * 60;
        uint16_t dc = pColors[(px + py) % 5];
        display.fillTriangle(cx2, cy2, cx2 - 30, cy2 + 30, cx2 + 30, cy2 + 30, dc);
        display.fillTriangle(cx2, cy2 + 60, cx2 - 30, cy2 + 30, cx2 + 30, cy2 + 30, dc);
      }

    drawCenteredText("Patterns with 6-color palette", H - 30, &FreeSans9pt7b);
  } while (display.nextPage());
}

// =====================================================================
// Screen 6: Dashboard
// =====================================================================
void drawColorCard(int x, int y, int w, int h, const char* title,
                   const char* value, const char* unit, uint16_t accent)
{
  display.drawRoundRect(x, y, w, h, 8, C_BLACK);
  display.fillRoundRect(x + 2, y + 2, w - 4, 34, 6, accent);
  display.setTextColor(C_WHITE);
  display.setFont(&FreeSansBold12pt7b);
  int16_t tbx, tby; uint16_t tbw, tbh;
  display.getTextBounds(title, 0, 0, &tbx, &tby, &tbw, &tbh);
  display.setCursor(x + (w - tbw) / 2 - tbx, y + 28);
  display.print(title);

  display.setTextColor(accent);
  display.setFont(&FreeSansBold24pt7b);
  display.getTextBounds(value, 0, 0, &tbx, &tby, &tbw, &tbh);
  display.setCursor(x + (w - tbw) / 2 - tbx, y + h / 2 + 15);
  display.print(value);

  display.setTextColor(C_BLACK);
  display.setFont(&FreeSans9pt7b);
  display.getTextBounds(unit, 0, 0, &tbx, &tby, &tbw, &tbh);
  display.setCursor(x + (w - tbw) / 2 - tbx, y + h - 15);
  display.print(unit);
}

void showDashboard()
{
  const uint16_t W = display.width();
  const uint16_t H = display.height();
  display.setRotation(0);
  display.setFullWindow();
  display.firstPage();
  do {
    display.fillScreen(C_WHITE);
    display.fillRect(0, 0, W, 50, C_BLACK);
    display.setTextColor(C_WHITE);
    drawCenteredText("Dashboard", 38, &FreeSansBold18pt7b);
    display.setTextColor(C_BLACK);

    int cw = 250, ch = 180, gap = 25;
    int sx = (W - 4 * cw - 3 * gap) / 2;
    int row1Y = 75;

    char uptBuf[16]; snprintf(uptBuf, sizeof(uptBuf), "%lu", millis() / 1000);
    char heapBuf[16]; snprintf(heapBuf, sizeof(heapBuf), "%lu", (unsigned long)(ESP.getFreeHeap() / 1024));

    drawColorCard(sx,                    row1Y, cw, ch, "Temp",     "23.5",  "Celsius",  C_RED);
    drawColorCard(sx + cw + gap,         row1Y, cw, ch, "Humidity", "65",    "% RH",     C_BLUE);
    drawColorCard(sx + 2 * (cw + gap),   row1Y, cw, ch, "Heap",    heapBuf, "kB free",  C_GREEN);
    drawColorCard(sx + 3 * (cw + gap),   row1Y, cw, ch, "Uptime",  uptBuf,  "seconds",  C_YELLOW);

    // Activity log
    int logY = row1Y + ch + 30;
    display.drawRoundRect(sx, logY, W - 2 * sx, 300, 8, C_BLACK);
    display.fillRoundRect(sx + 2, logY + 2, W - 2 * sx - 4, 34, 6, C_BLUE);
    display.setTextColor(C_WHITE);
    display.setFont(&FreeSansBold12pt7b);
    display.setCursor(sx + 20, logY + 28);
    display.print("Activity Log");

    display.setFont(&FreeMonoBold9pt7b);
    const char* logs[] = {
      " System boot - ESP32-S3 + PSRAM",
      " Panel: T133A01 1200x1600 6-Color",
      " Dual-chip controller (CS + CS1)",
      " SPI @ 4MHz (HSPI)",
      " Framebuffer: 937 KB in PSRAM",
      " Demo: 6 screens completed",
    };
    uint16_t logColors[] = {C_GREEN, C_BLUE, C_YELLOW, C_RED, C_BLACK, C_GREEN};
    int ly = logY + 65;
    for (int i = 0; i < 6; i++) {
      display.fillCircle(sx + 25, ly - 4, 6, logColors[i]);
      display.setTextColor(C_BLACK);
      display.setCursor(sx + 40, ly);
      display.print(logs[i]);
      ly += 36;
    }

    // Multi-color progress bar
    int barY = logY + 310;
    display.setFont(&FreeSansBold12pt7b);
    display.setTextColor(C_BLACK);
    display.setCursor(sx, barY + 20);
    display.print("Progress:");
    int barX = sx + 200, barW = W - 2 * sx - 260, barH = 30;
    display.drawRect(barX, barY, barW, barH, C_BLACK);
    uint16_t barColors[] = {C_RED, C_YELLOW, C_GREEN, C_BLUE, C_BLACK};
    int segW = barW / 5;
    for (int i = 0; i < 5; i++)
      display.fillRect(barX + i * segW, barY + 1, segW, barH - 2, barColors[i]);
    display.setTextColor(C_GREEN);
    display.setFont(&FreeSans9pt7b);
    display.setCursor(barX + barW + 10, barY + 20);
    display.print("100%");

    // Status cards row
    int sY = barY + 60;
    display.setFont(&FreeSansBold12pt7b);
    display.setTextColor(C_BLACK);
    display.setCursor(sx, sY);
    display.print("System Status:");

    int scW = (W - 2 * sx - 3 * 15) / 4, scH = 100;
    sY += 20;
    uint16_t scColors[] = {C_GREEN, C_BLUE, C_YELLOW, C_RED};
    const char* scLabels[] = {"SPI", "PSRAM", "Display", "Power"};
    const char* scValues[] = {"OK", "8 MB", "Ready", "Stable"};
    for (int i = 0; i < 4; i++) {
      int scX = sx + i * (scW + 15);
      display.fillRoundRect(scX, sY, scW, scH, 8, scColors[i]);
      display.setTextColor(C_WHITE);
      display.setFont(&FreeSansBold18pt7b);
      int16_t tbx2, tby2; uint16_t tbw2, tbh2;
      display.getTextBounds(scValues[i], 0, 0, &tbx2, &tby2, &tbw2, &tbh2);
      display.setCursor(scX + (scW - tbw2) / 2 - tbx2, sY + 45);
      display.print(scValues[i]);
      display.setFont(&FreeSans9pt7b);
      display.getTextBounds(scLabels[i], 0, 0, &tbx2, &tby2, &tbw2, &tbh2);
      display.setCursor(scX + (scW - tbw2) / 2 - tbx2, sY + scH - 12);
      display.print(scLabels[i]);
    }

    display.setTextColor(C_BLACK);
    drawCenteredText("13.3\" 6-color ePaper: vivid and power-efficient", H - 30, &FreeSans9pt7b);
  } while (display.nextPage());
}
The following figure shows the actual display effect of the E1004 example:
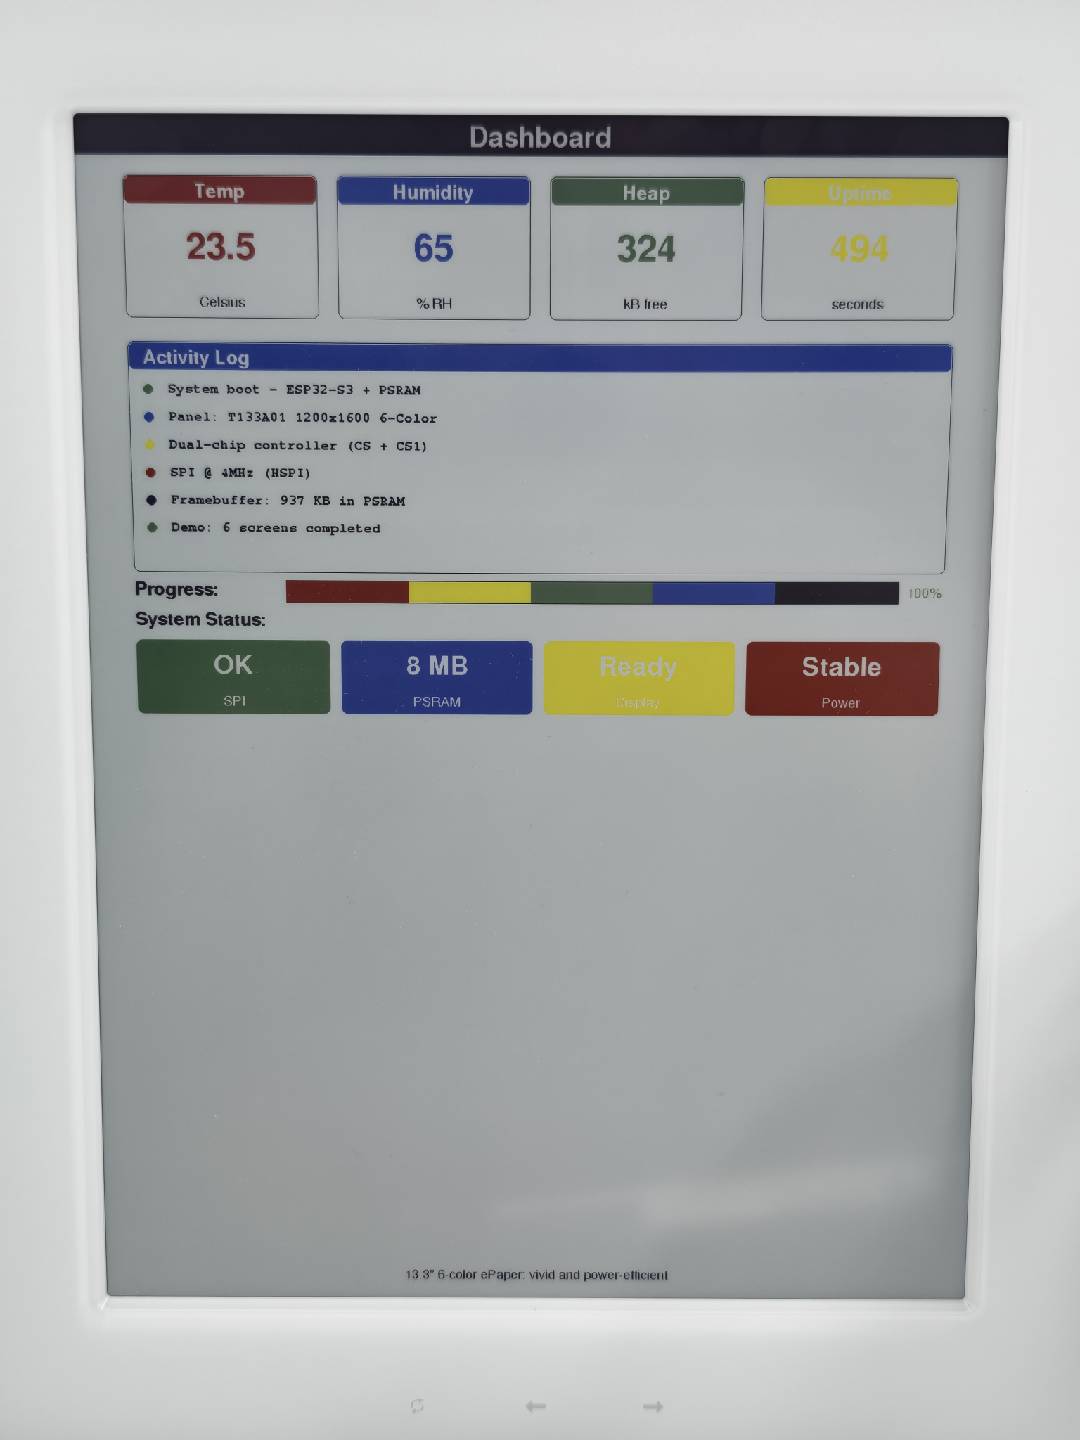
The full source code for the E1004 example (including all 6 demo screens with complete implementations for Splash, Color Palette, Typography, Geometry, Patterns, and Dashboard) is available in the repository at Seeed_GxEPD2/examples/GxEPD2_reTerminal_E1004/. The example features color cards, multi-color progress bars, status cards, and activity logs optimized for the large 13.3" 6-color display.
Using the GxEPD2 Library for Multi-Level Grayscale Display
In addition to the standard black-and-white and 6-color modes, some reTerminal displays support multi-level grayscale rendering. The Seeed_GxEPD2 library includes dedicated grayscale examples that bypass the normal GxEPD2_BW / GxEPD2_7C drivers and instead drive the display controller directly using custom LUT waveforms, while still leveraging Adafruit_GFX for drawing.
- reTerminal E1001 (7.5" B&W): The UC8179 controller supports a 4-level grayscale mode via specialized VCOM/WW/KW/WK/KK LUT tables. A 2bpp (96 KB) framebuffer is used, and each pixel can be Black, Dark Gray, Light Gray, or White.
- reTerminal E1003 (10.3" Monochrome): The IT8951 controller natively supports 16-level grayscale via its GC16 waveform mode. A 4bpp (~1.25 MB) framebuffer is allocated in PSRAM, and each pixel can render one of 16 gray levels.
- reTerminal E1001 (4-Gray)
- reTerminal E1003 (16-Gray)
Programming reTerminal E1001 — 4-Level Grayscale
The E1001's UC8179 controller can be switched from its normal 1-bit mode into a 4-level grayscale mode by uploading custom LUT tables (VCOM, LUTWW, LUTKW, LUTWK, LUTKK). This example creates a Gray4Canvas (2bpp, 96 KB) and uses Adafruit_GFX for drawing, then uploads two bit-planes to the controller for grayscale rendering.
After installing the Seeed_GxEPD2 library, you can find this example in the Arduino IDE via File > Examples > Seeed_GxEPD2 > GxEPD2_reTerminal_E1001_Gray4, or locate it manually at Seeed_GxEPD2/examples/GxEPD2_reTerminal_E1001_Gray4/GxEPD2_reTerminal_E1001_Gray4.ino.Click here to view the full code
#include <SPI.h>
#include <Adafruit_GFX.h>
#include <Fonts/FreeMonoBold9pt7b.h>
#include <Fonts/FreeMonoBold12pt7b.h>
#include <Fonts/FreeSansBold18pt7b.h>
#include <Fonts/FreeSansBold12pt7b.h>
#include <Fonts/FreeSans9pt7b.h>

// ===== Pin mapping (E1001) =====
#define EPD_SCK_PIN   7
#define EPD_MOSI_PIN  9
#define EPD_CS_PIN    10
#define EPD_DC_PIN    11
#define EPD_RES_PIN   12
#define EPD_BUSY_PIN  13

#define EPD_W  800
#define EPD_H  480

SPIClass hspi(HSPI);
SPISettings spiSet(2000000, MSBFIRST, SPI_MODE0);

// Gray levels
#define G_BLACK       0
#define G_DARK_GRAY   1
#define G_LIGHT_GRAY  2
#define G_WHITE       3

// UC8179 gray LUT tables (verbatim from Seeed_GFX UC8179_Defines.h)
// Each LUT is 7 phases x 6 bytes = 42 bytes.
static const uint8_t LUT_VCOM_GRAY[] = {
  0x00,0x00,0x06,0x08,0x07,0x01,
  0x00,0x06,0x0A,0x0B,0x0A,0x01,
  0x00,0x03,0x03,0x00,0x00,0x03,
  0x00,0x05,0x09,0x06,0x06,0x01,
  0x00,0x02,0x02,0x0A,0x0A,0x01,
  0x00,0x0A,0x11,0x06,0x07,0x01,
  0x00,0x02,0x01,0x02,0x01,0x01,
};

static const uint8_t LUT_WW_GRAY[] = {
  0x15,0x00,0x06,0x08,0x07,0x01,
  0x54,0x06,0x0A,0x0B,0x0A,0x01,
  0x90,0x03,0x03,0x00,0x00,0x03,
  0x2A,0x05,0x09,0x06,0x06,0x01,
  0xAA,0x02,0x02,0x0A,0x0A,0x01,
  0x00,0x0A,0x11,0x06,0x07,0x01,
  0x28,0x02,0x01,0x02,0x01,0x01,
};

static const uint8_t LUT_KW_GRAY[] = {
  0x2A,0x00,0x06,0x08,0x07,0x01,
  0x59,0x06,0x0A,0x0B,0x0A,0x01,
  0x90,0x03,0x03,0x00,0x00,0x03,
  0x5A,0x05,0x09,0x06,0x06,0x01,
  0xA8,0x02,0x02,0x0A,0x0A,0x01,
  0x45,0x0A,0x11,0x06,0x07,0x01,
  0xA8,0x02,0x01,0x02,0x01,0x01,
};

static const uint8_t LUT_WK_GRAY[] = {
  0x16,0x00,0x06,0x08,0x07,0x01,
  0xA0,0x06,0x0A,0x0B,0x0A,0x01,
  0x90,0x03,0x03,0x00,0x00,0x03,
  0x99,0x05,0x09,0x06,0x06,0x01,
  0xA0,0x02,0x02,0x0A,0x0A,0x01,
  0x40,0x0A,0x11,0x06,0x07,0x01,
  0x20,0x02,0x01,0x02,0x01,0x01,
};

static const uint8_t LUT_KK_GRAY[] = {
  0x26,0x00,0x06,0x08,0x07,0x01,
  0x6A,0x06,0x0A,0x0B,0x0A,0x01,
  0x90,0x03,0x03,0x00,0x00,0x03,
  0x65,0x05,0x09,0x06,0x06,0x01,
  0x50,0x02,0x02,0x0A,0x0A,0x01,
  0x10,0x0A,0x11,0x06,0x07,0x01,
  0x10,0x02,0x01,0x02,0x01,0x01,
};

static const uint8_t CMD_USER_GRAY[] = {
  0x17, 0x3F, 0x3F, 0x07, 0x06, 0x12,
};

// ============================================================
// 4-level grayscale canvas (2bpp)
// ============================================================
class Gray4Canvas : public Adafruit_GFX
{
public:
  Gray4Canvas(uint16_t w, uint16_t h) : Adafruit_GFX(w, h), _buf(nullptr) {}

  bool begin()
  {
    uint32_t sz = uint32_t(_width) * _height / 4;
    _buf = (uint8_t*)malloc(sz);
    if (_buf) memset(_buf, 0xFF, sz); // fill white (0b11 = 3 = white)
    return _buf != nullptr;
  }

  void drawPixel(int16_t x, int16_t y, uint16_t color) override
  {
    if (!_buf) return;
    if (x < 0 || x >= width() || y < 0 || y >= height()) return;

    int16_t rx = x, ry = y;
    switch (getRotation()) {
      case 1: rx = _width - 1 - y; ry = x; break;
      case 2: rx = _width - 1 - x; ry = _height - 1 - y; break;
      case 3: rx = y; ry = _height - 1 - x; break;
    }

    uint8_t g = color & 0x03;
    uint32_t idx = uint32_t(ry) * (_width / 4) + rx / 4;
    uint8_t shift = (3 - (rx & 3)) * 2;
    _buf[idx] = (_buf[idx] & ~(0x03 << shift)) | (g << shift);
  }

  void fillScreen(uint16_t color) override
  {
    if (!_buf) return;
    uint8_t g = color & 0x03;
    uint8_t fill = (g << 6) | (g << 4) | (g << 2) | g;
    memset(_buf, fill, uint32_t(_width) * _height / 4);
  }

  uint8_t getPixel(int16_t x, int16_t y) const
  {
    if (!_buf || x < 0 || x >= _width || y < 0 || y >= _height) return 0;
    uint32_t idx = uint32_t(y) * (_width / 4) + x / 4;
    uint8_t shift = (3 - (x & 3)) * 2;
    return (_buf[idx] >> shift) & 0x03;
  }

  uint8_t* buffer() { return _buf; }

private:
  uint8_t* _buf;
};

Gray4Canvas canvas(EPD_W, EPD_H);

// ============================================================
// UC8179 SPI helpers
// ============================================================
void checkBusy() {
  delay(10);
  while (!digitalRead(EPD_BUSY_PIN)) delay(10);
}

void writeCommand(uint8_t cmd) {
  hspi.beginTransaction(spiSet);
  digitalWrite(EPD_DC_PIN, LOW);
  digitalWrite(EPD_CS_PIN, LOW);
  hspi.transfer(cmd);
  digitalWrite(EPD_CS_PIN, HIGH);
  digitalWrite(EPD_DC_PIN, HIGH);
  hspi.endTransaction();
}

void writeData(uint8_t data) {
  hspi.beginTransaction(spiSet);
  digitalWrite(EPD_CS_PIN, LOW);
  hspi.transfer(data);
  digitalWrite(EPD_CS_PIN, HIGH);
  hspi.endTransaction();
}

void writeLUT(uint8_t cmd, const uint8_t* lut, uint16_t len) {
  writeCommand(cmd);
  for (uint16_t i = 0; i < len; i++) writeData(lut[i]);
}

// ============================================================
// UC8179 gray mode initialization
// ============================================================
void initGrayMode()
{
  // Hardware reset
  digitalWrite(EPD_RES_PIN, LOW); delay(10);
  digitalWrite(EPD_RES_PIN, HIGH); delay(10);
  checkBusy();

  // Power setting (0x01)
  writeCommand(0x01);
  writeData(0x07);
  writeData(CMD_USER_GRAY[0]);
  writeData(CMD_USER_GRAY[1]);
  writeData(CMD_USER_GRAY[2]);
  writeData(CMD_USER_GRAY[3]);

  // PLL (0x30)
  writeCommand(0x30);
  writeData(CMD_USER_GRAY[4]);

  // VCOM DC (0x82)
  writeCommand(0x82);
  writeData(CMD_USER_GRAY[5]);

  // Booster (0x06)
  writeCommand(0x06);
  writeData(0x27);
  writeData(0x27);
  writeData(0x28);
  writeData(0x17);

  // Power ON (0x04)
  writeCommand(0x04);
  delay(100);
  checkBusy();

  // Panel Setting (0x00)
  writeCommand(0x00);
  writeData(0x3F);

  // Power saving (0xE3)
  writeCommand(0xE3);
  writeData(0x88);

  // VCOM and Data interval (0x50)
  writeCommand(0x50);
  writeData(0x10);
  writeData(0x07);

  // PLL setting (0x52)
  writeCommand(0x52);
  writeData(0x00);

  // Resolution (0x61)
  writeCommand(0x61);
  writeData(EPD_W >> 8);
  writeData(EPD_W & 0xFF);
  writeData(EPD_H >> 8);
  writeData(EPD_H & 0xFF);

  // Write LUTs for gray mode. CRITICAL ordering — UC8179:
  //   0x20 = LUTC  (VCOM)   ← must be present
  //   0x21 = LUTWW (W -> W)
  //   0x22 = LUTKW (K -> W)
  //   0x23 = LUTWK (W -> K)
  //   0x24 = LUTKK (K -> K)
  writeLUT(0x20, LUT_VCOM_GRAY, sizeof(LUT_VCOM_GRAY));
  checkBusy();
  writeLUT(0x21, LUT_WW_GRAY,   sizeof(LUT_WW_GRAY));
  checkBusy();
  writeLUT(0x22, LUT_KW_GRAY,   sizeof(LUT_KW_GRAY));
  checkBusy();
  writeLUT(0x23, LUT_WK_GRAY,   sizeof(LUT_WK_GRAY));
  writeLUT(0x24, LUT_KK_GRAY,   sizeof(LUT_KK_GRAY));

  Serial.println(F("[Gray4] UC8179 gray mode init done"));
}

// ============================================================
// Upload 2bpp canvas to UC8179 as two bit-planes.
// ============================================================
void uploadGray4Frame()
{
  const uint32_t bytesPerRow = EPD_W / 4; // 200 bytes (2bpp, 4 pixels/byte)

  // ---- Bit plane → DTM1 (command 0x10) ----
  writeCommand(0x10);
  hspi.beginTransaction(spiSet);
  digitalWrite(EPD_CS_PIN, LOW);
  for (uint16_t row = 0; row < EPD_H; row++) {
    const uint8_t* rp = canvas.buffer() + uint32_t(row) * bytesPerRow;
    for (uint16_t col8 = 0; col8 < EPD_W / 8; col8++) {
      uint8_t out = 0;
      for (uint8_t bit = 0; bit < 8; bit++) {
        uint16_t px = col8 * 8 + bit;
        uint32_t idx = px / 4;
        uint8_t shift = (3 - (px & 3)) * 2;
        uint8_t gray = 3 - ((rp[idx] >> shift) & 0x03);  // INVERT
        if (gray & 0x01) out |= (0x80 >> bit);
      }
      hspi.transfer(out);
    }
  }
  digitalWrite(EPD_CS_PIN, HIGH);
  hspi.endTransaction();

  // ---- Bit plane → DTM2 (command 0x13) ----
  writeCommand(0x13);
  hspi.beginTransaction(spiSet);
  digitalWrite(EPD_CS_PIN, LOW);
  for (uint16_t row = 0; row < EPD_H; row++) {
    const uint8_t* rp = canvas.buffer() + uint32_t(row) * bytesPerRow;
    for (uint16_t col8 = 0; col8 < EPD_W / 8; col8++) {
      uint8_t out = 0;
      for (uint8_t bit = 0; bit < 8; bit++) {
        uint16_t px = col8 * 8 + bit;
        uint32_t idx = px / 4;
        uint8_t shift = (3 - (px & 3)) * 2;
        uint8_t gray = 3 - ((rp[idx] >> shift) & 0x03);  // INVERT
        if (gray & 0x02) out |= (0x80 >> bit);
      }
      hspi.transfer(out);
    }
  }
  digitalWrite(EPD_CS_PIN, HIGH);
  hspi.endTransaction();

  Serial.println(F("[Gray4] Frame uploaded (2 bit planes)"));
}

void refreshDisplay()
{
  unsigned long t0 = millis();
  writeCommand(0x12); // Display Refresh
  delay(100);
  checkBusy();
  Serial.printf("[Gray4] Refresh %lu ms\n", millis() - t0);
}

void sleepDisplay()
{
  writeCommand(0x02); // Power OFF
  checkBusy();
  writeCommand(0x07); // Deep sleep
  writeData(0xA5);
}

// ============================================================
// Demo drawing
// ============================================================
void drawCenteredText(const char* text, int16_t y, const GFXfont* font, uint8_t gray)
{
  canvas.setFont(font);
  canvas.setTextColor(gray);
  int16_t tbx, tby; uint16_t tbw, tbh;
  canvas.getTextBounds(text, 0, 0, &tbx, &tby, &tbw, &tbh);
  canvas.setCursor((EPD_W - tbw) / 2 - tbx, y);
  canvas.print(text);
}

void showGrayscaleDemo()
{
  Serial.println(F("[Gray4] Drawing demo..."));
  canvas.fillScreen(G_WHITE);

  // Title bar
  canvas.fillRect(0, 0, EPD_W, 40, G_BLACK);
  drawCenteredText("4-Level Grayscale Demo - E1001", 30, &FreeMonoBold12pt7b, G_WHITE);

  // 4 large gray bands
  int bandH = 70, startY = 55;
  const char* labels[] = {"Gray 0: Black", "Gray 1: Dark Gray", "Gray 2: Light Gray", "Gray 3: White"};
  for (int i = 0; i < 4; i++) {
    int y = startY + i * (bandH + 8);
    canvas.fillRect(30, y, EPD_W - 60, bandH, i);
    uint8_t textGray = (i < 2) ? G_WHITE : G_BLACK;
    canvas.setFont(&FreeSansBold12pt7b);
    canvas.setTextColor(textGray);
    canvas.setCursor(60, y + bandH / 2 + 8);
    canvas.print(labels[i]);
  }

  // Concentric gray circles
  int areaTop = startY + 4 * (bandH + 8);
  int areaBot = EPD_H - 30;
  int cy = (areaTop + areaBot) / 2;
  int cx = EPD_W - 80;
  canvas.setFont(&FreeMonoBold9pt7b);
  canvas.setTextColor(G_BLACK);
  canvas.setCursor(30, cy - 6);
  canvas.print("Concentric gray circles");
  canvas.setCursor(30, cy + 14);
  canvas.print("(black / dark / light / white)");
  canvas.fillCircle(cx, cy, 38, G_BLACK);
  canvas.fillCircle(cx, cy, 28, G_DARK_GRAY);
  canvas.fillCircle(cx, cy, 18, G_LIGHT_GRAY);
  canvas.fillCircle(cx, cy,  9, G_WHITE);

  // Footer
  canvas.fillRect(0, EPD_H - 30, EPD_W, 30, G_BLACK);
  drawCenteredText("UC8179 4-gray LUT mode | E1001", EPD_H - 8, &FreeMonoBold9pt7b, G_WHITE);

  Serial.println(F("[Gray4] Uploading..."));
  uploadGray4Frame();
  refreshDisplay();
  Serial.println(F("[Gray4] Done."));
}

// ============================================================
void setup()
{
  Serial.begin(115200);
  delay(200);
  Serial.println(F("[E1001 Gray4] Starting..."));

  pinMode(EPD_CS_PIN, OUTPUT);  digitalWrite(EPD_CS_PIN, HIGH);
  pinMode(EPD_DC_PIN, OUTPUT);  digitalWrite(EPD_DC_PIN, HIGH);
  pinMode(EPD_RES_PIN, OUTPUT); digitalWrite(EPD_RES_PIN, HIGH);
  pinMode(EPD_BUSY_PIN, INPUT);

  hspi.begin(EPD_SCK_PIN, -1, EPD_MOSI_PIN, -1);

  if (!canvas.begin()) {
    Serial.println(F("[Gray4] FATAL: alloc failed (96 KB)"));
    while (true) delay(1000);
  }
  Serial.printf("[Gray4] Canvas OK (%lu bytes)\n", (unsigned long)(EPD_W * EPD_H / 4));

  initGrayMode();
  showGrayscaleDemo();
  sleepDisplay();
}

void loop() {}
The following figure shows the actual display effect of the E1001 4-level grayscale example:
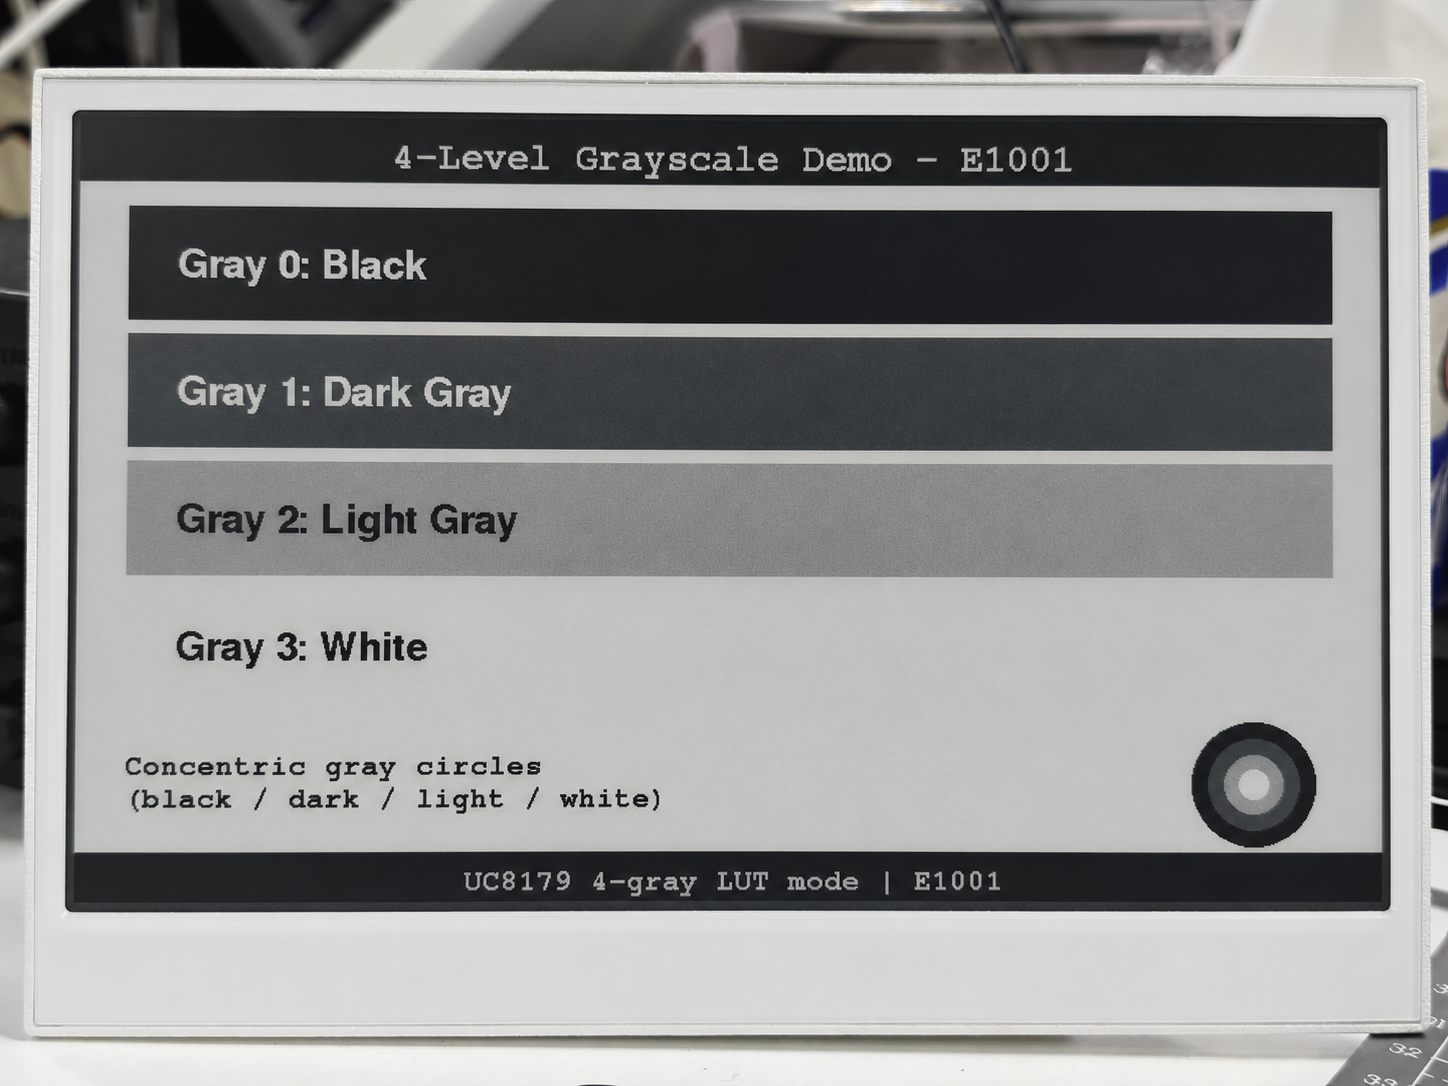
Programming reTerminal E1003 — 16-Level Grayscale
The E1003's IT8951 controller natively supports 16-level grayscale via its GC16 waveform mode. This example allocates a 4bpp (~1.25 MB) framebuffer in PSRAM and uses Adafruit_GFX for drawing via a Gray16Canvas class, then uploads the frame as 8BPP data to the IT8951 for GC16 refresh.
This example requires OPI PSRAM to be enabled in the Arduino IDE: Tools > PSRAM > OPI PSRAM. The ~1.25 MB framebuffer lives in PSRAM.
After installing the Seeed_GxEPD2 library, you can find this example in the Arduino IDE via File > Examples > Seeed_GxEPD2 > GxEPD2_reTerminal_E1003_Gray16, or locate it manually at Seeed_GxEPD2/examples/GxEPD2_reTerminal_E1003_Gray16/GxEPD2_reTerminal_E1003_Gray16.ino.Click here to view the full code
#include <SPI.h>
#include <Adafruit_GFX.h>
#include <Fonts/FreeMonoBold9pt7b.h>
#include <Fonts/FreeMonoBold12pt7b.h>

// ===== Pin mapping (E1003) =====
#define EPD_SCK_PIN     7
#define EPD_MISO_PIN    8
#define EPD_MOSI_PIN    9
#define EPD_CS_PIN      10
#define EPD_BUSY_PIN    13  // HRDY
#define EPD_TFT_ENABLE  11
#define EPD_ITE_ENABLE  21

// Panel geometry
#define EPD_W  1872
#define EPD_H  1404

SPIClass hspi(HSPI);
SPISettings spiSet(10000000, MSBFIRST, SPI_MODE0);

// IT8951 commands
#define CMD_SYS_RUN       0x0001
#define CMD_STANDBY       0x0002
#define CMD_SLEEP         0x0003
#define CMD_REG_RD        0x0010
#define CMD_REG_WR        0x0011
#define CMD_LD_IMG_AREA   0x0021
#define CMD_LD_IMG_END    0x0022
#define CMD_DPY_AREA      0x0034
#define REG_LISAR         0x0208

#define IT8951_8BPP        3
#define IT8951_B_ENDIAN    1
#define IT8951_ROTATE_0    0

#define DBG Serial0

// ============================================================
// Minimal 16-level grayscale canvas (4bpp, PSRAM-backed)
// ============================================================
class Gray16Canvas : public Adafruit_GFX
{
public:
  Gray16Canvas(uint16_t w, uint16_t h) : Adafruit_GFX(w, h), _buf(nullptr) {}

  bool begin()
  {
    uint32_t sz = uint32_t(_width) * _height / 2;
#if defined(ESP32)
    _buf = (uint8_t*)heap_caps_malloc(sz, MALLOC_CAP_SPIRAM | MALLOC_CAP_8BIT);
#else
    _buf = (uint8_t*)malloc(sz);
#endif
    return _buf != nullptr;
  }

  void drawPixel(int16_t x, int16_t y, uint16_t color) override
  {
    if (!_buf) return;
    if (x < 0 || x >= _width || y < 0 || y >= _height) return;
    switch (getRotation()) {
      case 1: { int16_t t = x; x = _width - 1 - y; y = t; break; }
      case 2: x = _width - 1 - x; y = _height - 1 - y; break;
      case 3: { int16_t t = x; x = y; y = _height - 1 - t; break; }
    }
    uint8_t g = color & 0x0F;
    uint32_t idx = uint32_t(y) * (_width / 2) + x / 2;
    if (x & 1) _buf[idx] = (_buf[idx] & 0xF0) | g;
    else       _buf[idx] = (_buf[idx] & 0x0F) | (g << 4);
  }

  void fillScreen(uint16_t color) override
  {
    if (!_buf) return;
    uint8_t g = color & 0x0F;
    memset(_buf, (g << 4) | g, uint32_t(_width) * _height / 2);
  }

  uint8_t getPixel4bpp(int16_t x, int16_t y) const
  {
    if (!_buf || x < 0 || x >= _width || y < 0 || y >= _height) return 0;
    uint32_t idx = uint32_t(y) * (_width / 2) + x / 2;
    return (x & 1) ? (_buf[idx] & 0x0F) : ((_buf[idx] >> 4) & 0x0F);
  }

  uint8_t* buffer() { return _buf; }

private:
  uint8_t* _buf;
};

Gray16Canvas canvas(EPD_W, EPD_H);

// IT8951 device info
uint32_t imgBufAddr = 0;

// ============================================================
// IT8951 SPI helpers
// ============================================================
void waitHRDY() { while (digitalRead(EPD_BUSY_PIN) == LOW) delay(1); }

uint16_t xfer16(uint16_t v) {
  uint16_t r = hspi.transfer16(v);
  return r;
}

void writeCmd16(uint16_t cmd) {
  waitHRDY();
  hspi.beginTransaction(spiSet);
  digitalWrite(EPD_CS_PIN, LOW);
  xfer16(0x6000);
  waitHRDY();
  xfer16(cmd);
  digitalWrite(EPD_CS_PIN, HIGH);
  hspi.endTransaction();
}

void writeData16(uint16_t data) {
  waitHRDY();
  hspi.beginTransaction(spiSet);
  digitalWrite(EPD_CS_PIN, LOW);
  xfer16(0x0000);
  waitHRDY();
  xfer16(data);
  digitalWrite(EPD_CS_PIN, HIGH);
  hspi.endTransaction();
}

uint16_t readData16() {
  waitHRDY();
  hspi.beginTransaction(spiSet);
  digitalWrite(EPD_CS_PIN, LOW);
  xfer16(0x1000);
  waitHRDY();
  xfer16(0);          // dummy
  uint16_t v = xfer16(0);
  digitalWrite(EPD_CS_PIN, HIGH);
  hspi.endTransaction();
  return v;
}

void writeReg(uint16_t reg, uint16_t val) {
  writeCmd16(CMD_REG_WR);
  writeData16(reg);
  writeData16(val);
}

uint16_t readReg(uint16_t reg) {
  writeCmd16(CMD_REG_RD);
  writeData16(reg);
  return readData16();
}

void readDevInfo() {
  writeCmd16(0x0302);
  uint16_t buf[20];
  waitHRDY();
  hspi.beginTransaction(spiSet);
  digitalWrite(EPD_CS_PIN, LOW);
  xfer16(0x1000);
  waitHRDY();
  xfer16(0);
  for (int i = 0; i < 20; i++) buf[i] = xfer16(0);
  digitalWrite(EPD_CS_PIN, HIGH);
  hspi.endTransaction();
  imgBufAddr = (uint32_t(buf[3]) << 16) | buf[2];
  DBG.printf("[IT8951] panel %ux%u, imgBuf=0x%08lX\n", buf[0], buf[1], imgBufAddr);
}

void setVCOM(uint16_t mV) {
  writeCmd16(0x0039);
  writeData16(0x0001);
  writeData16(mV);
}

void setTemperature(uint16_t t) {
  writeCmd16(0x0040);
  writeData16(0x0001);
  writeData16(t);
}

// ============================================================
// Upload 4bpp framebuffer to IT8951 as 8BPP, X-mirrored
// ============================================================
void uploadGray16Frame()
{
  writeReg(REG_LISAR,     (uint16_t)(imgBufAddr & 0xFFFF));
  writeReg(REG_LISAR + 2, (uint16_t)(imgBufAddr >> 16));

  setTemperature(16);

  uint16_t args[5];
  args[0] = (IT8951_B_ENDIAN << 8) | (IT8951_8BPP << 4) | IT8951_ROTATE_0;
  args[1] = 0;
  args[2] = 0;
  args[3] = EPD_W;
  args[4] = EPD_H;
  writeCmd16(CMD_LD_IMG_AREA);
  for (int i = 0; i < 5; i++) writeData16(args[i]);

  unsigned long t0 = millis();
  hspi.beginTransaction(spiSet);
  digitalWrite(EPD_CS_PIN, LOW);
  waitHRDY();
  xfer16(0x0000);
  waitHRDY();

  const uint16_t WB = EPD_W / 2;
  for (uint16_t row = 0; row < EPD_H; row++) {
    const uint8_t* rp = canvas.buffer() + uint32_t(row) * WB;
    // X-mirror: send bytes right-to-left, nibbles LSB-first within each byte
    for (int16_t col = WB - 1; col >= 0; col--) {
      uint8_t byte_val = rp[col];
      uint8_t lo = byte_val & 0x0F;
      uint8_t hi = (byte_val >> 4) & 0x0F;
      hspi.transfer(lo * 17);  // low nibble = right pixel (sent first due to X-mirror)
      hspi.transfer(hi * 17);  // high nibble = left pixel
    }
    if ((row & 0x3F) == 0) yield();
  }

  digitalWrite(EPD_CS_PIN, HIGH);
  hspi.endTransaction();

  writeCmd16(CMD_LD_IMG_END);
  waitHRDY();

  DBG.printf("[Gray16] upload %lu ms\n", millis() - t0);
}

void displayRefreshGC16()
{
  unsigned long t0 = millis();
  writeCmd16(CMD_DPY_AREA);
  waitHRDY(); writeData16(0);
  waitHRDY(); writeData16(0);
  waitHRDY(); writeData16(EPD_W);
  waitHRDY(); writeData16(EPD_H);
  waitHRDY(); writeData16(2);  // mode 2 = GC16

  while (digitalRead(EPD_BUSY_PIN) == LOW) {
    if (millis() - t0 > 15000) break;
    delay(100);
  }
  DBG.printf("[Gray16] refresh %lu ms\n", millis() - t0);
}

// ============================================================
// Demo drawing functions
// ============================================================

// Gray colors 0-15 (0=black, 15=white)
#define G_BLACK   0
#define G_WHITE  15

void drawCenteredText(const char* text, int16_t y, const GFXfont* font, uint8_t gray)
{
  canvas.setFont(font);
  canvas.setTextColor(gray);
  int16_t tbx, tby; uint16_t tbw, tbh;
  canvas.getTextBounds(text, 0, 0, &tbx, &tby, &tbw, &tbh);
  canvas.setCursor((EPD_W - tbw) / 2 - tbx, y);
  canvas.print(text);
}

void showGrayscaleDemo()
{
  DBG.println(F("[Gray16] Drawing grayscale demo..."));
  canvas.fillScreen(G_WHITE);

  // Title
  canvas.fillRect(0, 0, EPD_W, 60, G_BLACK);
  drawCenteredText("16-Level Grayscale Demo - E1003", 45, &FreeMonoBold12pt7b, G_WHITE);

  // 16 horizontal gray bands
  int bandH = 60, startY = 80;
  canvas.setFont(&FreeMonoBold9pt7b);
  for (int i = 0; i < 16; i++) {
    int y = startY + i * bandH;
    canvas.fillRect(50, y, EPD_W - 100, bandH - 4, i);
    uint8_t textColor = (i < 8) ? 15 : 0;
    canvas.setTextColor(textColor);
    char buf[32];
    snprintf(buf, sizeof(buf), "Gray %2d  (8bpp = %3d)", i, i * 17);
    canvas.setCursor(80, y + bandH / 2 + 5);
    canvas.print(buf);
  }

  // Gradient bar (smooth)
  int gradY = startY + 16 * bandH + 20;
  canvas.setFont(&FreeMonoBold9pt7b);
  canvas.setTextColor(G_BLACK);
  canvas.setCursor(50, gradY - 5);
  canvas.print("Smooth 16-step gradient:");
  for (int x = 0; x < EPD_W - 100; x++) {
    uint8_t g = (x * 15) / (EPD_W - 101);
    canvas.drawFastVLine(50 + x, gradY + 10, 60, g);
  }
  canvas.drawRect(49, gradY + 9, EPD_W - 98, 62, G_BLACK);

  // Concentric circles with gray levels
  int cx = EPD_W / 2;
  int cy = gradY + 102;
  canvas.setTextColor(G_BLACK);
  canvas.setCursor(50, cy);
  canvas.print("Concentric gray circles:");
  cy += 35;
  for (int r = 7; r >= 0; r--) {
    int radius = 24 + r * 12;
    canvas.fillCircle(cx, cy + 45, radius, r * 2);
  }

  DBG.println(F("[Gray16] Uploading..."));
  uploadGray16Frame();
  displayRefreshGC16();
  DBG.println(F("[Gray16] Done."));
}

void setup()
{
  Serial.begin(115200);
  delay(200);
  Serial.println(F("[E1003 Gray16] Starting..."));

  pinMode(EPD_CS_PIN, OUTPUT);
  digitalWrite(EPD_CS_PIN, HIGH);
  pinMode(EPD_BUSY_PIN, INPUT);
  pinMode(EPD_TFT_ENABLE, OUTPUT);
  digitalWrite(EPD_TFT_ENABLE, HIGH);
  pinMode(EPD_ITE_ENABLE, OUTPUT);
  digitalWrite(EPD_ITE_ENABLE, HIGH);

  hspi.begin(EPD_SCK_PIN, EPD_MISO_PIN, EPD_MOSI_PIN, -1);

  delay(100);
  writeCmd16(CMD_SYS_RUN);
  delay(100);

  readDevInfo();
  setVCOM(1400);

  if (!canvas.begin()) {
    DBG.println(F("[Gray16] FATAL: PSRAM alloc failed (~1.25 MB needed)"));
    while (true) delay(1000);
  }
  DBG.printf("[Gray16] Framebuffer OK (%lu bytes)\n", (unsigned long)(EPD_W * EPD_H / 2));

  showGrayscaleDemo();
}

void loop() {}
The following figure shows the actual display effect of the E1003 16-level grayscale example:
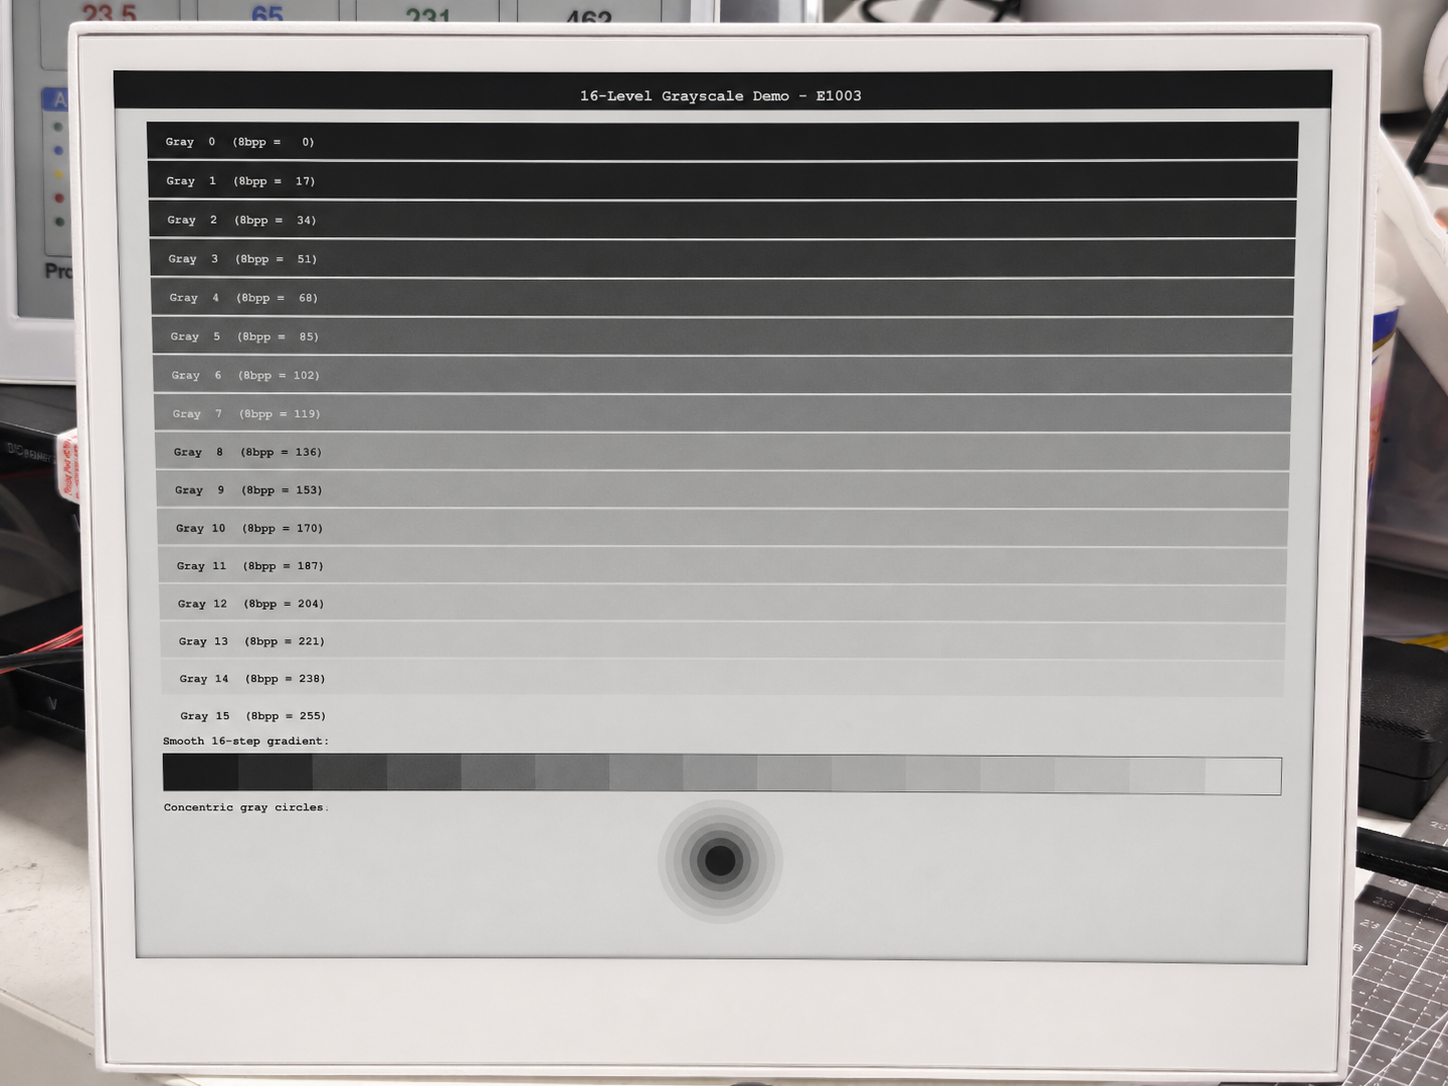
ePaper displays have a relatively slow refresh rate. Black & white displays (E1001, E1003) typically refresh in 1-3 seconds, while 6-color displays (E1002, E1004) can take 25-40 seconds for a full refresh. This is normal behavior and is a trade-off for the ultra-low power consumption and excellent visibility without backlighting.
Troubleshooting
Q1: Why does the reTerminal's ePaper display not show anything or refresh when running the code above?
This issue may occur if you have inserted a MicroSD card into the reTerminal. The reason is that the MicroSD card and the ePaper display share the same SPI bus on the reTerminal. If a MicroSD card is inserted but its enable (chip select) pin is not properly managed, it can cause a conflict on the SPI bus. Specifically, the MicroSD card may hold the BUSY line high, which prevents the ePaper display from functioning correctly—resulting in no display updates or refreshes.
// Initialize SD Card
pinMode(SD_EN_PIN, OUTPUT);
digitalWrite(SD_EN_PIN, HIGH);
pinMode(SD_DET_PIN, INPUT_PULLUP);
To resolve this, you must ensure that the MicroSD card is properly enabled using the code provided above. The code initializes and enables the MicroSD card by setting the correct pin states, which prevents SPI bus conflicts and allows both the SD card and the ePaper display to work together. Always use the recommended initialization code when using a MicroSD card with the reTerminal to avoid such issues.
If the MicroSD card is not used inside your project, we recommend powering down the device and removing the card before running the display program. If the card has been inserted into the reTerminal, you will need to add the above code to ensure that you can get the screen to display properly, regardless of whether you are using a MicroSD card or not.
Q2: Why can't I upload programs to reTerminal?
If you encounter the following error when uploading a program to reTerminal.

Then, it's likely that your Arduino IDE is set to an excessively high upload speed. Please change it to 115200 baud to resolve this issue.
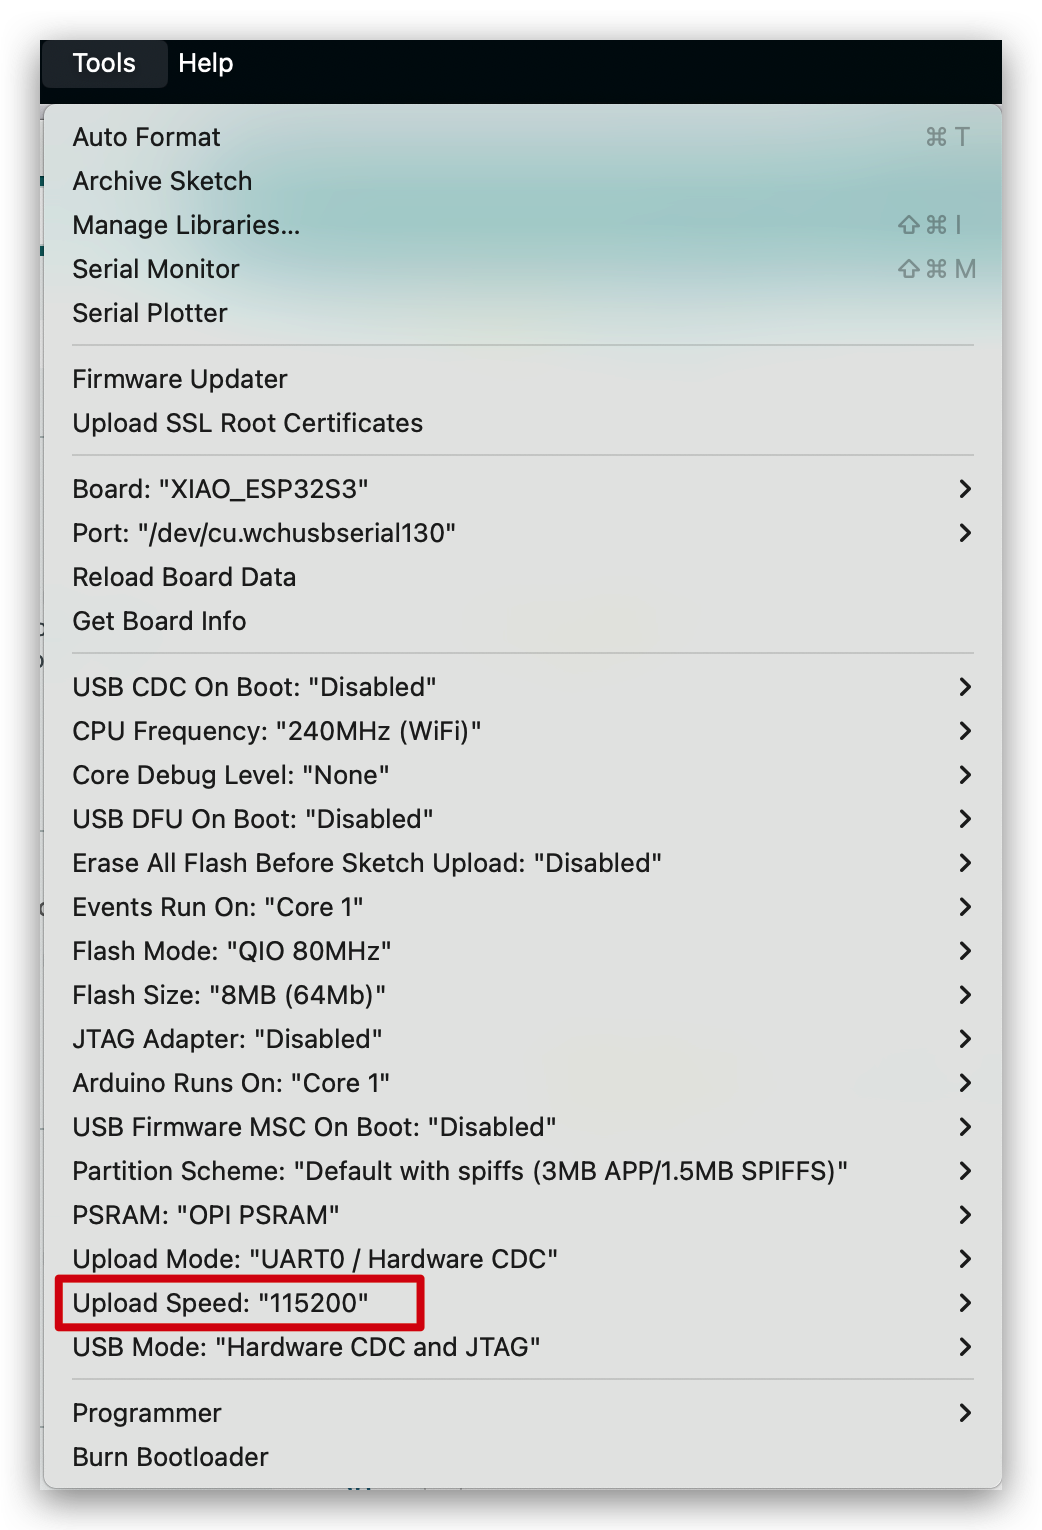
Tech Support & Product Discussion
Thank you for choosing our products! We are here to provide you with different support to ensure that your experience with our products is as smooth as possible. We offer several communication channels to cater to different preferences and needs.