Get Started with MeshCore on SenseCAP MeshTracker X1
Firmware Flashing
- Via Web Flasher
- Drag and Drop
Connect your device with a USB cable to the computer.
Please keep the USB cable connected while the data transmission, or else the device can be damaged.
Go to the Meshcore Web Flasher.
Choose Seeed Studio SenseCAP MeshTracker X1 in the Community Firmware group.
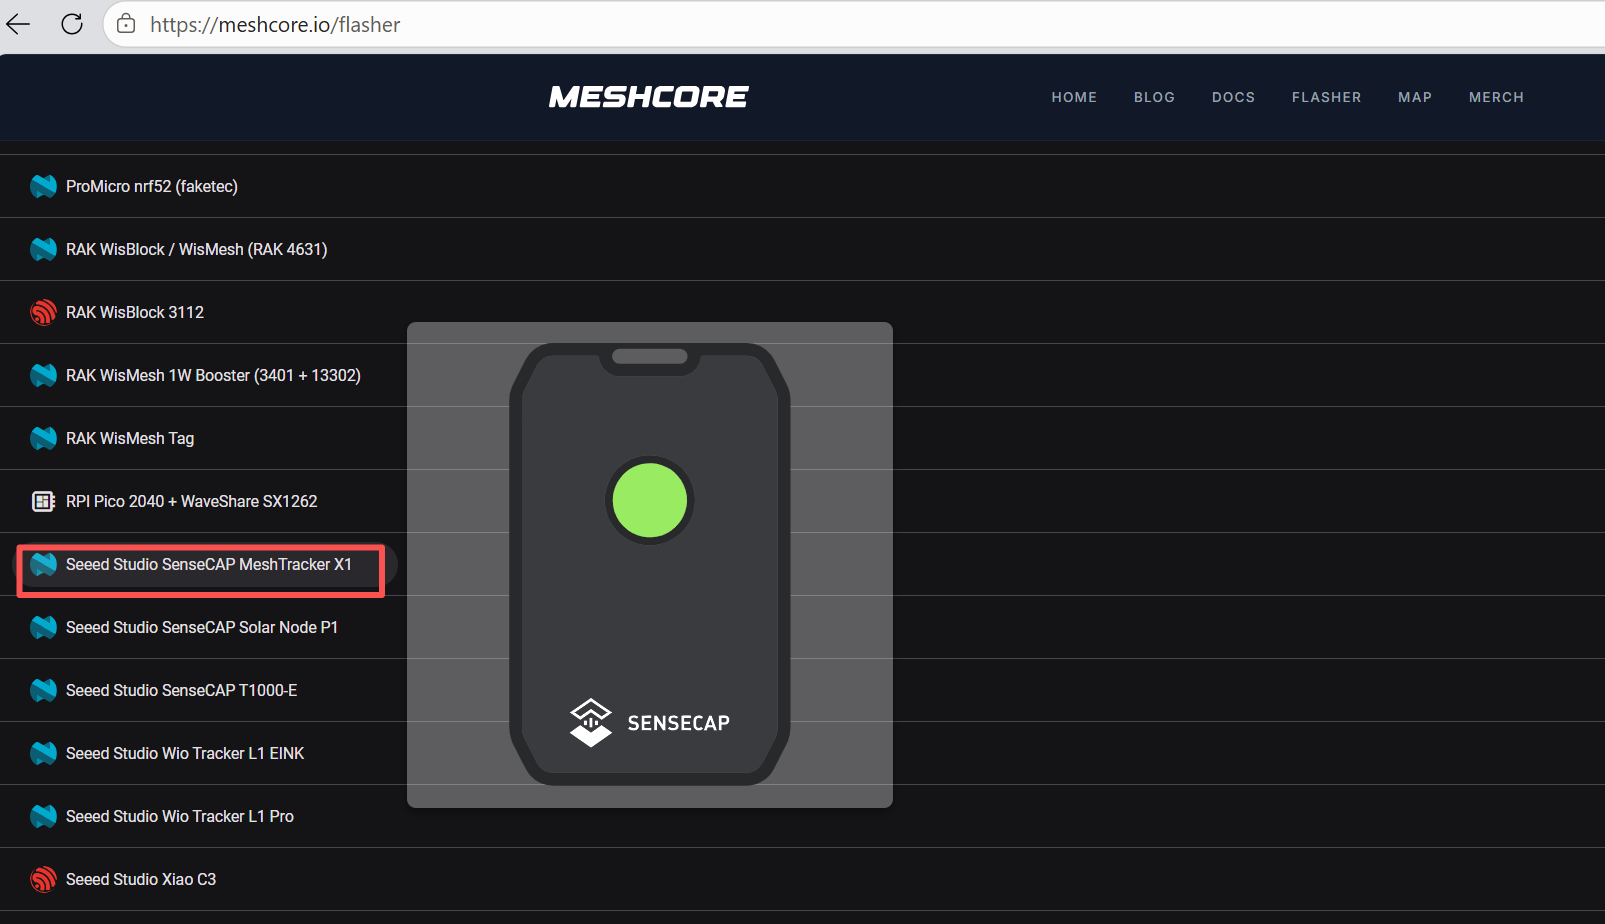
Choose Companion Bluetooth. Devices flashed with Bluetooth companion firmware can be connected to the APP. If you want to flash other firmware, please click here to see the tutorial.
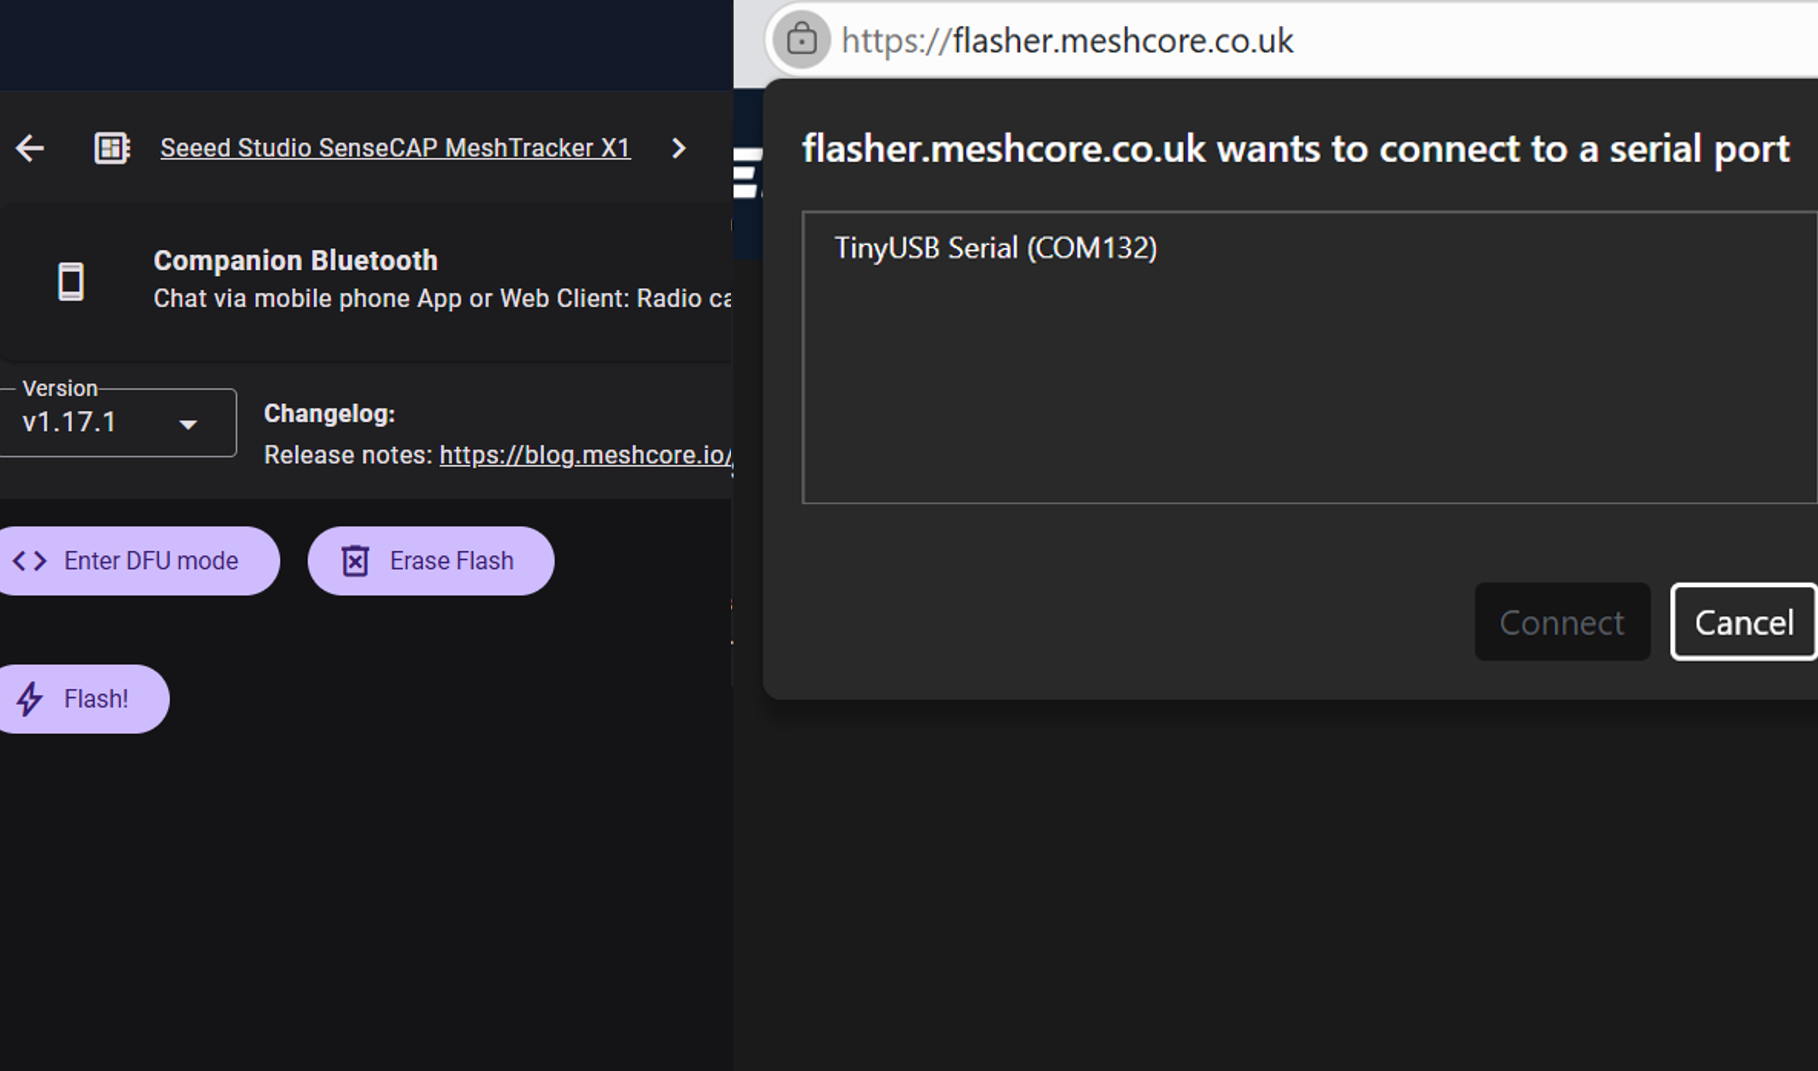
Step1 Flash Erase
Click Enter DFU Mode, choose the serial port named "nRF xxx" or "TinyUSB" serial. Then click Erase Flash and choose the serial port.
If you have clicked Erase Flash but there is no response, click Enter DFU again and then click Erase Flash to make sure you have successfully entered DFU.
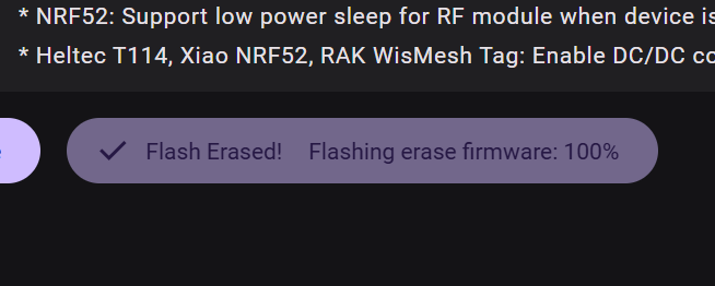
If you see "Flashing erase firmware:100%", the device has been successfully erased.
Step2 Flash Firmware
Click Enter DFU Mode, choose the serial port named "nRF xxx" or "TinyUSB" serial. Then click Flash and choose the serial port.
If you have clicked Flash but there is no response, click Enter DFU again and then click Flash to make sure you have successfully entered DFU.
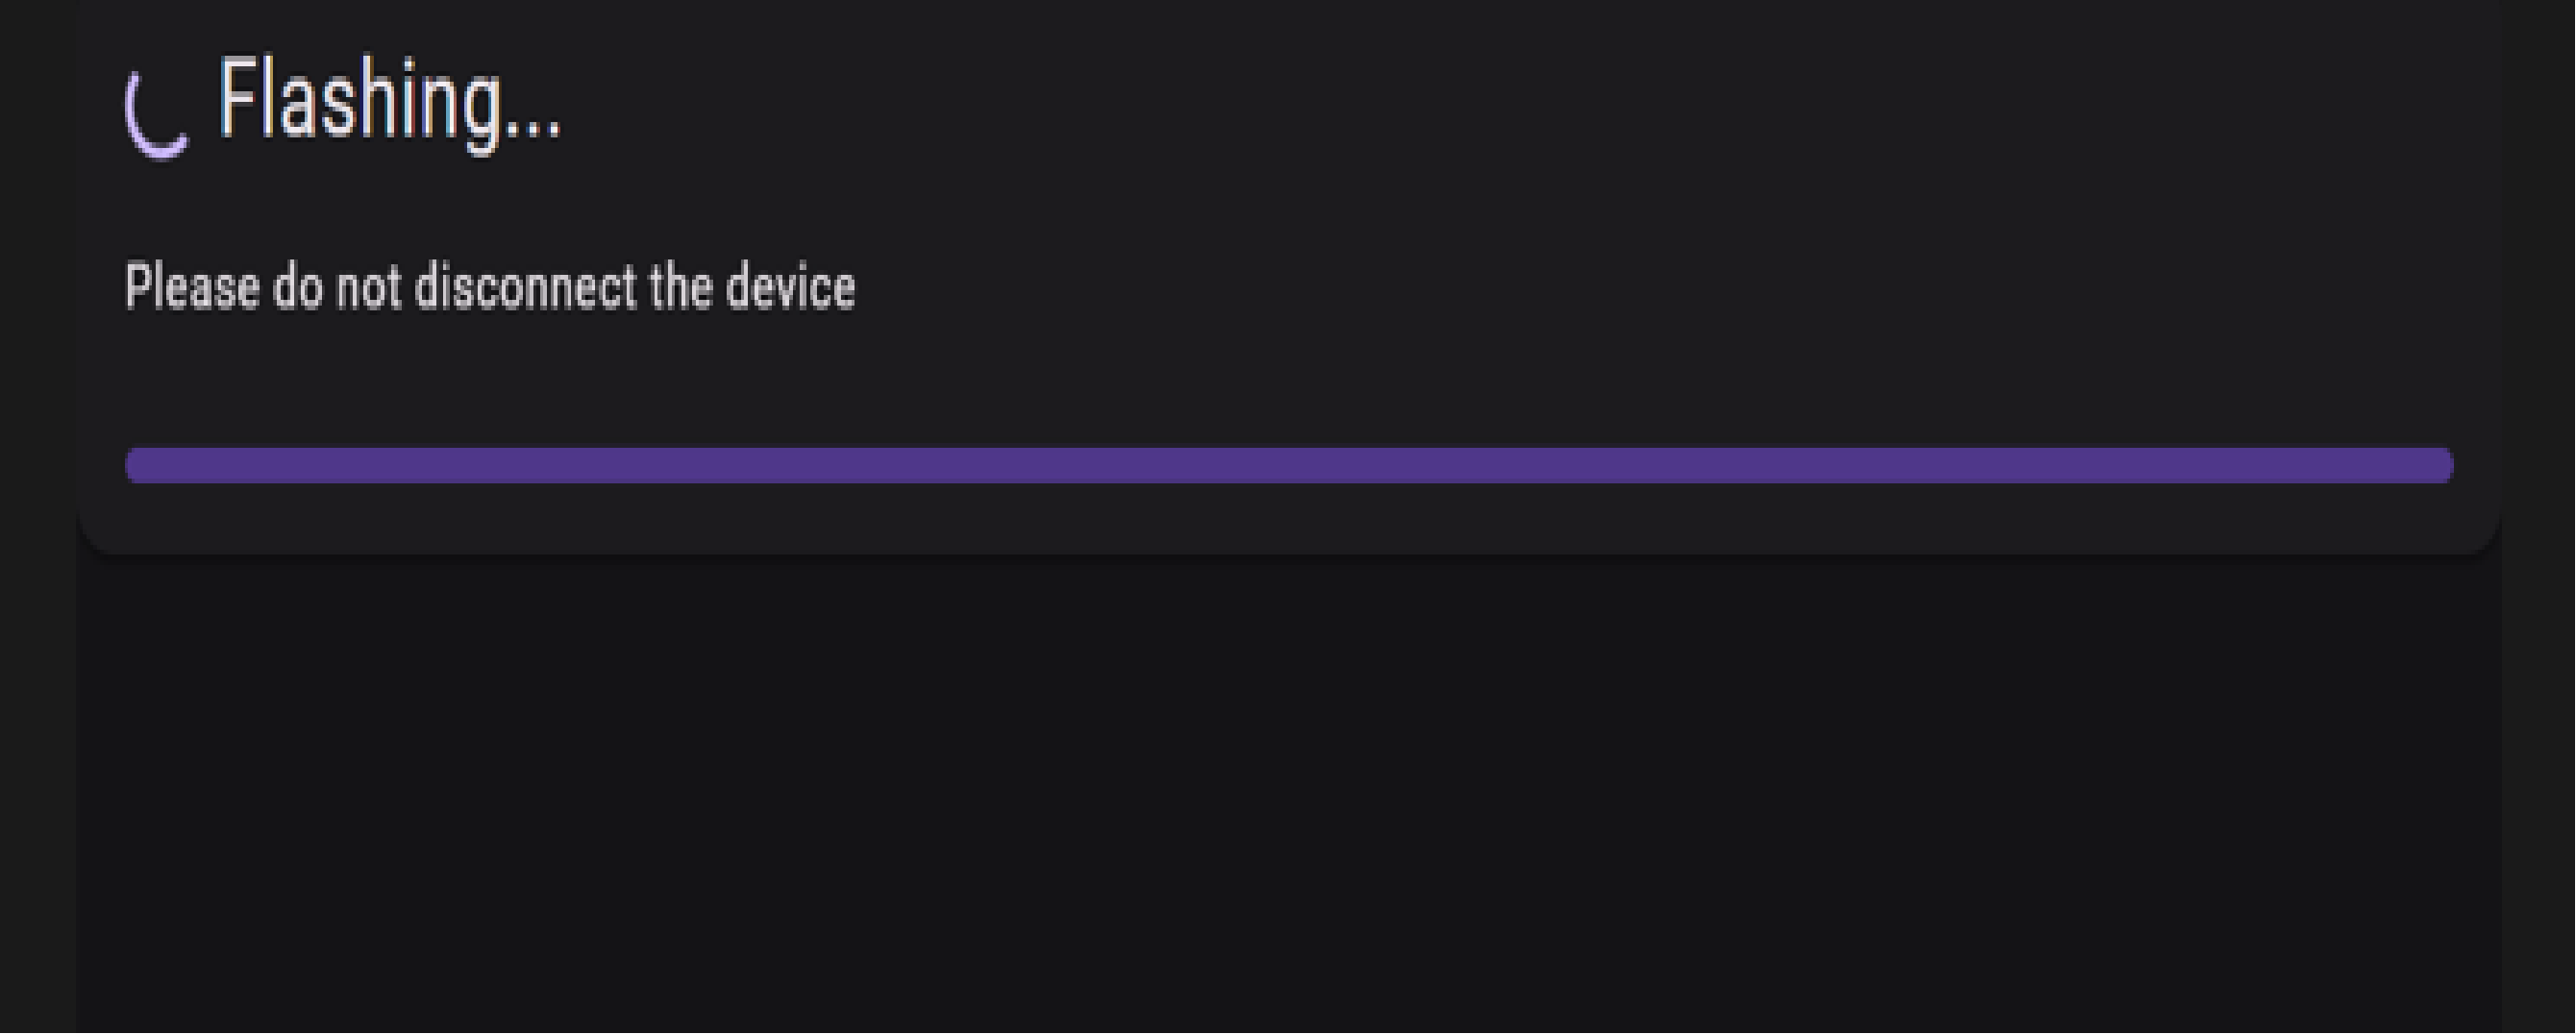
When the progress bar is completely filled, it indicates that Flash has completed. Then the device will automatically reboot.
Connect your device with a USB cable to the computer.
Please keep the USB cable connected while the data transmission, or else the device can be damaged.
Go to the Meshcore Web Flasher.
Choose Seeed Studio SenseCAP MeshTracker X1 in the Community Firmware group.
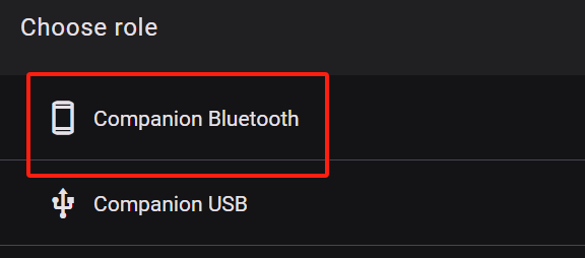
Choose Companion Bluetooth. Devices flashed with Bluetooth companion firmware can be connected to the APP. If you want to flash other firmware, please click here to see the tutorial.
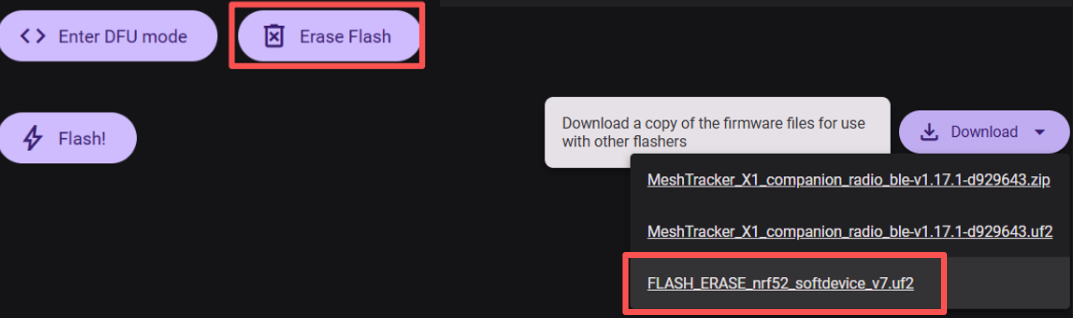
Step1 Flash Erase
Download the UF2 file.
Try to enter DFU mode manually: press and hold the device button, then quickly connect the device with the computer via USB cable, keep holding the button until a white ⚪️ LED turned on.
To successfully enter the DFU mode, you need to perform this operation quickly. You may need to try multiple times.
You can see a disk named X1 will pop out after 10~15 s.
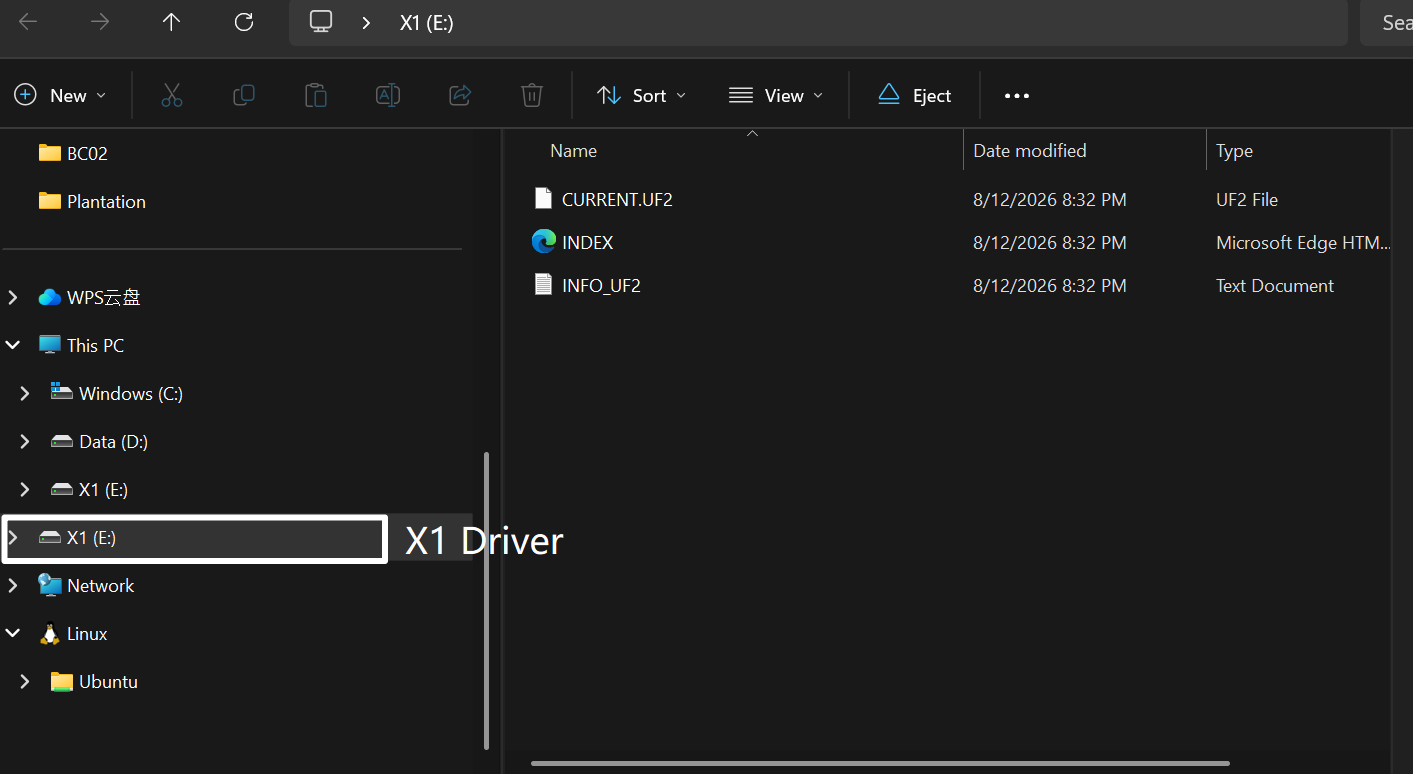
Drag the downloaded UF2 file to the pop-out disk.
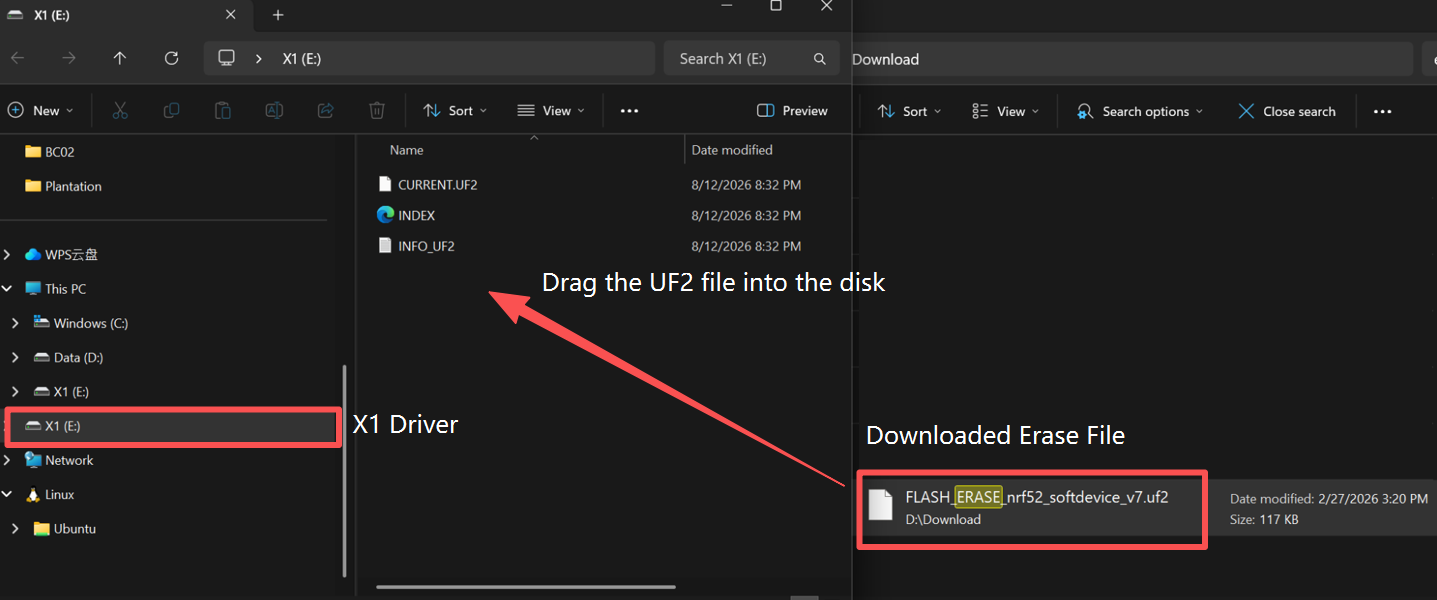
The disk will disappear after the firmware is successfully flashed. At this point there is no firmware in the device, so the device will NOT automatically reboot.
Step2 Flash Firmware
Choose the latest firmware version.
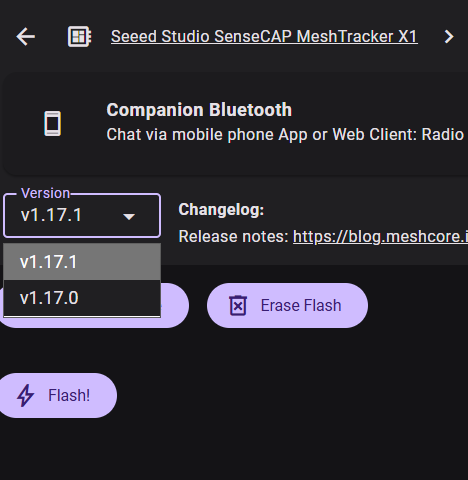
Download the UF2 file.
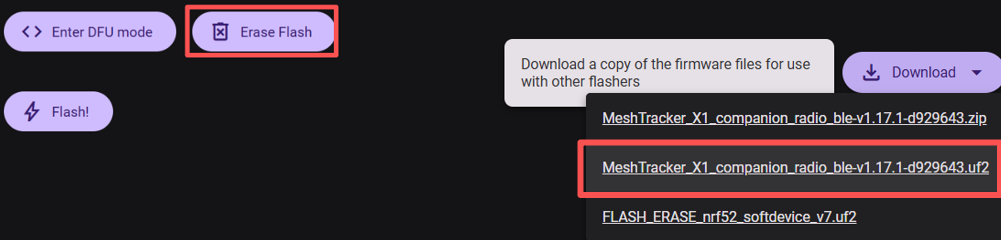
Try to enter DFU mode manually: press and hold the device button, then quickly connect the device with the computer via USB cable, keep holding the button until a white ⚪️ LED turned on.
To successfully enter the DFU mode, you need to perform this operation quickly. You may need to try multiple times.
You can see a disk named X1 will pop out after 10~15 s.
Drag the downloaded UF2 file to the pop-out disk.
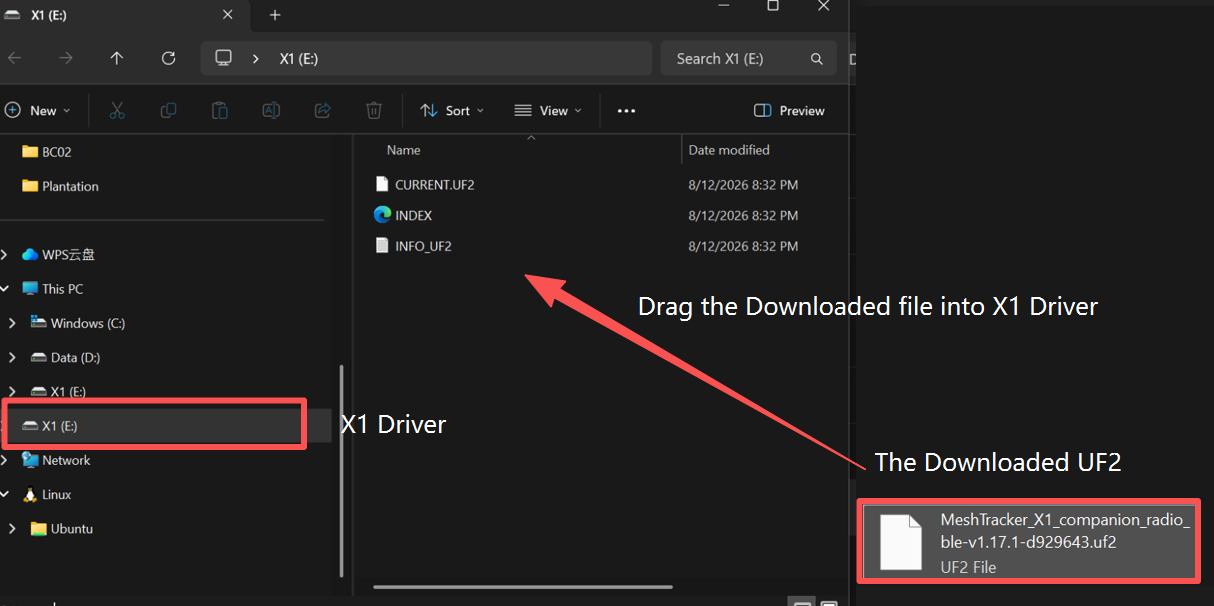
The disk will disappear after the firmware is successfully flashed. At this point there is no firmware in the device, so the device will automatically reboot.
Configuration
Power on the device
Press the button to turn it on. The LED will be on and there is an ascending melody melody.
Power off the device
Press the button for 3s to turn it off. The LED will be off and there is a descending melody.
If the device doesn't respond when you press the button, please charge it first. Do not use the fast-charging charger.
APP Connection
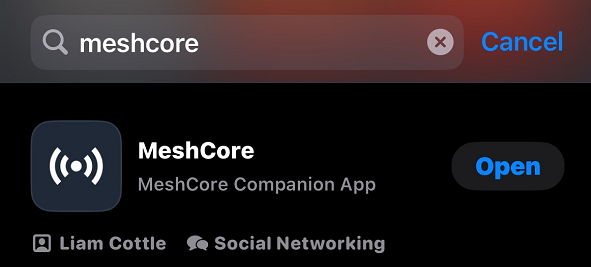
Download from the Google Store or Apple Store. Or click here to get the Meshcore APP.
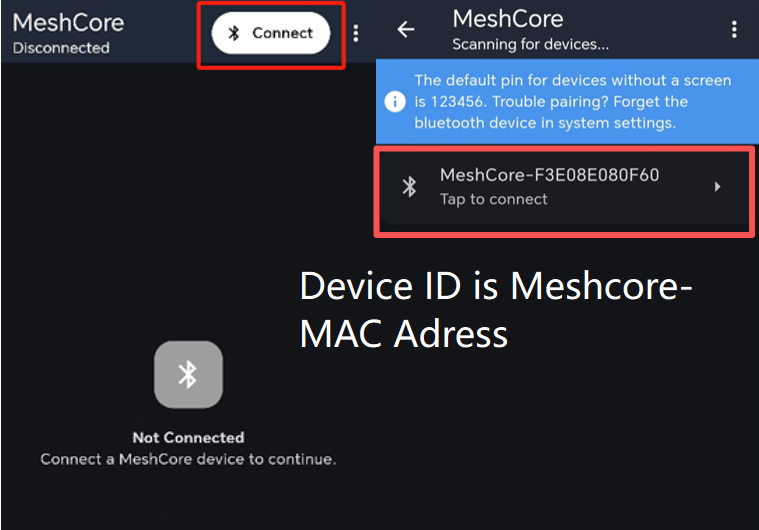
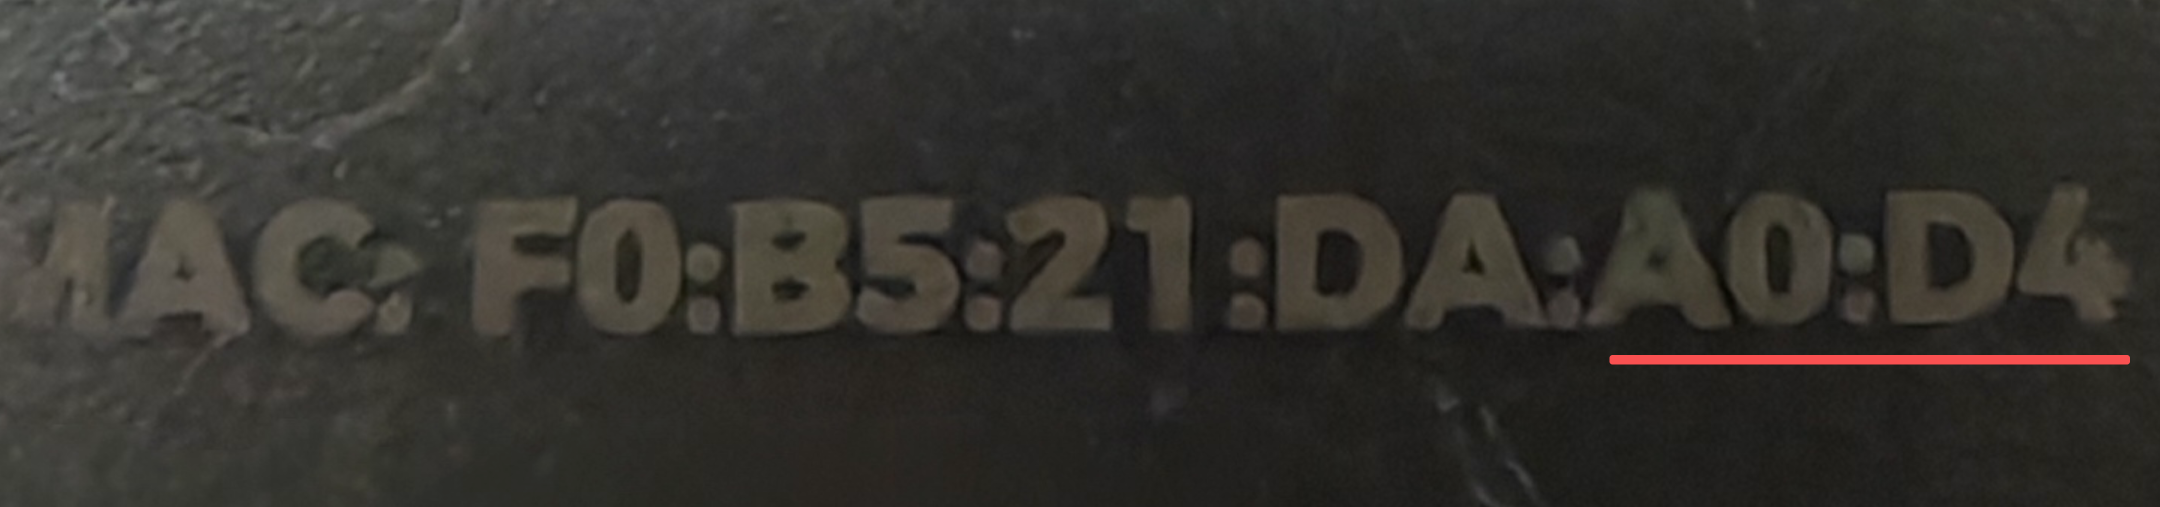
Click Connect and choose the target device. The default device ID is Meshcore-MAC Address. The MAC address can be seen on the back of the device.
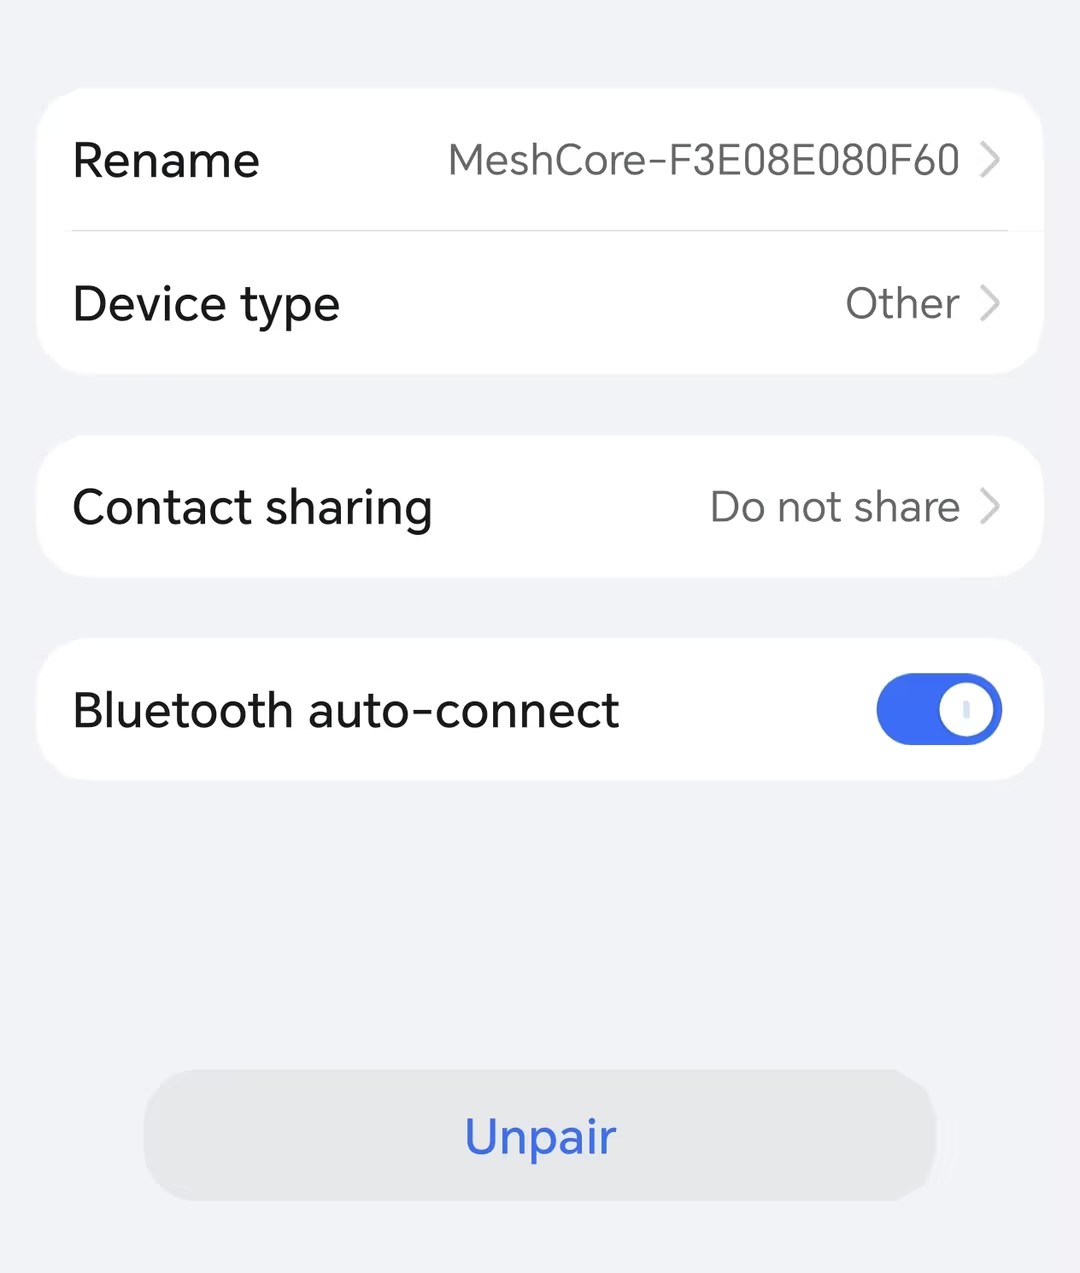
Enter the default pin code 123456 and then click Pair to connect the device.
If the connection fails, open your phone's Bluetooth list and forget or Unpair the device. Then try to reconnect again.
Configure the LoRa
In order to start communicating over the mesh, you must set your region. This setting controls which frequency range your device uses and should be set according to your regional location.
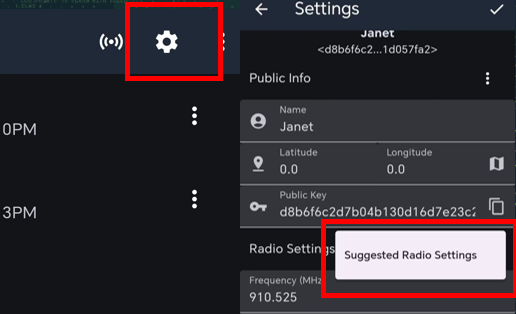
Then reboot the device, or else the configuration will not take effect.
Region List
| Region Code | Description | Frequency Range (MHz) | Duty Cycle (%) | Power Limit (dBm) |
|---|---|---|---|---|
| UNSET | Unset | N/A | N/A | N/A |
| US | United States | 902.0 - 928.0 | 100 | 30 |
| EU_868 | European Union 868 MHz | 869.4 - 869.65 | 10 | 27 |
Now that you have set the LoRa region on your device, you can continue with configuring any LoRa parameter to suit your needs.
Advanced Configuration
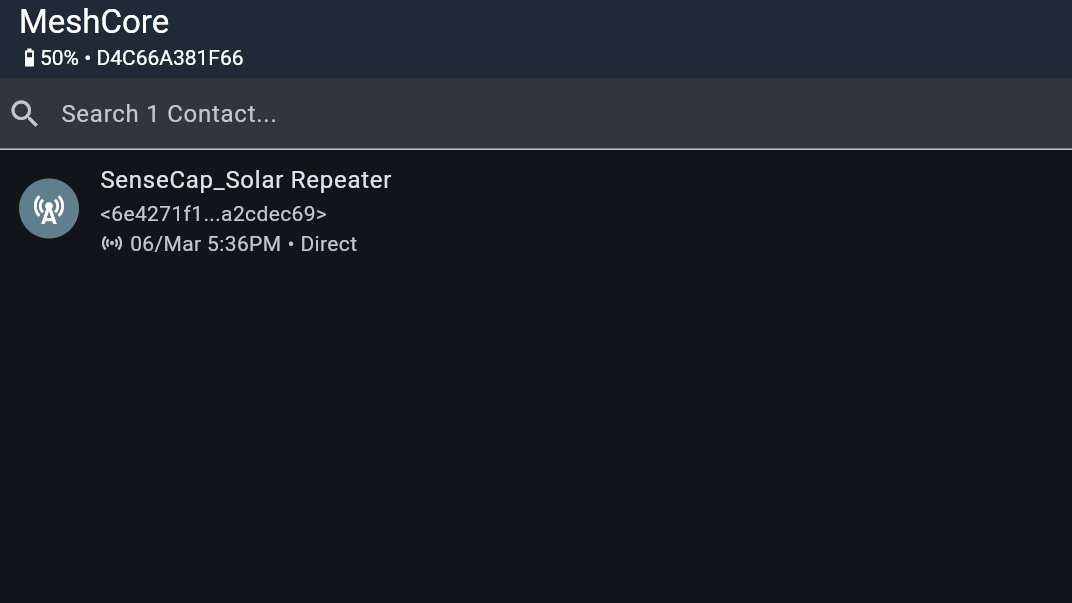
Connect via the web interface(BLE)
- Open the MeshCore Web App and click the Settings icon.
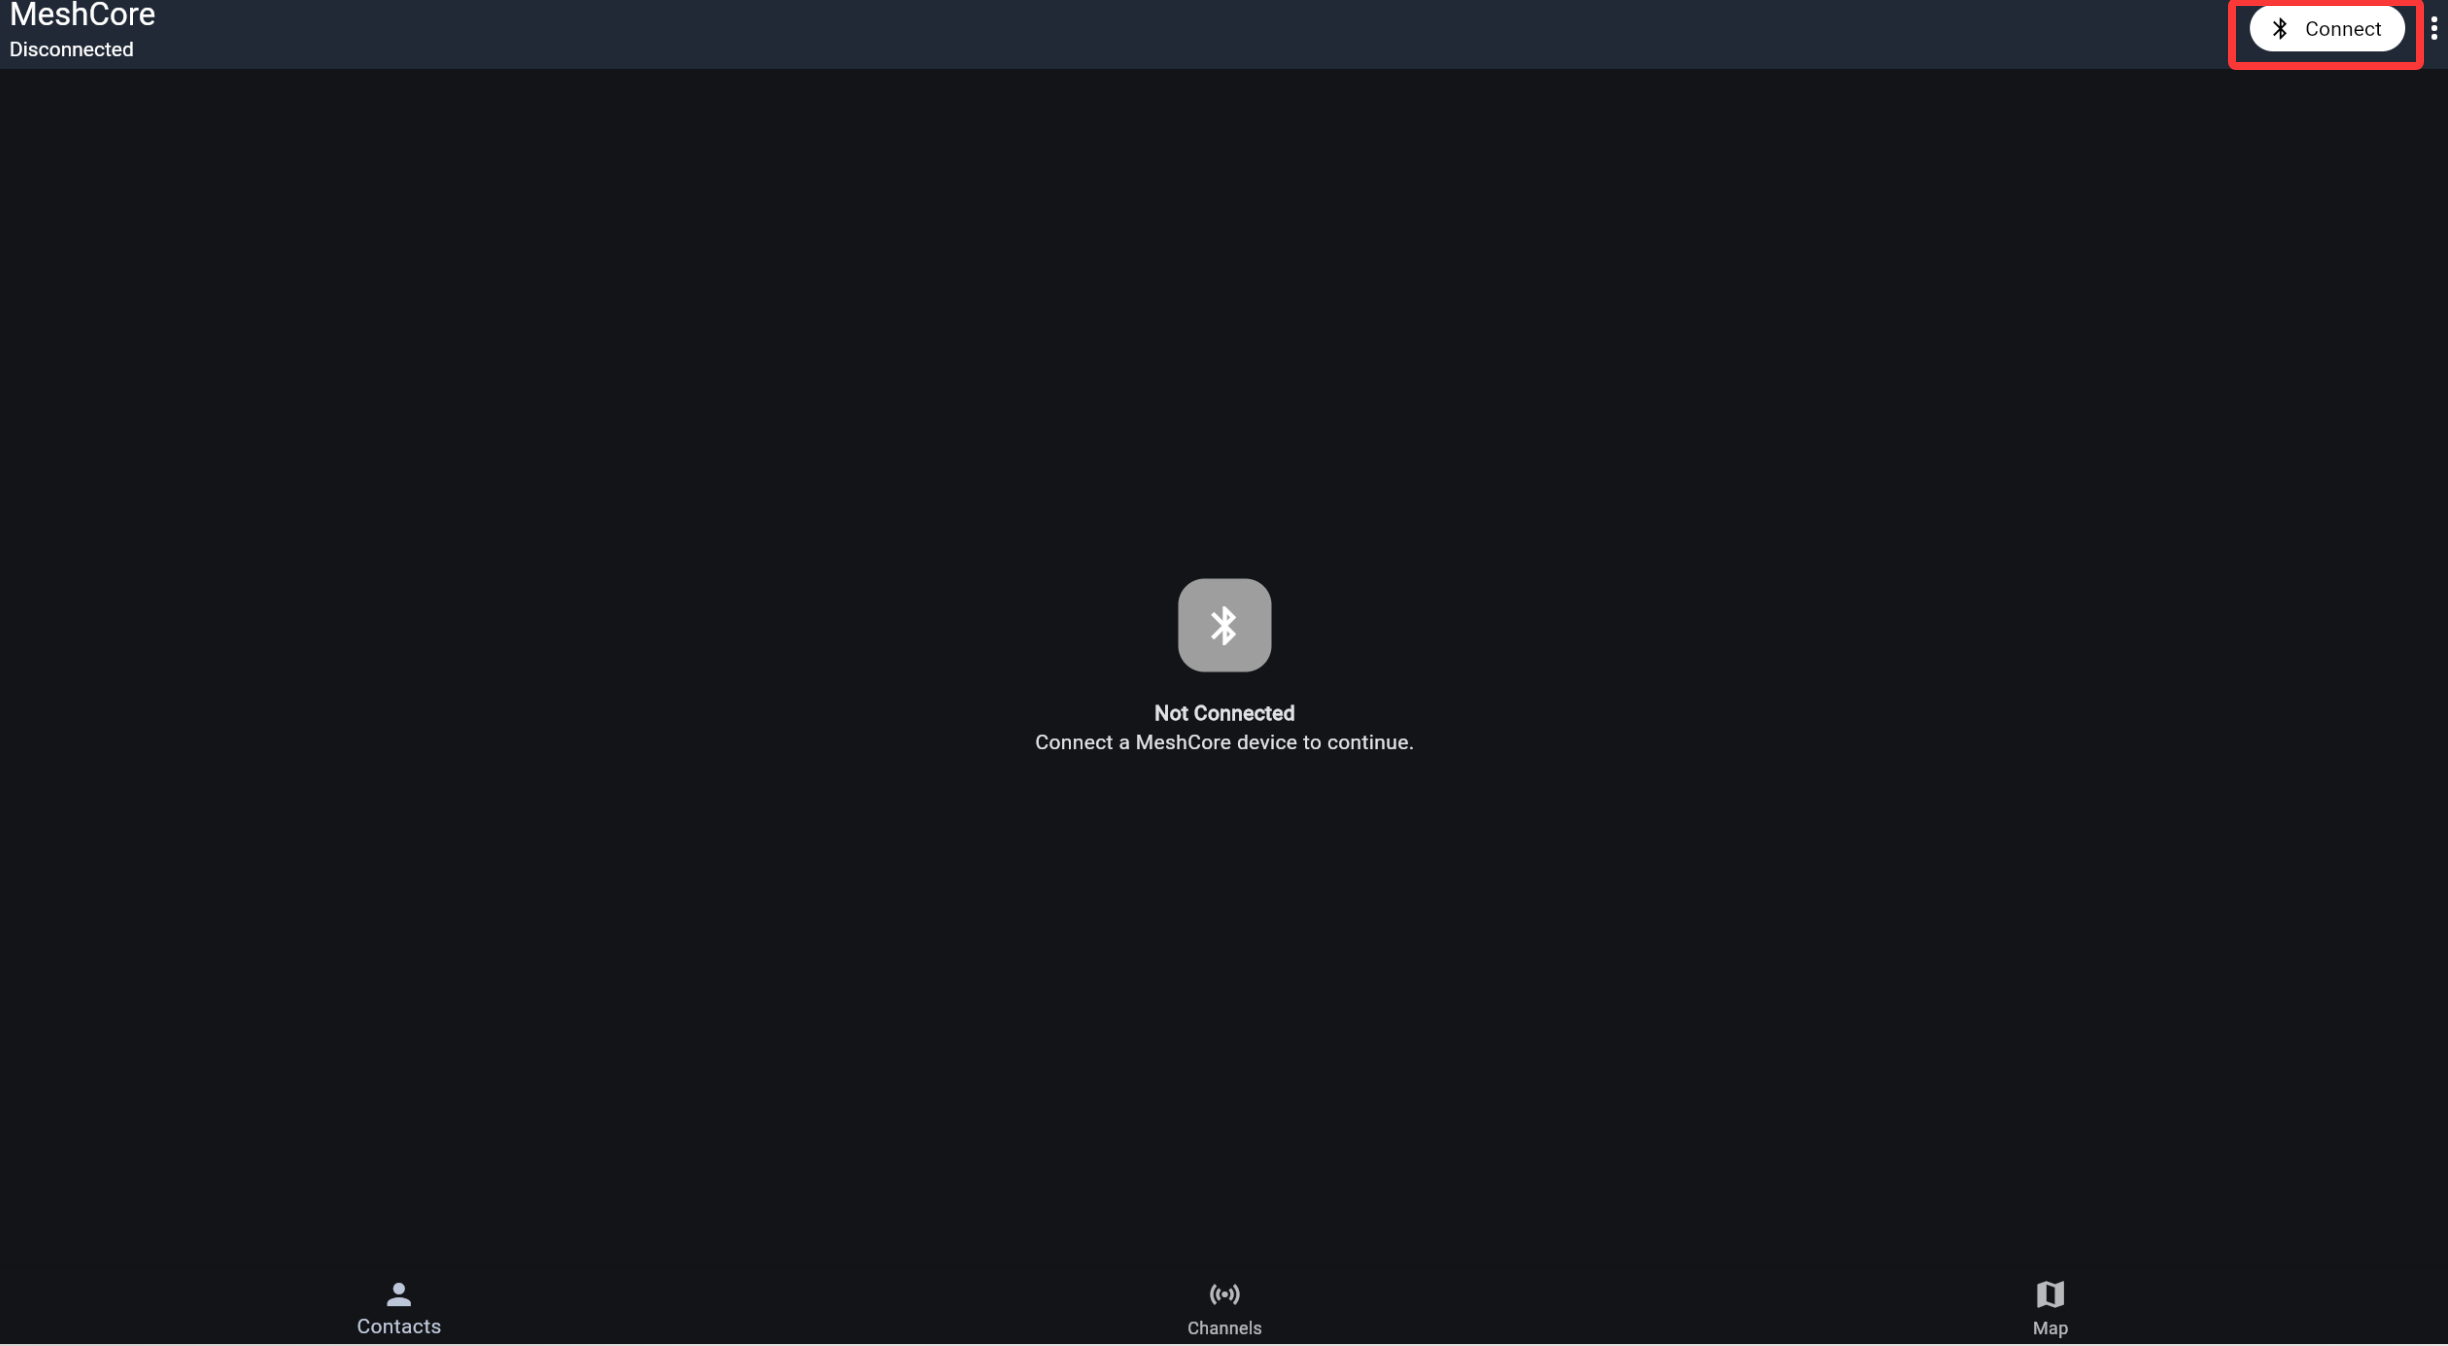
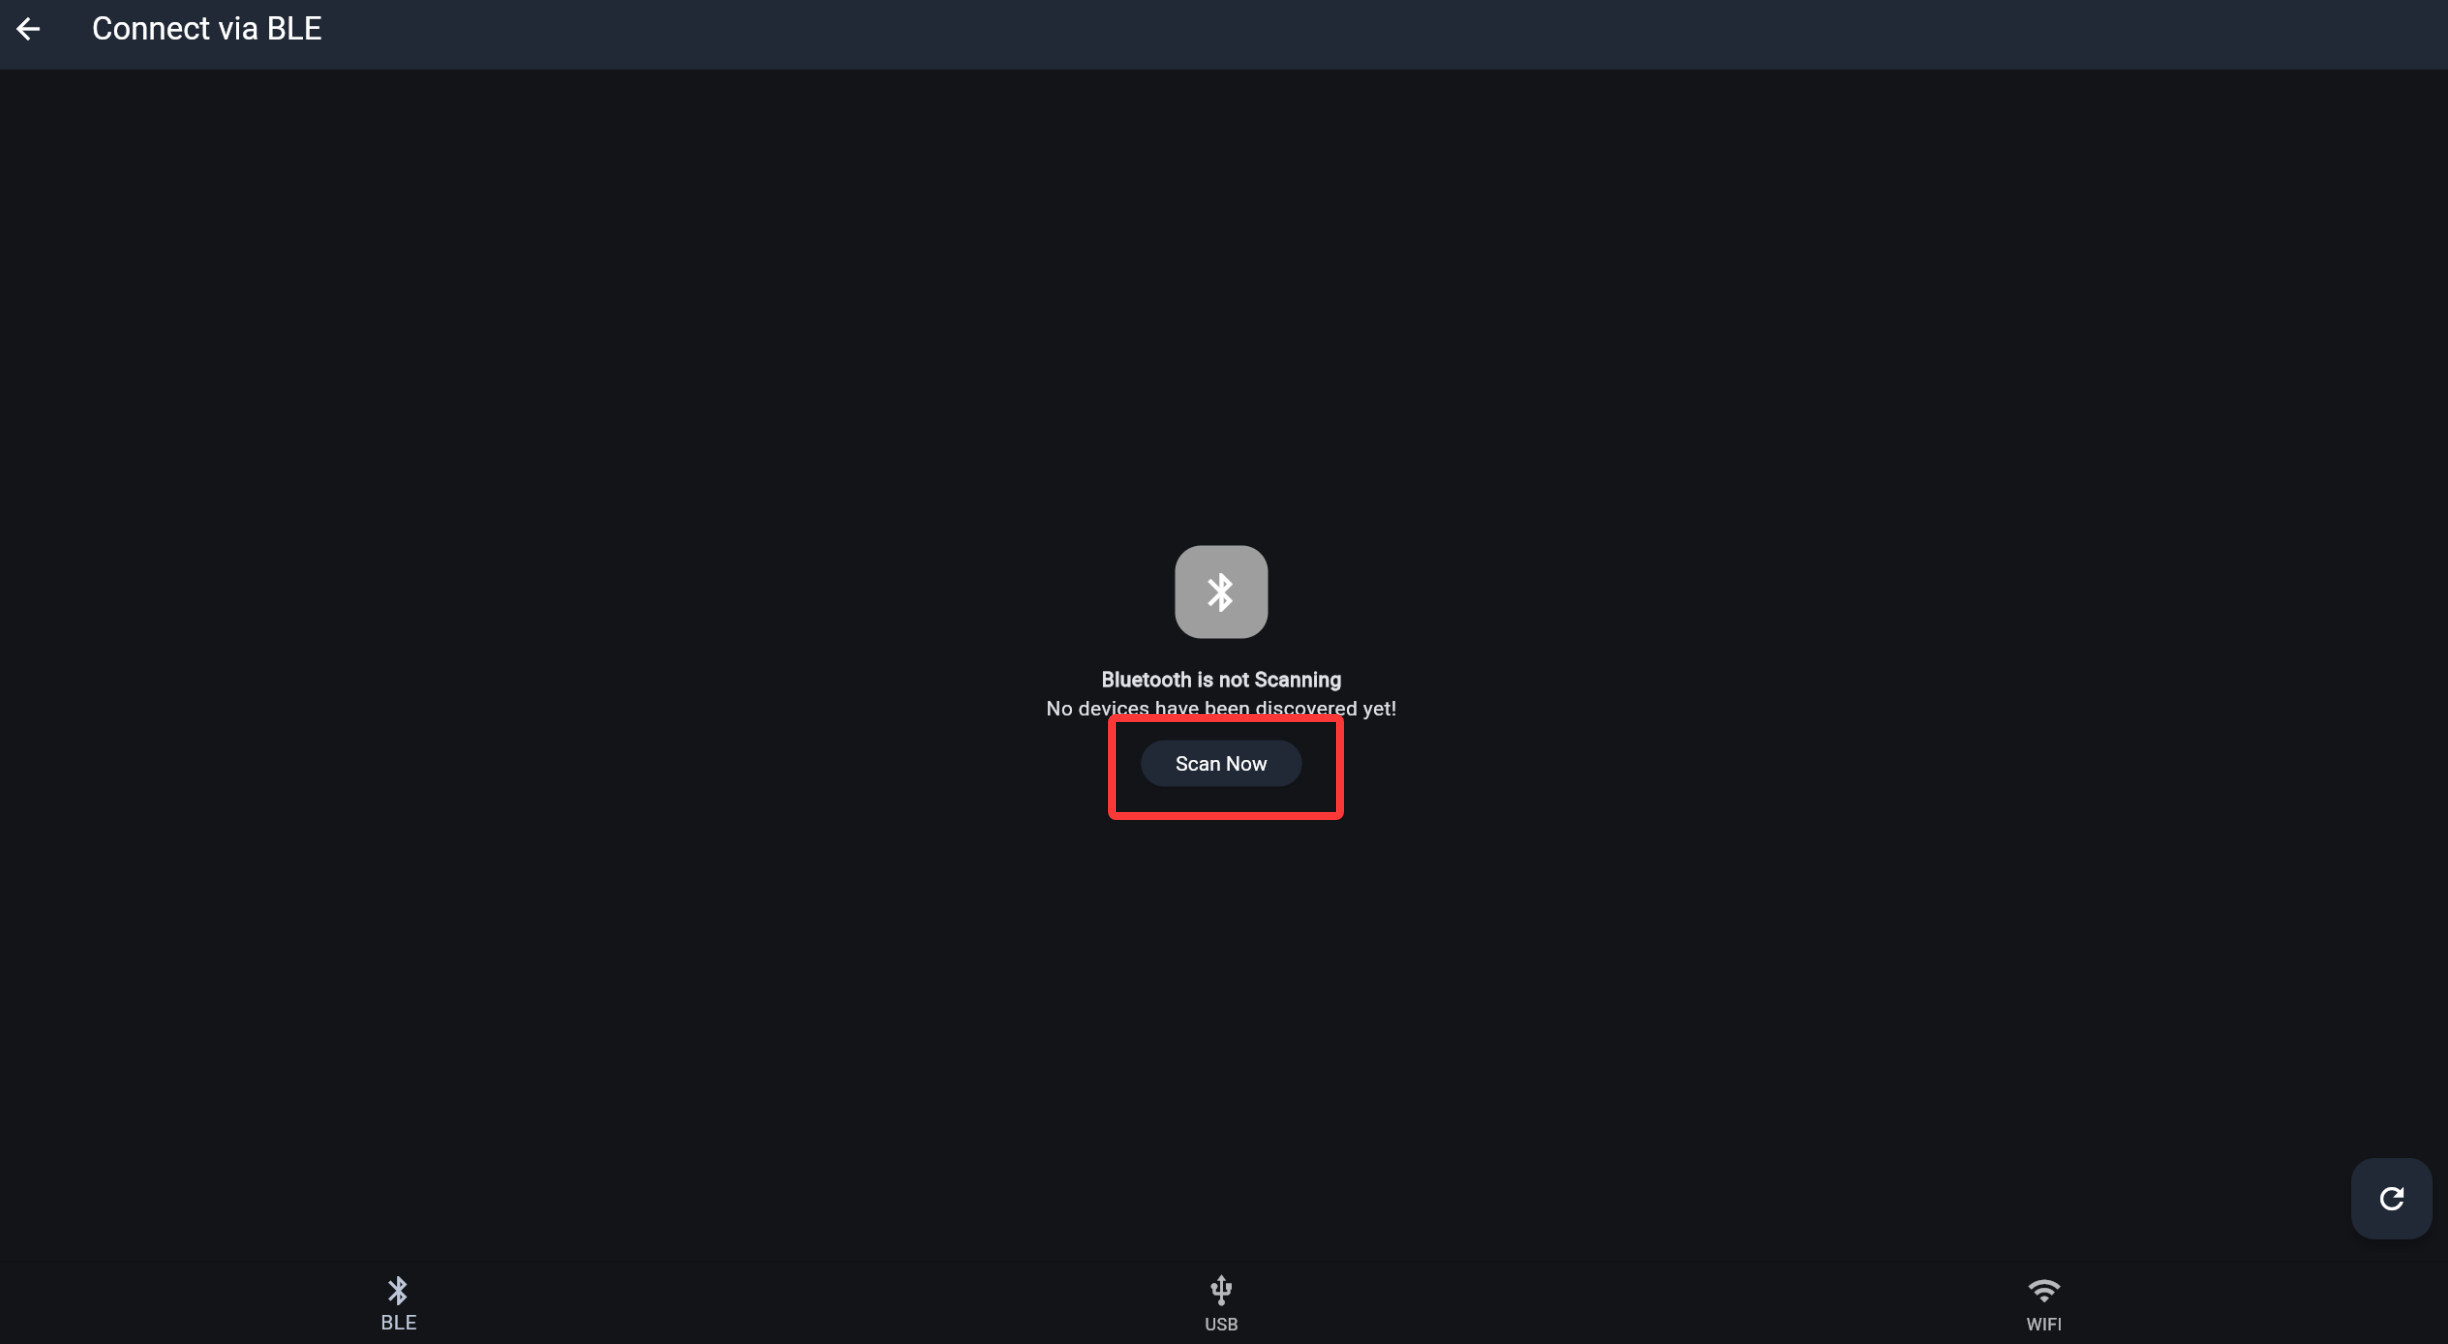
- Select the BLE tab, then click Scan Now.
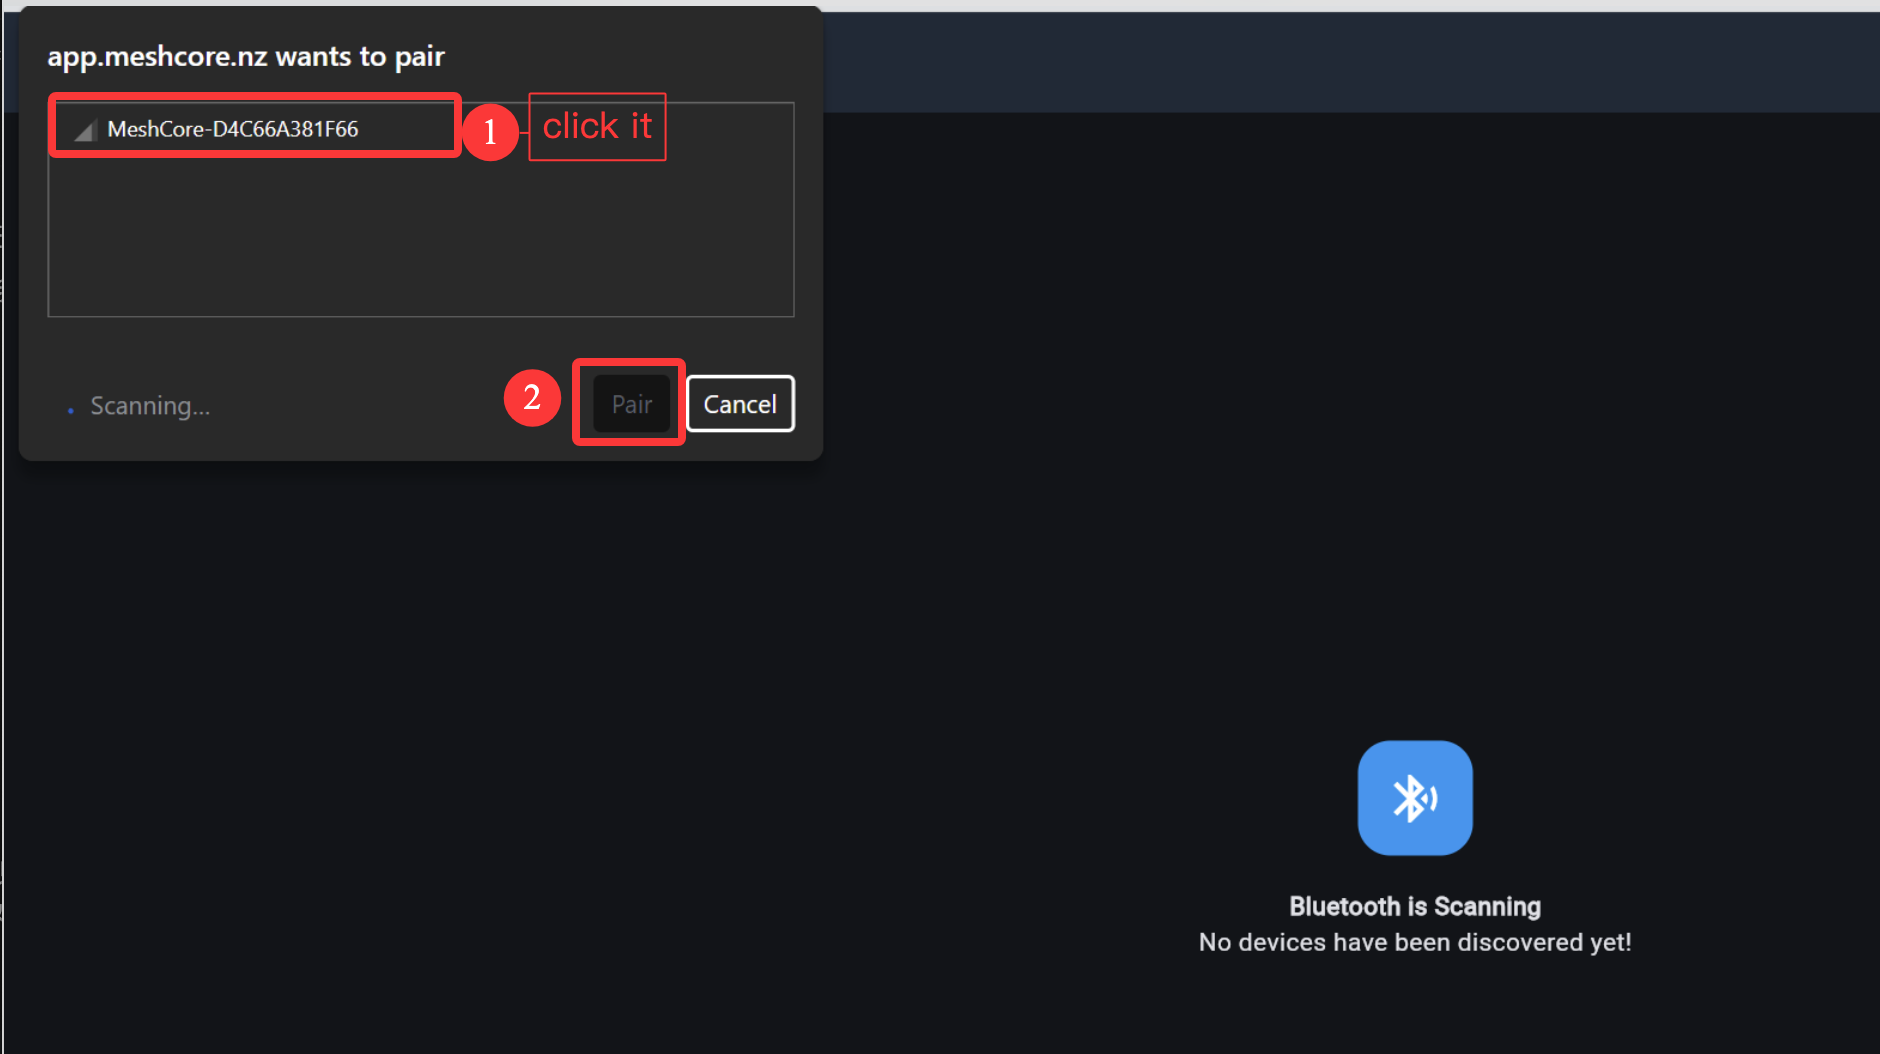
- In the system Bluetooth popup, select your device (for example, Meshcore-xxxxxx) and click Pair.
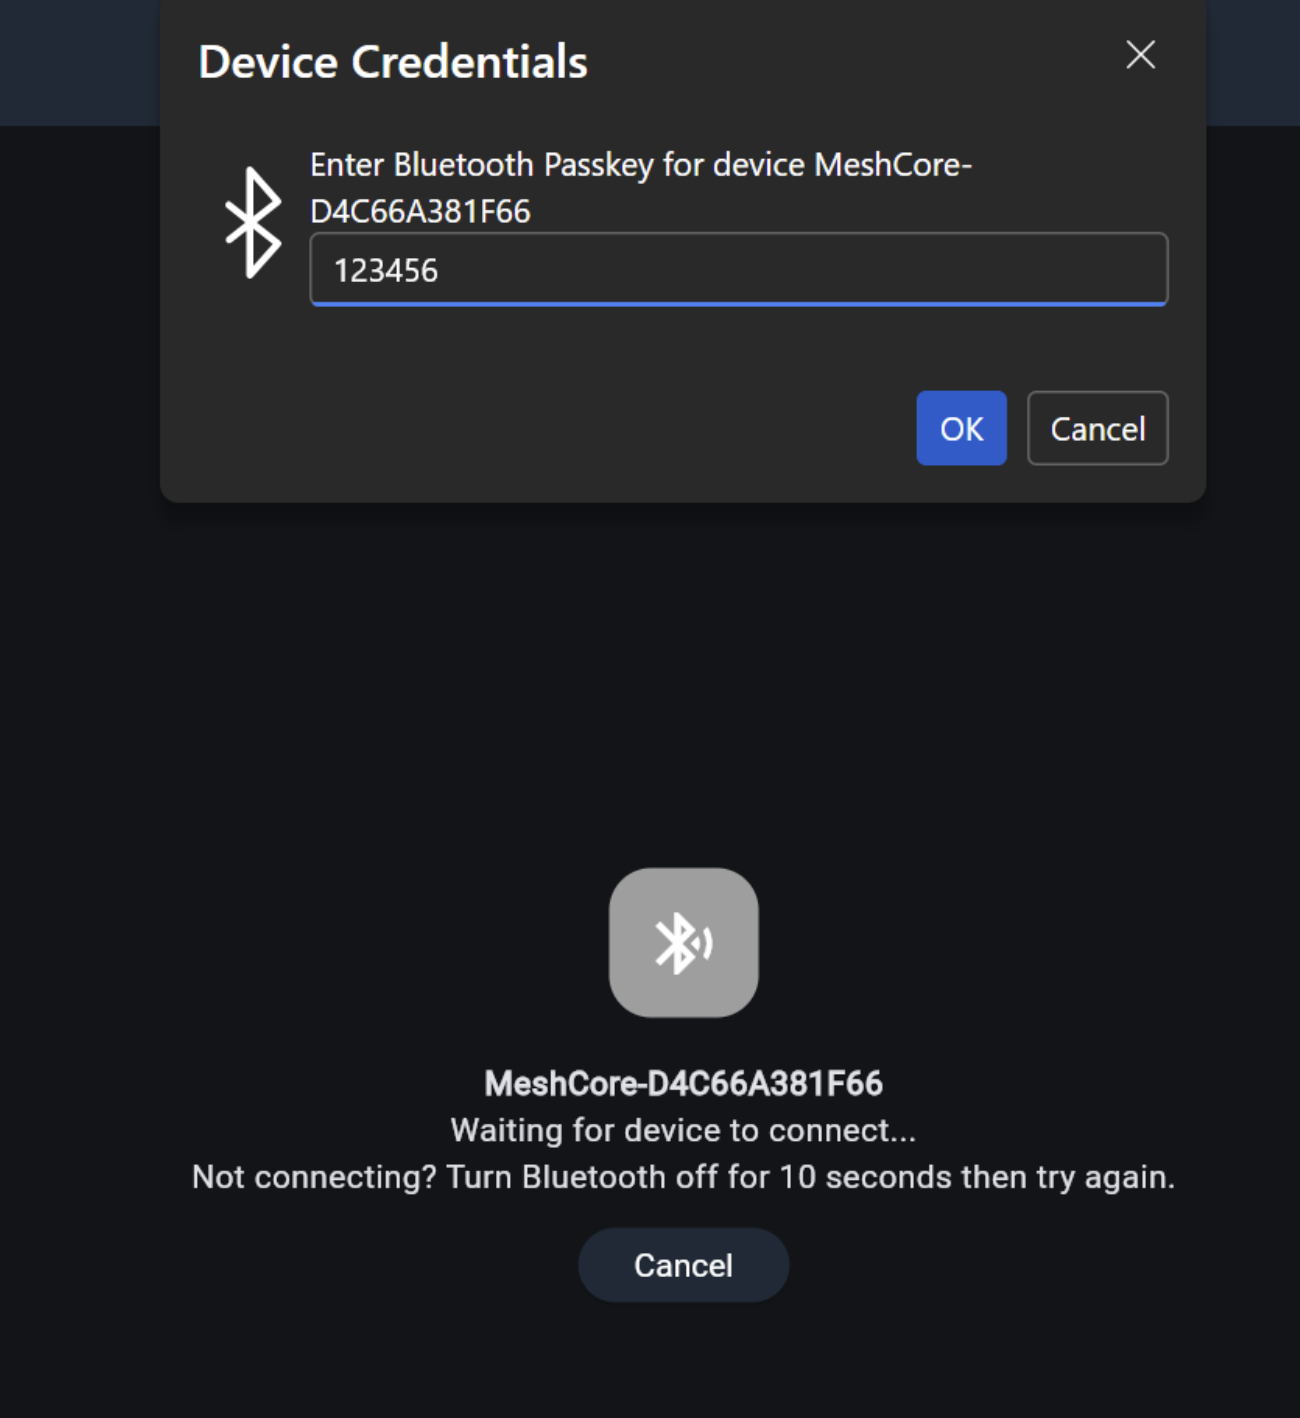
- When prompted, enter the default Bluetooth passkey
123456, then click OK.
- Wait until the status changes to connected and your node appears in the MeshCore interface.
Configure GPS
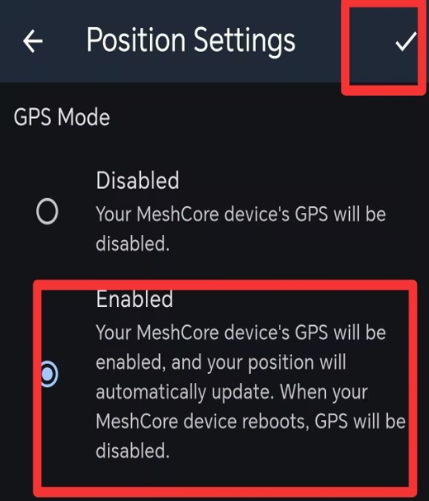
If you want to use GPS, please set it enabled.
You can go to APP Position Settings to enable GPS.
Message Transmission
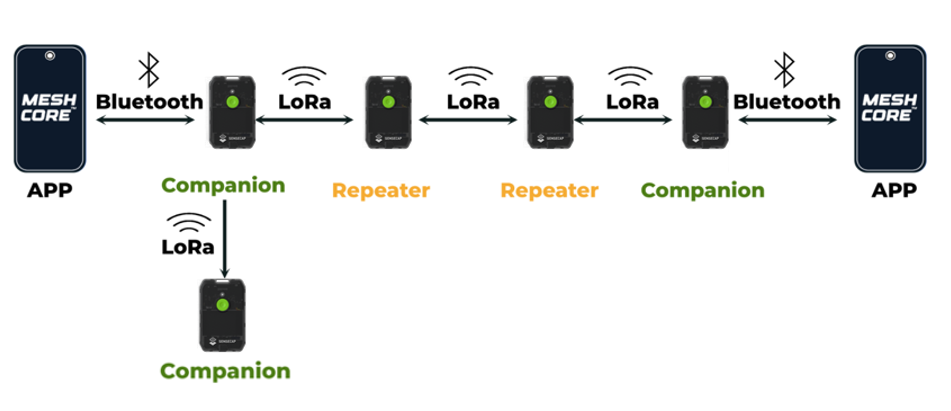
If you have two supported devices, and there are not many MeshCore users near you, flash both to BLE Companion firmware so you can use your devices to communicate with your nearby friends and family.
Advert
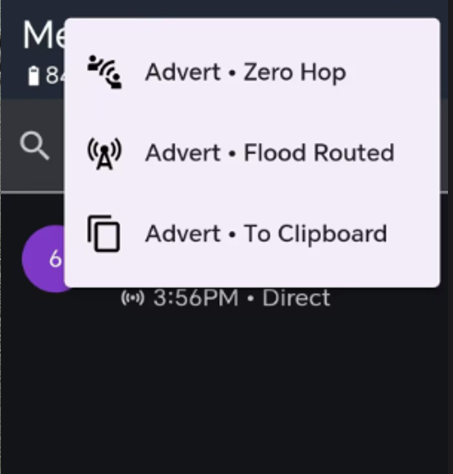
MeshCore allows you to manually broadcast your name, position and public encryption key, which is also signed to prevent spoofing. When you click the advert button, it broadcasts that data over LoRa. MeshCore calls that an Advert. There's two ways to advert, "zero hop" and "flood".
- Zero hop means your advert is broadcast out to anyone that can hear it, and that's it.
- Flooded means it's broadcast out and then repeated by all the repeaters that hear it.
You can send advert on the APP. Also you can send advert directly on the device advert page.
Public Message
After you configure the LoRa, you can send messages in the primary channel. All nearby people in the same frequency band will hear it.
Private Message
The two devices only establish a connection when they have both received each other's advert.
FAQ
How to check the device ID
The last four digits of the MAC address is the device ID
For example, the device ID of the device below would be A0D4
How to reboot the device
Press and hold the button, then connect the charging cable,release the button immediately.
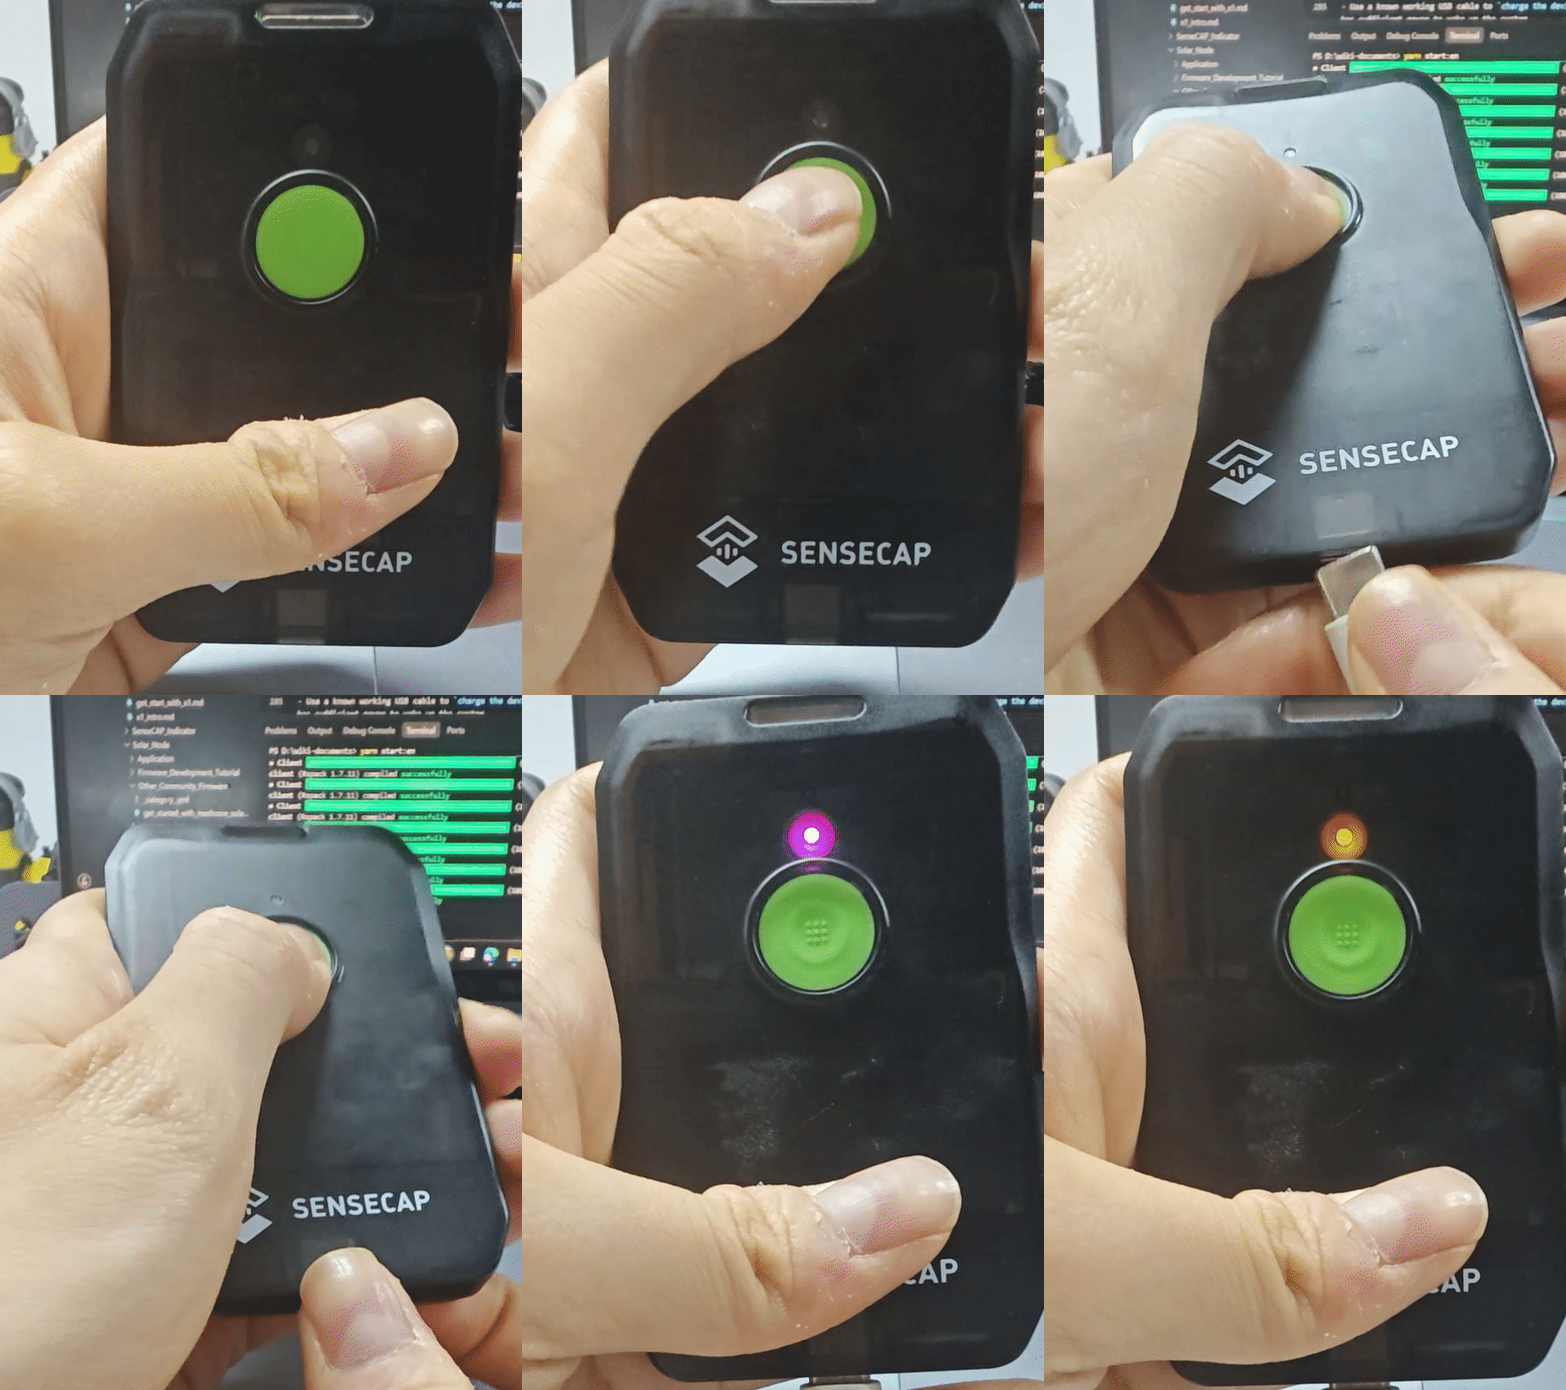
Press and hold the button, then connect the charging cable,keep holding for more than 3s will force the device into DFU mode.
If you want to get out of DFU mode, just ress and hold the button, then connect the charging cable,release the button immediately.
Troubleshooting
Device never turns on
-
Use a known working USB cable to
charge the devicecontinuously for 1–2 hours to ensure the battery has sufficient power to wake up the system. -
If the device still does not respond after charging,
perform a hard resetas follows: Unplug the USB cable. Press and hold the button, then plug in the USB cable while keeping the button pressed. Hold for approximately 3 seconds, then release it. This forces a system reset. -
If still no luck, Connect a USB cable to a computer. Hold the device button, then connect the device to the computer, see whether or not the a disk pop out in your PC. If so, re-install the bootloader
Device stuck in boot loop
Description:
The device will restart repeatedly, and the serial port connects and disconnects repeatedly.
Solution:
- Step 1: Try to enter DFU mode manually: press and hold the device button, then quickly connect the charging cable twice
The device is in DFU mode if the white LED is solid on.
To successfully enter the DFU mode, you need to perform this operation quickly. You may need to try multiple times.
-
Step 2: Erase Flash
-
Step 3: Flash Firmware
Bootloader Installation
When you are flashing the bootloader, please make sure the cable connection is stable and DO NOT disconnect it during the flash process.
Step 1: Adafruit-nrfutil Installation
For Windows users, press the "Win" key and the "r" key, then enter "cmd" in the pop-out window, and click "Enter". This can open the command line.
For MAC users, press the "Command" key and the "Space" key, so that you can open Spotlight. Then enter "termial", click "Return". This can open the command line.
Prerequisites
Check in your command line whether or not Python and pip are installed successfully.
python --version
python -m pip --version
Then "Python xxx" and "pip xxx" should appear. If it does not, please try installing Python again.
This is the recommended method to install the latest version:
pip3 install --user adafruit-nrfutil
Check the installation path:
python -m pip show adafruit-nrfutil
This is the installation location:
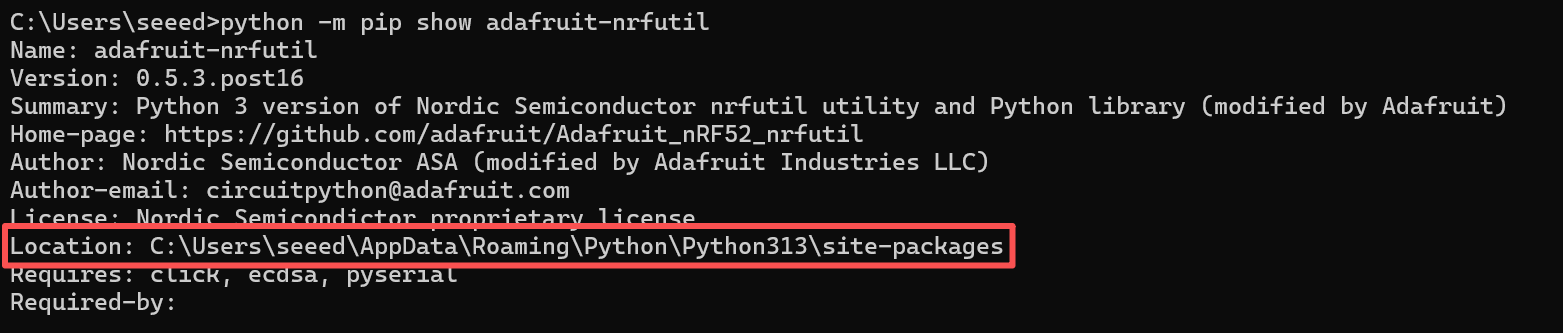
For Windows users, you may need to add the path manually. Copy the installation location shown in the last step. Then add it as followed:

Step 2: Check your port number
Connect your device to your PC, and check the port number.
For Windows users, open your device manager, and go to port, the port number newly popped out after the device connection is the device port number.
For Mac users, for example:

For Windows users, for example:
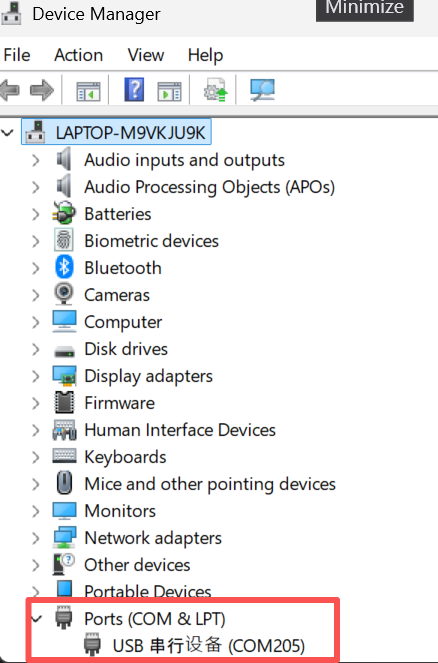
Step 3: Flash the bootloader
In the terminal or command prompt, navigate to the directory where you downloaded the bootloader zip package and execute the following command, replacing the correct port for your device:
- For Windows:
adafruit-nrfutil --verbose dfu serial --package Bootloader.zip -p COMxx -b 115200 --singlebank --touch 1200
Please change COMXX to your COM number. For example, if your device is on com6, change the command to be:
adafruit-nrfutil --verbose dfu serial --package Bootloader.zip -p **COM6** -b 115200 --singlebank --touch 1200
Some of the devices will change their port number after you enter this command. So if the installation fails, check the port number again.
- For others:
adafruit-nrfutil --verbose dfu serial --package Bootloader.zip -p /dev/tty.SLAB_USBtoUART -b 115200 --singlebank --touch 1200
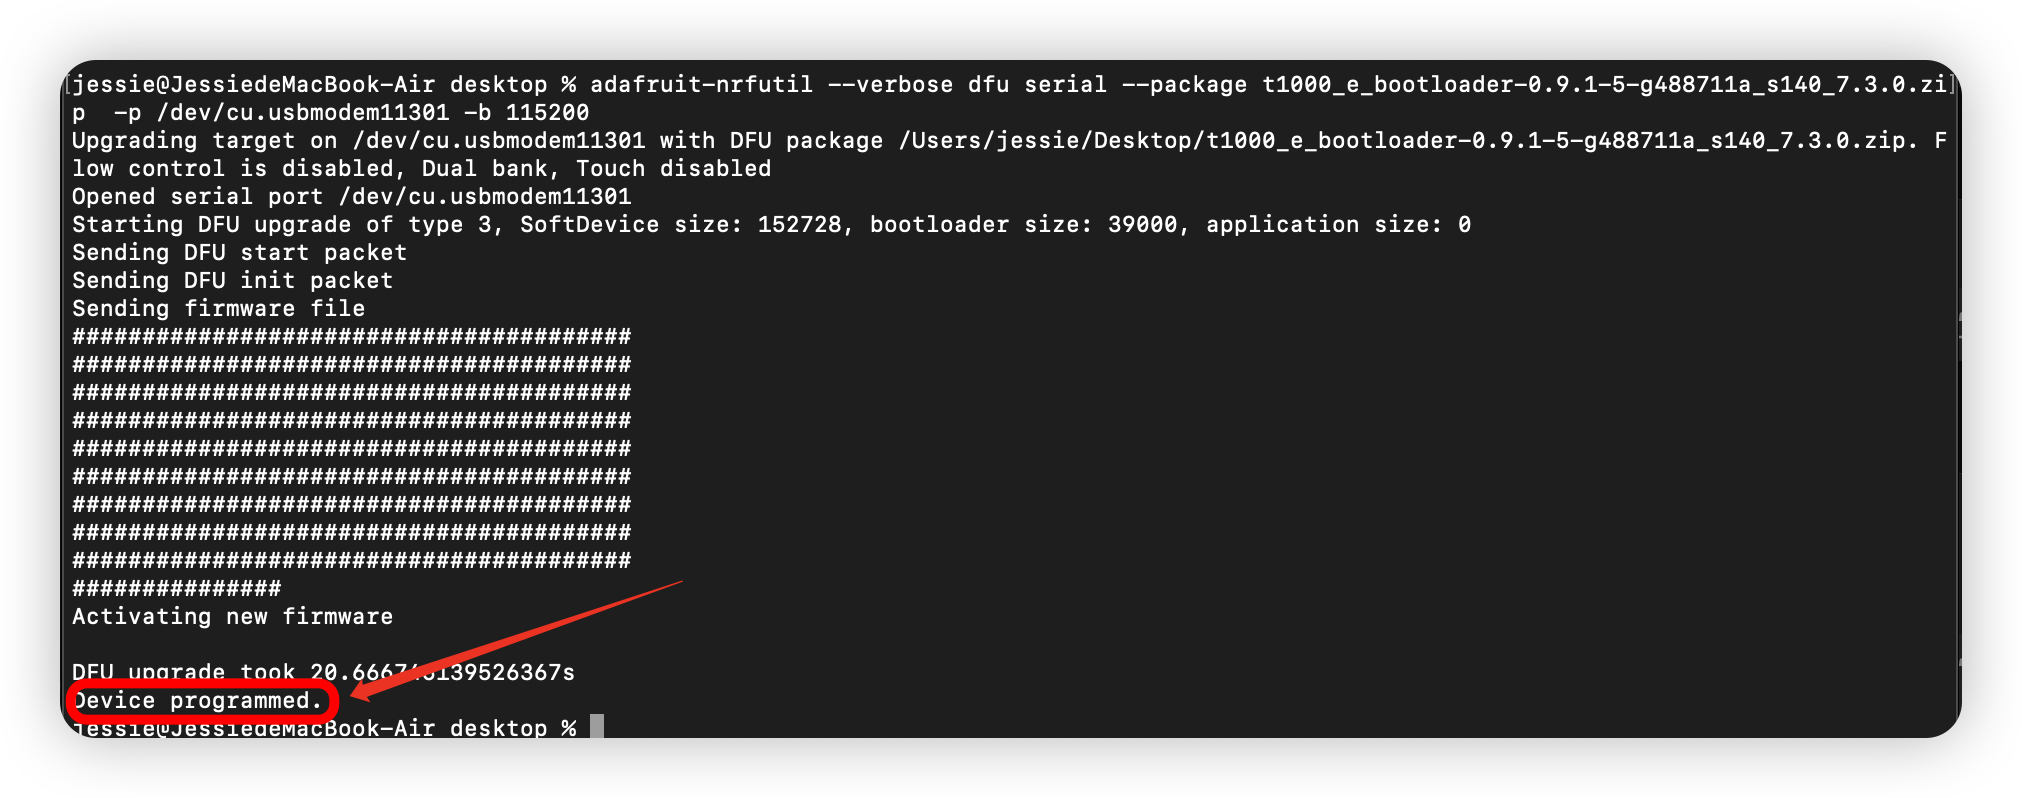
When you have completed the above steps, then you can follow this step to flash the application firmware.
2) Device can not enter DFU mode, but the serial port can be detected.
-
Open a serial port tool
-
Set the baud rate to
1200. -
Connect the device. The light will flash briefly when you connect it. Keep trying this until the light stays on, which means the device can go back to DFU mode, then flash bootloader -> erase flash -> flash the firmware.
3) Device can not enter DFU mode, and no serial port display
-
press and hold the device button, then connect the charging cable, and then release the button immediately. After a disk pops out on your PC, you may see the serial port.
-
If still no luck, please disconnect the charging cable and leave the device for a few days until the battery is completely drained, then connect the charging cable and try to pair it again.
4) If none of the above steps work, please contact tech support: support@sensecapmx.com
Device automatically turns off
-
Phenomena Description
-
After the device turns on, it will turn off or reboot automatically after a while.
-
The serial port log ran for a while and then stopped.
This is possibly caused by manually and forcibly rebooting or turning off the device when the device is in the following states: not finishing the message transmission process, being configured......
- Troubleshoot
Click here to perform a flash-erase.
Signal Quality
-
SNR reflects the quality of the communication link. A normal device usually operates above -7 dB. A device with a SNR lower than -10 dB indicates poor performance.
-
RSSI is determined jointly by the device and its surrounding environment. A normal device usually operates above -110 dBm. A device with an RSSI lower than -115 dBm is considered to have poor performance.
To achieve the best signal effect, please use the device in an open, unobstructed area with minimal interference for use.
Tech Support & Product Discussion