Using Gallery in SenseCraft HMI

Introduction
The Gallery function in SenseCraft HMI allows you to transform your screen-based devices into beautiful digital photo frames. You can upload local images or import them from URLs, then display them with customizable transition intervals and visual effects. This feature is perfect for creating ambient displays, information screens, or decorative photo albums using your Seeed Studio display devices.
This tutorial will guide you through using the Gallery function in SenseCraft HMI, covering image upload methods, display settings, and important considerations for optimal performance.
This article will use the reTerminal E1002 as an example to explain how to use this feature on the SenseCraft HMI platform.
Getting Started with Gallery
Accessing the Gallery Function
Step 1. Navigate to the SenseCraft HMI platform below.
Step 2. Connect your device or select an already paired device to use.
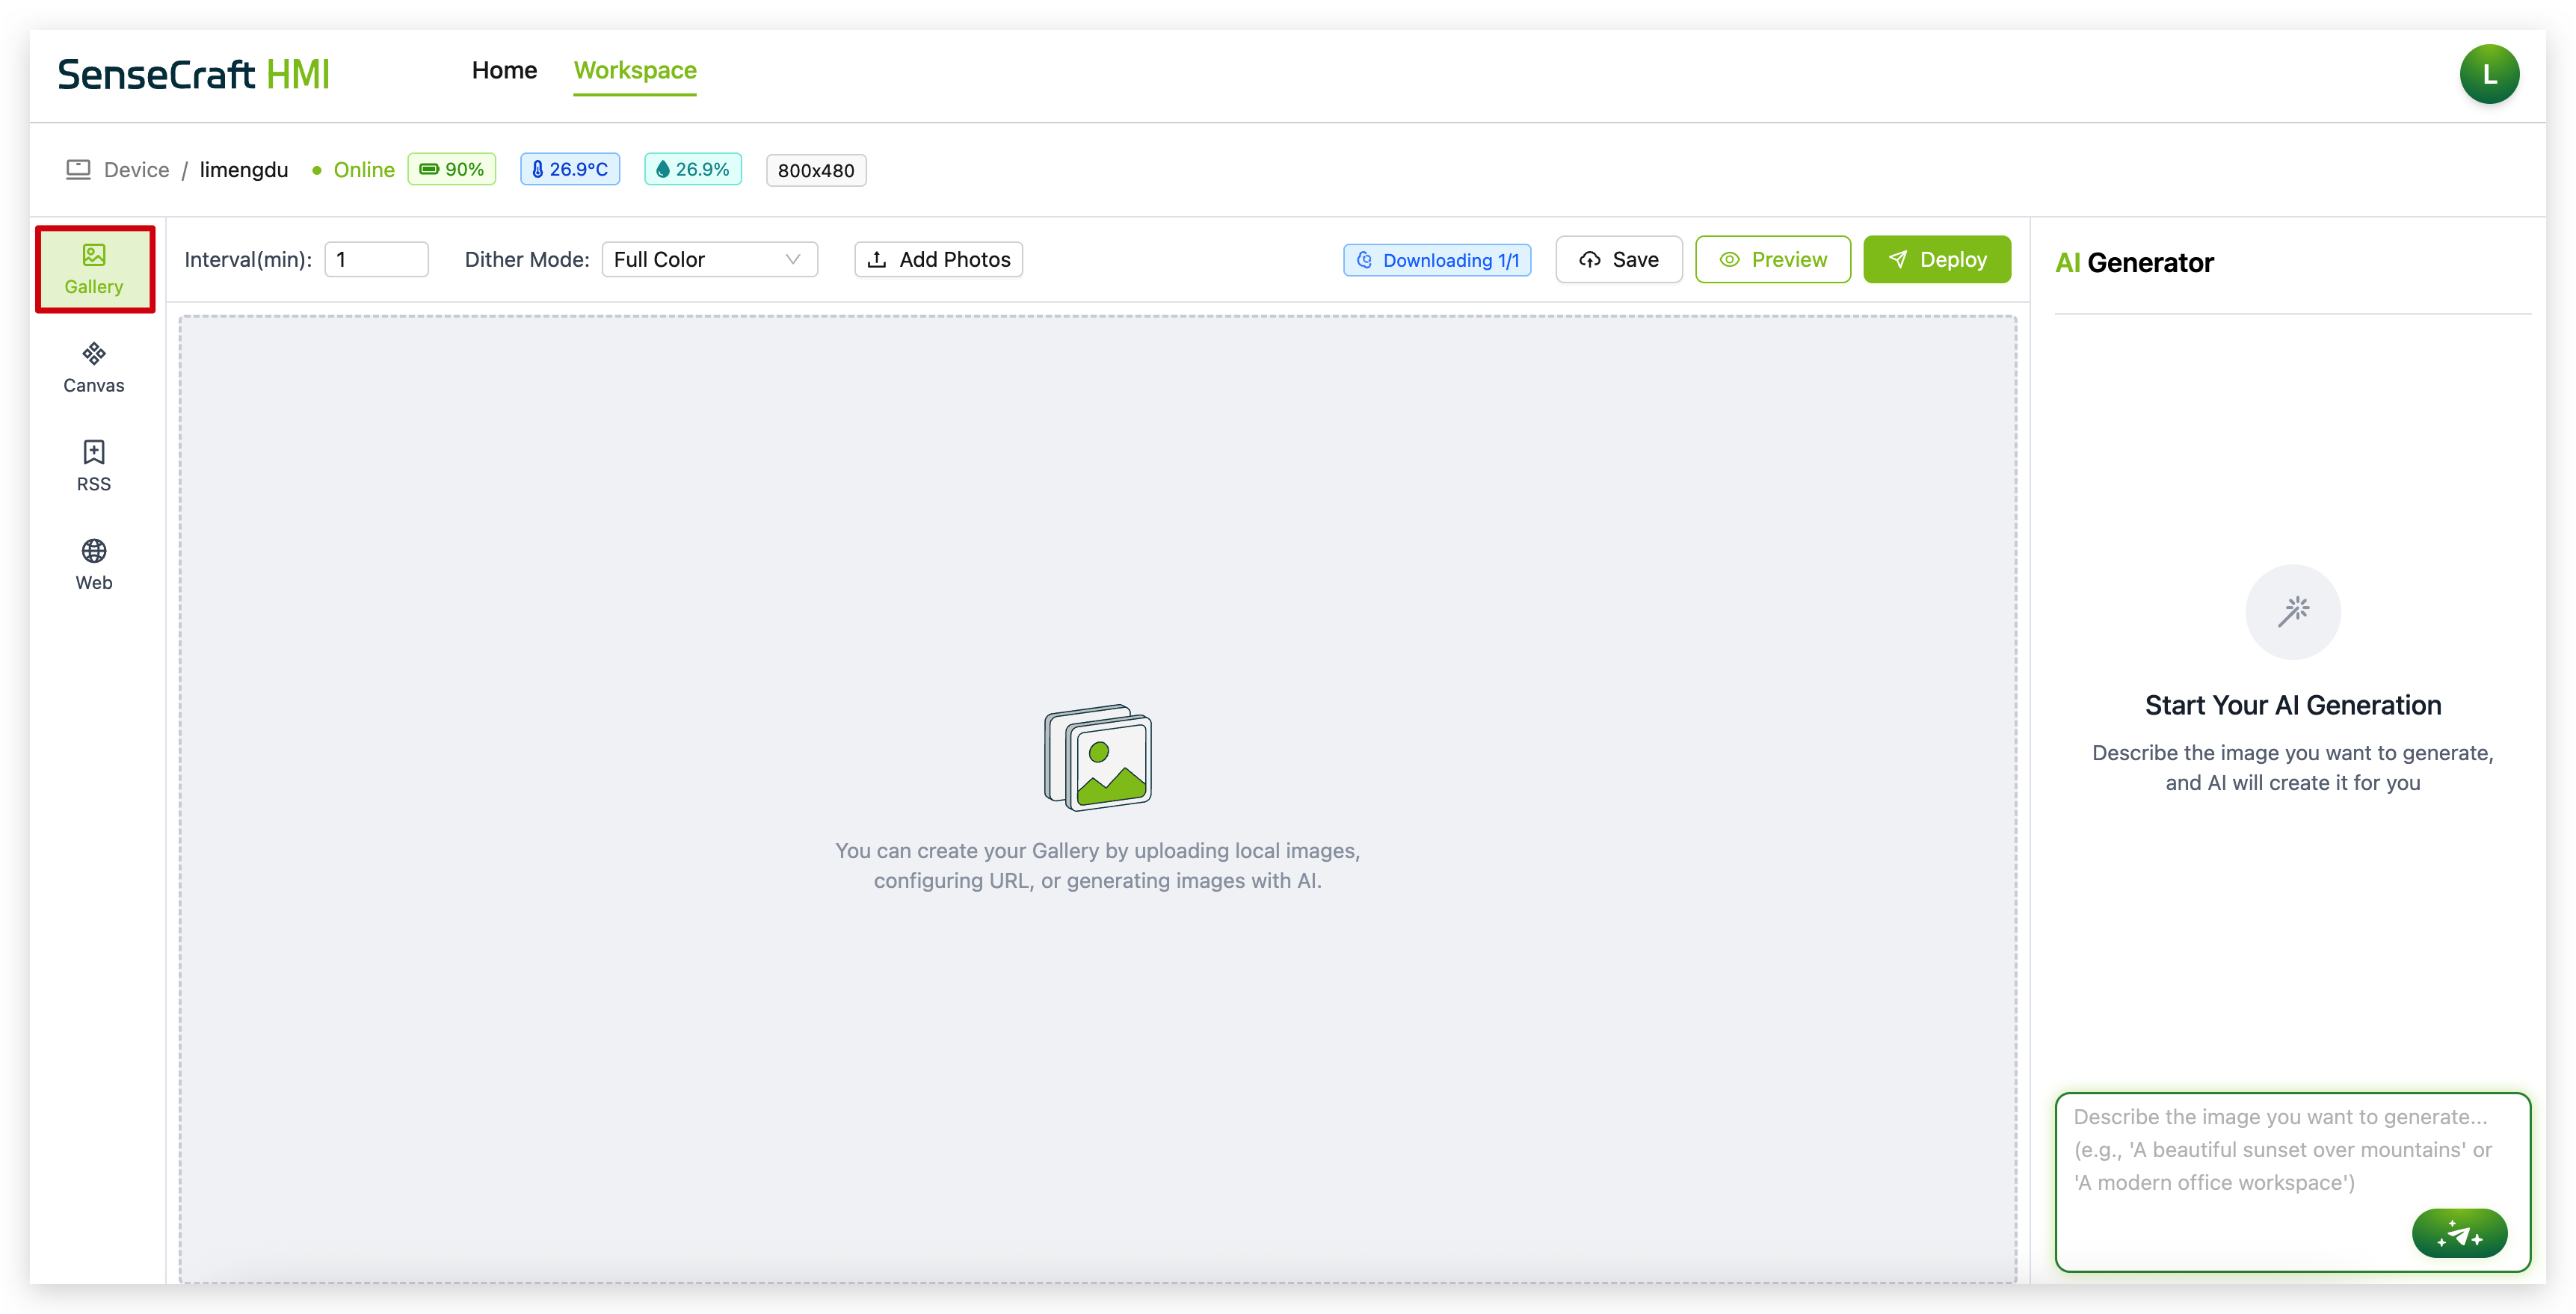
Step 3. Click on the "Gallery" tab in the left sidebar
Understanding the Gallery Interface
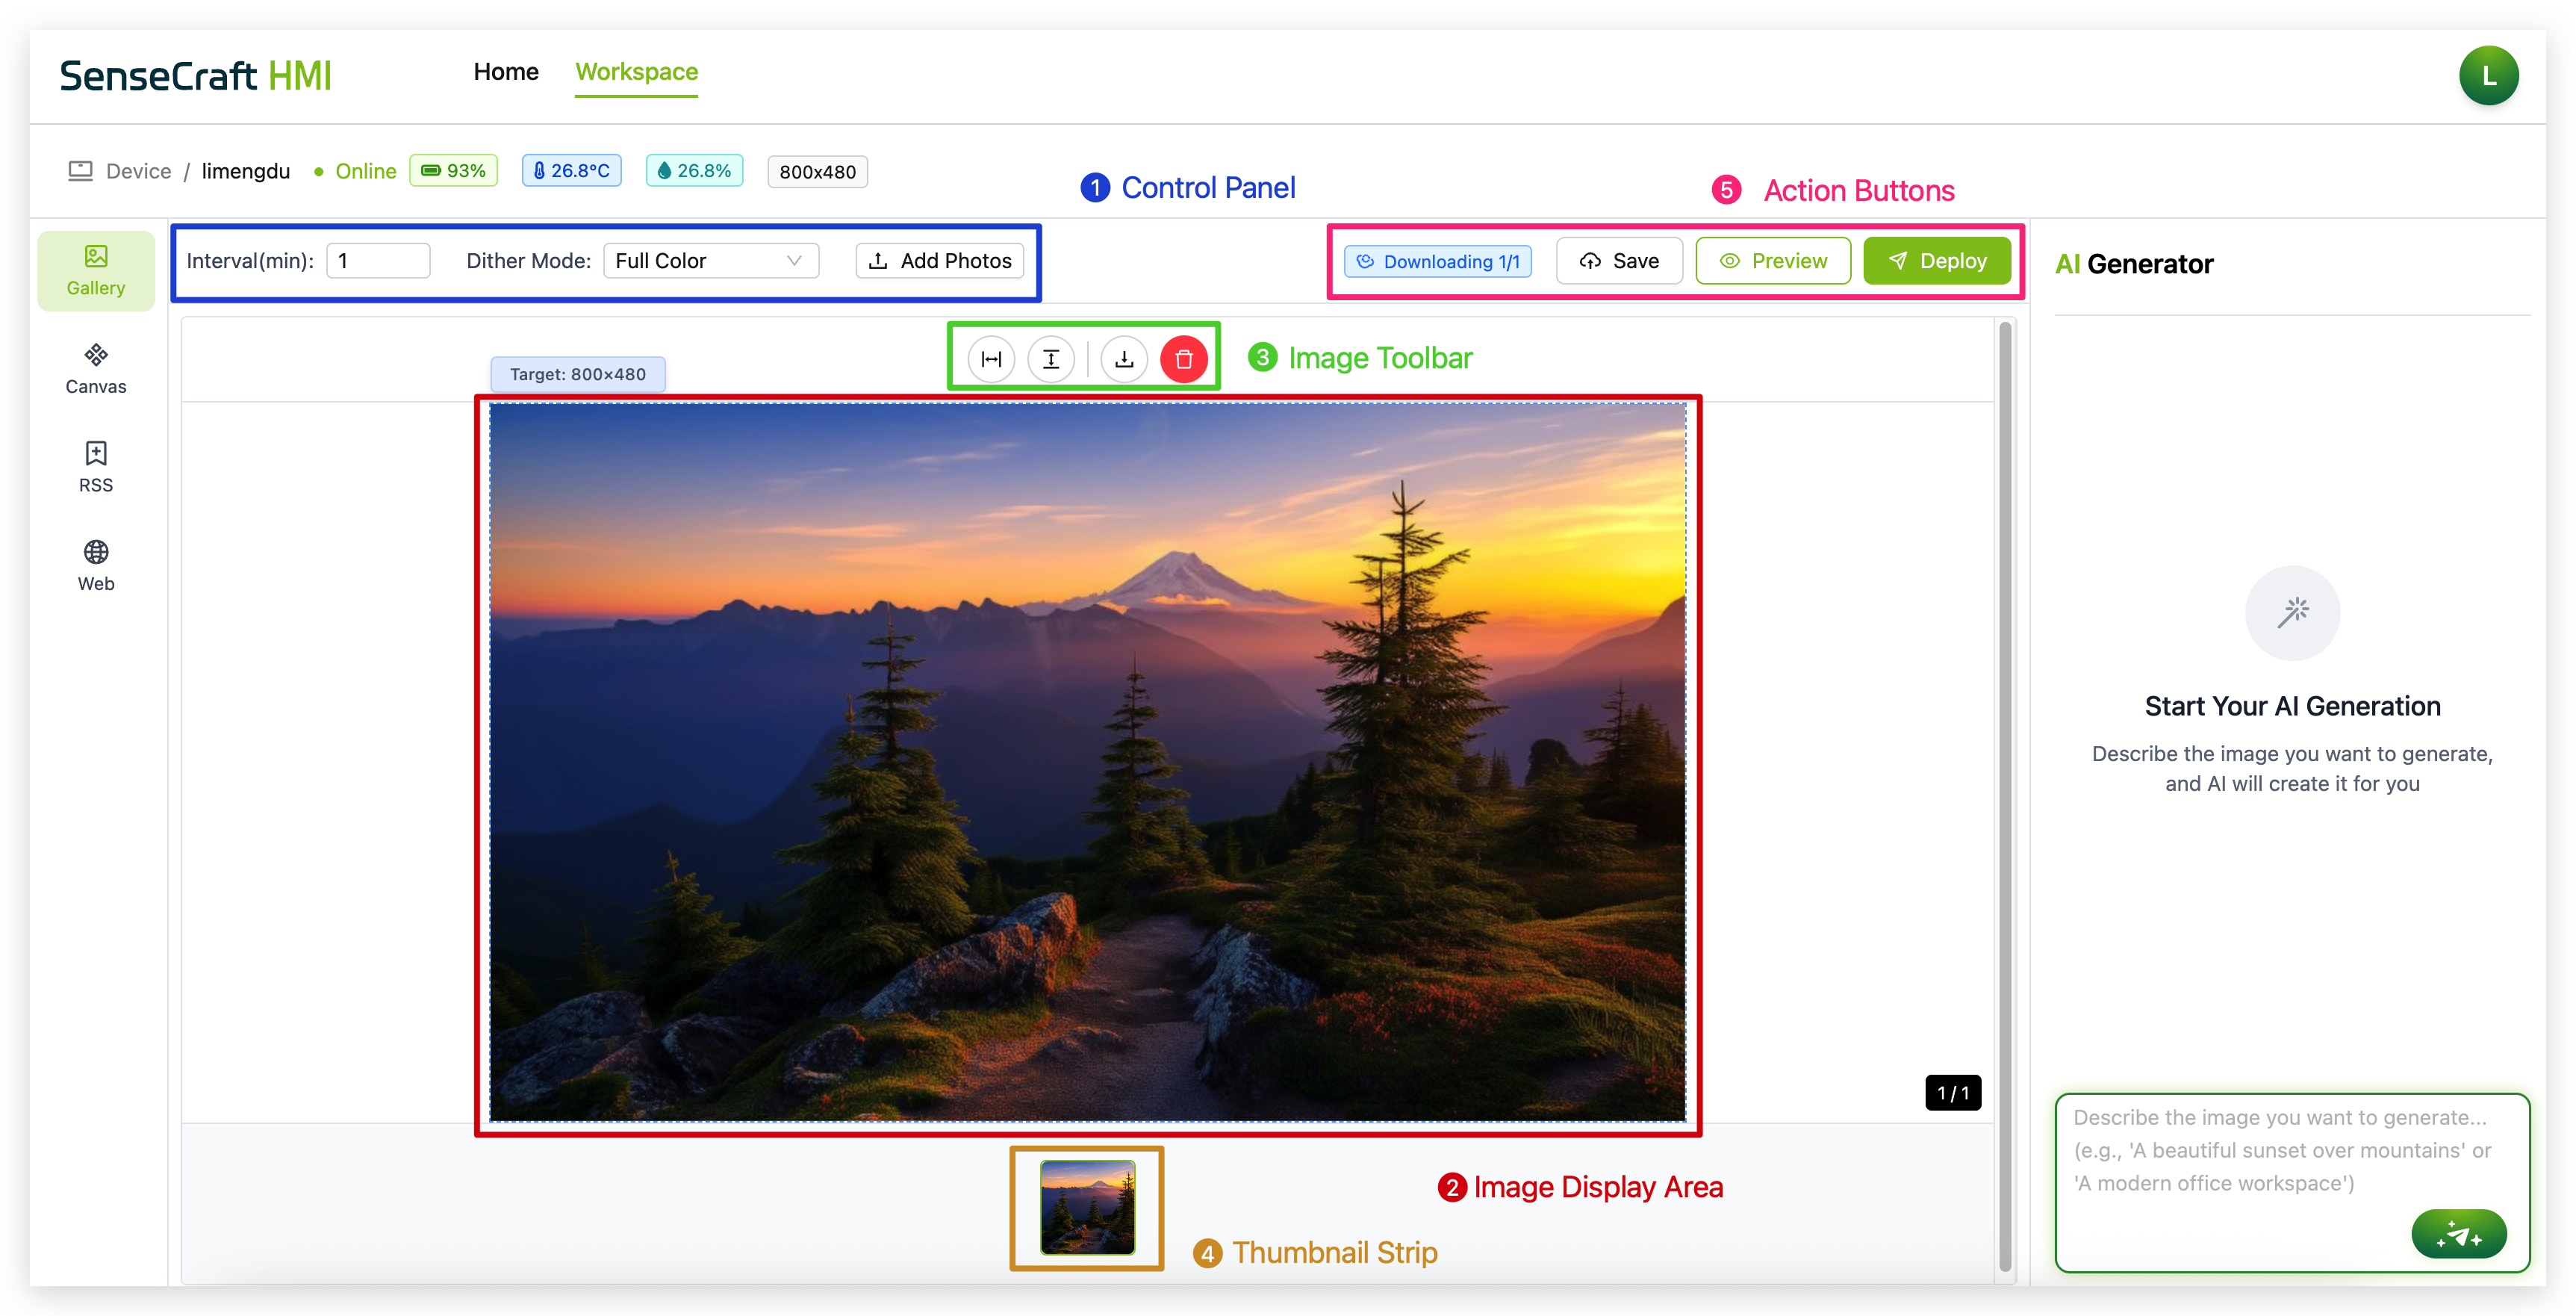
The Gallery interface consists of several key elements:
-
Control Panel: Located at the top, this area contains settings for interval time, dither mode, and action buttons
-
Image Display Area: The main section where your current image is displayed
-
Image Toolbar: Contains tools for adjusting, downloading, or deleting the current image
-
Thumbnail Strip: Located at the bottom, shows all uploaded images in your gallery
-
Action Buttons: Save, Preview, and Deploy buttons for testing and applying your gallery to the device
Adding Images to Your Gallery
SenseCraft HMI provides two methods for adding images to your gallery: uploading local files or importing from URLs.
Upload Local Images
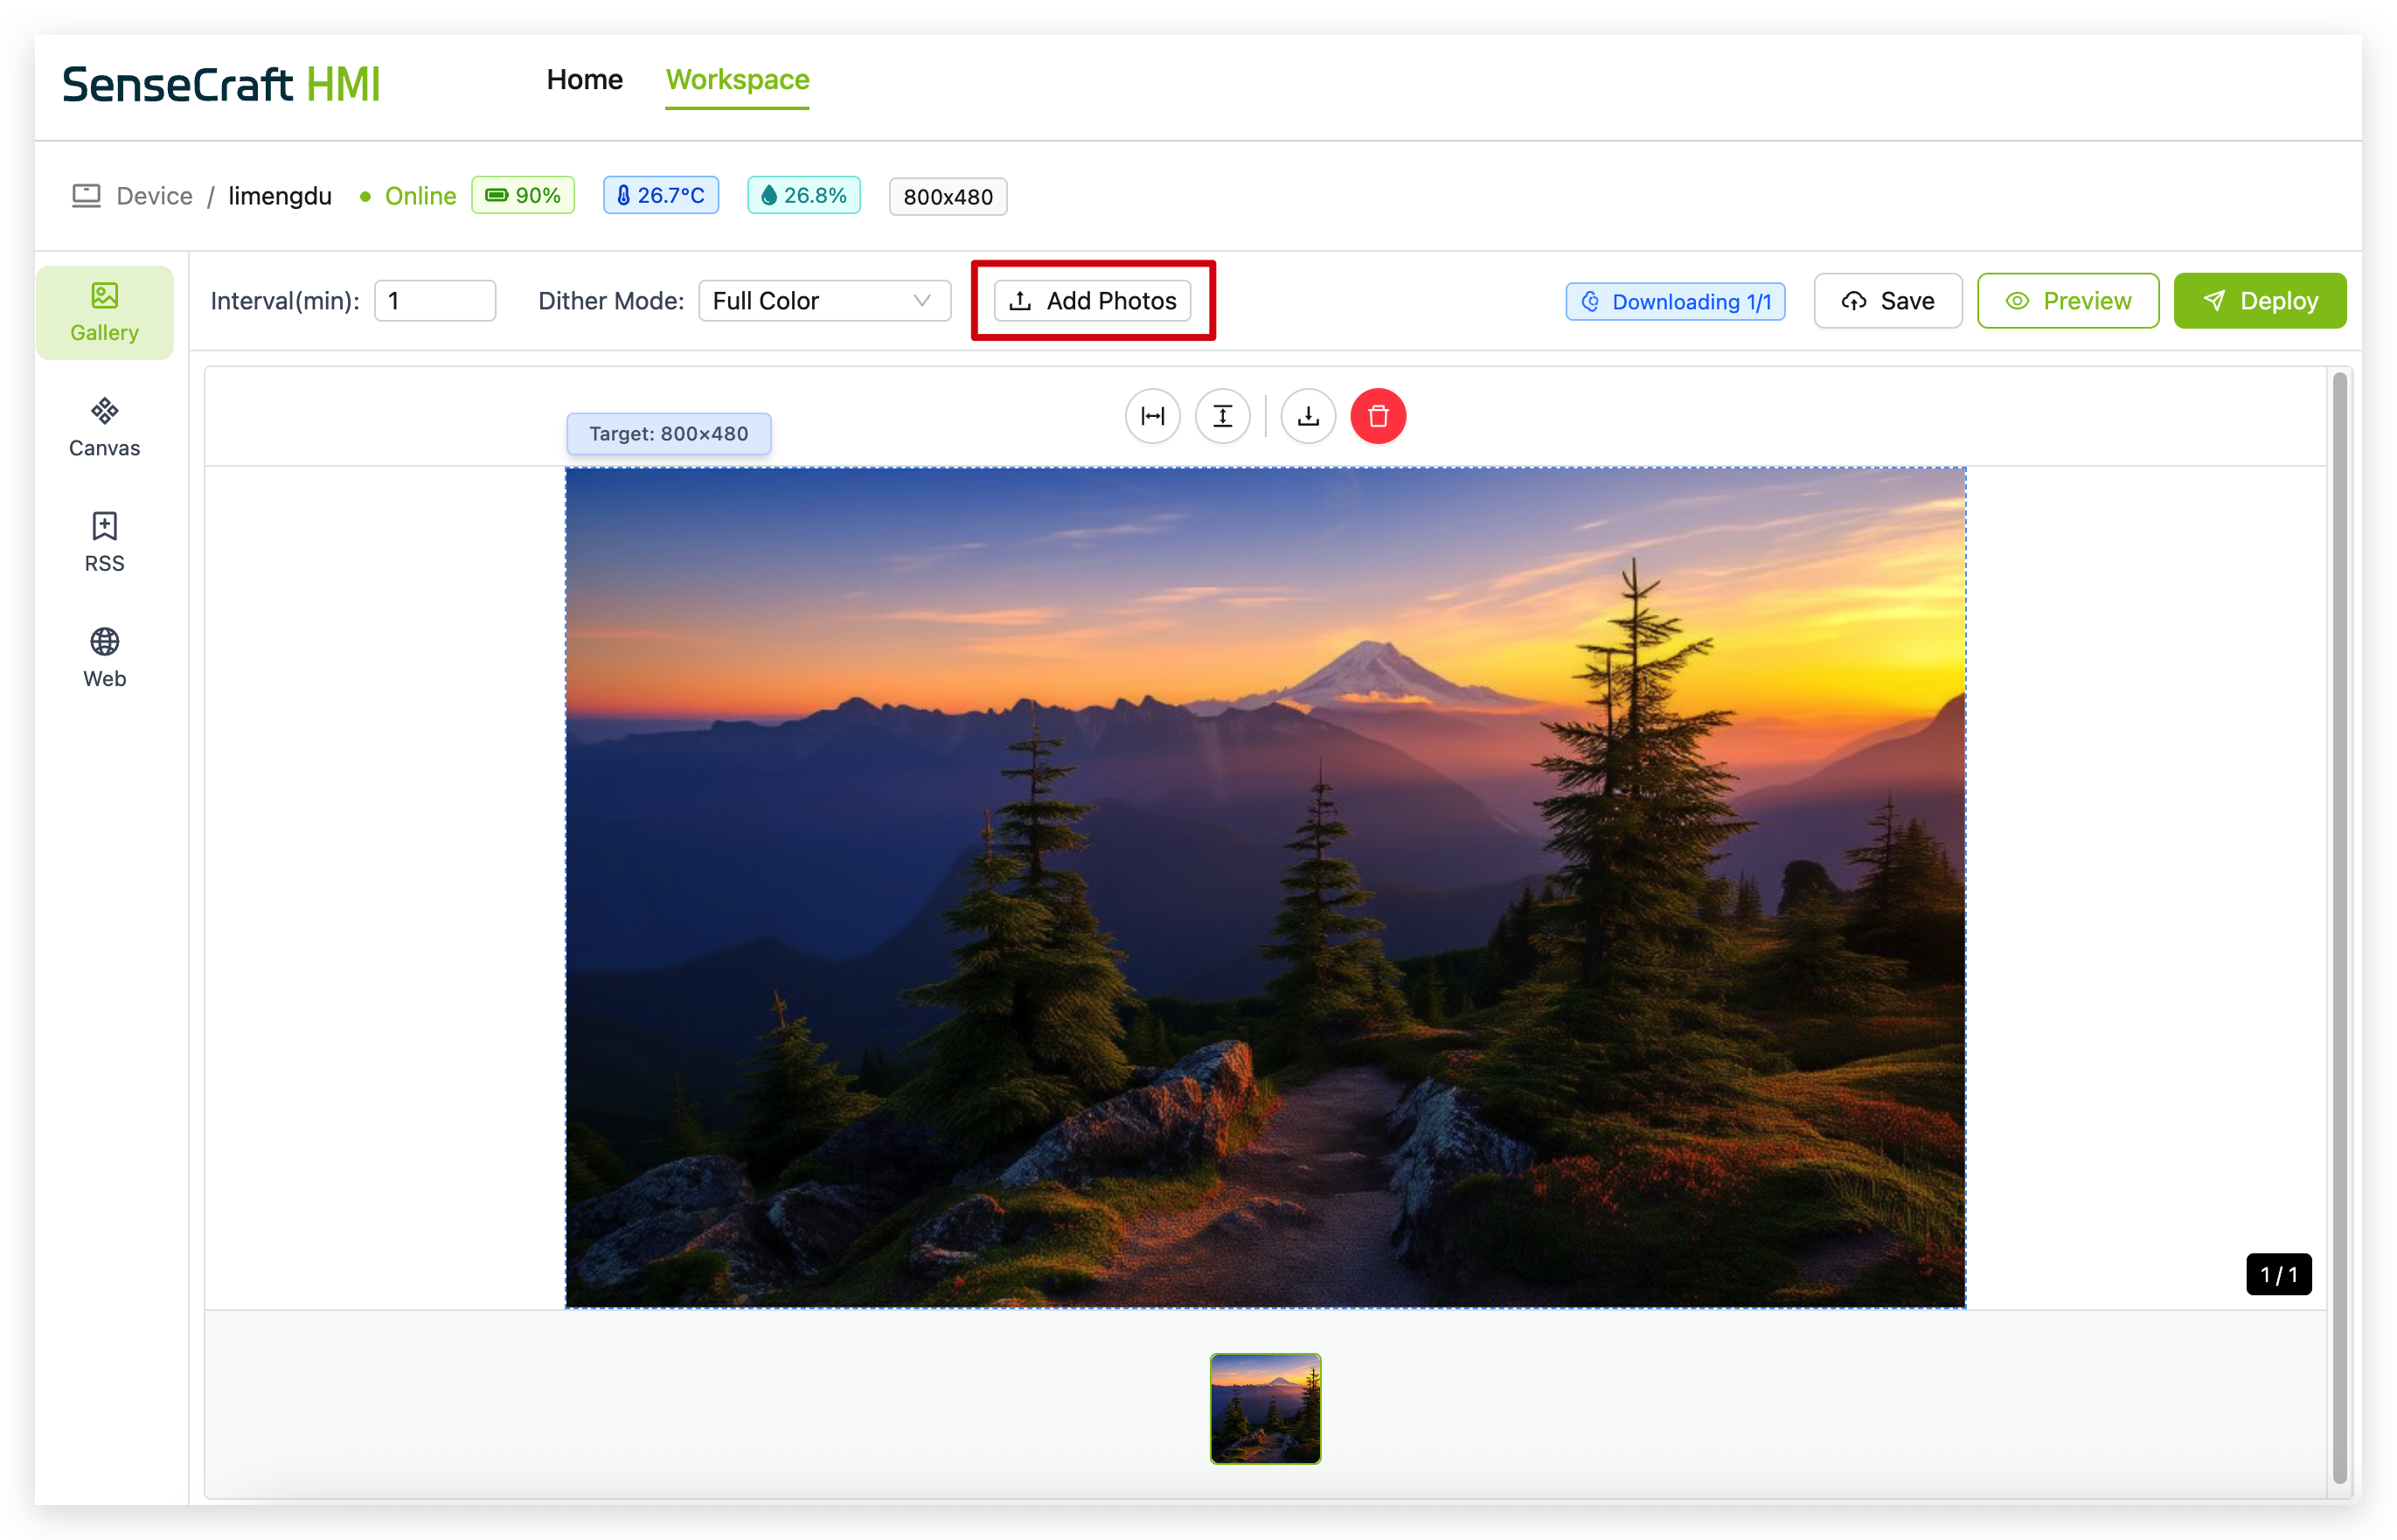
Step 1. Click the "Add Photos" button in the control panel
Step 2. In the dialog that appears, ensure the "Upload Files" tab is selected
Step 3. Click "Select Photos" and choose the images you want to upload from your computer
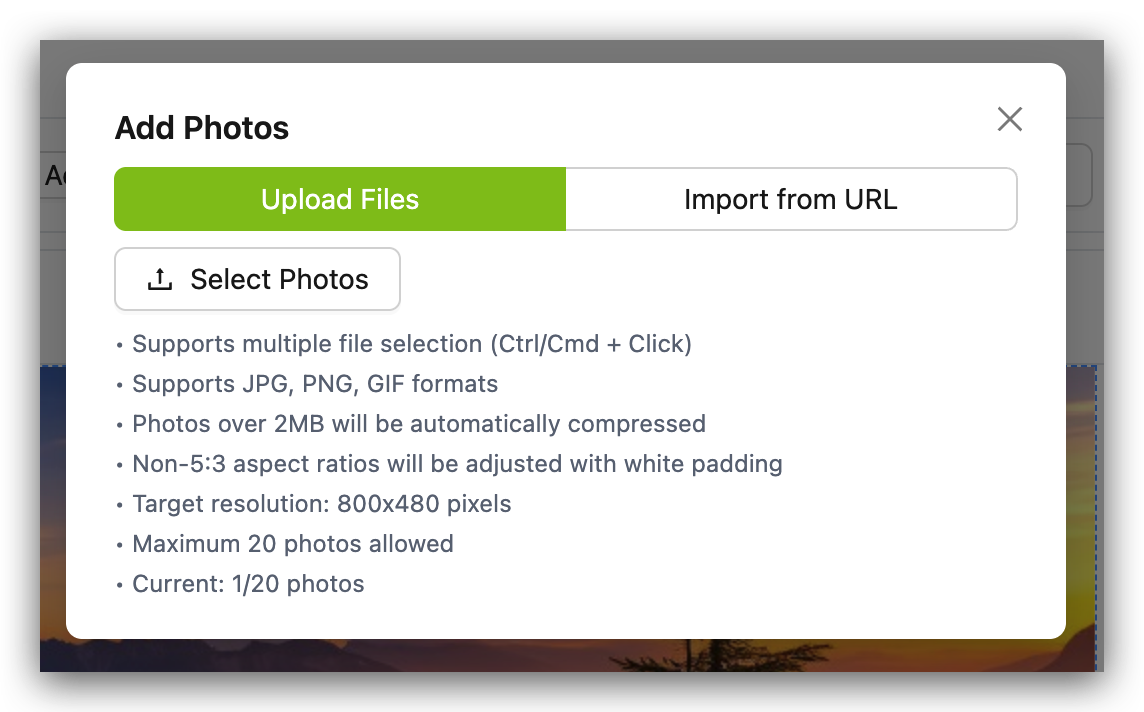
Step 4. Important image requirements and limitations:
-
Supports JPG, PNG, and GIF formats
-
Photos over 2MB will be automatically compressed
-
Non-5:3 aspect ratios will be adjusted with white padding
-
Target resolution: 800x480 pixels (or your device's native resolution)
-
Without a MicroSD card, you can upload a maximum of 3 photos
-
With a MicroSD card, you can upload up to 20 photos
Step 5. Select multiple files using Ctrl/Cmd + Click if desired
Step 6. Click "Open" to upload the selected images
Import Images from URL
Step 1. Click the "Add Photos" button in the control panel
Step 2. In the dialog that appears, select the "Import from URL" tab
Step 3. Enter the direct image URL in the provided field
Step 4. Click "Import" to add the image to your gallery
When importing from URLs, ensure you're using direct image links that end with file extensions like .jpg, .png, or .gif. Links to web pages containing images may not work.
Managing Your Gallery
Setting Display Interval
The interval setting determines how long each image is displayed before transitioning to the next one:
Step 1. Locate the "Interval(min):" field in the control panel
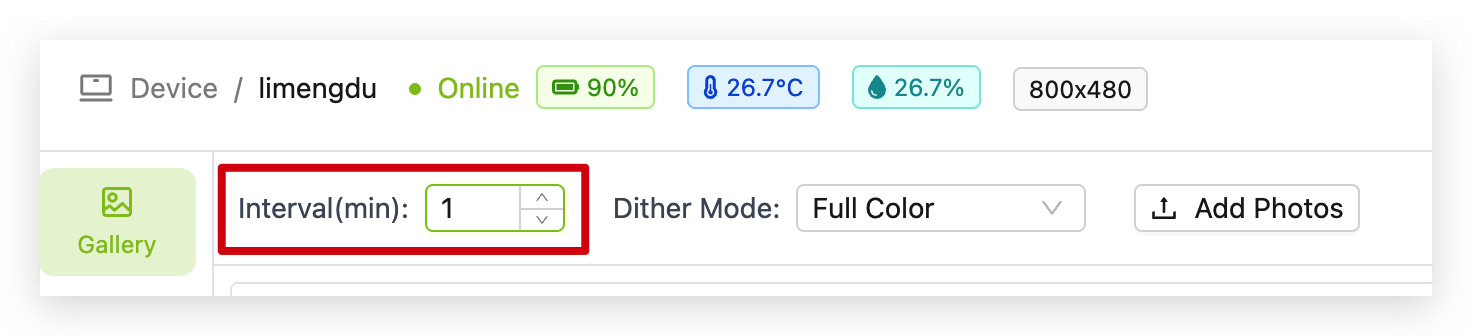
Step 2. Enter your desired display time in minutes (e.g., 1 for one minute per image)
Choosing Dither Mode
The dither mode affects how images are processed for optimal display on your specific device:
Step 1. Find the "Dither Mode:" dropdown in the control panel
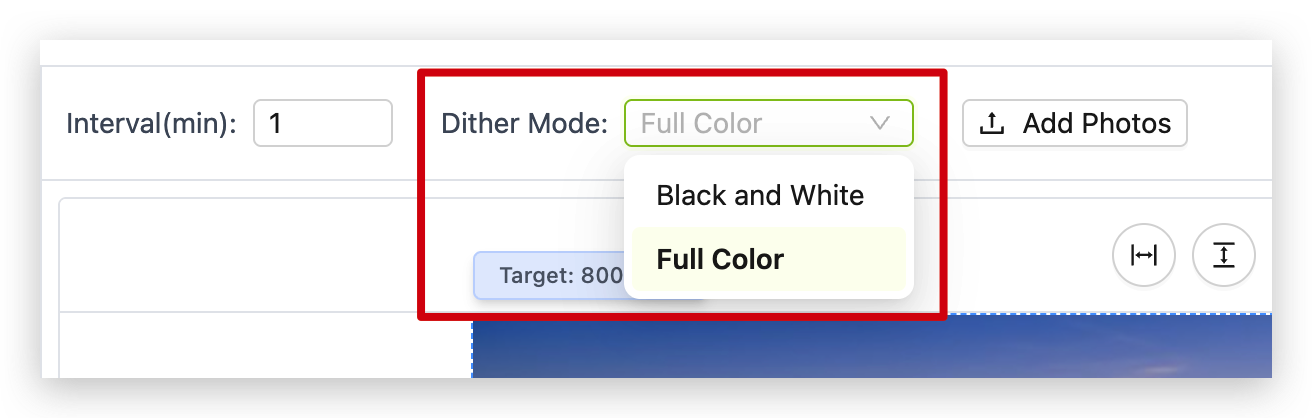
Step 2. Select the appropriate option for your device:
-
Full Color: Best for color LCD displays, preserves all color information
-
Black and White: Converts images to pure black and white, ideal for monochrome e-paper displays
For e-paper/e-ink displays, select "Black and White" mode for optimal display quality and faster refresh rates. For LCD screens, "Full Color" will provide the best visual experience.
Using the Image Toolbar
Each image in your gallery can be adjusted using the toolbar that appears above the image:
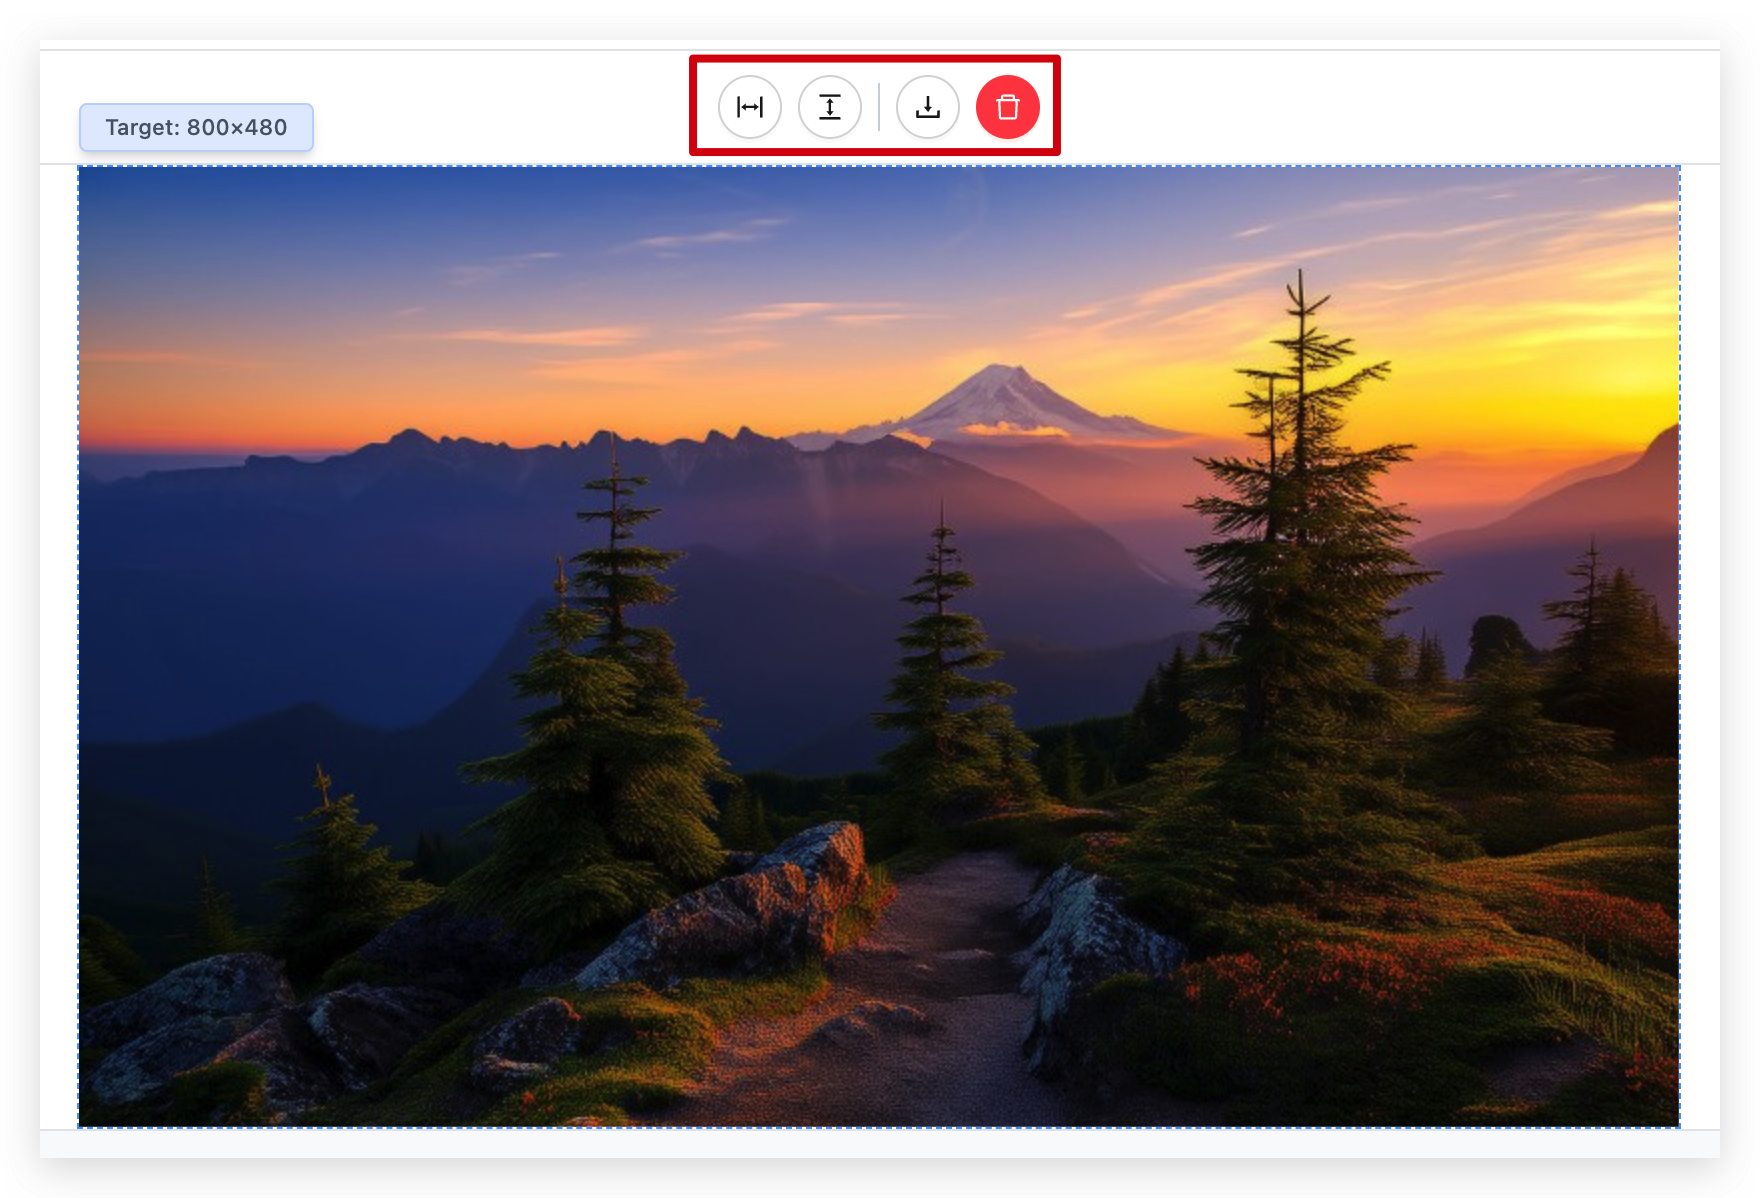
From left to right, the tools are:
-
Fill Horizontally: Adjusts the image to fill the screen horizontally while maintaining aspect ratio
-
Fill Vertically: Adjusts the image to fill the screen vertically while maintaining aspect ratio
-
Download: Save the processed image to your computer
-
Delete: Remove the image from your gallery
Use the "Fill Horizontally" option for landscape images and "Fill Vertically" for portrait images to make the best use of your display space while avoiding image distortion.
Reordering Images
You can change the display order of your images using the thumbnail strip:
Step 1. Locate the image thumbnail you want to move in the strip at the bottom of the screen
Step 2. Click and drag the thumbnail to a new position in the sequence
Step 3. Release to set the new order
Deploying Your Gallery to Your Device
Once you've added and configured your images, you can deploy the gallery to your connected device:
Step 1. Click the "Save" button to store your gallery configuration
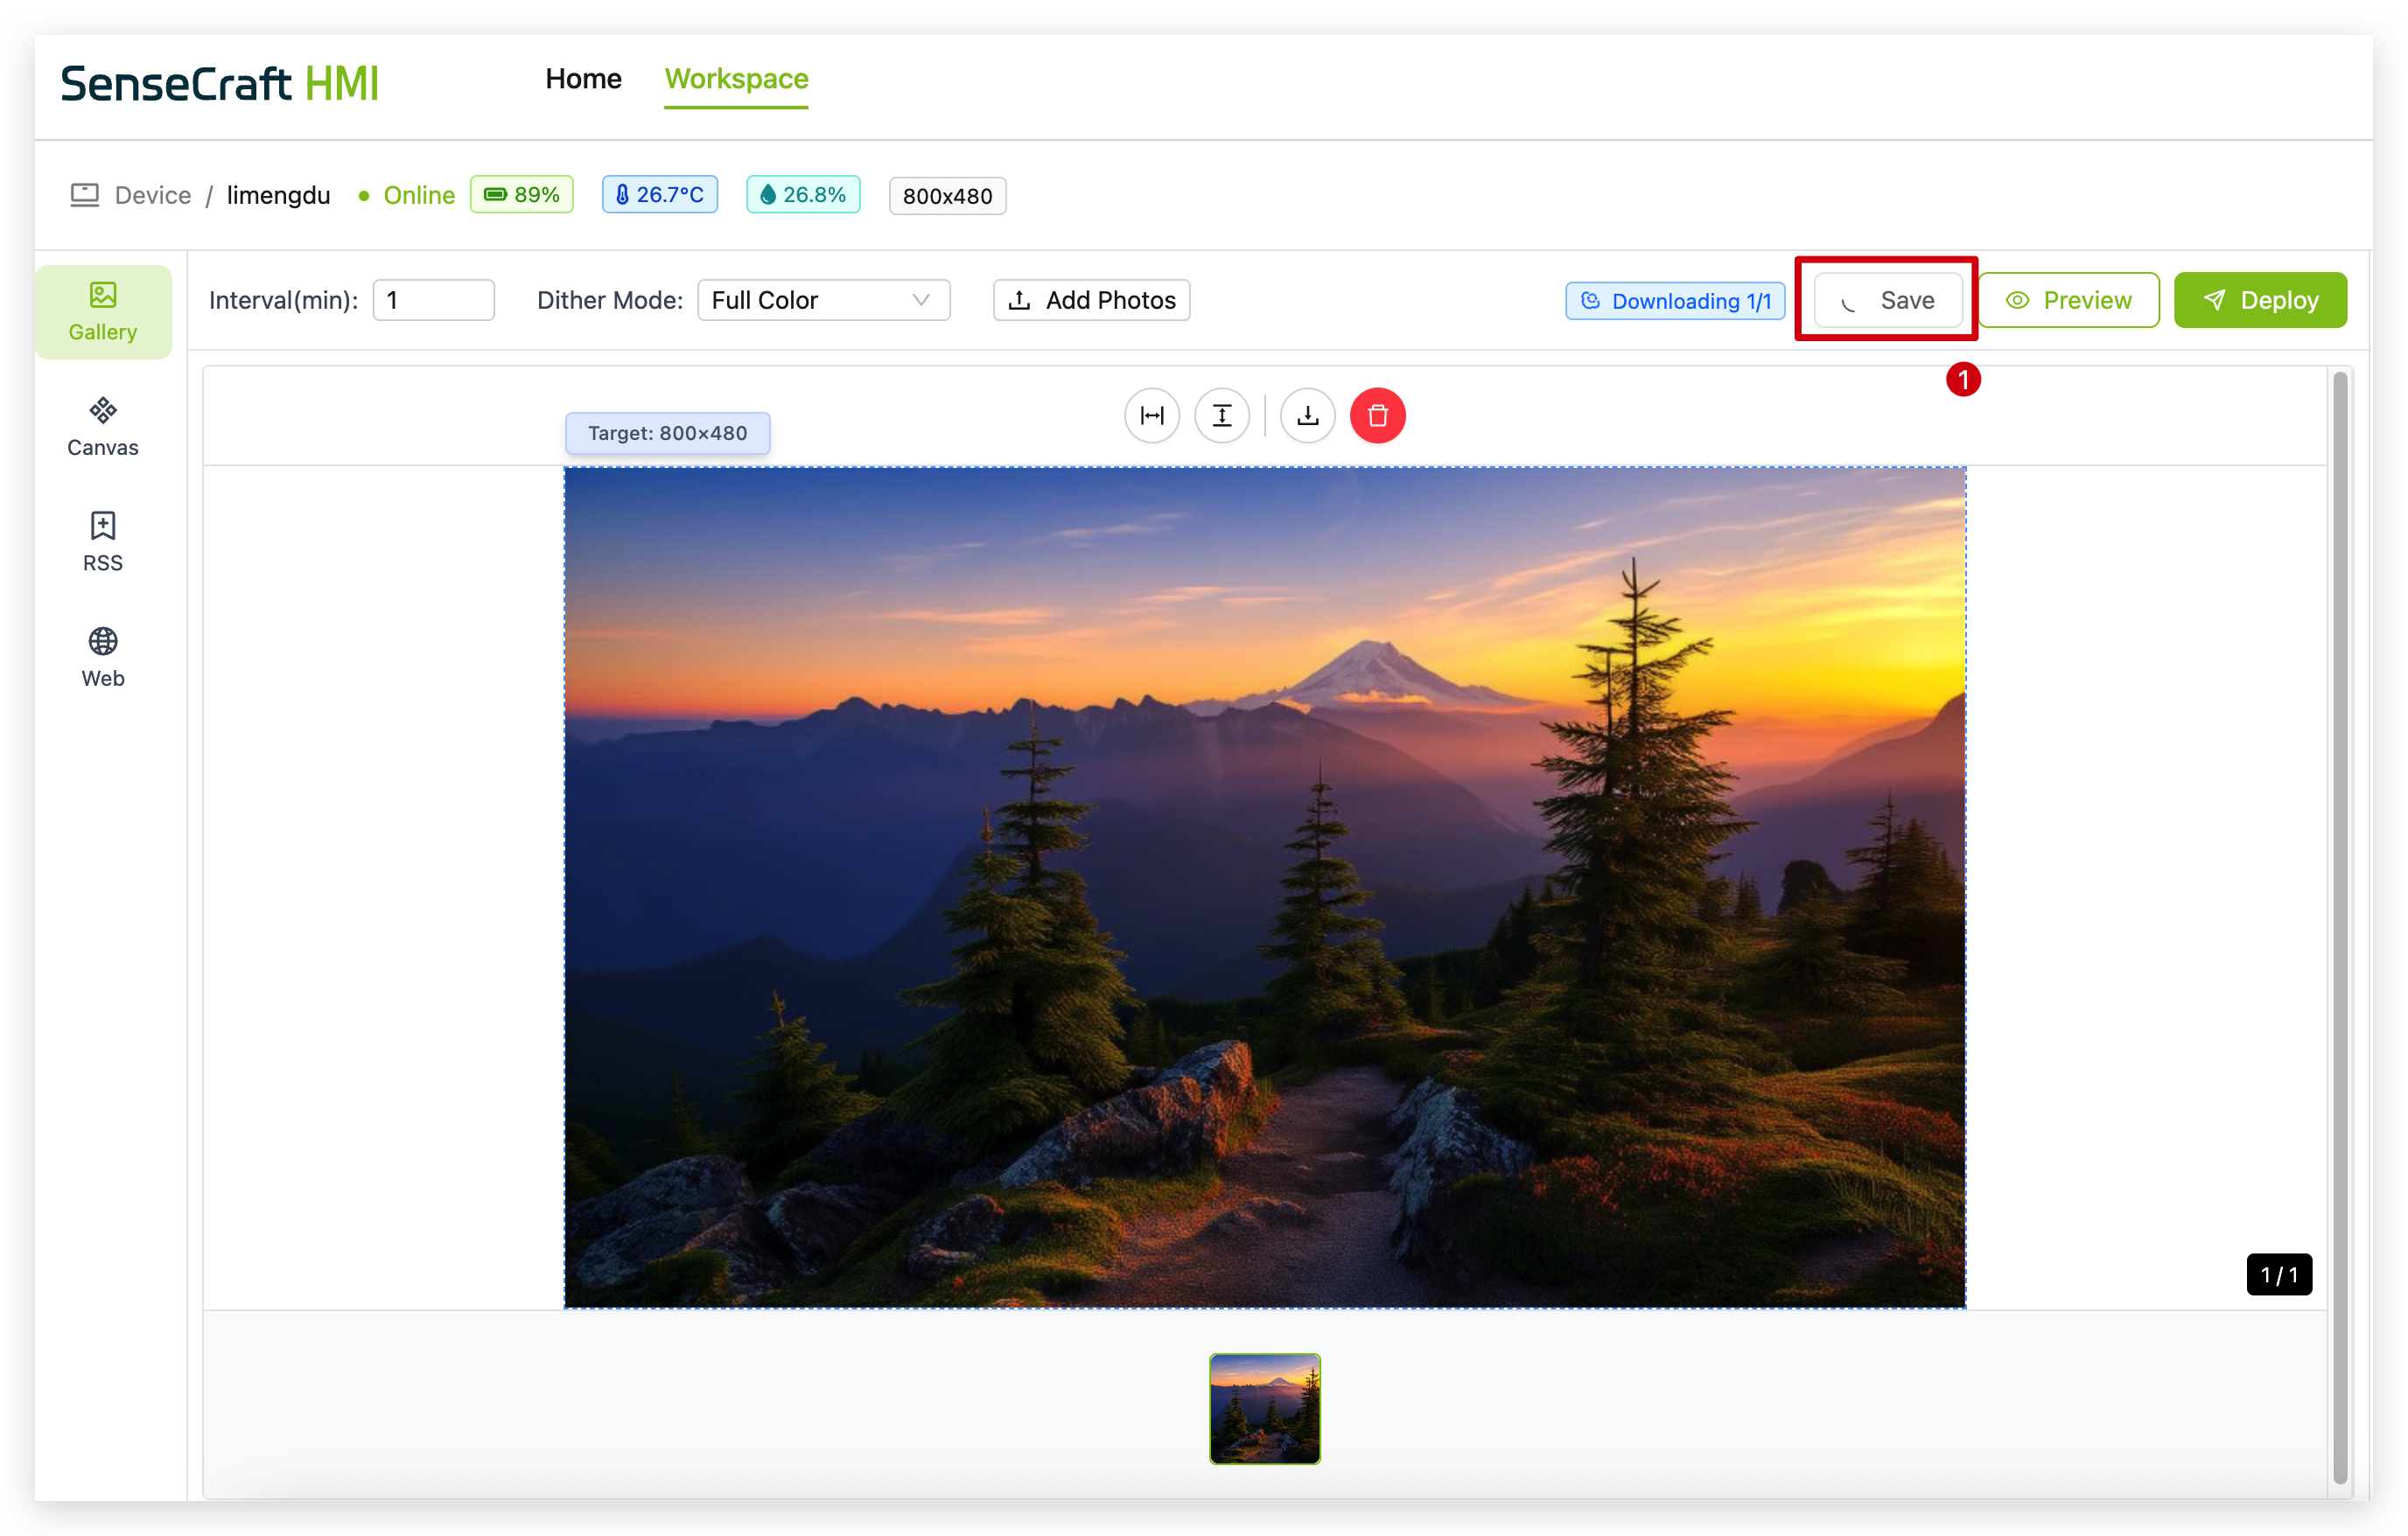
After uploading or designing an image, habitually click the save button to ensure your layout design won't be easily lost.
Step 2. (Optional) Click "Preview" to see how your gallery will appear on the device without fully deploying it
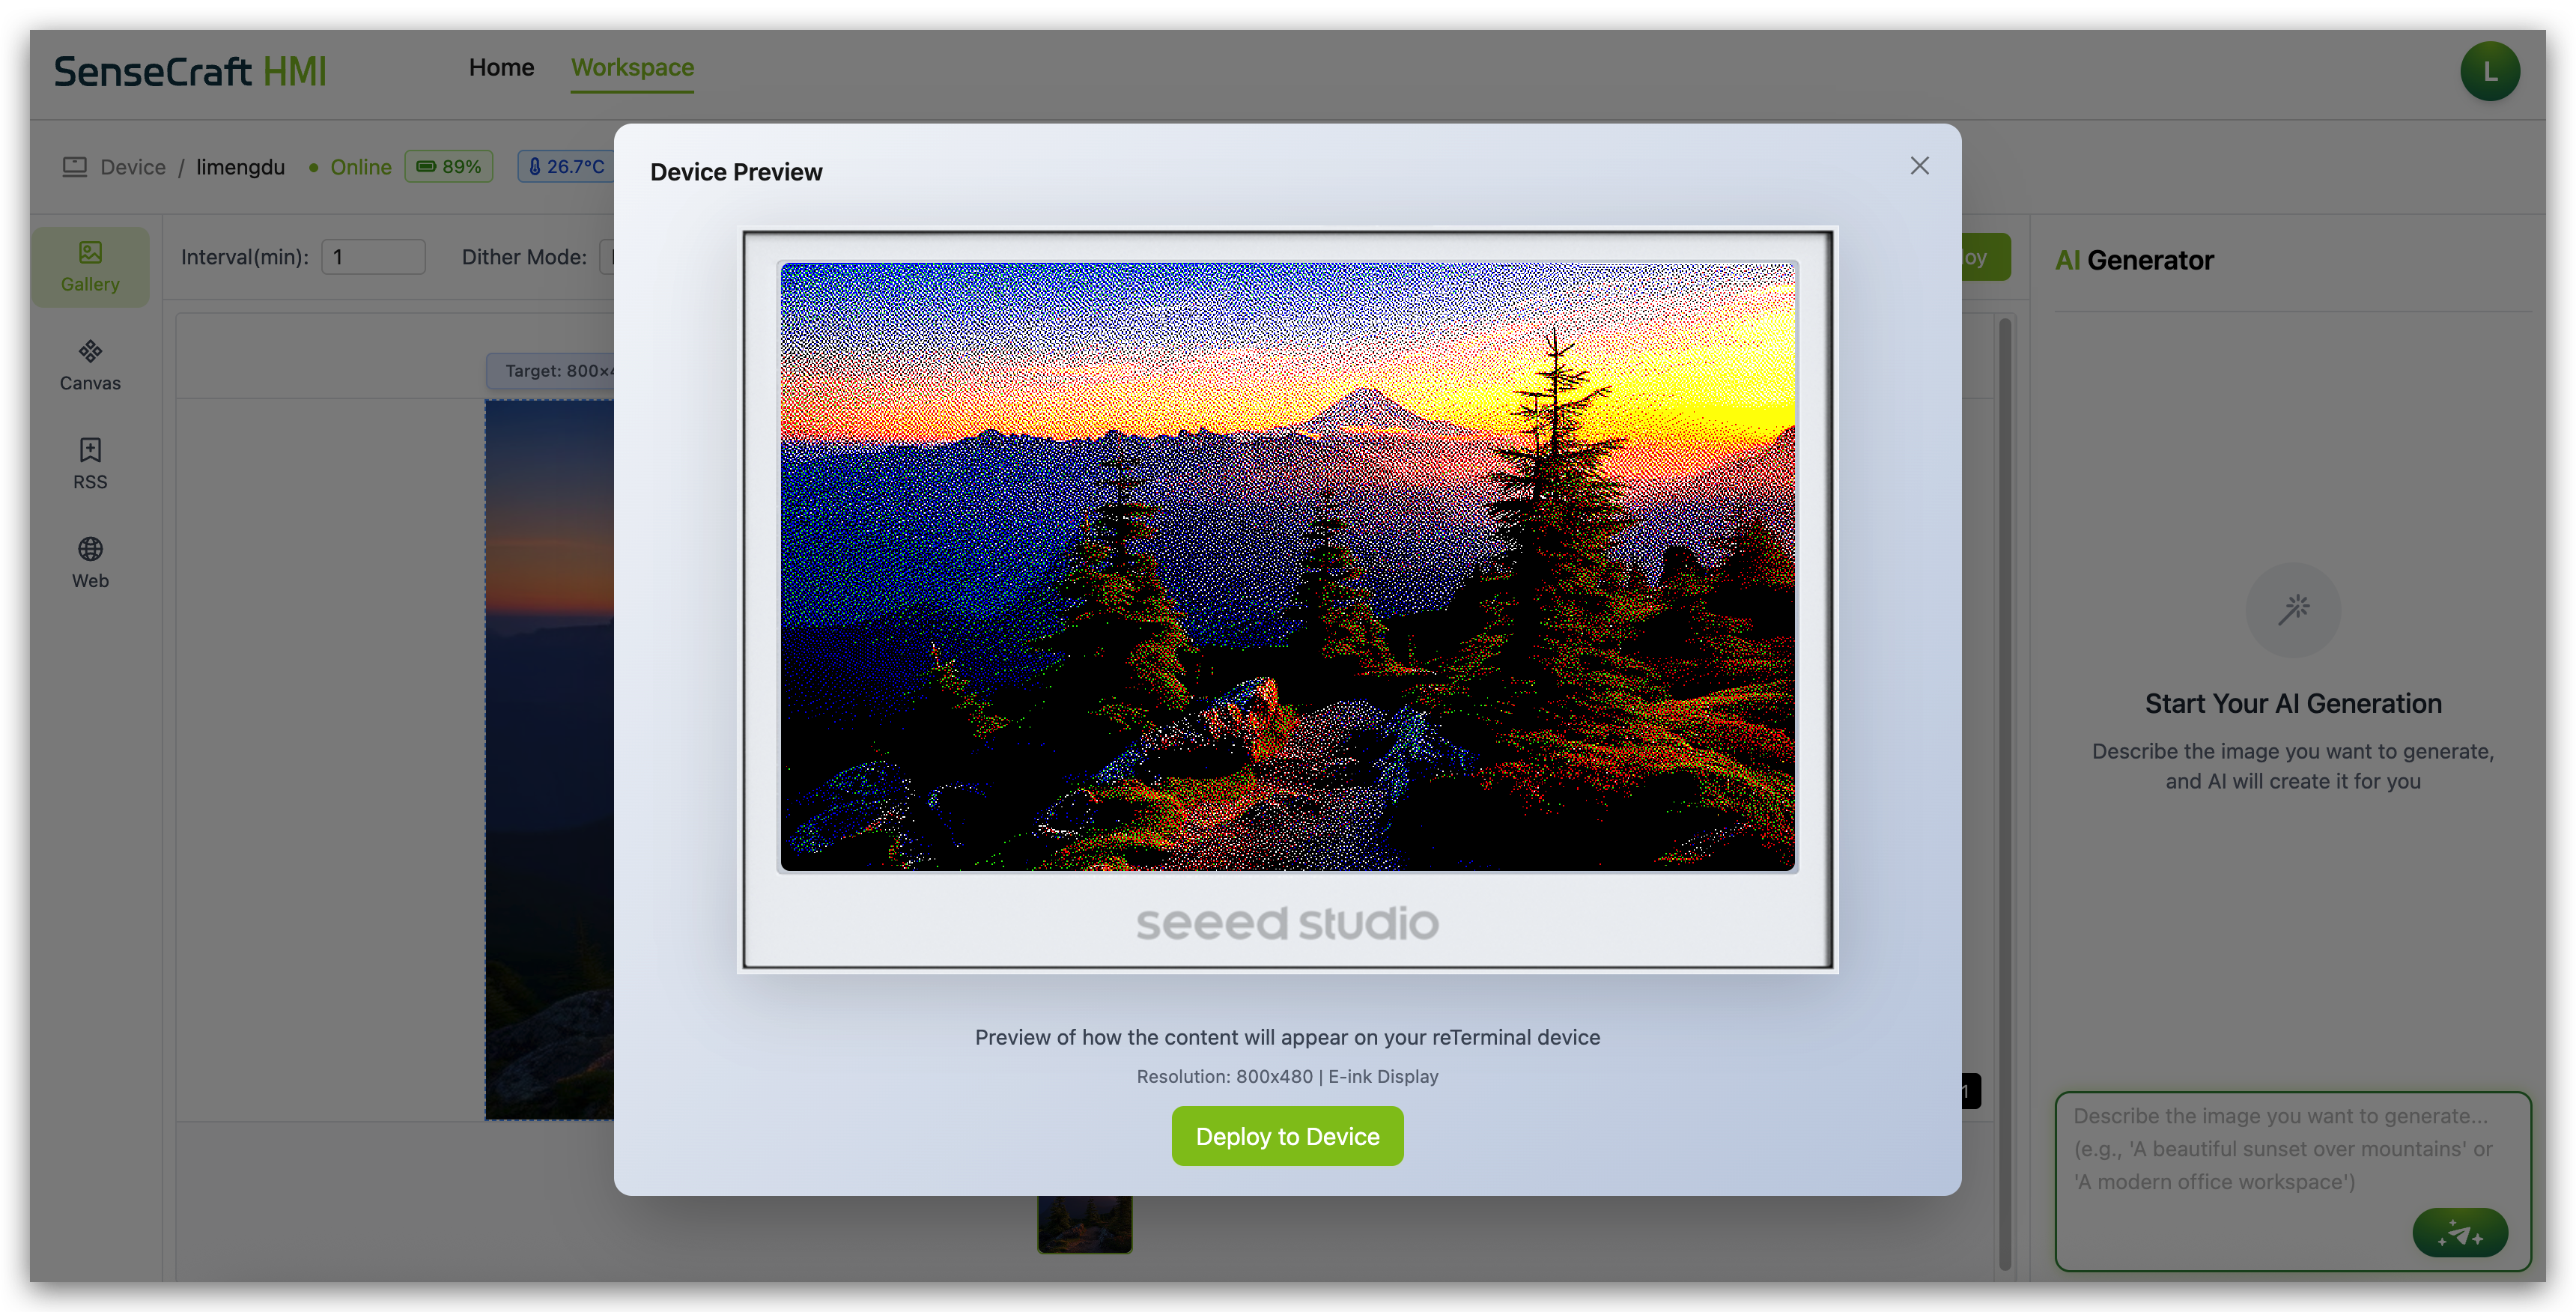
Step 3. Click "Deploy" to send your gallery to the connected device
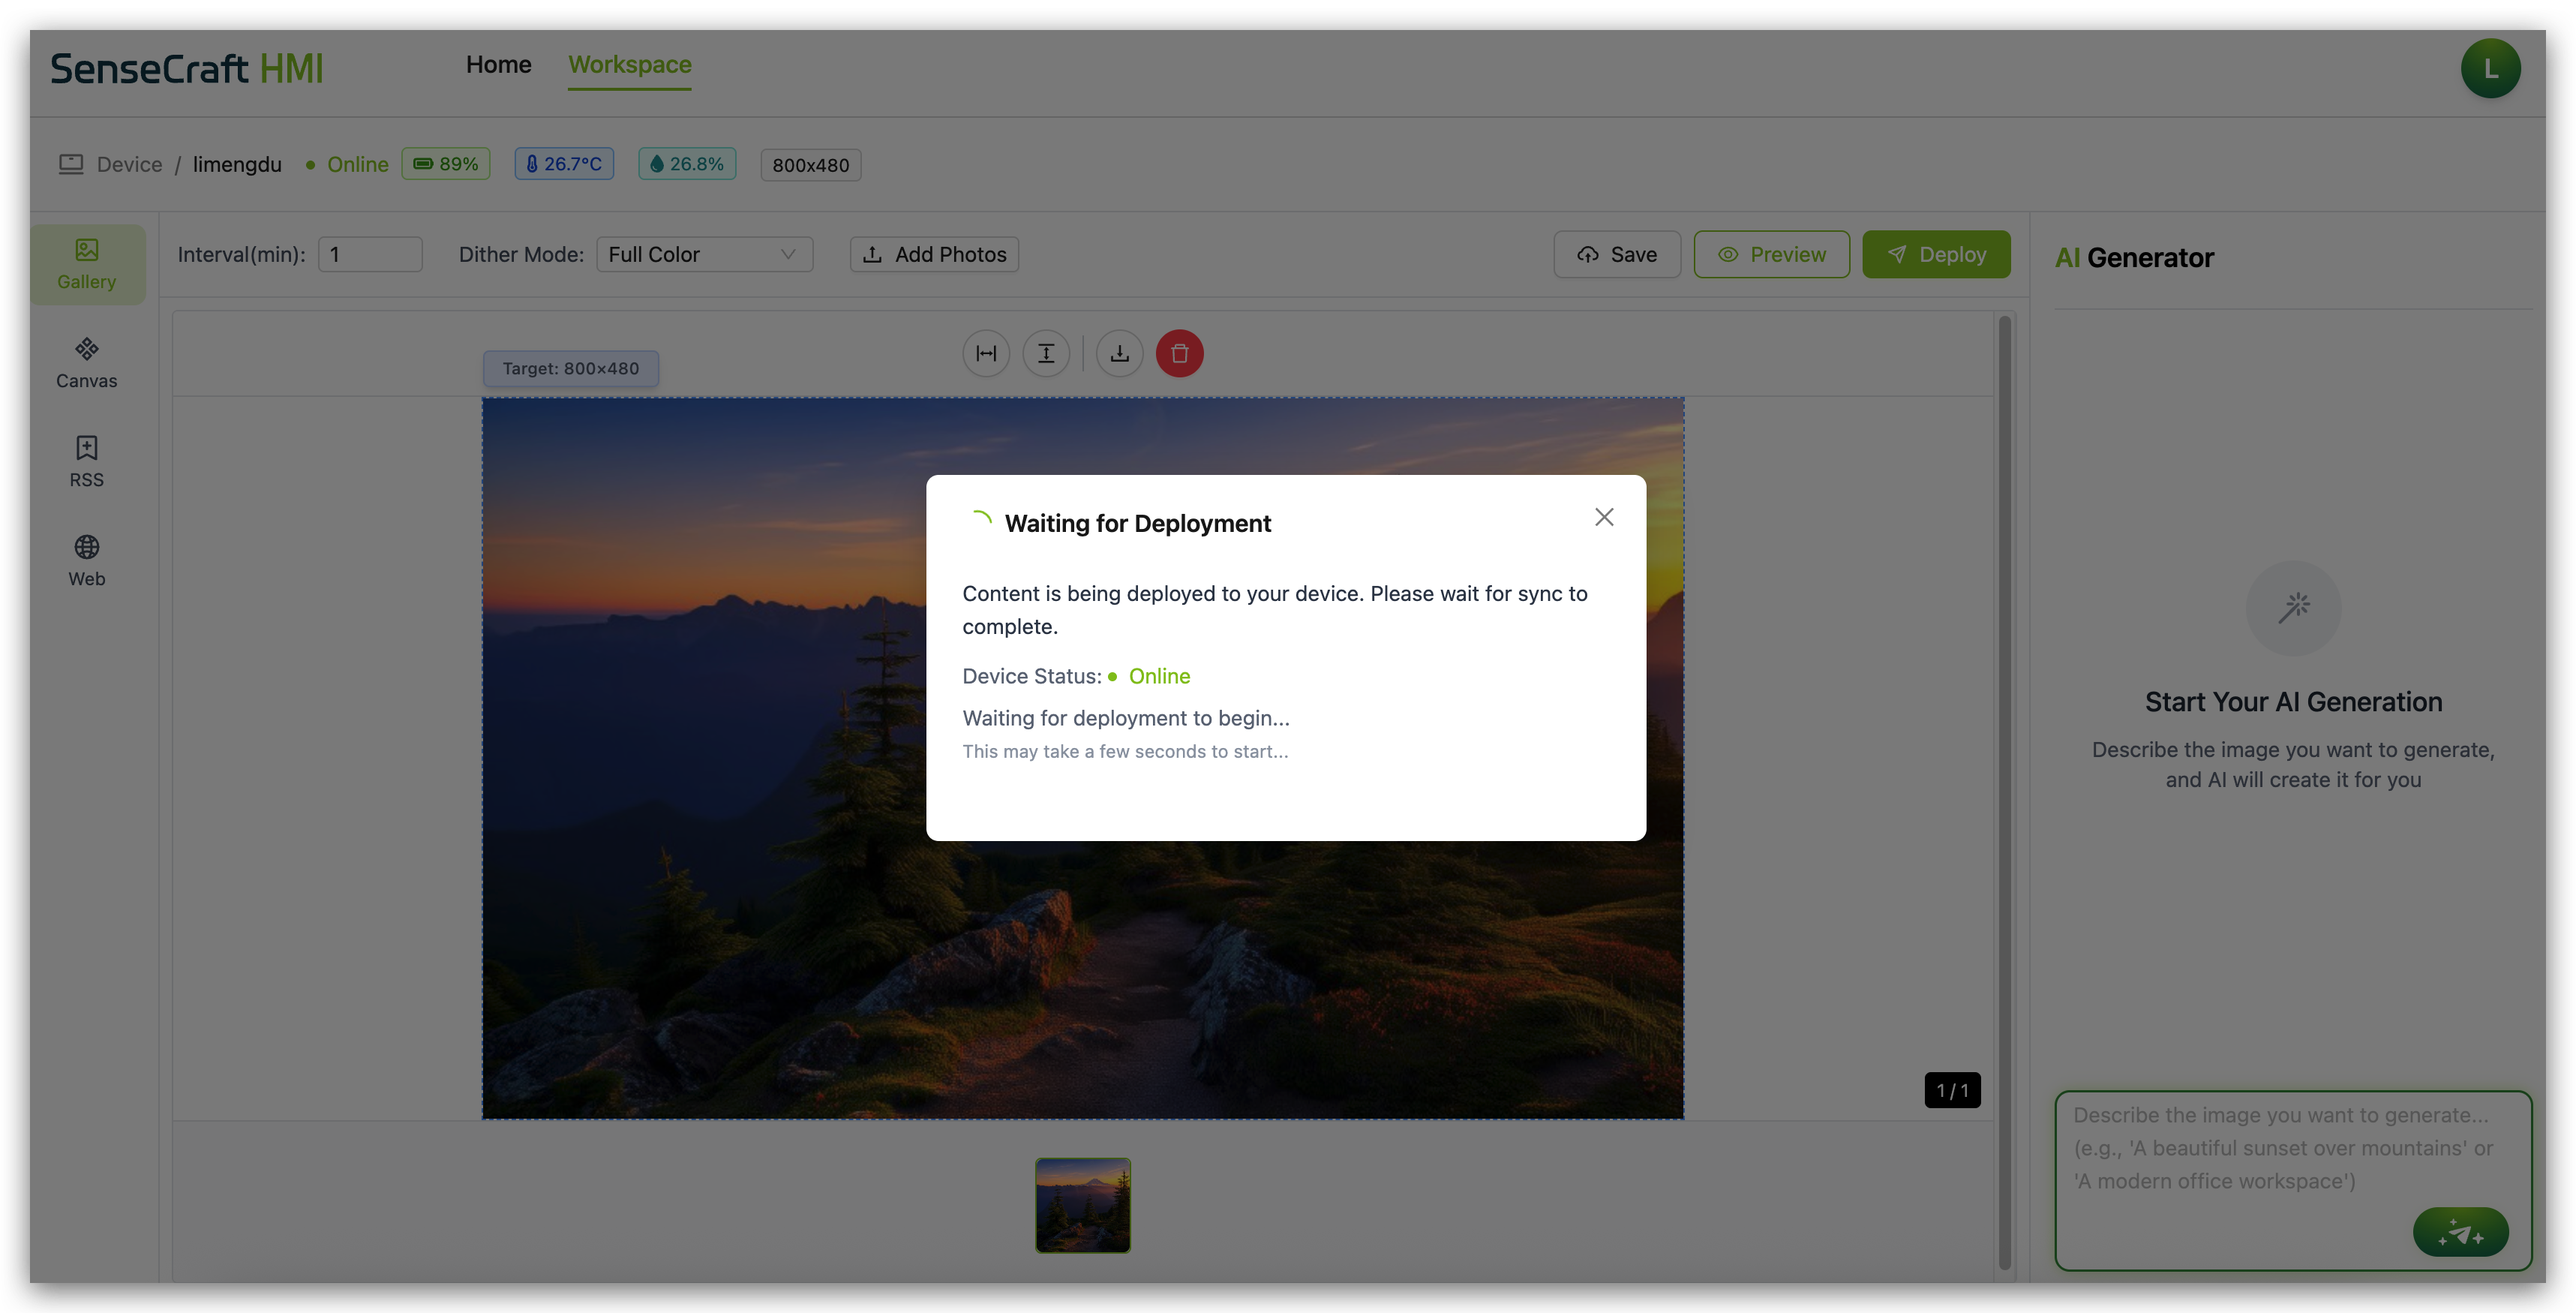
Step 4. Wait for the deployment confirmation message
After clicking the deploy button, the device may not update the album immediately. The device might be in sleep mode. It will pull the latest album images when it wakes up next time. If you want to update the photos immediately, you can click the green button above the device, and the device will wake up instantly and pull the dashboard updates.
After deployment, your device will begin displaying the images according to your interval setting.
Storage Considerations
MicroSD Card Requirements
To store more than 3 images on your device, you'll need to use a MicroSD card:
-
Format: The MicroSD card must be formatted as FAT32
-
Size: 8GB or larger recommended (up to 32GB supported)
-
Speed: Class 10 or higher recommended for better performance
Using file systems other than FAT32 may result in the device not recognizing the MicroSD card or failing to save images properly.
How to Format a MicroSD Card as FAT32
- On Windows
- On macOS
Step 1. Insert your MicroSD card into your computer
Step 2. Open File Explorer and right-click on the MicroSD card
Step 3. Select "Format..."
Step 4. Choose "FAT32" from the File System dropdown
Step 5. Click "Start" to begin formatting
Step 1. Insert your MicroSD card into your computer
Step 2. Open Disk Utility (Applications > Utilities > Disk Utility)
Step 3. Select your MicroSD card from the sidebar
Step 4. Click "Erase"
Step 5. Choose "MS-DOS (FAT)" as the format
Step 6. Click "Erase" to format the card
Inserting the MicroSD Card
Step 1. Power off your device
Step 2. Locate the MicroSD card slot on your device
Step 3. Insert the properly formatted MicroSD card

Step 4. Power on your device
Step 5. Reconnect to SenseCraft HMI to verify the expanded storage is recognized
Optimizing Images for Your Display
For the best visual results on your device's display:
-
Match the resolution: Prepare images that match your device's native resolution (typically 800x480 pixels)
-
Consider aspect ratio: Use images with a 5:3 aspect ratio to avoid white padding
-
Optimize for display type:
- For color LCD: Standard color images work well
- For e-paper/e-ink: Higher contrast images with fewer color gradients
- For 2-color e-paper: Black and white or high contrast images
-
File size: Keep images under 2MB to avoid automatic compression
-
Brightness/contrast: Adjust based on your specific display's characteristics
Troubleshooting
Common Issues and Solutions
- Images not uploading:
-
Check that your image is in a supported format (JPG, PNG, GIF)
-
Ensure the file size is not too large (ideally under 2MB)
-
Try a different browser or clear your browser cache
- Cannot upload more than 3 images:
-
Verify that you have a properly formatted MicroSD card inserted in your device
-
Check that the MicroSD card is formatted as FAT32
-
Ensure the device is properly detecting the MicroSD card
- Images display incorrectly:
-
Adjust the brightness/contrast using the image toolbar
-
Prepare images that match your device's resolution
- Deployment fails:
-
Ensure your device is properly connected to SenseCraft HMI
-
Check that your device has sufficient storage space
-
Restart your device and try deploying again
Conclusion
The Gallery function in SenseCraft HMI provides an easy way to transform your screen-based devices into digital photo frames. By following this guide, you can upload, manage, and display images on your device with customized settings for optimal viewing.
Remember that for storing more than 3 images, you'll need a properly formatted MicroSD card inserted in your device. With the right setup, you can create beautiful slideshows and displays that showcase your favorite images on your Seeed Studio display devices.
Resources
Tech Support & Product Discussion
Thank you for choosing our products! We are here to provide you with different support to ensure that your experience with our products is as smooth as possible. We offer several communication channels to cater to different preferences and needs.