MQTT Gateway
Why do you need Meshtastic + mqtt
Integrating MQTT with Meshtastic extends off-grid communication by bridging distant networks. This enables global messaging, provides a backup when mesh signals are weak, and ensures faster message delivery via the internet. Perfect for remote areas and emergency situations.
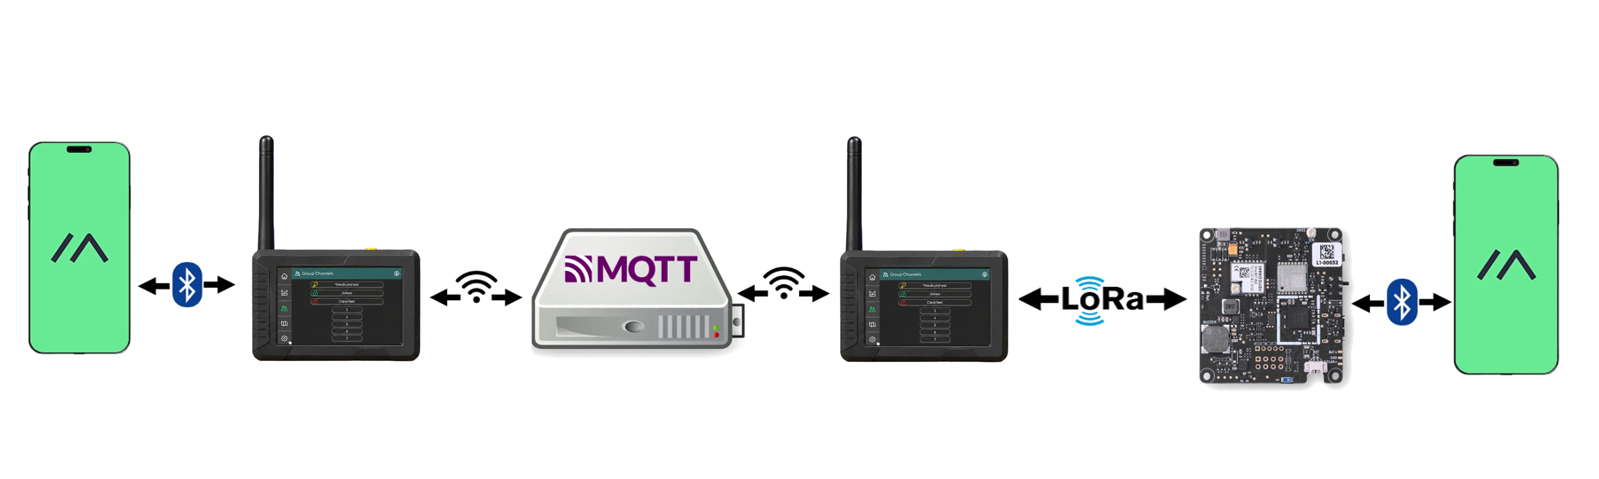
Hardware Preparation
Setting up a Meshtastic Gateway requires a device that can both run LoRa and Wifi. Additionally, if you want to share your gateway's location via mqtt, you can add a GPS module.
Set Up
Step1 Flash Firmware
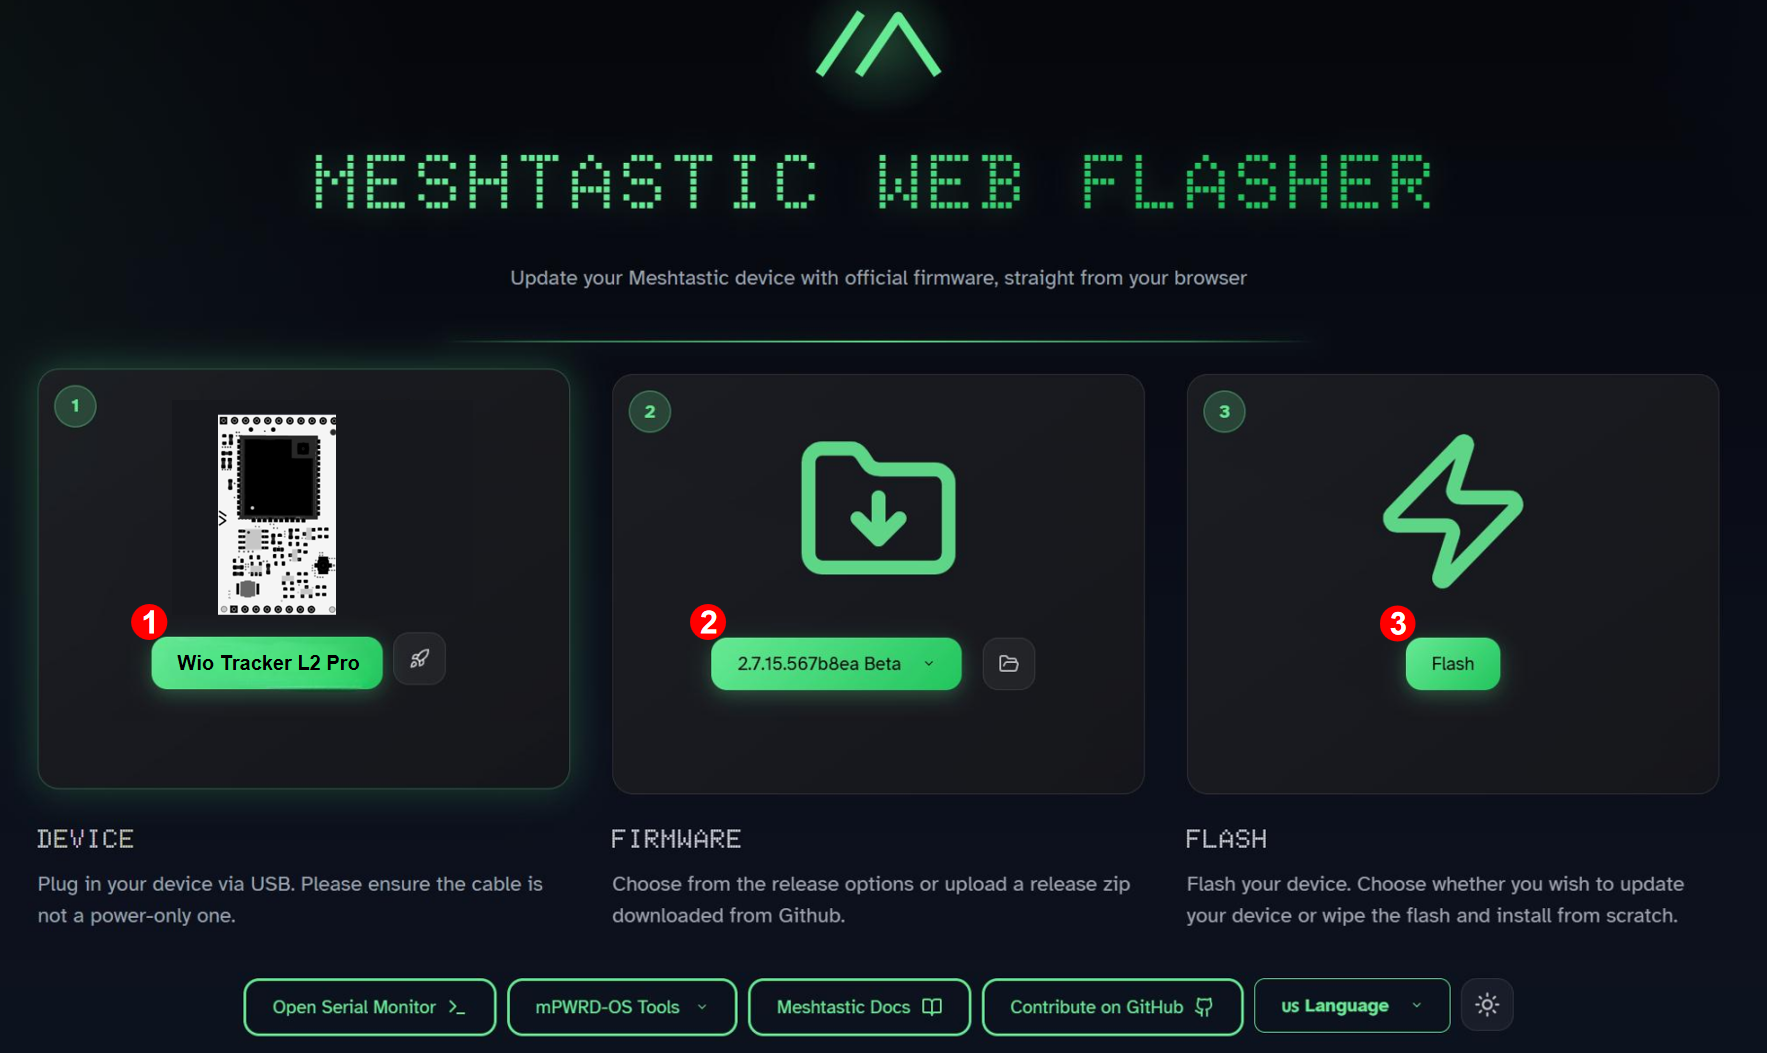
Visit Meshtastic Web Flasher.
Select the target device to Seeed Wio Tracker L2 and choose the latest firmware, then click Flash.
Switch on the device, click Enter DFU Mode, there will be a serial port named Tracker L2, click and connect it.
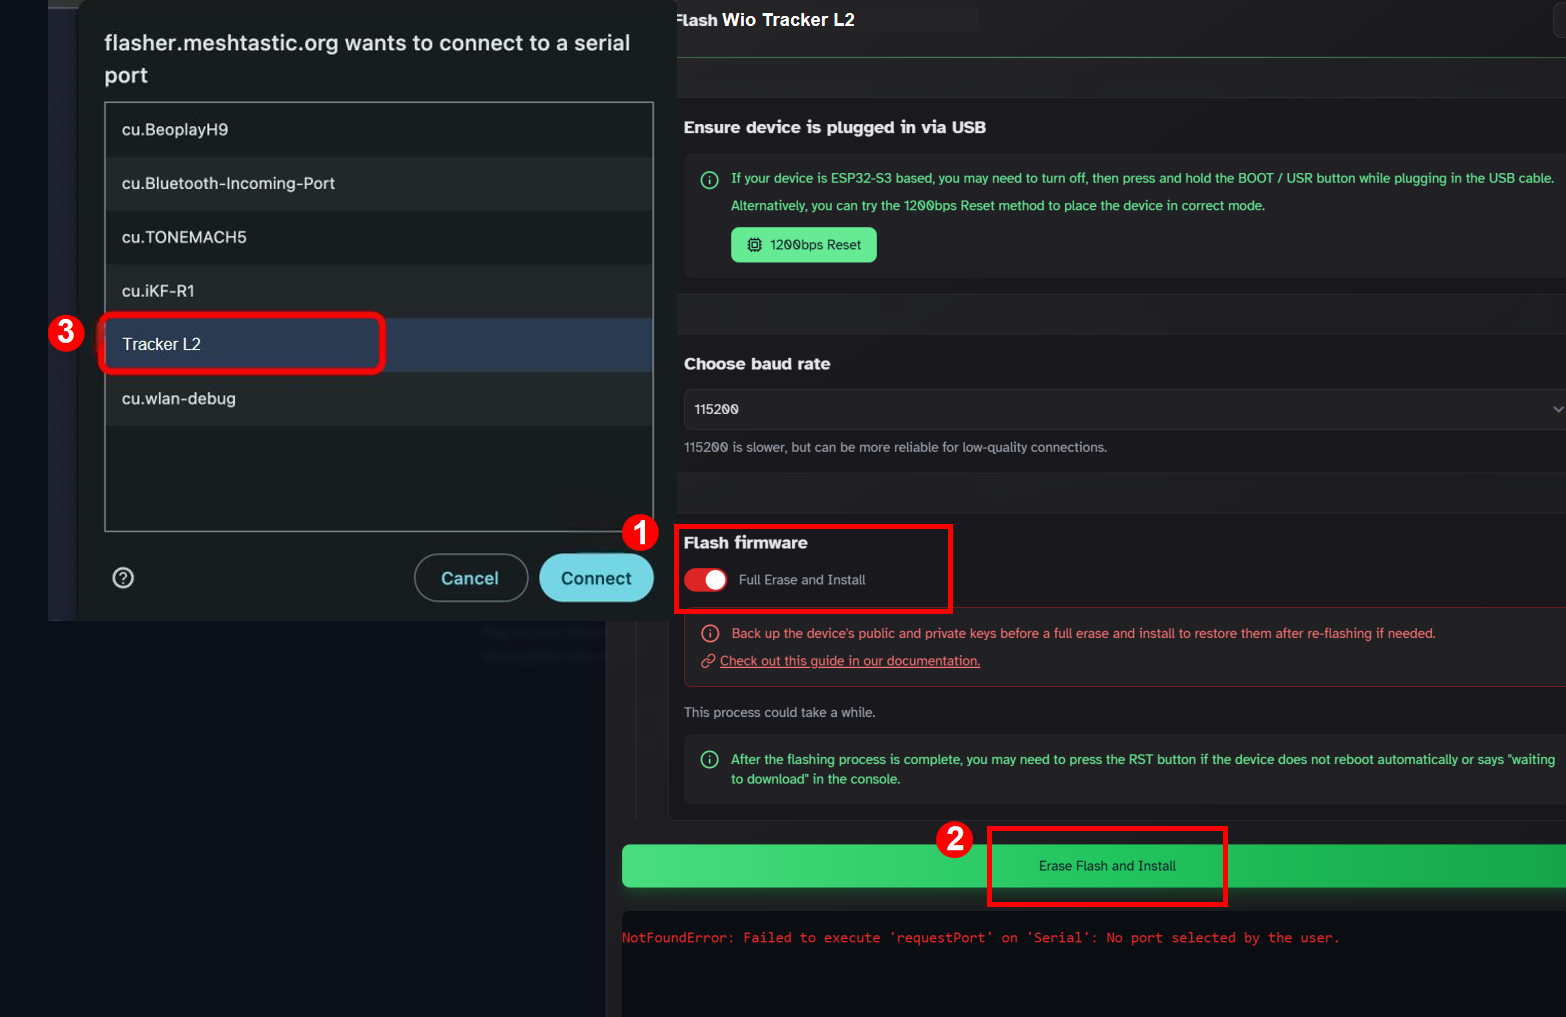
And then click "Flash". Don't forget to tick "Full Erase and Install" if you want to cover previous firmware.
Step2 Check your Device ID
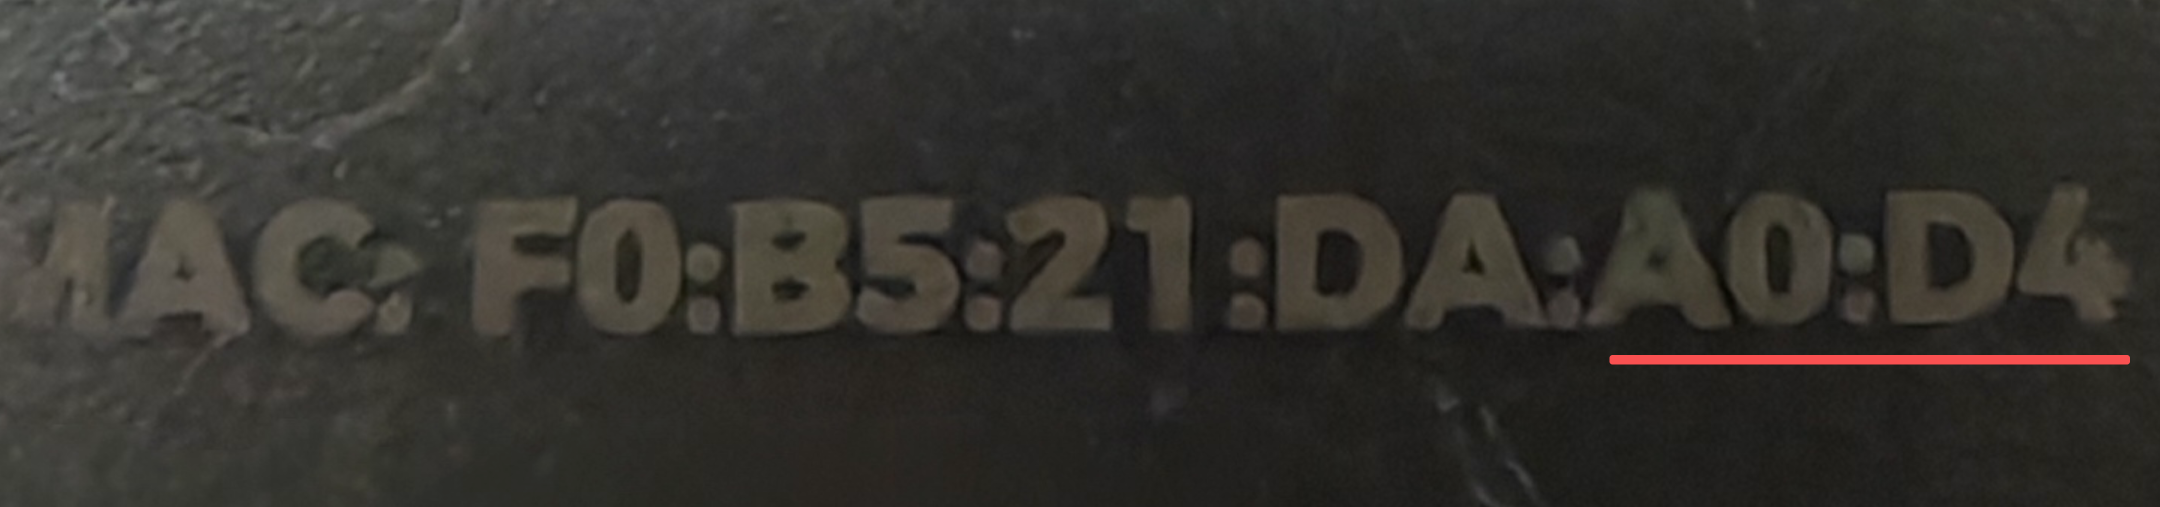
- Check the device back
- Via Serial Tool
The last four digit of the MAC address is the device ID
For example, the device ID of the device below would be A0D4
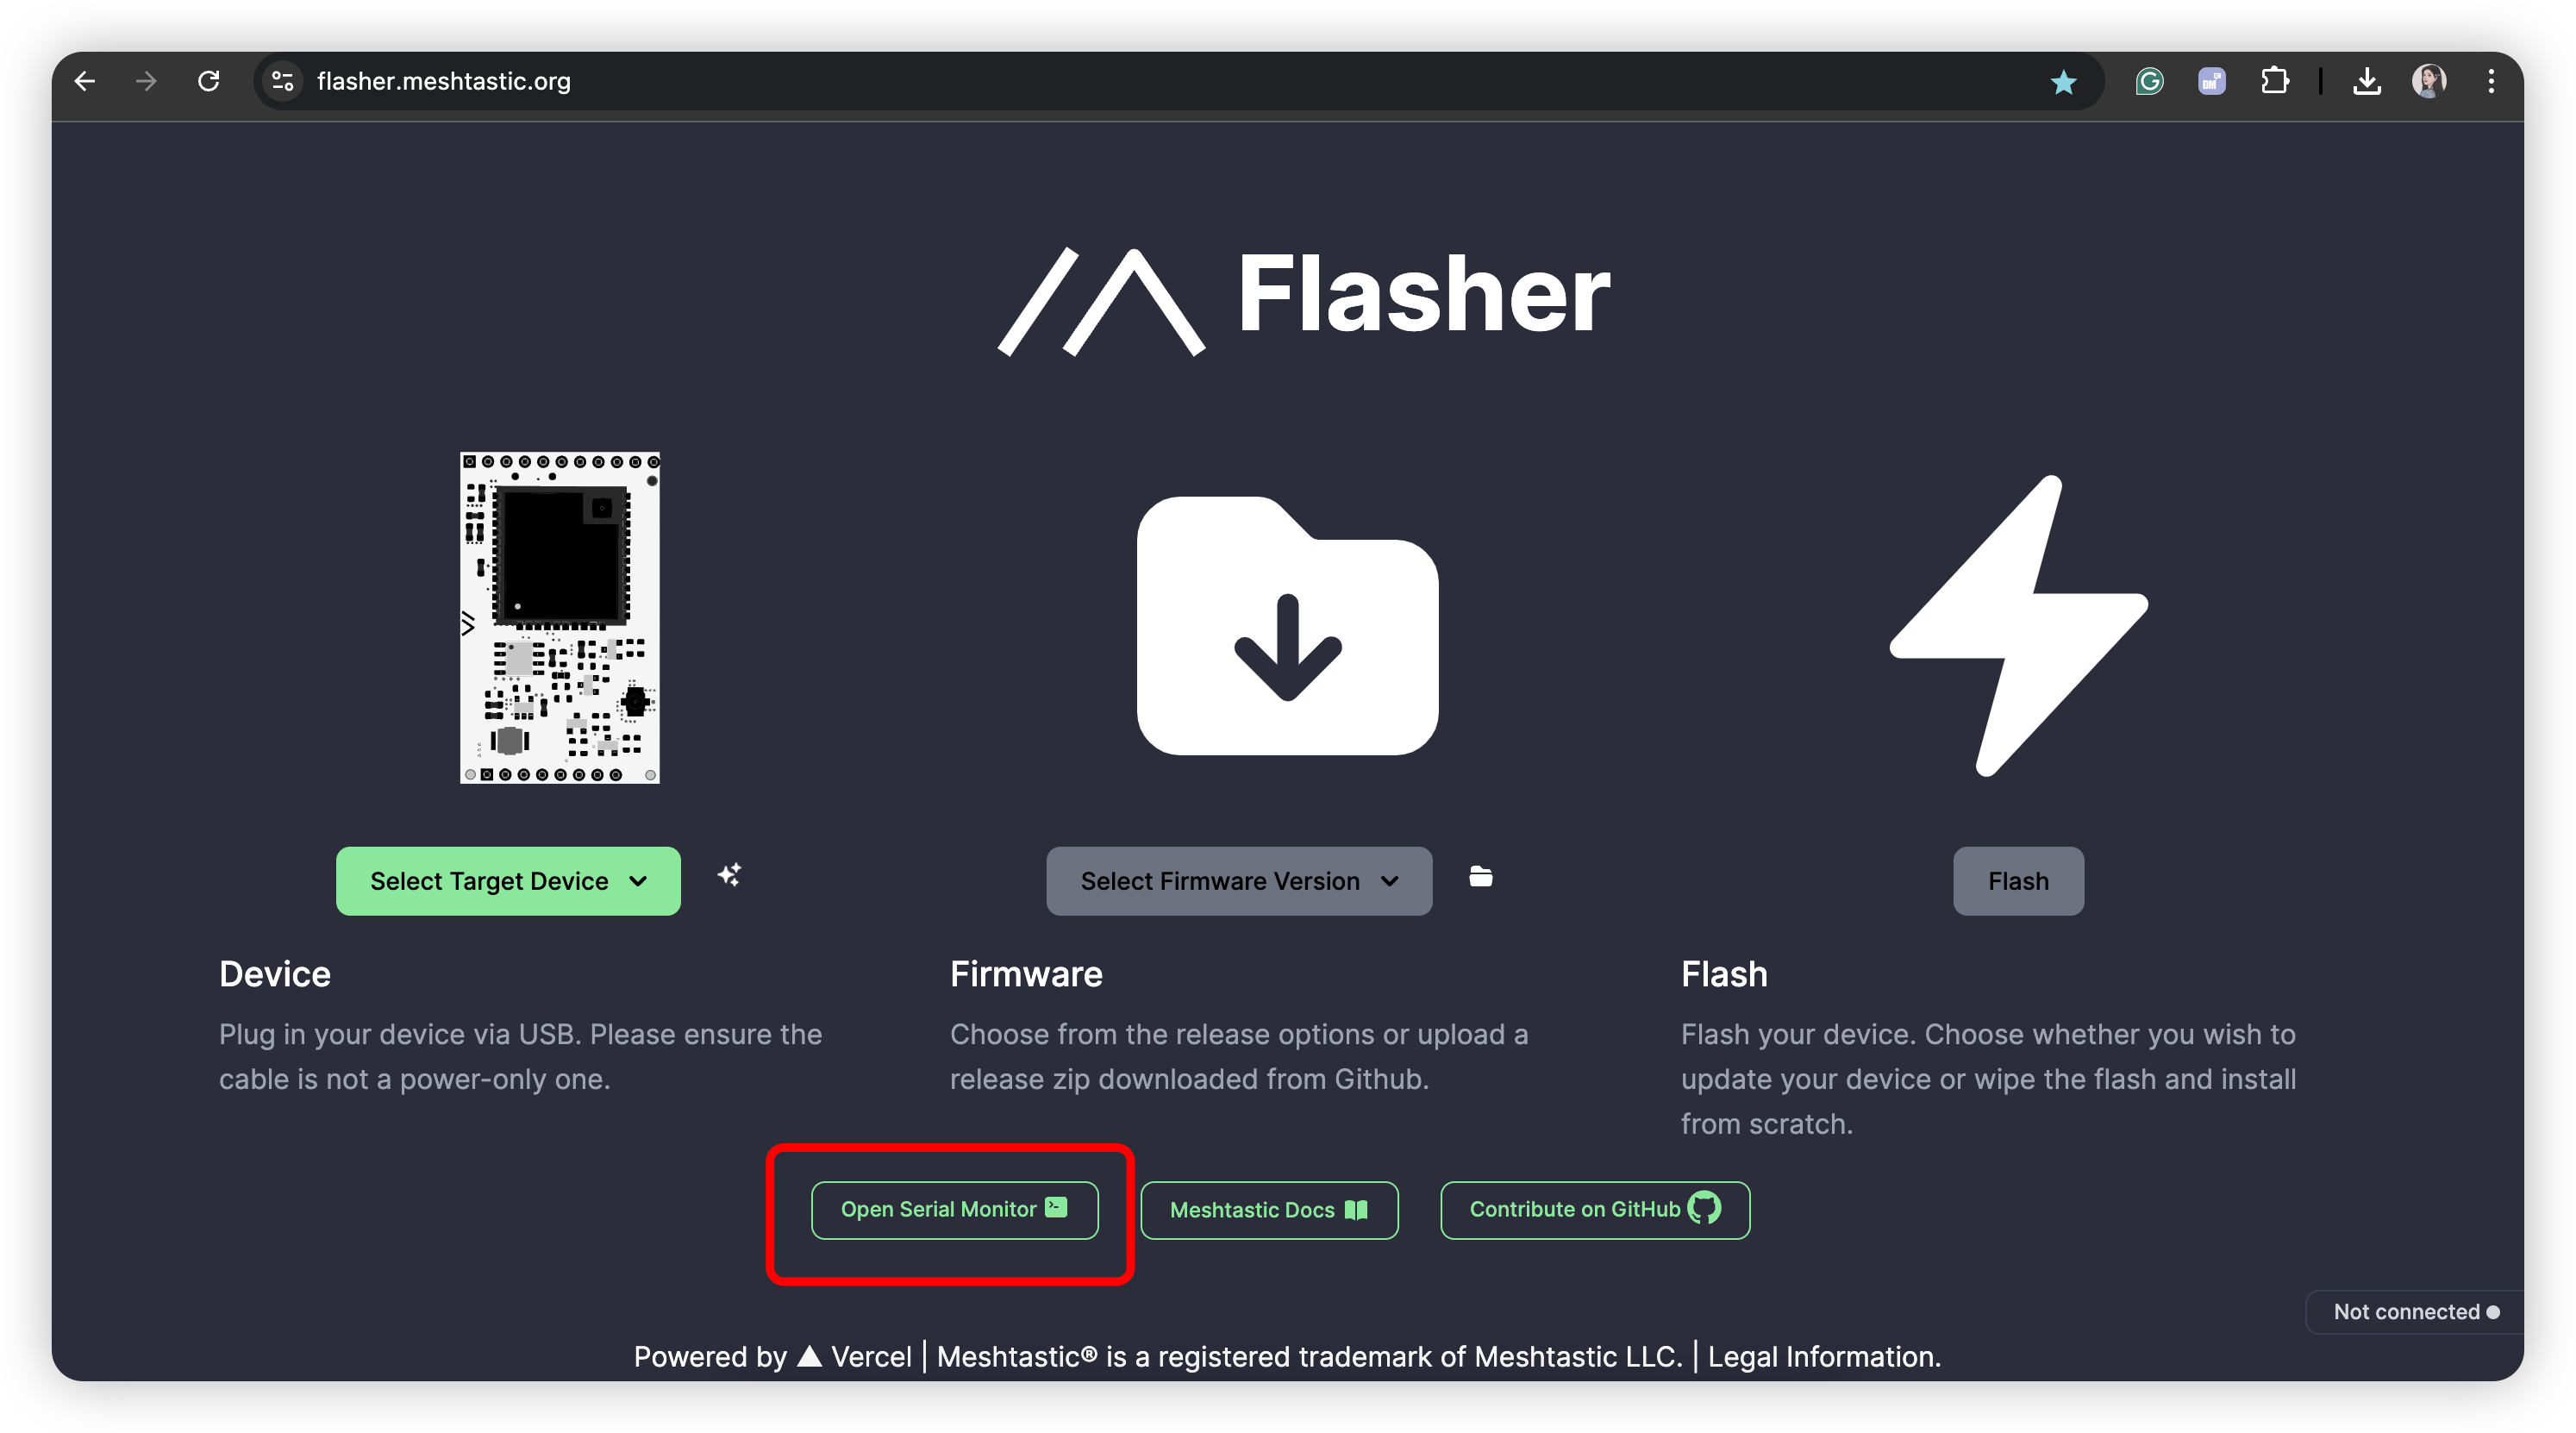
Visit Meshtastic Web Flasher.
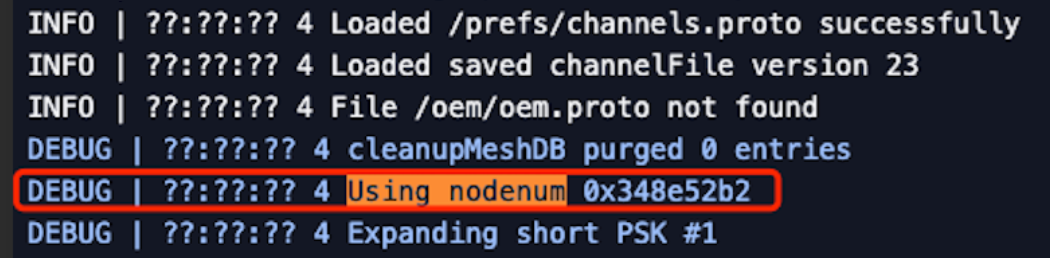
Click Open Serial Monitor, connect the device to your PC, check the serial log, keyword using nodenum.
Step3 APP Connection
- MUI
- BaseUI
Go to Setting page, click Reboot/Shutdown, then click the Bluetooth icon.
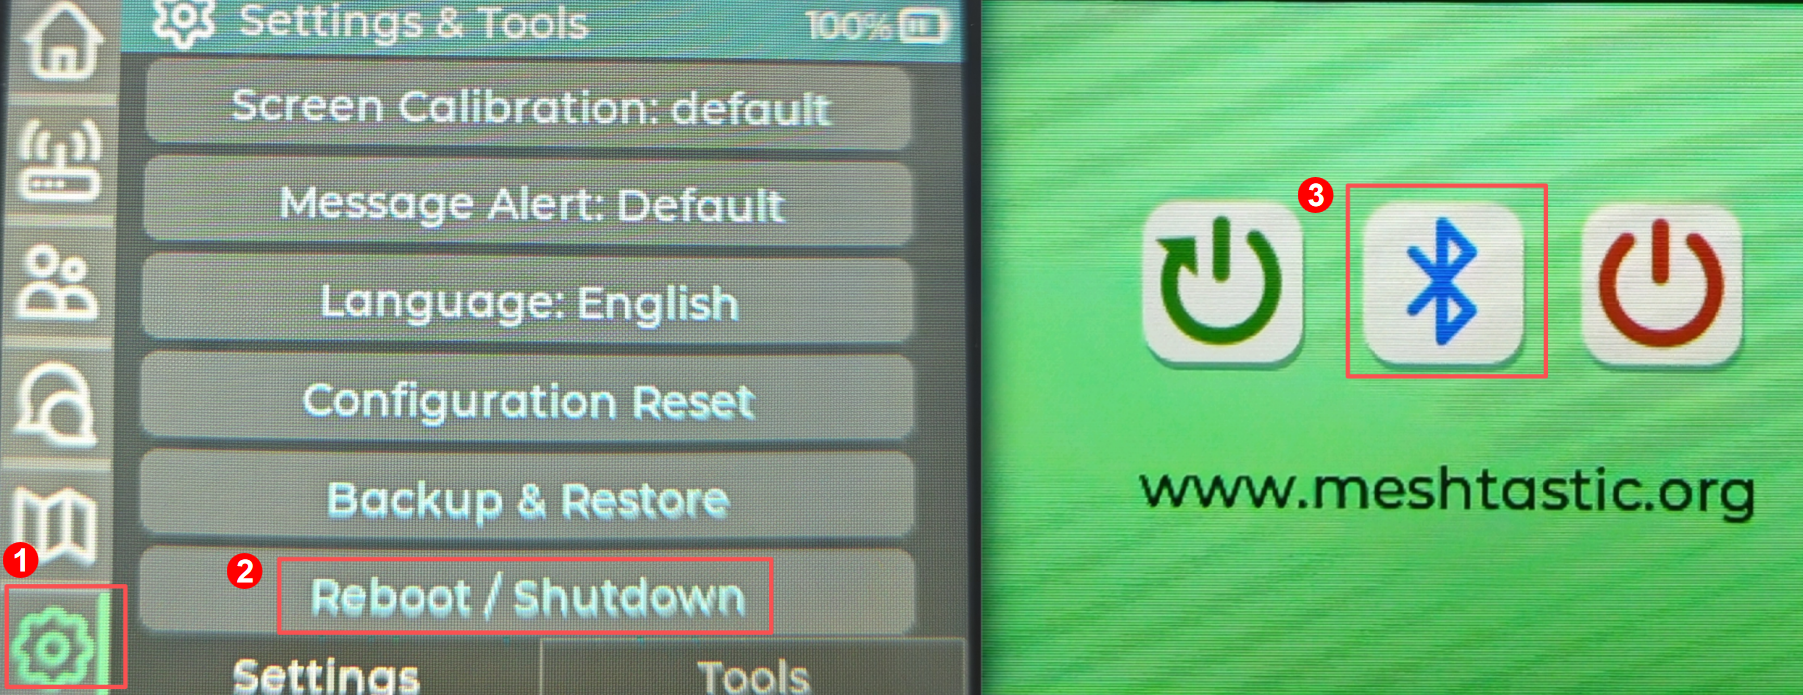
The device will then reboot in Bluetooth mode. The Bluetooth pairing code will be shown on the screen.
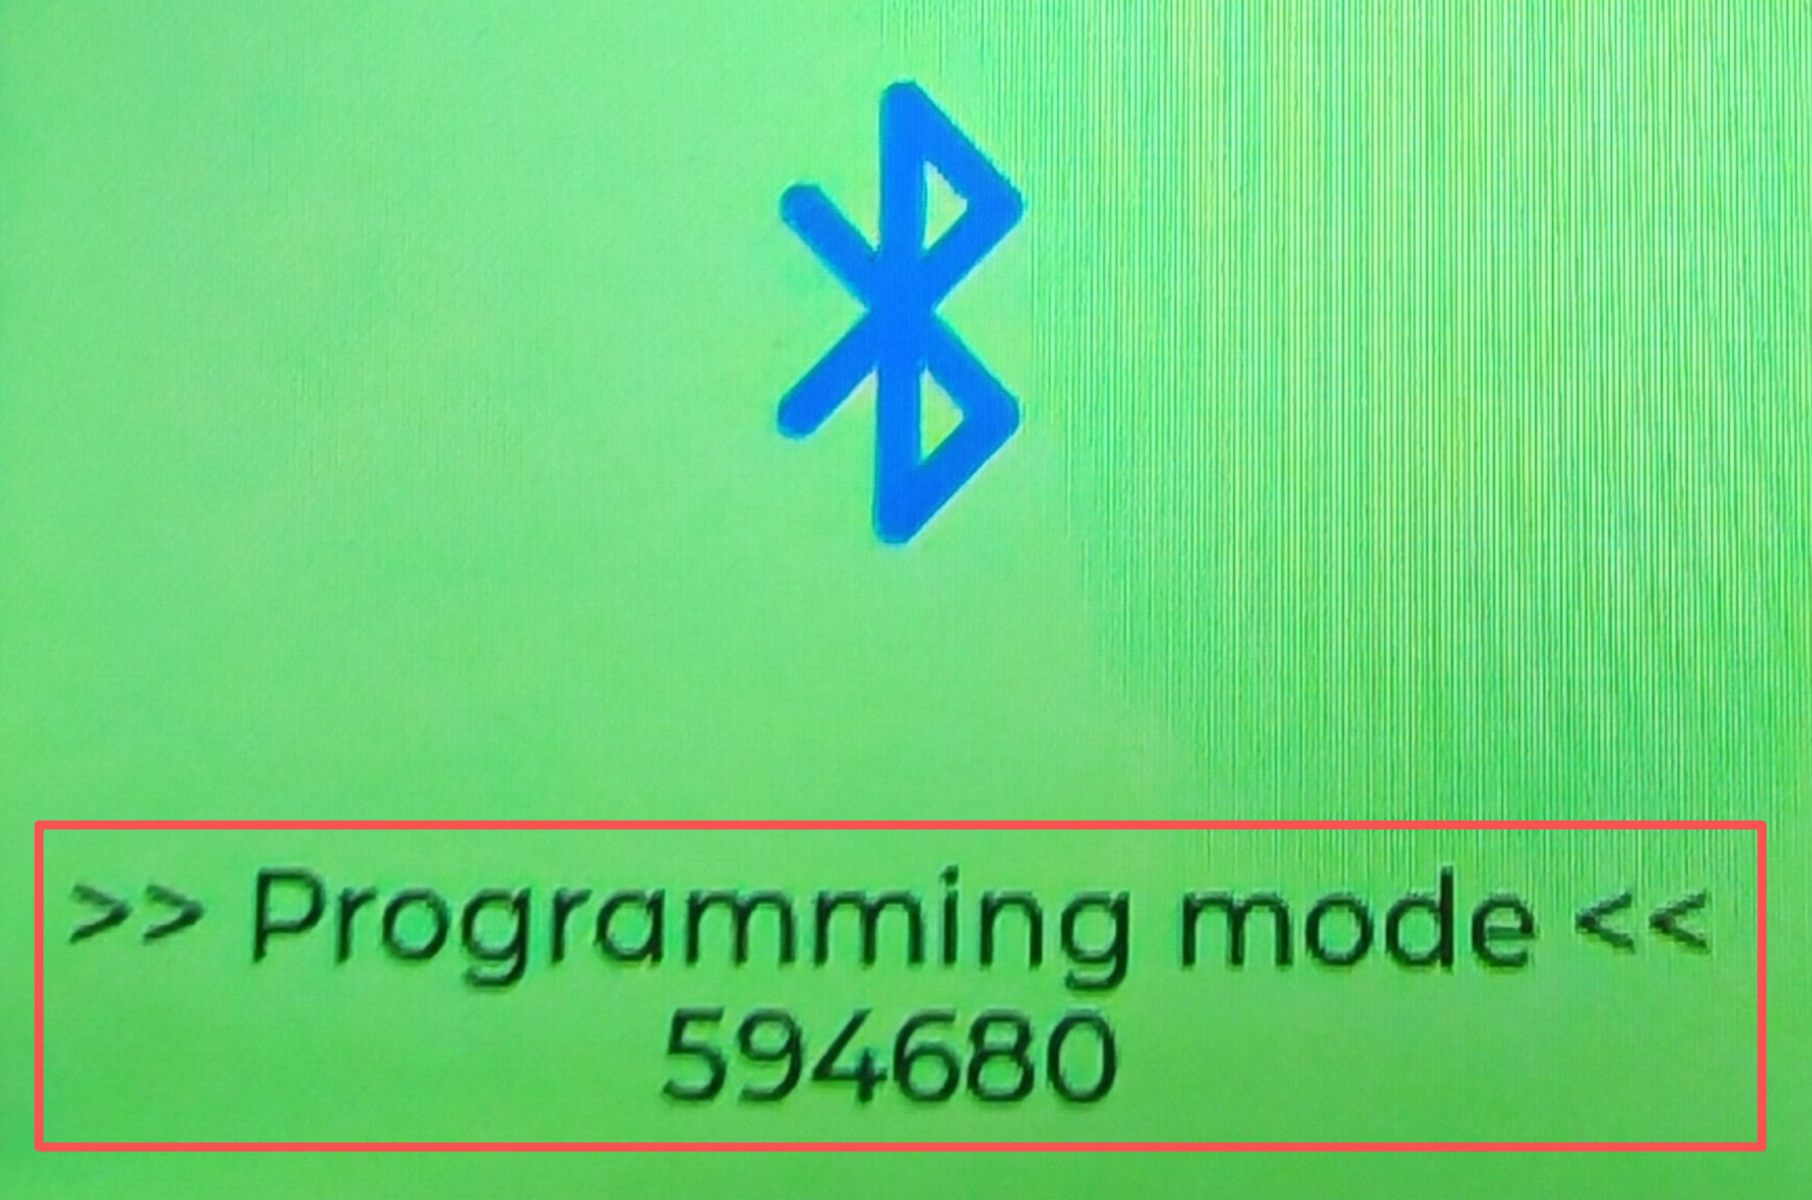
The device is always in Bluetooth pairing mode, requiring no special operation.
Click here to download Meshtastic APP.
Pair your device with your phone APP.
- IOS
- Android
- Select the target device on the Bluetooth panel.
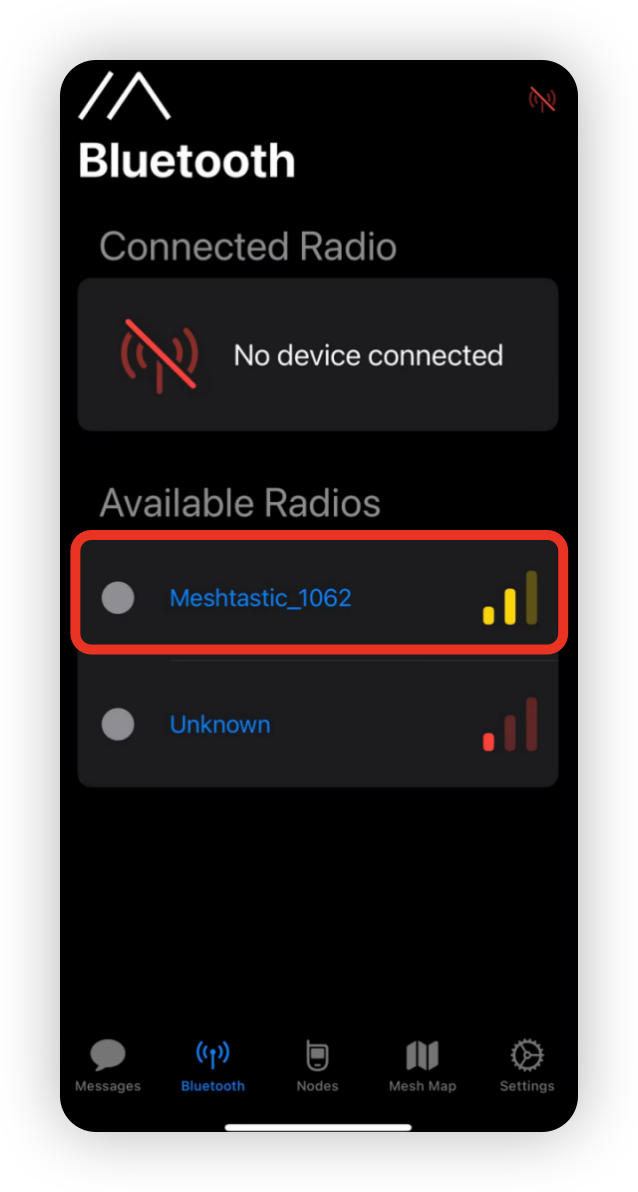
- Enter the code shown on the screen and then click
Pairto connect the device.

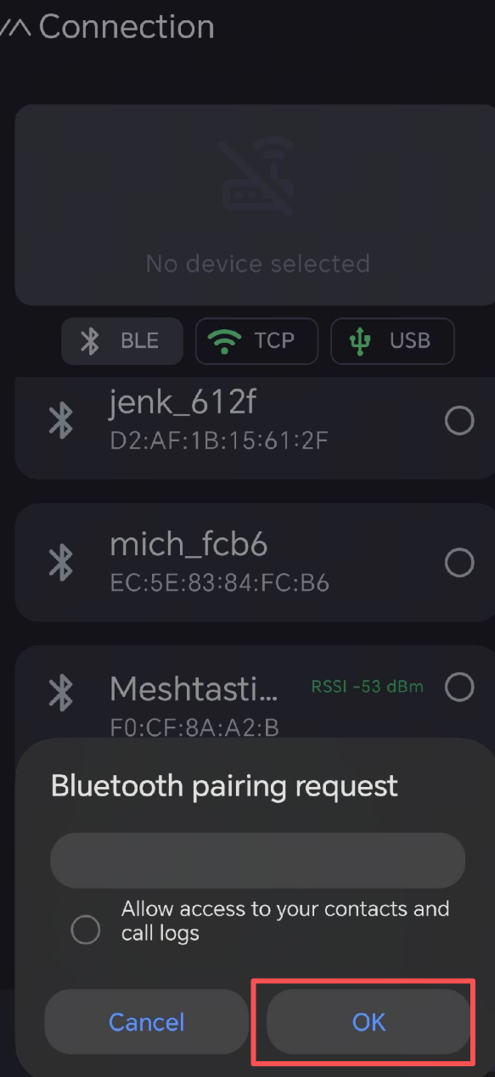
- Select the target device on the Bluetooth panel.
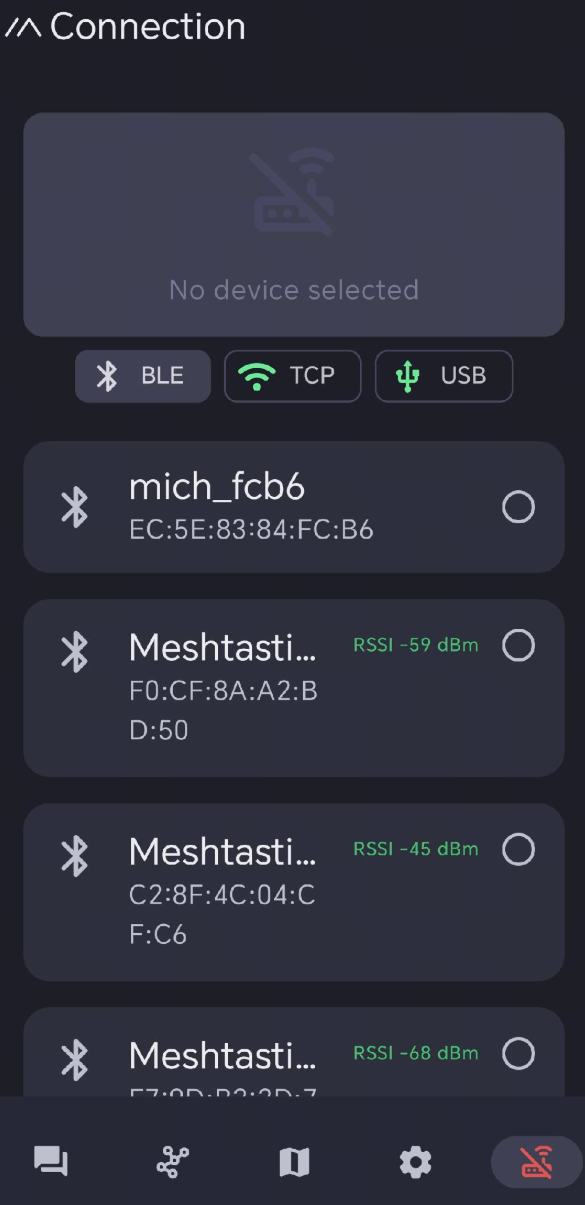
- Enter the code shown on the screen and then click
OKto connect the device.
Step4 Set up Xiao ESP32S3 Mesh-mqtt Gateway
- Android
- IOS
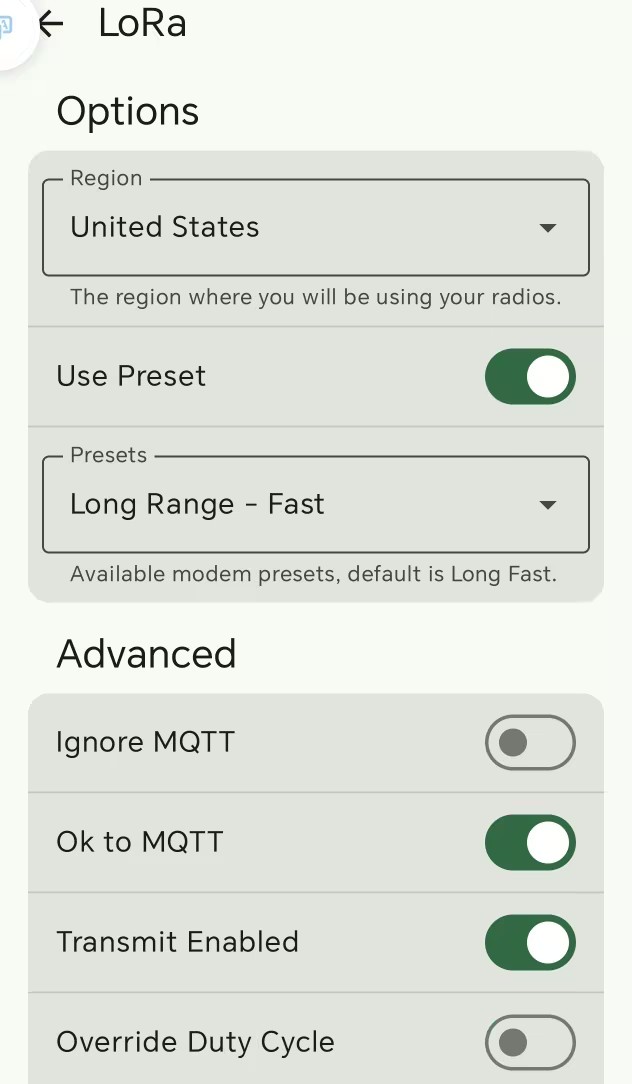
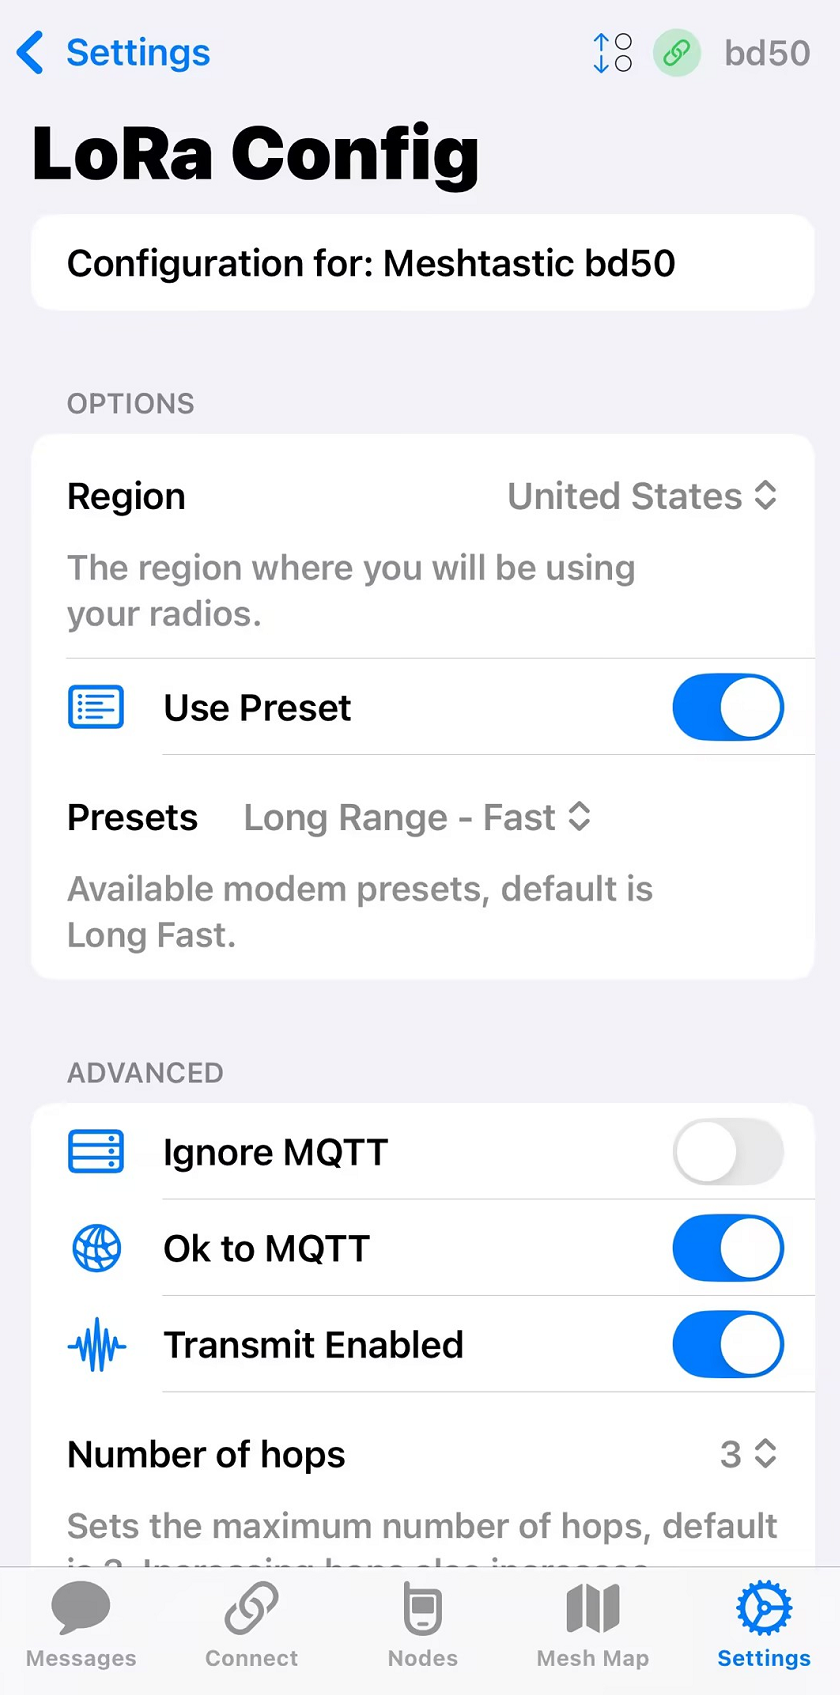
1. LoRa Configuration
- change the region from UNSET to your country/region (e.g., EU868 for Europe, US for USA, etc.).
- Choose
OK to MQTT - Click Send
- The device reboots and reconnects automatically. The device will automatically reboot and reconnect. This may take 30s to 2 mins.
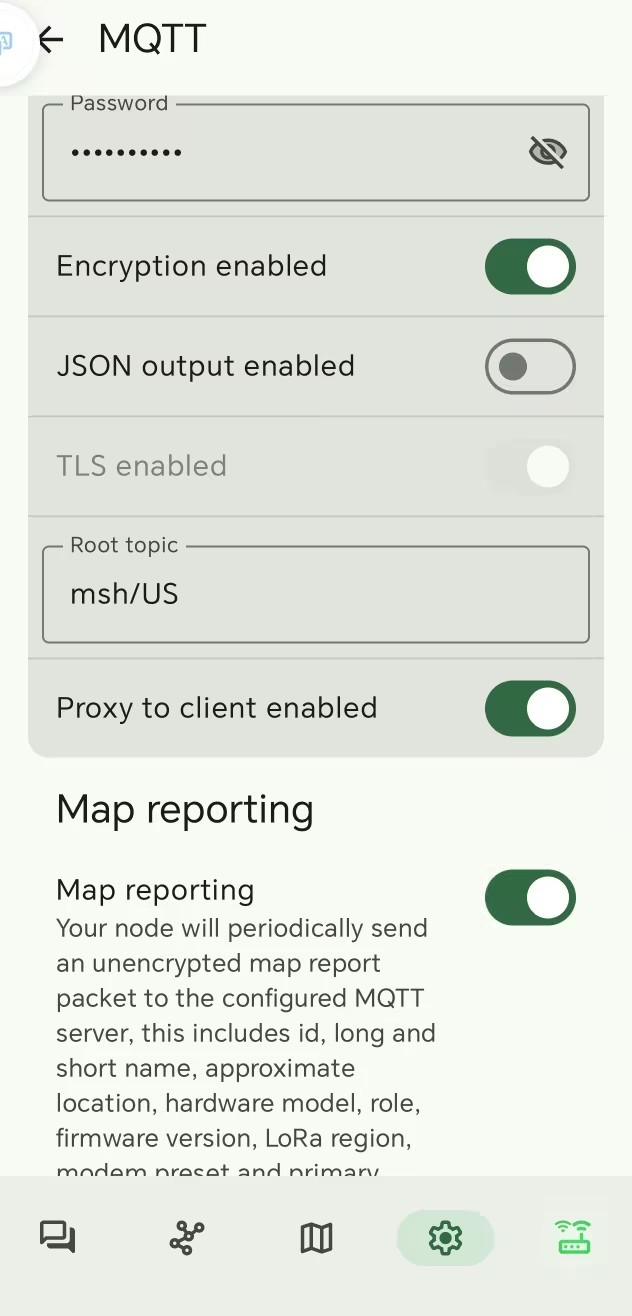
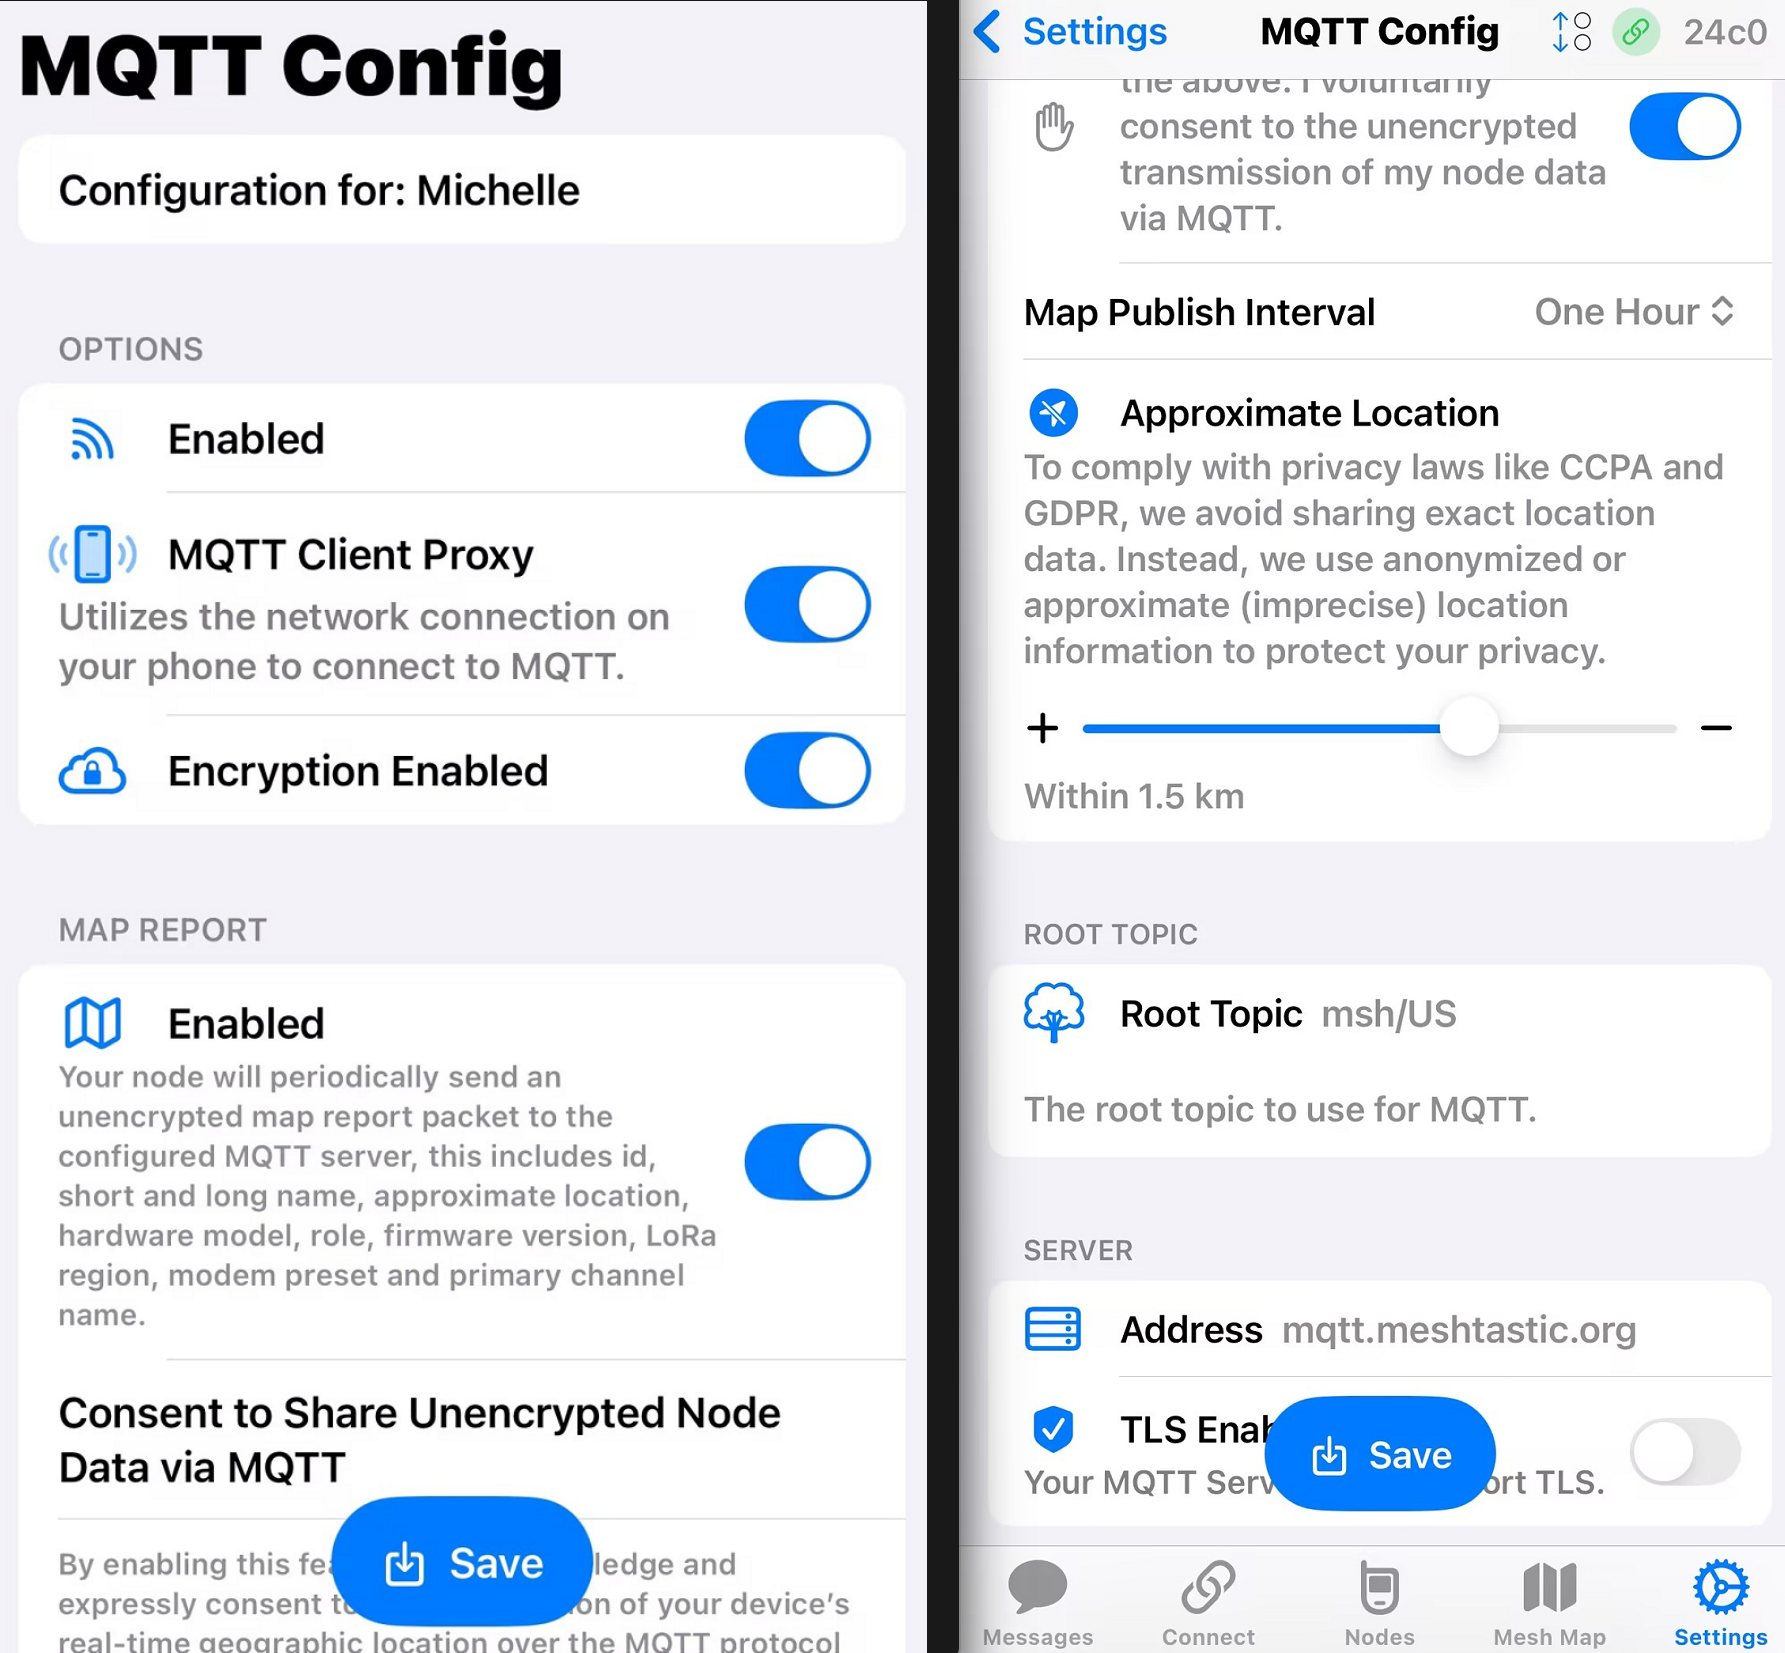
2. MQTT Configuration
- You can use the default
MQTT Address(mqtt.meshtastic.org),User name(meshdev) andPassword(large4cats). - Choose
MQTT Enabled - Choose
MQTT Client Proxy Enabled - (Optional)If you want other mqtt users to see you on the map, please choose
Map ReportingandI agree. - Click Send
- The device reboots and reconnects automatically. The device will automatically reboot and reconnect. This may take 30s to 2 mins.
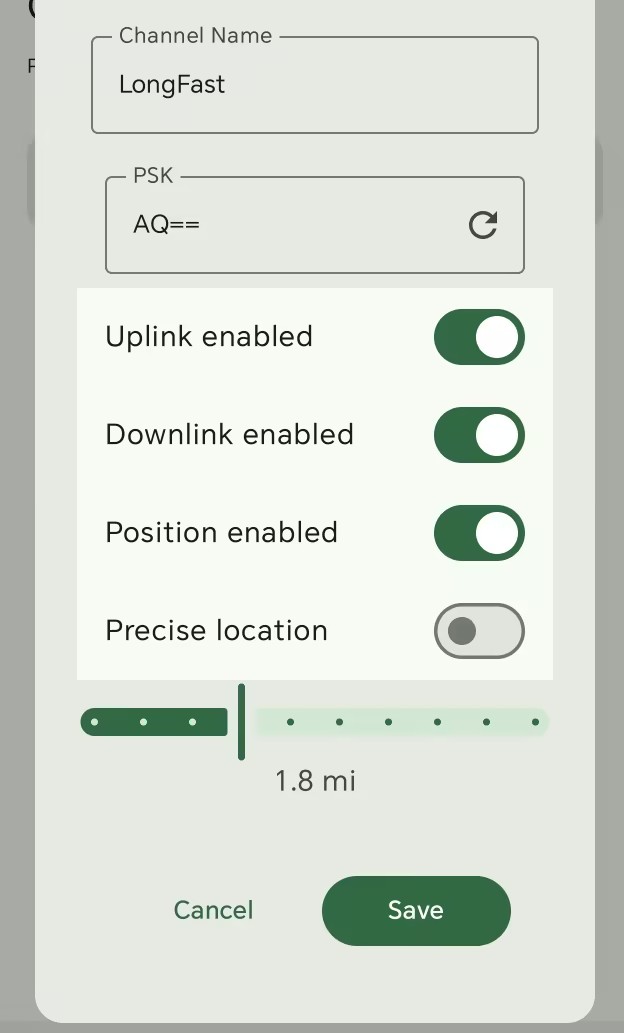
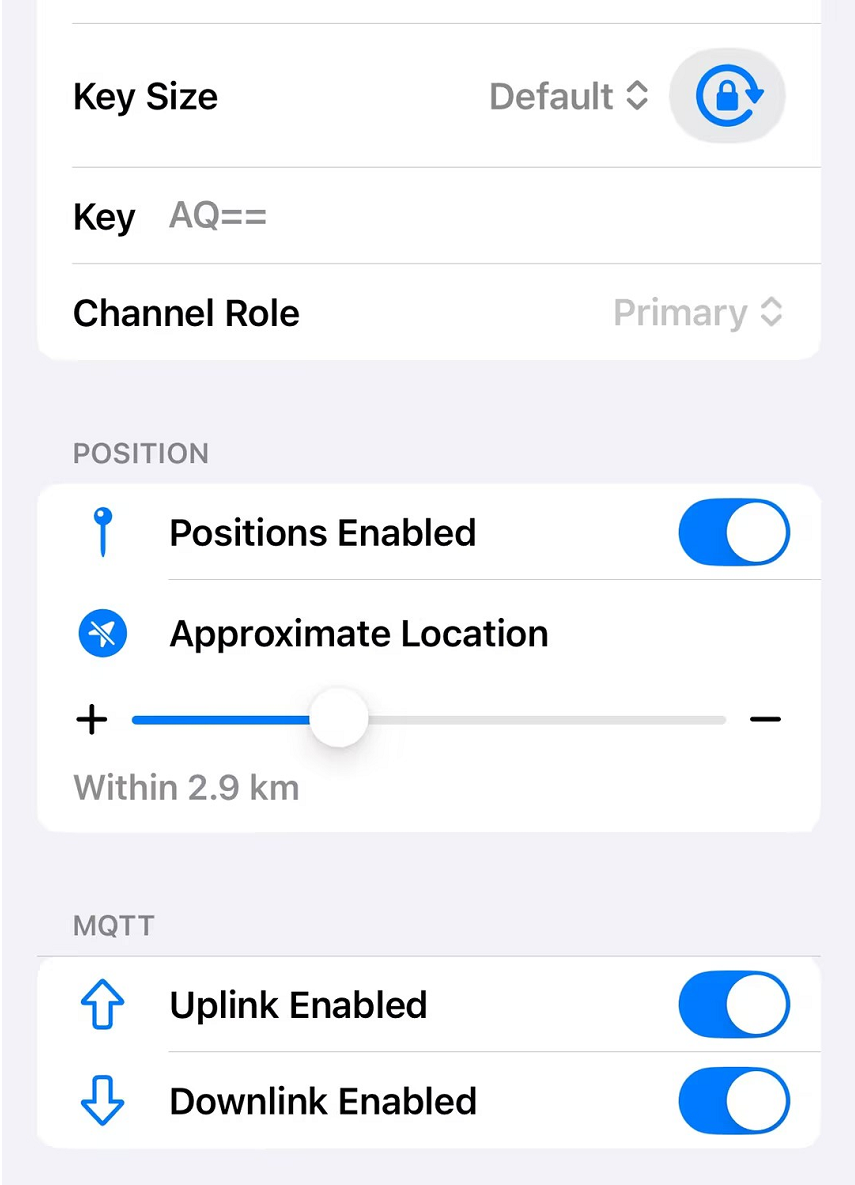
3. Chanel Configuration
- open
Uplink enabledandDownlink enabledfor your primary chanel - Click Send
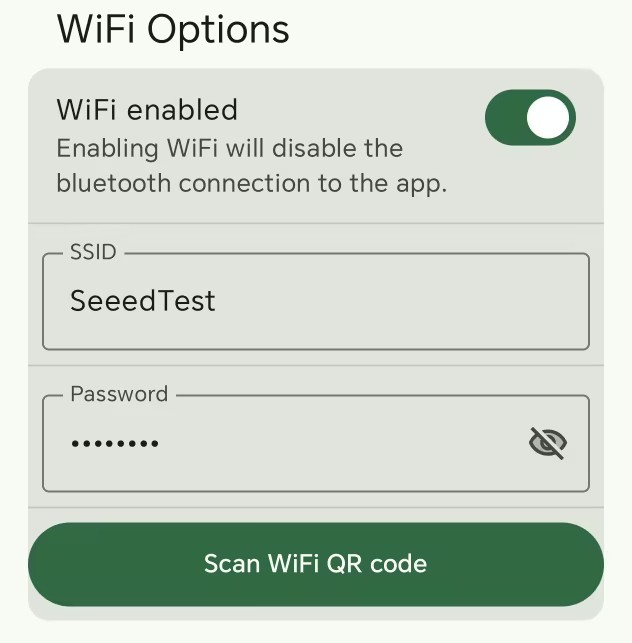
4. Network Configuration
After this configuration, your device will not be able to connect to your APP via Bluetooth. But it can connect to your APP via network.
- Fill in the SSID (Wifi Name) and the Wifi password. The wifi you expect to use should be 2.4G.
- Click Send
- The device reboots automatically.
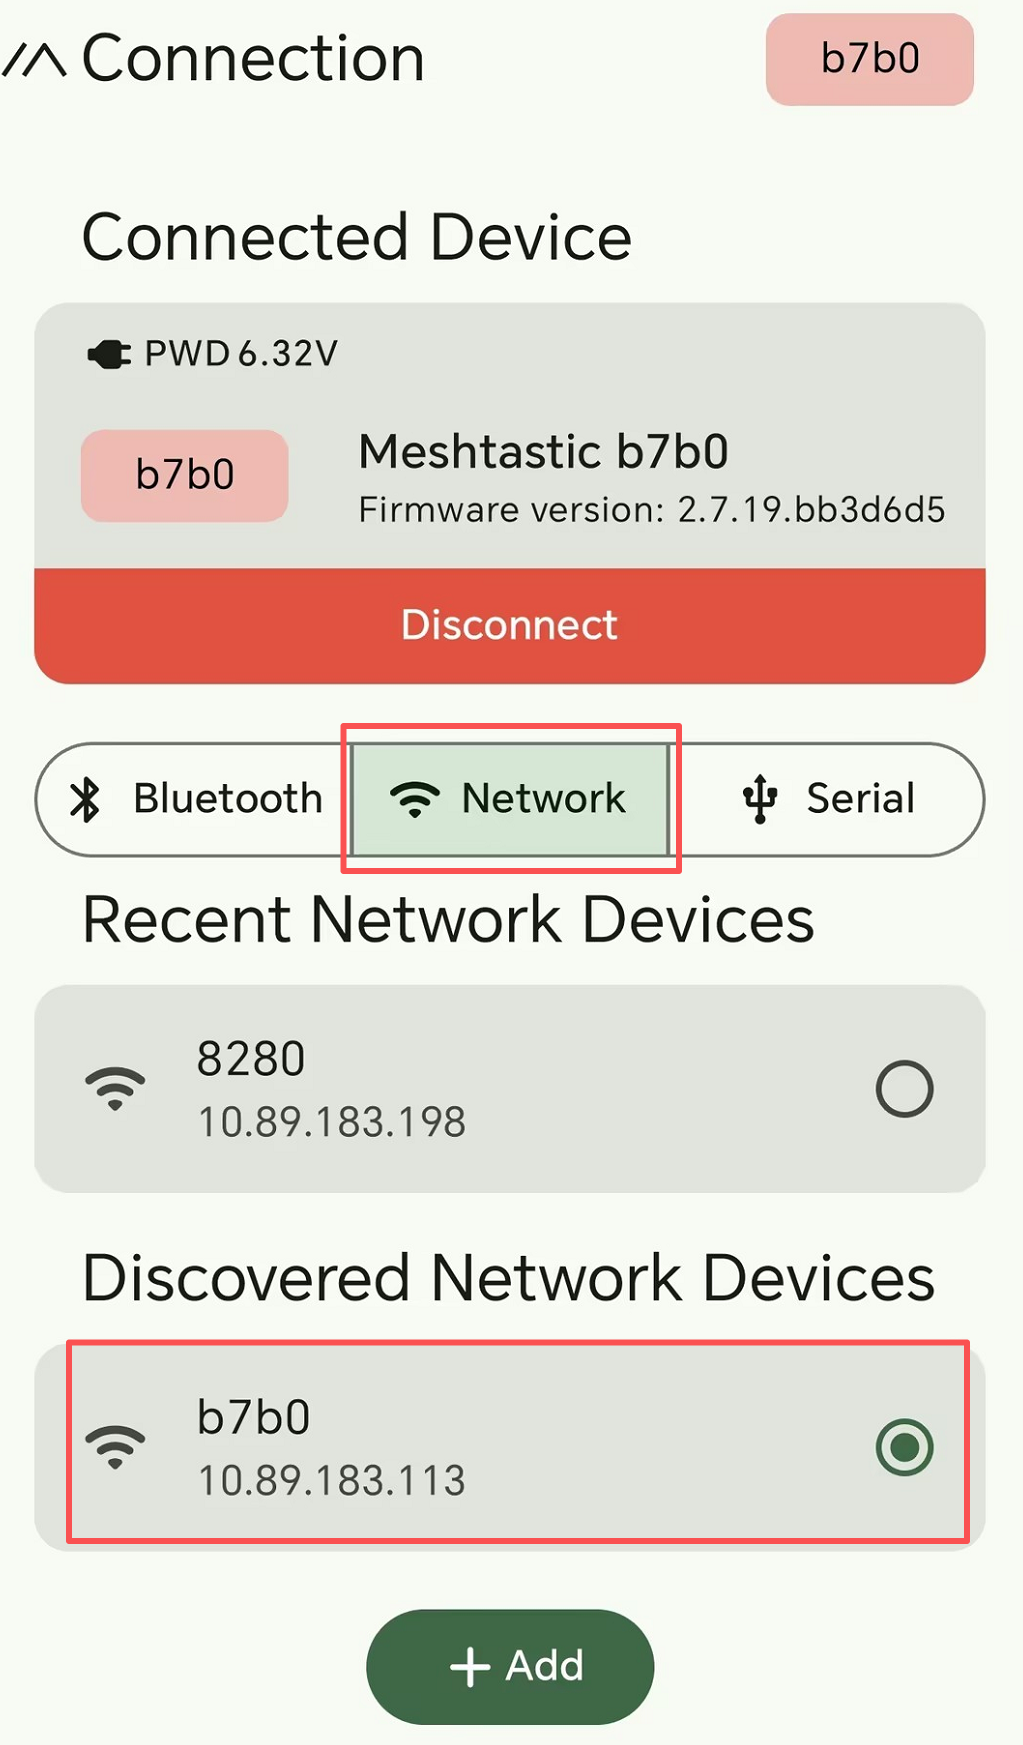
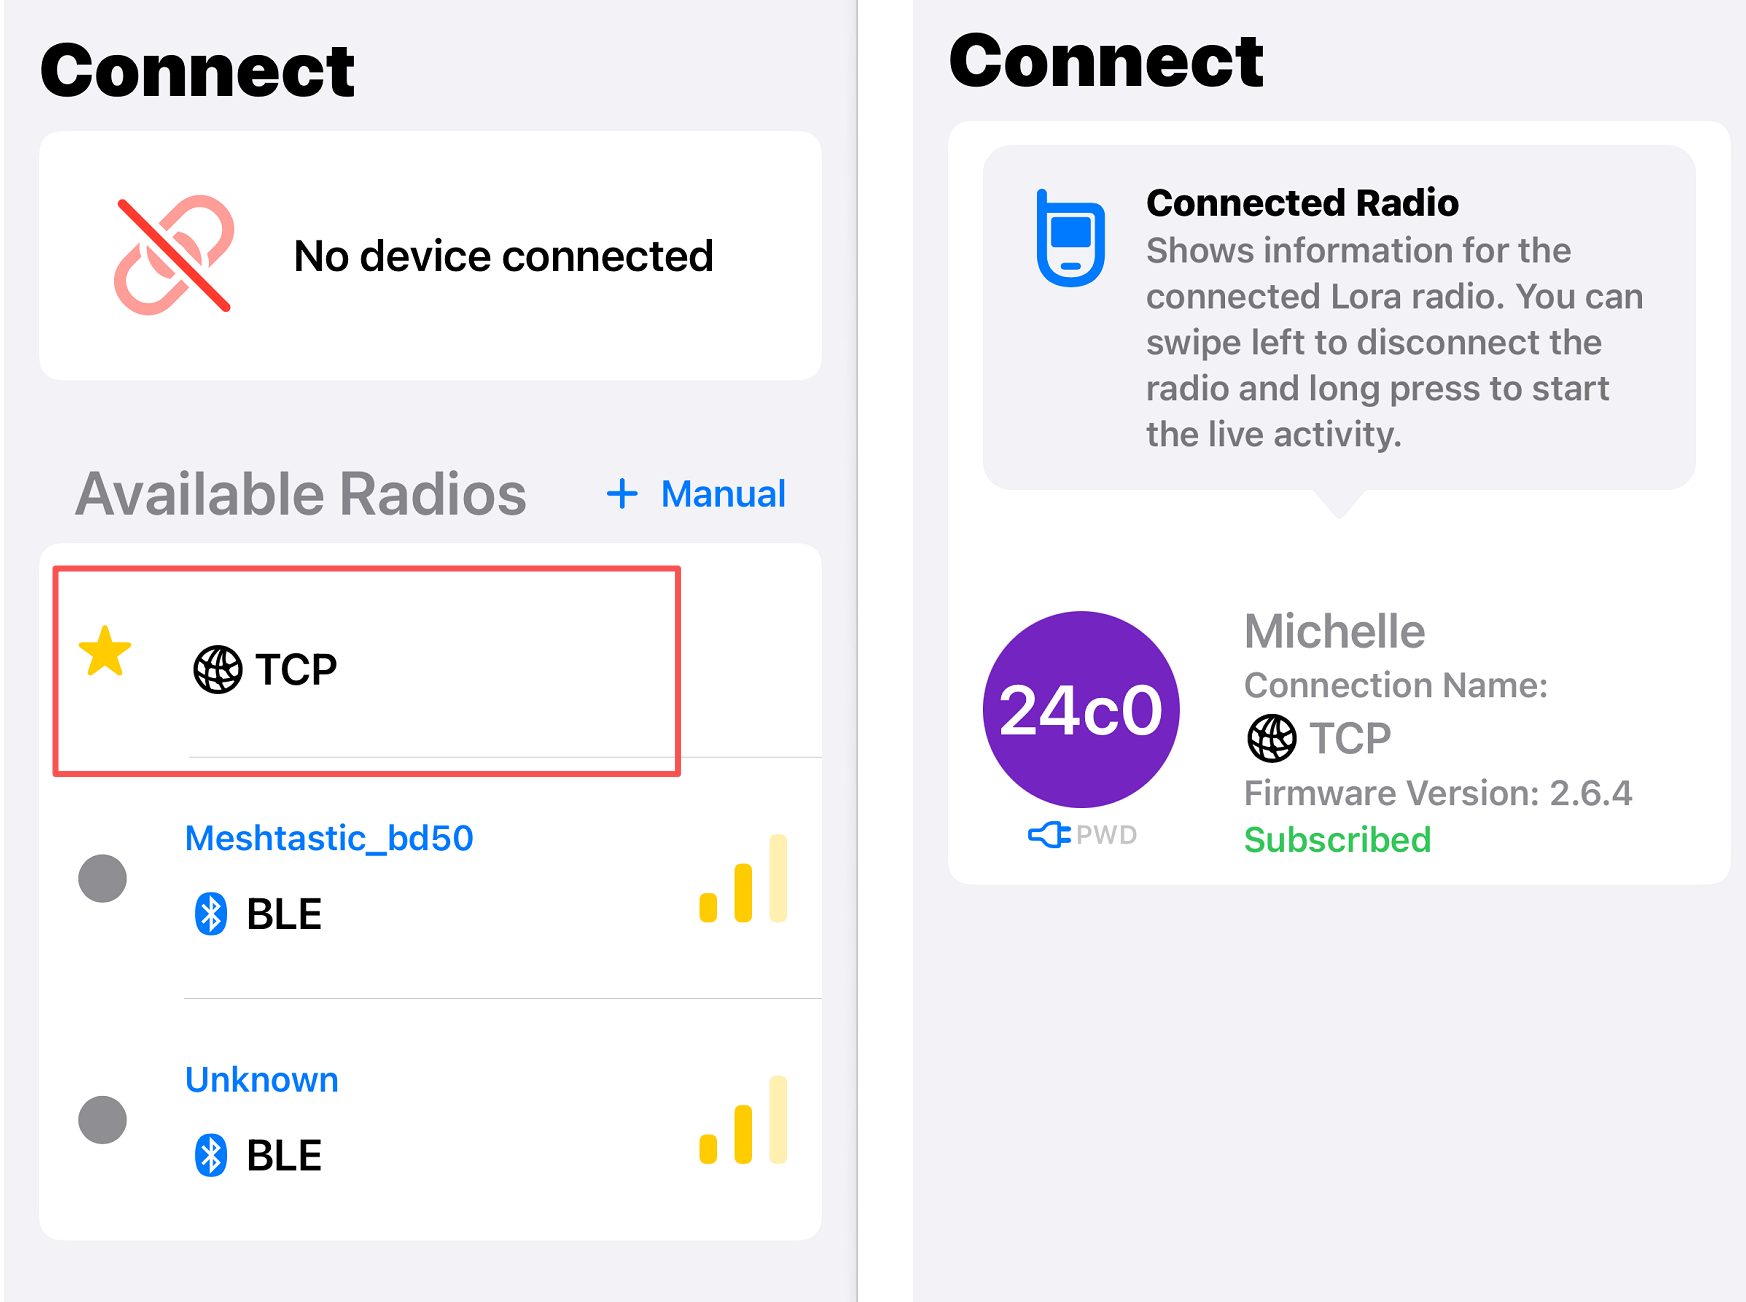
5. APP Connection
Now your device can not be connected via Bluetooth. But you can connect via Network.
1. LoRa Configuration
- change the region from UNSET to your country/region (e.g., EU868 for Europe, US for USA, etc.).
- Choose
OK to MQTT - Click Send
- The device reboots and reconnects automatically. The device will automatically reboot and reconnect. This may take 30s to 2 mins.
2. MQTT Configuration
- You can use the default
MQTT Address(mqtt.meshtastic.org),User name(meshdev) andPassword(large4cats). - Choose
MQTT Enabled - Choose
MQTT Client Proxy Enabled - (Optional)If you want other mqtt users to see you on the map, please choose
Map ReportingandI agree. - Click Send
- The device reboots and reconnects automatically. The device will automatically reboot and reconnect. This may take 30s to 2 mins.
3. Chanel Configuration
- open
Uplink enabledandDownlink enabledfor your primary chanel - Click Send
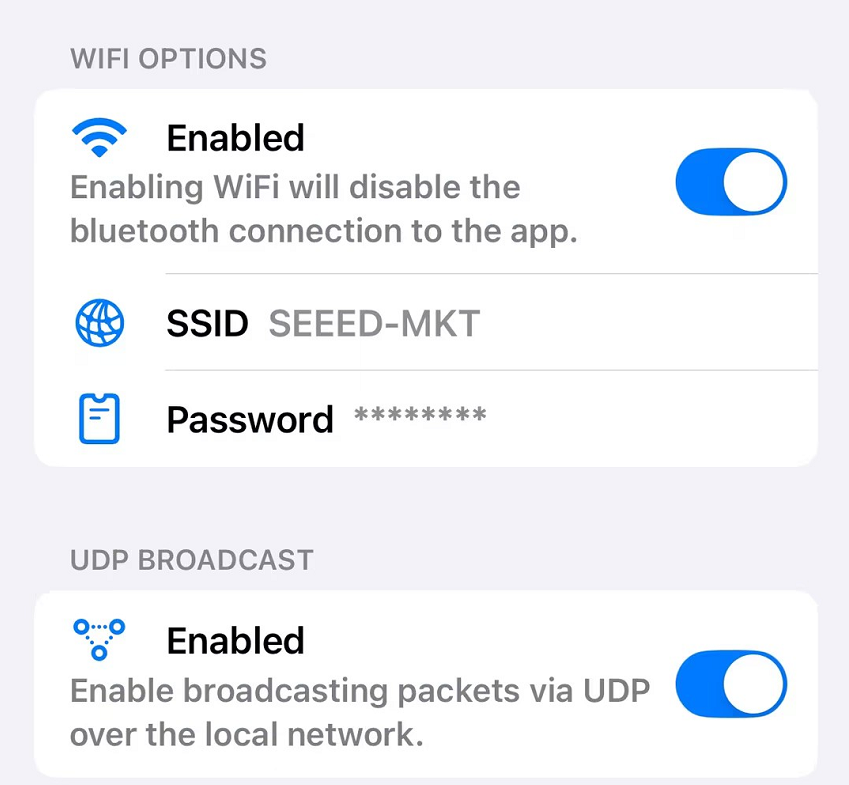
4. Network Configuration
After this configuration, your device will not be able to connect to your APP via Bluetooth. But it can connect to your APP via network.
- Fill in the SSID (Wifi Name) and the Wifi password. The wifi you expect to use should be 2.4G.
- Click Send
- The device reboots automatically.
5. APP Connection
Now your device can not be connected via Bluetooth. But you can connect via Network.
Messgage Sending
Now you can communicate with other people from internet.
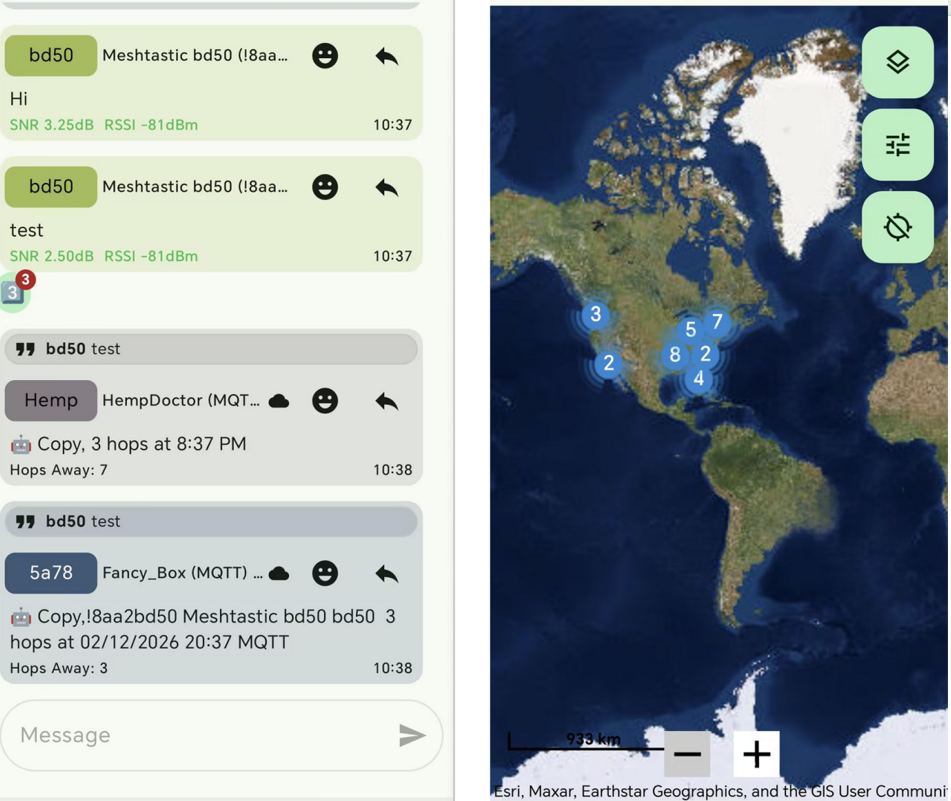
If you have another Meshtastic device that is in the same frenquency band with the MQTT Gateway, it can transmit message via the L2 gateway with other people in internet too.