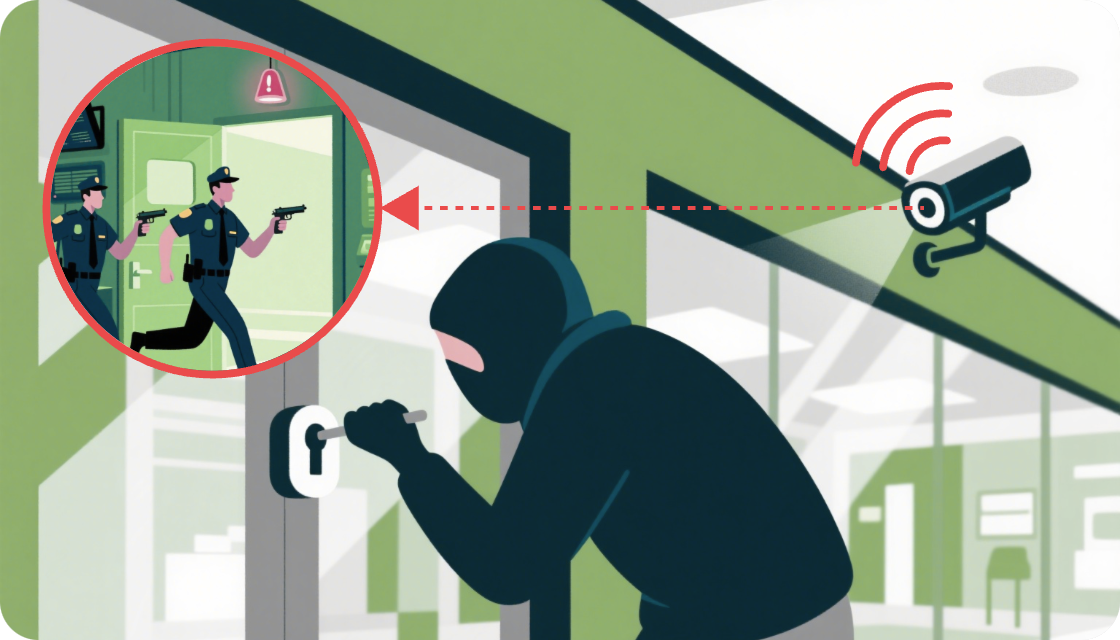
AI Gun Detection Solution for Real-Time Edge Alerts
This project is provided for educational and demonstration purposes only.
If you intend to deploy it in a real environment, please ensure compliance with local regulations and obtain any required authorizations before doing so.
Overview
The Frigate + Node-RED Gun Detection Solution is an edge AI video analytics stack that detects firearms in live camera streams and orchestrates alerting, review, and integrations. Built for privacy-preserving, low‑latency deployments on AI Boxes, the NVIDIA Jetson series and reComputer R2000, it combines an optimized detection engine (Frigate) with a visual automation layer (Node‑RED) and optional LLM‑assisted review.
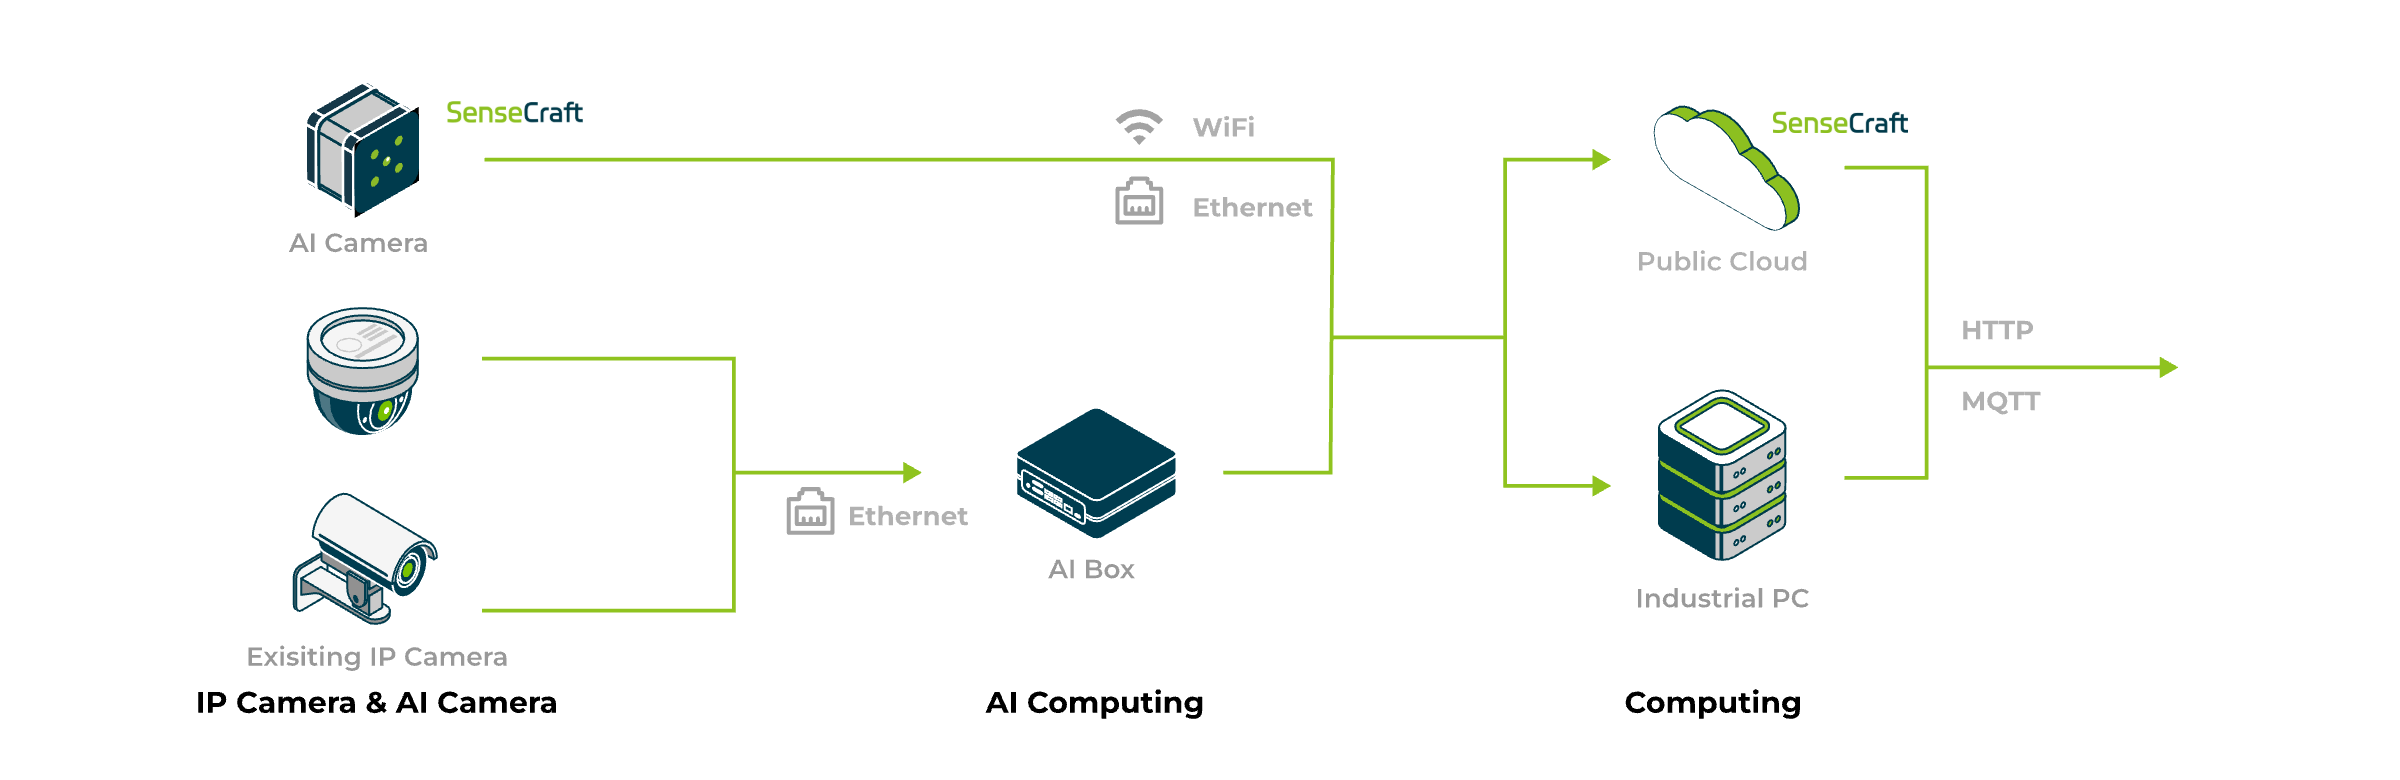
It delivers a complete AI NVR1 experience that:
- Detects firearms from live RTSP/HTTP streams in real time.
- Automates event alerts, logging, and notifications.
- Operates locally to ensure privacy, low latency, and reliability.
Follow this guide to deploy the solution if your device isn’t from Seeed’s bundle or you’d like to tailor it to your own setup.
| Campus Safety Management |
|---|
 |
Features
Traditional NVRs rely on human monitoring, which is slow, inconsistent, and hard to scale. This solution addresses these challenges by focusing on measurable outcomes that deliver immediate value.
Faster Response Time
Achieve instant situational awareness with automated alerts and real-time dashboards, bypassing the delays of manual monitoring.
Lower False Positives
Utilize optional LLM-assisted verification to intelligently review alerts, significantly reducing false alarms and focusing operator attention.
Data Sovereignty & Privacy
All inference and data processing happens on-premise with no cloud dependency, ensuring complete data privacy and control.
Scalable Multi-Stream Support
Leverage powerful hardware decoding on Jetson and Hailo platforms to monitor multiple camera streams concurrently without performance loss.
System Architecture
The solution is composed of several key modules that work in concert:
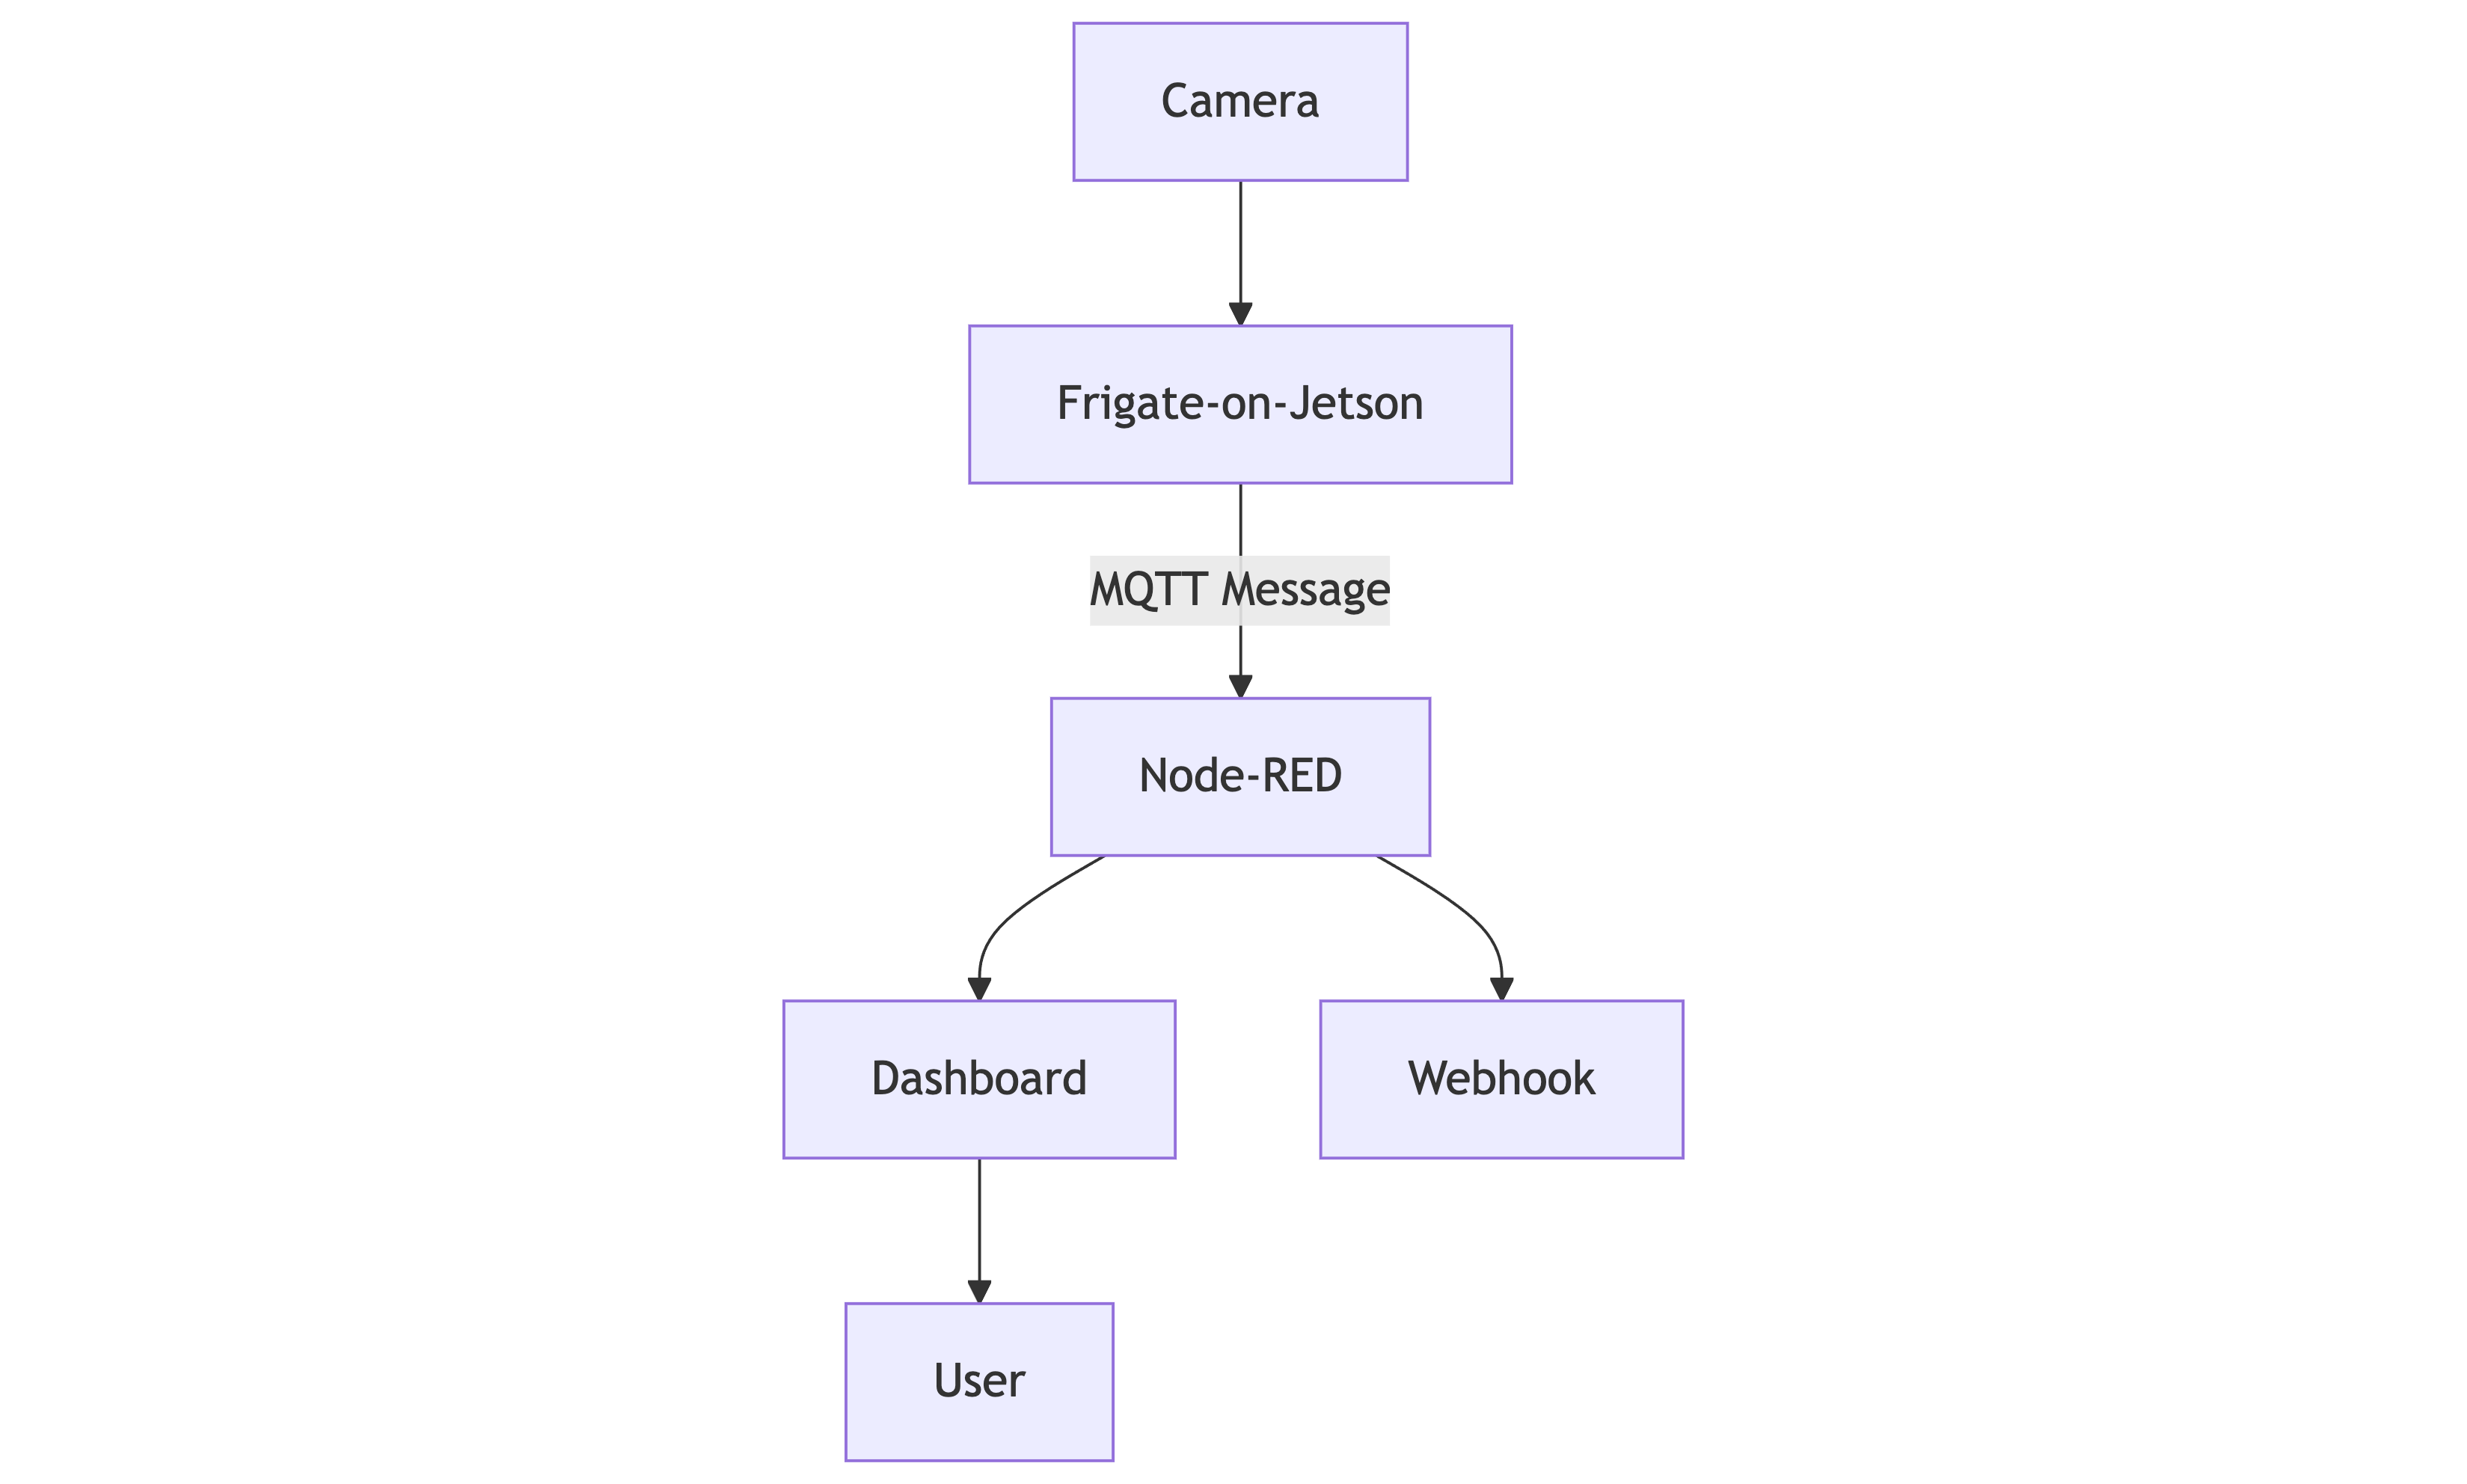
- Frigate processes live video and publishes detection events via MQTT.
- Node-RED subscribes to these events, orchestrates alerting workflows, and updates the dashboard.
- Real-time Dashboard provides visual monitoring, event review, and system configuration.
- Webhooks enable integration with any third-party systems for notifications and data export.
Deployment Guide
Prerequisites
- AI Boxes/Edge Hardware: reComputer J3011/J4012 (Jetson Nano/Xavier/Orin Series).
- Network Cameras: RTSP/HTTP streams accessible on the same network.
- Basic familiarity with Docker, Node-RED, and Frigate configuration.
In this page, we'll use the reComputer J4012 (Jetson Orin™ NX 16GB) as an example platform. However, the steps are similar for other supported hardware.
Step 1: Frigate Installation
Run the following command to install curl if it is not already installed:
sudo apt update && sudo apt install -y curl
⚠️ Do not run sudo apt upgrade, as it may break Jetson-specific dependencies.
Use the pre-configured one-click installation script to deploy Frigate automatically on your Jetson device.
curl -sSL https://raw.githubusercontent.com/Seeed-Studio/frigate-on-jetson/main/install.sh | bash
Once the installation is complete, open your browser and visit http://<your_jetson_ip>:5000 to access the Frigate web UI and configure your cameras.
If it didn't work, check if you have lack of permission to run Docker without sudo. Refer to the FAQ section for troubleshooting steps. And then rerun the command above.
On NodeRED, we will subscribe to Frigate's MQTT topics to receive detection events and orchestrate alerting workflows. You can refer to the Frigate MQTT documentation for more details on the available topics and payloads.
Step 2: Node-RED Setup
We use NodeRED as the orchestration layer to handle programming.
Node-RED Installation
If you haven't installed Node-RED yet, follow the steps below to set it up on your Jetson device.
Run Node-RED in a container with the following command:
sudo docker run -d --restart=always -p 1880:1880 -v node_red_data:/data --name mynodered nodered/node-red
After the container starts, open your browser and visit http://<your_jetson_ip>:1880 to access the Node-RED editor.
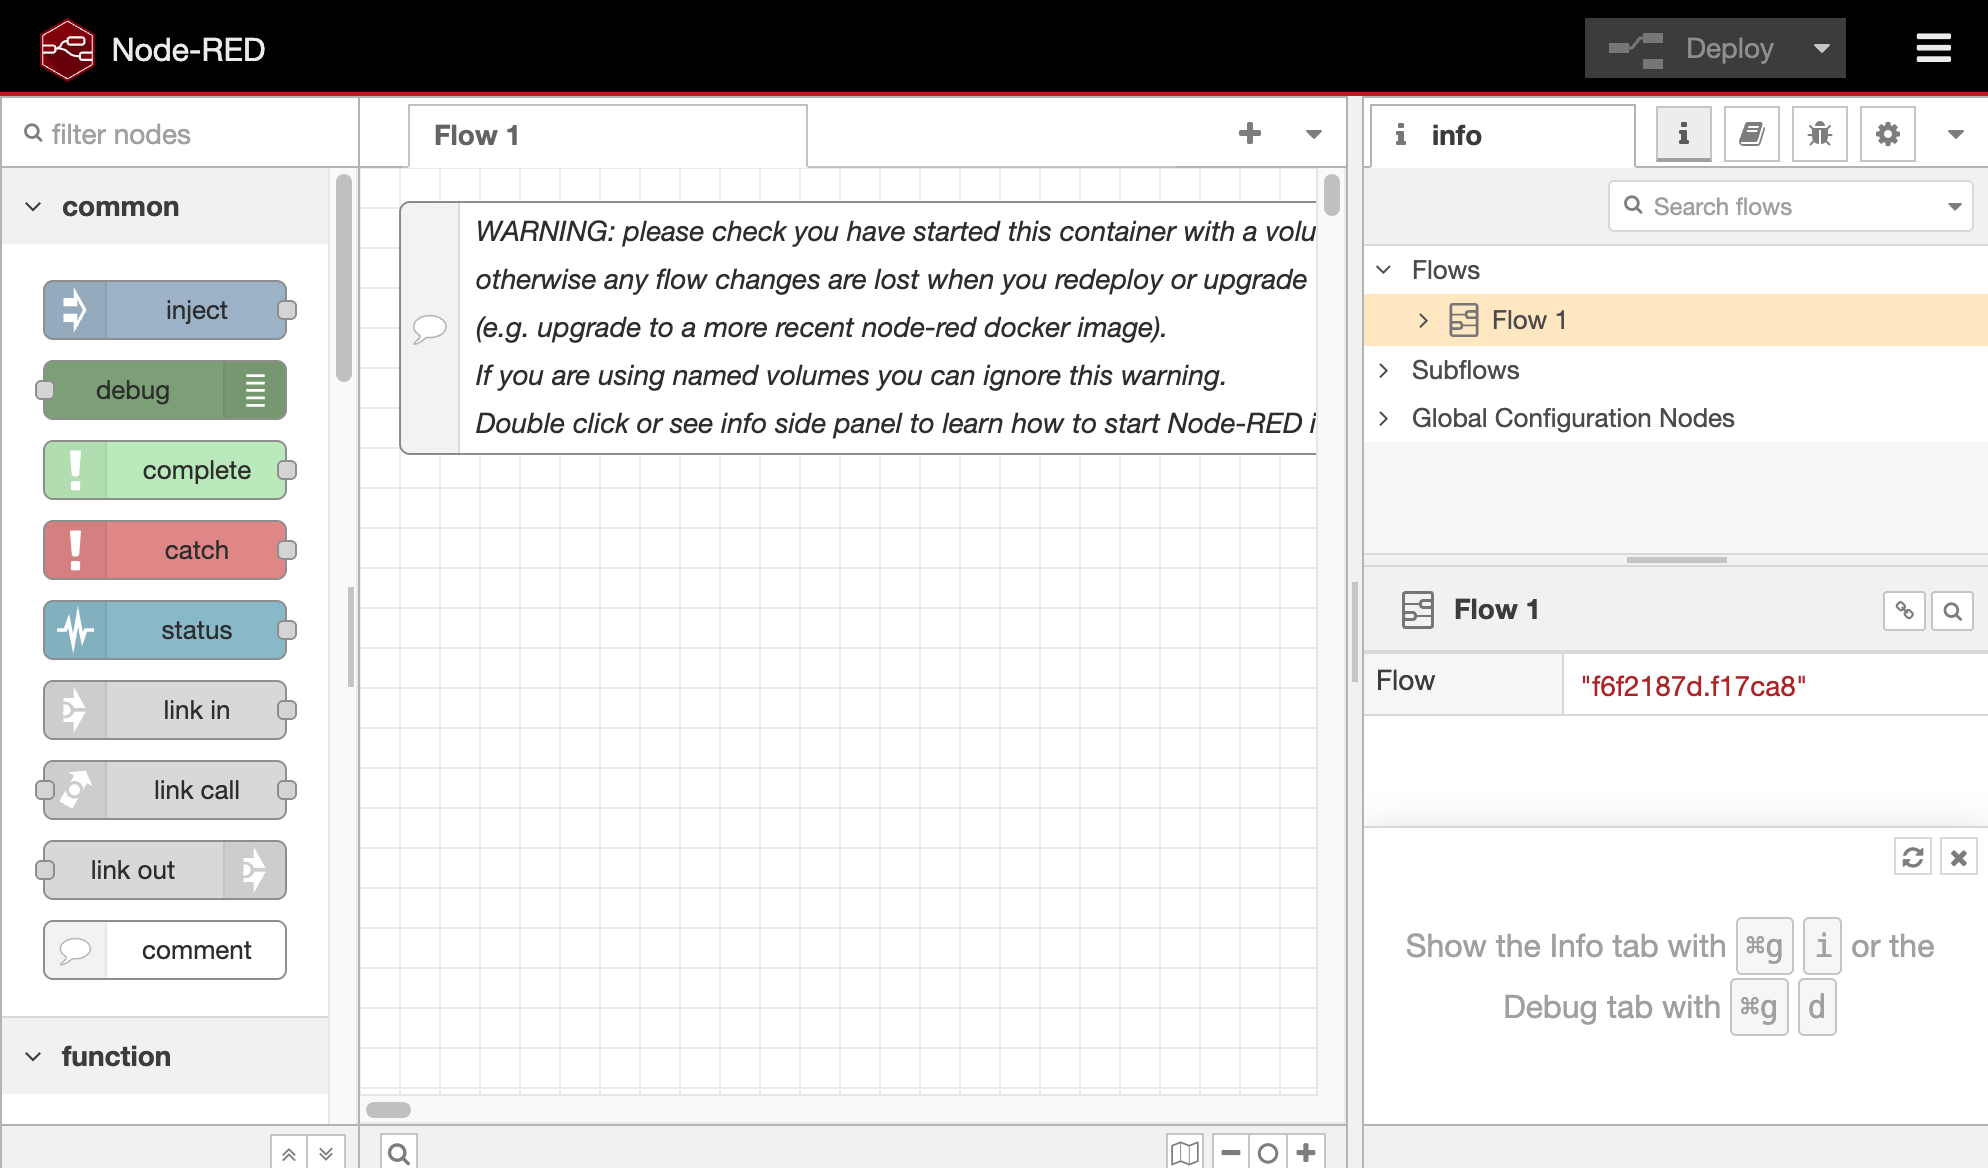
Node Installation
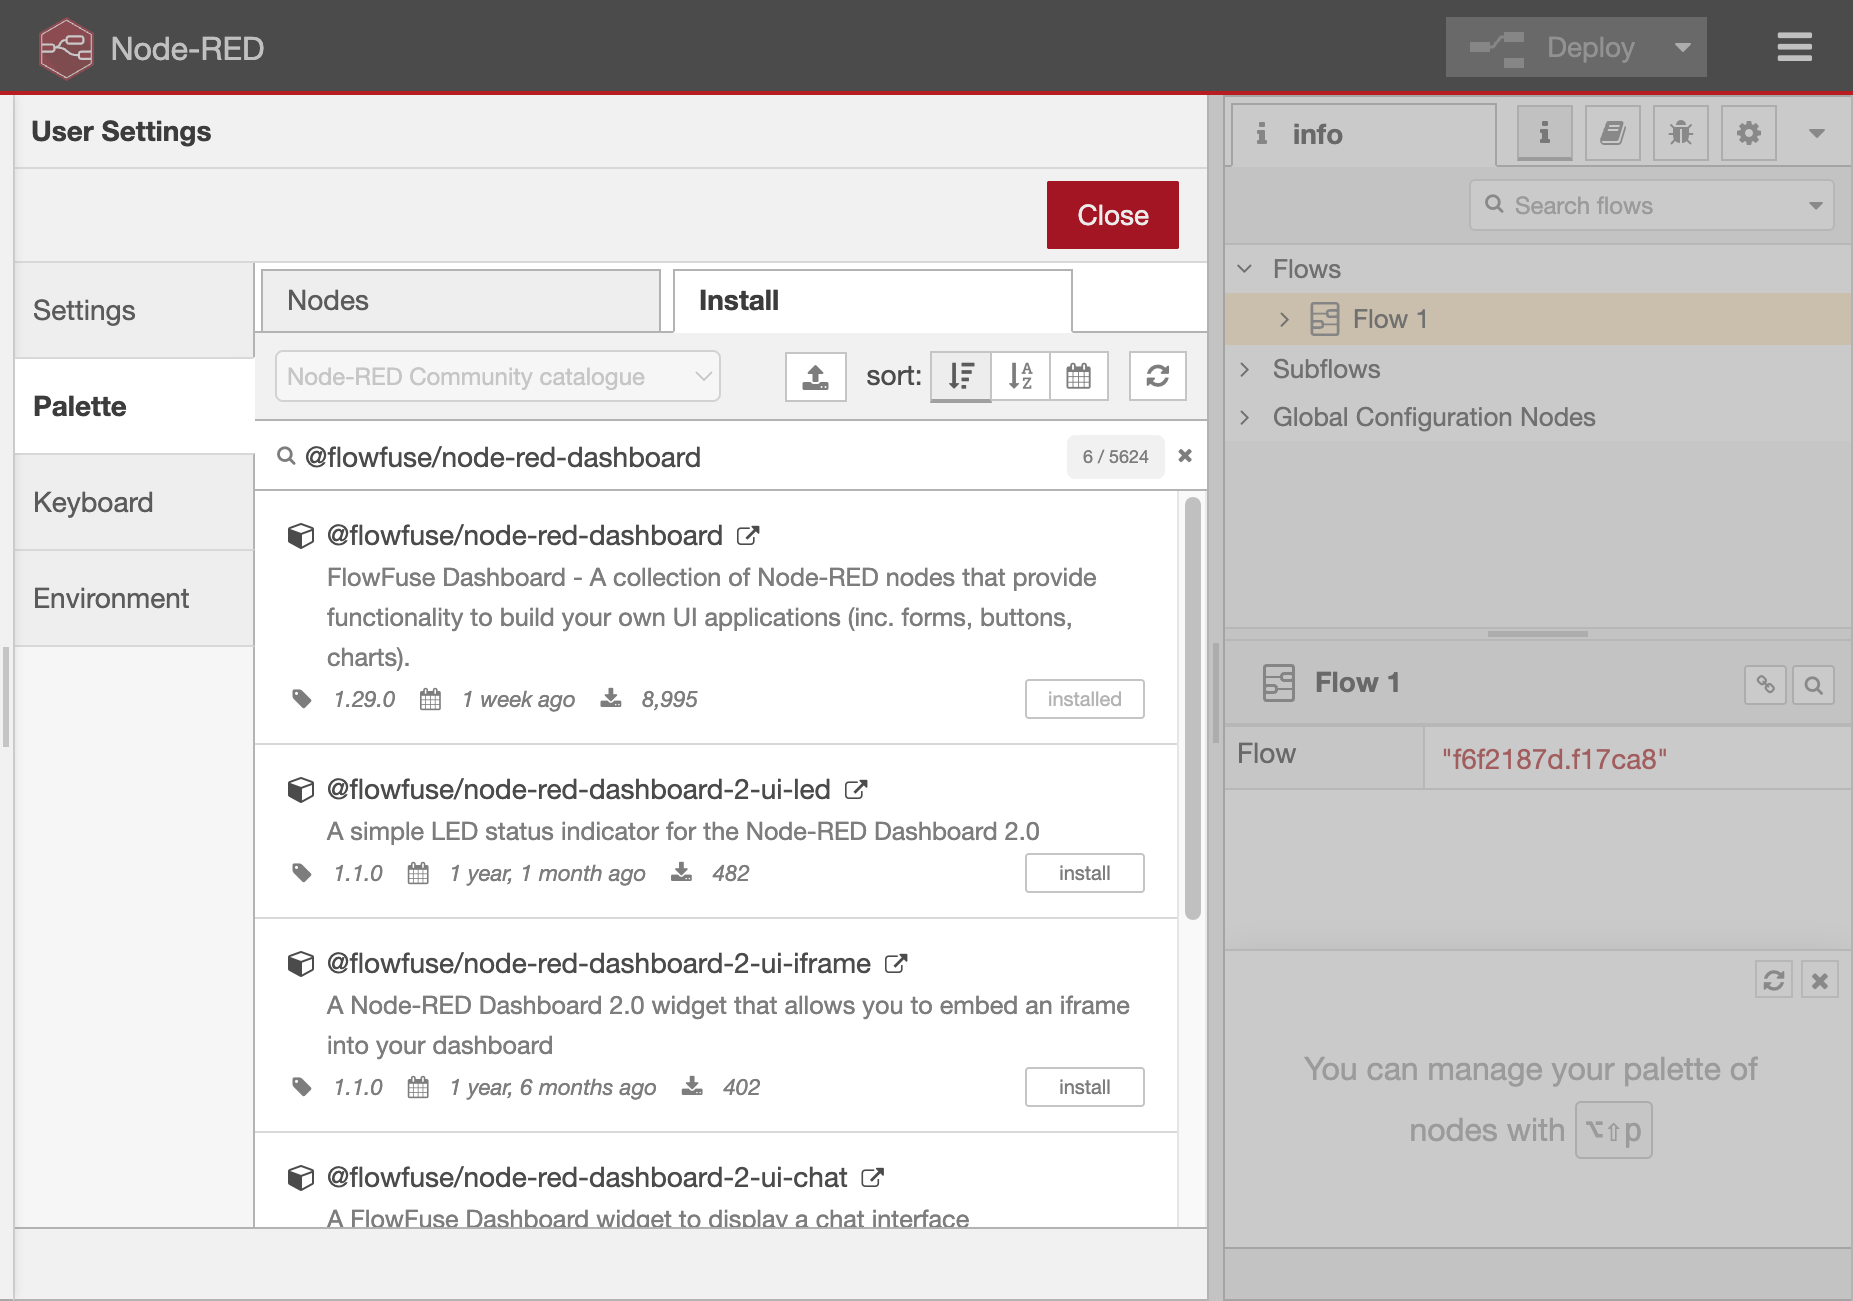
Before we begin, make sure to install the following Node-RED nodes from the "Manage palette" option in the Node-RED editor:
node-red-dashboardfor building the simple fronted dashboard.
Applications
In environments such as campuses, transportation hubs, industrial parks, and public venues, operators need instant response to firearm risks. This solution is designed for:
Campus & Education
Enable proactive alerts for security teams and facilitate rapid incident review with logged event data and snapshots.
Public Transport Hubs
Deploy multi-camera monitoring across stations and integrate alerts directly into a Security Operations Center (SOC) via webhooks.
Industrial Parks & Logistics
Secure perimeters, access points, and sensitive zones with automated monitoring that never gets tired or distracted.
The following sample demos guide you through the process of deploying and customizing the solution.
Demo 1 — Gun Detection Alert
This demo shows how to build a Node-RED flow that listens for gun detection events from Frigate via MQTT, then triggers real-time alerts both on a dashboard and through webhook notifications.
Data Pipeline
Frigate (detect gun) → MQTT (publish) → Node-RED (filter/alert) → Dashboard + Webhook
Node-RED Flow Setup
You can import the sample flow directly into your Node-RED editor using the provided flow configuration file (gist flow.json).
Note: Update the IP address and webhook URL in the flow to match your Frigate instance and notification endpoint.
The dashboard entry path is configured as /frigate.
Access the dashboard at: http://<your_jetson_ip>:1880/dashboard/frigate
For example: http://192.168.101.100:1880/dashboard/frigate.
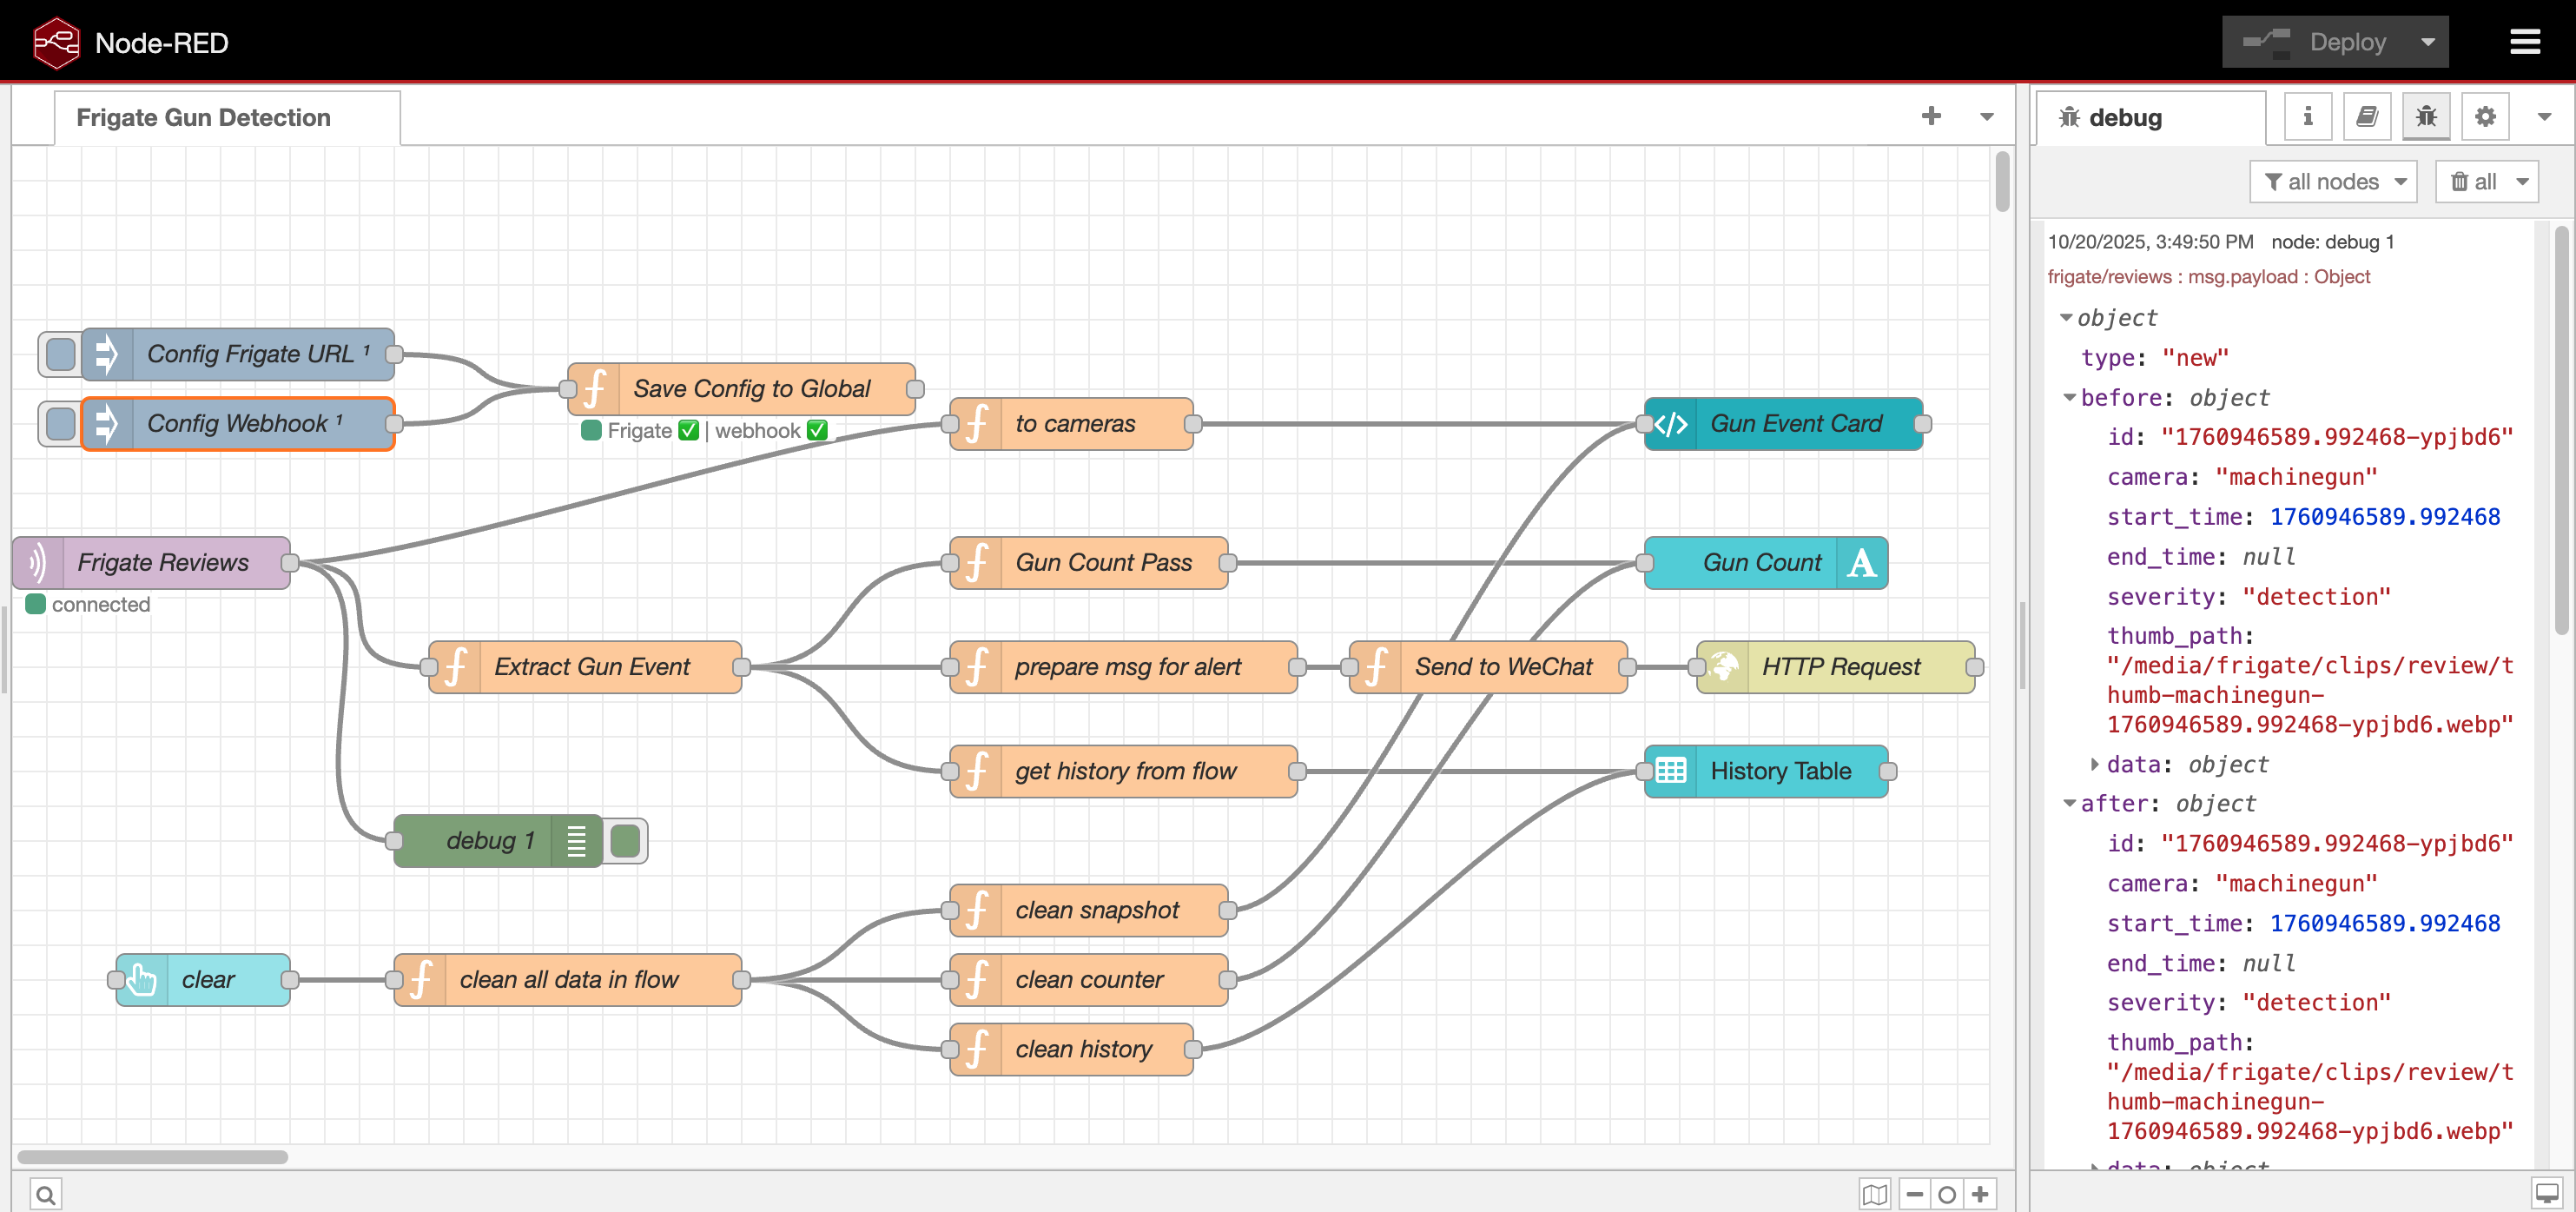
Flow Overview
- MQTT Listener – Subscribes to a specified topic (e.g., frigate/reviews) to receive detection events.
- Event Filter – Passes through only events labeled as “gun.”
- Alert Builder – Constructs a detailed alert message including a thumbnail, timestamp, and counter.
- Dashboard Update – Updates the dashboard with the latest image, event history, and detection counters.
- Webhook Notification – Sends HTTP POST requests to external endpoints, such as Telegram bot, Slack, or custom APIs.
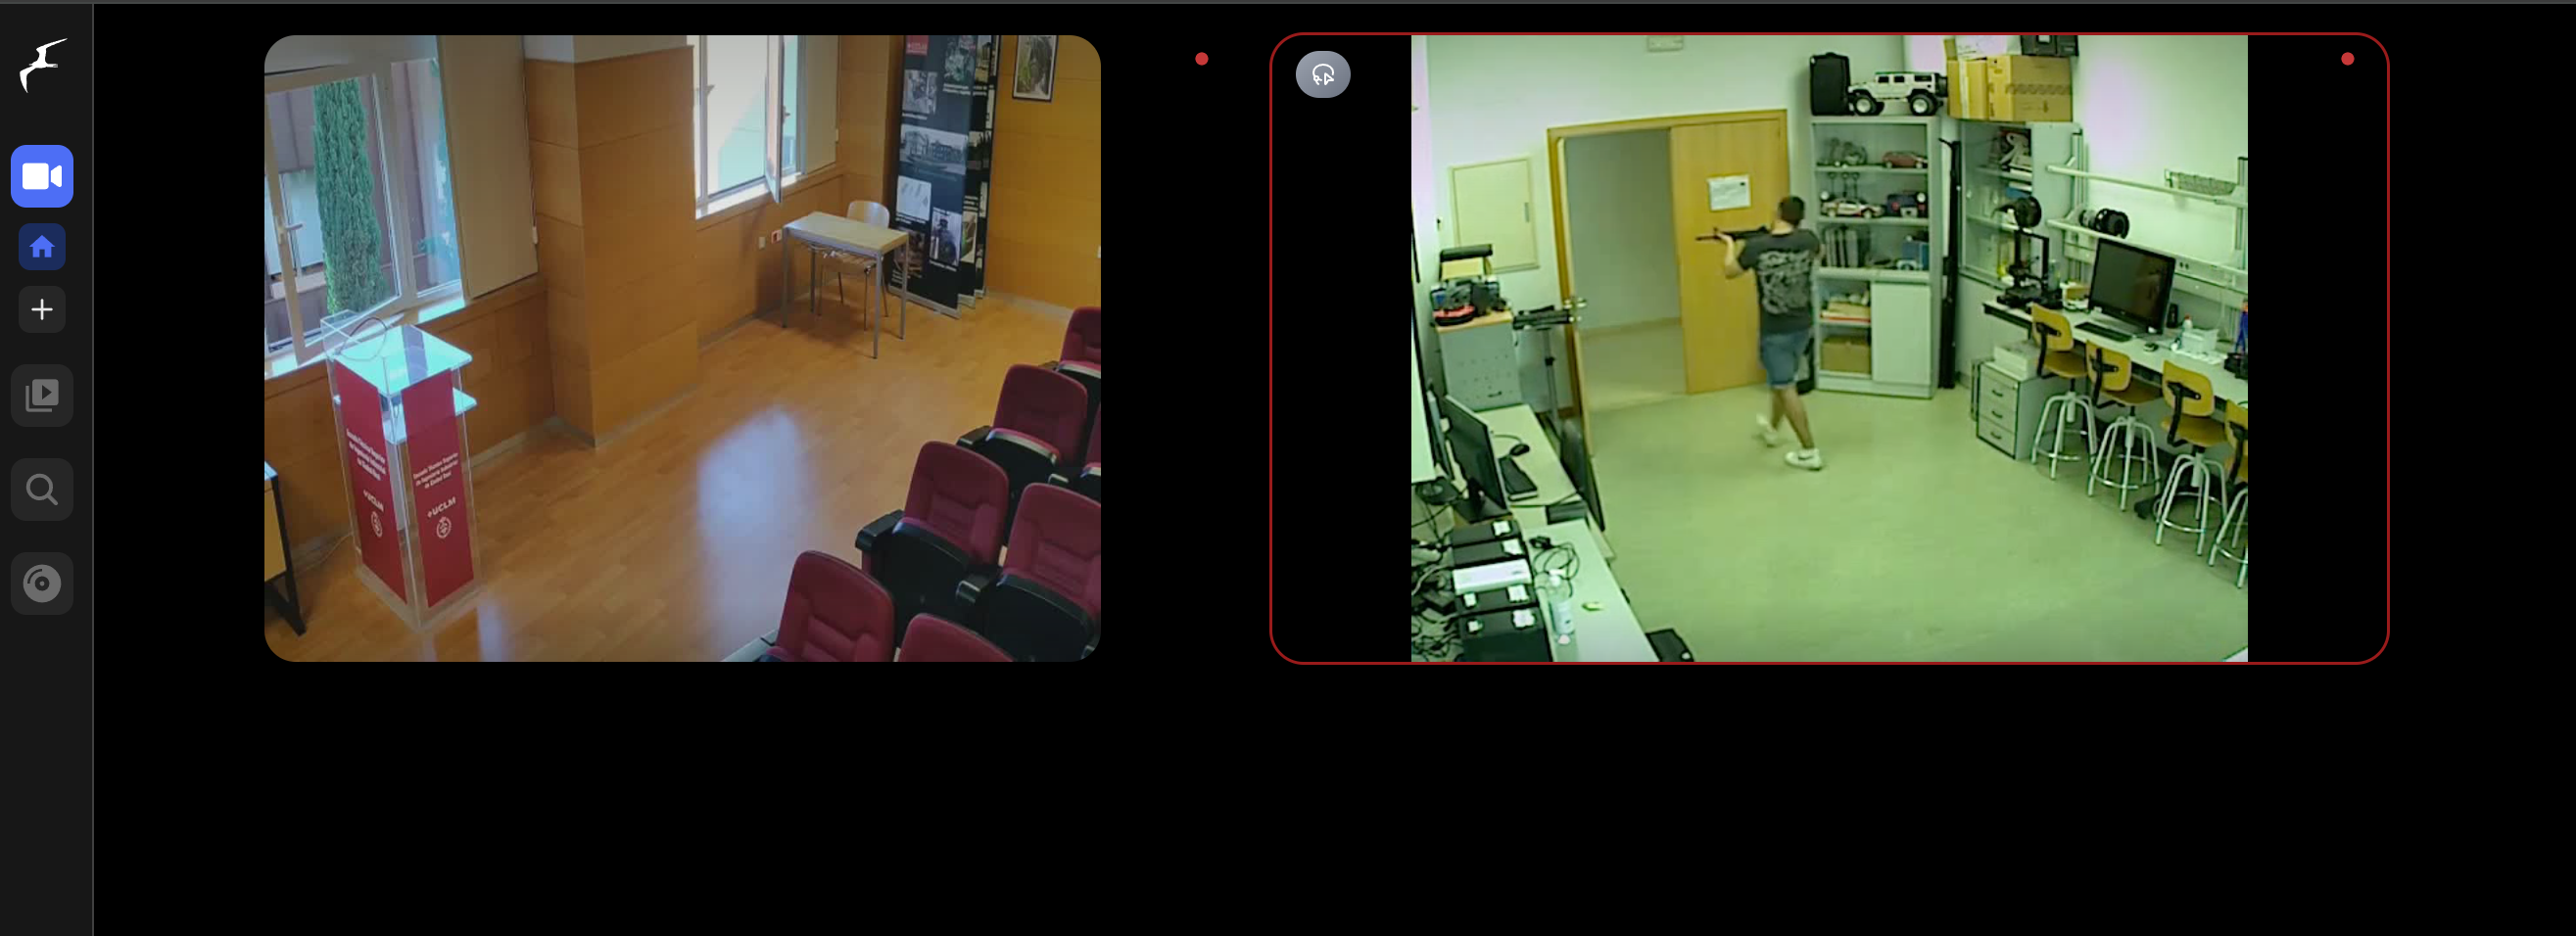
Results
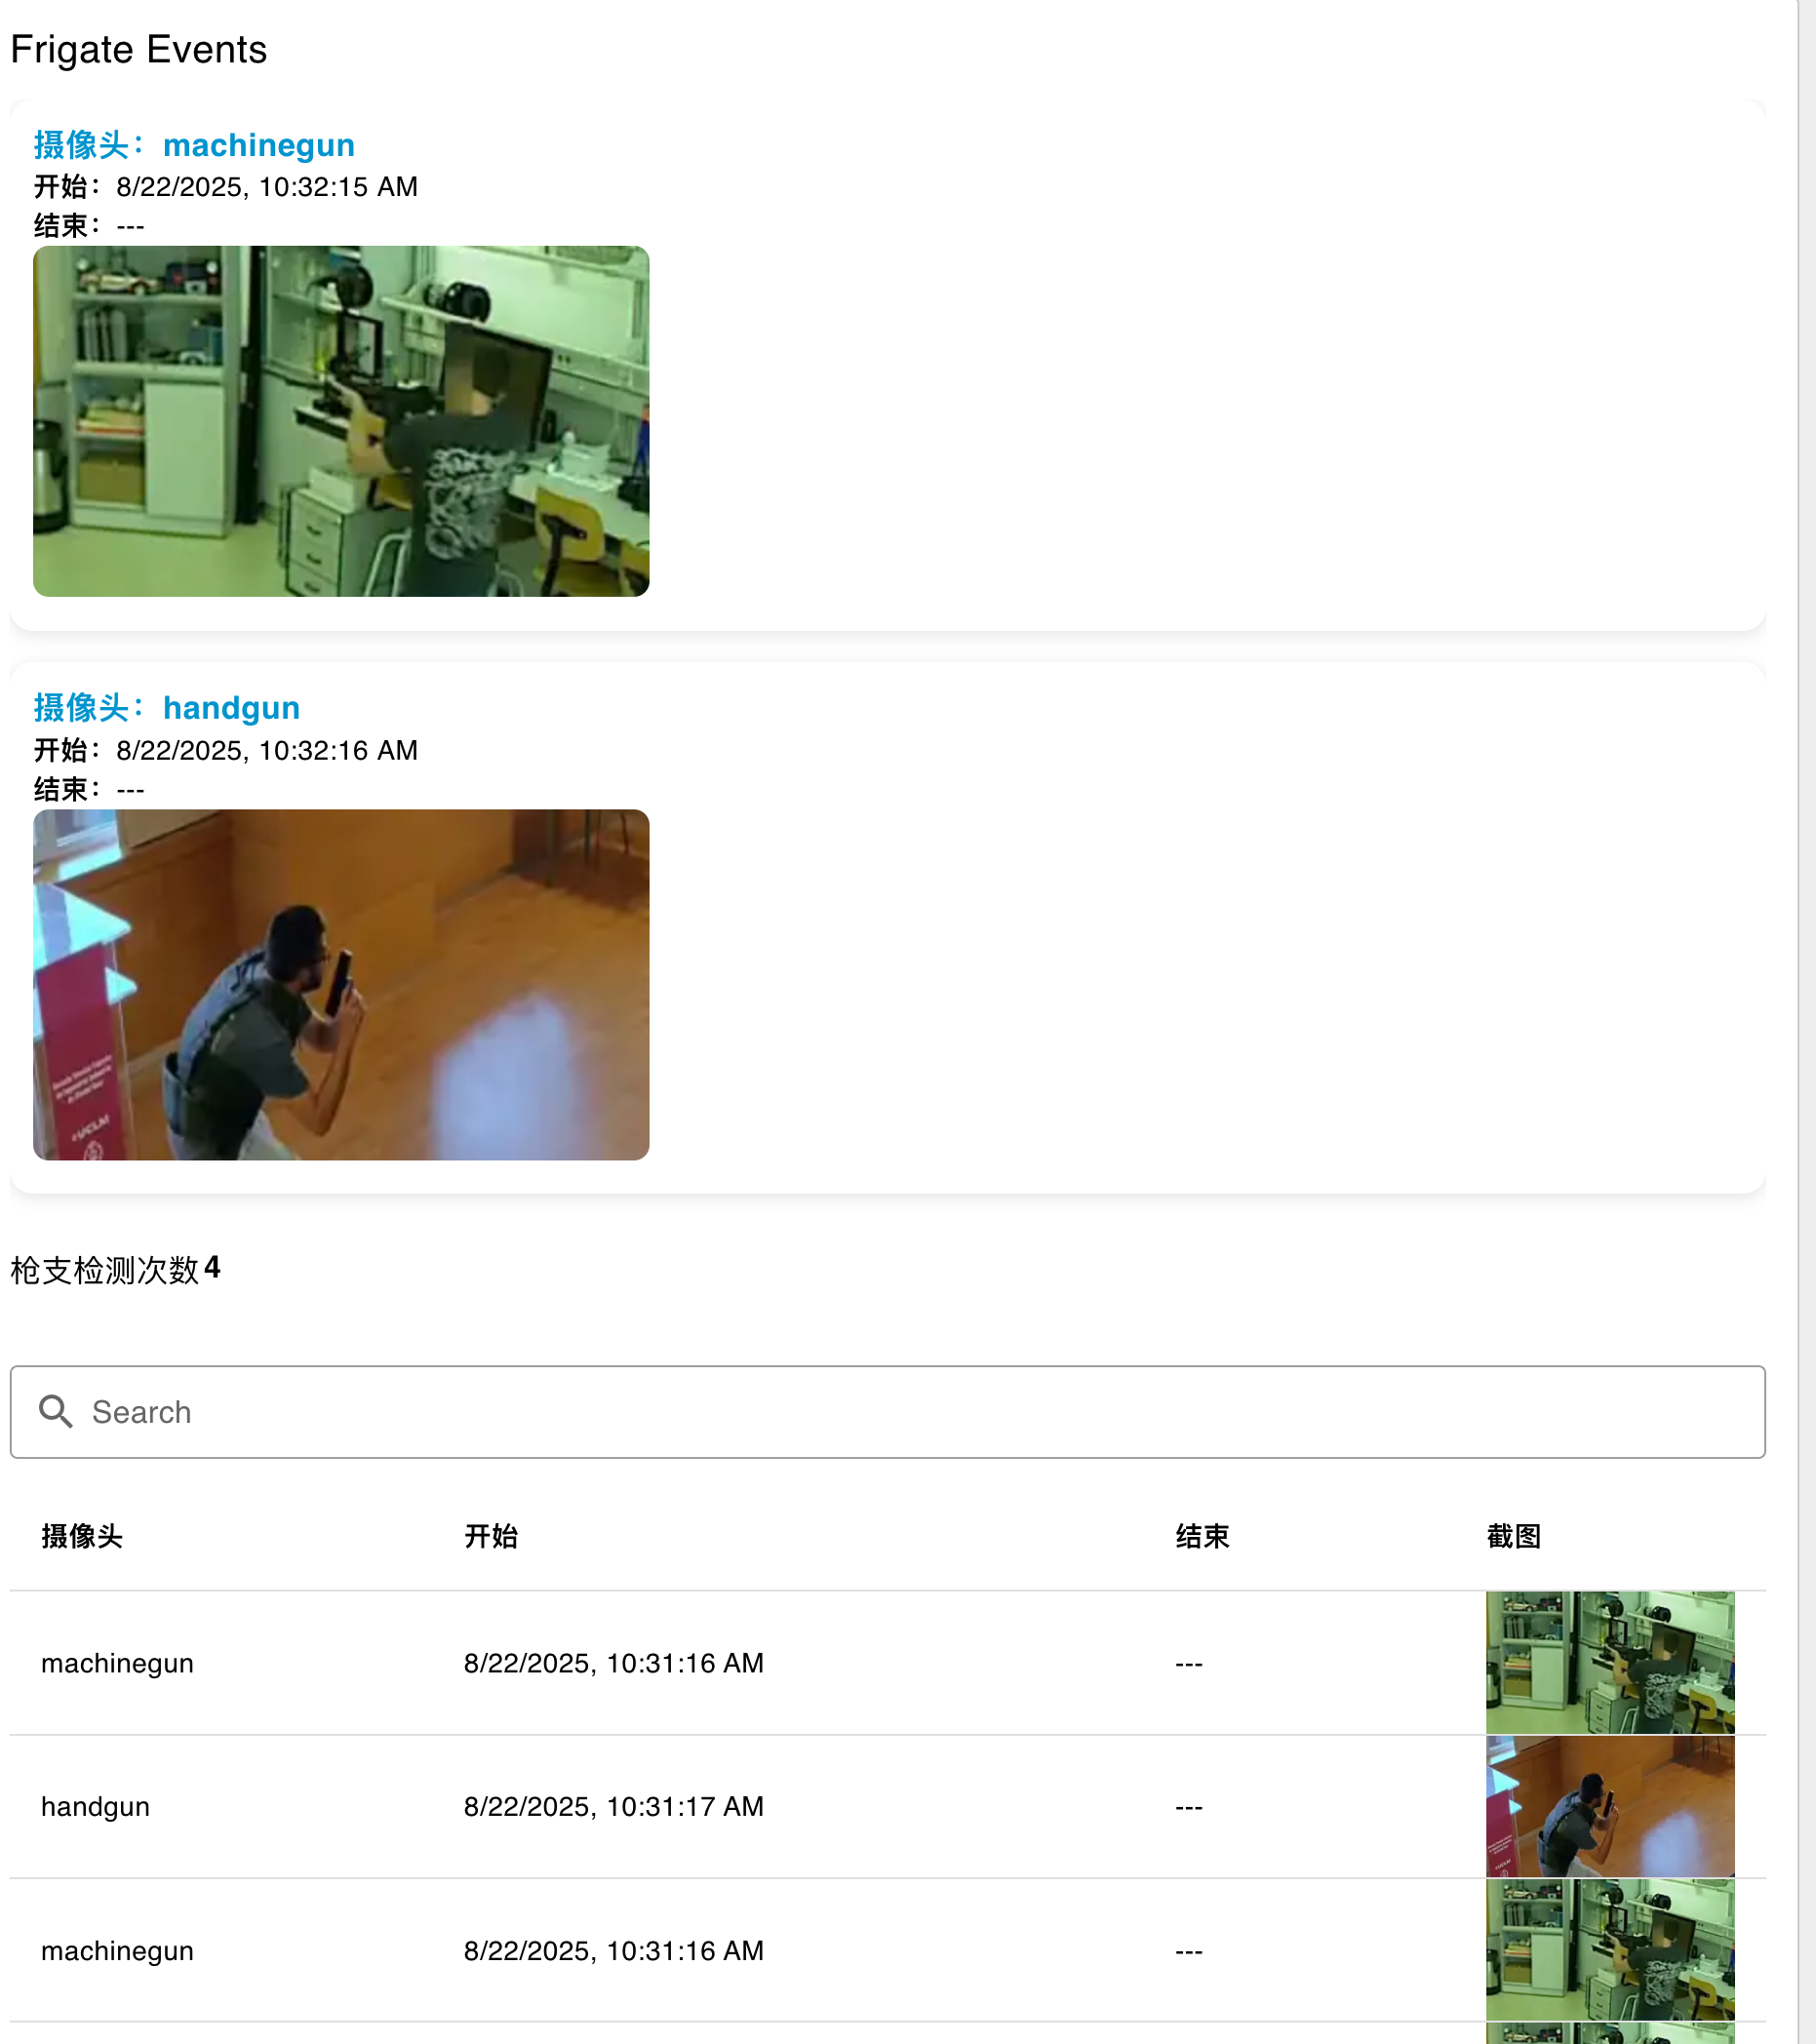
After setting up this flow, Node-RED will automatically respond to Frigate’s gun detection events by updating your dashboard and sending immediate webhook notifications.
Proceed to the Frigate Configuration section for instructions on setting up the detection parameters.
Default Frigate Config
Quickly navigate to the Frigate configuration page at http://<your_jetson_ip>:5000/config to see your current setup.
Frigate uses a YAML file called config.yml to define how it runs.
This file tells Frigate where to find your camera streams, which AI model to use, and how to send detection results through MQTT.
By adjusting it, you can control how objects are detected, recorded, and displayed.
Storage Location
By default, Frigate stores video recordings and snapshots under: /media/frigate on your Jetson device.
For example:
seeed@desktop:/$ docker exec -it frigate /bin/sh
root@274103ae951b:/opt/frigate# cd /media/frigate/
root@274103ae951b:/media/frigate# ls
clips  exports  handgun.mp4  machinegun.mov  recordings
If you plan to keep videos for longer periods, mount this directory to an external SSD or network drive to prevent your Jetson’s internal storage from filling up.
Camera Configuration
In Frigate, each camera needs to be defined under the cameras: section.
Every camera block describes where the video stream comes from and how it is decoded before being analyzed by the detection model.
cameras:
  handgun:
    enabled: true
    ffmpeg:
      hwaccel_args: preset-jetson-h264
      inputs:
        - path: /media/frigate/handgun.mp4
          input_args: -stream_loop -1 -re
          roles:
            - detect
  machinegun:
    enabled: true
    ffmpeg:
      hwaccel_args: preset-jetson-h264
      inputs:
        - path: /media/frigate/machinegun.mov
          input_args: -stream_loop -1 -re
          roles:
            - detect
Explanation:
enabled: Enables or disables this camera.ffmpeg: Defines how Frigate uses FFmpeg to read and decode the video stream.- FFmpeg is a media framework that converts and streams video from files, RTSP cameras, or other sources.
hwaccel_args: Enables hardware acceleration (e.g., H.264 decoding on Jetson).inputs: Lists one or more video inputs.path: The actual video source.- In this example, it’s a local demo file like
/media/frigate/handgun.mp4. - In real deployments, you can replace it with a live camera stream, such as:
path: rtsp://user:[email protected]:554/stream1
- In this example, it’s a local demo file like
input_args: Extra FFmpeg parameters.-stream_loop -1loops the demo video endlessly.-reensures playback matches real-time speed.
roles: Defines how this input is used.detectmeans the stream is used for object detection.- Other possible roles include
recordorrtmpfor streaming.
Each camera can have multiple inputs — for example, one for detection and another for high-quality recording. Frigate automatically manages decoding and frame extraction through FFmpeg for all defined sources.
AI Model and Detection Settings
After defining the cameras, the next step is to tell Frigate which AI model to use and how to process each video frame. This section defines the detector type, model file path, and detection behavior such as frame size, object tracking, and threshold.
detectors:
  tensorrt:
    type: tensorrt
    device: 0

model:
  path: /config/model_cache/tensorrt/yolov4-tiny-288_gun_v3.trt
  width: 288
  height: 288
  labelmap_path: /config/guns.txt
  input_tensor: nchw
  input_pixel_format: rgb
Explanation:
detectors: Defines which AI backend Frigate uses for inference.type: tensorrt tells Frigate to use NVIDIA TensorRT acceleration (optimized for Jetson).device: Specifies the GPU index. For most Jetson devices, use 0.
model: Points to the AI model file and describes its input format.path: Path to your .trt (TensorRT engine) file.width/ height: Input resolution of the model (must match what the model expects).labelmap_path: File that maps class indices to labels, e.g. guns.txt → contains "gun".input_tensor: Defines the tensor layout; nchw = batch, channel, height, width.input_pixel_format: Specifies the pixel format, usually rgb.
TensorRT models are compiled versions of trained networks, optimized for fast GPU inference. You can replace this file with your own model if you train a new one — just make sure the width, height, and labels match.
Object Tracking Configuration
Frigate can detect and track specific types of objects. For this project, we only track guns, which keeps the system efficient and focused.
objects:
  track:
    - gun
  filters:
    gun:
      threshold: 0.3
Explanation:
track: List of objects to detect and track.- Here it’s only "gun", but you could add more labels (e.g., person, car, etc.) if your model supports them.
filters: Fine-tune the detection confidence for each object type.threshold: Minimum confidence value (0.0–1.0).- A lower value (like 0.3) is more sensitive but may include false positives.
- A higher value (like 0.5) makes detection stricter.
If you notice too many false detections, try increasing the threshold to 0.5 or higher. For smaller objects that are often missed, you can lower it slightly — but balance between accuracy and noise.
Recording Settings
Once Frigate detects an object, it can record videos and save snapshots for further analysis or alert display. These settings control how long recordings are stored and what information is shown in captured images.
record:
  enabled: true
  retain:
    days: 3
    mode: all
Explanation:
enabled: Turns on video recording.retain: Controls how long to keep recorded files and which type of footage is stored.days: Number of days to keep recordings before automatic deletion.mode:all– continuously record (useful for testing).motion– only record when motion is detected.events– record only when tracked objects (e.g., guns) appear.
For real deployments, use mode: events or mode: motion to save storage space while keeping useful recordings.
Snapshot Settings
snapshots:
  enabled: true
  clean_copy: true
  timestamp: true
  bounding_box: true
  crop: false
  retain:
    default: 14
  quality: 95
Explanation:
enabled: Enables snapshot saving when a detection event occurs.clean_copy: Saves an additional version without detection boxes.timestamp: Adds the time and date overlay on the snapshot.bounding_box: Draws a box around detected objects.crop: When true, saves only the cropped detection area.retain.default: Number of days to keep snapshots.quality: Sets the image quality (1–100). Higher = better detail but larger file size.
Snapshots are ideal for alerts or dashboards, as they are much smaller than video clips and easy to send via webhook or MQTT.
Birdseye View
Frigate also supports a Birdseye view, which displays multiple camera feeds together for a quick overview.
birdseye:
  enabled: true
  mode: objects
Explanation:
enabled: Turns on the Birdseye composite view.mode:objects– only show cameras where objects are currently detected.continuous– always show all camera feeds.
MQTT Configuration
Frigate communicates its detection events through MQTT, which allows other services — such as Node-RED, Home Assistant, or custom dashboards — to receive real-time updates whenever an object is detected. It also provides logging options to help monitor system performance and debug detection issues.
mqtt:
  enabled: true
  host: 172.17.0.1
  port: 1883
Explanation:
enabled: Turns on MQTT communication.host: The IP address of your MQTT broker.- When using Docker on Jetson,
172.17.0.1usually refers to the host machine. - Replace with your actual MQTT server IP if you run it on another device.
- When using Docker on Jetson,
port: Default MQTT port, typically 1883.
For more advanced MQTT settings, refer to the Frigate MQTT documentation.
With MQTT enabled, Frigate becomes part of a real-time event network — sending gun detection alerts directly to Node-RED or Home Assistant, where they can trigger dashboards, notifications, or custom workflows.
Performance & Sizing
| Hardware Platform | Model | FPS (Total) | Stable Streams (≥15 FPS) | Remarks |
|---|---|---|---|---|
| reComputer R2000 (Raspberry Pi + Hailo-8) | YOLOv11-s | 30 | 2 | Compact AI NVR; efficient low-power edge device |
| reComputer J3011 (Jetson Orin Nano 8 GB) | YOLOv4-tiny-288 | 90 | 6 | Entry-level Jetson; FPS stabilizes after warm-up |
| reComputer J4012 (Jetson Orin NX 16 GB) | YOLOv4-tiny-288 | 120 | 8 | NVDEC concurrency limit reached; compute headroom remains |
Resources & Next Steps
- Solution Bundle: Frigate + Node-RED Gun Detection on Jetson
- Frigate Documentation: https://docs.frigate.video/
- GitHub Repository: Seeed-Studio / frigate-on-jetson
- Node-RED Dashboard Add-on: @flowfuse/node-red-dashboard
FAQ
1. I cannot install Docker on my Jetson device. What should I do?
If you encounter issues with the default Docker installation script, you can use the following alternative script:
bash <(curl -sSL https://linuxmirrors.cn/docker.sh)
For more information, please visit: https://linuxmirrors.cn
2. How to know my Jetpack version?
Run the following command on your Jetson device:
dpkg -l | grep nvidia-jetpack
The output will show the installed Jetpack version.
3. How to update my Jetpack version?
Follow the instructions in your specific product wiki.
4. “Permission Denied” When Running Docker
You don’t have permission to access the Docker daemon. Run:
sudo usermod -aG docker $USER
newgrp docker
Logging out and back in again also applies the new group permissions.
Then verify:
docker ps
Footnotes
-
AI NVRs leverage advanced machine learning models to provide real-time insights and automation capabilities, while traditional NVRs primarily focus on recording and storing video footage. ` ↩