Training SoArm101 Policy with IsaacLab
Introduction
This wiki introduces how to use Isaac Lab to train and test SO-ARM100/101 robotic arm policies with reinforcement learning.
📌Prerequisites
- An Ubuntu PC with Nvidia GPU
If you don’t have CUDA drivers or Conda installed, please set them up first.
Getting Started
🚀 Step 1. Install Isaac Lab
NVIDIA Isaac™ Lab is an open-source unified framework for robot learning that helps researchers and developers efficiently train robotic policies.
Run the following commands in the Ubuntu PC terminal:
# Create and activate Conda environment
conda create -n isaaclab python=3.10
conda activate isaaclab

# Install PyTorch (GPU version)
pip install torch==2.7.0 torchvision==0.22.0 --index-url https://download.pytorch.org/whl/cu128

# Upgrade pip
pip install --upgrade pip

# Install Isaac Sim (with extensions)
pip install 'isaacsim[all,extscache]==4.5.0' --extra-index-url https://pypi.nvidia.com

# Clone IsaacLab repository
cd ~/Documents
git clone https://github.com/isaac-sim/IsaacLab.git

# Install dependencies
sudo apt install cmake build-essential

# Initialize setup
cd IsaacLab
./isaaclab.sh --install
Run the following command to verify installation:
./isaaclab.sh -p scripts/tutorials/00_sim/create_empty.py
If successful, an empty Isaac Sim window should appear.
🤖 Step 2. Install isaac_so_arm101 Project
This repository implements tasks for the SO‑ARM100 and SO‑ARM101 robots using Isaac Lab. It serves as the foundation for several tutorials in the LycheeAI Hub series Project: SO‑ARM101 × Isaac Sim × Isaac Lab.
Run the following commands:
cd ~/Documents
git clone https://github.com/MuammerBay/isaac_so_arm101.git
cd isaac_so_arm101
# Install project dependencies
python -m pip install -e source/SO_100
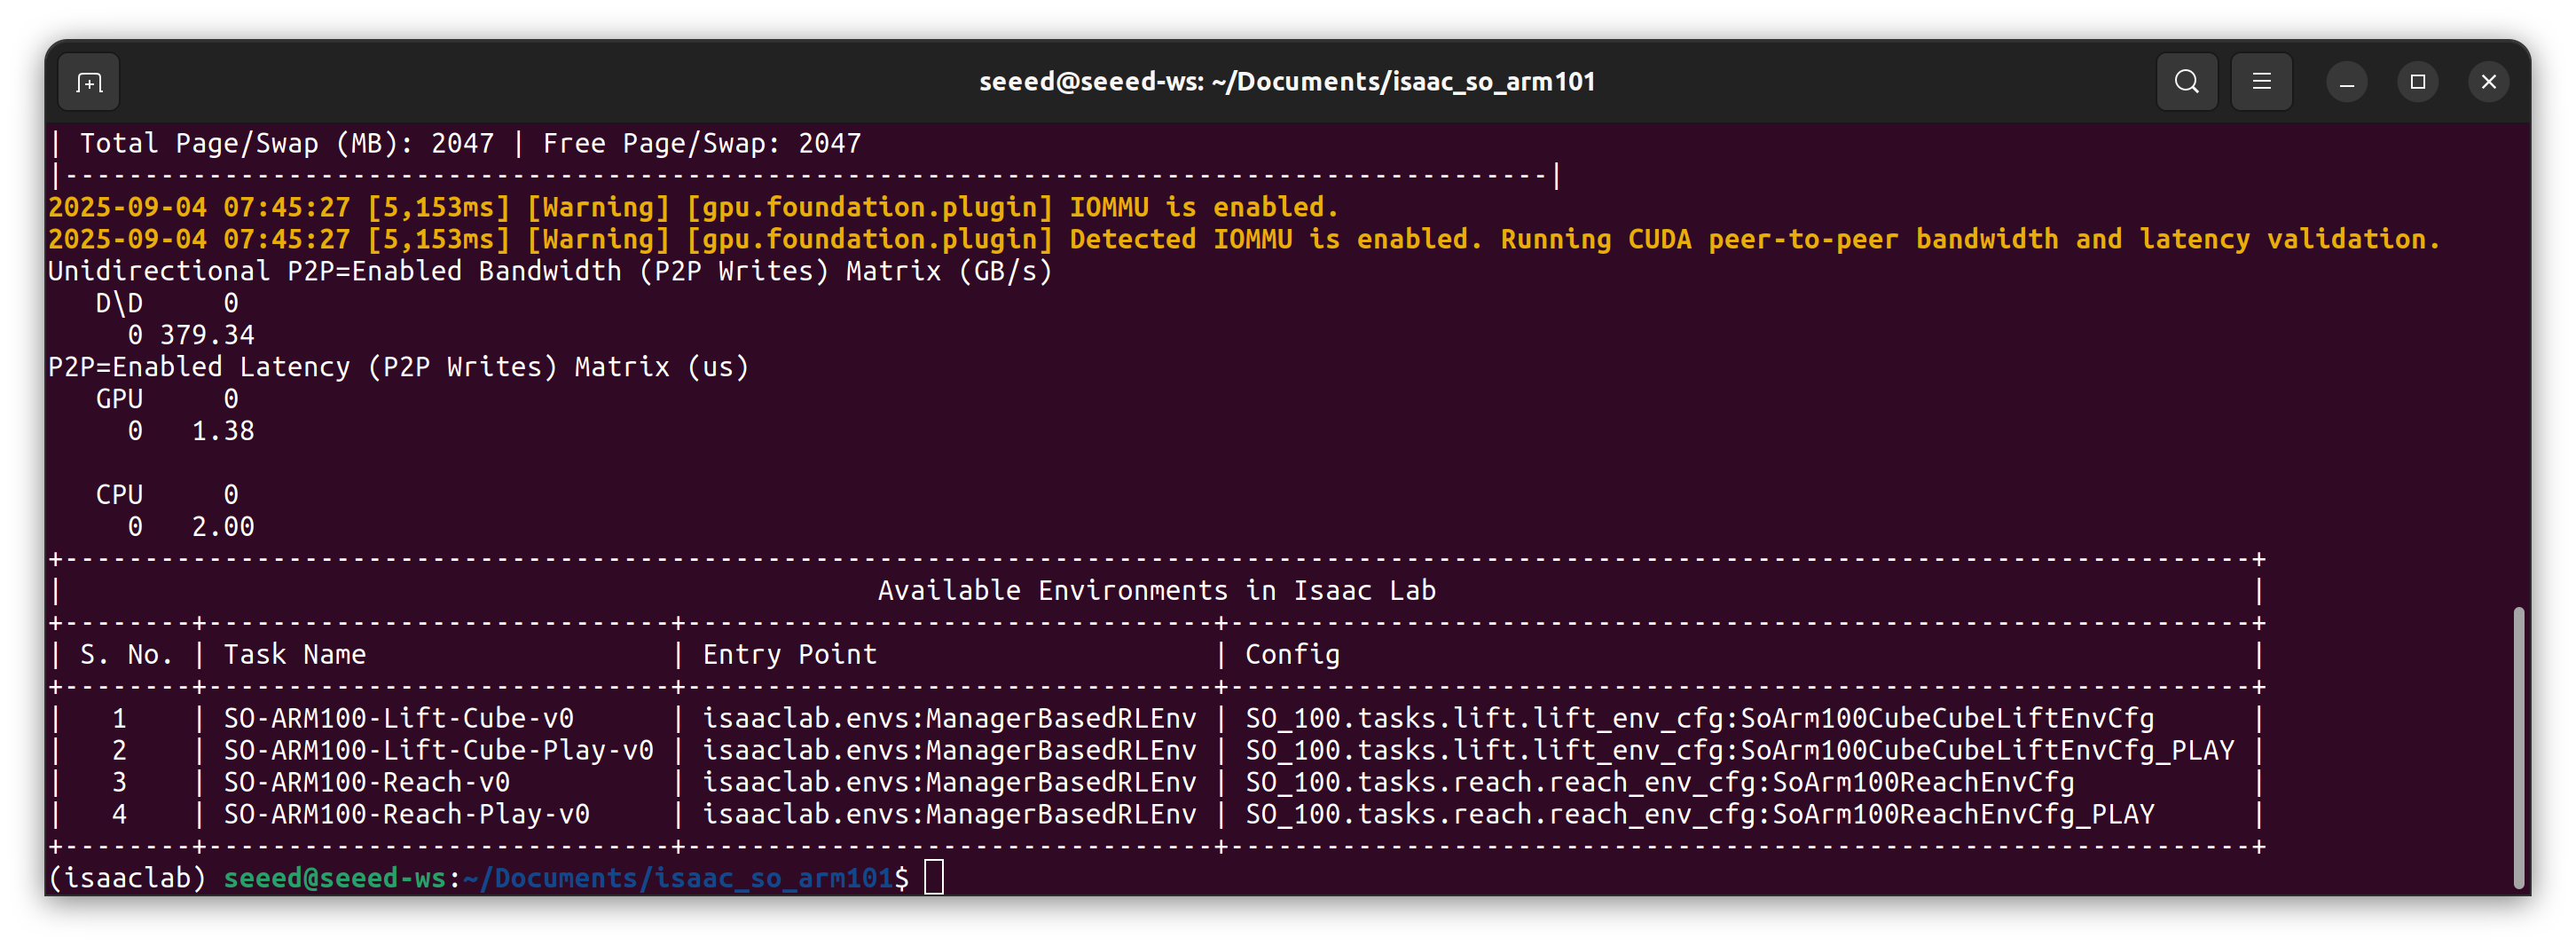
# Test environments
python scripts/list_envs.py
If the isaac_so_arm101 project is successfully installed, the terminal window will print the following log:
🎯 Step 3. Start Training
Launch training with:
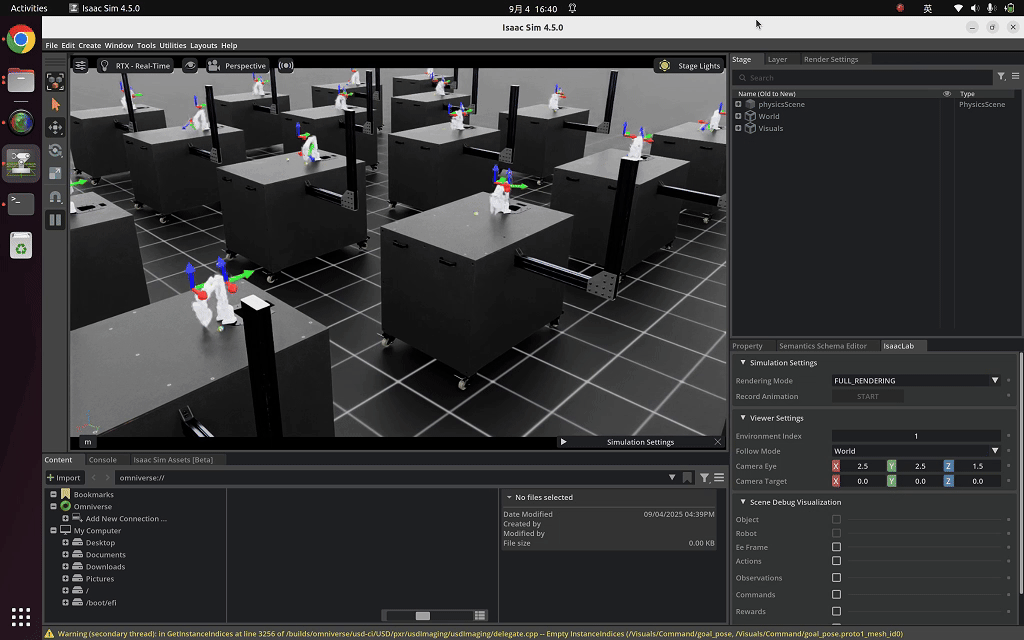
python scripts/rsl_rl/train.py --task SO-ARM100-Reach-v0
This will open an Isaac Sim window where you can observe the training process in real time. You can add the --headless parameter to the launch command to speed up the training process.
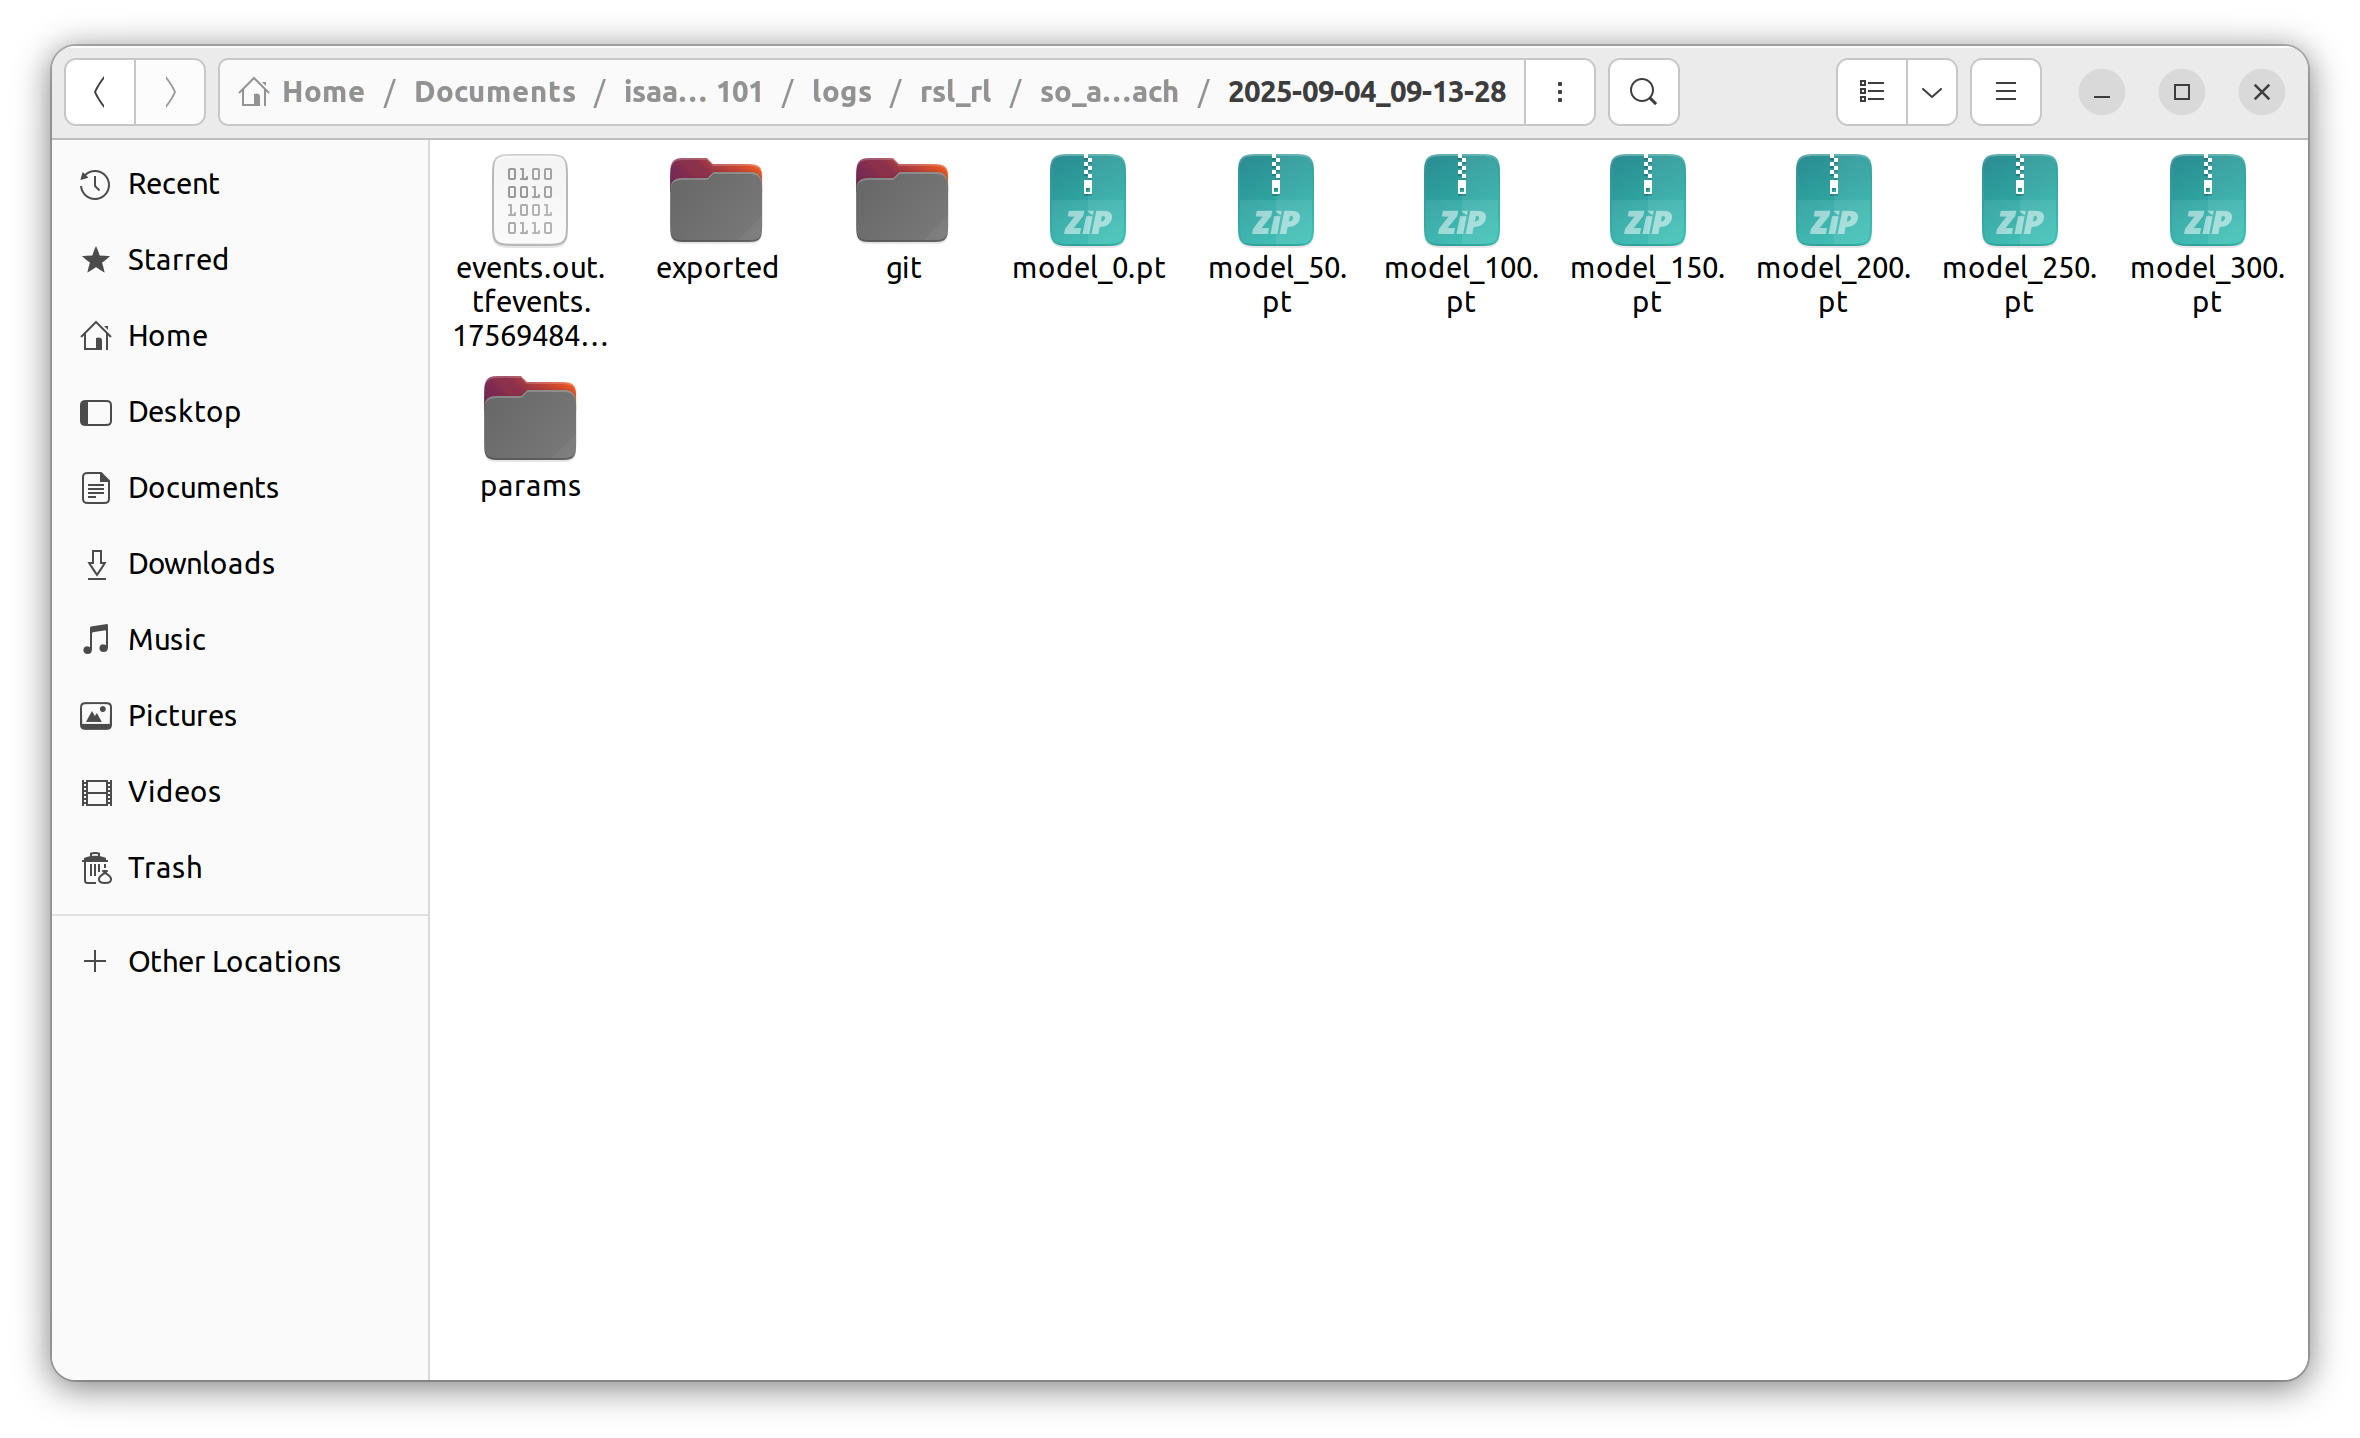
After training, the model weights will be saved under:
~/Documents/isaac_so_arm101/logs/rsl_rl/so_arm100_reach
🧪 Step 4. Test the Model
Test the trained model with:
python scripts/rsl_rl/play.py --task SO-ARM100-Reach-Play-v0
During testing, target positions are randomly generated within a defined range, and the trained model drives the robotic arm to reach those targets.
References
- https://lycheeai-hub.com/project-so-arm101-x-isaac-sim-x-isaac-lab-tutorial-series
- https://github.com/MuammerBay/isaac_so_arm101
- https://github.com/huggingface/lerobot
- https://github.com/isaac-sim/IsaacLab
- https://github.com/leggedrobotics/rsl_rl
Tech Support & Product Discussion
Thank you for choosing our products! We are here to provide you with different support to ensure that your experience with our products is as smooth as possible. We offer several communication channels to cater to different preferences and needs.