TRMNL 7.5" (OG) DIY Kit
Introduction
Product Overview
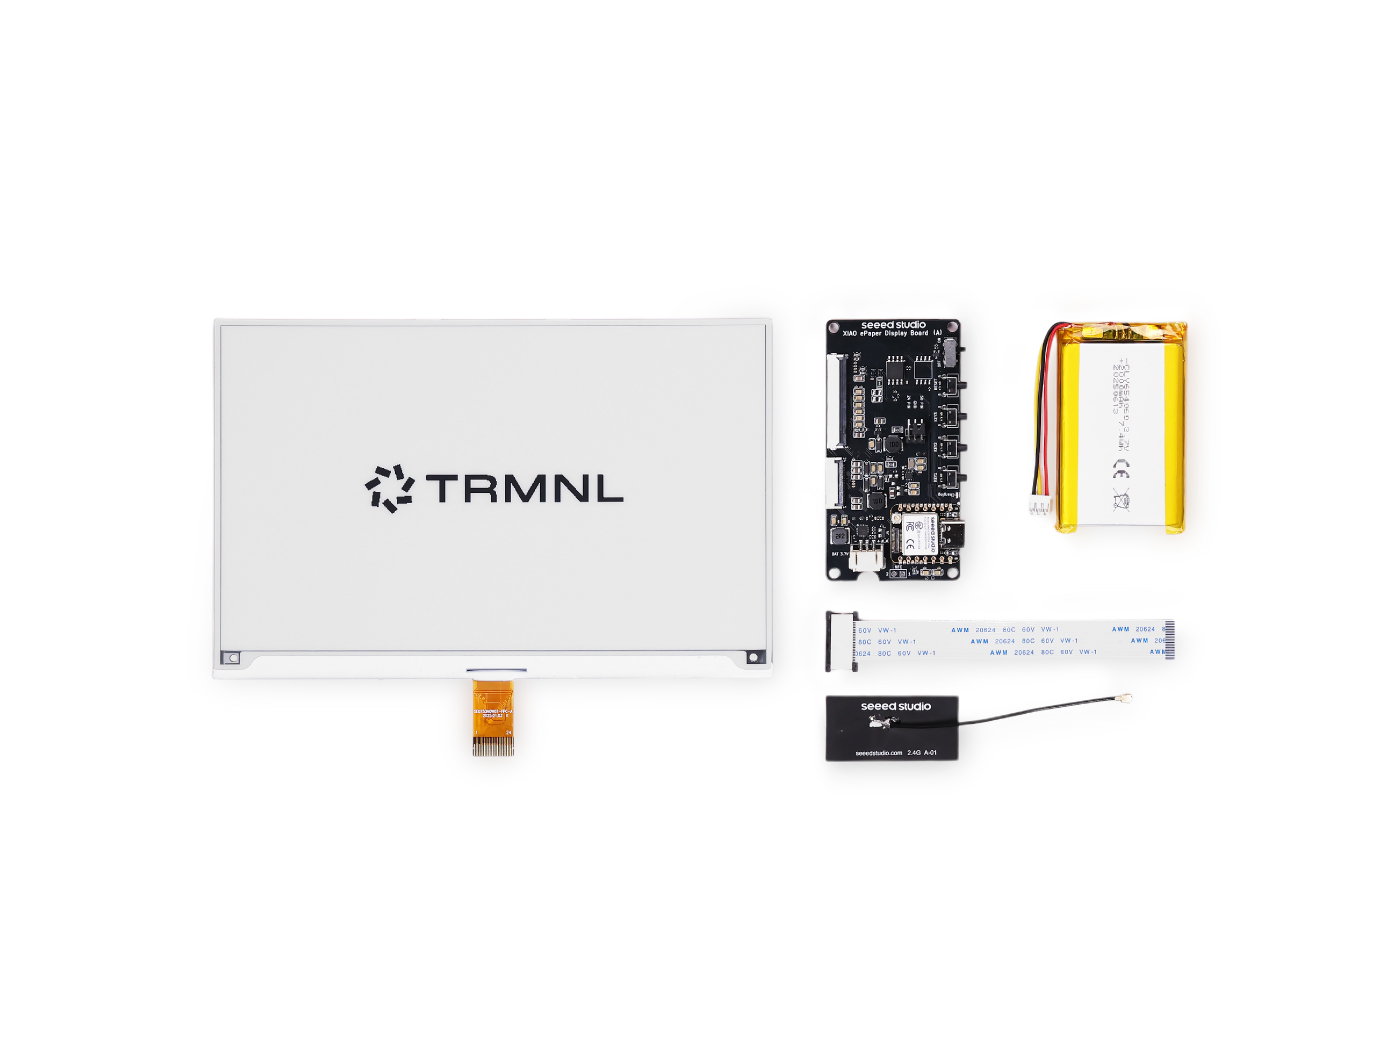
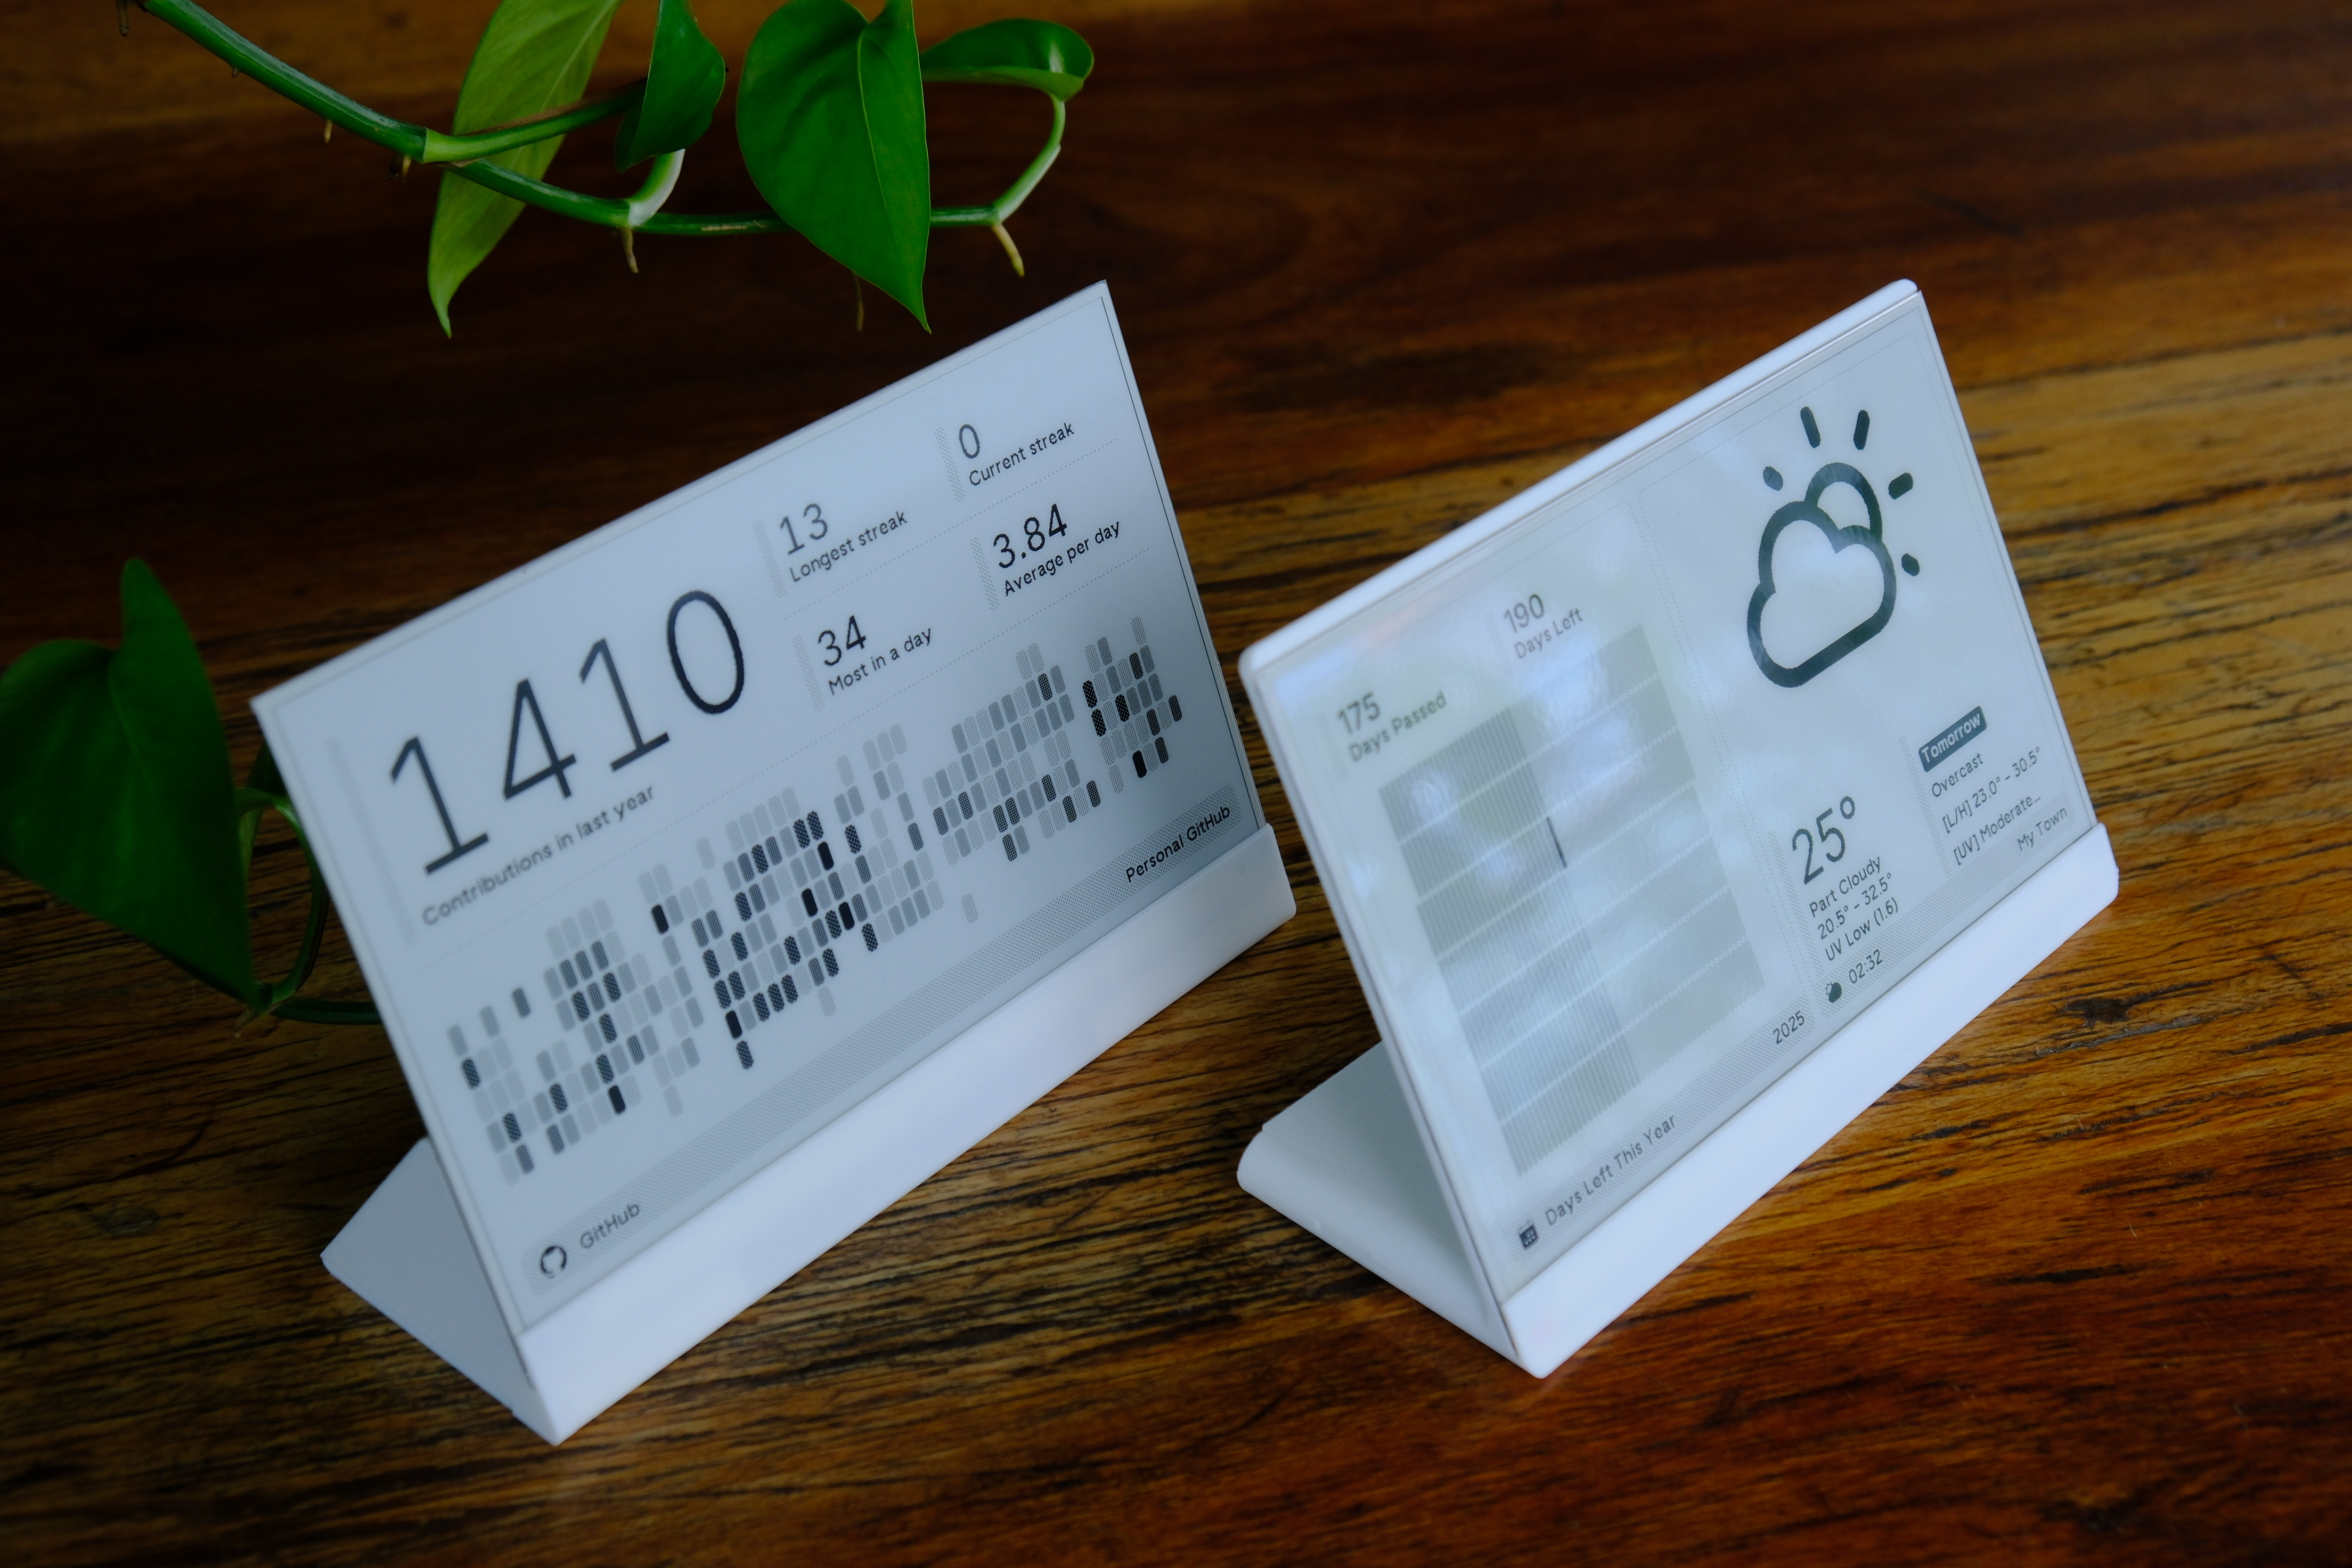
The TRMNL 7.5" (OG) DIY Kit, co-developed by Seeed Studio and TRMNL, is a versatile e-ink development solution. It combines a 7.5-inch 800×480 monochrome e-ink display, XIAO ESP32-S3 PLUS driver board, 2000 mAh rechargeable battery, and 10cm FPC extension cable. Fully compatible with the TRMNL BYOD ecosystem, this kit enables no-code dashboard building with over 375 plugins and 8 layouts, ideal for DIY enthusiasts, smart home interfaces, and creative digital signage.
Features
- TRMNL BYOD Compatibility: Official kit for building TRMNL 7.5'' OG device with 375+ plugins and 8 no-code layouts (e.g., Calendar, Shopify, GitHub)
- 7.5" E-Ink Display: 800×480 monochrome display with partial refresh (0.34s) and full refresh (3.5s)
- Energy-Efficient Design: 2000mAh battery provides up to 3 months of operation in deep sleep mode (6-hour refresh interval)
- Dual Ecosystem Support: Compatible with Home Assistant (via ESPHome) and Arduino IDE for custom development
- Open Source Enclosures: Available on Printables and Thingiverse for easy customization
Specification
| Parameter | Description |
|---|---|
| MCU | XIAO ePaper Display Dev Board with XIAO ESP32-S3 Plus onboard |
| Display | 7.5-inch Monocolor ePaper Display |
| Resolution | 800x480 |
| Operating Voltage | 5V |
| Battery | 2000mAh Rechargeable Li-ion Battery (3-month battery life in deep sleep mode) |
| Operating Temperature | -40°C to 85°C |
| Enclosure | Not included (open-source designs on Printables and Thingiverse) |
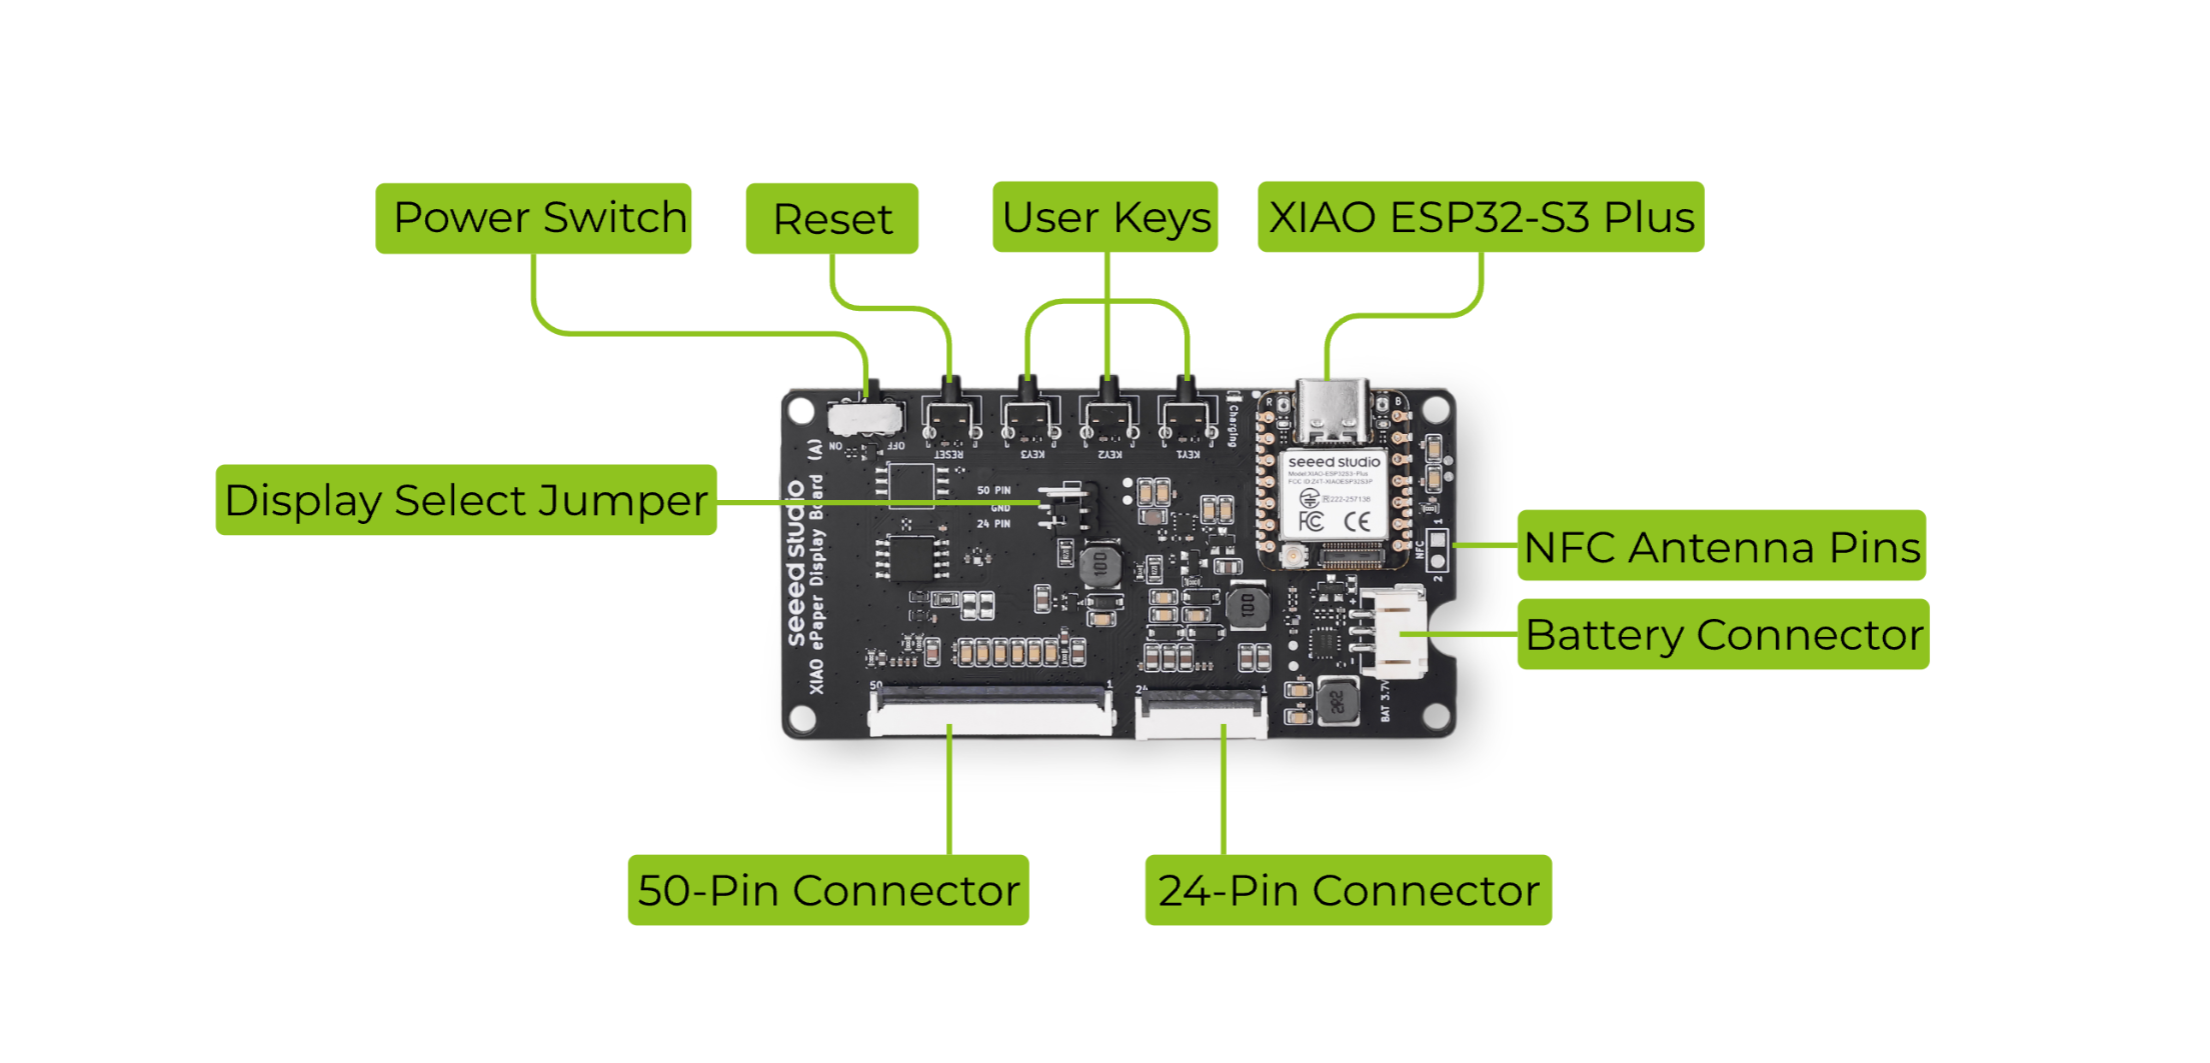
Hardware Overview
Component Diagram
Part List
| Product | Quantity |
|---|---|
| XIAO ePaper Display Dev Board (XIAO ESP32-S3 Plus) | 1 |
| 7.5-inch Monocolor ePaper Display (800×480) | 1 |
| FPC Extension Cable (10 cm) | 1 |
| FPC Connector | 1 |
| 2000mAh Rechargeable Li-ion Battery | 1 |
Getting Started
Equipment Installation
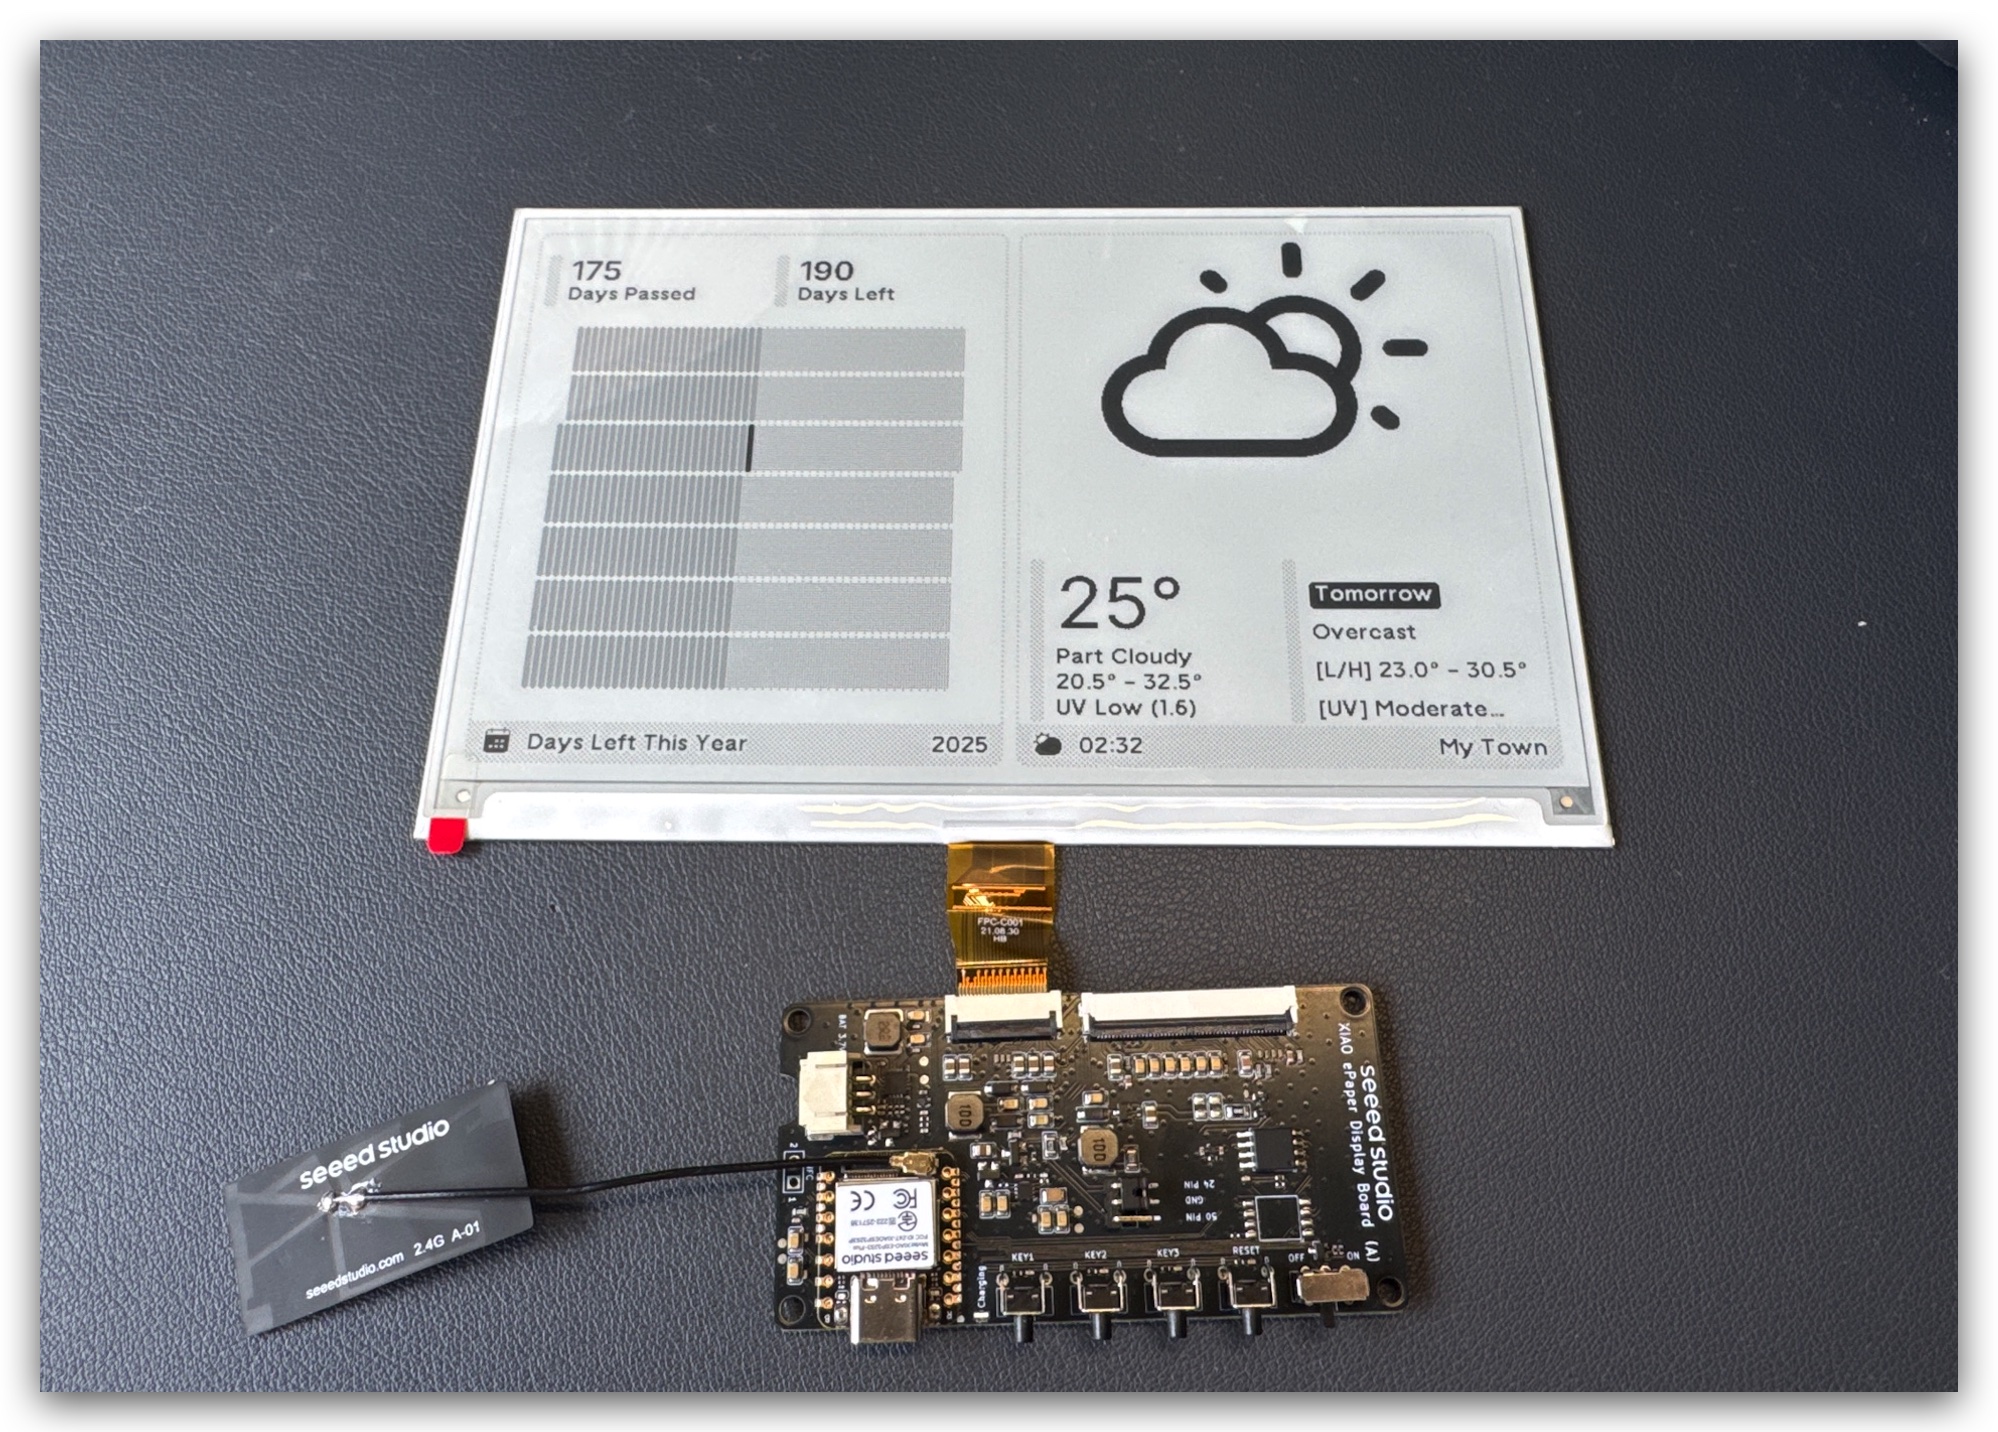
Step 1. Connect Display to Driver Board
Align the FPC cable with the connector on the XIAO ePaper Display Board, then secure the latch to ensure a firm connection.
The metal side of the FPC cable should face upwards, otherwise, no content will be displayed.
Please follow the installation tutorial below, many people get it wrong.
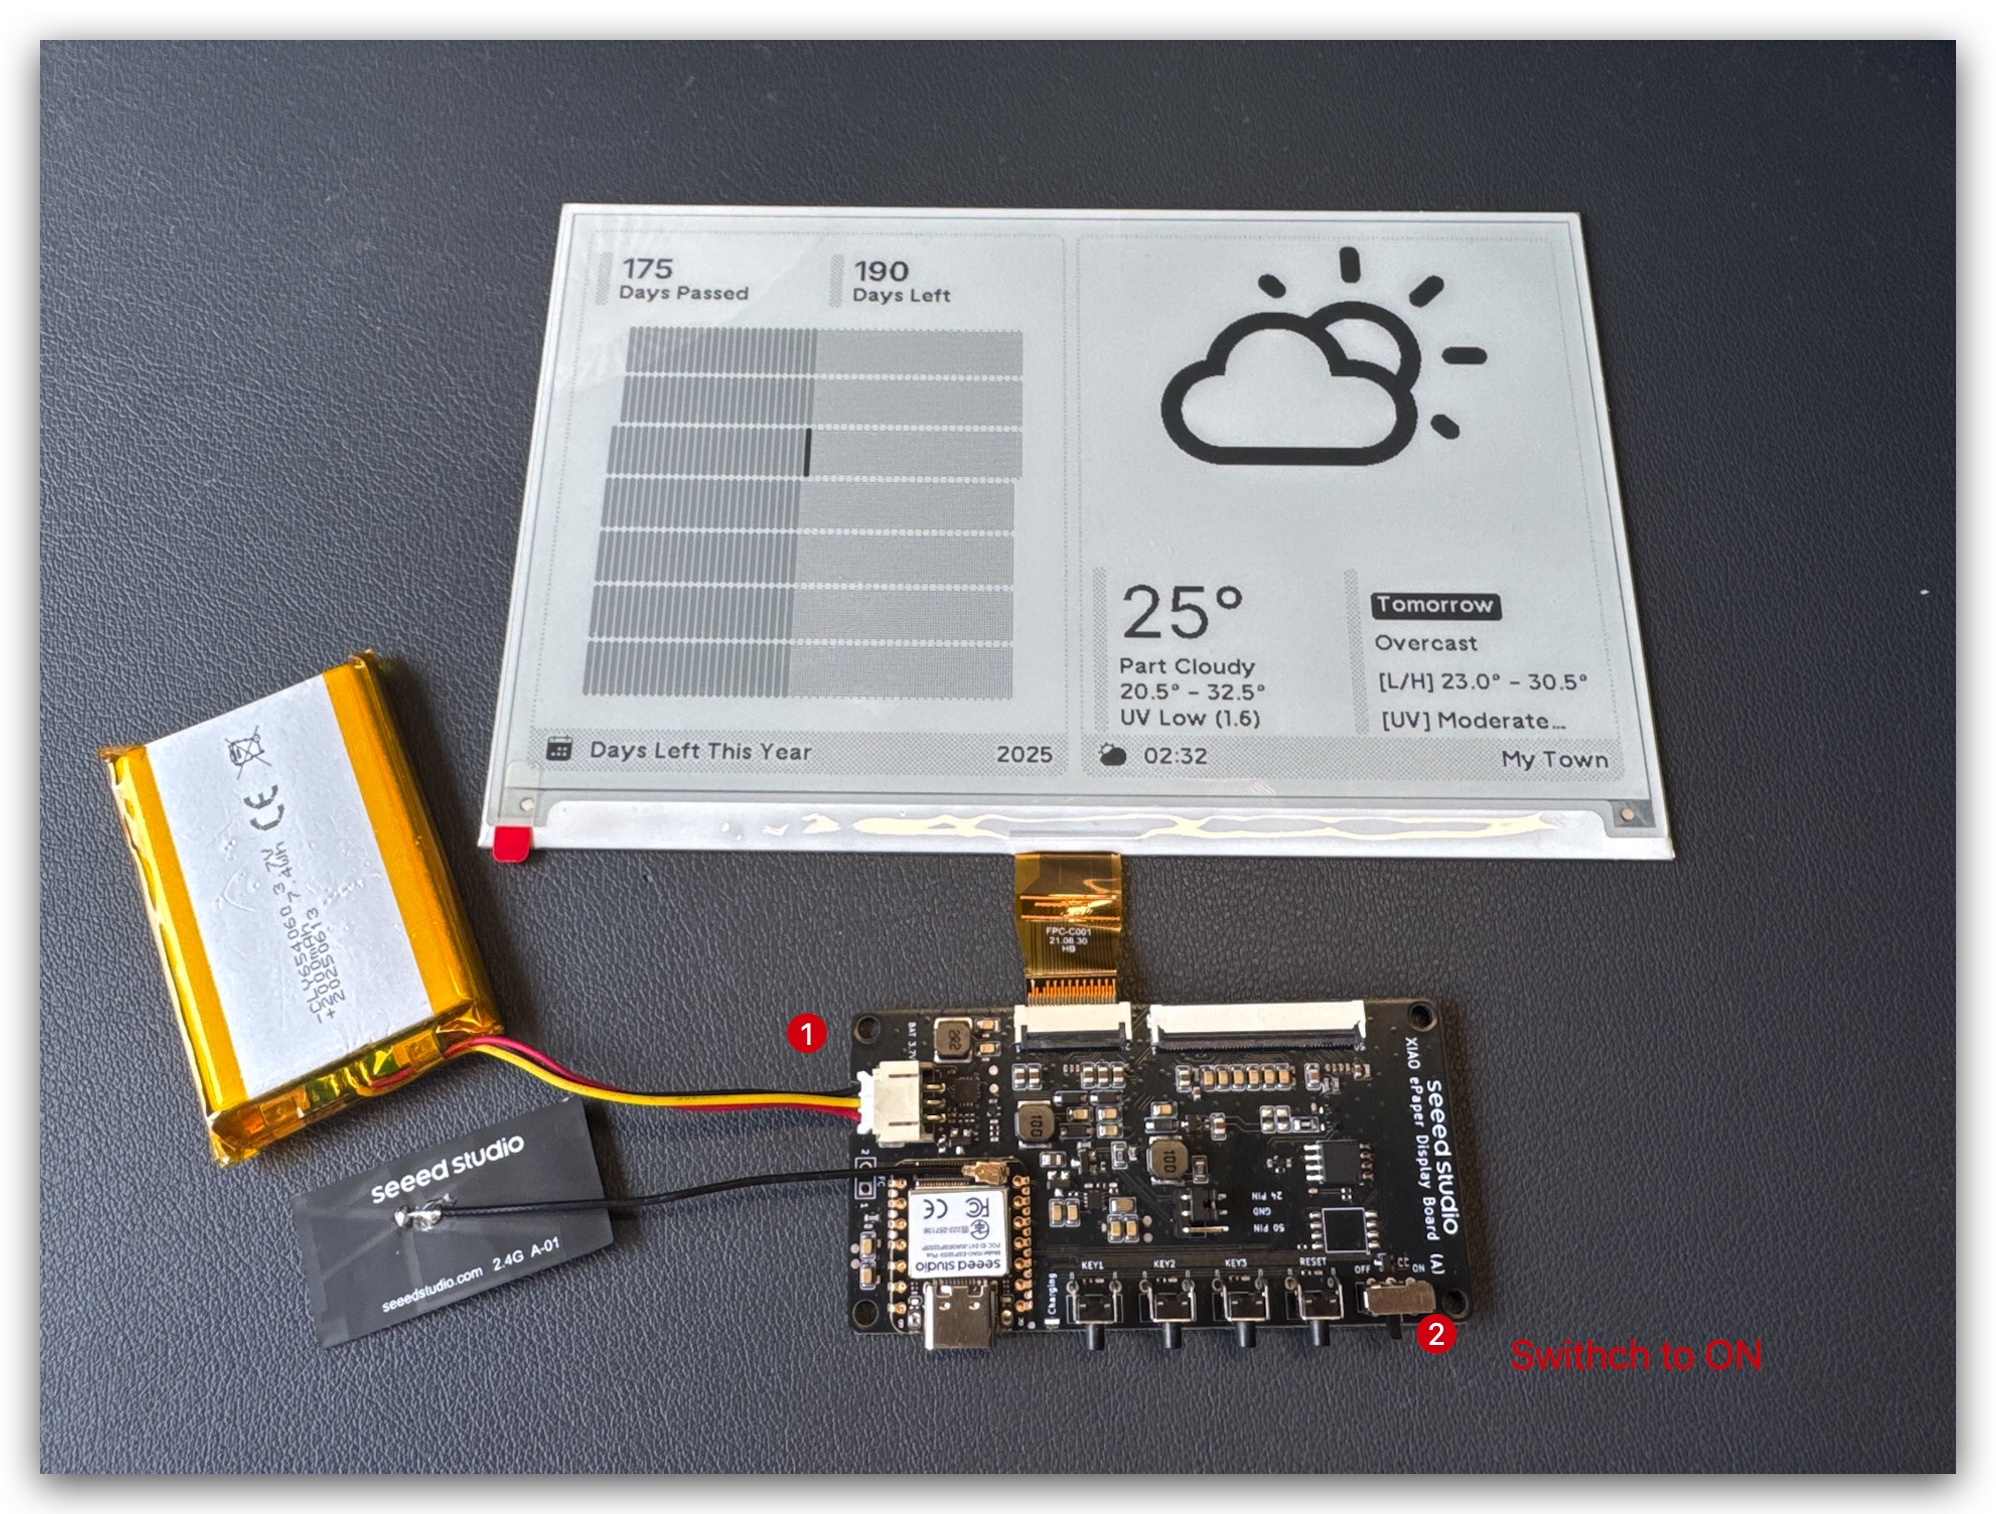
Step 2. Attach Battery
Connect the battery cable to the JST connector on the driver board, ensuring correct polarity (red wire to +, black to -).
Step 3. Enclosure Assembly (Optional)
Please note that the screen's flexible cable is very fragile. Be careful when operating. If it gets damaged, the entire screen will stop working.
Print open-source enclosure parts from Resource part and assemble the components inside.
First, assemble driver board and battery.
Test TRMNL kit if it works well.
Plug the screen into the case and make the FPC able out.
Connect FPC extension cable and assemble the whole case.
L-Shape enclosure is very similar.
If your TRMNL kit far away from your router, you can move the antenna outside the case. It would have better performance.
Wiki Center
Explore Detailed Guides
1. TRMNL BYOD Ecosystem Tutorial
Discover how to use the TRMNL BYOD platform with 375+ plugins, including no-code dashboard creation for your work and life.
2. Works with Home Assistant
Learn how to set up your TRMNL kit with Home Assistant via ESPHome, including firmware upload and basic programming.
3. Works with Arduino
Master TRMNL kit control with Arduino, including refresh mechanisms, graphics rendering, and power management.
Resources
- [Firmware] TRMNL ePaper Library (GitHub)
- [Hardware] Driver Board SCH
- [Printable] triangular base
- [Printable] protected triangular base
- [Printable] L-shaped base
- [Thingiverse] triangular base
- [Thingiverse] protected triangular base
- [Thingiverse] L-shaped base
- [Makerworld] triangular base
- [Makerworld] protected triangular base
- [Makerworld] L-shaped base
Tech Support & Product Discussion
Thank you for choosing our products! We offer multiple support channels: