Common Flashing Errors and How to Fix Them
This page summarizes several common Jetson flashing failures, especially errors related to USB reconnection, NFS mount, host environment issues, missing flashing tools, and first boot OEM setup.
Before You Start
Before troubleshooting a specific error, confirm the following:
- Use a dedicated physical Ubuntu host whenever possible. Avoid virtual machines, Docker containers, and WSL for flashing.
- Use a short, good-quality USB cable that supports stable data transfer.
- Connect the cable directly to the host PC. Avoid USB hubs.
- Put the Jetson into recovery mode again and reconnect power if needed.
- Make sure the host OS matches the JetPack version:
- JetPack 5.x: Ubuntu 18.04 or 20.04 is recommended.
- JetPack 6.x: Ubuntu 20.04 or 22.04 is recommended.
Error: USB Timeout During Flashing

Typical symptoms include messages such as:
ERROR: might be timeout in usb write
or the device disconnecting during the flashing process.
Why this happens
During flashing, the Jetson may reboot and re-enumerate over USB. On a physical Ubuntu host, this is usually reconnected automatically. In a VM or WSL environment, you often need to reattach the device manually, and this can cause timeout failures.
What to check
- Confirm whether the host is a physical Ubuntu PC, a VM, or WSL.
- If you are using a VM, manually reconnect the Jetson USB device after it reboots during flashing.
- If you are using WSL, re-attach the device after reconnect. For setup details, refer to Flash JetPack with WSL2.
- Confirm the DC power adapter can provide sufficient power for the Jetson device.
- Switch to another high-quality USB Type-C cable. The cable should support at least USB 2.0 data communication and should ideally be shorter than 1.5 meters.
- Try another USB-A port on the host.
- Avoid using USB hubs, as they may reduce connection stability during flashing.
- Confirm that you selected the correct flashing package for the target Jetson product and JetPack version.
- Re-enter recovery mode and reconnect power before trying again.
- After checking the items above, restart the flashing script and try again.
Recommendation
We strongly recommend using a dedicated physical Ubuntu host for flashing.
Error: NFS Mount Failure During Flashing

Typical logs may include:
Formatting APP partition /dev/nvme0n1p1 ...
tar --checkpoint-action="ttyout=Hit %s checkpoint #%u%*\r" -x -I 'zstd -T0' -pf /mnt/external/system.img --warning=no-timestamp --numeric-owner --xattrs --xattrs-include=* -C /tmp/ci-EUsLOiqBxk
Flash failure
Either the device cannot mount the NFS server on the host or a flash command has failed.
Check your network setting (VPN, firewall,...) to make sure the device can mount NFS server.
Reference: Flash fails Orin AGX at 99% - NVIDIA Developer Forums
Why this happens
When using initrd flash, Jetson mounts an NFS share exported by the host PC through the USB0 network interface. If the host NFS service is unavailable, blocked by firewall rules, or the host environment is unstable, the flash can fail near the end.
Checklist
- Make sure the NFS server is running on the Ubuntu host:
systemctl status nfs-kernel-server
- Disable the Ubuntu firewall temporarily and test again:
sudo ufw status
sudo ufw disable
- Avoid VM, Docker, and WSL environments.
- Format the NVMe SSD to
ext4before use. - Install the required dependencies on the host:
sudo apt install qemu-user-static sshpass abootimg nfs-kernel-server libxml2-utils binutils -y
- Check that the host PC has enough free disk space. NFS mount failures can also happen when host storage is insufficient.
- If the issue persists, test with a validated SSD model. Seeed SSD reference: NVMe M.2 2280 SSD 256GB
Error: The connected jetson device is not ready for flash: Stat for blob_boot0.imgimg failed
The key line is:
Stat for blob_boot0.imgimg failed Error: Return value 19
Why this happens
In practice, this usually means the host environment used to generate the boot blob is not compatible with the flashing toolchain. We have seen this on Ubuntu 24.04 hosts.
Recommended fix
Use Ubuntu 20.04 or Ubuntu 22.04 as the flashing host instead of Ubuntu 24.04.
Error: could not find tegrarcm_v2
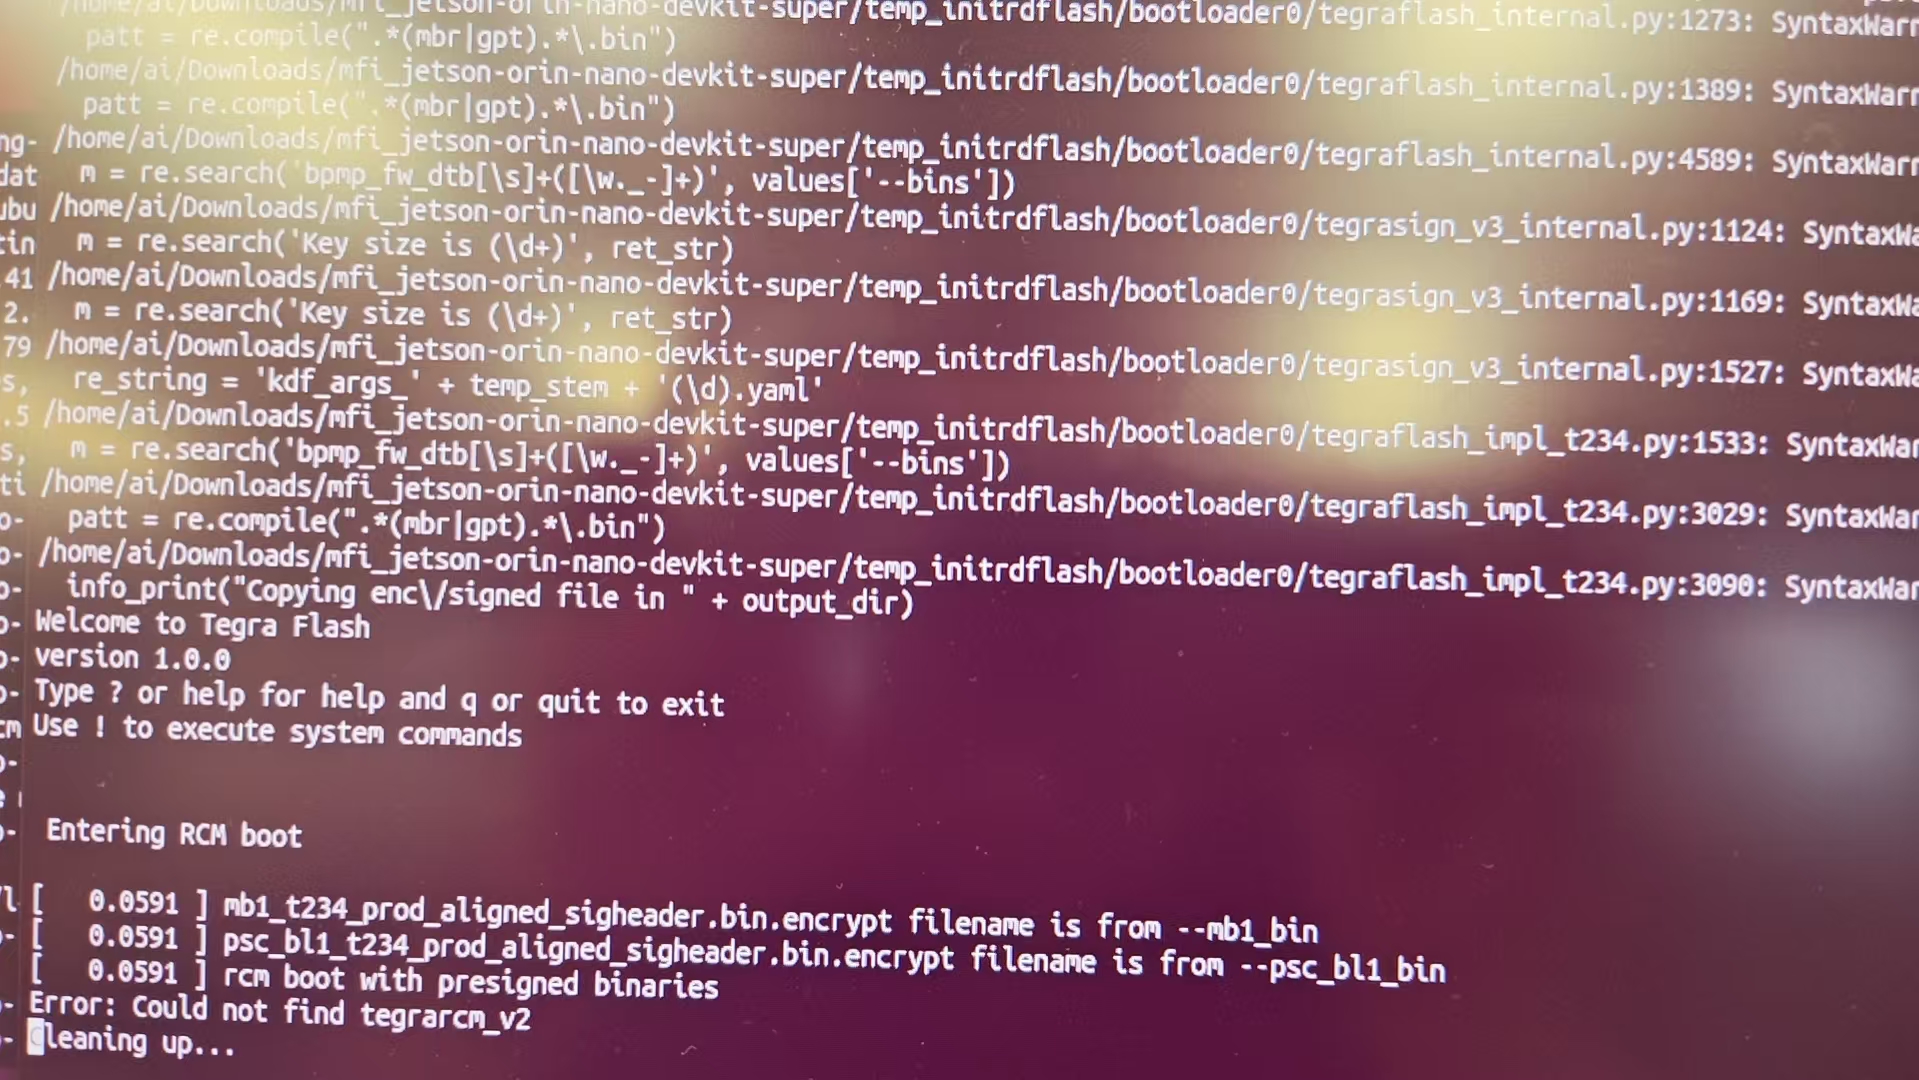
Typical log:
Error: could not find tegrarcm_v2
Why this happens
The flashing package and MFI flashing tool are intended for an x86 host. This error often appears when users try to flash from another Jetson device or another unsupported host architecture.
Recommended fix
Use an x86 Ubuntu host PC for flashing.
Error: Stuck At OEM Configuration After First Boot

Typical message:
(1 of 2) A start job is running for End-user configuration after initial OEM installation (Debconf UI)
Why this happens
This usually means the OEM setup service is waiting for user interaction, but no usable display path is available. This commonly happens when the HDMI display was not connected at the first boot and was attached later.
What to do
- Power off the Jetson.
- Disconnect unnecessary peripherals.
- Keep only the HDMI monitor and power connected.
- Reboot the device.
- If needed, reboot a few more times.
Additional Notes
- If the device reboots during flashing, this can be expected. The important part is whether the host re-detects and reconnects the Jetson correctly.
- If you are flashing to NVMe, confirm the target drive is healthy and already formatted properly.
- If you use SDK Manager, also review the terminal details for the exact failing component.
Tech Support & Product Discussion
Thank you for choosing our products! We are here to provide you with different support to ensure that your experience with our products is as smooth as possible. We offer several communication channels to cater to different preferences and needs.