Use OpenClaw to control the reCamera Gimbal
Introduction
This project successfully shattered the barrier between virtual large models and the physical world by deeply integrating the OpenClaw Agent framework with the reCamera Gimbal edge AI camera from Seeed Studio.
Relying on the powerful RISC-V architecture, the built-in Node-RED low-code environment, and 1 TOPS edge computing power of reCamera, we have developed a dedicated underlying interaction Skill for OpenClaw.
Now, the large model is no longer a "brain in a jar" that can only type on the screen. It has a "neck" that can actively rotate 360°, "eyes" (image capture + VLM analysis) that can see the physical world, "hands" (LED control) that can change the environment, and "ears and mouth" (microphone and speaker) for bidirectional interaction.
Here is the usage effect after completing this demo.
Hardware Preparation
one reCamerab Gimbal one computer
| reCamera Gimbal |
|---|
 |
1. Install OpenClaw on your computer
Git and nodejs need to be installed before installation. If it is a Windows10 user, Visual Studio needs to be installed again. If it is not installed, it will report an error.
Please visit OpenClaw official website to view the detailed installation tutorial:OpenClaw-Personal AI Assistant
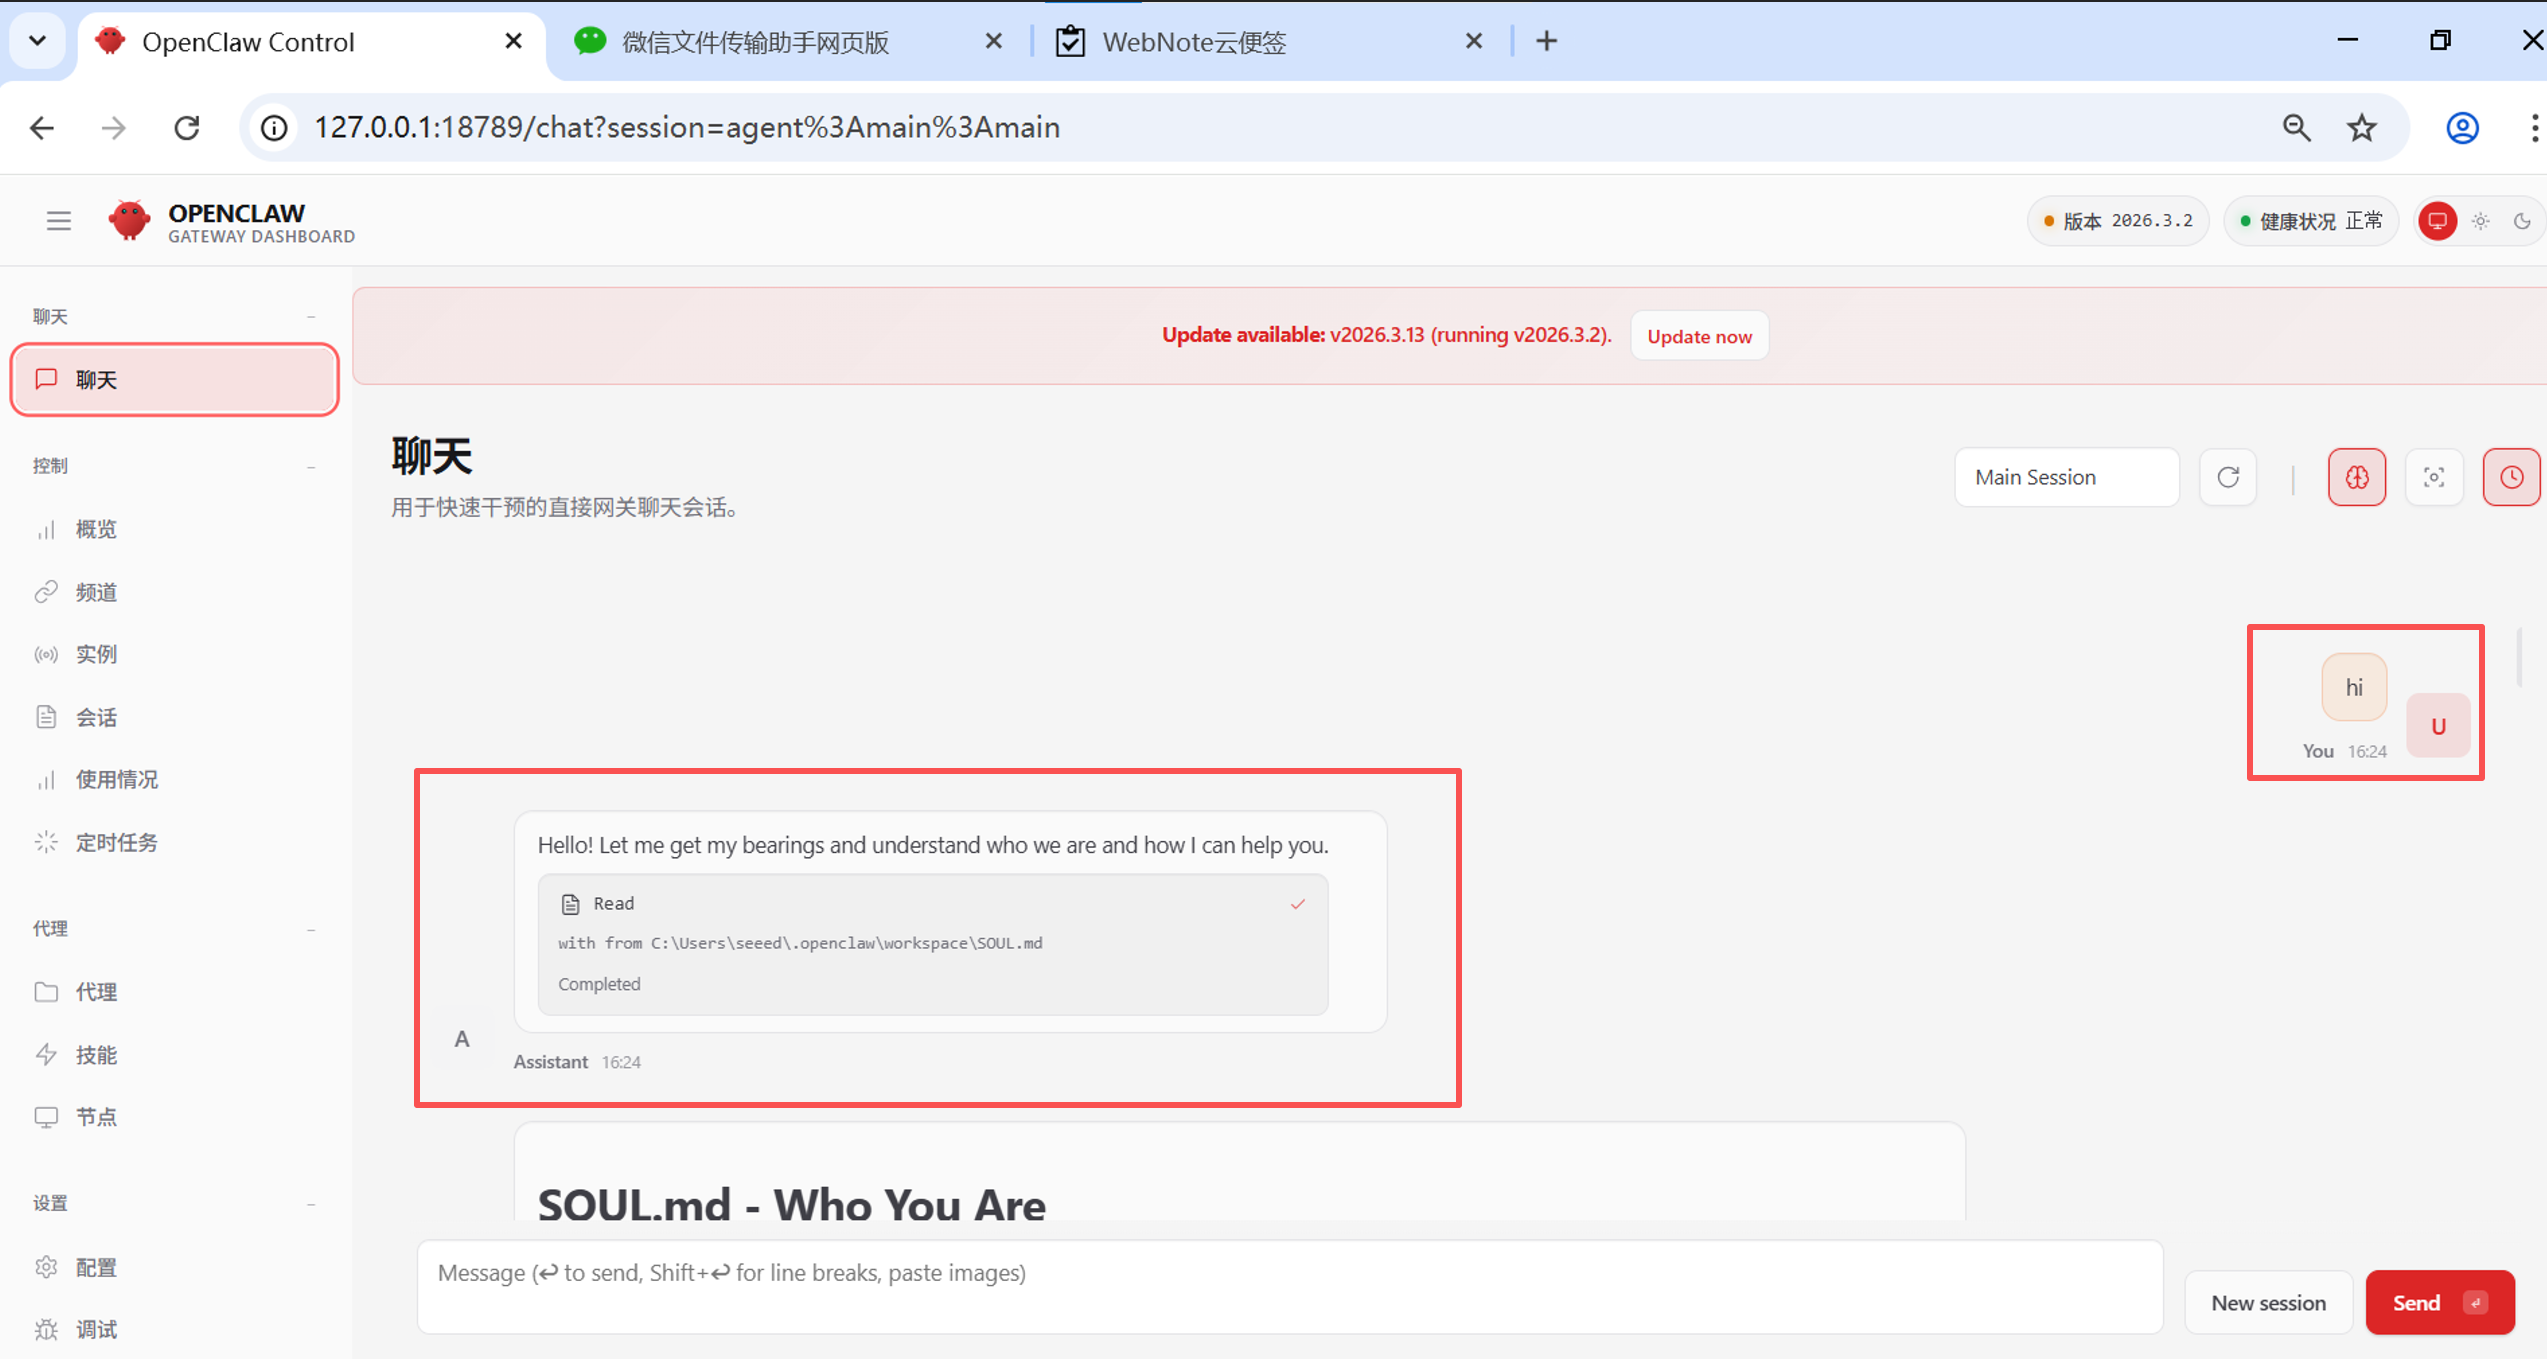
After installation, you can directly enter the web page to try to chat with it. If you can get feedback normally at this time, then you have successfully installed the OpenClaw and configured it. Please go on step by step. If there is a problem with the installation OpenClaw, please find out the reason and solve it yourself.
You can also click the "Overview" page on the left to see if the "Status" is normal.
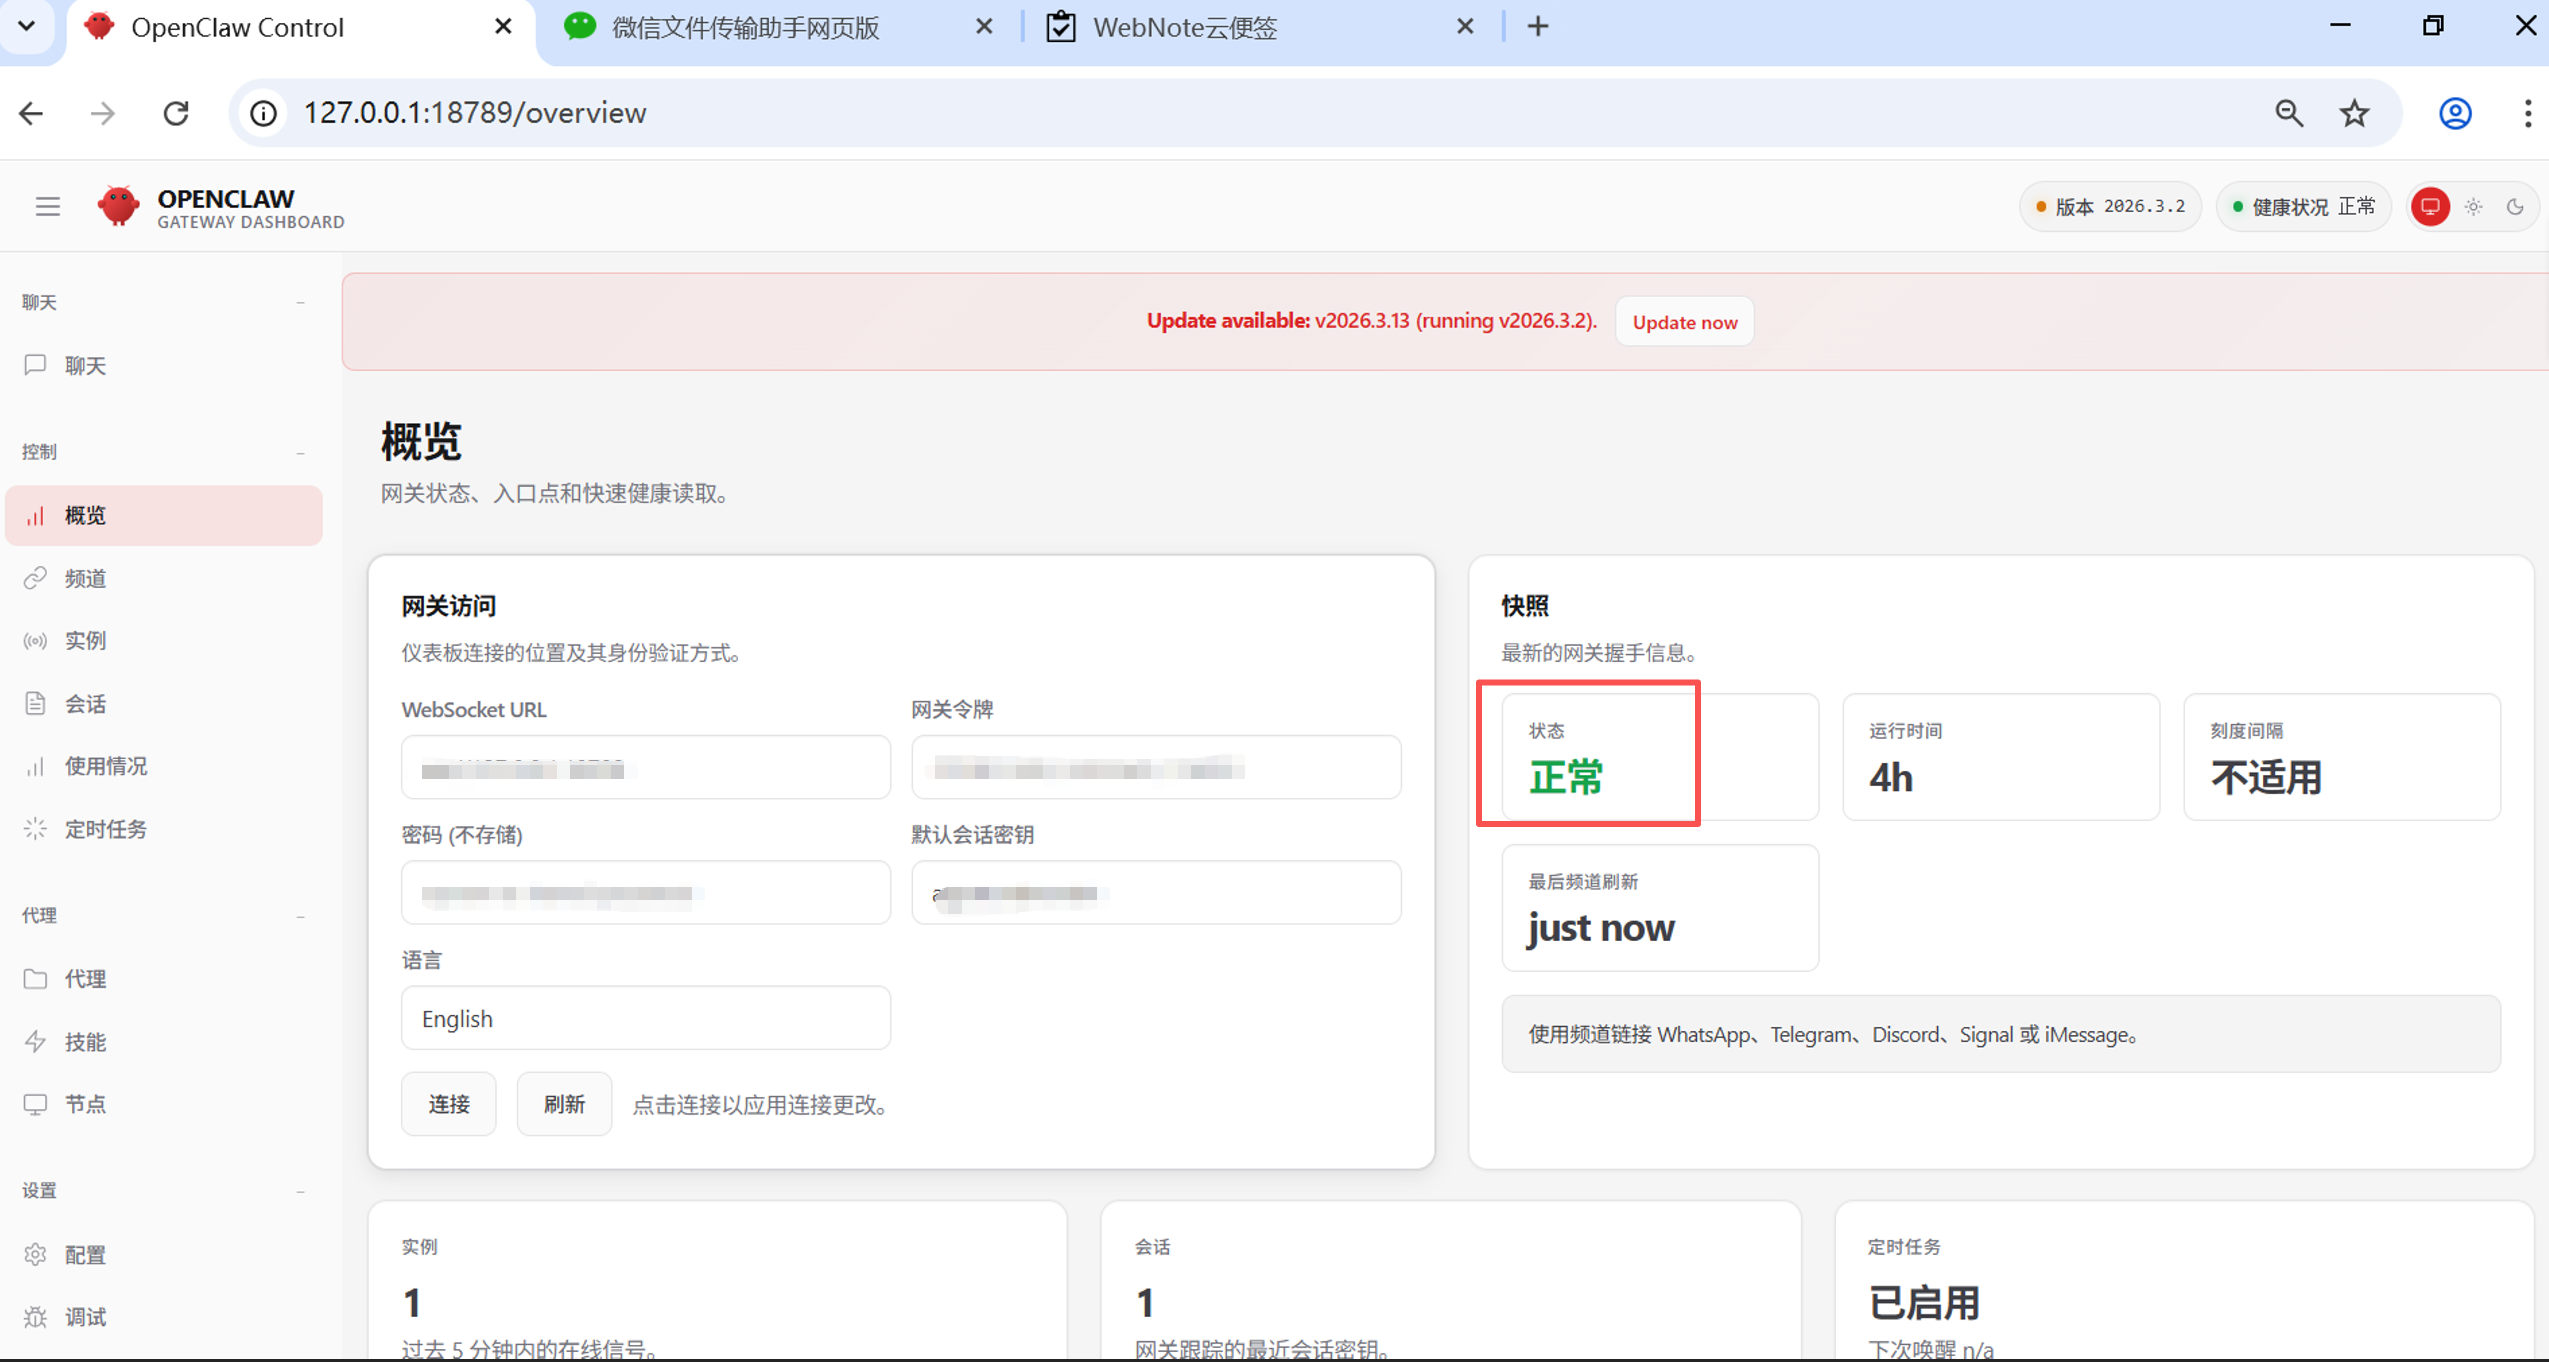
%5C%E9%BE%99%E8%99%BE%5Copenclaw_3.png)
2. Import reCamera Gimbal's Skills
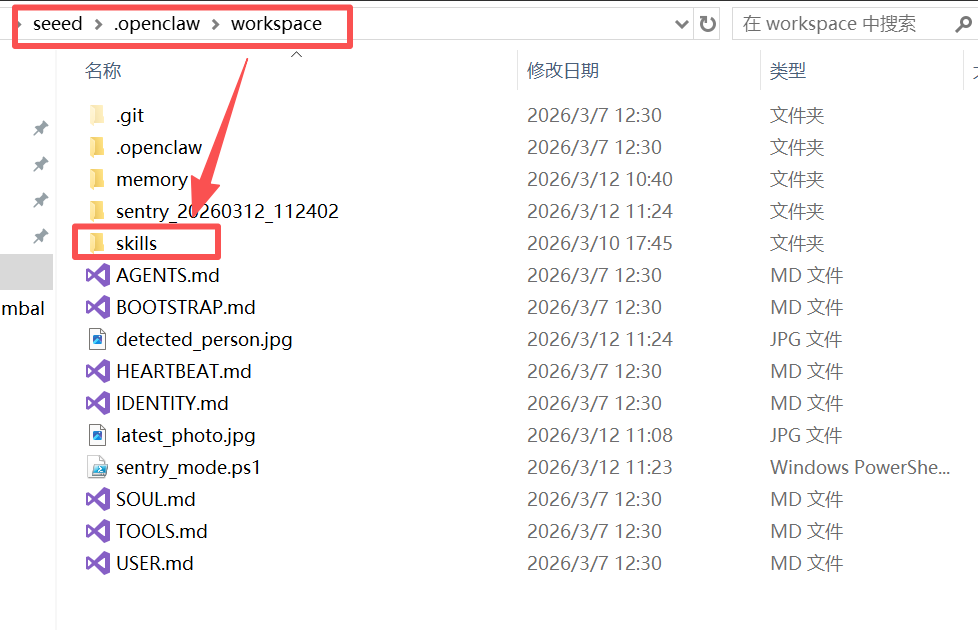
2.1 new skills folder
In the folder where the OpenClaw is installed, find the workspace and create a new folder named "skills" under this path.
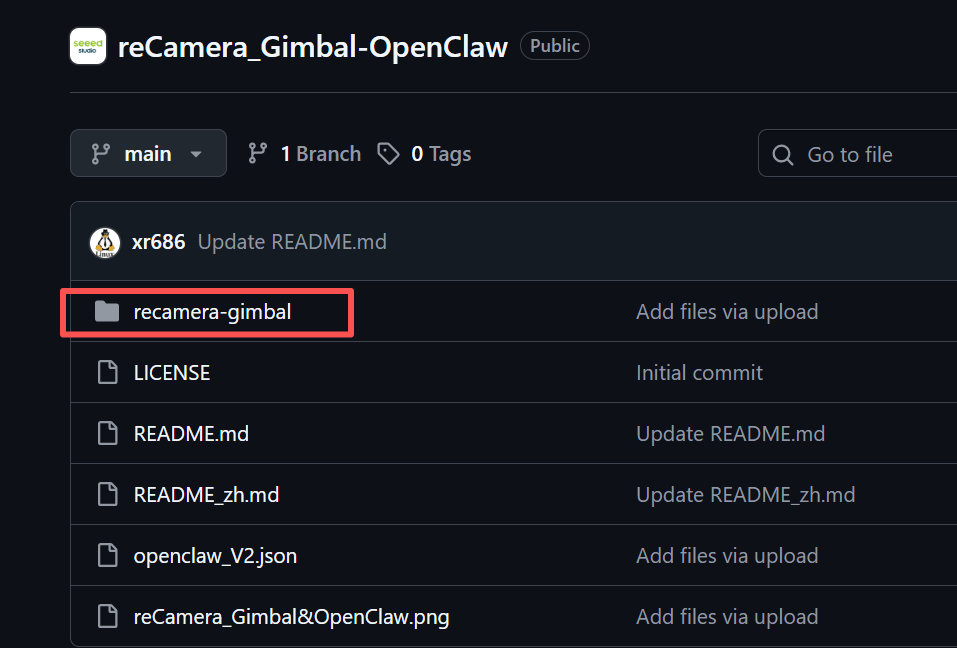
2.2 Download the reCamera Gimbal project on GitHub
The project address is:
https://github.com/Seeed-Projects/reCamera_Gimbal-OpenClaw
After downloading and decompressing, place the "recamera-gimbal" folder in the project in the "skills" folder created in step 2.1.
2.3 Configuration openclaw.json
openclaw.json is located in the folder of your installation openclaw. This file contains all the configurations you need to access the AI model. What you need to do is to add the following contents about reCamera Gimbal to openclaw.json:
-
Replace "C :\ Users\seeed\.openclaw\workspace\skills" for your actual skills folder path
-
Replace "192.168.31.198" with the IP address where you actually reCamera Gimbal
-
Replace "recamera.1" for you to reCamera Gimbal's actual password)
"skills": {
    "load": {
      "extraDirs": [
        "C:\\Users\\seeed\\.openclaw\\workspace\\skills"
      ]
    },
    "entries": {
      "recamera-gimbal": {
        "enabled": true,
        "env": {
          "RECAMERA_IP": "192.168.31.198",
          "RECAMERA_PASS": "recamera.1"
        }
      }
    }
  }
If you want to write your own Skills, please refer to the official writing specification
3. Open the SenseCraft to deploy the application
3.1 Set reCamera Gimbal
First, do not connect reCamera Gimbal's power supply, directly connect the Type-C to the computer and access 192.168.42.1. after entering, click "Login to SenseCraft" in the lower left corner. after logging in, connect WiFi to it to ensure that the connected WiFi is the same as your computer. then check the IP address of reCamera Gimbal, copy the IP address and access it to see if it can be accessed normally.

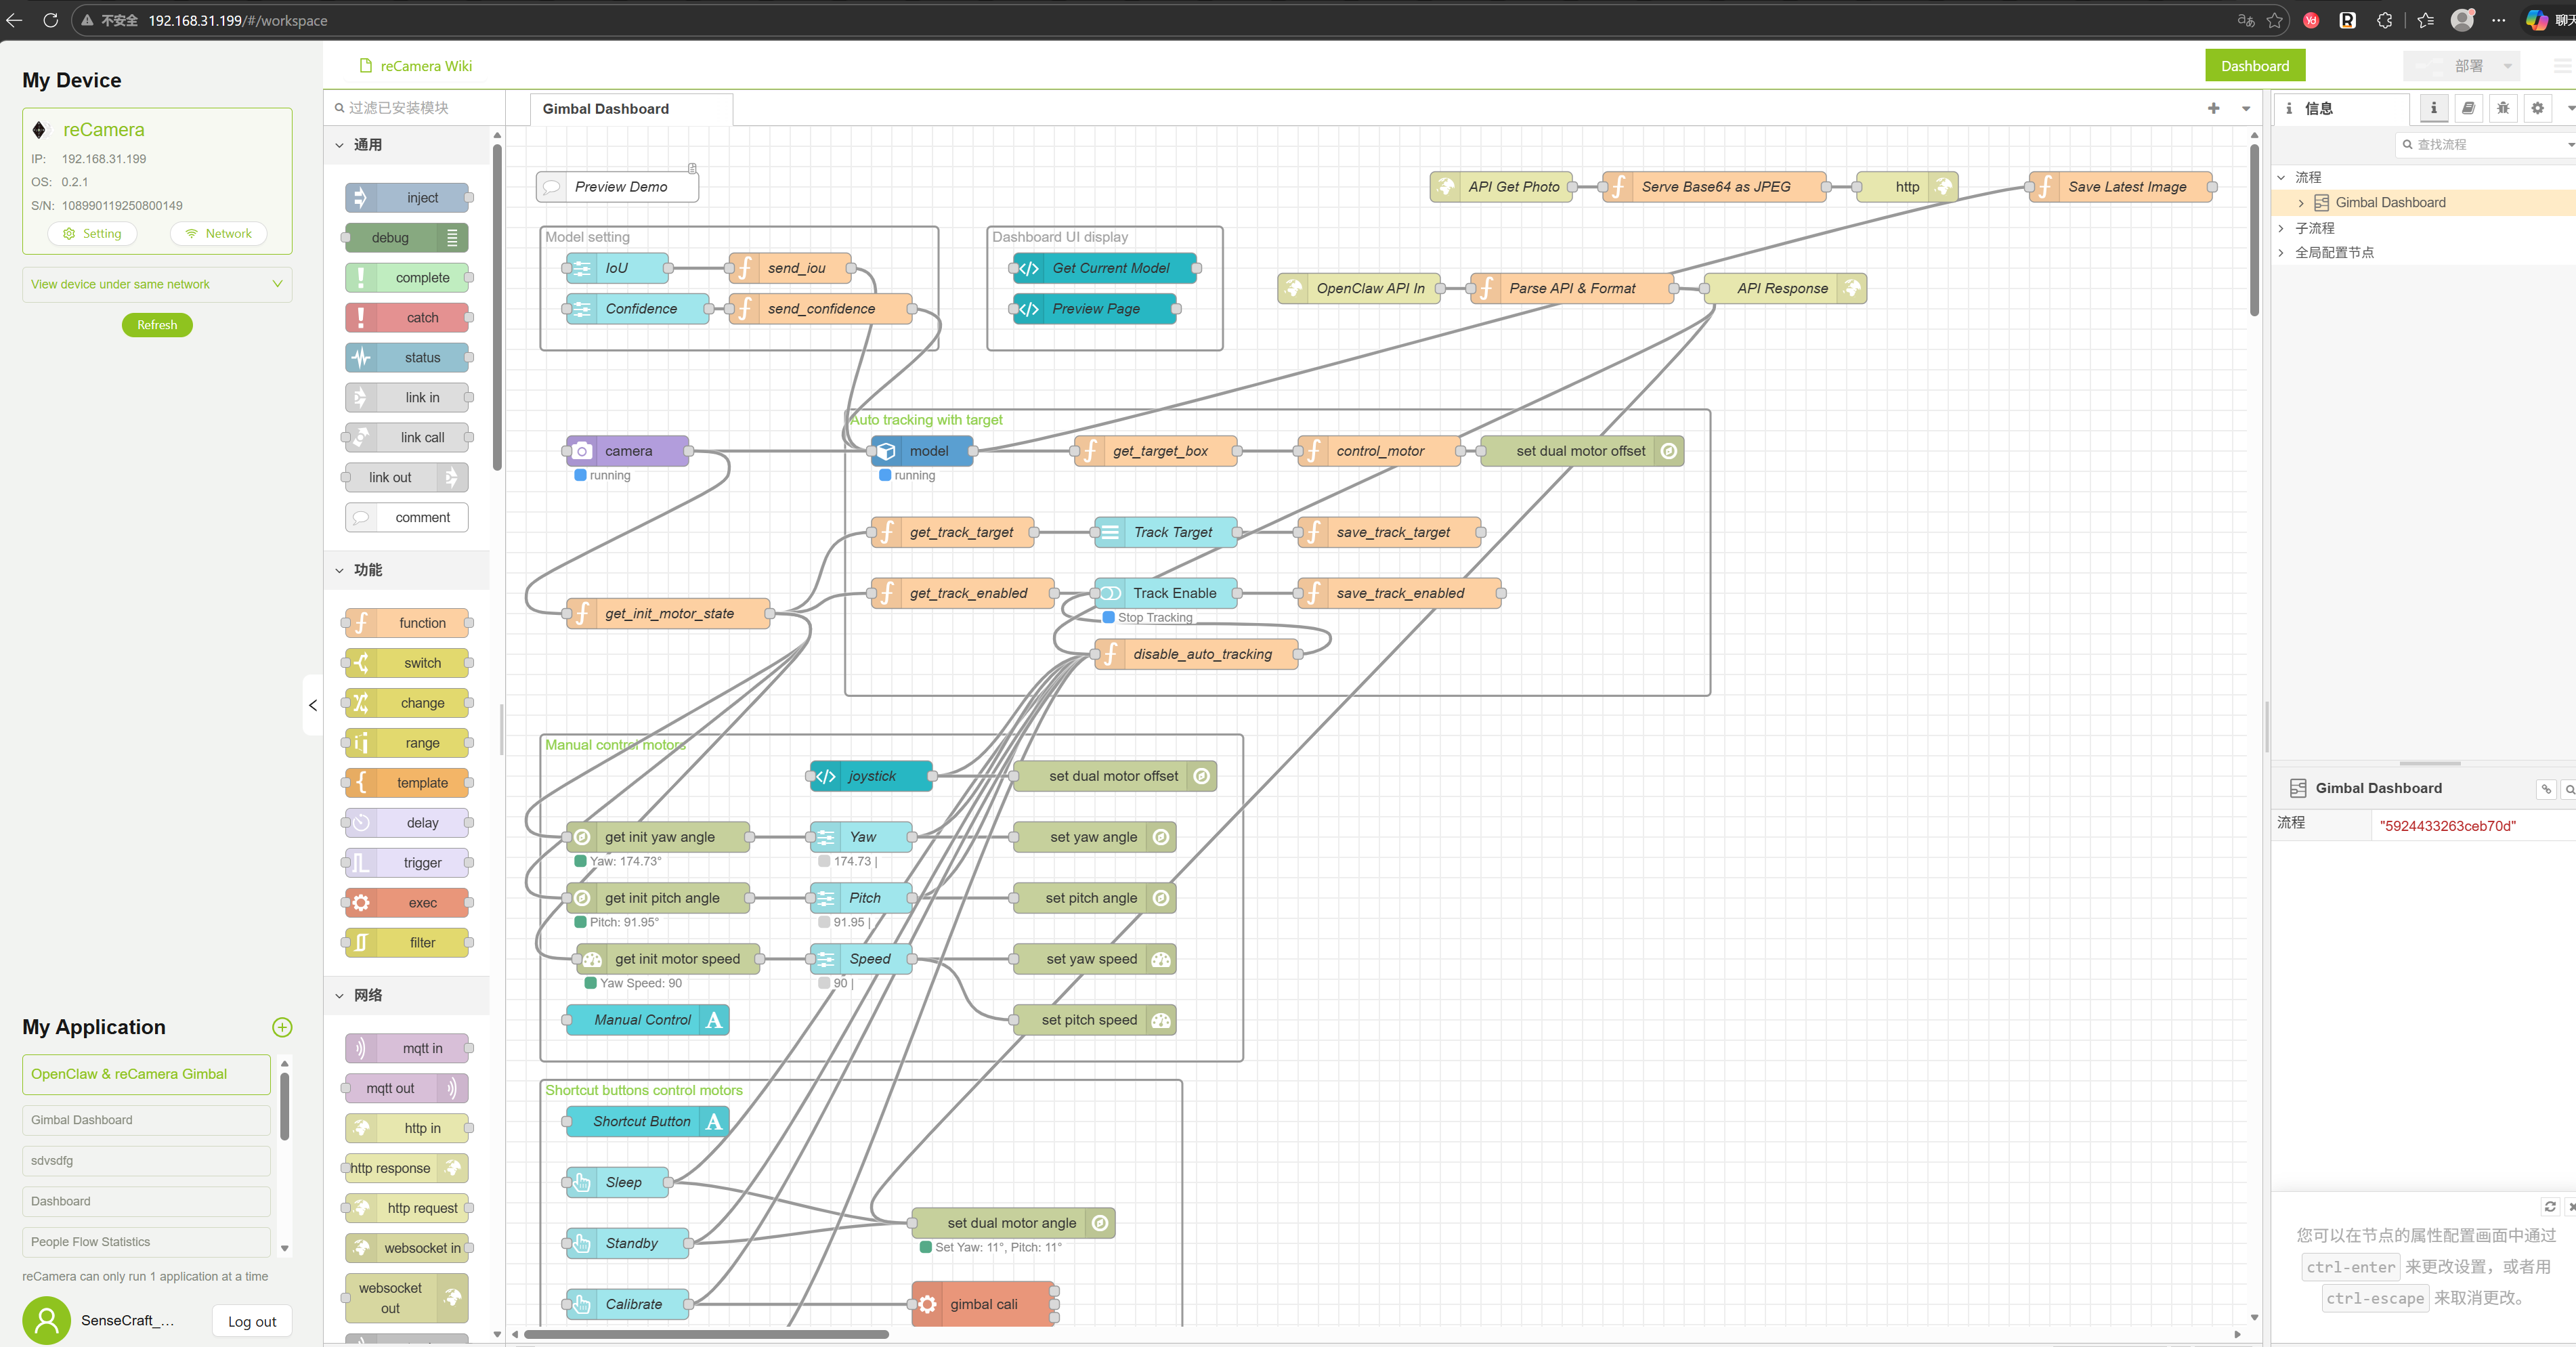
3.2 deployment application
Open the SenseCraftApplication, find the project named "OpenClaw & reCamera Gimbal", click "Deploy Application"-"Visit Workspace Via USB", and the workflow you see after deployment should be as shown in the following figure:
4. Test the motor and take pictures
Then unplug the Type-C cable, plug in the 12V power supply, wait for the reCamera Gimbal automatic calibration to complete, revisit the IP address just now in the browser, enter the interface of reCamera Gimbal, and ensure that Node-RED has started normal operation. Next, we test whether the two HTTP interfaces drawn out can work normally:
4.1 test motor
First test whether the pan-tilt motor is normal, please replace "<DEVICE_IP>" with the real IP of your reCamera Gimbal:
http://<DEVICE_IP>:1880/api/gimbal?yaw=120&pitch=90
If everything is normal, then when you visit this website, you will see that reCamera Gimbal's motor has rotated, and you can replace 120 and 90 with other angles
4.2 test photo
Then test whether the photo is normal, please replace "<DEVICE_IP>" with the real IP of your reCamera Gimbal:
http://<DEVICE_IP>:1880/api/photo
If everything is OK, then when you visit this URL, you can see the image reCamera Gimbal took now in the webpage.
Make sure reCamera Gimbal and your computer are connected under the same WiFi
5. Test in OpenClaw
Before testing we need to confirm two things:
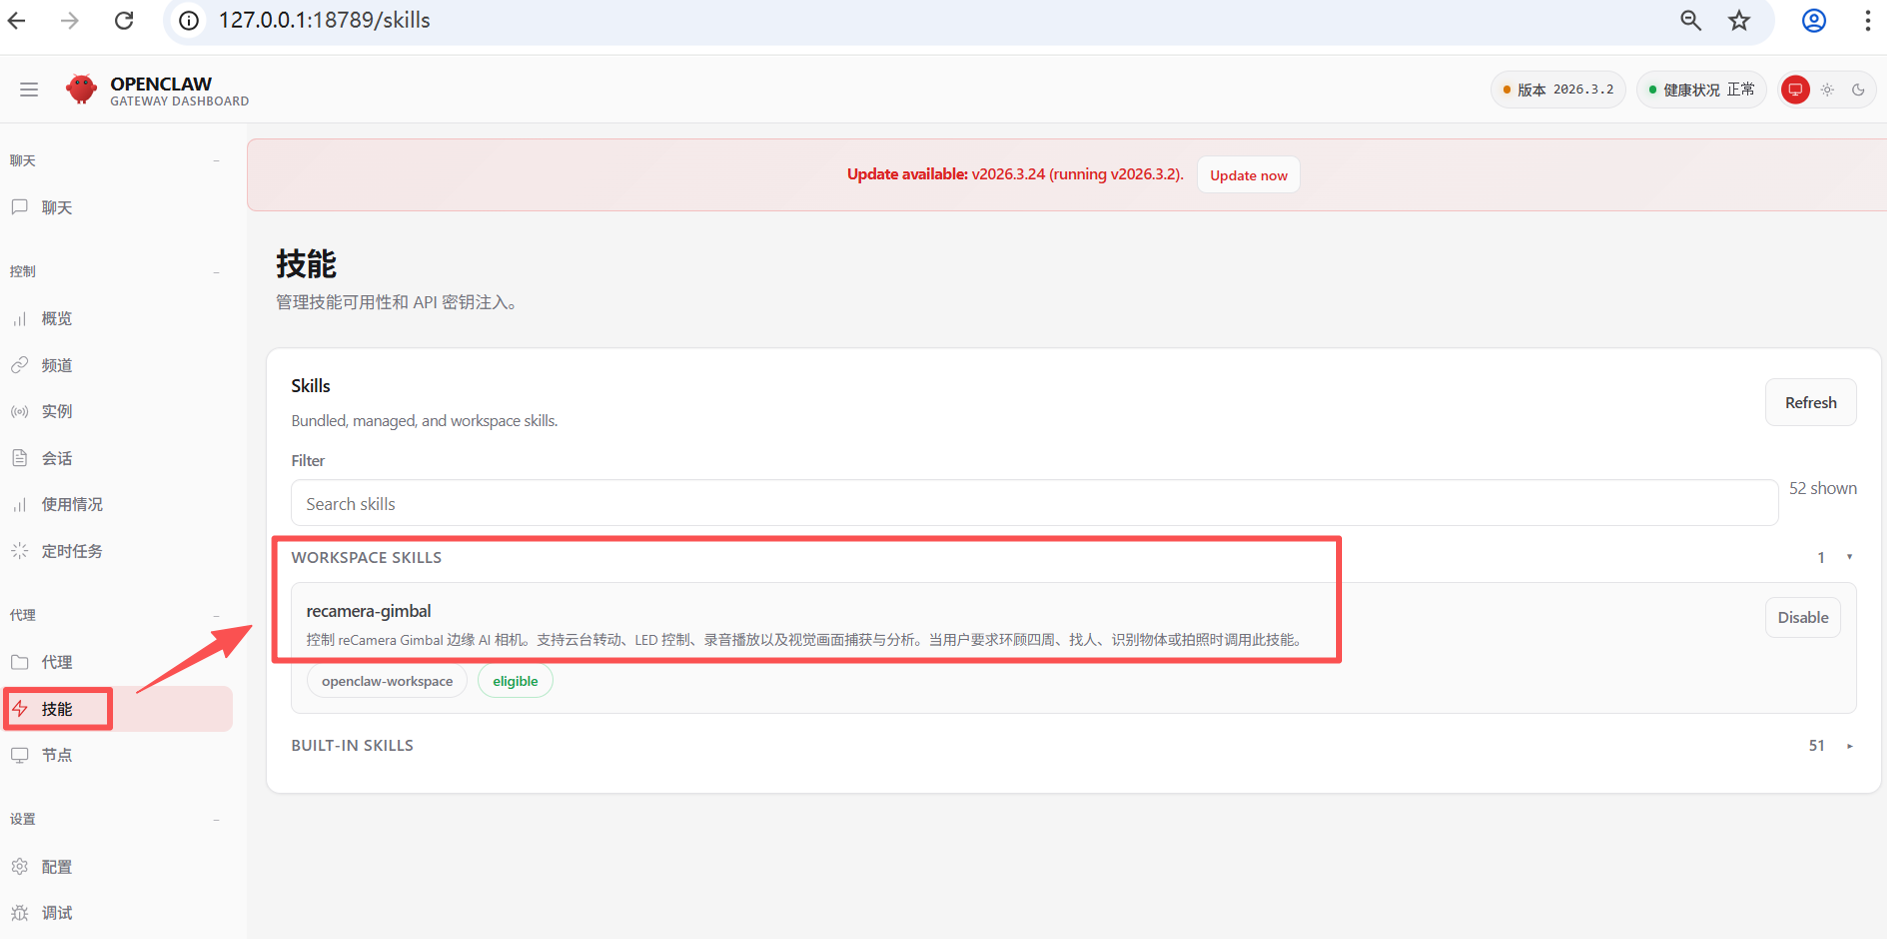
5.1 Make sure your Skills are configured correctly
If you have configured Skills according to step 2, in the OpenClaw interface, after clicking "Skills" on the left and then clicking "WORKSPACE SKILLS", you should be able to see the "recamera-gimbal" you have configured locally"
5.2 Make sure your model is configured correctly
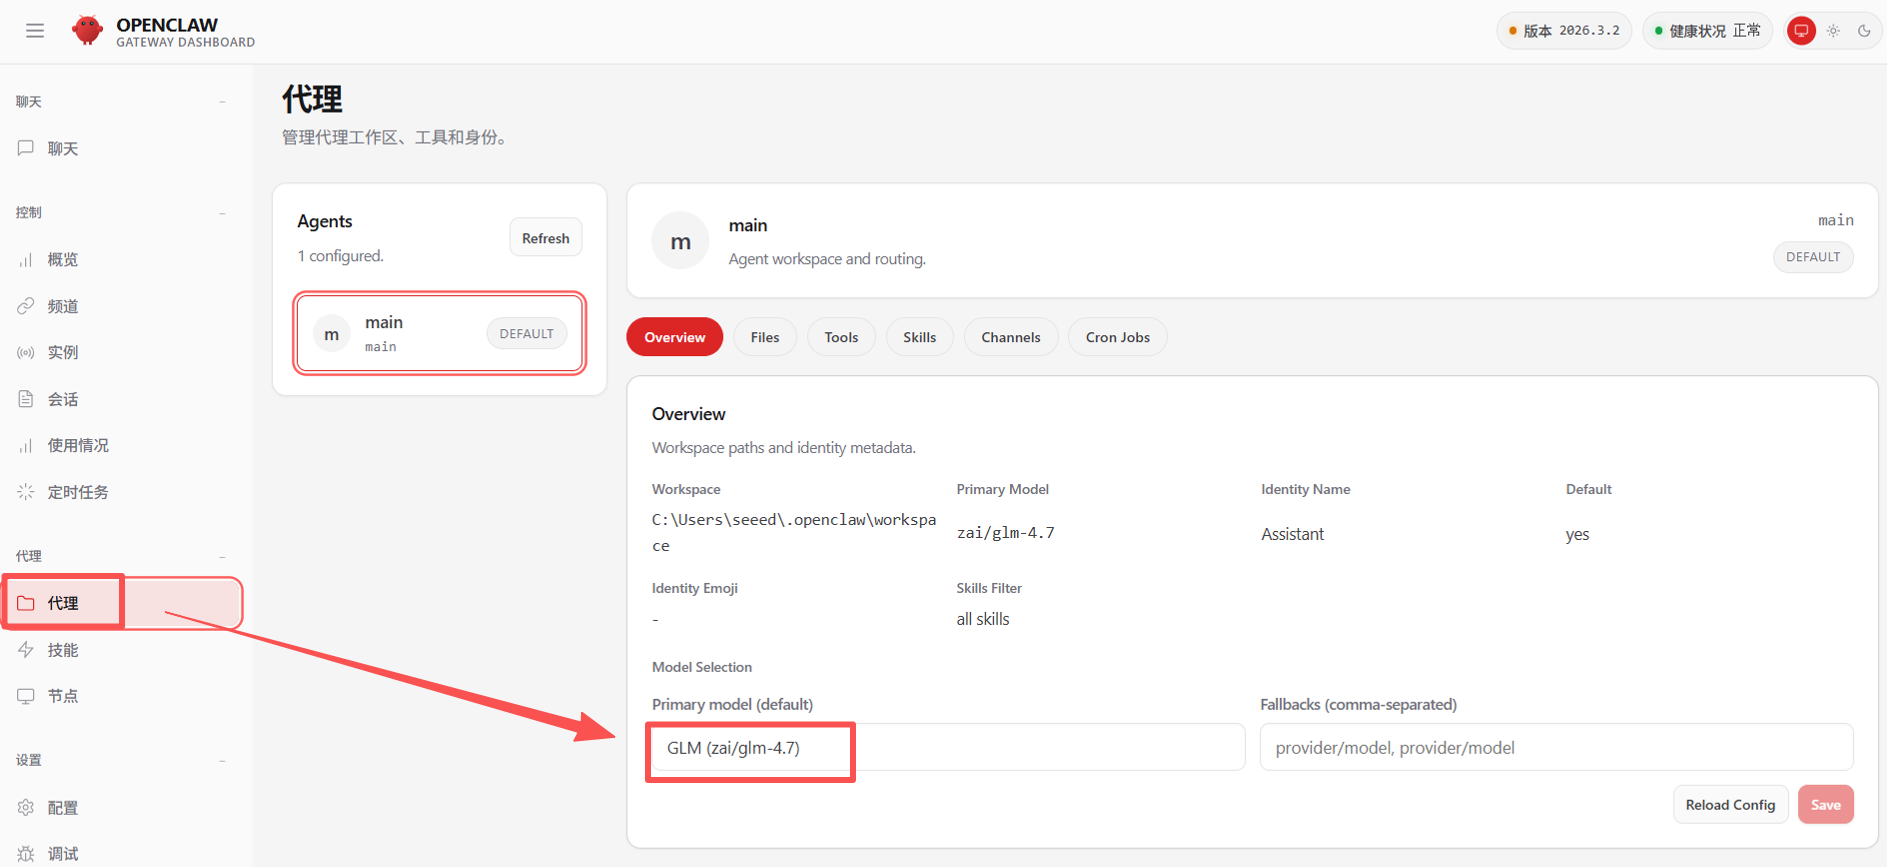
Please make sure your model is configured correctly. After clicking "Agent" on the left, you can see the model you have configured under "Primary model". I am using GLM4.7 model here.
5.3 Get Started Controlling Your reCamera with OpenClaw Gimbal
Please tell the OpenClaw directly in the chat window "turn on the LED of the camera", "look around to see if there is anyone", "record a 5s audio and play it" and other tasks, or you can try more complicated tasks, such as "turn on the sentinel mode of the reCamera (quickly scan around, one scan cycle, that is, one scan circle is controlled within 6s), if there is a person wearing a white T-shirt in the picture, you will turn on the camera light and play test.wav audio, analyze the content of the picture and save the picture to the local", and then wait a moment to see reCamera Gimbal's reaction.
The OpenClaw execution of tasks will be very slow, and complex instructions will take about two or three minutes to see the effect, so please wait patiently, this is normal.
Tech Support & Product Discussion
Thank you for choosing our products! We are here to provide you with different support to ensure that your experience with our products is as smooth as possible. We offer several communication channels to cater to different preferences and needs.