Using Cursor to Create Zigbee Projects with XIAO ESP32C6
This guide will walk you through using Cursor's AI-powered chat to develop Zigbee applications with XIAO ESP32C6 and sensors. By the end of this tutorial, you'll be able to independently use Cursor's Chat to develop Zigbee applications with your XIAO board and sensors.
What is Cursor?
Cursor is an AI-powered code editor built on top of Visual Studio Code. It integrates powerful AI capabilities that can help you write, understand, and debug code more efficiently.

Why Use Cursor for Embedded Development?
Cursor offers several advantages for embedded software development:
- Code Generation: Cursor can generate code based on your requirements, saving you time and effort.
- Context-Aware Assistance: Cursor understands your project structure and can provide relevant suggestions.
- Debugging Help: Cursor can help identify and fix bugs in your code.
- Learning Tool: For beginners, Cursor can explain complex concepts and provide educational insights.
- Efficiency: Cursor can help you navigate large codebases and understand unfamiliar libraries quickly.
For embedded systems like the XIAO ESP32C6, Cursor can help you understand hardware-specific APIs, generate boilerplate code for sensor interactions, and troubleshoot hardware-software integration issues.
Materials Required
For this tutorial, you'll need:
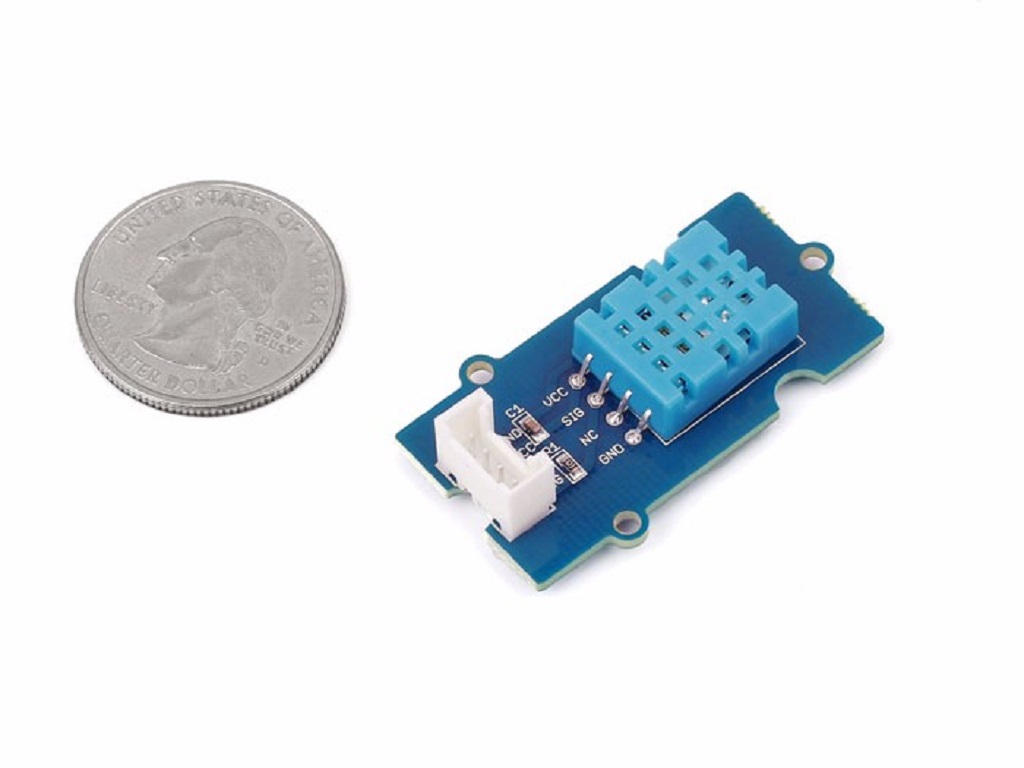
| XIAO ESP32C6 | Grove DHT11 Temperature & Humidity Sensor |
|---|---|
 |  |
- Grove cables
- USB-C cable
- Computer with Arduino IDE installed
- Cursor application (we'll install this in the next section)
This tutorial uses the DHT11 Temperature & Humidity Sensor as an example. If you have other sensors, feel free to experiment with them as well. For the best experience, we recommend using sensor types that are currently supported by the ESP Zigbee SDK. This will ensure compatibility and smoother implementation when building your Zigbee projects.
Installing Cursor
Follow these steps to install Cursor on your operating system:
- Windows
- MACOS
- Visit the Cursor download page.

- Click on "Windows".
- Run the downloaded installer.
- Follow the on-screen instructions to complete the installation.
- Visit the Cursor download page.

- Click on "MacOS".
- Open the downloaded .dmg file.
- Drag the Cursor app to your Applications folder.
- Open Cursor from your Applications folder.
Cursor Subscription

Cursor offers different subscription tiers to accommodate various user needs:
Free Hobby Plan
Cursor can be downloaded and used for free with the Hobby plan, which includes:
- 2000 completions
- 50 slow premium requests
- A two-week trial of Pro features
This free tier is sufficient for getting started and exploring Cursor's capabilities.
Paid Plans
For more advanced features and higher usage limits, Cursor offers paid subscription options:
Pro Plan ($20/month)
- Unlimited completions
- 500 fast premium requests per month
- Unlimited slow premium requests
Business Plan ($40/user/month)
- All Pro features
- Enforce privacy mode organization-wide
- Centralized team billing
- Admin dashboard with usage stats
- SAML/OIDC SSO
You can view the complete pricing details on the Cursor pricing page.
It's important to note that regardless of which plan you use, all code generated in Cursor belongs to you and can be used however you like, including for commercial purposes.
Setting Up Cursor
After installing Cursor, follow these steps to set it up:
- Launch Cursor
- Sign in with your account or create a new one
- Verify that the Chat panel is accessible (usually on the right side of the interface)

Opening the Zigbee Examples
When using Cursor to generate code for your project, providing example code can significantly enhance the accuracy of the generated project. Examples serve as a reference point for Cursor, allowing it to understand the structure, syntax, and specific requirements of your project. By analyzing these examples, Cursor can generate more precise and relevant code, tailored to your needs.
In the context of our Zigbee project, finding the right example helps Cursor to:
- Understand the specific functionalities required
- Identify the appropriate libraries and functions to use
- Generate code that is compatible with the hardware and interfaces you are using
By providing a relevant example, you ensure that the generated code is more likely to work correctly and meet your project's requirements, saving you time and effort in debugging and modifications.
Now, let's locate and open the Zigbee examples provided by the ESP32 Arduino package:
- First, make sure you have installed the latest ESP32 board package in Arduino IDE:
- Open Arduino IDE
- Go to Tools > Board > Boards Manager
- Search for esp32
- Find esp32 by Espressif Systems
- Click Install or Update to get the latest version
- Wait for the installation to complete

- Navigate to the Zigbee examples directory:
The following paths use ESP32 board package version 3.1.3 as an example. Replace 3.1.3 with your installed version number if different:
- On Windows:
C:\Users\[YourUsername]\AppData\Local\Arduino15\packages\esp32\hardware\esp32\3.1.3\libraries\Zigbee\
- On macOS:
/Users/[YourUsername]/Library/Arduino15/packages/esp32/hardware/esp32/3.1.3/libraries/Zigbee/
-
Open Cursor and select Open Folder from the File menu.
-
Navigate to the Zigbee directory path from step 2 and click Open.

Selecting the Right Example
Before using Cursor's Chat to generate your code, you need to identify the most appropriate example to use as a starting point:
Determining Your Device Type
Zigbee devices generally fall into two main categories, and understanding this is crucial for selecting the right example code:
-
Sensors:
-
Sensors are devices that "sense" the environment and collect data
-
They convert physical information from the real world into electronic signals
-
Sensors only "read" data and then transmit it to the network
-
Examples:
- Temperature sensors: measure the surrounding temperature
- Humidity sensors: measure moisture levels in the air
- Light sensors: detect ambient light intensity
- Motion sensors: detect if objects are moving nearby
- Gas sensors: detect concentrations of specific gases
-
-
Actuators:
-
Actuators are devices that "perform actions"
-
They receive commands and affect the physical world
-
Actuators are responsible for "changing" the state of something
-
Examples:
- Light switches: turn lights on or off
- Motor controllers: control motor rotation
- Relays: control high-power electrical devices
- Valve controllers: control water or air flow
- Door locks: lock or unlock doors
-
How to determine your device type:
- If your device primarily collects data (reads information), it's a sensor
- If your device primarily performs actions (changes states), it's an actuator
- Some devices might have both functionalities, in which case you should choose based on the primary function
In our example, the DHT11 is a typical sensor because it reads temperature and humidity data but doesn't change the environment.
Identifying Interface Type
Next, determine the interface type your sensor uses:
- GPIO: Simple digital or analog pins
- I2C: Two-wire interface for communication
- SPI: Serial Peripheral Interface
- UART: Serial communication
The DHT11 uses a simple GPIO interface with a single data line.
Checking Zigbee Device Support
Before proceeding, it's important to verify if your intended device type is supported by the ESP Zigbee SDK. You can check the supported device types in:
This header file contains all the device types currently supported by ESP's Zigbee implementation. Review this file to:
- Confirm your device type is supported
- Note the specific device ID and cluster IDs you'll need
- Understand what capabilities are available for your device type
If your device type isn't listed, you may need to:
- Choose a similar supported device type that matches your needs
- Consider implementing a custom device type (advanced)
- Contact ESP support for guidance
Finding the Closest Example
Browse through the examples in the Zigbee library and find one that most closely matches your needs. For our DHT11 sensor, look for examples like:
ZigbeeTemperatureSensorZigbeeHumiditySensor- Any example that demonstrates reading from a GPIO sensor
Fortunately, ESP provides a "Zigbee_Temp_Hum_Sensor_Sleepy" example in their Zigbee examples, which perfectly matches our needs for creating a temperature and humidity sensor project. This example demonstrates:
- How to implement a temperature and humidity sensor device
- How to configure the device as a sleepy end device to save power
- How to report sensor readings periodically
- How to handle Zigbee networking and data transmission
You can find this example at:
zigbee/example/Zigbee_Temp_Hum_Sensor_Sleepy
This example will serve as an excellent starting point for our DHT11-based Zigbee sensor project.

Determining Pin Connections
For the XIAO ESP32C6 and DHT11 sensor, we need to decide which pins to use:
-
The DHT11 sensor requires a single data pin.
-
We'll connect it to pin D0 (GPIO1) on the XIAO ESP32C6.
For XIAO examples, only GPIO (Digital/Analog) and SPI protocol devices require manual pin configuration. For I2C and UART devices, the pin definitions are already pre-configured in XIAO's board package, so you can skip this step.
Gathering Technical Documentation
Having the technical documentation for your sensor is crucial. If you are using Seeed's products, you can find detailed documentation and resources for your sensor or actuator on Seeed Studio's official Wiki. The wiki's resource section also contains datasheets for Grove products that you can provide to Cursor. For example, for the DHT11 sensor used in this project:
If you are using sensors from other manufacturers, please contact them directly to obtain the necessary technical documentation.
Using Cursor's Chat to Generate Code
Now that we have all the necessary information, we can use Cursor's Chat to generate our Zigbee application code.
Here's where you'll need to create a prompt for Cursor's Chat.
Sensor Project Template
If you, like me, choose to use a sensor as the device, you can refer to the following prompt.
Please refer to the code and then create an Arduino sensor project with ESP32-C6 using Zigbee protocol.

Project name: [project name]

Sensor details:
- Type: [sensor model]
- Connections: [pin connections]

Sensing specifications:
- Parameters to measure: [measurement values]
- Transmission frequency: [sending interval]

Reference materials:
- Documentation: [documentation links]

Generate a complete project in the Example directory. Name the main file [project name with spaces replaced by underscores].ino with comprehensive code comments.
Let's break down how to fill out the prompt template and provide an example using the DHT11 sensor:
- Project name: Choose a descriptive name for your project
- Sensor details:
- Type: Specify the exact sensor model
- Connections: List all pin connections between the sensor and XIAO ESP32C6
- Sensing specifications:
- Parameters: List what you want to measure (temperature, humidity, etc.)
- Transmission frequency: How often you want to send data (e.g., every 5 seconds)
- Reference materials: Include links to datasheets or documentation
Here's a completed prompt for a DHT11 temperature and humidity sensor project:
Please refer to the code and then create an Arduino sensor project with ESP32-C6 using Zigbee protocol.

Project name: Zigbee_DHT11_XIAO

Sensor details:
- Type: DHT11 Temperature and Humidity Sensor
- Connections: DHT11 data pin connected to D2 of XIAO ESP32C6

Sensing specifications:
- Parameters to measure: Temperature (°C) and Relative Humidity (%)
- Transmission frequency: Every 1 hour

Reference materials:
- Documentation:
  - DHT11 Sensor: https://wiki.seeedstudio.com/Grove-TemperatureAndHumidity_Sensor/
  - XIAO ESP32C6: https://wiki.seeedstudio.com/xiao_pin_multiplexing_esp32c6/

Generate a complete project in the Example directory. Name the main file [project name with spaces replaced by underscores].ino with comprehensive code comments.
Actuator Project Template
If you want to work with an actuator instead, you can use the following prompt template. Let's look at how to structure a prompt for an actuator project:
Please refer to the code and then create an Arduino actuator project with ESP32-C6 using Zigbee protocol.

Project name: [project name]

Actuator details:
- Type: [actuator model]
- Connections: [pin connections]

Control specifications:
- Default behavior: [startup state]

Reference materials:
- Documentation: [documentation links]

Generate a complete project in the Example directory. Name the main file [project name with spaces replaced by underscores].ino with comprehensive code comments.
When building your first project with Cursor, it's recommended to start with simple, basic functionality rather than complex logic and requirements. This approach significantly reduces the likelihood of Cursor generating incorrect code. First, let Cursor create a working basic program that you can verify functions correctly. Once you have a solid foundation, you can gradually add more features and complexity to enhance your project. This iterative approach leads to more reliable and maintainable code.
After preparing your prompt with all the specific details about your project, follow these steps:
- Open Cursor's Chat panel (usually by clicking the chat icon in the sidebar).

-
Locate the example code that most closely matches your project requirements. For our DHT11 temperature and humidity sensor project, we'll use the "Zigbee_Temp_Hum_Sensor_Sleepy" example.
-
Drag and drop the example code file(s) from the Zigbee examples directory into the Cursor Chat window. This helps Cursor understand the structure and requirements of Zigbee sensor implementations.

- Copy and paste our pre-written prompt into the chat input field and press Enter. Wait for Cursor to generate your project based on the prompt and example code.
- Click the Accept button to save the generated code. This will create the project files in your workspace.
Review the Generated Code
After Cursor generates the code, it's important to carefully review it before uploading to your device. Here are key aspects to check:
- Pin Configuration
- Verify that all pin assignments match your physical connections
- Check that the pins specified are actually available on the XIAO ESP32C6
- Ensure no pin conflicts exist (e.g., same pin used for multiple purposes)
- Confirm the pins support the required functions (analog, digital, I2C, etc.)
- Functionality Check
Compare the generated code against your requirements:
- Does it implement all the requested features?
For example, inside the programme it provided me, the pins are defined in terms of GPIO numbering, which may require reading the wiki and then checking that the XIAO's A/D numbering matches the correct GPIO numbering, which is more cumbersome. For this, we can ask Cursor to use the pins in the same way as A/D.
Click here to preview the full code
/**
 * @brief DHT11 Temperature and Humidity Sensor with Zigbee for XIAO ESP32C6
 *
 * This example demonstrates how to create a Zigbee end device that measures temperature
 * and humidity using a DHT11 sensor and reports the data every hour.
 *
 * Hardware Requirements:
 * - XIAO ESP32C6 board
 * - DHT11 Temperature and Humidity Sensor
 *
 * Connections:
 * - DHT11 Data Pin -> D2 (GPIO8) of XIAO ESP32C6
 * - DHT11 VCC -> 3.3V
 * - DHT11 GND -> GND
 *
 * The device operates as a Zigbee end device and goes into deep sleep between measurements
 * to conserve power.
 */

#ifndef ZIGBEE_MODE_ED
#error "Zigbee end device mode is not selected in Tools->Zigbee mode"
#endif

#include "Zigbee.h"
#include "DHT.h"

/* Pin Definitions */
#define DHT_PIN 8  // D2 on XIAO ESP32C6
#define BOOT_BUTTON 9  // Boot button on XIAO ESP32C6

/* DHT11 Sensor Configuration */
#define DHT_TYPE DHT11
DHT dht(DHT_PIN, DHT_TYPE);

/* Zigbee Configuration */
#define TEMP_SENSOR_ENDPOINT_NUMBER 10

/* Sleep Configuration */
#define uS_TO_S_FACTOR 1000000ULL  // Conversion factor for micro seconds to seconds
#define TIME_TO_SLEEP  3600        // Sleep for 1 hour (3600 seconds)

/* Global Variables */
ZigbeeTempSensor zbTempSensor = ZigbeeTempSensor(TEMP_SENSOR_ENDPOINT_NUMBER);

/************************ Sensor Functions *****************************/
void measureAndSleep() {
  // Read temperature and humidity from DHT11
  float temperature = dht.readTemperature();
  float humidity = dht.readHumidity();

  // Check if readings are valid
  if (isnan(temperature) || isnan(humidity)) {
    Serial.println("Failed to read from DHT11 sensor!");
    delay(1000);
    return;
  }

  // Update temperature and humidity values in Temperature sensor EP
  zbTempSensor.setTemperature(temperature);
  zbTempSensor.setHumidity(humidity);

  // Report temperature and humidity values
  zbTempSensor.report();
  Serial.printf("Reported temperature: %.2f°C, Humidity: %.2f%%\r\n", temperature, humidity);

  // Add small delay to allow the data to be sent before going to sleep
  delay(100);

  // Put device to deep sleep
  // Serial.println("Going to sleep for 1 hour");
  // esp_deep_sleep_start();
}

/********************* Arduino Setup **************************/
void setup() {
  Serial.begin(115200);

  // Initialize DHT11 sensor
  dht.begin();

  // Init button switch
  pinMode(BOOT_BUTTON, INPUT_PULLUP);

  // Configure the wake up source
  // esp_sleep_enable_timer_wakeup(TIME_TO_SLEEP * uS_TO_S_FACTOR);

  // Set Zigbee device information
  zbTempSensor.setManufacturerAndModel("Seeed", "XIAO_DHT11_Sensor");

  // Set temperature measurement range (-20°C to 60°C for DHT11)
  zbTempSensor.setMinMaxValue(-20, 60);

  // Set tolerance for temperature measurement (±2°C accuracy for DHT11)
  zbTempSensor.setTolerance(2);

  // Configure humidity sensor (20-90% RH range for DHT11, ±5% RH accuracy)
  zbTempSensor.addHumiditySensor(20, 90, 5);

  // Set power source to battery (assuming battery-powered operation)
  zbTempSensor.setPowerSource(ZB_POWER_SOURCE_BATTERY, 100);

  // Add endpoint to Zigbee Core
  Zigbee.addEndpoint(&zbTempSensor);

  // Create Zigbee configuration for End Device
  esp_zb_cfg_t zigbeeConfig = ZIGBEE_DEFAULT_ED_CONFIG();
  zigbeeConfig.nwk_cfg.zed_cfg.keep_alive = 60000; // 60 second keep-alive

  // Start Zigbee
  if (!Zigbee.begin(&zigbeeConfig, false)) {
    Serial.println("Zigbee failed to start!");
    Serial.println("Rebooting...");
    ESP.restart();
  }

  Serial.println("Connecting to Zigbee network");
  while (!Zigbee.connected()) {
    Serial.print(".");
    delay(100);
  }
  Serial.println("\nSuccessfully connected to Zigbee network");

  // Allow time for connection establishment
  delay(1000);
}

/********************* Arduino Loop **************************/
void loop() {
  // Check boot button for factory reset
  if (digitalRead(BOOT_BUTTON) == LOW) {
    delay(100); // Debounce
    int startTime = millis();
    while (digitalRead(BOOT_BUTTON) == LOW) {
      delay(50);
      if ((millis() - startTime) > 3000) {
        Serial.println("Factory reset initiated. Rebooting in 1s...");
        delay(1000);
        Zigbee.factoryReset();
      }
    }
  }

  // Measure sensor data and go to sleep
  measureAndSleep();
}
All you have to do is select the part you want to change, type in the prompt word, and hit enter.
Verify and Upload the Program
Now that Cursor has generated our Zigbee project code, we need to verify if it works correctly. The best way to do this is by using Arduino IDE, which provides excellent tools for compiling and uploading code to our XIAO ESP32C6 board. Let's switch to Arduino IDE and go through the verification process:
- Open the main file in Arduino IDE.
- Select XIAO ESP32C6 board from the Boards menu.
- Select the appropriate port.
- Click Verify to compile the code.
- If there are any errors, return to Cursor's Chat and ask for help fixing them.
- Once the code compiles successfully, upload it to your XIAO ESP32C6.

If everything goes well, you should now have a Zigbee device that can be discovered by Home Assistant (provided you have a Zigbee gateway in your Home Assistant setup).

Troubleshooting with Cursor
If you encounter issues with the generated code, you can ask Cursor for help:
- Describe the specific error or issue you're facing
- Include any error messages from the Arduino IDE
- Ask Cursor to suggest fixes or improvements
- Implement the suggested changes and test again
Cursor's AI is particularly good at debugging and can often identify issues that might be difficult to spot manually.
For example, if you're using Zigbee functionality for the first time or encounter a compilation error like
#error Zigbee end device mode is not selected in Tools->Zigbee mode

due to oversight, you can always ask Cursor for guidance. Simply prompt:
I got a compilation error in Arduino IDE saying 'Compilation error: #error Zigbee end device mode is not selected in Tools->Zigbee mode'. What should I do?
Cursor will likely suggest checking the Tools menu in Arduino IDE and selecting the appropriate Zigbee mode:

You can ask Cursor about any errors you encounter, and it will help guide you through the resolution process. Some other common issues you might want to ask about include:
- Library installation problems
- Pin configuration errors
- Sensor connection issues
- Communication protocol setup
- Power management concerns
Just describe the issue clearly in your prompt, and Cursor will provide relevant suggestions and solutions.
Enhancing Your Program with Cursor
After getting the basic Zigbee functionality working, you can use Cursor to add more features and improvements to your program. Let's look at an example of how to enhance the code by adding a serial port initialization check.
This is particularly useful during development and debugging, as it ensures you don't miss any serial output by waiting for the serial port to be ready before proceeding with the setup.
-
Open your project in Cursor and locate the
setup()function in your code. -
In the Chat panel, describe what you want to add. For example: "Add code to wait for serial port to be ready before proceeding with setup"
-
Cursor will suggest modifications like this:

Beyond these minor enhancements, we can maximize the value of Zigbee by implementing power-saving features on top of the basic functionality. One of Zigbee's key advantages is its low power consumption capabilities, which can be further optimized through proper implementation of sleep modes.
Here's how you could ask Cursor to add deep sleep functionality to your sensor project:
- Open the Chat panel and request deep sleep implementation:
Modify the programme so that the temperature and humidity values are reported once every three hours. Deep sleep the rest of the time to save power.
- Cursor will suggest code modifications that include:
- Updated the sleep duration
- Updated the sleep message for better feedback
- Updated the documentation to reflect the new reporting interval.
- Go back to deep sleep for 3 hours

This power optimization is particularly valuable for battery-powered sensor nodes, potentially extending battery life from days to months or even years, depending on the reporting frequency and sensor type.
Cursor can help you implement all these features - just be specific in your requirements when asking for assistance.
Conclusion
You've now learned how to use Cursor's AI-powered chat to develop Zigbee applications for the XIAO ESP32C6 with sensors. This approach can significantly speed up your development process and help you overcome technical challenges.
As you become more familiar with Cursor, you'll discover additional ways to leverage its capabilities for your embedded projects. Remember that the quality of your prompts greatly affects the quality of the generated code, so be specific and detailed when describing your requirements.
This tutorial represents an important step forward in making embedded development more accessible. By combining AI tools like Cursor with powerful hardware like the XIAO ESP32C6, we're lowering the barriers to entry for IoT and sensor network development. This is particularly valuable for:
- Beginners who are just starting their journey in embedded systems
- Experienced developers looking to accelerate their prototyping process
- Educators teaching IoT and wireless communication concepts
- Makers and hobbyists wanting to create smart home solutions
The integration of AI-assisted development tools with Zigbee technology opens up new possibilities for creating energy-efficient, reliable wireless sensor networks. This combination of technologies enables faster development cycles while maintaining high code quality, ultimately helping drive innovation in the IoT space.
This article was written by Citric with assistance from Cursor.
Tech Support & Product Discussion
Thank you for choosing our products! We are here to provide you with different support to ensure that your experience with our products is as smooth as possible. We offer several communication channels to cater to different preferences and needs.