Flashing AI Models on the SenseCAP Watcher
Overview
Special thanks to XiaoZhi AI Chatbot for their open-source contributions that made this project possible.
This guide focuses on how to flash the SenseCAP Watcher with the Visual Recognition Triggered Conversation firmware and how to replace or update the AI model on the device. It is intended as a hands-on instructional guide for these operations.
For a full introduction to Watcher features, applications, and use cases, please refer to : SenseCAP Watcher - AI Assistant that actively interacts with the world
Prerequisites
Required Hardware
- SenseCAP Watcher device
- USB Type-C data cable
- Windows PC
If you are flashing the Visual Activation Firmware, and your Watcher device model is not -EN, you will also need to manually flash the authentication file for normal usage (only required once).
For detailed instructions, please refer to Watcher Agent Firmware Flashing Guide.
Firmware Flashing Process
- SenseCraft AI
- Flash Download Tool
- Command Line
- Compile from Source (For Developers)
-
Prerequisites
-
Step 1. Open our platform and Select SenseCAP Watcher in Workspace

-
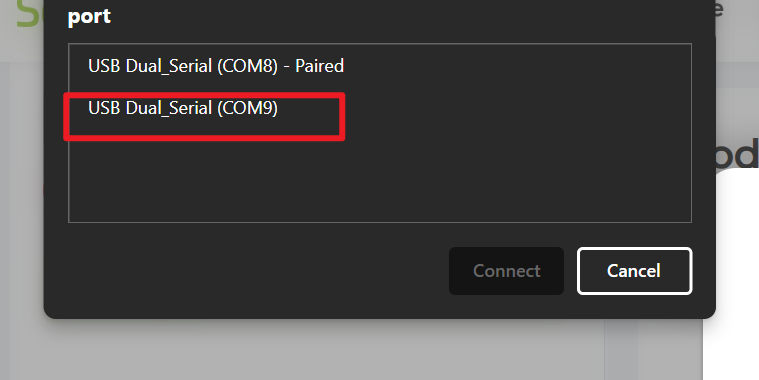
Step 2. Connect to our Platform by serial port
- Click
Connect
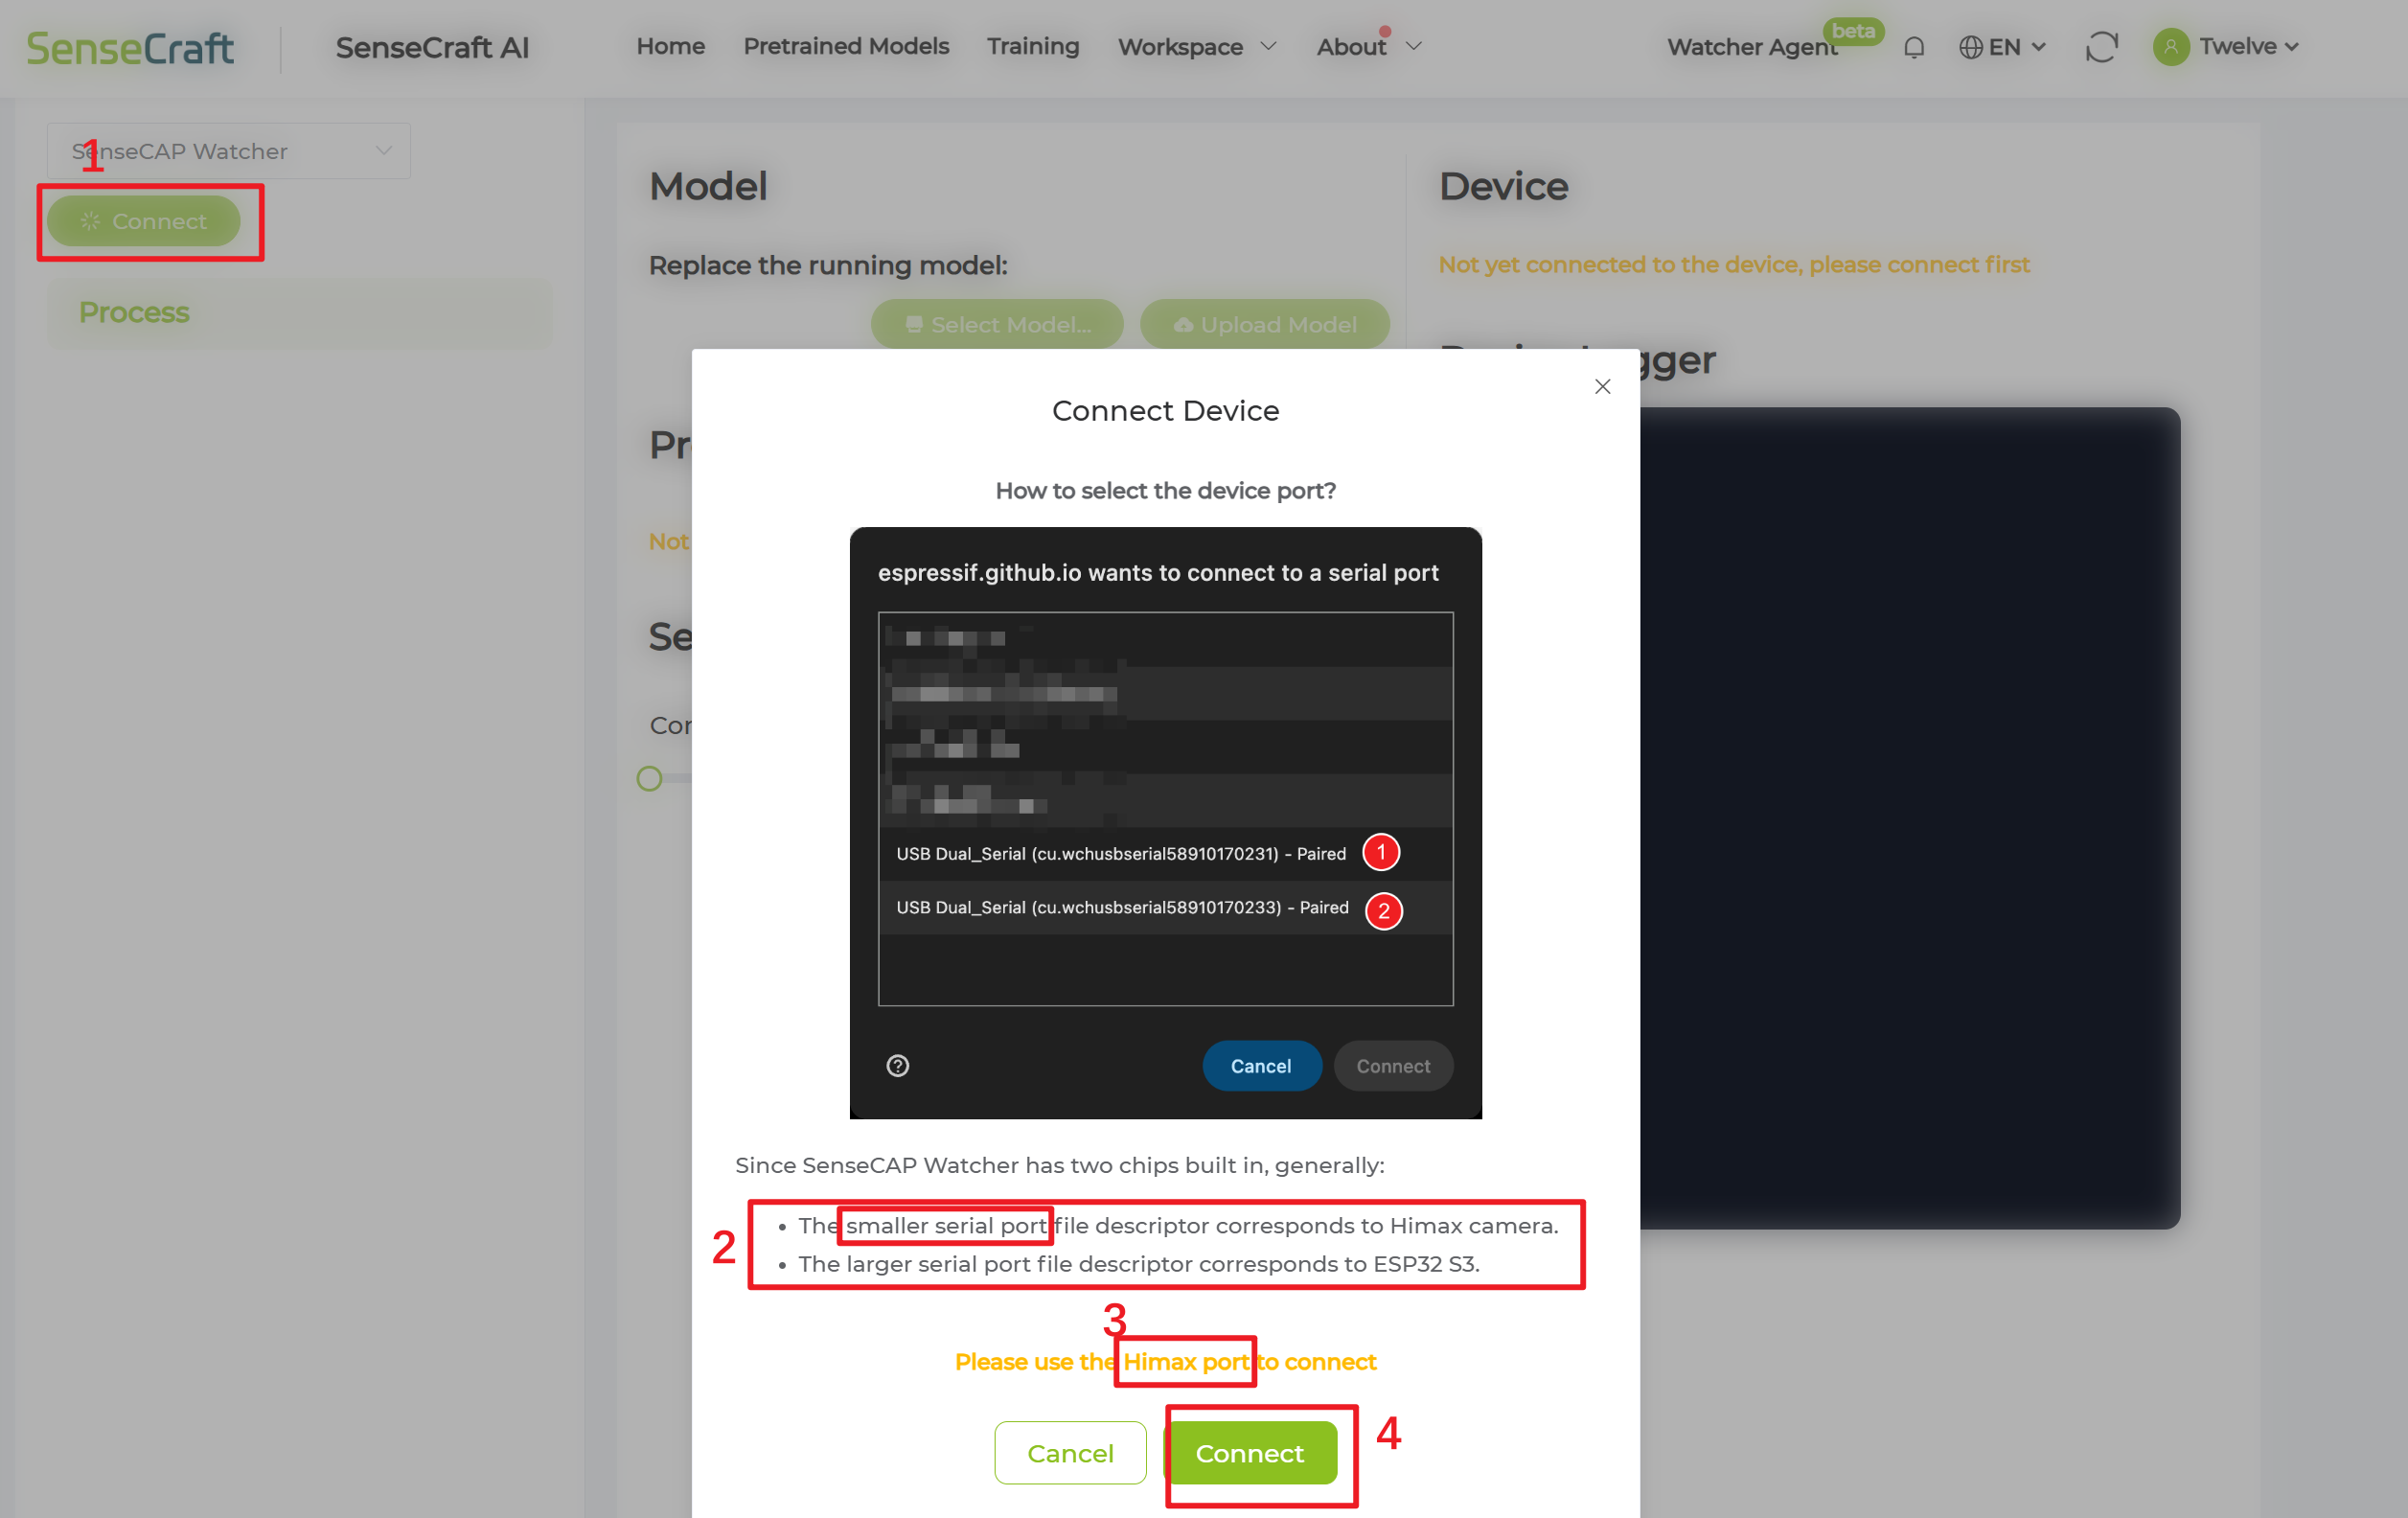
-
Select correct serial port (ending with “A”)

noteIf you are using macOS or Linux, please choose the port with the smaller number.
-
Click
Connect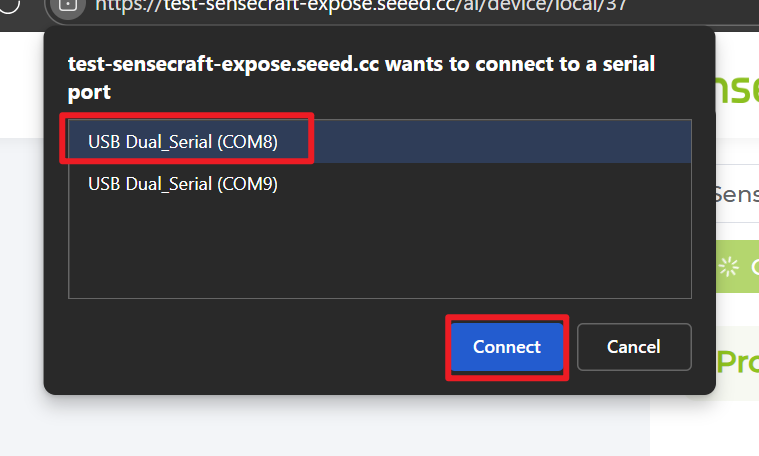
- Click
-
Step 3. Check and Update the Device Version
-
Click
Update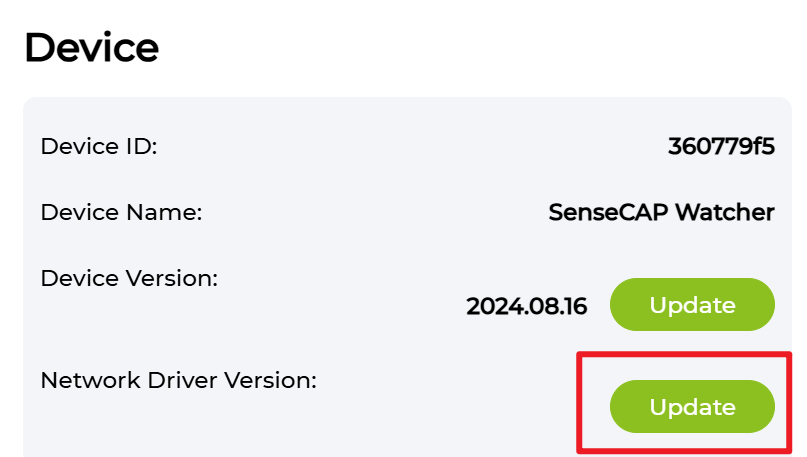
-
Select correct serial port (ending with "B")
noteIf you are using macOS or Linux, please choose the port with the bigger number.
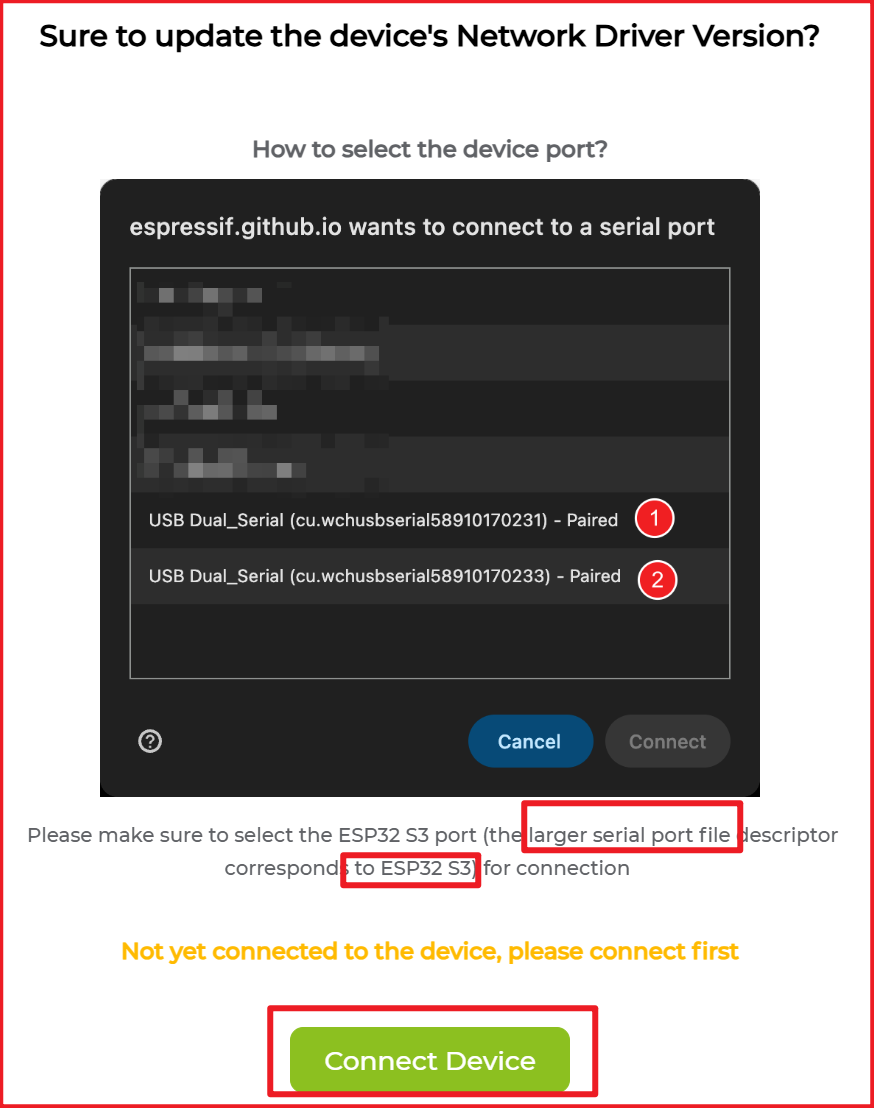

-
Click 'Connect'
-
Select the version you want to flash and Click
Confirm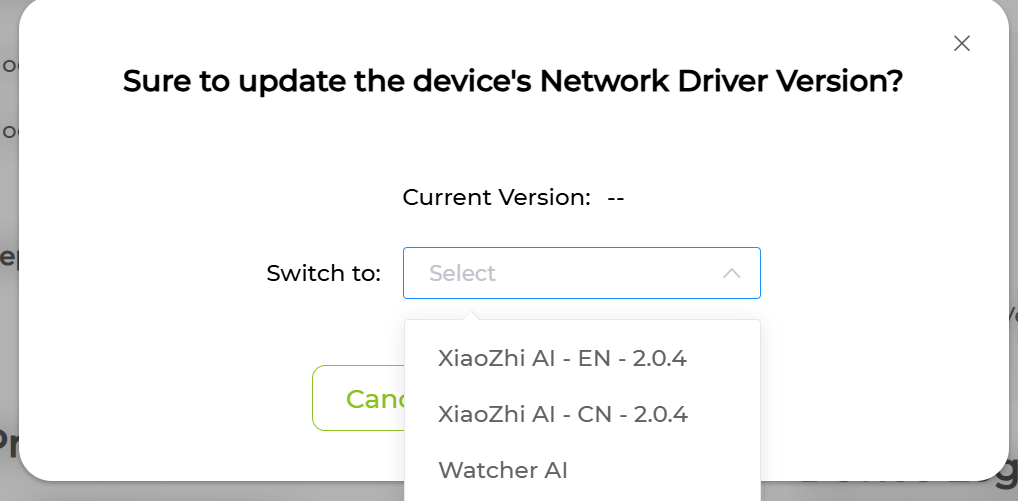
-
Waiting update and reboot process

-
-
Prerequisites
-
Visual Trigger Firmware v2.0.4: Download Link
-
Flash Download Tool (3.9.6 or later)
-
-
Step 1. Connect to the device(Type-C port on the bottom of the device) and Open your Flash Download Tool

-
Step 2. Configure Firmware Settings
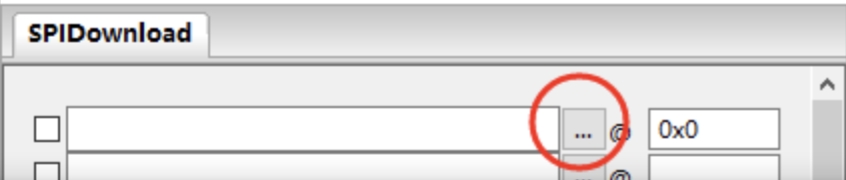
-
Step 3. Select COM Port and Flash Settings
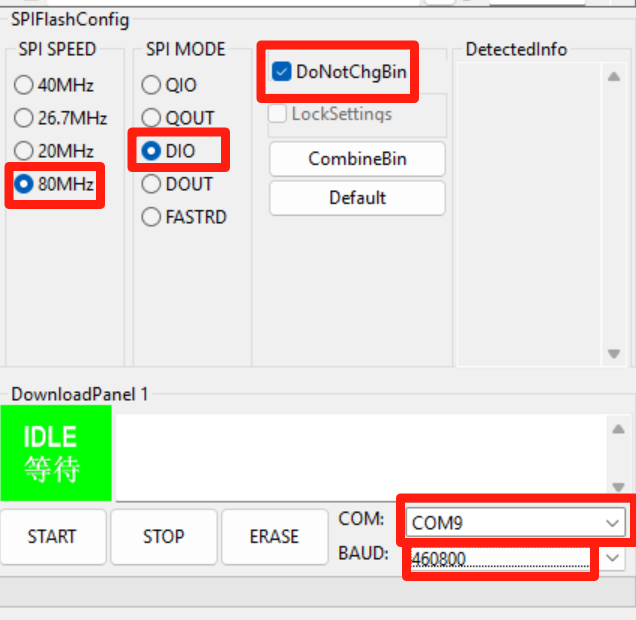
- If flashing doesn’t start after clicking START, click STOP and confirm you have selected the COM port ending with “B”.
- If flashing doesn’t start after clicking START, click STOP and confirm you have selected the COM port ending with “B”.
-
Step 4. Erase and Flash
- Click the
ERASEbutton to clear the existing firmware - Wait for the erase process to complete
- Click the
STARTbutton to begin flashing - You should see progress information in the log window
- If no progress appears or failed, try the other COM port
- Click the
-
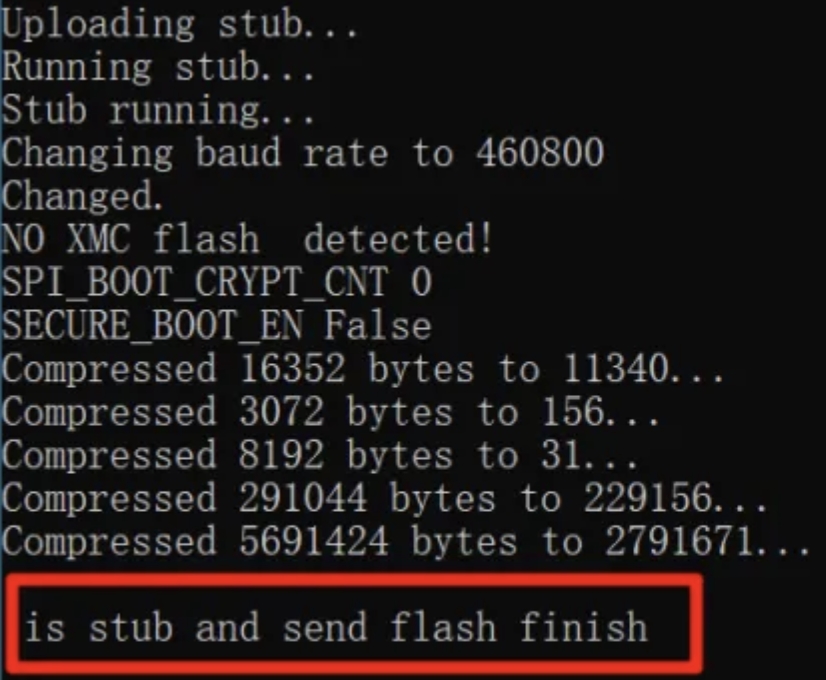
Step 5. Verify Success
-
The flashing process is complete when you see the success message in the log window.
-
-
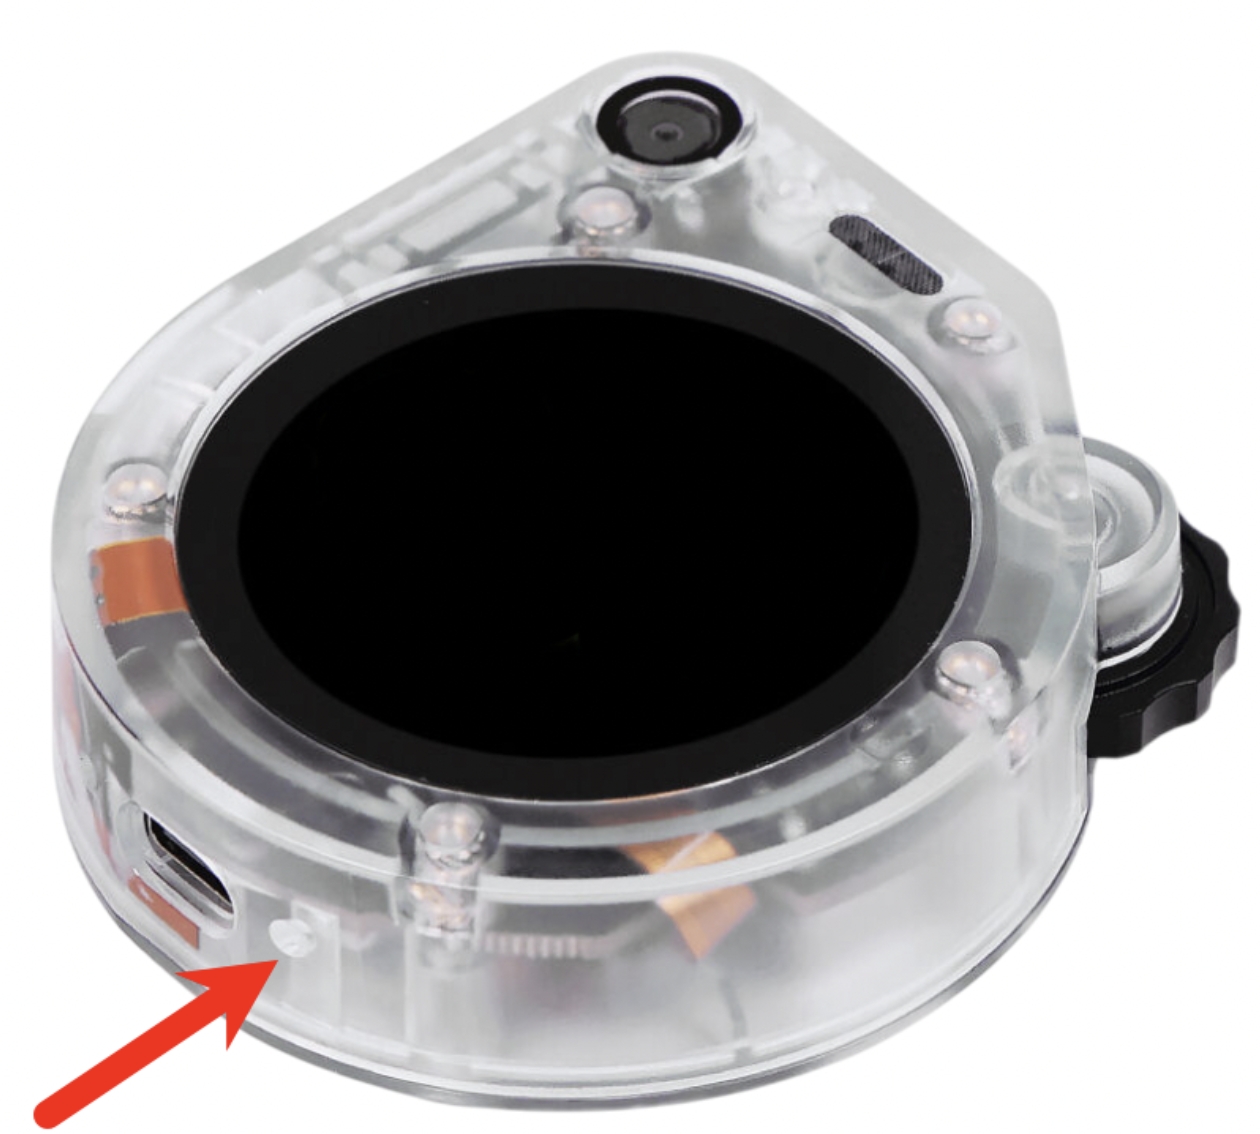
Step 6. Restart the Device
- Locate the reset hole on your Watcher device
- Use a pin to gently press the reset button
- The device will restart with the new firmware
-
Prerequisites
-
Visual Trigger Firmware v2.0.4: Download Link
-
-
Step 1. Extract the downloaded firmware package and use the esptool.py to perform the flash
esptool.py -p /dev/ttyACM0 -b 2000000 write_flash 0 merged-binary.bin(Note: Adjust the port
/dev/ttyACM0according to your system, e.g.,COM3on Windows) -
Step 2. Restart the Device
- Locate the reset hole on your Watcher device
- Use a pin to gently press the reset button
- The device will restart with the new firmware
-
Prerequisites
-
Step 1. Open ESP-IDF CMD and Navigate to the project folder
cd xiaozhi-esp32 -
Step 2. Set the target chip
idf.py set-target esp32s3 -
Step 3. Open the configuration menu
idf.py menuconfig -
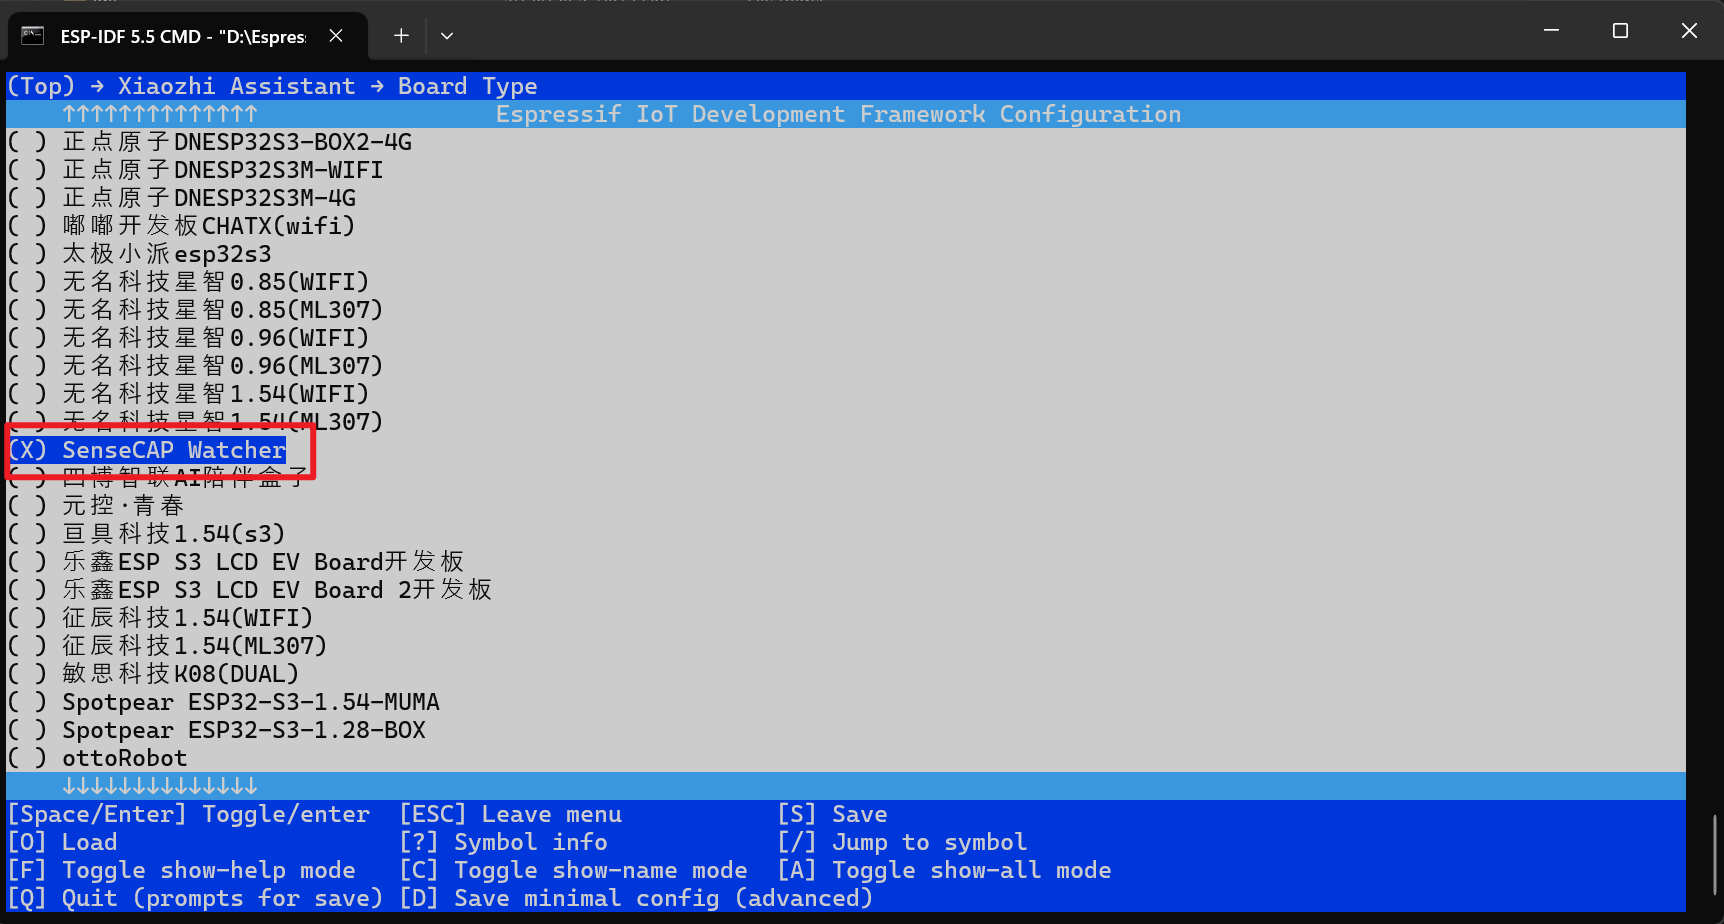
Step 4. Set Board Type as SenseCAP Watcher
-
Select the Xiaozhi Assistant
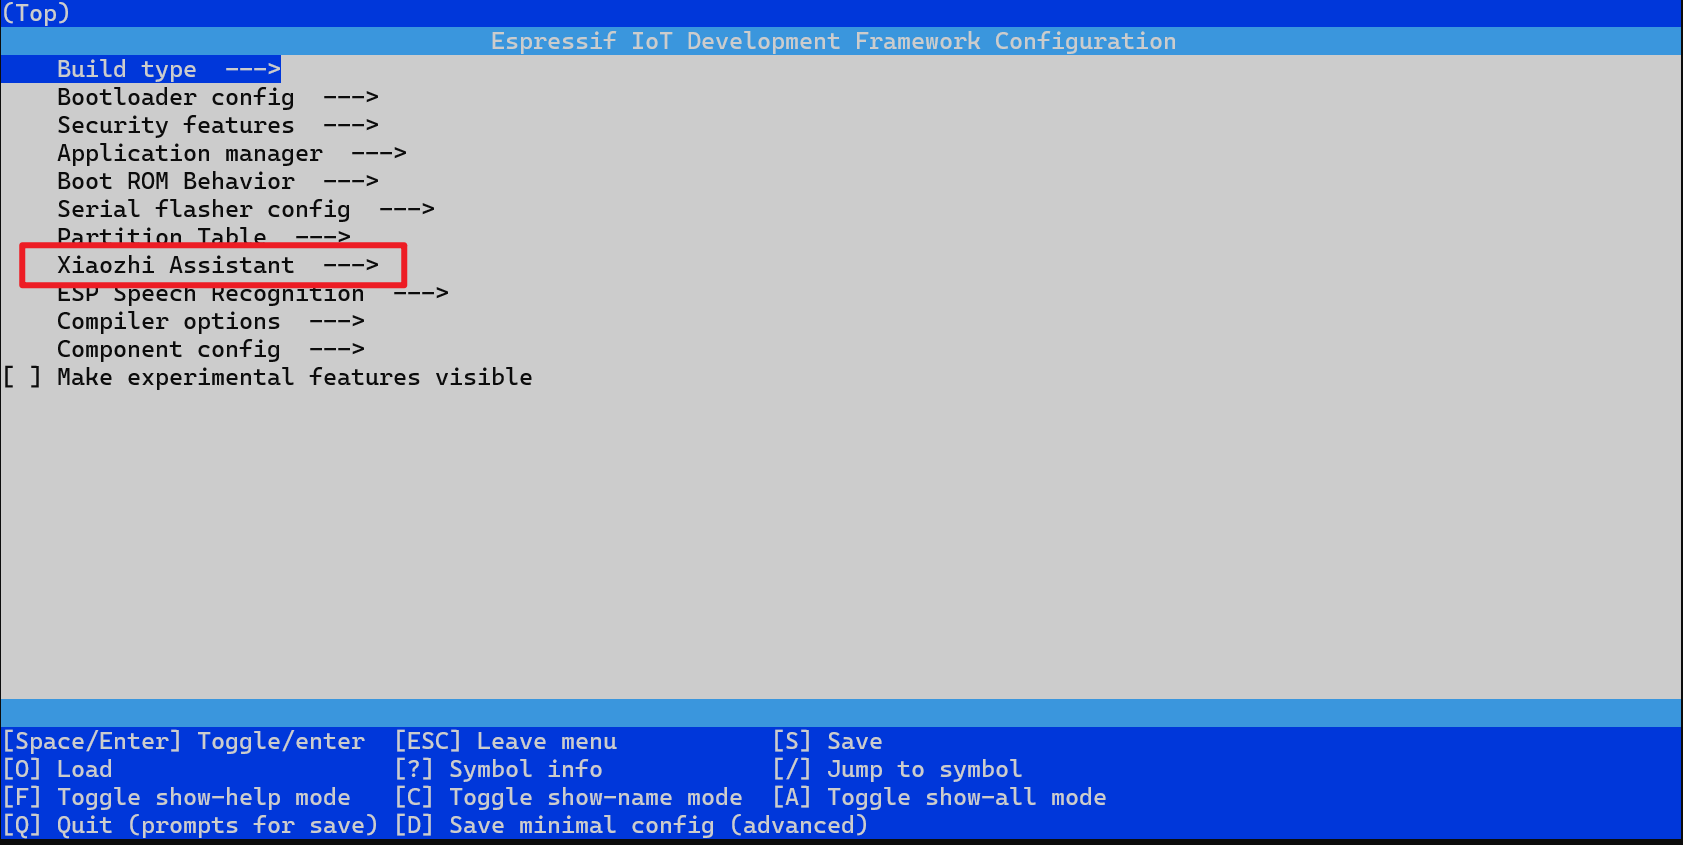
-
Select Board Type
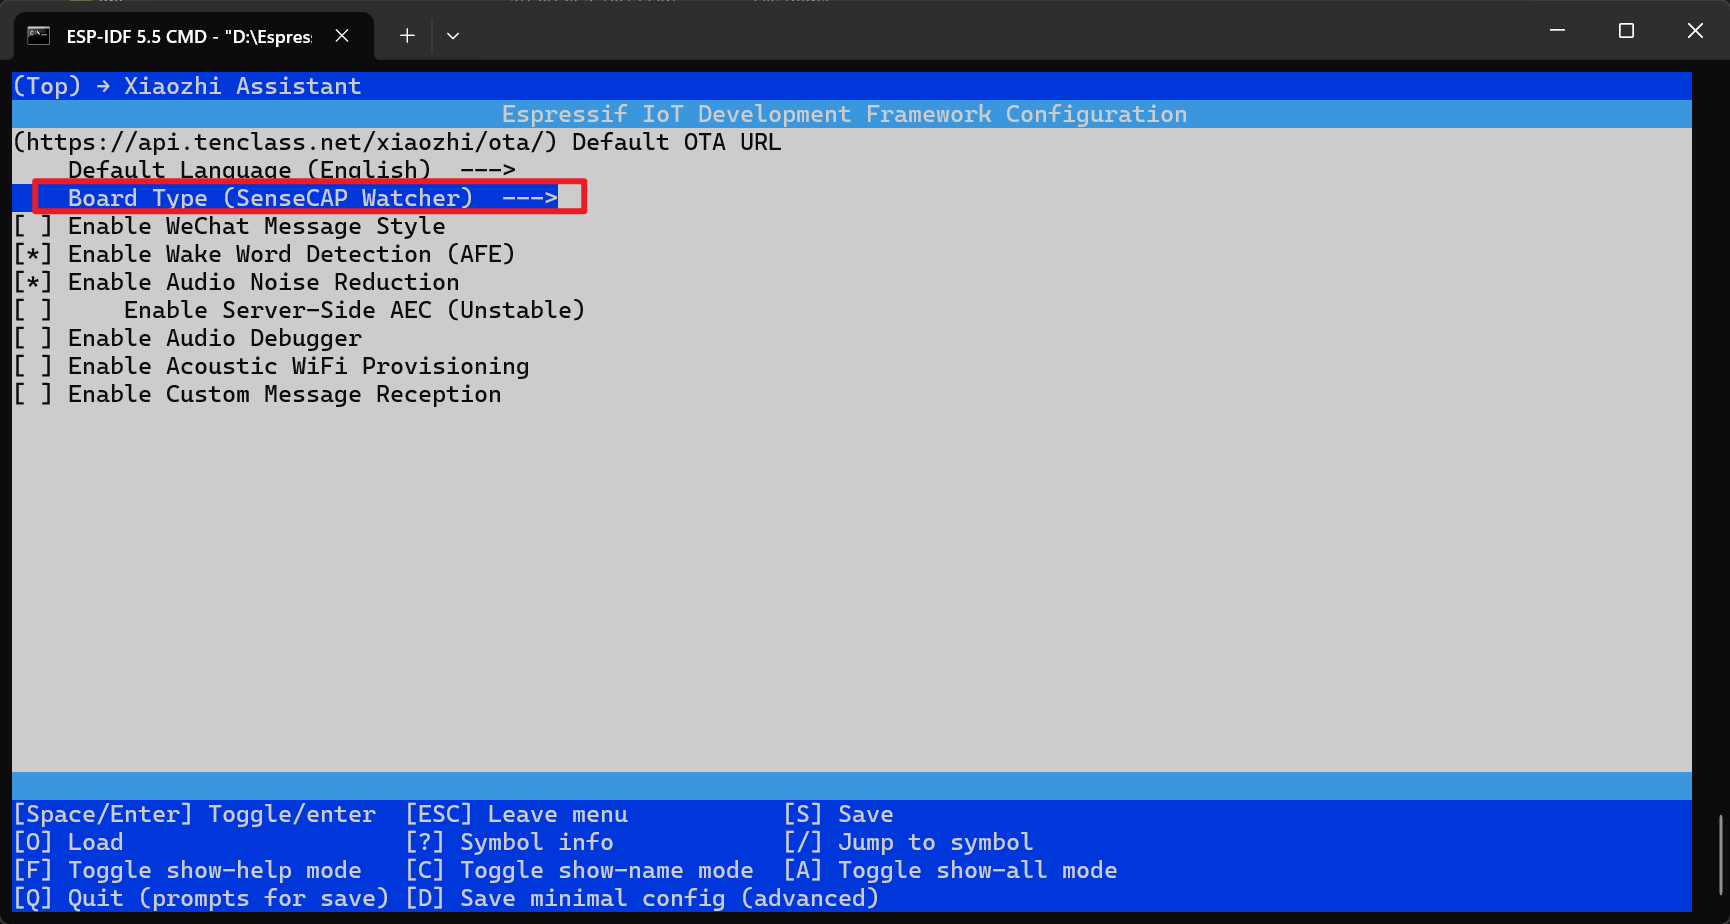
-
Select SenseCAP Watcher
-
-
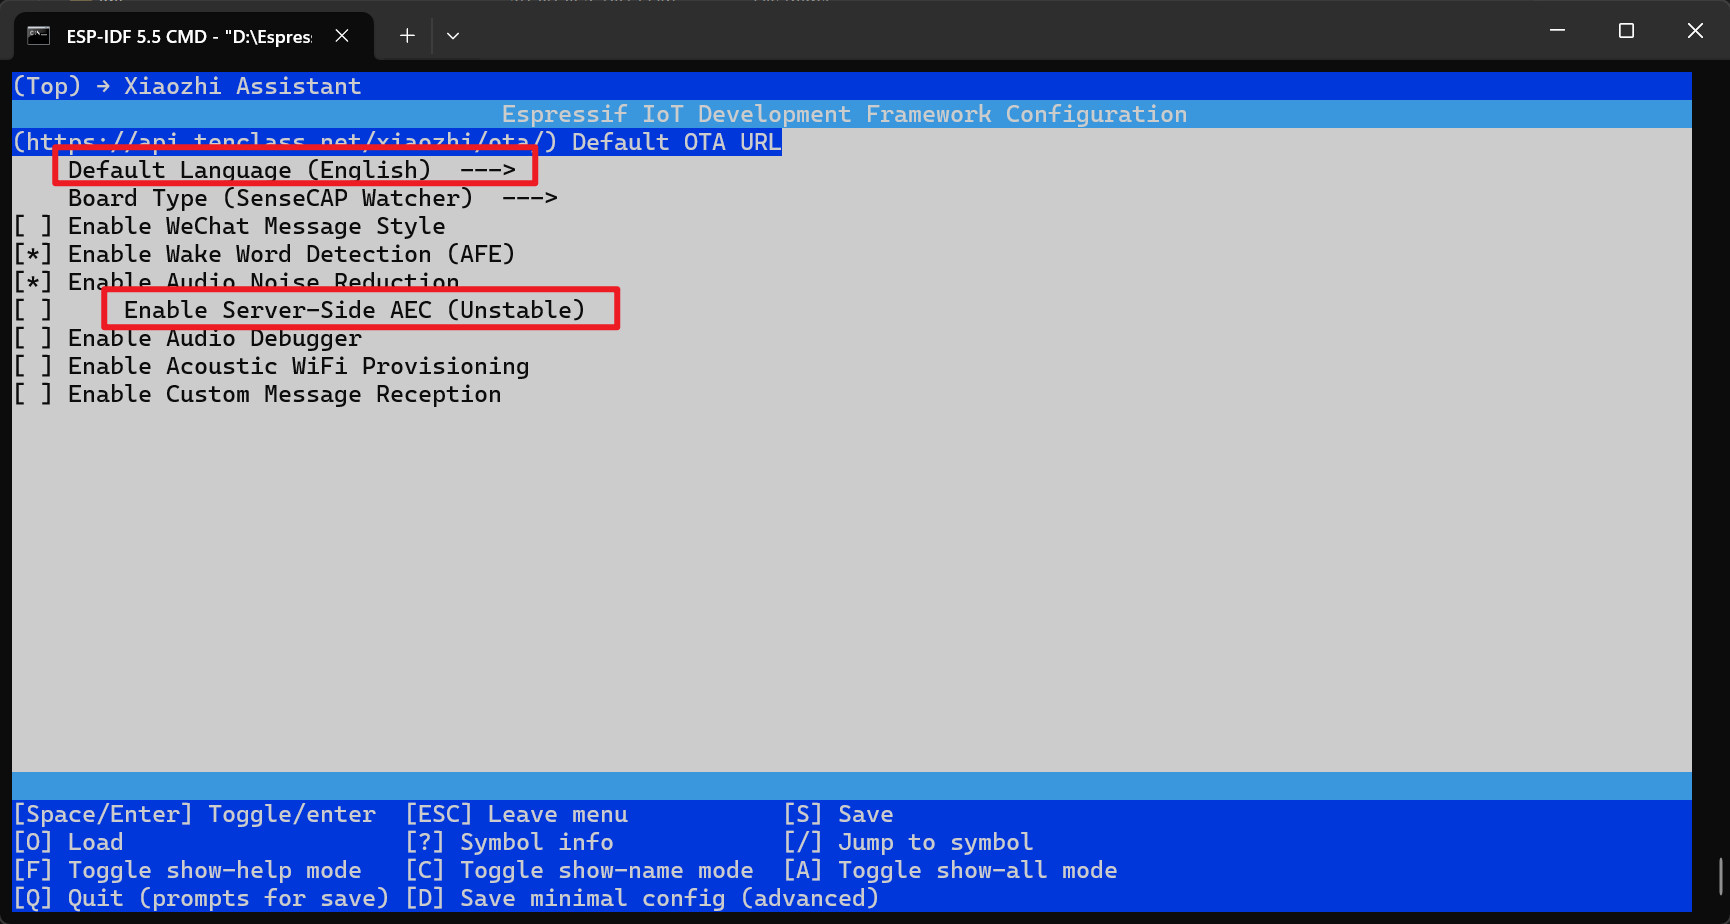
Step 5. Configure Additional Settings According to Your Needs(Optional)
-
Default display language and AEC (Automatic Echo Cancellation / voice interruption handling)
-
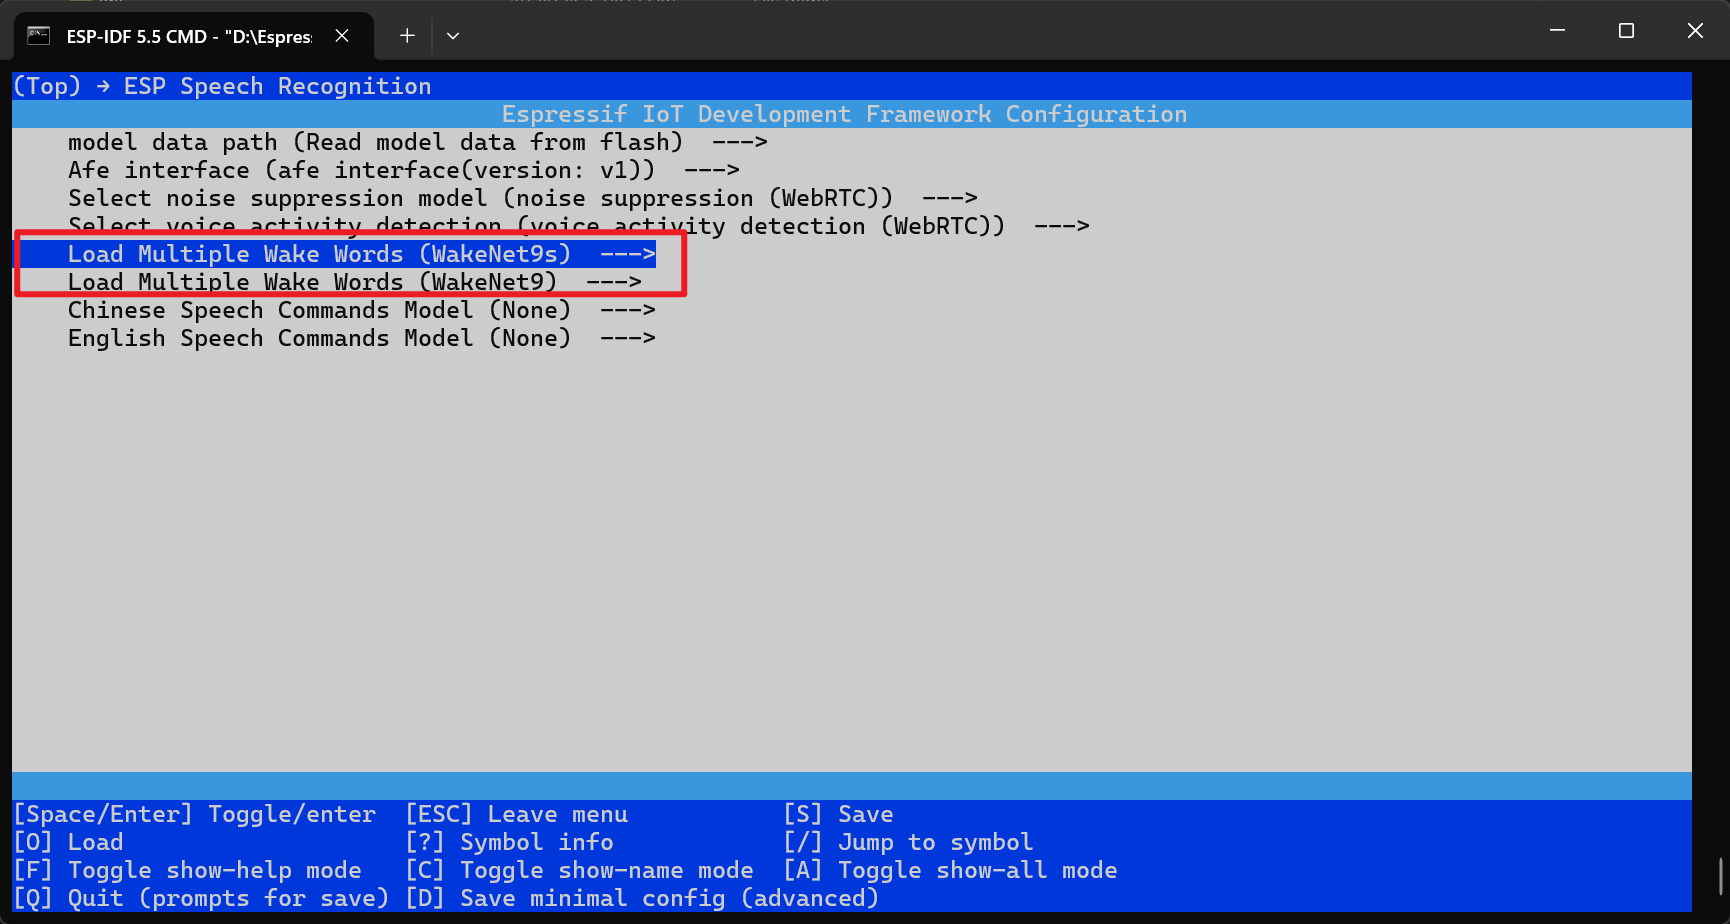
Wake words and triggers

-
Other optional parameters specific to your application
-
After completing your configuration, save and exit the menu
-
-
Step 7. Build and flash the firmware
idf.py build flash
Only firmware version 1.8.8 or higher supports visual wake-up functionality. Firmware version above v2.0.3 requires saying “Turn on the inference switch” to Xiaozhi to enable visual detection.
AI Model Flashing Process
Prerequisites
Step 1. Open our platform and Select SenseCAP Watcher in Workspace
Step 2. Connect to our Platform by serial port
-
Click
Connect -
Select correct serial port (ending with “A”)
If you are using macOS or Linux, please choose the port with the smaller number.
- Click
Connect
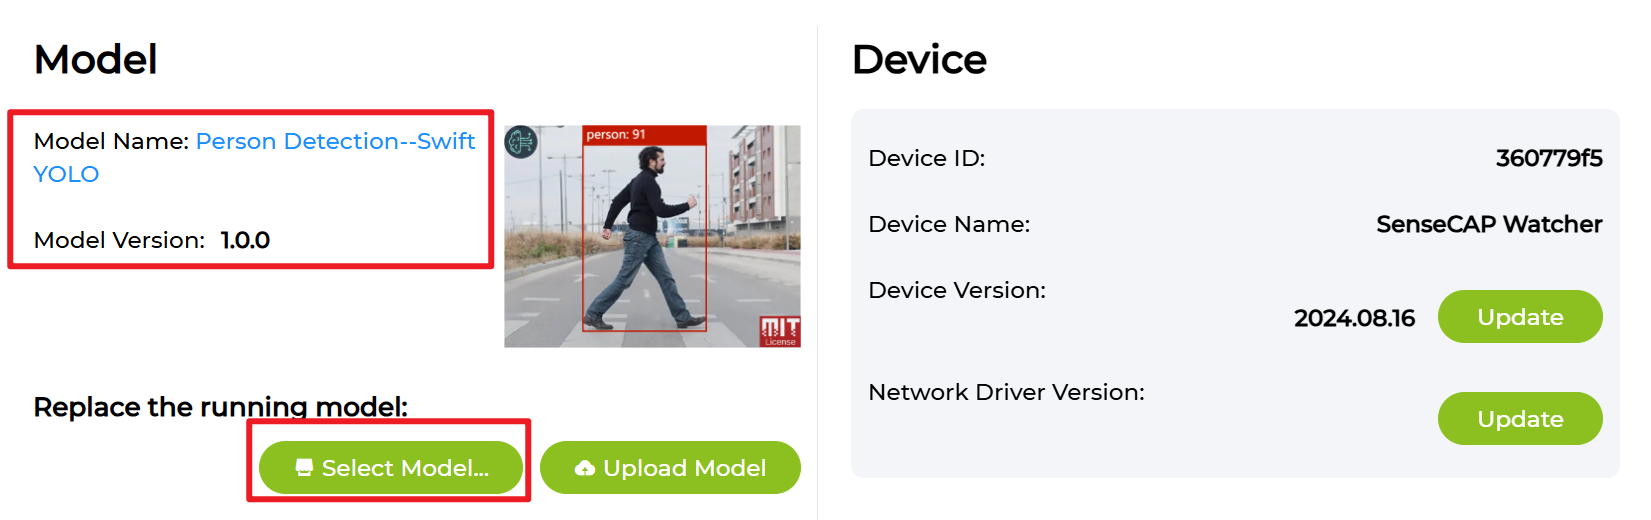
Step 3. View existing model and Change a new model
-
View Model name and Model version
-
Click
Select Model...and Click the model you want to flash
-
Click
Confirm
Step 4. Preview the effect and Adjust the parameter

The current visual wake-up function offers the following configuration options:
- Target ID (
target): Specifies the target ID to detect. This ID depends on the visual model used; the default value is 0. - Detection Duration (
duration): Unit is seconds, used to adjust the sensitivity of the visual wake-up. The default is 1 second (this default does not include the 1-second debounce processing). - Confidence Threshold (
threshold): The lower confidence limit for the visual model to recognize an object, used to adjust detection sensitivity. Represented as a percentage, the default is 75%. - Cooldown Period (
interval): Unit is seconds, indicating the wait time required after one conversation ends before triggering again, used to avoid frequent interruptions by the same object. The default is 8 seconds.
For example, you can adjust the model's sensitivity by modifying the threshold parameter. If you find the current threshold too strict, simply say to Watcher: "Please set the confidence threshold to 60%".
Troubleshooting
Common Issues
-
No COM Port Detected
- Ensure you're using the bottom Type-C port
- Try a different USB cable
- Check if USB drivers are installed properly
-
Flashing Fails
- When flashing Himax, select the COM port ending with “A”.
- When flashing ESP32-S3, select the COM port ending with “B”.
-
Device Not Responding
- Use a pin to gently press the reset button
- Try erasing before flashing
-
Device does not wake up with visual detection
- Check if there are relevant log messages in the serial output.
- Firmware version v2.0.3 requires saying “Turn on inference switch” to Xiaozhi to enable this function.
-
Serial shows visual recognition logs but device still cannot wake up
- Go to the SenseCraft AI Platform and flash the Person model to the AI chip.
FAQ
Q: Can I flash other AI models to Himax?
A: Currently, only Face and Person models are supported. Flashing other models is not yet supported and will be available in a future update.