Watcher To Discord Quick Start
Discord is an instant messaging and VoIP social platform that facilitates communication via voice calls, video calls, text messaging, and media sharing. Conversations on Discord can be private or occur within virtual communities known as "servers."
This tutorial will guide you through integrating the Watcher API with Node-RED to seamlessly send data from the Watcher to Discord. This integration provides a simple and efficient method to receive notifications and opens the door for further applications and integrations.
Part 1. Set up Watcher in Node-RED
Step 1. Set up Node-RED
Fisrt of all, you need to run a task in Watcher following the video below. If you want to know more please click here.
Node-RED is required for this setup, along with the Watcher API. If you haven't installed Node-RED or connected it with the Watcher API, start here: Watcher to Node-RED Quick Start.
Step 2. Prepare data from Watcher
After setting up the Watcher to work with Node-RED, the next step is to prepare the data from the Watcher for Discord. Double click the function node to format the data appropriately.
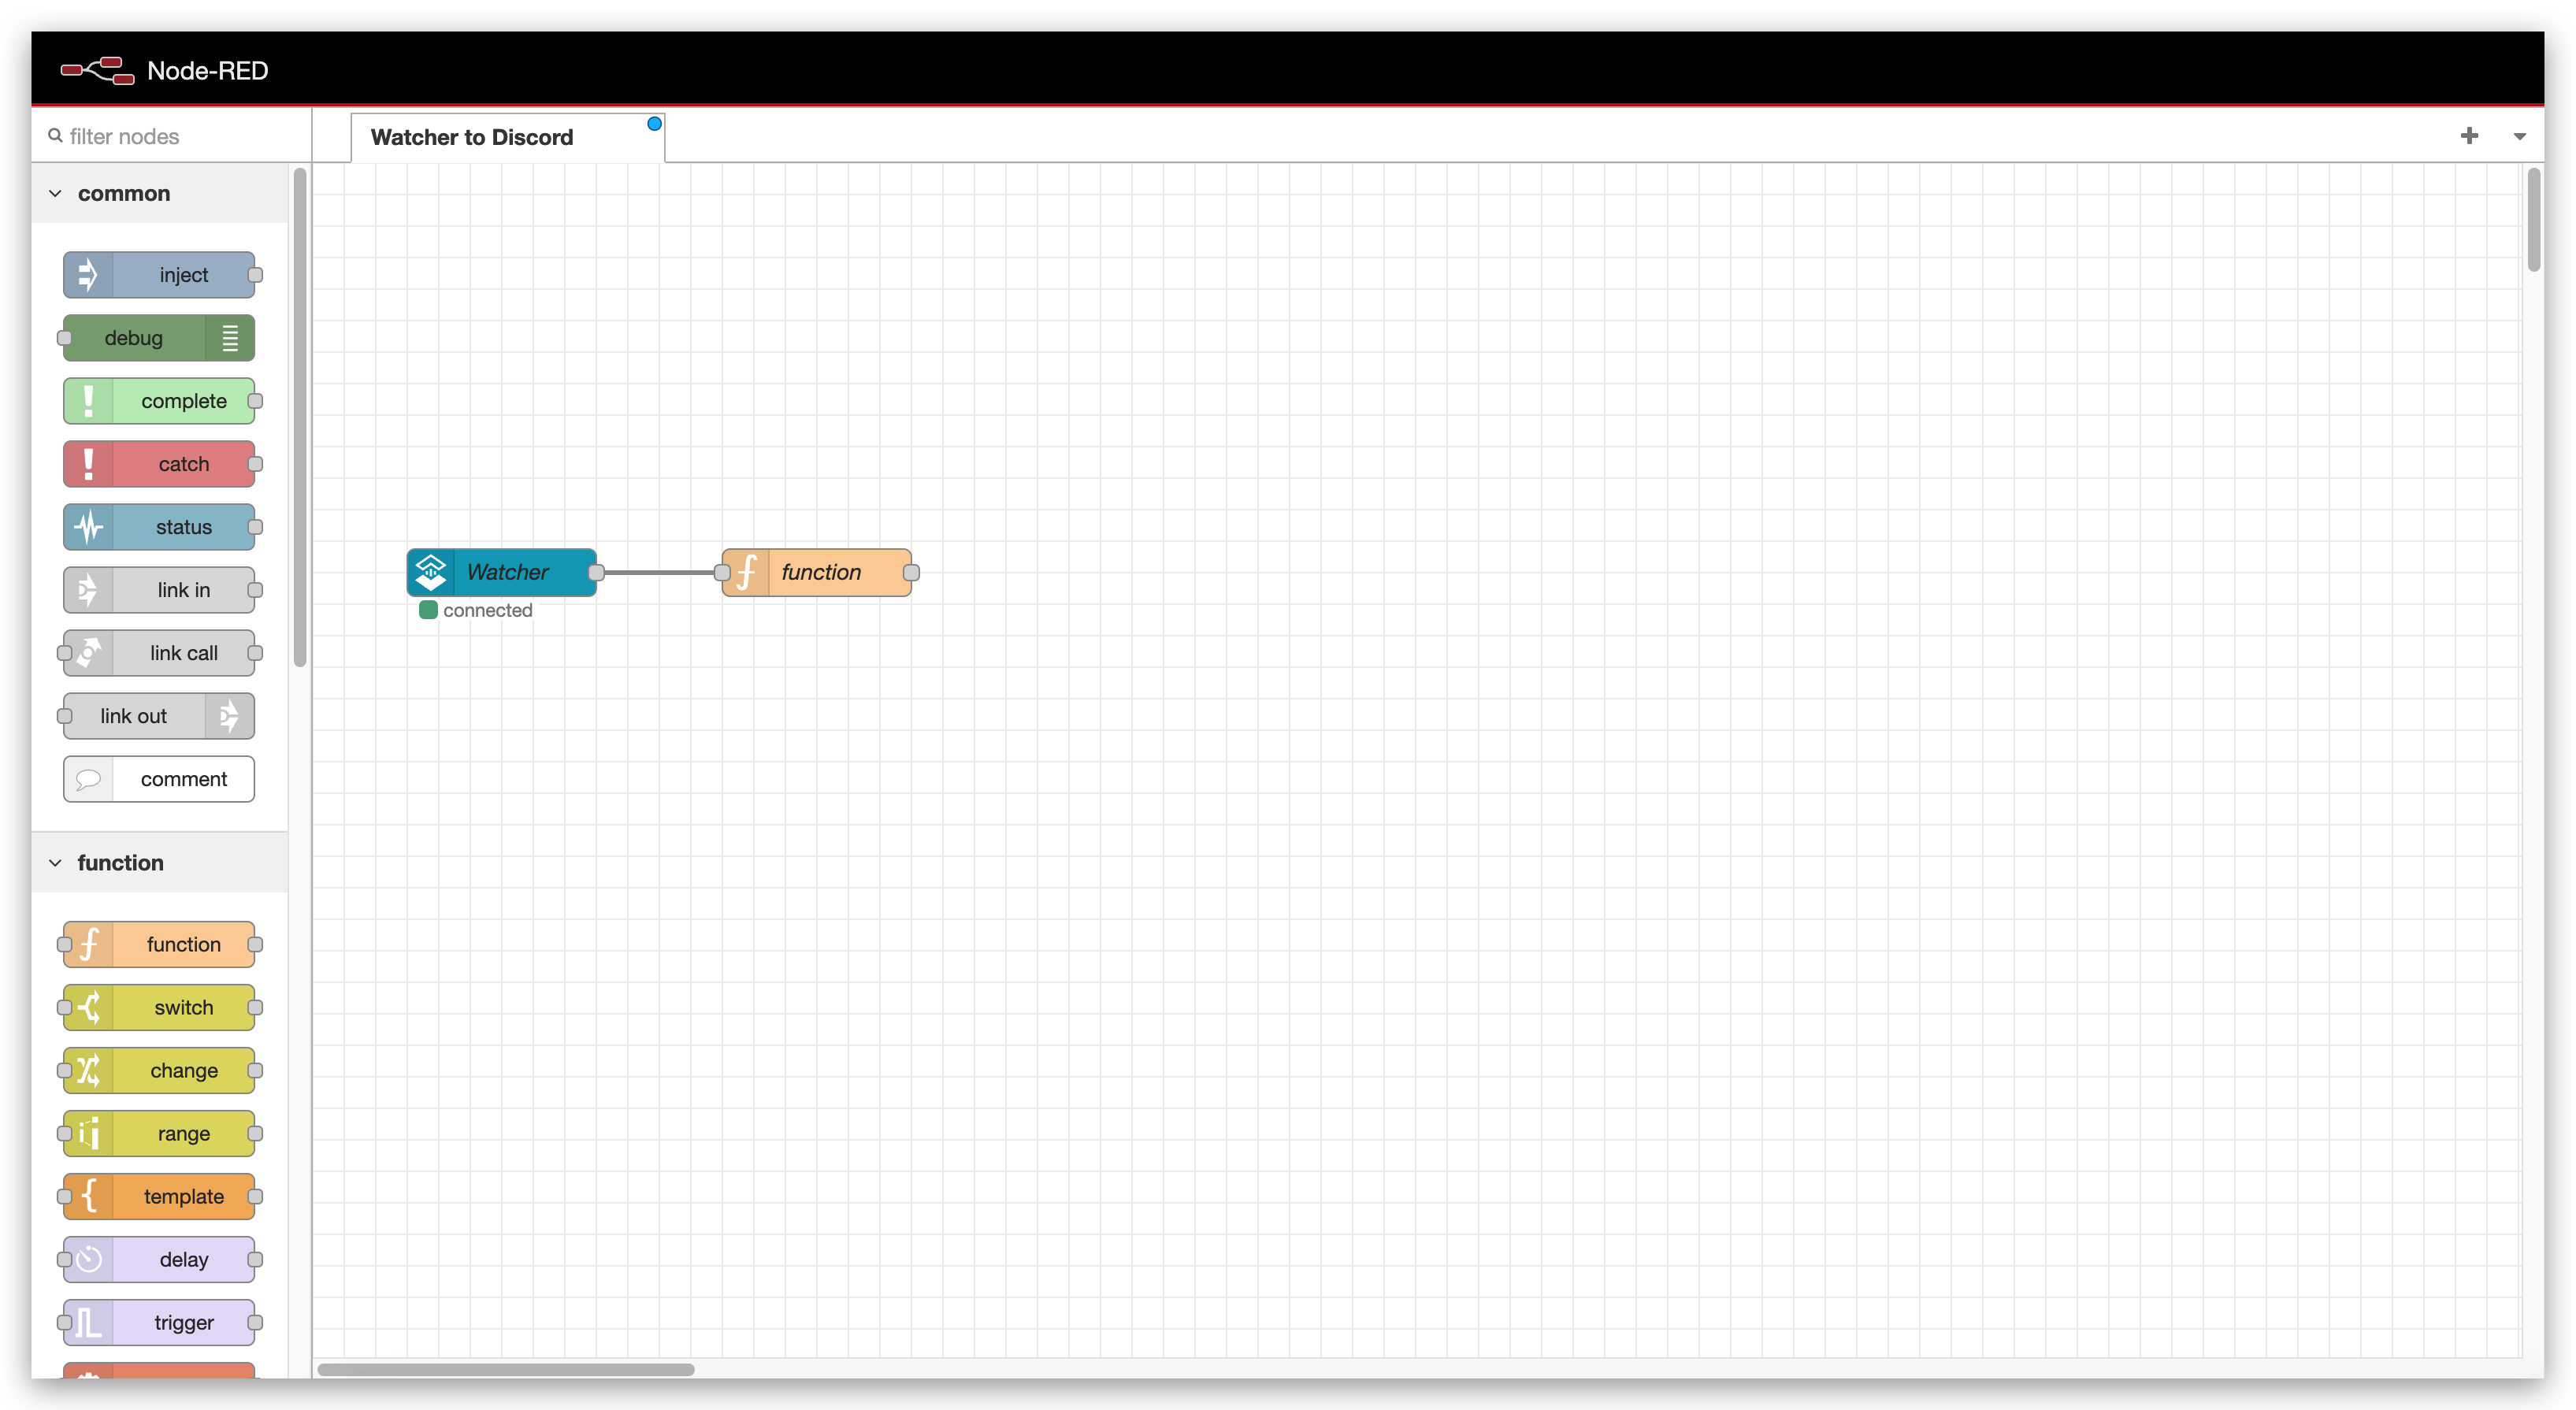
For the purpose of this tutorial, we will be sending the content as well as the the image. However, you are encouraged to transform the data as needed for your application.
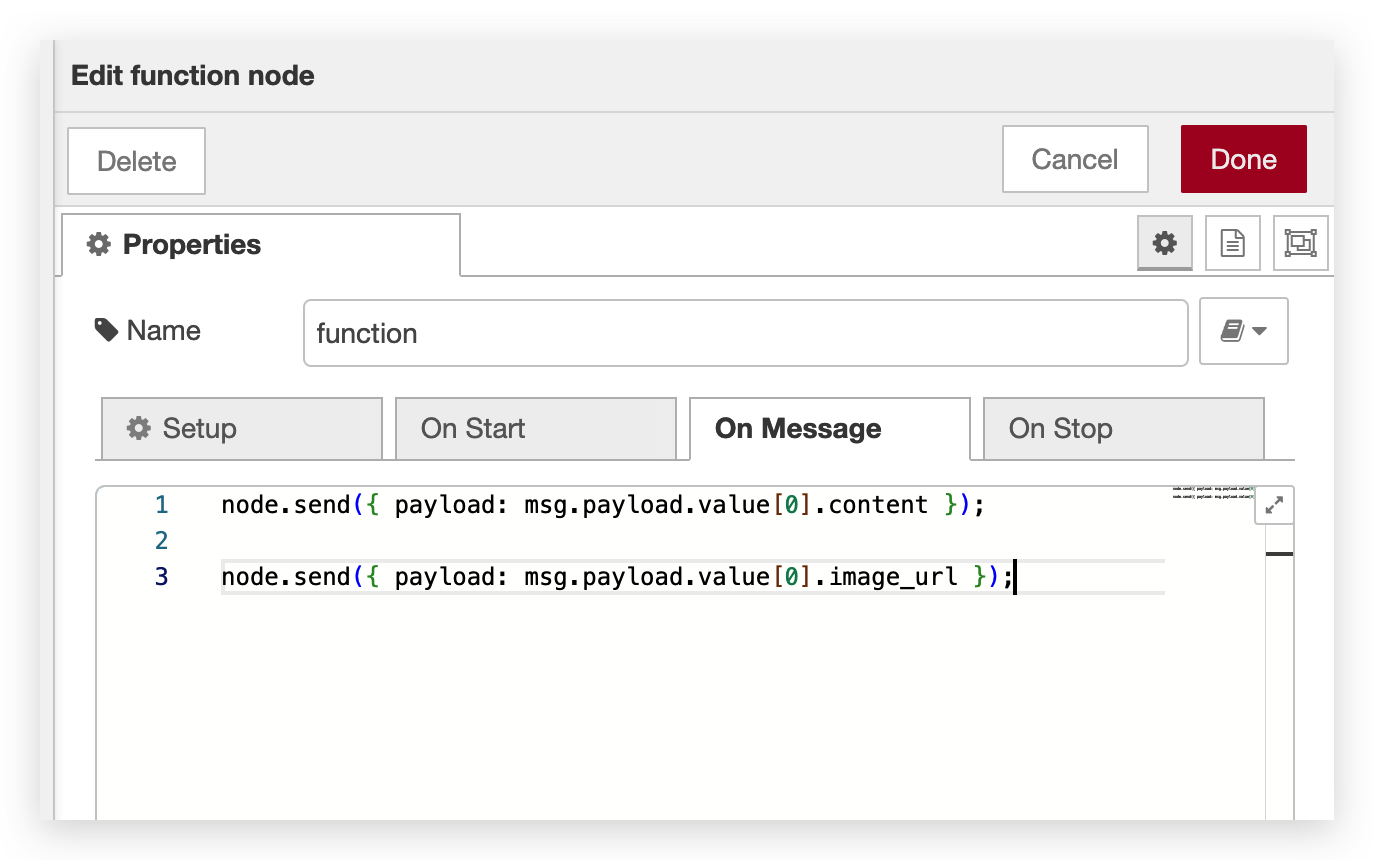
Example Node-RED Function to Format Data
node.send({ payload: msg.payload.value[0].content });

node.send({ payload: msg.payload.value[0].image_url });
Part 2. Set up Discord Bot
Step 3. Sign up for Discord
A Discord account is required to proceed. If you do not already have an account, please click here and complete the steps to create an account.
If you already have an account, please proceed to Step 4.
If you already have a Discord bot you would like to configure in Node-RED, please skip to Part 3.
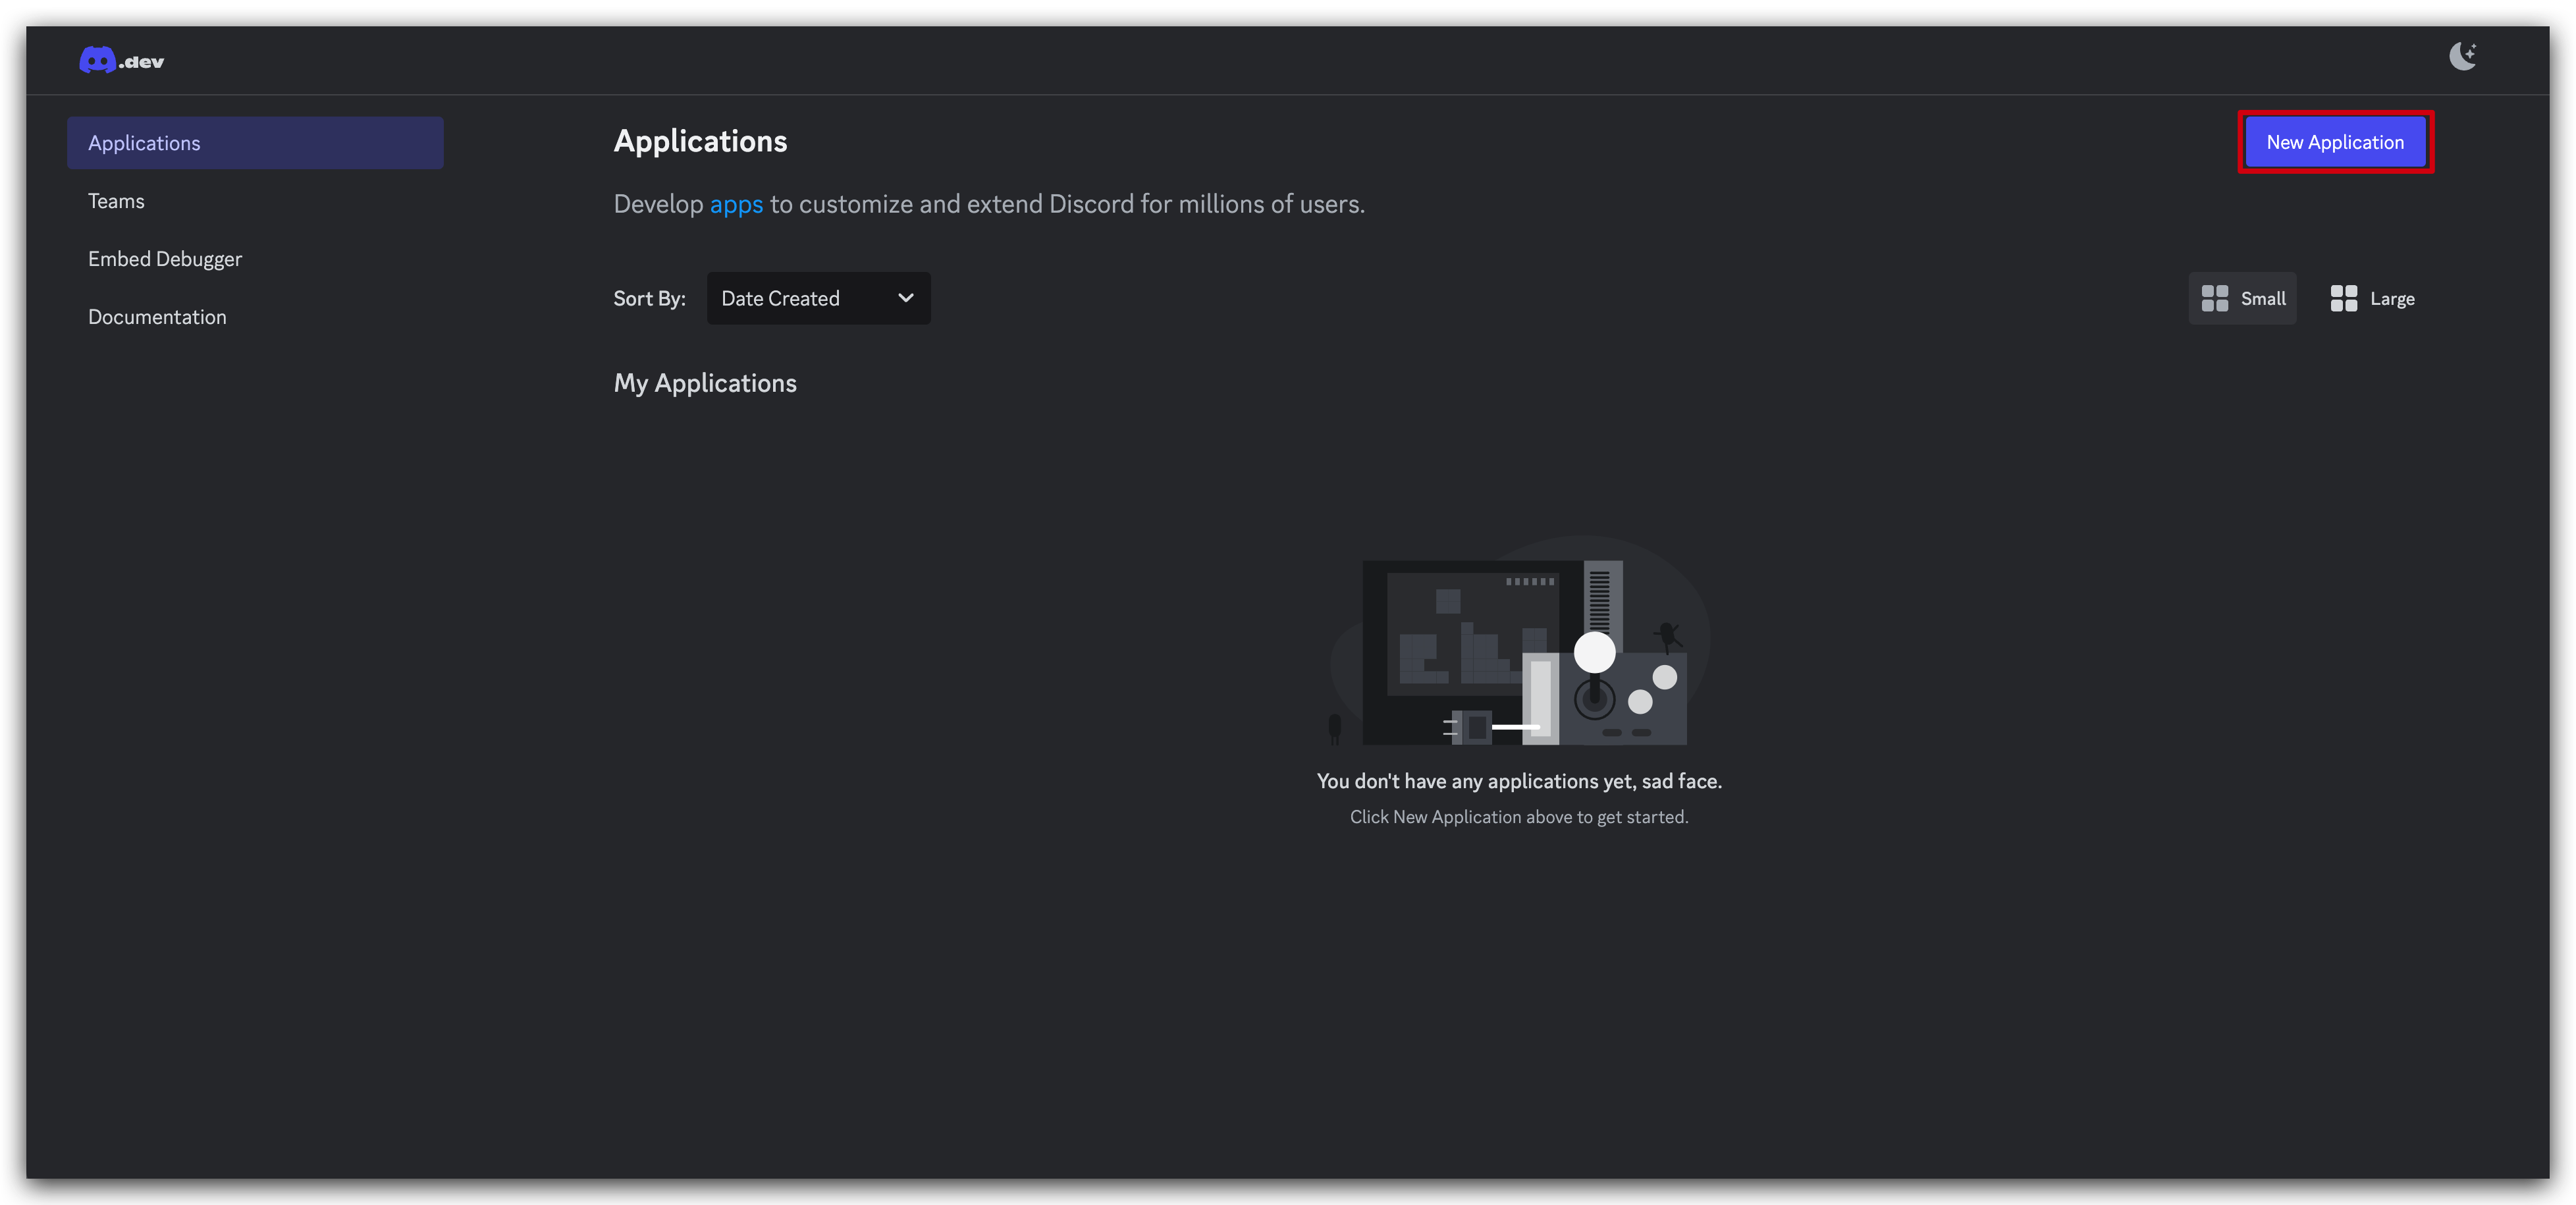
Step 4. Create Development Application
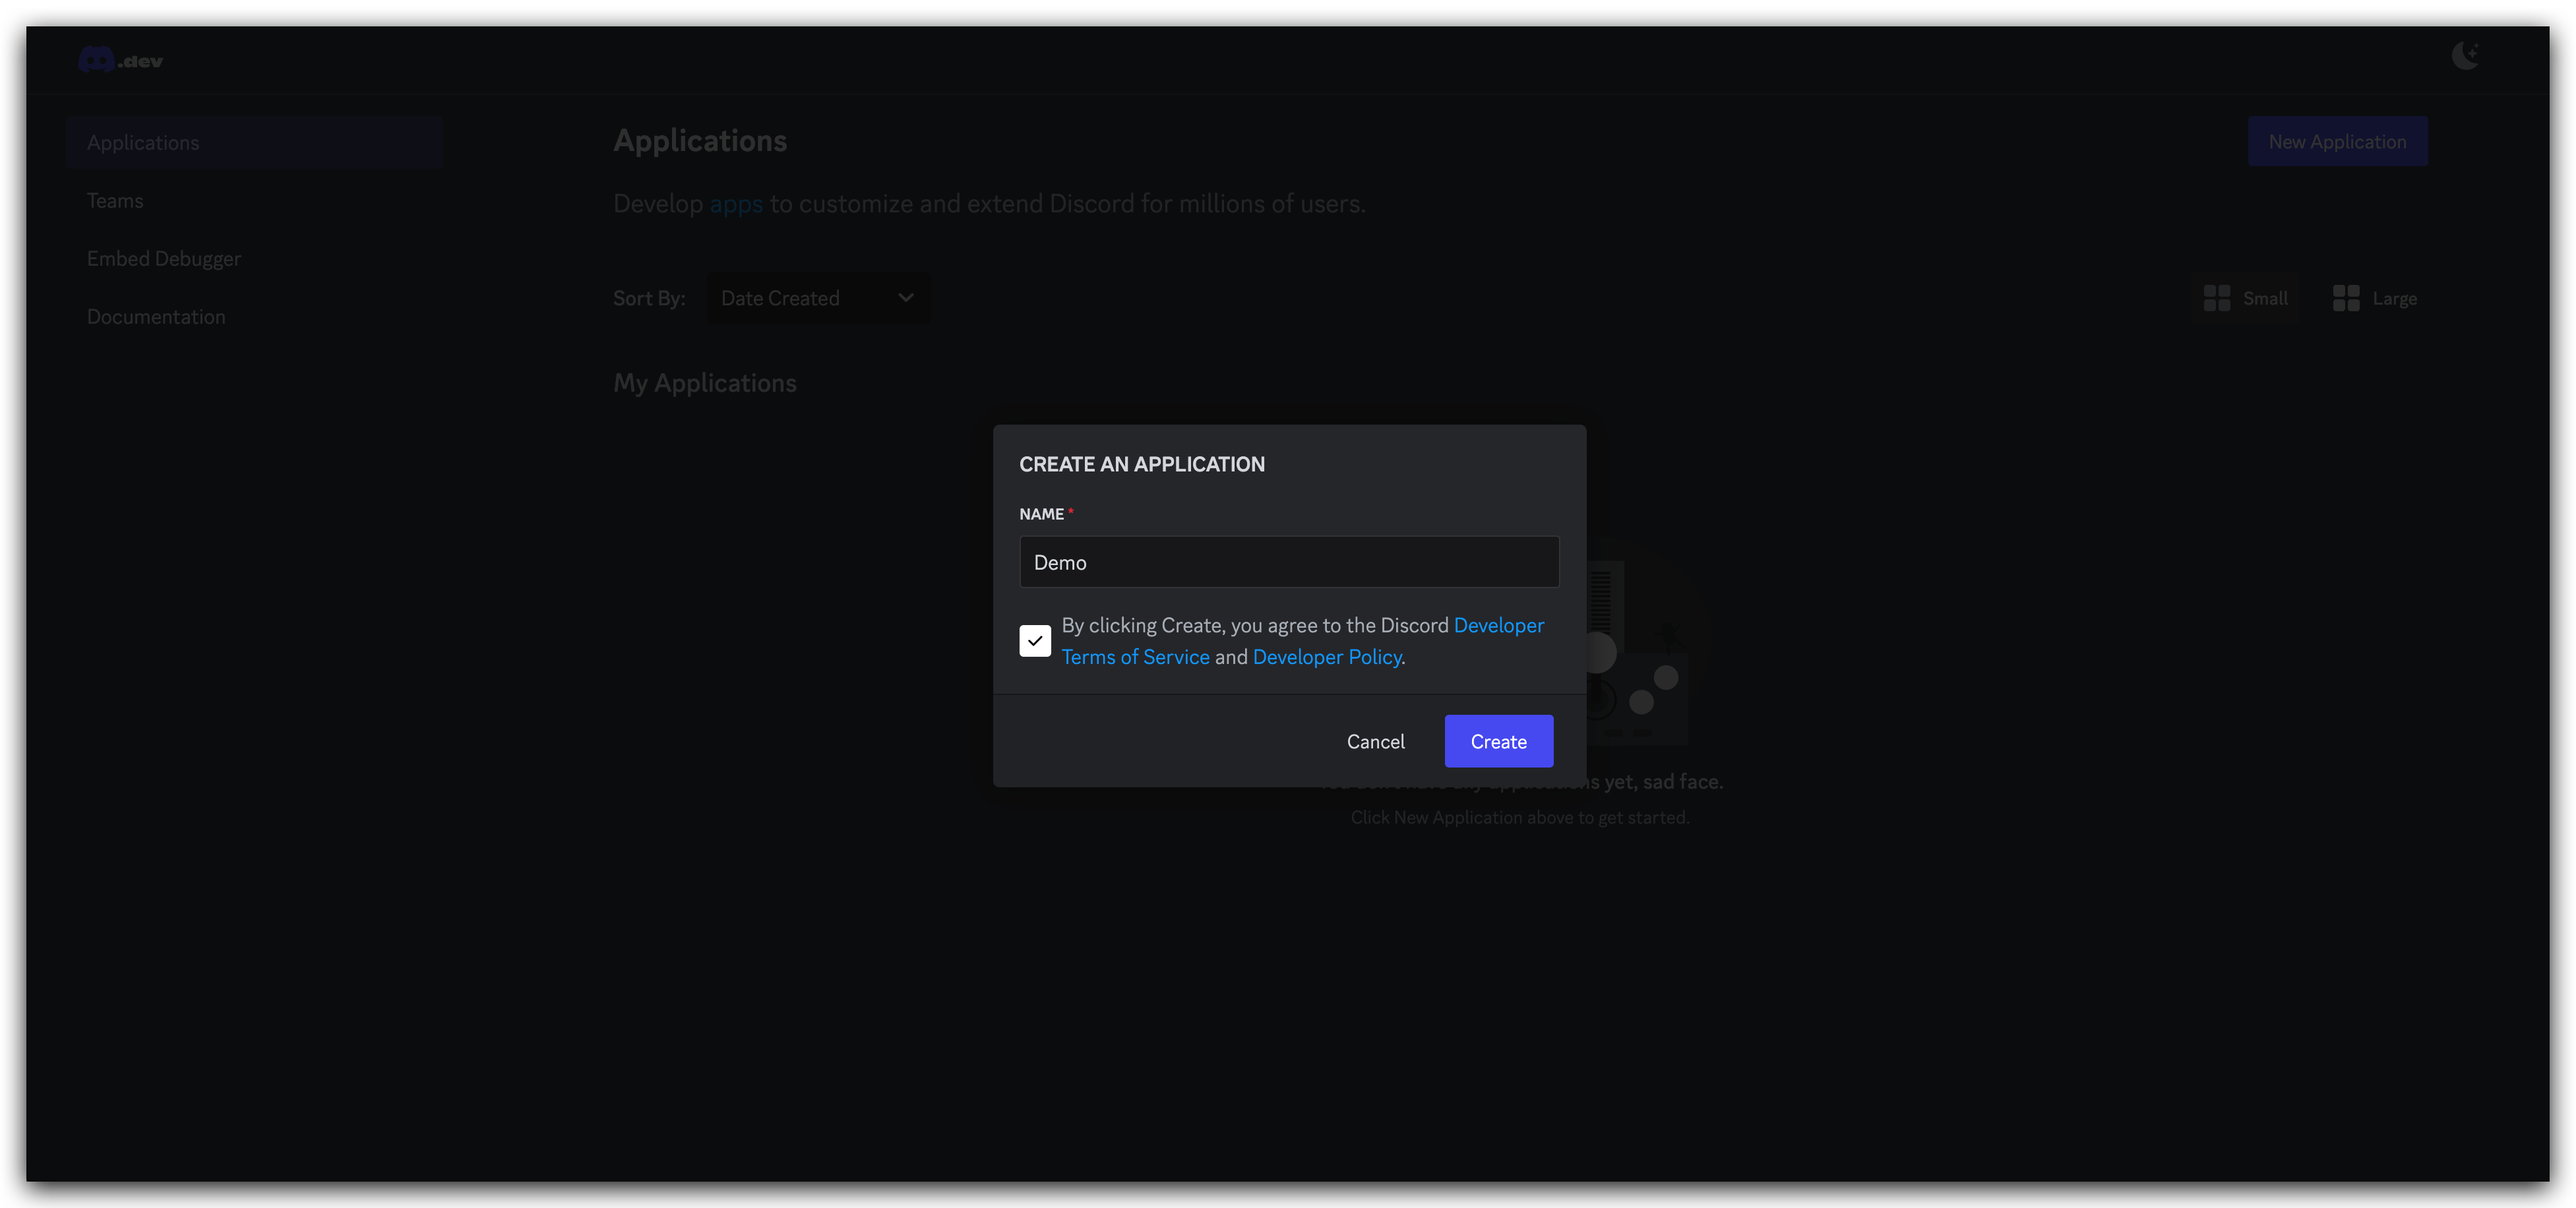
Once you have your Discord account set up and logged in, proceed to the Discord Developer Portal and create a new application.
Enter a name for your application, agree to the Discord Developer Terms of Service and Developer Policy, then click Create.
You will need a valid email address linked to your Discord account in order to proceed. If you do not have an email associated with your Discord account, please follow these instructions: How to Change Your Account's Email Address
Step 5. Configure Bot Settings
Now we will configure the bot settings. To do so, follow these steps:
-
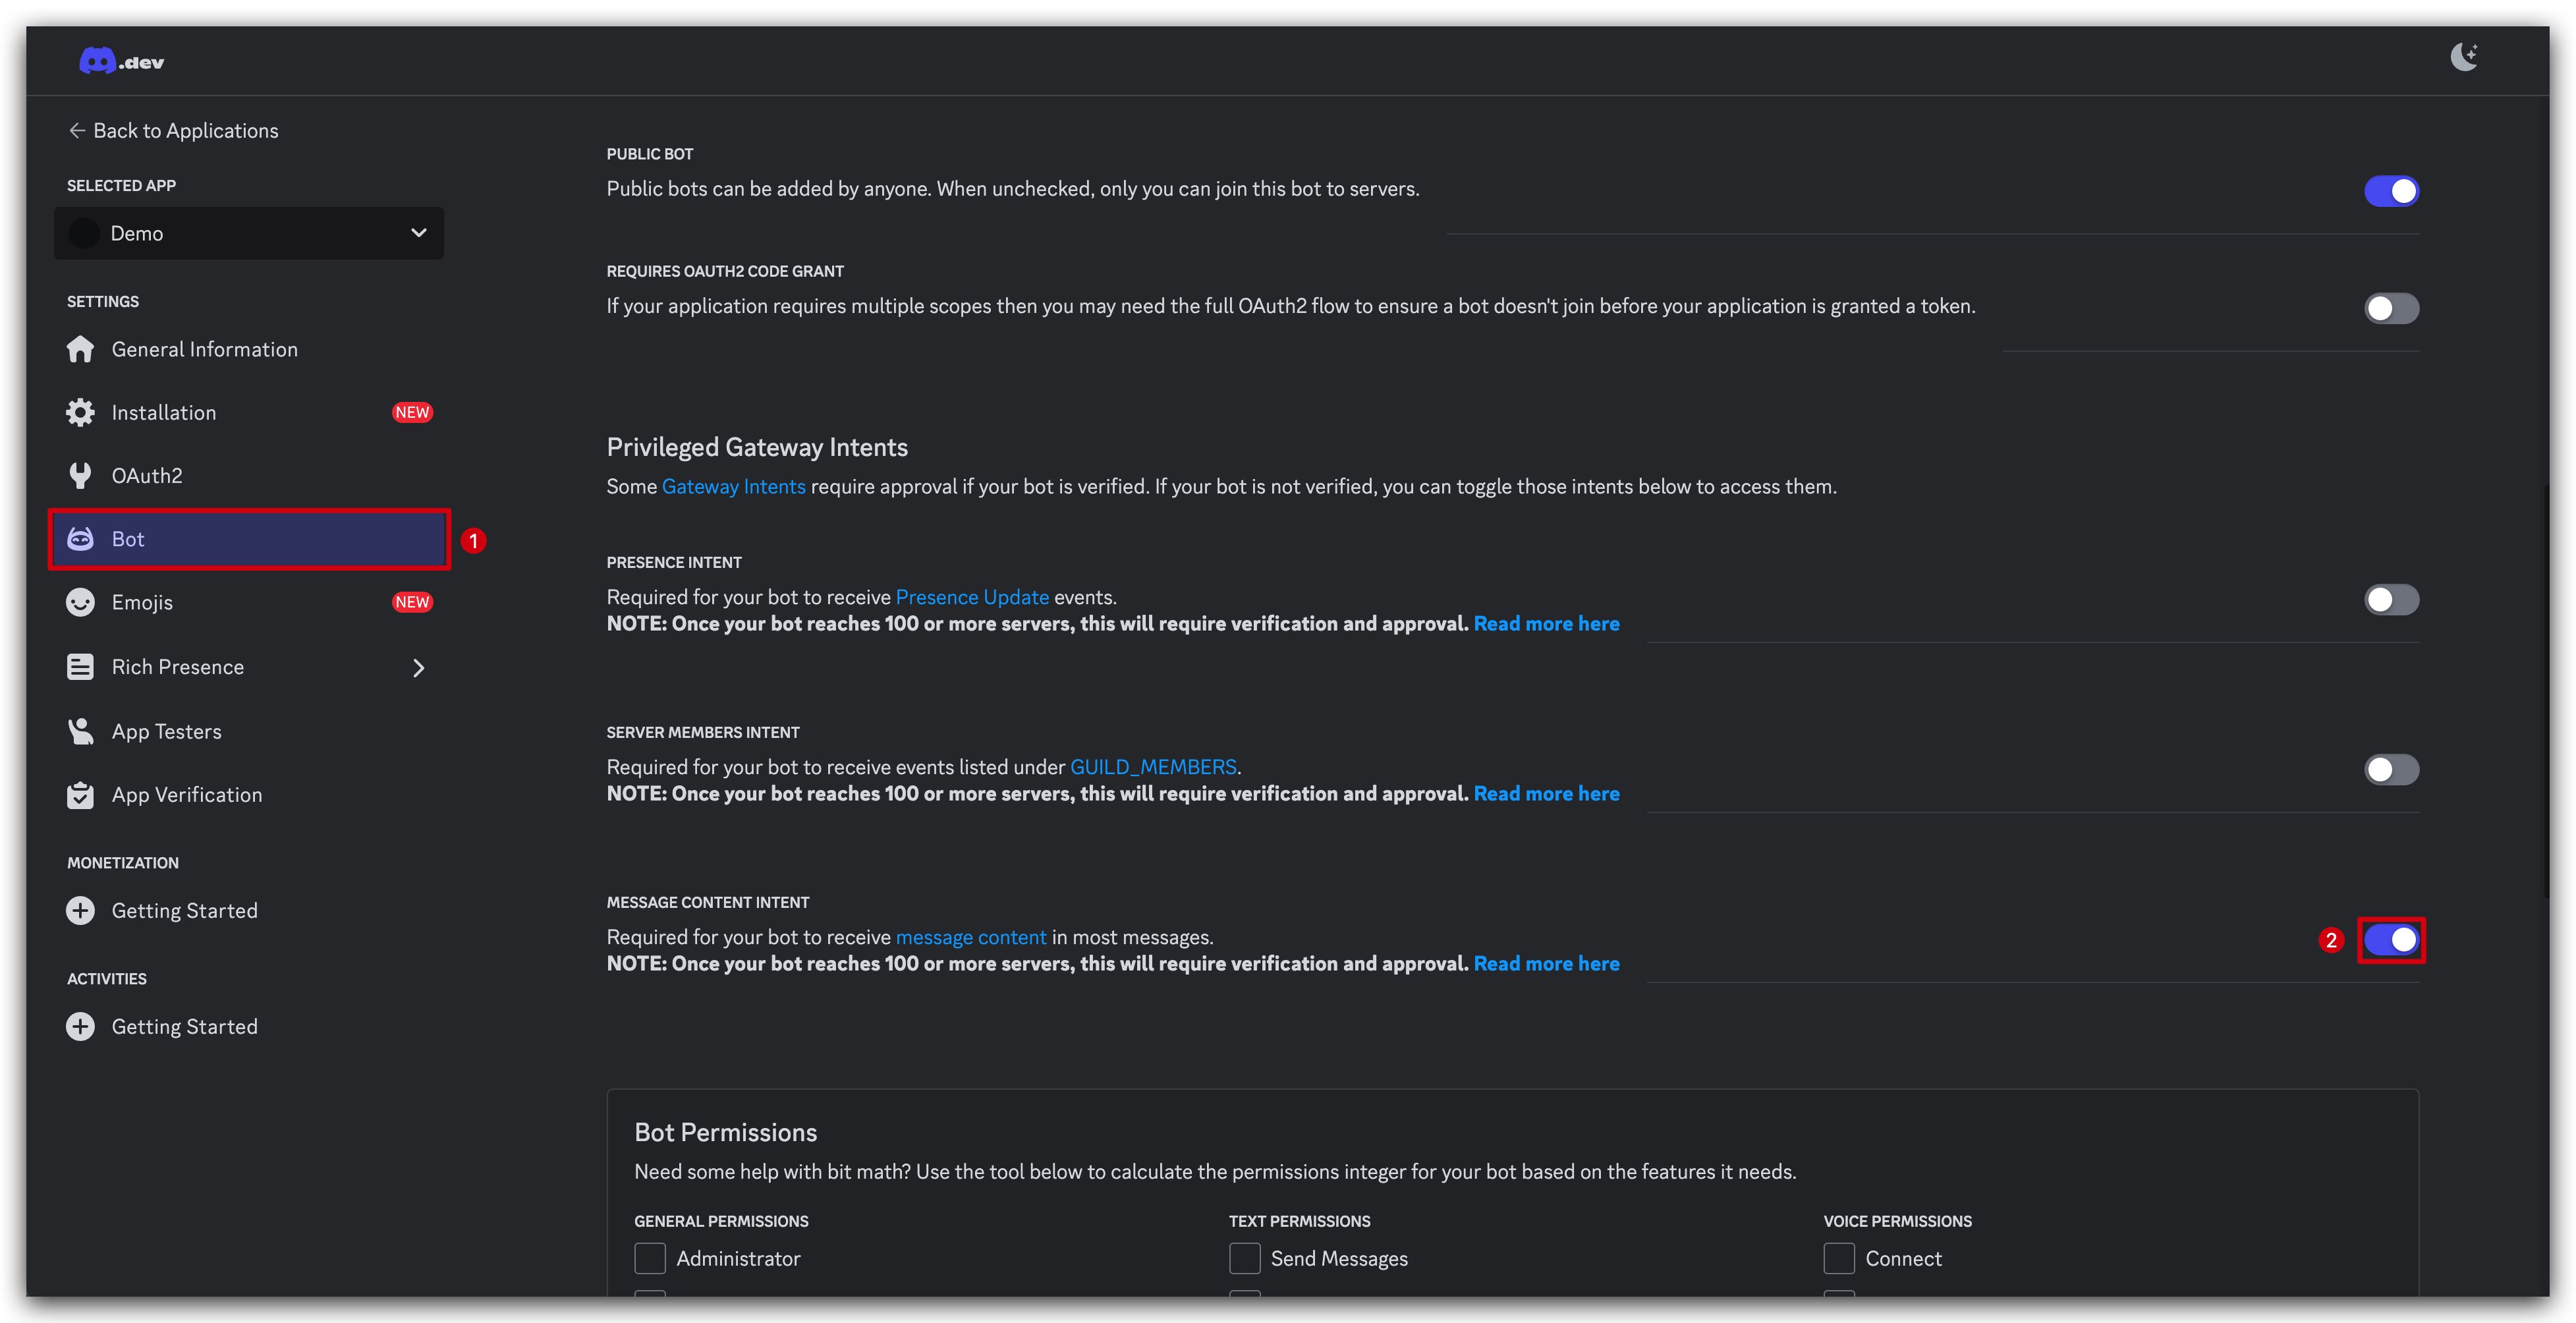
In the left sidebar of your application page, click on the Bot tab under Settings.
-
In the Privileged Gateway Intents section, you will see several options. For this tutorial, we only need to enable the MESSAGE CONTENT INTENT. This allows your bot to read message content. Toggle the switch next to MESSAGE CONTENT INTENT to enable it. When enabled, the switch will turn blue.
Whenever you make a change to your bot, a pop-up will appear at the bottom, prompting you to Save Changes. Please ensure you do this before proceeding.
Depending on what you intend to do with your application, you may need to enable additional intents. For more complex bot functionalities, you might need to enable other intents like PRESENCE INTENT or SERVER MEMBERS INTENT. However, for the purpose of this tutorial where we're only sending messages, enabling the MESSAGE CONTENT INTENT is sufficient.
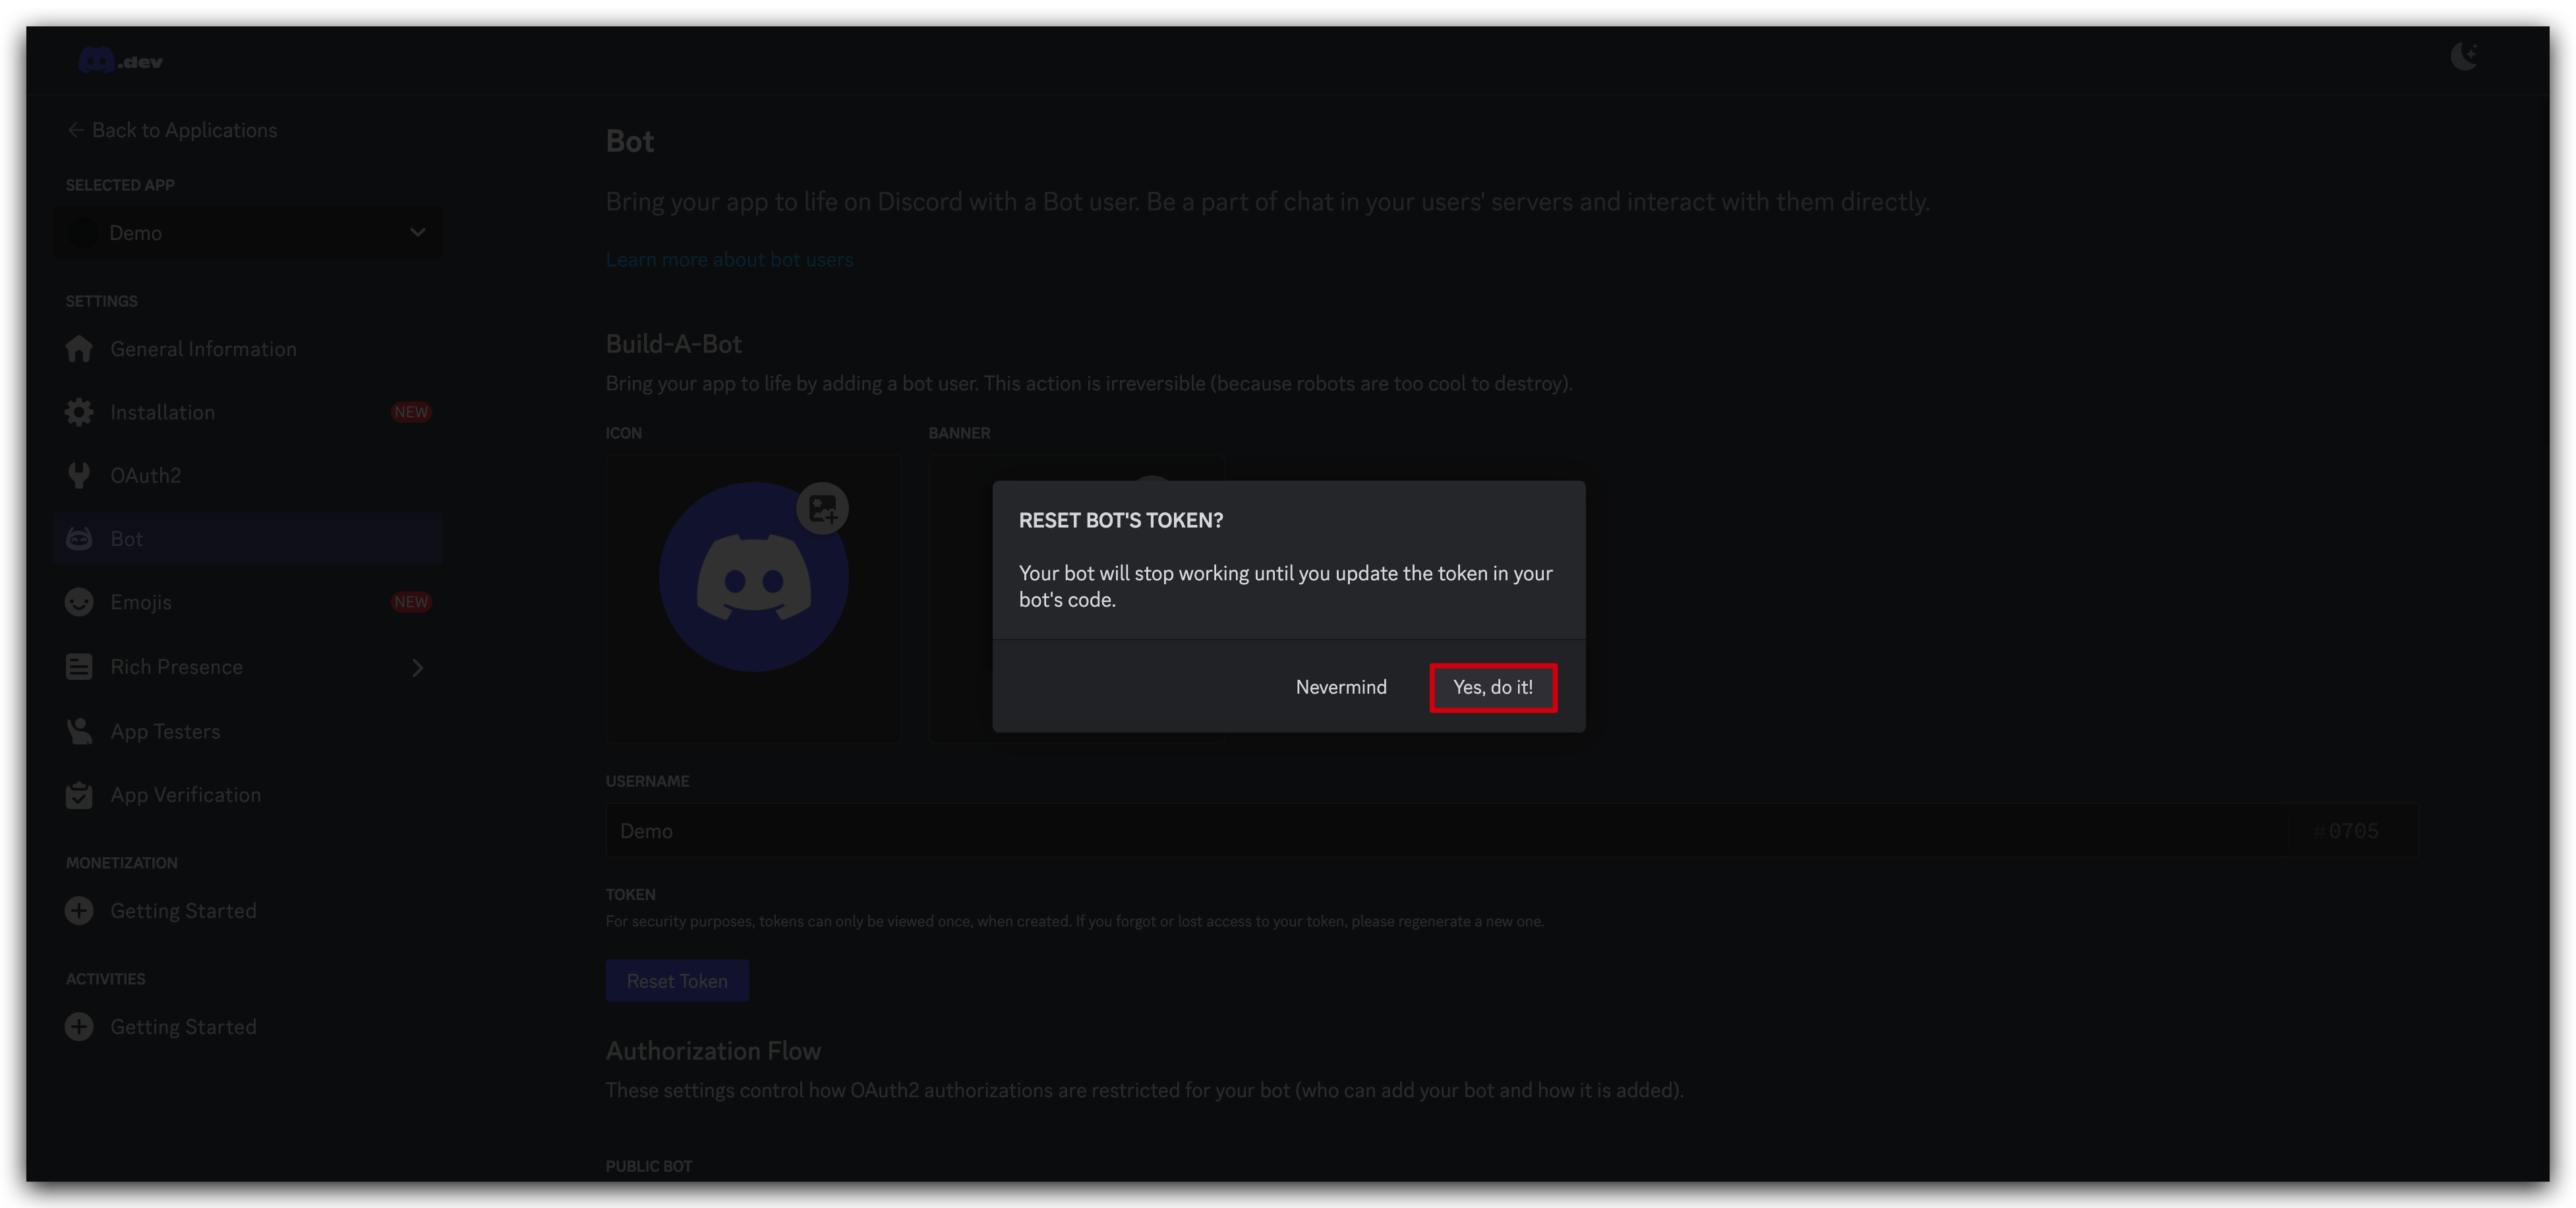
While on the Bot page, you'll also see a section titled Token toward the top of the page. Click the Reset Token button to generate a new token for your bot.

Be aware that resetting your token will cause your bot to stop working until you update the token in your bot's code. Ensure that you're prepared to update your bot's configuration before proceeding with the reset.
You may be prompted for Multi-factor authentication. If so, complete this step as required before proceeding.
Copy this token and keep it safe. You'll need this token to authenticate your bot in Node-RED later.
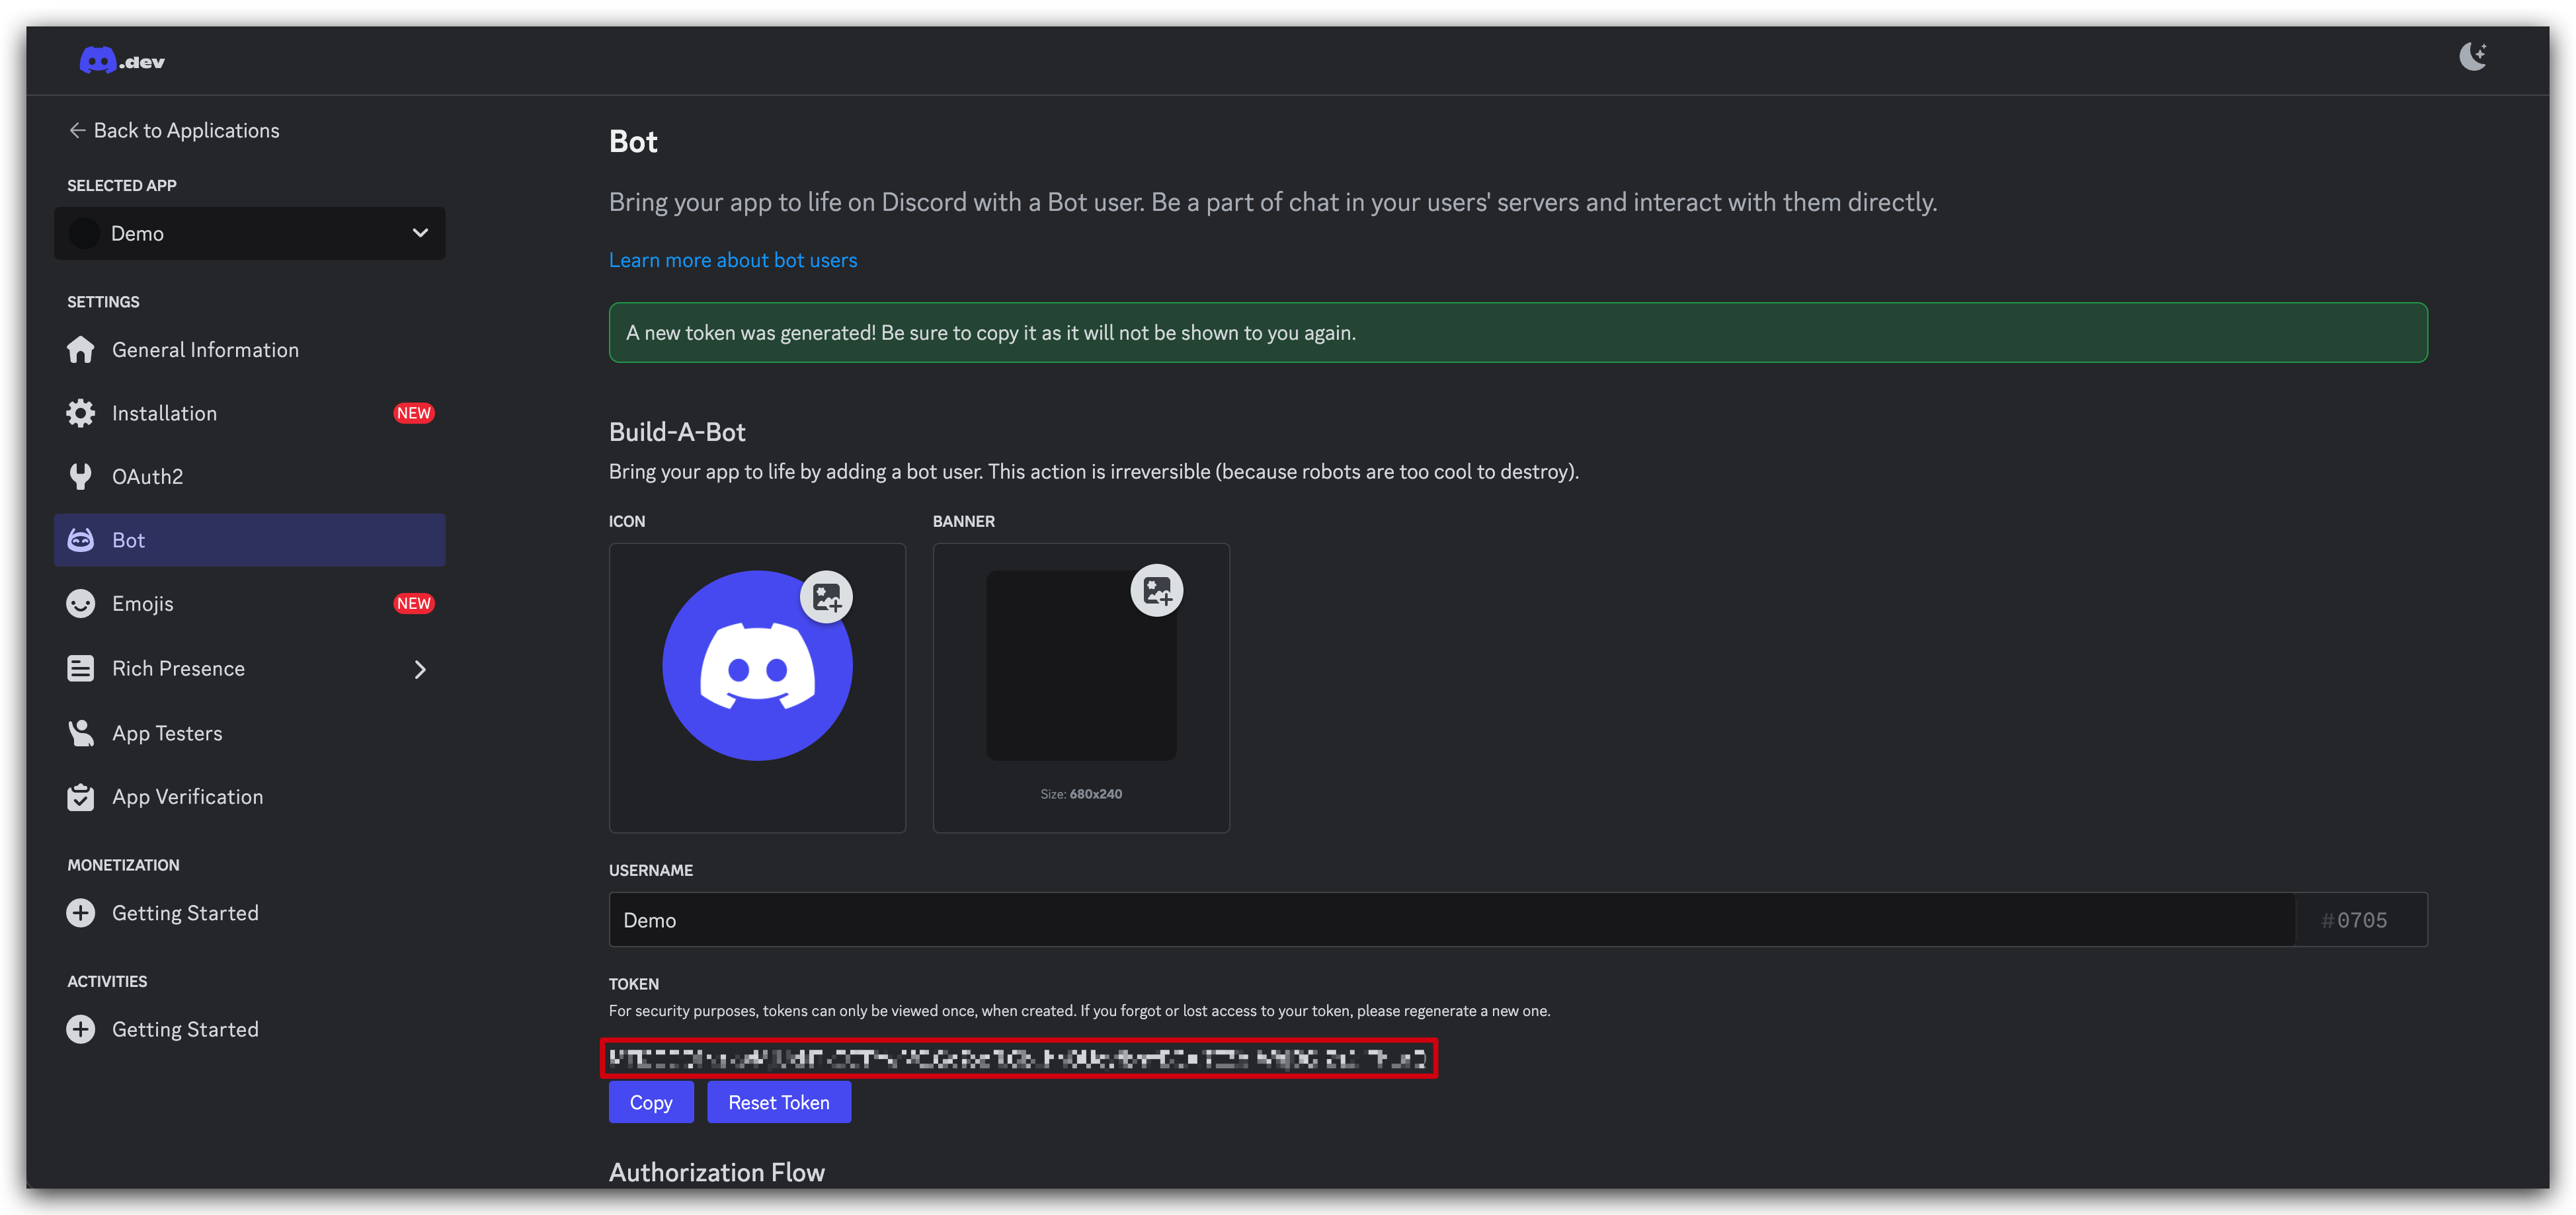
Never share your bot token publicly. Anyone with your token can control your bot. If you accidentally expose your token, immediately reset it on this page.
Step 6. Configure OAuth2 Settings
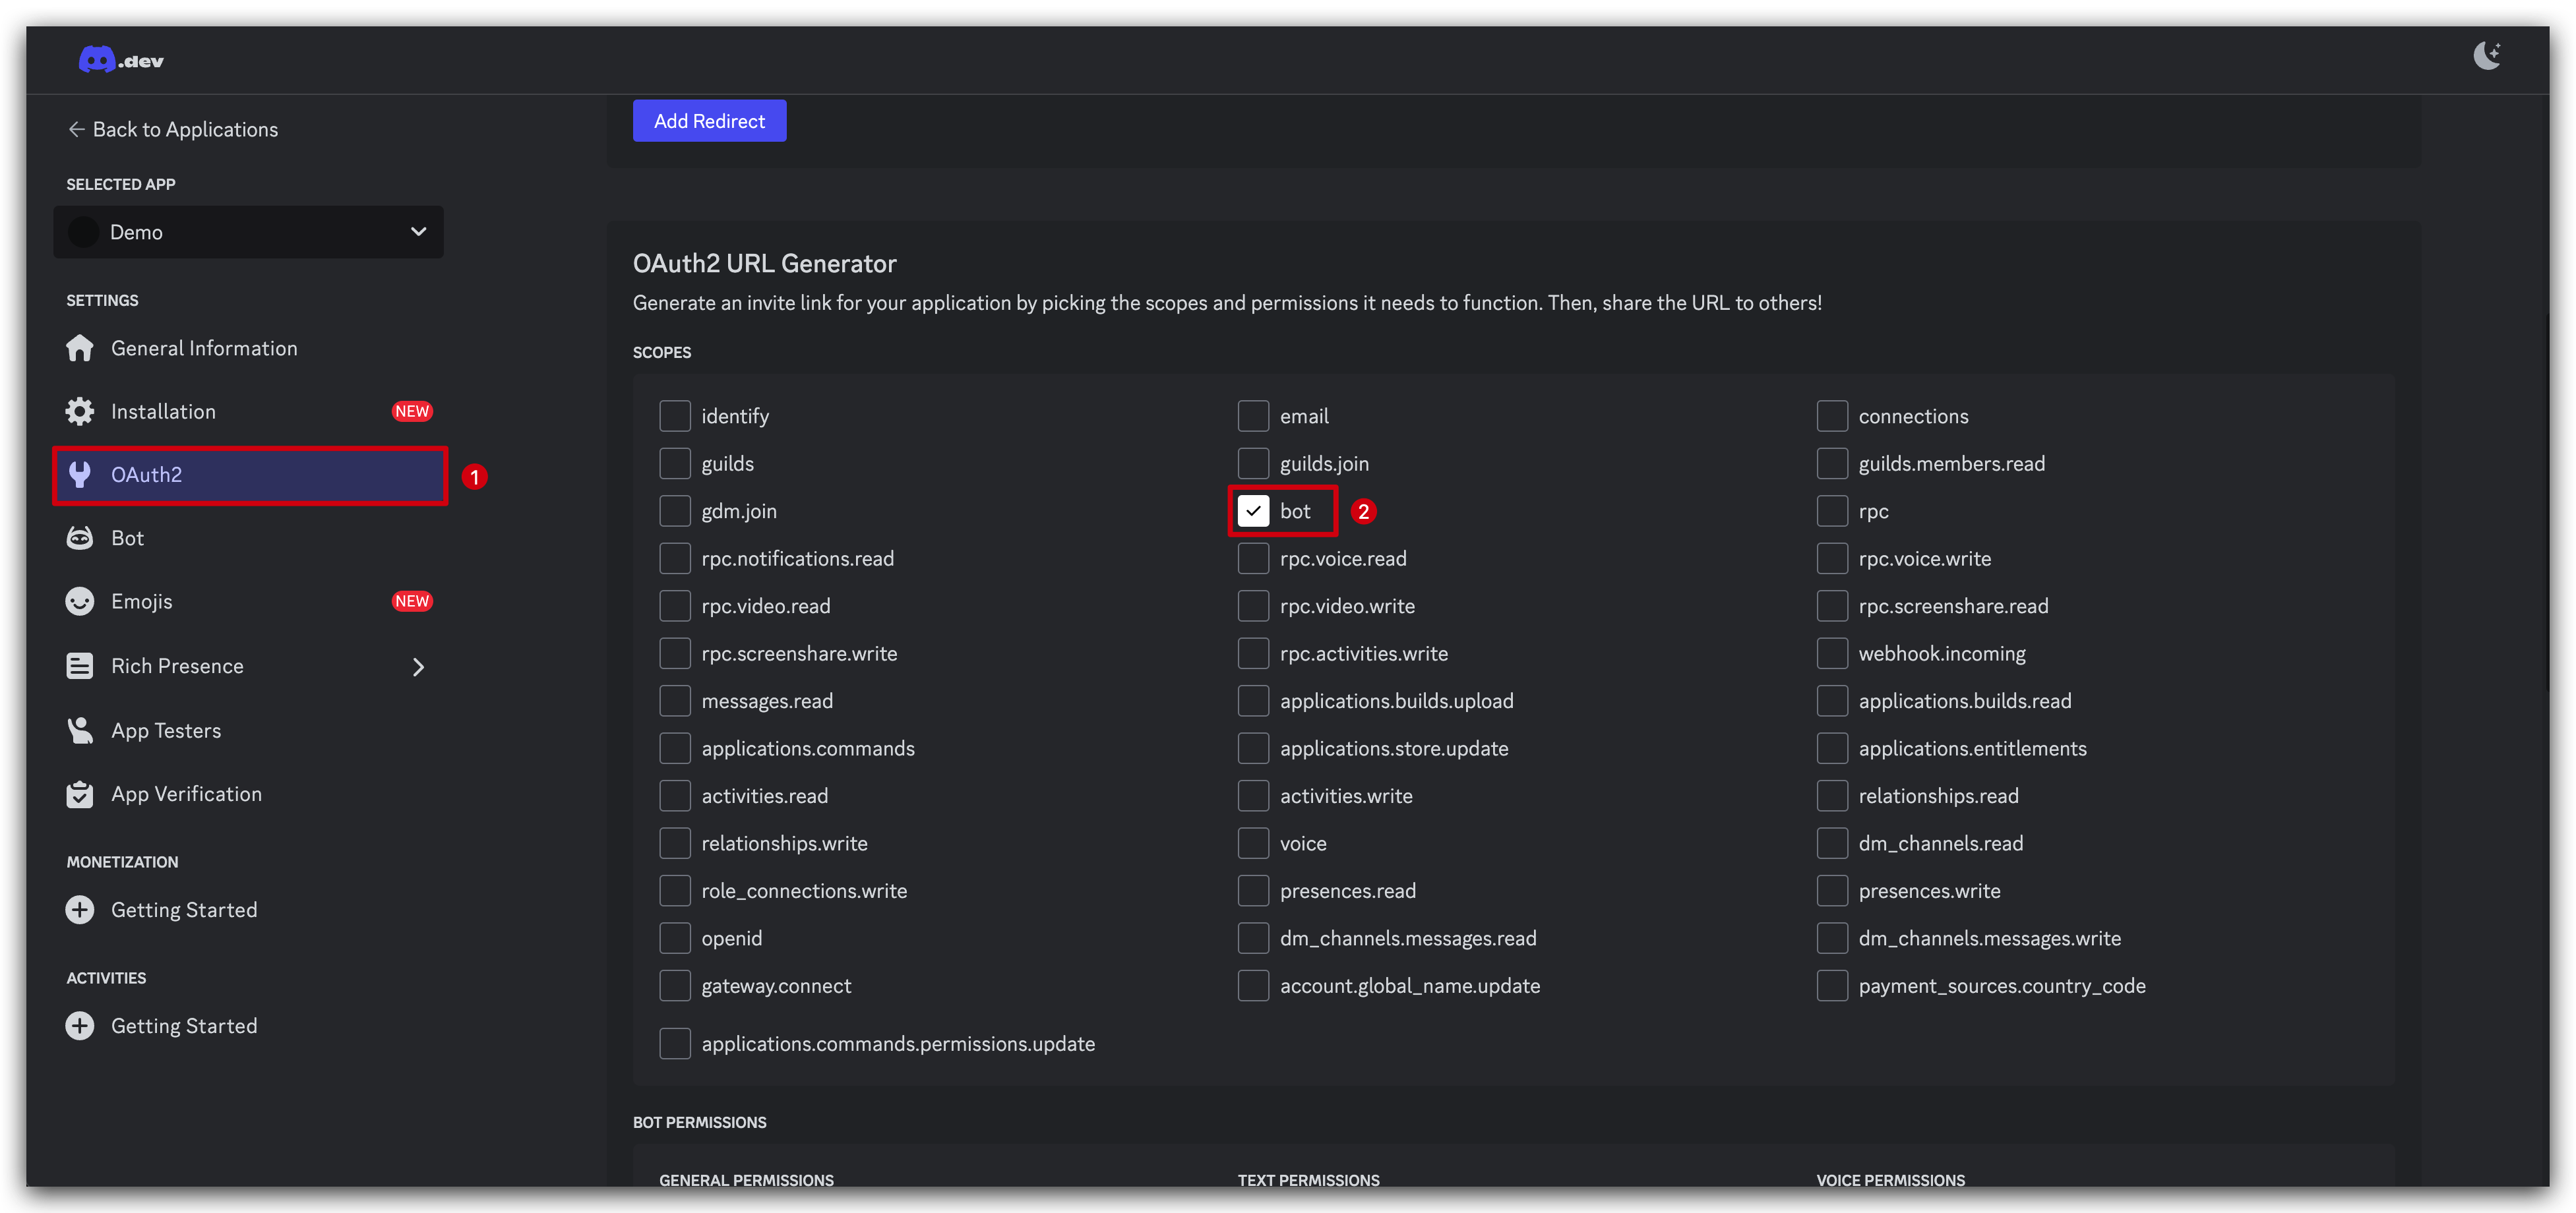
Now, switch over to the OAuth2 tab under Settings and scroll down until you see OAuth2 URL Generator. Here, we will check the bot scope since we are creating a bot application.
After selecting the bot scope, a new box will appear that allows you to select Bot Permissions. For the purposes of this tutorial, we are going to give the bot Administrator permissions, which provides the bot access to all functionalities.
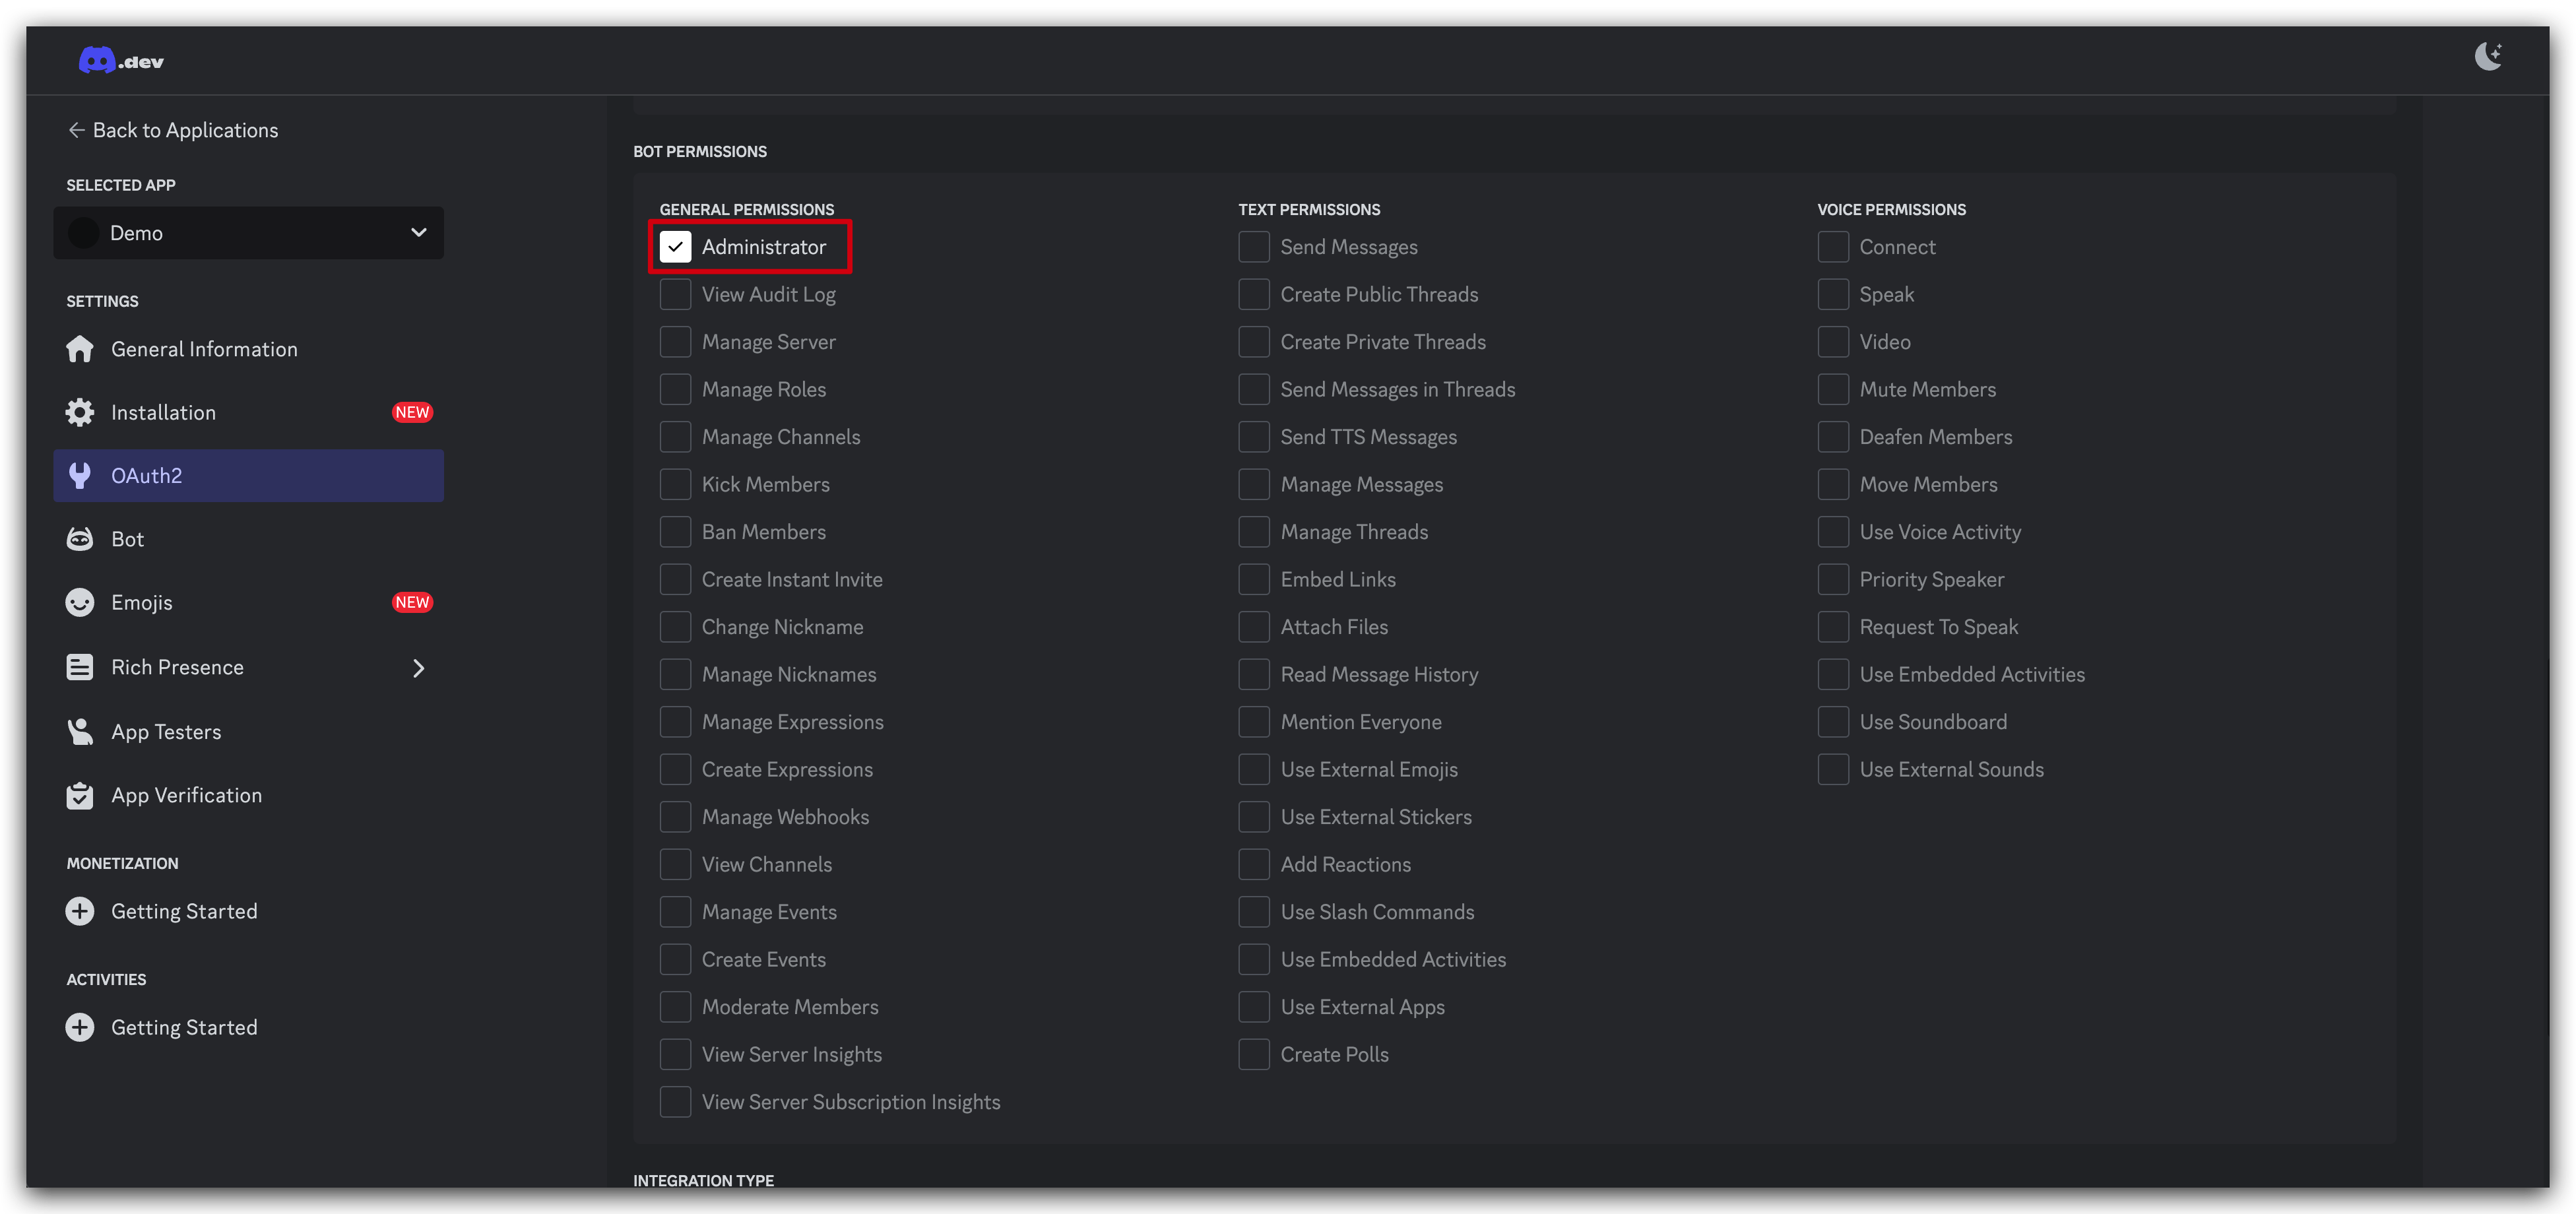
Granting Administrator permissions to a bot gives it full access to all server functionalities. In a production environment, it's recommended to follow the principle of least privilege and only grant the specific permissions your bot needs for its intended functions.
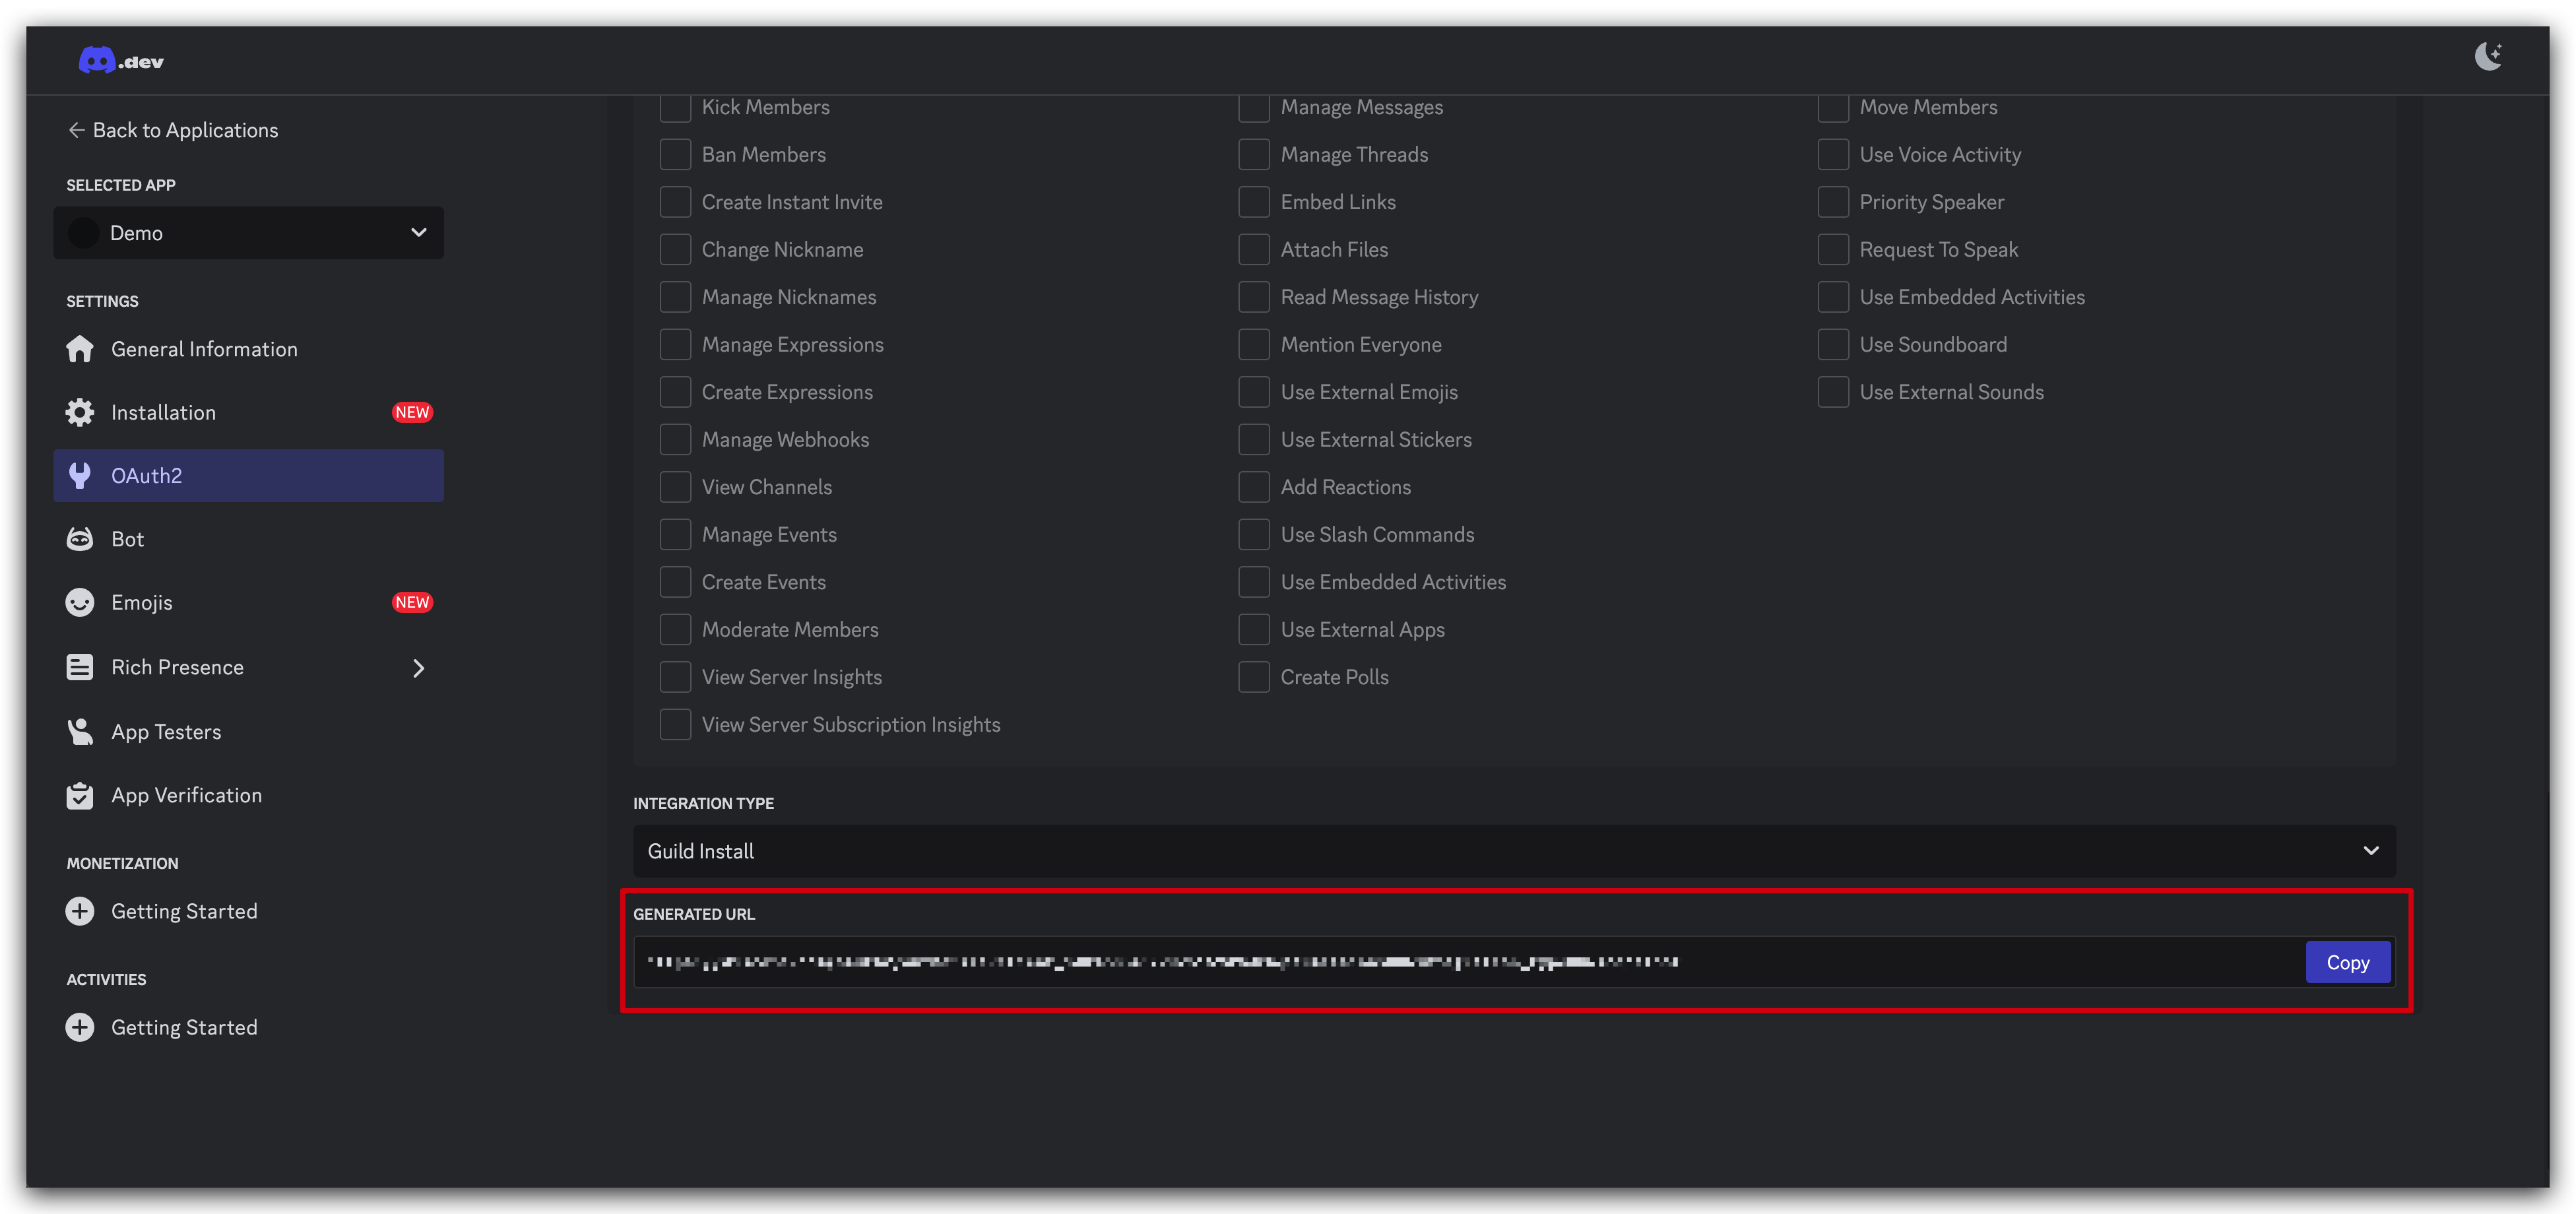
Finally, scroll down to see your newly generated URL. Copy this URL and paste it into your web browser's address bar.
Step 7. Grant Bot Access to Server
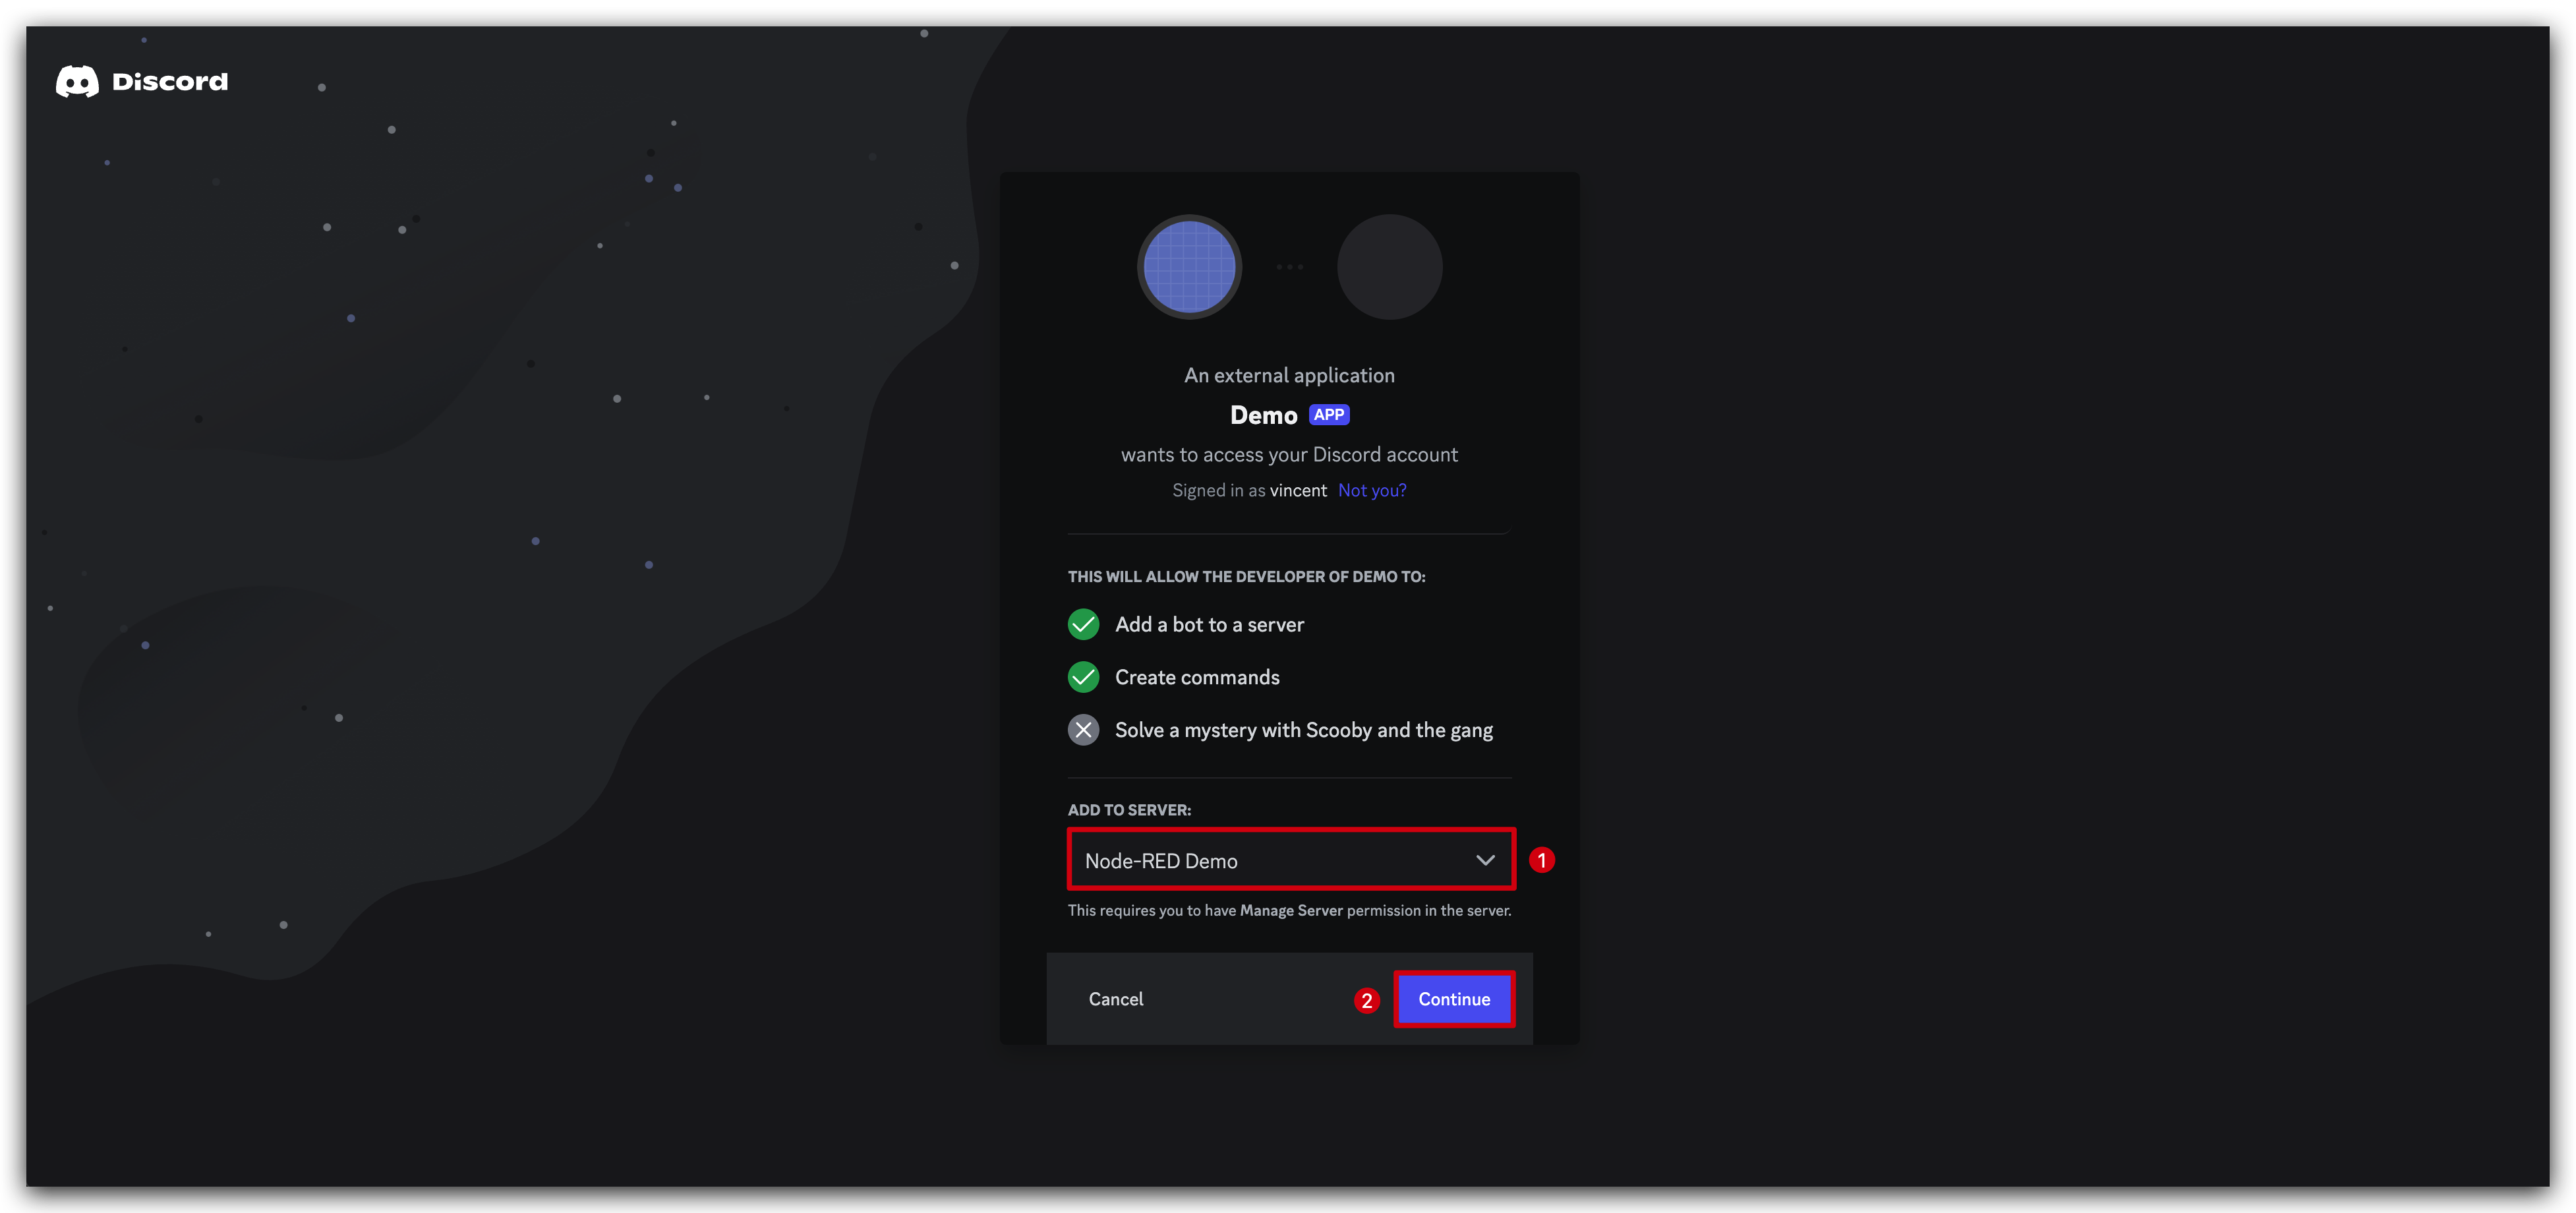
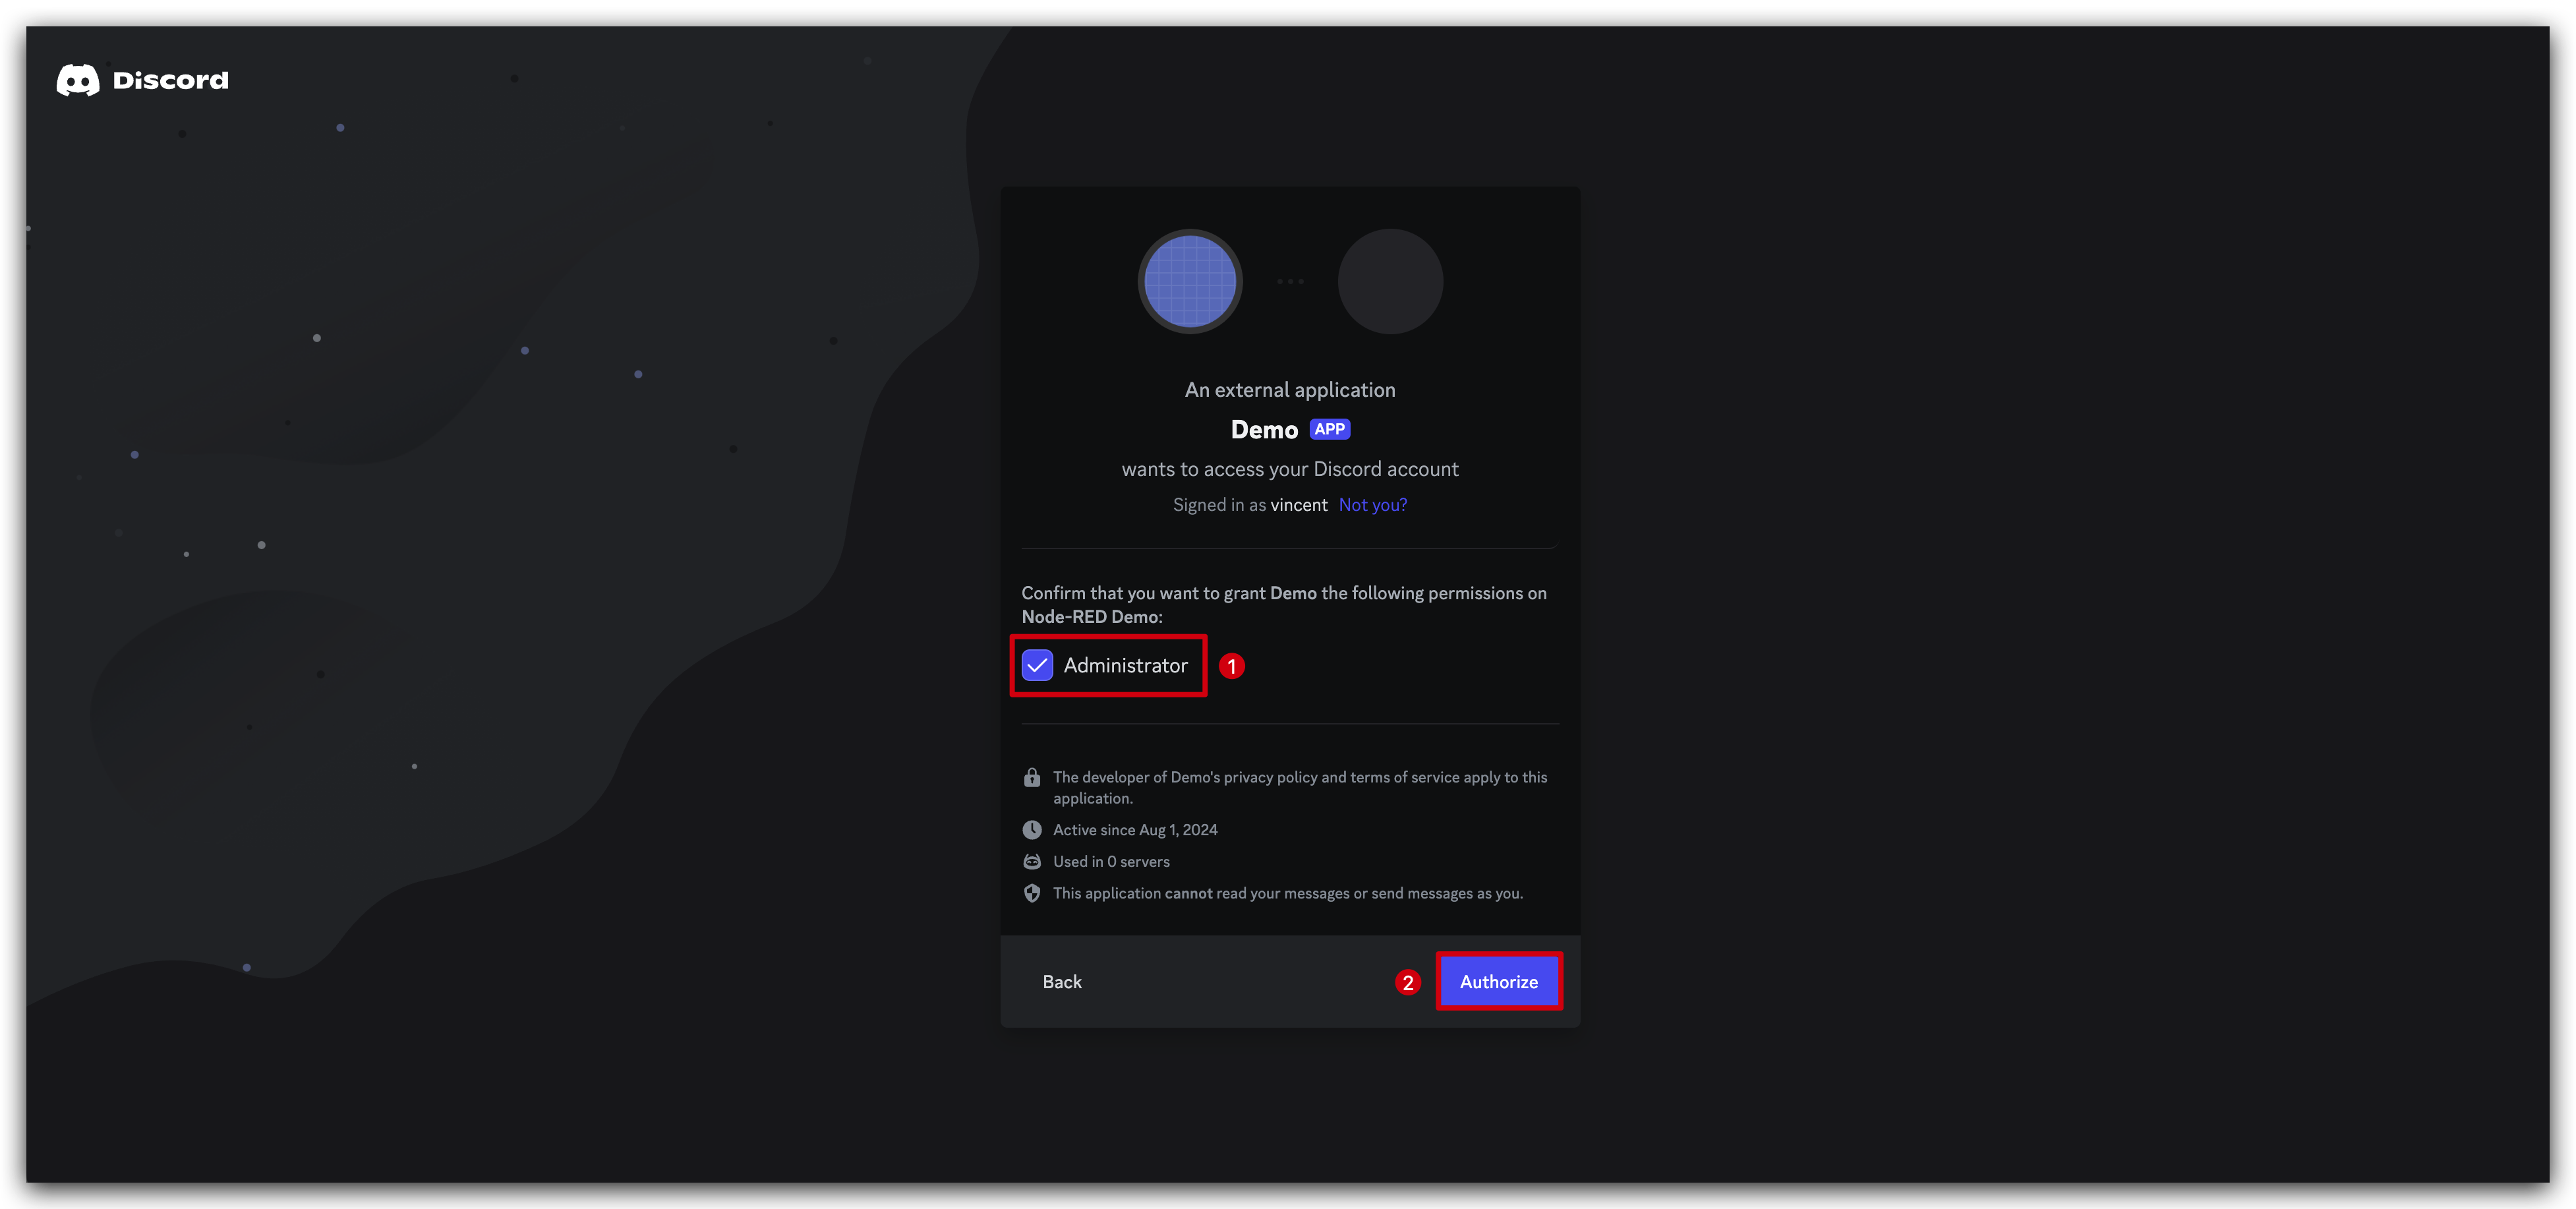
You'll be prompted to select a server where you want to add the bot. Choose the appropriate server from the dropdown menu and click Continue.
On the next screen, you'll see a comprehensive list of permissions you're granting to the bot. These permissions are based on what you selected in the OAuth2 URL Generator in Step 6. Review each permission carefully, then click Authorize.
Similar to in Step 5, you may be prompted for multi-factor authentication again. If so, complete this step as required before proceeding.
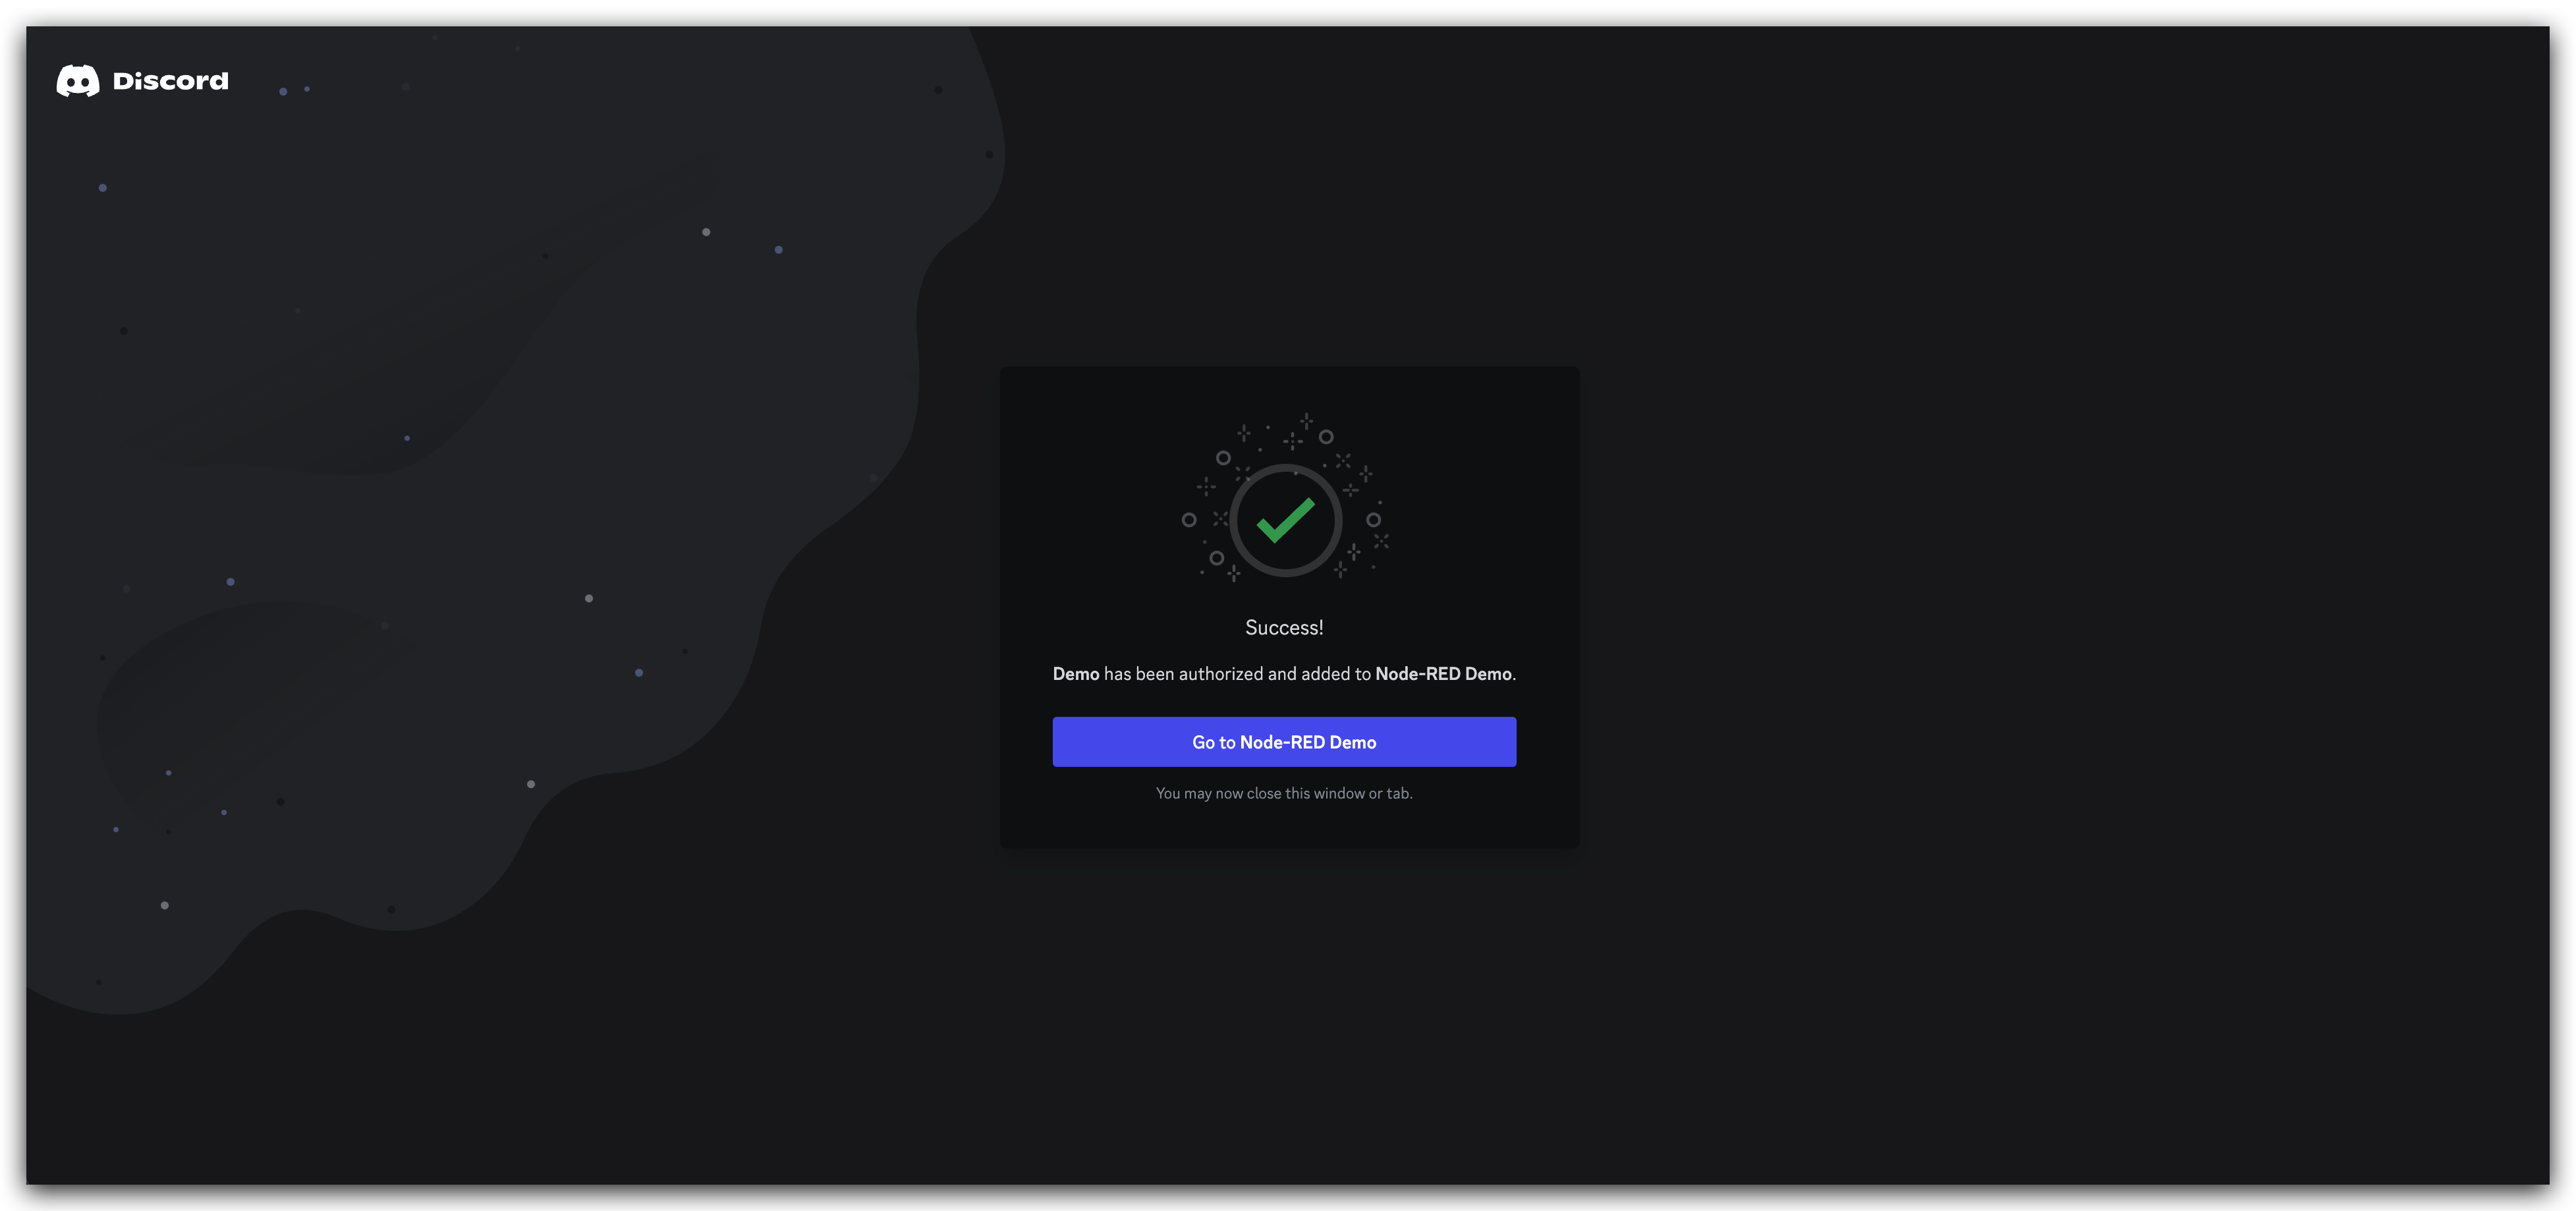
After successful authorization, you'll see a confirmation message indicating that the bot has been added to your selected Discord server. Now, return to your Discord server to continue.
Step 8. Obtain Channel ID
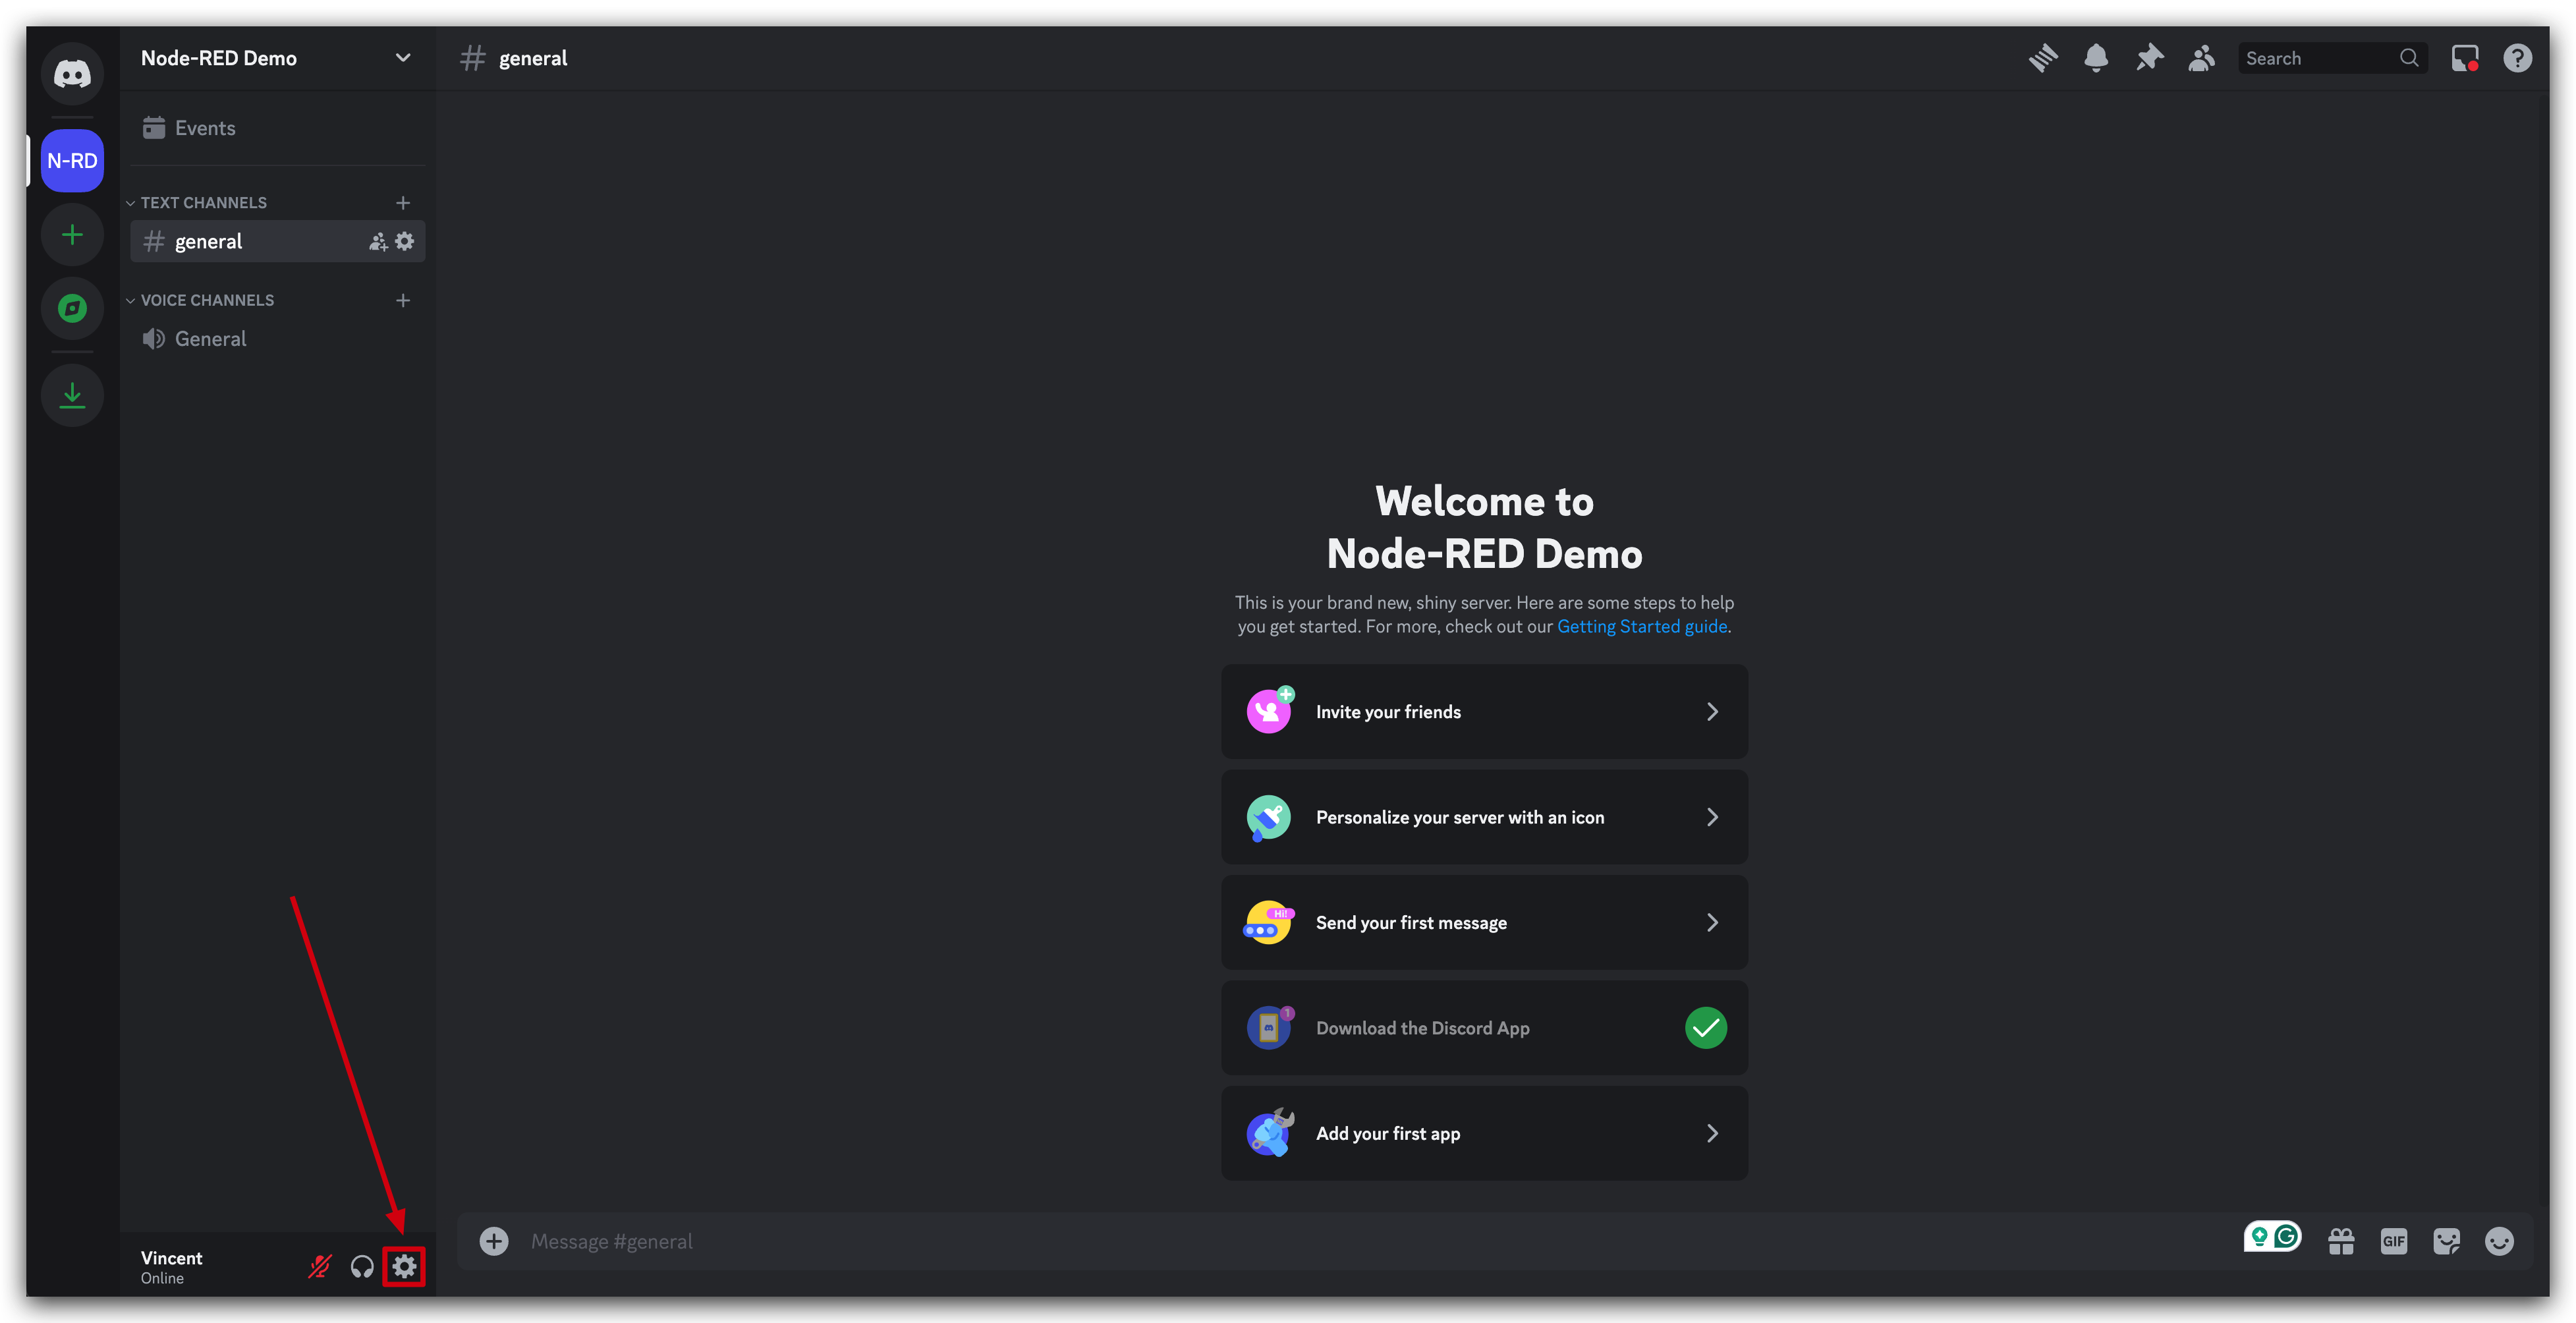
Once you reached your Discord server, click on the gear icon (⚙️) near the bottom of the screen, next to your profile information. This will open your User Settings.
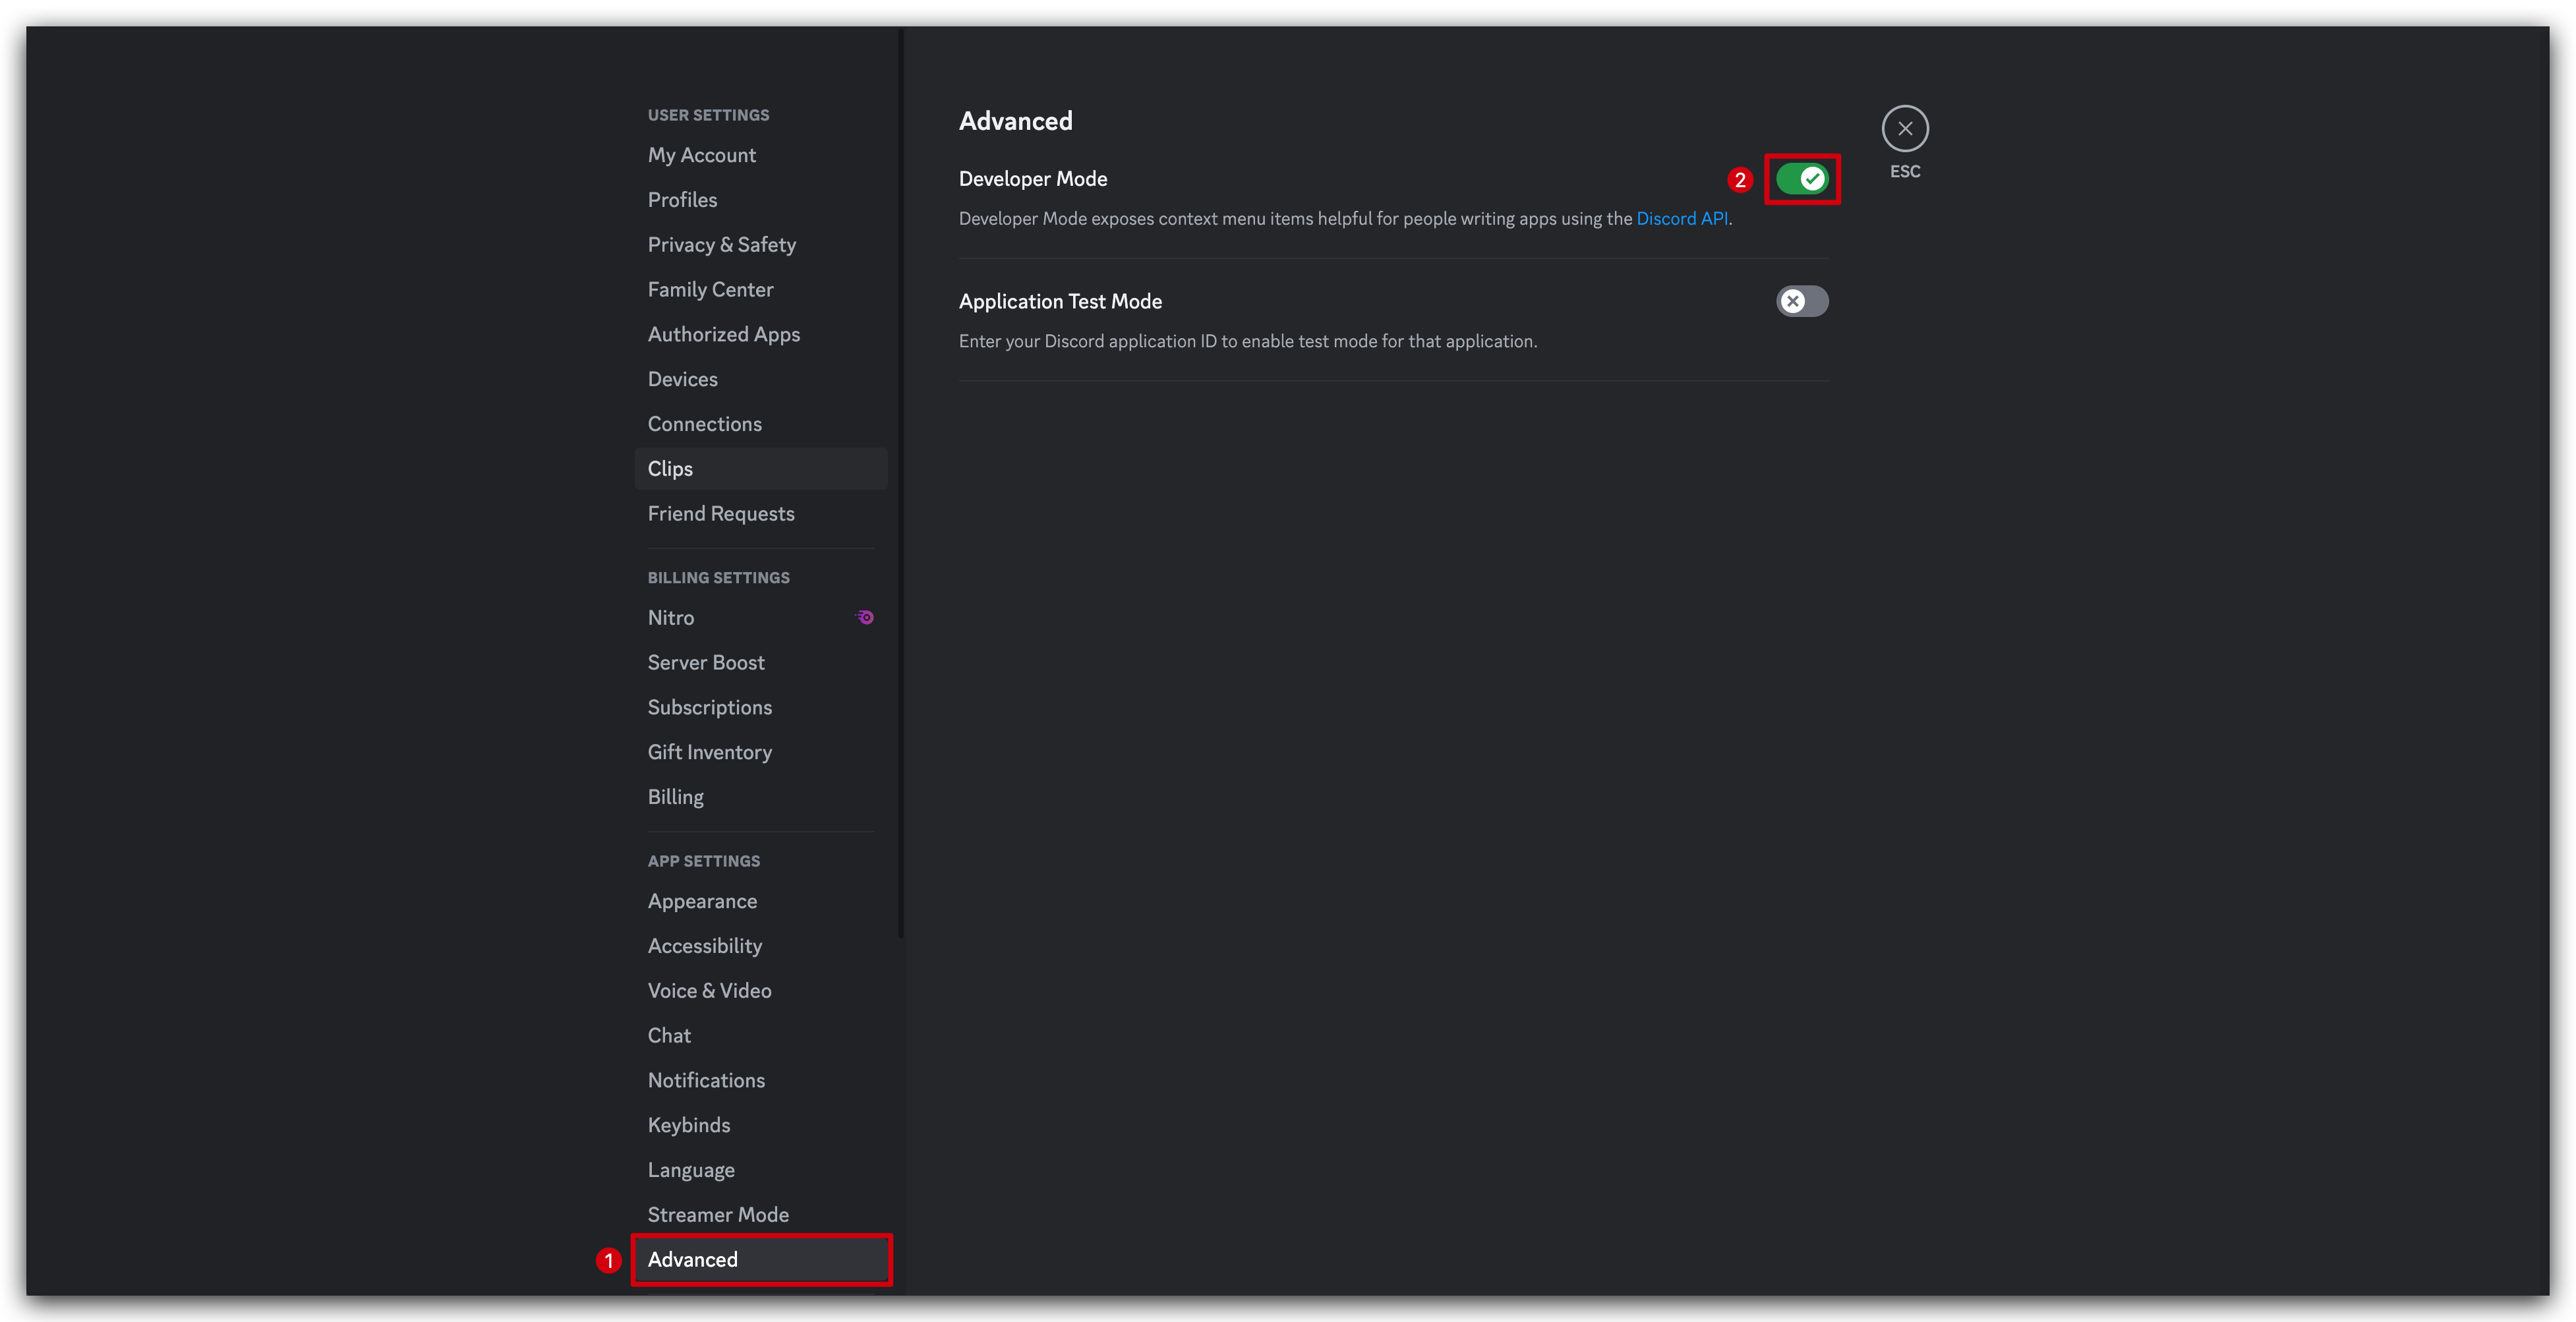
In the User Settings sidebar, scroll down to the App Settings section and click on Advanced. Make sure the Developer Mode toggle is switched on.
Close the User Settings and return to your Discord server. Right-click on the channel you want to use (in this tutorial, we're using the general channel). At the bottom of the context menu that appears, click on Copy Channel ID. Save this Channel ID for use in your Node-RED flow.
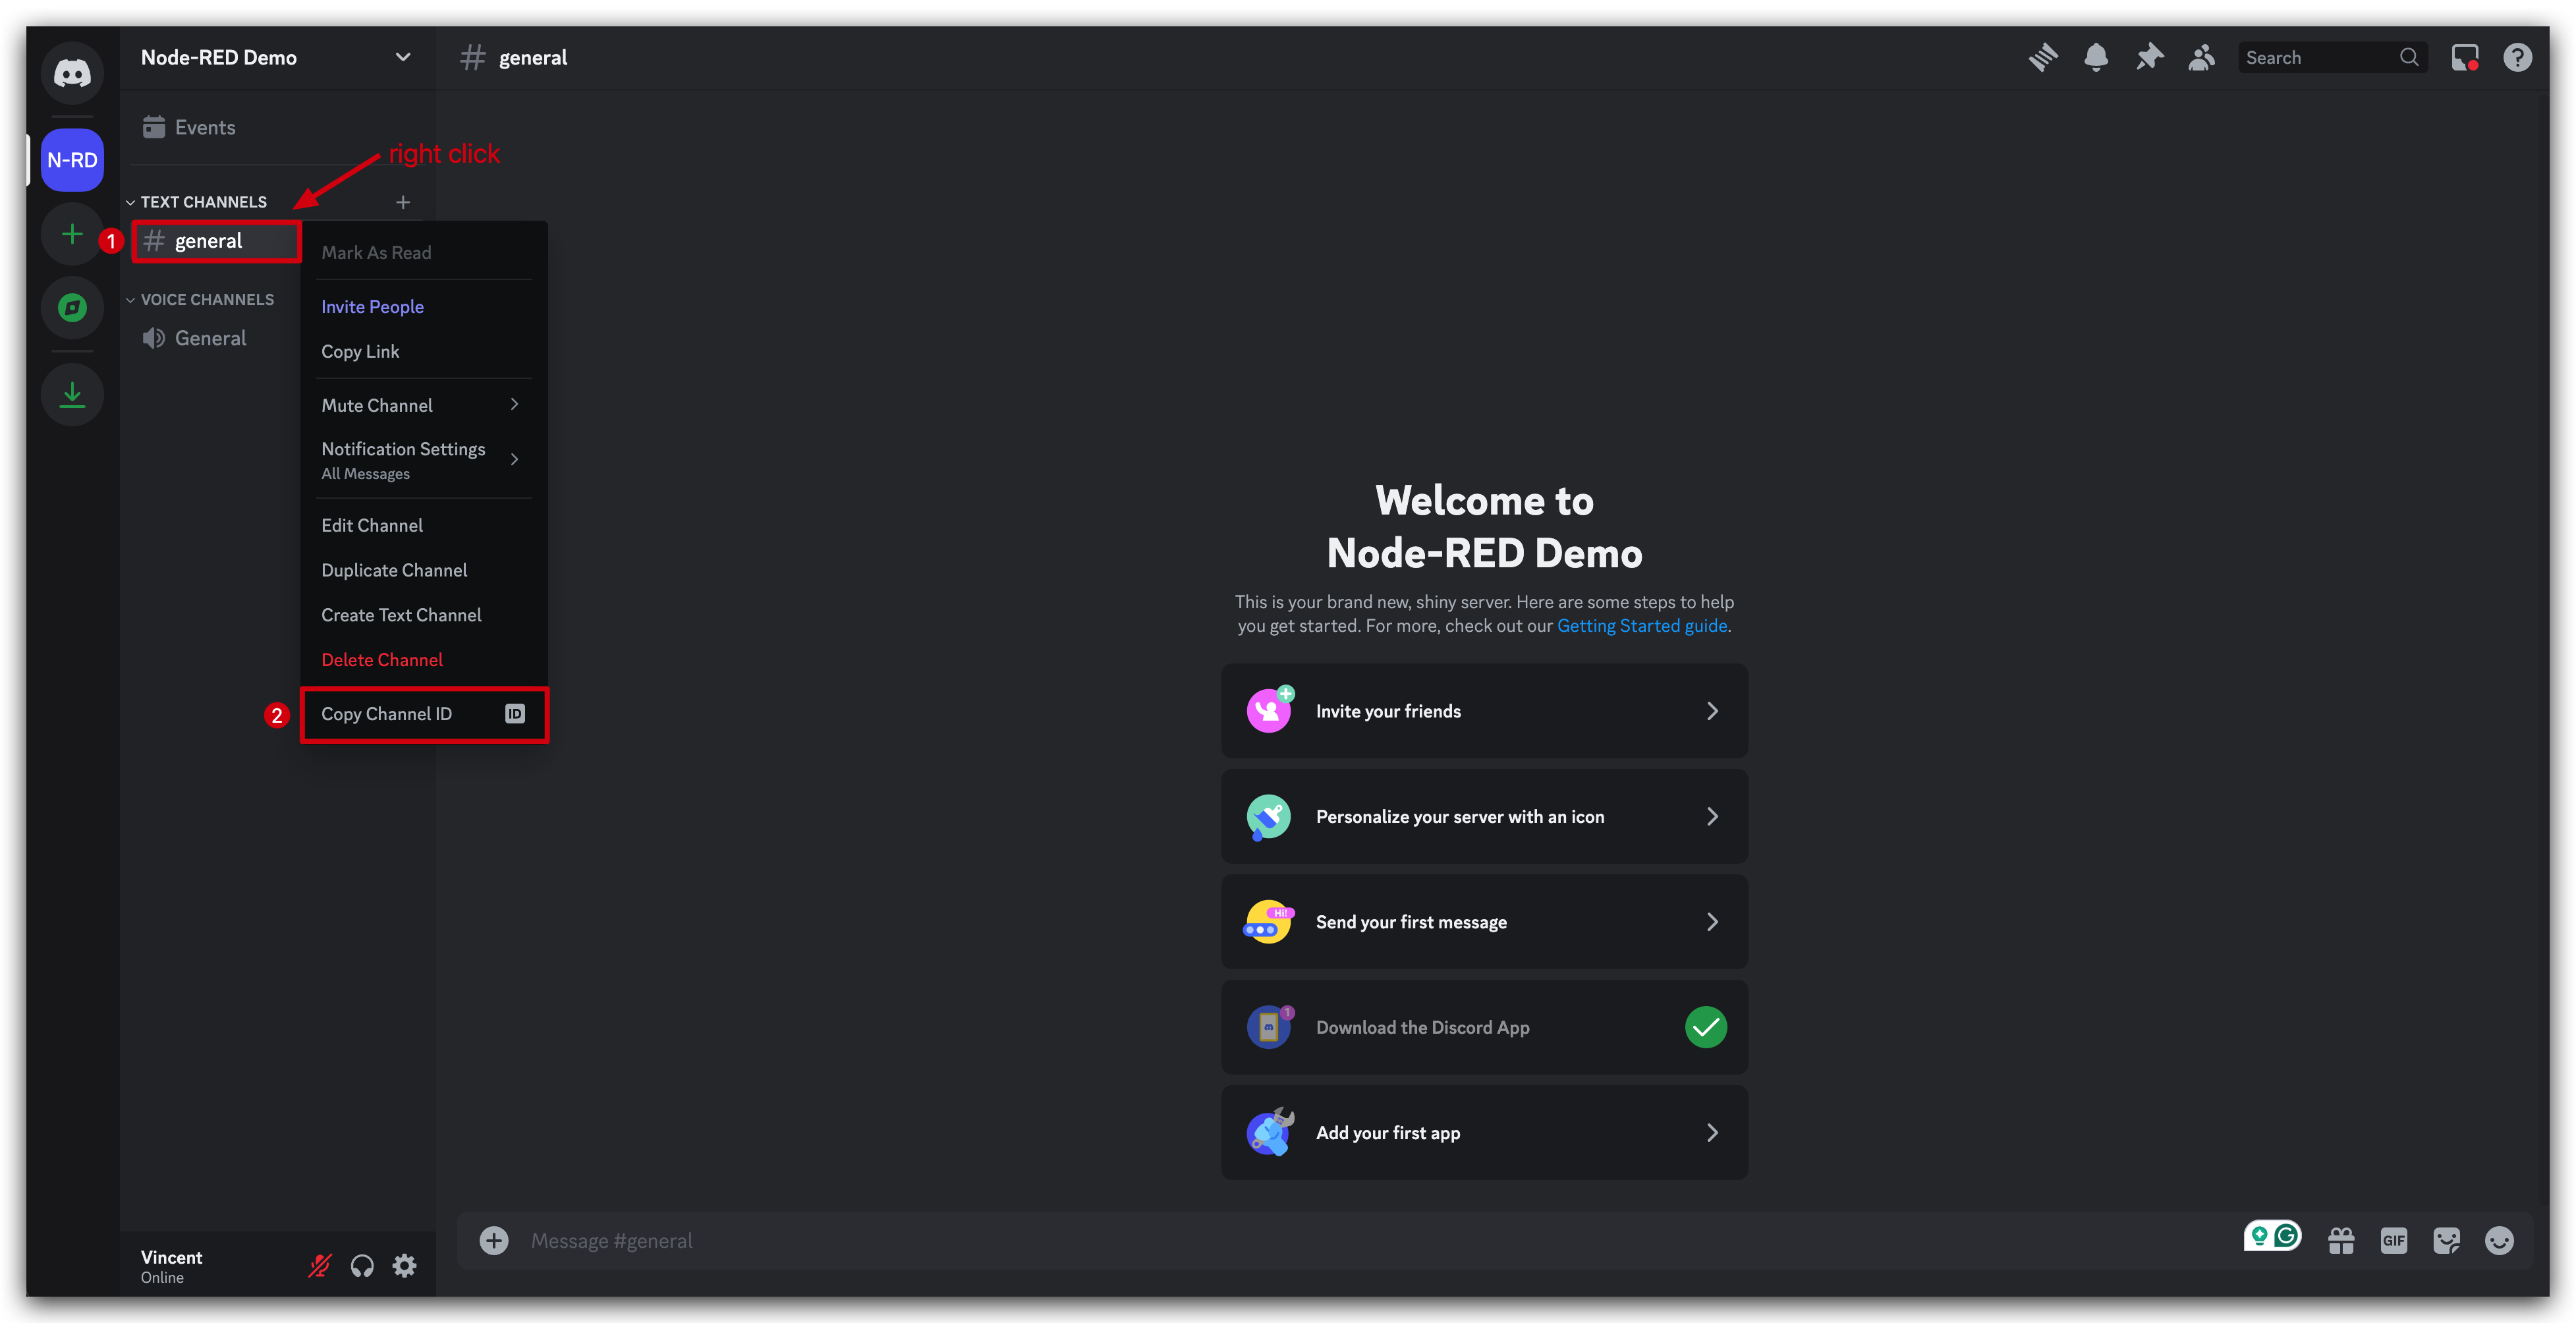
The Channel ID is a unique identifier for each Discord channel. Make sure to keep it secure and don't share it publicly.
Part 3. Integrate Discord with Node-RED
Step 9. Install Discord module
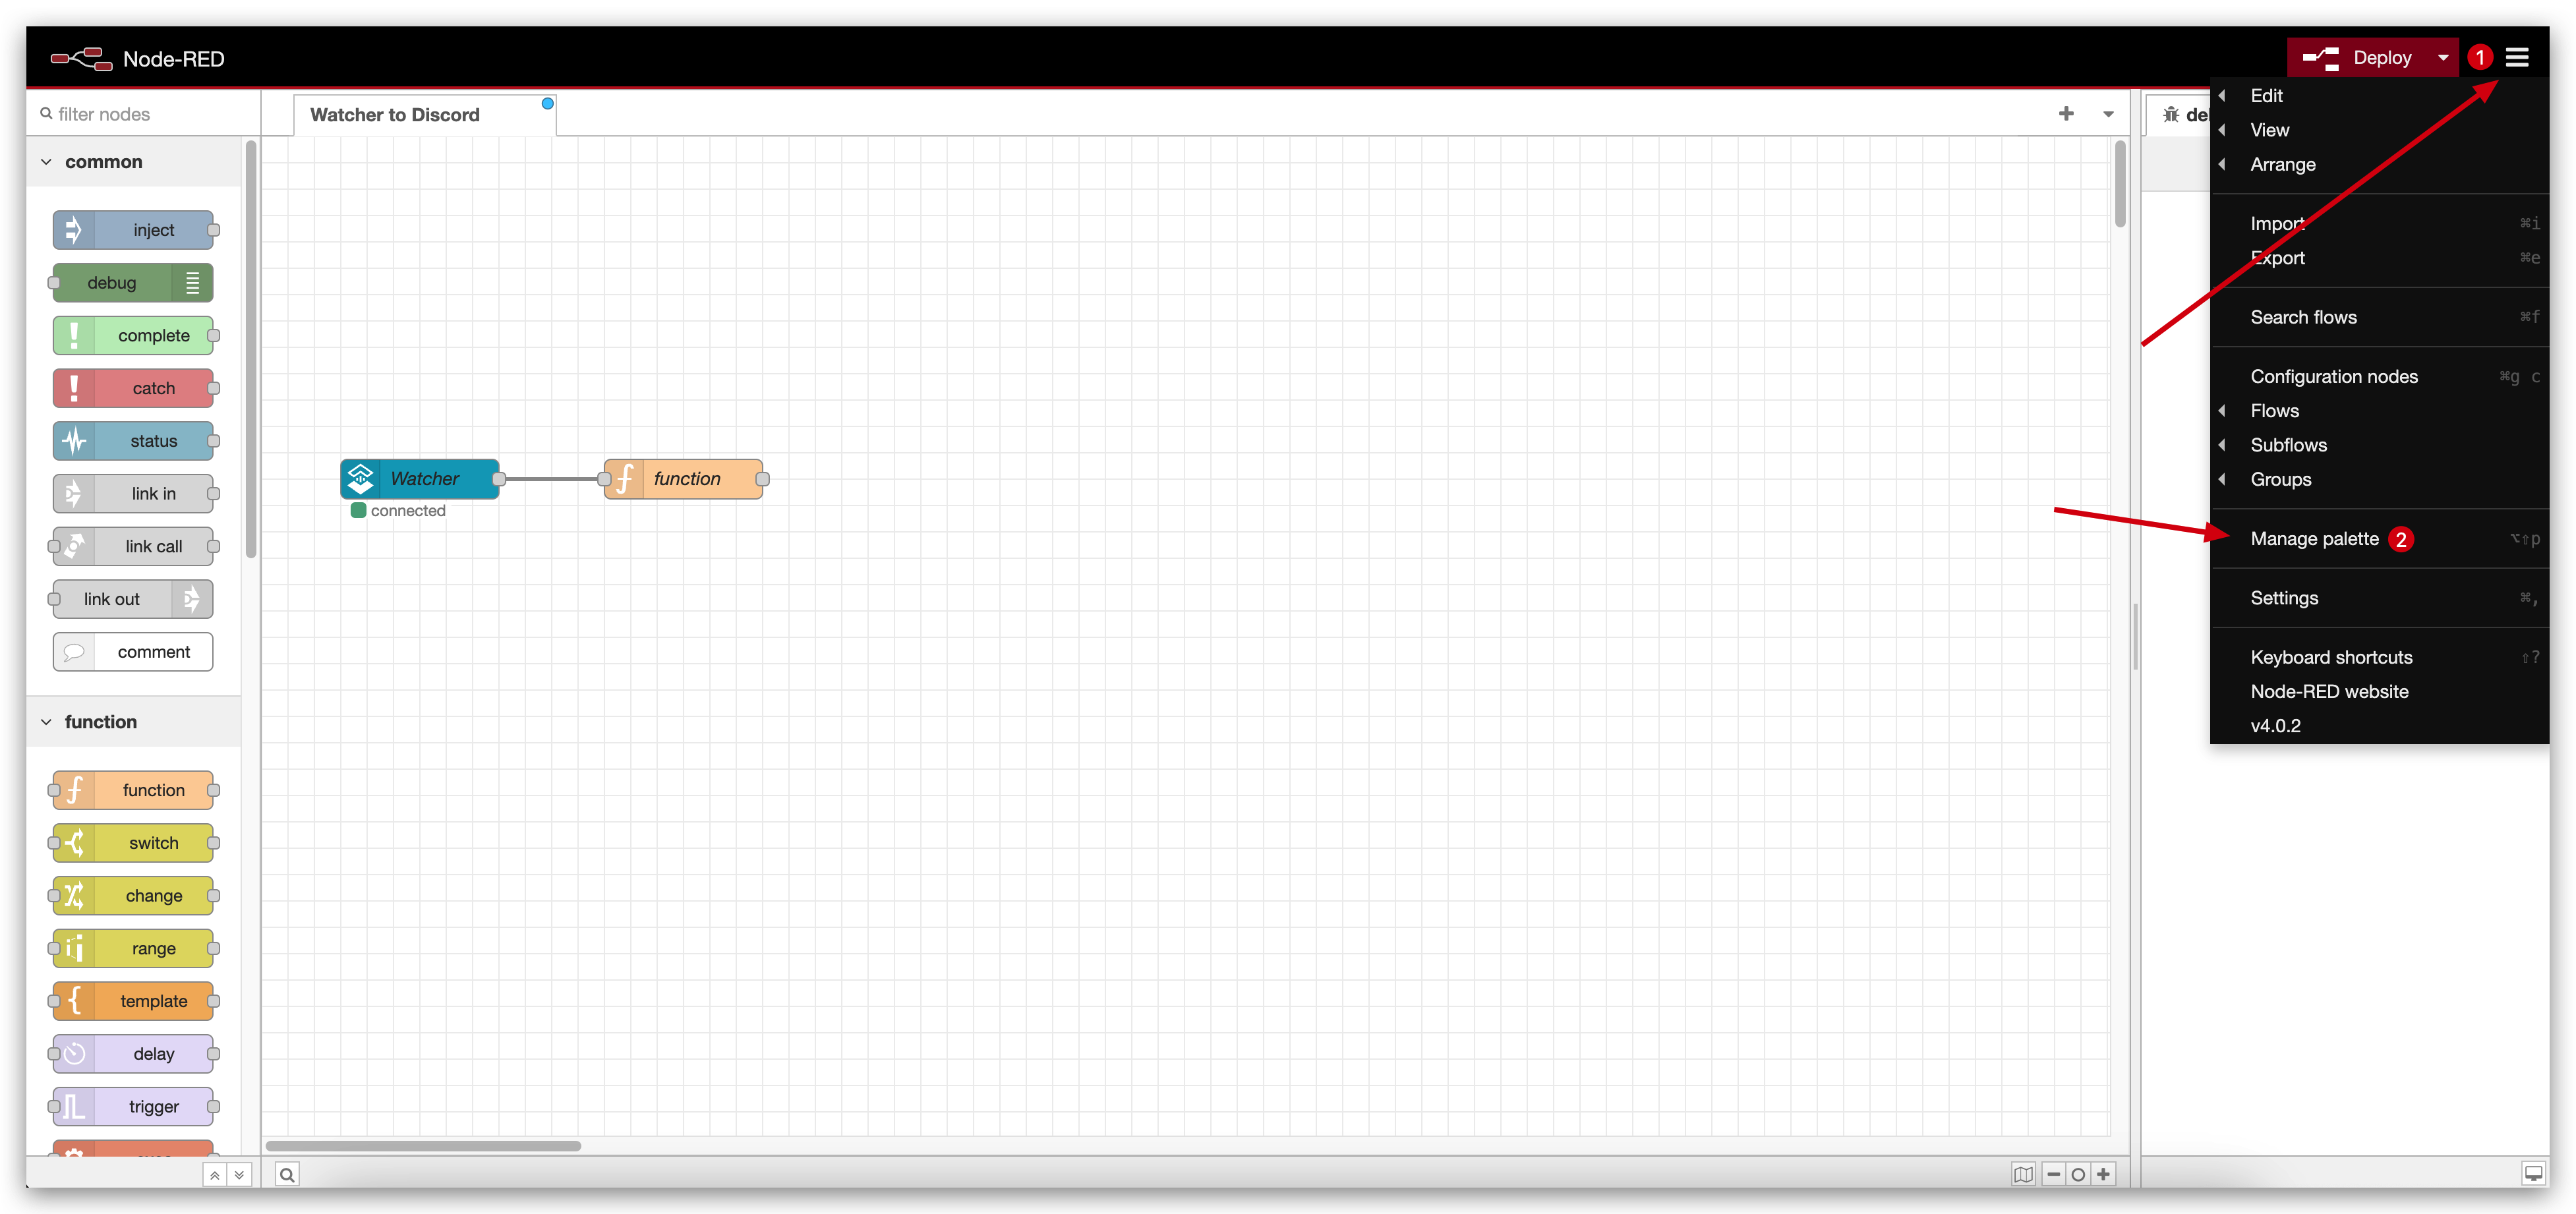
Click the three bars icon and then click Manage palette option. This opens a new window where you can add or remove nodes.
Switch to the Install tab within the palette management window. In the search bar, type discord to find the module. Then, click the install button next to the node-red-contrib-discord-advanced entry.
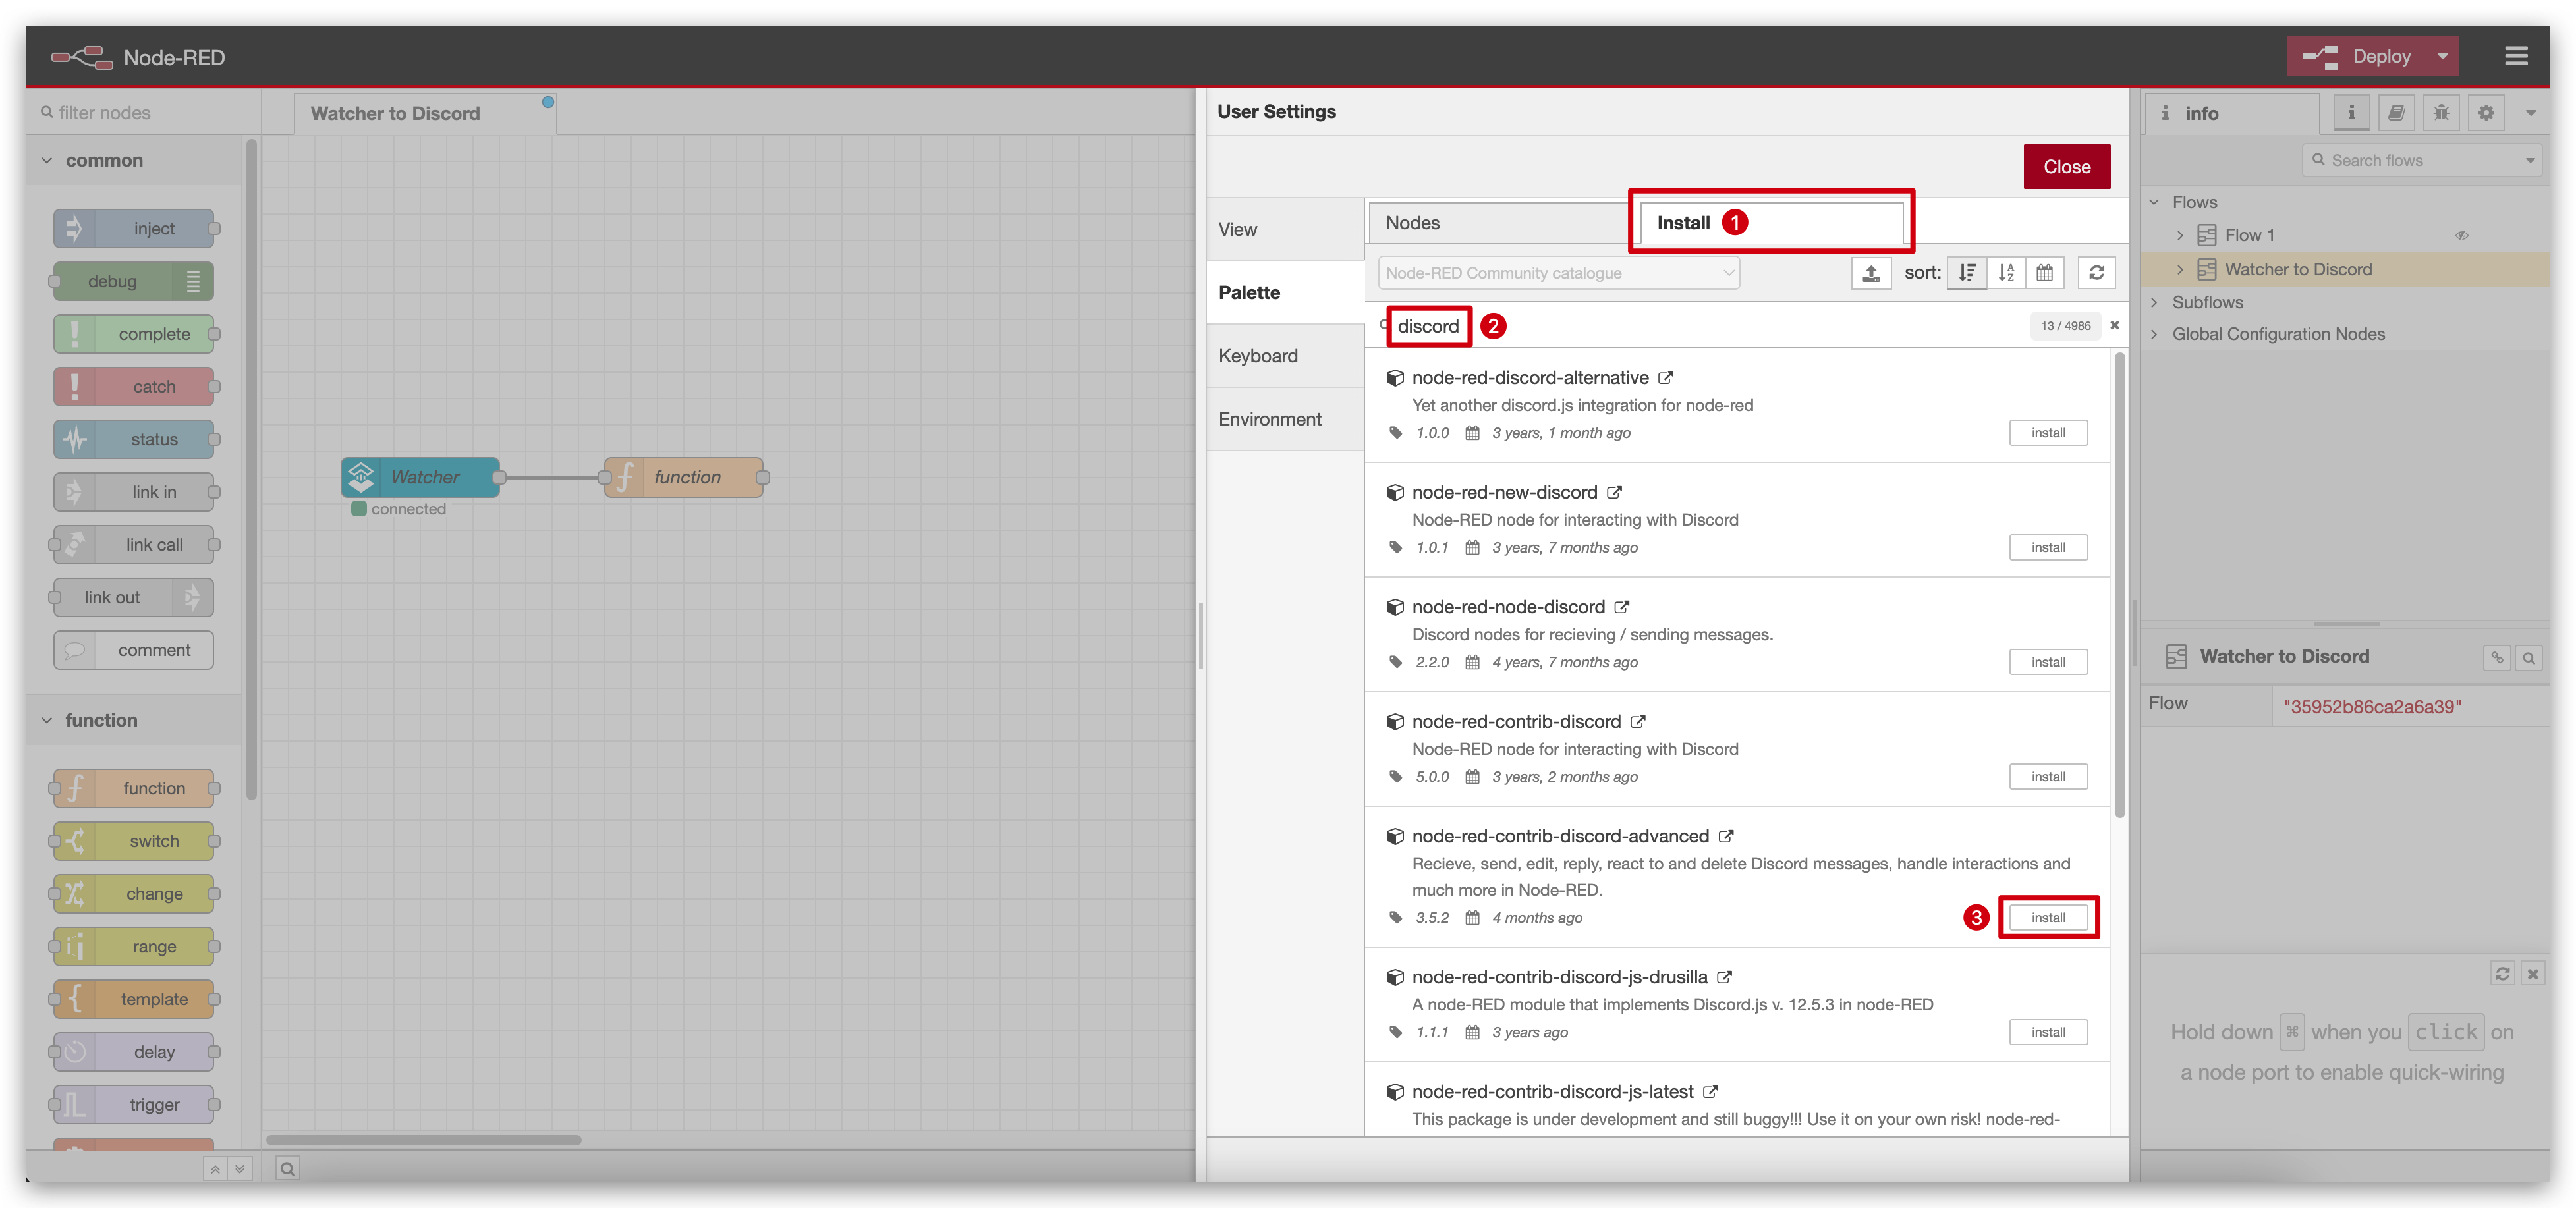
We also recommend reviewing the node's documentation and the associated Github repository if you want a more in-depth understanding of how the module works and how to maximize its potential.
The node-red-contrib-discord-advanced module is recommended for its current compatibility and reliability at the time of writing this tutorial (August 2024). However, the availability and functionality of Node-RED modules can vary over time. It's advisable to review the most recent user feedback and compatibility notes in the Node-RED library or GitHub repositories. If you encounter issues with this module, consider exploring other Discord modules listed in the Node-RED library for a more suitable option.
Step 10. Configure Discord node
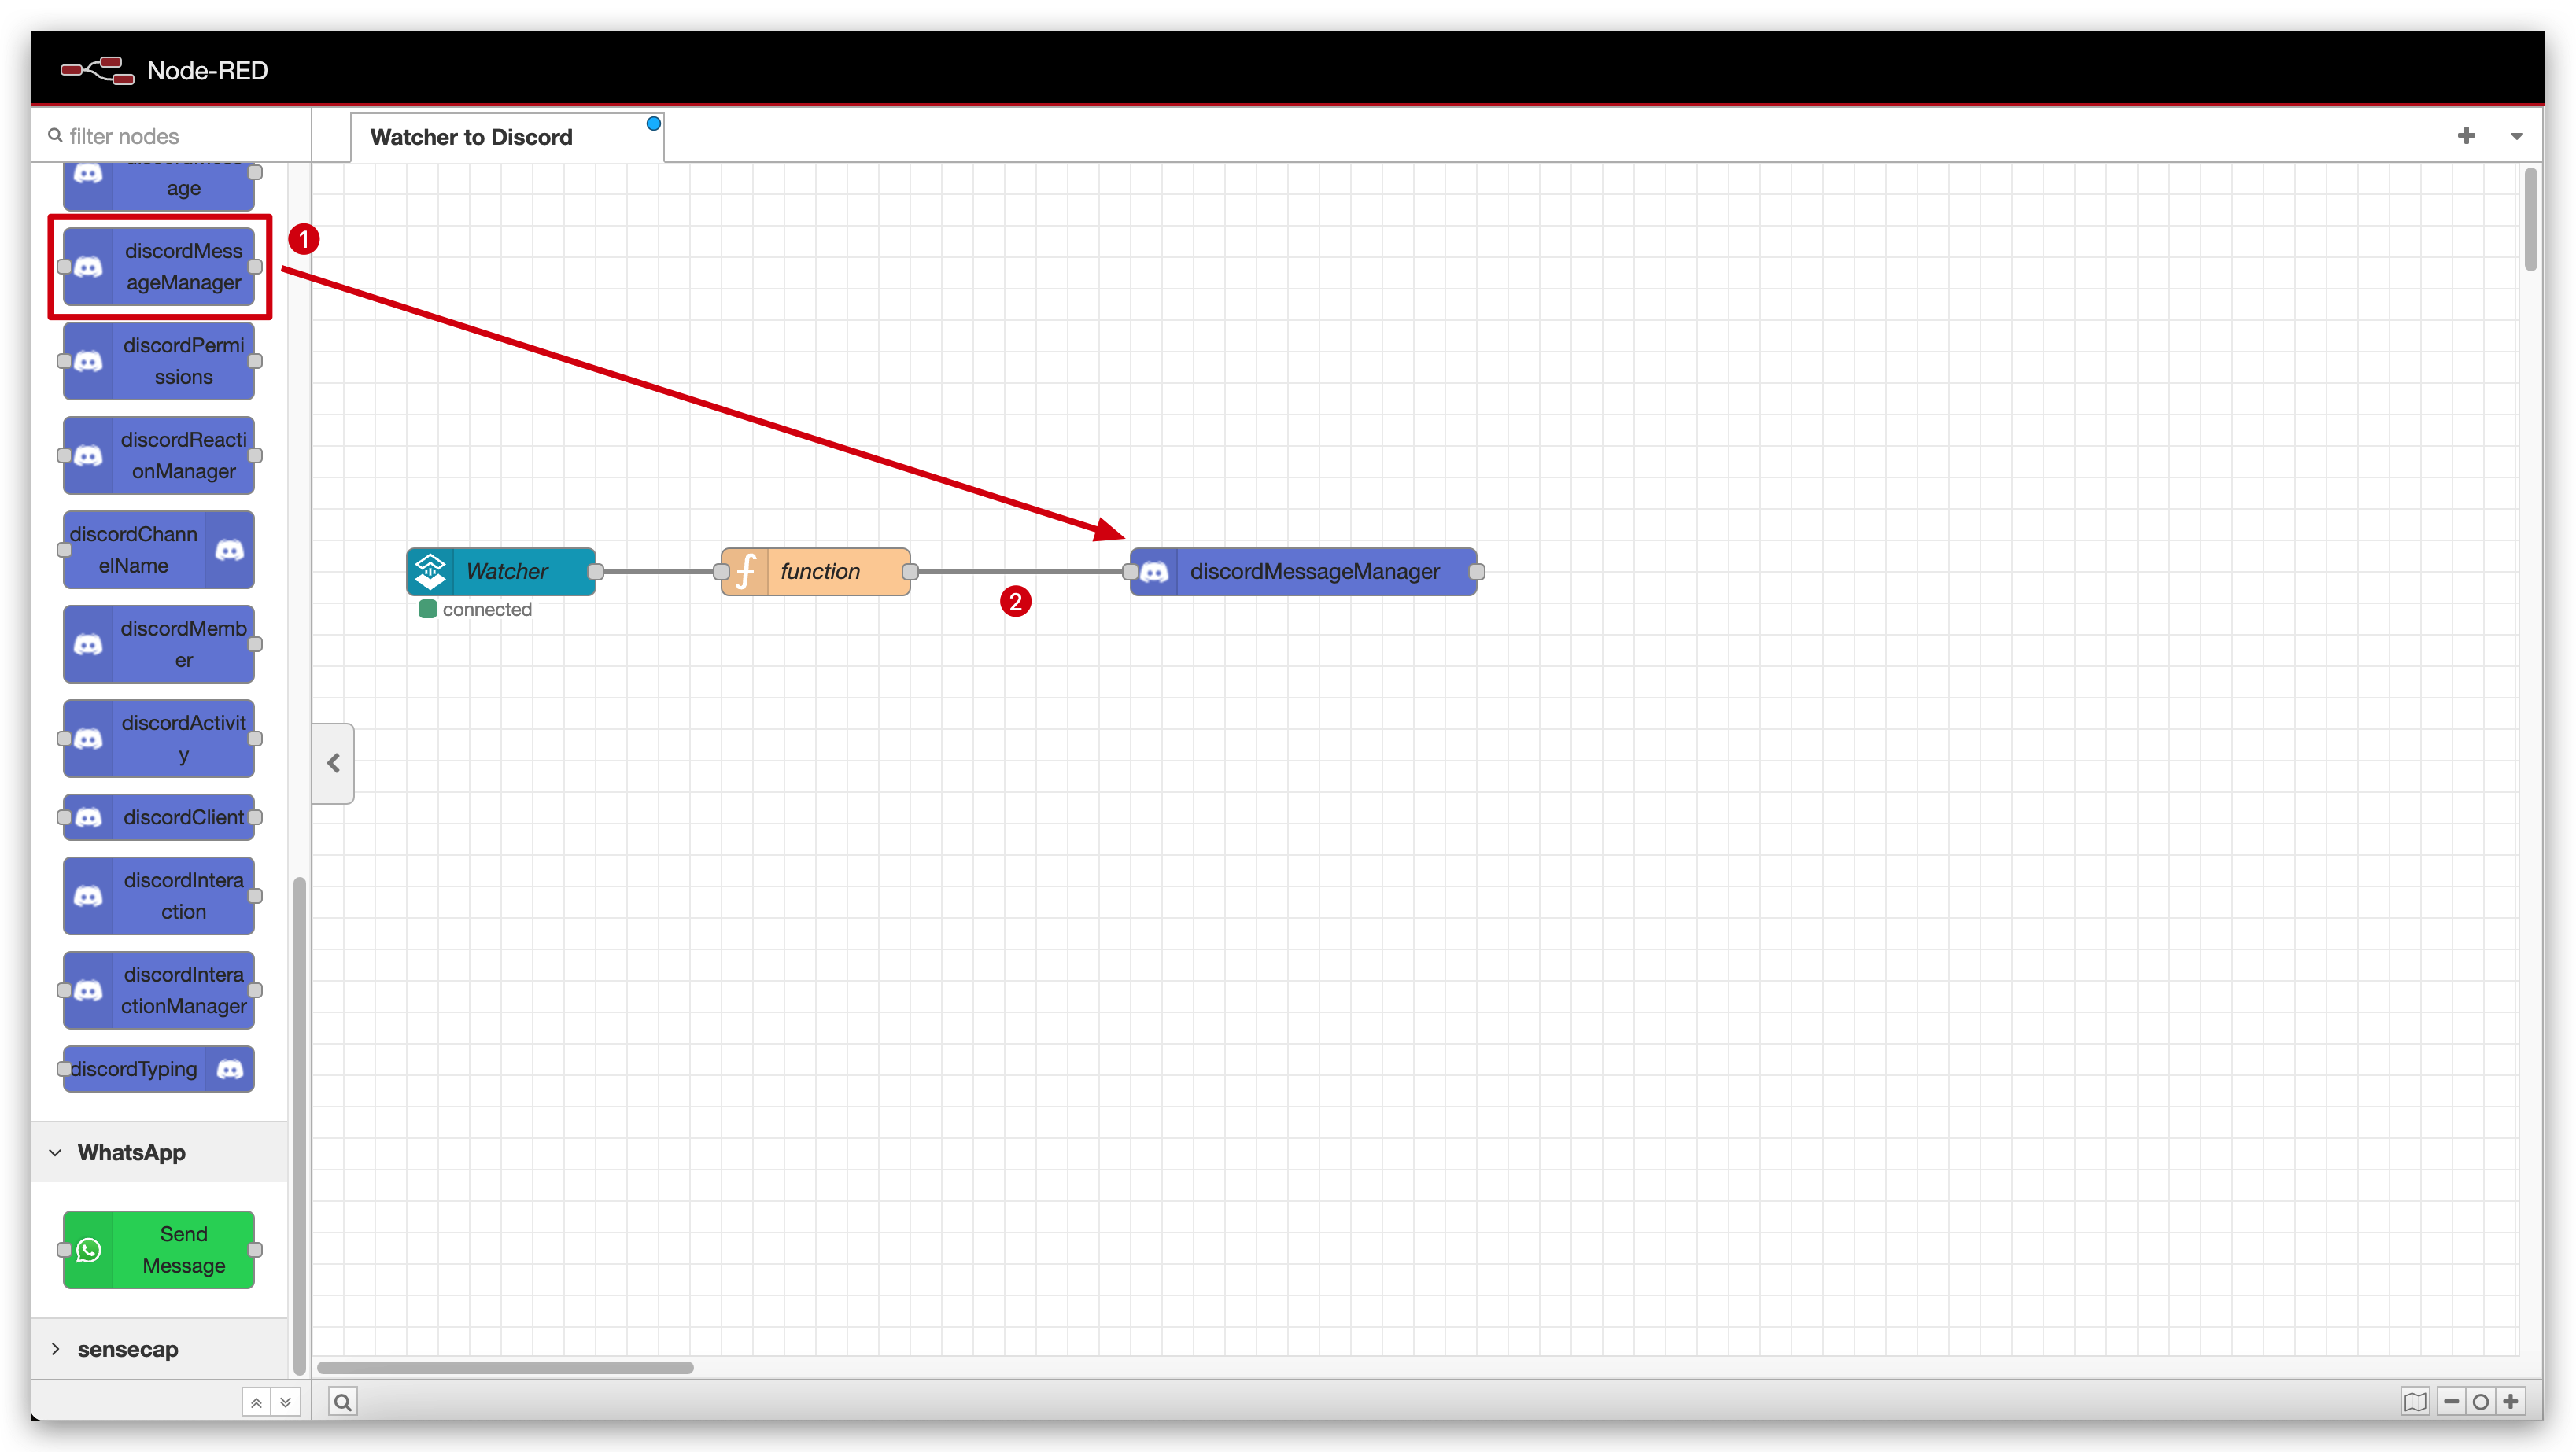
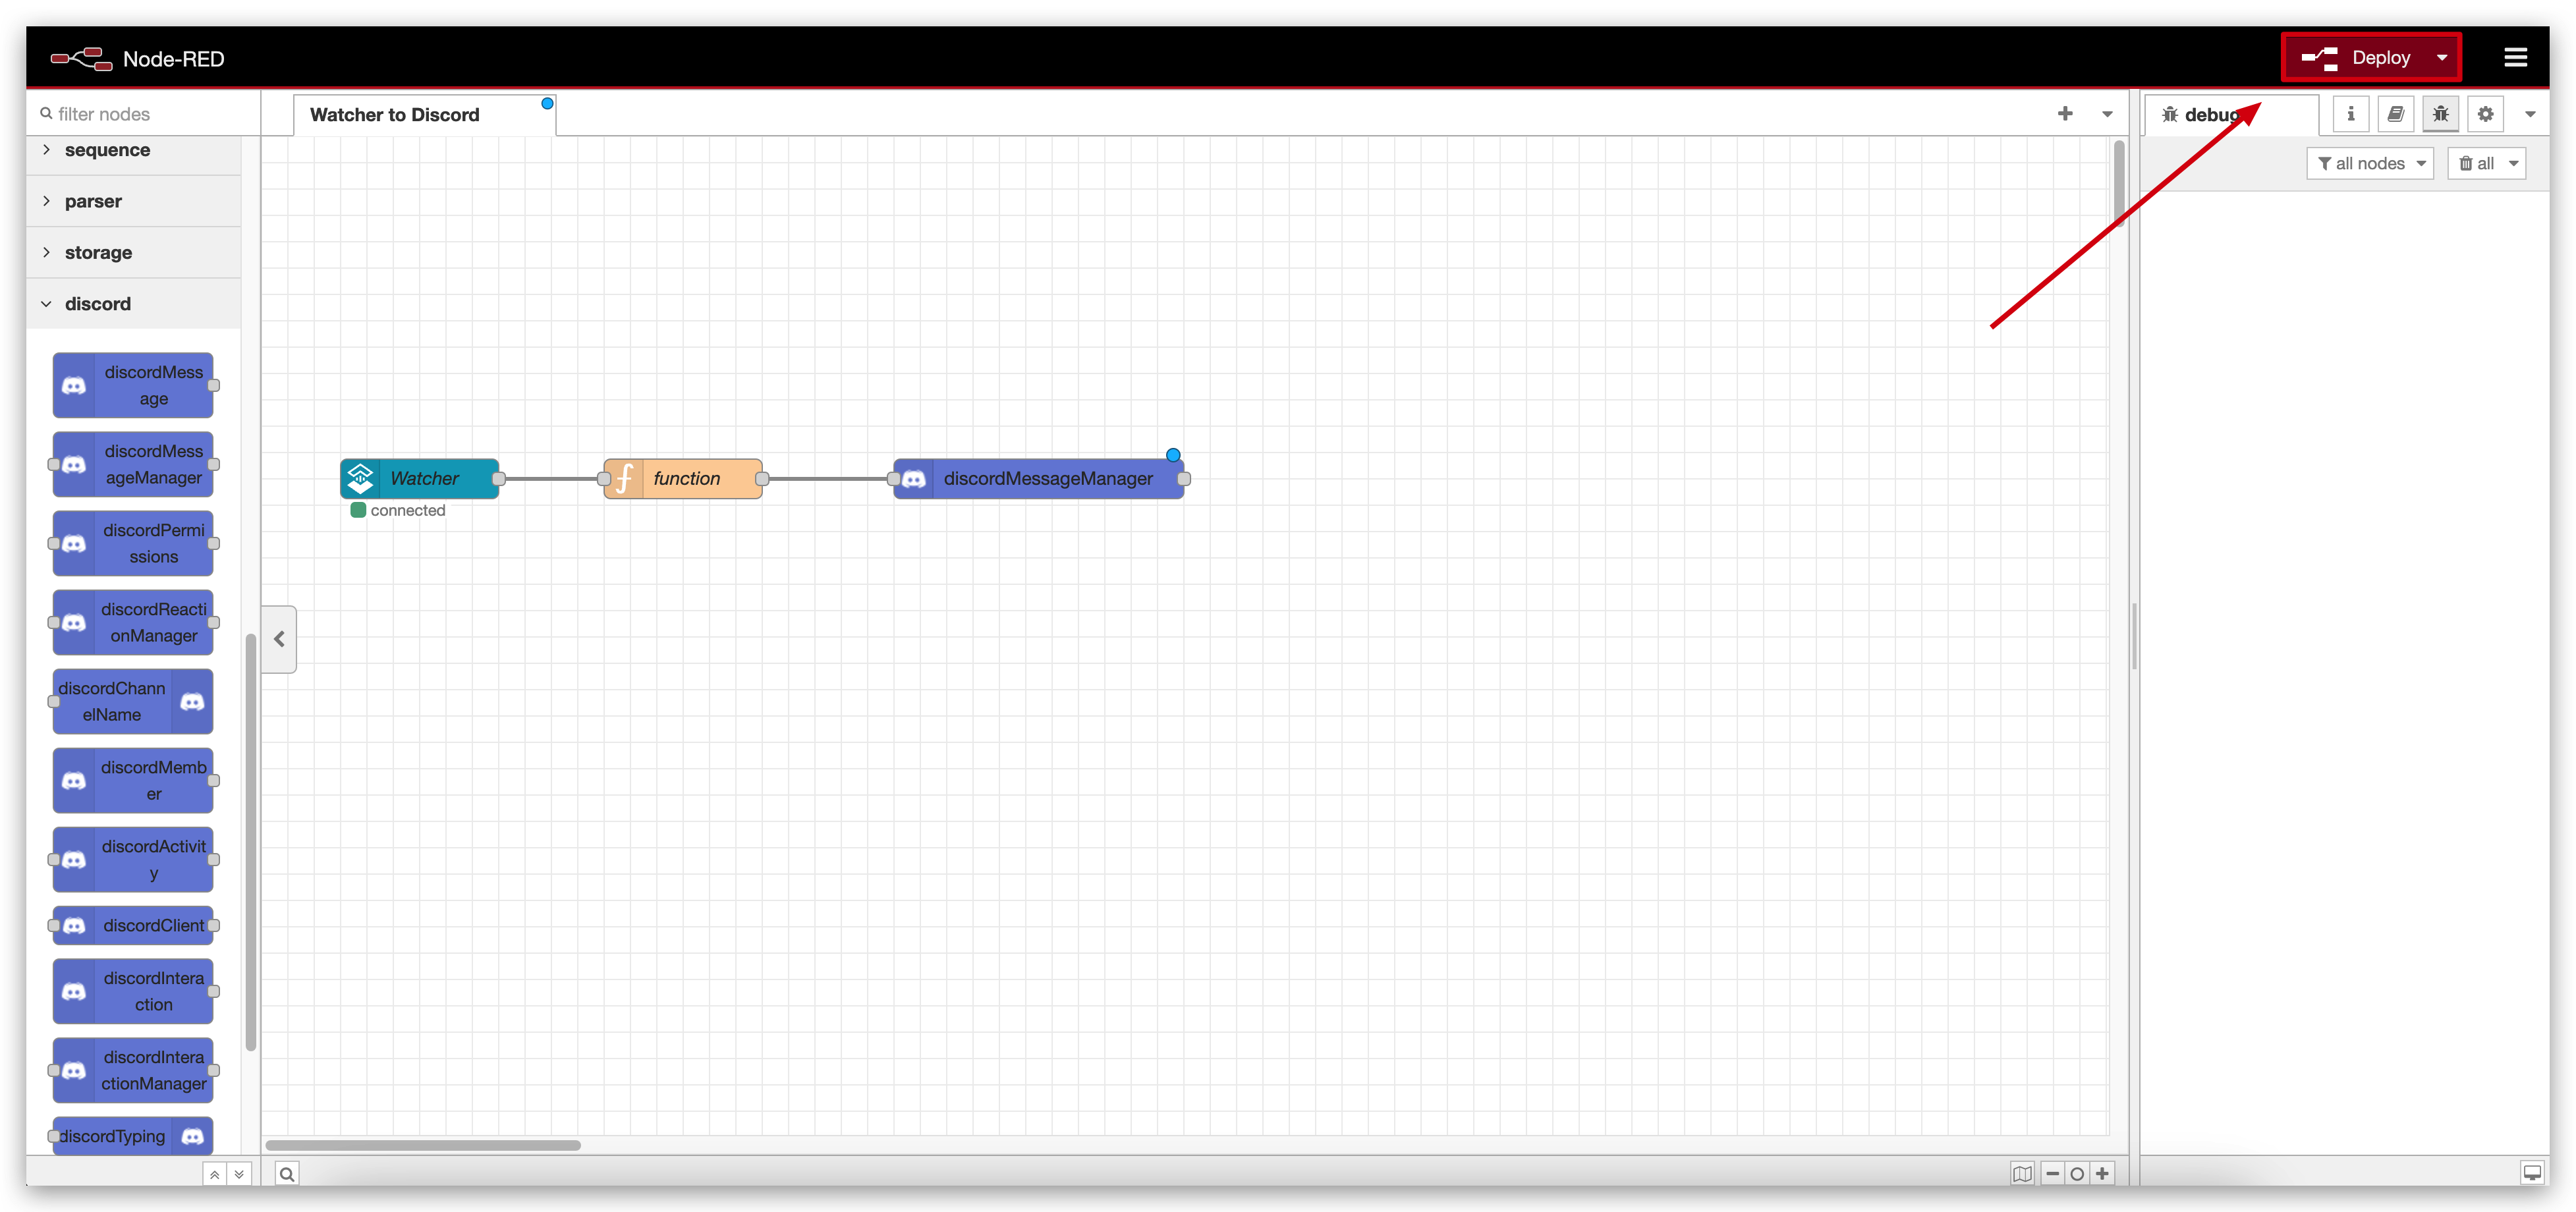
After installing the Discord module, drag the discordMessageManager node to your Node-RED flow and connect it to the function node
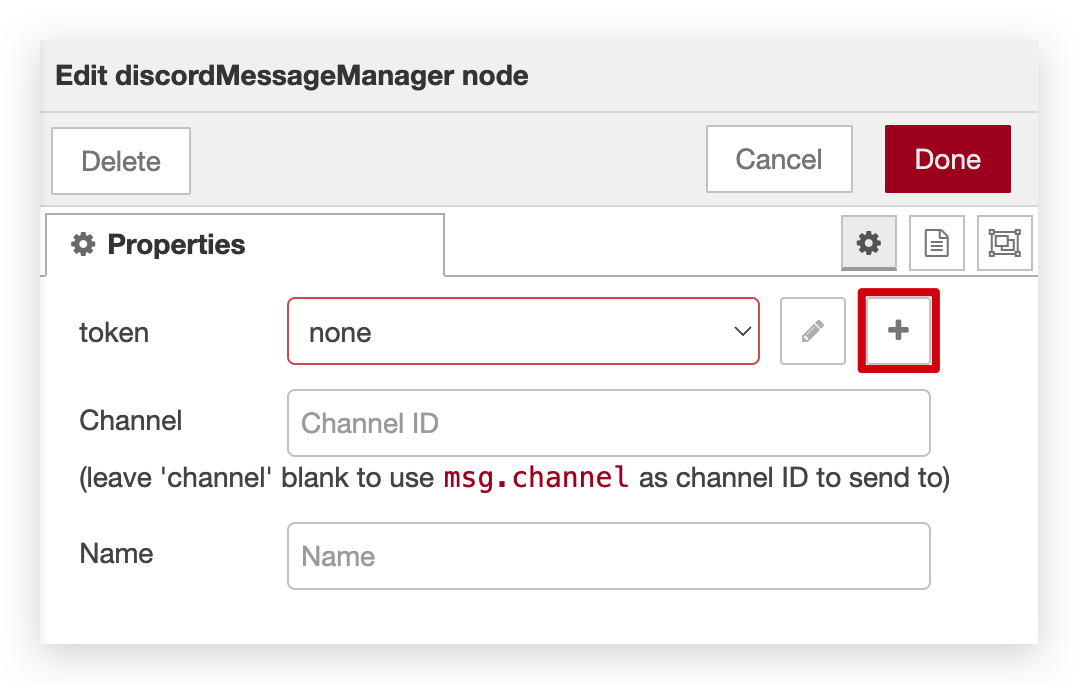
Double-click the discordMessageManager node to open its configuration panel. Click the plus icon next to the token field to add a new Discord API token configuration.
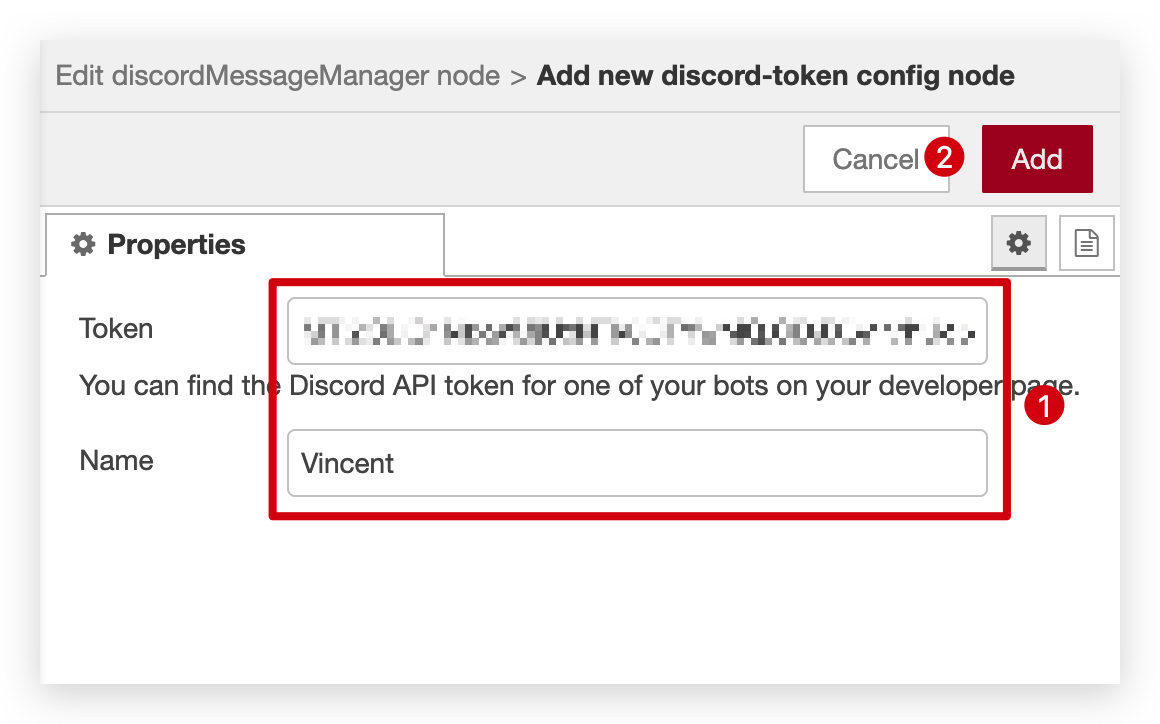
In the new window, enter the following information:
- Token: Enter the token you obtained in Step 5
- Name: Give a name for your token configuration
Then, click Add or Update to save the configuration.
In the Channel field, enter the Channel ID you obtained in Step 8. Then, click Done to close the configuration panel.
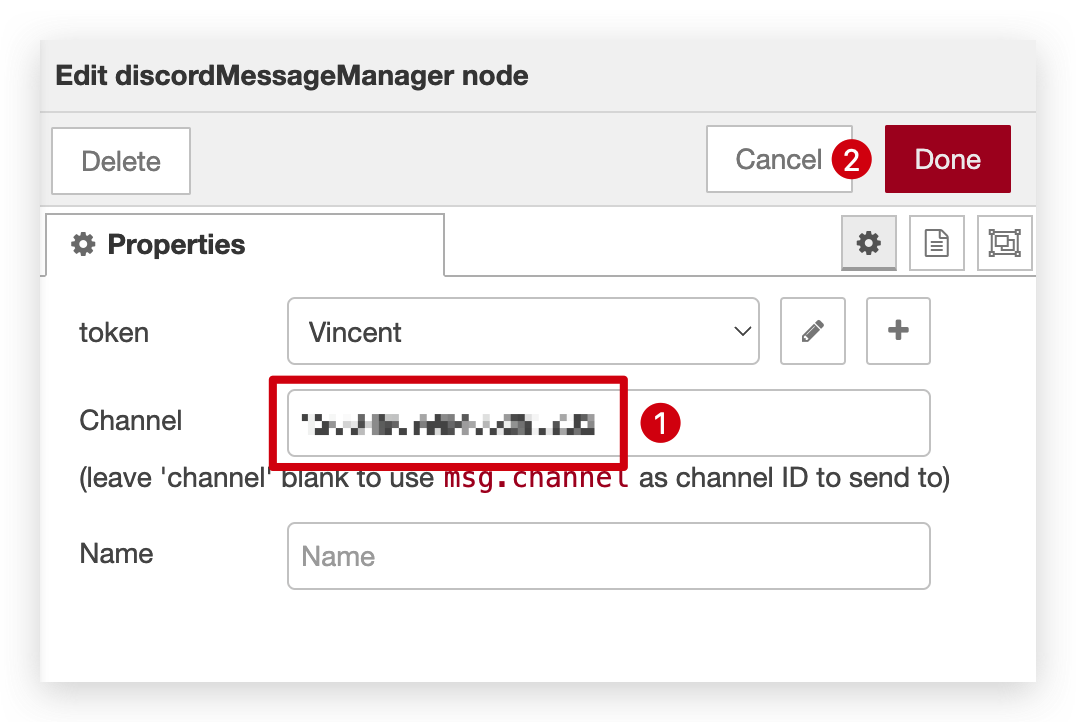
For more complex setups with multiple channels and trigger conditions, you can leave the Channel field blank and use msg.channel to dynamically set the channel. However, for this basic tutorial, we'll use a static channel ID.
Step 11. Deploy
Finally, click the Deploy button at the top right of the Node-RED interface. Once deployed, your Watcher will send messages to Node-RED, which will then forward them to your Discord channel.
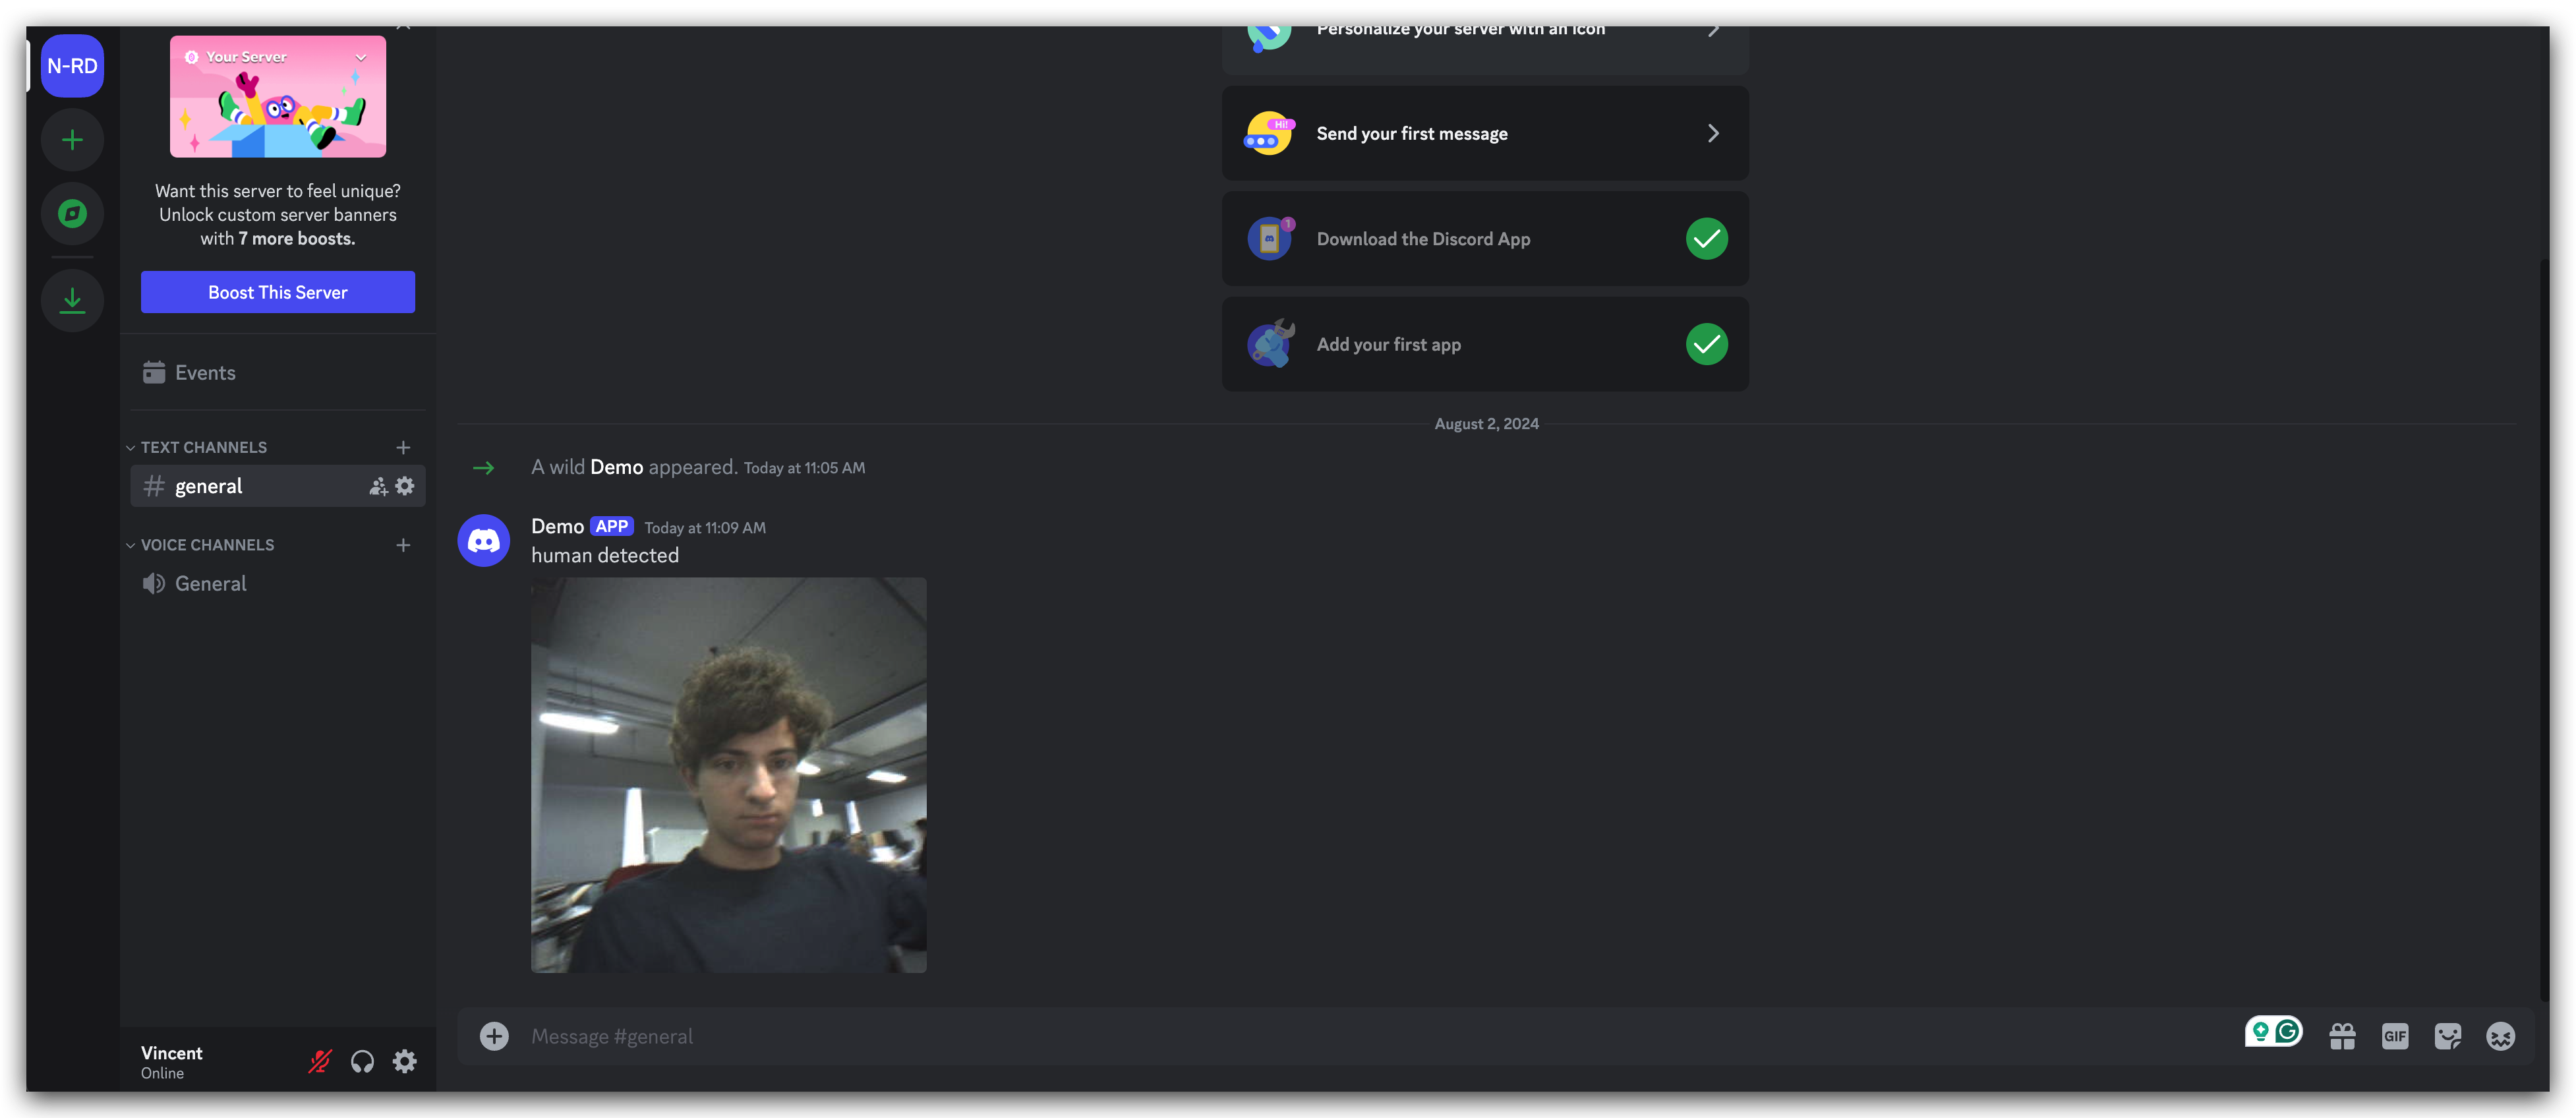
Congratulations! You have successfully configured your Watcher to send messages to Discord through Node-RED. This setup ensures that you receive real-time notifications in your Discord channel whenever your Watcher is triggered. By doing so, you've unlocked a plethora of thrilling opportunities for your development projects. We eagerly anticipate the innovative solutions you'll create next!
Troubleshooting
When integrating Discord with Node-RED, you might encounter some errors. Here are two common errors and detailed steps to resolve them:
Error: Used disallowed intents
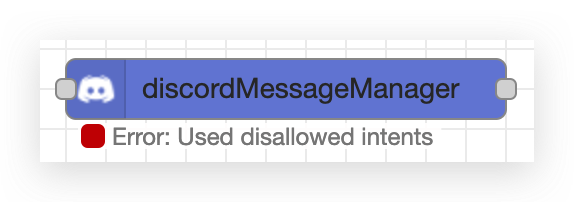
This error occurs when your bot is trying to use intents that haven't been enabled in the Discord Developer Portal. To fix this:
- Go to the Discord Developer Portal.
- Select your application.
- Click on Bot in the left sidebar.
- Scroll down to the Privileged Gateway Intents section.
- Enable the intents your bot needs (commonly Presence Intent, Server Members Intent, and Message Content Intent).
- Click Save Changes at the bottom of the page.
- Redeploy your Node-RED flow.
DiscordAPIError[50001]: Missing Access
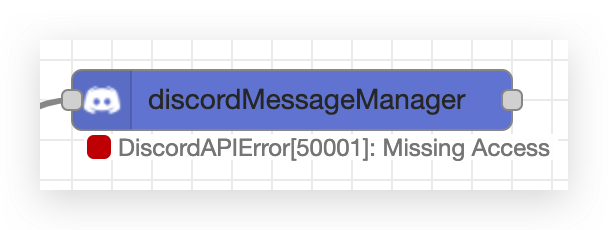
This error suggests that your bot doesn't have the necessary permissions to perform the action. To resolve this:
- Ensure your bot has been invited to the server with the correct permissions:
- Go to the Discord Developer Portal.
- Select your application and go to the OAuth2 section.
- In URL Generator, select bot under SCOPES.
- Under BOT PERMISSIONS, select the permissions your bot needs (at minimum, Send Messages and View Channels).
- Copy the generated URL and open it in a new tab to invite the bot to your server with these permissions.
- Check the channel permissions:
- In Discord, right-click on the channel you're trying to send messages to.
- Click Edit Channel > Permissions.
- Ensure your bot role has the necessary permissions, especially View Channel and Send Messages.
- Verify the Channel ID:
- Double-check that the Channel ID in your Node-RED configuration is correct.
- Ensure you're using the ID of a text channel, not a voice channel or category.
- Check your bot token:
- Ensure the token in your Node-RED configuration is correct and up-to-date.
- If unsure, you can regenerate the token in the Discord Developer Portal under the Bot section.
- Redeploy your Node-RED flow after making these changes.
If you continue to experience issues after trying these steps, consider checking the Discord API documentation or seeking help in the Discord developer community for more specific troubleshooting.
Tech Support & Product Discussion
Thank you for choosing our products! We are here to provide you with different support to ensure that your experience with our products is as smooth as possible. We offer several communication channels to cater to different preferences and needs.