Watcher To IFTTT Quick Start
Part 1. What is IFTTT (If This Then That)
IFTTT is a web-based service that allows developers to create automations and integrations between various apps, devices, and services without complex programming. It enables users to define simple conditional statements called "applets" that trigger actions based on specific events. It provides a user-friendly interface and a vast library of pre-built applets, making it accessible for developers to create powerful automations and integrations efficiently.
Part 2. How to configure IFTTT
Step 1. Configure Webhooks
First, we need to Create a IFTTT Applet.
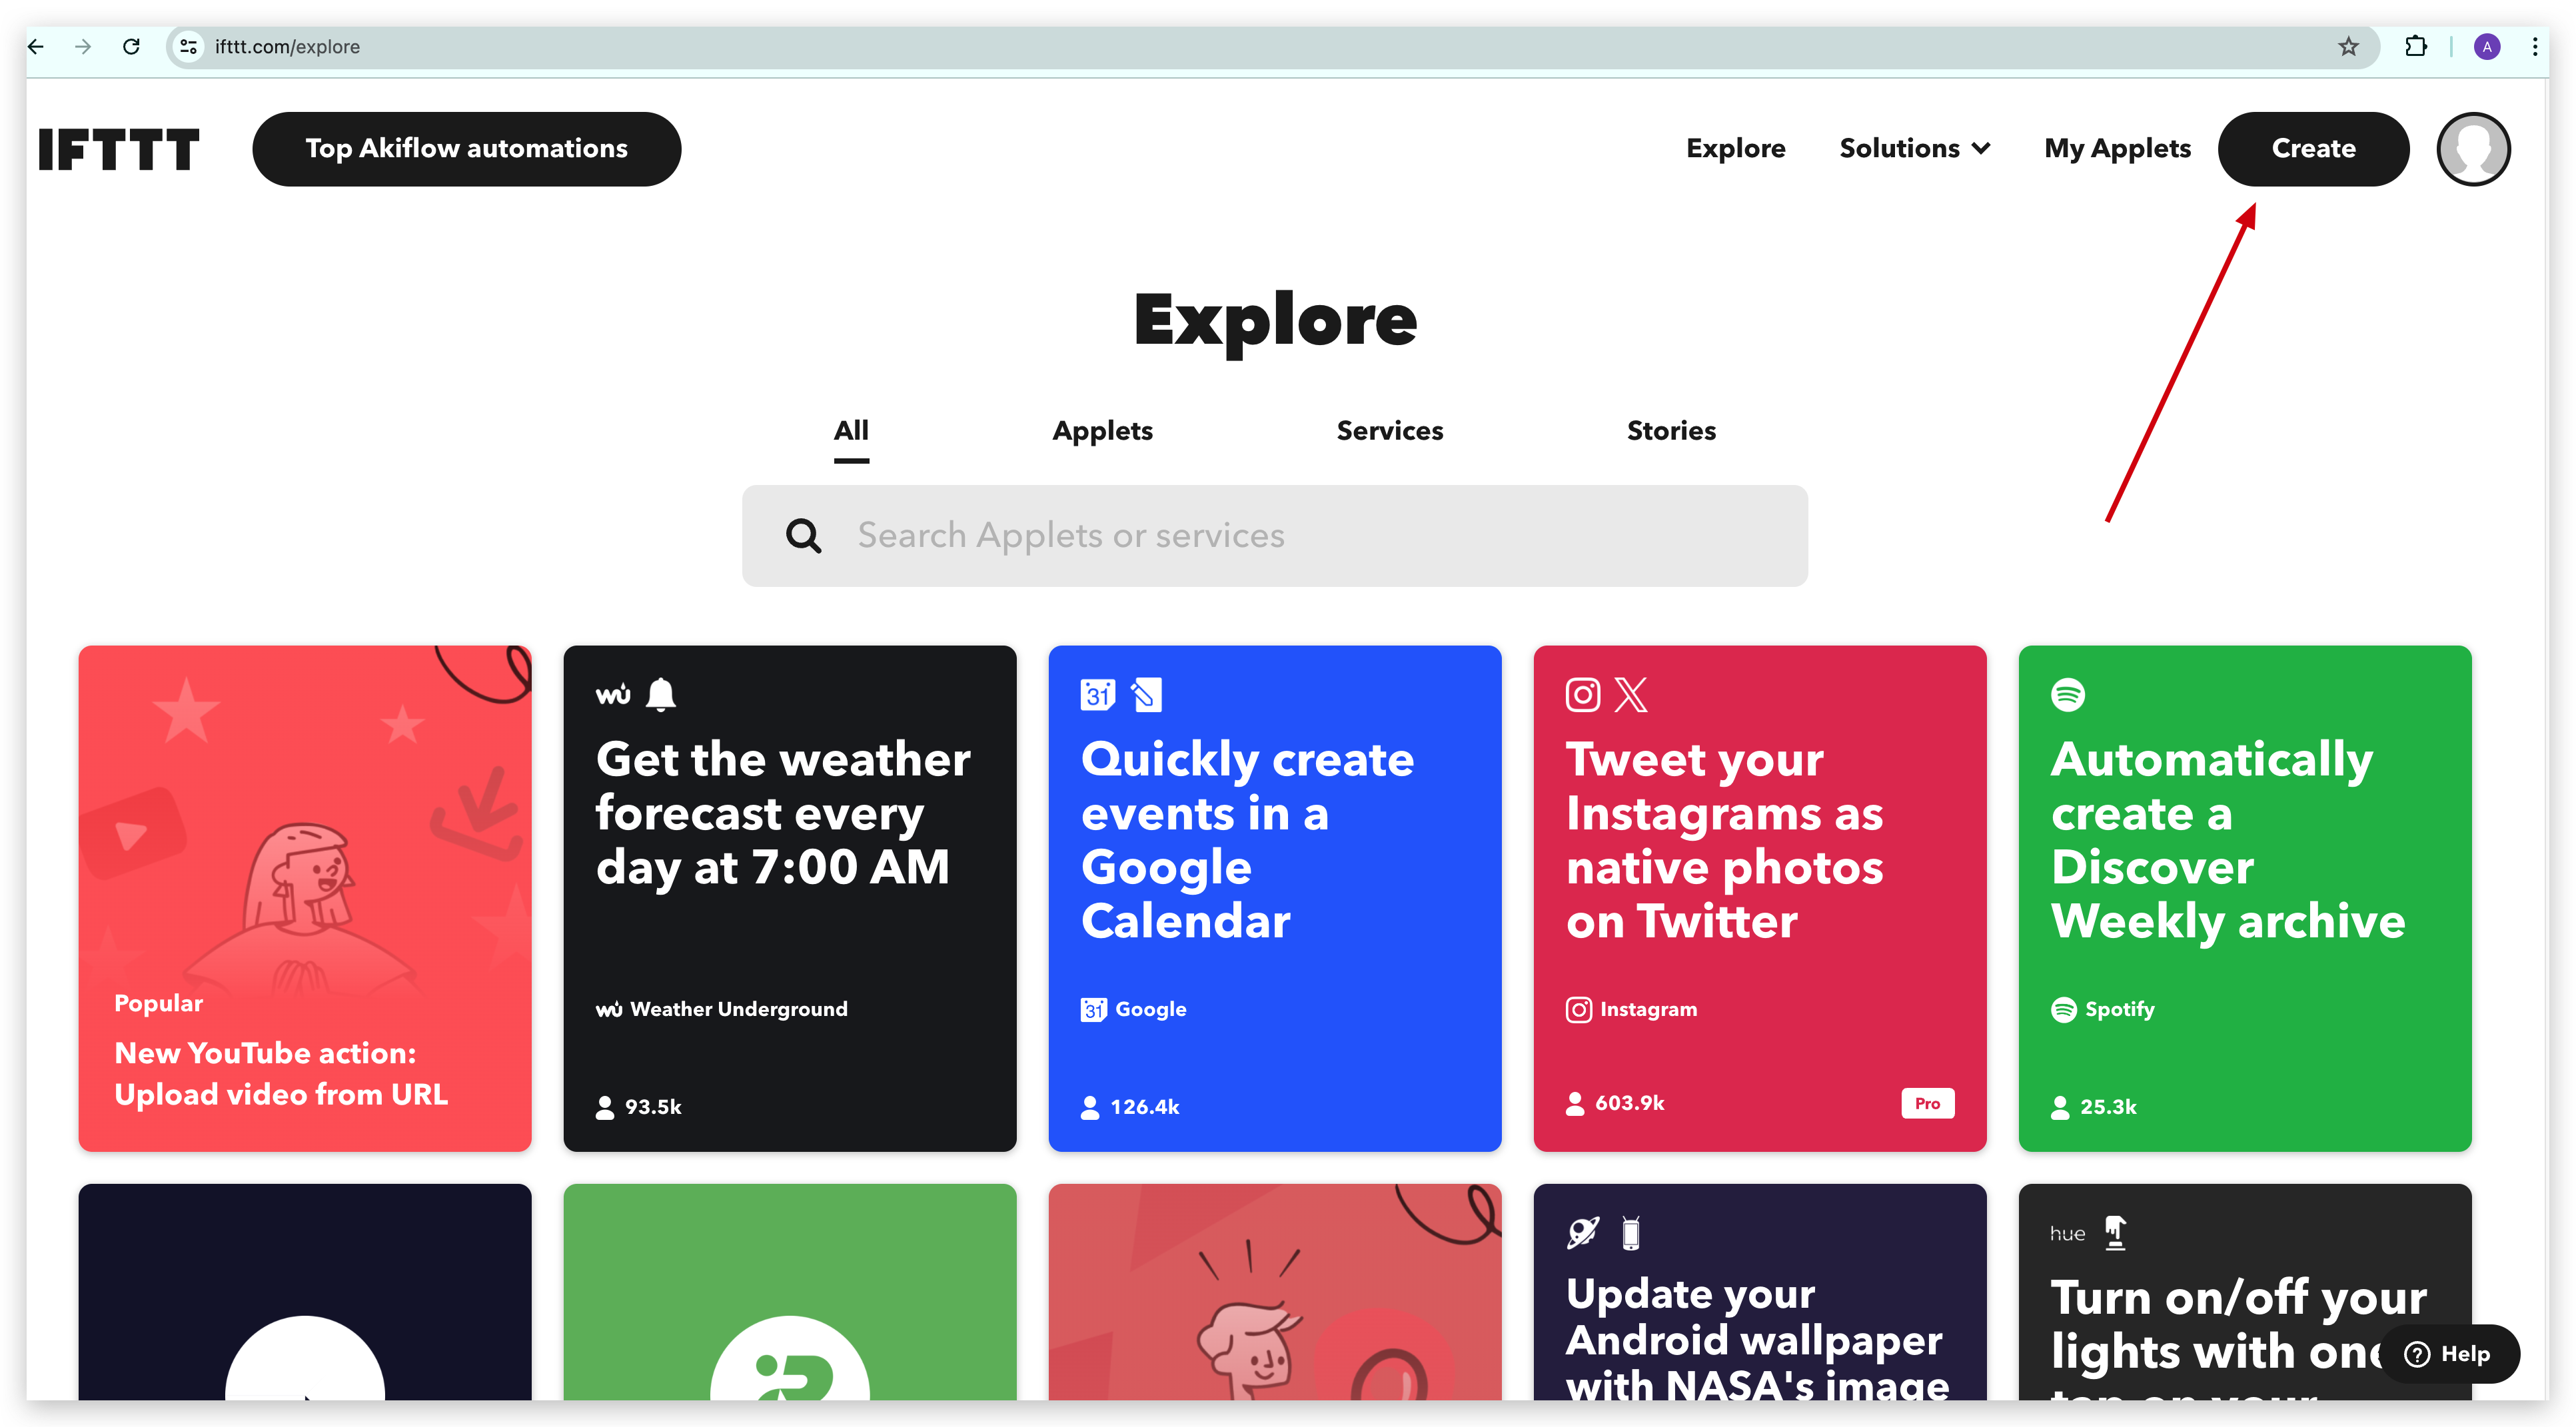
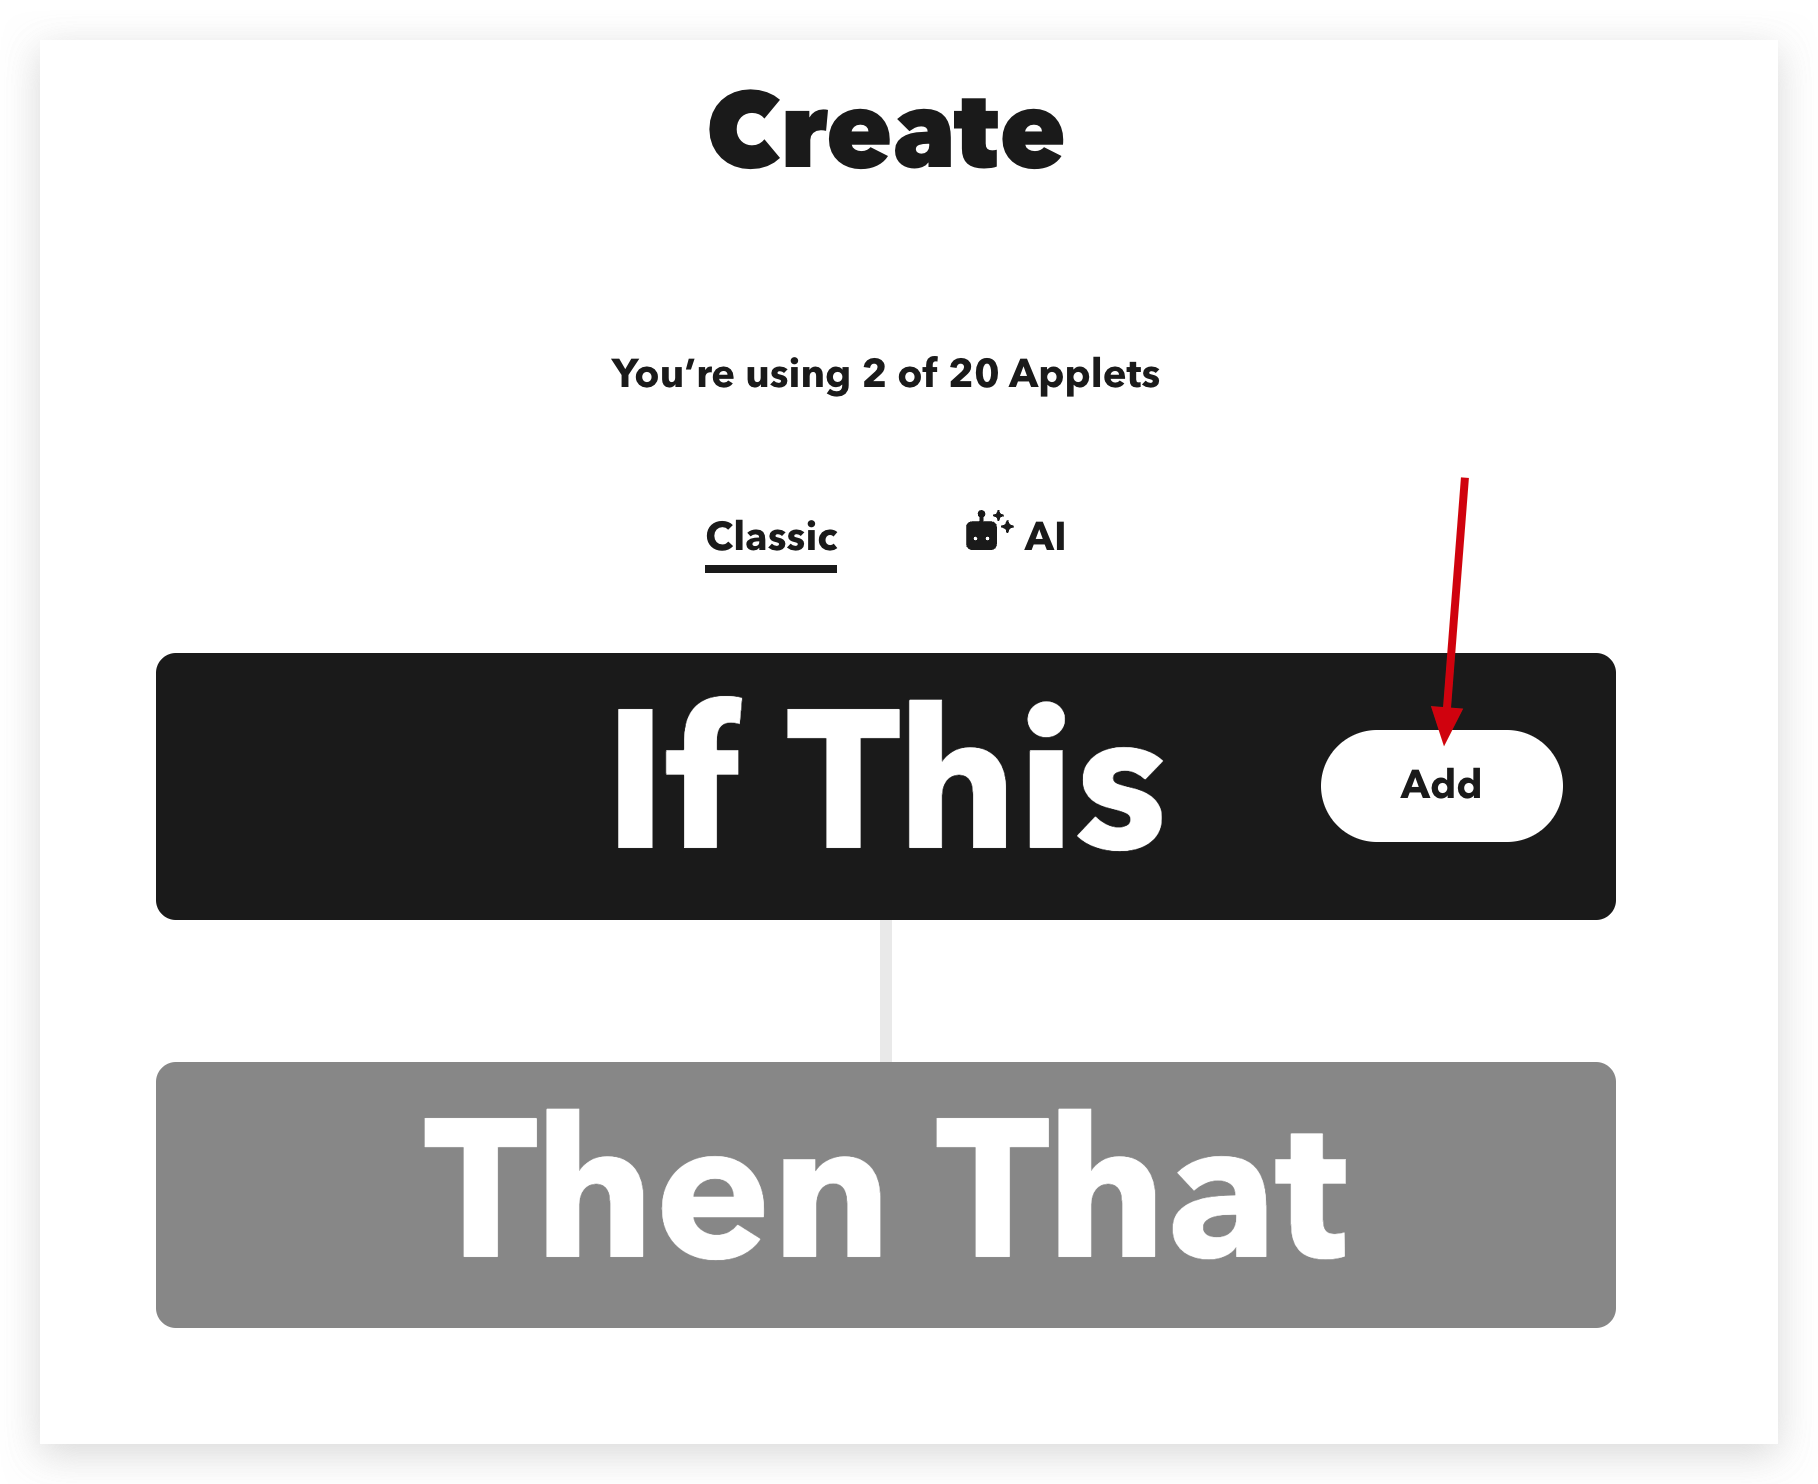
We need to Add a trigger.
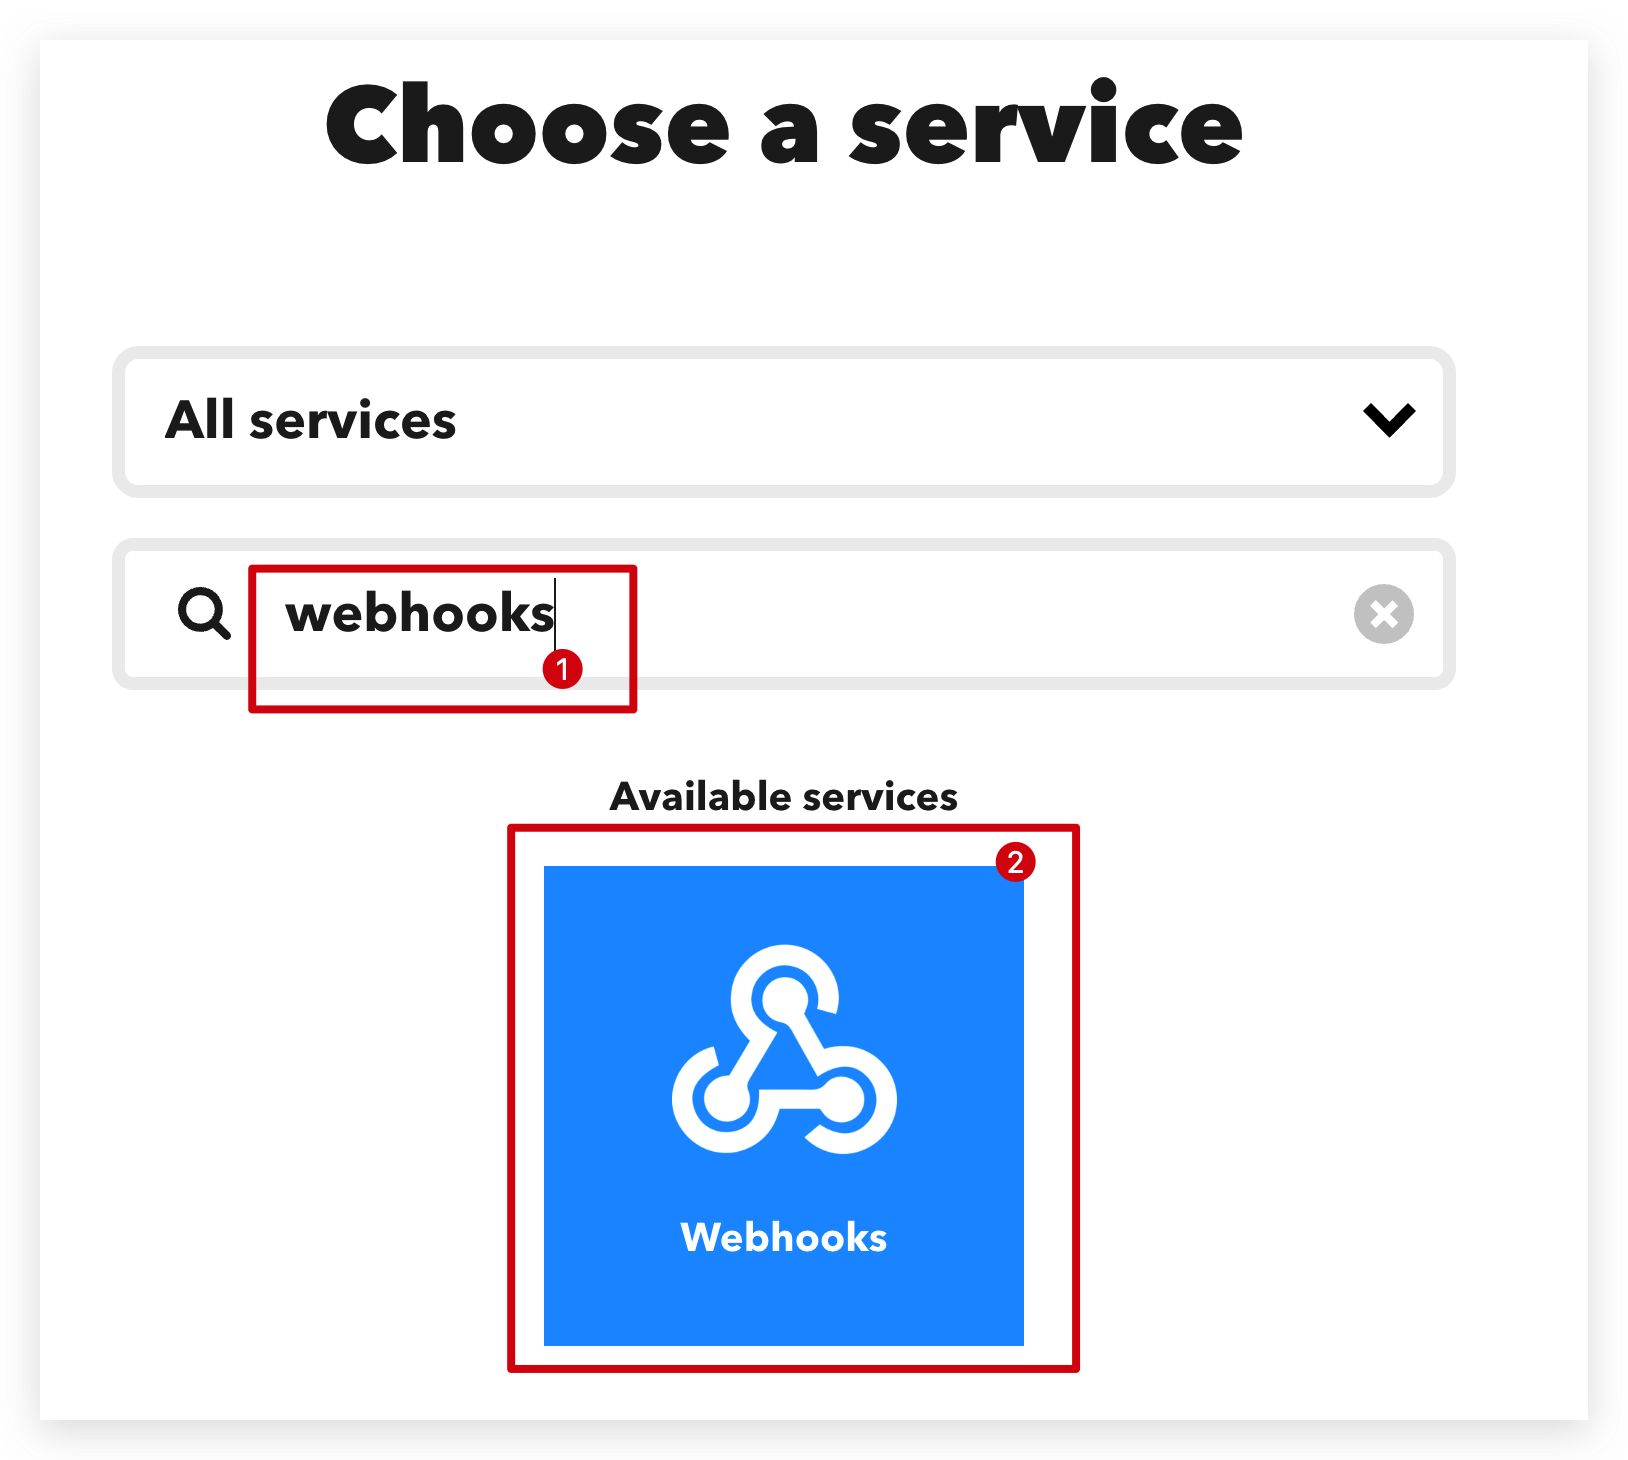
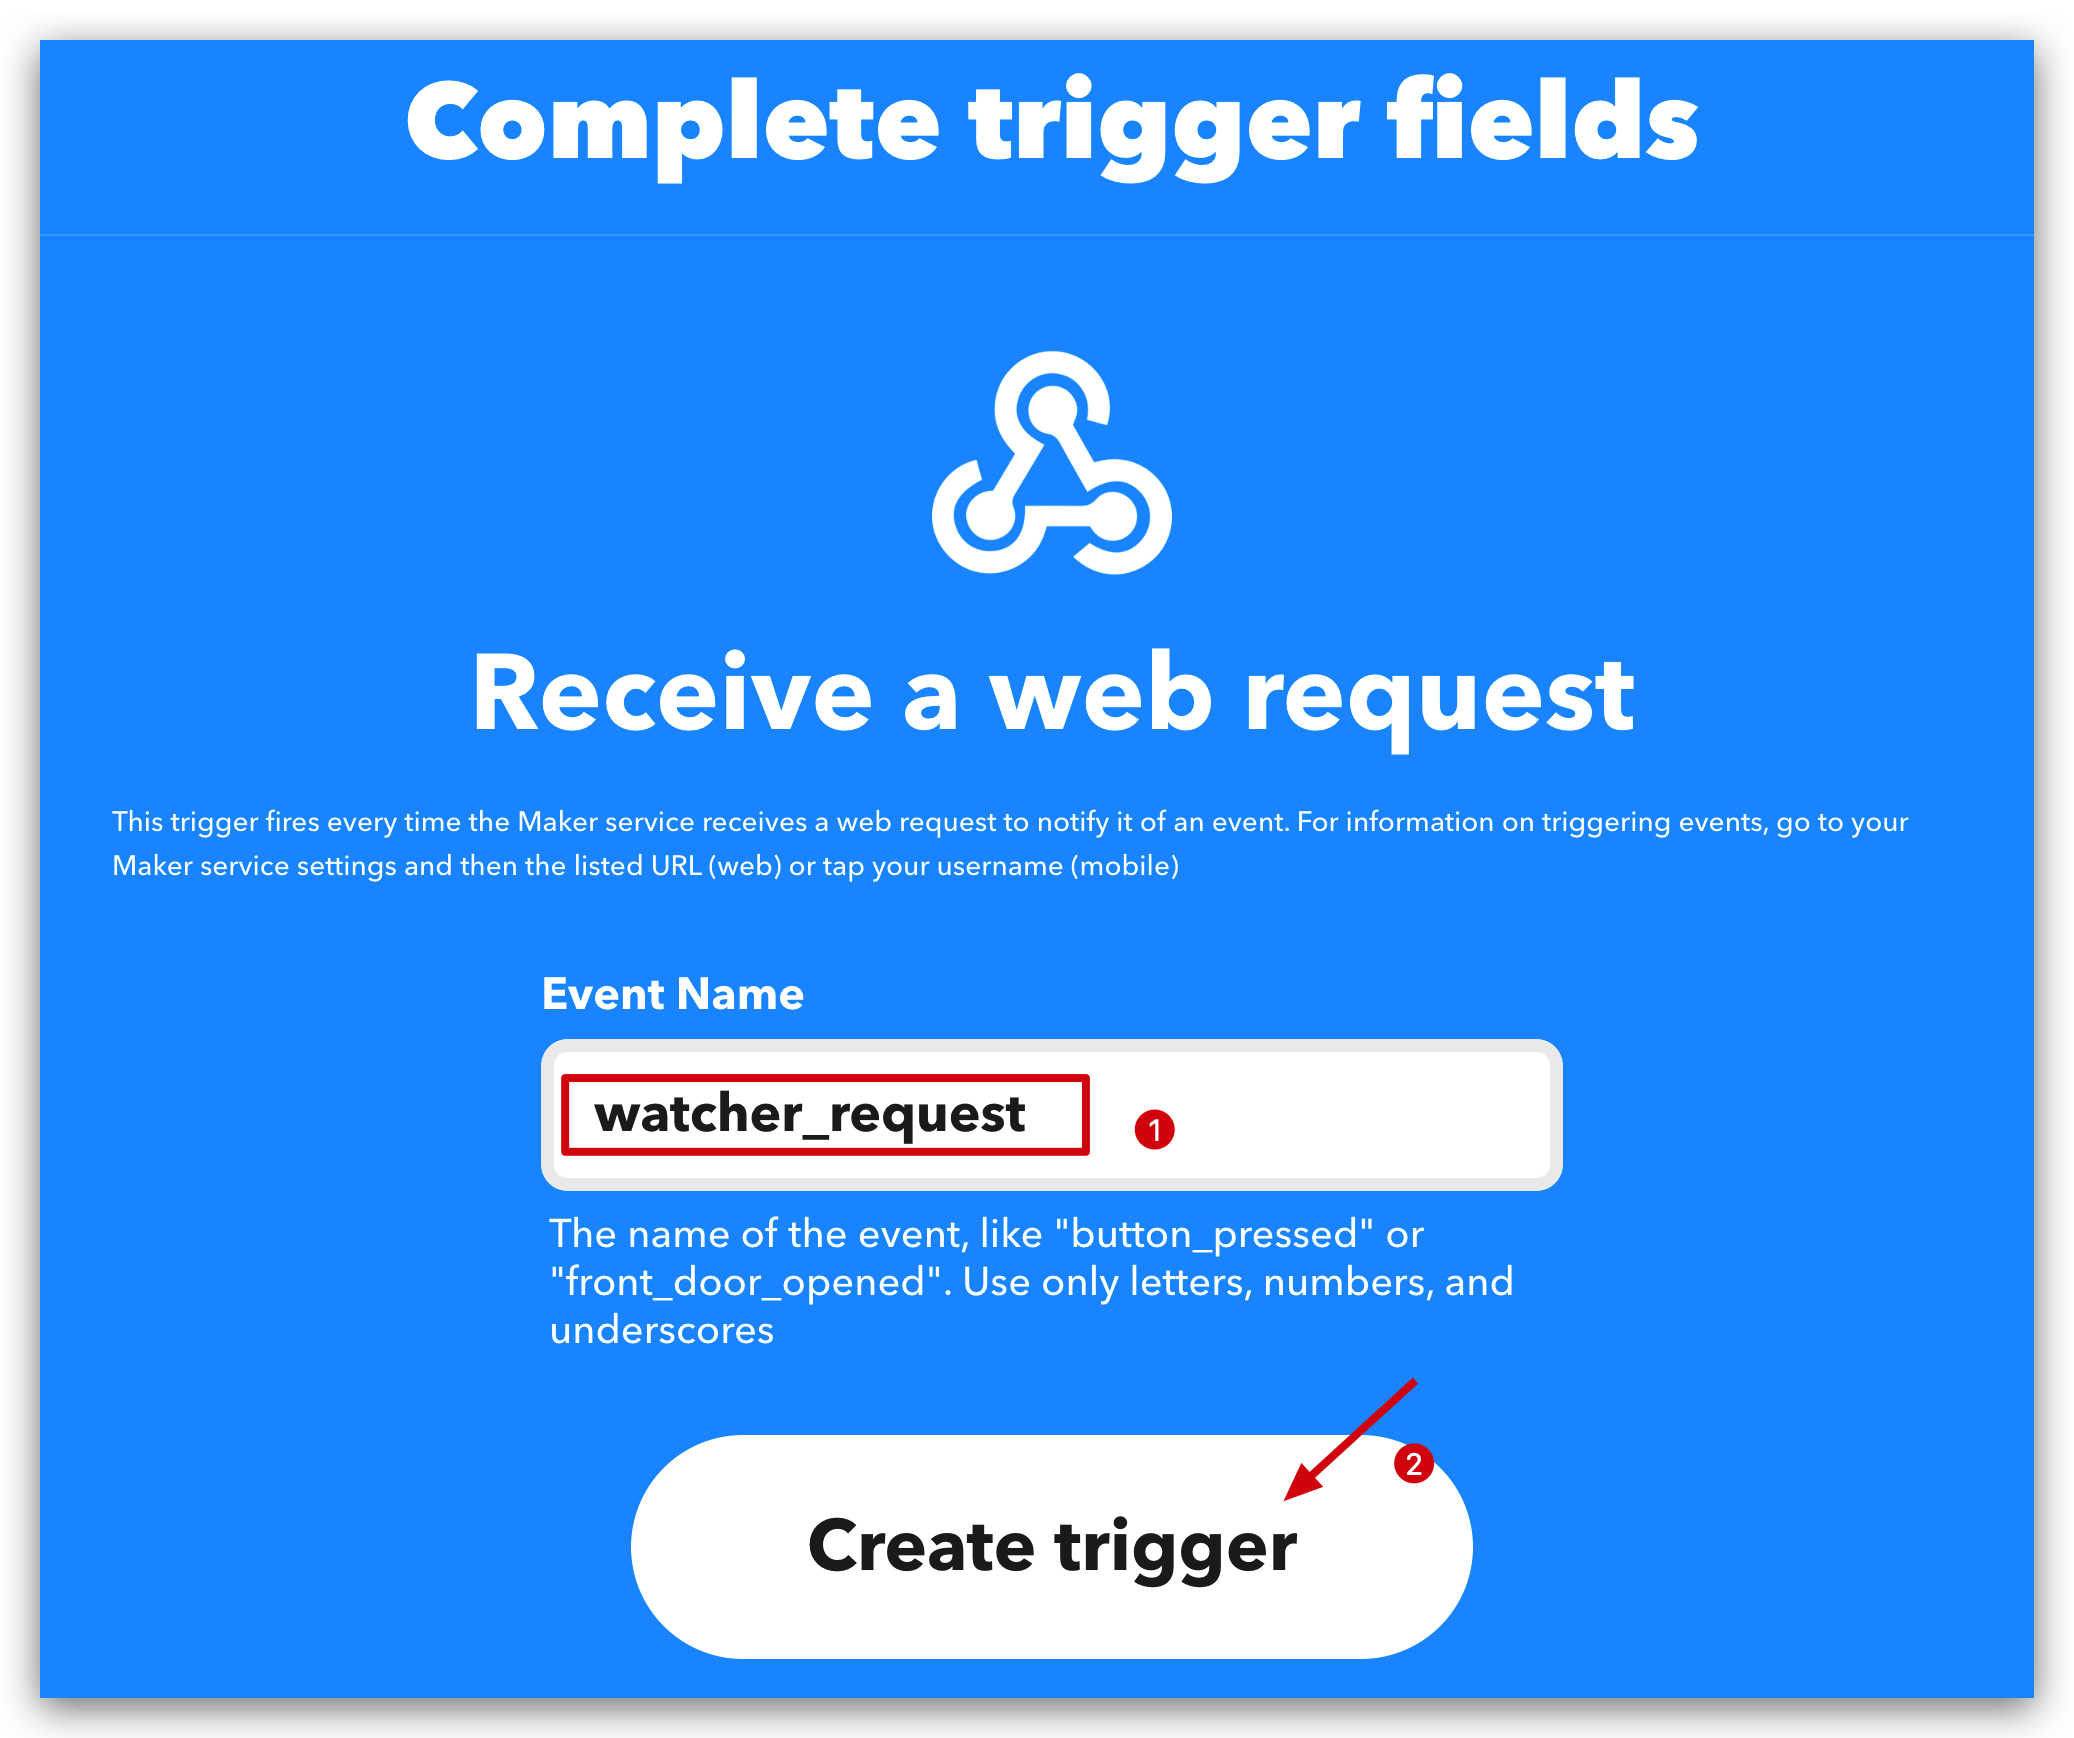
Search Webhooks and click that service.
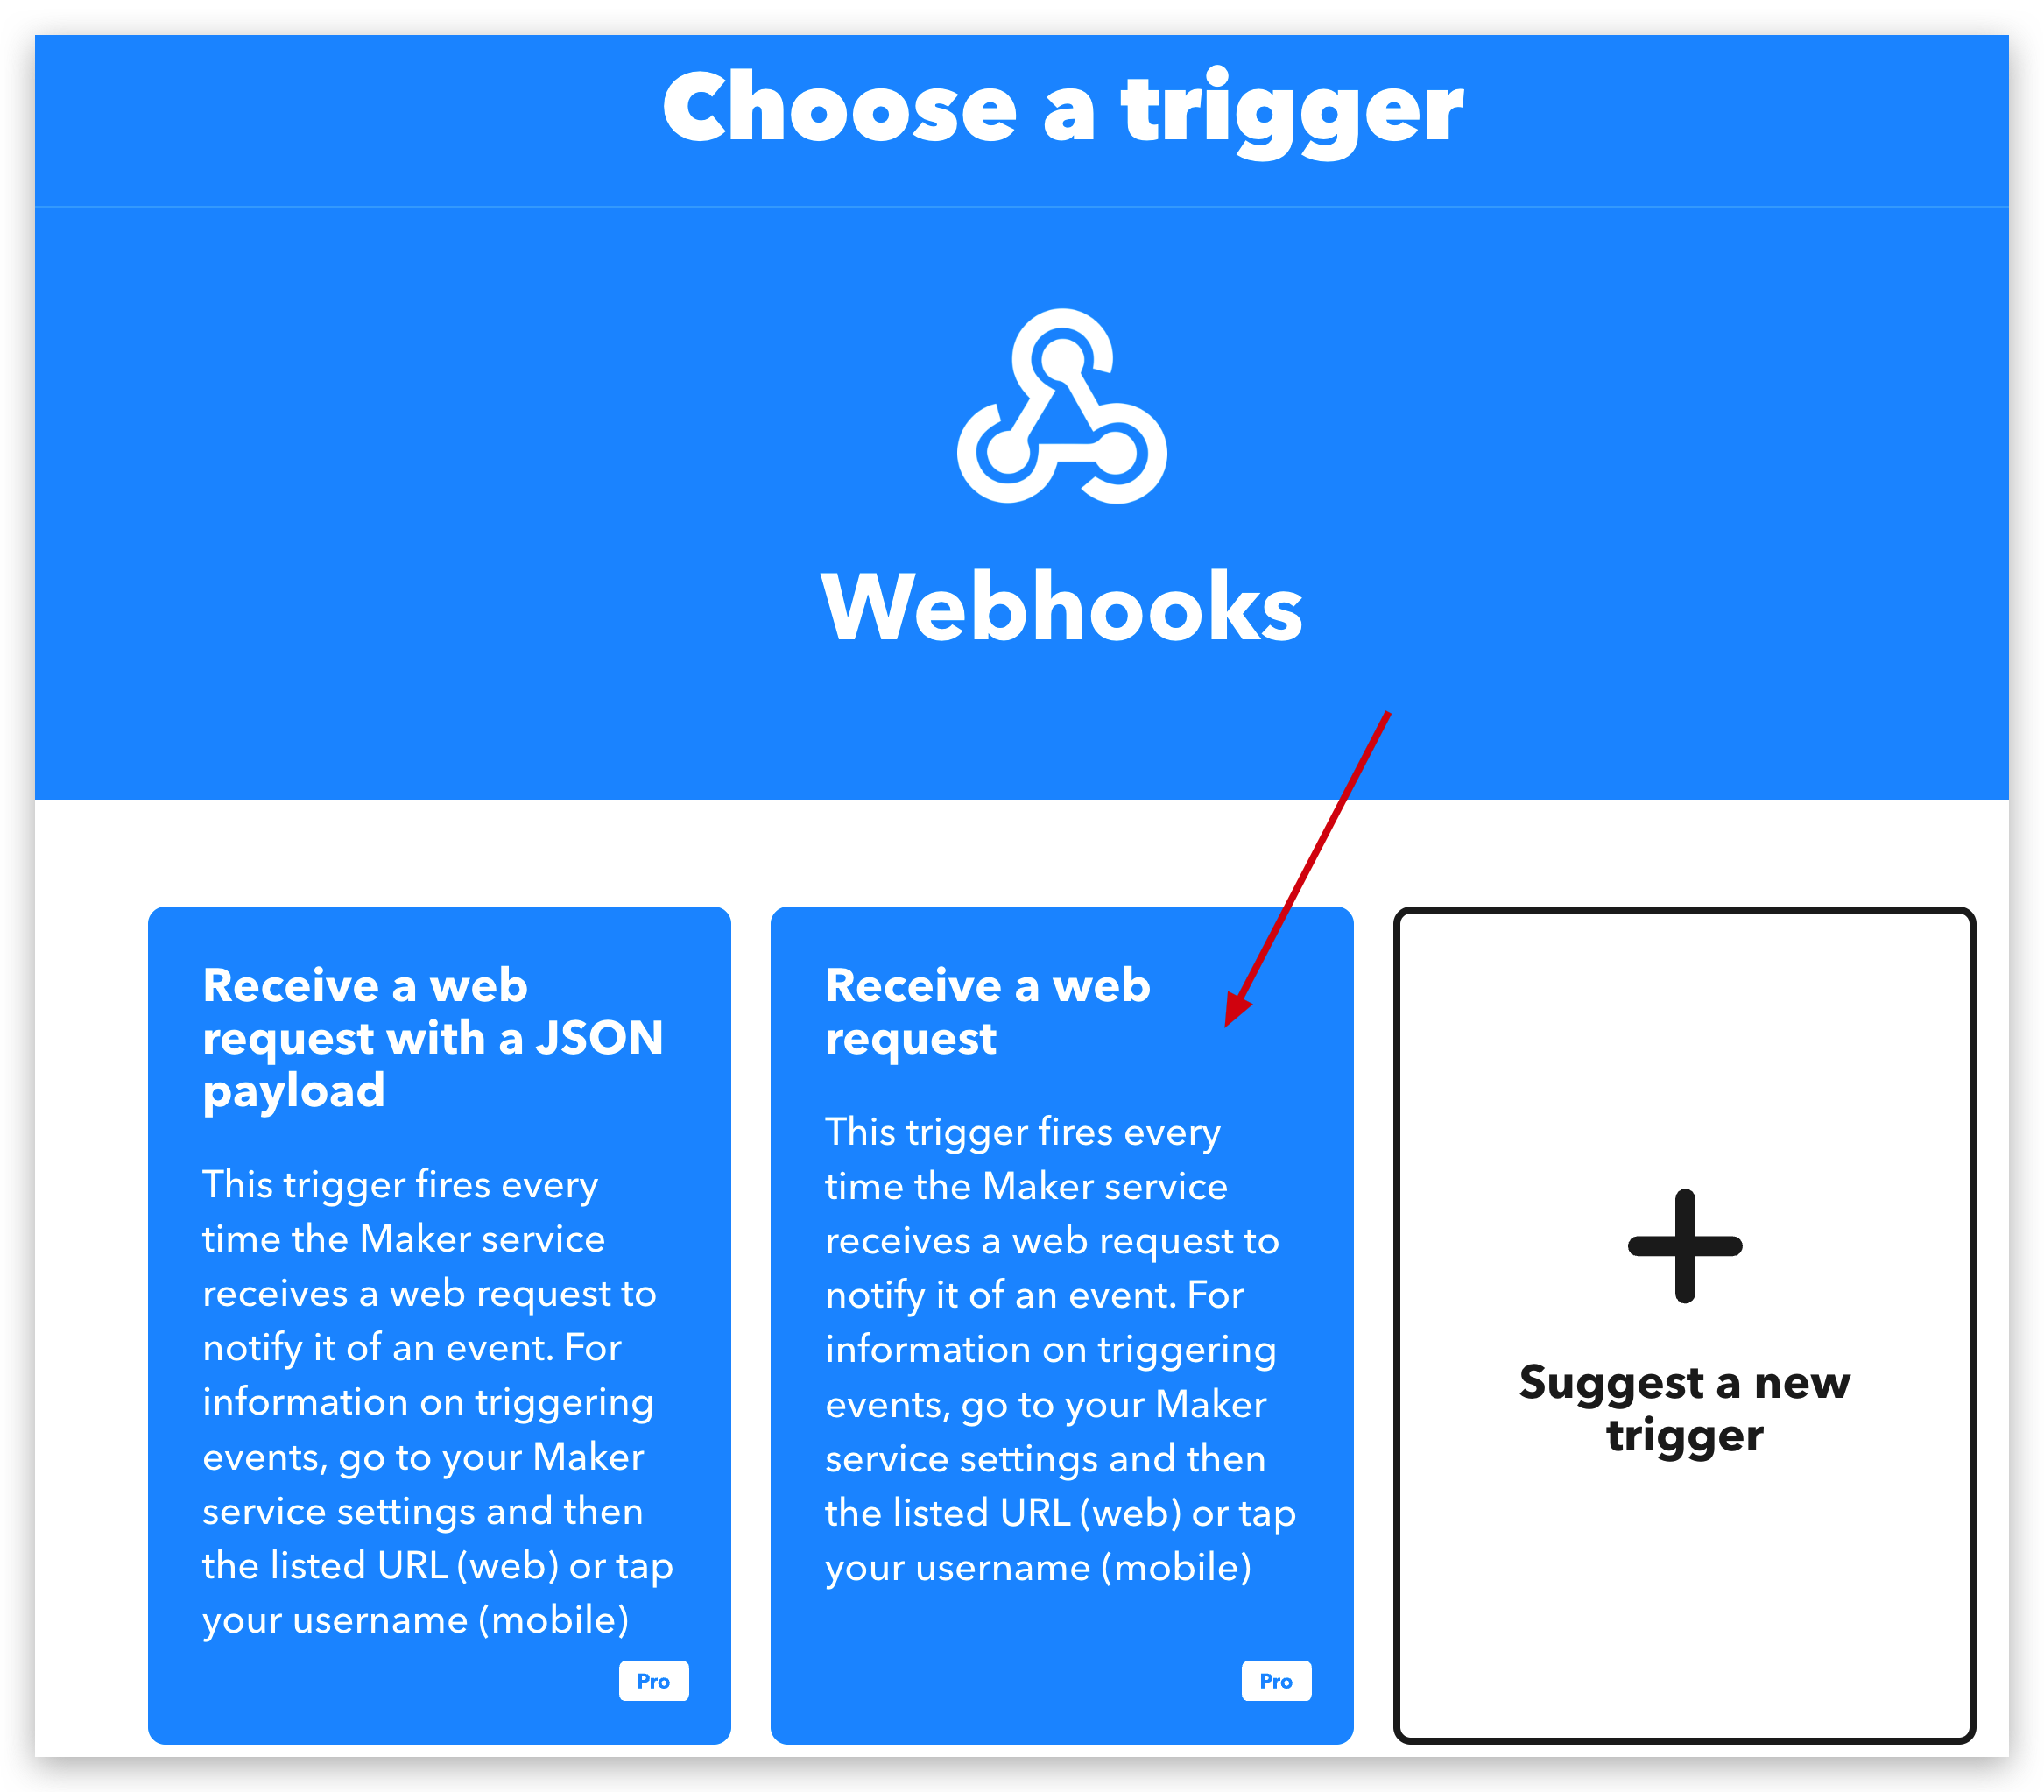
You will see a brief introduction of Webhooks trigger and we're going to select the second one.
Give it a name of your trigger and create it.
Step 2. Configure Email
When trigger fired, we need to take action. So here is what action you want to take.
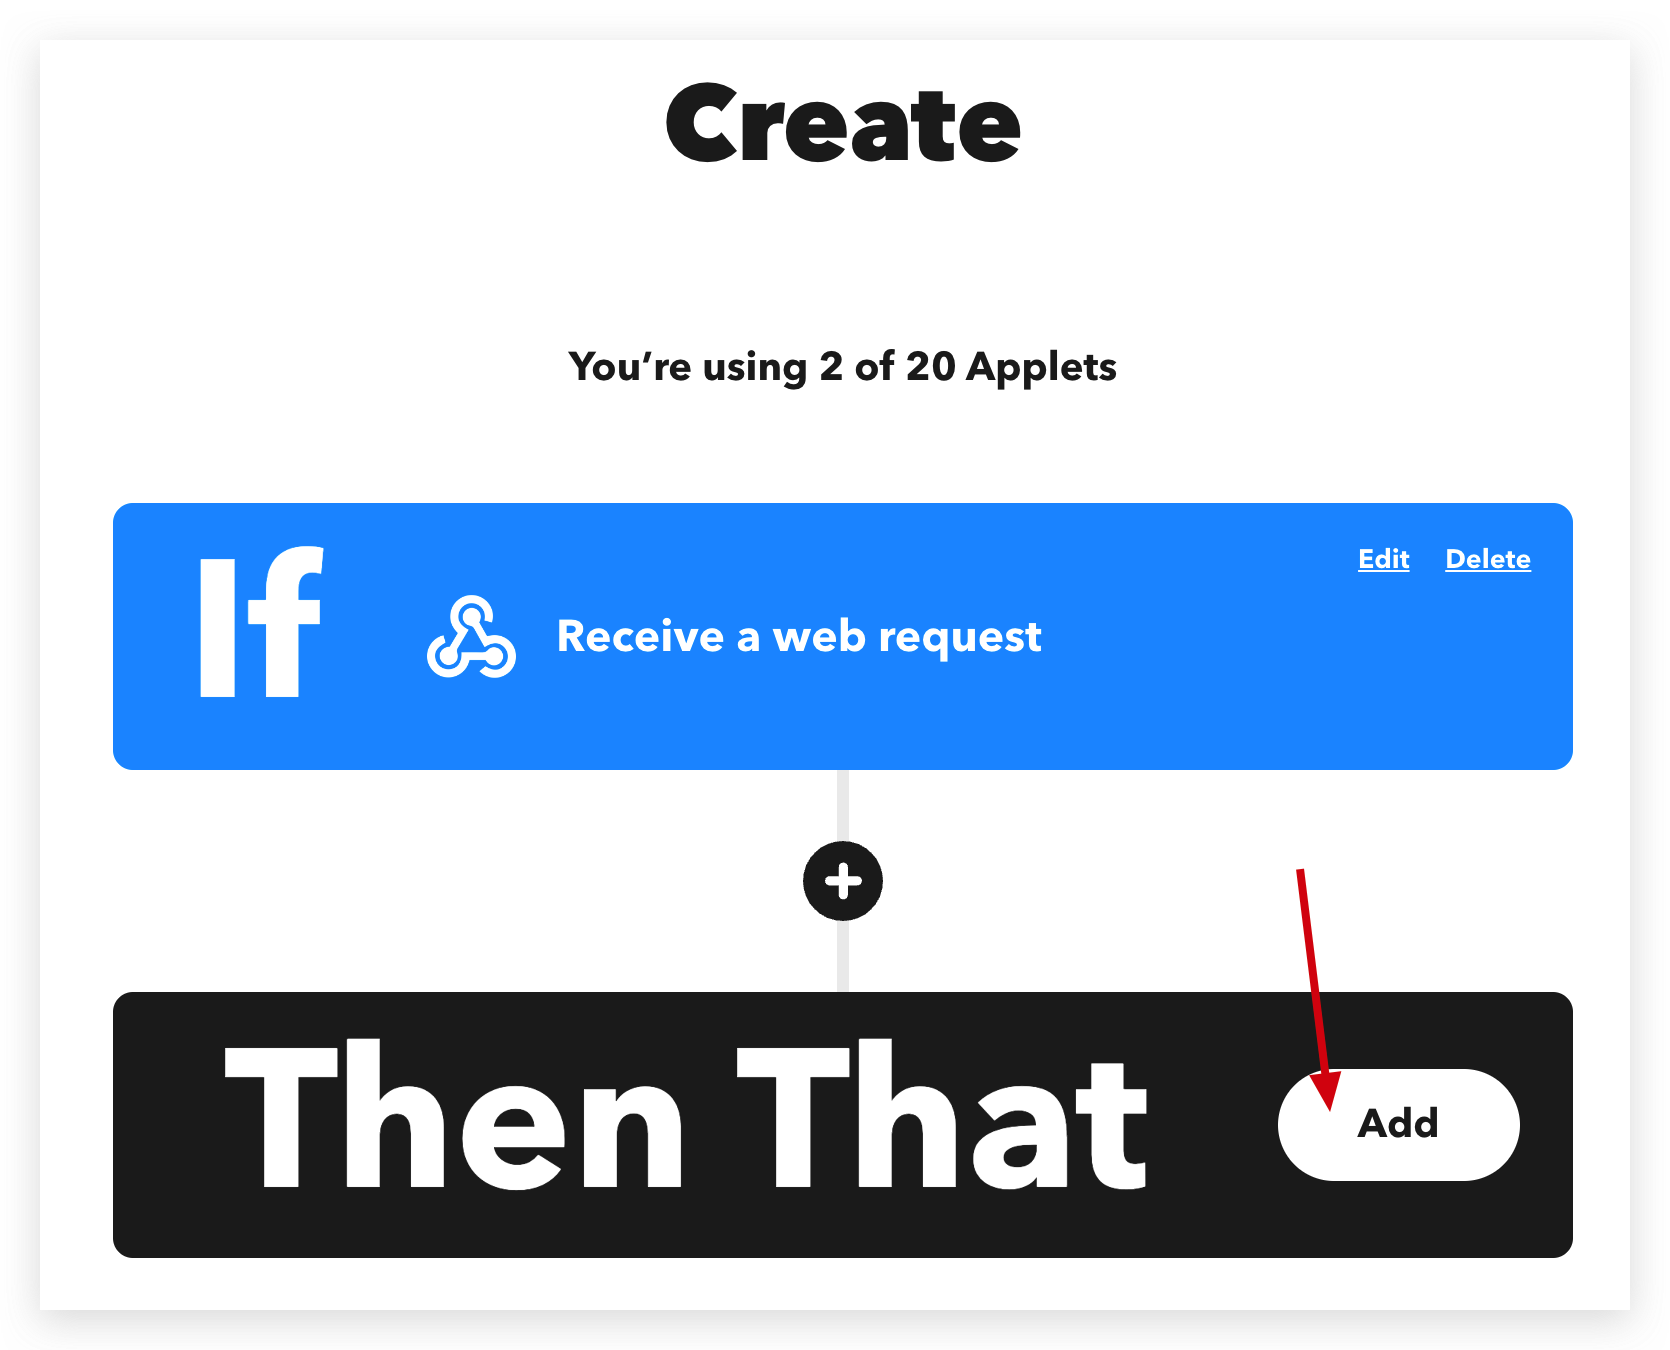
We are going to send a email via Gmail when trigger fired. Of course, there are millions of services you can use.
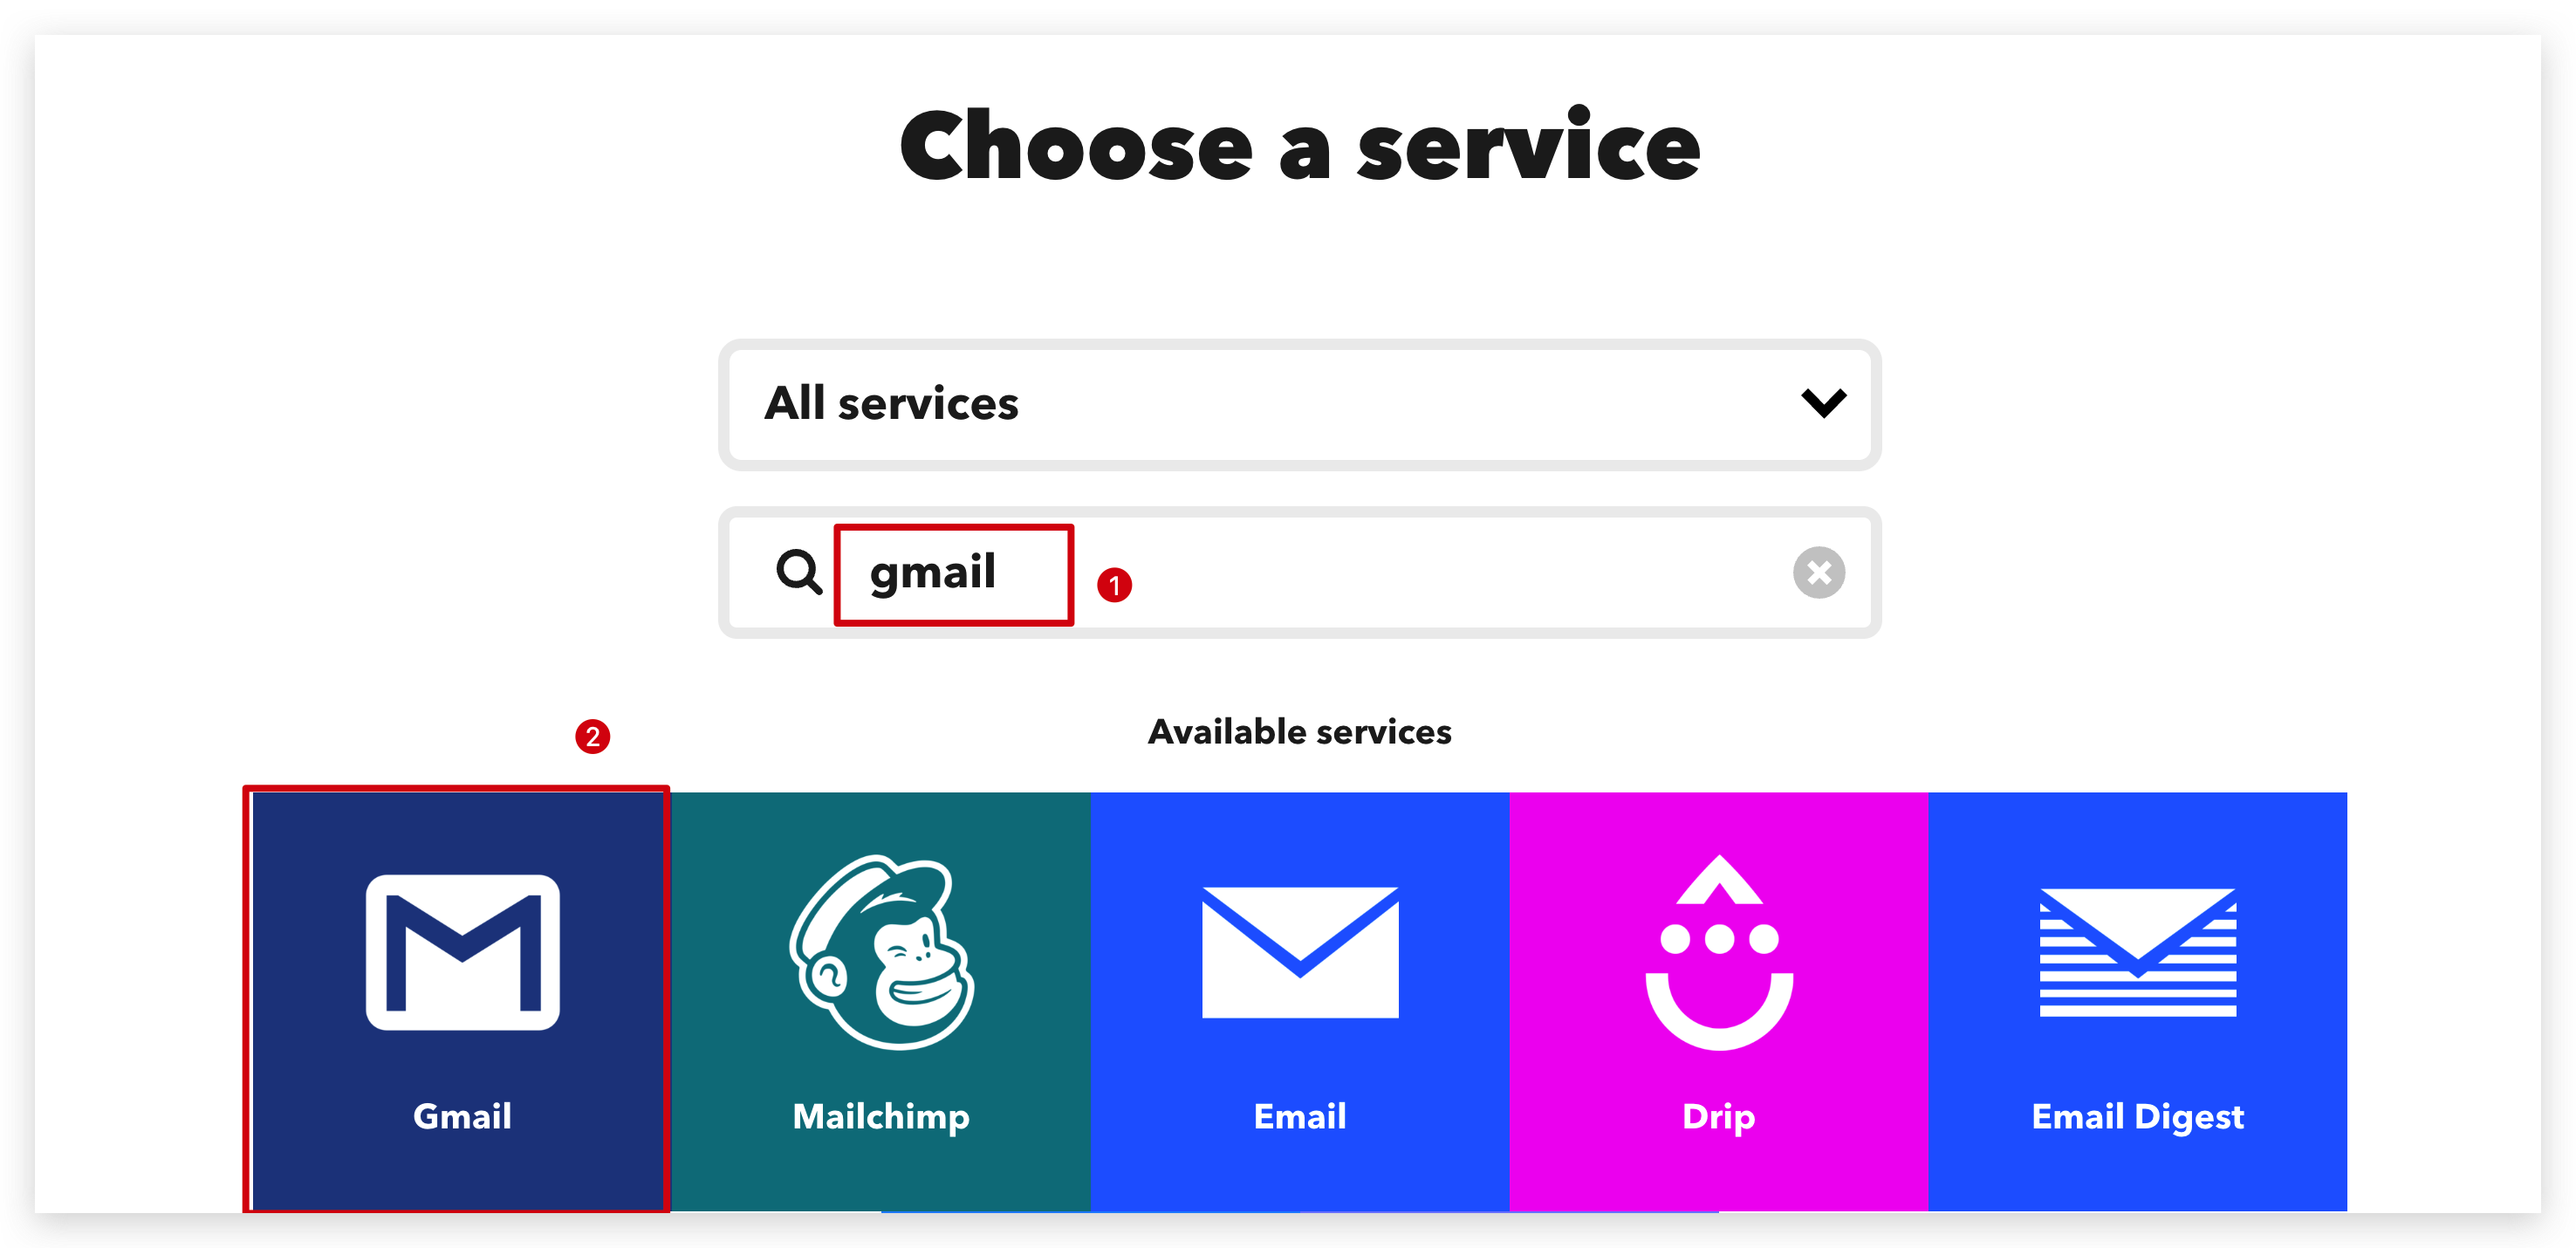
Select Gmail account and fill in email address where you want to send.
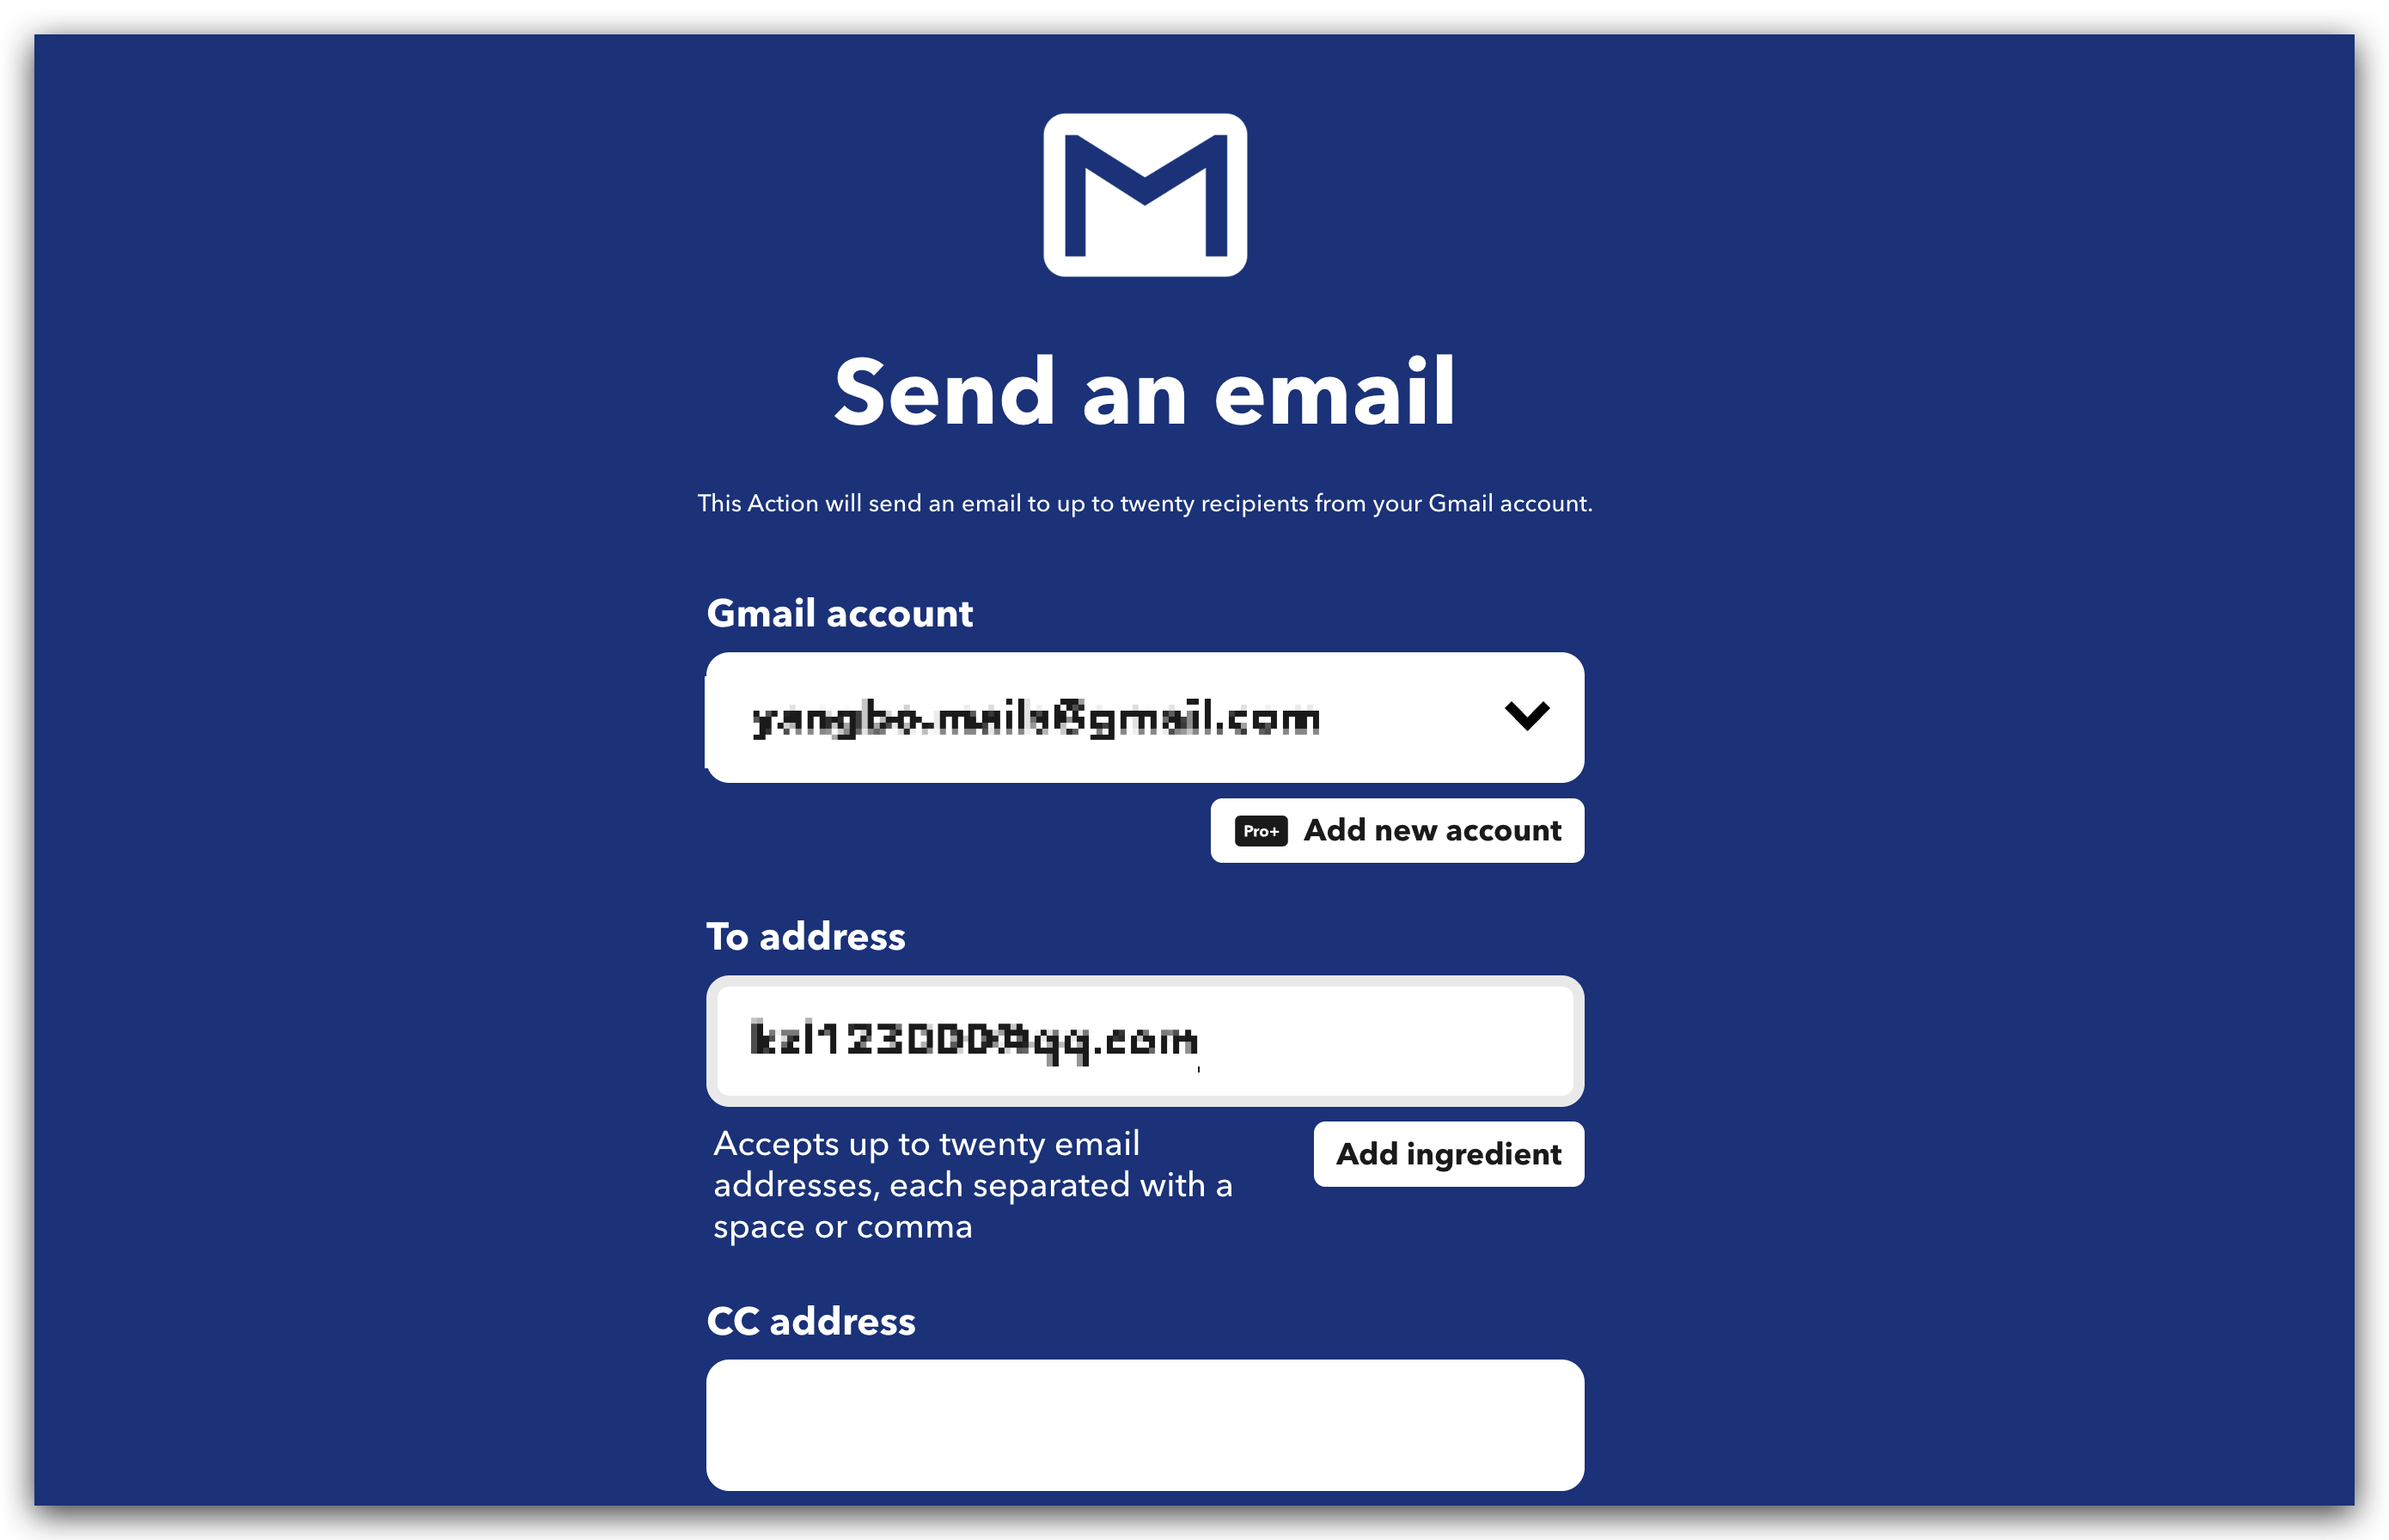
Customize Subject and Body as you want or by default.
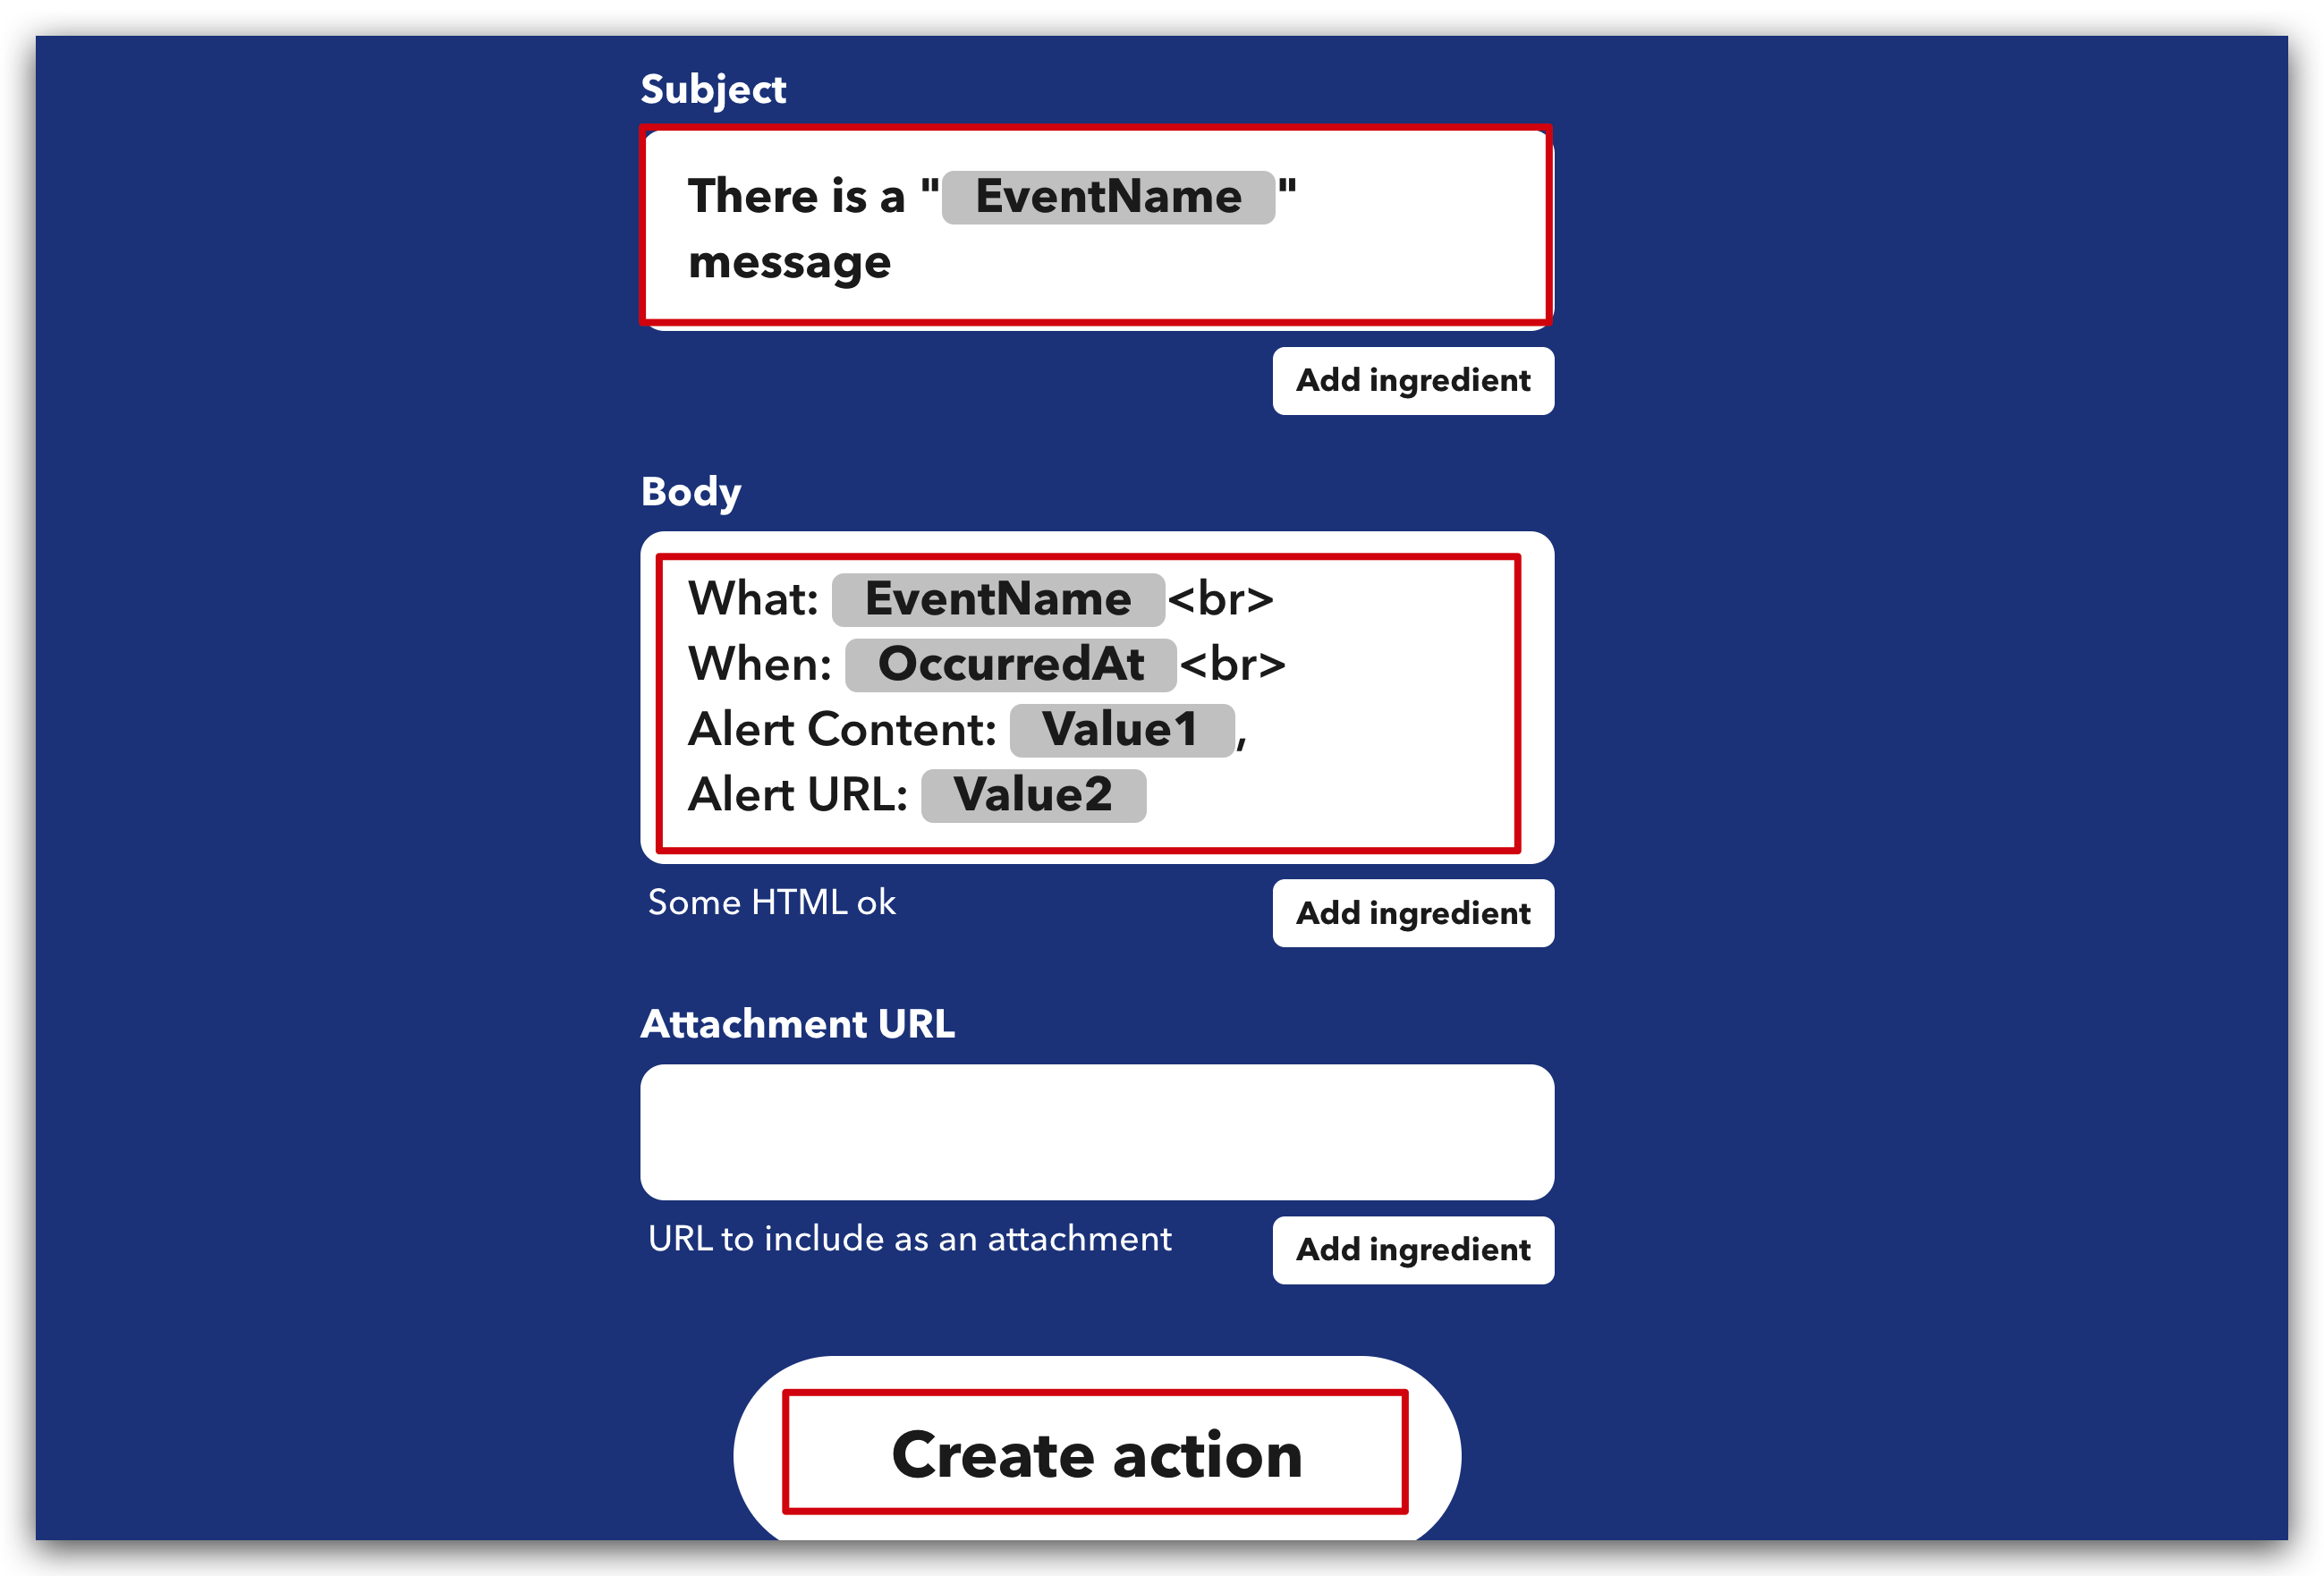
Click Continue button.
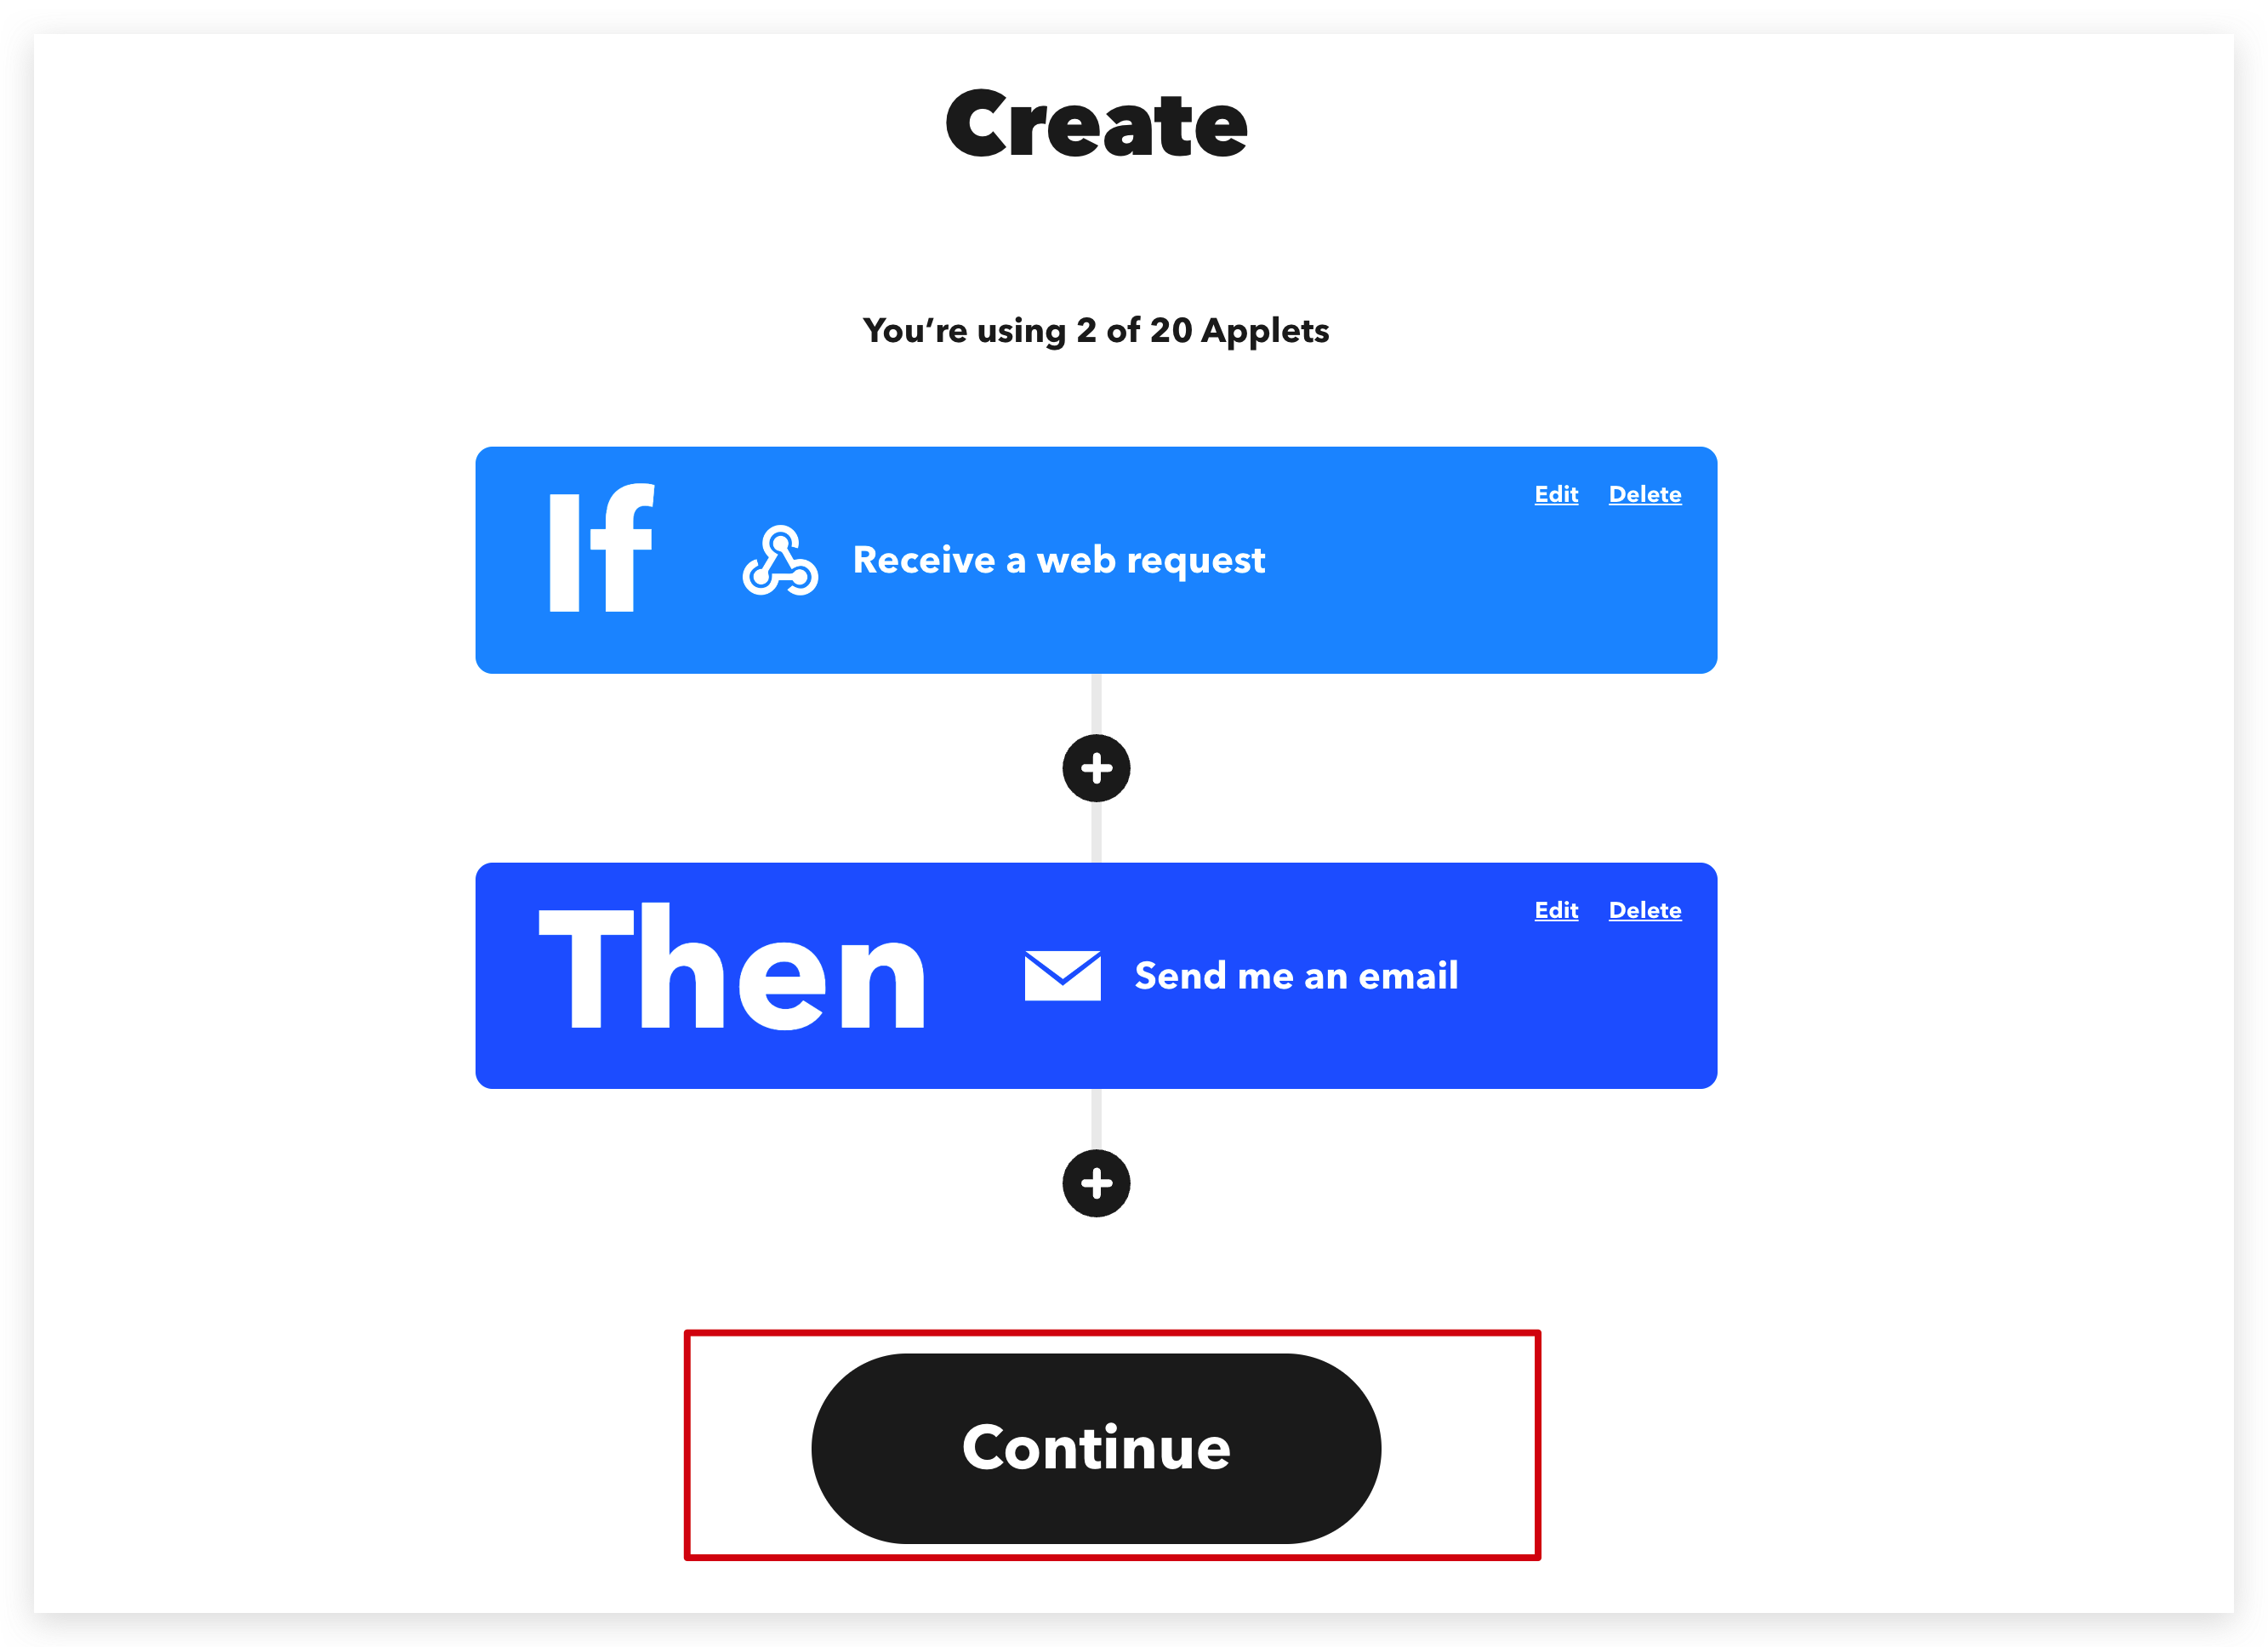
Step 3. Finish Applet
You can edit your Applet Title or let it by default, and then click Finish.
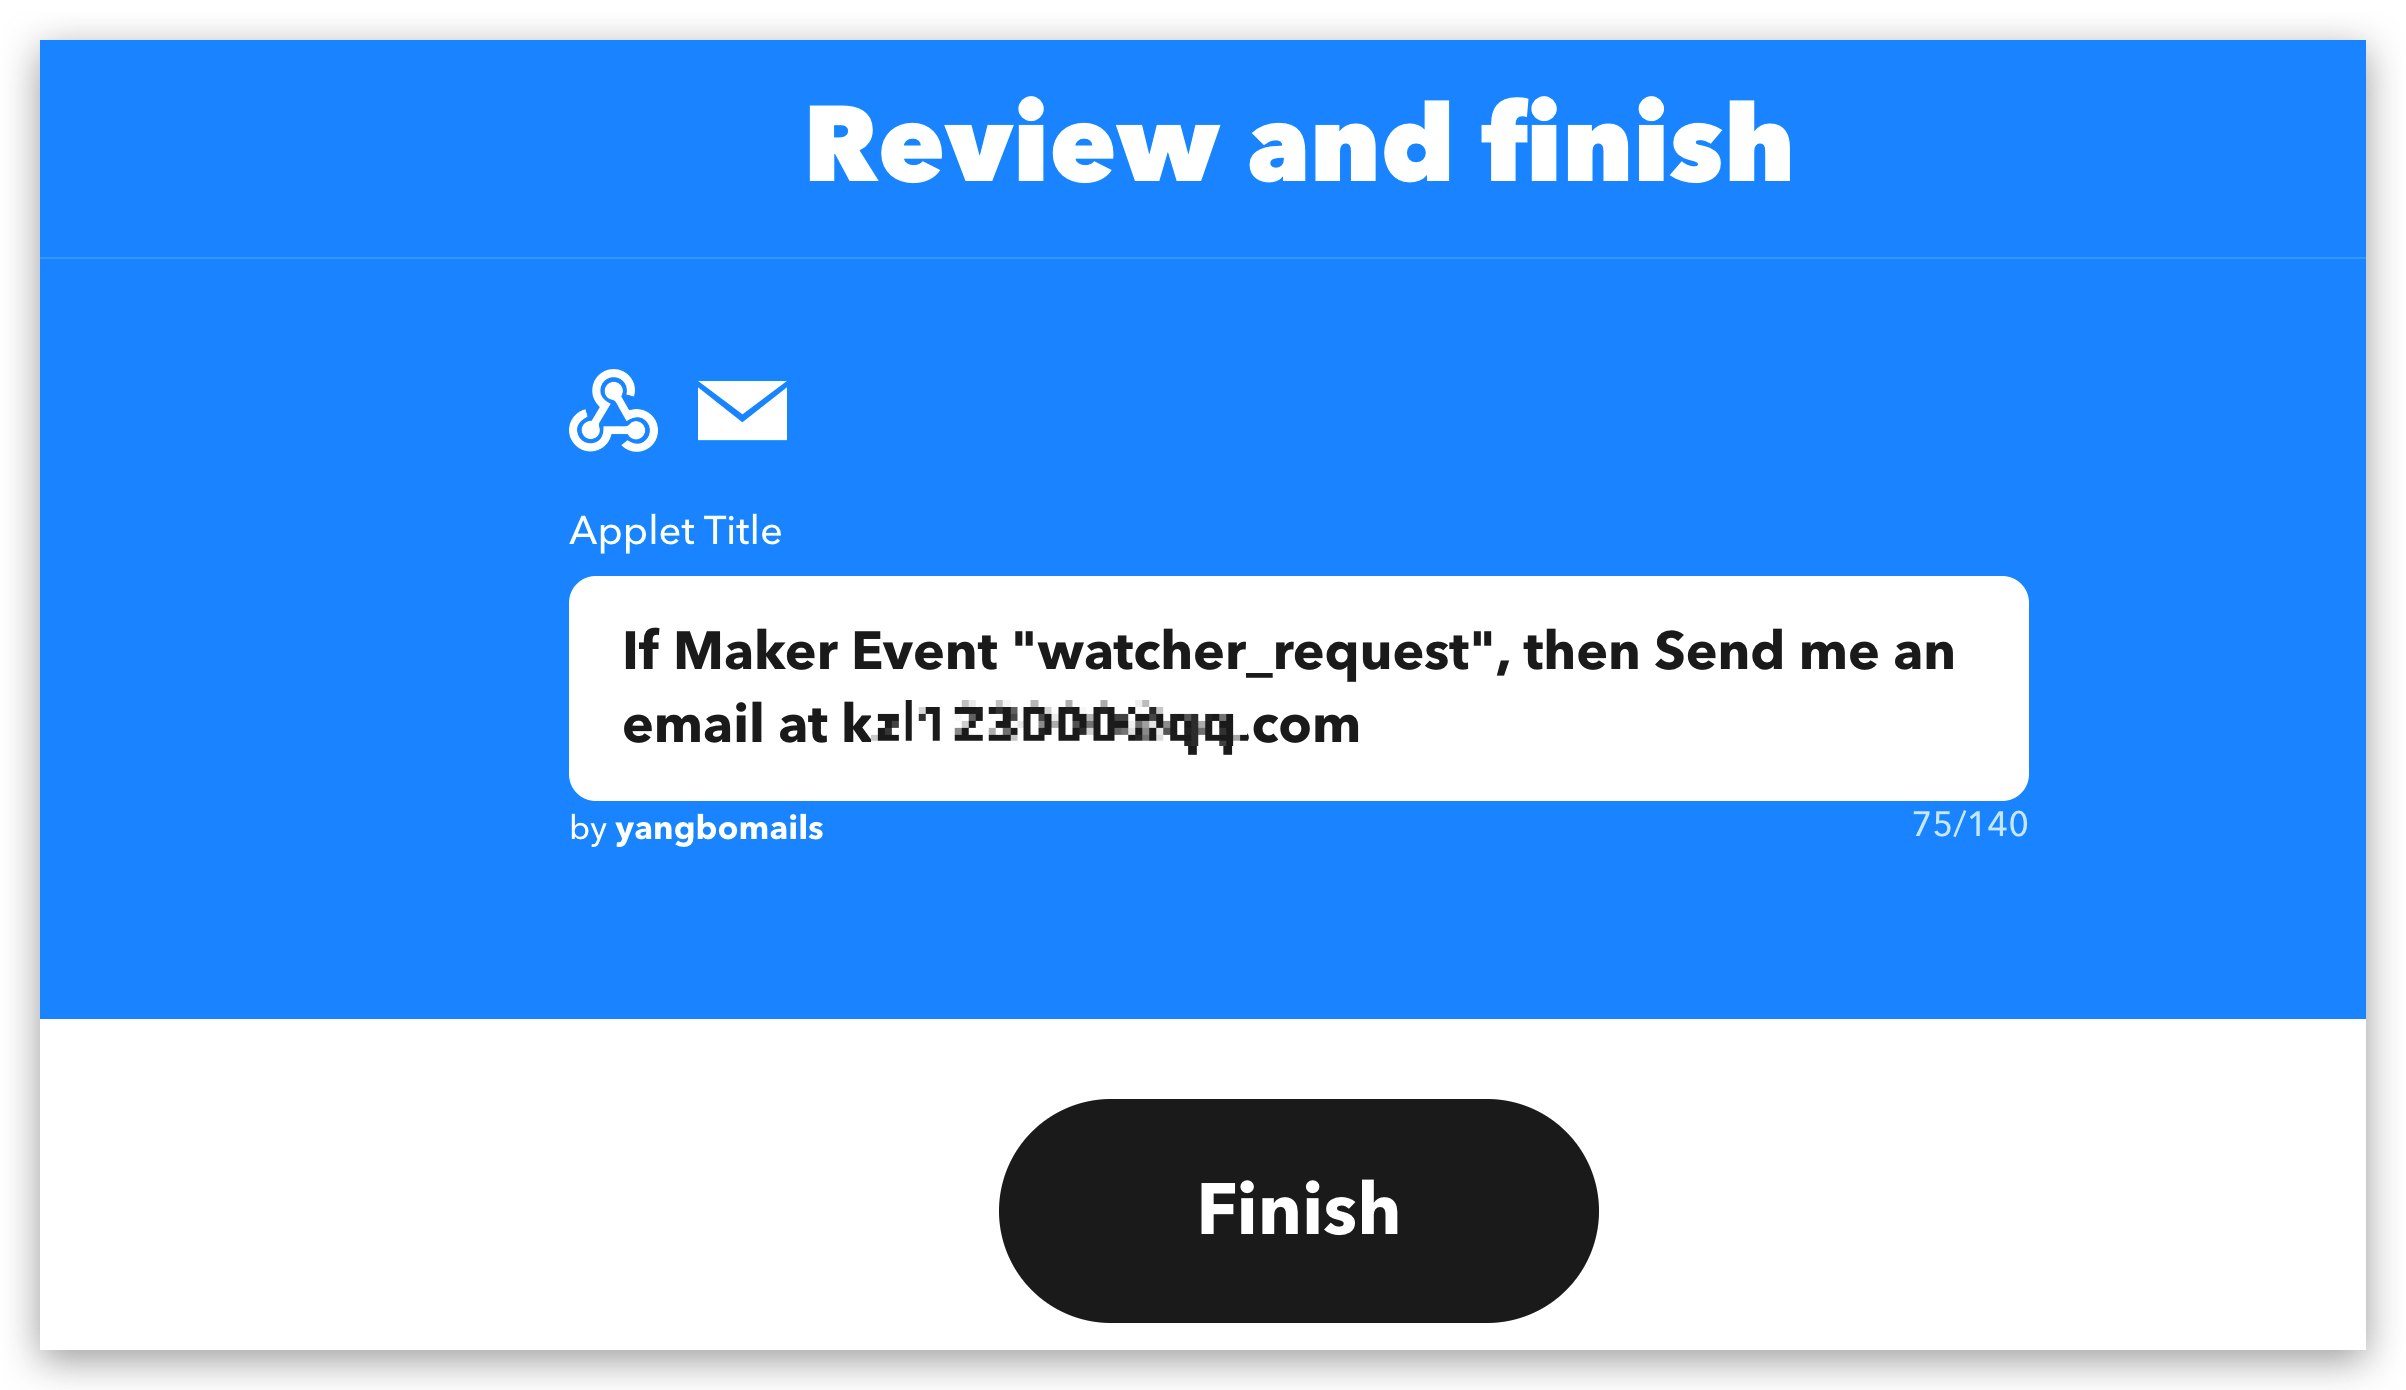
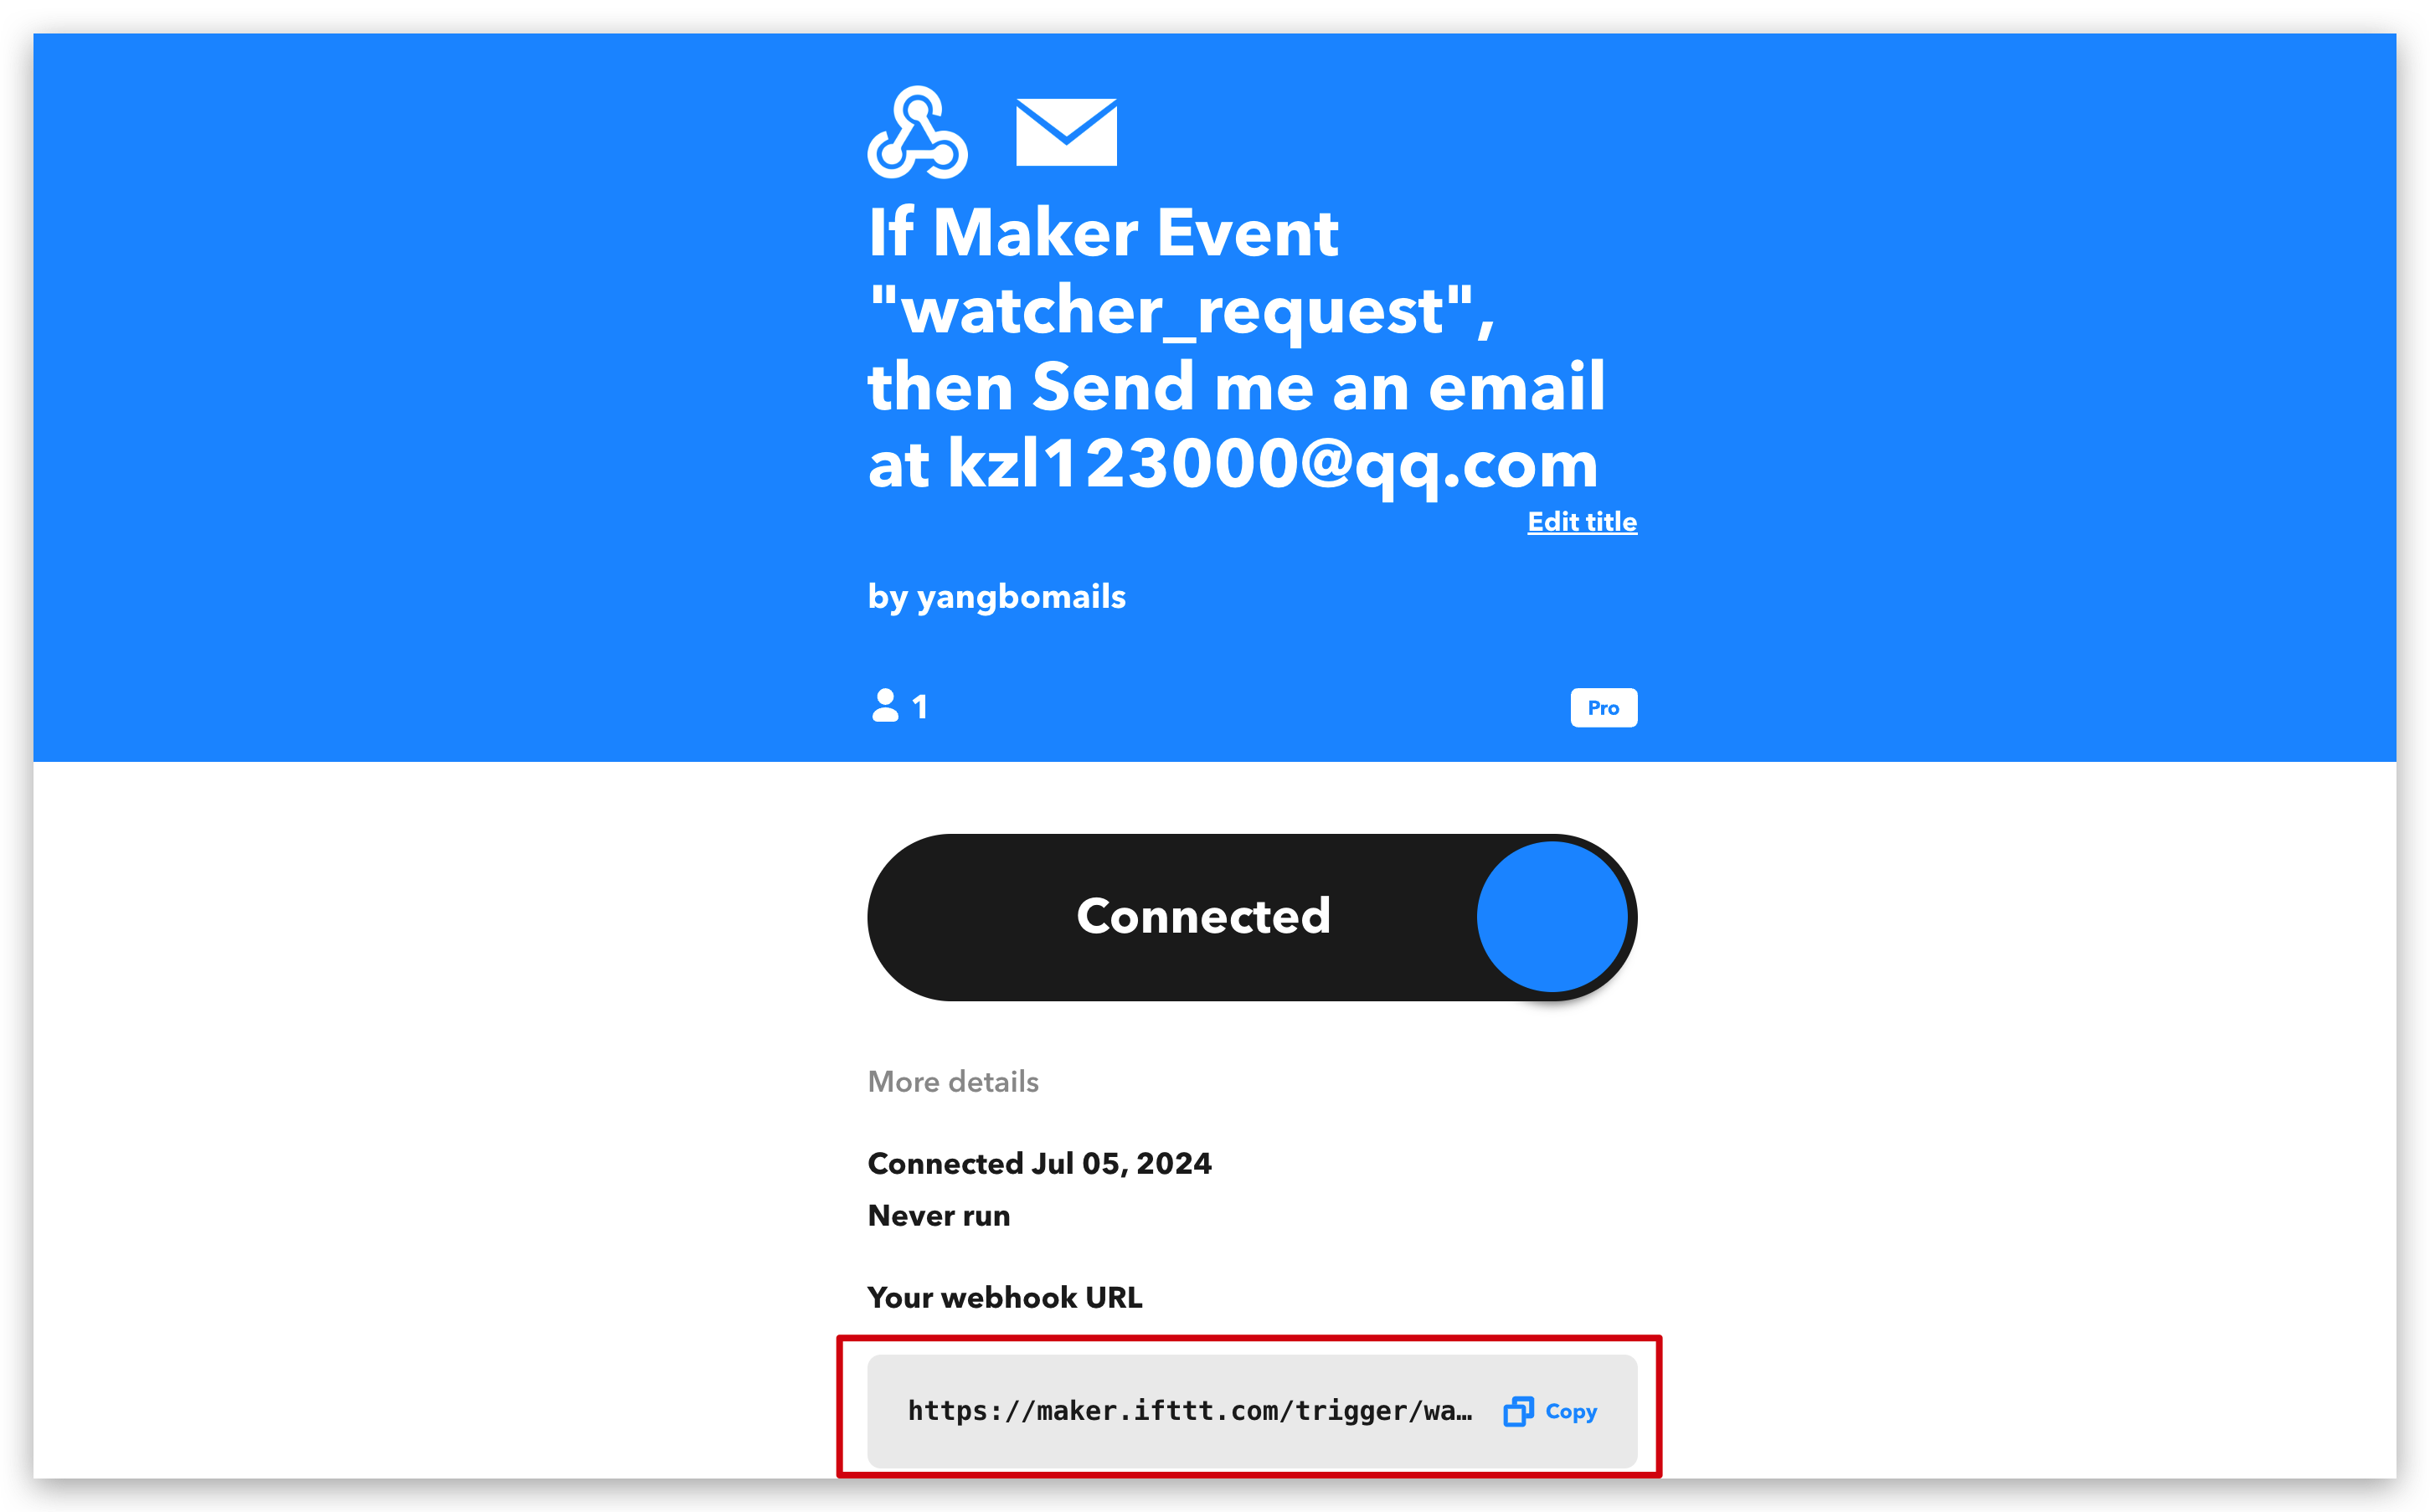
When you finish, you can save this link because we will use it later.
Part 3. Access IFTTT in Node-RED
Step 4. Watcher message send to Node-RED
Drag those module to workspace and connect them together. If you don't know how to send message from watcher to Node-RED yet, please click here.
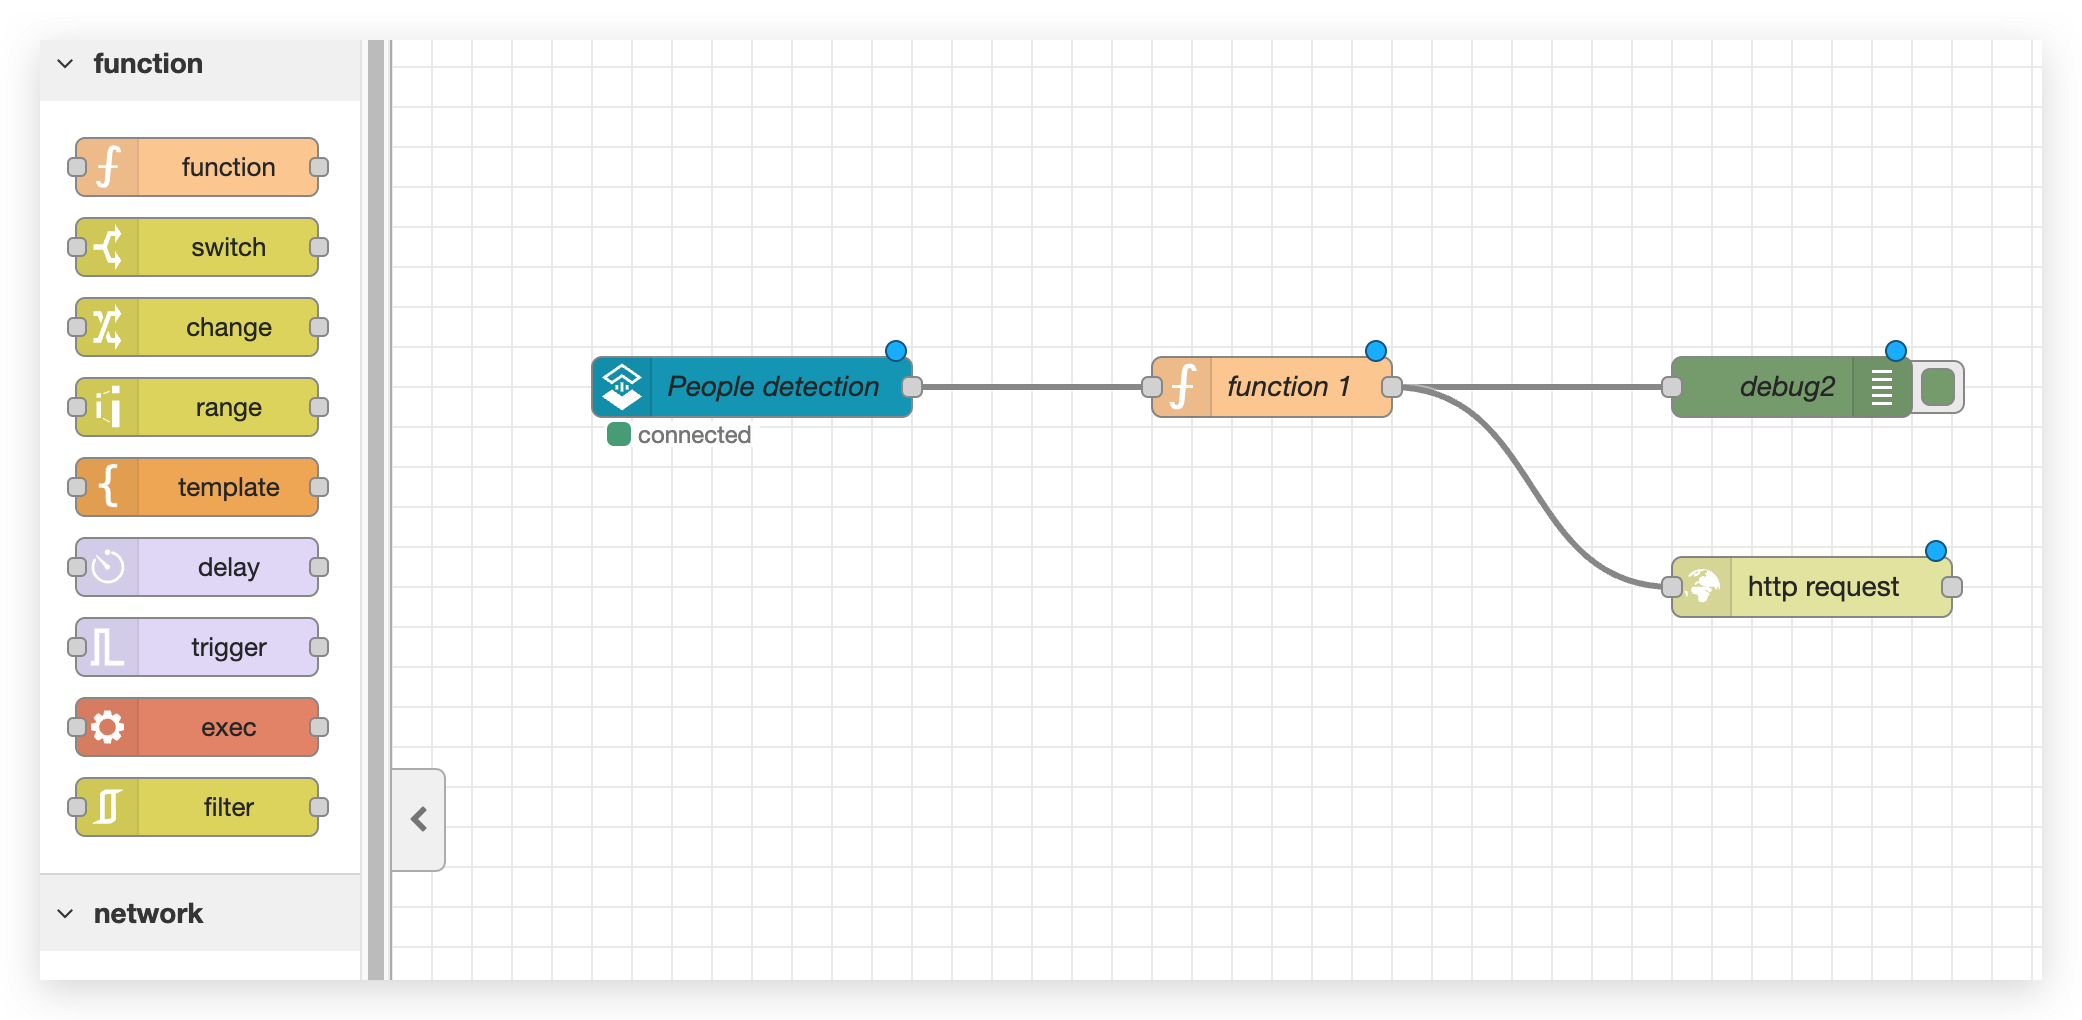
Step 5. Process message you want to send to IFTTT
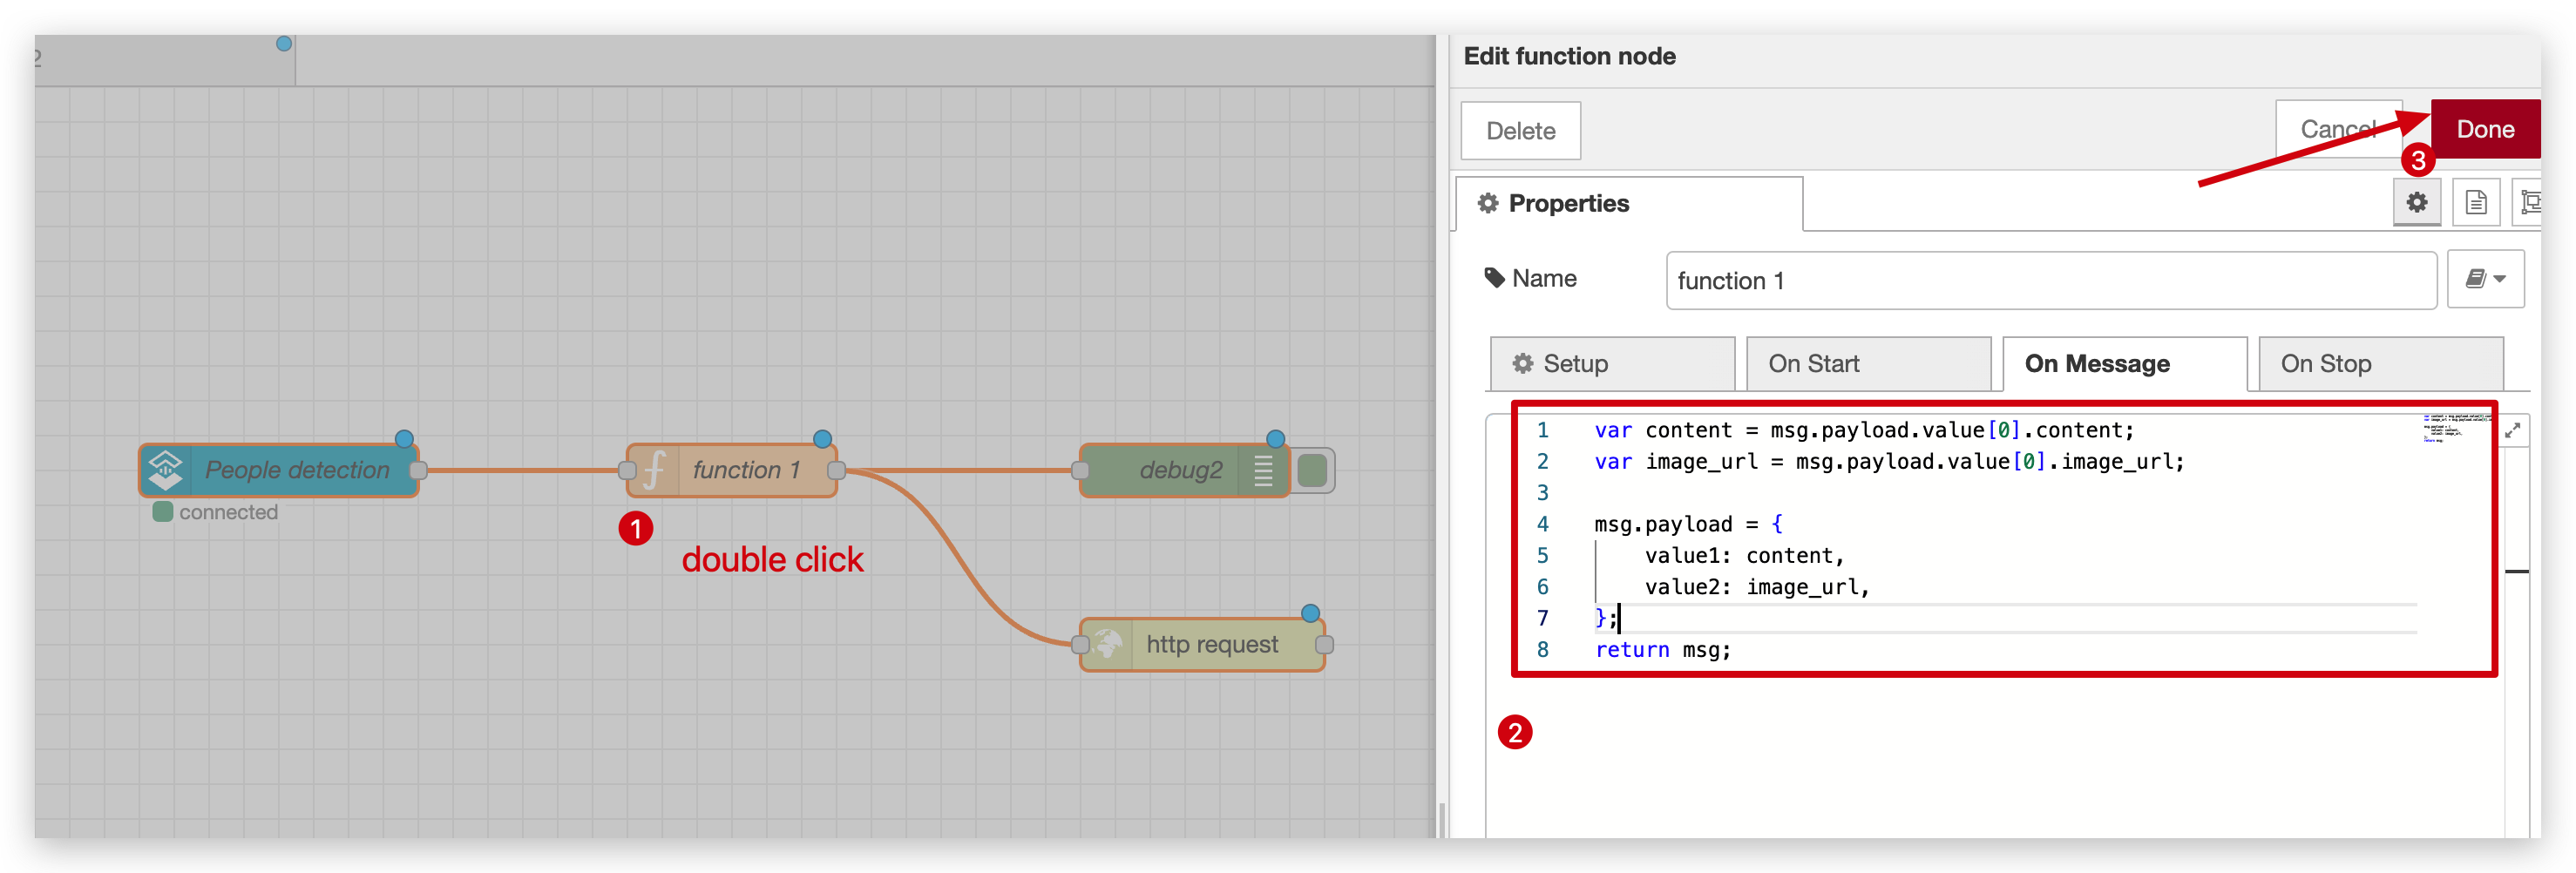
Double click function module and write some code to get value1 and value2, maybe value3. Those value will be sent to IFTTT.
var content = msg.payload.value[0].content;
var image_url = msg.payload.value[0].image_url;

msg.payload = {
    value1: content,
    value2: image_url,
};
return msg;
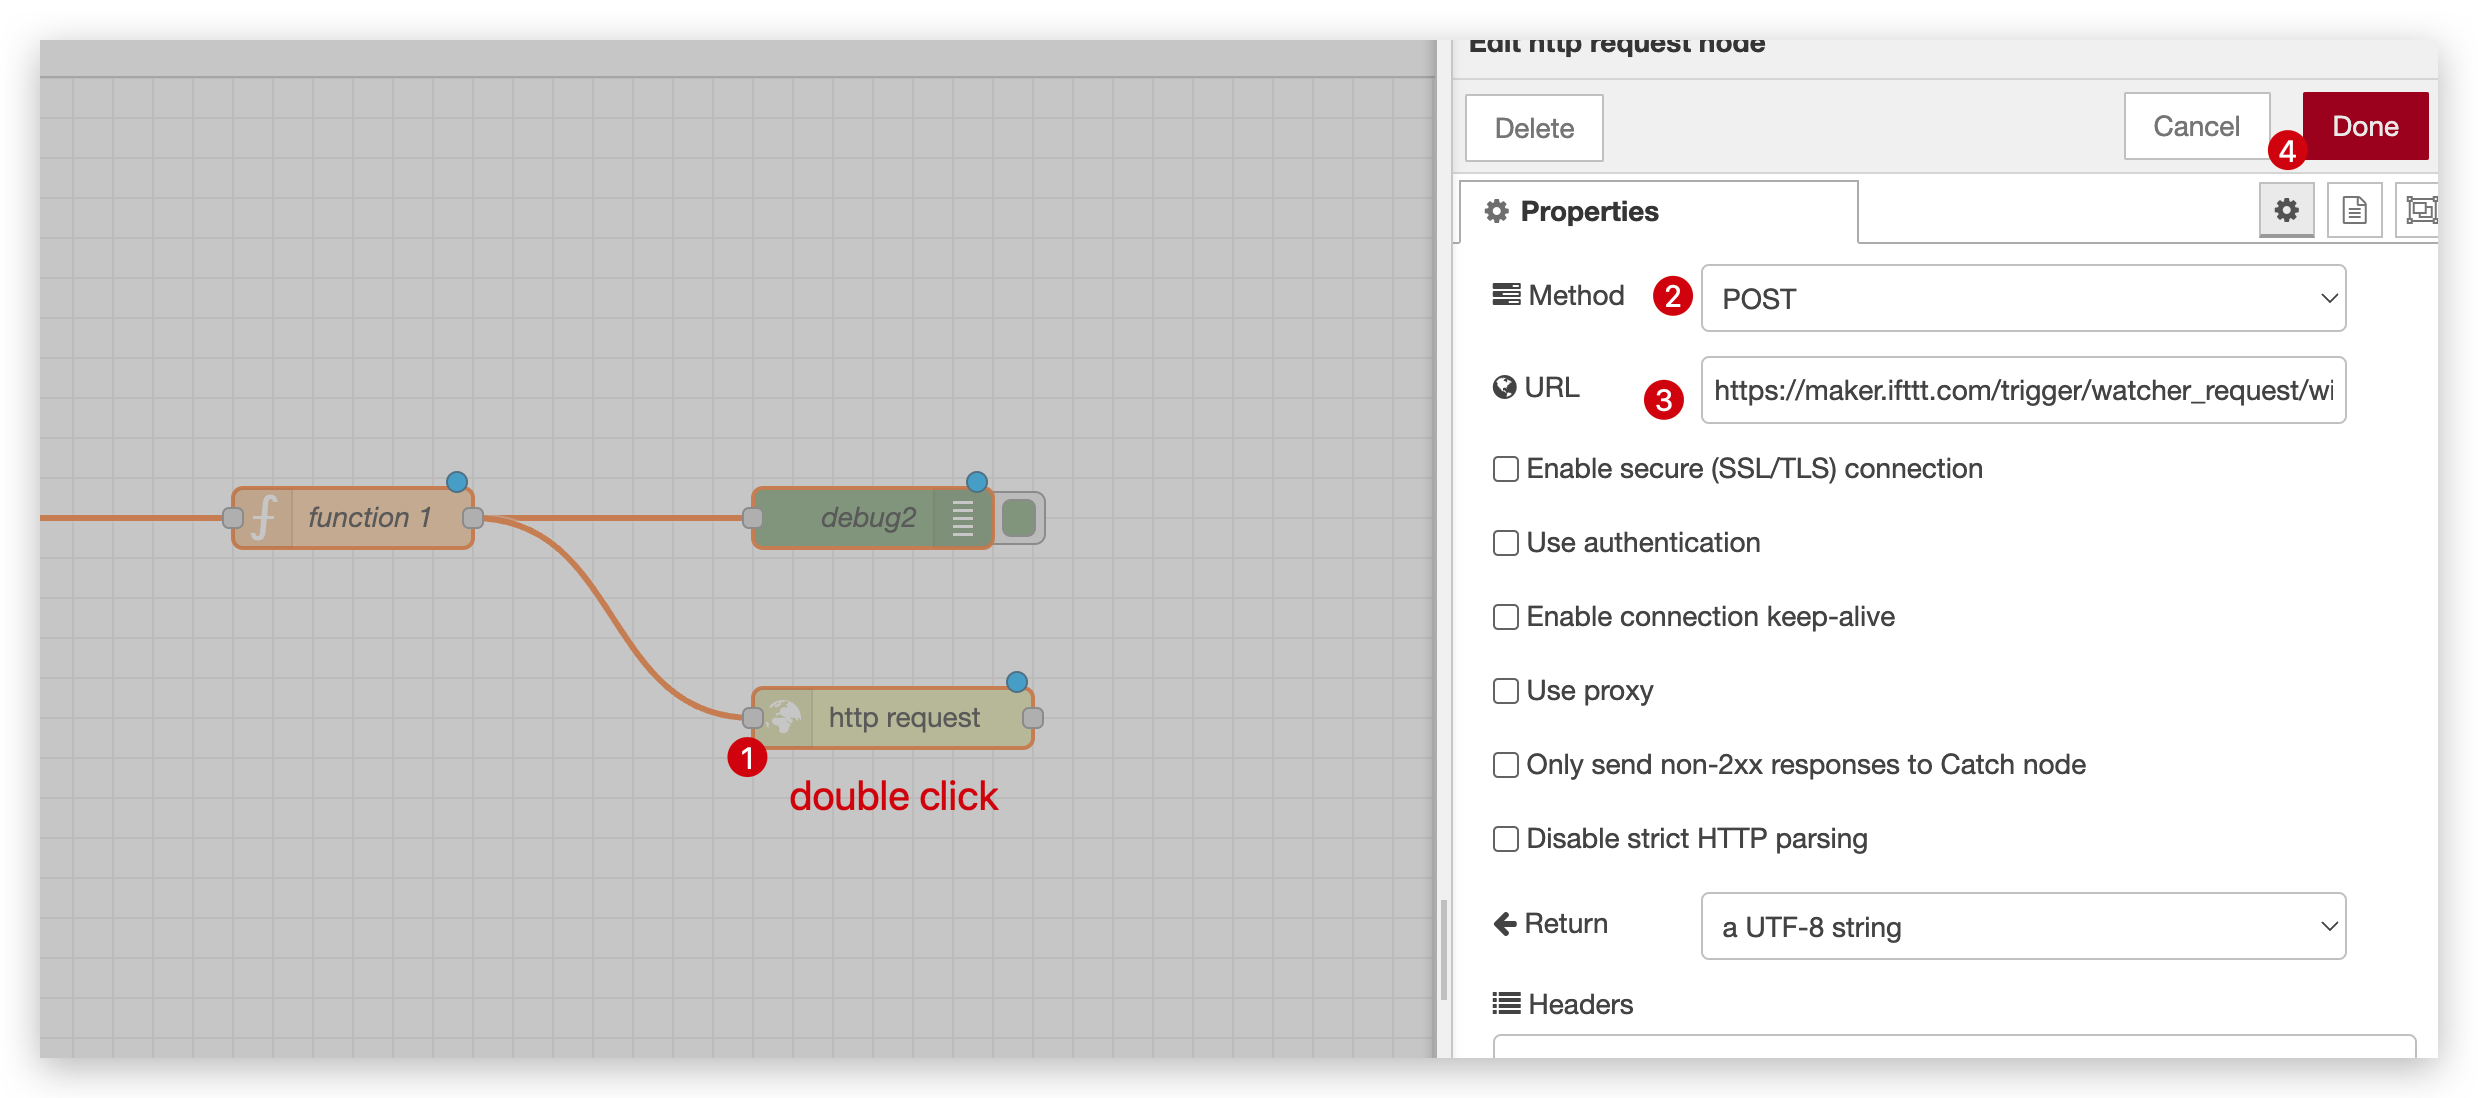
Double click http request module, select POST method and paste URL you just copy from IFTTT.
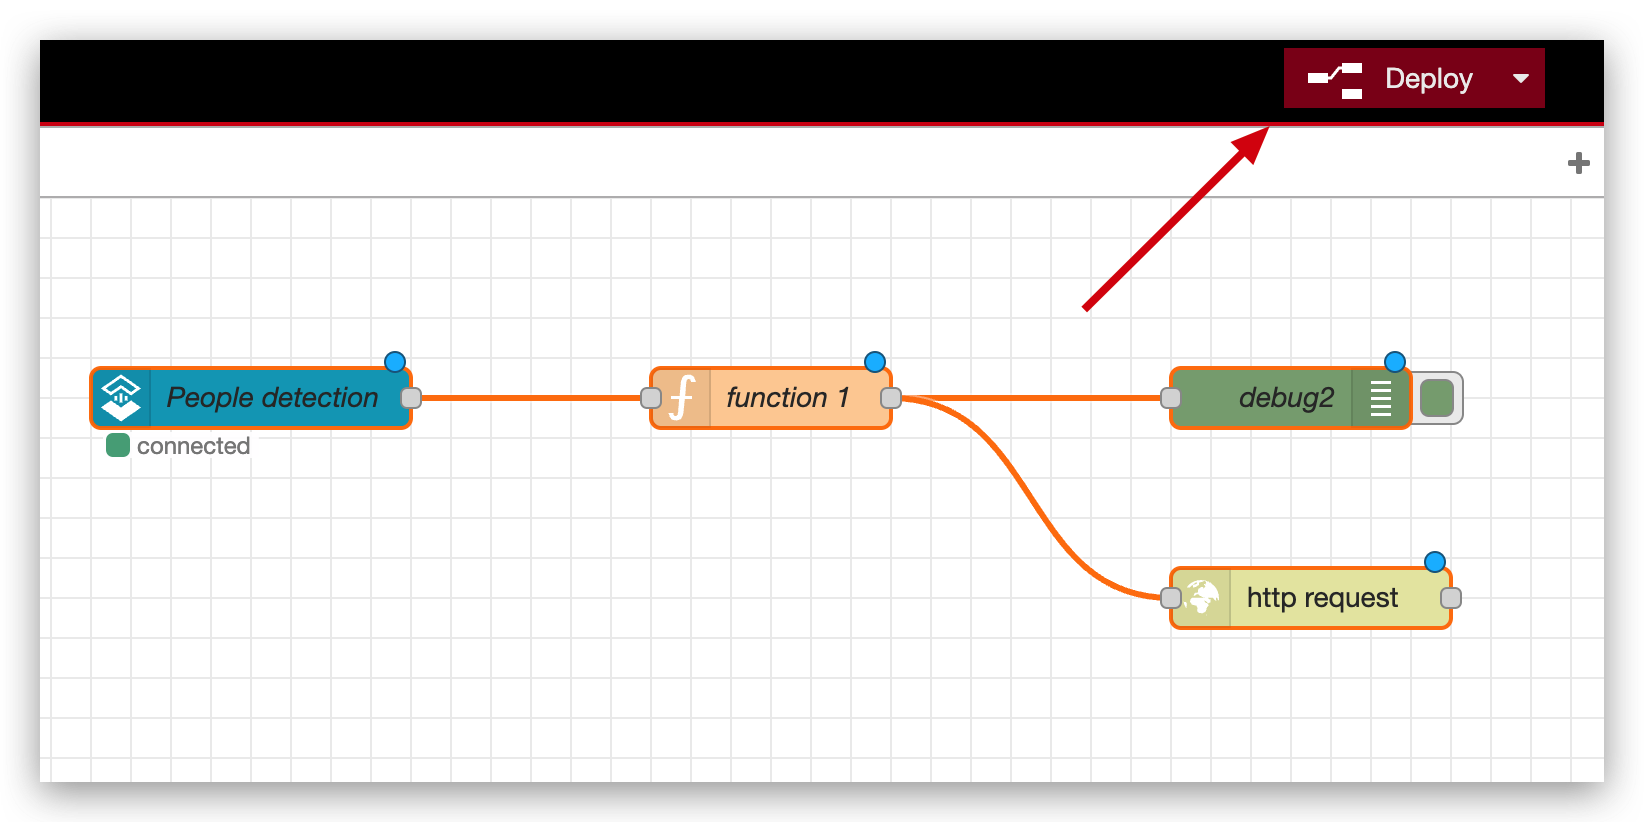
When finished, don't forget to Deploy it.
Part 4. Send message via IFTTT
Step 6.Send a task to Watcher
First of all, you need to run a task in Watcher following the video below. If you want to know more please click here.
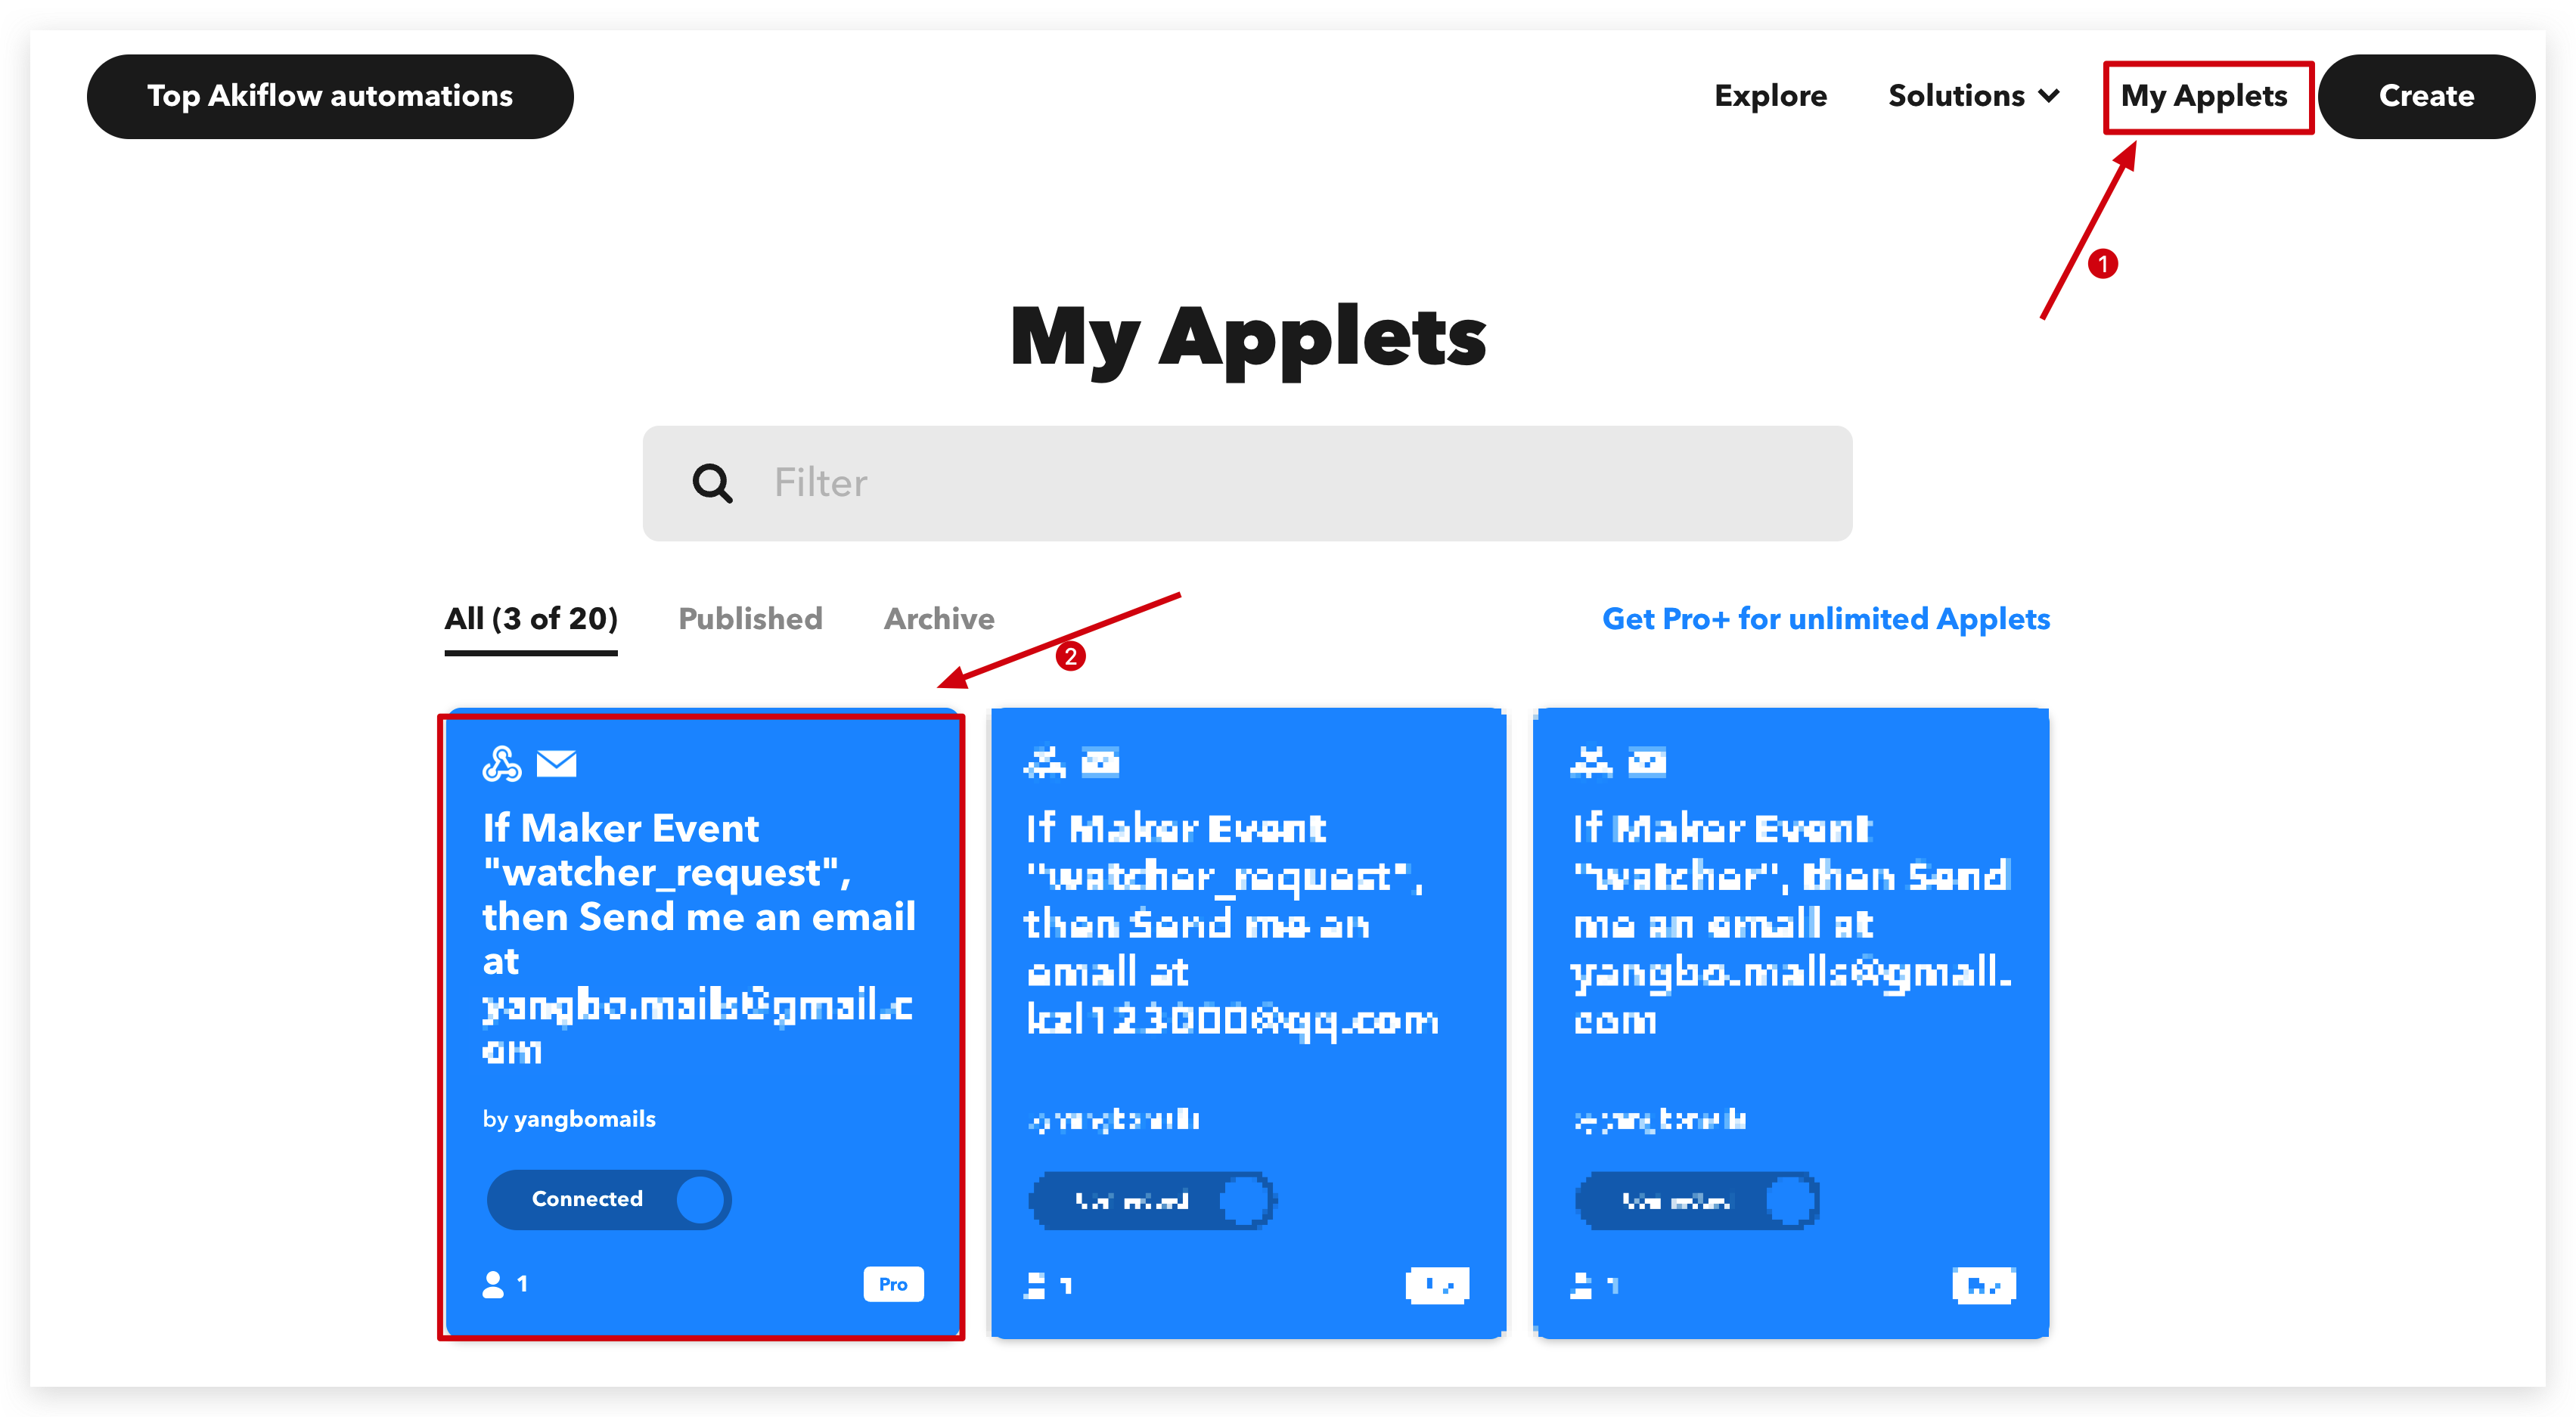
Step 7.Check those message in IFTTT and Phone
Open My Applets and click the applet you created before.
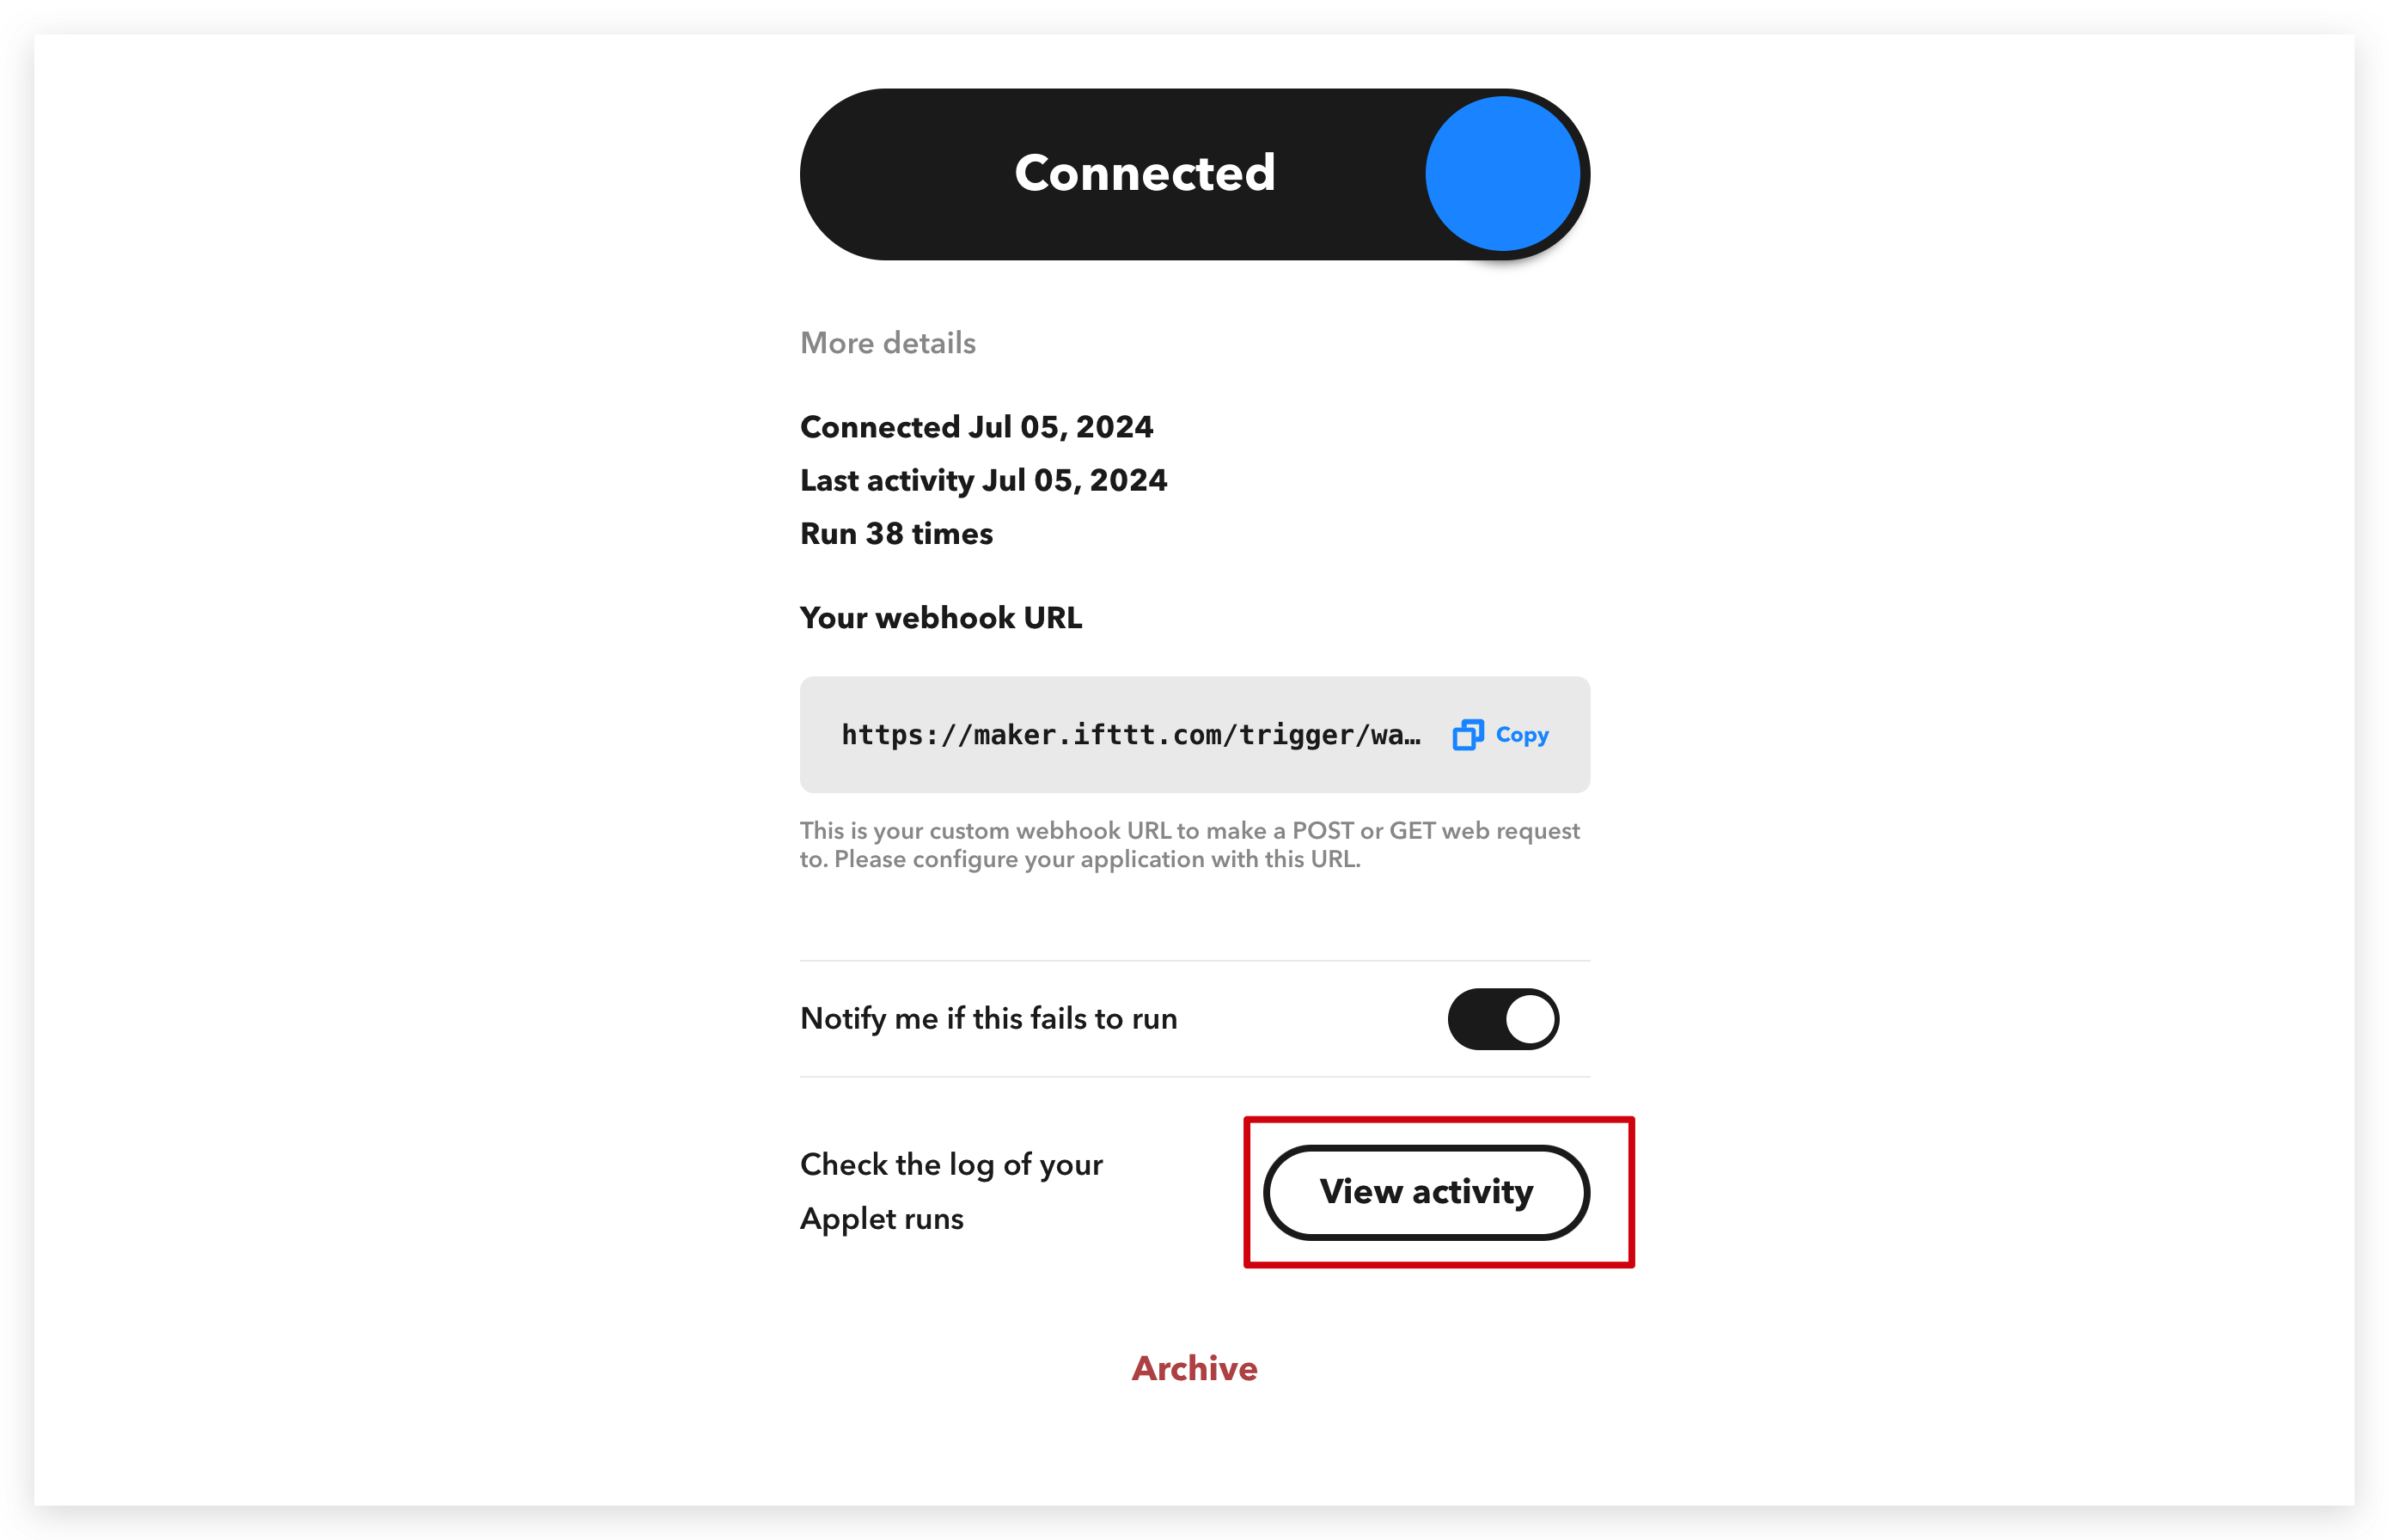
Scroll down the page and click View activity button.
Continue to scroll down and click this two button.
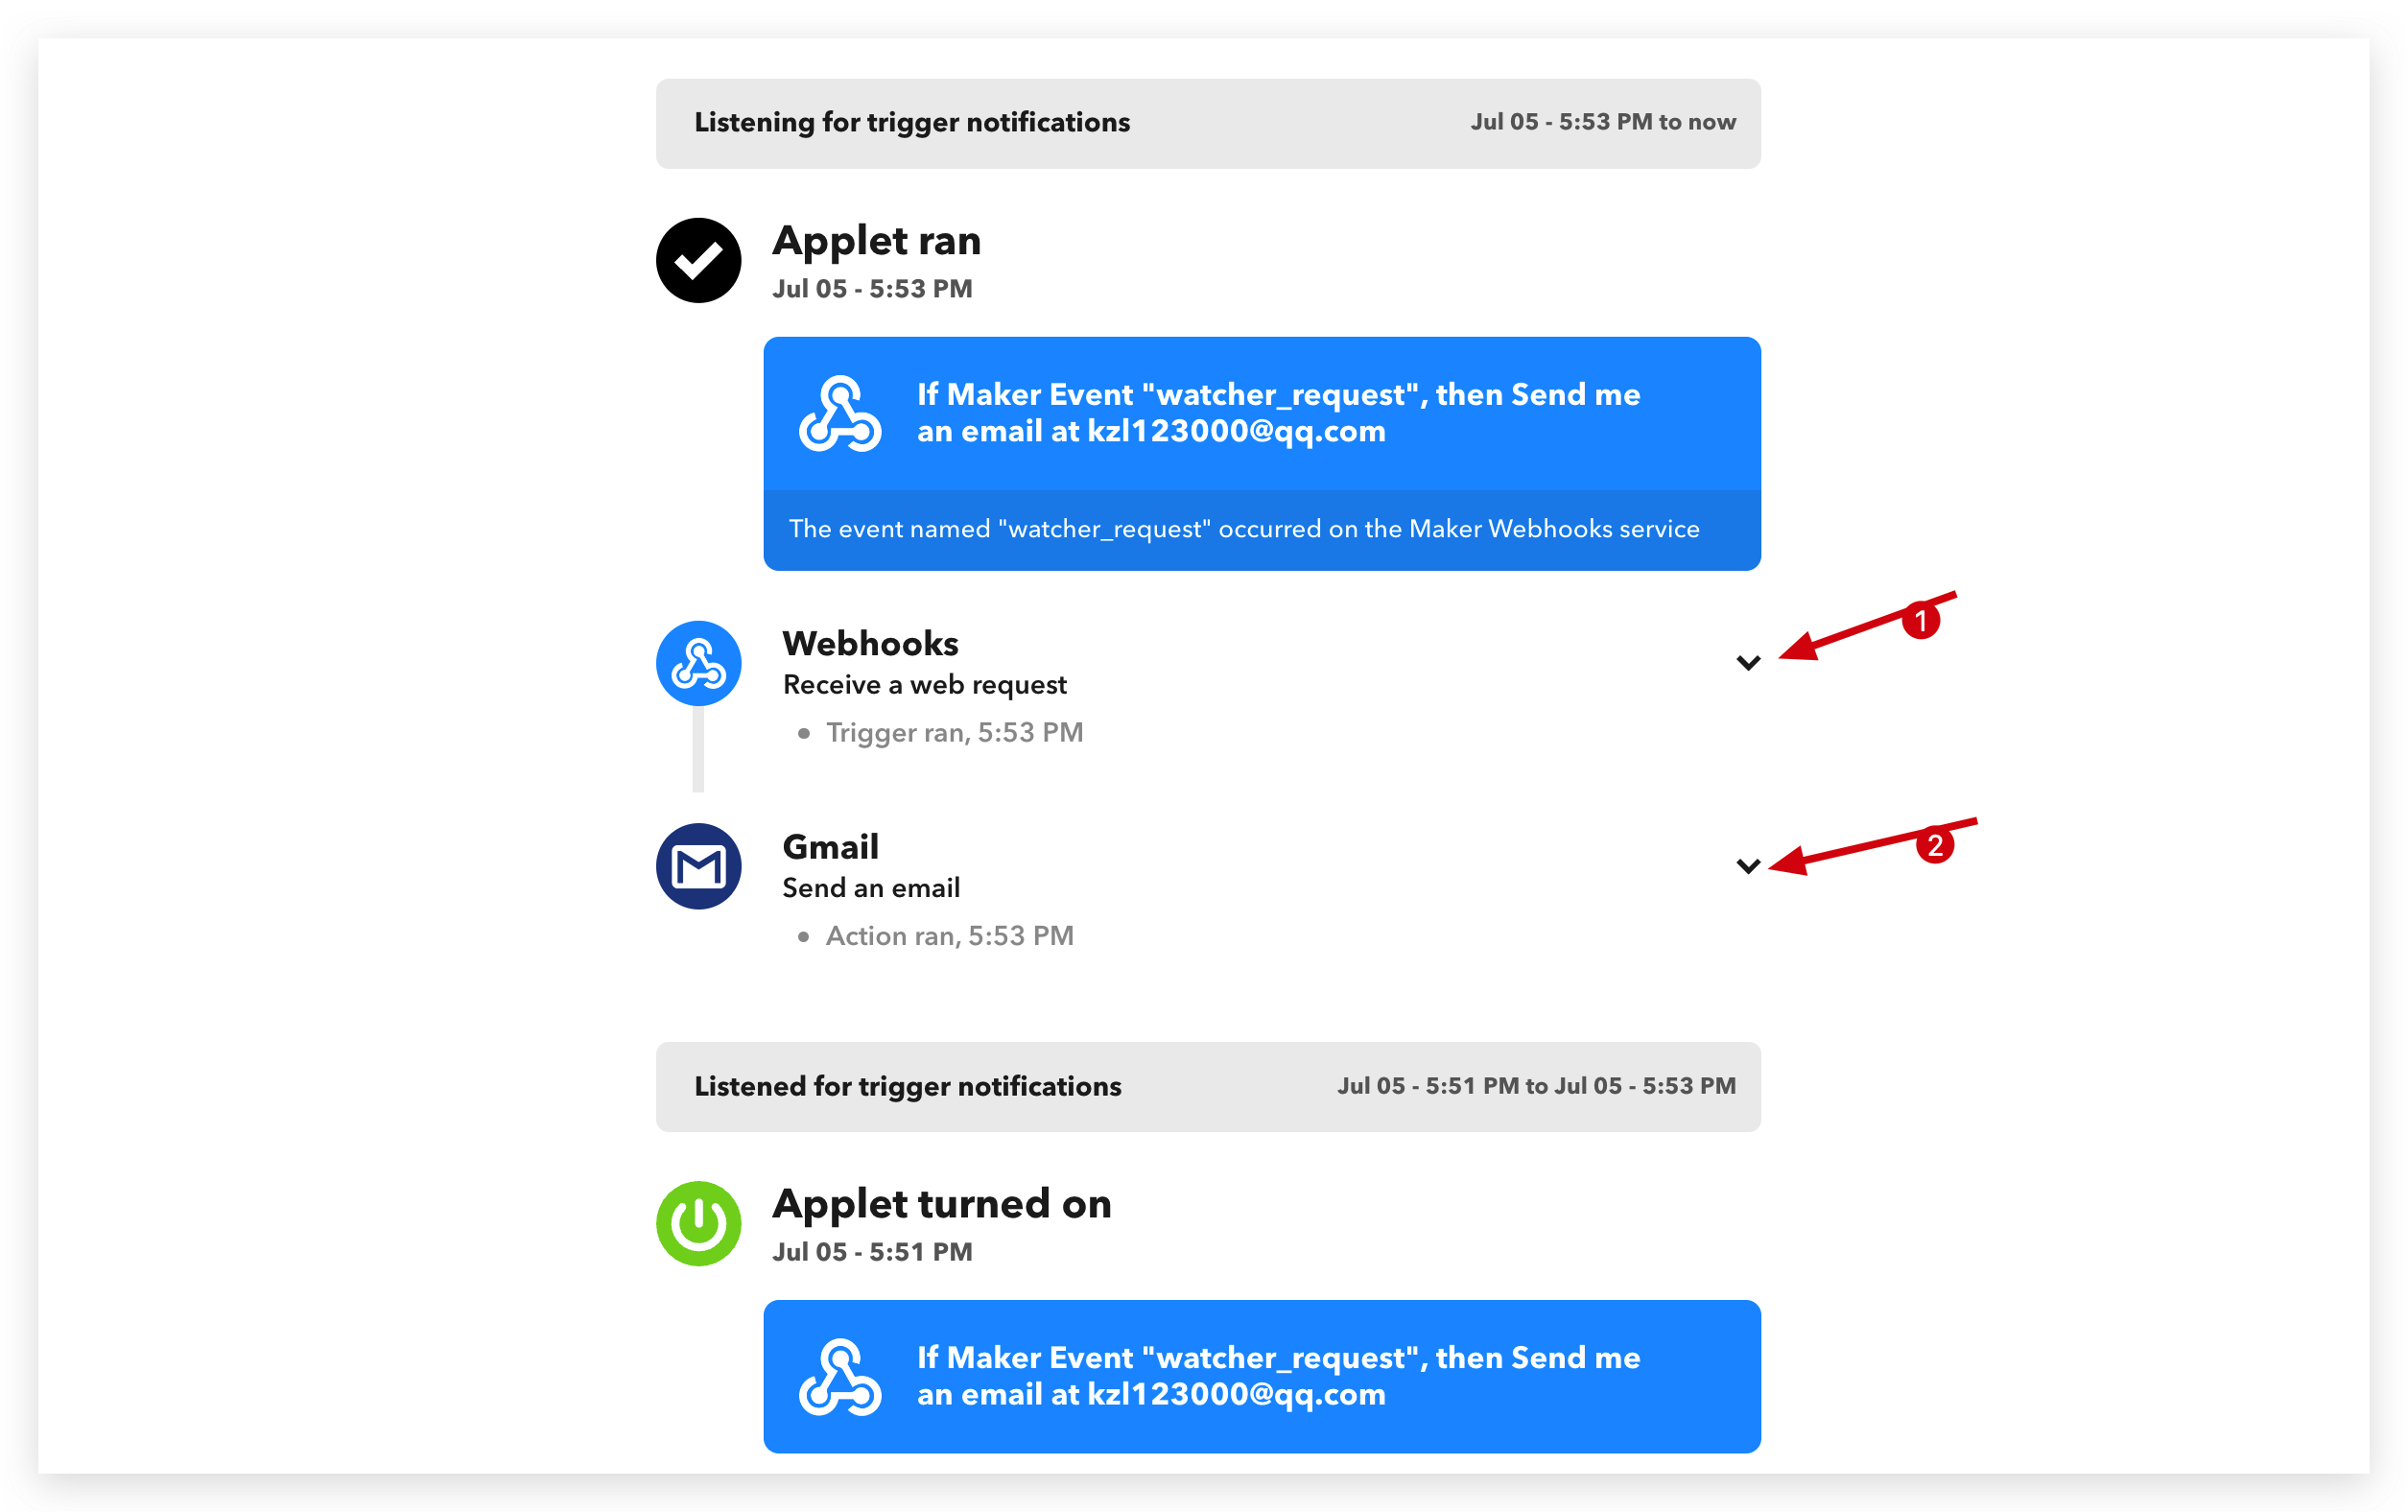
And then you will see those message sent by Watcher as well as your email.
| IFTTT message | Email message |
|---|---|
 |  |
Congratulations on completing the Watcher to IFTTT email demo! This is just the beginning of your journey with IFTTT. There are countless more applications and integrations waiting for you to discover. Keep exploring, learning, and automating to make your life more efficient and productive. The possibilities are endless with IFTTT, so have fun and happy experimenting!
Tech Support & Product Discussion
Thank you for choosing our products! We are here to provide you with different support to ensure that your experience with our products is as smooth as possible. We offer several communication channels to cater to different preferences and needs.